Note: I was sent some baking tools from OXO in order to write this post. Opinions are mine alone.
It’s the holiday season which means another cookie recipe inspired by some goodies from OXO! This year, I’m making something a little different for me: Christmas Pinwheel Cookies.

I tend to gravitate toward drop cookies because they are simple, decidedly not fussy, and still delicious! These Christmas Pinwheel Cookies are slice and bake cookies instead, which means you roll them into a log, slice them into equally sized slices, and bake.

Every year, OXO supports Cookies for Kids’ Cancer and the fight against pediatric cancer. Before I share my cookie recipe, I want to share a bit about Cookies for Kids’ Cancer.
Cookies for Kids’ Cancer (CFKC) is a nonprofit founded by two OXO employees after their son, Liam, was diagnosed with pediatric cancer. Through grassroots bake sales across the country, CFKC raises funds to develop new, improved and less toxic treatments for childhood cancer. Liam Witt’s legacy lives on as the organization works toward a cure for pediatric cancer, helping children and families everywhere.
Every year, OXO supports CFKC by encouraging people to bake and share. This year, OXO sent me a GG Non-Stick Pro Cookie Sheet, a Slice and Bake Cookie Maker, and a Silicone Cookie Scoop & Small Spatula Set (paid links), which is why I decided to share these Slice and Bake Christmas Pinwheel Cookies!
For every cookie baked, OXO donates $1 to Cookies for Kids’ Cancer up to $100,000, so here is my new cookie this year to support the cause and spread the word!

Here are some of my old cookie swap and Cookies for Kids’ Cancer posts, in case you’re in a baking mood:
- 2012: Oatmeal, Chocolate Chip, and Pecan Cookies
- 2013: Gluten-Free Boston Cream Pie Cupcakes and Hot Cocoa Cookies
- 2014: Spritz Cookies and Dark Chocolate Chip Cranberry Cookies
- 2015: Dark Chocolate Hazelnut Cookies and Kourambiethes (Greek Christmas Cookies)
- 2016: Oatmeal Chocolate Chip Cookies and Apple Butter Swirled Gingerbread Bars
- 2017: Old Fashioned Cupcakes
- 2019: S’mores Cookies
- 2020: Red Velvet Crinkle Cookies
- 2021: Chocolate Creme De Menthe Cookies
- 2022: Frozen Key Lime Pie
On to this year’s recipe: Christmas Pinwheel Cookies!

Ingredients:
- 1 1/2 cups (3 sticks) unsalted butter, at room temperature
- 1 1/2 cups sugar
- 2 eggs, at room temperature
- 1 tablespoon vanilla extract
- 4 cups flour
- 1 teaspoon baking powder
- 1/2 teaspoon salt
- 1 tablespoon red gel food coloring
- 1 tablespoon green gel food coloring
- sprinkles for decorating, optional
To make your Christmas Pinwheel Cookies, add your butter and sugar to a mixing bowl and beat together with an electric mixer until light and fluffy. Scrape down the sides of the bowl with a spatula if needed.

Add in your eggs and vanilla extract, mixing to combine.


In a large bowl, whisk together the flour, baking powder and salt.

Slowly add the dry mixture to the wet mixture until fully combined.

Divide the dough into three equal balls (using a kitchen scale is super helpful here – paid link).

Add the green gel food coloring to one of the bowls, mixing thorough to combine.

Add the red gel food coloring to another one of the bowls, mixing thoroughly to combine.

Reserve one of the bowls with no food coloring.

Cover each bowl in plastic wrap and add to your refrigerator for one hour.
After an hour, remove the bowls from the fridge. Turn the red dough out onto a piece of wax paper. Top with another piece of wax paper and roll out into a relative rectangle (it doesn’t have to be perfect.)

Set aside and repeat with your other doughs.


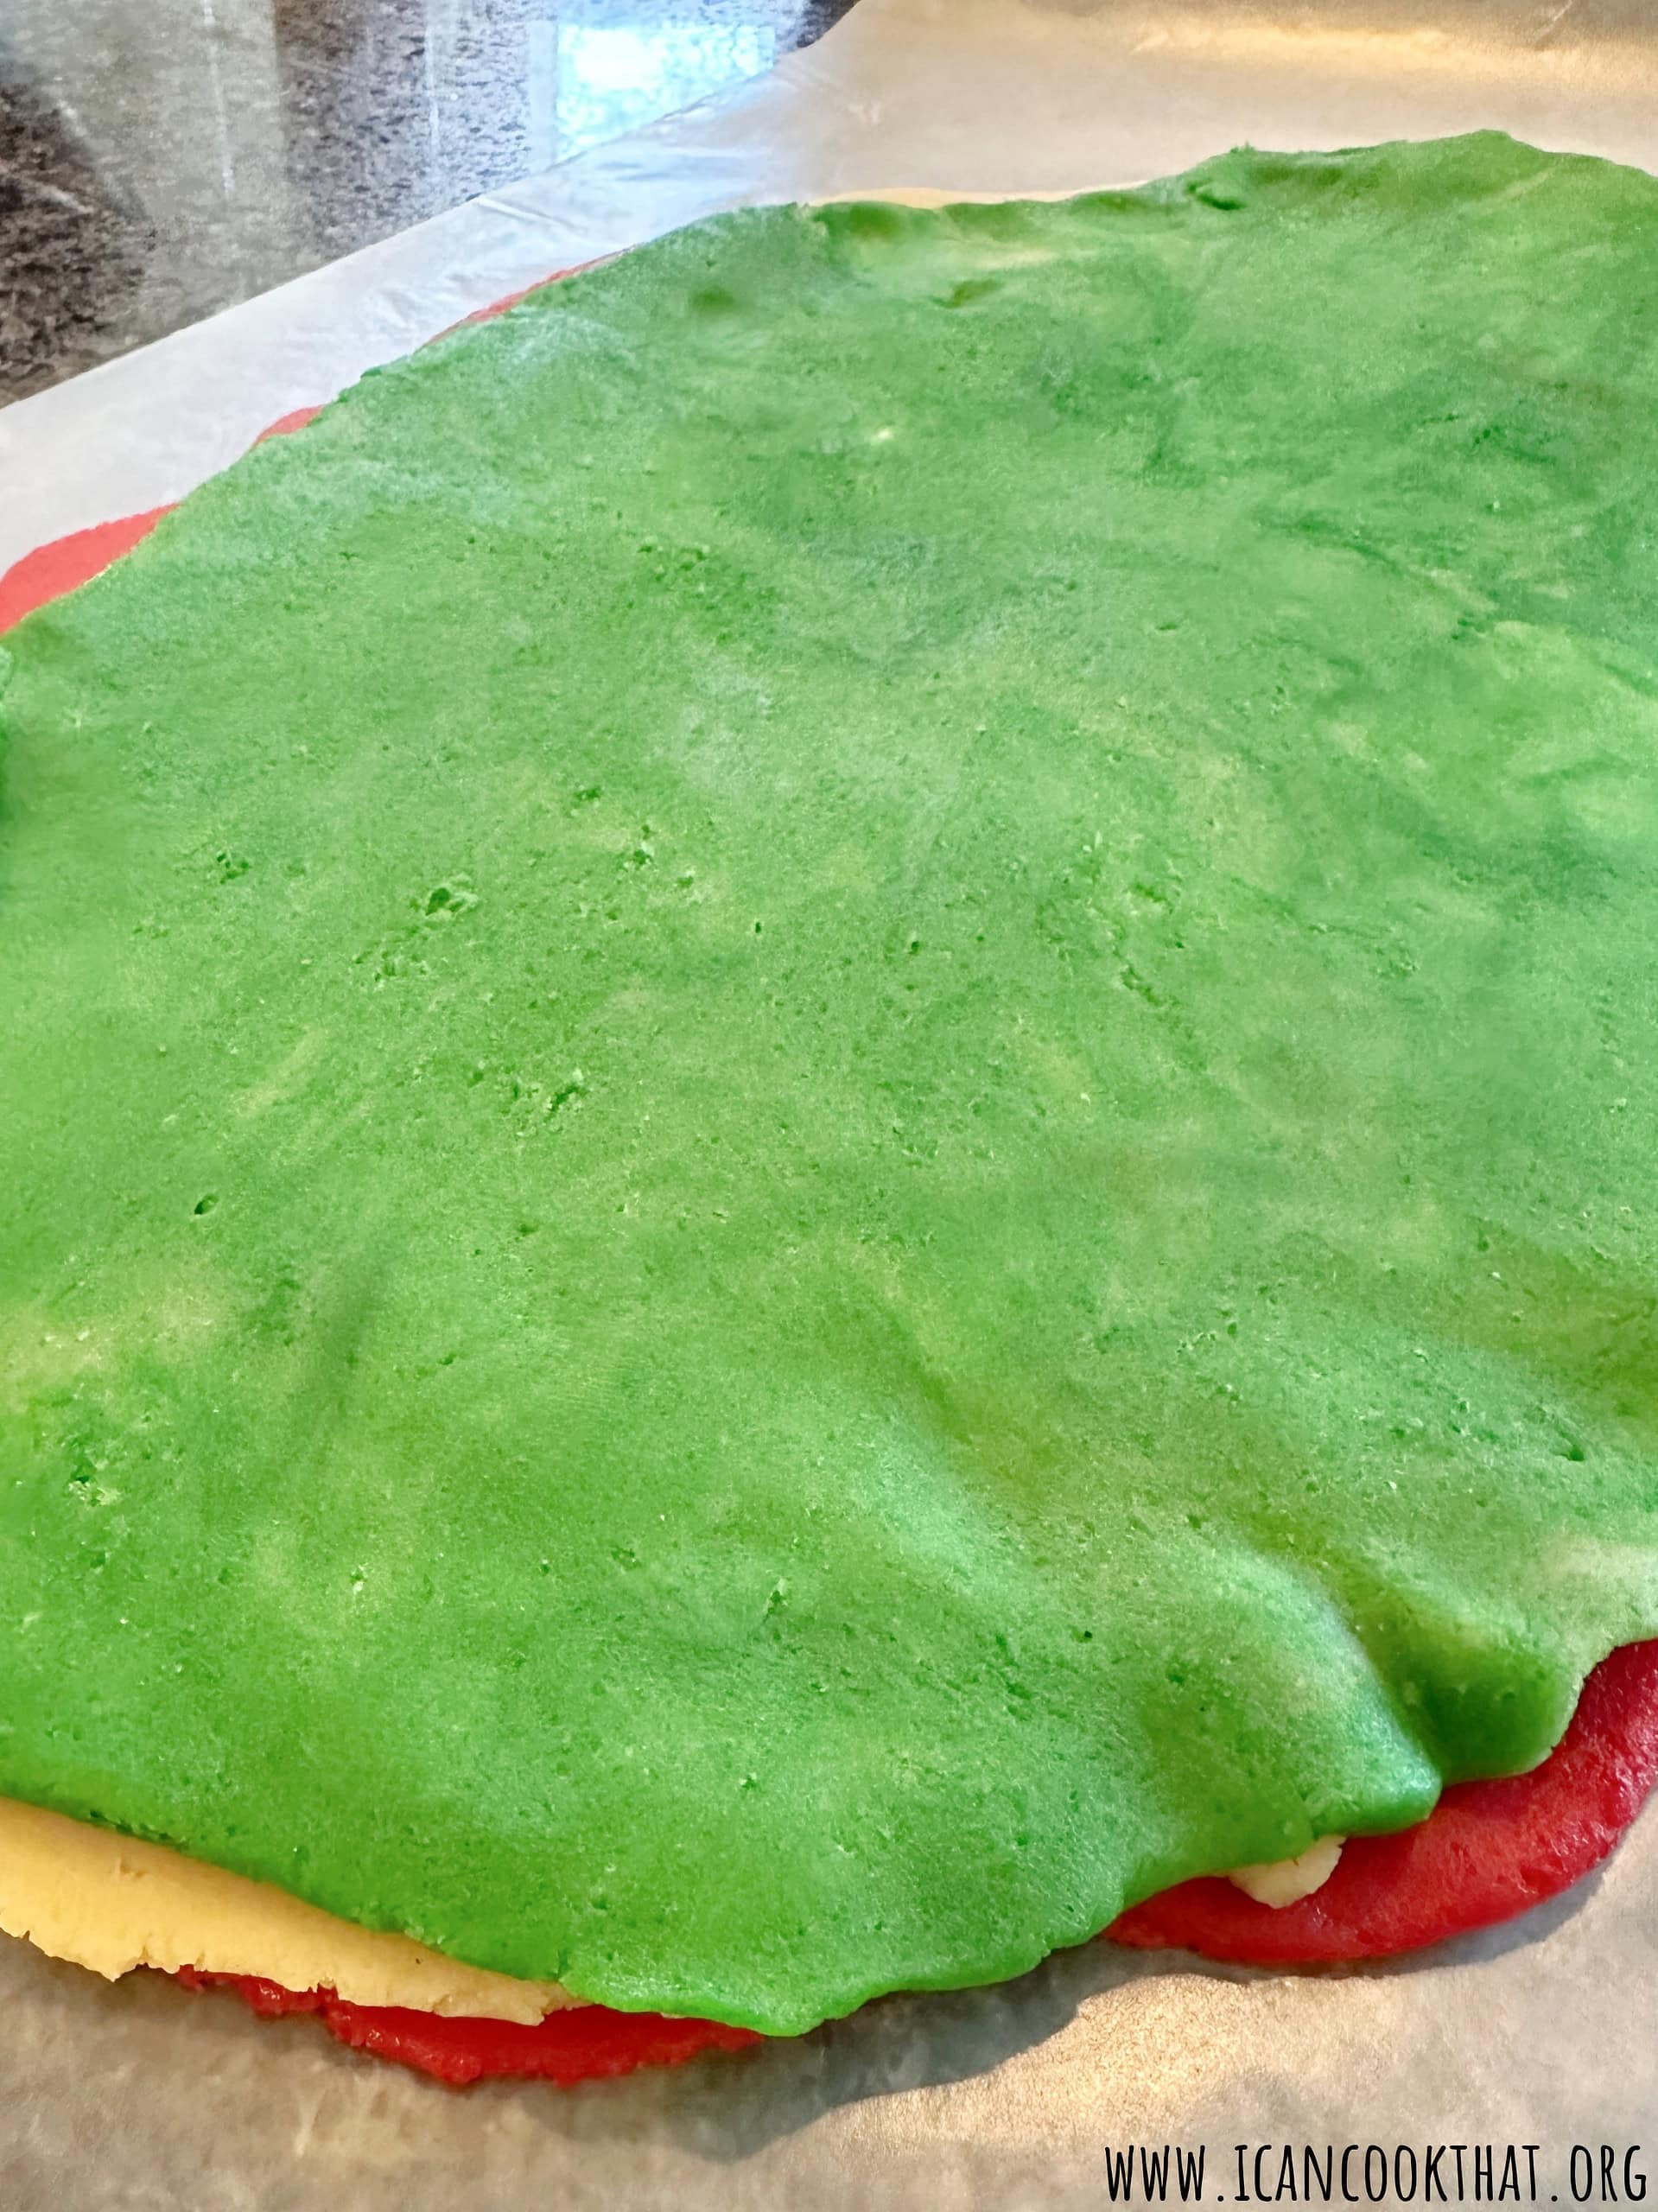
Take the top layer of wax paper off each of your dough rectangles. Start with your red dough. Invert the white dough on top of the red, lining up the doughs as best you can. Remove the wax paper from the white dough.

Invert the green dough on top of the white dough, lining up the dough as best you can. Remove the wax paper from the green dough.
Use the wax paper to start rolling up the three doughs along the long edge until you end up with a long log. Gently pinch the seam closed, then wrap in plastic wrap.
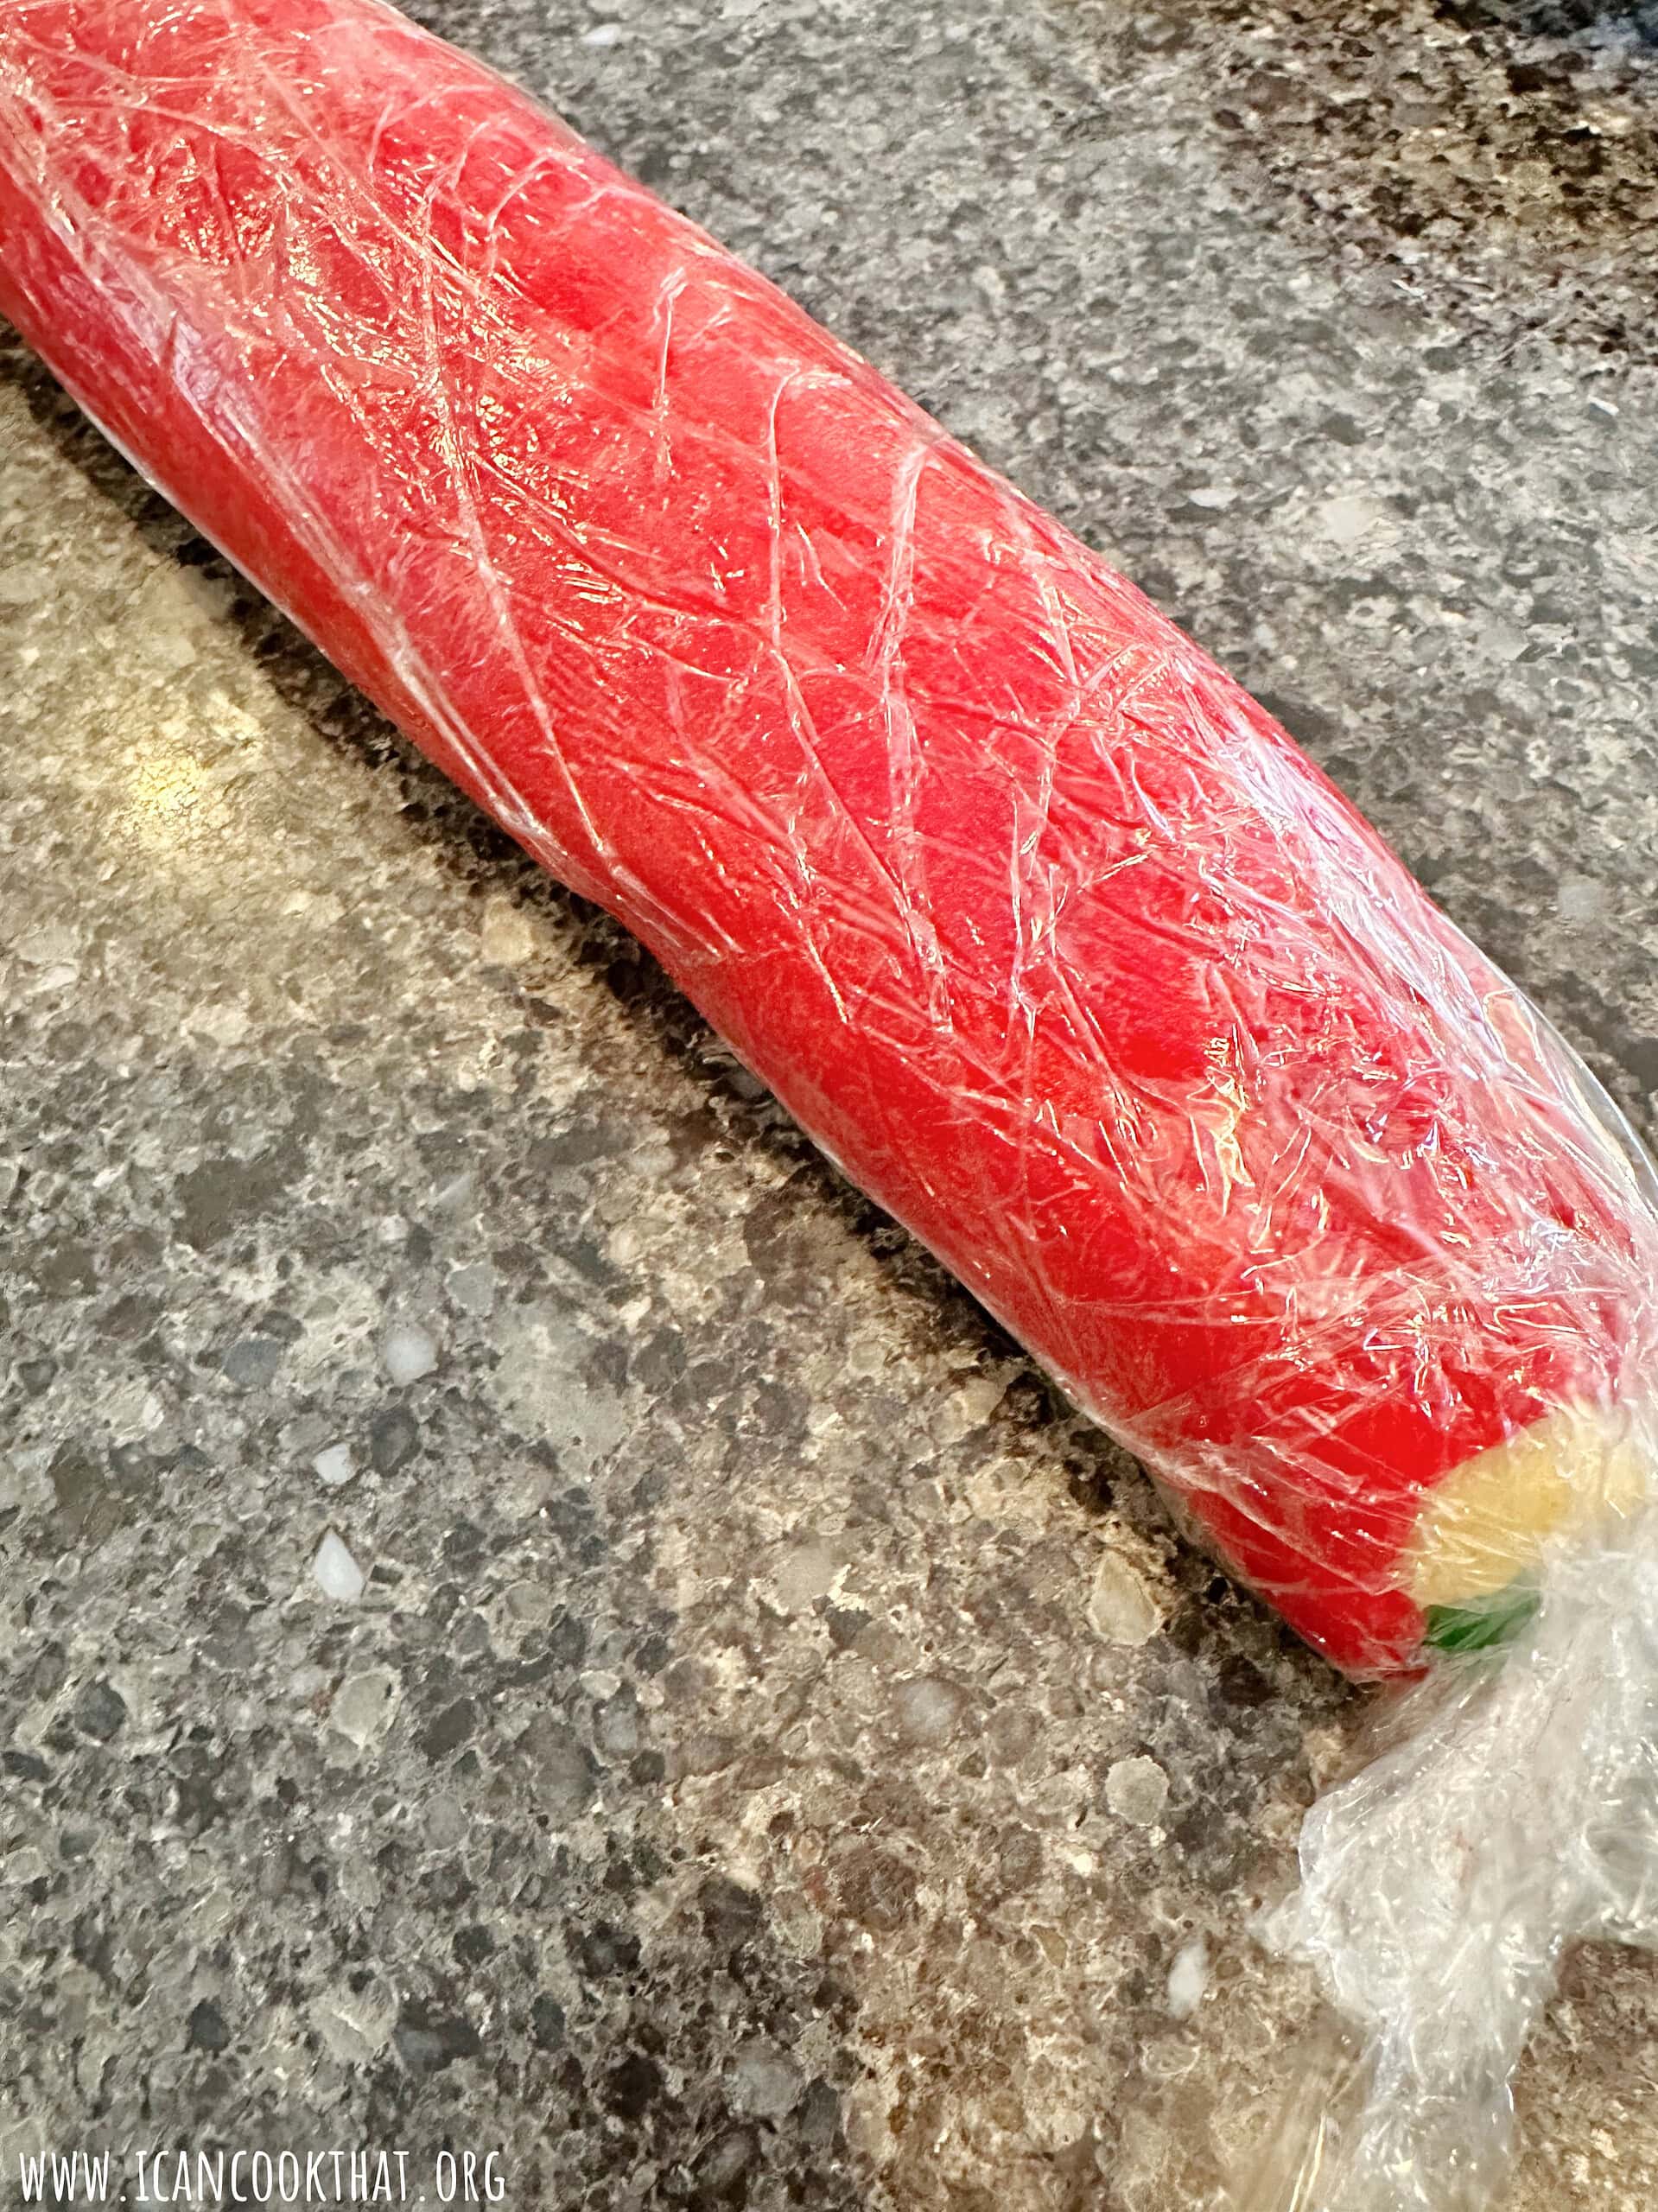
If using the Slice and Bake Cookie Maker, Roll the log inside the cookie maker and secure. This will add markings to the cookies to know where to slice for more uniform cookies. Add the log to your refrigerator for one hour.
After an hour, remove from the refrigerator. Preheat your oven to 350 degrees F.
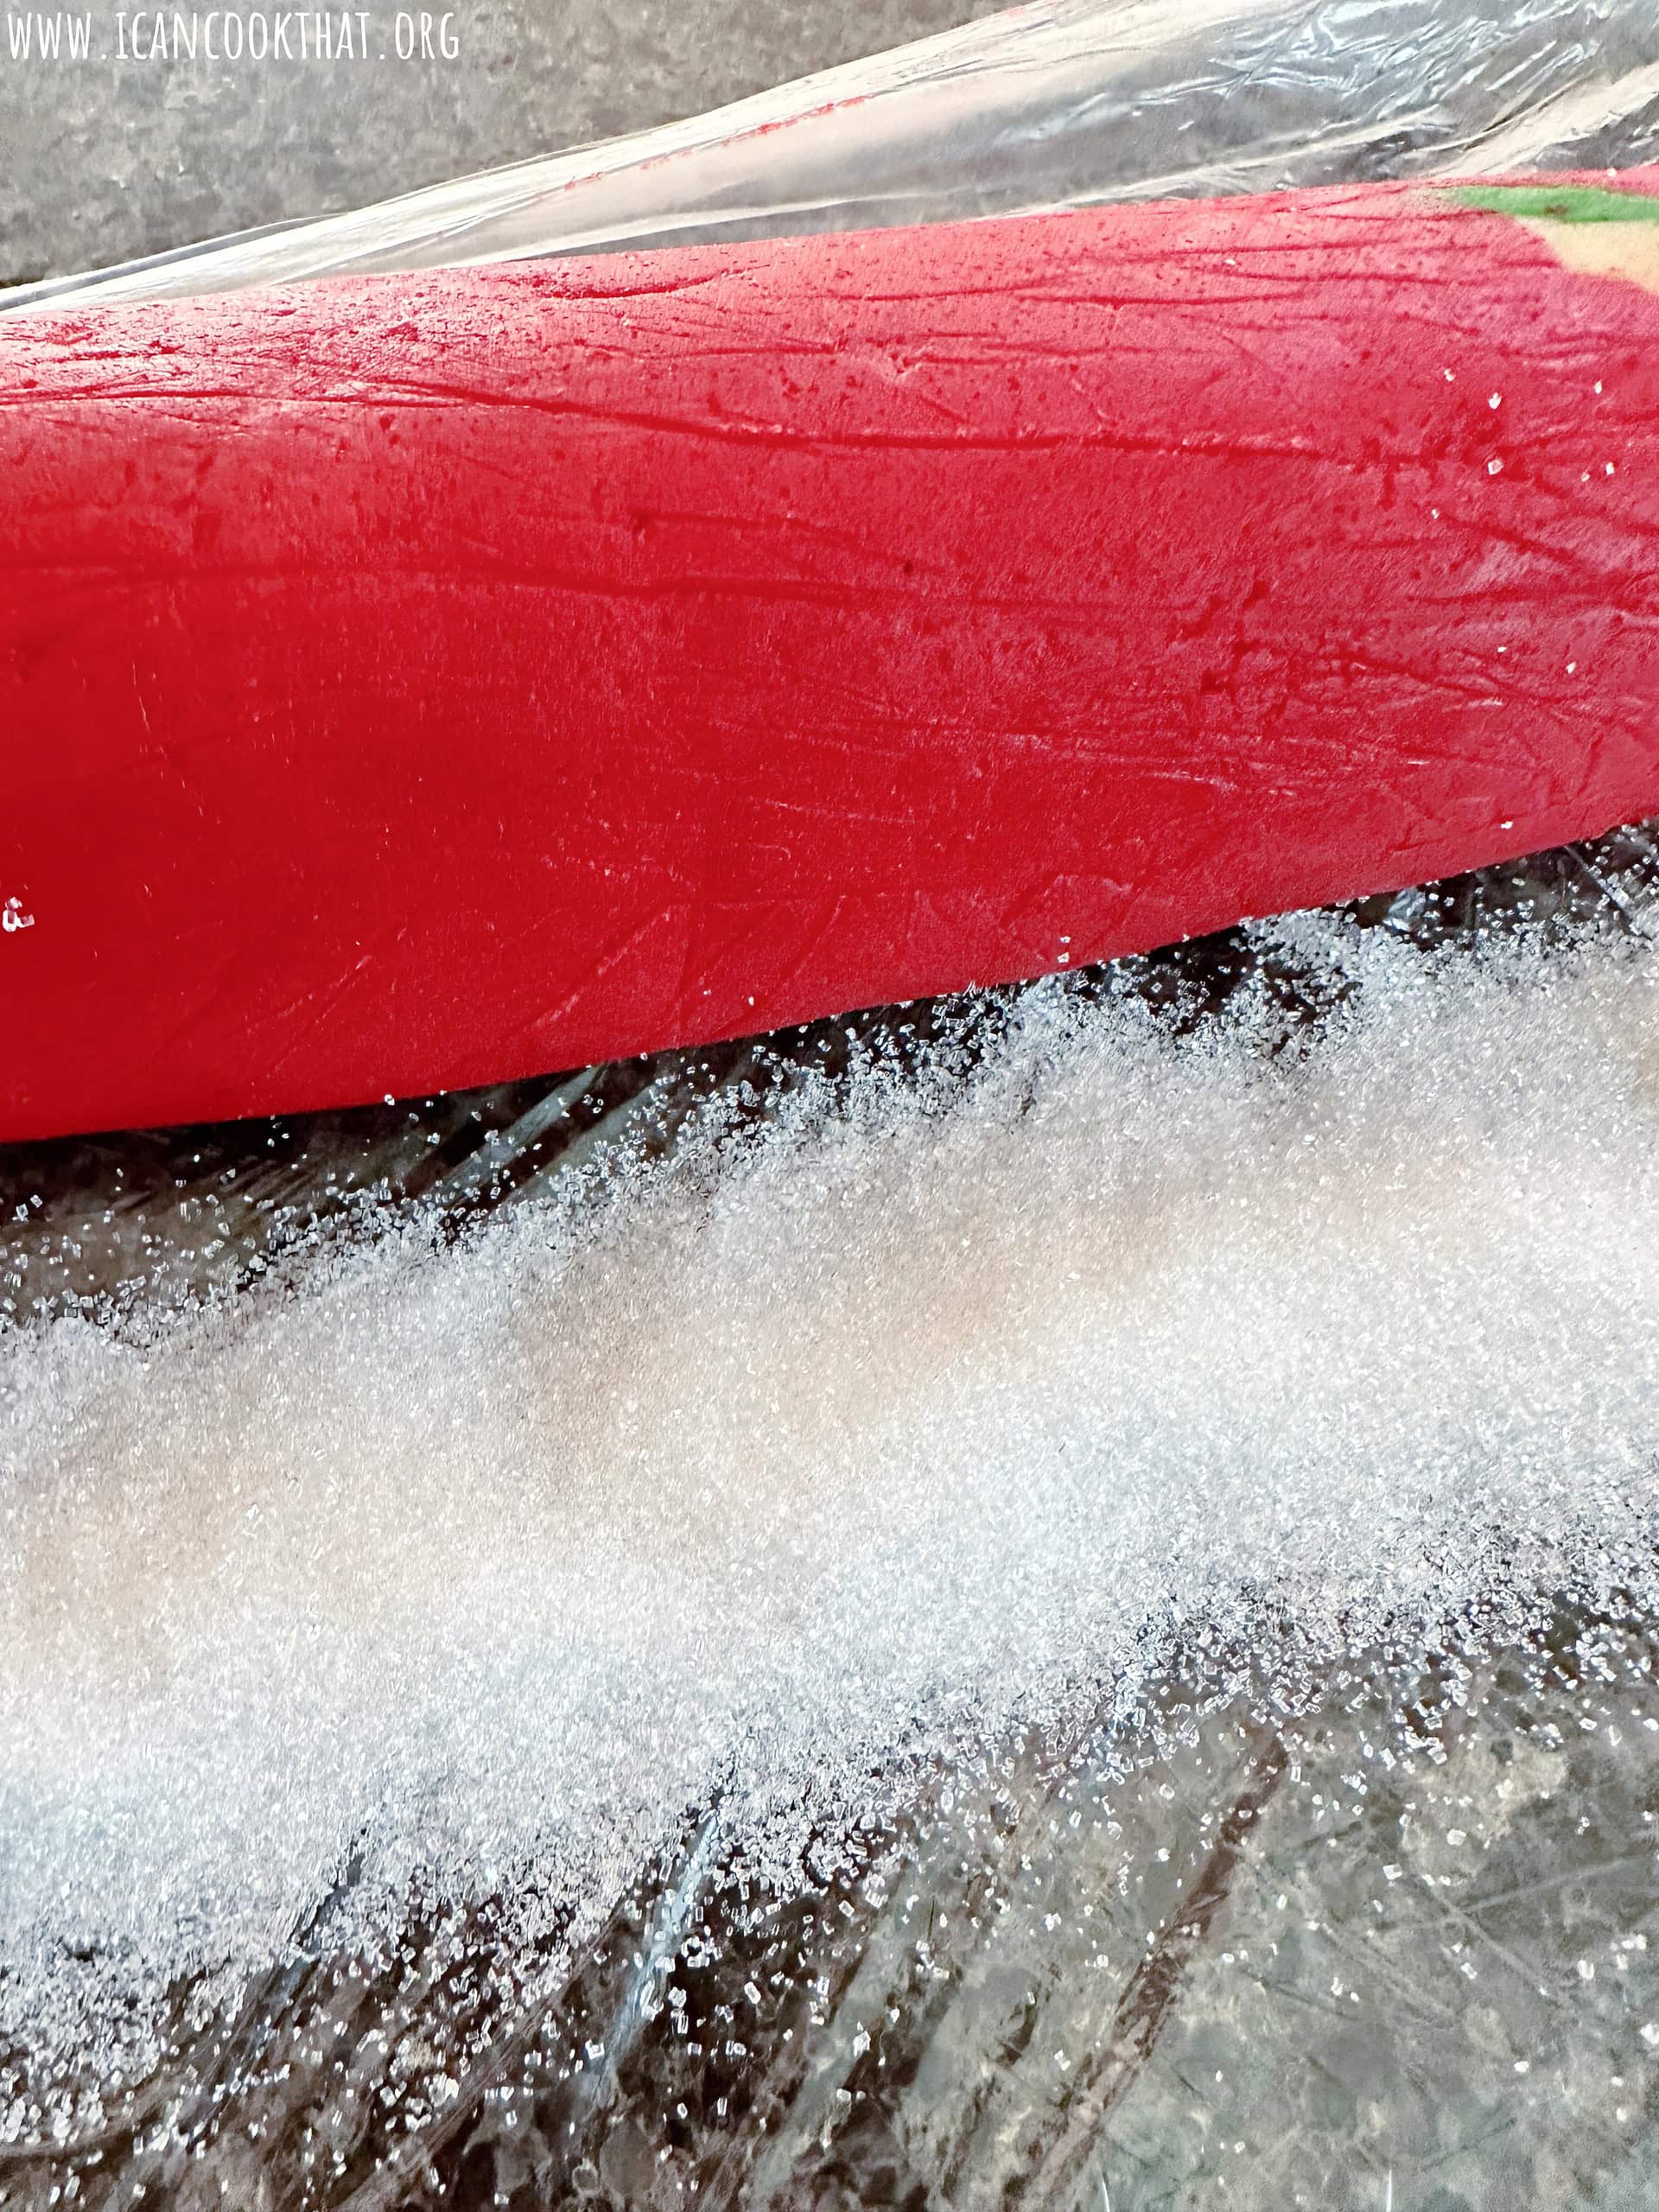
If desired, spread out the sprinkles of your choice and roll the log in the sprinkles until completely covered.

Using a sharp knife, cut the log into 1/4 inch slices, discarding the end pieces where you don’t have a pinwheel.

Add the cookies to your prepared cookie sheet 2 inches apart.

(Note: I strongly suggest not using a silicone mat for these cookies. It will help keep your cookies from spreading) Bake for 11 to 14 minutes.

Let the Christmas Pinwheel Cookies cool for 5 minutes on the baking sheet, then transfer to a rack to cool completely.

These are a fun and festive addition to your cookie plate this year, don’t you think?

If desired, you can roll the log in sprinkles before slicing to make even more festive!

Christmas Pinwheel Cookies
Ingredients
- 1 1/2 cups 3 sticks unsalted butter, at room temperature
- 1 1/2 cups sugar
- 2 eggs at room temperature
- 1 tablespoon vanilla extract
- 4 cups flour
- 1 teaspoon baking powder
- 1/2 teaspoon salt
- 1 tablespoon red gel food coloring
- 1 tablespoon green gel food coloring
- sprinkles for decorating optional
Instructions
- To make your Christmas Pinwheel Cookies, add your butter and sugar to a mixing bowl and beat together with an electric mixer until light and fluffy. Scrape down the sides of the bowl with a spatula if needed.
- Add in your eggs and vanilla extract, mixing to combine.
- In a large bowl, whisk together the flour, baking powder and salt.
- Slowly add the dry mixture to the wet mixture until fully combined.
- Divide the dough into three equal balls (using a kitchen scale is super helpful here – paid link).
- Add the green gel food coloring to one of the bowls, mixing thorough to combine.
- Add the red gel food coloring to another one of the bowls, mixing thoroughly to combine.
- Reserve one of the bowls with no food coloring.
- Cover each bowl in plastic wrap and add to your refrigerator for one hour.
- After an hour, remove the bowls from the fridge. Turn the red dough out onto a piece of wax paper. Top with another piece of wax paper and roll out into a relative rectangle (it doesn’t have to be perfect.)
- Set aside and repeat with your other doughs.
- Take the top layer of wax paper off each of your dough rectangles. Start with your red dough. Invert the white dough on top of the red, lining up the doughs as best you can. Remove the wax paper from the white dough.
- Invert the green dough on top of the white dough, lining up the dough as best you can. Remove the wax paper from the green dough.
- Use the wax paper to start rolling up the three doughs along the long edge until you end up with a long log. Gently pinch the seam closed, then wrap in plastic wrap.
- If using the Slice and Bake Cookie Maker, Roll the log inside the cookie maker and secure. This will add markings to the cookies to know where to slice for more uniform cookies. Add the log to your refrigerator for one hour.
- After an hour, remove from the refrigerator. Preheat your oven to 350 degrees F.
- If desired, spread out the sprinkles of your choice and roll the log in the sprinkles until completely covered.
- Using a sharp knife, cut the log into 1/4 inch slices, discarding the end pieces where you don’t have a pinwheel.
- Add the cookies to your prepared cookie sheet 2 inches apart.
- (Note: I strongly suggest not using a silicone mat for these cookies. It will help keep your cookies from spreading) Bake for 11 to 14 minutes.
- Let the Christmas Pinwheel Cookies cool for 5 minutes on the baking sheet, then transfer to a rack to cool completely.


Your Christmas Pinwheel Cookies recipe looks delightful and festive! The step-by-step instructions are clear and easy to follow, which is perfect for both novice and experienced bakers. I especially appreciate the tips about using a kitchen scale for dividing the dough evenly and the suggestion to avoid using a silicone mat to prevent spreading.
One thing that stands out is the detailed process for rolling out and stacking the colored dough, which will surely result in beautifully layered and vibrant cookies. Adding the option to roll the dough in sprinkles is a fun touch that will make the cookies even more festive and appealing.
If I may add a small suggestion, including some photos of the process—particularly the rolling and layering steps—that could be really helpful for visual learners. Also, noting any specific brands or types of
food coloring that you find works best could be beneficial for achieving those vivid red and green colors.
This is such a useful article! I’ve been looking for something like this for ages. Could you share more recipes related to this?