With the weather starting to cool off a bit, I had a hankering for something a little more hearty that I could still prepare on a weeknight. This recipe from Cooking Light incorporates mushrooms and turkey sausage into a tomato sauce to make a filling but lighter meal. The polenta is kicked up a notch with the addition of some cream cheese to add some decadence to the whole dish. I kept this recipe mostly in tact and just messed with some of the amounts for the ingredients. To see the original recipe, click here. Ingredients:
1 1/2 tablespoons olive oil, divided
8 ounces hot turkey Italian sausage
3/4 cup chopped onion
20 oz sliced baby bella mushrooms
2 large (or 4 small) garlic cloves, minced
1/4 teaspoon kosher salt, divided
1 (14.5-ounce) can no-salt-added diced tomatoes, undrained
1 tablespoon tomato paste
1 tablespoon coconut aminos (or soy sauce if not gluten-free)
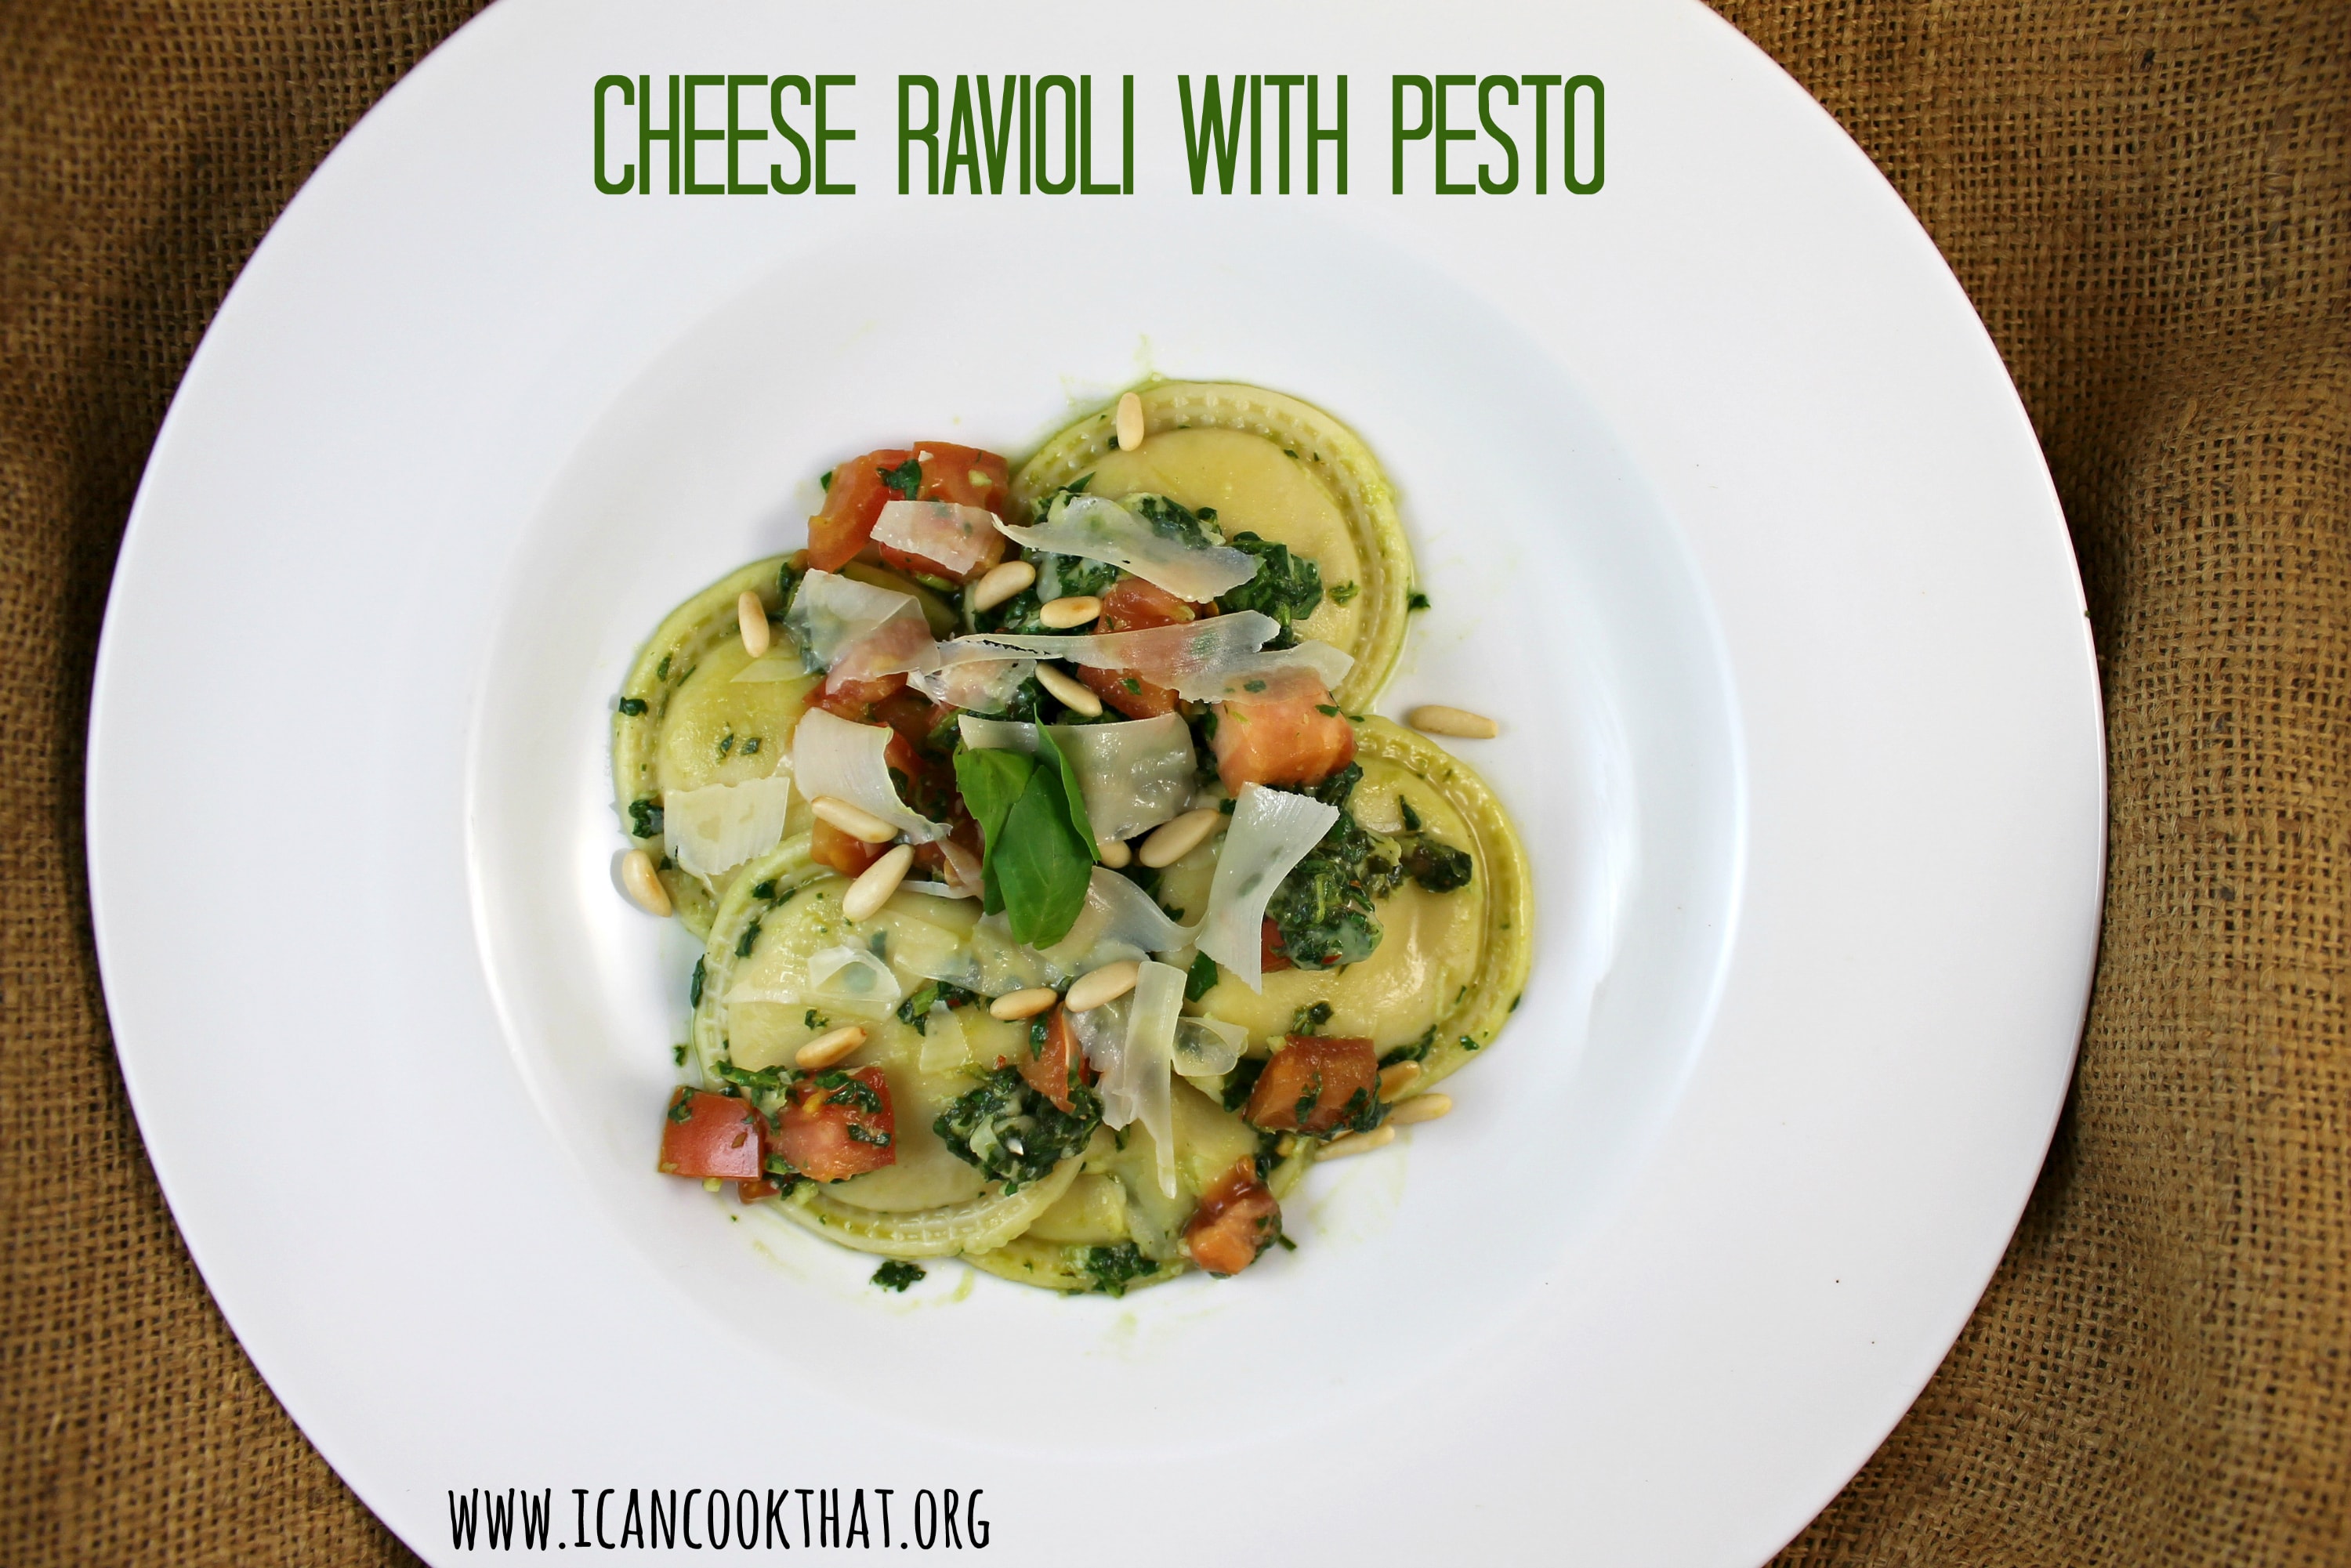
I have another busy week this week so I needed some easy meals that can be prepared quickly. Pasta is usually a great option and this recipe for Cheese Ravioli with Pesto is no exception. It comes together in about 15 minutes!
I found this recipe on Cooking Light. The pesto is more of a “pesto” and stays pretty chunky. But don’t be fooled, those little flecks of green are packed with flavor!
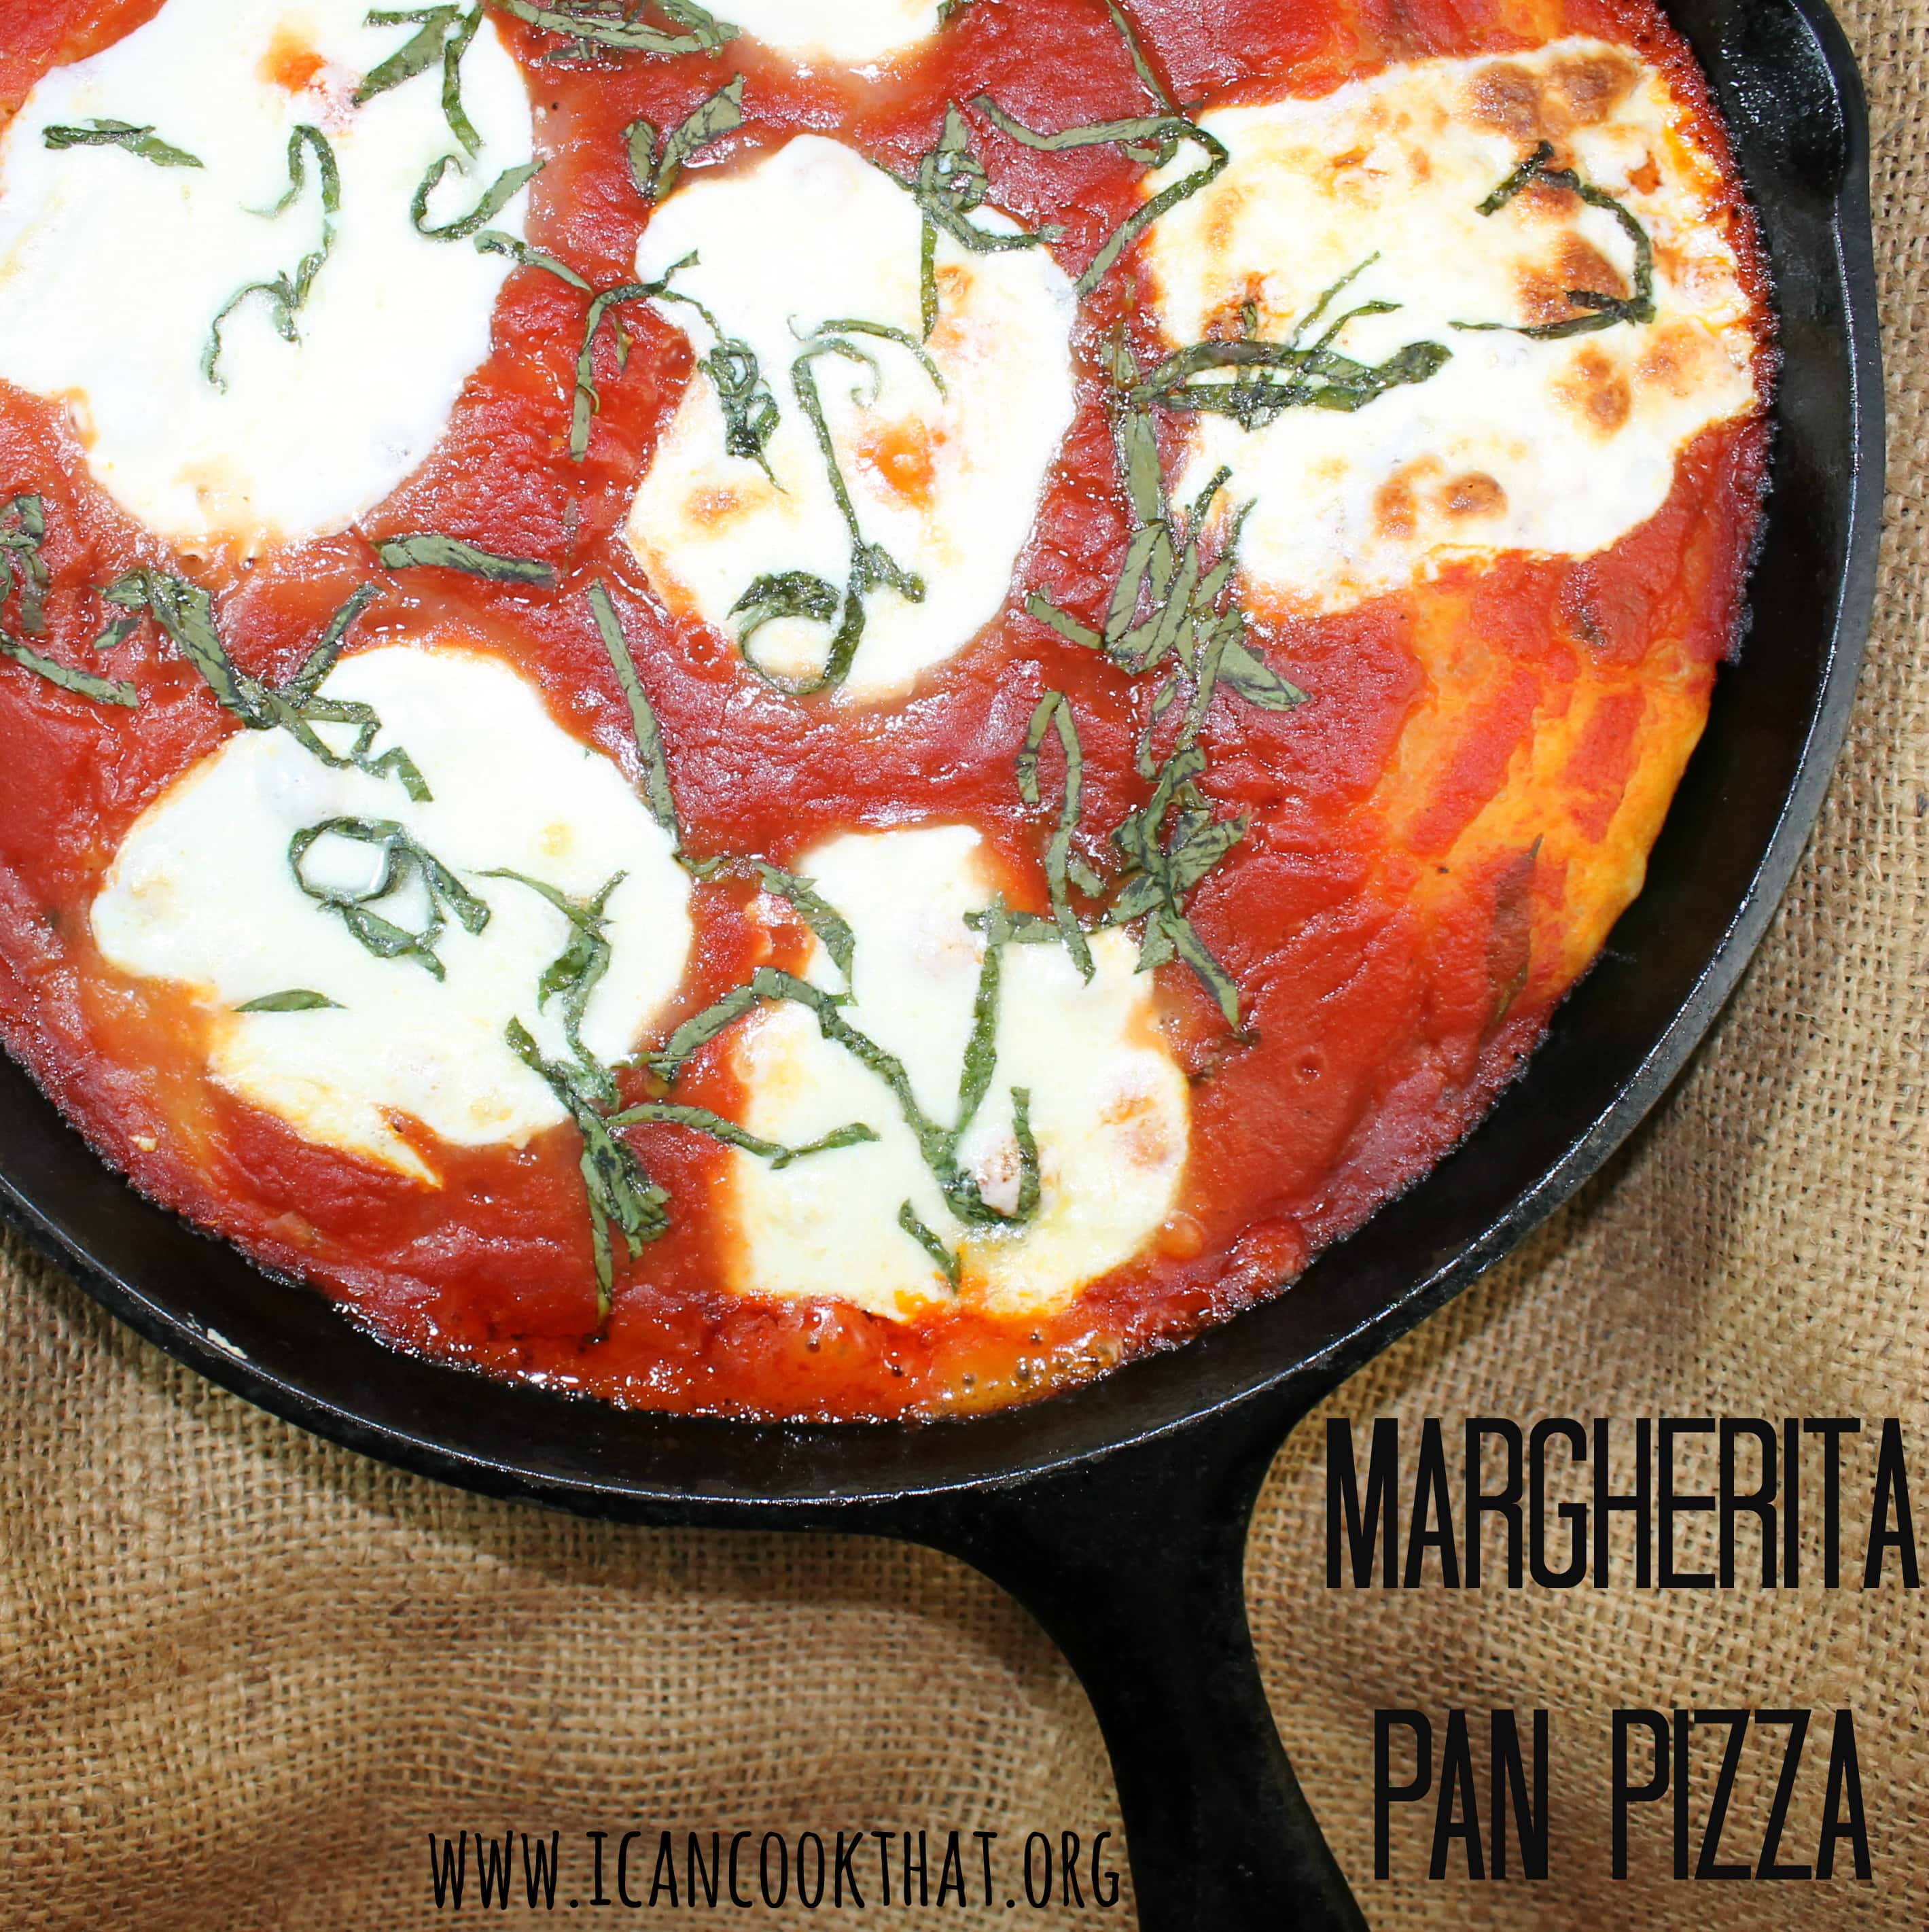
The September Issue of Cooking Light has a super yummy looking pizza on the front. The pizza shown was a Deep Dish Mushroom and Onion Pizza but the photo made me think of pan pizzas I used to love as a kid.
So I decided to try to make my own in my cast iron pan (paid link) but give it a more “grown up” twist by making a Margherita Pan Pizza.
The result was a nice thick and chewy crust with the perfect amount of tangy tomato sauce, creamy melted mozzarella, and fresh basil!
September is Childhood Cancer Awareness Month. Annually, OXO highlights this month with a program benefiting Cookies for Kids’ Cancer, founded by two OXO employees who’s son battled pediatric cancer. Cookies for Kids’ Cancer provides inspiration and support to allow anyone to easily get involved in fundraising to find a cure for pediatric cancer.
To show support, OXO will donate up to $100,000* to support Cookies for Kids’ Cancer through the sales of specially marked items, bake sale matches, and other fundraising efforts. And that’s where this post comes in! OXO sent me a set of cookie-baking tools including specially marked OXO baking products with this Cookies for Kids’ Cancer sticker:
But they aren’t stopping there. For every stickered item sold, OXO will donate 25 cents in support of pediatric cancer research as part of its $100,000* pledge to Cookies for Kids’ Cancer. Look for specially marked OXO products at participating retailers in September. (Here’s a list of OXO products that include the sticker.)
* In 2014, OXO will donate up to $100,000 to Cookies for Kids’ Cancer through specially marked baking tools, bake sale matches and other fundraising efforts. Cookies for Kids’ Cancer is a recognized 501c(3) public charity duly incorporated under the laws of the state of New Jersey. Your donations are tax deductible to the fullest extent allowable by law. 100% of proceeds raised by Cookies for Kids’ Cancer fund pediatric cancer research.
So my cookie-baking set came with a Cookie Press with Disk Storage Case, as well as a Cookie Spatula and a 3 Piece Spatula Set. OXO was even kind enough to send over their newest Measuring Cups and Measuring Spoons! I have never made Spritz cookies before so I was really excited to try the Cookie Press out. Although Spritz cookies are typically thought of as a holiday cookie, OXO’s Cookie Press comes with plenty of other non-winter shapes, including a Leaf, Daisy, Sunflower, Buttercup, Fleur-de-lis, Butterfly, Shell, and Heart! (More winter-y shapes include a Bear, Snowflake, Tree, and Wreath)
As kids are going back to school (or may even be back!) and the “busy season” of work creeps closer, it’s necessary to find recipes that can be prepared ahead of time so that weeknight meals can be on the table as quickly as possible. My favorite tool for really yummy dishes that I can just reheat is my lovely slow cooker.
Cooking Light had a recipe for Slow Cooker Red Beans and Rice that is perfect for weekend prep and weeknight meals. This particular recipe has a good amount of prep time before putting everything in the slow cooker so I’d suggest making it on a weekend versus a weeknight morning. (If you want to make this before work, set aside 30-45 minutes to get everything ready to put in the slow cooker.)
A couple of notes before I dive into the recipe. You actually soak the dried red beans in water overnight, so don’t forget to do that that night before you plan on making this recipe. Also, dried kidney beans apparently contain a toxin that is not killed at low temperatures (like in a slow cooker) so you have to boil them for 10 minutes before slow cooking. (Who knew?! Definitely don’t skip that step!) This recipe makes 8 servings so you can also freeze the red bean mixture for future meals if you won’t finish it during the week. Ok! Let’s cook!
Ingredients:
1 pound dried red kidney beans
1 tablespoon olive oil
12 oz andouille sausage, quartered lengthwise and cut crosswise
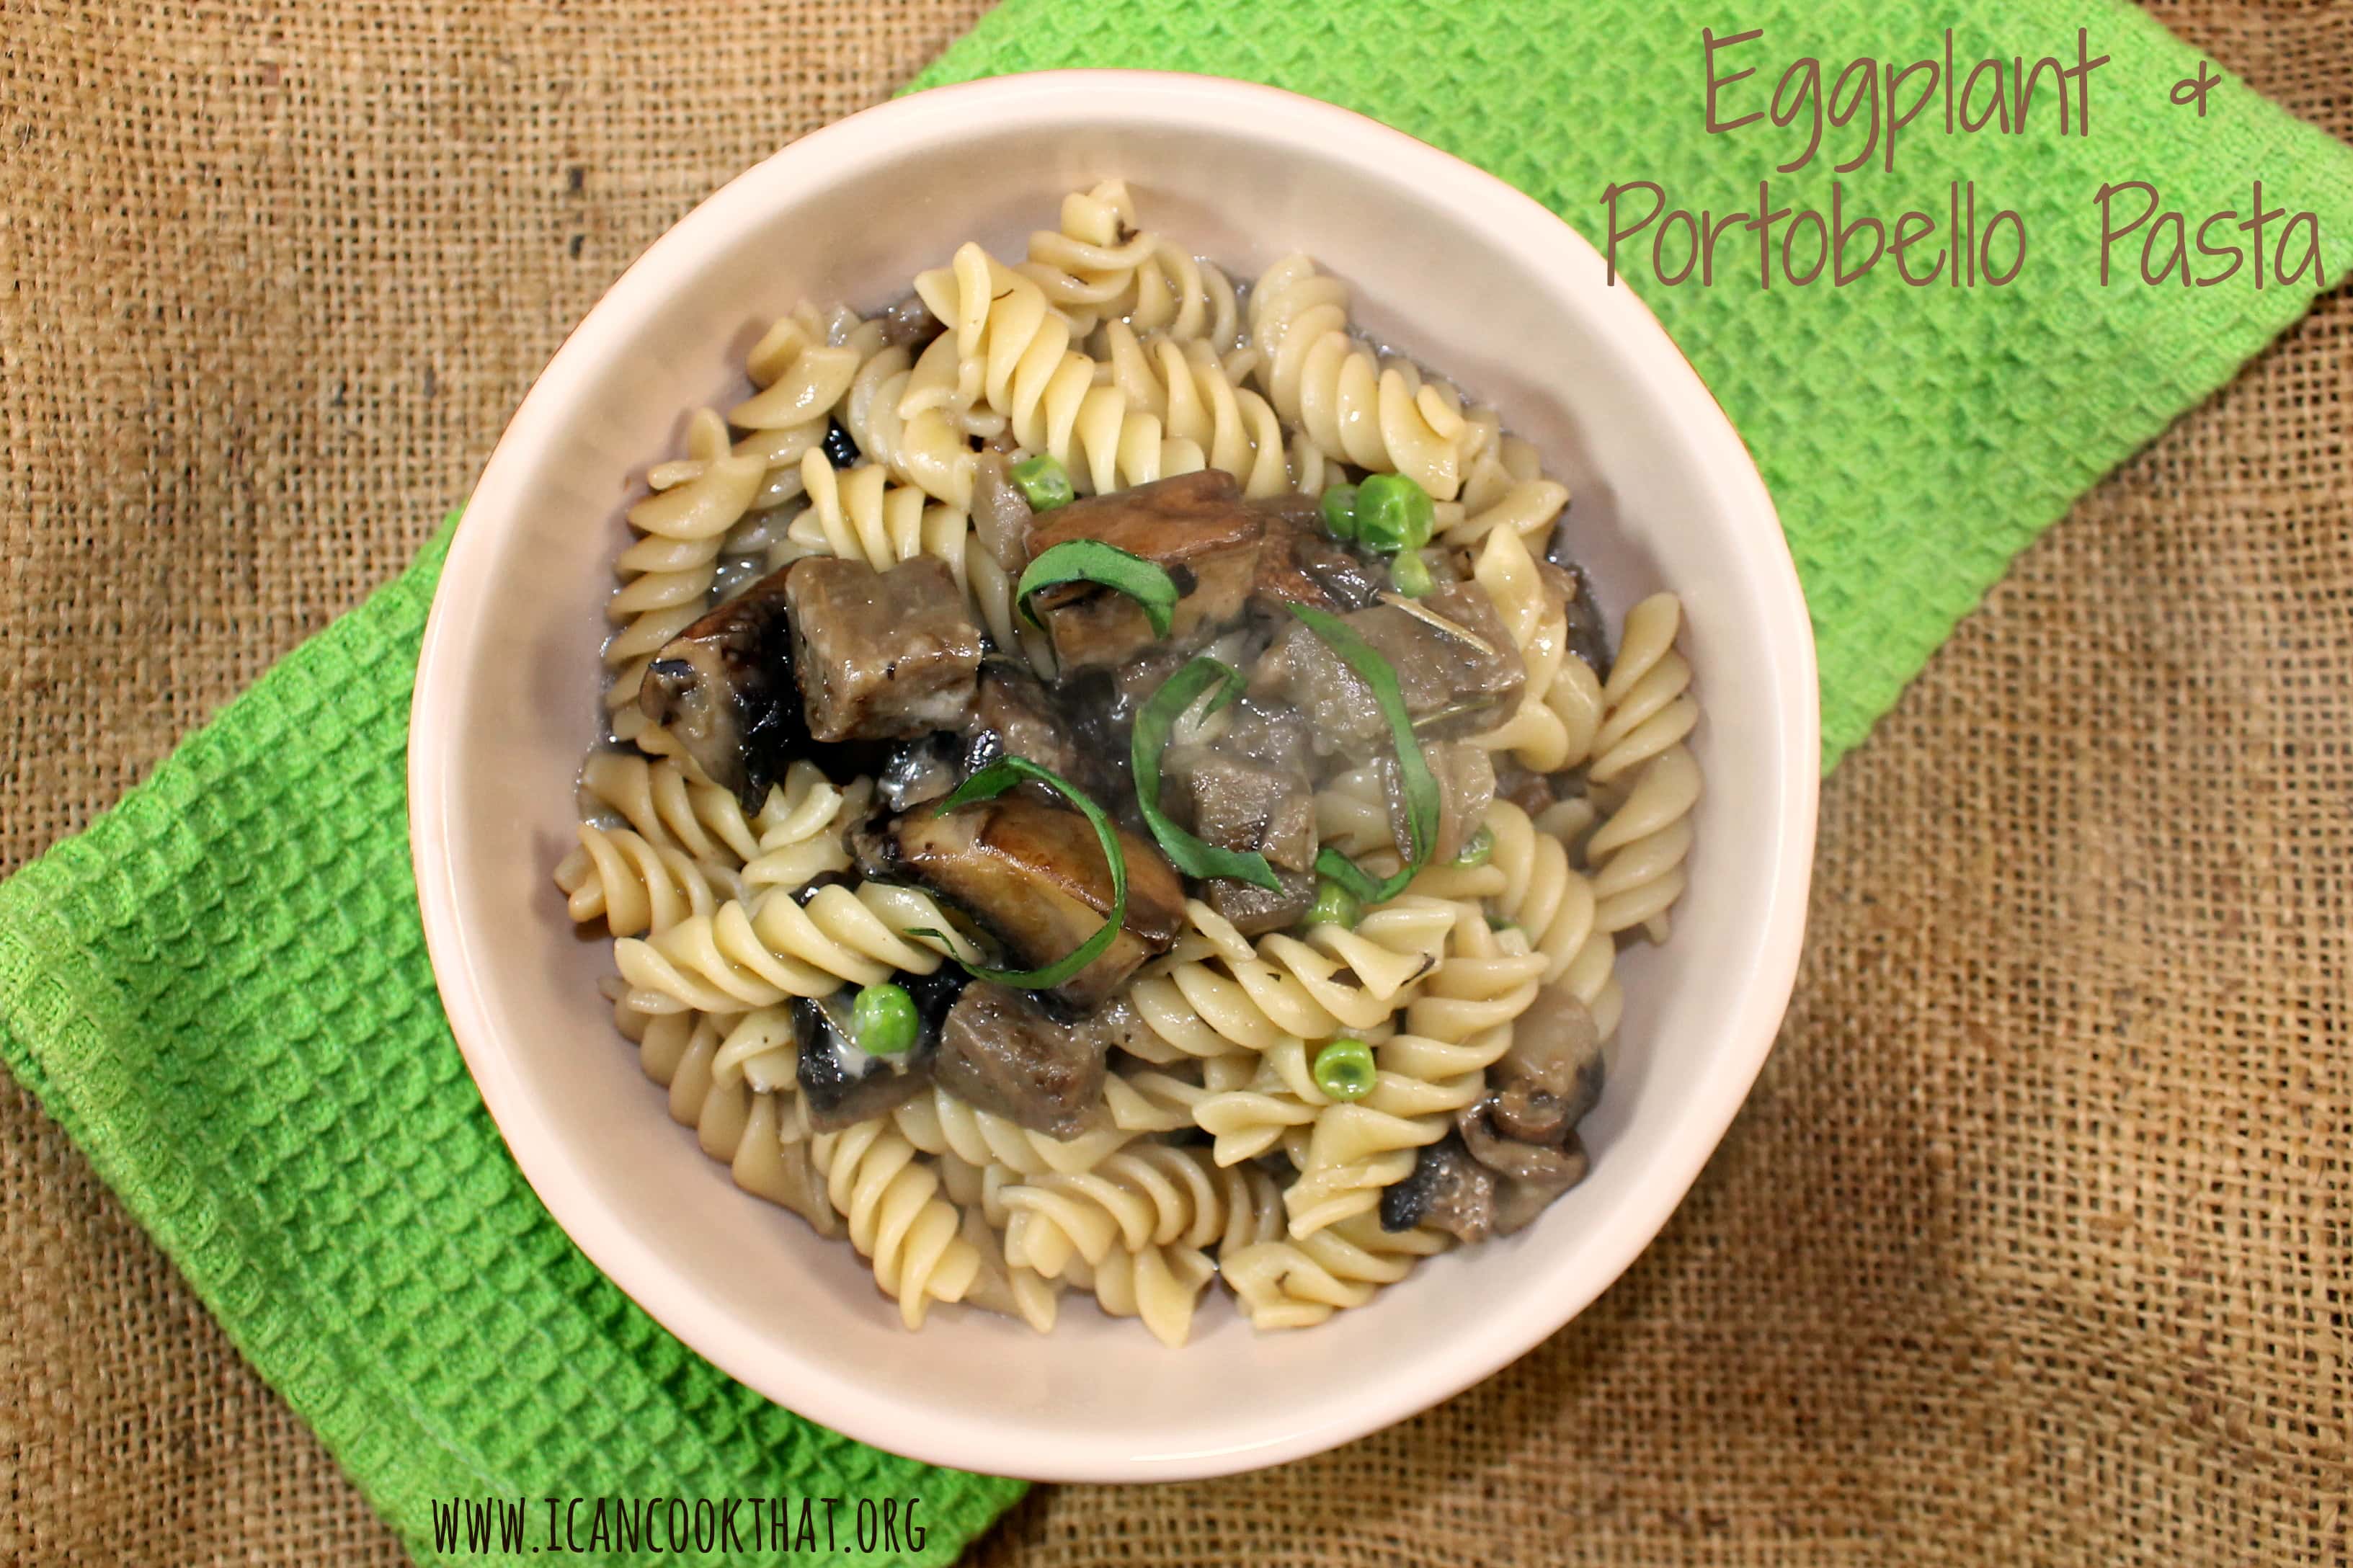
I love cooking with beer, I’ve used it a lot in past recipes — everything from Beer-Steamed Clams and Mussels to Pumpkin Spice Bread. So this new cookbook is right up my alley! The Ultimate Beer Lover’s Happy Hour includes bar snacks, beer cocktails, and recipes that incorporate beer into the dish as well as almost 1,000 beer pairing suggestions for the recipes.
I was sent one of the recipes in the cookbook to test and share with you: Eggplant & Portobello Pasta. I used local witbier in the recipe but you can also use a slightly toasty Vienna Lager, mellow Golden Ale, or classic American Wheat Ale.
I also have a fun contest to share! In celebration of the release of John Schlimm’s new book, The Ultimate Beer Lover’s Happy Hour,you can win a copy of the cookbook for your very own!
For a chance to win, try the recipe of the week (this Eggplant & Portobello Pasta I’m posting below) and take a photo of your dish.
Hi all! I’m happy to introduce Chris from HealthSmartLiving.com! His blog is filled with tips on hydroponic gardening, healthy cooking, juicing and overall nutritious recipes. His website even includes a review of juicers. Juicing is a foreign concept to me and looking through his blog helped answer a lot of questions I had about it.
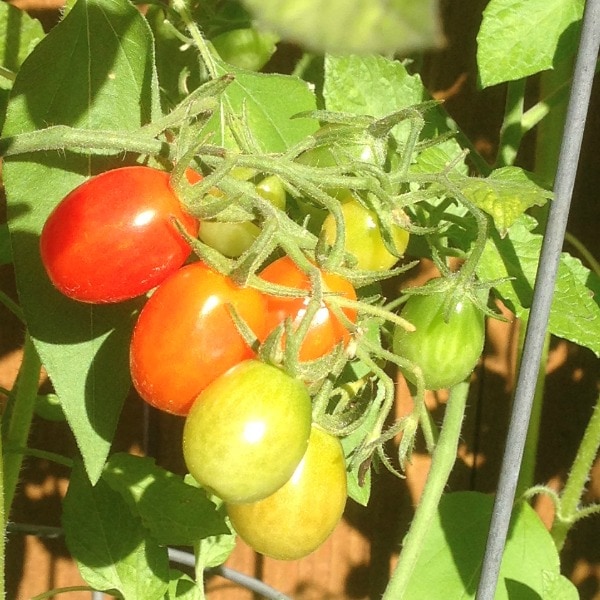
Today, he is sharing a Spicy Tomato Juice recipe make from home grown tomatoes that looks oh so tasty! Let me turn it over to Chris…
I love August in Chicago. It’s warm, sunny, and all of my gardening efforts start to pay off. Even though we live in downtown Chicago with a 400 square foot yard, we still manage to pack a pretty good fruitful garden in. This year we grew tomatoes, peppers, onions and various herbs.
You also have to be prepared to use a lot of fresh vegetables or watch them go bad. I hope to learn canning someday but it won’t be this year. Recently I made my first batch of tomato gazpacho and it was amazing. It also was really time consuming so I would call it a special occasion dish.
Another simpler way I’ve found to use a LOT of tomatoes, jalapenos, and onions is by juicing my own tomato juice. My wife and I started juicing this spring as a way to get more fruits and vegetables in our diet and to improve our overall health. We have really enjoyed it and I’ve even dedicated a section of my personal blog to juicing. It covers all the basics to get started.
I had a hankering for pho this week so I figured I would try to make it! This at-home recipe has a bit of a darker broth but boy does it taste good!
I found this recipe on Food Network and was surprised at how simple it really was to make. The hardest part was slicing the beef super thin so that it can finish cooking in the broth. If you are worried that your slices are too thick to cook fully, just add the sliced beef to the broth and simmer for about 1 minute before assembling.
Almost every Sunday night, my boyfriend and I have pasta for dinner. We typically just have spaghetti or rigatoni with meat sauce. I make the sauce in huge batches and freeze it for later use. Last weekend, I didn’t realize we had used up the last of our sauce until Sunday afternoon! So we needed a quick pasta recipe that we could use instead. (Don’t worry, I made more sauce this weekend so we are safe for the next few weeks!)
This recipe from Food and Wine uses sun-dried tomatoes to make a quick and simple no-cook sauce. The meal was done in under 30 minutes!
The Republic of Tea is one of my favorite tea companies, their tea is so good! (One of my go-to’s is their Earl Greyer Tea) I also really like their packaging; the tins make it easy to transport and keep the tea bags more fresh than they would be in a box.
What makes this tea particularly noteworthy is that the caffeine content of this tea is enhanced with green tea extract and pure caffeine isolated from premium tea leaves, so it’s a great morning pick-me-up. This tea also has a natural coconut flavor and a touch of licorice flavor, making for quite the tasty tea! It’s really yummy with a splash of milk. To really enhance the coconut flavor, add a little turbinado sugar to your tea too. (You can now understand why my boyfriend stole this tea from me!) The HiCAF Toasted Coconut Black Tea is also gluten free, carb free, with no added sugars.
I love using tea and coffee in recipes and the flavors of this tea just begged to be used in a dessert! The inspiration for this recipe was a Sunset recipe for a Blackberry-Black Tea Sorbet. Because there is already a flavor of coconut in the tea, I wanted to further enhance that by turning this recipe for a sorbet into a vegan ice cream using coconut milk.
Making ice cream is really easy but it takes quite a bit of preparation. First, you need an ice cream maker. (Luckily my mom had one!) The bowl of the ice cream maker has to be frozen for at least 24 hours before it’s ready to use. For this particular recipe, the tea bags need to be steeped in the coconut milk, cooled, and refrigerated before making the ice cream. Plus the whole ice cream mixture needs a few hours in the fridge to get cold. Whew!
So, if you’re making this, be sure to prepare ahead!
I have been in full on grilling mode recently. I can’t seem to get enough of recipes made on the grill! So as the end of summer continues to creep closer, I am trying to get in all of the grilling I can. As much as I would love to grill in the colder months, I’m a wimp and know I just won’t stand out in the cold.
I’ve used indoor counter top grills in the past and really wasn’t thrilled with the cooking results — it didn’t seem to heat up enough to get proper grill marks, all of the juices would flow out of the grill making for a very dry protein, and I’d always under or overcook the meat.
Source: https://optigrill.t-falusa.com/
So when I was contacted to test out the T-fal OptiGrill as part of T-fal’s OptiGrill Blogger Bash, I had some reservations about if this grill would really live up to expectations. Well, I was really pleasantly surprised! What sets the OptiGrill apart is its Precision Grilling Technology that adjusts the cooking time and temperature depending on the type of protein and the thickness of whatever you’re cooking.
Source: https://optigrill.t-falusa.com/
The T-fal OptiGrill has a cooking level indicator with a color changing display that notifies you when your protein has reached rare, medium, or well-done. It also beeps when your food reaches each of the cooking stages. (Keep in mind that if you want your meat to rest before slicing, it continues to cook. So if you wanted a steak at medium rare and planned to let it rest for 5 minutes, you should probably take it out when the OptiGrill hits the “rare” notification.)
Source: https://optigrill.t-falusa.com/
The grill comes pre-programmed with 6 settings that adapt cooking temperature and times for different types of food: burger, poultry, sandwich, pork/sausage, red meat, and fish/seafood. There is also a frozen food function button so that you can cook your protein even when frozen; just push the snowflake button and then one of the 6 pre-programmed buttons. The grill will defrost and cook the protein in one easy step! When cooking fruits and veggies, just use the manual mode, which allows you to determine when the food is done cooking. The OptiGrill also takes into account the thickness of your food using an integrated thickness sensor so that the protein is fully cooked correctly.
The grill is made of brushed stainless steel with die-cast aluminum plates with a non-stick coating. The plates are removable for easy cleaning and are even dishwasher safe. The plates are angled so that drippings can flow into the removable drip tray, which surprisingly doesn’t leave the meat tough, dry, or chewy.
Want to see the grill in action? I decided to test it out with a yummy recipe from Cooking Light that uses both chicken thighs and chicken breasts. Chicken is so easy to overcook leaving a dry meal so I thought it would be a perfect way to test what this grill can really handle. This recipe also includes grilled pineapple so I was able to test out the manual setting as well. I made the marinade from this recipe for Jerk-style Chicken and the salsa from this recipe for Jerk Chicken with Grilled Pineapple Salsa.
I also am giving away one T-fal OptiGrill to one lucky reader, courtesy of T-fal OptiGrill! Details below the recipe.
Note: I was sent a T-fal OptiGrill to test for this review. T-fal is also offering one I Can Cook That reader the chance to win their own T-Fal OptiGrill. All opinions are my own.
Ingredients:
1 teaspoon grated lime rind
1/4 cup fresh lime juice plus 1 tablespoon, divided (about 3 limes)
1 tablespoon ground allspice
1 tablespoon brown sugar (substitute 1 tablespoon molasses to make paleo)
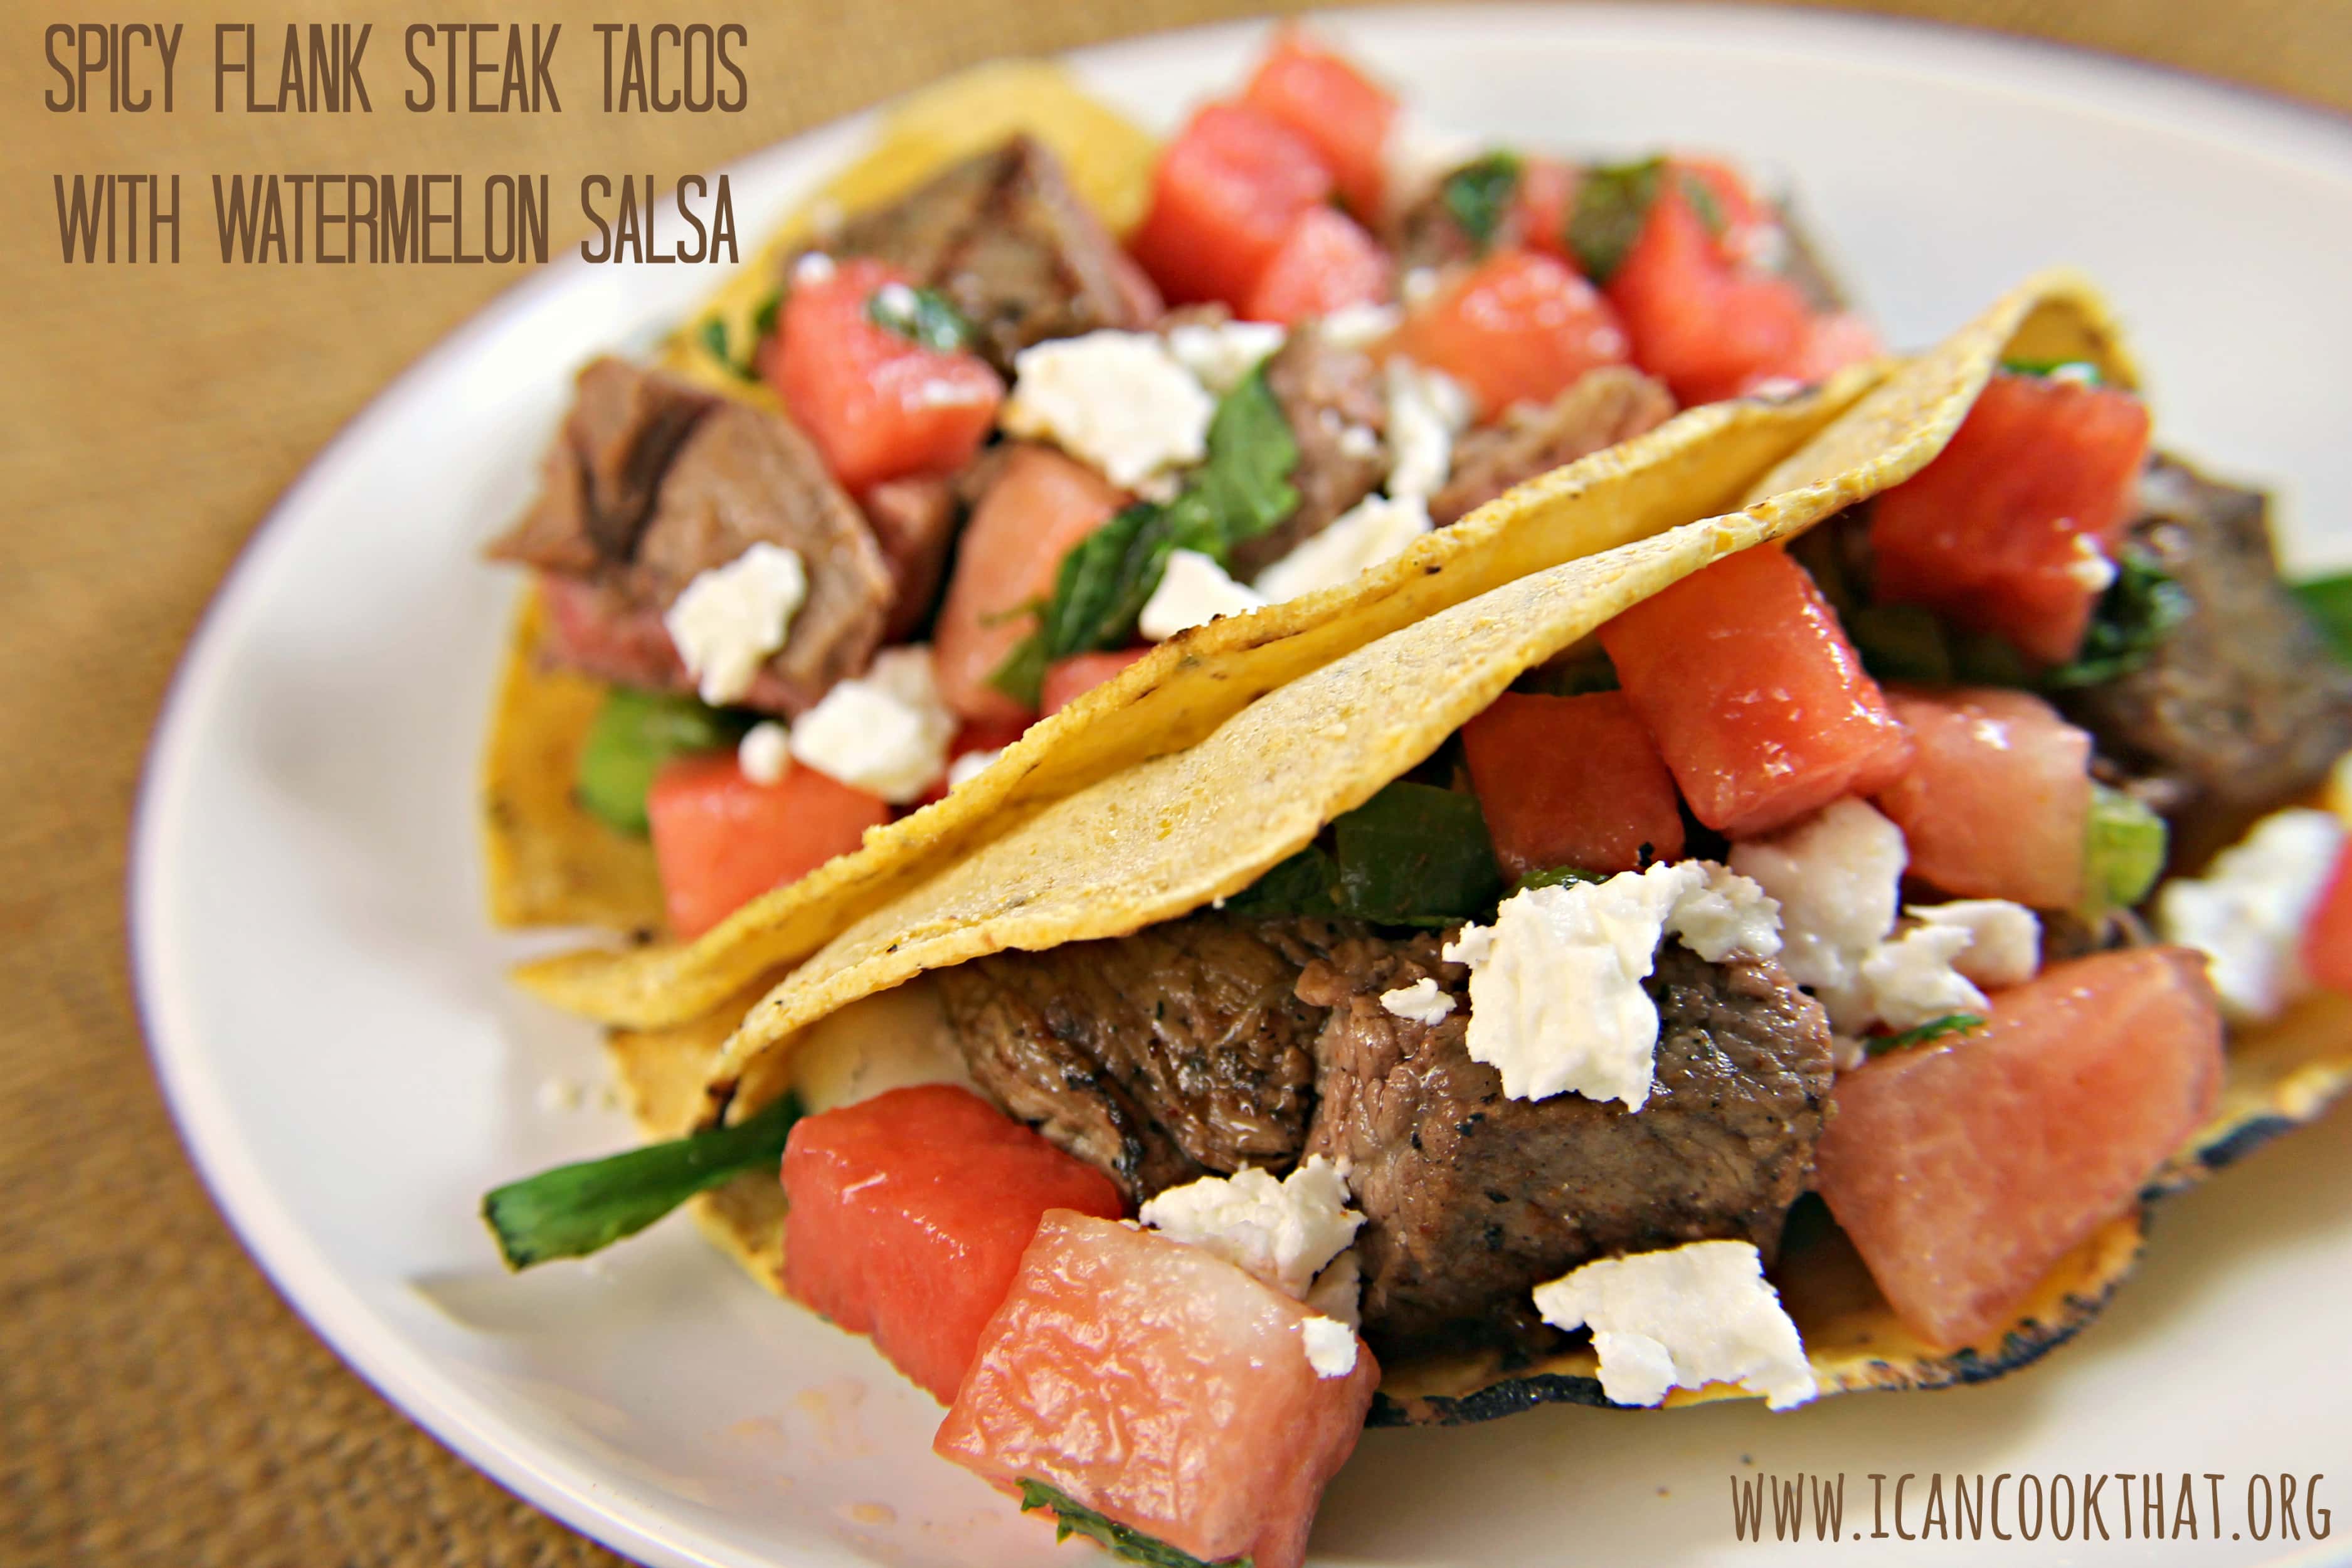
When I first spotted this recipe in the August issue of Cooking Light, I knew I wanted to make it. I have never used watermelon in a savory recipe before and it sounded like a perfect summer dinner! This recipe comes together in no time (and is really simple to make), making it a great weeknight meal option.
The rub on the steak is only four ingredients: salt, black pepper, white pepper, and red (cayenne) pepper. If you don’t have white pepper you can just substitute in more black pepper. But each pepper does bring it’s own taste to the rub.
Black and white pepper comes from the same pepper plant but white peppercorns have the outer layer removed, leaving the seed inside. White pepper has a more subtle flavor than black pepper. Red pepper, or cayenne pepper, is ground from hot peppers so it has a nice level of heat to it. The three together add a nice spiciness to the steak without being overwhelming.
I altered this recipe a little bit but the general idea is there. If you’re interested in seeing the original version, check it out here.
Ingredients:
1/2 teaspoon plus 1/8 teaspoon kosher salt, divided
1/4 teaspoon freshly ground black pepper
1/4 teaspoon ground white pepper
1/4 teaspoon ground red pepper
1 (1-pound) flank steak, trimmed and halved lengthwise
I love the flavor that grilling adds to a recipe but I struggle with grilling protein to the correct temperature. This means we sometimes end up with dry, chewy and overcooked food or, even worse, super rare/raw meat.
Luckily, Verizon Wireless’ Philadelphia Tri-State Region team gave me the opportunity to try out an iGrill thermometer that not only displays the temperature, but also uses Verizon’s LTE 4G network to send me an alert when my protein has reached the temperature I want!
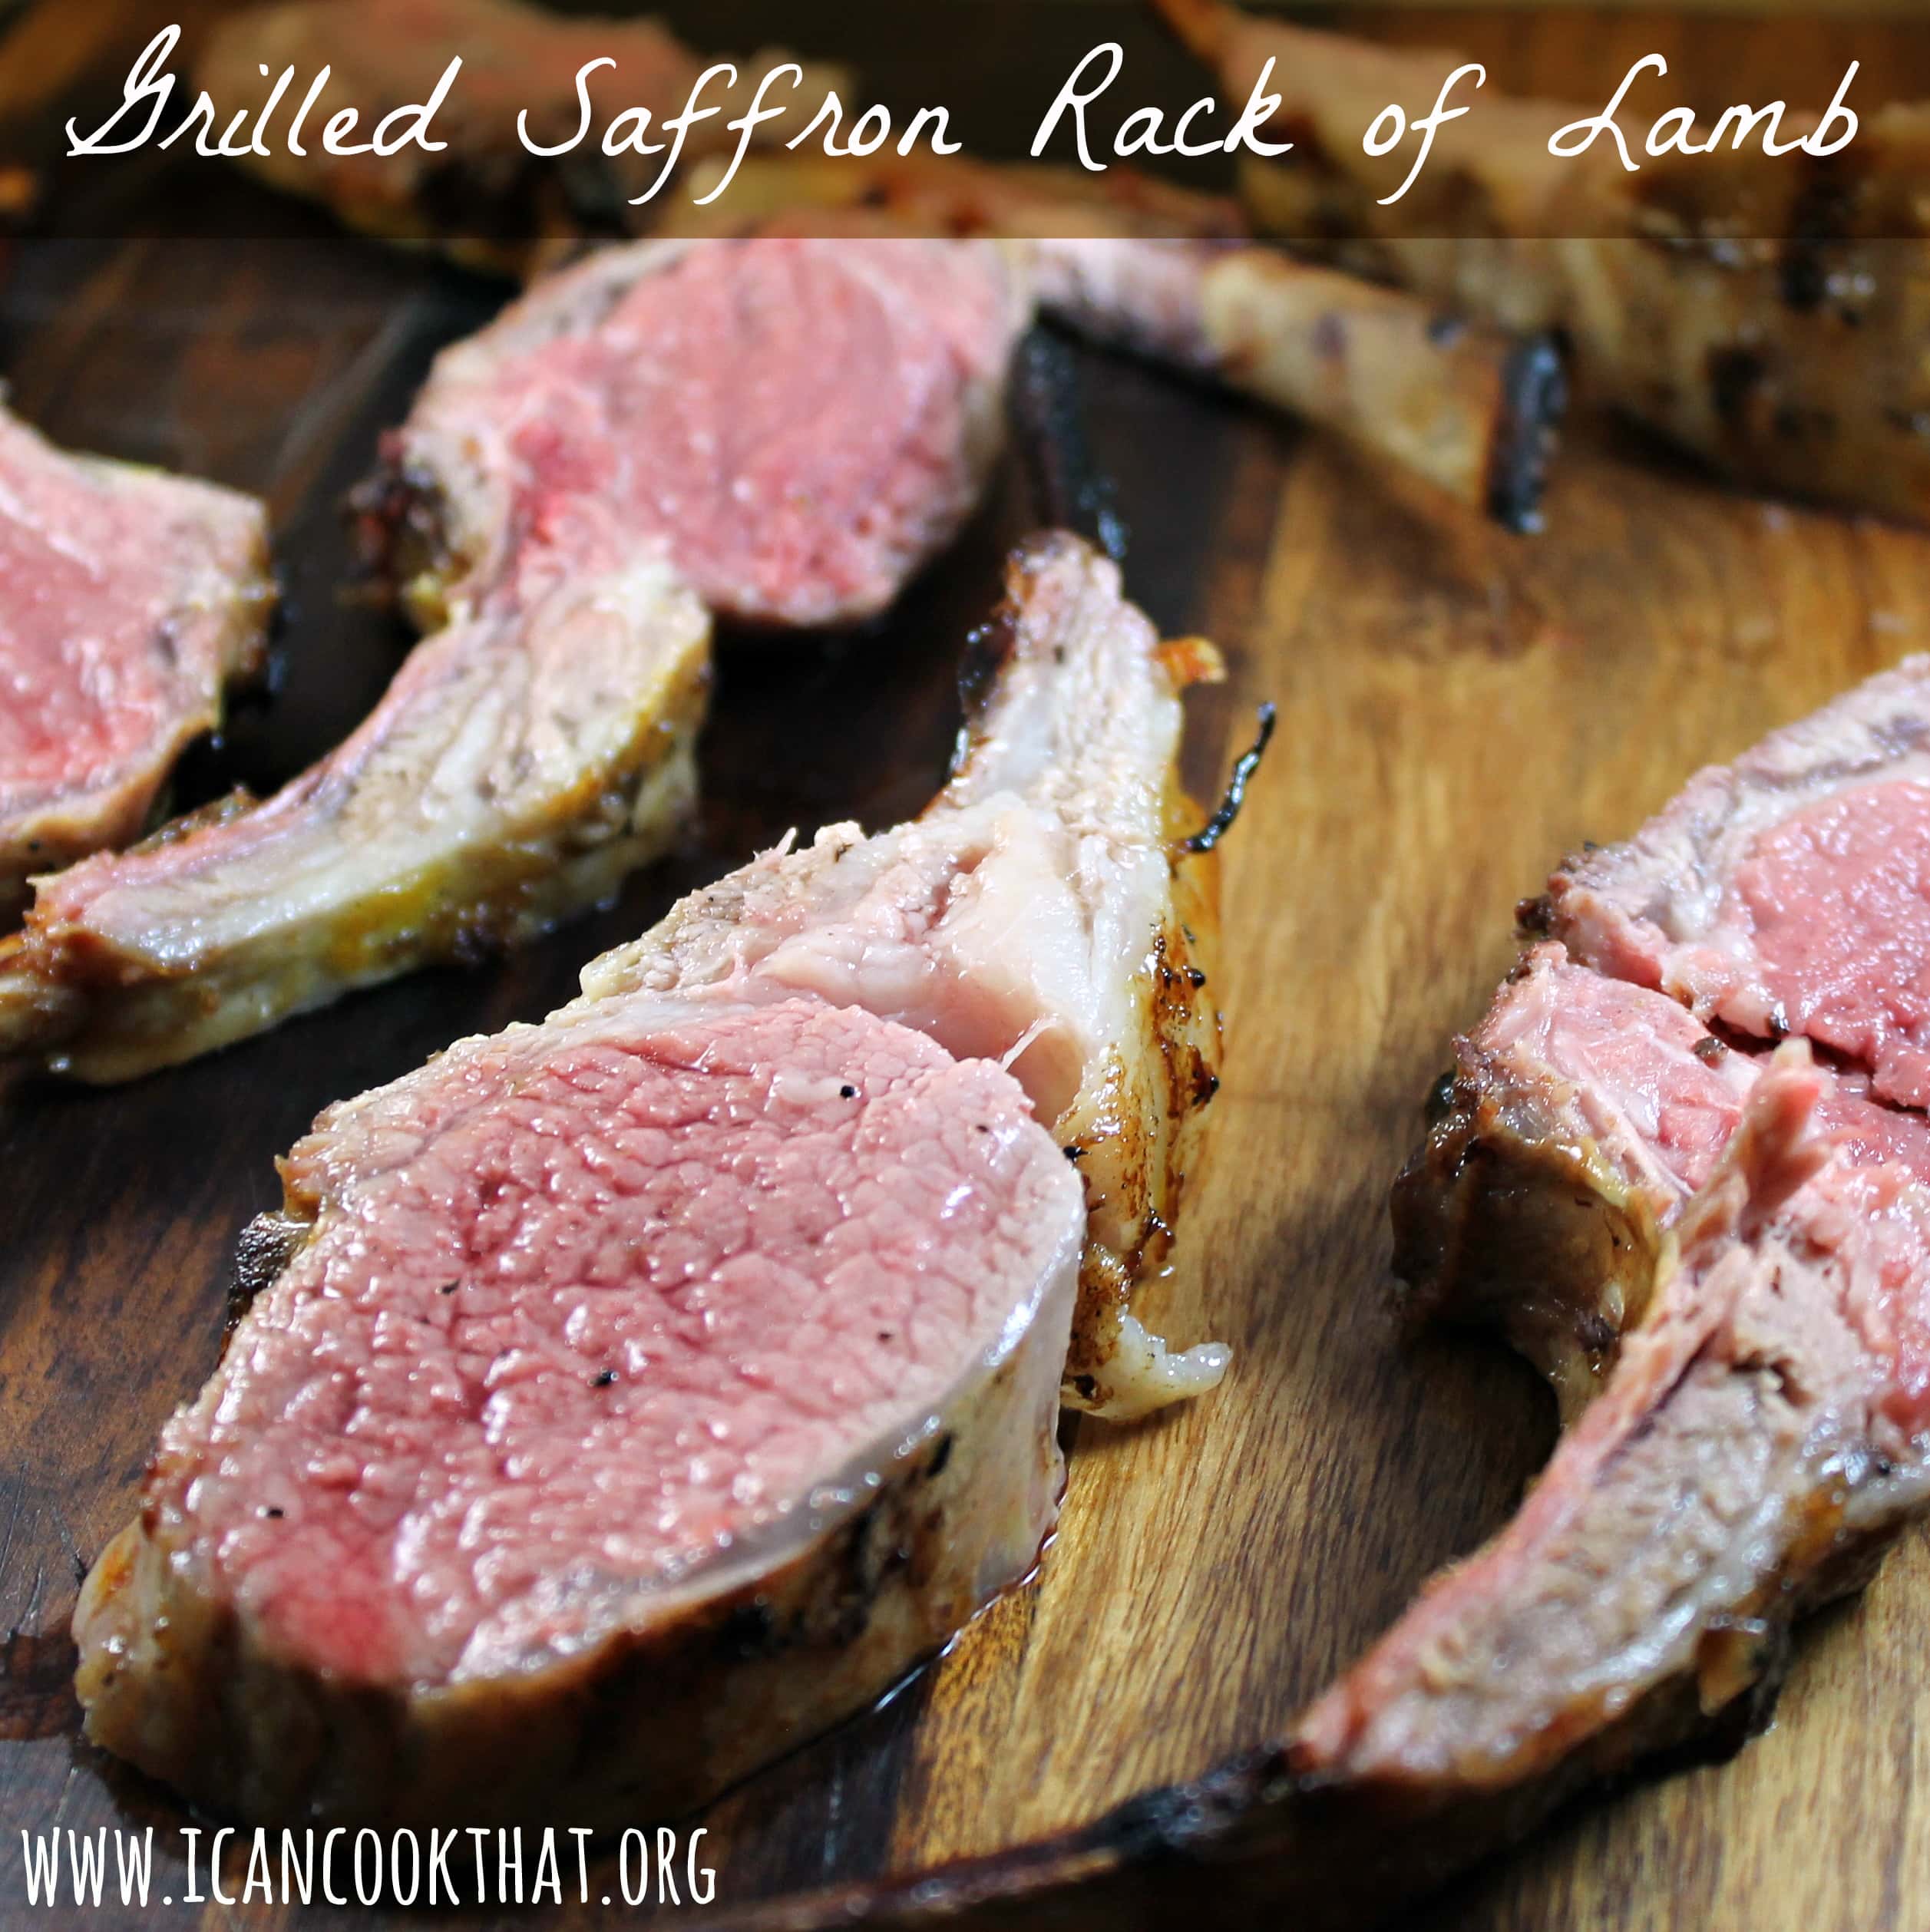
I was so excited about this product that I decided to really test it out and used it on a pretty finicky meat: lamb. Lamb is a protein that should be cooked to medium rare and not much more. It gets really tough and chewy if overcooked. It’s pretty easy to overcook as well; lamb continues to cook after being removed from heat so it has to be removed before reaching the ideal internal temperature for medium rare. Plus, it’s a pretty expensive meat so you want it to be perfect!
The iGrill Thermometer takes a lot of the guesswork out of the process. The thermometer comes with two probes so you can track the temperature of two meats at the same time. You just insert the probe into the thickest part of the meat (not touching a bone). The thermometer pairs with your phone through Bluetooth. Using the iGrill app on your smartphone, you can set a temperature or a timer to alert you when your meat is finished cooking. Pretty nifty, right?
Ingredients:
2 racks of lamb, rib bones frenched
salt and pepper, to taste
2 garlic cloves, crushed
1 cup plain 0% Greek yogurt
2 tablespoons olive oil
the zest of 1 lemon
1/2 teaspoon saffron threads, finely crumbled
note: “Frenched rib bones” means that the meat has been cut away from the end of the rib so that part of the bone is exposed
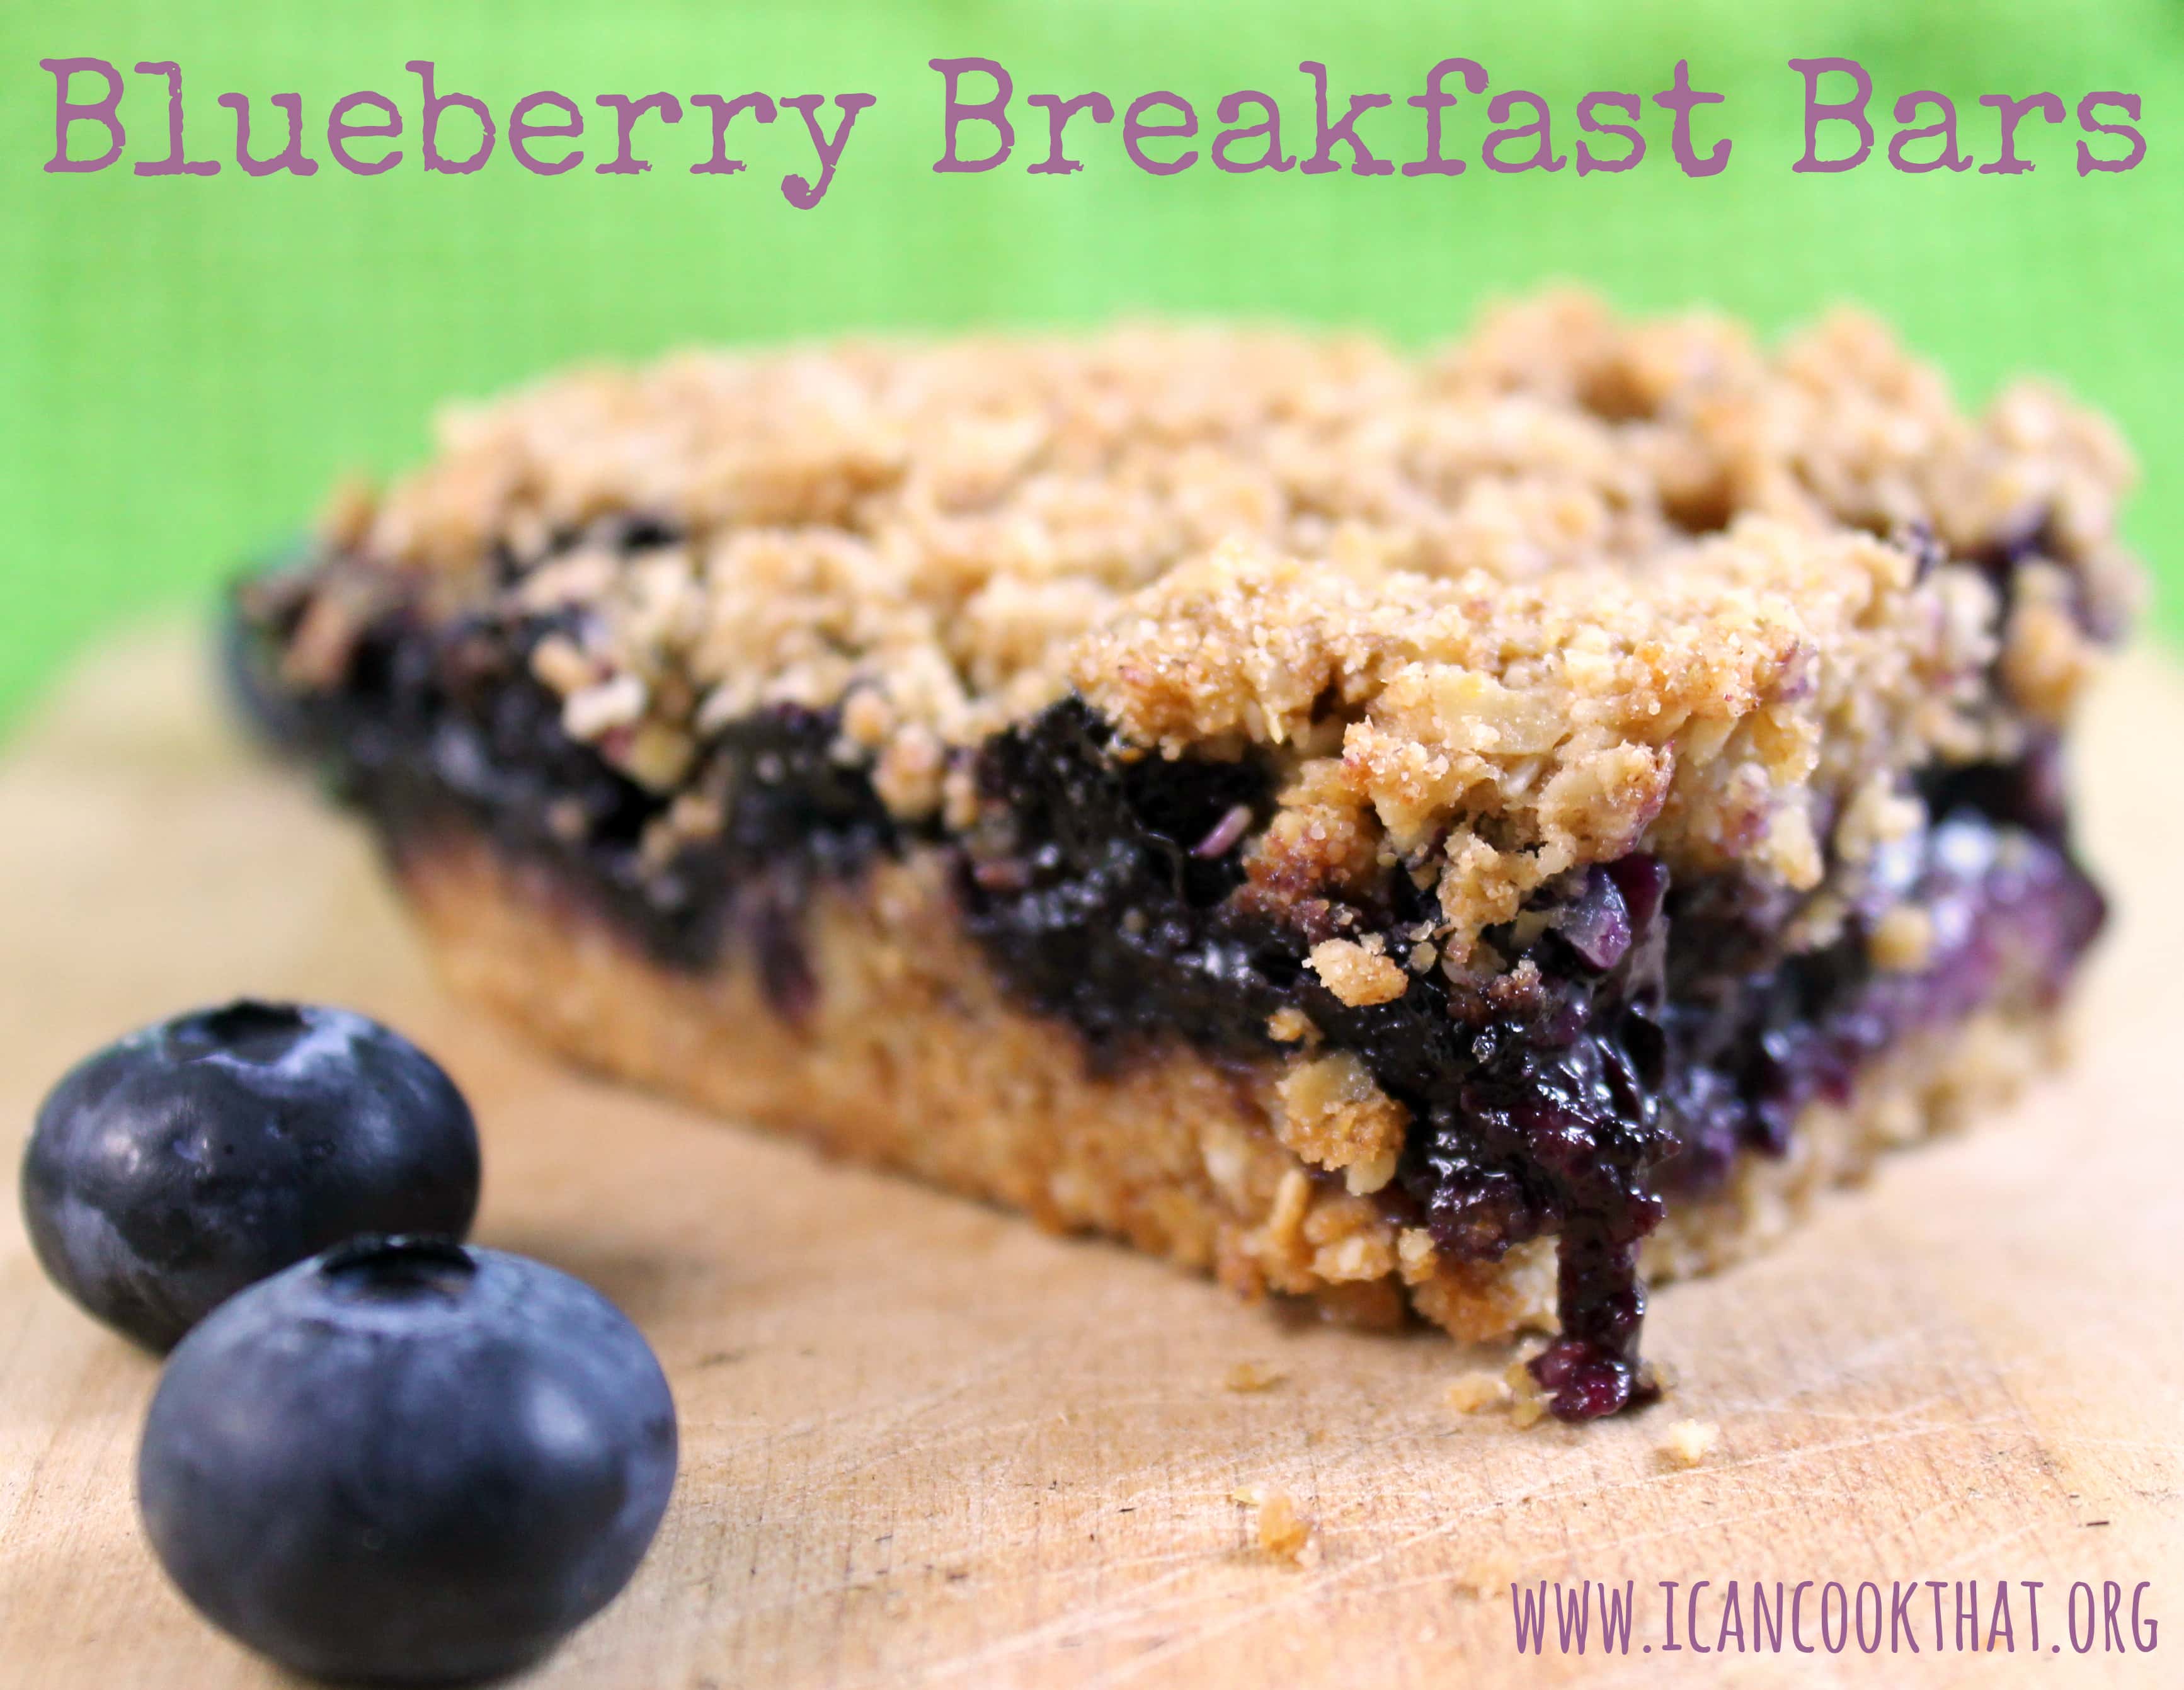
My version uses quite a bit of substitutes and including using sprouted spelt flour instead of whole wheat flour because I could not find my whole wheat flour when I went to make these (I guess I need to clean out my pantry!) I also have more blueberry filling in my version, and used a different sized pan. Be sure to check out the original version on the kitchn to see if you prefer their method!
When I have friends coming to visit, I like to make a batch of cocktails beforehand so that I have a pre-made refreshment to serve. Lemonade-based drinks are a favorite of mine: I’ve made a Rhuby-Lavender Lemonade as well as a Bourbon-Peach Lemonade in the past.
So to keep my trend going, I decided to make this Honey, Ginger Sparkling Lemonade with Rosemary and added in some bourbon. (My friends are big bourbon fans, if yours aren’t, vodka would work as an easy substitute). I changed the recipe a bit to fit my tastes, but you can find the original recipe here.
Ingredients:
1/2 cup local honey
1/2 cup water
the juice of 5 lemons, plus the zest of 1 lemon
the juice of 1 lime
1/4 cup minced ginger
10 full rosemary stalks
2 1-liter bottles of club soda
1 1/2 cups bourbon
Ice cubes
Note: Bourbon does include grains that contain gluten. However, distilled alcohol is considered gluten-free because the process of distillation removes the harmful gluten protein, which is why I have this recipe listed as gluten free. If you are highly sensitive to gluten, bourbon may be off limits for you.