Heirloom Gazpacho

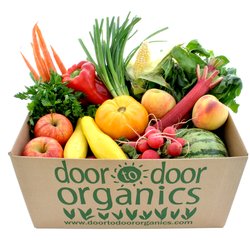
This post is sponsored by Door-to-Door Organics. All opinions are my own. #MyFarm2Table


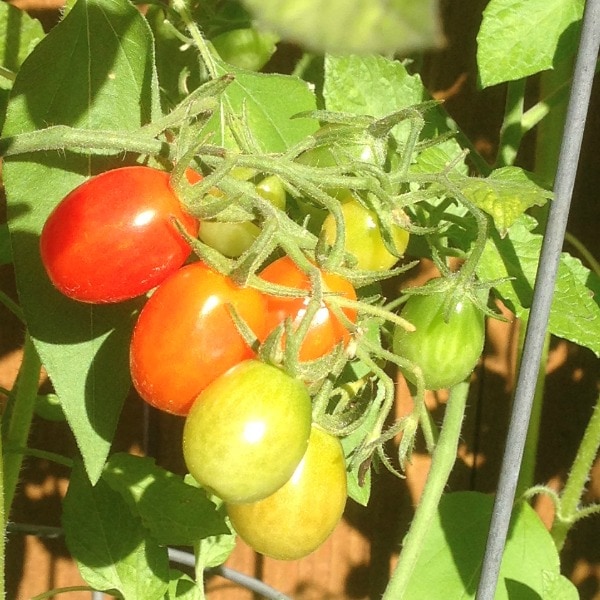
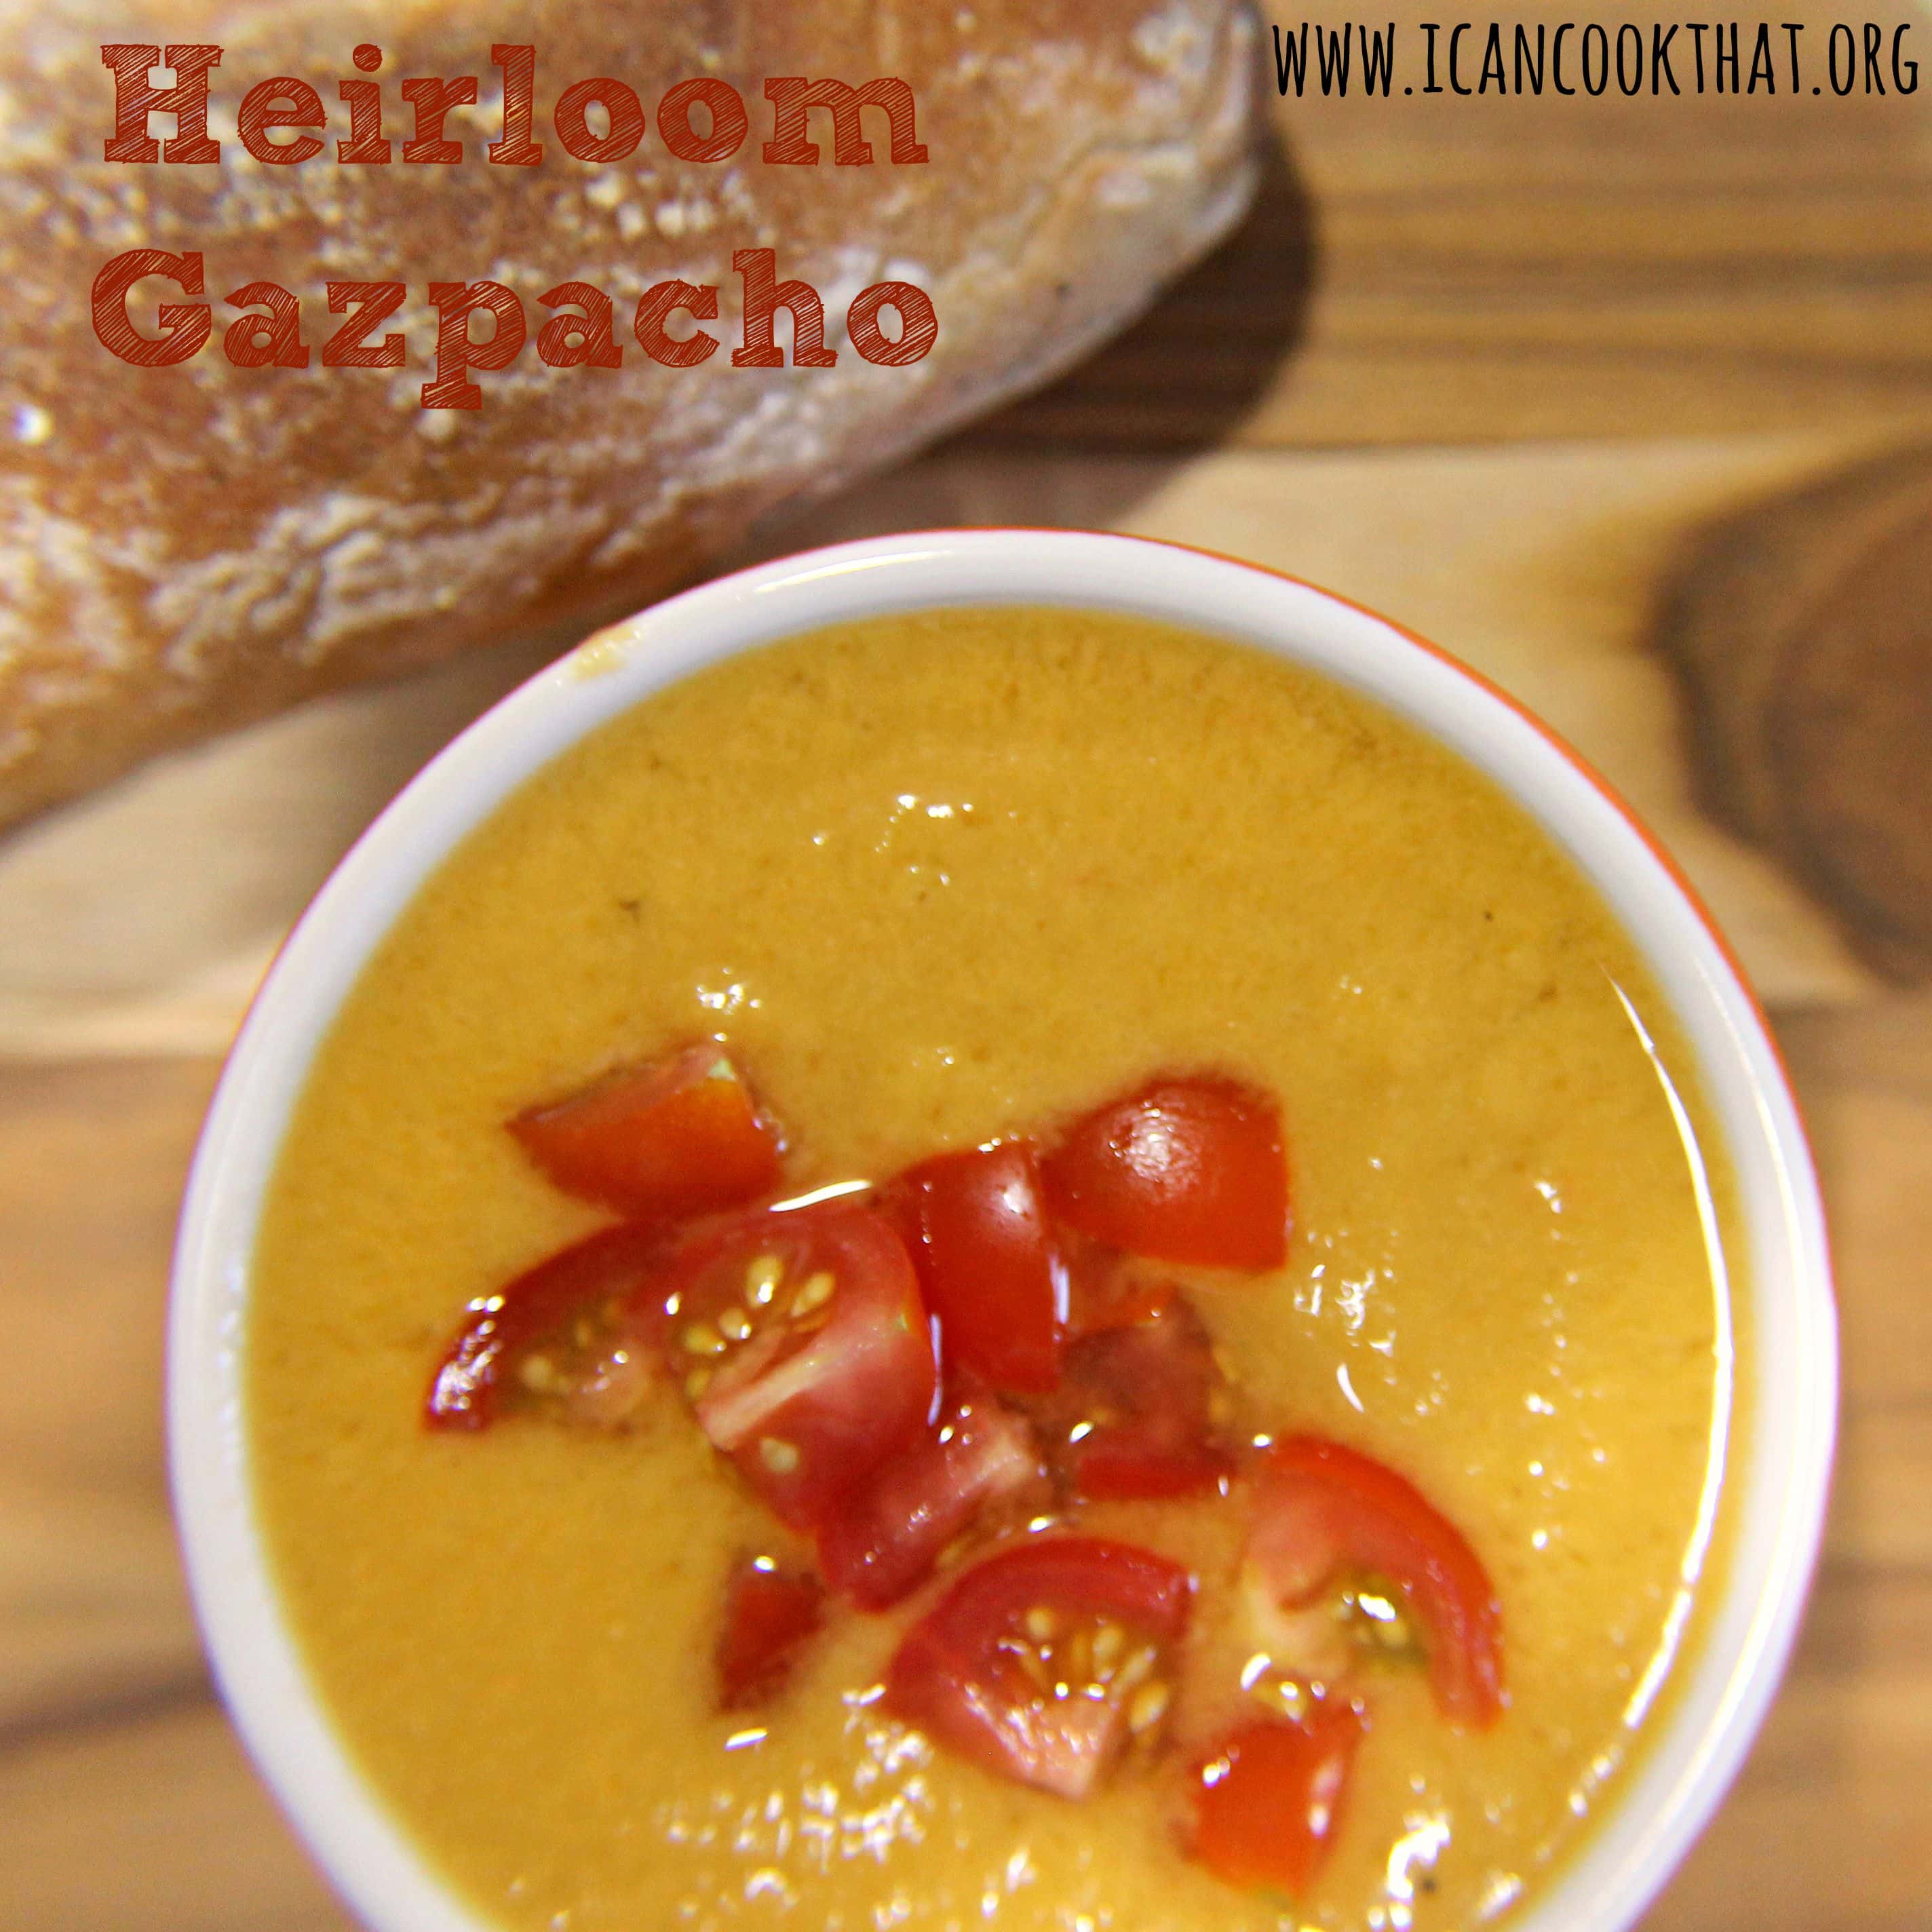
I was sent some beautiful Local Organic Heirloom Tomatoes from Door-to-Door Organics for my Farm-to-Table post. I love the colors of heirloom tomatoes, especially the lighter ones, so I wanted to use them in a way that highlighted their coloring. What better way to make heirloom tomatoes the star but in a Gazpacho recipe?

Heirloom Gazpacho #MyFarm2Table


Now, the one typical setback of making gazpacho is going through the whole process of peeling and seeding tomatoes. So, for this recipe, I just eliminated it. I have a pretty awesome blender (a Blendtec) which blended the tomatoes well enough to basically eliminate the skins and seeds, so yours may come out a bit more chunky. But removing the skin of a tomato is just such a pain!


I served my silky smooth gazpacho topped with finely chopped cherry tomatoes and a Wild Flour Bakery Hearth Baked Mini Baguette that was also in my box from Door-to-Door Organics. The recipe also includes a green bell pepper and a jalapeno which were also a part of my box.


Ingredients:

  • 3 cups heirloom tomatoes, chopped (I used some yellow and red)
  • 1 green bell pepper, chopped
  • 1 peeled cucumber, chopped
  • 1/2 cup onion, chopped
  • 1 jalapeno, seeded and chopped
  • 1 garlic clove, chopped
  • 1 tablespoon olive oil
  • 1 teaspoon Worcestershire sauce
  • 2 tablespoons champagne vinegar
  • 1 teaspoon salt
  • 1/2 teaspoon pepper
  • cherry tomatoes, chopped, optional

Continue reading Heirloom Gazpacho

Salsa Recipe & Beginners Guide to Canning #CanItForward

This Saturday marks Jarden Home Brands fifth annual Can-It-Forward Day, which will be broadcast live online at FreshPreserving.com from 11AM – 4PM EST from the new state-of-the-art Jarden Home Brands headquarters in Fishers, Indiana.


An event celebrating the joys of fresh preserving, the -It-Forward Day webcast will have an integrated chat function where viewers can submit their home canning questions to be answered in real time. New this year, there will also be an exciting celebrity mason jar auction unveiled during the webcast!


To celebrate, I was sent a Ball Canning Discovery Kit (paid link), Ball Blue Book Guide to Preserving (paid link), Red Design Series Lids, and Ball Fiesta Salsa Mix (paid link).


My future sister-in-law is big into canning, and I’ve “helped” (a.k.a kept her company in the kitchen) once before, but the process of canning is really intimidating to me. I was told that if I can boil water, I can can, so I was both wary and excited to try this out!

I need to give a little shout out to my city, because the Mason jar was, in fact, invented and patented in Philadelphia in 1858 by local tinsmith John Landis Mason. So, this should be in my blood, right?


  • The Ball Canning Discovery Kit  is a great beginners kit; it comes with a canning rack that fits into most pasta pots, a recipe guide, and three jars. The kit is really affordable ($11.99) and allows you to assess if canning is for you before investing fully into the process.
  • My sister-in-law assured me that if I had a Ball Blue Book Guide to Preserving, I’d be just fine canning. So. WHEW. This book lays out each step of the process (and even tells you why you are doing it this way) to ensure a successful canning process. The step-by-step guides are particularly helpful as a beginner.
  • The Red Design Series Lids are normal lids and bands, just prettier.  🙂 The lids can only be used once during canning, so it’s helpful to have extras on hand. (You can reuse the jars and bands as many times as you want)
  • The Ball Fiesta Salsa Mix makes the process of seasoning salsa super easy. You just need fresh or canned tomatoes, a splash of vinegar, and the mix to make a yummy salsa!


I decided to make a salsa from the Ball Blue Book, but adapted it slightly to include the Ball Fiesta Salsa Mix. The recipe is simple, and is basically just cutting up the ingredients, so this post is more about the canning process than the actual recipe.

I am absolutely a beginner with this, but luckily was able to glean some tips from my sister-in-law and the Ball Blue Book, which I will share as well.

I also am giving away a coupon for a free case of jars! Details at the end of the post. 


Zesty Salsa (adapted from Ball Blue Book Guide to Preserving)

Yields ~3 pint jars

Ingredients:

  • 5 cups chopped cored peeled tomatoes (fresh or canned)
  • 4 green bell peppers, seeded and chopped (~2.5 cups)
  • 1 large onion, chopped (~2.5 cups)
  • 1 large jalapeno, seeded and finely chopped (~3 tablespoons)
  • 2 garlic cloves minced
  • 2/3 cup cider vinegar
  • 1 tablespoon fresh cilantro, finely chopped
  • 1/4 cup Ball Fiesta Salsa Mix

Gear:

  • Ball canning rack with lifter
  • 3 Ball Pint Jars with lids and bands (I used the Red design series lids and bands)
  • Large stockpot (at least 7.5 inches tall and 9.5 inches in diameter)
  • a non-metallic spatula (I ended up using chopsticks. They worked just fine)
  • A clean, damp towel to wipe rims of jars

Continue reading Salsa Recipe & Beginners Guide to Canning #CanItForward

Homemade Fresh Salsas and Keeping #NaturallyClean with Clorox Green Works

This shop has been compensated by Collective Bias, Inc. and its advertiser. All opinions are mine alone.
#NaturallyClean #CollectiveBias


Having a blog means that I tend to do a lot of cooking for larger groups. I usually show up to any gathering with at least one appetizer or snack for a crowd. Cooking for groups can be a bit of a challenge in my small apartment, so it’s crucial that I can reuse kitchen tools while making different parts of a recipe!


Clorox Green Works has a great new product, Pump ‘N Clean, now available in Target. Green Works Pump ‘N Clean can be found in the green section of the cleaning aisle, with the rest of the Clorox Green Works line.

The whole Clorox Green Works line cleans thoroughly and powerfully without using harsh chemicals or leaving any residue. The line includes wipes, dish soaps, detergents, and cleaners that are made with plant- and mineral-based cleaning ingredients. The products are not tested on animals and use environmentally sustainable packaging whenever possible.

From June 14-July 11, you can use the Target Cartwheel app to save 10% on all Green Works products.


The Pump ‘N Clean product is both a time saver and a way to keep your kitchen clean and safe. It’s food-safe, so you can use it to clean your knives and cutting boards in between cutting veggies and fruits! (Green Works Pump ‘N Clean is not to be used to clean up after raw meat or raw fish.) To use, just place a dish towel or sponge on top of the Pump ‘N Clean and press down to dispense the liquid. Use the dish towel/sponge to clean your knifes, counters, stove top, whatever needs cleaning! It’s easy to clean are you are cooking, which is a huge time saver!

I wanted to make two different salsas for a friend’s party, a traditional fresh salsa, and a fruit salsa. The traditional salsa is made of fresh tomatoes, red onion, and jalapeno, while the fruit salsa is filled with berries, pineapple, oranges and kiwifruit.  Obviously, mixing the flavors of these two would ruin them both, so it was important that I was able to quickly clean both my knife and my cutting board!

Ingredients:

Fresh Salsa:

  • 3 plum tomatoes, chopped and seeded
  • 1 red onion, finely chopped
  • 2 garlic cloves, minced
  • 1 jalapeno, finely chopped
  • 1/4 cup chopped fresh cilantro
  • 3 tablespoons fresh lime juice
  • 1/2 teaspoon kosher salt

Fruit Salsa:

  •  1/2 cup strawberries, finely chopped
  • 1/4 cup blueberries, halved
  • 1/4 cup raspberries, quartered
  • 1 medium orange, peeled and chopped
  • 3 medium kiwifruit, peeled and chopped
  • 1  (8 oz) can unsweetened crushed pineapple, drained
  • the juice of 1 lemon
  • 1 teaspoon sugar

Continue reading Homemade Fresh Salsas and Keeping #NaturallyClean with Clorox Green Works

Natural Balance Foods- Healthy Cereal Bars and Snacks

A while back, I was contacted by a healthy snack company based out of Britain called Natural Balance Foods. Their Eat Nakd Bars are snack bars made from natural ingredients including fruits and nuts and are gluten free, wheat free, and dairy free with no added sugars.


The company was kind enough to send me a bunch of the Nakd Bars to try, including their Cashew Cookie and Berry Delight Bars, which were my two favorites.

I brought a bunch of the Nakd Bars hiking and they were the perfect portable treat for the day. (I actually ended up spraining my ankle and spent most of my day at the base of the mountain, but hey, sprains work up an appetite as well!)


These little bars don’t skimp on flavor and are a great on the go snack for busy days.


So, what sets Eat Nakd apart from the rest?


A typical cereal bar can contain as many as 30 ingredients, many of which I can’t really pronounce.

It only takes 35 minutes to make an Eat Nakd bar, from start to finish, while a baked cereal bar can take almost 4 hours to process.


The lack of sugars doesn’t result in a cardboard tasting bar, however. The bars typically are made with dates, which adds natural sweetness to the other flavors. Eat Nakd currently has nine different bars, so it’s worth trying them all to find your favorite!


The company also has Eat Nākd Crunch bars which are are dairy, wheat and gluten free, packed with soya crunchies for extra protein to keep you feeling fuller for longer, and are completely vegan friendly. Flavors include Banana, Strawberry, Apple and Cocoa.


I enjoyed these bars so much that I want you to be able to try them too! One I Can Cook That Reader will will an Eat Nakd Sampler Box! The Sampler Box includes one of each of their yummy bars —

  • One of each 9 Eat Nakd fruit and nut bar flavors; Rhubarb & Custard, Caffe Mocha, Cocoa Orange, Cashew Cookie, Pecan Pie, Berry Delight, Cocoa Mint, Ginger Bread and Cocoa Delight (9x 35g bars)
  • One of each 4 Eat Nakd Crunch bars: Apple Crunch, Strawberry Crunch, Banana Crunch and Cocoa Crunch (4x 30g bars)


Use the widget below to enter. Also, be sure to check out their website and pick up some of the bars for yourself — because Natural Balance Foods is relatively new to the U.S., they are currently offering free shipping on all U.S. orders!

a Rafflecopter giveaway

Honey Mustard Roasted Rainbow Carrots

Hooray for spring weather! As the days get warmer, the produce offerings also get better. It’s the perfect time of year to experiment with more veggies!


Door-to-Door Organics, a home delivery organic and grocery company,  is a great way to receive seasonal and organic fruits and vegetables. Their produce is USDA Certified Organic and is locally sourced whenever possible. You choose a produce box size (little, small, medium, or large), type (fruits, veggies, or mixed), and delivery frequency. A few days before it will be delivered, you will receive an email with what will be in the box. You can make up to 5 substitutions, which is really a great feature.


You can also shop for other groceries and add them to your delivery, including diary, meat, bread, etc. Their Facebook page is also an awesome resource. You can find some recipes, links to some of their helpful blog posts, and get more information about Door-to-Door Organics!


I have been using Door-to-Door Organics for a few weeks now (I get the Little Mixed Box box delivered every other week courtesy of a coupon given to me by Door-to-Door Organics) and was so excited to see that my latest delivery had beautiful rainbow baby carrots in it!


I love when my food has vibrant colors, so I couldn’t wait to roast these beauties up. My box also came with a red onion, a head of garlic and some fresh Italian parsley, perfect accompaniments to the carrots.


This recipe for Honey Mustard Roasted Rainbow Carrots is really simple and takes about 30 minutes, depending on how soft you like your carrots (I like mine to have some crunch to them!)


If you want to try Door-to-Door Organics for yourself, they were nice enough to offer a discount for I Can Cook That readers! Use the coupon code ICANCOOKTHAT to receive $10 off!  


Ingredients

  • 1 (12 oz) bag rainbow baby carrots
  • 1/2 red onion, chopped (about 1/3 cup)
  • 2 garlic cloves, minced
  • 1 teaspoon olive oil
  • 1 tablespoon Dijon mustard
  • 1 teaspoon local honey
  • 1 teaspoon dried rosemary
  • salt and pepper, to taste
  • 1 tablespoon chopped fresh Italian parsley

Continue reading Honey Mustard Roasted Rainbow Carrots

Vegan Chocolate Peanut Butter Nests

Every Easter, my fiance’s mom makes peanut butter nests for her sons to take home. They are made with chow mein noodles, mixed in a melted peanut butter sauce, shaped into little nests and topped with egg-shaped chocolate candies. And I absolutely love them! I look forward to eating more than my share of them each year, but this year I just couldn’t wait.


I had a craving for something chocolatey and peanut buttery so, I decided to make mine with semi-sweet chocolate as well as peanut butter. We were visiting my fiance’s brother and his wife last weekend, so I used them as an excuse to make the recipe!


They try to eat vegan as much as possible, so when I began assembling the ingredients for this recipe and realized how simple this recipe would be to make vegan, I did so! You can easily make these Vegan Chocolate Peanut Butter Nests non-vegan if you so choose.


Ingredients:
1 (12 oz) package chow mein noodles
1 cup roasted unsalted peanuts
12 oz vegan semi-sweet chocolate morsels
1 cup creamy peanut butter
~12 oz Jordan almonds or dark chocolate covered almond “eggs” (or any other candy that is egg-shaped if not making vegan) — you’ll need roughly 85 egg shaped pieces


Continue reading Vegan Chocolate Peanut Butter Nests

Sourdough Bread

I have made a couple of breads in the past, but never one that yielded a typical bread you’d use for sandwiches. For whatever reason, I’ve always been very intimidated by the whole bread making process. I recently visited a friend that loves to bake bread and she assured me it wasn’t nearly as difficult as I was imagining. So, after putting it off for a couple of months, I finally decided to try!


I decided to make a sourdough bread, because it is a relatively simple recipe. The hardest part is the whole waiting aspect of it. I found this recipe on King Arthur Flour’s website and used their sourdough starter to make the bread (rather than making my own starter which can take a week). My interest in baking bread was well timed, ZWILLING‘s Knife of the Month for March is the ZWILLING Pro 8″ Bread Knife, and they were kind enough to offer to not only let me try one of the knives out, but are also offering one to give away!  Details after the recipe.


ZWILLING J.A. HENCKELS knives are no joke, they are great quality knives made in Germany for over 280 years. When I moved out on my own, my mom actually bought me a set of ZWILLING J.A. HENCKELS knives to get my kitchen started, and I still use them daily!

The ZWILLING Pro 8″ Bread Knife has a serrated edge that effortlessly cuts through hard bread crusts, and cuts neat slices due to its aggressive long prongs. The knife is forges from one single piece of steel, is ice-hardened, and is hand sharpened and polished. The knife is dishwasher safe, but it’s suggested you hand wash it to keep it in great shape longer (dishwashers are really tough on knives).

Ingredients:

  • 1 cup “fed” sourdough starter
  • 1 1/2 cups lukewarm water
  • 2 teaspoons instant yeast
  • 1 tablespoon sugar
  • 2 1/2 teaspoons salt
  • 5 cups unbleached all purpose flour

Continue reading Sourdough Bread

Green Pea Cookie Review

I have a serious sweet tooth. I feel like no meal is complete without dessert! So when a friend told me about a healthier cookie company that was raising funds on Kickstarter, I knew I had to check them out.


source: www.greenpeacookie.com


According to their website, Green Pea Cookies are based off a recipe from Singapore and are made with roasted green peas, powdered sugar, non-GMO sunflower oil, unbleached white flour (or brown rice flour for their gluten-free version), salt, and “happeaness.”

source: www.greenpeacookie.com


The cookies currently come in three flavors: original, chocolate dipped, and cranberry, and can be purchased in three sizes: Small: 18 cookies (110g), Medium: 24 cookies (145g), Large: 34 cookies (200g).

source: www.greenpeacookie.com


Green Pea Cookie is in their final days of their Kickstarter and have been doing an awesome job. They have already reached their initial goal, but now have a new goal of distributing 1 million cookies (as of writing this, they were up to over 40,500 distributed).


Their marketing is absolutely adorable by the way. Each of the cookies has a name (Peater is the original, Penelopea is cranberry, and Dimpea is chocolate dipped).


source: www.greenpeacookie.com


Depending on your donation amount on their Kickstarter page, you can receive some of the cookies, a t-shirt (they are so cute!), stickers, or a monthly box of happeaness. With my donation, I will receive a t-shirt and cannot wait to rock it with pride. Seriously, how great are these shirts?

source: https://www.kickstarter.com/projects/1877303117/green-pea-cookie


The founders of Green Pea Cookies were kind enough to send me a sample of their original flavor. I am happy to say they are absolutely delicious!


The texture is kind of like shortbread, crumbly but rich. I honestly didn’t taste much “pea” flavor in mine, but my fiance said he did get a hint of it and really enjoyed it. They are both salty and sweet, which makes for a pretty fantastic combo.

The little bite sized cookies are perfectly pop-able, but at just 100 calories a serving (which is 6 cookies), you can keep on popping them!


They would make the perfect “afternoon work” snack, don’t you think?

I can only imagine how tasty the chocolate dipped cookies are, but I personally think the cranberry ones must be amazing — sounds like such a great combo!


It’s awesome to see how great this company is doing so far on Kickstarter, but I’d love to see them get to their goal of 1 million cookies. Be sure to check out their Kickstarter page ASAP (it ends March 15, 2015) and consider donating!

Spiked Mint Coconut Milk Hot Chocolate

Today (February 19) is National Chocolate Mint Day! With the cold temperatures across most of the U.S., I think we can all use a nice warm beverage to keep us toasty, and this is the perfect food holiday for such a beverage! So, I present: Spiked Mint Coconut Milk Hot Chocolate!

Blue Chair Bay must feel the same way, so I developed this non-dairy hot chocolate beverage to pair with their Coconut Spiced Rum. The coconut rum, spiced with cinnamon, nutmeg, and clove is the perfect accompaniment to hot chocolate, don’t you think? To enhance the coconut flavor in the rum, I decided to use coconut milk which makes a rich and creamy hot chocolate base.

Rum always reminds me of warmer weather, and the Coconut Spiced Rum is no exception. Blue Chair Bay offers a collection of premium-blended rums inspired by multi-platinum singer-songwriter Kenny Chesney’s love of the island lifestyle. So even though most of us probably are not soaking up the sun at the moment, we can have our own little escape with this winter-weather treat!

For readers over 21 years of age, I also have an exciting giveaway! Blue Chair Bay has offered to give one bottle of Blue Chair Bay Rum to a lucky winner! Details after the recipe.

Ingredients:

  • 2 (13.5 oz) cans full fat coconut milk
  • 4 oz dark chocolate, finely chopped
  • 1/2 teaspoon peppermint extract
  • 4 teaspoons turbinado sugar
  • 4 oz Blue Chair Bay Coconut Spiced Rum

Continue reading Spiked Mint Coconut Milk Hot Chocolate

Winter Risotto with Farro and Arborio Rice

A couple of weeks ago, I was invited on a Chevy Farm-to-Table Road Trip, which was SO much fun! Chauffeured in snazzy Chevrolets, the group first went to Terrain in Glen Mills for lunch at their cafe and then went wine tasting down the road at Chaddsford Winery. (To read more about Terrain and Chaddsford Winery, visit my guest post over on Drive the District.)

All of the food was fantastic at Terrain, but I cannot stop thinking about their fabulous Farro and Arborio Risotto with sweet potato puree and autumn vegetables. So, naturally, I decided to try to make my own version! This recipe is pretty involved but it sure is worth it!

This recipe can be easily made vegan (noted below) and is vegetarian if vegetable stock is used instead of chicken stock. This recipe, however, is not gluten free because farro does contain some gluten. 


Ingredients:

Veggies:

  • 2 cups peeled and cubed butternut squash
  • 1 cup halved Brussels sprouts
  • 3 Sweet potatoes, divided
  • 2 Shallots, halved
  • 2 tablespoons olive oil
  • 1/2 tsp fresh thyme leaves
  • 1/4 teaspoon fresh chopped rosemary
  • Salt and pepper, to taste
  • 2 tablespoons unsalted butter (or margarine to make vegan)

Risotto

  • 3 cups water
  • 1 cup uncooked farro
  • 6 cups chicken stock (or vegetable stock to keep vegetarian)
  • 2 tablespoons olive oil
  • 1 large shallot, minced
  • 2 garlic cloves, minced
  • 2/3 cup Arborio rice
  • ½ cup white wine
  • 2 tablespoons Parmesan cheese (omit for vegan version)
  • Salt and pepper, to taste
  • Rosemary and thyme for garnish

Continue reading Winter Risotto with Farro and Arborio Rice

Cardamom Glazed Carrots

Carrots are a staple on most Thanksgiving tables. My dad loves super mushy carrots, which just don’t do it for me.  I want a bit of a crunch! So this recipe for Cardamom Glazed Carrots from Cooking Light is perfect for me; sorry, Dad!

The cardamom adds a lightly floral taste which works so nicely with the fresh ginger. This recipe takes just 15 minutes to make so it’s a great weeknight option as well. The recipe serves 6, so multiply as needed.

Ingredients:

  • 1 tablespoon unsalted butter (or margarine to make vegan)
  • 1 tablespoon olive oil
  • 2 teaspoons minced peeled fresh ginger
  • 1/4 teaspoon ground cardamom
  • 1/2 cup water
  • 2 tablespoons light brown sugar
  • 1 pound carrots, peeled and cut diagonally into 1/2-inch pieces
  • 1/4 teaspoon kosher salt
  • 1/4 teaspoon freshly ground black pepper
  • 2 tablespoons fresh cilantro leaves (optional)


Continue reading Cardamom Glazed Carrots

Cherry Port Cranberry Sauce

I absolutely love cranberry sauce. This not-too-tart and not-too-sweet Thanksgiving staple is always a favorite of mine.

Now I don’t turn my nose up at the canned stuff, but this homemade version for Cherry Port Cranberry Sauce is a really simple alternative. It’s also a bit of a chunky sauce instead of the smooth canned version, so it has a really nice texture to it. Plus, it can be made in 20 minutes!

If you don’t want to use port in the recipe, you can substitute in pomegranate juice.


Ingredients:

  • 2 cups fresh cranberries (about 8 ounces)
  • 3/4 cup dried sweetened cherries
  • 3/4 cup port wine
  • 1/3 cup brown sugar
  • 1 tablespoon red wine vinegar
  • 1 tablespoon orange juice
  • 1/4 teaspoon freshly ground black pepper


Continue reading Cherry Port Cranberry Sauce

Black Bean Brownies

So, I’ve avoided making this recipe for months. Seriously, MONTHS. Black bean brownies always sounded really um… not tasty… to me.

This recipe is from a cookbook I received ages ago called Vegan Beans from Around the World: Adventurous Recipes for the Most Delicious, Nutritious and Flavorful Bean Dishes Ever. There are some seriously awesome recipes in here, from African Peanut Soup to Curried Dal with Cauliflower. But I was really curious about the Black Bean Brownies and wanted to make them. So after months of putting it off I finally tried it. And this recipe really changed my mind about black bean brownies! The consistency is spot on, and the chocolate flavor comes through really well. Who knew?

I adapted this recipe slightly from the original: I doubled the recipe to make a thicker brownie and used a different baking dish so the cooking time is different as well. I also limited the cinnamon because when I originally made these, I felt like the cinnamon flavor was too strong.


Ingredients:

  • 2 (15.5 ounce) cans of black beans, rinsed and drained
  • 1/4 cup plus 2 tablespoons vegetable oil
  • 1/4 cup plus 1 tablespoon freshly ground flax seeds
  • 1/4 cup plus 2 tablespoons warm water
  • 1/2 cup brown sugar
  • 1/2 cup plus 2 tablespoons cocoa powder
  • 2 teaspoons baking powder
  • 1/4 tsp salt
  • 2 teaspoons vanilla extract
  • 2 teaspoons lukewarm coffee (I just used what was left from my morning coffee)
  • 1 teaspoon cinnamon
  • 1/4 cup – 1/2 cup walnuts

Continue reading Black Bean Brownies

Autumn Apple Salad with Cinnamon Honey Dijon Dressing

It’s September which means apples are right in their prime season! Although apples are available year-round, most apples ripen in the August-October time frame. I’ve had a craving for apples ever since September began so I was so excited when I was contacted recently about trying an apple variety called SweeTango that I’ve never had before.

SweeTango apples a variety bred at the University of Minnesota and are a cross between  the Honeycrisp and Zestar! varieties.  The apples are crisp and sweet with a hint of citrus, honey, and spice and have a nice crunchy and juicy texture that’s perfect to eat raw. They have a beautiful coloring too — SweeTango is a blush apple with deep red coloration over a yellow breaking background. The variety first hit store shelves in limited quantities in 2009, and has since grown to achieve distribution across the U.S. and Canada. 

Photo Courtesy of SweeTango

I received two SweeTango apples in the mail and couldn’t wait to try them! One I saved for me to just enjoy on its own and the other went into one of the most delicious salads I’ve ever had, Autumn Apple Salad with Cinnamon Honey Dijon Dressing! This salad is packed with a bunch of different textures and flavors which is what I really love about it. But the true star of the salad is the SweeTango apple!

Photo Courtesy of SweeTango

Ingredients:

Salad:

  • 2 cups red leaf lettuce, torn
  • 2 cups spinach leaves, torn
  • 1/2 cup thinly sliced fennel bulb
  • 1/2 cup walnuts, toasted
  • 2 tablespoons salted pumpkin seeds (pepitas)
  • 2 tablespoons dried cherries
  • 2 tablespoons golden raisins
  • the juice of 1 lemon
  • 1 SweeTango apple, thinly sliced

Dressing:

  • 4 tablespoons olive oil
  • 2 tablespoons cider vinegar
  • 1 tablespoon red wine vinegar
  • 2 teaspoons Dijon mustard
  • 2 teaspoons honey
  • 1 tablespoon minced shallot
  • 1/2 teaspoon cinnamon
  • a pinch of salt and pepper

Continue reading Autumn Apple Salad with Cinnamon Honey Dijon Dressing

From Garden to Glass — Guest Post

Hi all! I’m happy to introduce Chris from HealthSmartLiving.com! His blog is filled with tips on hydroponic gardening, healthy cooking, juicing and overall nutritious recipes. His website even includes a review of juicers. Juicing is a foreign concept to me and looking through his blog helped answer a lot of questions I had about it.

Today, he is sharing a Spicy Tomato Juice recipe make from home grown tomatoes that looks oh so tasty! Let me turn it over to Chris…


I love August in Chicago. It’s warm, sunny, and all of my gardening efforts start to pay off. Even though we live in downtown Chicago with a 400 square foot yard, we still manage to pack a pretty good fruitful garden in. This year we grew tomatoes, peppers, onions and various herbs.

You also have to be prepared to use a lot of fresh vegetables or watch them go bad. I hope to learn canning someday but it won’t be this year. Recently I made my first batch of tomato gazpacho and it was amazing. It also was really time consuming so I would call it a special occasion dish.

Another simpler way I’ve found to use a LOT of tomatoes, jalapenos, and onions is by juicing my own tomato juice. My wife and I started juicing this spring as a way to get more fruits and vegetables in our diet and to improve our overall health. We have really enjoyed it and I’ve even dedicated a section of my personal blog to juicing. It covers all the basics to get started.

Continue reading From Garden to Glass — Guest Post

Exit mobile version