Irish Brown Bread & Review of Mockmill Grain Mill

Note: I was sent the Mockmill Grain Mill for review. All opinions are mine alone.

I have dabbled in bread-making for this blog before. I’ve made beer bread, sourdough bread, soda bread, and even gluten-free bread in the past.

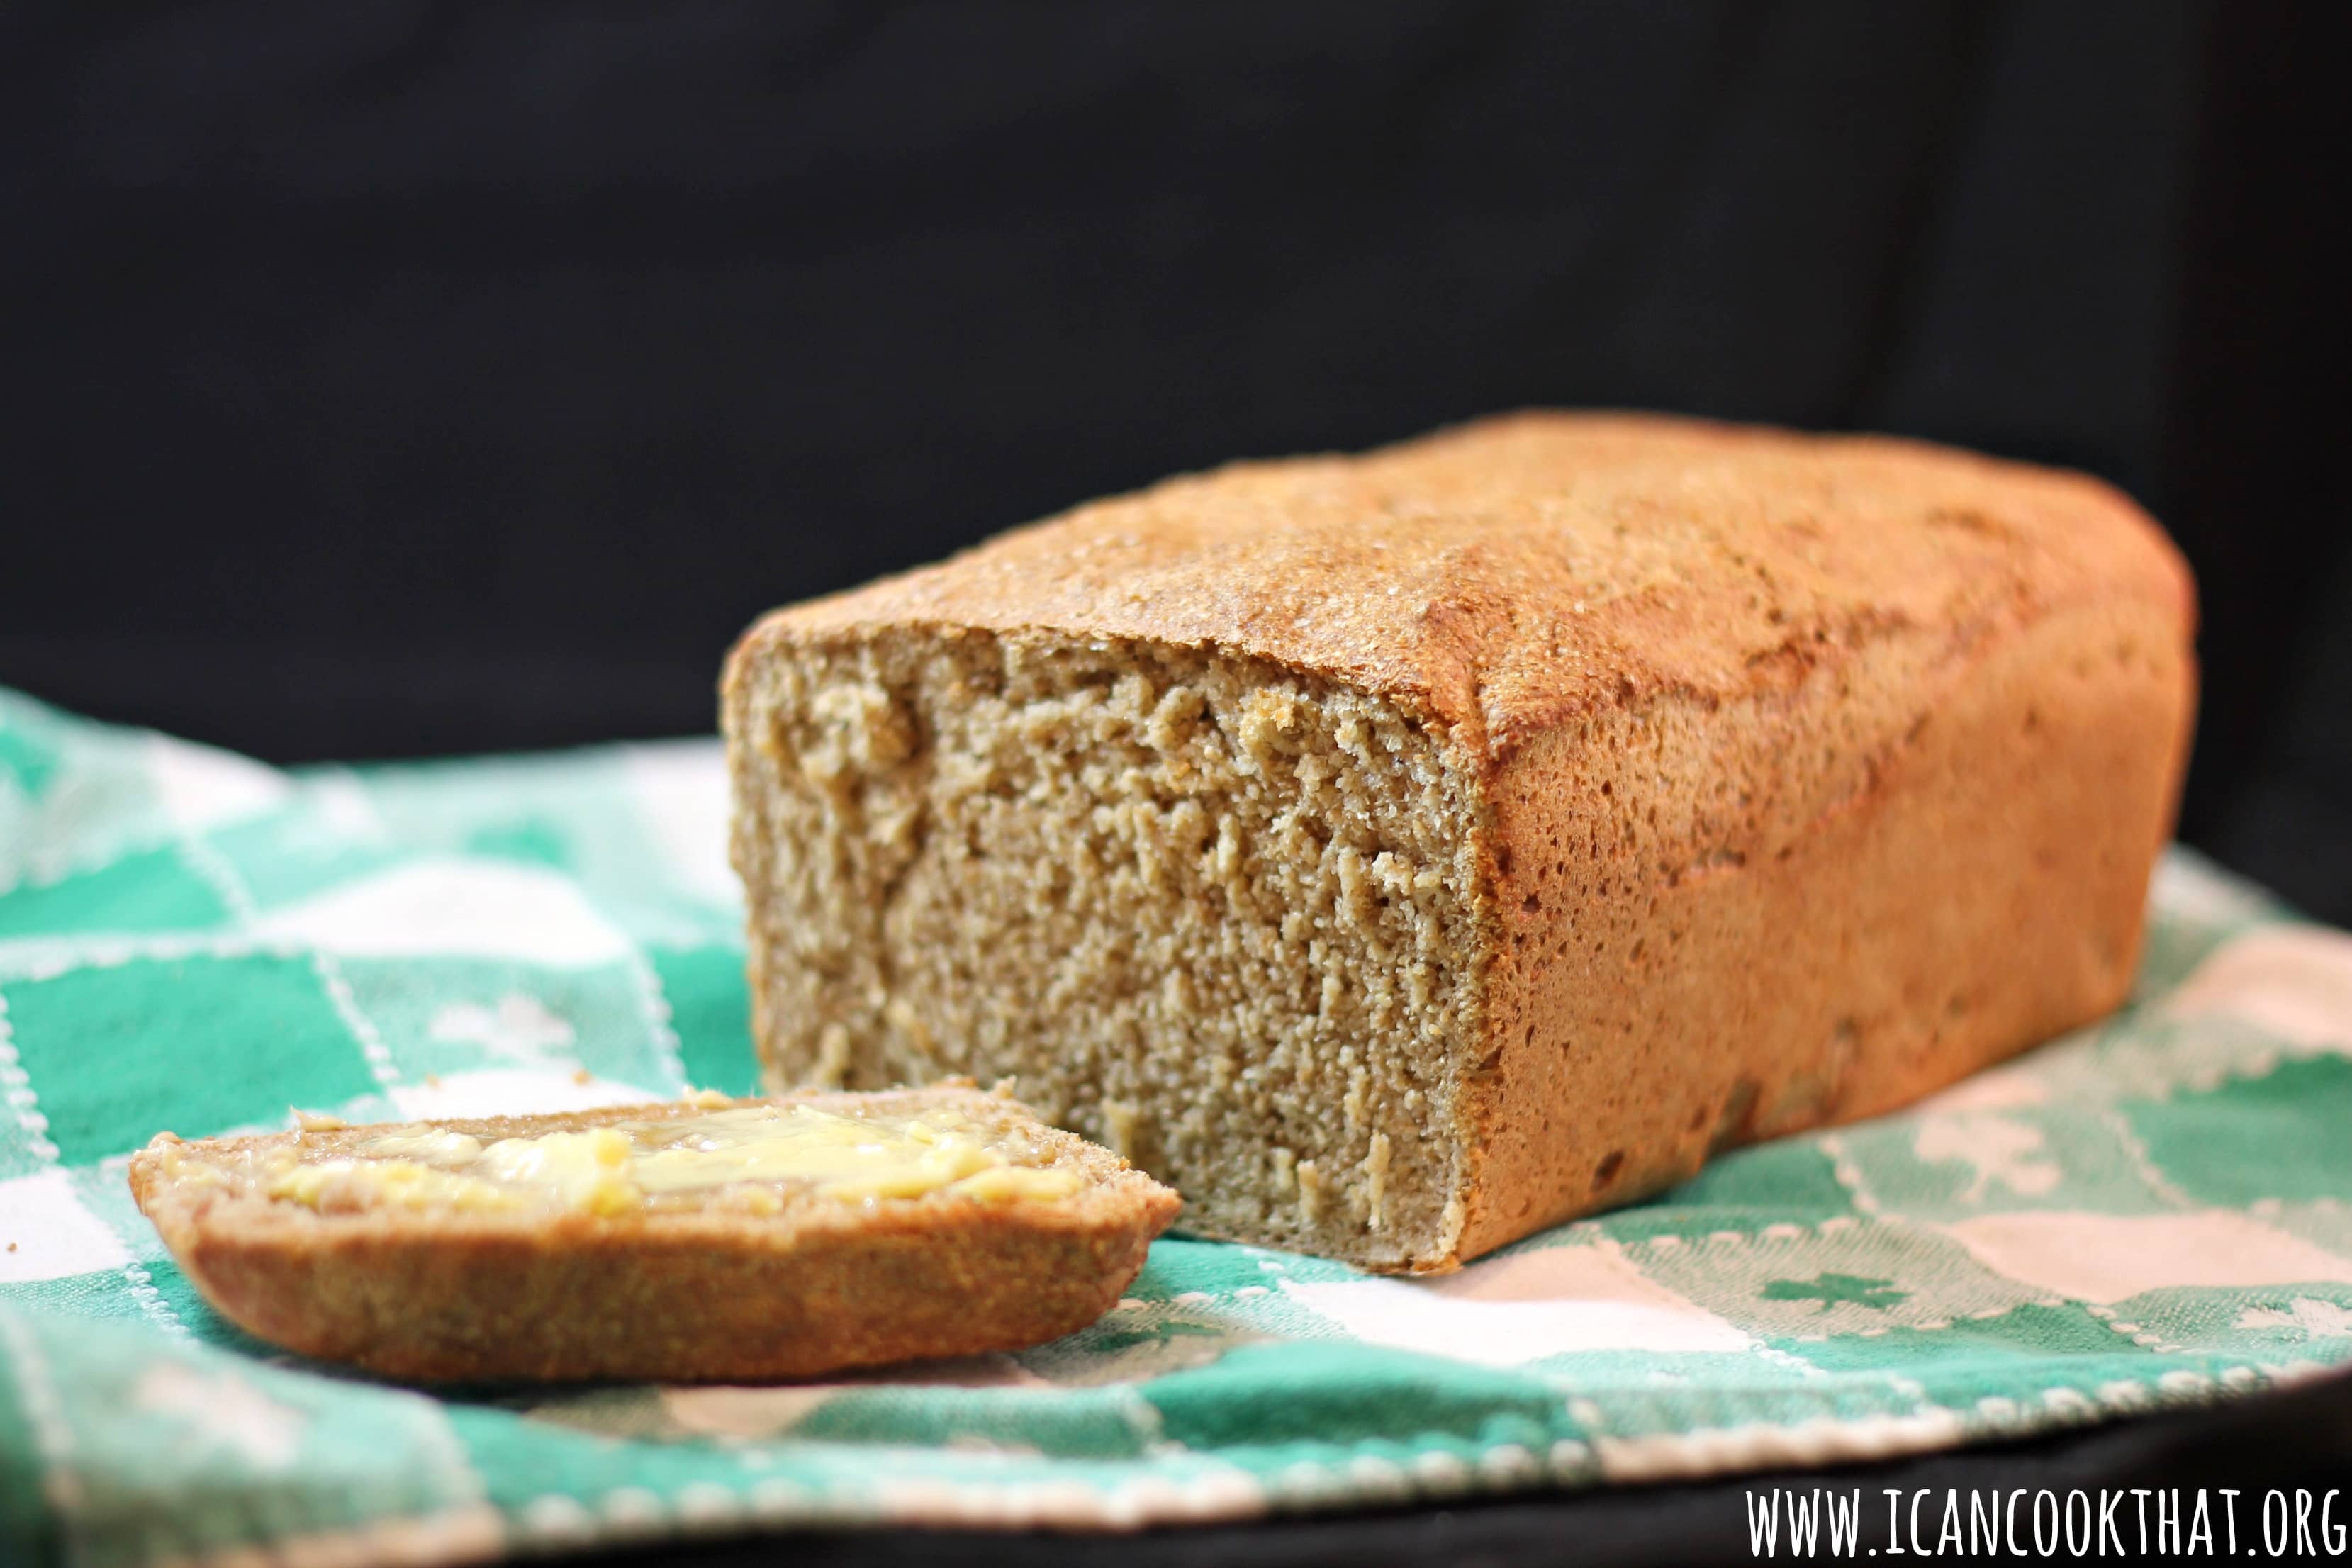
Since I returned from my honeymoon in Ireland a few weeks ago, I have been craving Irish Brown Bread like crazy. Served typically with breakfast, Irish brown bread is made with a coarse whole wheat flour, resulting in a hearty bread different than anything I can easily find here in the U.S.

Irish Brown Bread

The difference is really in the flour. To get the right consistency, you’d need to purchase a wholemeal flour, sometimes labeled as “Irish-Style,” which can be somewhat difficult to find (although it is available online.)

So when I was offered the chance to try out the Mockmill, a grain mill attachment for the KitchenAid Mixer, I jumped at the chance.  I can make my OWN Irish-Style flour!

Mockmill Grain Mill Attachment

Besides my very specific reason for wanting to mill my own flour, there are a bunch of other benefits to using a grain mill. Grinding from whole wheat berries at home means that the bran and germ stay in your flour. A bunch of the “good stuff” is found in the bran and germ: fiber, vitamins, minerals, antioxidants. However, the germ is removed from commercial flour because it reduces its shelf life; the oil in germ can turn rancid, so home milled flour should be used in 1-2 weeks, or stored in the freezer.

The Mockmill, designed by Wolfgang Mock, is nicely compact. (As a city dweller, I very much appreciate this.) I love that it attaches right to my stand mixer; it’s really simple to set up and begin using right away.

source: Mockmill

You adjust the coarseness of the grind by twisting the front of the mill. The mill uses self-sharpening ceramic-bonded corundum grinding stones, which can produce a very fine flour if needed.

The Mockmill grinds flour directly into the mixing bowl, really convenient if you’re using it immediately like I am!

Cleaning the Mockmill is also a breeze; the mill can be separated easily and rinsed to clean any minimal residue left from milling.

Mockmill is offering I Can Cook That readers a really sweet deal, available until August 31: $80 off (that’s over 30% off!) two different package options through this link if you use the code icancookthat. 

The packages come with everything you need to begin milling at home: the Mockmill Grain Milling Attachment for Stand Mixers,  a variety of whole grain berries to get you started, plus “Flour Power” by Marleeta Basey, a comprehensive introduction to the benefits of home milling! Be sure to check them out here.

Note: the price listed is the original price. Add the code icancookthat at checkout to receive $80 off. The sets of books, grains, and Mockmills are being especially made for this promotion so delivery times may vary.

To test out the mill (and make me some oh so yummy brown bread,) I decided to start with a relatively simple version of Irish bread, a yeasted version from the Ballymaloe House in County Cork, Ireland. This version of their recipe comes from David Lebovitz, and is super easy to make.

So let’s test this mill out!

Ingredients:

  • 3 cups freshly ground whole-wheat flour (~2 cups red wheat berries)
  • 1/2 cup all purpose white flour
  • 1 teaspoon salt
  • 1/2 cup plus 1 1/2 cups tepid water
  • 1 tablespoon dark molasses
  • 2 1/2 teaspoons active dry yeast

Continue reading Irish Brown Bread & Review of Mockmill Grain Mill
Blackberry Syrup & Watermelon Blackberry Granita

Today (July 22nd), Ball brand is hosting it’s sixth annual Can-It-Forward Day. (You may recall my last post on Can-It-Forward Day, where I canned on my own for the very first time to make salsa.) Can-It-Forward day is a day to celebrate the joys of fresh preserving, and encourage both new and veteran canners to preserve more. This year, the day will be streamed online via Facebook Live from 10:00 am 3:30 pm EST. Throughout the day, the Ball brand and expert ambassadors will be demoing a variety of canning recipes. In the true spirit of “canning it forward,” for every engagement received on the videos, whether it be a comment, like or share, the brand donate $1 to a local charity, so be sure to check it out!


You can also ask Jarden Home Brands canning experts any preserving or home canning questions via Twitter with the hashtag #canitforward from 10AM – 5PM ET on July 22nd. Share your own #canitforward creations with the brand on Pinterest and Instagram as well!

Ball brand has also launched the Freshly Preserved Ideas Tumblr page, a “digital pledge page” a place for consumers to take the pledge to Can-It-Forward this year. Check it out and pledge!

To celebrate, I was sent The All New Ball Book of Canning and Preserving, a Case of Collection Elite Wide Mouth Pint Jars, one $5 off coupon to be used on FreshPreservingStore.com.

I really loved the new canning book from Ball; along with canning and preserving recipes, there are many recipes that incorporate the canned/preserved items.

source: freshpreserving.com/

I wanted to show off how great both types of recipes found in the book are, so I made a blackberry syrup to can, and used it in a watermelon blackberry granita.


The blue wide mouth pint jars are SO PRETTY. I have been using a set of the regular mouth blue pint jars as my drinking glasses for years so I was excited to use the wide mouth for their actual intended use!

source: freshpreserving.com/


I will get to the canning and recipes shortly, BUT Ball brand was also kind enough to provide a second set of the products I received as a giveaway to my readers! Details on how to enter will be at the end of the post!

Ingredients:

For Blackberry Syrup:

  • 3 lbs blackberries
  • 2 cups water
  • 2 3/4 cups sugar
  • 1/4 cup honey
  • 2 tbsp bottled lemon juice

For Watermelon-Blackberry Granita:

  • 8 cups seeded watermelon cubes
  • 1/2 cup Blackberry Syrup
  • 2 tbsp fresh lime juice

Gear:

  • stainless steel or enameled Dutch oven
  • wire-mesh strainer
  • 3 pint jars, lids, and bands
  • large pot for canning + a rack to keep the jars off the bottom of the pot
  • cheesecloth
  • 13×9 inch baking dish

So, since my last post, I’ve upgraded my canning situation to the Ball Fresh Preserving Kit. However, for beginners, you really can’t beat the value of the Beginners Kit that I used last year to make the salsa. On to the recipes!

Continue reading Blackberry Syrup & Watermelon Blackberry Granita

Arugula Pizza with Poached Eggs

May is (was) National Egg Month, and, well, the month of May ended more abruptly than I was expecting. So, happy June, and happy belated National Egg Month! (This Friday, June 3rd, is National Egg DAY though, so you can celebrate your little heart out then.)

I love using eggs in dinner recipes, because I don’t get much opportunity for a nice sit down breakfast with eggs. This Cooking Light recipe is the perfect eggs-for-dinner meal — Arugula Pizza topped with Poached Eggs.

Nellie’s eggs sent me some coupons, plus a cool little kit that included a t-shirt, stress egg, and a gift card so that I could try their eggs in a post, and this recipe seemed like the perfect opportunity. Nellie’s are free range, the hens are never caged, and have as much or as little access to the outside as they’d like.

Nellie’s works with over 40 independent, family owned and operated farms to provide their free range eggs produced from Certified Humane Free Range hens that are antibiotic and hormone free.

You can find where Nellie’s eggs are sold here.

On to the recipe!

Ingredients:

  • 1 (11-ounce) package refrigerated pizza crust dough (suggested: thin crust)
  • Cooking spray
  • 1 cup part-skim ricotta cheese
  • 1 cup (4 ounces) shaved fresh Romano cheese, divided
  • 1 tablespoon white vinegar
  • 6 large Nellie’s free range eggs
  • 2-3 ounces baby arugula
  • 4 teaspoons extra-virgin olive oil
  • grated fresh lemon rind from 1 lemon
  • fresh lemon juice from 1 lemon
  • 1/8 teaspoon salt
  • 1/4 teaspoon freshly ground black pepper

Continue reading Arugula Pizza with Poached Eggs

Homemade Marinara Sauce

I had a sad surprise this weekend. I opened my freezer to grab a quart of tomato sauce only to find I was all out!

Time to make another batch of sauce, so I decided to make Homemade Marinara Sauce!

This time around, I have a nifty new tool to help make my marinara sauce: OXO’s new Illuminating Digital Immersion Blender.

The immersion blender has six digital controls so you can pick the perfect speed for whatever it is you need blended. Just turn the dial at the top of the immersion blender to adjust the speed; a backlit LED indicator clearly shows your speed selection.

To start blending, you just press down on the wide, soft-touch power button located on the top half of the blender. The handle is nonslip, even when hands are wet.

source: oxo.com

The head is made of nylon, which won’t scratch your bowls or cookware while it blends.

source: oxo.com

A really nifty spec is the soft-glow LED headlight that illuminates the pot while you blend, which is super helpful when making a large batch of soup or sauce in a tall pot. A softer version of the light remains on the entire time the blender is plugged in for safety.

The immersion blender comes with a measuring beaker with a silicone lid that holds up to 3 cups. You can blend right in the beaker, then top with the lid to store whatever you don’t use immediately.

When finished using the blender, the cord wraps securely around the blender body for tidy, compact storage, great for my small kitchen!

source: oxo.com

The blender is a super helpful tool when making soups, dips, smoothies, and sauces. I used it to make a smooth marinara sauce made with canned whole plum tomatoes and sauteed carrots, celery and onions.

Ingredients:

  • 1 tablespoon olive oil
  • 1 medium onion, chopped
  • 4 garlic cloves, chopped
  • 2 celery stalks, chopped
  • 2 carrots, chopped
  • 1 tablespoon tomato paste
  • 1/3 cup red wine
  • 2 (28 oz) cans whole plum tomatoes
  • 1 (28 oz) can crushed tomatoes
  • 1 tablespoon dried parsley
  • 1 tablespoon dried basil
  • 1 tablespoon dried oregano
  • 1 bay leaf
  • fresh basil, sliced

Continue reading Homemade Marinara Sauce

Slow Cooker Beef and Bean Chili

Note: I was sent a Rubbermaid’s Easy Find Lids 20-Piece Storage Set to review. All opinions are mine alone.


We have had a pretty moderate fall so far, but the cold weather isn’t too far off. This time of year, I like to fill my freezer with different meals so I always have comfort food on hand for busy weeknights. One of my favorites, of course, is chili.


I was sent Rubbermaid’s Easy Find Lids 20-Piece Storage Set to try out, so it was the perfect time to make my annual batch of chili!


Rubbermaid Easy Find Lids are a life saver – I typically just keep the containers from take out and they are all just shoved into a cabinet net to my stove, with no organization to them whatsoever. So i spend a good 10 minutes finding the right top to go with whatever container I’ve chosen. Rubbermaid’s storage set takes the annoyance out of trying to find the right top — the Lids snap on to the bottom of their respective containers so you can find them in no time! The containers also nest inside each other so you can have a small stack of all of your containers and lids in one spot.


The 20-piece set comes with  3 (0.5 Cup), 3 (1.25 Cup), 1 (2 Cup), 2 (3 Cup), 1 (5 Cup), and 10  respective Easy Find Lids. The plastic is dishwasher, freezer, and microwave safe and is also BPA-free.


On to the recipe! This time around, I went for a classic – ground beef and beans with some bratwurst meat for additional flavor (I used beef bratwurst, but you can use any type you’d like).


Ingredients:

  • 1 tablespoon unsalted butter (omit for dairy free)
  • 1 tablespoon olive oil
  • 2 pounds ground beef
  • 1 pound bratwurst, removed from its casing
  • 5 garlic cloves, minced
  • 1  onion, chopped
  • 1 chipotle from can of chipotles in adobo sauce, finely chopped (seeds removed if preferred)
  • 1 tablespoon adobo sauce from can of chipotles in adobo
  • 2 red bell peppers, chopped (or whatever color you prefer)
  • 2 (15.5 oz) cans red kidney beans, drained
  • 1 (15.5 oz) can black beans, drained
  • 1 (28 oz) can crushed tomatoes
  • 1 (28 oz) can diced tomatoes, undrained
  • 2 tablespoons tomato paste
  • 2 tablespoons Worcestershire sauce
  • 1 tablespoon ground chili powder
  • 1 teaspoon cumin powder
  • 1/2 tablespoon dried parsley
  • 1/2 tablespoon dried basil
  • 1/2 teaspoon cayenne
  • 1 cup beef stock
  • 1 tablespoon espresso grounds
  • For garnish: 1 tablespoon fresh cilantro, chopped; 4 oz sour cream; 4 oz cheddar or pepper Jack cheese, shredded

Continue reading Slow Cooker Beef and Bean Chili

Salsa Recipe & Beginners Guide to Canning #CanItForward

This Saturday marks Jarden Home Brands fifth annual Can-It-Forward Day, which will be broadcast live online at FreshPreserving.com from 11AM – 4PM EST from the new state-of-the-art Jarden Home Brands headquarters in Fishers, Indiana.


An event celebrating the joys of fresh preserving, the -It-Forward Day webcast will have an integrated chat function where viewers can submit their home canning questions to be answered in real time. New this year, there will also be an exciting celebrity mason jar auction unveiled during the webcast!


To celebrate, I was sent a Ball Canning Discovery Kit (paid link), Ball Blue Book Guide to Preserving (paid link), Red Design Series Lids, and Ball Fiesta Salsa Mix (paid link).


My future sister-in-law is big into canning, and I’ve “helped” (a.k.a kept her company in the kitchen) once before, but the process of canning is really intimidating to me. I was told that if I can boil water, I can can, so I was both wary and excited to try this out!

I need to give a little shout out to my city, because the Mason jar was, in fact, invented and patented in Philadelphia in 1858 by local tinsmith John Landis Mason. So, this should be in my blood, right?


  • The Ball Canning Discovery Kit  is a great beginners kit; it comes with a canning rack that fits into most pasta pots, a recipe guide, and three jars. The kit is really affordable ($11.99) and allows you to assess if canning is for you before investing fully into the process.
  • My sister-in-law assured me that if I had a Ball Blue Book Guide to Preserving, I’d be just fine canning. So. WHEW. This book lays out each step of the process (and even tells you why you are doing it this way) to ensure a successful canning process. The step-by-step guides are particularly helpful as a beginner.
  • The Red Design Series Lids are normal lids and bands, just prettier.  🙂 The lids can only be used once during canning, so it’s helpful to have extras on hand. (You can reuse the jars and bands as many times as you want)
  • The Ball Fiesta Salsa Mix makes the process of seasoning salsa super easy. You just need fresh or canned tomatoes, a splash of vinegar, and the mix to make a yummy salsa!


I decided to make a salsa from the Ball Blue Book, but adapted it slightly to include the Ball Fiesta Salsa Mix. The recipe is simple, and is basically just cutting up the ingredients, so this post is more about the canning process than the actual recipe.

I am absolutely a beginner with this, but luckily was able to glean some tips from my sister-in-law and the Ball Blue Book, which I will share as well.

I also am giving away a coupon for a free case of jars! Details at the end of the post. 


Zesty Salsa (adapted from Ball Blue Book Guide to Preserving)

Yields ~3 pint jars

Ingredients:

  • 5 cups chopped cored peeled tomatoes (fresh or canned)
  • 4 green bell peppers, seeded and chopped (~2.5 cups)
  • 1 large onion, chopped (~2.5 cups)
  • 1 large jalapeno, seeded and finely chopped (~3 tablespoons)
  • 2 garlic cloves minced
  • 2/3 cup cider vinegar
  • 1 tablespoon fresh cilantro, finely chopped
  • 1/4 cup Ball Fiesta Salsa Mix

Gear:

  • Ball canning rack with lifter
  • 3 Ball Pint Jars with lids and bands (I used the Red design series lids and bands)
  • Large stockpot (at least 7.5 inches tall and 9.5 inches in diameter)
  • a non-metallic spatula (I ended up using chopsticks. They worked just fine)
  • A clean, damp towel to wipe rims of jars

Continue reading Salsa Recipe & Beginners Guide to Canning #CanItForward

One-Pot Chicken with Lemon & Rosemary

I am kind of obsessed with Zwilling JA Henckel’s knife of the month. It became my favorite knife overnight! The ZWILLING Pro 8″ Ultimate Serrated Chef’s Knife lives up to its name. This bad boy can be used for basically anything. The serrated edge is comprised of large and small scallops, which helps the knife stay share longer than a fine-edged chef’s knife.

From the website: Precision forged from a single piece of high-carbon, no-stain steel, the SIGMAFORGE® blade is exceptionally sturdy yet flexible. The FRIODUR® blade is ice hardened, making it extremely sharp and durable. The knife is hand ground and polished, then the angle of the cutting edge is checked with precise laser technology. The durable ABS resin handle is ergonomically shaped for a comfortable grip and is triple riveted to the blade.

I have been using it for anything and everything; fruits, veggies, meat, you name it! I typically gravitate towards Santoku knifes so I was surprised how comfortable I was using this chef’s knife. It works great to chop and thinly slice, but is super sharp so be sure to take care where your fingers are when using it (as you should when using any knife).


I chose a recipe highlighting this knife’s chopping skills, but it also works great on produce with more delicate out layers like tomatoes, and can even be used to slice chicken breasts with ease.

This recipe is adapted from a Rachel Ray recipe, so you know it’s a quick and simple recipe with tons of flavor. Per her suggestion, you should definitely have a loaf of bread on hand to dip into the yummy sauce!


Ingredients:

  • 2 tablespoons olive oil
  • 6 pieces bone-in, skin-on chicken (I used a chicken broken down- 2 breasts, 2 drumsticks, 2 thighs)
  • Salt and pepper to taste
  • 1 large onion, chopped
  • 6 cloves garlic, sliced
  • 1 bulb fennel, chopped
  • 1/4 teaspoon crushed red pepper flakes
  • 2 cups dry white wine
  • 1/4 cup chopped fresh rosemary
  • 1 cup chicken stock
  • Zest and juice of 1 large lemon
  • Crusty bread, to pass at table


Continue reading One-Pot Chicken with Lemon & Rosemary

{Giveaway} The Joy of Writing a Great Cookbook Review

If you’ve ever dreamed of publishing a cookbook, Kimberly Yorio’s THE JOY OF WRITING A GREAT COOKBOOK: How to Share Your Passion for Cooking from Idea to Published Book to Marketing It Like a Bestseller is right up your alley. I was sent a free copy of this book to review, and I was surprised with how much content was in this book that I never really even considered before!


Kimberly Yorio is a brand strategist, food authority, and women’s business advocate who has worked as an in-house publicist and marketing director, a for-hire publicist and agent, a cookbook co-author and proposal writer.


Kim, with 20+ years experience in the cookbook industry, has developed an amazing how to for cookbook author hopefuls. In her own words, the cookbook “will show you how to get from great idea to bookstore shelves (or, at the very least, Amazon).”

This book is filled with not just Kimberly Yorio’s advice, but tips and tricks of publishers, editors, publicists, recipe testers, food stylists, journalists, bloggers, agents, and celebrity chefs. It even includes a history of cookbooks and a thorough review of social media, which I found to be really helpful for my own blog!


Not only has Kim given novice writers all of the tools to create a cookbook of which they can be proud, Page Street Publishing is offering  a chance to win your very own cookbook contract and marketing campaign executed by Kim and her team. Hopeful cookbook authors can submit their proposal by August 1, 2015 and have a chance to earn a publishing deal for a printed book and an e-book. (Guidelines and official rules can be found at pagestreetpublishing.com.)


If it’s always been your dream to write a cookbook, don’t hesitate, and enter now!


screen shot of pagestreetpublishing.com


A copy of Kim’s book would be super helpful in preparing a proposal for this contest though, wouldn’t it? Luckily, I have also been given the opportunity to give away one copy of The Joy of Writing a Great Cookbook to one reader! Use the widget below and good luck!

For those who can’t wait to get their hands on a copy, the book is available now and retails for $21.99.


a Rafflecopter giveaway

Fish Tacos and How to Use a Fillet Knife

This month, Zwilling sent me a fun challenge: use a fillet knife.  June’s knives of the month are boning and fillet knives, so Zwilling sent me their ZWILLING Pro 7″ Fillet Knife to try out. I have never used one before so I was so excited to learn how to use one; gotta love learning a new technique!


Fillet and boning knives are exactly what they sound like: knives used to cut meat off of the bone (to fillet something is to remove it from the bone). The knife is long, thin, and super flexible to allow it to get as close to the bone as possible.


You can fillet anything with a bone — chicken, beef, etc. but most people immediately think of fish, so I decided to revisit an old recipe on my blog to try out this lovely new knife!


This recipe for fish tacos with lime cilantro crema is a Cooking Light recipe and a favorite of mine. I switched it up a touch this time, just to try something a bit new.


Ingredients:

Crema:

  • 1/4 cup thinly sliced green onions
  • 1/4 cup chopped fresh cilantro
  • 3 tablespoons fat-free mayonnaise
  • 3 tablespoons reduced-fat sour cream
  • the zest of one lime
  • the juice of one lime
  • 1/4 teaspoon salt
  • 1 garlic clove, minced

Tacos:

  • 1 teaspoon ground cumin
  • 1 teaspoon ground coriander
  • 1/2 teaspoon  paprika
  • 1/4 teaspoon cayenne pepper
  • 1/8 teaspoon salt
  • 1/8 teaspoon garlic powder
  • 1 1/2 pounds white fish (I used 3 branzino)
  • 1 teaspoon olive oil
  • 8 (6-inch) corn tortillas
  • 2 cups shredded cabbage (or romaine lettuce)
  • 1/2 cup chopped red onion

Continue reading Fish Tacos and How to Use a Fillet Knife

ZWILLING Pro 3″ Paring Knife Review

ZWILLING J.A. Henkels‘ May Knife of the Month was the paring knife, a versatile knife that every kitchen needs (in my humble opinion). I was sent the ZWILLING Pro 3″ Paring Knife to test, and I ended up using it almost daily!


The 3 inch paring knife is small and light, with a slim blade and centered tip. Paring knives are one of the most versatile tools in the kitchen and can be used for peeling, cutting, cleaning, and preparing fruits, vegetables, and meat. It’s no wonder they are the knife of the month, this knife is perfect for seasonal produce that is now available!


I used the knife for prep almost every night: slicing peppers, mincing garlic, chopping onions, etc. The slim blade also makes it perfect for chopping more delicate produce, like green onions/scallions.


I asked my fiance to help me prep some ingredients for a post recently, and he seemed to have almost too much fun using the paring knife!


The paring knife also really came in handy with my recent dessert post with peaches and plums.  The knife is sharp enough to cut into the fruit but is delicate enough to not bruise the fruit in the process.


Paring knives can also be used to peel fruit (such as apples or oranges),  devein shrimp, hull strawberries, clean the seeds out of peppers, and many other uses.


ZWILLING J.A. Henckels knives are made in Germany and designed in Italy by Matteo Thun. The knife is forged from one single piece of steel, is ice-hardened, and is hand sharpened and polished. The knife is dishwasher safe, but it’s suggested you hand wash it to keep it in great shape longer (dishwashers are really tough on knives).


I’ve reviewed the ZWILLING Pro 8″ Bread Knife in the past, and continue to be impressed with the quality of these knives! Currently, paring knives are on sale, with the 3 inch paring knife I reviewed on sale for $39.99.


Note: I was sent a ZWILLING Pro 3″ paring knife for review. Opinions are my own.


Curry Shrimp in Coconut Milk

Next week, many Philadelphia restaurants will be participating in Caribbean Cuisine Week.

The week, held from April 8th – April 10th this year, helps raise funds to send over 700 high school athletes from Trinidad, Jamaica, St. Vincent and Grenada to attend the 2015 Penn Relays.


The Penn Relays is the largest track and field meet in the United States and draws over 110,000 people to Philadelphia each Spring.


CCW partners with restaurants throughout Center City by encouraging the Chefs to prepare Caribbean inspired dishes and offer as specials. The restaurants will donate 5% of food proceeds from the three day period to help bring the students to Philadelphia.


The list of participating restaurants can be found here. One of the restaurants participating, 48th Street Grille in West Philly, invited some local bloggers to check out their offerings. 48th Street Grille is a Caribbean-American restaurant led by Executive Chef Carl Lewis Sr. who is originally from Jamaica and brings the flavors and spirit of his home to his food.


Appetizers included garlic roasted shrimp, jerk chicken quesadillas, 5 island wings, and my personal favorite, conch fritters.


Garlic Roasted Shrimp
Jerk Chicken Quesadillas
5 Island Wings


Fried Conch Fritters


We were also treated to quite a few of their entrees, including sweet chili glazed salmon, jerk chicken, and savory curried chicken, which were all amazing. I am fairly certain I had dreams about the curried chicken sauce that night (I loved it so much, I didn’t even take a photo! boo), while my fiance was wowed by the flavors and tenderness of the jerk chicken.


Chili Glazed Salmon
Jerk Chicken


In case we weren’t full enough, we were also served mashed yams with scallions, green beans, and braised cabbage.


Mashed Yams with Scallions
Green Beans
Braised Cabbage


I wanted to share with you a Caribbean-inspired recipe given to me by CCW, in case you don’t live in the area and can’t participate next week.

I turned this recipe for Curry Shrimp in Coconut Milk into a main dish by serving it over coconut rice, but it also would work well as an appetizer.

Ingredients:

  • 2 (14 oz) cans lite coconut milk, divided
  • 1.5 cups uncooked rice (or about 1 can full)
  • 2 tablespoons margarine
  • 1 cup onion, chopped
  • 1 1⁄2 tablespoons curry
  • 1/2 cup bell peppers, diced (I used an assortment of green, red, and orange peppers)
  • 1/2 cup plum tomatoes, diced
  • 1/4 teaspoon salt
  • 1/4 teaspoon black pepper
  • 1 teaspoon fresh thyme, chopped
  • 1 1⁄2 tablespoons of sugar
  • 1 pound medium shrimp, peeled and deveined

Continue reading Curry Shrimp in Coconut Milk

Swordfish with Macadamia Nut Crust and Papaya Salsa

I can’t say that I know much about Hawaiian food, past that I assume is it fish-heavy and influenced by tropical and Asian/Polynesian flavors (with their favorite canned meat, Spam, sprinkled in, of course). So when I was given the opportunity to review Tommy Bahama‘s FLAVORS of ALOHA: Cooking with Tommy Bahama (paid link), I was really curious to see what the cookbook had in store.


The cookbook is filled with quite the range of dishes, from appetizers to dessert. Written by Rick Rodgers, the cookbook transports you to Hawaii through 100+ island-inspired recipes including:

  • Tuna Poke with Guacamole and Flatbread
  • Flavorful Ono Oxtail Soup
  • Saimin with Asian Chicken Broth (arguably Hawaii’s state dish)
  • Steamed Sea Bass with Ginger Dipping Sauce
  • Huli Huli Pork Tenderloin and Pineapple with Old-School Teriyaki Marinade
  • Pineapple Crème Brulee
  • Hibiscus Lime Cooler


The cookbook also contains little facts about Hawaiian culture and history as well as tips for eating, drinking, and “living the life,” FLAVORS OF ALOHA invites aspiring cooks of all abilities to embrace the Tommy Bahama spirit by taking an “island time” approach to cooking for family and friends. Plus the photos are gorgeous!


I wanted to use this opportunity to work with a seafood I rarely make (although I am absolutely going to have to make the Kona Flan in the near future!) and adapted the cookbook’s recipe for Mahi Mahi with Macadamia Nut Crust and Papaya Salsa to use swordfish instead.


Adapted from Flavors of Aloha, Cooking with Tommy Bahama

Ingredients:

Papaya Salsa:

  • 2 tablespoons fresh lime juice
  • 1 tablespoon light brown sugar
  • 1 tablespoon minced shallots
  • 1 tablespoon minced fresh cilantro
  • 1 tablespoon finely chopped crystallized ginger
  • 1 teaspoon Sriracha
  • 1 garlic clove, minced
  • 1 cup diced papaya

Swordfish:

  • 1/2 cup unsalted macadamia nuts
  • 1/2 cup panko breadcrumbs
  • 4 swordfish steaks, about 6 oz each
  • 1/4 teaspoon salt
  • 1/2 teaspoon pepper
  • 1 large egg white
  • 1 tablespoon unsalted butter
  • 2 tablespoons vegetable oil

Continue reading Swordfish with Macadamia Nut Crust and Papaya Salsa

Frog in a Hole with Blueberry Pancakes

Did you know that February is Hot Breakfast Month? If your schedule is anything like mine, the closest you get to a hot breakfast on a week day is instant oatmeal. So why not switch up a weeknight dinner and serve breakfast instead?

Coinciding with National Hot Breakfast Month in February and to make sure everyone can regularly enjoy both the simplicity and fun of breakfast for dinner, Krusteaz has officially named every Wednesday Night in February “Breakfast Night.”


To make Breakfast Night super simple, Krusteaz sent me some of their Baking Mixes so I could have breakfast for dinner!

My fiance absolutely loves breakfast, so he was so excited for us to switch it up and have a sweet and savory dinner. I used Krusteaz’ Blueberry Belgian Waffle Mix to make pancakes (I don’t have a Belgian waffle maker), and cut out the center of each pancake to make a spin on Frog in a Hole with Blueberry Pancakes. (Frog in a Hole is usually made with a piece of toast that has the center cut out to make room for an egg.) I added some crumbled bacon for good measure on top as well.

You only need to add water, oil, and eggs to the Krusteaz Blueberry Belgian Waffle Mix to have your batter ready to go, the blueberries are already in there!  Krusteaz was also kind enough to allow me to host a giveaway. You can receive a bunch of their yummy mixes, including:

  • 1 box of Buttermilk Pancake Mix
  • 1 box of Blueberry Belgian Waffle Mix
  • 1 box of Chocolate Chunk Muffin Mix
  • 1 box of Honey Wheat Pancake Mix
  • Krusteaz coupons for free product

More details and how to enter after the recipe!

Ingredients:

  • 4 strips of bacon
  • 1 tablespoon unsalted butter at room temperature
  • 1 tablespoon maple syrup
  • 3 cups Krusteaz Blueberry Belgian Waffle Mix
  • 6 eggs, divided
  • 1 1/4 cup water
  • 1/3 cup canola or vegetable oil
  • cooking spray
  • salt and pepper, to taste

Continue reading Frog in a Hole with Blueberry Pancakes

Baked Avocado and Feta Wontons

With the holidays fast approaching, everyone needs some new appetizer and hors d’oeuvres options for guests. Nasoya must have known I was in need of some new creative recipes, because they sent me a great holiday entertaining kit to try out their Wonton Wraps. The kit included some fun inventive recipes using wonton wraps, so I wanted to share one of them with you!


These Baked Avocado and Feta Wontons come together in 30 minutes and are the perfect bite-sized hors d’oeuvres for your next party. The wraps are filled with a mixture of avocados, sun-dried tomatoes, and feta cheese and are served with a lime flavored dipping sauce.


Note: I was sent a holiday entertaining kit to review Nasoya wonton wraps. My opinions are my own.


Ingredients:

  • 2 large avocados, chopped into bite sized pieces
  • 4 tablespoons chopped sun-dried tomatoes
  • 1/4 cup crumbled feta cheese
  • 1/2 tablespoon minced garlic
  • 2 tablespoons red onion, finely chopped
  • 24 Nasoya Wonton Wraps
  • 1 egg white
  • the juice of 3 limes
  • 2 tablespoons olive oil
  • salt and pepper, to taste

Continue reading Baked Avocado and Feta Wontons

Autumn Apple Salad with Cinnamon Honey Dijon Dressing

It’s September which means apples are right in their prime season! Although apples are available year-round, most apples ripen in the August-October time frame. I’ve had a craving for apples ever since September began so I was so excited when I was contacted recently about trying an apple variety called SweeTango that I’ve never had before.

SweeTango apples a variety bred at the University of Minnesota and are a cross between  the Honeycrisp and Zestar! varieties.  The apples are crisp and sweet with a hint of citrus, honey, and spice and have a nice crunchy and juicy texture that’s perfect to eat raw. They have a beautiful coloring too — SweeTango is a blush apple with deep red coloration over a yellow breaking background. The variety first hit store shelves in limited quantities in 2009, and has since grown to achieve distribution across the U.S. and Canada. 

Photo Courtesy of SweeTango

I received two SweeTango apples in the mail and couldn’t wait to try them! One I saved for me to just enjoy on its own and the other went into one of the most delicious salads I’ve ever had, Autumn Apple Salad with Cinnamon Honey Dijon Dressing! This salad is packed with a bunch of different textures and flavors which is what I really love about it. But the true star of the salad is the SweeTango apple!

Photo Courtesy of SweeTango

Ingredients:

Salad:

  • 2 cups red leaf lettuce, torn
  • 2 cups spinach leaves, torn
  • 1/2 cup thinly sliced fennel bulb
  • 1/2 cup walnuts, toasted
  • 2 tablespoons salted pumpkin seeds (pepitas)
  • 2 tablespoons dried cherries
  • 2 tablespoons golden raisins
  • the juice of 1 lemon
  • 1 SweeTango apple, thinly sliced

Dressing:

  • 4 tablespoons olive oil
  • 2 tablespoons cider vinegar
  • 1 tablespoon red wine vinegar
  • 2 teaspoons Dijon mustard
  • 2 teaspoons honey
  • 1 tablespoon minced shallot
  • 1/2 teaspoon cinnamon
  • a pinch of salt and pepper

Continue reading Autumn Apple Salad with Cinnamon Honey Dijon Dressing

Exit mobile version