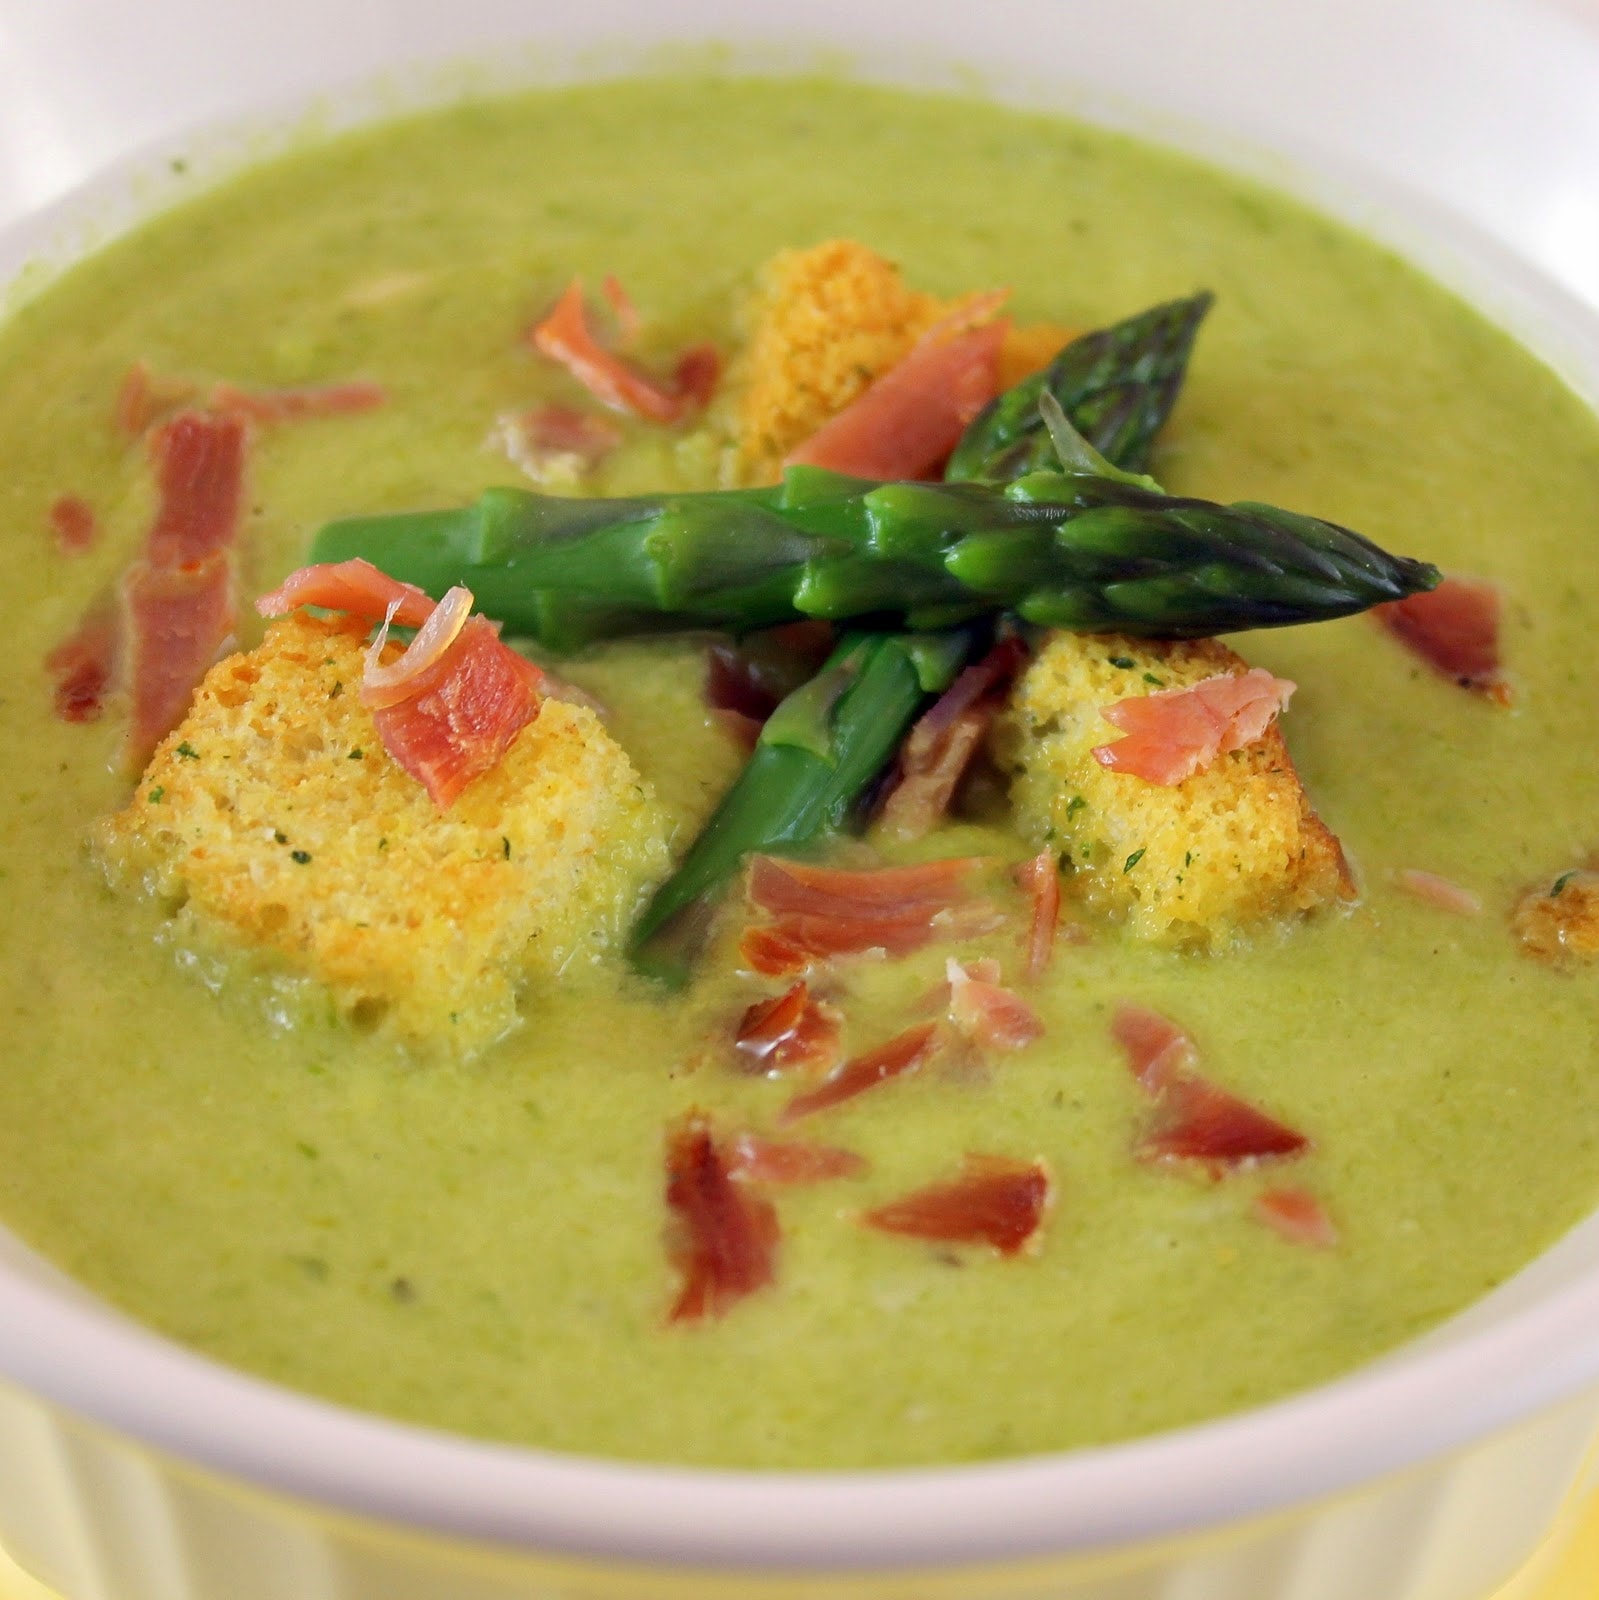
Creamy Asparagus Soup with Prosciutto

It’s about time I finished my review of Pomi! This time, I am working with their Alfredo Sauce. As a reminder, Pomi products come in boxes and are BPA-free.You can find them in most supermarkets (I was even able to find it in Reading Terminal, huge plus!)
The Alfredo Sauce would be yummy just over your favorite pasta with some fresh parsley, but I once again wanted to use the sauce a little differently to show how versatile the product is. (Don’t forget, I also have a giveaway to win a box of both the Alfredo Sauce AND the Vodka Sauce on my other post! Go check it out for details — ends Friday October, 21 12:00pm EST.)
Because it’s fall, and I cannot manage to satiate my craving for soup, I am making a Creamy Asparagus Soup topped with Crispy Prosciutto.


Ingredients:
1 tablespoon unsalted butter (I am using Melt, a butter substitute)
1 garlic clove, minced
1 large shallot, finely chopped
1 teaspoon dried parsley
3 cups chicken broth
1-2 bunches of asparagus, woody ends removed
1 box Pomi Alfredo Sauce
3 slices of prosciutto, cut into thin strips
Salt, to taste
Garlic croutons, optional
Fresh parsley, chopped, optional

Begin by preparing your asparagus. Cut the asparagus into 1-inch pieces. Take the tips (maybe about 10 of them) and reserve for a later use. Chop your shallot and garlic clove.


Bring a pot of salted water to a boil. Add ice water to a bowl.
In another pot, melt the butter over medium heat. Add the chopped shallots, garlic, and dried parsley. Cook for two minutes, stirring.


Add the chicken stock and bring to a simmer. Add the asparagus (without the reserved tips) and cook for 5 minutes.


Pour the mixture in batches into a blender and blend until smooth.

Return to the pot. Cook for ten minutes over medium low heat, stirring occasionally.


At this stage, your pot of water should be boiling. Add the reserved asparagus tips to the boiling water. Cook for 2 minutes and drain. Move the asparagus tips to an ice bath to cool. Once cool, remove from the ice water and set aside.


While waiting for the soup to cook, add the thin strips of prosciutto to a dry saute pan over medium-high heat. Cook for 1-2 minutes or until crisp.
Transfer to paper towels and allow to cool. When cooled, roughly chop the prosciutto and set aside.
Add the Pomi Alfredo Sauce to the pot and stir to combine. Depending on your tastes, you might want to just use half a box. If you want it cheesy, go for the whole thing; if you want it more asparagus-y (is that a word?) use between 1/2 and the full box. Cook for about 5 minutes.
To serve, top with crumbled prosciutto, 2-4 asparagus spears, and a few garlic croutons.

Oh my. This was delicious! I really wish I was able to make this in the spring, when asparagus is it’s freshest, I can only imagine how tasty this soup would be!

The Alfredo sauce complements the brightness of the asparagus and adds to the smooth texture. I loved the bites of prosciutto, which added a burst of saltiness to the soup. The asparagus spears and garlic croutons added nice crunch to an otherwise silky soup.

It’s quite nice looking too isn’t it?

Don’t forget to enter my giveaway here for a chance to win a box of this alfredo sauce (plus a box of the vodka sauce) so that you can try these tasty sauces for yourself!

Tomato Seafood Chowder &Review of Pomi Vodka Sauce

We all have those nights where we are absolutely too exhausted to cook. I tend to go straight for pasta whenever these nights come up, but recently I’ve been running low on my homemade tomato sauce. Sigh. I will of course whip up a batch of my tomato sauce when I have time, but it takes a good three hours to make!
Luckily, Pomi must have sensed my tomato sauce drought, and asked if I’d be willing to try some of their new sauces, specifically the Vodka Sauce and the Alfredo Sauce. (They also have traditional Marinara and Tomato & Basil sauces.) Not only do I get to try theses sauces, but Pomi is also going to send one lucky reader one box each of the Vodka Sauce and the Alfredo Sauce! I will discuss the giveaway at the end of this post, so stick with me!
I was excited to try Pomi. Unlike most tomato sauces, Pomi products actually come in boxes and are BPA-free. BPA, or bisphenol A is a compound used to make polycarbonate plastic and epoxy resins. Polycarbonate plastics are typically used in containers that store food and beverages, such as water bottles, and baby bottles. Epoxy resins are mainly used to coat the inside of metal products, such as food cans. The issue is there is evidence that BPA can seep into food and be absorbed into the human body, causing damage to the cardiovascular and reproductive systems, possibly leading to cancer, diabetes, asthma and obesity. Although more research needs to be completed, it has been suggested that consumers should try to limit their BPA exposure. Pomi also uses 100% natural tomatoes (no pesticides, herbicides or genetically modified seeds are used) and they do not add preservatives or artificial flavors to the end result.
Naturally, you can used these sauces just poured over freshly cooked pasta. But I decided to also test how versatile these sauces are. To save from a ridiculously long post, the Alfredo Sauce post will be coming shortly!
I decided to use the Vodka Sauce to make a Tomato Seafood Chowder. Pomi’s vodka sauce ingredients include: tomatoes, heavy cream, vodka, onion, cheeses, garlic, basil and parsley, which sounded like a wonderful base for a soup.


Ingredients:
1 teaspoon olive oil
1 teaspoon dried basil
1 teaspoon dried parsley
1/4 teaspoon red pepper flakes, or to taste
1 garlic clove, minced
1 cup orzo, uncooked
1 medium sized yellow onion, finely chopped
1 pound raw bay scallops
1/2 cup clam juice
1/2 cup chicken broth
1 box Pomi Vodka Sauce
1/2 can diced tomatoes, optional
1 dozen clams
8 oz crab meat
2 tablespoons sliced fresh basil, for garnish
2 tablespoons chopped fresh parsley, for garnish

Cook the orzo according to package instructions on the package. Drain and set aside. While the orzo is cooking, prepare your ingredients: chop the onion, garlic, basil and parsley.
In a large pot, add the olive oil over medium heat. Add the onion ,garlic, dried basil and dried parsley. Cook for 5 minutes, stirring occasionally.

Add the scallops and cook for another 2-3 minutes, stirring.

Add the clam juice and chicken broth. If you want, you can sub out the clam juice for all broth.  Add the Pomi Vodka Sauce, red pepper flakes, and diced tomatoes. If you do not want a chunky stew, you can leave out the chopped tomatoes.

Bring to a boil, reduce heat, cover, and cook for about 10 minutes. Add the clams and cover, cooking for 3-5 minutes or until the clams open.

Stir in the orzo and the crab meat and serve with day old French bread.


There is plenty of salt from the clam juice, chicken broth and Pomi Vodka sauce so you really don’t need to add any. Feel free to add a bit of ground pepper if you’d like.

The Pomi Vodka sauce added plenty of flavor to the soup. It created a wonderful base and tasted awesome with the clams, crab meat and scallops.  I strongly suggest adding the red pepper flakes for a tiny bit of heat, it works so well with the tomatoes. My boyfriend, who was really wary of trying the chowder, ended up polishing off his bowl, and he doesn’t even like scallops!


So now, for the giveaway! As a reminder, one reader will receive one box of Pomi Alfredo Sauce and one box of Pomi Vodka Sauce, mailed to your home. Unfortunately, this is only open to U.S. residents.
To enter, please leave a comment below letting me know how you’d use one of the sauces (this one is mandatory).
For extra entries, you can do as many of the following as you please. Leave me a comment below letting me know you’ve done them, each comment counts as a separate entry!
  1. Like I Can Cook That and Pomi on Facebook (comment saying you did so or let me know if you already do)
  2. Follow I Can Cook That on twitter (comment saying you did so or let me know if you already do)
  3. Tweet the following: “I just entered @icancookthat’s Pomi Sauce Giveaway! https://tinyurl.com/3c56eep” (leave a comment saying you did so below)
The winner will be chosen using random.org and will be announced Friday, October 21. All entries must be received by 12:00pm EST on Friday, October 21. Good luck!
Note: This giveaway is now closed. Thanks for participating!
Skinny Iced Pumpkin Cookies & Review of Melt Buttery Spread

One of the huge downsides of my pumpkin obsession is that most of the sweets made with pumpkin really should be eaten in moderation (something I am not capable of adhering to). So I am always in search of a way to lighten the calorie intake of those desserts so that I can still enjoy them without feeling terribly guilty afterwards.

Kelly from Eat Yourself Skinny recently had a post trying out a new buttery spread called Melt with rave reviews. Luckily, Melt graciously sent me two packages of their organic buttery spread for me to try out as well!

So what exactly is melt and what makes it different from other butter substitutes? Melt contains virgin coconut oil, flax seed oil, palm fruit oil, and canola oil — all healthy cooking oils and “good fats.” Typical buttery spreads are made of hydrogenated or partially hydrogenated oils, which have been liked to obesity, heart disease, etc. Melt is also organic, gluten free, soy free, kosher, and has 50% of the saturated fat and fewer calories than butter. Whew.
Melt’s, well, melt point is close to original butter’s melting point, making it perfect for baking. Typical buttery spreads usually have a lower melting point, which means they tend to separate during the baking process resulting in a flat cookie. So what better way to really test out Melt’s best qualities than making a batch of Skinny Iced Pumpkin Cookies? I adapted this recipe from AllRecipes.com.


Ingredients (this makes 3 dozen cookies):
  • 2 1/2 cups all-purpose flour
  • 1 teaspoon baking powder
  • 1 teaspoon baking soda
  • 2 teaspoons ground cinnamon
  • 1/2 teaspoon ground nutmeg
  • 1/2 teaspoon ground cloves
  • 1/2 teaspoon ginger
  • 1/2 teaspoon salt
  • 1/2 cup Melt buttery spread
  • 1 1/2 cups white sugar
  • 1 cup canned pumpkin puree
  • 1 egg
  • 1 teaspoon vanilla extract

Icing, for drizzling:

  •   1/2 cup and 1 tablespoon confectioners’ sugar
  •   2-1/2 teaspoons 2% milk
  •   3/4 teaspoon melted Melt buttery spread
  •   1/4 teaspoon vanilla extract

Continue reading Skinny Iced Pumpkin Cookies & Review of Melt Buttery Spread

Sargento Cheese Taste Test & Grilled Cheese

Cheese is a bit of an obsession of mine.  I honestly cannot remember a time in my life that I did not love cheese.The first meal I ever learned to make was a grilled cheese sandwich. I was so into making them that my parent’s actually bought me a grilled cheese pan for Christmas when I was about 8. So when I was given the opportunity to do a taste test through the Foodbuzz Tastemakers Program of Sargento Natural Cheese versus a processed cheese, I knew making grilled cheese would be the perfect way to test them out.
Ingredients:
4 slices of sourdough bread
1 avocado
2 tomatoes, sliced (I used Roma tomatoes)
4 slices of Sargento Natural Cheddar Cheese
4 slices of a Processed Cheese (I used American)
4 slices of smoked applewood bacon
2 tablespoons butter
Tomato soup
Optional: a few drops of Tabasco and Worcestershire

I went with the sliced cheddar cheese from Sargento so that the sandwiches would visually be the same.
To give a little background, Sargento is 100% natural cheese, made from only natural ingredients (milk, cheese cultures, enzymes and salt).
Processed cheese, on the other hand adds, emulsifiers and preservatives, making it a cheese product instead of actual cheese. The cheese is melted down to a liquid and then formed into a slice. Even more gross, some processed cheese can be in unrefrigerated storage for months. Goo. Ok, now on to the yummy part.
Both sandwiches are made the exact same way.
Begin by slicing your avocado and tomatoes.
Prepare your soup according to the directions on the label. Add a few drops of Tabasco and Worcestershire sauce to add a little kick to the tomato soup.
Add two slices of bacon to a medium saute pan over medium heat. Cook for about 10 minutes or until desired level of crispness, turning occasionally.
Add 1 tablespoon butter to a separate saute pan over medium heat. When melted, add two pieces of sourdough bread.


I like both sides to have a little toasting, so I flip my bread after a few minutes and then top with cheese. Feel free to skip that step. Top with slices of cheese (either American or Sargento cheddar).
When the cheese is melted (about three minutes), add the cooked bacon, tomato and avocado to the bread.

Assemble the sandwich and cut in half. Serve with tomato soup for dipping.

So that both sandwiches were hot, we tried one half of each one after another. The American cheese sandwich wasn’t too bad, but the taste of American cheese could not be ignored. I found it to have a somewhat plastic-y taste to is. The sandwich also tasted like each individual part, (i.e. more of a bacon, tomato, avocado and cheese sandwich on sourdough) versus a bite of melty grilled cheese.
The Sargento cheddar, however, worked really well within the sandwich. All the flavors melded together and didn’t overpower each other. The Sargento cheese also had a wonderful gooey texture that clung to the other ingredients within the sandwich.
Honestly, there really isn’t that much difference in taste between the two, so if you are a fan of American cheese, the Sargento cheese would not be too much of a change to your palate without the fillers and almost half the amount of sodium. The real difference is the quality of the cheese as well as the end result.
Sargento offers a range of natural cheeses to fit any tastes, including Colby Jack, Swiss, Mozzarella, Provolone, Pepper Jack and Gouda (plus many more). I stuck to using cheddar solely to keep the cheeses somewhat similar. To really amp up the taste of this grilled cheese, I suggest mixing two of the Sargento natural cheeses to add more flavor (think Mozzarella and Provolone, Pepper Jack and Cheddar, etc.)

Many thanks to Foodbuzz for the opportunity to try Sargento Natural Cheese!

Review of Level Up

If you live in Philadelphia or Boston, you may have noticed signs like these posted at some of your favorite restaurants and shops:
That nifty little sign indicates that the businesses are a part of Level Up, a new way to pay using your iPhone, Android, or a card you receive in the mail. For the past week,  I have tried out the app at various participating merchants around Philadelphia and am really pleased with how simple (and oddly fun!)  it is to use.
So how does it work? After registering online (it’s free to join but does link to your credit card), you are assigned a personal QR Code.
You can download the Android or iPhone app on to your phone, and begin using the service immediately. To find merchants who accept Level Up, you can use the app on your phone, which will sort locations depending on their proximity to your location, or by checking out the “Browse” section of the Level Up website. Just go to a participating location and bring up the QR code on your phone. The store scans the code as a method of payment; you will receive an e-mail within minutes with a digital receipt.
The scanner used to pay
You can even add tip right on the app.
If you do not have a smart phone, you can request a card be sent to you, and that can be scanned at all participating locations.
So what’s in it for you? Each participating merchant has a credit that will be applied the first time you use Level Up at that location. The credit varies depending on location, but you can look up how much it is on your phone or on the website. The credits never expire, and the more you use the app, the more credits you unlock at that merchant. To check on your status until your next credit is unlocked, just view the progress bar.
“Spend $100, Get $10”
The leftover balance is charged to your credit card.
The process is secure and even has the option to pin-lock your QR code.
If you ever think the code has been compromised, you can easily reset the QR code and receive a new one instantly.
 
Level Up is adding new businesses daily, so keep a look out for some of your favorite spots. 
I love how simple Level Up is! It is a great quick way to pay for your purchases, no signing, no one walking away with your card. The credits are a great reward for using Level Up; who doesn’t love a few extra dollars saved?

Level Up is not just for restaurants, many boutiques, hair salons and shops are also participants. Just keep an eye out for the Level Up signs and have fun using it! To sigh for Level Up and receive a $10 credit that can be used at any location, go to TheLevelUp.com/joinand enter the code “KLUNN” where it says “have a promotion code?”

Feel free to leave me any comments or questions below!

The images are courtesy of Level Up. The poor quality photos were taken by me around Philadelphia.

Review of Birds Eye Chef’s Favorites

As much as I love cooking, there are some nights where whipping up an entire meal is a chore instead of a fun experience. It is so tempting to just order pizza or some other delivery on these nights, but I end up not enjoying it as much as a home cooked meal. So I was really excited when the Foodbuzz Tastemakers Program gave me the chance to try Birds Eye’s new line of microwave-steamed veggies, which are ready to eat in minutes.
The vegetables steam right in the bag, and can go straight from the freezer into the microwave (they can also be cooked on the stove top). While cooking in the microwave, the bags puff up to steam the vegetables in about five minutes, depending on which bag you are cooking.
Products include:
  • Lightly Sauced Primavera Vegetable Risotto: a creamy risotto, with sweet green peas and tender carrots, with light notes of Parmesan cheese.
  • Lightly Sauced Mushroom & Green Bean Risotto: made with savory mushrooms and cut green beans.
  • Lightly Sauced Creamed Spinach
  • Lightly Sauced Roasted Red Potatoes & Green Beans with Parmesan Olive Oil Sauce: whole green beans and roasted baby red potatoes, lightly tossed in a Parmesan cheese and olive oil sauce.

I enjoyed all four, but my favorites were the risottos. I love risotto, and make it quite often. But it is a good half hour process, so it is pretty time consuming. In a pinch, these risottos are a yummy side dish, or even a complete meal.
The mushroom and green bean risotto was creamy and delicious. The green beans still maintained their crunch which worked well with the creaminess of the rice and mushrooms.
Mushroom & Green Bean Risotto
The Primavera Vegetable Risotto was also really creamy. The peas and carrots still had a wonderful fresh taste to them. I actually ended up adding a bit more Parmesan cheese (hey, it was the only thing in my fridge. I might as well use it!)
The creamed spinach was so yummy! It’s a versatile side dish and would be great with steak, pork chops, or (as I used to eat it as a kid), with macaroni and cheese.
Creamed Spinach
The Roasted Red Potatoes and Green Beans were another huge time saver. Making potatoes is another pretty long process, so it was so nice to have roasted red potatoes in just minutes. I think I would have enjoyed these more without the cheesy sauce, but they were still tasty. I ate this with a simple sauteed chicken, but would also work well with salmon, other fish, or honestly any kind of meat.
Each bag is retailed in a range of $2.69 – $3.09 per item, so they are also an affordable option for dinner. The timing I received these could not have been better. Coming off of vacation, I had literally nothing in my fridge (ok, I had some Parmesan cheese, but that doesn’t make a meal!) so the Chef Favorites were my go-to sides. I only had to worry about cooking up a quick protein to accompany the dish. I’d suggest purchasing a few of these bags at a time so that you always have some around for convenience. These four Chef’s Favorites will be in stores in September; look for them in the freezer section.

Review of of Cooking Light’s New App & A Chance to Win a Free Download!

It comes as no surprise that I am a huge fan of Cooking Light. I attribute a good portion of my interest in cooking to their magazine. When I was living at home after college, my mom brought the December copy home on a whim from the supermarket. Everything sounded so delicious, I jumped right in, trying to make as many recipes as possible. The rest is history. I am now Cooking Light obsessed.

The issue that got me hooked. Courtesy of cookinglight.com

So when I heard that Cooking Light had made it’s own app for iPad and iPhone, I was overjoyed. The “Quick & Healthy Menu Maker App” is genius. How often do you prepare a nice healthy main course only to wreck it with some ridiculous side that ends up negating the healthiness of the original dish? Or, if you’re like me, how many times do you struggle to find a side that would complement the other components of the meal? 

Here’s a little blurb about what the app actually is and why it is such a useful tool:
The Quick & Healthy Menu Maker offers more than 300 recipes and lets users design create delicious, quick menus in an interactive way. Users simplyswipe through the gorgeous photos to create a complete and healthy menu, selecting one entrée and then adding two sides plus one dessert. The app calculates nutrition per serving in real time—calories, sodium, and saturated fat. If a menu meets or exceeds Cooking Light’s nutrition recommendations, the app lets the user know with green and red indicators. There are thousands of possible menu combinations.

The second to last sentence is what truly makes this app worthwhile in my opinion. If a menu meets or exceeds Cooking Light’s nutrition recommendations, the app lets the user know with green and red indicators.”  How fantastic is that??

A friend and I decided to try the app out for ourselves. After finding, oh, 20 different combinations that made our stomachs growl, we finally went with:


Mango Shrimp Kabobs, Corn with Lime and Chipotle, Wild Rice Pilaf with Pecans, and Yogurt with Berry Sauce. How wonderful does this dinner look? (If you click on the photo above, it will enlarge so you can actually read what it says.) The photo above is a screen shot from the Corn. I received corn as part of my CSA share this week so I was excited to see this recipe. I came across the recipe by scrolling through the “vegetable” sides. I then clicked the “suggested menus” button and that gave me suggestions for a main meal, another side, and a dessert.

I will post my attempt at the recipes in a different post. This post is getting too long

So, overall we had the following thoughts about the App:
  • Pros:
    • Love the suggested menu option. Not only are there multiple suggestions, but you can use it by starting off with any part of the meal: Main dish, Side, or Dessert. Genius!
    • You have the option to save a specific recipe you enjoy or the whole menu
    • You can also e-mail the recipe or menu straight from the app.
    • The nutrition per serving is very helpful. Includes all parts of the dish. It also breaks down fat and sodium content.
    • The photos are spectacular. I was so hungry after playing around with the app!
  • Cons/Suggested Improvements:
    • There is no “search” feature. So if you find a recipe you love and don’t save it, you have to scroll through a bunch of other recipes before finding it again. Bummer.
    • It would be nice if there was a way to choose ingredients you had on hand and have menus/recipes suggested that include those recipes.
    • Another possible improvement: adding a shopping list feature. It would make the app more useful in the supermarket.
    • The app is so large, it crashed the iPad a few times. Slightly frustrating but not a deal breaker.
    • I think I’ve already managed to scroll through all of the recipes, so I hope the app is continuously updated with new and delicious meals! 
    • When I tried to e-mail the menu to myself, I realized there is no way to do so. You have to go through recipe by recipe and e-mail them out.
    • I personally am a Droid aficionado. I hope this becomes available for my beloved Android in the near future!
Overall, I think the pros outweigh the cons. It really is a well made app and is really quite useful.


So if you managed to stay with me this entire time, I have a little reward. Cooking Light was kind enough to give me five free codes to their app! To be eligible to receive one of these codes you must meet the following requirements:
  1. Have an iPhone or iPad (this is kind of mandatory, sorry)
  2. Be willing to write either a blog post review of the app on your own site OR a guest review post on my site OR just send me an e-mail with your thoughts about the app
  3. “Like” my facebook page AND/OR follow me on twitter
To enter, leave me a comment letting me know if you’d write your review as a guest blogger or if you’ll have it on your own site (please include a link to your site). If you are not comfortable writing a whole post on the app, an e-mail with feedback about the app is also perfectly fine. In a separate comment, post whether you’ve liked my facebook page or if you’re following me on twitter (excuse my shameless plug.) If you become a facebook fan AND follow me on twitter, post two separate comments letting me know, they will each count as an individual entry. Please be sure to include your e-mail address as well so I can contact you if you win. Note: you do not need to do all three; just leaving a comment will count as an entry.It would also be much appreciated if you’d direct people to this post to allow more people a chance to win! I will choose 5 lucky winners using random.org. Entries must be received by Friday, July 22 at 5:00 pm EST. Good luck!


Note: if you have used the Cooking Light App and have any comments, don’t hesitate to e-mail me at icancookthat@icancookthat.org. I’d love to hear your opinions! To read up on another blogger’s thoughts on the app, check out Katie K. is Losing It. She has used the app on a few posts so far, and has found some great recipes.
Exit mobile version