Quinoa Chicken Curry

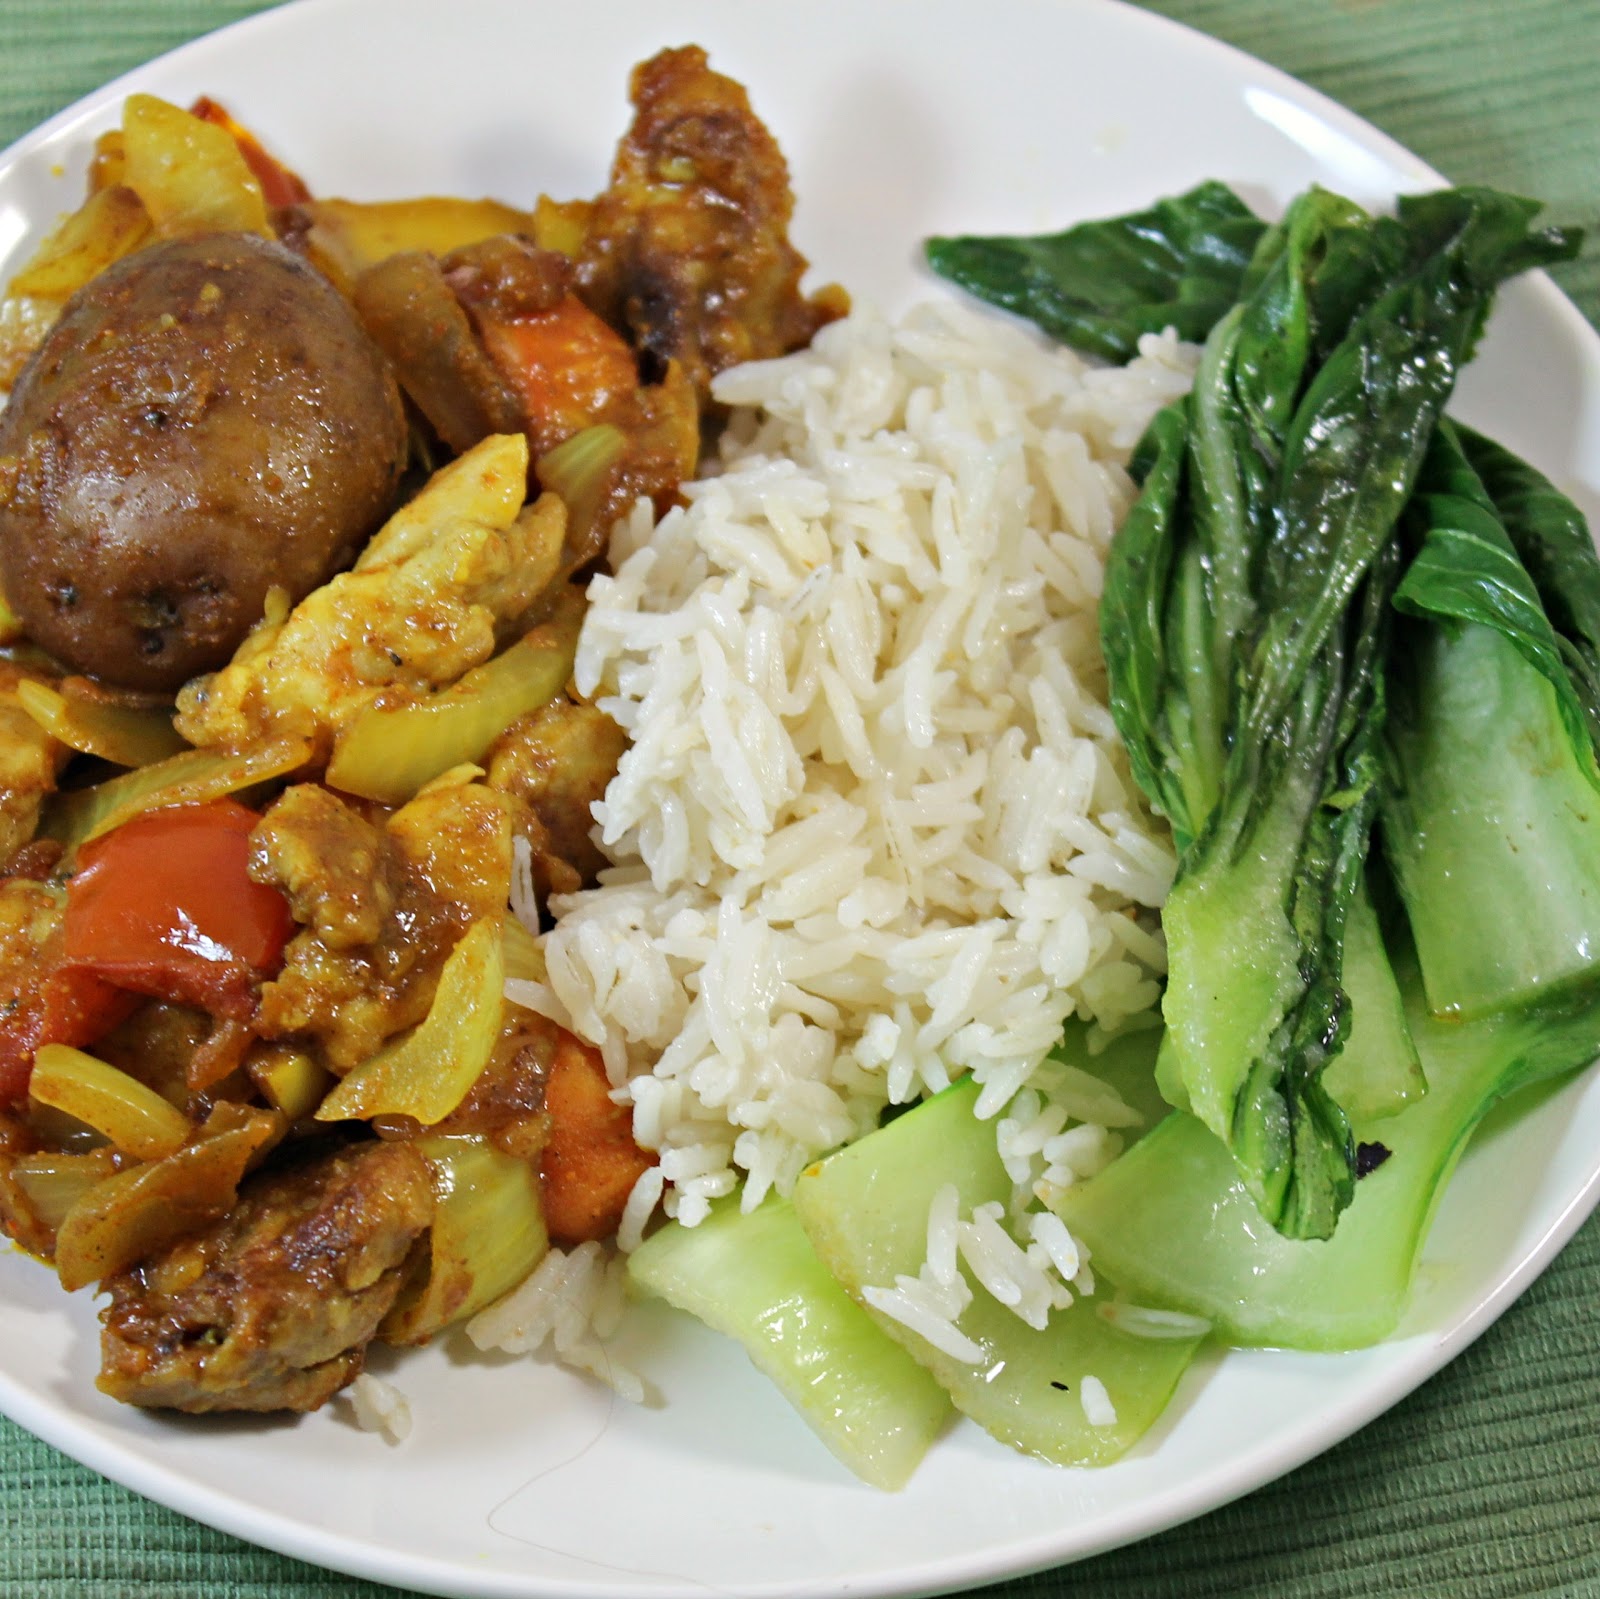
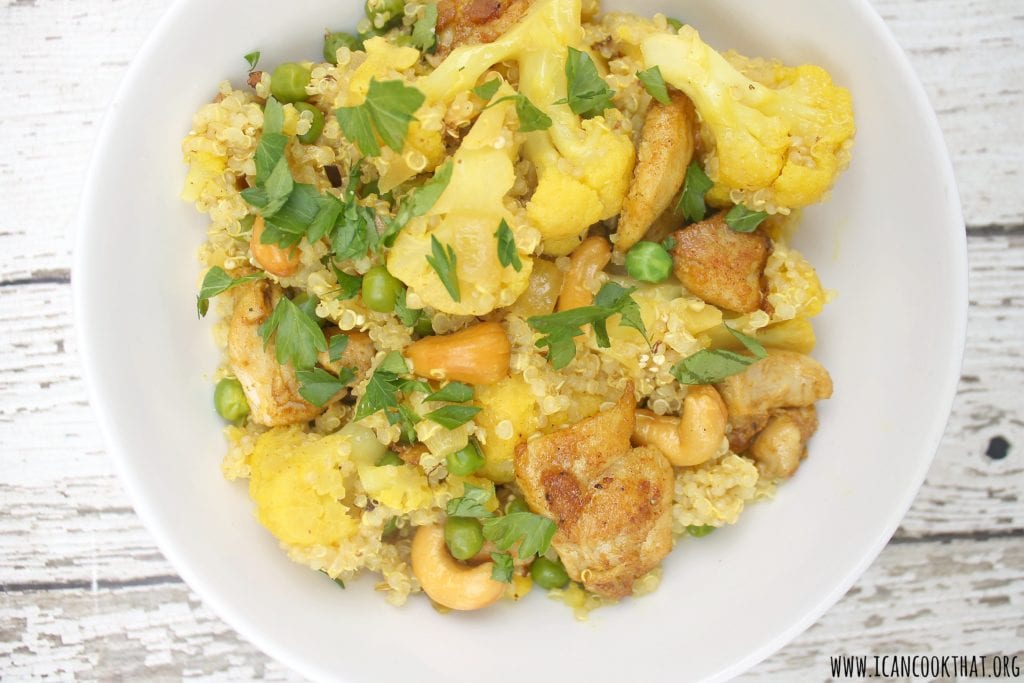
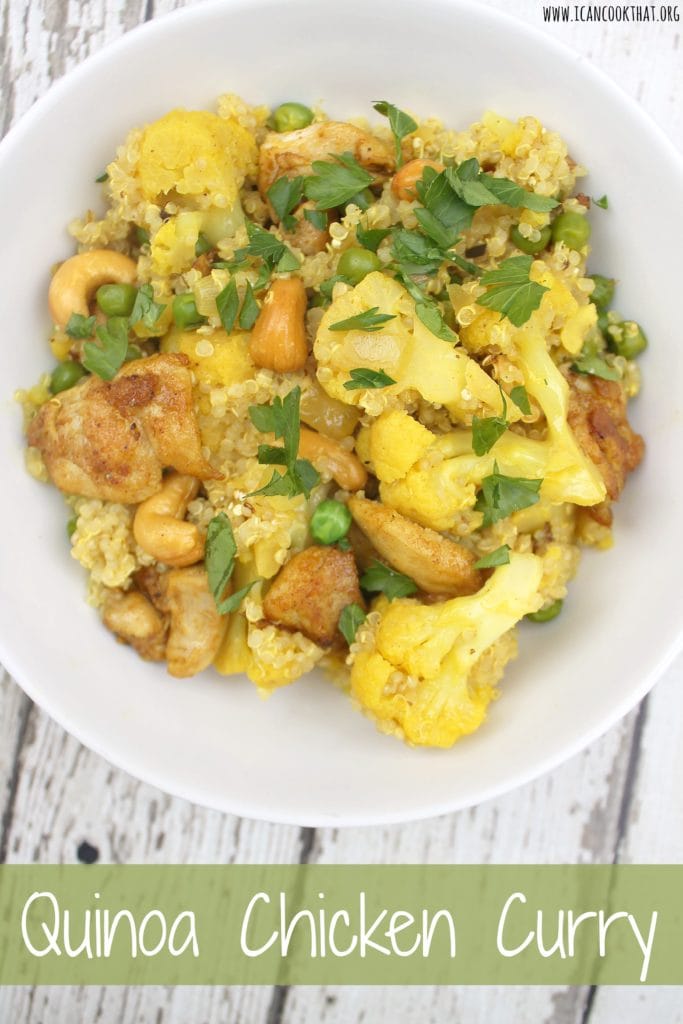
I’m excited to share with you this recipe for Quinoa Chicken Curry, but before I do, I wanted to share a bit about quinoa.
Although quinoa seems to be a bit of a “new” super food, it has actually been around for thousands of years and was considered one of the most important crops of the Incas. This grain-like seed is really easy to cook (you cook it like rice) but is chock full of nutritional benefits. Quinoa’s high protein content makes it a great choice for vegans and vegetarians. It is also a complete protein which means it contains all the essential amino acids. Quinoa is also rich in vitamins and minerals, including magnesium, phosphorous, zinc, iron, potassium, calcium, vitamin B, folate, and riboflavin. Quinoa is also naturally gluten free, and can be ground into a flour that allows for gluten free baking. Whew.
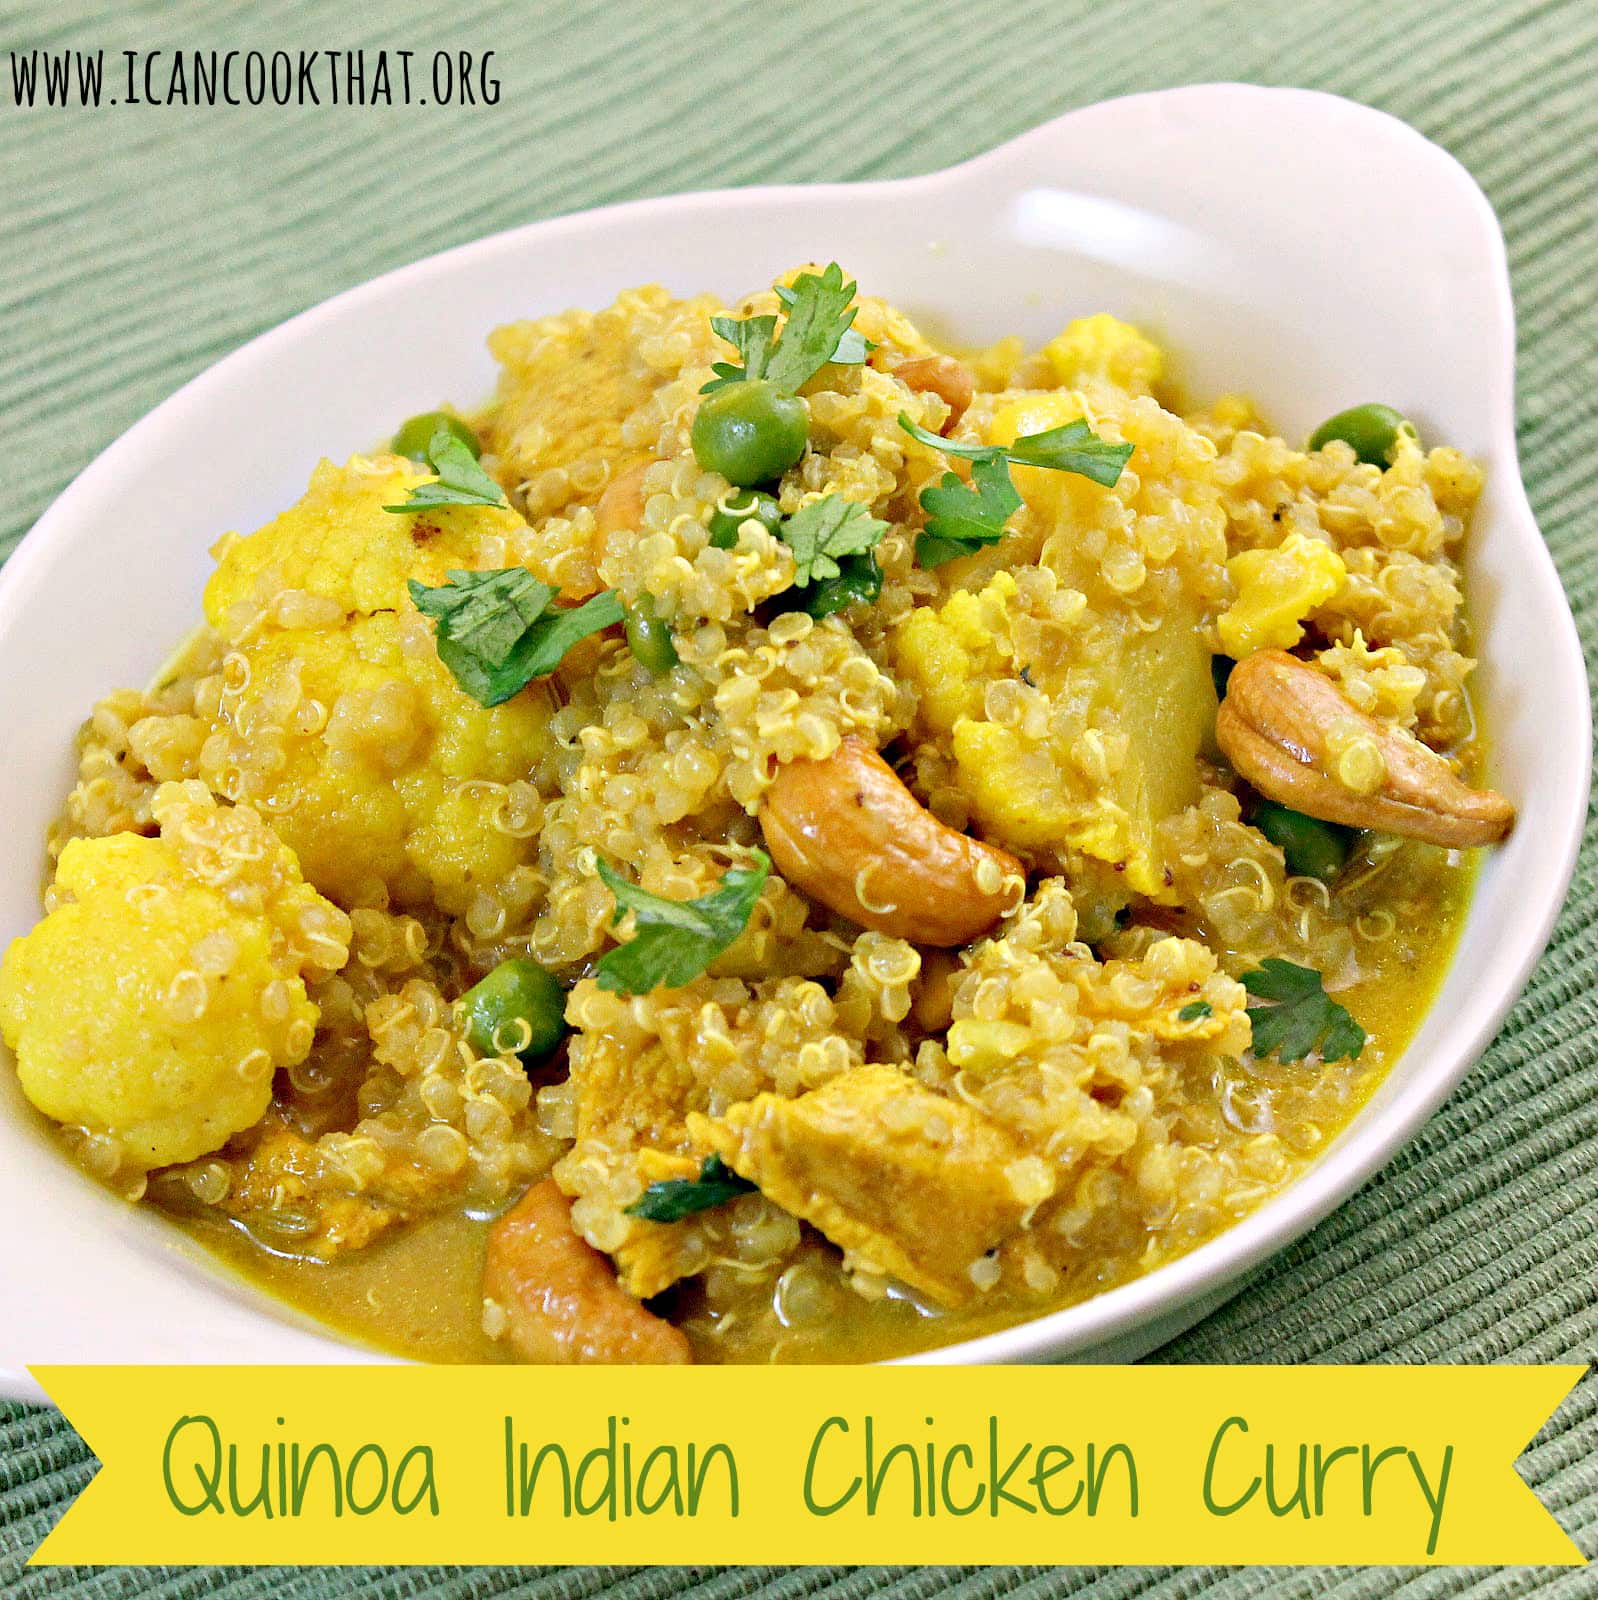
I really didn’t know much about quinoa, or how to use it. So I was excited to be given the chance to review The Complete Idiot’s Guide Quinoa Cookbook to learn more about it.  The book is full of quinoa recipes, including breakfast, dinner, and even dessert recipes. I wanted to try one of the more traditional preparations of quinoa, but can’t wait to delve into the more interesting uses for it in future posts (Lemon Poppy Seed Quinoa Cupcakes, anyone?) The book had a recipe for Quinoa Indian Chicken Curry that sounded absolutely fantastic!
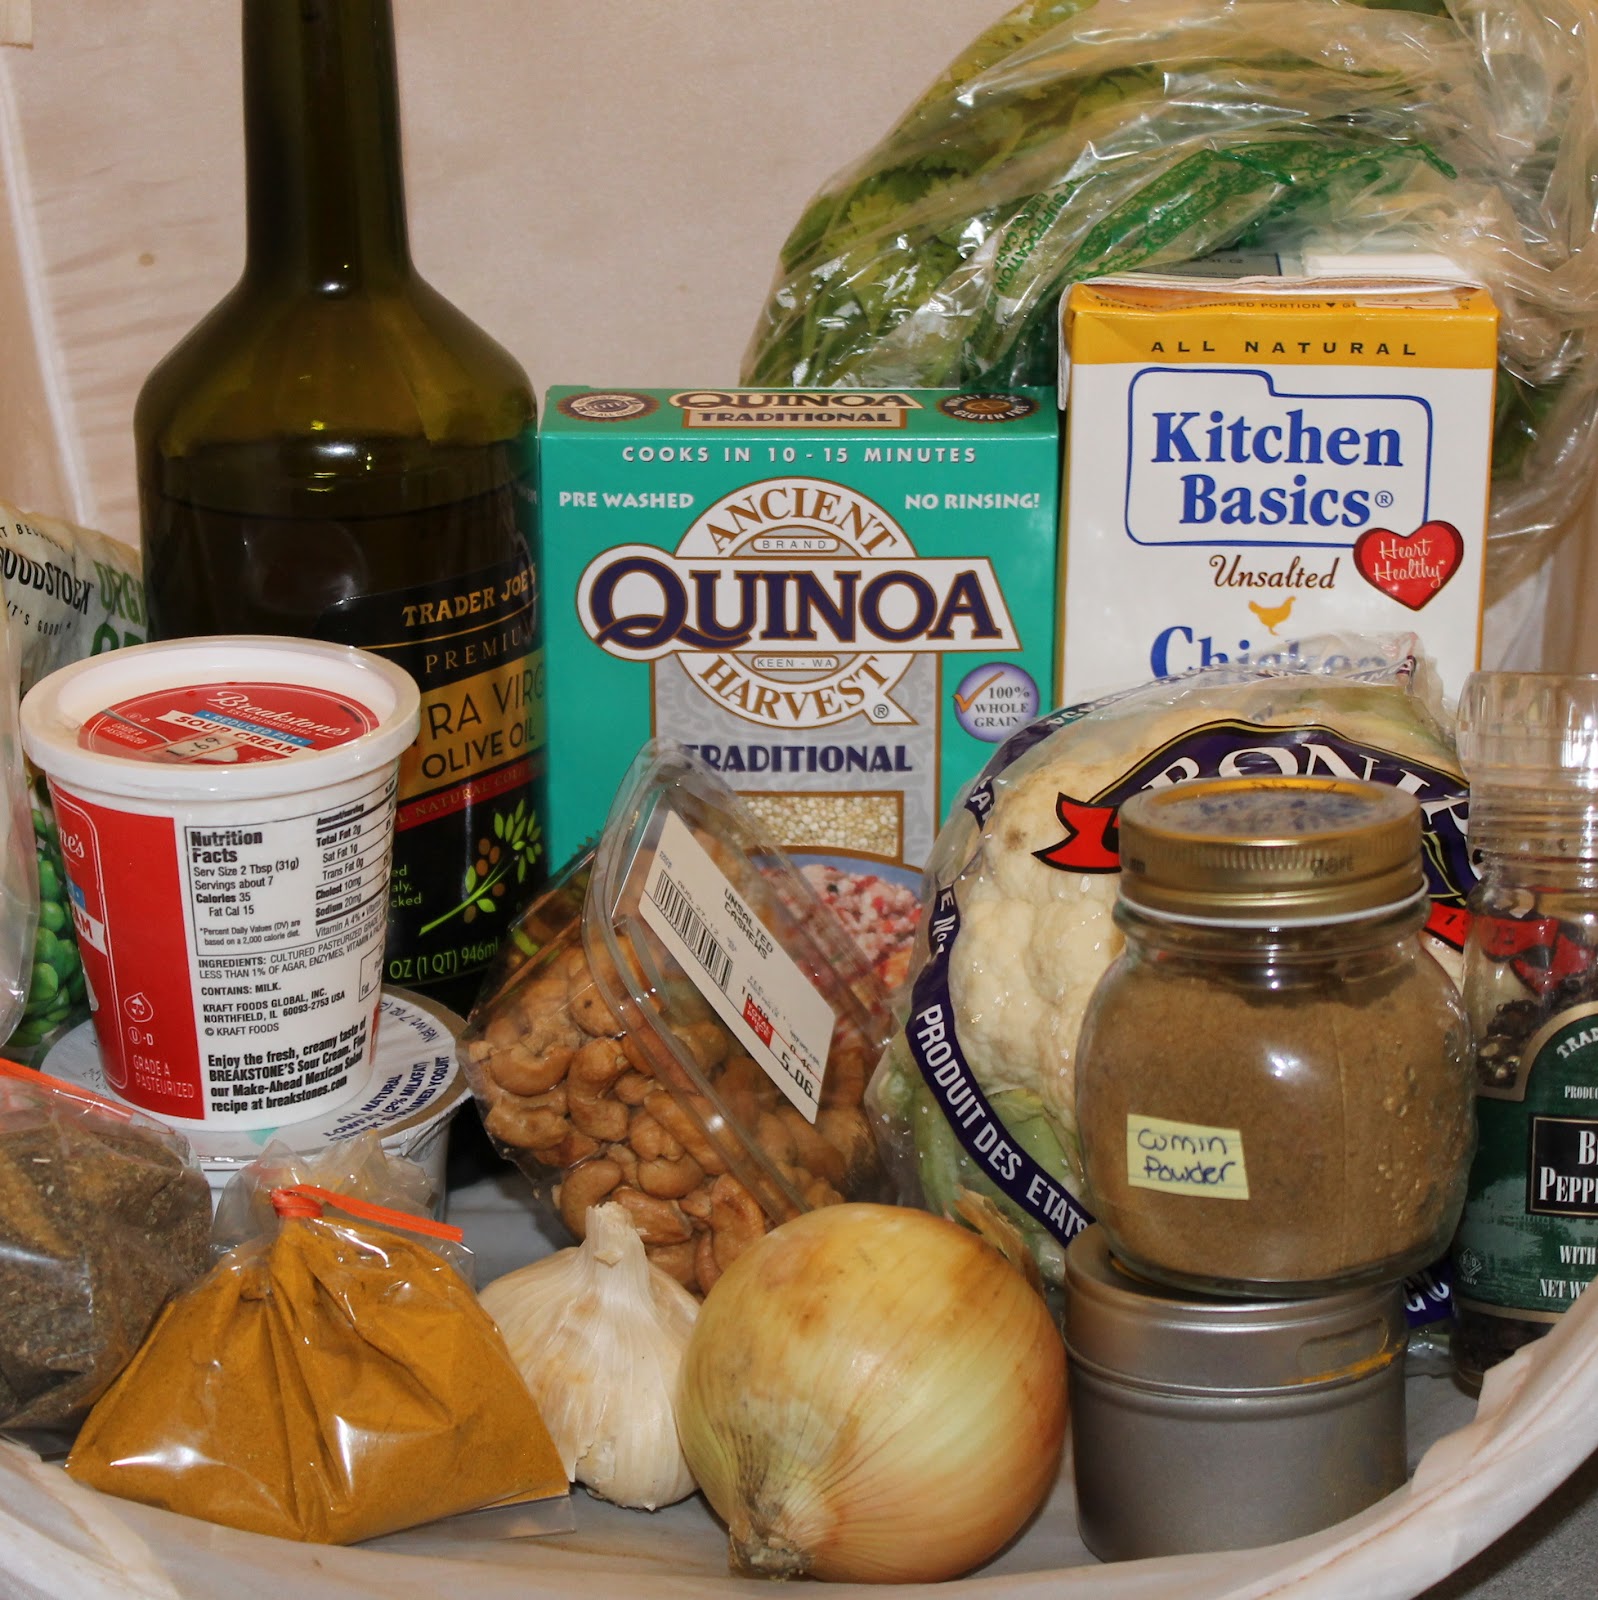
Ingredients:
  • 1 cup uncooked quinoa, rinsed and drained
  • 4 cups chicken broth, divided
  • 2 boneless skinless chicken breasts, cut into 1 inch pieces
  • 4 tablespoons olive oil, divided
  • 6 teaspoons curry powder, divided
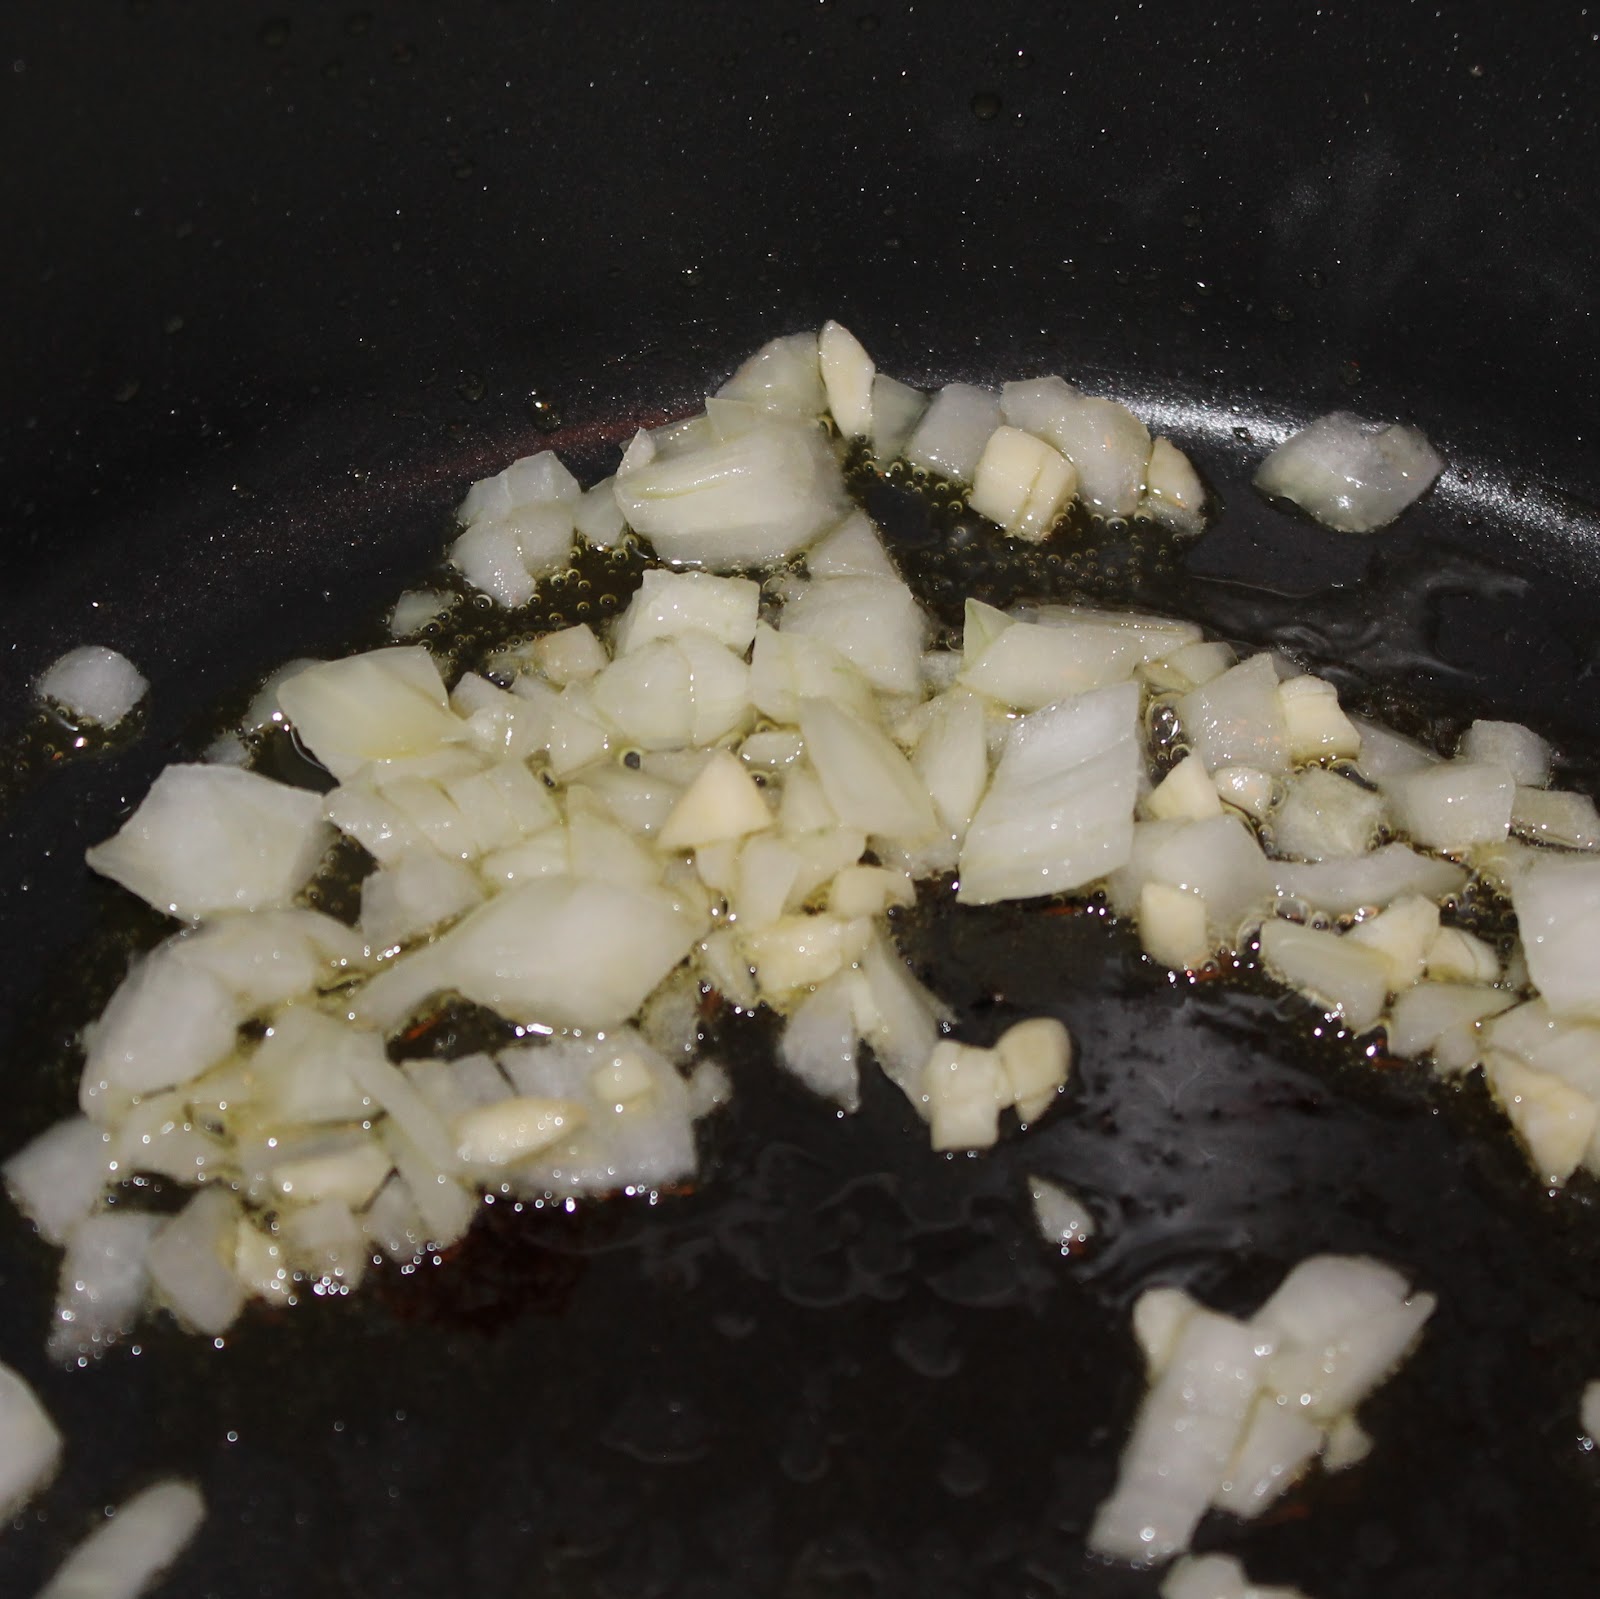
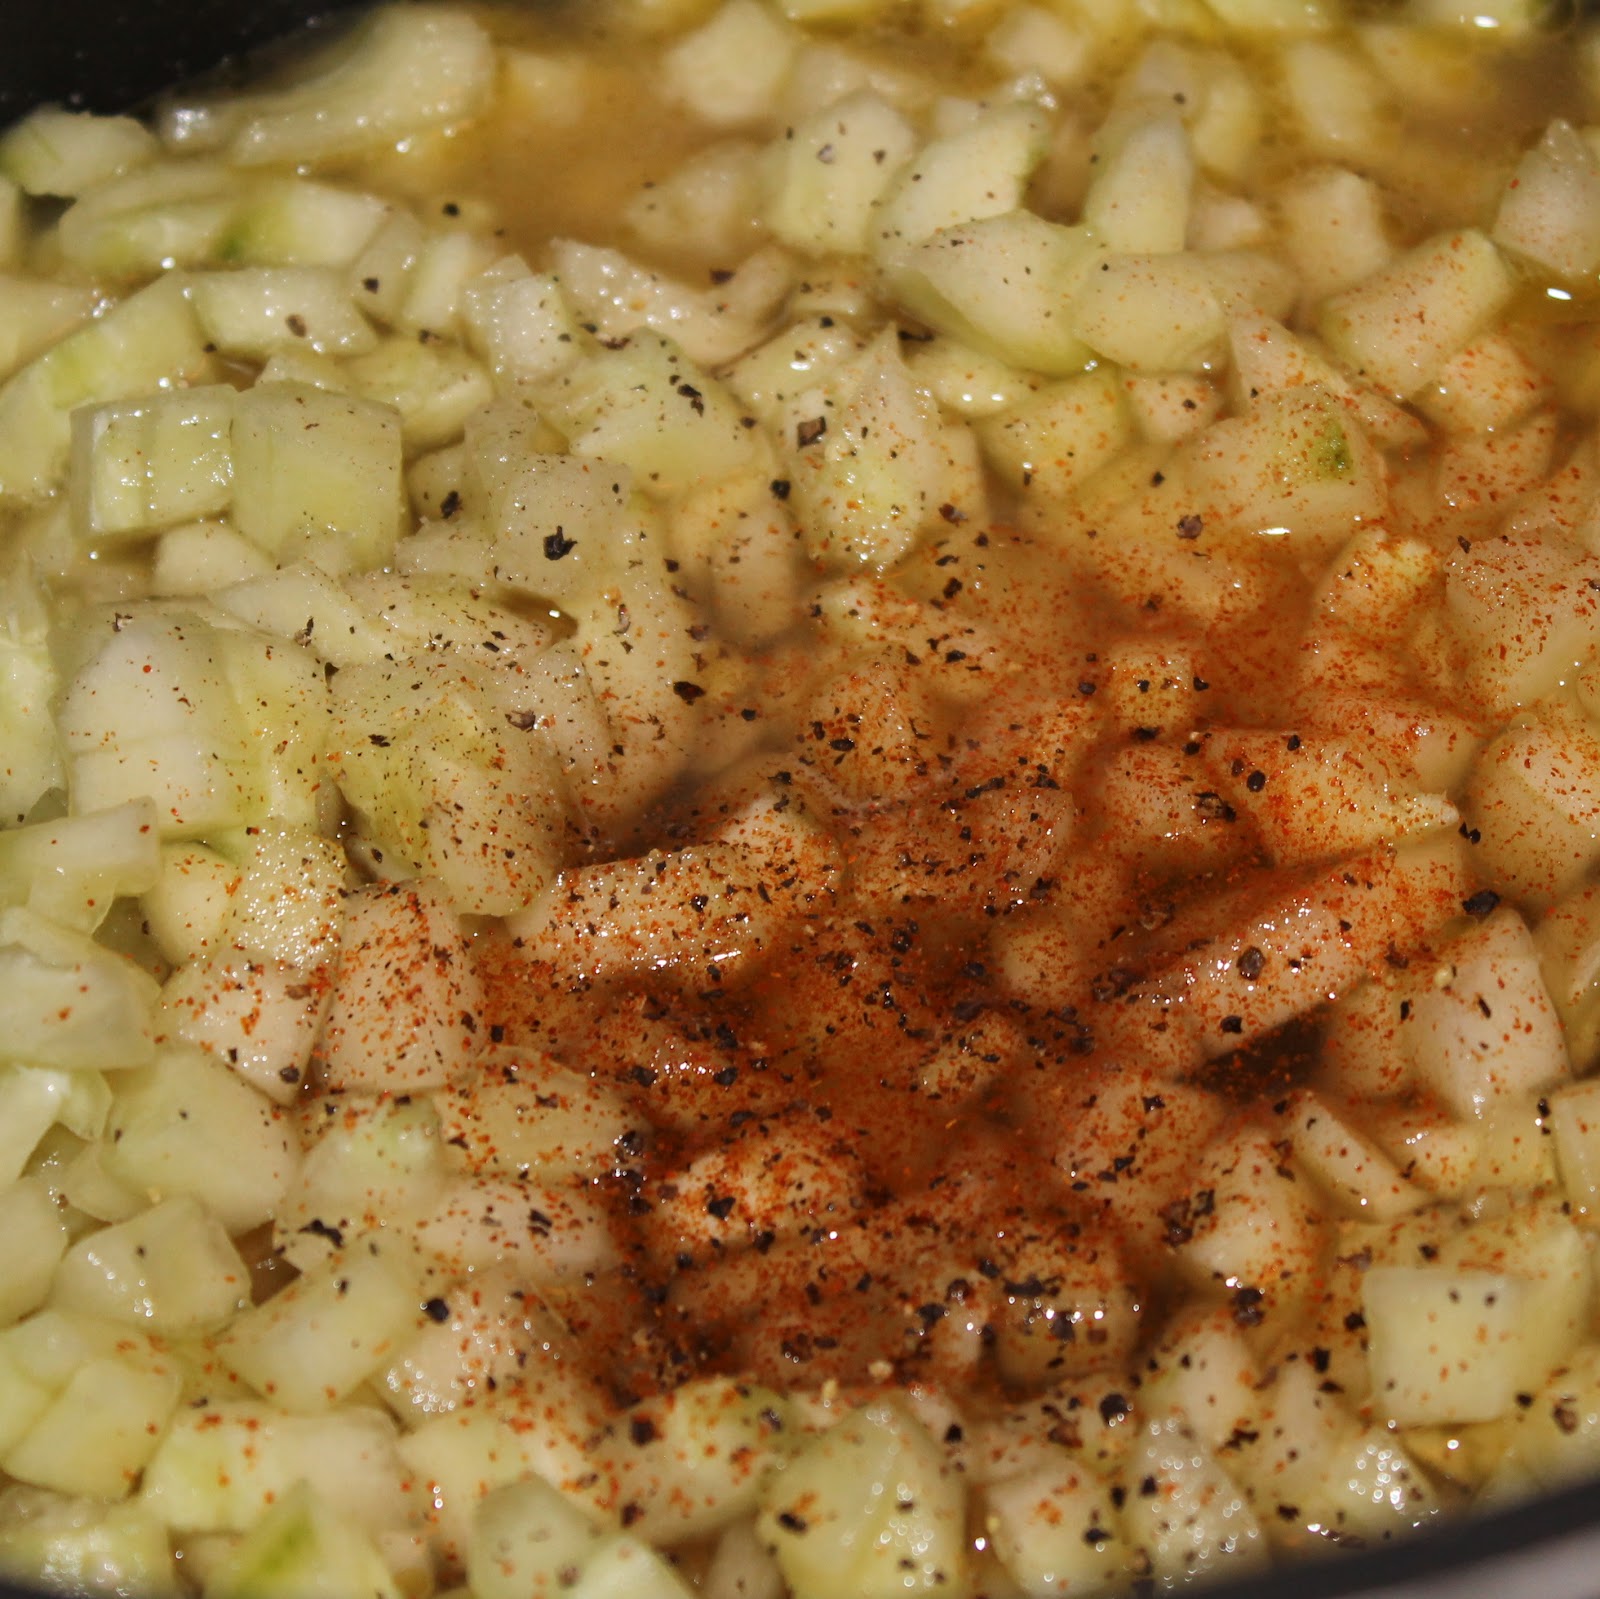
  • 1 medium yellow onion, chopped
  • 2 garlic cloves, minced
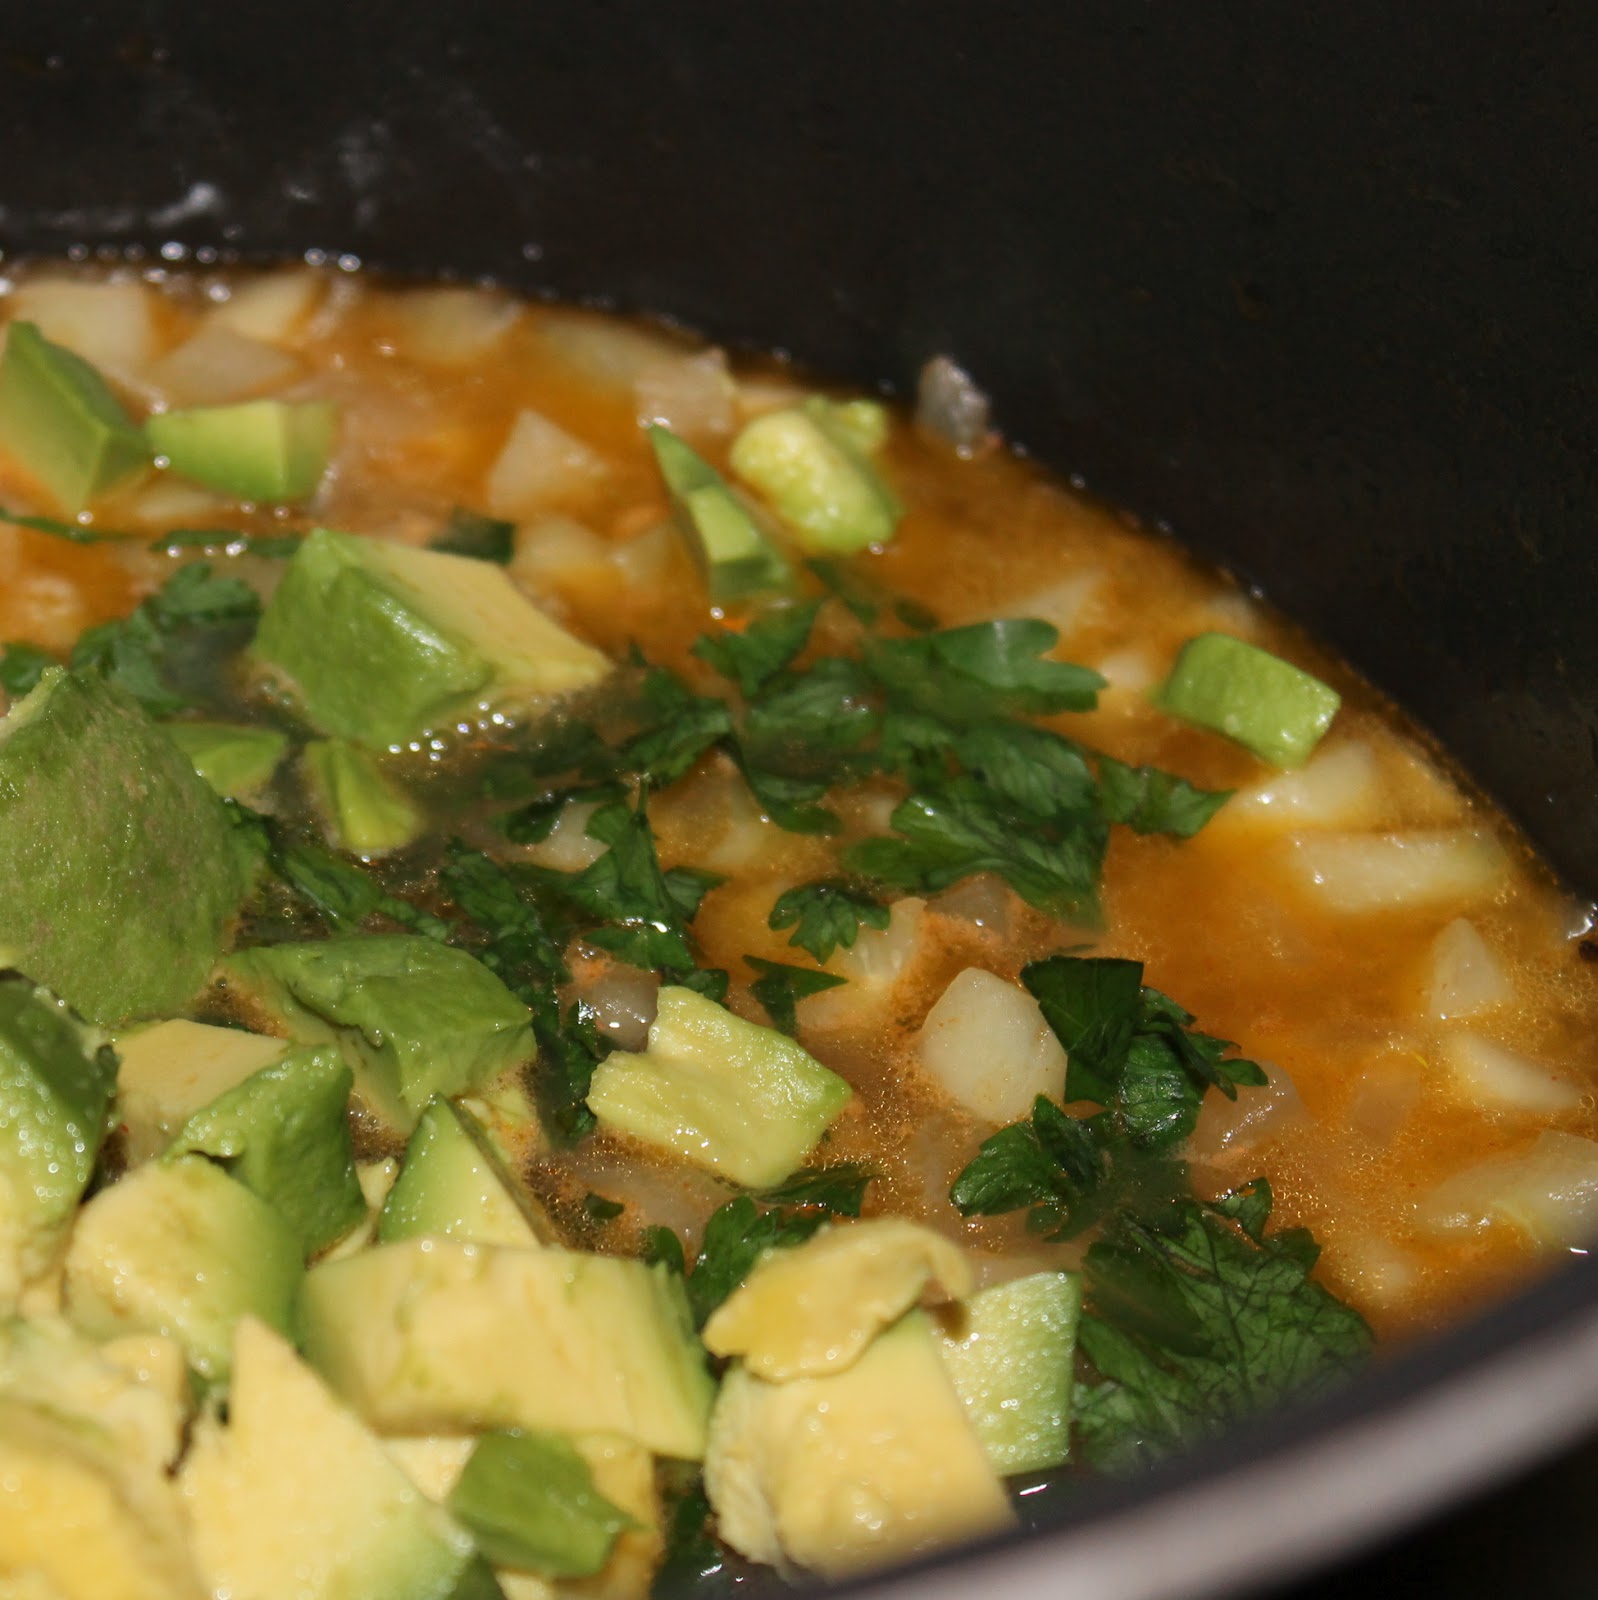
  • 1 cup frozen peas
  • 1 medium head cauliflower, chopped into 1 inch pieces
  • 1/2 tsp ground cumin
  • 1 tsp celery seed
  • 1/2 tsp fennel seed
  • 1/2 tsp turmeric
  • 1/3 cup plain low-fat yogurt
  • 1/3 cup nonfat sour cream
  • 1/2 cup cashews
  • 1/4 cup chopped fresh cilantro
  • 1/2 tsp salt
  • 1/2 tsp pepper
Yields 5 cups, or about 4 servings.

Cinnamon Rum-Spiked Grilled Pineapple with Ice Cream

When I was creating my Labor Day Round Up post, I realized one of my favorite grilling recipes was conspicuously missing. My friends and I love to soak pineapple in a rum-sugar mixture, heat it on the grill until the sugars caramelize, and dig in. Although I have been butchering the recipe all summer, I used this Cooking Light recipe as inspiration for our favorite summer grilling treat. Now that I am making this in my kitchen on a grill pan, I’m actually able to pair it with the ice cream for the full effect.
Ingredients:
1/4 cup packed brown sugar
1/4 cup dark spiced rum (such as Captain Morgan’s)
1 pineapple, peeled, cored, and sliced
1 tablespoon butter
1 pint vanilla ice cream
Cinnamon, to taste

Chili Oil Hummus

Hummus is probably my favorite snack. On days I don’t feel like cooking, I tend to grab some hummus with pita, tomatoes, cucumbers, or anything else that will work as a yummy vehicle for the hummus. It’s also really delicious as a spread on a sandwich instead of mayo. So I usually have at least one container of hummus in my fridge at any moment. But homemade hummus is exponentially better than the store bought stuff. Plus, you can customize it to your liking.

I recently watched a video of the hummus master himself, James Beard winner Michael Solomonov. Mike Solo has arguably the best hummus found in Philly, at his restaurant Zahav. I wanted to attempt to make my own creamy hummus at home. I tend to like mine slightly spicy, which can be achieved by adding a lot of garlic. But I have this awesome Nudo Chili Olive Oil, so I thought I’d include that to give it a bit of a kick, so I decided to make this Chili Oil Hummus!

Ingredients:
  • 1 can (15 oz) chickpeas
  • 2 large cloves of garlic, roughly chopped
  • ½ teaspoon salt
  • ¼ cup Tahini sesame seed paste
  • the juice of 2 lemons
  • 2 tablespoons chili olive oil (I used Nudo)
  • Paprika, for garnish
  • Chopped parsley, for garnish


Continue reading Chili Oil Hummus

Scallops Gratineed with Wine Garlic and Herbs

I am on a butter kick. Darn you, Julia Child, and your deliciously simple but butter-filled recipes. There are few things that change the taste of a meal as easily as really good butter. I’m talking full-fat, salted, hand-churned butter. Keep in mind, meals like this should not be a weekly staple. But my goodness are they fantastic as a treat. This recipe for Scallops Gratineed with Wine Garlic and Herbs is no different. I am obviously on a bit of a Julia Child kick at the moment as well which is well timed because her 100th birthday is coming up on August 15. Might I suggest making this lovely (but amazingly easy) recipe to celebrate? I made this as a meal for two, with a salad on the side. It would also make a wonderful appetizer, or just multiply as you see fit.


Ingredients:

  •  1/3 cup minced yellow onions
  • 1 tablespoon butter (I’m talking good butter, no substitutions here!)
  • 1 1/2 tablespoons thinly sliced green onions
  • 1 clove minced garlic
  • 4 washed dry scallops
  • salt and pepper, to taste
  • 1 cup flour in a dish
  • 2 tablespoons butter
  • 1 tablespoon olive oil
  • 2/3 cup dry white wine (I used a Sauvignon Blanc)
  • 1 small bay leaf
  • 1/8 teaspoon thyme
  • 1/4 cup grated Swiss cheese (I used gruyere)
  • 1 tablespoon butter cut into 6 pieces
 Excerpted from Mastering the Art of French Cooking by Julia Child. Copyright © 1961 by Alfred A. Knopf. Reprinted with permission from the publisher Alfred A. Knopf, a division of Random House, Inc.

White Wine Sangria Pops

I was at a restaurant on Long Island that had a drink they called a “lushee” which was basically a frozen sangria. And I haven’t been able to stop thinking about it. Pure brilliance. I told a friend about this and we knew we had to make our own, what could possibly be more refreshing on a hot summer day? I was recently sent a cookbook that actually one-upped the concept of the lushee: a White Wine Sangria Popsicle.
The book, Poptails, by Erin Nichols of Erin Cooks, is filled with sixty pops inspired by your favorite alcoholic beverages. Recipes range from classics like a gin and tonic to fancy favorites like a cosmopolitan.  There are even some awesome dessert pops like cherry cheesecake and banana split.  
 
 
I was in love with this book before I even received it. What an amazing idea! Who wouldn’t want their favorite drink in iced pop form? The recipes had me imagining all of the lovely get-togethers I could have: a brunch with iced coffee and bloody Mary pops, a pool party with strawberry basil martini pops, or Christmas in July with spiked eggnog, mulled wine, and Christmas cheer pops. Sigh.
Anyways, I kept thinking back to those lushes and knew I had to try the white wine sangria pops.
I tweaked the recipe within the book a bit. For the original recipe, pick up a copy of this fun book!
Ingredients:
1 bottle white wine (I used Sauvignon Blanc)
1 liter flattened seltzer water
1/4-1/3 cup cranberry juice (I used cranberry hibiscus)
1 tablespoon simple syrup, or to taste
1 pint raspberries
1 pint blackberries
1 pint blueberries                                
Note: You’ll need ice pop molds and Popsicle sticks to make these.

I wanted to start this post with the definition of seltzer, club soda, tonic water, and sparkling water. Because I always manage to mess these drinks up. And no wonder: club soda, seltzer and sparkling water are all water infused with carbonation.  These can all be interchanged. Tonic water is something a bit different, it is still a carbonated water, but quinine is dissolved into the water as well. It’s quite a bit more bitter so be sure to use club soda/seltzer/sparkling water in this recipe. Or for a bit more sweetness, a lemon-lime soda would work.
Make sure to allow your seltzer water to flatten. Don’t forget this step! Unflattened carbonated beverages will explode when frozen. And that sounds like an awful waste of white wine sangria if you ask me. The book suggests opening your seltzer 8 hours prior and popping it into your fridge in a place it won’t spill.
Combine the wine, flattened seltzer water, cranberry juice, and simple syrup. I used lemon simple syrup to give a touch more flavor. Feel free to add some lemon zest to add a little extra.  Add whatever mixture of berries you’d like to the pop molds. I went for one raspberry, one blackberry, and a few blueberries per pop.  Fill each mold ¾ of the way full with the mixture; you need to leave a small amount at the top to allow the liquid to expand.
Note: you’ll have some extra sangria that won’t fit in the pop molds. This is so you can enjoy your creation before waiting 24 hours 🙂
Add popsicle sticks, cover, and freeze for approximately 24 hours.
To remove from the molds, fill a bowl larger than your pop molds with warm (not hot) water. Add the mold to the bowl for 15 seconds then gently pull on the top of the ice pop stock. If the pop does not release, add the mold back to the water for another 15 seconds, repeat this process until the pops come out of the molds.
These pops were refreshing and a little bit tangy. I wanted a bit more sweetness though, I might add more simple syrup next time I make them. I also would add a bit more cranberry juice so that the pops turn a very light pink color, which would probably look really nice.
What’s nice about this recipe is how adaptable it is. You can add or subtract whatever fruit makes you happy. You could use a sweeter wine, or even a (flattened) champagne. My friend made this recipe using white grape juice instead of cranberry.
There are plenty of other creative pop recipes within the pages of this book. I love the element of fun that the popsicles add and can’t wait to try more of these yummy recipes!
White Wine Sangria Pops

Prep Time: 15 minutes

Total Time: 24 hours, 15 minutes

Yield: 8 servings

Ingredients

  • 1 bottle white wine (I used Sauvignon Blanc)
  • 1 liter flattened seltzer water
  • 1/4-1/3 cup cranberry juice (I used cranberry hibiscus)
  • 1 tablespoon simple syrup, or to taste
  • 1 pint raspberries
  • 1 pint blackberries
  • 1 pint blueberries

Instructions

  1. Make sure to allow your seltzer water to flatten. Don’t forget this step! Unflattened carbonated beverages will explode when frozen. And that sounds like an awful waste of white wine sangria if you ask me. The book suggests opening your seltzer 8 hours prior and popping it into your fridge in a place it won’t spill.
  2. Combine the wine, flattened seltzer water, cranberry juice, and simple syrup. I used lemon simple syrup to give a touch more flavor. Feel free to add some lemon zest to add a little extra. Add whatever mixture of berries you’d like to the pop molds. I went for one raspberry, one blackberry, and a few blueberries per pop. Fill each mold ¾ of the way full with the mixture; you need to leave a small amount at the top to allow the liquid to expand.
  3. Note: you’ll have some extra sangria that won’t fit in the pop molds.
  4. Add popsicle sticks, cover, and freeze for approximately 24 hours.
  5. To remove from the molds, fill a bowl larger than your pop molds with warm (not hot) water. Add the mold to the bowl for 15 seconds then gently pull on the top of the ice pop stock. If the pop does not release, add the mold back to the water for another 15 seconds, repeat this process until the pops come out of the molds.
Schema/Recipe SEO Data Markup by Yummly Rich Recipes
0.1
https://icancookthat.org/2012/07/white-wine-sangria-pops-from-poptails.html
                                                                                                                                  

Beet Risotto

I love the taste of beets, but preparing them is so time consuming that I tend to avoid buying them. Most recipes involving beets require you to roast the beets and then peel them. I came across a recipe for beet risotto in Food and Wine that just cooked the beets on the stove top in significantly less time. This risotto recipe is supposed to turn a beautiful red color from the beets. I didn’t get the same bright red color but I still love how it looks!
Ingredients:
  • 3 cups chicken stock or water
  • 1 tablespoon unsalted butter
  • 1 tablespoon extra-virgin olive oil
  • 1 large shallot, finely chopped
  • 2 large beets peeled and finely chopped, plus thinly sliced beets for garnish
  • 1 cup arborio rice
  • 2 ounces young pecorino cheese, freshly grated
  • 1 teaspoon poppy seeds, plus more for garnish

Continue reading Beet Risotto

Chilled Creamy Cucumber Soup

Cucumbers are everywhere right now, and as much as I love just eating them raw, I thought it might be a nice change to try to use them cooked. Cucumber soup, chilled, sounds oh so refreshing doesn’t it? I found this recipe for Chilled Creamy Cucumber Soup from Eating Well.  It uses an avocado and some plain yogurt, making a really creamy delicious soup. Plus, it only takes 35 minutes to make (it is additional time to chill).
Ingredients:
  • 1 tablespoon extra-virgin olive oil
  • 2 cloves garlic, minced
  • 1 small onion, diced
  • 1 tablespoon lemon juice
  • 4 cups peeled, seeded and thinly sliced cucumbers, divided
  • 1 1/2 cups vegetable broth, or reduced-sodium chicken broth
  • 1/2 teaspoon salt
  • 1/4 teaspoon freshly ground pepper
  • Pinch of cayenne pepper
  • 1 avocado, diced
  • 1/4 cup chopped fresh parsley, plus more for garnish
  • 1/2 cup low-fat plain Greek yogurt

Begin by prepping all your ingredients. Mince the garlic, dice the onion, peel, seed, and slice the cucumber, and dice your avocado. (I added a squeeze of lemon juice over the avocado to keep it from browning).
Heat the olive oil in a large pot over medium high heat. Add your onion and garlic to the pot, stirring occasionally. Cook for 4 minutes.
Add the lemon juice and cook for another minute. Add the cucumber, broth, salt, pepper, and cayenne (optional) and bring to a simmer.
Reduce heat and simmer for 6 to 8 minutes, or until the cucumbers are soft.

Add thesoupto a blender (be careful), removing the center of the top of the blender. Add the avocado and parsley.

Place a paper towel over the open hole before blending.  Blend on low until smooth. (I just do all of this in the pot using an immersion blender, I find it less hazardous hehe).

If you want to eat the soup hot, pour into a serving bowl and stir in the yogurt. Top with cucumber slices and garnish with parsley. If chilling the soup, refrigerate for at least one hour, then stir in the yogurt and garnish before serving.

The soup is smooth, a little tangy from the Greek yogurt, and ends with a slight hint of spice. I like mixing in the parsley and chopped cucumbers into the soup to give it some texture.

I love what I call “after work recipes.” I can make this when I get home and can eat before 8 pm. For an even more refreshing soup, try substituting mint or dill for the parsley.

Curry Clay Pot Chicken

I was recently sent a clay pot from Romertopf to try out and review. Cooking in a clay pot is something I never really thought about, or even considered.  You just cook your meal in a clay pot which has been soaking in water. This releases steam while it cooks and keeps the food moist. Clay pots have been used for cooking dating back to Roman times and are still used around the world.  The clay pots are perfect for making roast chicken, paella, ratatouille, or even dessert!
I honestly had no idea how to go about finding a recipe to try out my new spiffy clay pot. So I just used a recipe from the Romertopf website as my first attempt.  The Curry Clay Pot Chicken sounded right up my alley. (https://www.romertopfonline.com/chicken-recipes.htm)
Ingredients:
  • 1 pound skinless, boneless chicken thighs
  • 1/4 teaspoon salt
  • 1/8 teaspoon pepper
  • 1 teaspoon finely chopped fresh ginger
  • 1 tablespoon cornstarch
  • 6 small new red potatoes, cut into 1/2-inch slices (I forgot to cut mine! Make sure you do though!)
  • 6 baby carrots
  • 2 tablespoons vegetable oil
  • 2 teaspoons minced garlic
  • 1 medium onion, roughly chopped
  • 2 tablespoons curry powder
  • 1 medium tomato, cut into 1/2-inch wedges
  • 1 tablespoon soy sauce (or coconut aminos to make gluten free)
  • 1 teaspoon sugar

Continue reading Curry Clay Pot Chicken

Slow-Roasted Salmon with Baby Bok Choy and Coconut Rice

Tuesday I received one of my most anticipated ingredients (aside from tomatoes, can’t wait!!) from my CSA share: Fuyo Shumi, or Baby Bok Choy.  I am absolutely in love with this vegetable. It’s just a mini version of bok choy which has a cabbage flavor and is very popular in Asian cooking. I personally am not a fan of cabbage (sorry to my Irish roots), but love the subtle taste and crunchy texture of these little guys.  I’m always looking for new methods to cook salmon so this recipe from Cooking Light was the perfect opportunity. This recipe slow cooks the salmon to keep it really moist. Keep in mind you’ll need a good 30-40 minutes to make this dish.
Ingredients:
Salmon:
8 (6-ounce) salmon fillets
1/2 teaspoon salt
1/2 teaspoon freshly ground black pepper
Cooking spray 
Rice:
2 cups uncooked basmati rice
1 1/2 cups light coconut milk
1 1/2 cups water
1/4 teaspoon salt
Bok choy:
2 teaspoons canola oil
16 cups bok choy, trimmed and cut into 1 1/2-inch pieces (about 4 pounds)
1 tablespoon minced peeled fresh ginger
1/2 cup sake (rice wine)
1/4 teaspoon salt
Sauce:
1/3 cup fresh lime juice
1/4 cup seasoned rice vinegar
3 tablespoons brown sugar
2 tablespoons Thai fish sauce
1/2 teaspoon red curry paste (such as Thai Kitchen)


Preheat the oven to 250 degrees. Season the salmon with salt and pepper. Place the salmon on a baking sheet coated with cooking spray, skin side down.


Bake for 30 minutes or until the fish flakes easily. Cut off all the drippings.


While the salmon is cooking, rinse the rice in cold water and drain. Combine the rice, coconut milk, 1.5 cups water and ¼ teaspoon salt in a sauté pan. Bring to a boil over high heat and stir. Cover, reduce heat, and simmer for 20 minutes or until liquid is absorbed. Remove from heat and let stand for 10 minutes. 
Cut the baby bok choy pieces in half
 

While the rice is standing, heat the canola oil in a large sauté pan over medium-high heat. Add the bok choy and ginger and sauté for 1 minute. 
Add the sake and ¼ teaspoon salt, cover, and cook for 2 minutes until the bok choy wilts. Remove from heat and keep warm.

Add the lime juice, rice vinegar, cilantro, brown sugar, fish sauce, and red curry paste to a bowl. Whisk to combine.


Serve over the salmon, rice, and bok choy.
Um. Yum. What an awesome dinner! The flavors go so well together. The sauce has a little tanginess that I really liked with all of the parts of this dish, but especially the rice. The salmon, because it was cooked at a low temperature, came out really moist. And the baby bok choy was crunchy, wilty, and flavorful all at the same time.
This will definitely become a staple meal for me!

Ratatouille

With the influx of vegetables in my life from my CSA, I am swimming in quite a large amount of highly perishable produce. So to preserve (and use) a bunch of my CSA veggies, I decided to try my first hand at Ratatouille. I looked at a bunch of recipes online and they can get really quite complex! There are some that cook each vegetable separately to bring out the flavor of each, some that layer the ingredients into a beautiful casserole. Well, I’m making this on a weeknight after work. So this is one of the easier versions, a one pot wonder if you will. One day, I will make the other version, but tonight, I just want a delicious meal that I can freeze for later.
So what is ratatouille, besides a really cute kids movie? It’s basically a stewed vegetable dish, usually served with bread, or maybe egg noodles or polenta (something to sop up all the deliciousness). There are many different recipes for the dish, but most include eggplant, zucchini, peppers, and onions. The spices can range from thyme or marjoram to herbes de Provence.
I found this recipe on MarthaStewart.com and kind of messed with the ratio of ingredients, so be sure to check out the original recipe to see if that is more to your liking.
Ingredients:
1/4 cup olive oil (or enough to cover the bottom of your pot)
1 medium onion, chopped (I used a sweet onion)
4 cloves garlic, minced
3 small eggplants,  cubed
2 large zucchini, cubed
Salt and ground pepper, to taste
2 yellow or bell peppers, ribs and seeds removed, cubed (use any color pepper you want)
1 can (28 ounces) diced tomatoes
2 teaspoons fresh thyme
Chopped fresh basil, for garnish

To make, add the olive oil to a Dutch oven or other large pot that has a lid. Heat over medium heat. While waiting to heat, chop your onions, garlic, eggplant, and zucchini.
I want to take a minute to discuss a method of cutting eggplant. I googled this just as I was about to make the recipe so it was new to me too and it worked quite well. I found the method on recipetips.com.
To cut the zucchini, remove the skin using a knife by cutting the zucchini into a square shape (or close to a square.)
Slice the zucchini into smaller square disks.
Stack a few of them, and cut into fours to make smaller squares. This doesn’t have to be uniform, you just want them to be the same general shape so they cook evenly.
Add the onions to the pot and stir occasionally. Cook for 5 minutes.
Add the garlic and cook for another minute. Stir in the eggplant and zucchini and season with salt and pepper. Add 3/4 cup of water, cover, and simmer for about 5 minutes, stirring once half way through. While waiting for the 5 minutes to pass, chop your peppers.
Add the peppers to the pot and simmer, covered, for another 5 minutes.
Add the tomatoes and thyme and bring to a boil.
Reduce heat to medium-low, partially cover, and simmer for 15 to 20 minutes. The recipe said to stir often. I didn’t. I got distracted and walked away. Oh well.
Remove from heat and serve.  Top with a few slices of basil.
If freezing, leave the basil out and freeze.
For being vegetarian, doesn’t this look fabulously hearty?
I paired mine with day old bread which was a perfect amount of crispiness to go with the veggies. It may not be terribly pretty, but it was comforting and really flavorful.
I ate one serving and froze the rest for nights when I don’t have time to cook. I’m glad I did or I’d still be sitting here eating it!

Vichyssoise (Cold Leek & Potato Soup)

I figured it was about time I posted another Julia Child recipe. I have to admit, the past two weeks recipes intimidated me quite a bit, so I didn’t even make them. Although I have to say, Coq au Vin is not even close to being a weeknight friendly meal. Vichyssoise, or cold leek and potato soup, is more my speed. I’m pretty “skilled” at throwing things into a pot and letting time do the work. This isn’t a meal you can make and eat within one night, unless you have the luxury of beginning your meal much earlier in the day. I cooked this one night, chilled it overnight, and served it for dinner the next night. The original recipe is quite simple. I added crumbled bacon on top because, well, what isn’t better with bacon?
Ingredients: (I didn’t want a ton of soup sitting around so I scaled the recipe down. This makes about 2 hearty bowls)
  • 4 cups of chicken stock (or vegetable stock for vegetarian)
  • 2 cups of sliced leeks, white part only
  • 2 cups of peeled and chopped potatoes
  • 3/4 cup heavy cream
  • Salt and pepper, to taste
  • 1 piece of cooked bacon, crumbled
  • Chives, for garnish
Excerpted from Mastering the Art of French Cooking by Julia Child. Copyright © 1961 by Alfred A. Knopf. Reprinted with permission from the publisher Alfred A. Knopf, a division of Random House, Inc.

Continue reading Vichyssoise (Cold Leek & Potato Soup)

Seared Chicken with Avocado Salsa

I have inexplicably been picking up an avocado each and every time I buy groceries. I didn’t have a recipe for the avocados, I just kept buying them. I guess my subconscious really wanted one. So I finally sat down and found a recipe highlighting them: Seared Chicken with Avocado. I added some tomato to give it a bit more freshness but the rest of the recipe is pretty intact.
Ingredients:
  • 1 1/2 teaspoons blackened seasoning
  • 4 skinless, boneless chicken breast halves
  • 1 teaspoon coconut oil
  • 1 diced peeled avocado
  • 2 tablespoons chopped fresh cilantro
  • 1 jalapeño pepper, seeded and finely chopped
  • 2 tablespoons fresh lime juice (about 1 lime), plus the zest of the lime
  • 1/2 a tomato (or one plum tomato), diced

Continue reading Seared Chicken with Avocado Salsa

Grilled Duck with Warm Mushroom Salad and Truffle Vinaigrette

Happy Memorial Day weekend! Grilling is synonymous with Memorial Day in my mind, so I was so happy to receive a Grilling Cookbook from Cooking Light a few days ago.  The cookbook: Cooking Light Way to Cook Grilling: The Complete Visual Guide to Healthy Grilling is pretty darn snazzy. The photos are gorgeous, so um, please don’t compare my crummy photos for this recipe to the ones in the book, that will make me sad. Anyways, when I saw a recipe for grilled duck, I wanted to try it. I love duck, it’s a go-to for me at restaurants. But, I’m beyond terrified to cook it myself. It’s a tough meat to cook, and if overcooked, can be super crummy. Plus, it’s not exactly cheap! But grilling? I think I can handle that…
This recipe sounded like it was written just for me and my boyfriend. Before even opening the cookbook this was our conversation:
“We should try grilling a meat we’ve never made before, I’m not in the mood for a normal burger”
“Yeah, and maybe we can grill up some asparagus and mushrooms as well. I do want a meat as part of the meal though.”
We turn to this recipe, which managed to incorporate all of our requirements, and we were sold. The only thing we weren’t sold on? The marinating time. The original recipe suggested marinating the duck overnight, up to two days. We wanted duck, and we wanted it well before tomorrow, so our marinating was closer to 3 hours instead. There are also some pretty pricey ingredients in this dish, so this would definitely be a special occasion type of meal.


Ingredients:
  • 2 tablespoons chopped fresh rosemary
  • 2 tablespoons chopped fresh parsley
  • 1 tablespoon olive oil
  • 4 (6-ounce) boneless duck breast, skinned
  • 3 garlic cloves, minced
  • 1/2 teaspoon salt, divided
  • 1/4 teaspoon freshly ground black pepper, divided
  • Cooking spray
  • 3 cups thinly sliced shiitake mushroom caps (about 5 ounces)
  • 2 cups thinly sliced portobello mushroom caps (about 5 ounces)
  • 3/4 cup (1/4-inch) diagonally cut asparagus
  • 1 1/2 tablespoons Champagne vinegar
  • 1 1/2 teaspoons truffle oil

Continue reading Grilled Duck with Warm Mushroom Salad and Truffle Vinaigrette

Black Bean Soup with Orange Jalapeno Salsa

Every food blogger dreams of walking out of their day job and never looking back to pursue a full-time career in food. Most keep this as a fun little pipe dream to think about while sipping on their morning coffee. Michael Natkin, however, did the unthinkable. He took a sabbatical from his job as a software engineer and spent 6 months immersed in food, experiencing Italy and Israel through food with his family and interning in the kitchen at Cafe Flora. He dove into the world of food full time this year.
His blog, Herbivoracious, has been going strong since 2007. If you’ve never seen it, go there. Now. I’ll wait…. Fantastic, right?!

Michael’s cookbook based off his super popular blog, Herbivoracious: A Flavor Revolution with 150 Vibrant and Original Vegetarian Recipes, was released on May 9. Michael has been touring America to promote his book and recently came through Philadelphia. He hosted a food blogger event at the fantastic R2L, where local bloggers (like yours truly) were treated to bites from the kitchen and the opportunity to chat with Michael himself.

So, the cookbook is vegetarian. It honestly doesn’t even need to be mentioned though because the recipes inside the pages of this book are not wimpy, skimpy meals. As his blog states “You Don’t Have To Be A Vegetarian To Love This Cookbook!” and he is so right. The recipes are really inventive and sound so appetizing that you won’t even wonder where the meat is. Michael kindly allowed me to pick any recipe I wanted from the book to use for this post and boy did I have a problem. I am not exaggerating when I tell you I tagged over 50 recipes as possibilities.
see?
I finally decided on this recipe for Black Bean Soup with Orange Jalapeno Salsa when I mentioned it to my boyfriend and his eyes lit up. I altered the recipe ever so slightly, so check out the original at the link. You should check it out anyways because Michael gives some really great tips prior to the recipe.
Ingredients:
  • 6 cans black beans
  • Vegetable broth
  • 2 bay leaves
  • 3 tablespoons olive oil
  • 1 white onion, diced
  • 1 yellow bell pepper, diced
  • 4 cloves garlic, minced
  • 1 tablespoon dried oregano
  • 1 teaspoon dried cumin
  • 1 teaspoon paprika
  • 1/2 teaspoon ground chipotle
  • 6 mandarin oranges (or fewer, larger oranges)
  • 1/4 cup red onion, finely diced
  • 1jalapeno pepper, finely diced
  • 1 handful cilantro leaves
  • salt to taste
  • Sour cream
Each recipe in the cookbook mentions any dietary restrictions that are satisfied within the recipe. This soup is vegetarian, vegan if the sour cream is omitted, and is gluten-free. This recipe serves 6. 

Strawberry-Mint Sparkling Limeade

I have a confession. I honestly don’t get the brunch obsession with mimosas. Every time I order one, I end up drinking maybe half of it. It just doesn’t do it for me. I love the general idea of them though: sparkling wine with fruit juice. So I was really excited to find this drink recipe in Cooking Light. It sounds right up my alley!
Ingredients (makes 6 servings):
1 container of strawberries, sliced
1/2 cup loosely packed fresh mint leaves
the juice of 4 limes
1/4 cup water
1/4 cup agave nectar
1 (750-milliliter) bottle sparkling wine, chilled

To make, place the strawberries, mint leaves, limes, water, and agave nectar in a blender.
Blend until smooth, about 1 minute.
Pour enough of the mixture into a glass to fill the glass half way.
Carefully fill with the sparkling wine and gently mix to combine.
Serve garnished with mint leaves and a whole strawberry, if desired.
So as you can see from my ingredients photo, you do not need to buy an expensive sparkling wine for this. I used a rose to give it a little extra flavor, but a normal white sparkling wine will do just fine.
This is one of the most refreshing drinks I’ve ever had! The lime and agave completely balance each other out, so it’s not to sweet or too sour.
The mint-strawberry-lime flavor can be tasted in every sip, it’s just perfect!
Note: you can substitute in 3 cups club soda for the wine if you’d like an alcohol-free version. I personally would add another maybe teaspoon of agave to account for the lack of sweetness in the club soda.
Exit mobile version