I am very vocal about my love of Cooking Light and myrecipes.com in general. I think it is a fantastic resource to find delicious recipes of all kinds and sort them easily and helpfully. I was recently sent a copy of myrecipes’ America’s Favorite Food: 200 Top-Rated Recipes from the Country’s Best Magazines which is a collection of recipes from All You, Coastal Living, Cooking Light, Health, Real Simple, Southern Living, and Sunset magazines.
What makes this cookbook different than any I’ve ever seen, is that it incorporates a Scan-It/Cook-It technology. Once you download the free Digimarc Discover app onto your smartphone, you are able to scan photos and info boxes in the cookbook which opens up how-to videos, shopping lists, and related recipes. Brilliant!
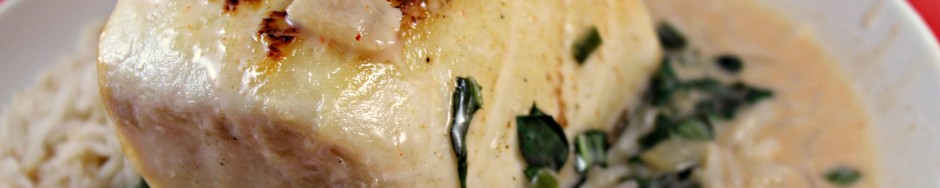
When I scanned the photo of the recipe I was making (Halibut with Coconut-Red Curry Sauce), it opened a how-to video to see how to prepare the dish, which is a wonderful tool for beginner cooks. The recipe also includes a side bar with substitutes and even tips on how to cook fish without smelling up the whole house.
This is the perfect cookbook for all levels of home cooks and I’m happy to be able to giveaway a copy of this cookbook! Check out the widget below to enter…
Ingredients:
2 teaspoons canola oil, divided
4 (6-ounce) halibut fillets
1 cup chopped onion
1/2 cup chopped green onions
1 tablespoon grated peeled fresh ginger (or a punch of ground ginger)
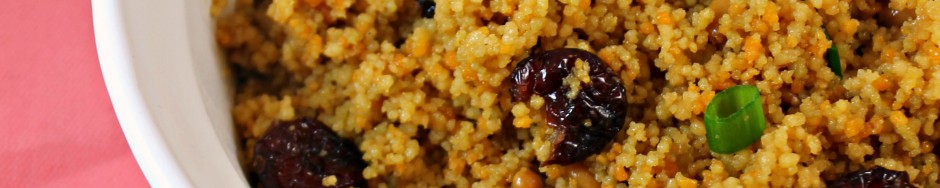
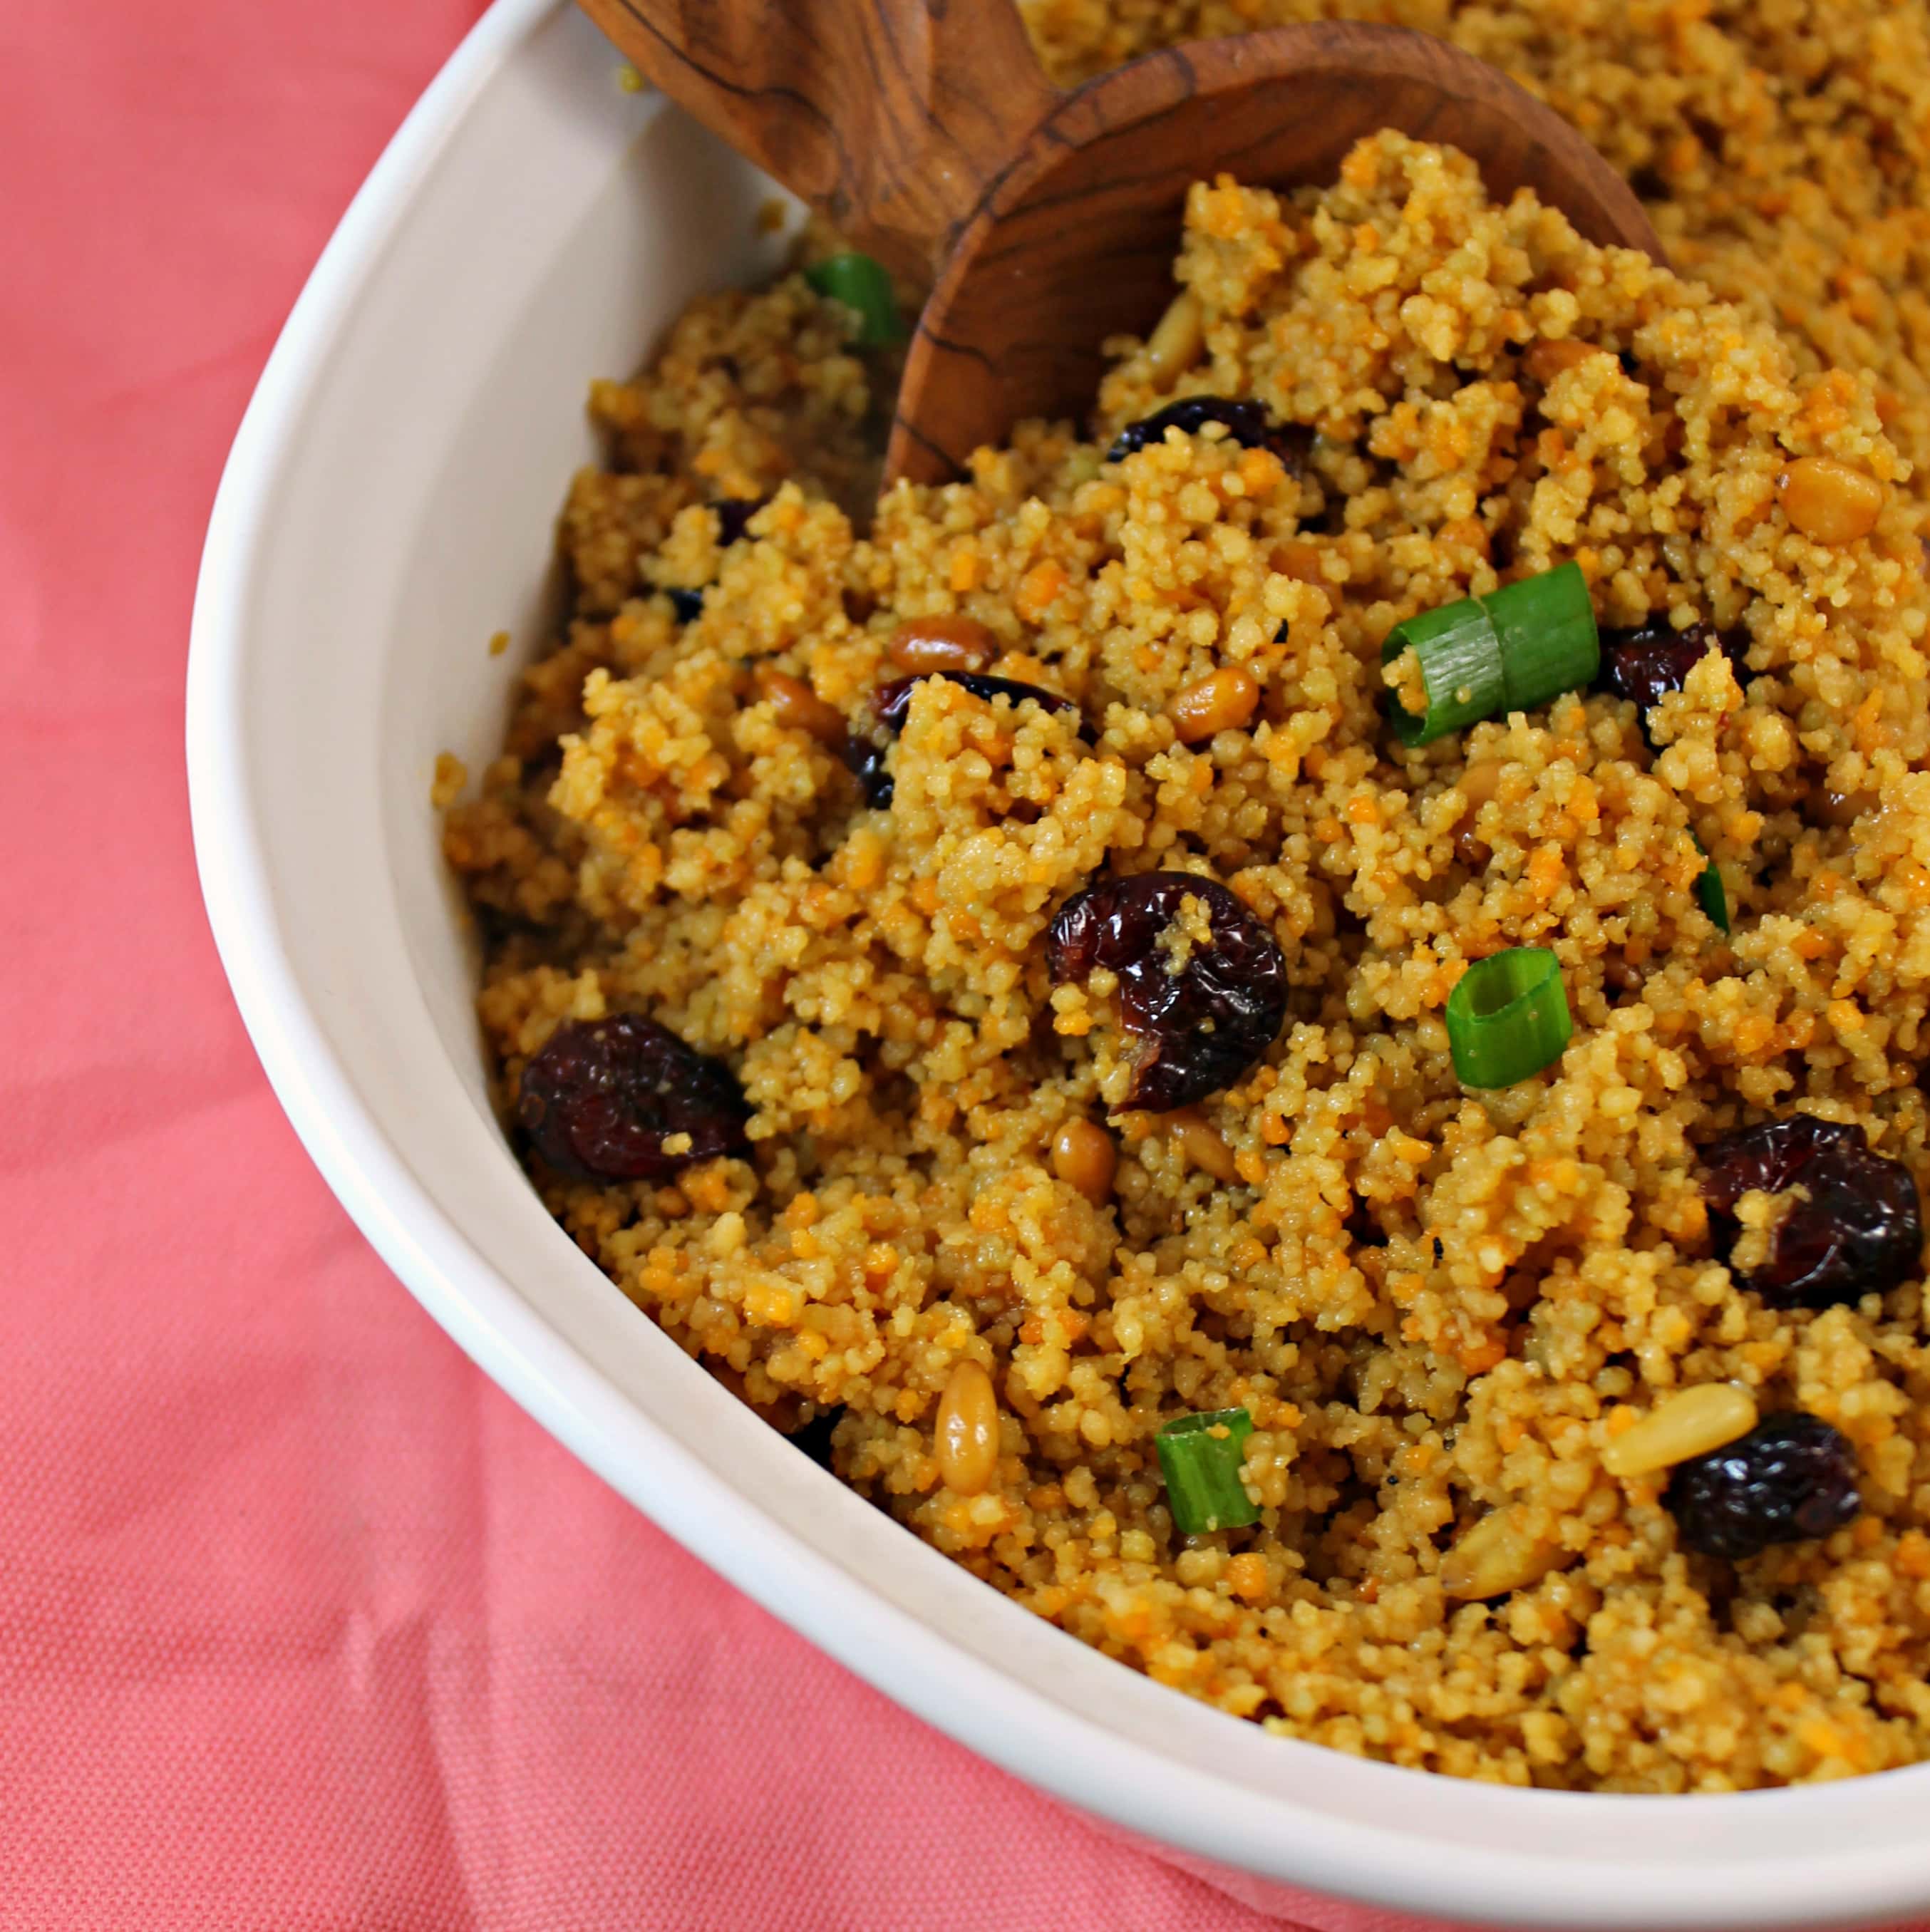
I need more sides in my life. Couscous is a great weekday choice because it’s so quick to make, maybe 20 minutes in total. This recipe is from the Fresh & Healthy DASH Diet Cooking Cookbook which I absolutely love. The DASH (Dietary Approaches to Stop Hypertension) diet was developed by the National Heart, Lung, and Blood Institute a encourages increasing whole grains, nuts, fruits, vegetables, low-fat dairy and lean proteins and minimizing processed gains, high-fat meats and dairy, sugars and sodium… which is basically more just eating healthy versus a diet.
This couscous recipe is made with vegetable broth to give it some flavor with bites of pine nuts, dried cranberries, and scallions.
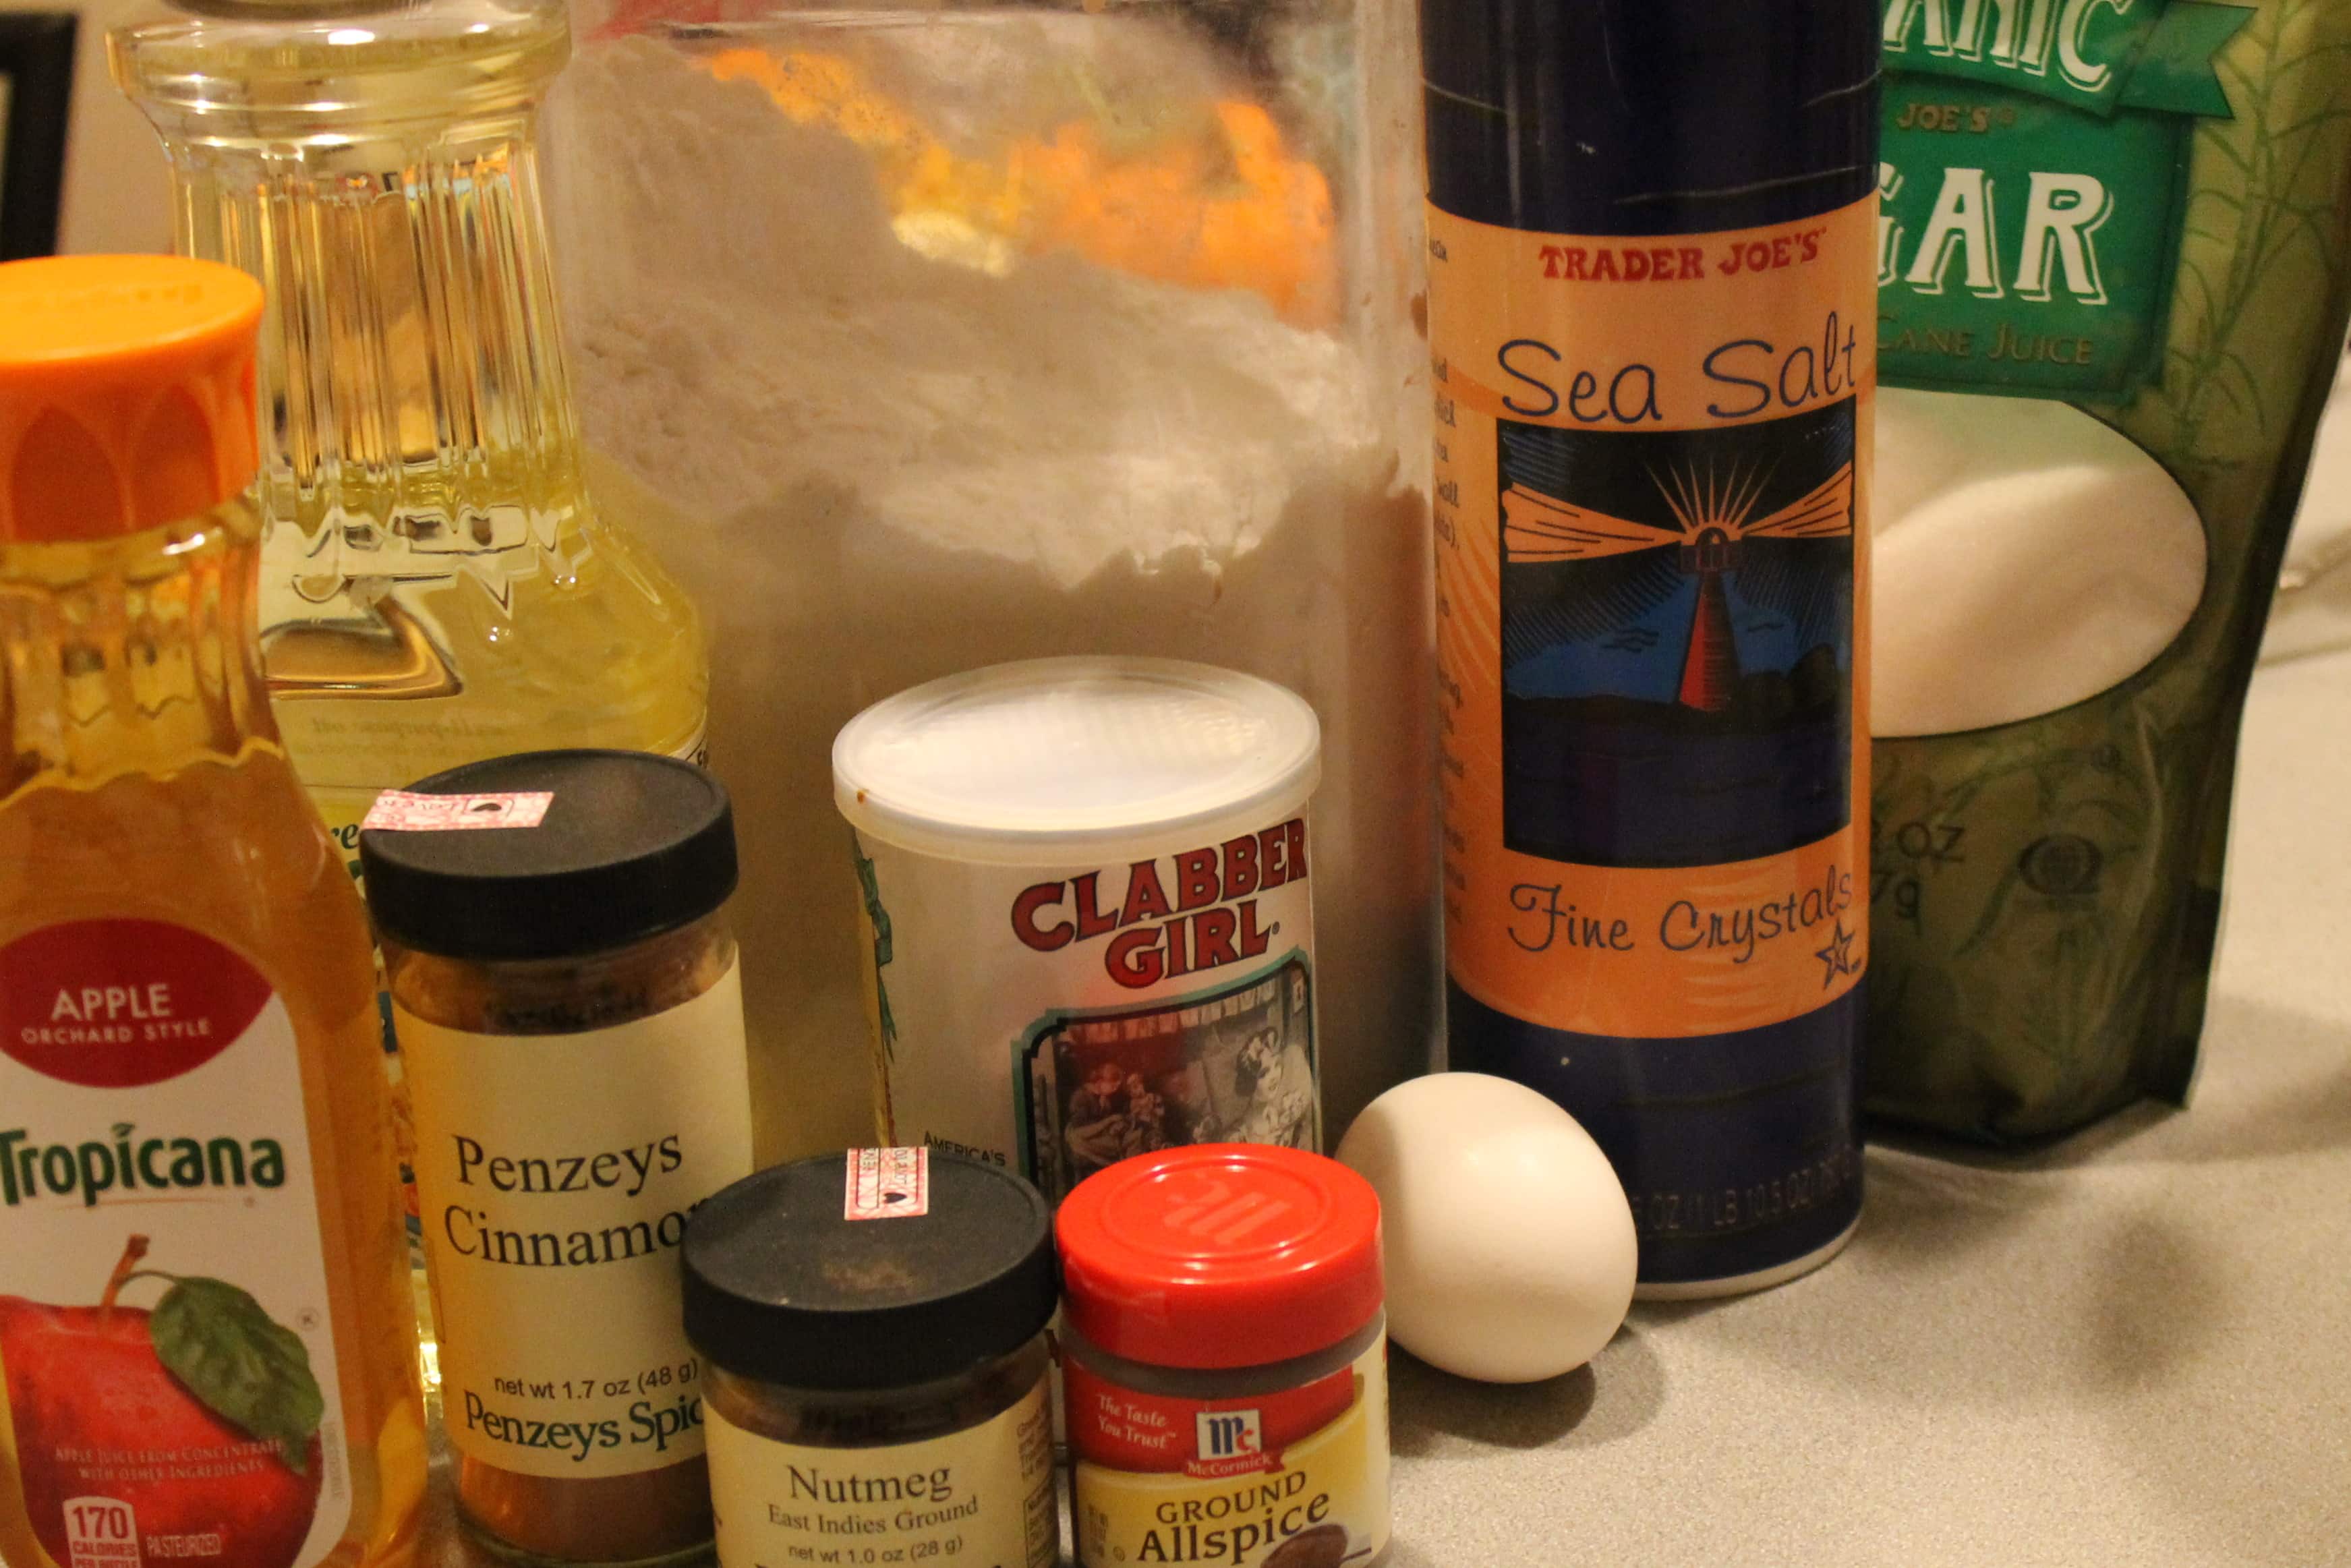
I wanted to make another batch of the Applejack Spiked Hot Cider but *gasp* I couldn’t find any apple cider anywhere! There must have been a Thanksgiving rush, but I wanted some darn Apple Cider. But then I remembered I bought a Babycakes Cake Pop Maker (paid link) and figured I could at least make Apple Cinnamon Donut Holes as a sweet apple-y substitute. (Because I couldn’t find apple cider, I substituted apple juice)
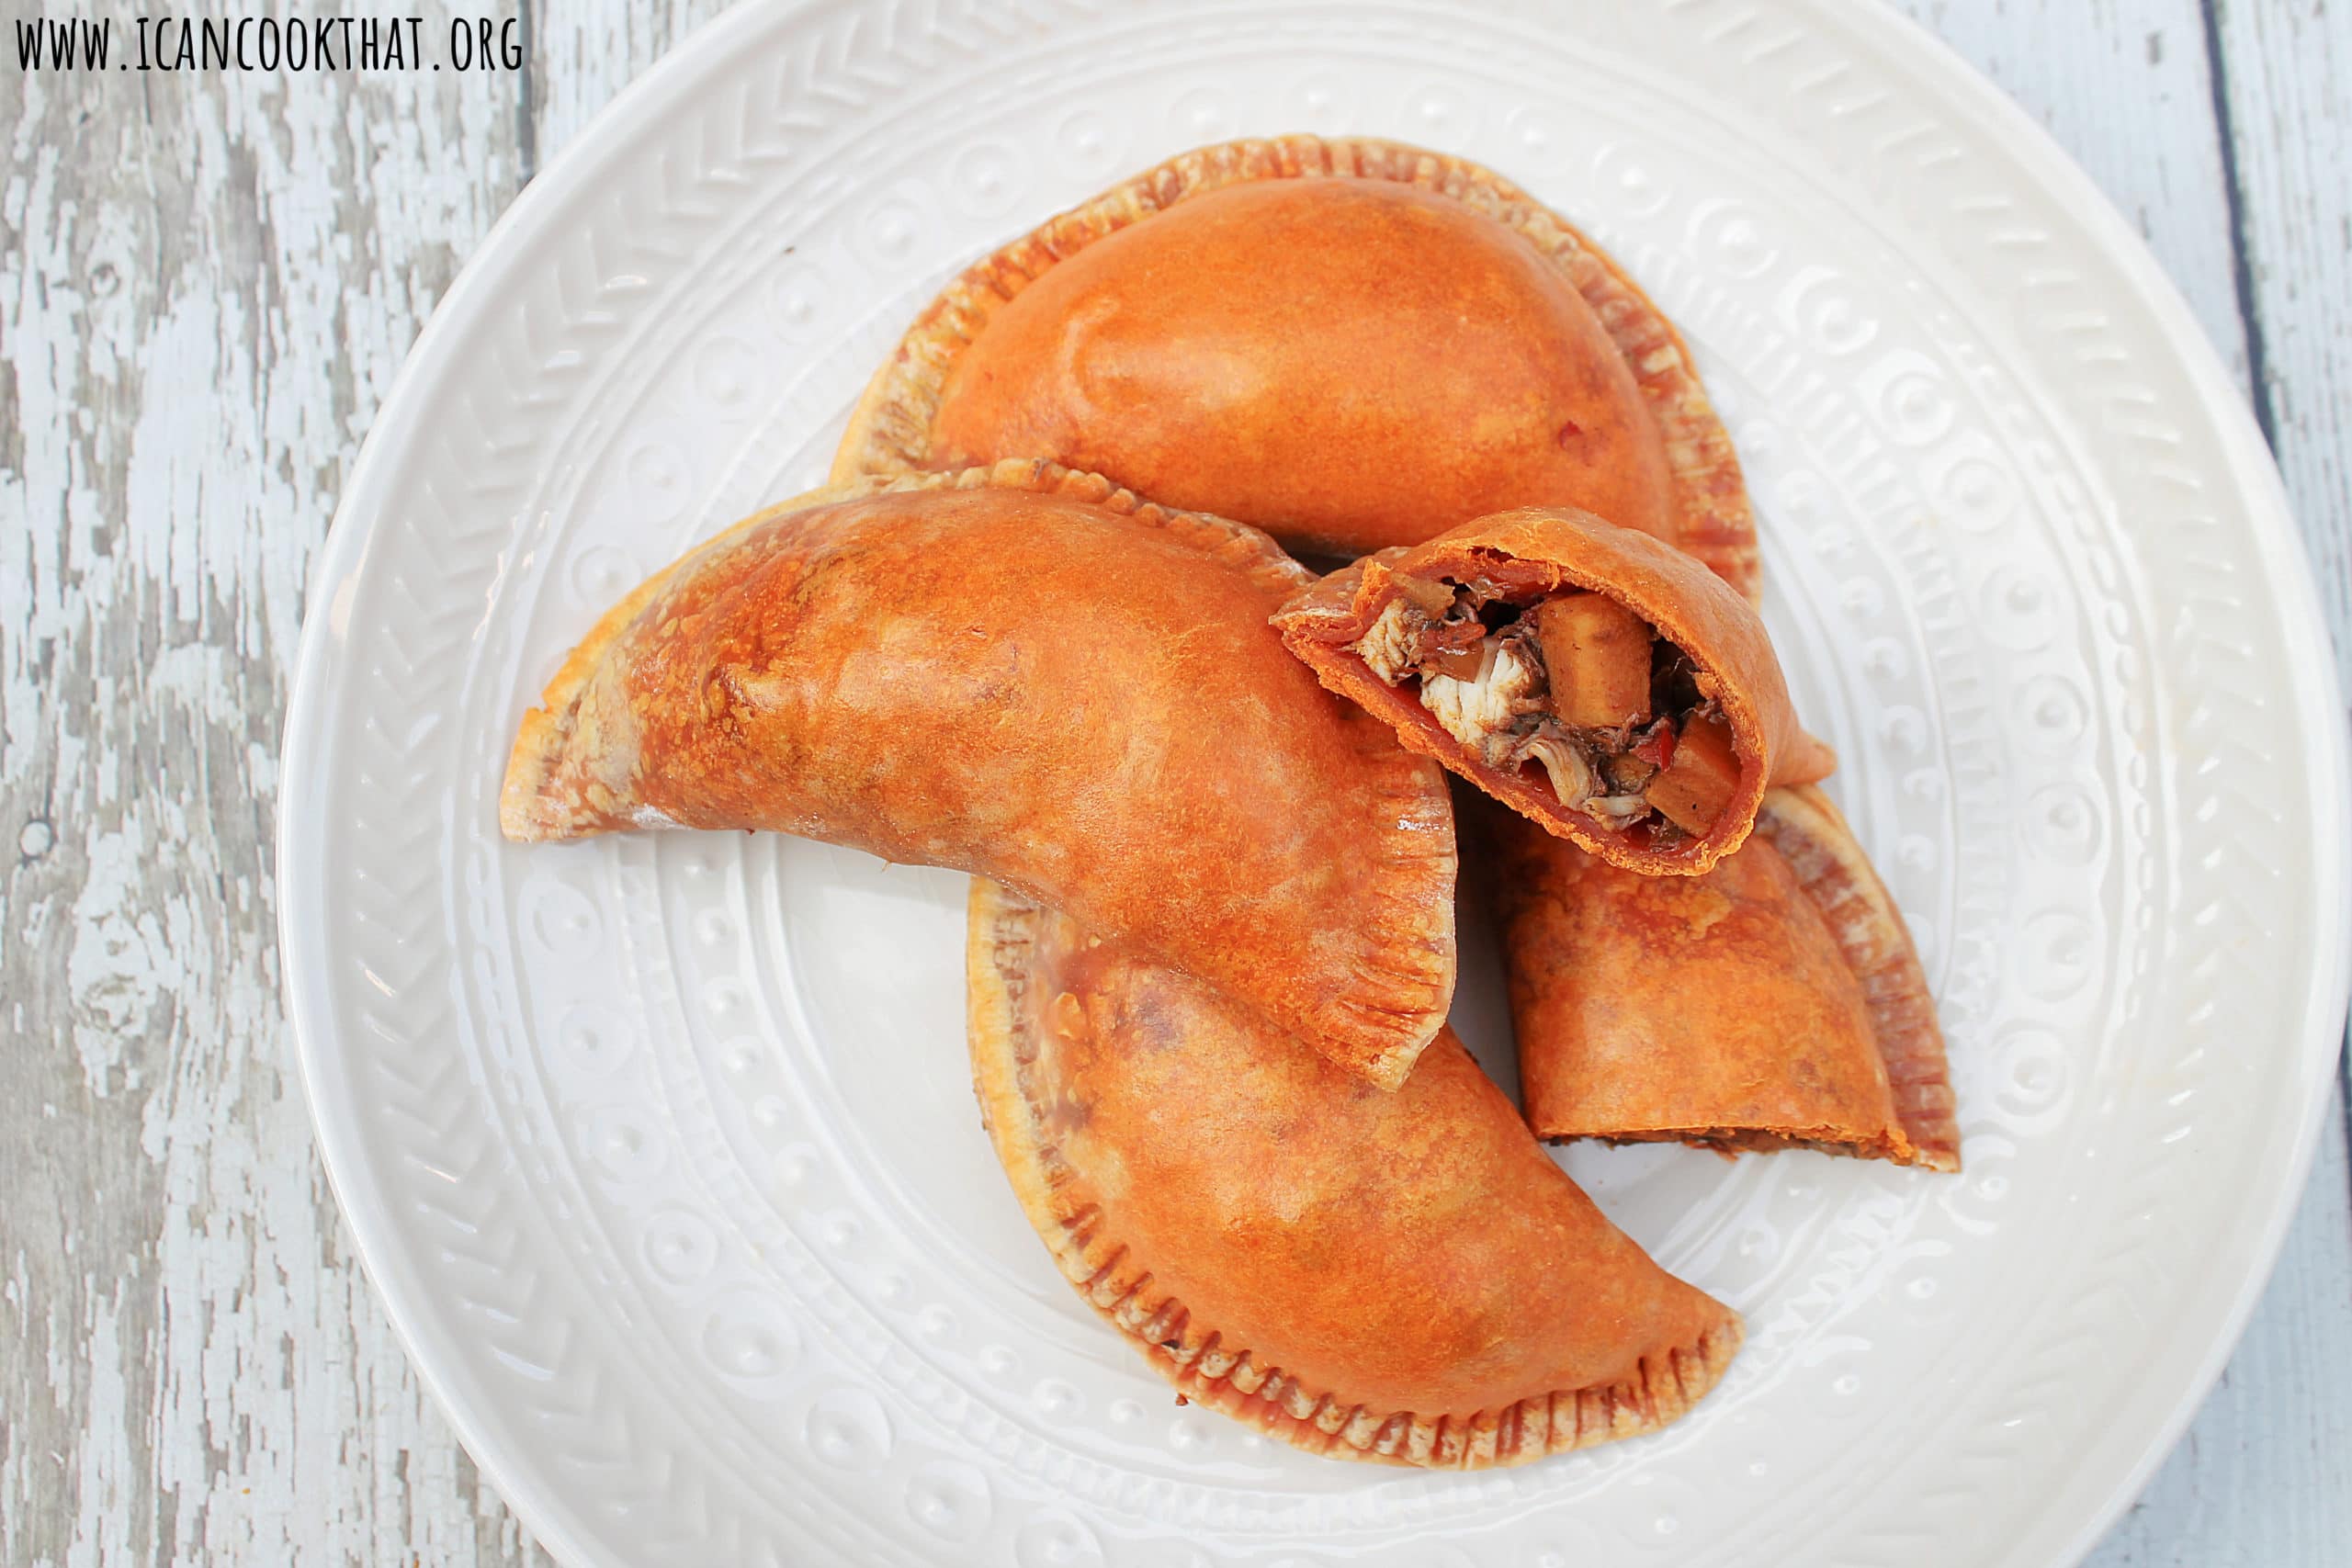
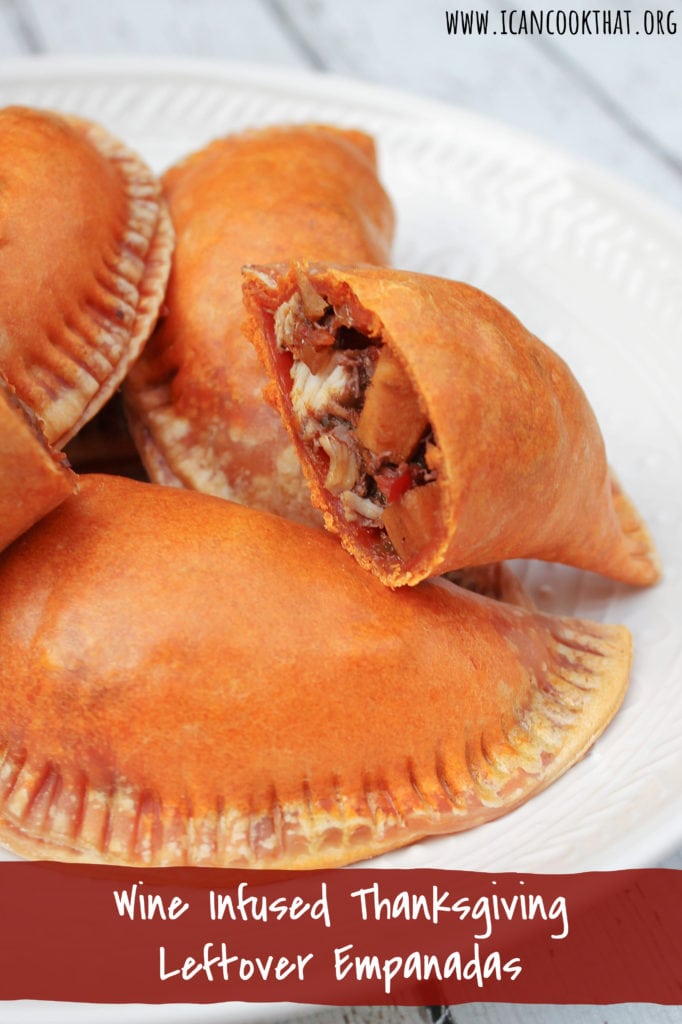
One of the best parts of Thanksgiving doesn’t even take place on Thursday. I (and I’m assuming many others) look forward to the leftovers as much as the original meal. Friday always includes a Thanksgiving sandwich (which you can actually get a version of in Delaware all year long at Capriotti‘s called the “Bobby” mmm). Saturday tends to be my own version of the Wawa Turkey Bowl. By Sunday, I’m starting to run out of creative ways to mush my leftovers into a new meal.
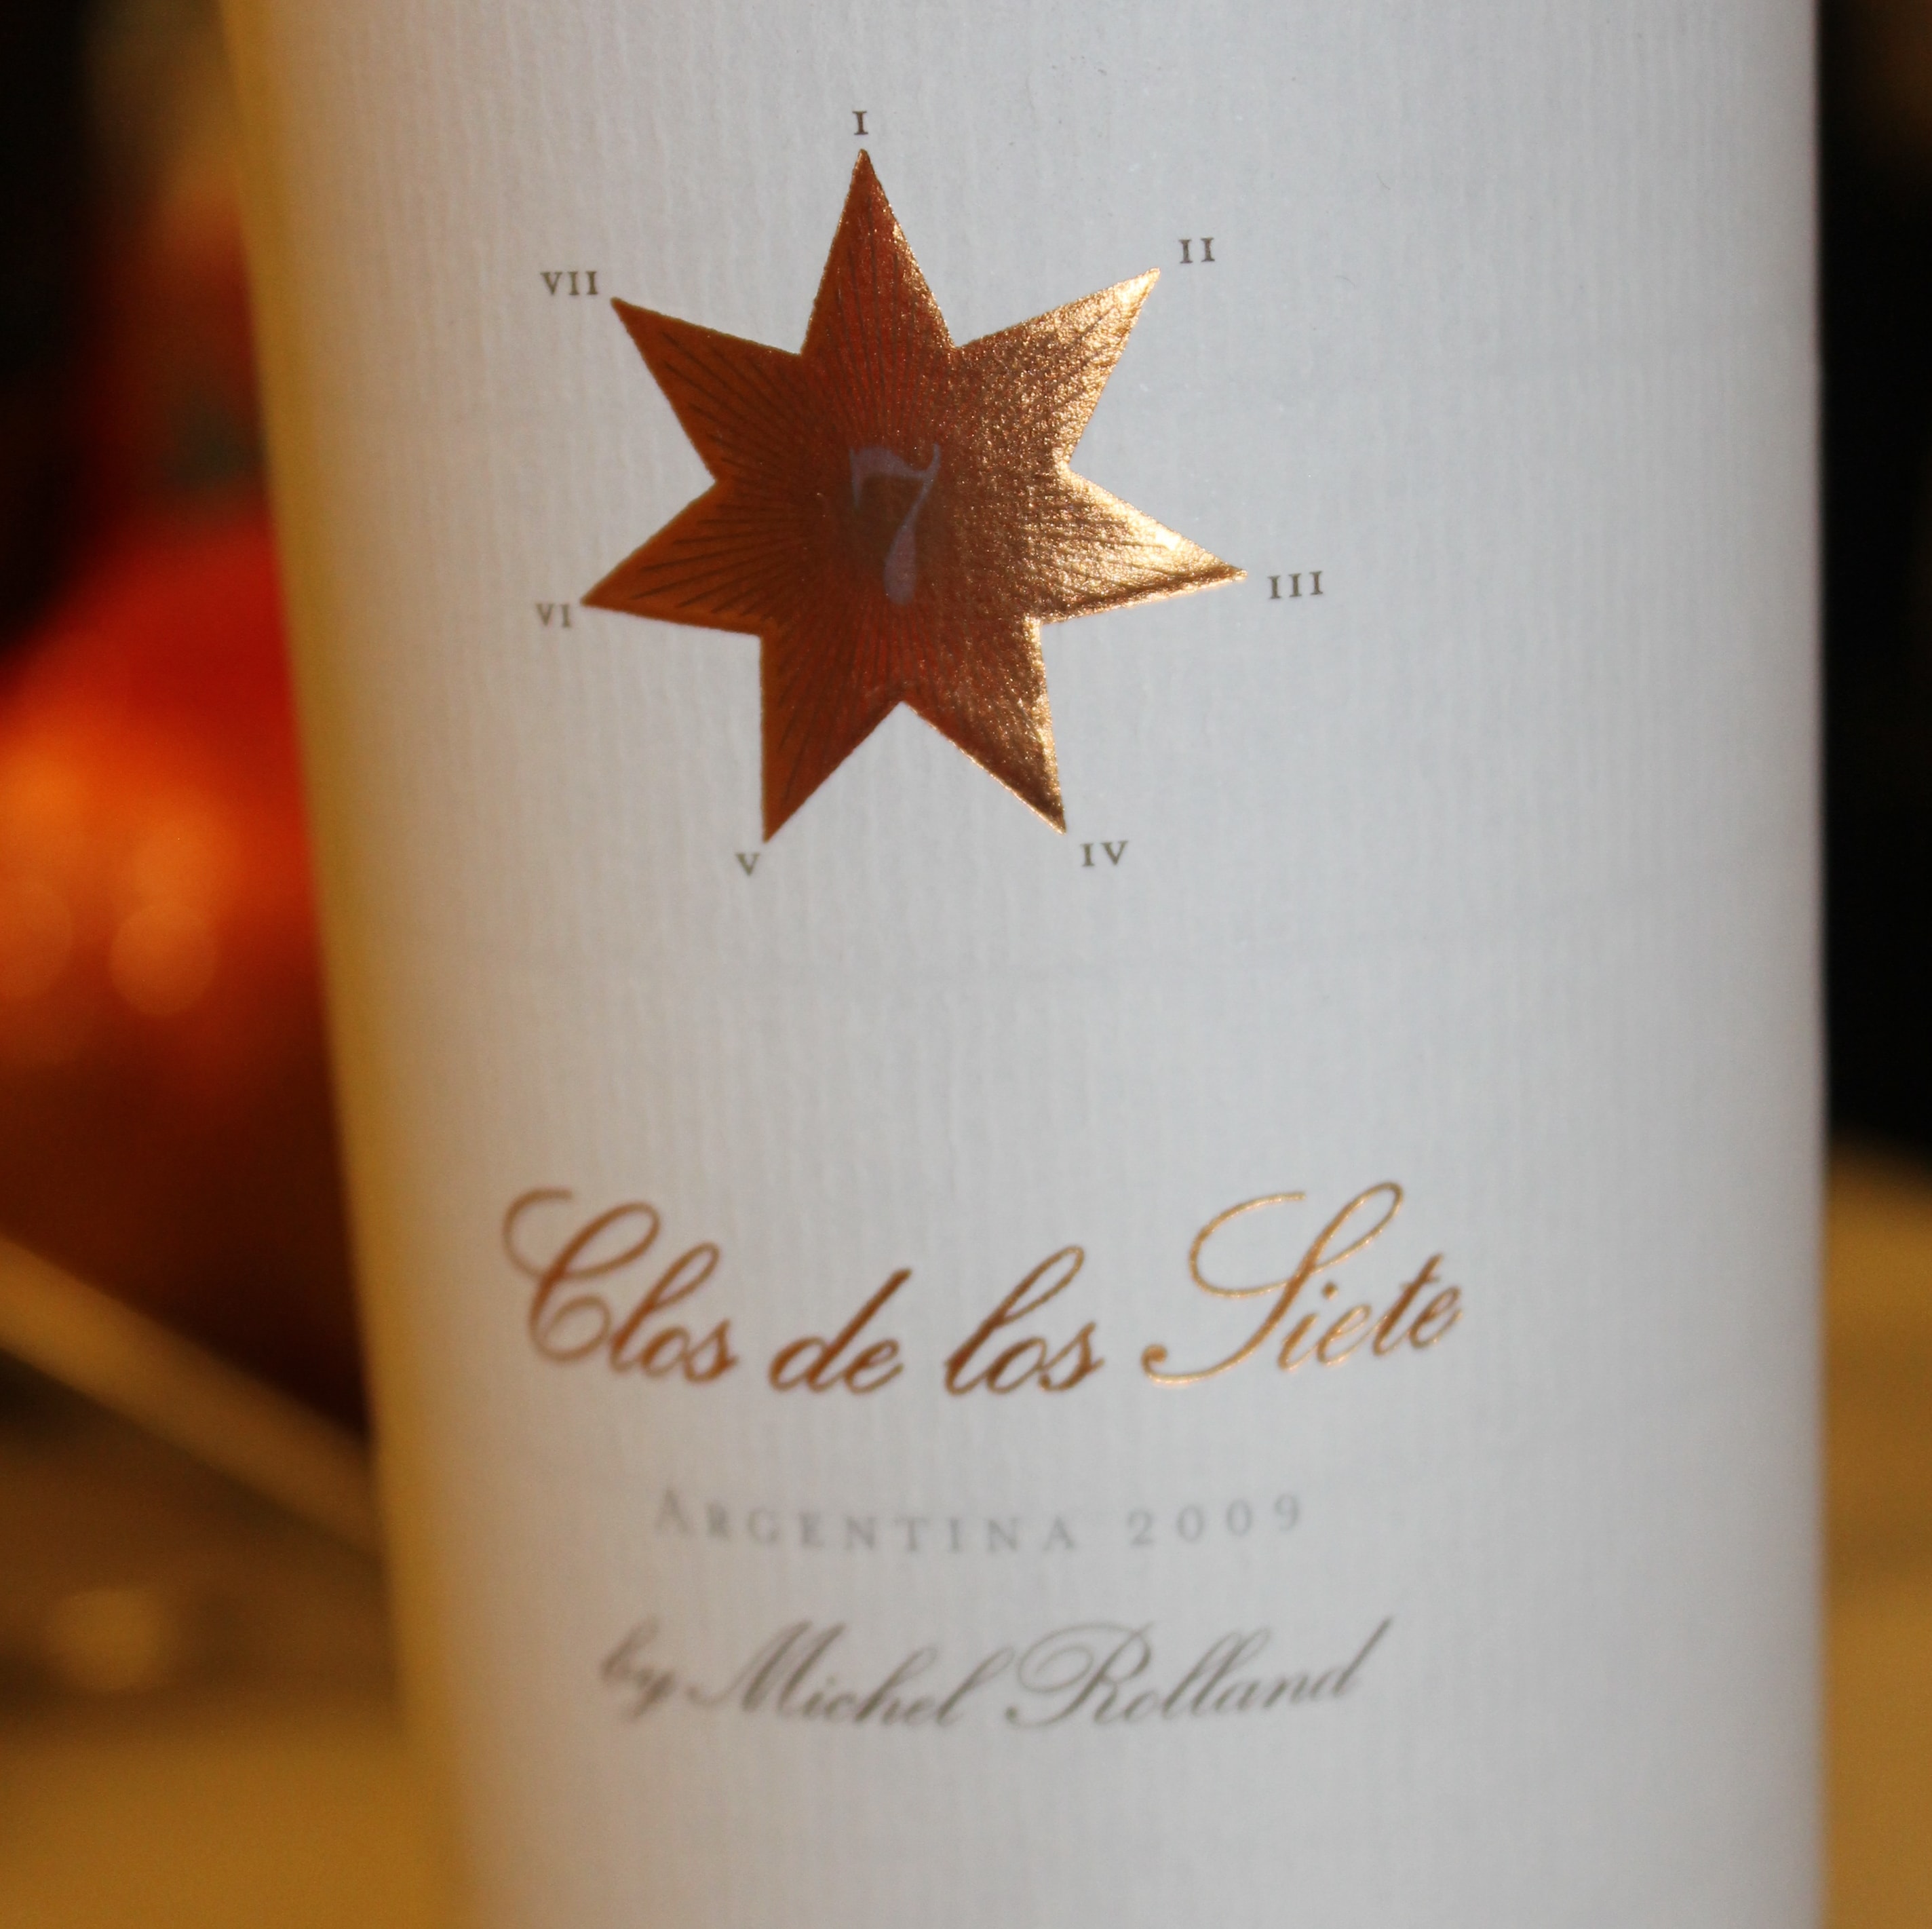
The makers of Clos de los Siete came to my rescue! Clos de los Siete is an Argentine red wine that is made from seven vineyards in the foothills of the Andes. The wine is a mixture of 57% malbec, 15% merlot, 15% cabernet sauvignon, 10% syrah and 3% petit verdot that is a really nice complement to turkey. Azul Argentine Bistro in New York created a recipe that uses Thanksgiving leftovers along with some spices to create Wine Infused Thanksgiving leftover Empanadas, how fantastic does that sound?
Ingredients:
1 green pepper, finely chopped
1 red pepper, finely chopped
1 medium white onion, finely chopped
1 garlic clove, minced
1 sweet potato, peeled and finely diced (about 1 cup)
1 pound turkey breast, shredded (about 1 cup)
1 teaspoon salt
¼ teaspoon ground black pepper
½ teaspoon cumin
1/4 teaspoon smoked paprika
1 tablespoon olive oil
1 cup Clos de los Siete wine
1-2 packages store-bought empanada discs (note: mine have annatto in them which is why they are orange)
I’ve got turkey on the brain with Thanksgiving fast approaching and I wanted to do a post that used turkey. But if you’re like me, you don’t have 15 people around to help me eat an entire roasted turkey. So instead, why not make an Herb Infused Turkey Breast?
This recipe for Herb Infused Turkey Breast is cooked using the Ninja Cooking System, I thought it was a fantastic alternative for a smaller Thanksgiving. If you don’t have a Ninja Cooking System, you can still make this recipe; you’ll just need a saute pan that is also oven safe.
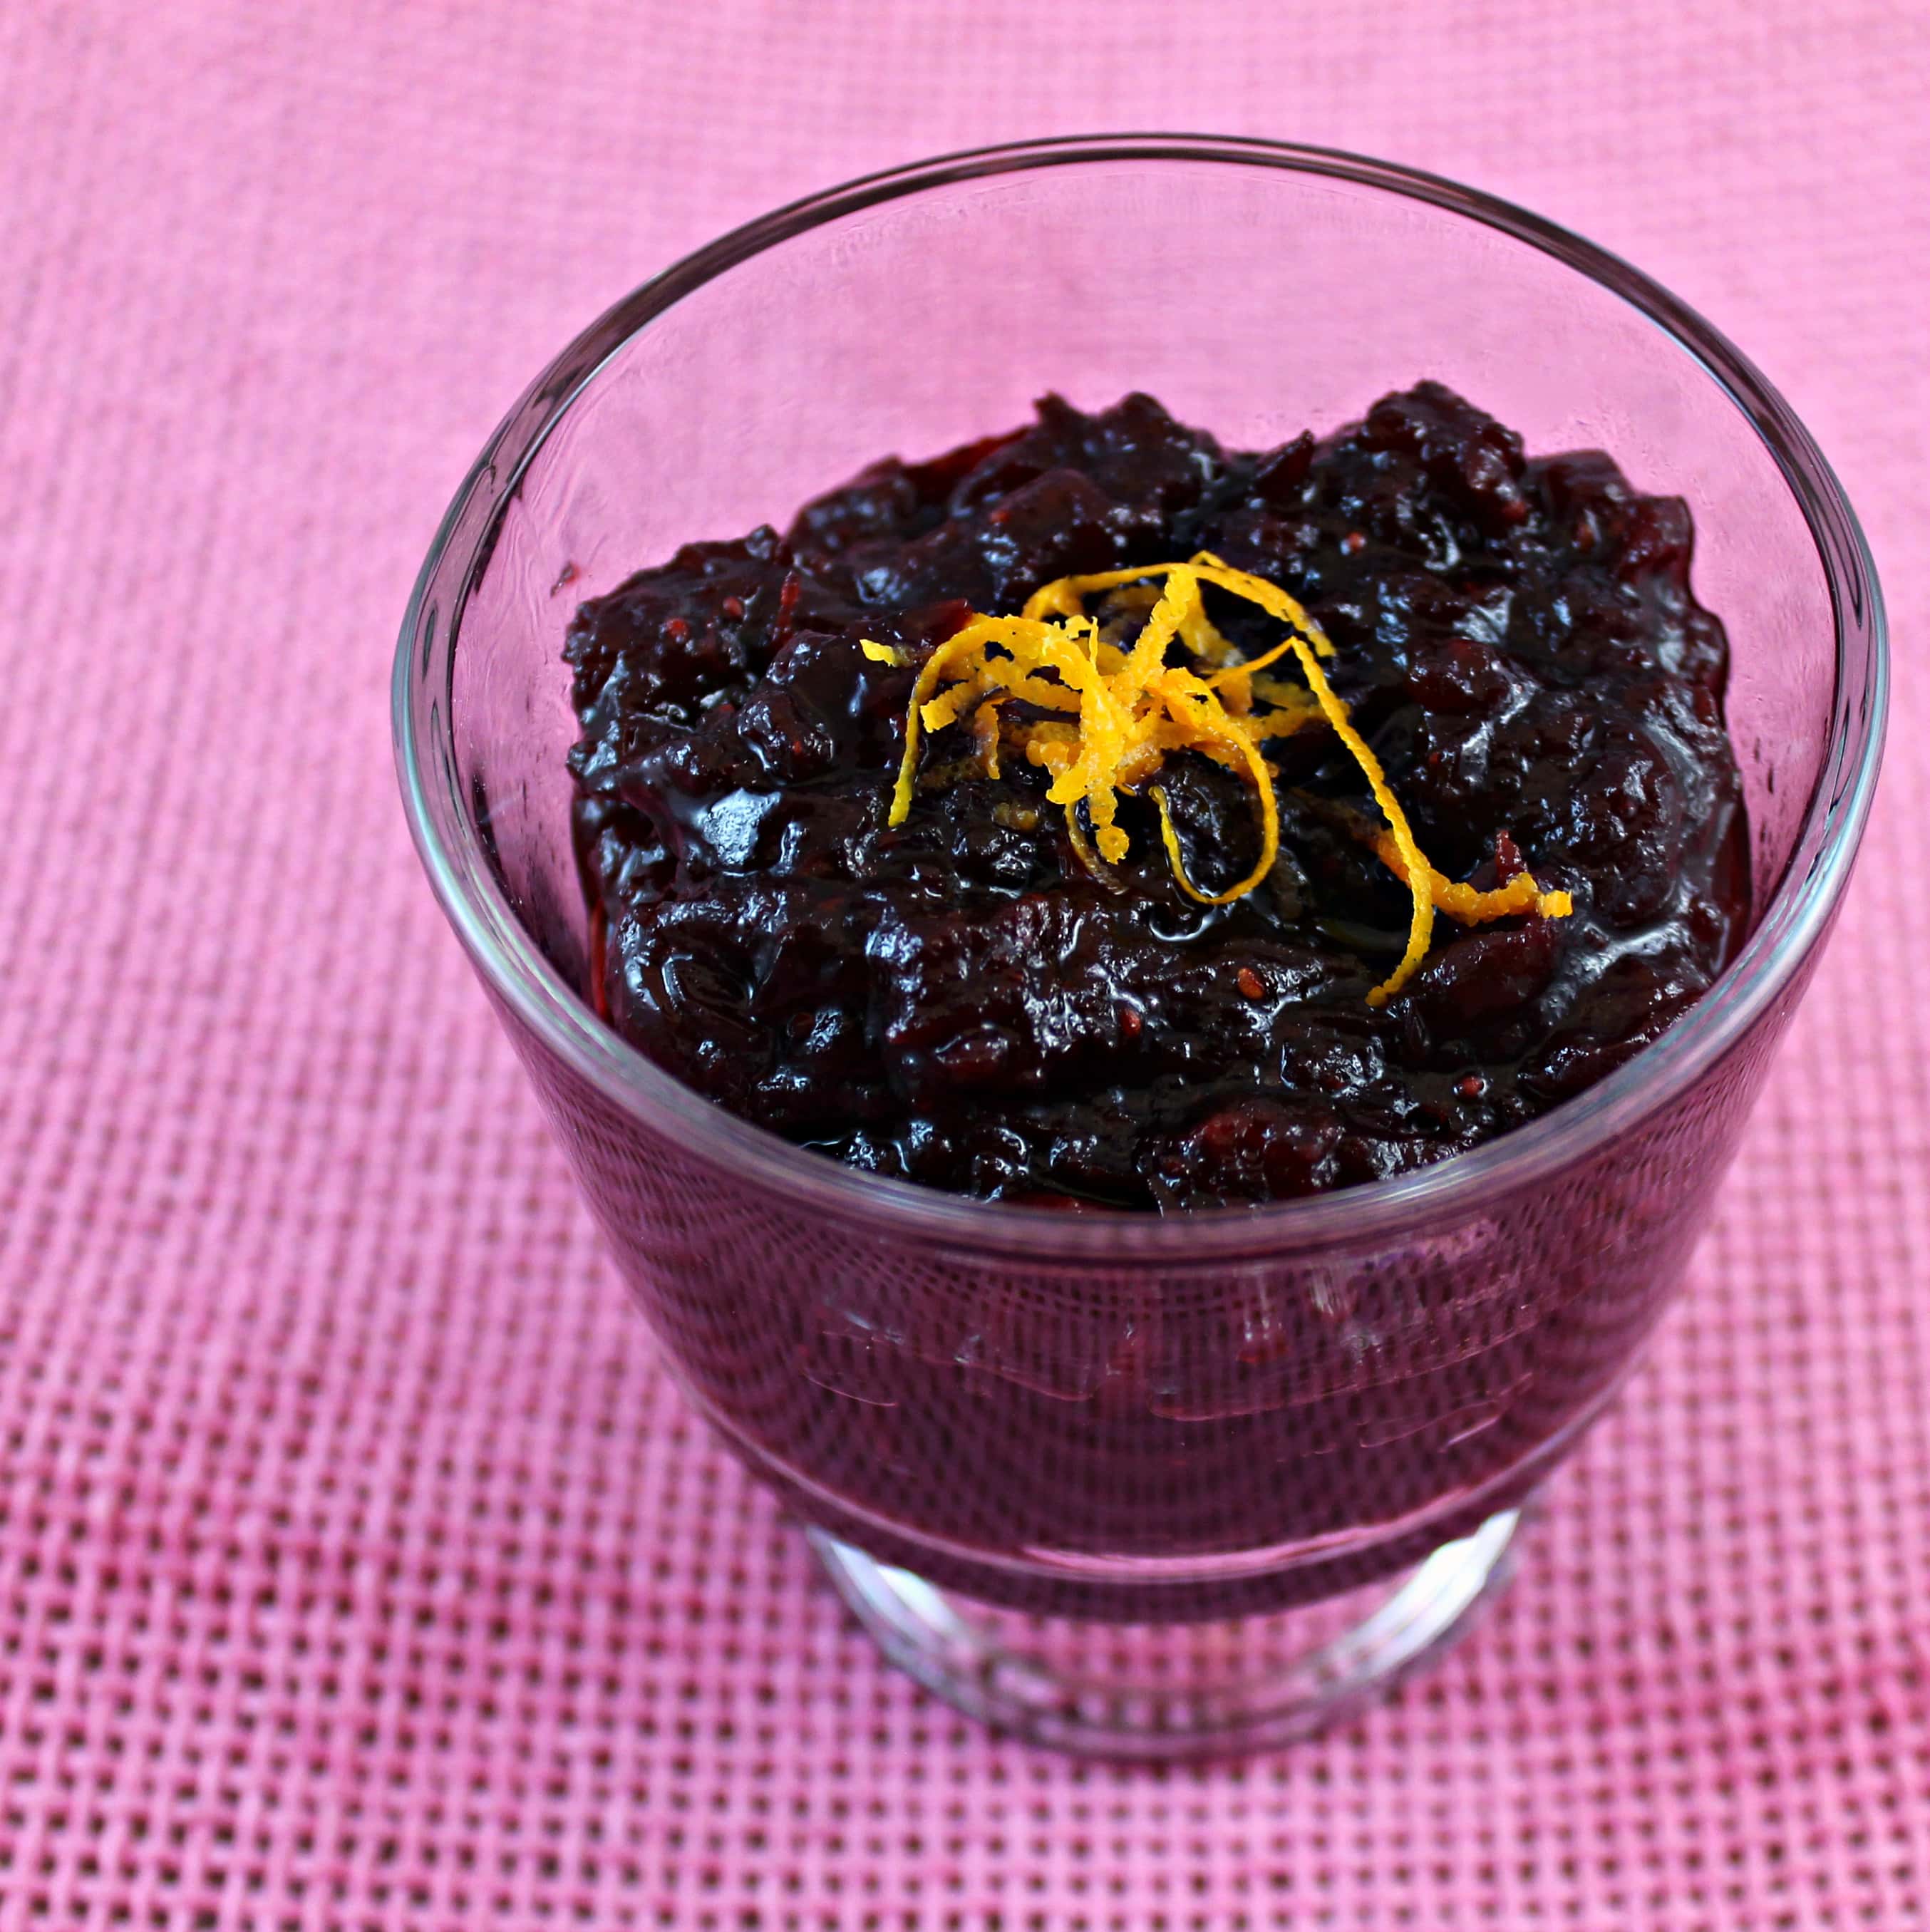
It isn’t Thanksgiving without cranberry sauce. We’ve always had the canned cranberry sauce at my Thankgivings growing up; I honestly believed the ridges from the can were there so I knew where to cut. I am all for the canned version, but I thought I’d attempt to make a homemade version in my slow cooker. I based it slightly off of Cooking Light’s Classic Cranberry Sauce but changed up a few ingredients and the method of cooking.
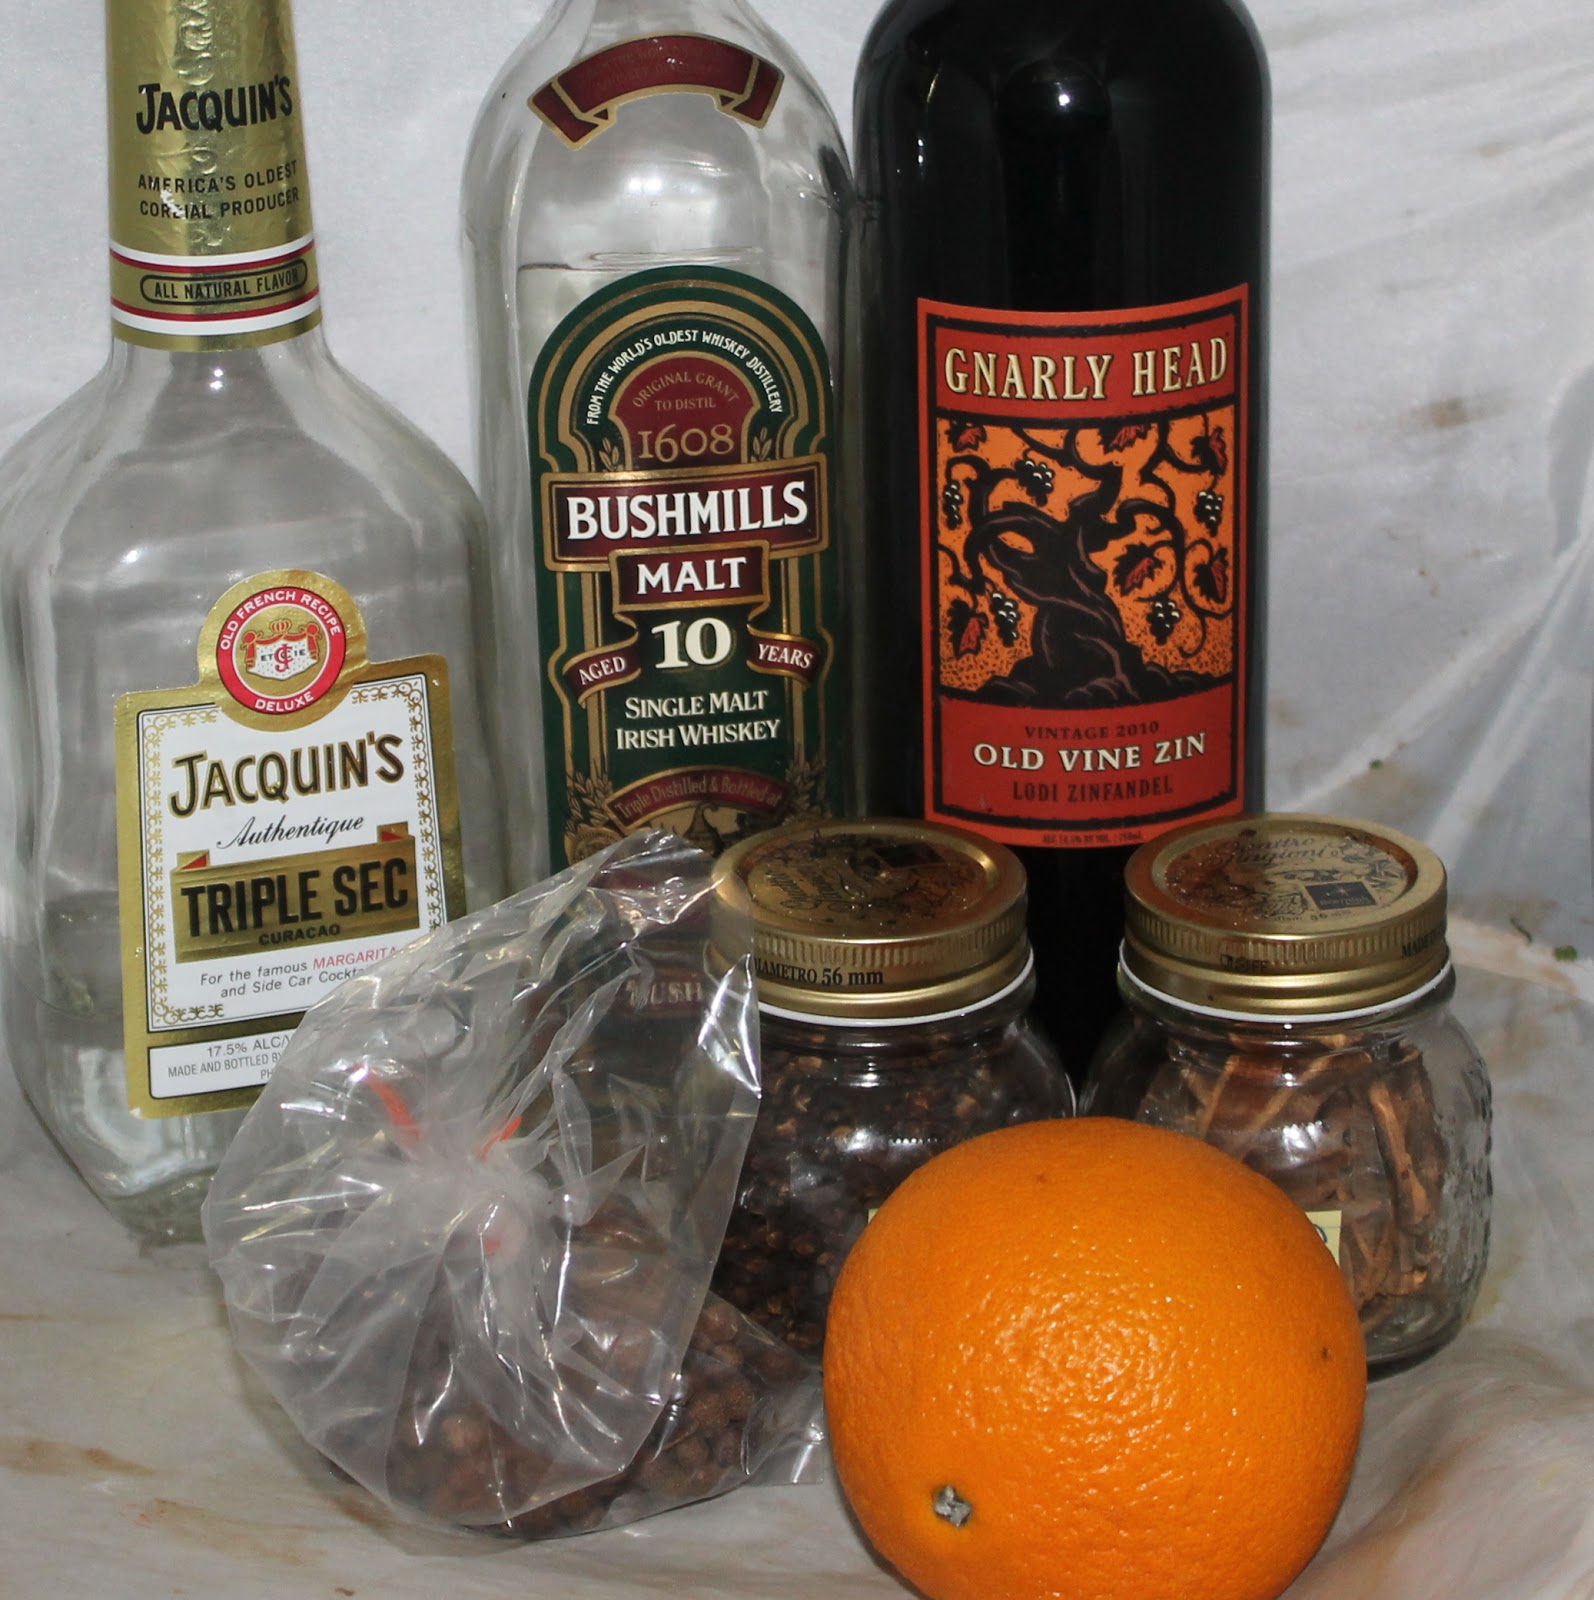
My goodness it dropped in temperature quickly! It feels like we went straight from September weather to December weather. Luckily, I have the perfect warm drink to keep you toasty. This is a (probably) oversimplified version of a drink my aunt and uncle always have at their house for the holidays: Wassail. It’s basically a mulled wine that warms you up from the inside out. I’ve been thinking about Wassail since the change in temperature so I decided to make a quick batch with things I already had in my house.
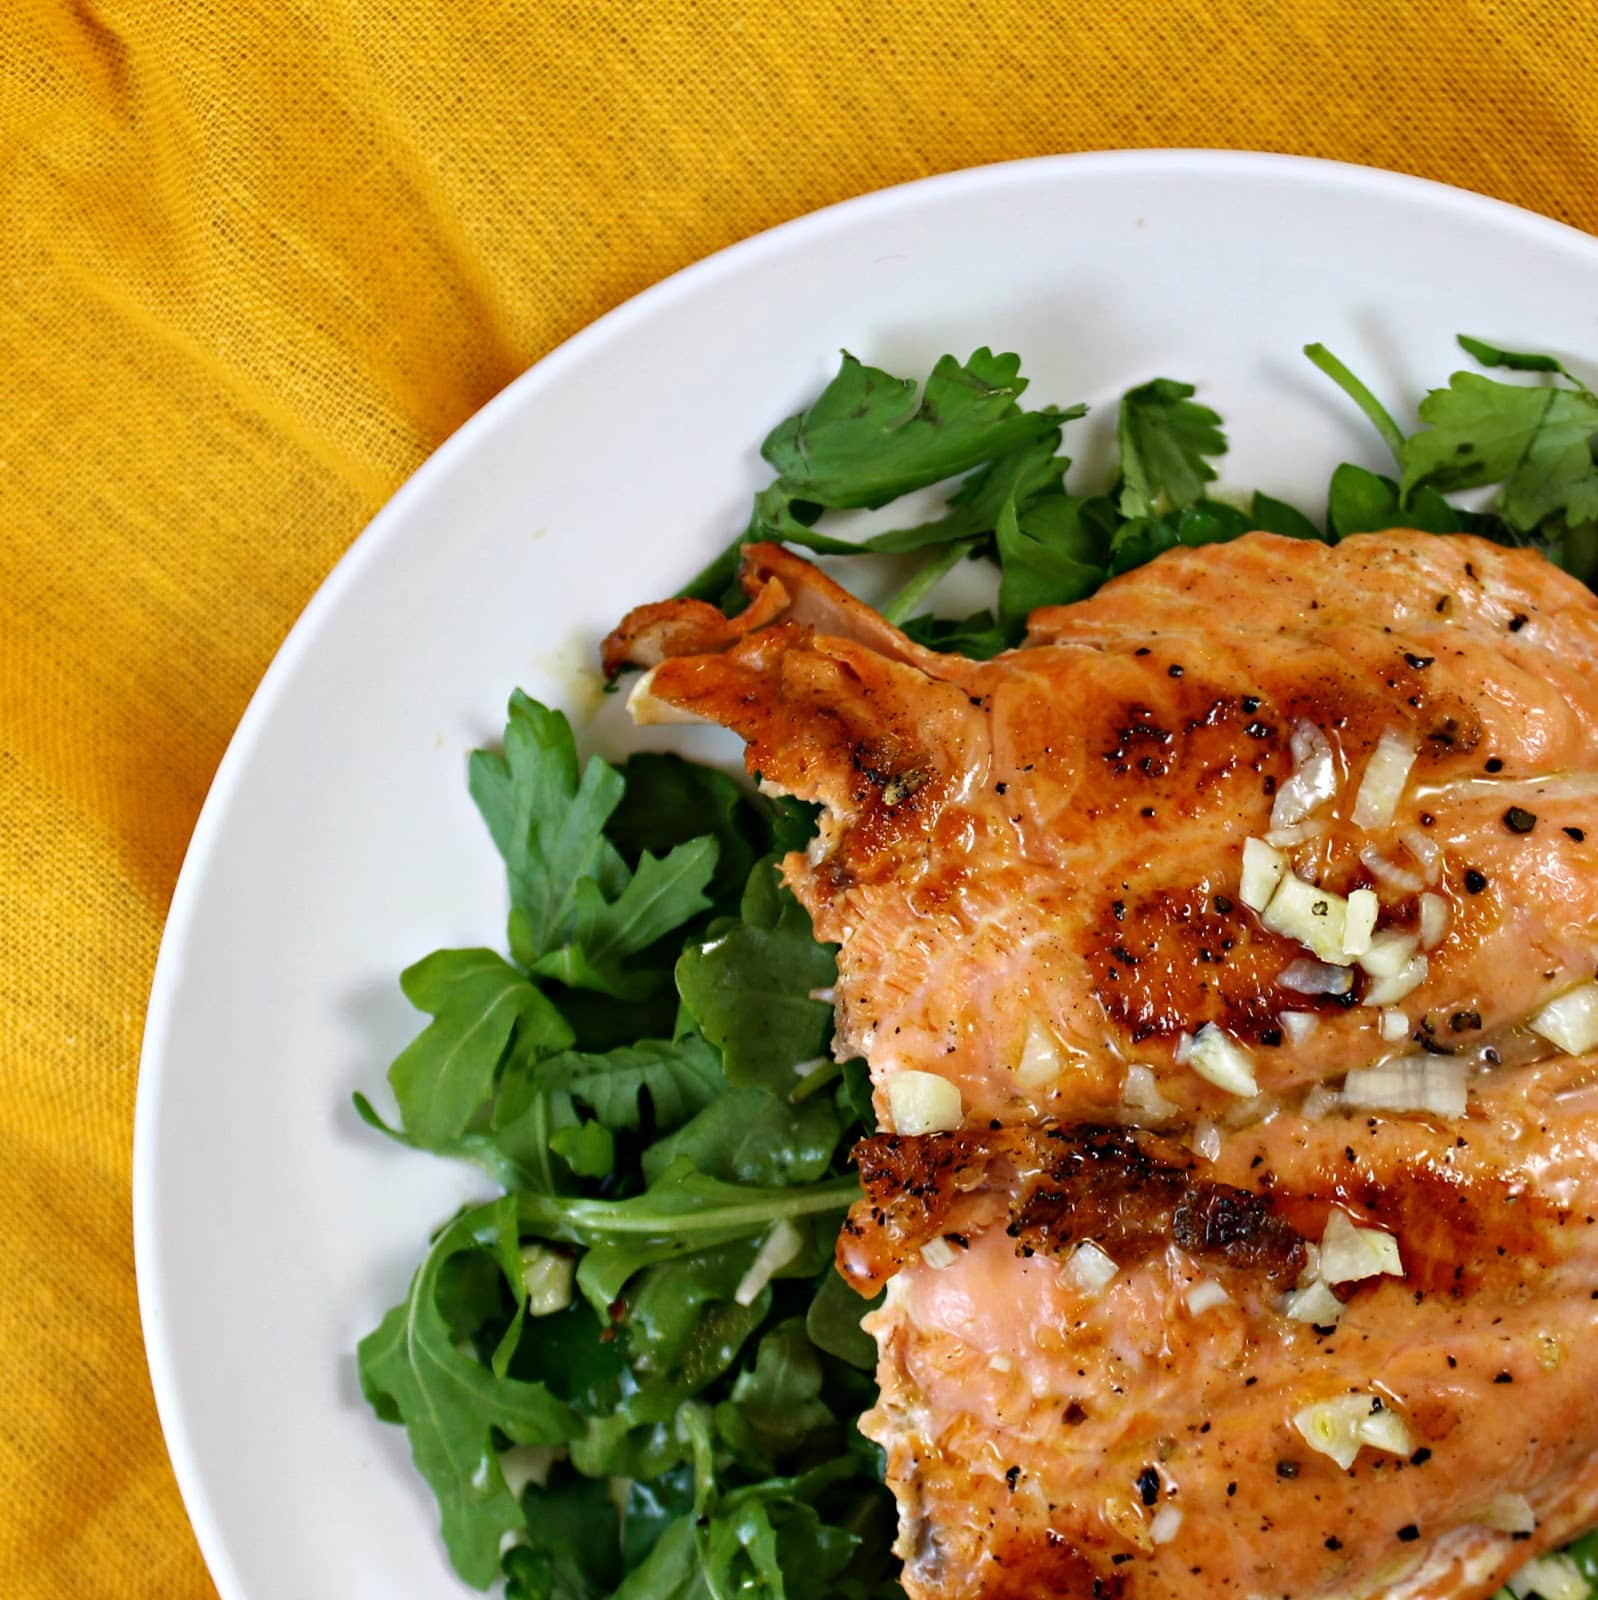
Salmon and salad are a great healthy go-to on a weeknight. You can have your meal on the table in under 20 minutes! This salad is a nice alternative to your traditional salads. Made with four different herbs and spicy arugula, the salad adds a ton of flavor to the crispy salmon. The lemon dressing is fantastic as well! This recipe is from Cooking Light’s cookbook: The New Way to Cook Light.
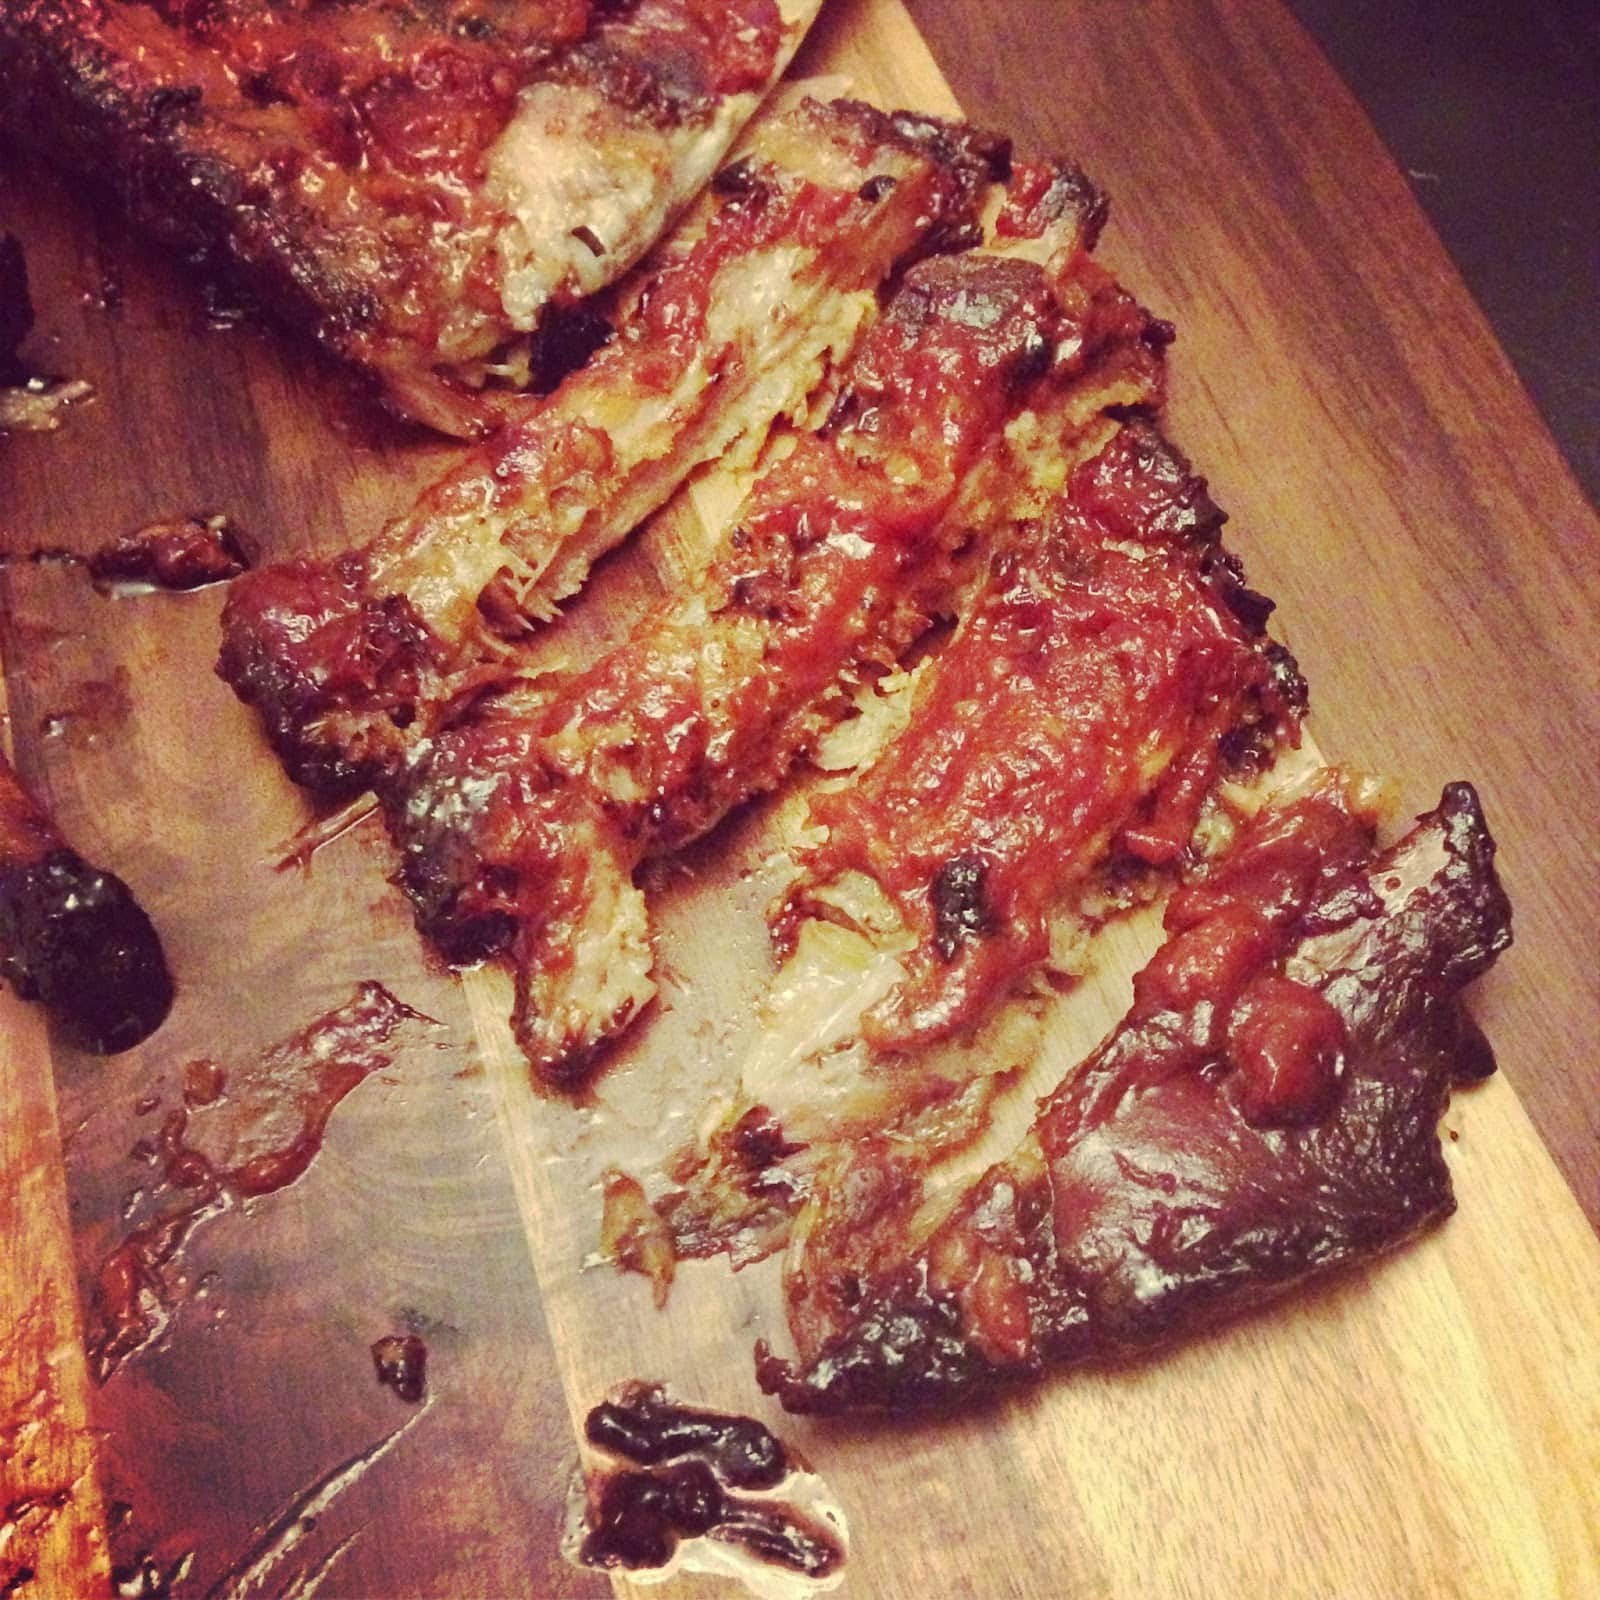
I’m not even going to pretend to care about football. I have no clue what is going on on the field, nor do I honestly want to. Not even going to school with Flacco could peak my interest in the sport. But I do care about the food aspect of watching football, to no one’s surprise.
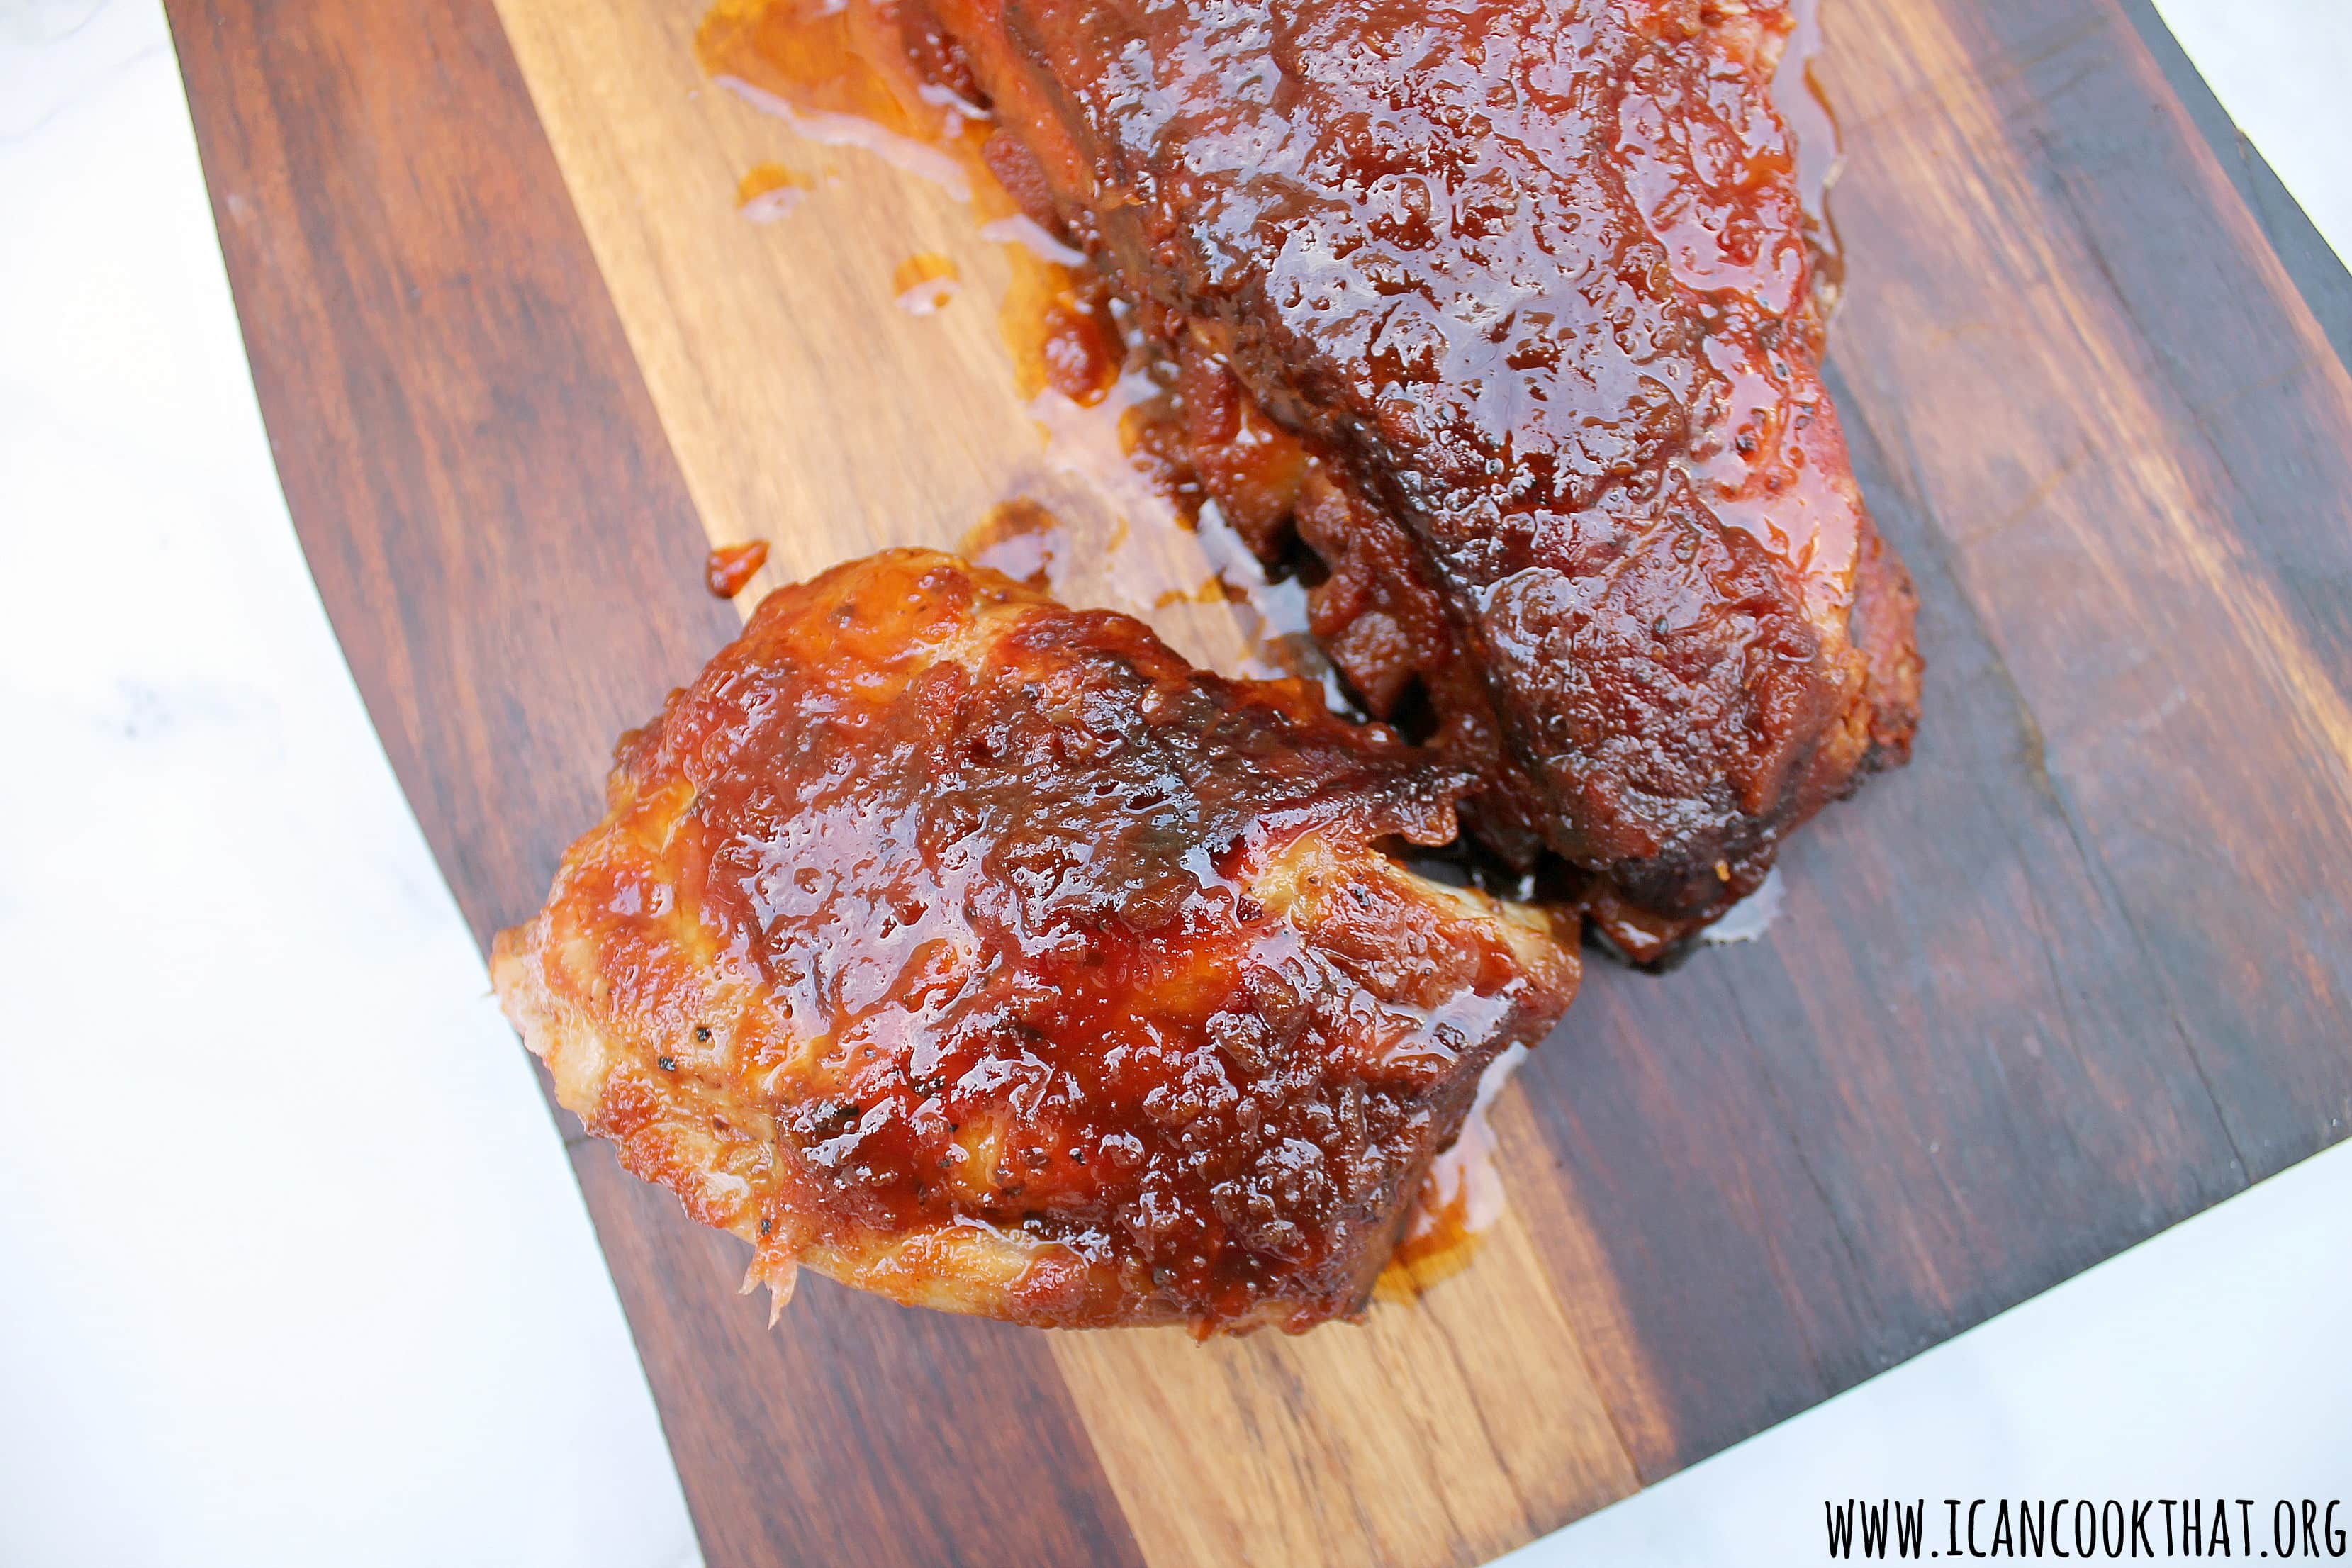
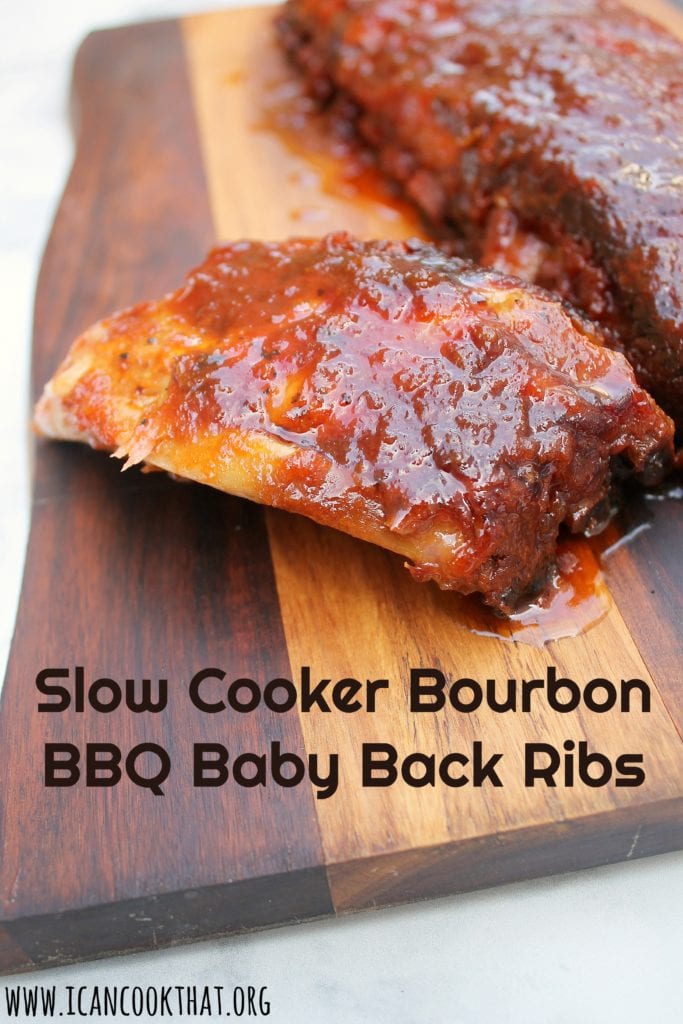
So with the season in full swing, I figured it was about time for me to figure out how to make ribs. I “surprisingly” do not have a smoker in my tiny apartment, so I went in search of a slow cooker recipe. This Bourbon BBQ Baby Back Ribs recipe fit the bill.
Ingredients:
5 lbs baby back ribs, cut to fit in your slow cooker
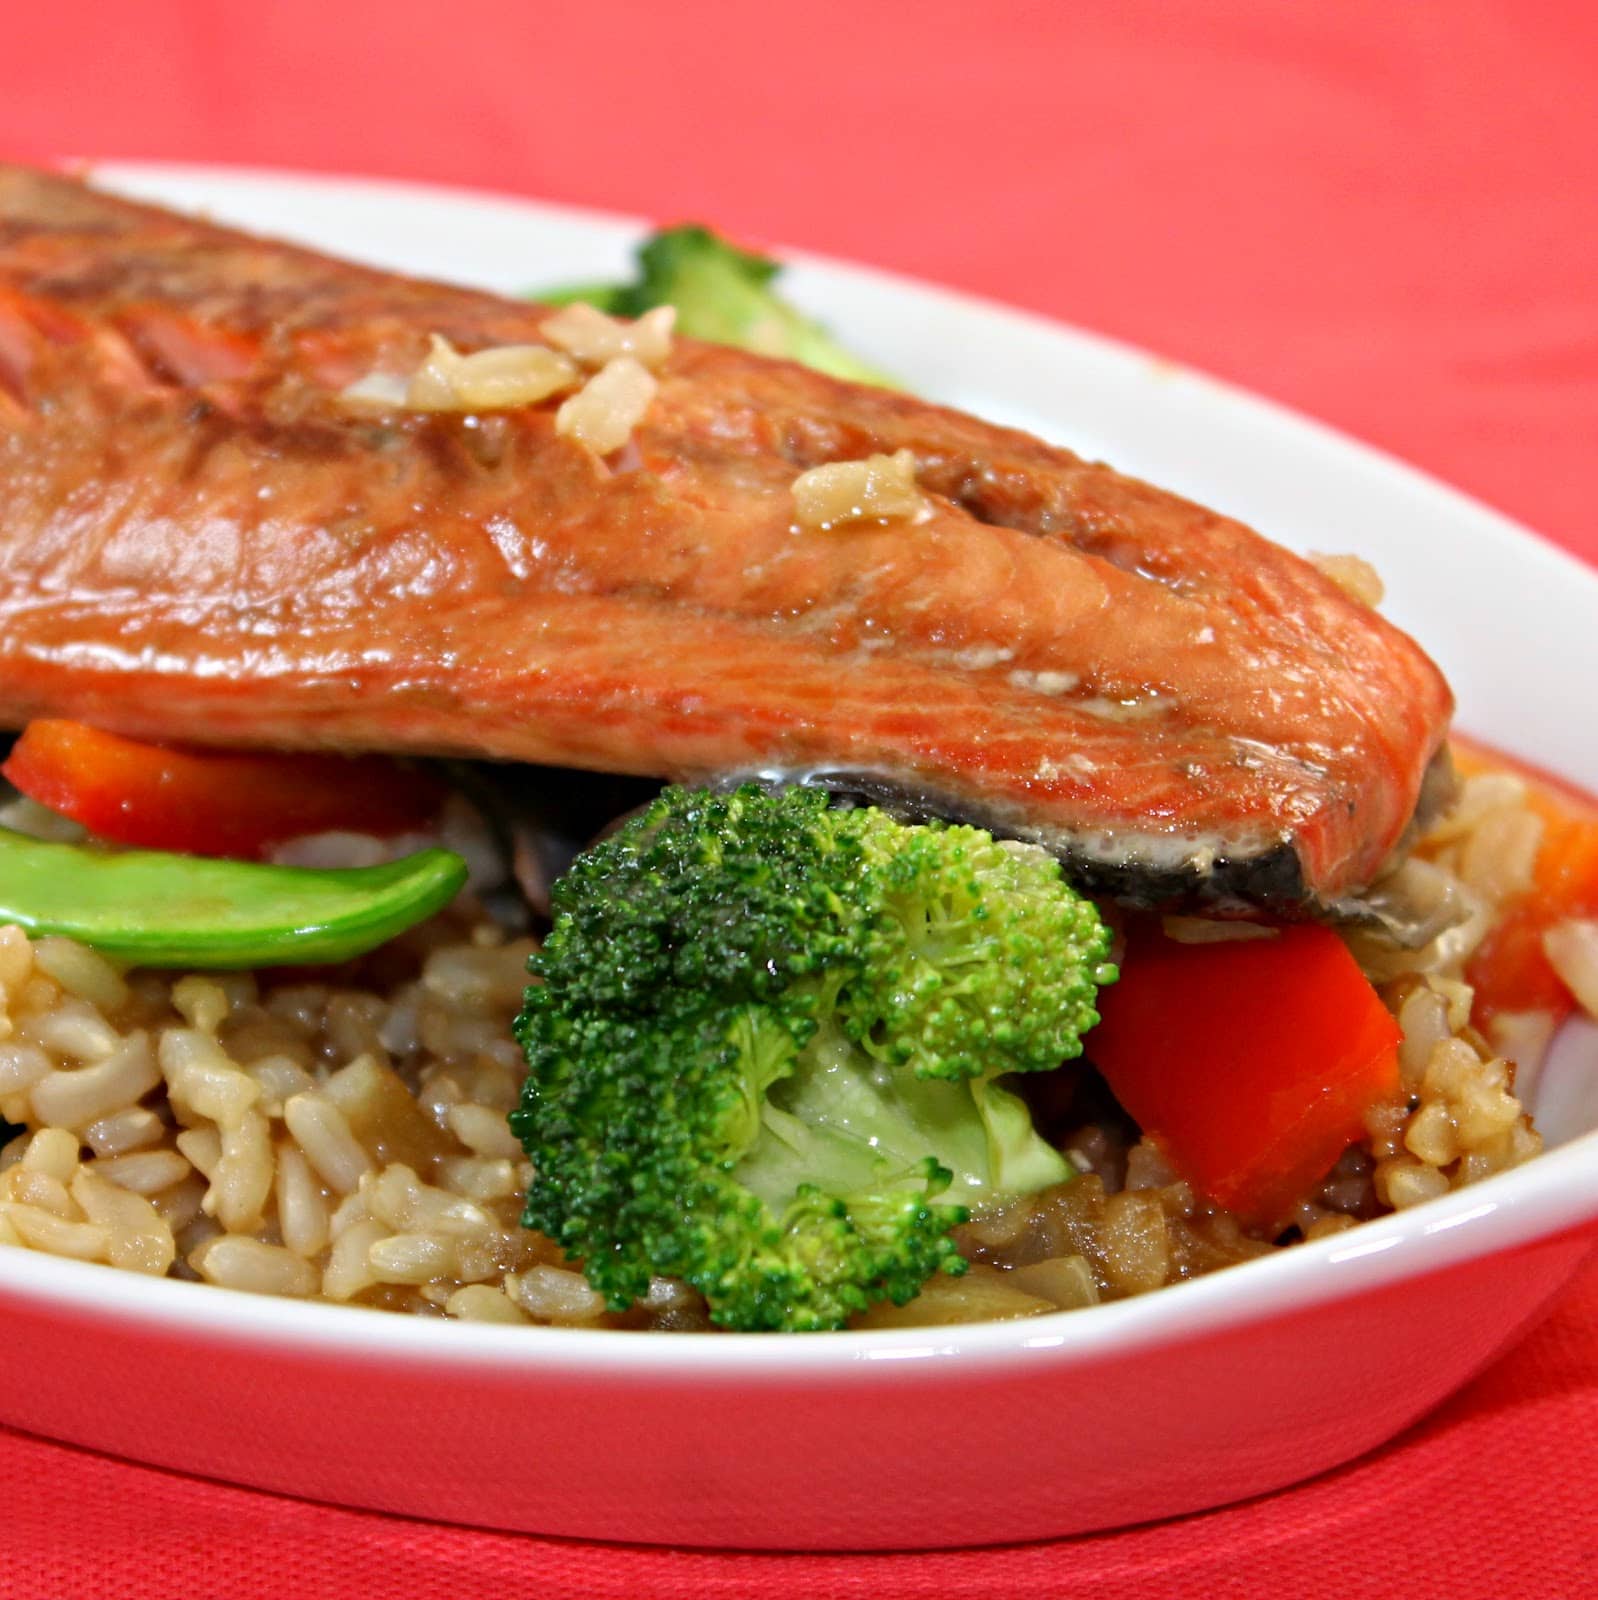
There is a good chance I have a rice problem, I love all things rice. My go-to meal in a pinch is always risotto. So when DailyBuzz Food had an opportunity to work with RiceSelect through their Tastemaker program, I jumped at the chance. RiceSelect is one of my favorite rice brands. You may notice their nifty containers popping out of a bunch of my posts so I was really excited to work with their rice. The catch was that they sent me one of RiceSelect’s rice randomly, I didn’t get to choose it. When I opened up the package, I discovered brown rice. Hum. I’ve never worked with brown rice before, but I was up for the challenge!
I decided to make a stir fry teriyaki dish using my favorite protein, salmon. Normally stir fry is a quick dinner choice but brown rice takes quite a bit of time to cook. But it gives you plenty of time to prep your veggies and hang out with your dinner guests!
Ingredients: (I cut this recipe for Salmon Teriyaki Stir Fry down to two servings to make it easier. Multiply as needed)
I have no idea who decided that different foods should get taco-fied, but I am all for this movement. I love tacos, and Cooking Light comes up with the best taco recipes. These Kung Pao Chicken Tacos are everything I want in a meal: quick and easy to make, colorful, a hint of spice, and full of many ingredients I already had on hand.
Kung Pao chicken is a spicy stir-fry Chinese dish that includes peanuts, vegetables, chili peppers, and chicken. It is usually served over rice, but Cooking Light took some inspiration from Korean taco trucks and added the Kung Pao chicken to corn tortillas.
Ingredients:
6 skinless, boneless chicken thighs, cut into bite-sized pieces
3 tablespoons lower-sodium soy sauce, divided (or coconut aminos to make gluten free)
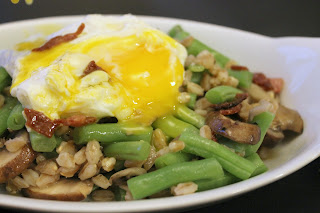
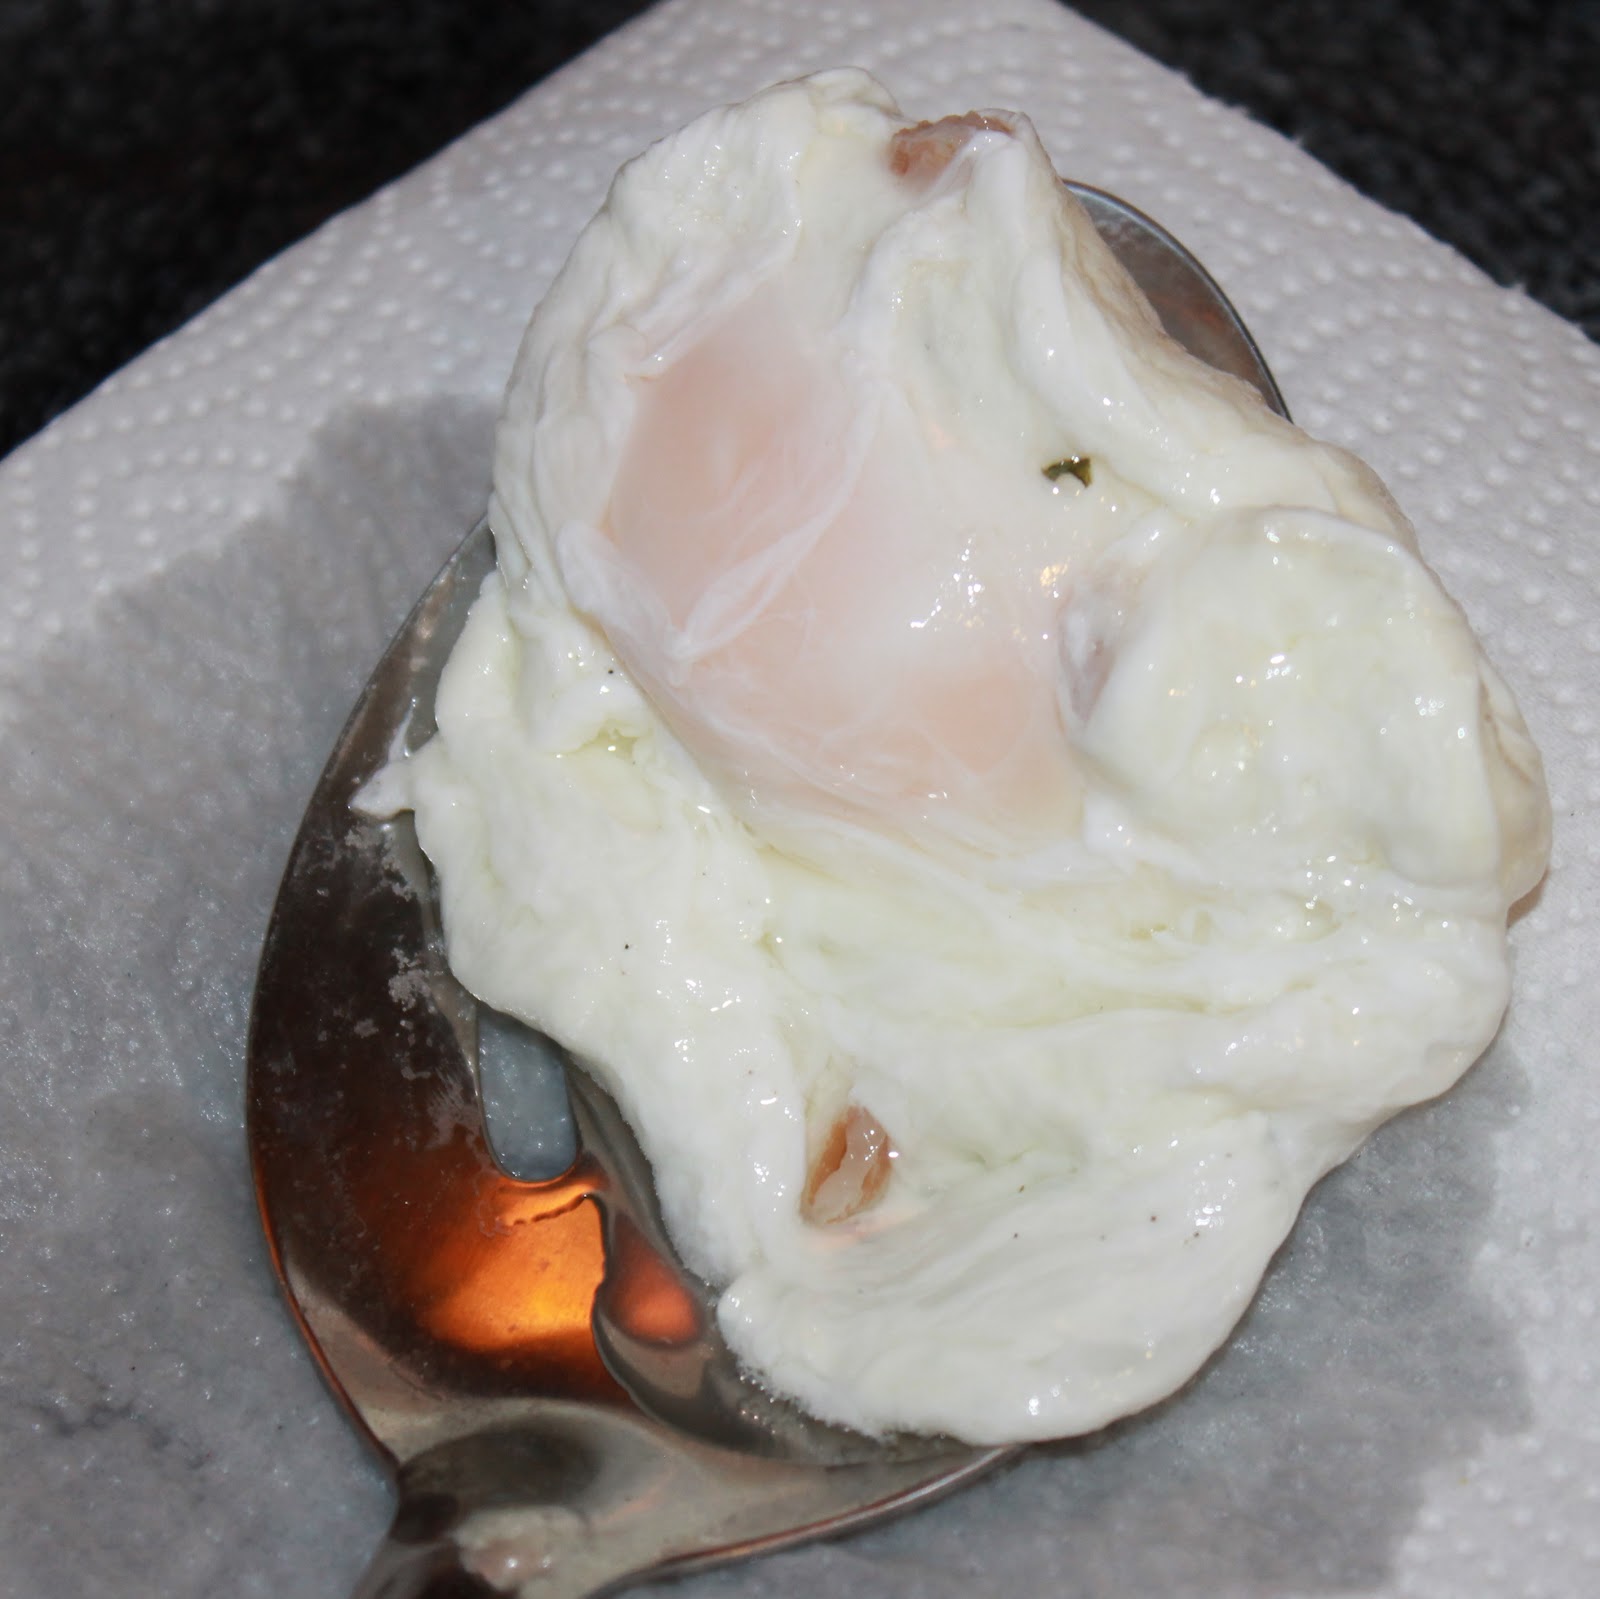
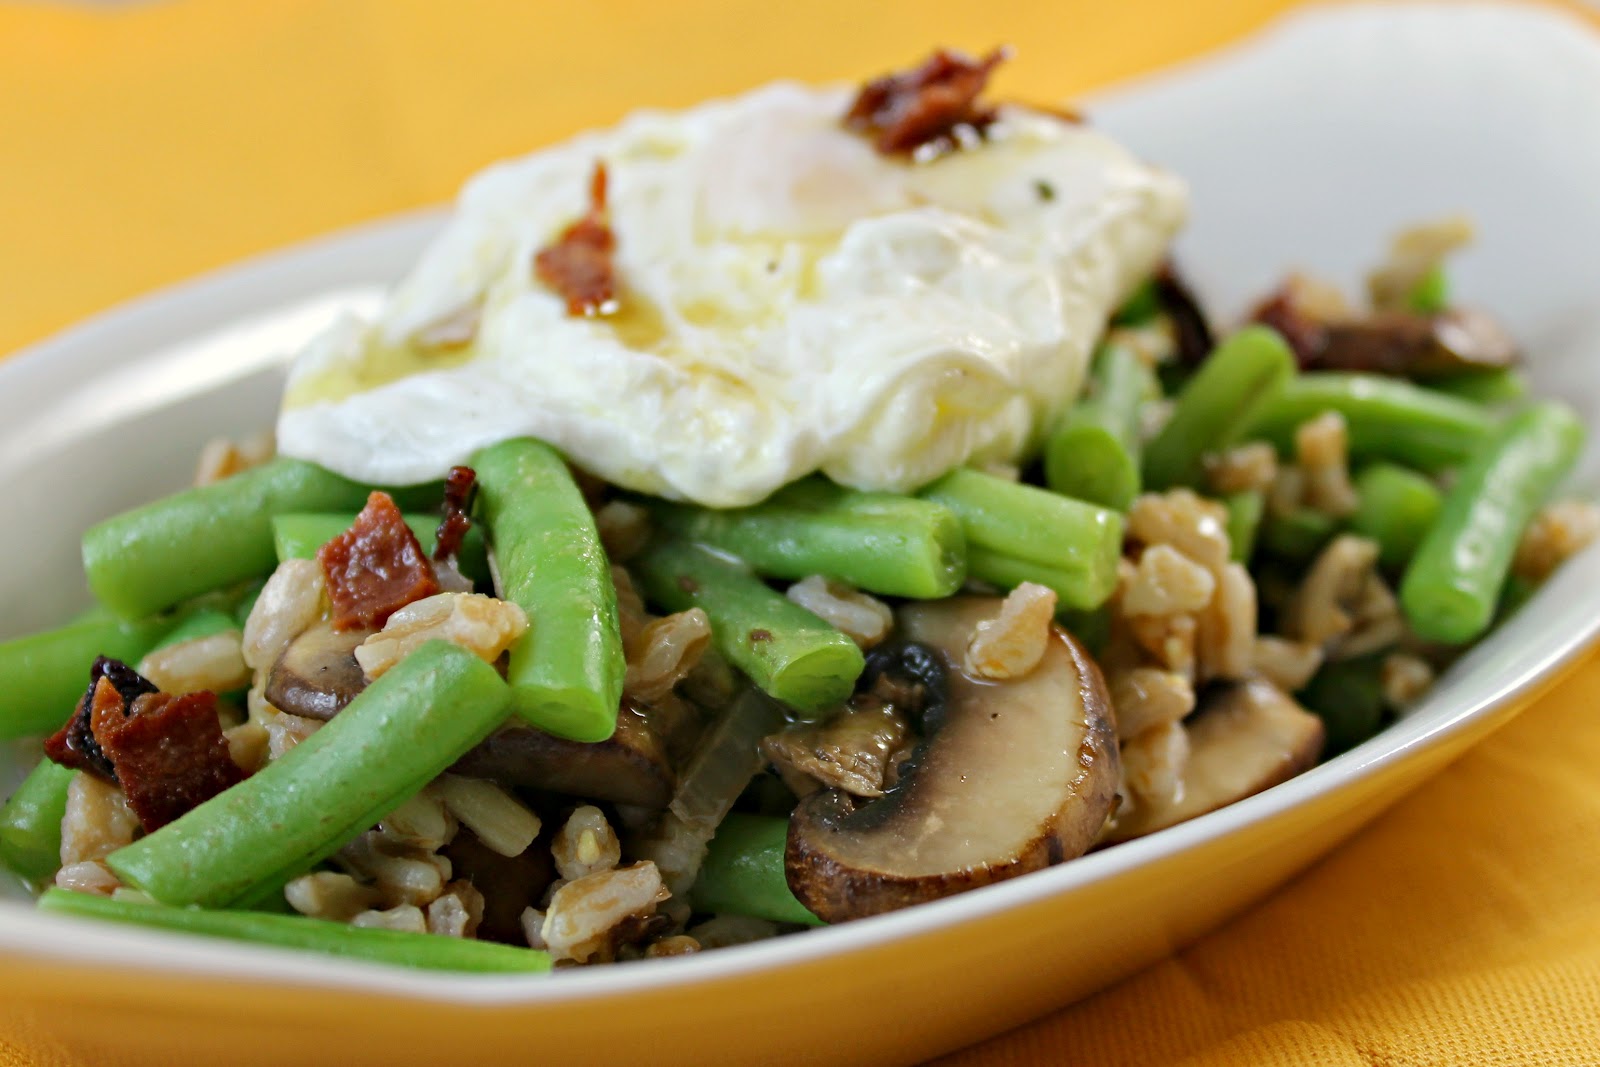
One of the highlights of the Kennett Square Mushroom Festival was catching a cooking demonstration by Antonia Lofaso of Top Chef. She made this wonderful mushroom and green bean salad with a poached egg and bacon vinaigrette. How fantastic does that sound? I didn’t have any arugula on hand, which was in Chef Antonia’s recipe, so I decided to sub in farro instead. (Farro is a grain that you cook like rice). I also kinda sorta forgot how she made most of the stuff, but it still turned out great. This is also the first time I’ve ever poached an egg because I’ve been terrified to do so but it was much more simple than expected!
Ingredients:
2 cups water
1 cup farro
1 garlic clove, minced
1 shallot, minced
8 ounces mushrooms, chopped (if you can, go for some wild mushrooms)
Salt and pepper, to taste
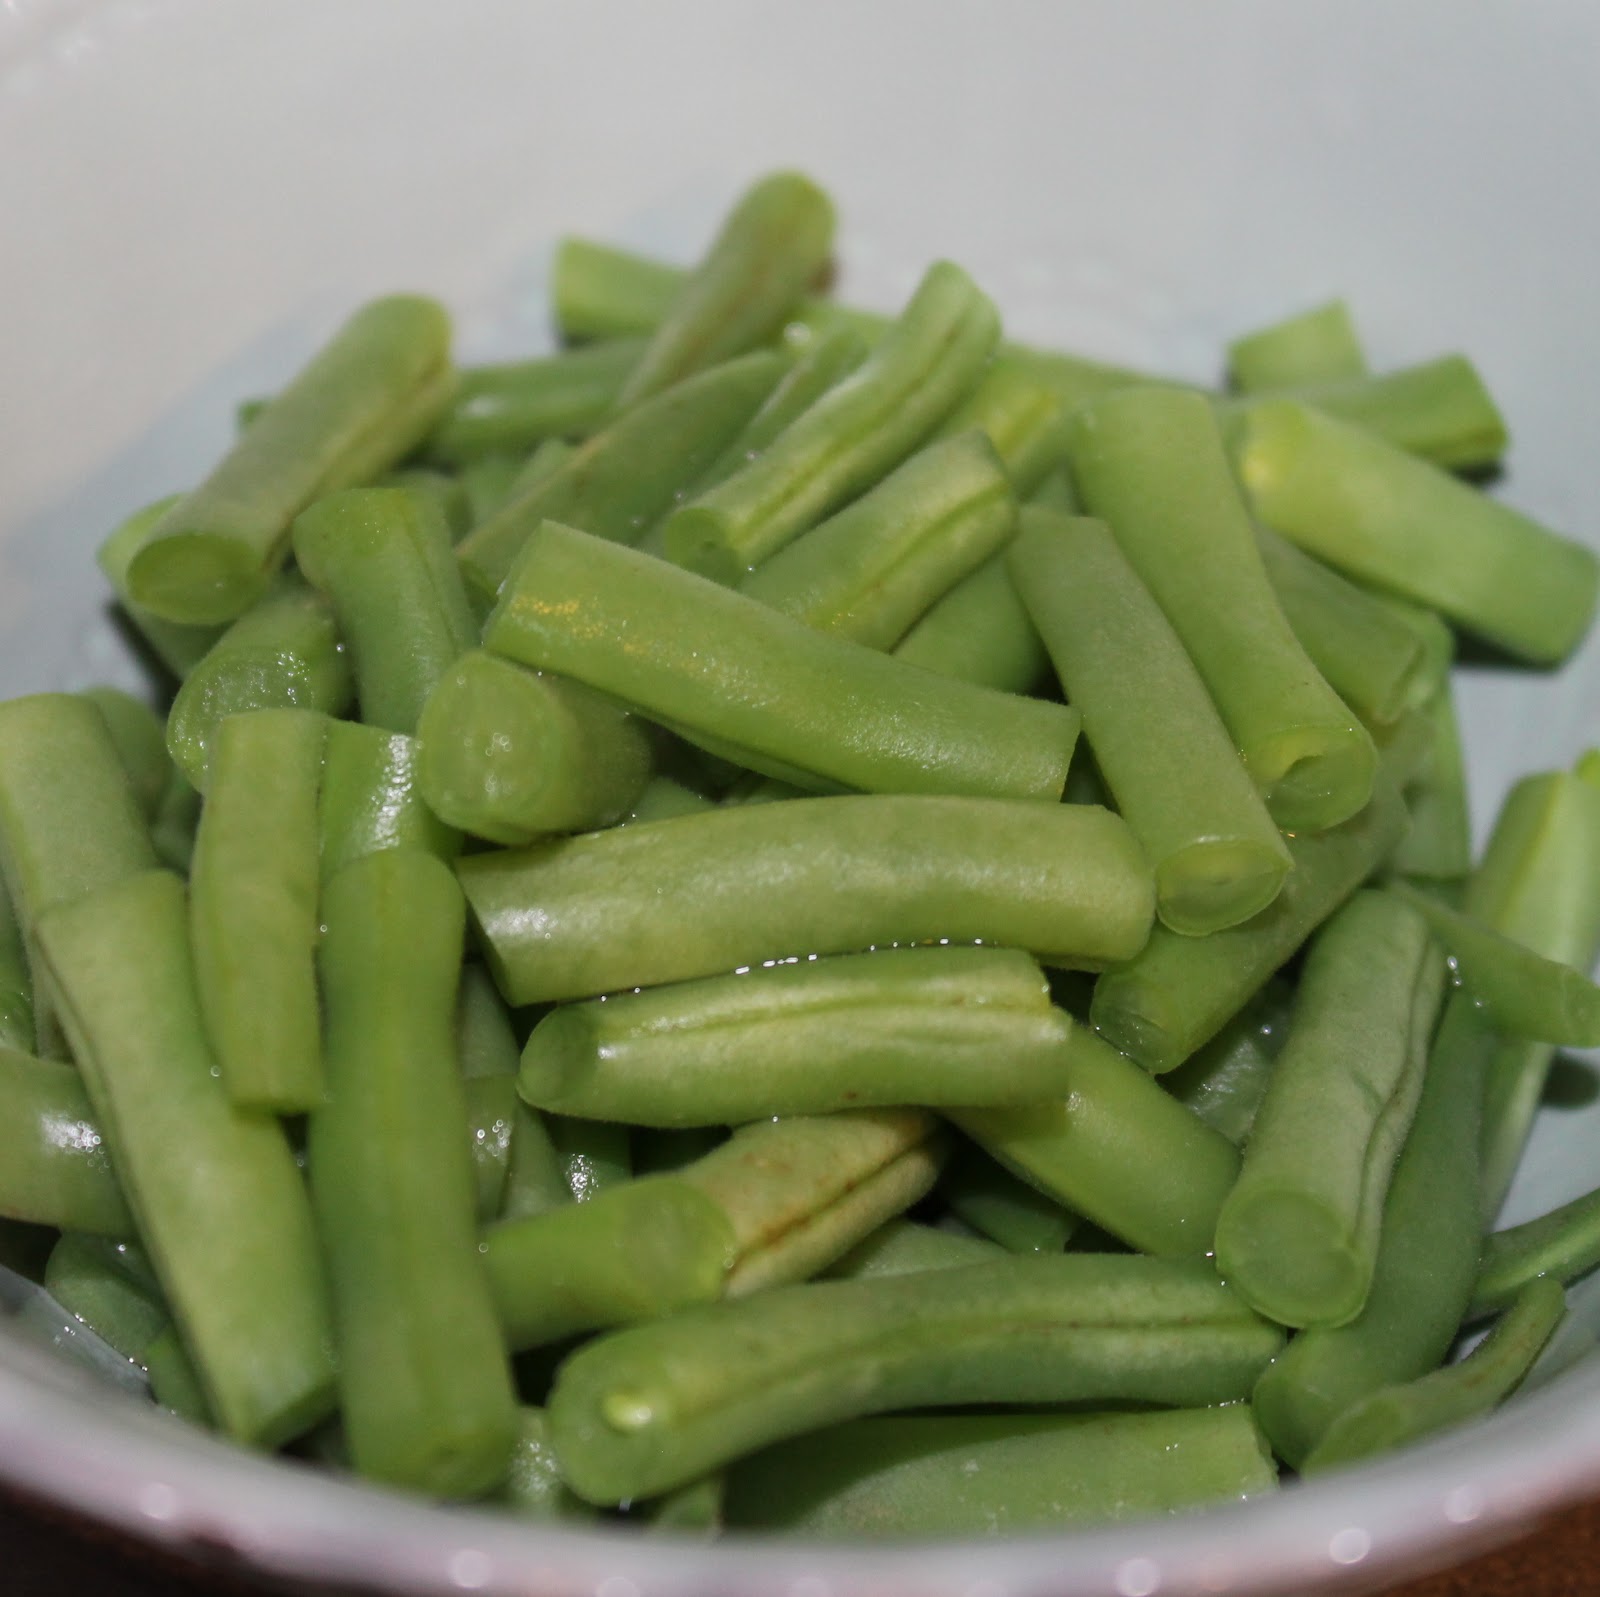
1/2 pound green beans, trimmed, and cut into bite sized pieces
3 strips bacon, finely chopped
3 tablespoons olive oil, divided
3 tablespoons apple cider vinegar, plus 1 teaspoon, divided
1 teaspoon Dijon mustard
4 eggs
Begin by cooking your farro. Bring the 2 cups water and 1 cup farro to a boil in a pot. Cover, reduce the heat, and cook for 20 minutes or until the water has evaporated.
Also bring another pot of water to a boil. Liberally salt the boiling water (Chef Antonia says that your water should “taste like the ocean”). While waiting for the water to boil, prepare your green beans and mushrooms. Add the green beans to the water for 3 minutes. Remove with a slotted spoon and reserve. Keep the water at a simmer (you’ll use it again soon).
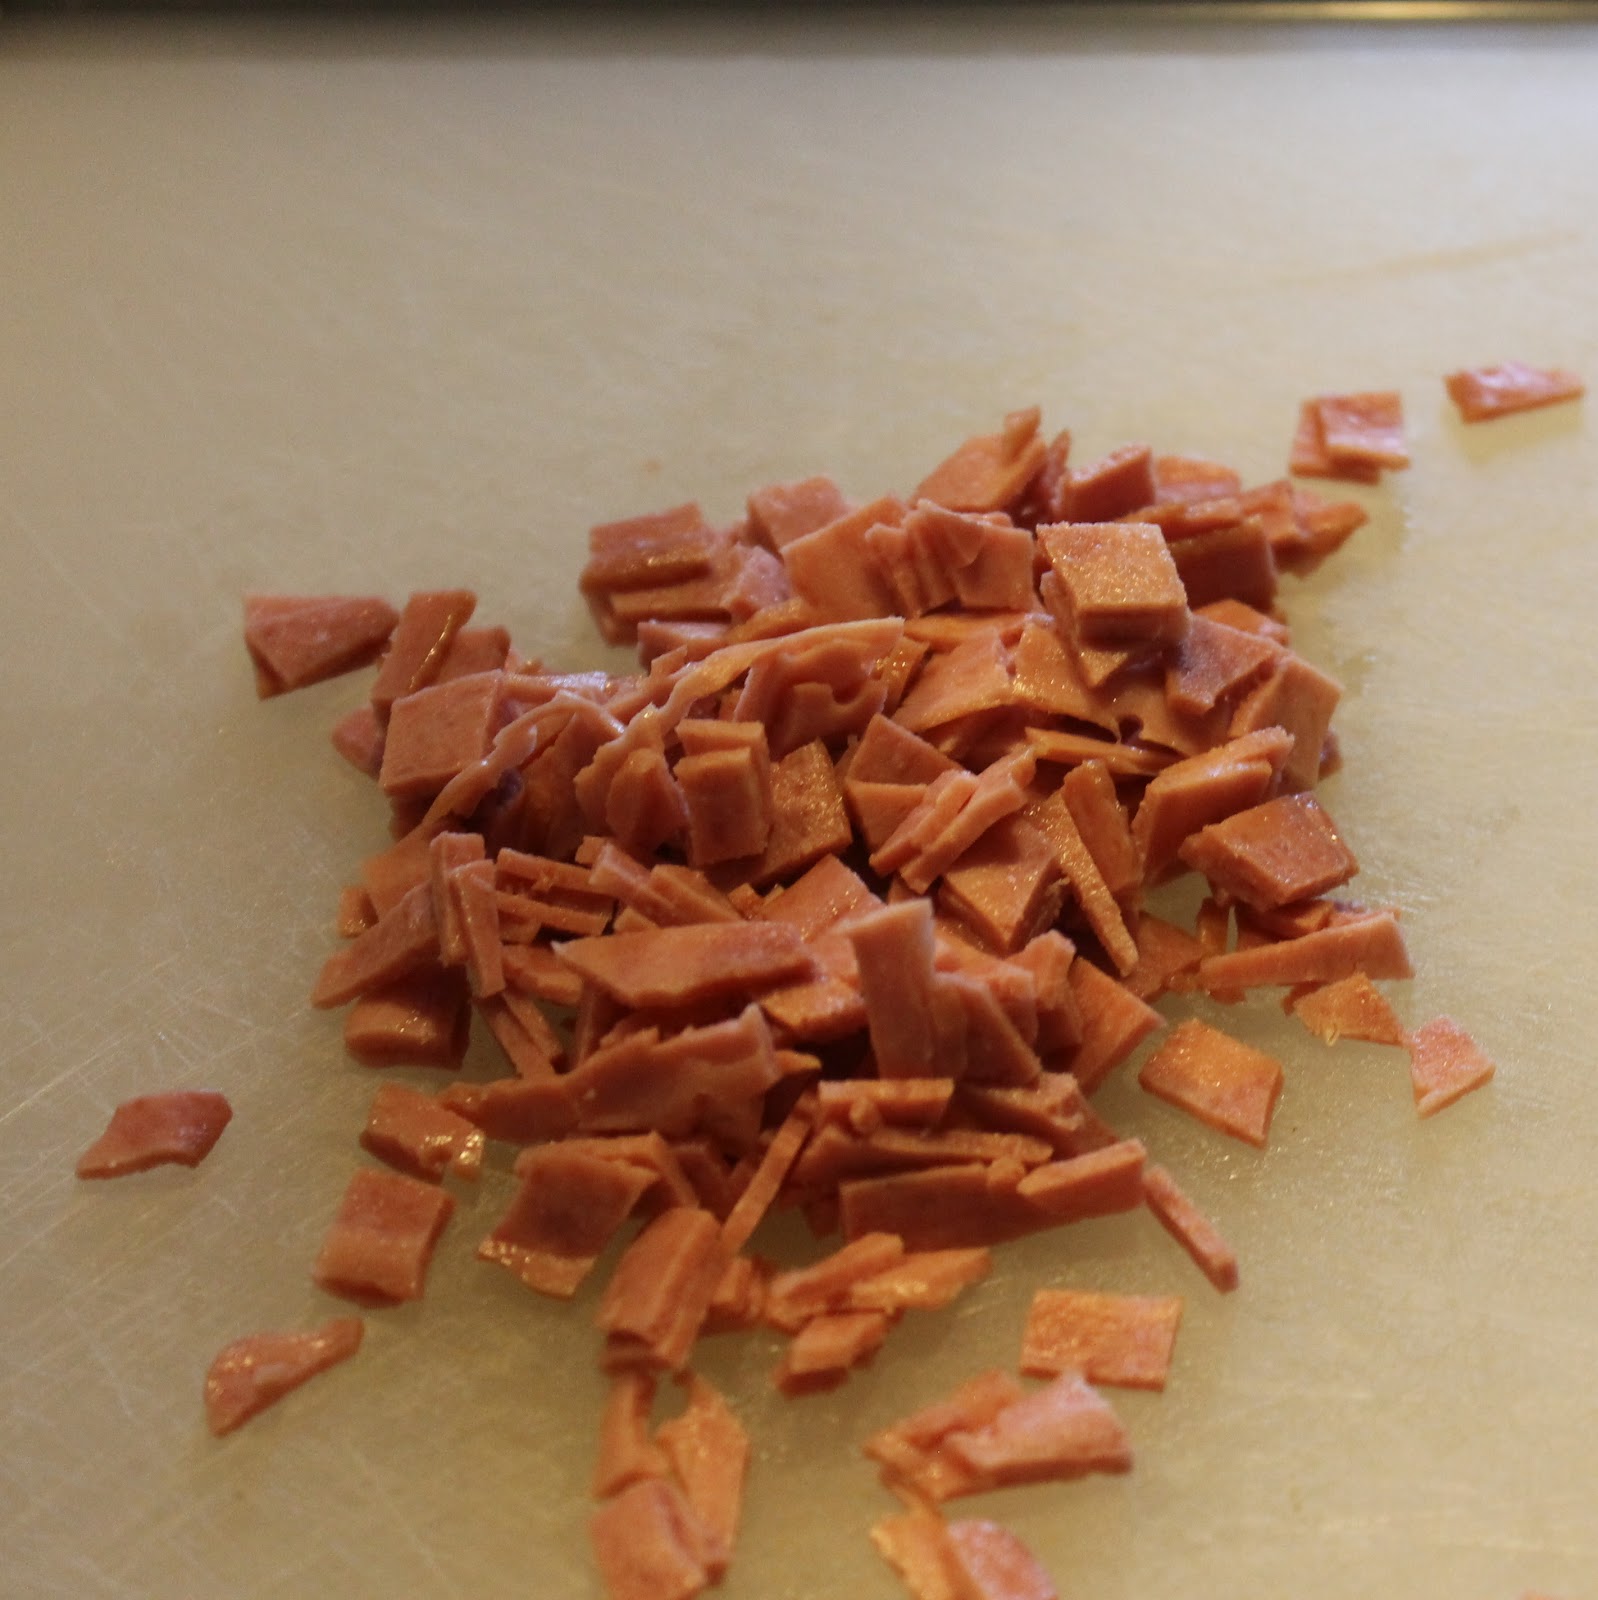
Finely chop the bacon and add to a saute pan over medium high heat.
Cook until the bacon begins to brown and crisp. Remove from heat, reserve the pan.
Add the olive oil, 3 tablespoons cider vinegar and Dijon mustard to the bacon and whisk to combine. Set aside.
Return the saute pan to the stove and heat 1 tablespoon olive oil over medium heat. Add the shallot and garlic and cook for 1 minute. Add the mushrooms and season with salt and pepper. Cook until the mushrooms give off some water and it evaporates. Remove from heat.
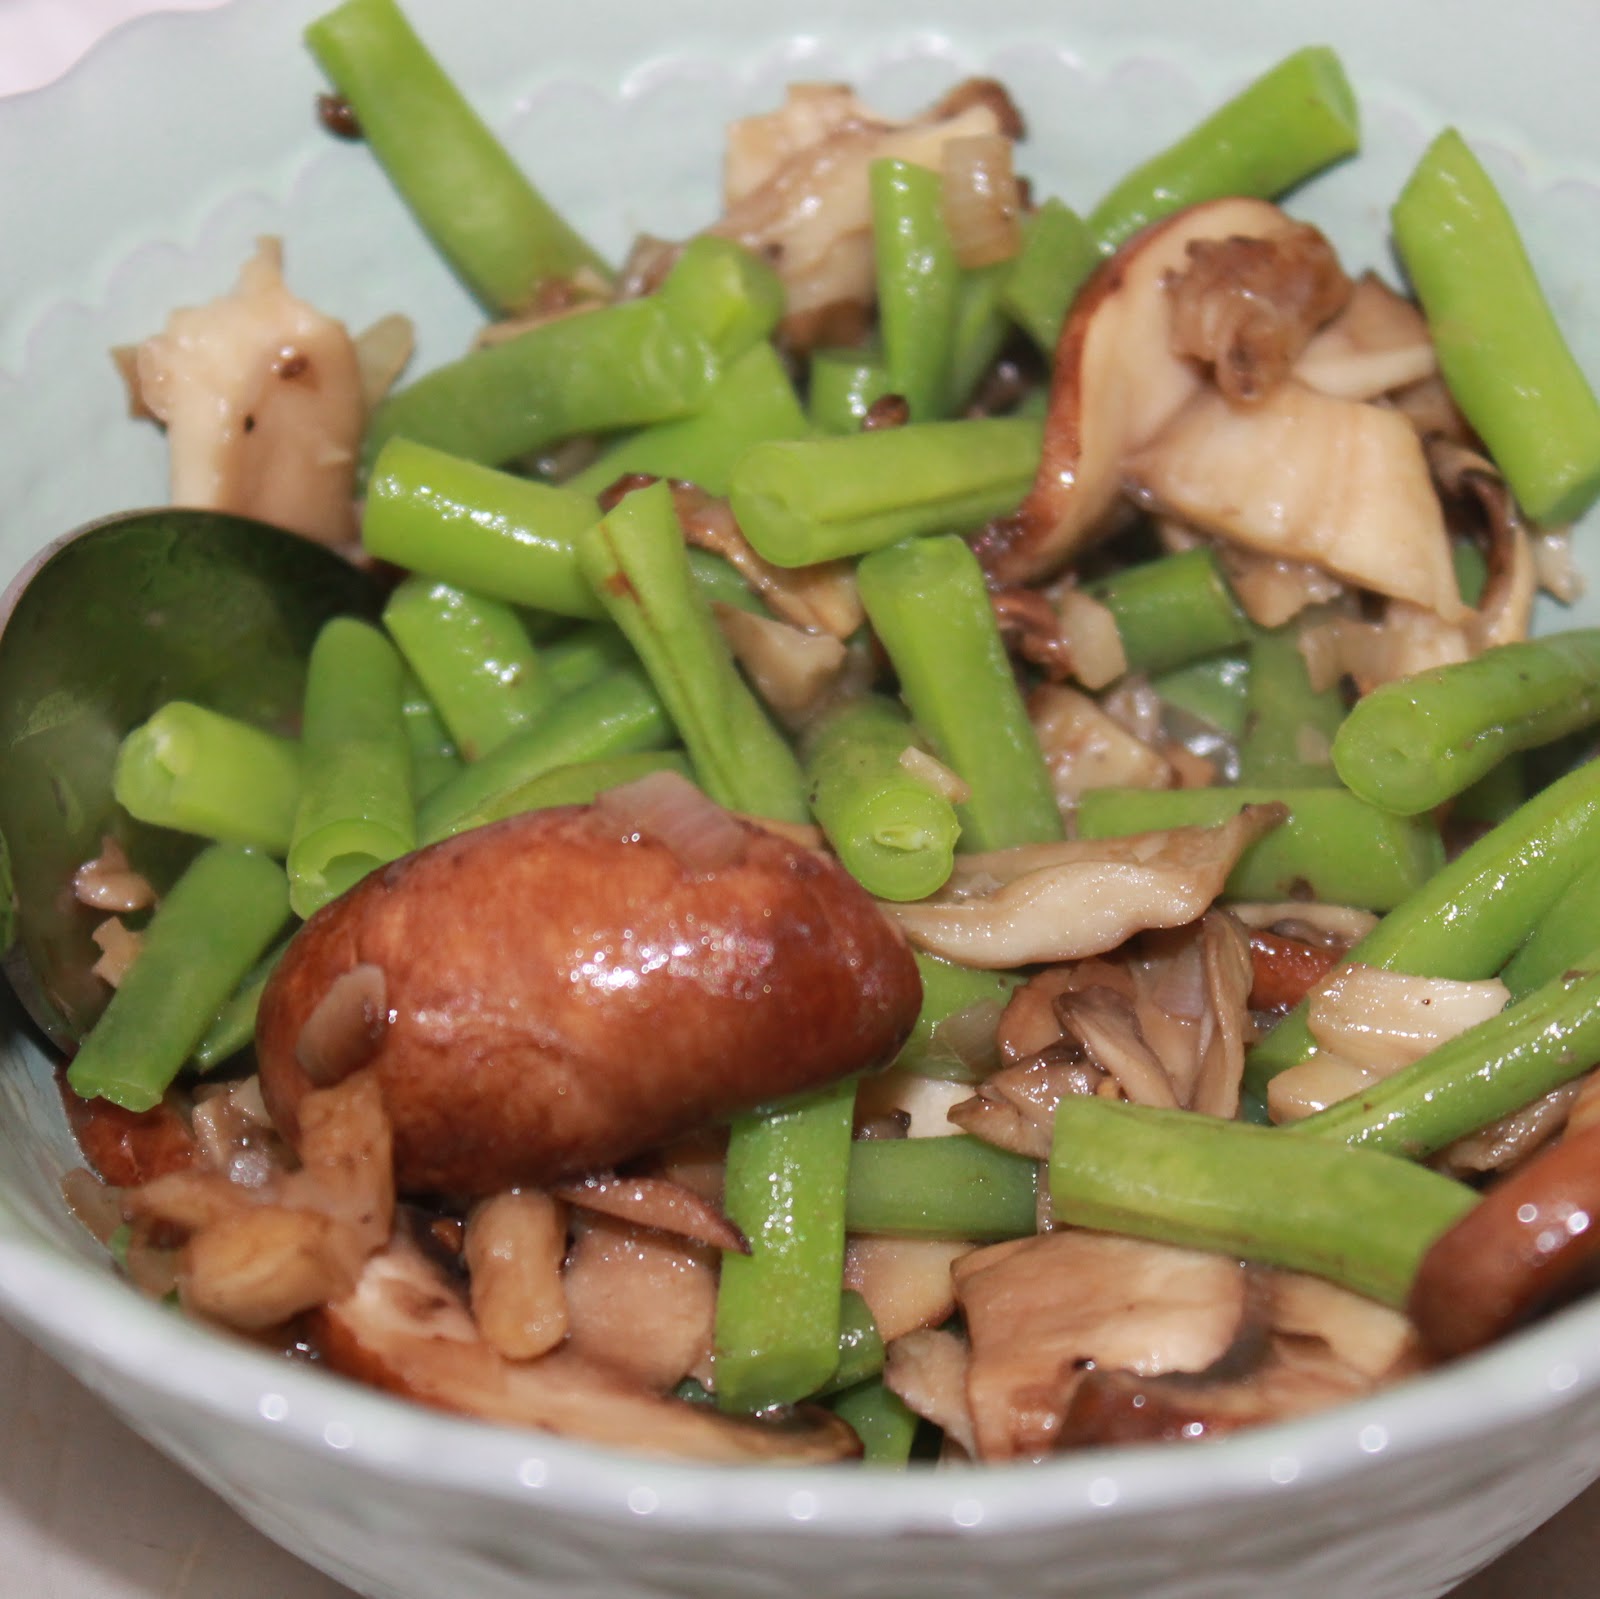
Combine the green beans, farro, and mushrooms.
To poach the eggs, add 1 teaspoon of the cider vinegar to the simmering water. Drop the eggs in one at a time.
Cook for 3 minutes and remove with a slotted spoon.
Top the green beans, farro, and mushroom mixture with the poached egg. Drizzle with the bacon vinaigrette.
The textures of this dish are fantastic. Farro has the texture of a more al dente rice, which was really nice with the crunchy green beans and the meaty mushrooms.
My poached egg, was a success! Look at that egg!
The bacon vinaigrette set this dish right over the top. Little bites of smokiness were an awesome touch. This is definitely a winning dish!
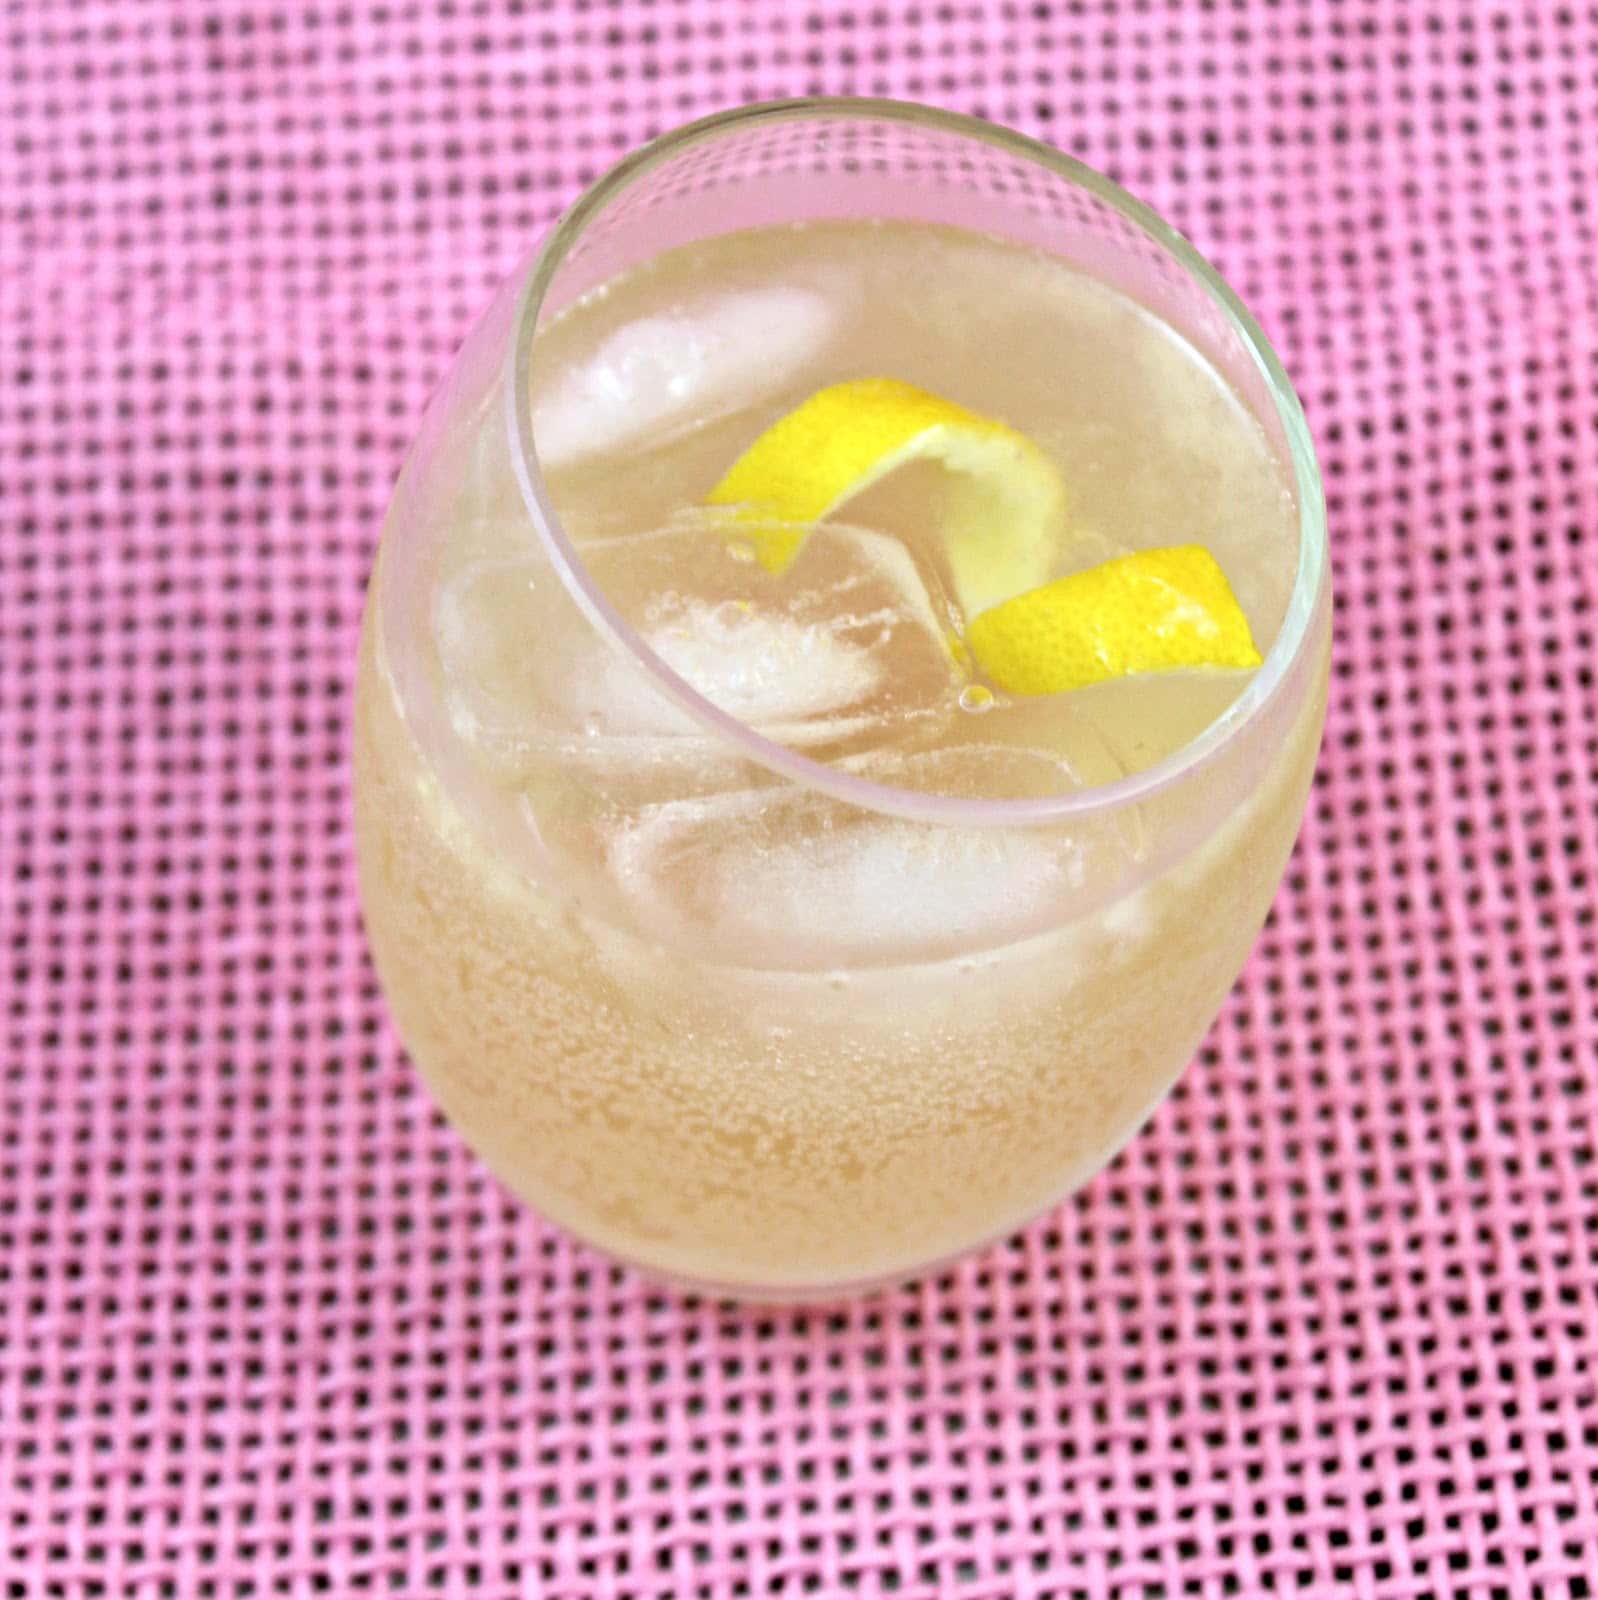
Whenever I have a cocktail, I tend to lean towards refreshing drinks, usually with gin. But while visiting friends in New York, we went to a cocktail bar that used caraway vodka in a drink. (Caraway has an anise flavor to it and is frequently used in baking. It is commonly used in rye bread and most versions of Irish soda bread.) So it adds a really nice earthy flavor to any drink. I decided to make my own to use in refreshing cocktails. I also used it to make a version of my favorite cocktail: the east side, which is essentially a gimlet. (Every drink seems to just be a variation of yet another drink).
Ingredients to make caraway vodka:
2 cups vodka (I used a cucumber vodka for more flavor)
2 tablespoons caraway seeds
Ingredients to make cocktail:
2 oz caraway vodka
1 oz lemon juice
1/2 oz simple syrup
1 basil leaf, chopped
ice
club soda
Making your own flavored vodka is really easy. Just take a jar and fill it with 2 cups vodka and 2 tablespoons caraway seeds. Allow to sit for at least a week. Strain and store for future use. I used cucumber vodka as a base which made a pretty awesome flavor combination.
A traditional east side uses cucumber and mint muddled together then mixed with gin, simple syrup, and lime and topped off with club soda. My version is just as refreshing, but uses some of summer’s other favorite fresh ingredients, lemon juice and basil, paired with my homemade caraway-cucumber vodka.
To make, add ice to a cocktail shaker and add the caraway vodka, lemon juice, simple syrup, chopped basil, and ice. Shake and strain into a glass. Top with club soda. If desired, garnish with a cucumber or a lemon twist.
You can also serve the drink on the rocks, which I prefer (the ice keeps it nice and cool to keep it super refreshing).
If you are a fan of more citrus over sweetness, omit the simple syrup. You can further customize the drink by muddling the basil before adding it to the drink to release more flavor into the cocktail.
Everything about this drink screams summer. I wish I had made the vodka earlier in the summer so I could have had this all season. Sigh. Instead, it will just have to be my way to keep a little summer going on all year long!
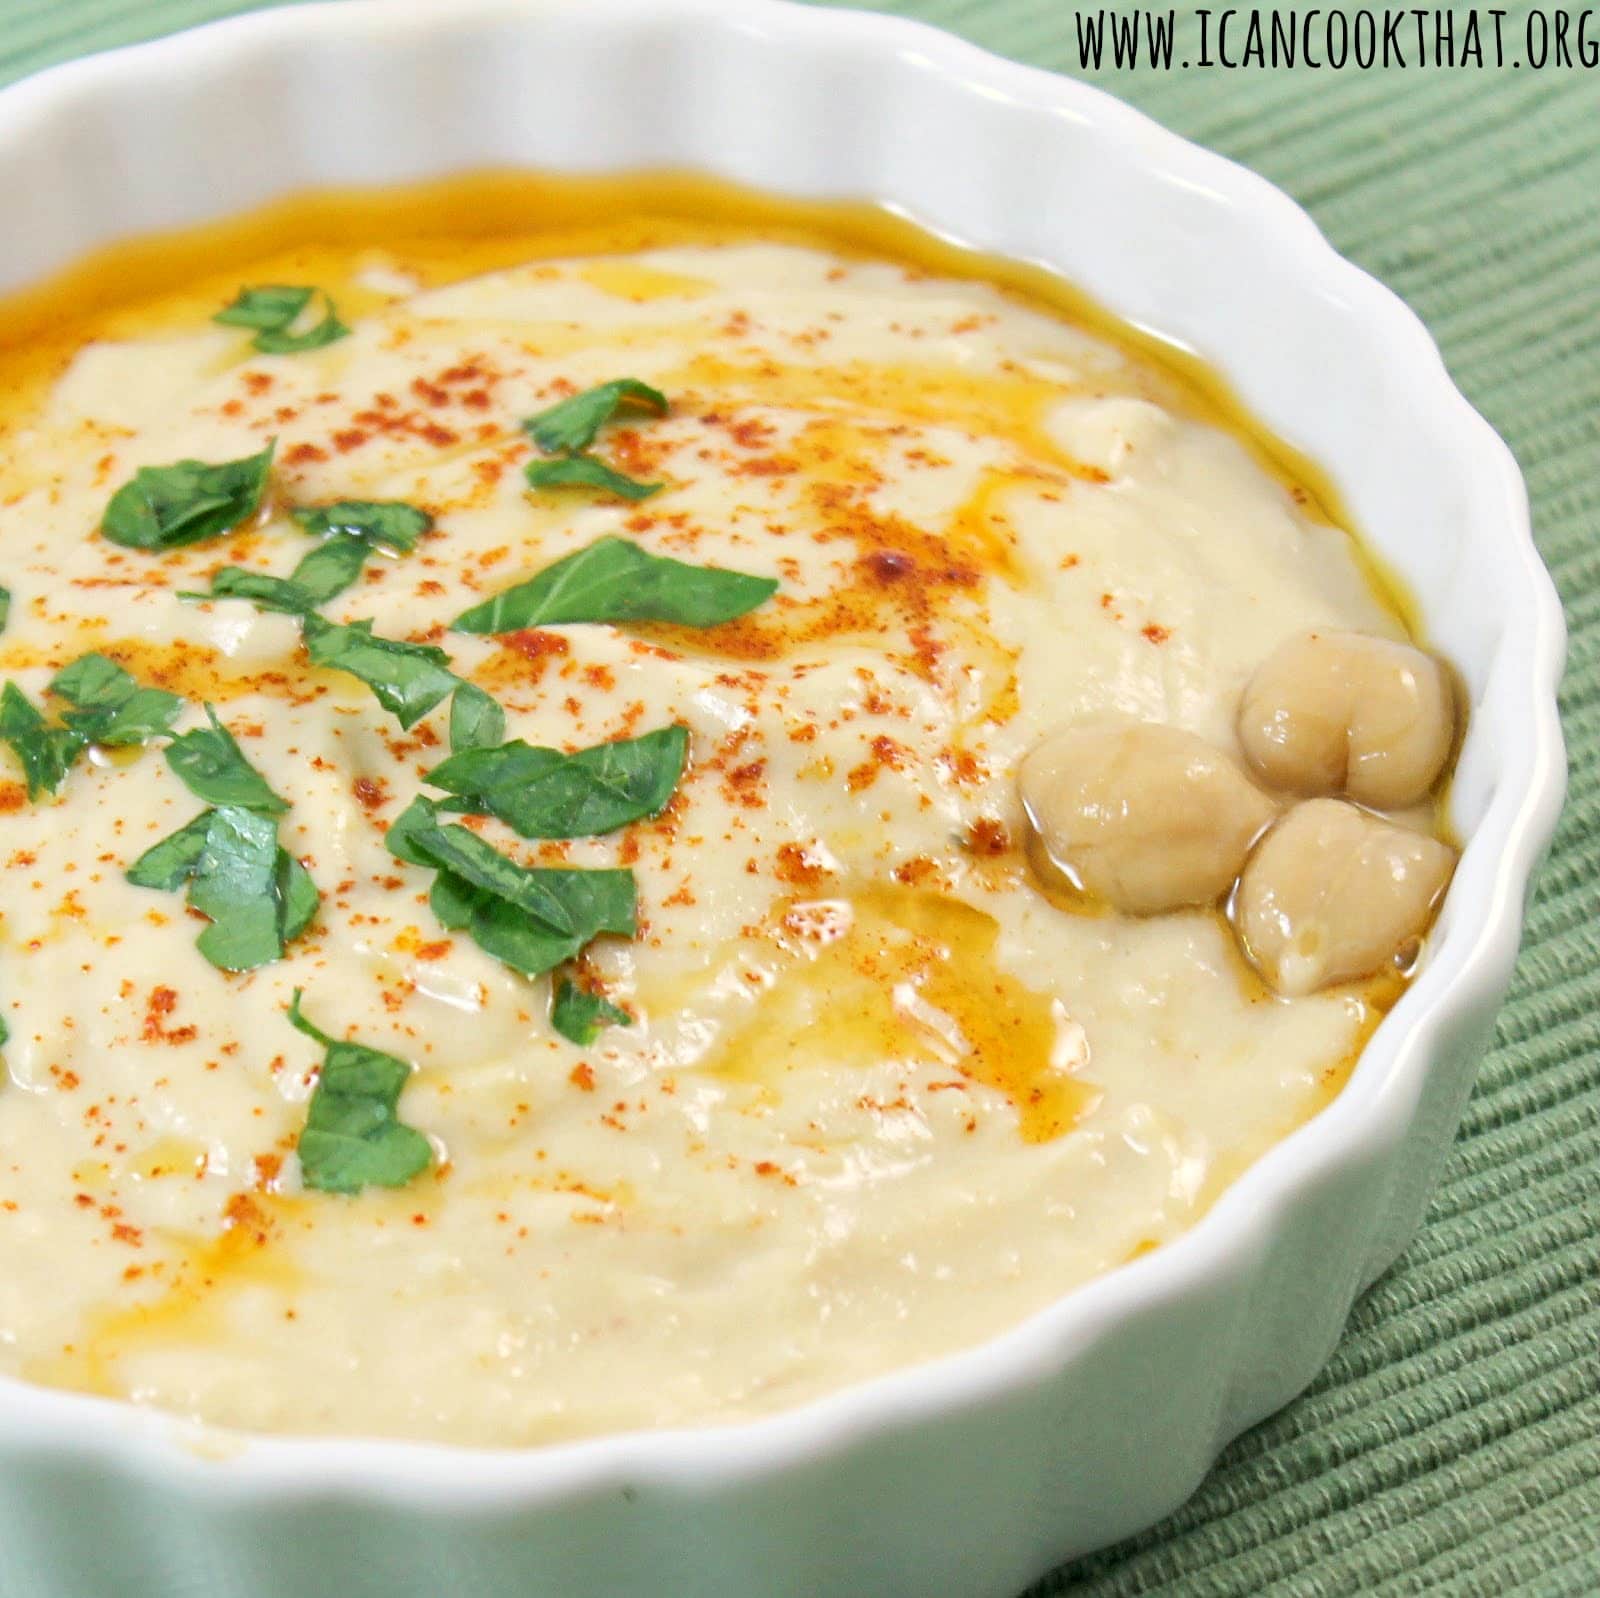
Hummus is probably my favorite snack. On days I don’t feel like cooking, I tend to grab some hummus with pita, tomatoes, cucumbers, or anything else that will work as a yummy vehicle for the hummus. It’s also really delicious as a spread on a sandwich instead of mayo. So I usually have at least one container of hummus in my fridge at any moment. But homemade hummus is exponentially better than the store bought stuff. Plus, you can customize it to your liking.
I recently watched a video of the hummus master himself, James Beard winner Michael Solomonov. Mike Solo has arguably the best hummus found in Philly, at his restaurant Zahav. I wanted to attempt to make my own creamy hummus at home. I tend to like mine slightly spicy, which can be achieved by adding a lot of garlic. But I have this awesome Nudo Chili Olive Oil, so I thought I’d include that to give it a bit of a kick, so I decided to make this Chili Oil Hummus!
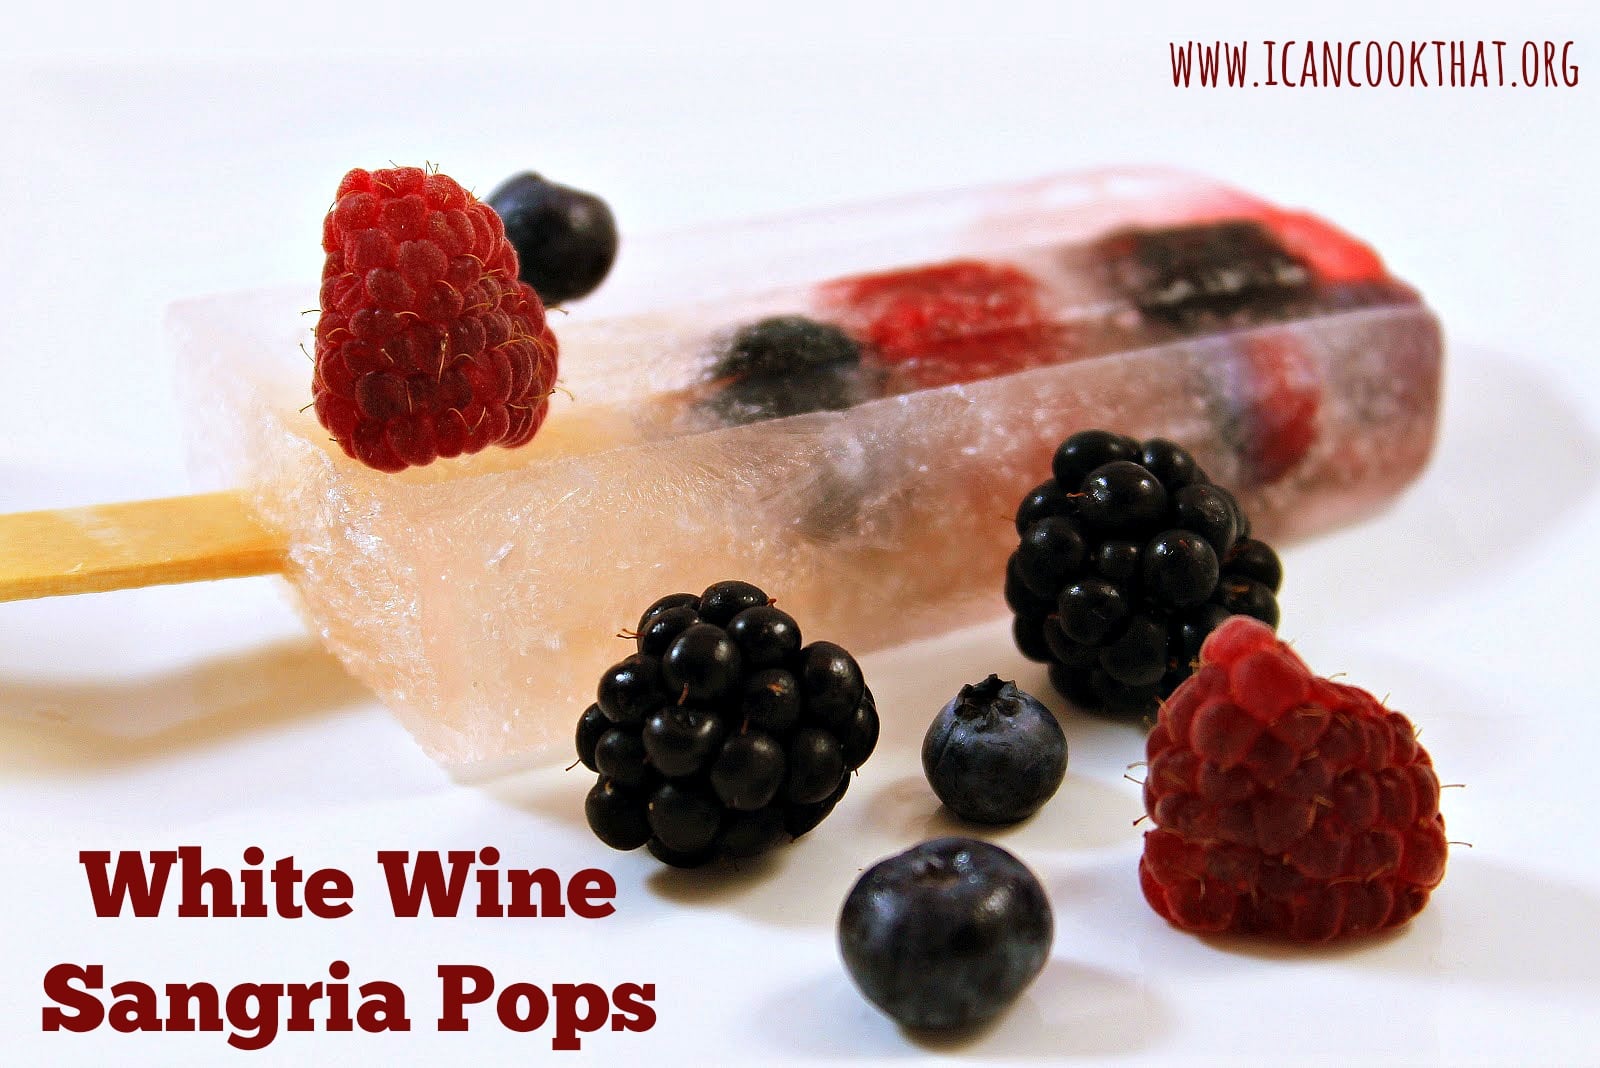
I was at a restaurant on Long Island that had a drink they called a “lushee” which was basically a frozen sangria. And I haven’t been able to stop thinking about it. Pure brilliance. I told a friend about this and we knew we had to make our own, what could possibly be more refreshing on a hot summer day? I was recently sent a cookbook that actually one-upped the concept of the lushee: a White Wine Sangria Popsicle.
The book, Poptails, by Erin Nichols of Erin Cooks, is filled with sixty pops inspired by your favorite alcoholic beverages. Recipes range from classics like a gin and tonic to fancy favorites like a cosmopolitan.There are even some awesome dessert pops like cherry cheesecake and banana split.
I was in love with this book before I even received it. What an amazing idea! Who wouldn’t want their favorite drink in iced pop form? The recipes had me imagining all of the lovely get-togethers I could have: a brunch with iced coffee and bloody Mary pops, a pool party with strawberry basil martini pops, or Christmas in July with spiked eggnog, mulled wine, and Christmas cheer pops. Sigh.
Anyways, I kept thinking back to those lushes and knew I had to try the white wine sangria pops.
I tweaked the recipe within the book a bit. For the original recipe, pick up a copy of this fun book!
Ingredients:
1 bottle white wine (I used Sauvignon Blanc)
1 liter flattened seltzer water
1/4-1/3 cup cranberry juice (I used cranberry hibiscus)
1 tablespoon simple syrup, or to taste
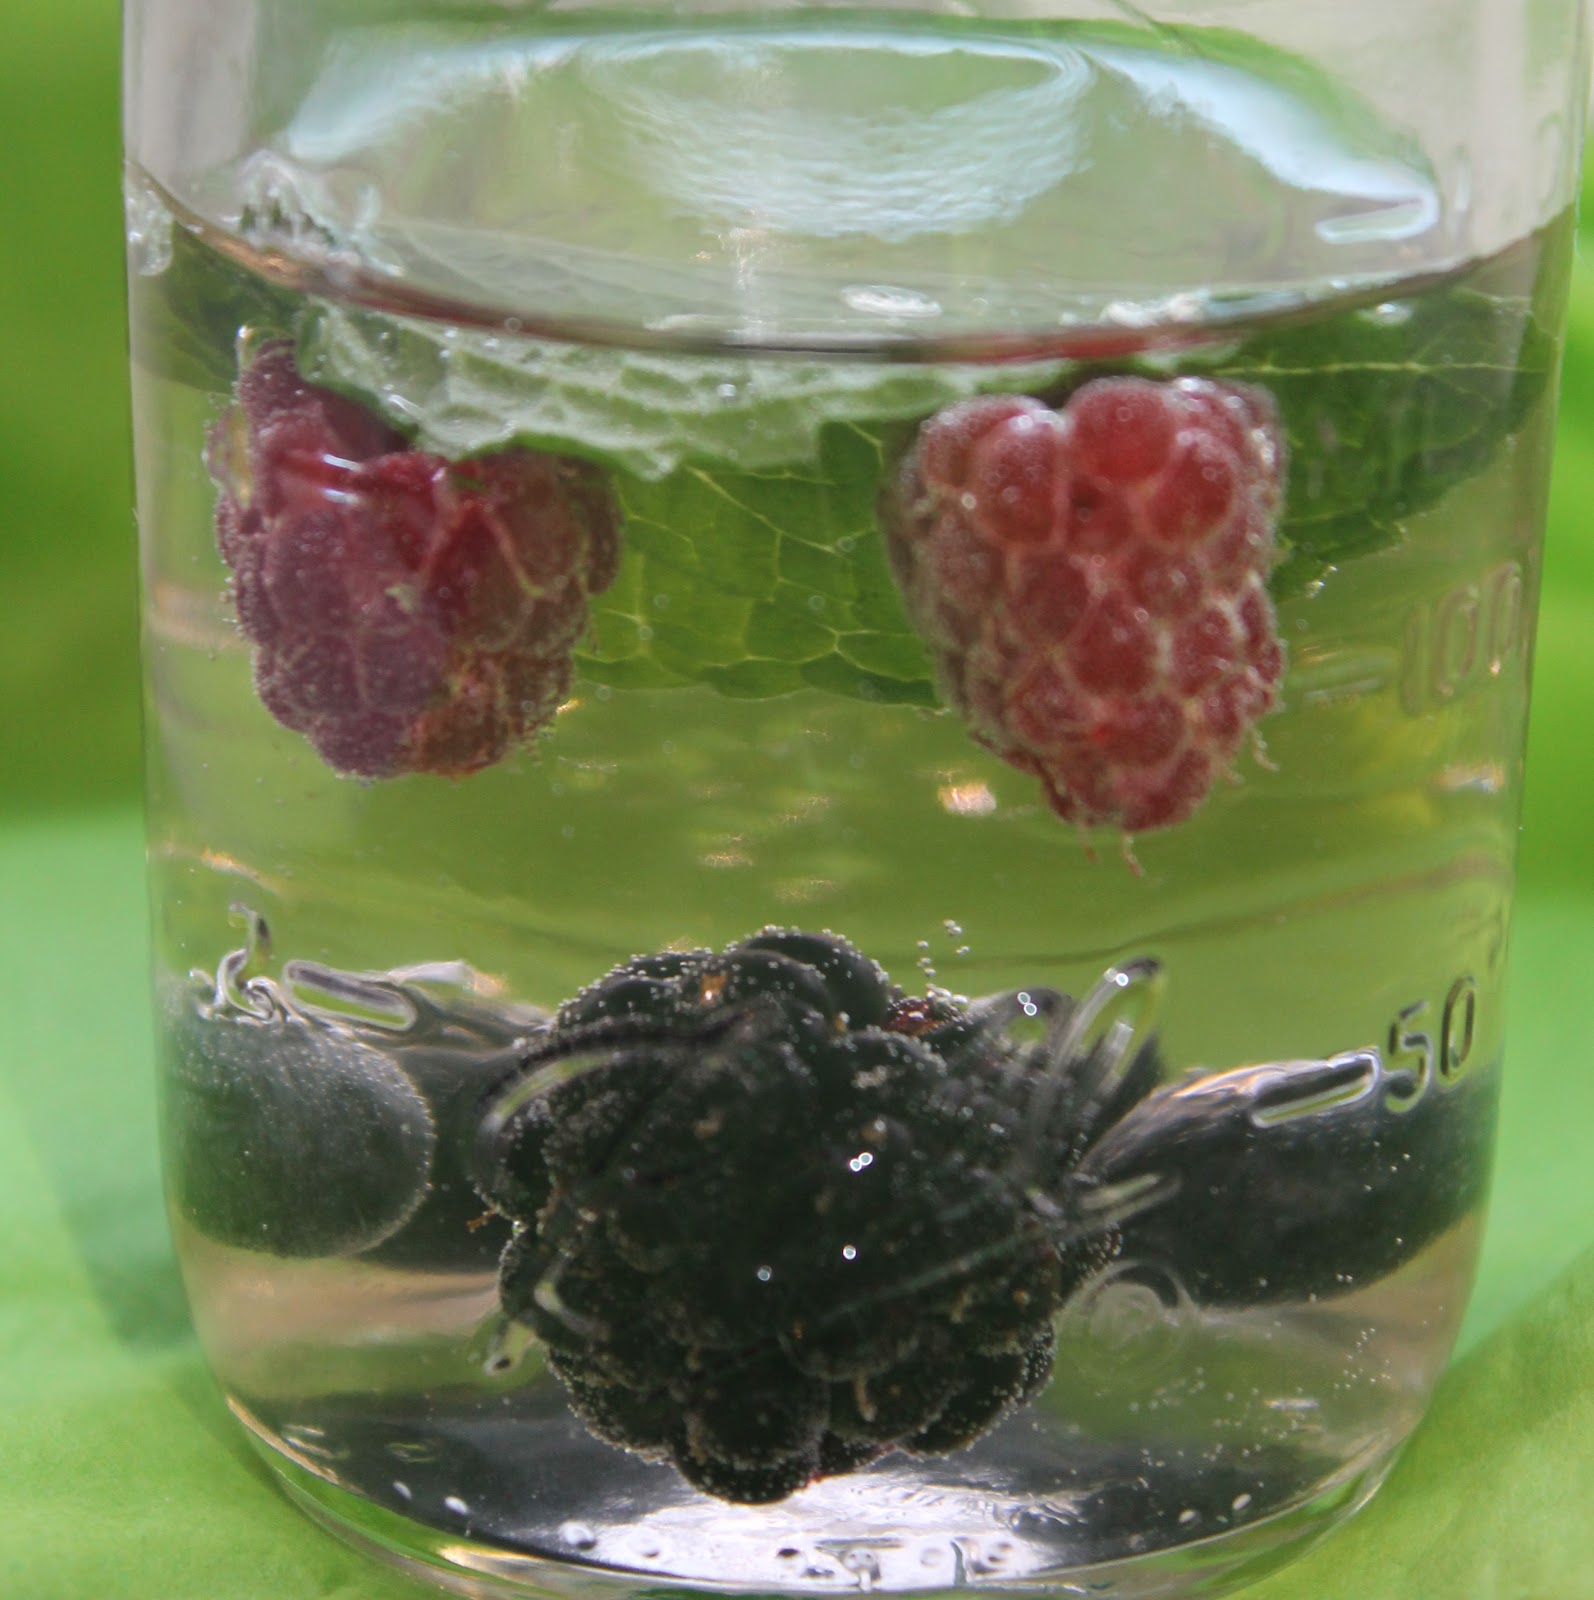
1 pint raspberries
1 pint blackberries
1 pint blueberries
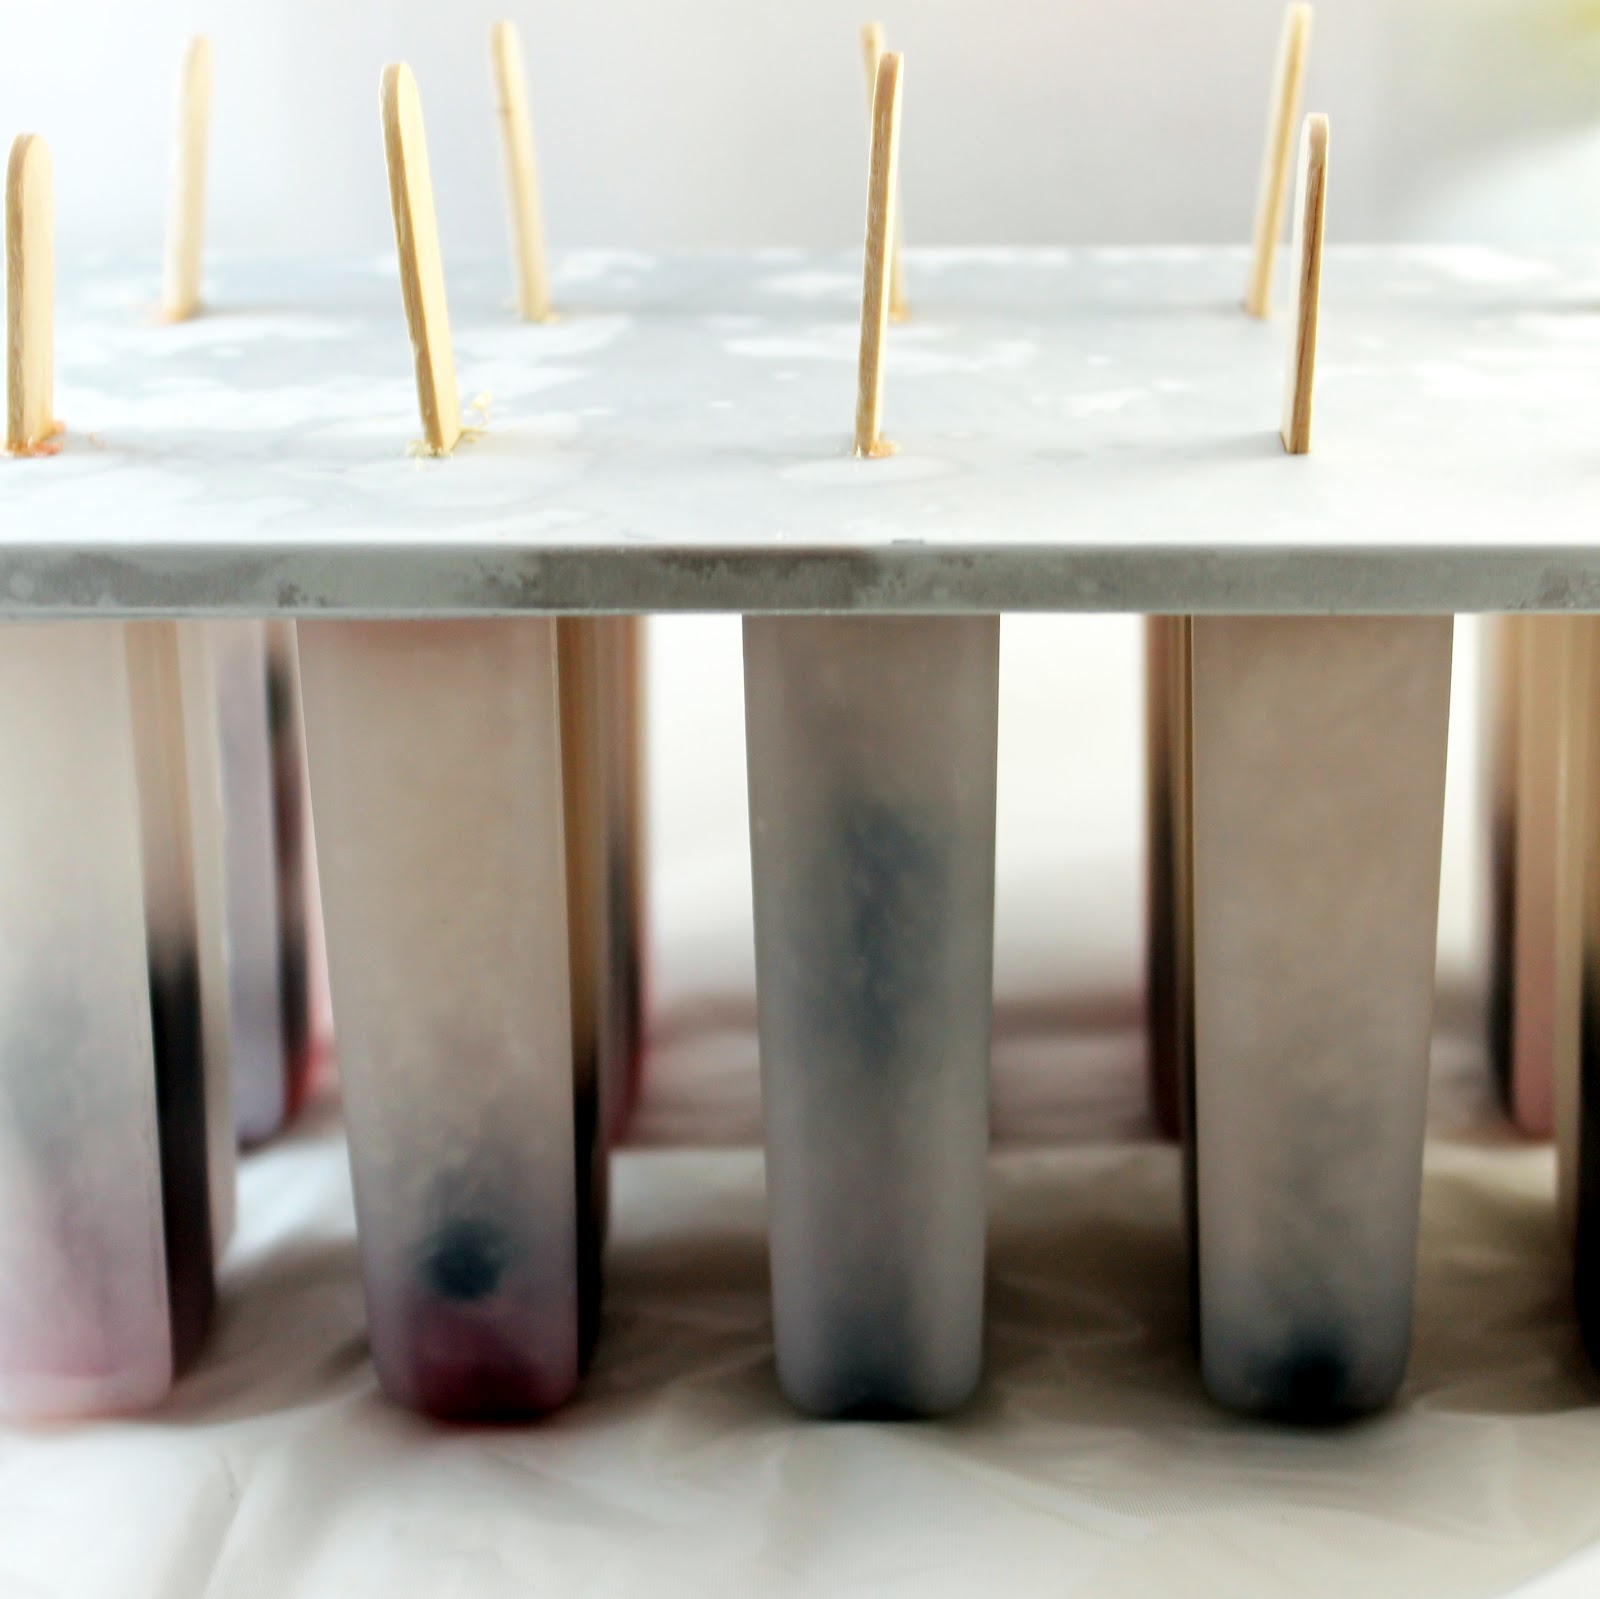
Note: You’ll need ice pop molds and Popsicle sticks to make these.
I wanted to start this post with the definition of seltzer, club soda, tonic water, and sparkling water. Because I always manage to mess these drinks up. And no wonder: club soda, seltzer and sparkling water are all water infused with carbonation. These can all be interchanged. Tonic water is something a bit different, it is still a carbonated water, but quinine is dissolved into the water as well. It’s quite a bit more bitter so be sure to use club soda/seltzer/sparkling water in this recipe. Or for a bit more sweetness, a lemon-lime soda would work.
Make sure to allow your seltzer water to flatten. Don’t forget this step! Unflattened carbonated beverages will explode when frozen. And that sounds like an awful waste of white wine sangria if you ask me. The book suggests opening your seltzer 8 hours prior and popping it into your fridge in a place it won’t spill.
Combine the wine, flattened seltzer water, cranberry juice, and simple syrup. I used lemon simple syrup to give a touch more flavor. Feel free to add some lemon zest to add a little extra.Add whatever mixture of berries you’d like to the pop molds. I went for one raspberry, one blackberry, and a few blueberries per pop.Fill each mold ¾ of the way full with the mixture; you need to leave a small amount at the top to allow the liquid to expand.
Note: you’ll have some extra sangria that won’t fit in the pop molds. This is so you can enjoy your creation before waiting 24 hours 🙂
Add popsicle sticks, cover, and freeze for approximately 24 hours.
To remove from the molds, fill a bowl larger than your pop molds with warm (not hot) water. Add the mold to the bowl for 15 seconds then gently pull on the top of the ice pop stock. If the pop does not release, add the mold back to the water for another 15 seconds, repeat this process until the pops come out of the molds.
These pops were refreshing and a little bit tangy. I wanted a bit more sweetness though, I might add more simple syrup next time I make them. I also would add a bit more cranberry juice so that the pops turn a very light pink color, which would probably look really nice.
What’s nice about this recipe is how adaptable it is. You can add or subtract whatever fruit makes you happy. You could use a sweeter wine, or even a (flattened) champagne. My friend made this recipe using white grape juice instead of cranberry.
There are plenty of other creative pop recipes within the pages of this book. I love the element of fun that the popsicles add and can’t wait to try more of these yummy recipes!
1/4-1/3 cup cranberry juice (I used cranberry hibiscus)
1 tablespoon simple syrup, or to taste
1 pint raspberries
1 pint blackberries
1 pint blueberries
Instructions
Make sure to allow your seltzer water to flatten. Don’t forget this step! Unflattened carbonated beverages will explode when frozen. And that sounds like an awful waste of white wine sangria if you ask me. The book suggests opening your seltzer 8 hours prior and popping it into your fridge in a place it won’t spill.
Combine the wine, flattened seltzer water, cranberry juice, and simple syrup. I used lemon simple syrup to give a touch more flavor. Feel free to add some lemon zest to add a little extra. Add whatever mixture of berries you’d like to the pop molds. I went for one raspberry, one blackberry, and a few blueberries per pop. Fill each mold ¾ of the way full with the mixture; you need to leave a small amount at the top to allow the liquid to expand.
Note: you’ll have some extra sangria that won’t fit in the pop molds.
Add popsicle sticks, cover, and freeze for approximately 24 hours.
To remove from the molds, fill a bowl larger than your pop molds with warm (not hot) water. Add the mold to the bowl for 15 seconds then gently pull on the top of the ice pop stock. If the pop does not release, add the mold back to the water for another 15 seconds, repeat this process until the pops come out of the molds.