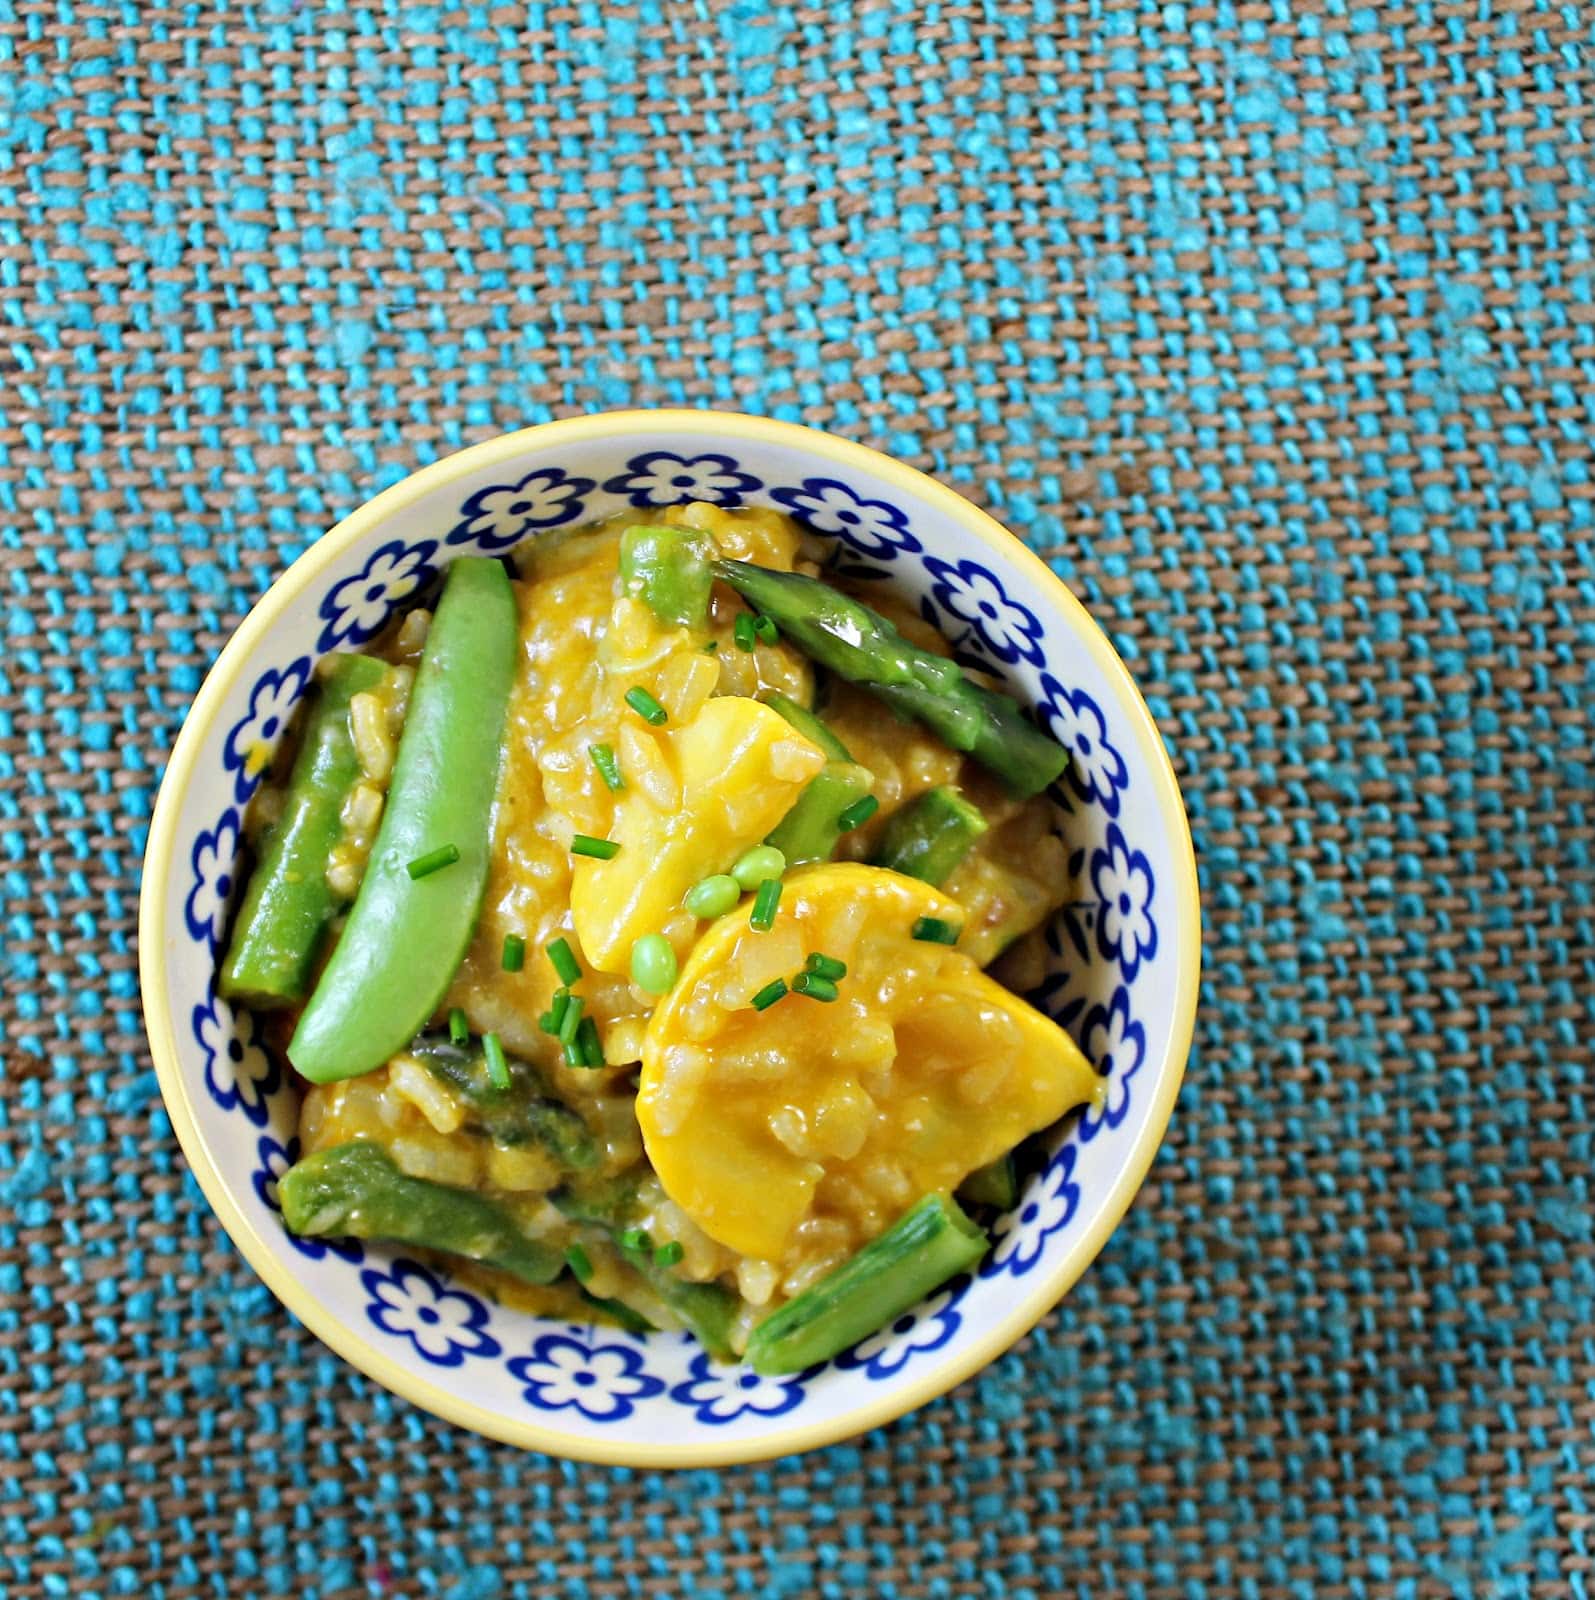
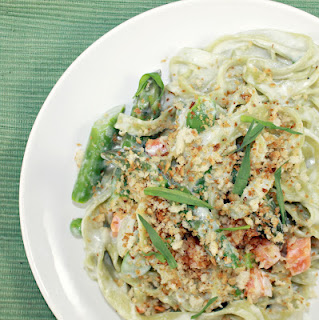
As I hear rumblings of all things pumpkin just around the corner (yay!), I realized that my days of beautiful, fresh vegetables are numbered (boo). Which means I needed a recipe that used some of summer’s best. This risotto recipe from Cooking Light fit the bill: Asparagus, Sugar Snap Peas, Zucchini, Yellow Squash.. mmm.
Ingredients:
8 ounces asparagus, trimmed and cut into 1-inch pieces
8 ounces sugar snap peas, trimmed and cut in half
5 teaspoons extra-virgin olive oil, divided
1 (8-ounce) zucchini, halved lengthwise and cut into 1/2-inch-thick slices
1 (8-ounce) yellow squash, halved lengthwise and cut into 1/2-inch-thick slices
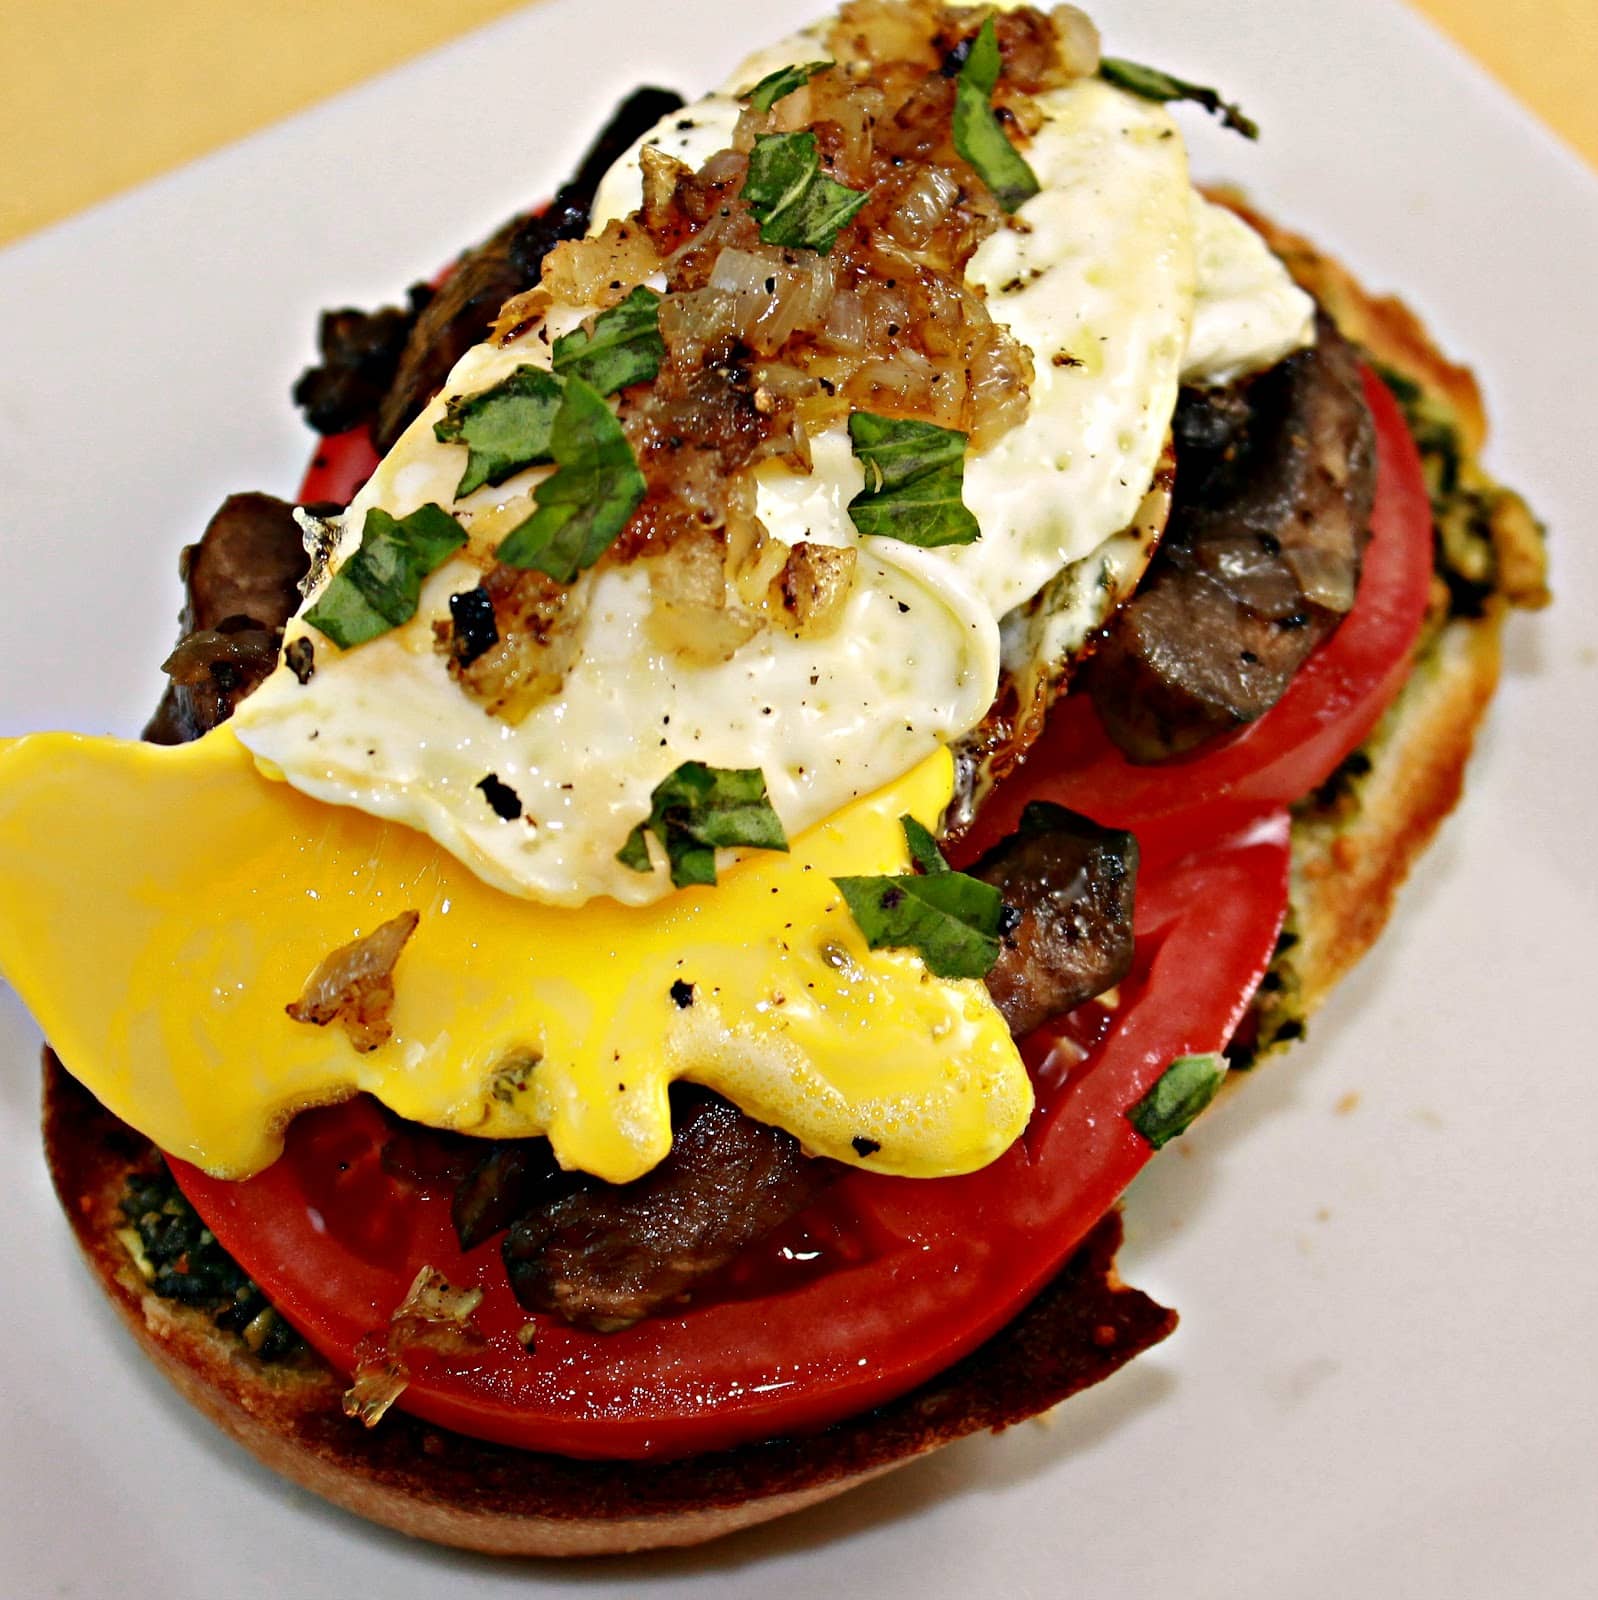
Brunch appeals to my indecisive side: I love not having to choose between breakfast or lunch. Philadelphia is a huge brunch town so almost every weekend I have the opportunity to have an awesome brunch at a local coffee shop or restaurant. This weekend, I decided to stay home for brunch and try out this delicious sounding recipe from Cooking Light. The recipe includes mushrooms, a fried egg, tomatoes, and pesto … did they make this recipe especially for me?!
Ingredients (this makes 4 servings):
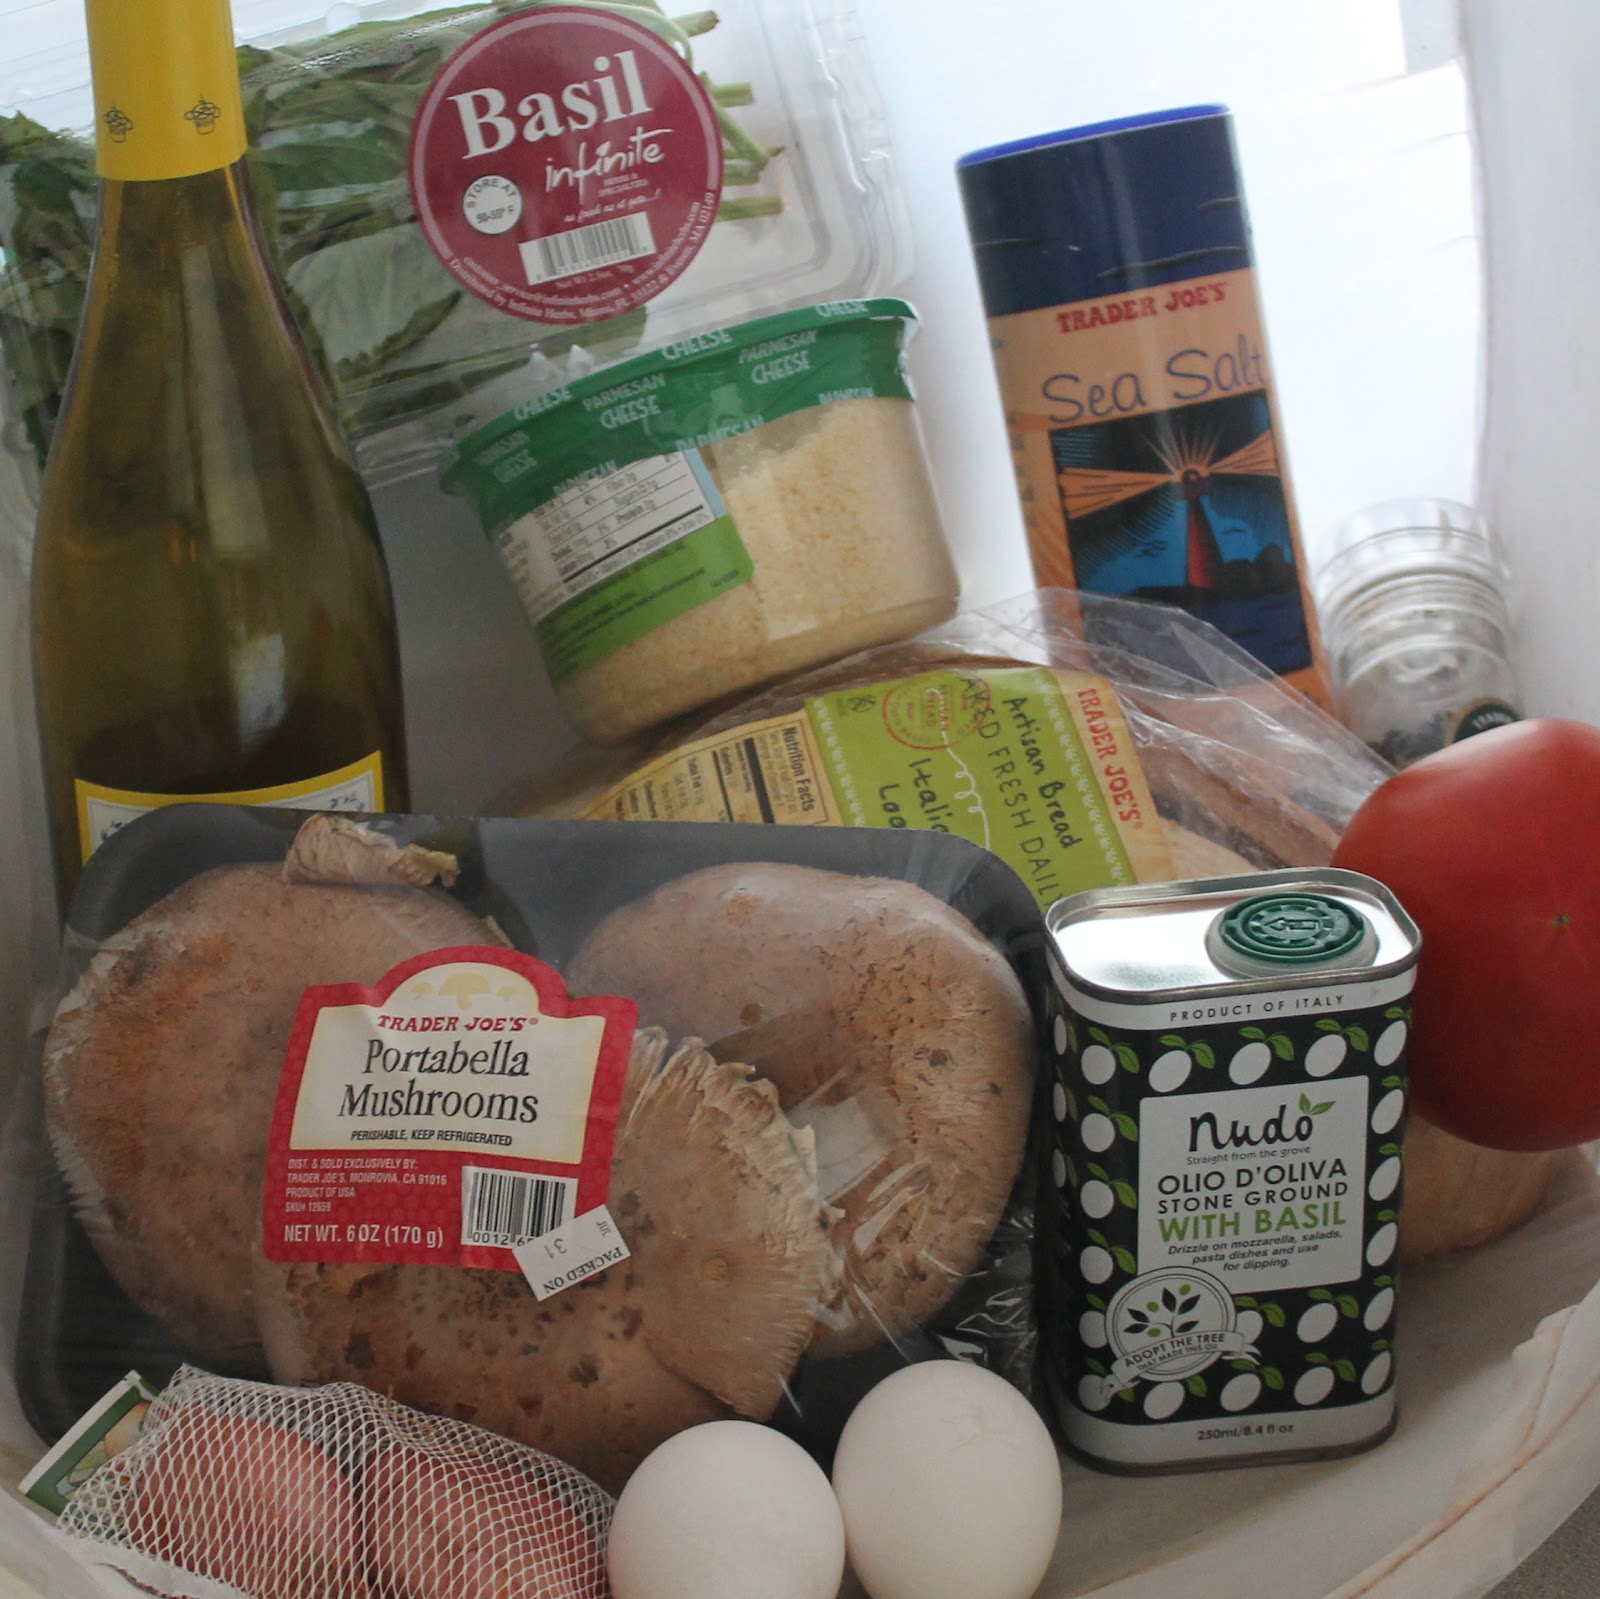
4 teaspoons extra-virgin olive oil, divided (I used basil olive oil)
1 cup thinly sliced shallots, divided
3 portobello mushrooms, roughly chopped
2 tablespoons dry white wine
1/2 teaspoon freshly ground black pepper, divided
1/4 teaspoon kosher salt
8 teaspoons refrigerated pesto (or fresh, check out my recipe here)
The wonderful people at Nudo sent me a new product on their site: the Squadra Italiana Set which includes cold press olive oil, olive oil with Sicilian chillies, and a free tin of extra virgin olive oil stone ground with fresh basil. These olive oils are absolutely wonderful on their own, to just dip breads in. But I wanted to add that extra punch of basil to this dish so I used the basil olive oil to add a little bit more flavor. Expect these tasty olive oils to show up in quite a few posts in the coming weeks. (You can get your own Squadra Italiana Set here)
If you’re making your own pesto, do that first. It takes maybe 5 minutes and tastes considerably better (at least I think so).
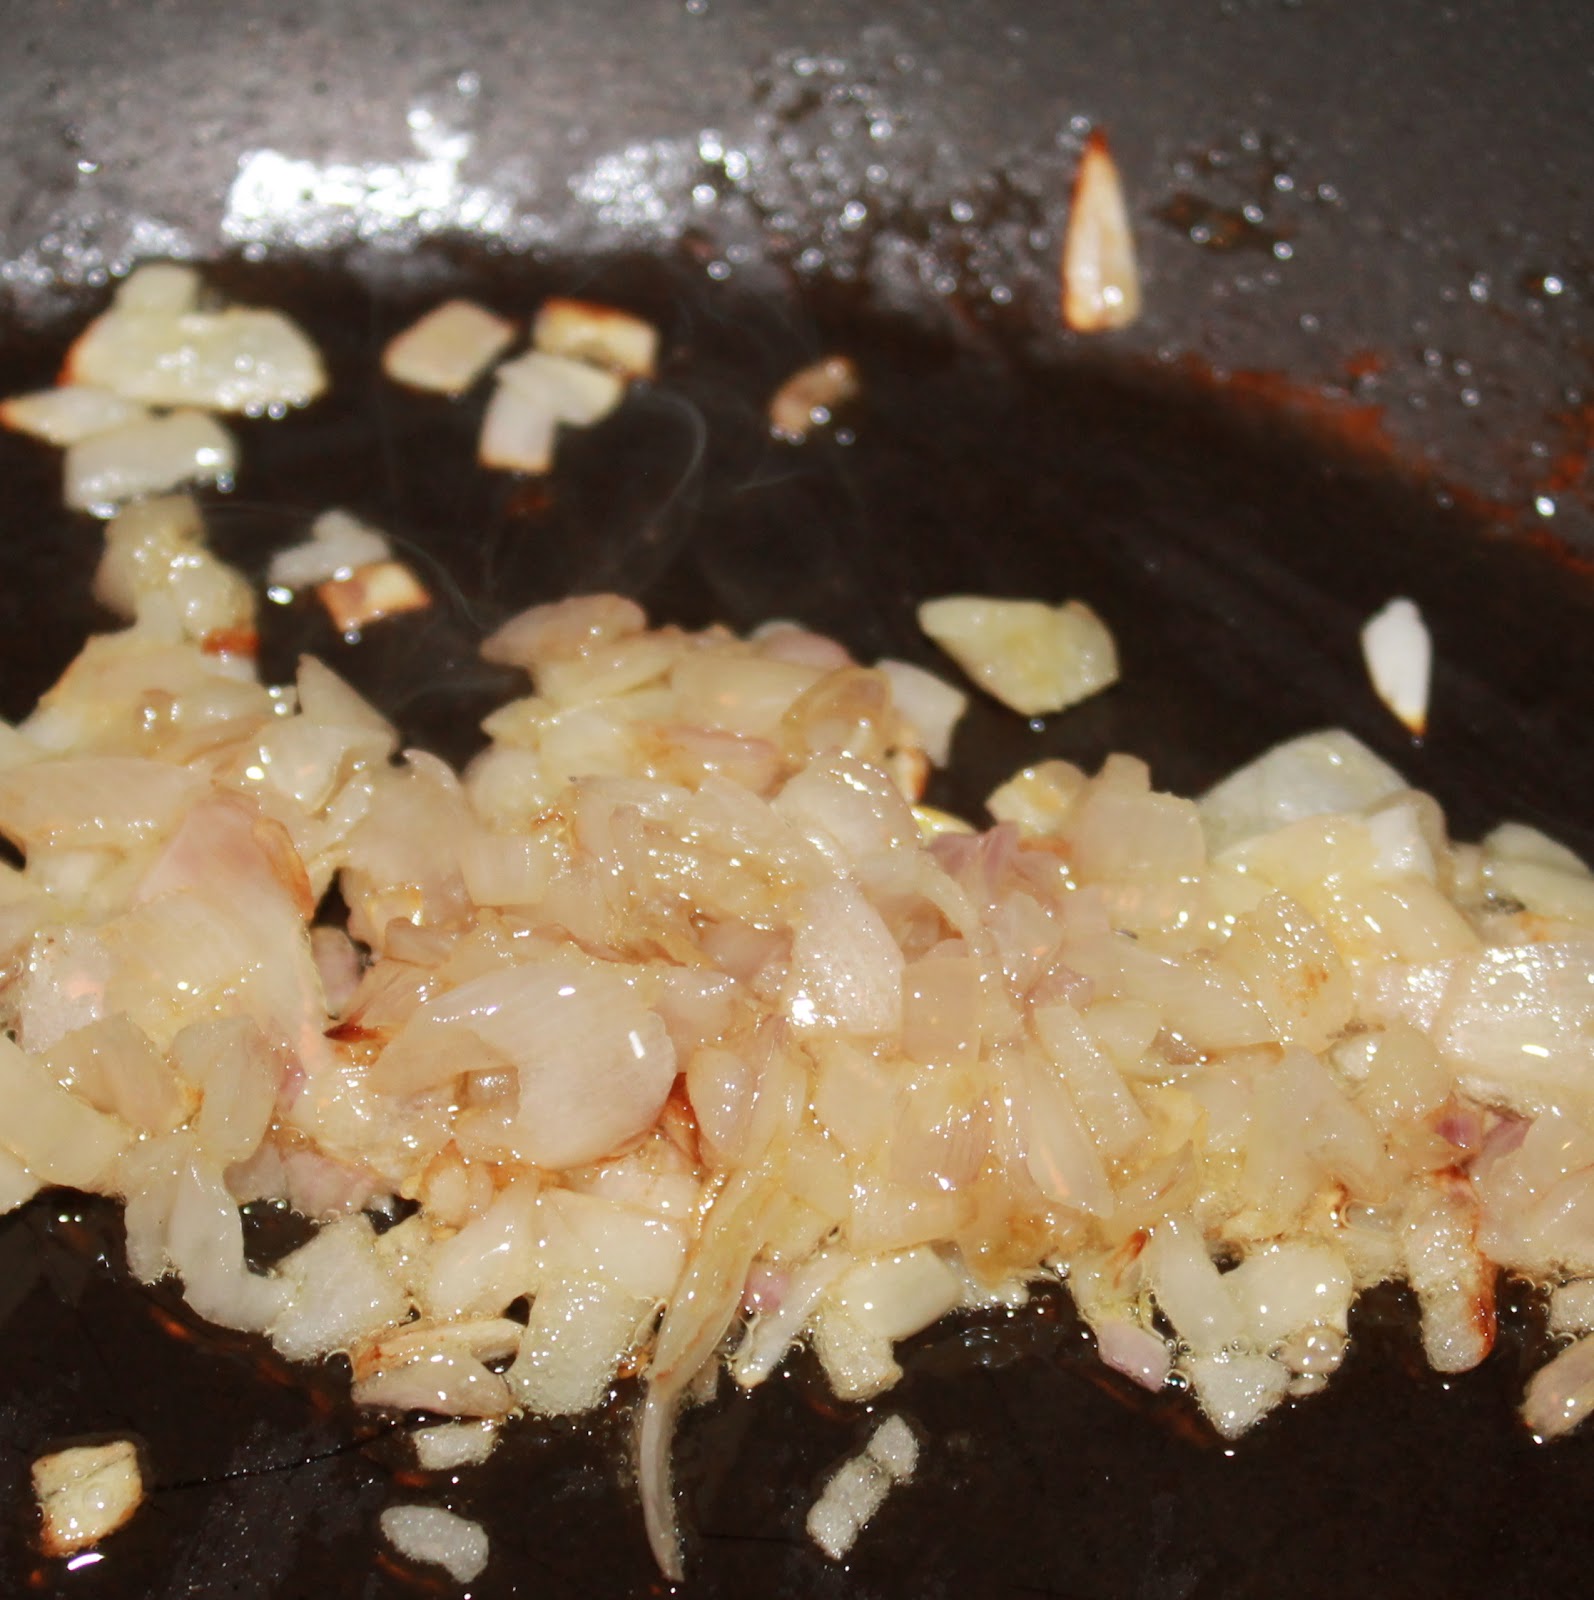
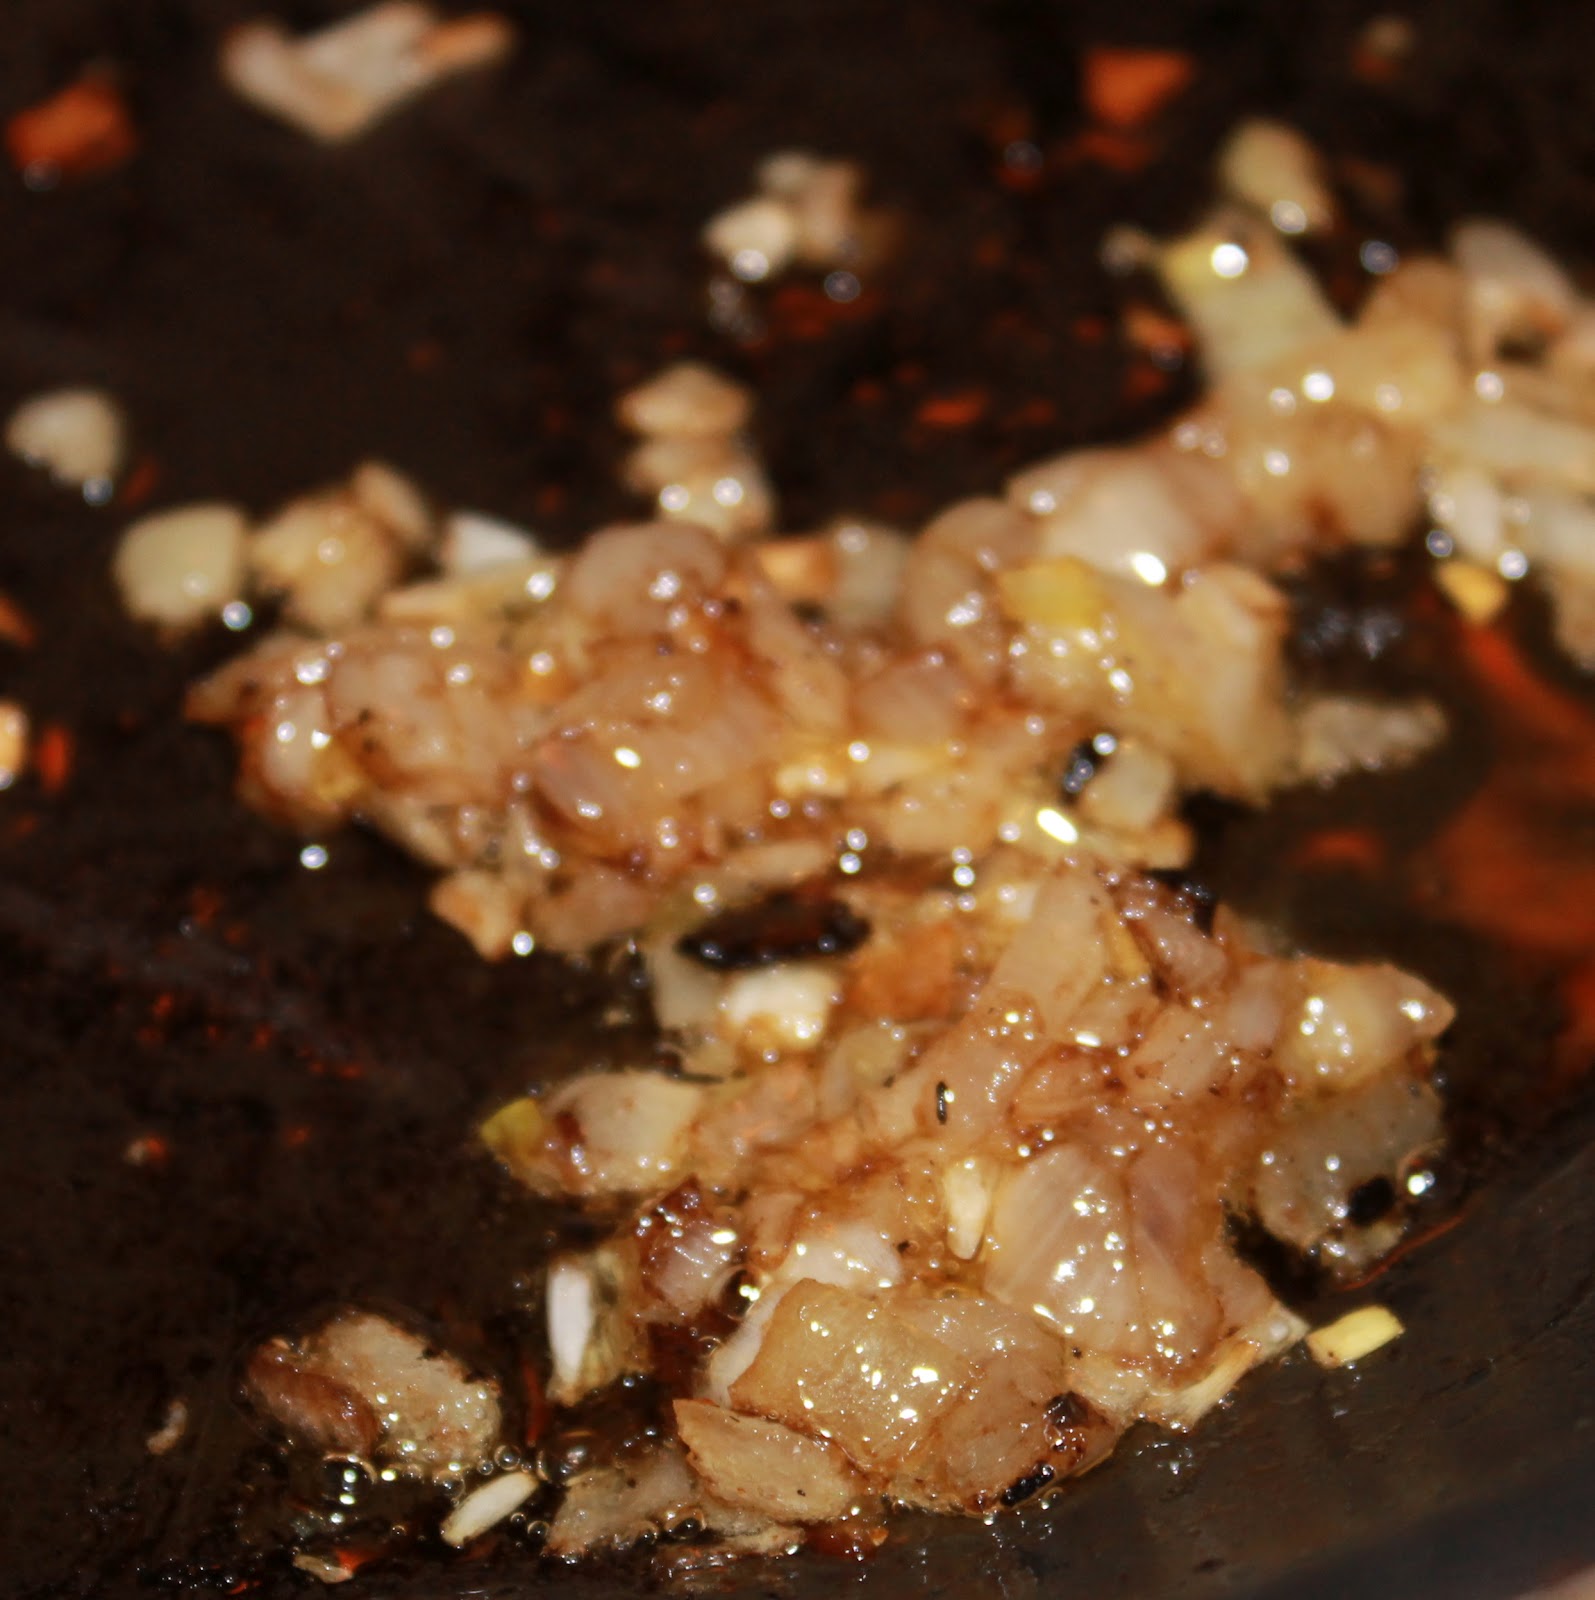
Heat a large saute pan over medium heat. Add 2 teaspoons olive oil to the pan and swirl to coat. Add 2/3 cup shallots and cook for 3 minutes.
Add the chopped mushrooms and cook for 4 minutes, stirring occasionally.
Add the wine, 1/4 teaspoon pepper and 1/4 teaspoon salt. Bring to a boil, scraping the pan to loosen up the brown bits. Cook for 2 minutes or until liquid almost evaporates, stirring occasionally. Remove the mushroom mixture from the pan and keep warm. Preheat your broiler.
Return the pan to medium heat. Add 1 teaspoon oil to the pan, swirling to coat. Add the remaining 1/3 cup shallots and saute for 5 minutes or until lightly browned. Remove from pan and keep warm.
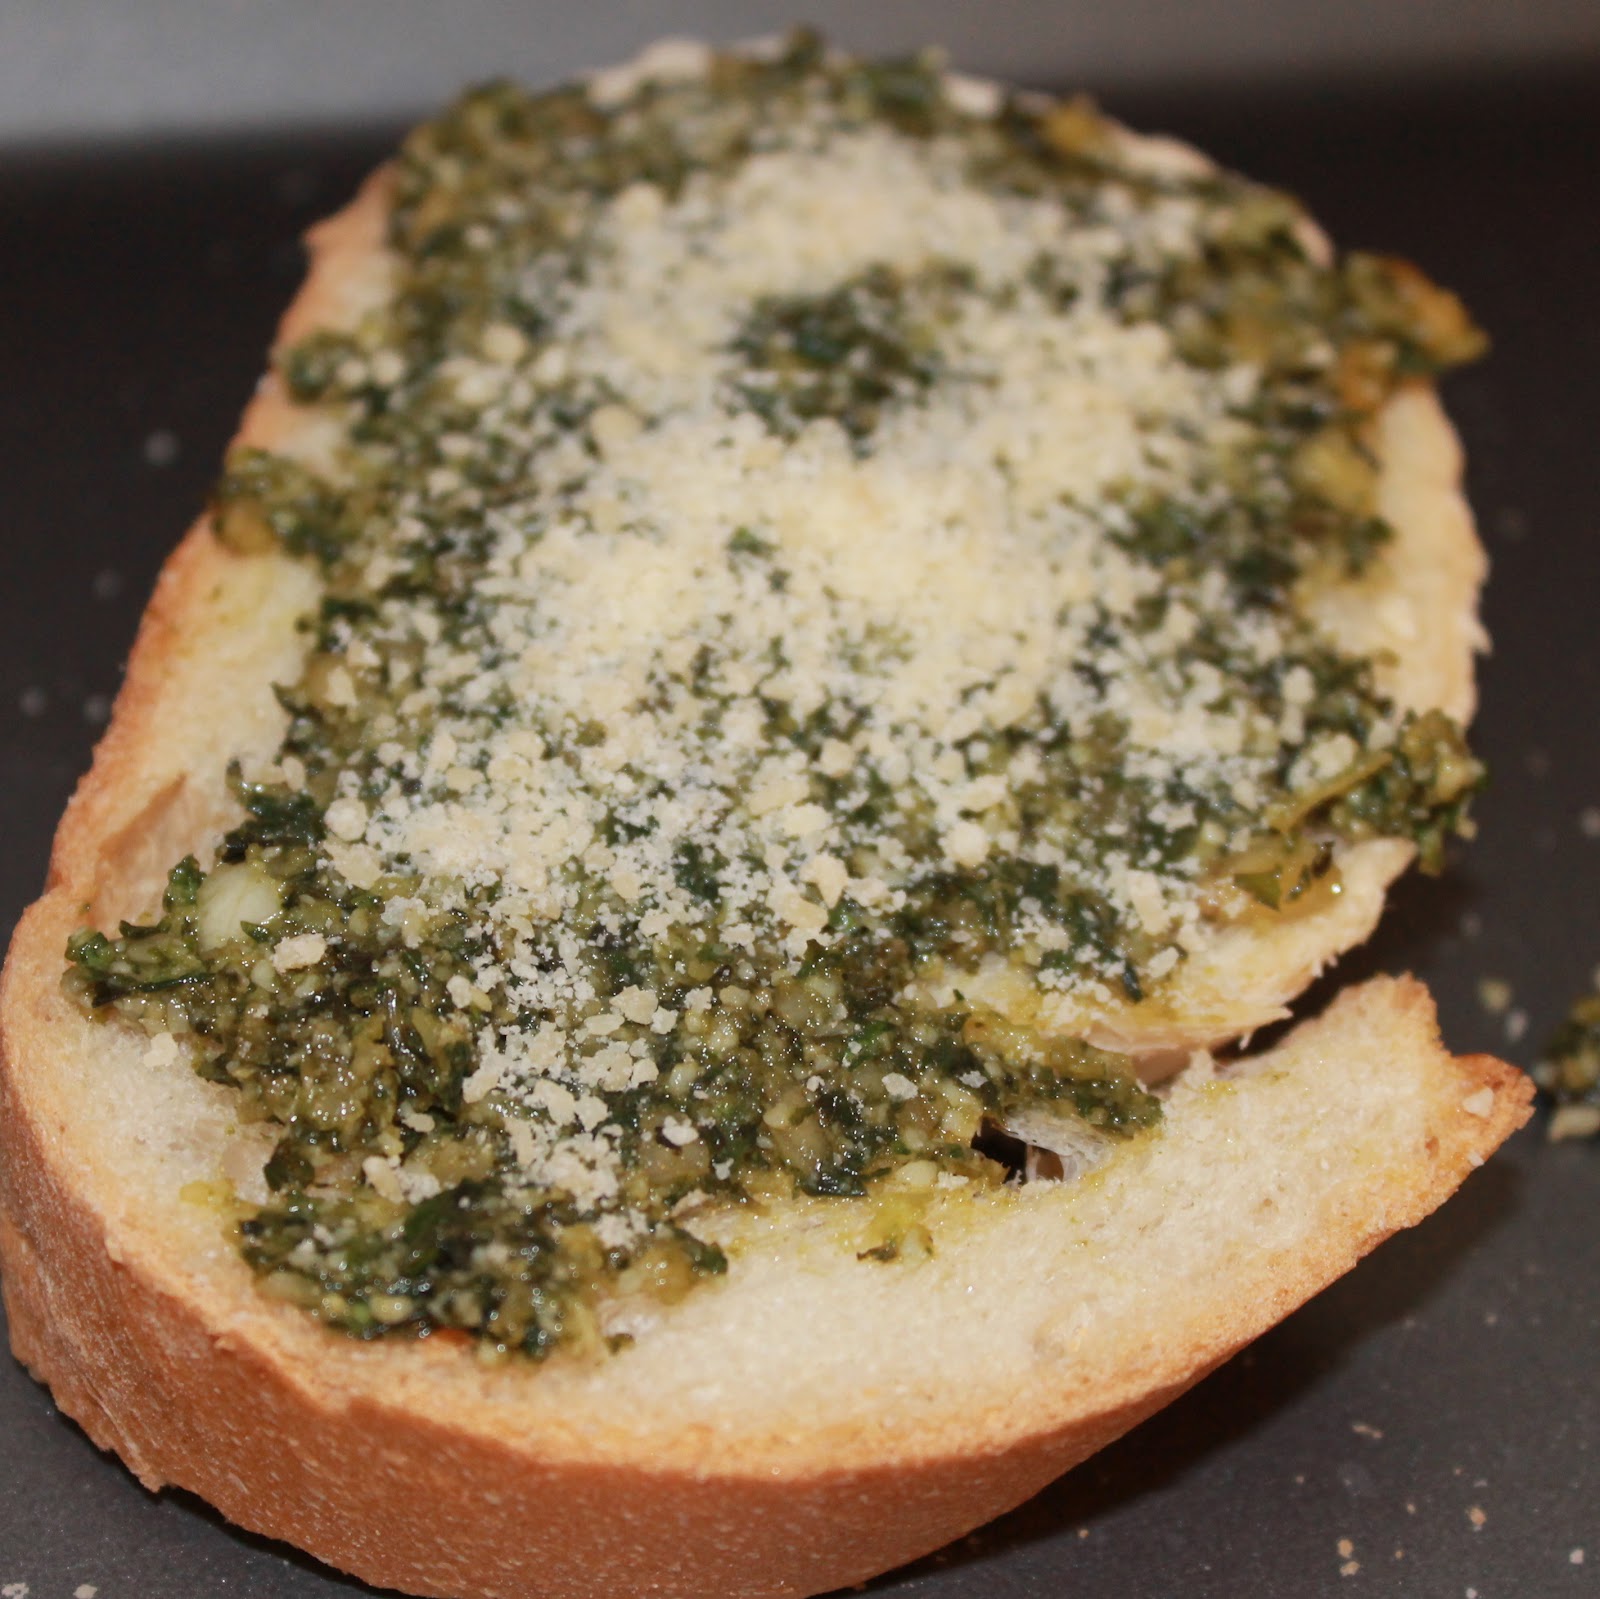
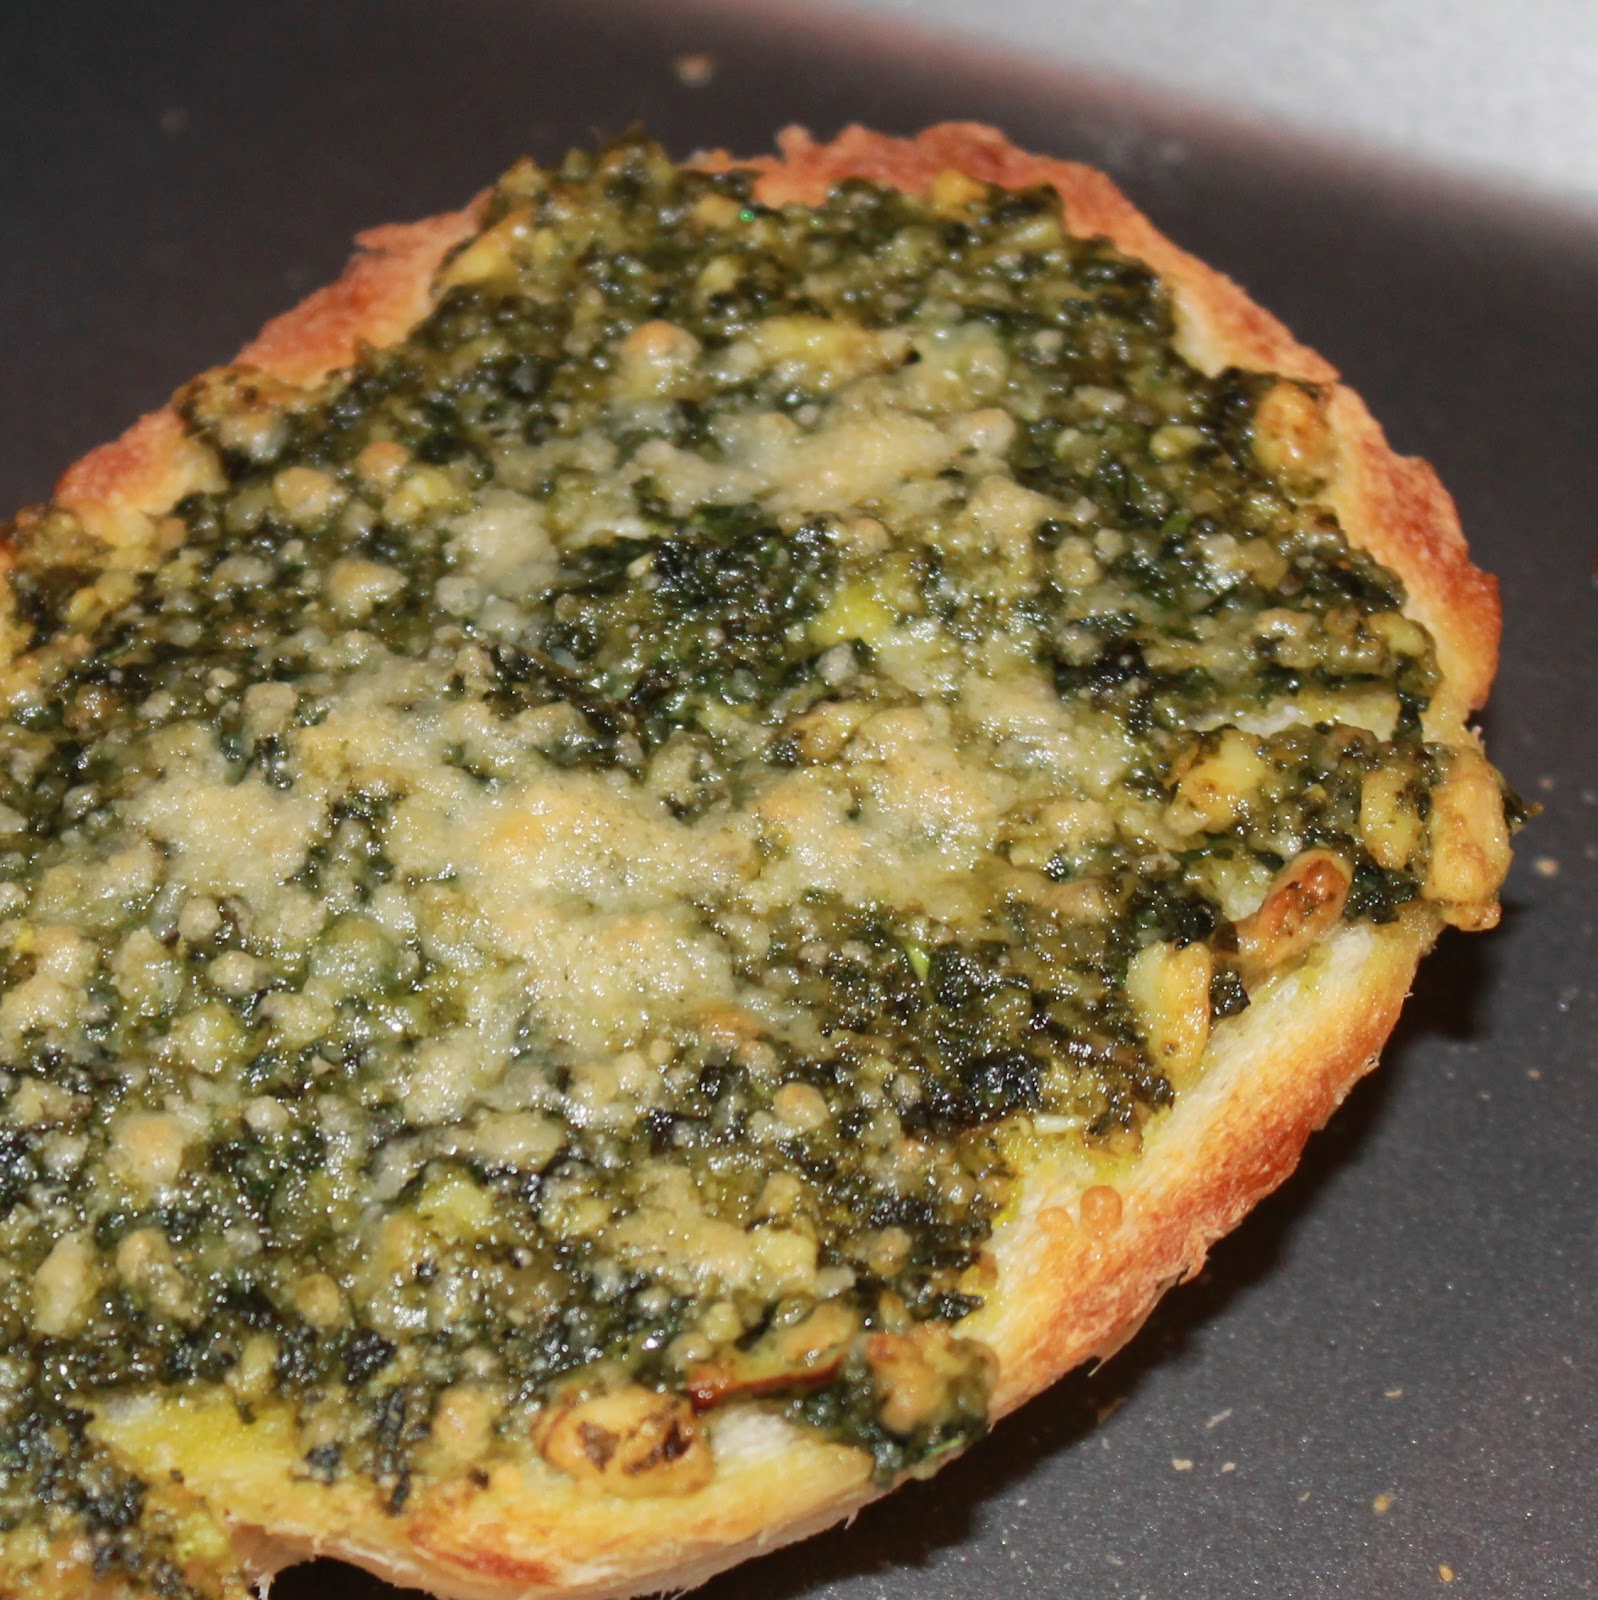
Spread 2 teaspoons pesto over one side of each bread slice. Top each slice with 2 tablespoons cheese.
Broil for 2 minutes and set aside.
Return the pan to medium heat. Add 1 teaspoon olive oil to the pan and swirl to coat. Crack the eggs into the pan and cook until whites set, about 4 minutes.
Boy did I botch this egg. Oh well, it will still taste good!
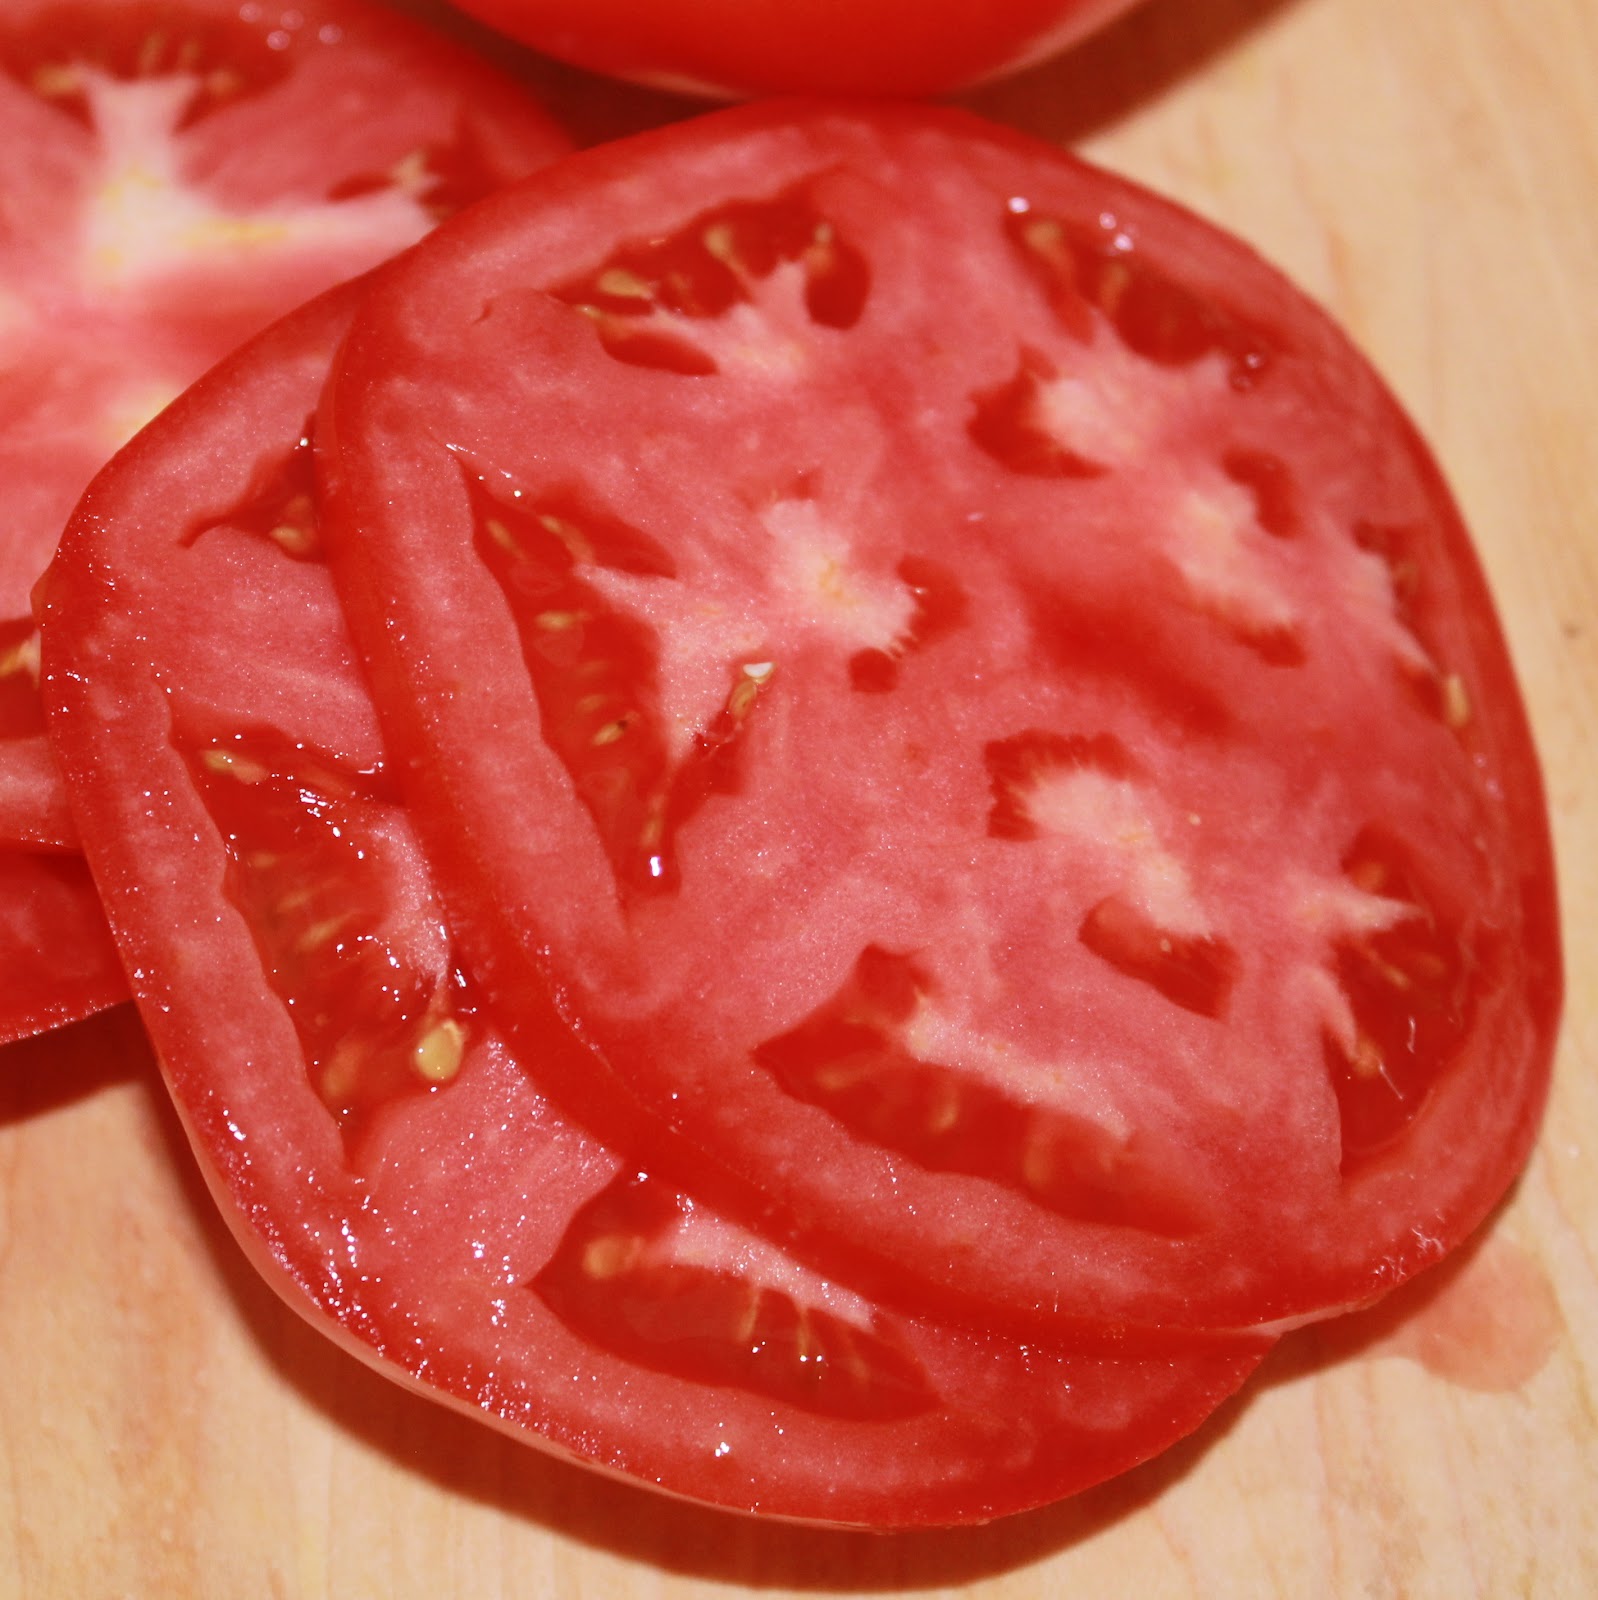
Top each bread slice with 2 tomato slices.
Divide the mushroom mixture evenly among the bread slices. Top each serving with 1 egg. Sprinkle with 1/4 teaspoon pepper, shallots and basil.
This is quite the meal!
I loved the meatiness of the mushrooms which went so well with the egg. Tomatoes are in season right now so they were absolutely perfect in this dish. And my pesto was pretty darn good if I do say so myself 🙂 This meal, although it’s called a “sandwich” definitely required a fork and knife, and even then got a bit messy. But that’s part of the fun!
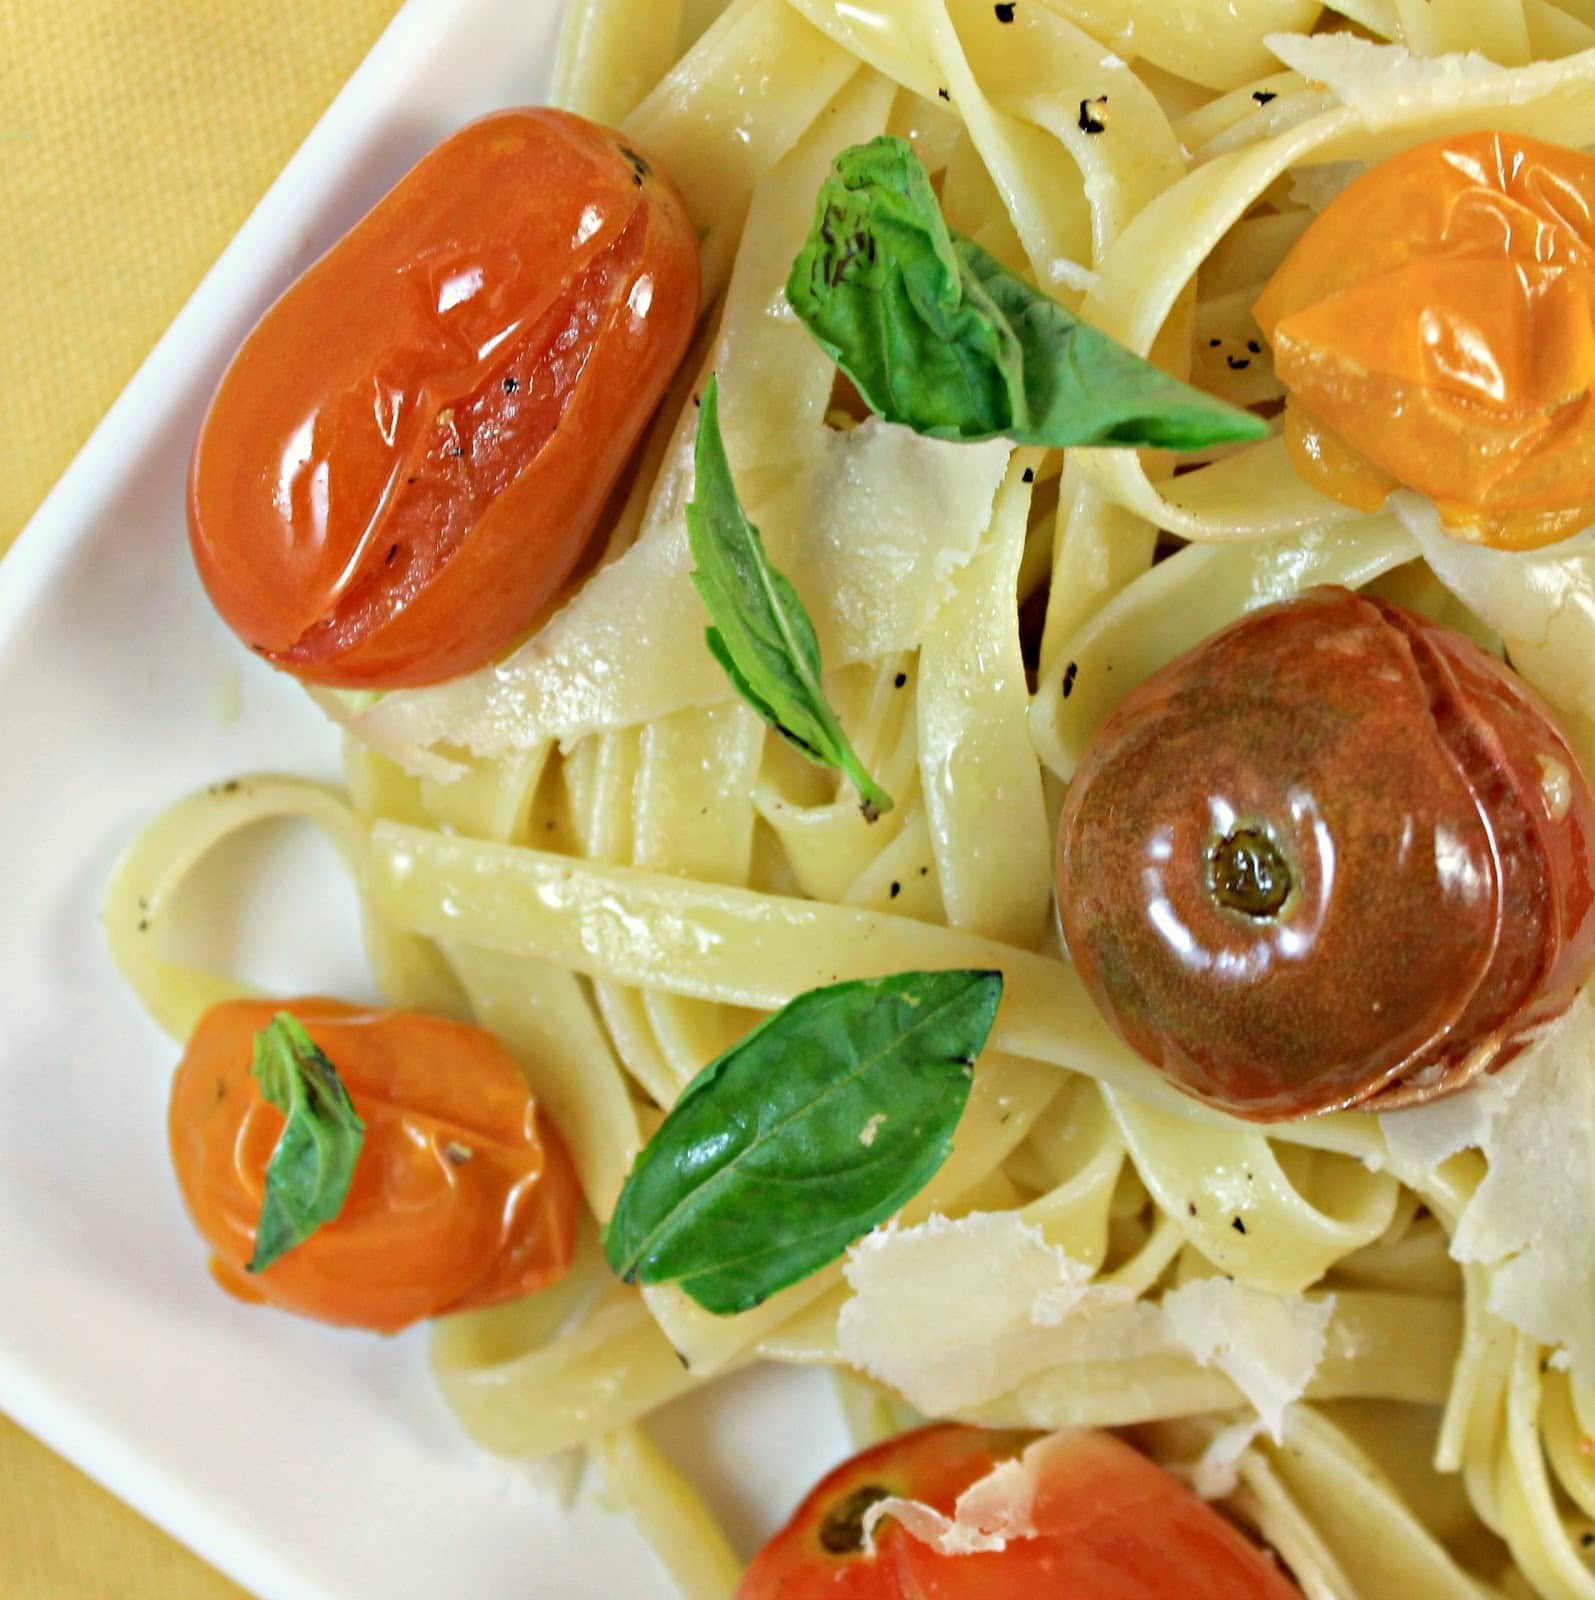
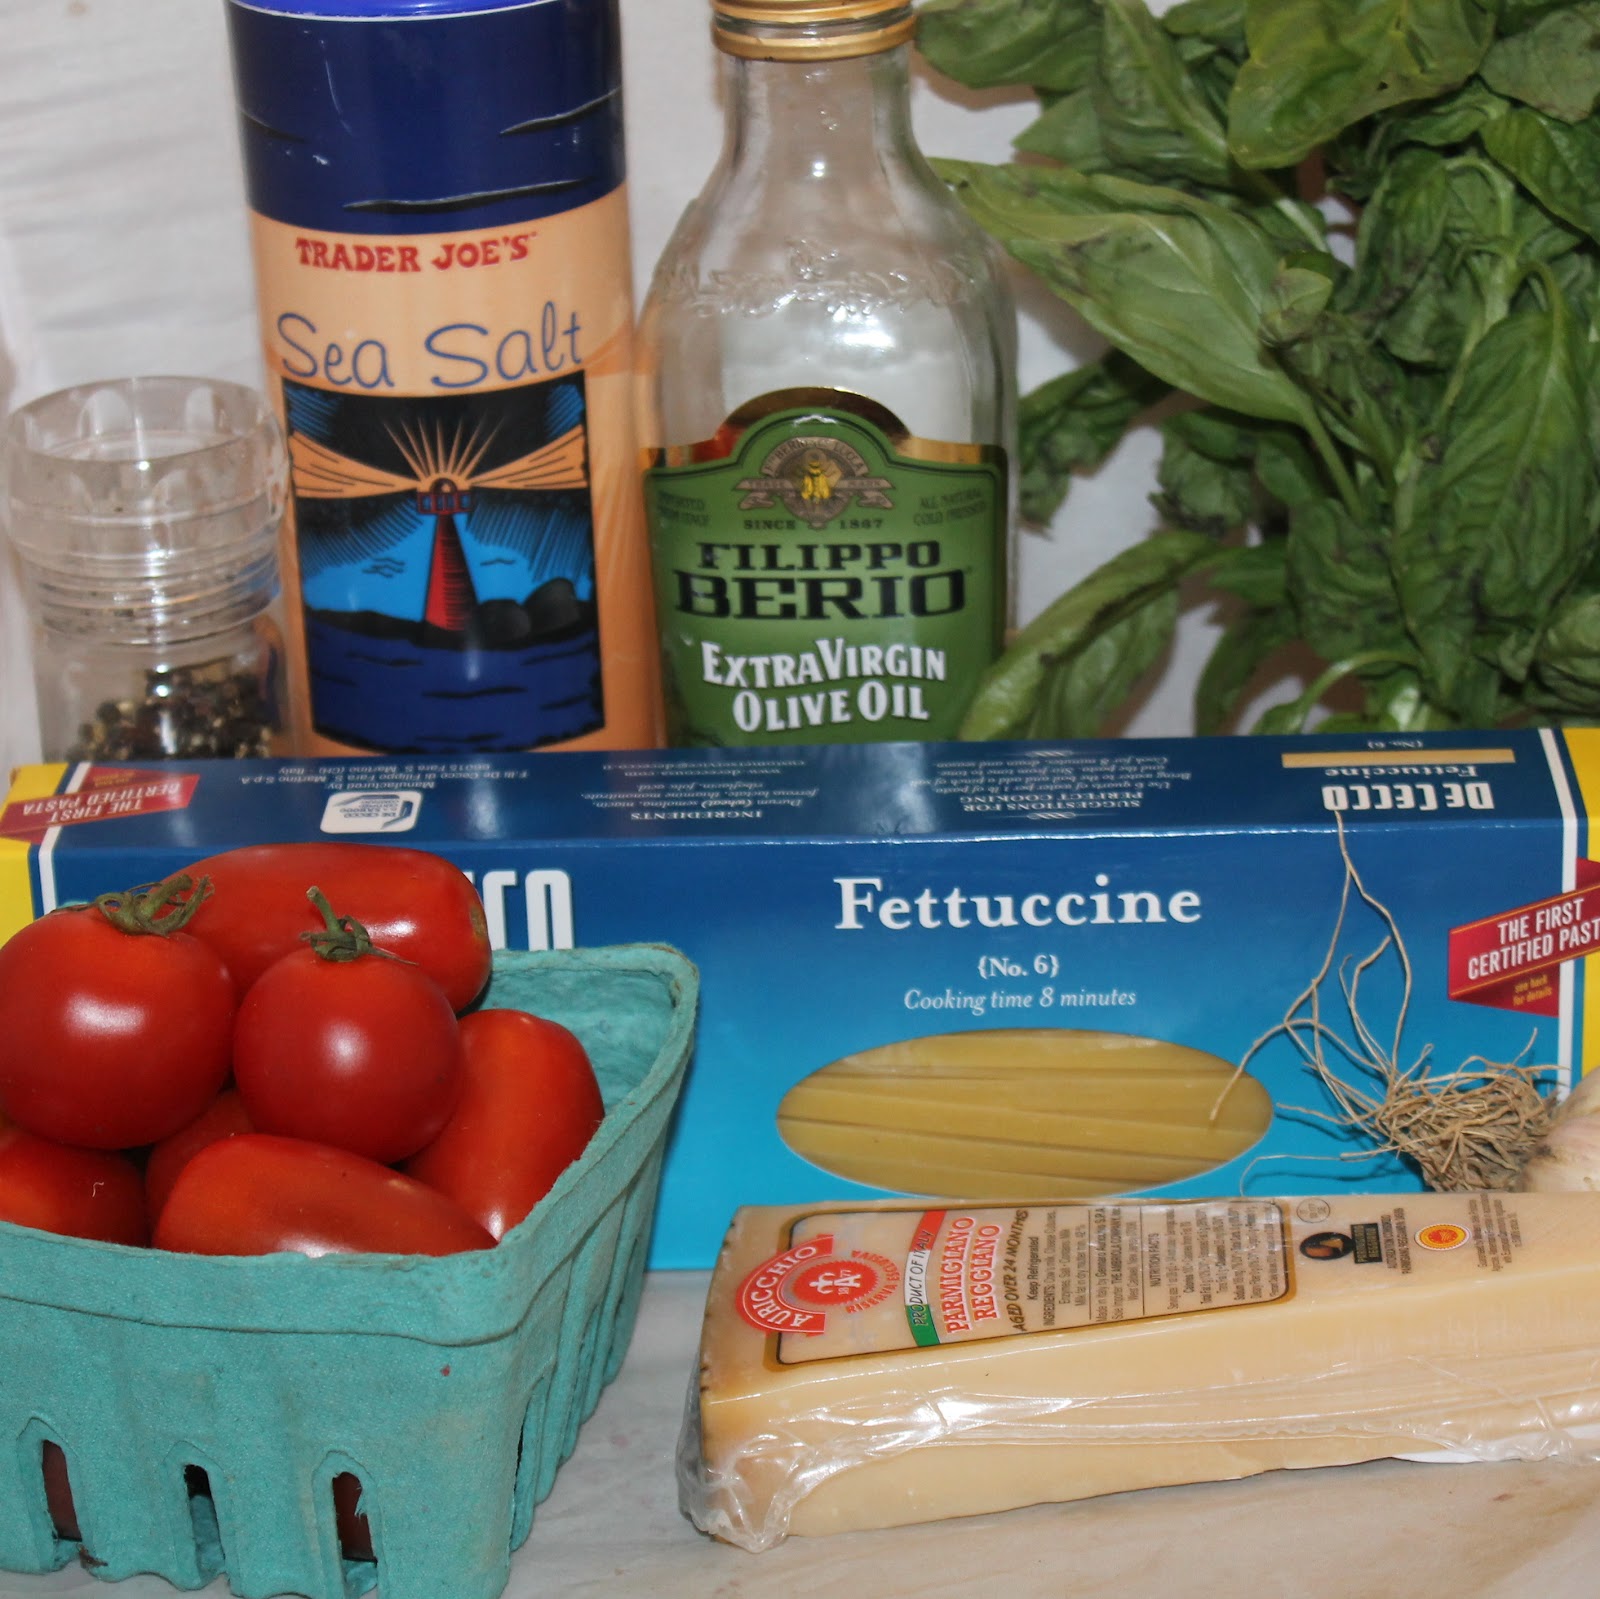
This week is my favorite week of the summer: I received my first batch of tomatoes from my CSA. I love tomatoes oh so much (if you haven’t figured that out with all my posts including tomatoes as an ingredient). As a kid, I used to eat them whole, dipping them in ranch dressing. Not much has changed, except now I choose to dip them in hummus instead. Although I do love a good fresh, juicy tomato, there is something wonderful about a cooked tomato. Cooking Light‘s latest issue was (as usual) on point with a lovely, simple pasta recipe that includes tomatoes, garlic, basil … and not much else.
Ingredients:
1 tablespoon kosher salt
8 ounces uncooked fettuccine
1/4 cup extra-virgin olive oil, divided
2 pints multicolored tomatoes (I used cherry/grape tomatoes)
Have you ever heard of Meatless Monday? It’s a campaign that began in 2003 encouraging people to cut out meat from their Monday meals. Monday was chosen as a way to start your week off more healthy. I am a big fan of Meatless Monday in general but I find it difficult to reserve one day a week specifically to go meatless. I prefer a much more flexible approach, where I try to cut meat out of three meals within my week.
The point of Meatless Monday is to eat a healthy meal as a substitute, adding a little more vegetables or whole grains to your diet instead of always making protein the star of the meal. I am by no means a vegetarian, and honestly never will be. But Americans in general tend to consume way too much protein. According to meatlessmonday.com, “going meatless once a week may reduce your risk of chronic preventable conditions like cancer, cardiovascular disease, diabetes and obesity.”
It’s honestly pretty darn easy to do once you make a mental note to try it out. I have plenty of meatless options on my blog to help get you started. Some of my favorites include (in no particular order):
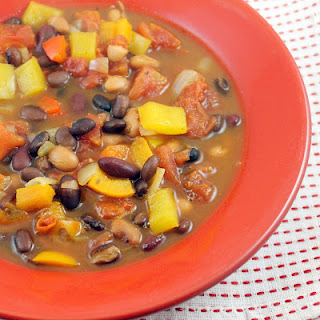
If you are in need of more inspiration, one of my favorite vegetarian cookbooks is Herbivoracious. (Michael Natkin, the author, also has a pretty snazzy blog. Check it out here.) Michael’s recipes are truly wonderful (the black bean soup above is one of his) so be sure to pop over to see them.
Do you already participate in Meatless Monday? What is your favorite meatless meal to prepare?
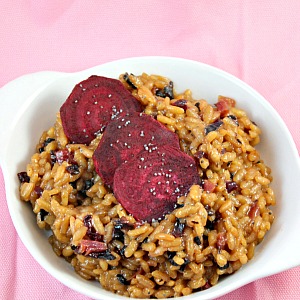
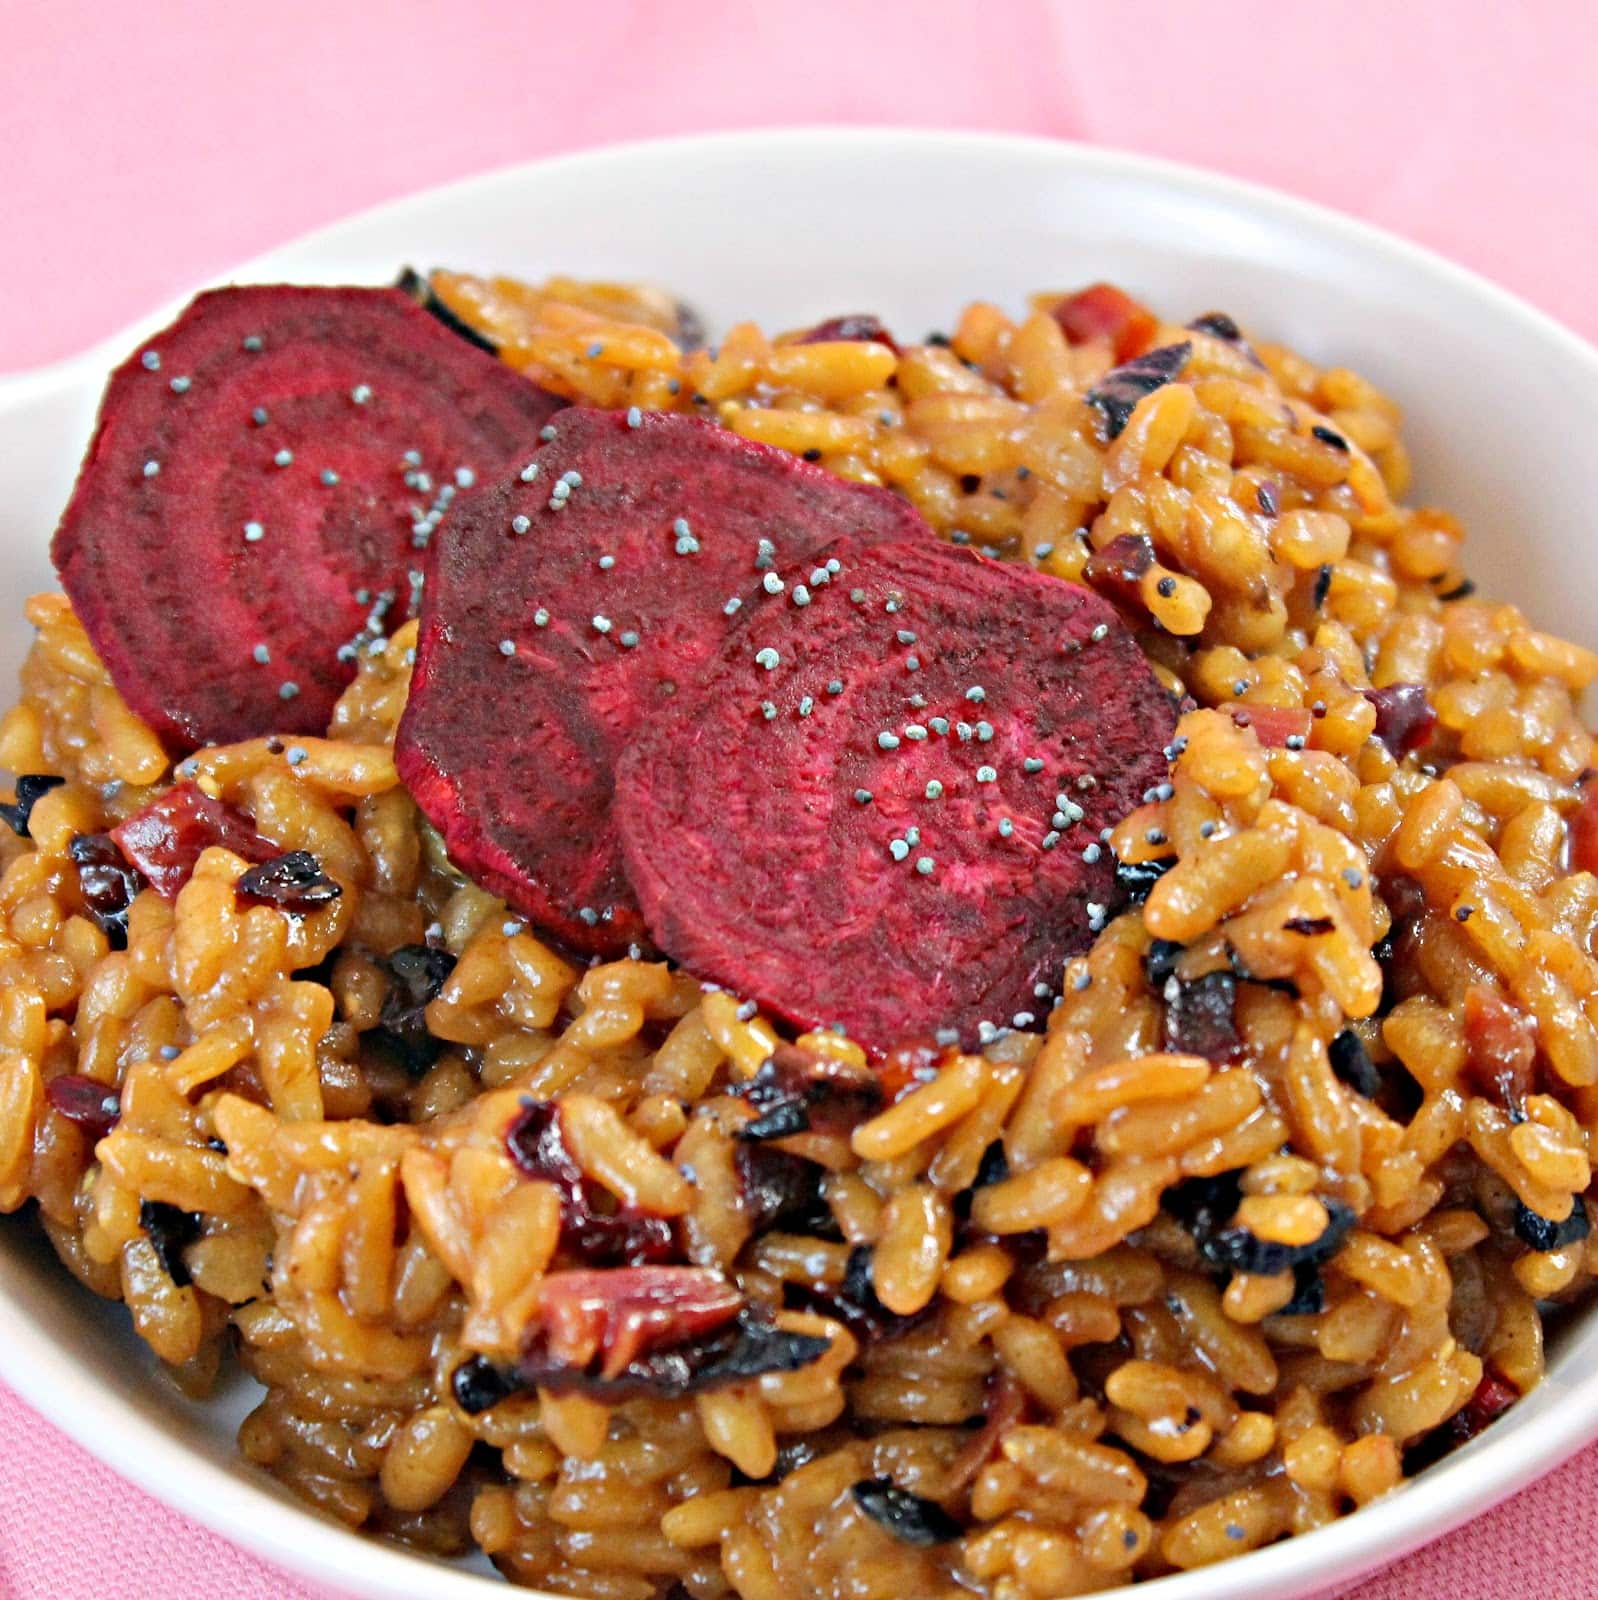
I love the taste of beets, but preparing them is so time consuming that I tend to avoid buying them. Most recipes involving beets require you to roast the beets and then peel them. I came across a recipe for beet risotto in Food and Wine that just cooked the beets on the stove top in significantly less time. This risotto recipe is supposed to turn a beautiful red color from the beets. I didn’t get the same bright red color but I still love how it looks!
Ingredients:
3 cups chicken stock or water
1 tablespoon unsalted butter
1 tablespoon extra-virgin olive oil
1 large shallot, finely chopped
2 large beets peeled and finely chopped, plus thinly sliced beets for garnish
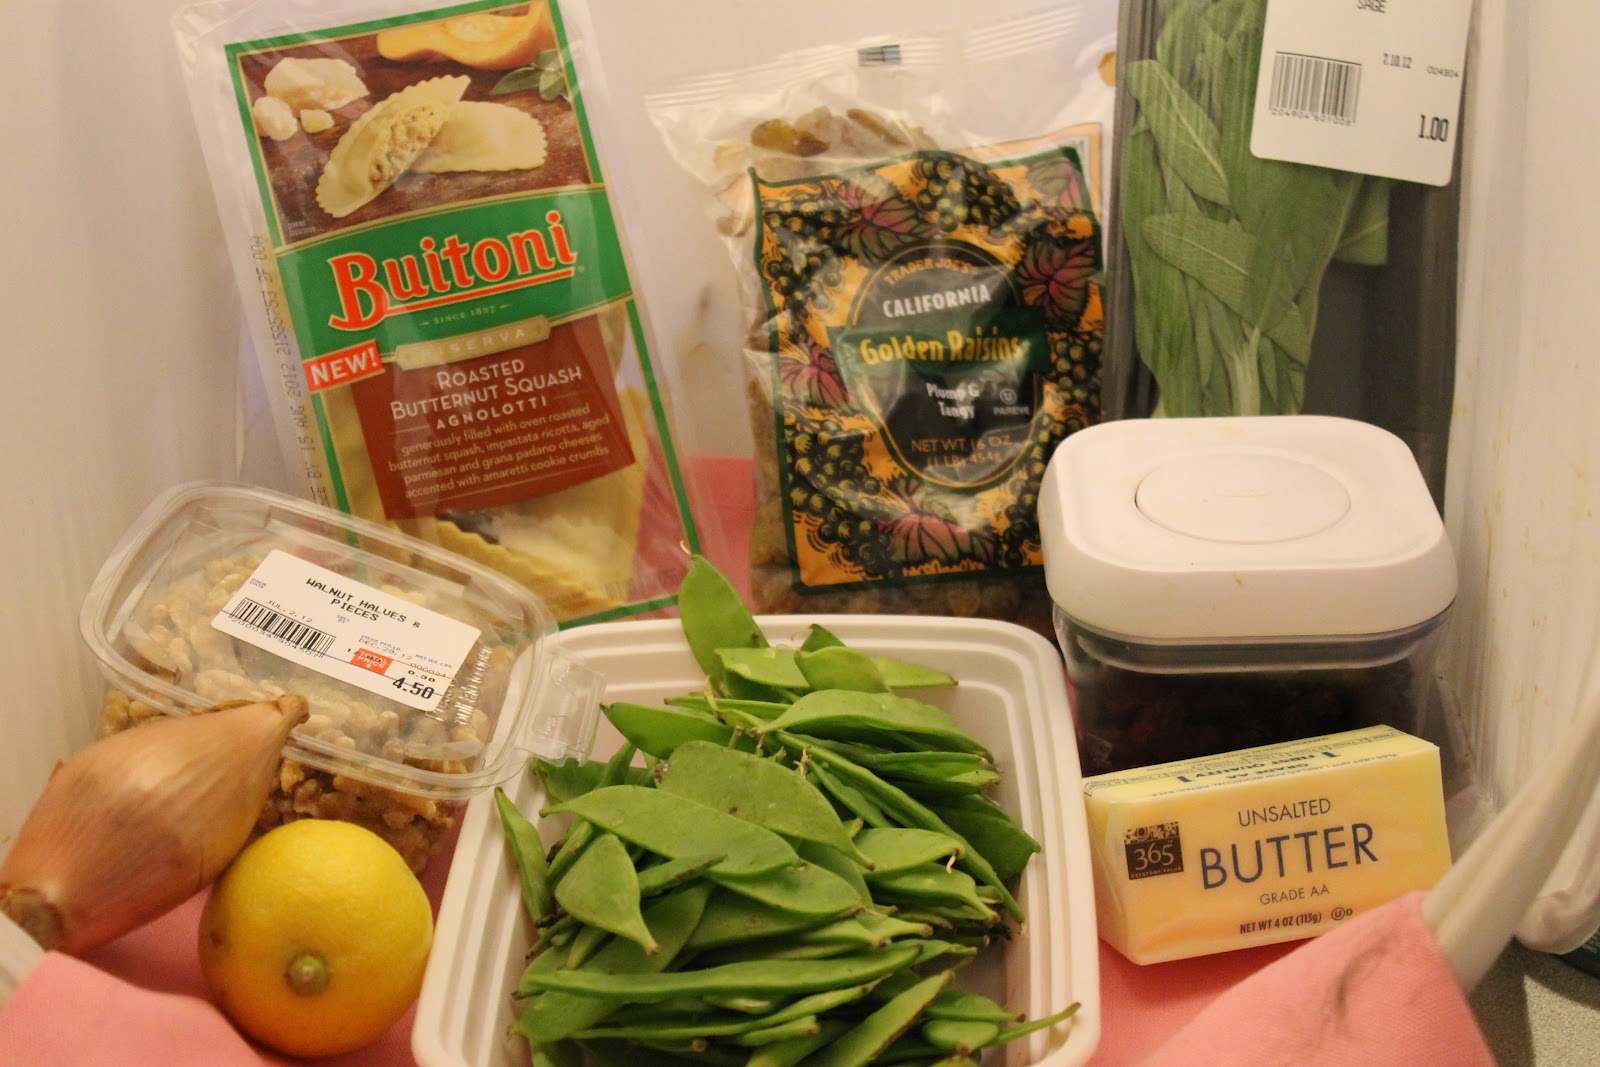
What is it about nuts that go so wonderfully with pumpkin and butternut squash dishes? Walnuts, pecans, and hazelnuts just pair so nicely with the flavors of squash. When I first received Buitoni’s Butternut Squash Agnolotti, I knew I wanted to make a hazelnut cream sauce with it. Hazelnuts, like most nuts, taste significantly better when toasted. I have no idea why this is, but I feel the need to always heat nuts for a little while to increase the flavor.
Ingredients:
1 package of Buitoni’s Butternut Squash Agnolotti
1/2 cup hazelnuts, blanched
1 stick of butter
1/4 cup sweet vermouth
1/2 cup heavy cream
1/4 teaspoon cinnamon
a pinch each of ginger, allspice, and nutmeg (1/8 teaspoon or less)
If you’ve been following my blog for a while, you might have picked up on my obsession with pumpkin and butternut squash. I attempt to limit my gourd intake to the September and October months, but every now and then I still need my fix outside of those months. Butternut squash seems to be more socially acceptable, especially in pasta form. Buitoni’s Butternut Squash Agnolotti is the perfect way for me to have this delicious ingredient year-round.
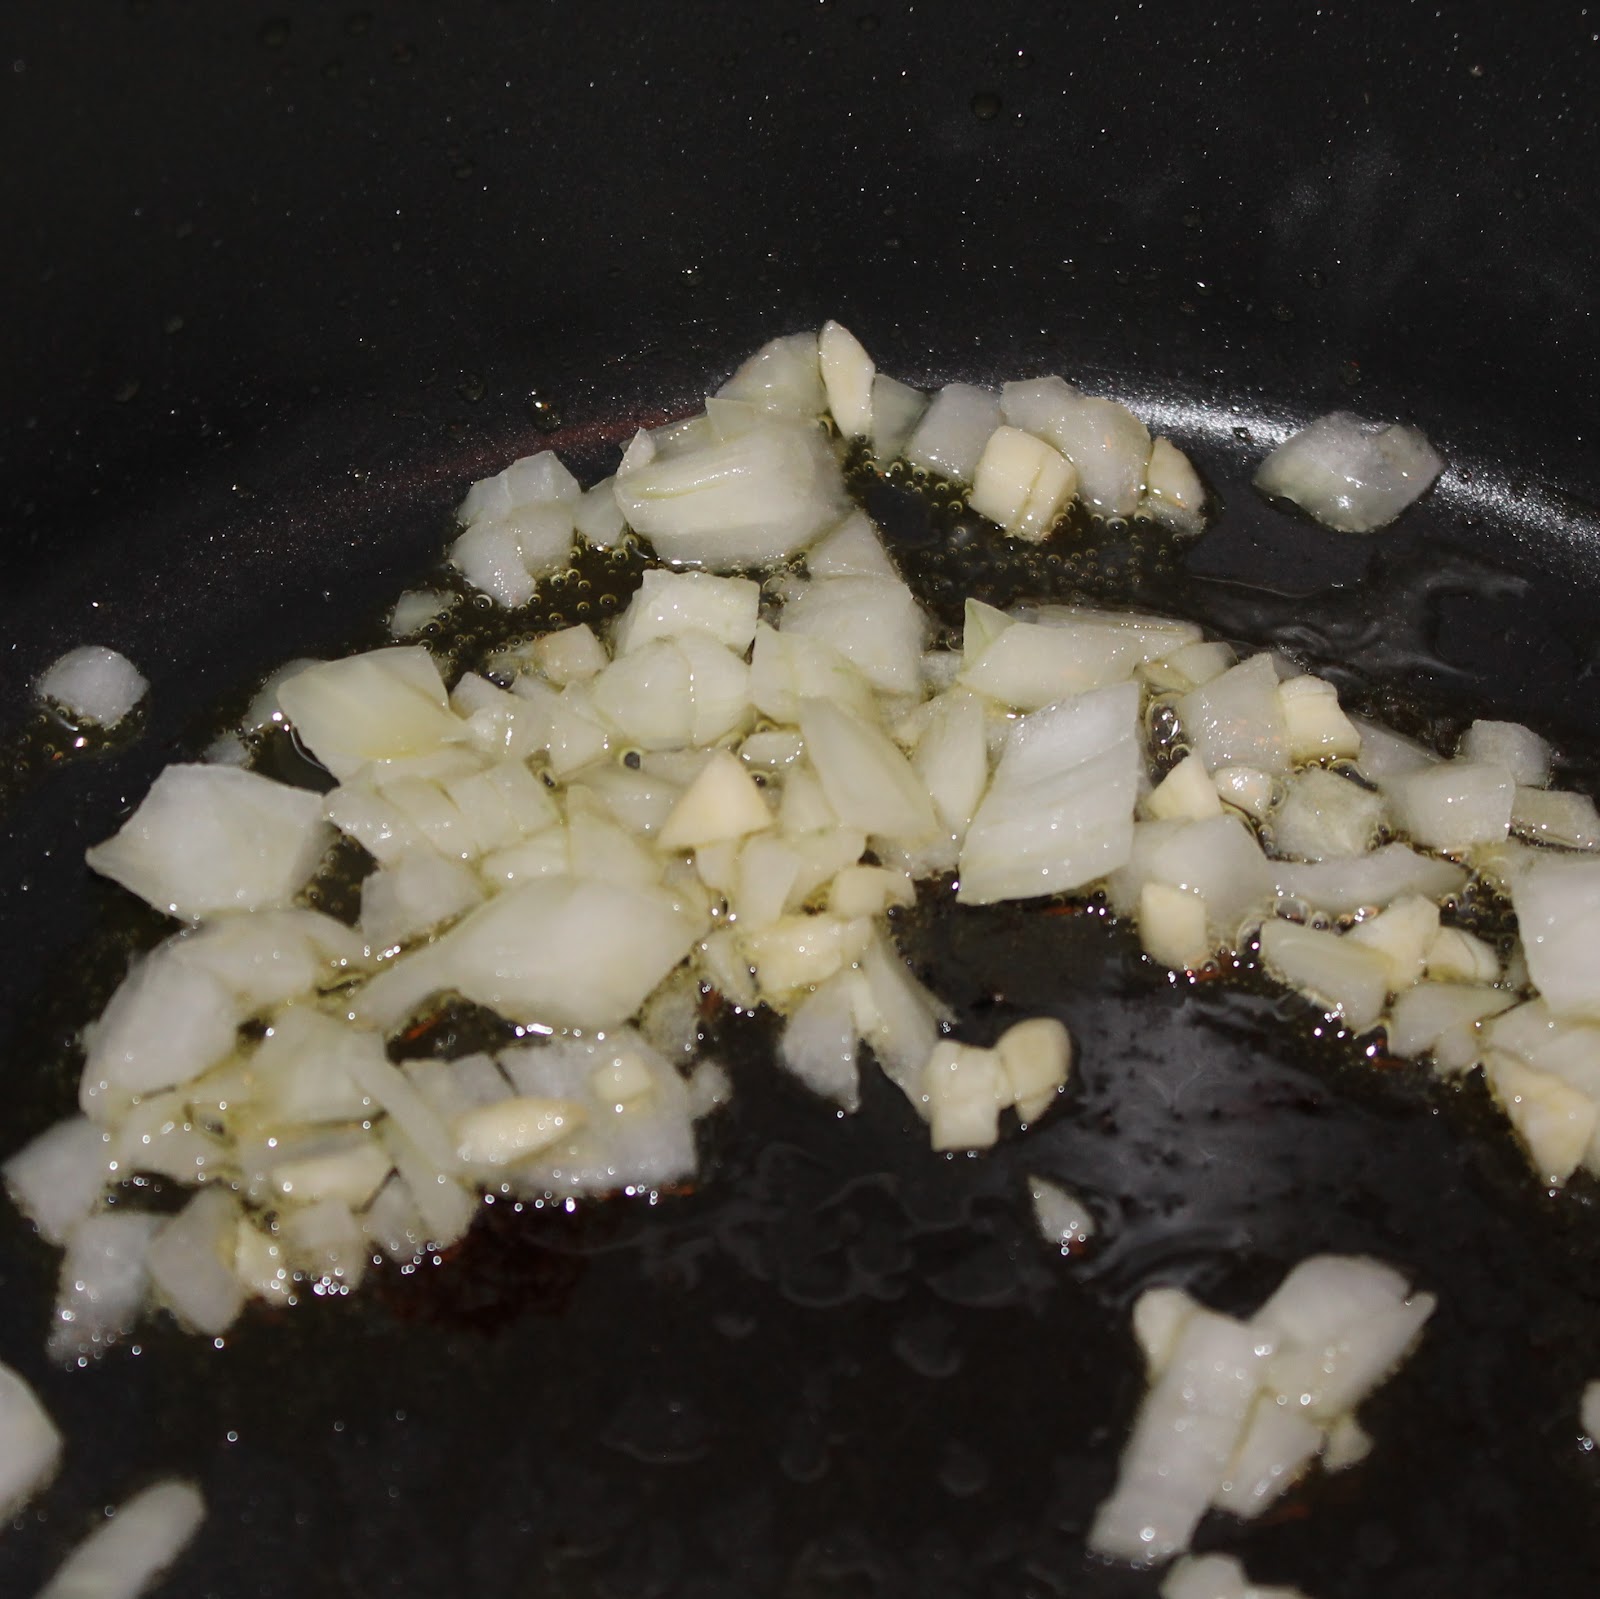
Agnolotti is just a type of ravioli. This specific agnolotti is a “half-moon pasta filled with oven-roasted butternut squash, Impastata Ricotta, aged Parmesan and Grana Padano cheeses, accented with amoretti cookie crumbs. I traditionally use a brown butter sage sauce with butternut squash ravioli because they are a perfect pair. I wanted to try something a little different with this agnolotti, so I instead made a cold pasta salad. It has been so unbearably hot in Philadelphia that I thought this would be a perfect (and timely) twist.Also, don’t forget to enter my giveaway to win a bunch of Buitoni goodies and free Buitoni pasta!
Ingredients:
1 package of Buitoni’s Butternut Squash Agnolotti
½ cup butter
1 shallot, chopped
1 tablespoon fresh sage leaves, roughly chopped
½ cup walnuts, toasted and roughly chopped
A handful of golden raisins, or to taste
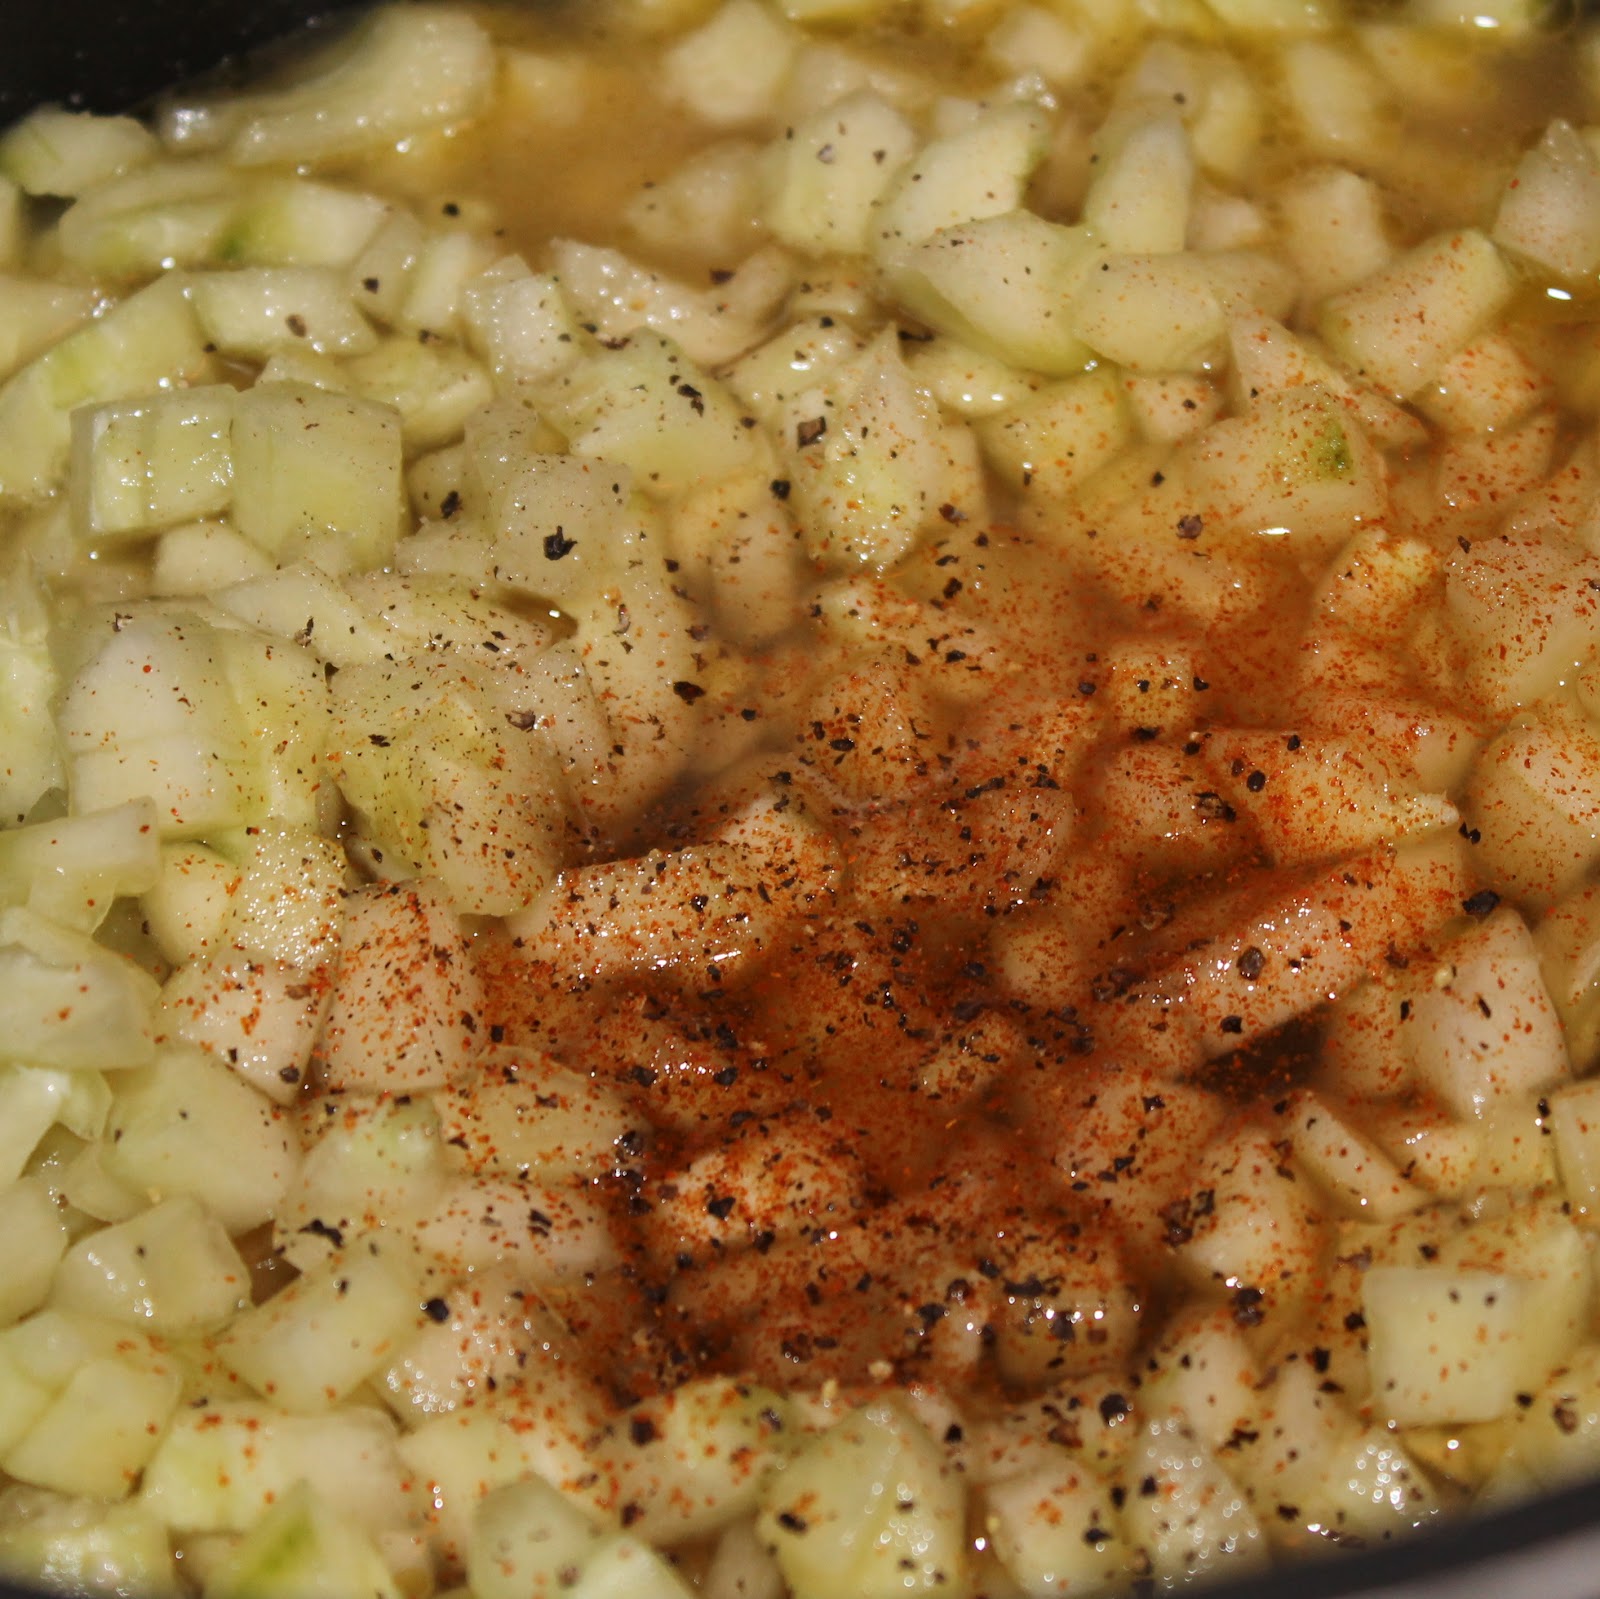
Cucumbers are everywhere right now, and as much as I love just eating them raw, I thought it might be a nice change to try to use them cooked. Cucumber soup, chilled, sounds oh so refreshing doesn’t it? I found this recipe for Chilled Creamy Cucumber Soup from Eating Well. It uses an avocado and some plain yogurt, making a really creamy delicious soup. Plus, it only takes 35 minutes to make (it is additional time to chill).
Ingredients:
1 tablespoon extra-virgin olive oil
2 cloves garlic, minced
1 small onion, diced
1 tablespoon lemon juice
4 cups peeled, seeded and thinly sliced cucumbers, divided
1 1/2 cups vegetable broth, or reduced-sodium chicken broth
1/2 teaspoon salt
1/4 teaspoon freshly ground pepper
Pinch of cayenne pepper
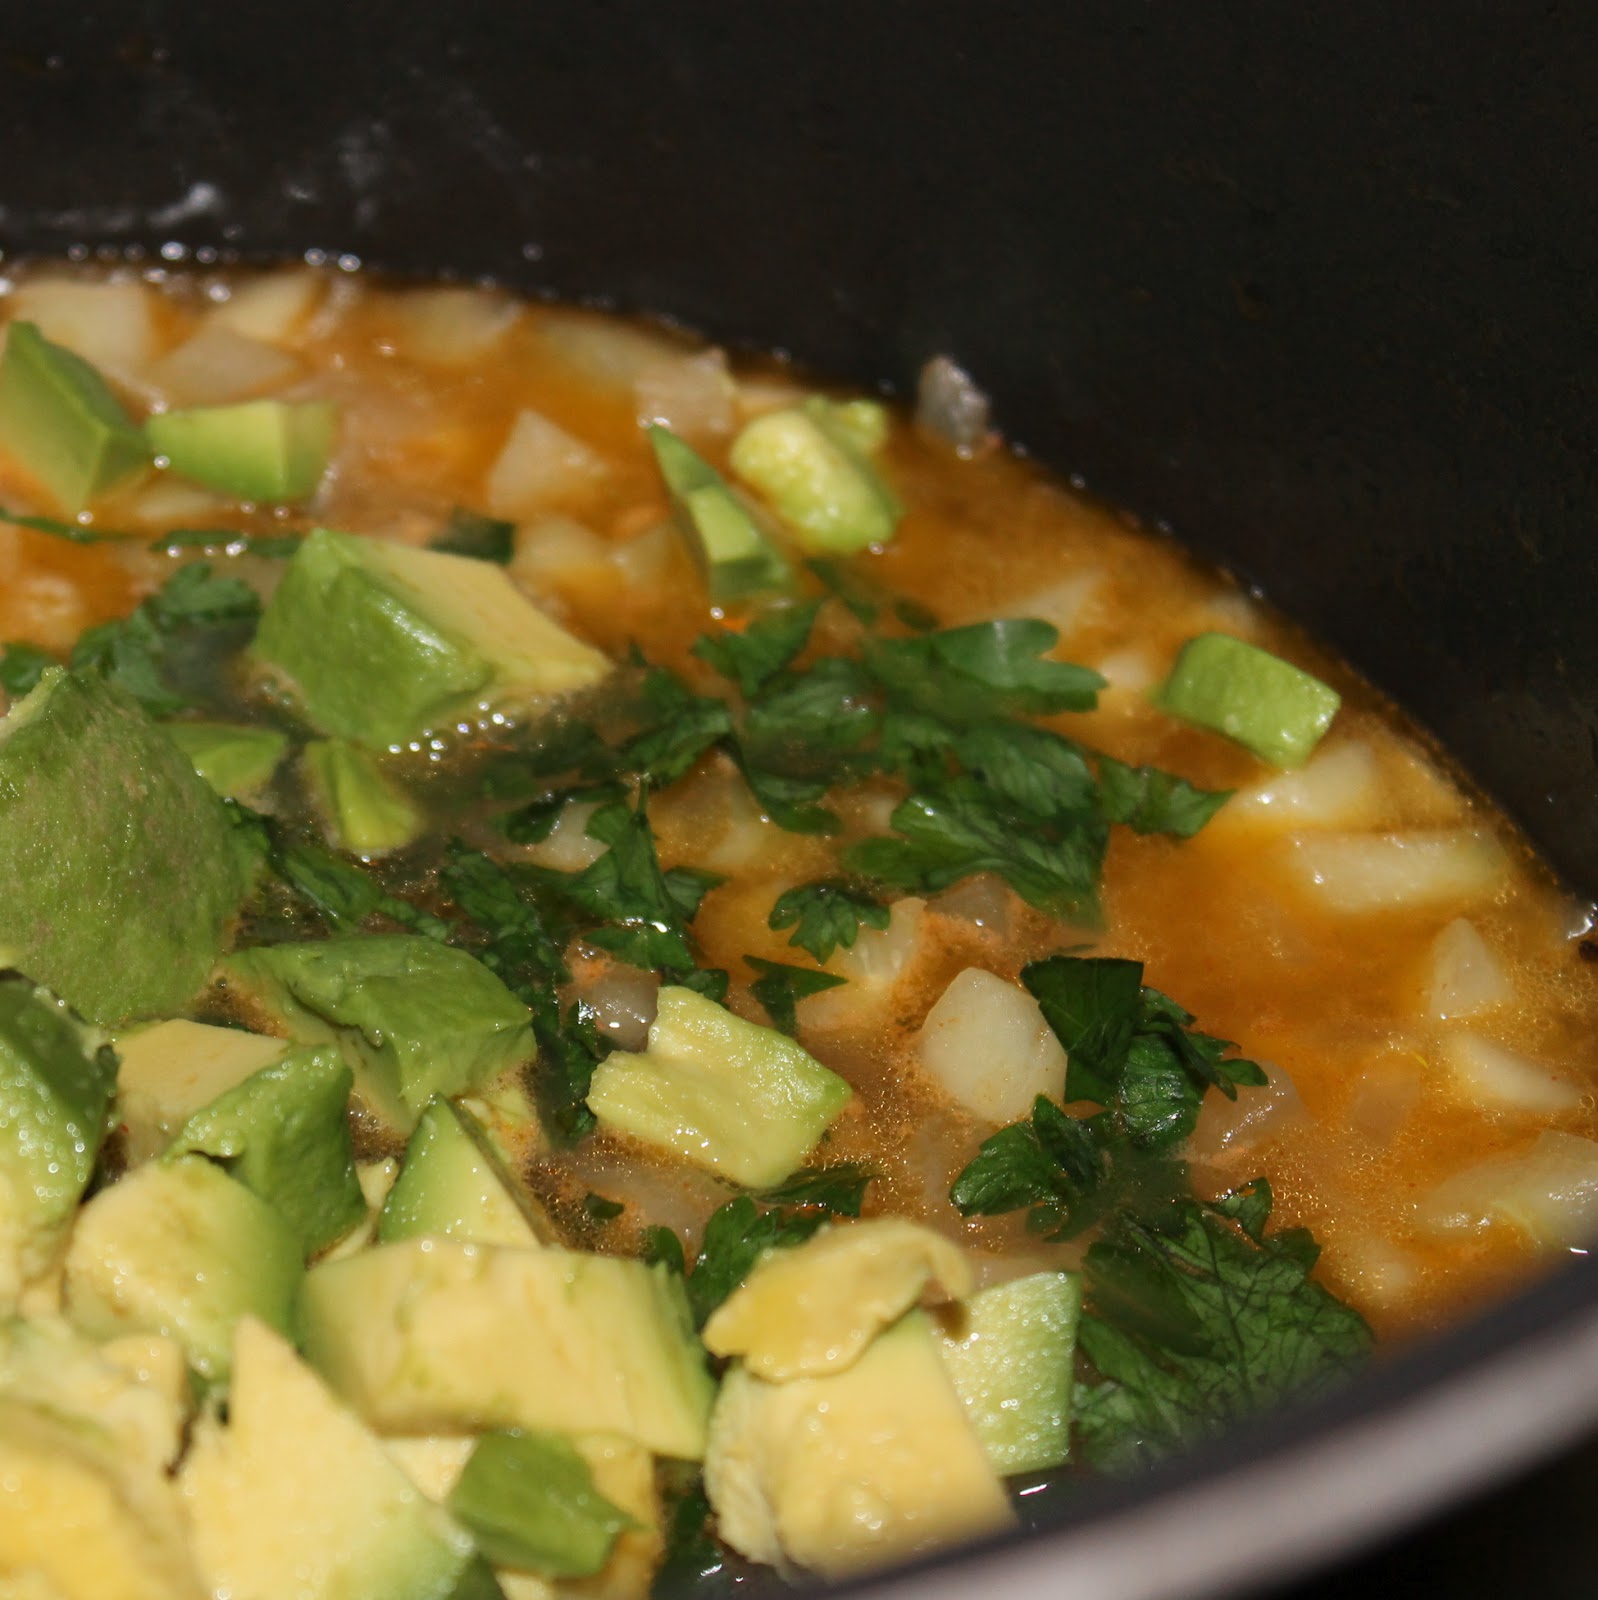
1 avocado, diced
1/4 cup chopped fresh parsley, plus more for garnish
1/2 cup low-fat plain Greek yogurt
Begin by prepping all your ingredients. Mince the garlic, dice the onion, peel, seed, and slice the cucumber, and dice your avocado. (I added a squeeze of lemon juice over the avocado to keep it from browning).
Heat the olive oil in a large pot over medium high heat. Add your onion and garlic to the pot, stirring occasionally. Cook for 4 minutes.
Add the lemon juice and cook for another minute. Add the cucumber, broth, salt, pepper, and cayenne (optional) and bring to a simmer.
Reduce heat and simmer for 6 to 8 minutes, or until the cucumbers are soft.
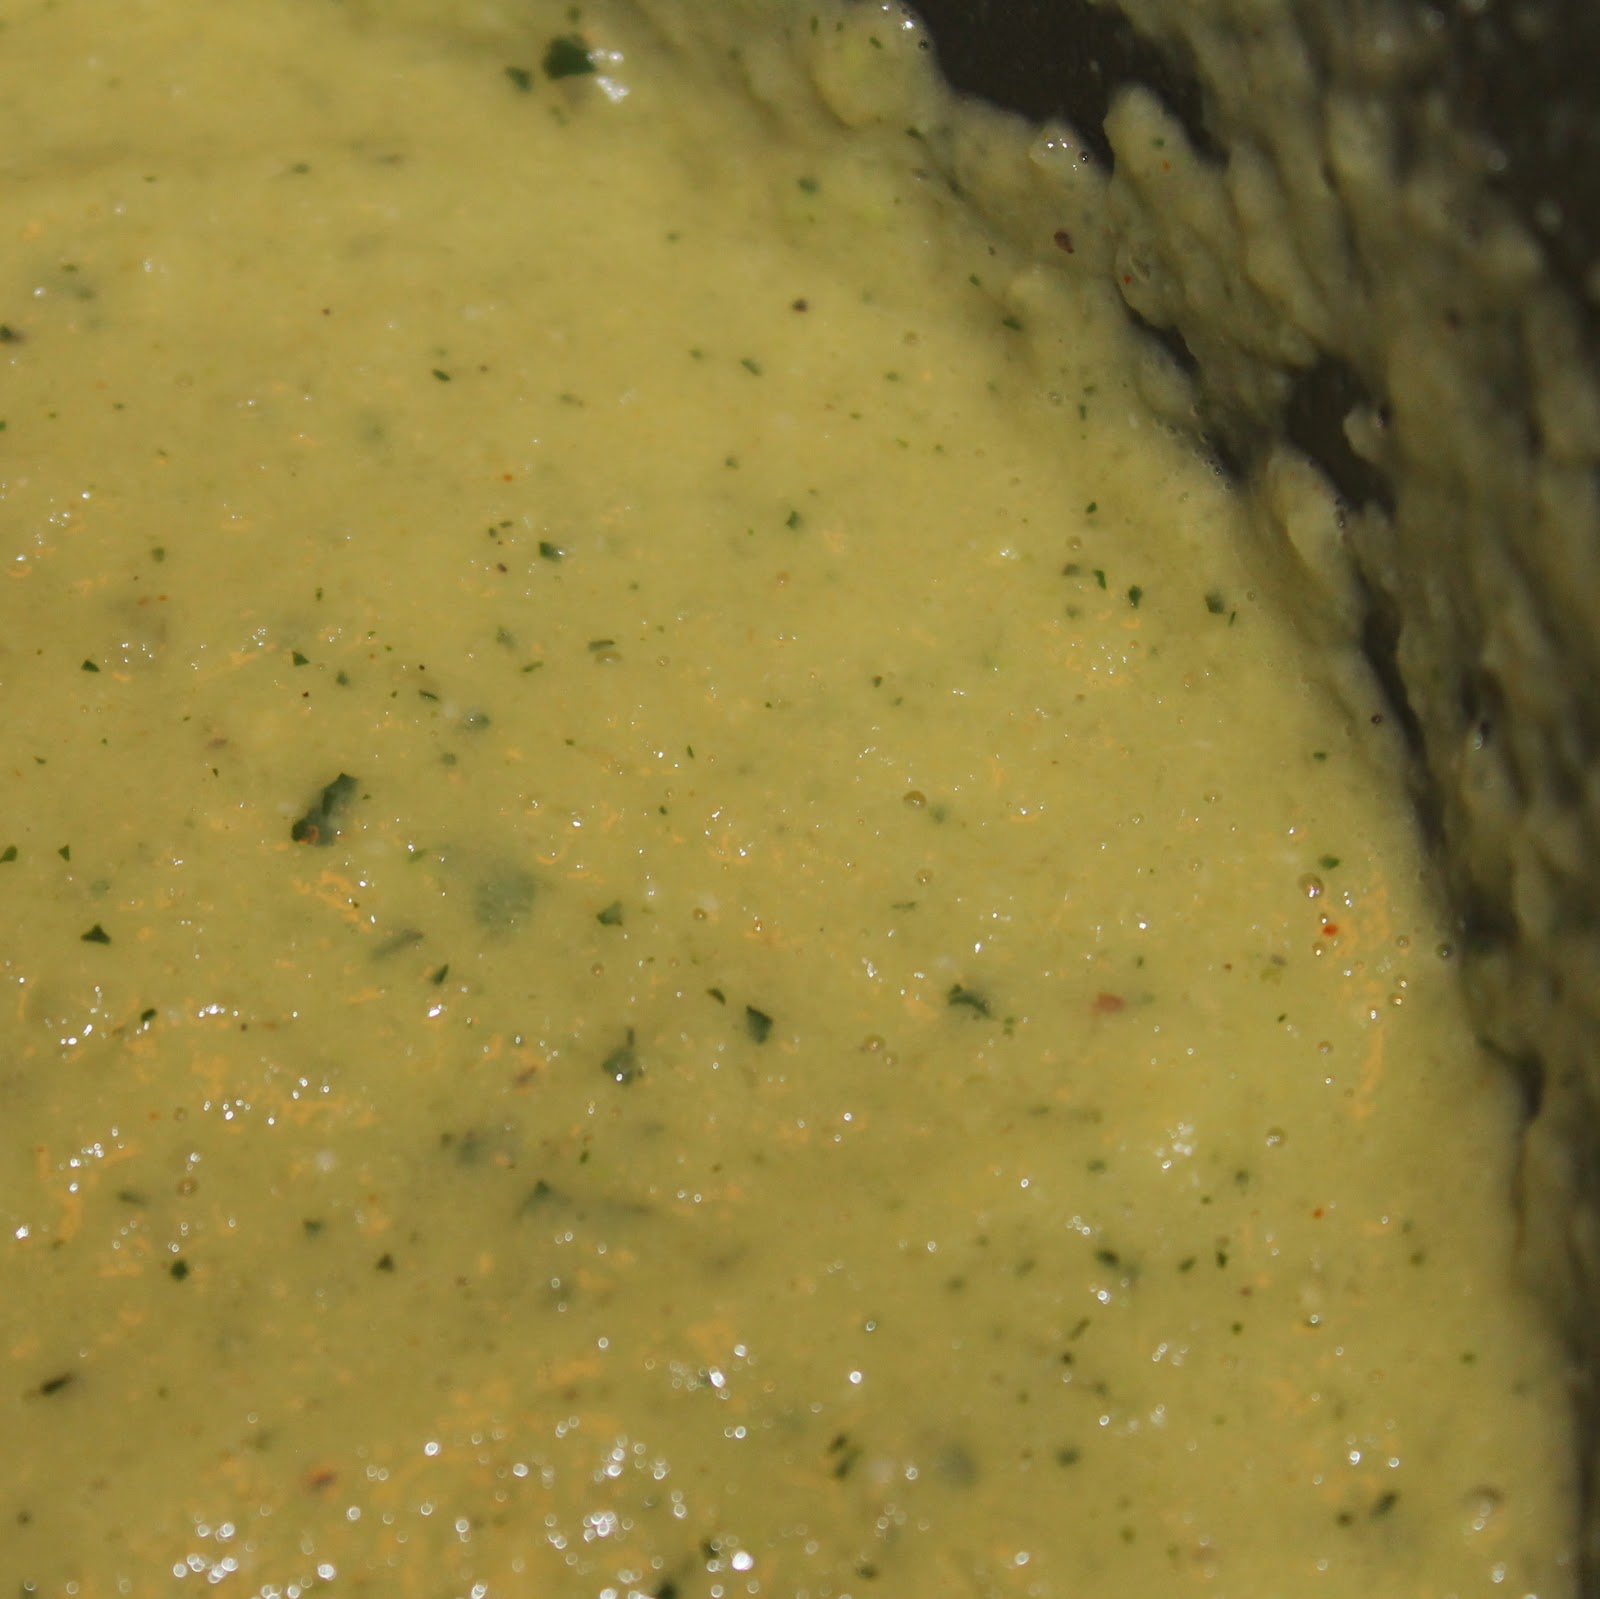
Add thesoupto a blender (be careful), removing the center of the top of the blender. Add the avocado and parsley.
Place a paper towel over the open hole before blending. Blend on low until smooth. (I just do all of this in the pot using an immersion blender, I find it less hazardous hehe).
If you want to eat the soup hot, pour into a serving bowl and stir in the yogurt. Top with cucumber slices and garnish with parsley. If chilling the soup, refrigerate for at least one hour, then stir in the yogurt and garnish before serving.
The soup is smooth, a little tangy from the Greek yogurt, and ends with a slight hint of spice. I like mixing in the parsley and chopped cucumbers into the soup to give it some texture.
I love what I call “after work recipes.” I can make this when I get home and can eat before 8 pm. For an even more refreshing soup, try substituting mint or dill for the parsley.
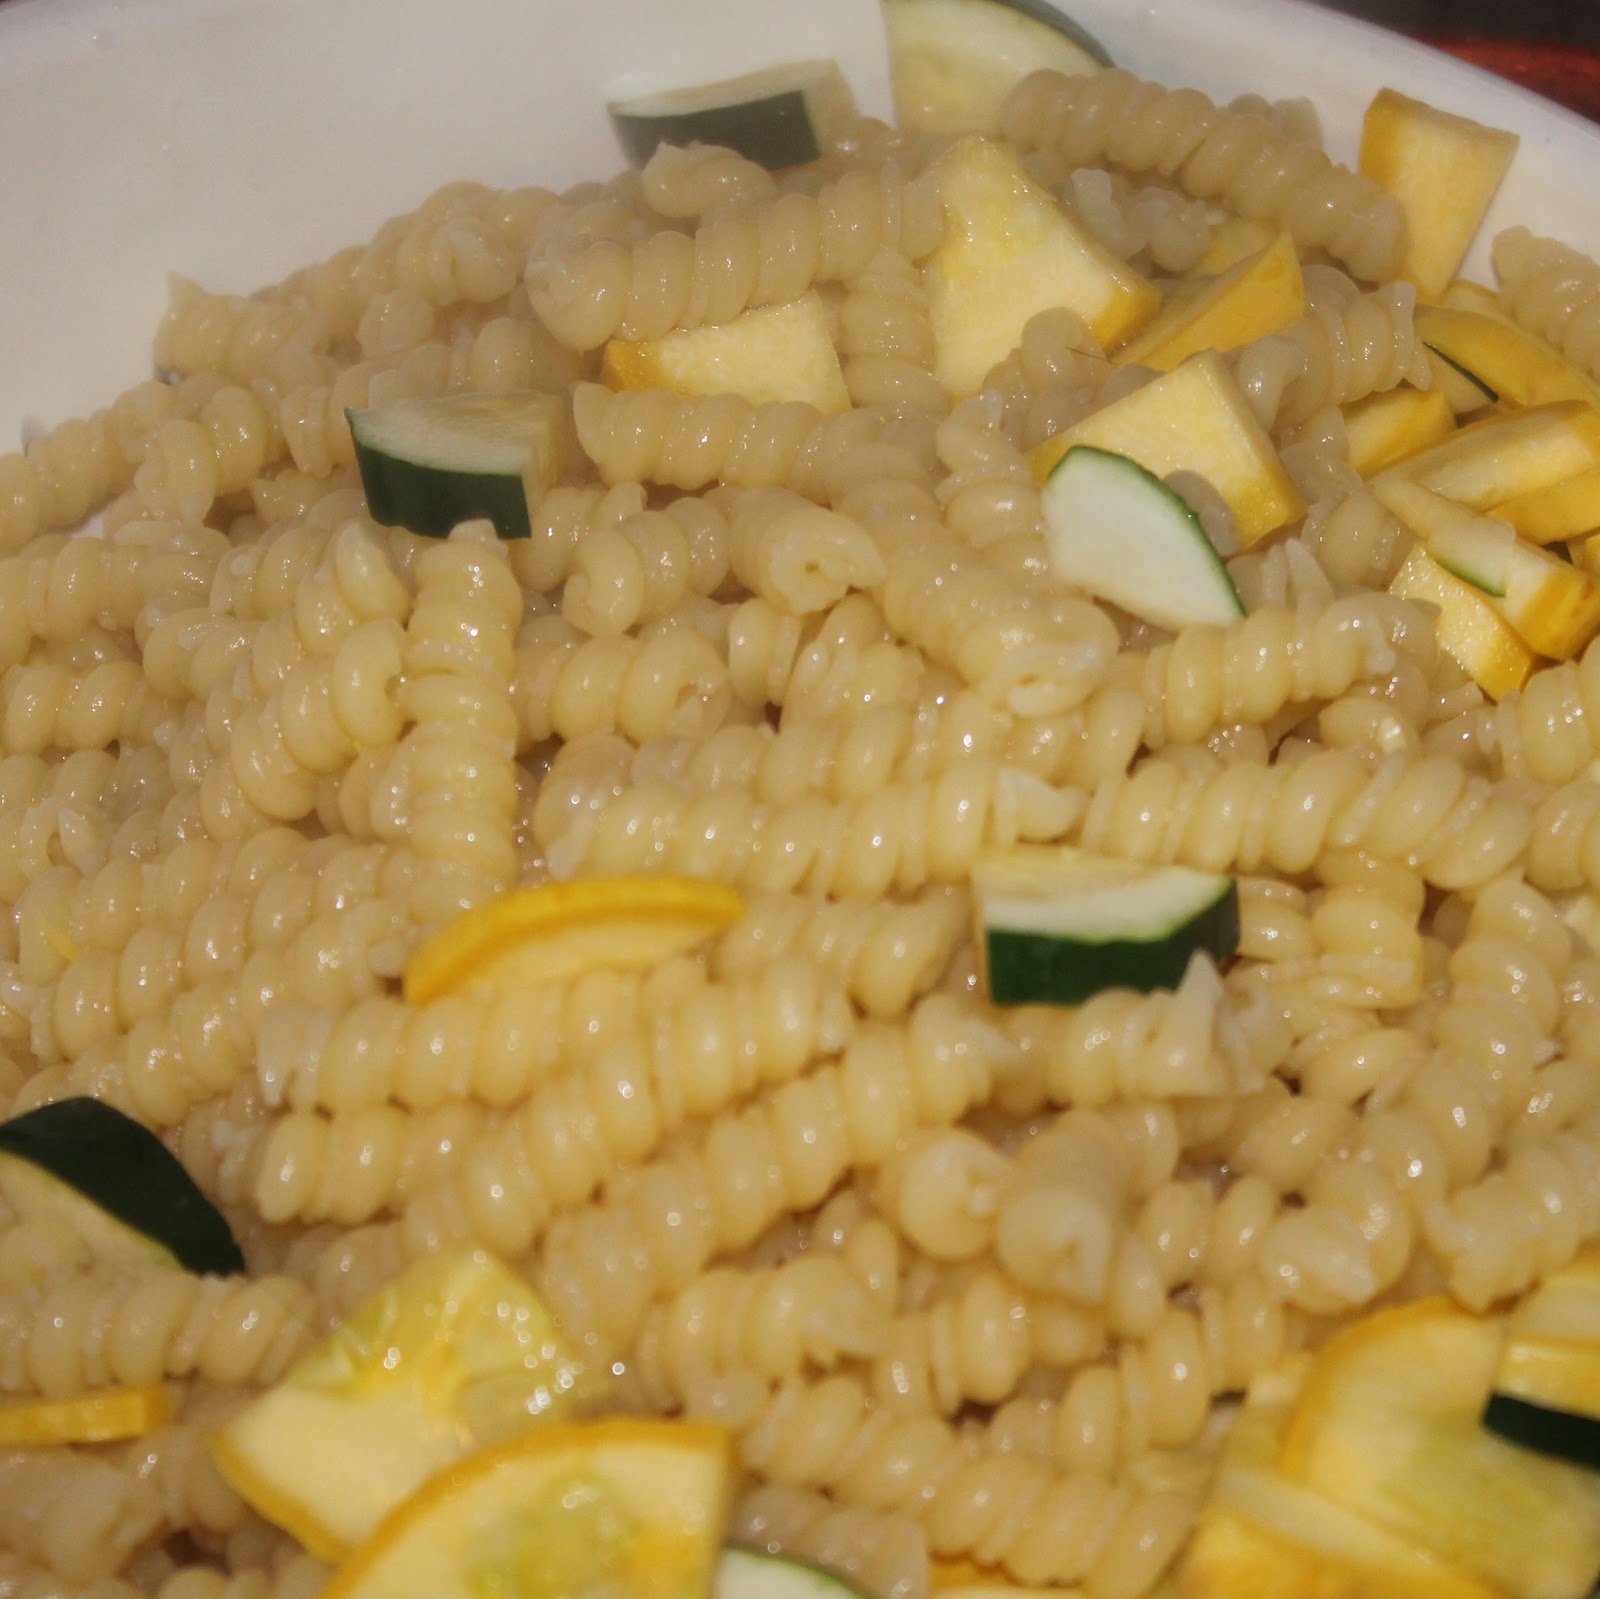
One of my favorite parts of the CSA share is having a plethora of zucchini and summer squash at my disposal. I love these ingredients with a simple pasta, so I was happy to come across a Martha Stewart recipe fthat incorporated these ingredients. I thought I still had some snap peas left over and was going to throw those in, but I unfortunately was all out. Plus, I didn’t have any frozen peas in my freezer. If you have those, be sure to include them. I threw in a zucchini also because I had one on hand.
Ingredients:
Coarse salt and ground pepper
8 ounces gemelli or other short pasta
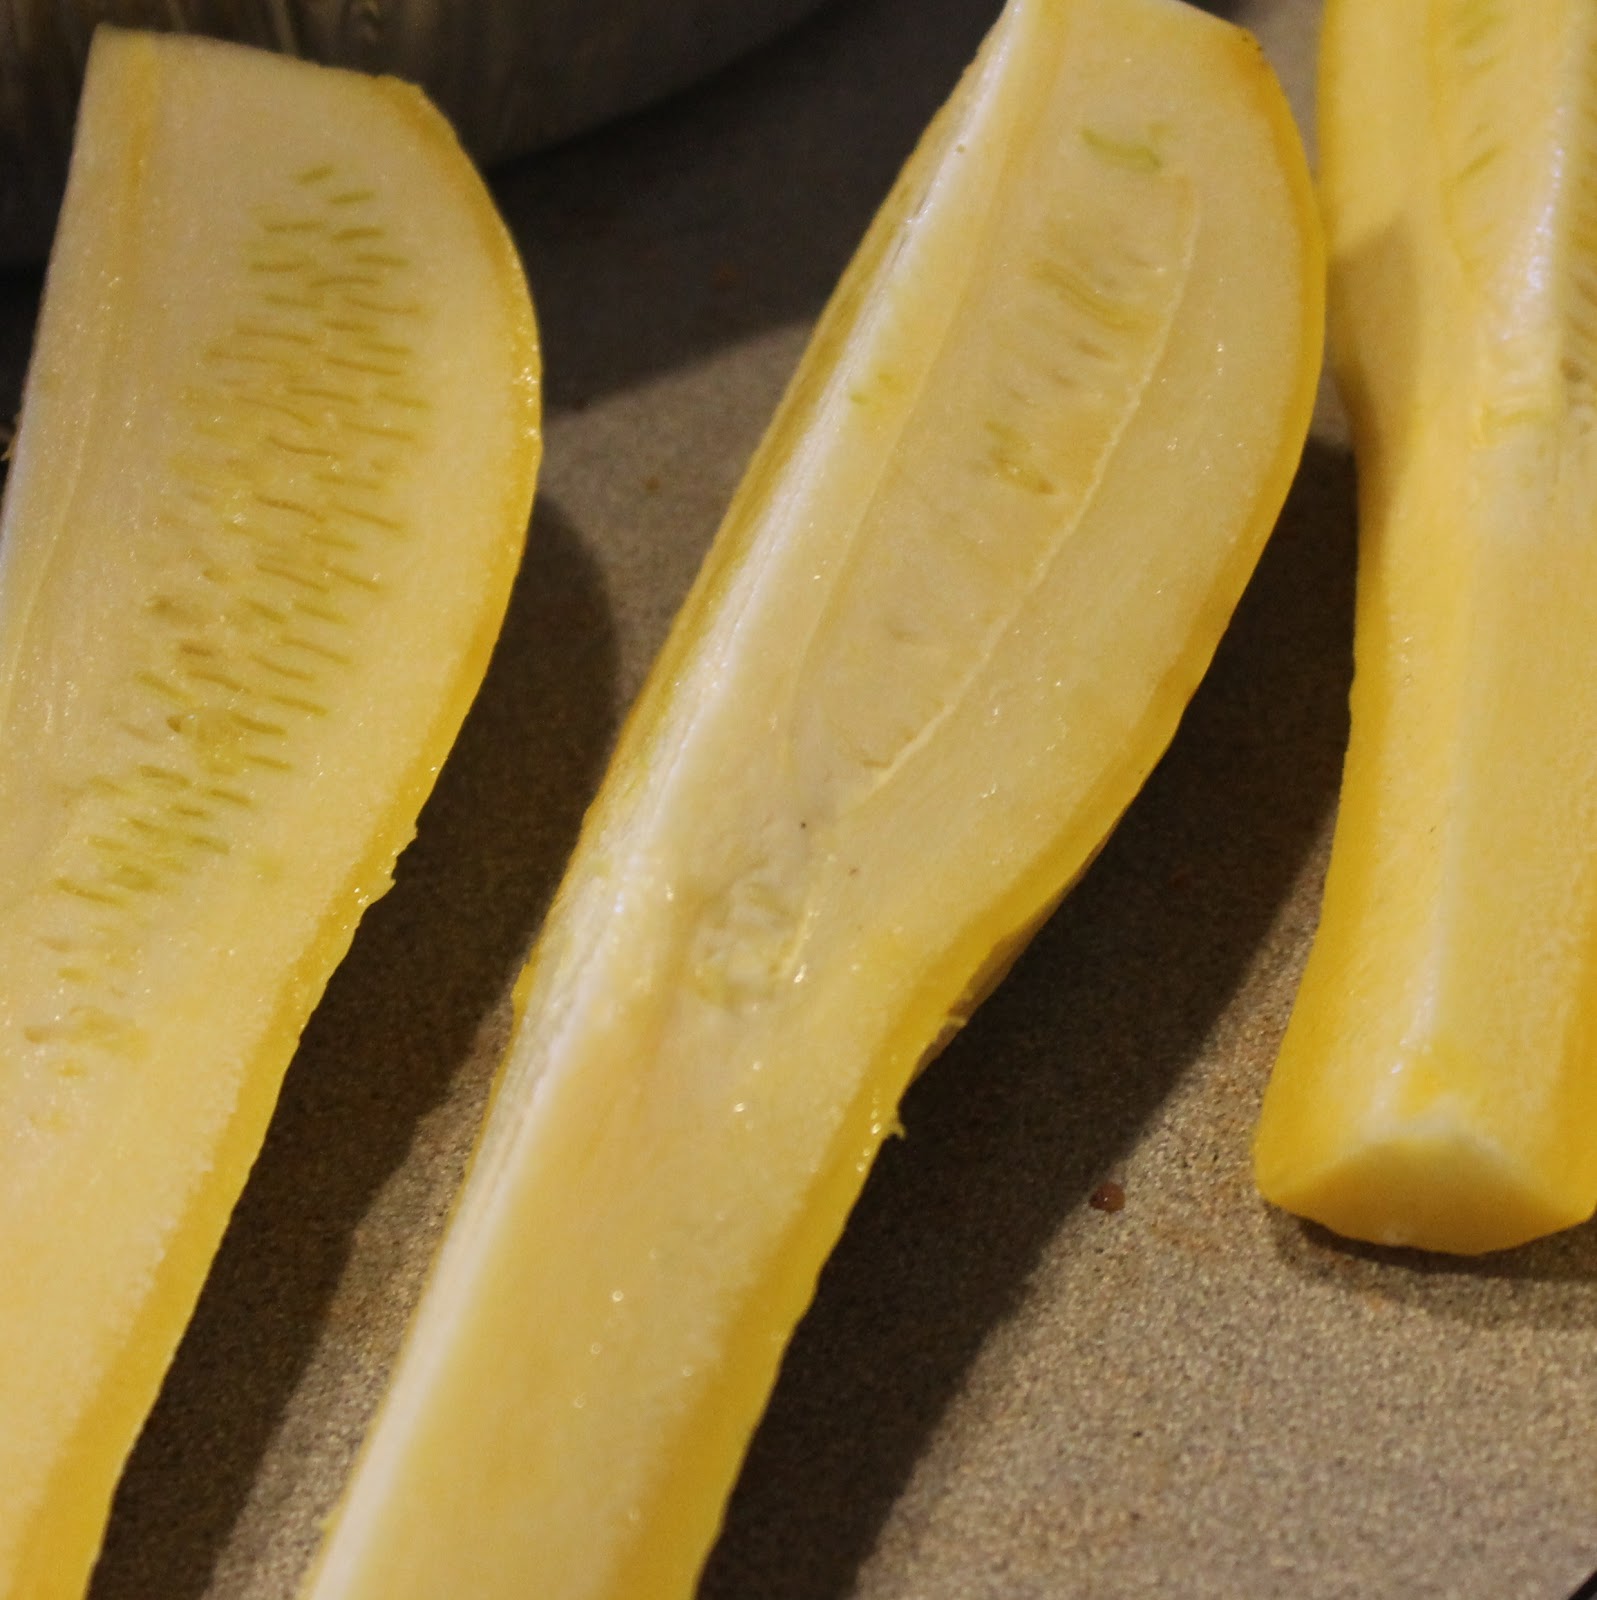
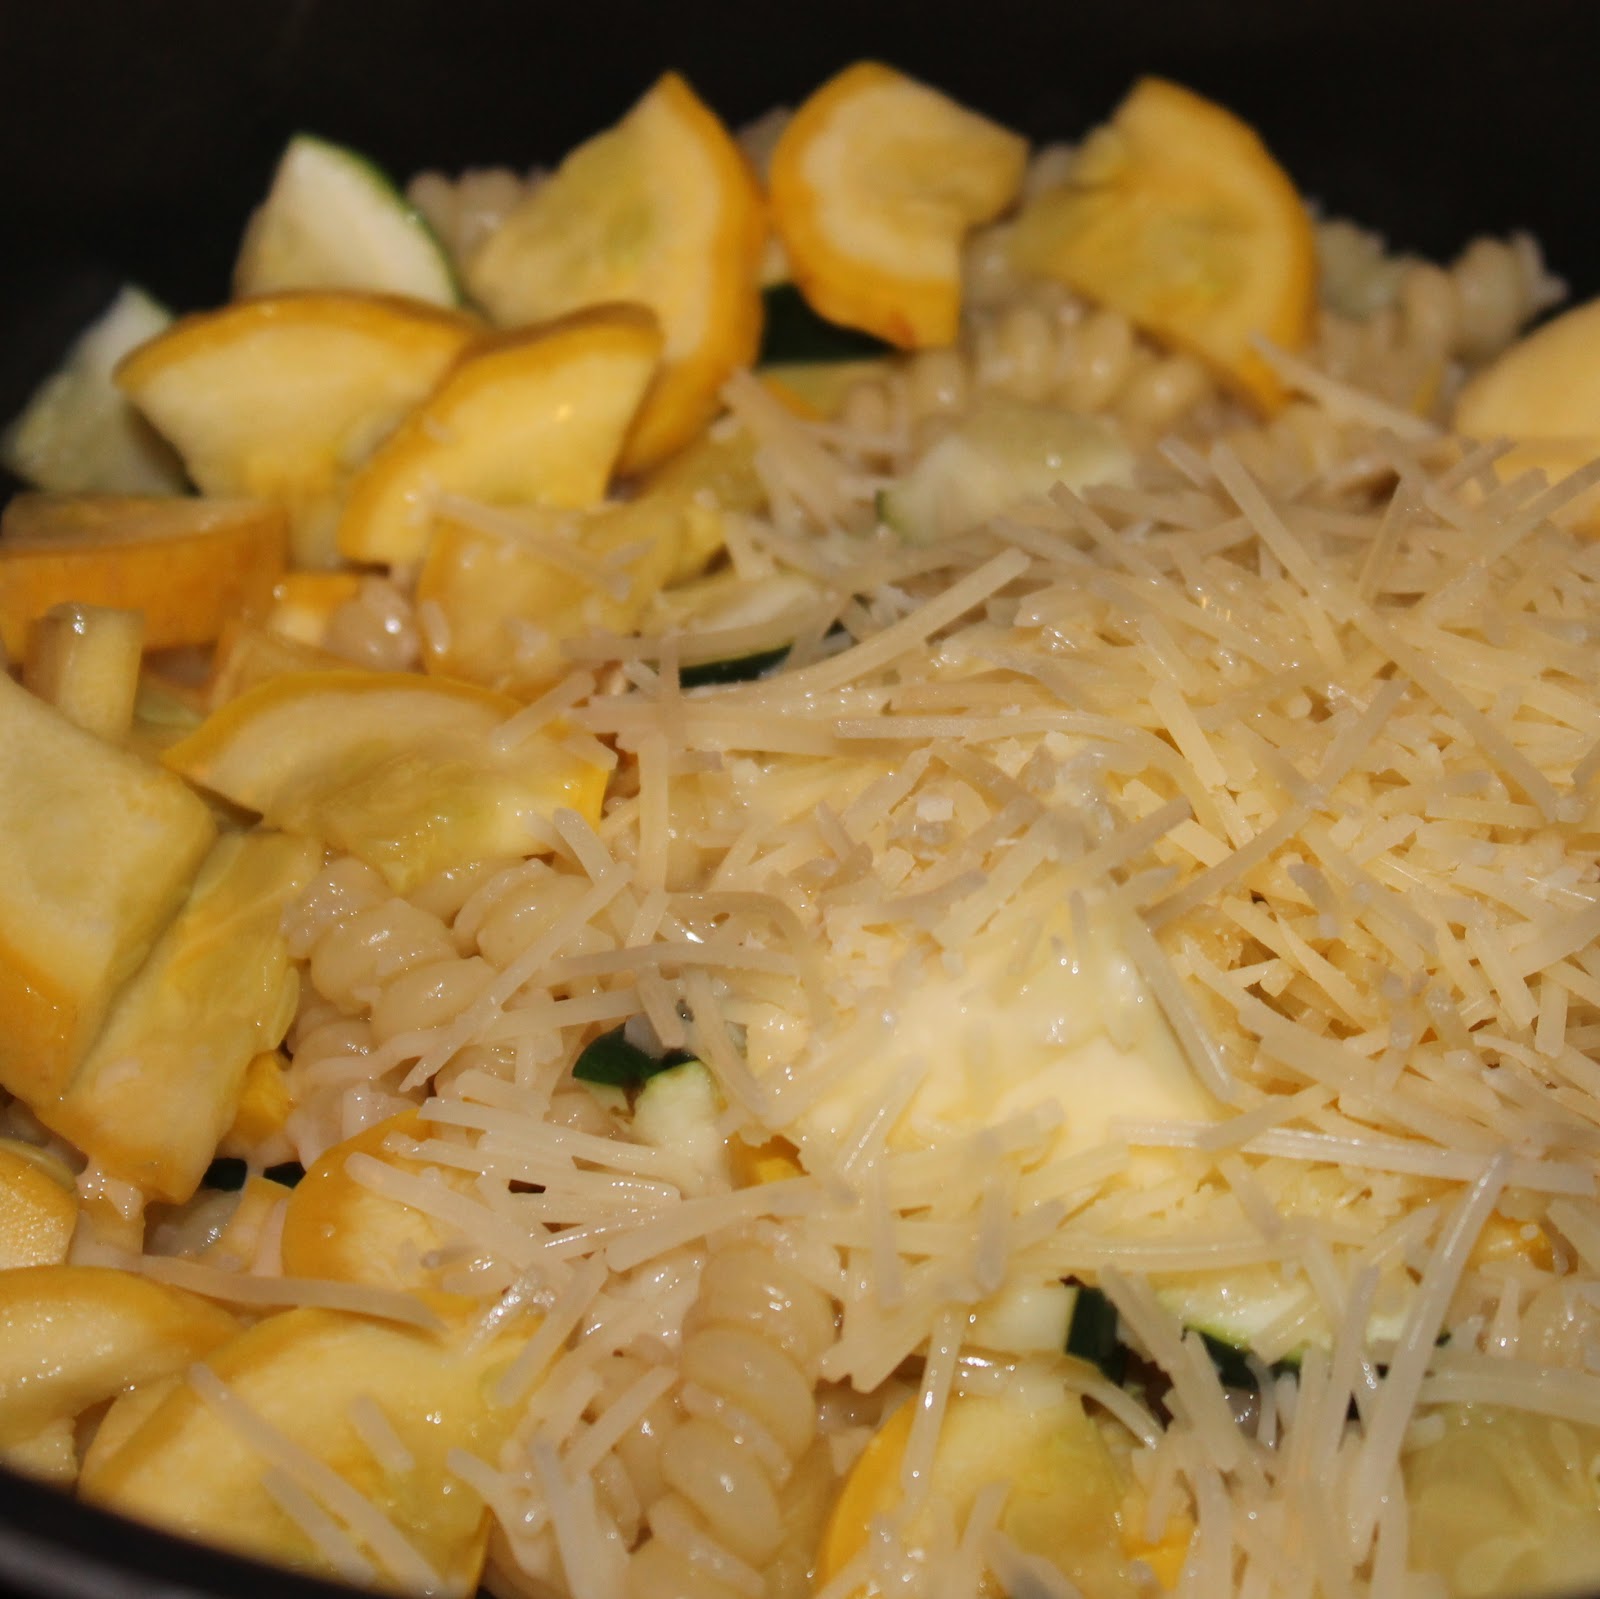
3 medium yellow squash, quartered lengthwise and thinly sliced
1 medium zucchini, quartered lengthwise and thinly sliced
4 tablespoons butter, cut into small pieces
1 tablespoon fresh lemon juice
1/2 cup shredded Parmesan
Torn fresh basil leaves, as garnish
Cook pasta in a pot of boiling salted water. Cook 2 minutes less than required for al dente (my pasta had to cook for 6 minutes).
While waiting for the pasta to cook, slice your squash and zucchini.
Add the squash and zucchini to the pasta and water, and cook for 2 minutes.
Drain the pasta, reserving 1/2 cup of pasta water. Return the pasta to the pot.
Add the butter, lemon juice, 1/4 cup Parmesan, and 1/2 cup pasta water. Season with salt and pepper and toss to combine.
Spoon into individual bowls and top with basil and sprinkle with Parmesan.
At first bite, I thought this might be missing something. But all it really needed was another seasoning of pepper and an extra squeeze of lemon. After that, it was quite yummy.
To really up the flavor, a few red pepper flakes would go a long way.
The flavor of this was nice and fresh. It was a solid vegetarian dish, but I think it works best as a base. I feel like you could really turn this into something special with some additional flavors included.
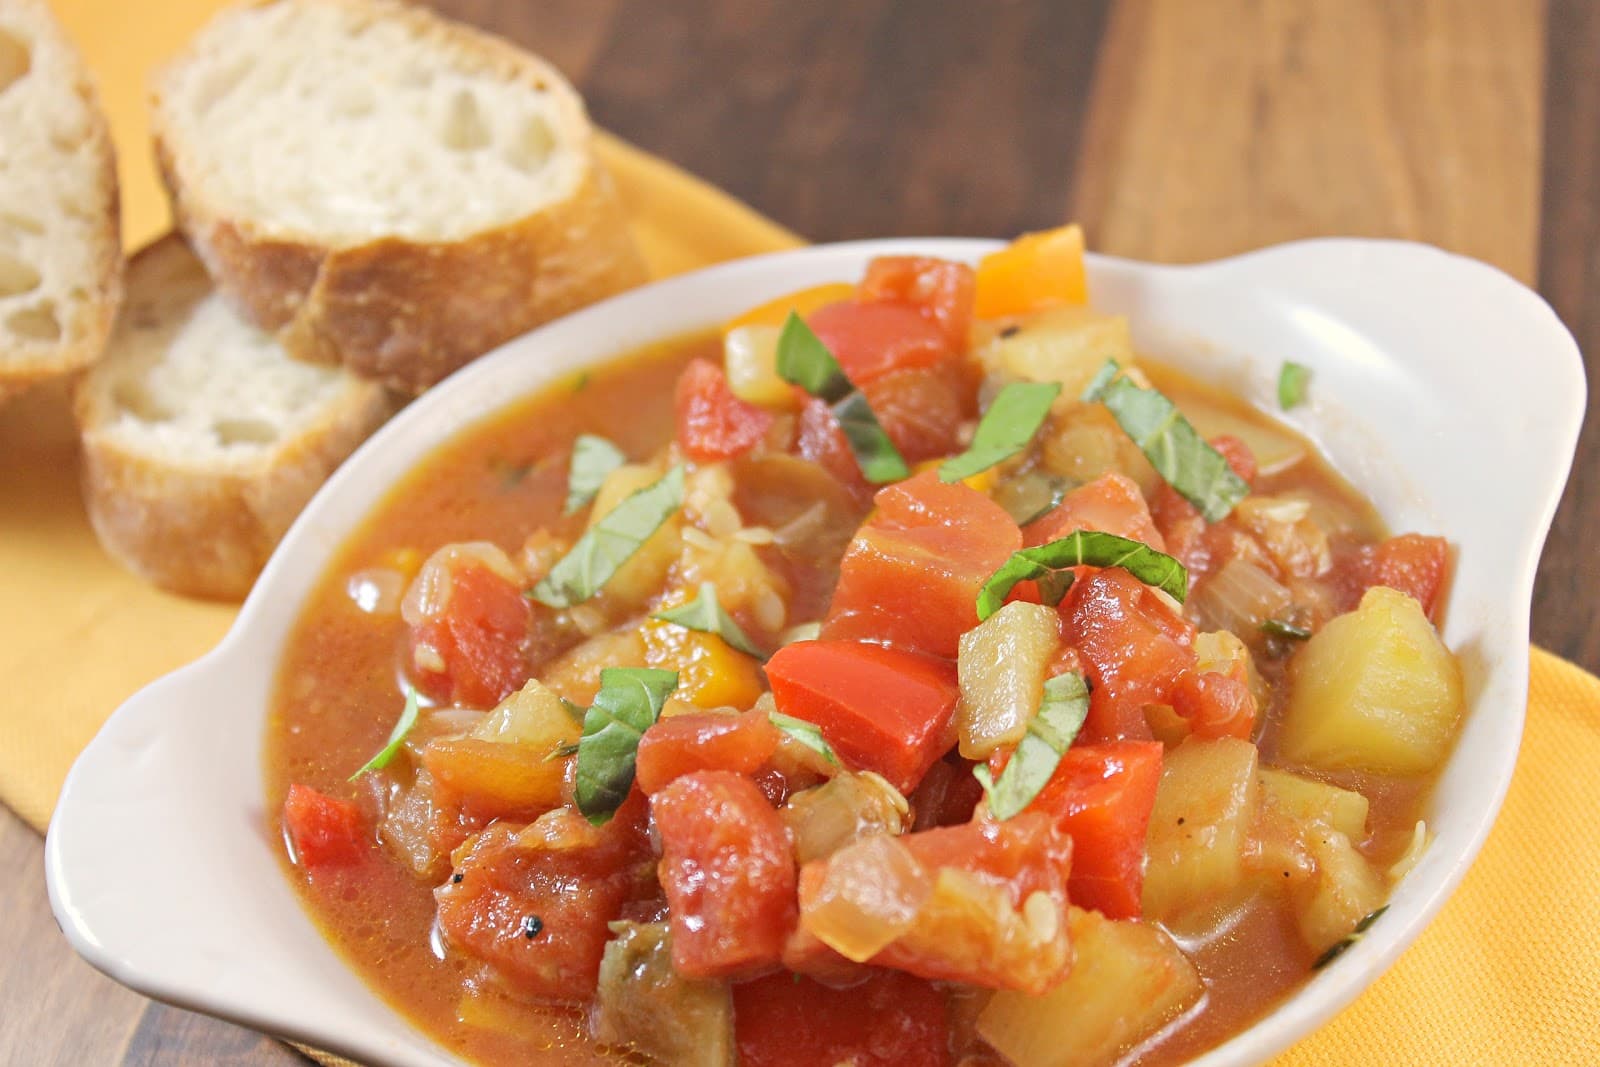
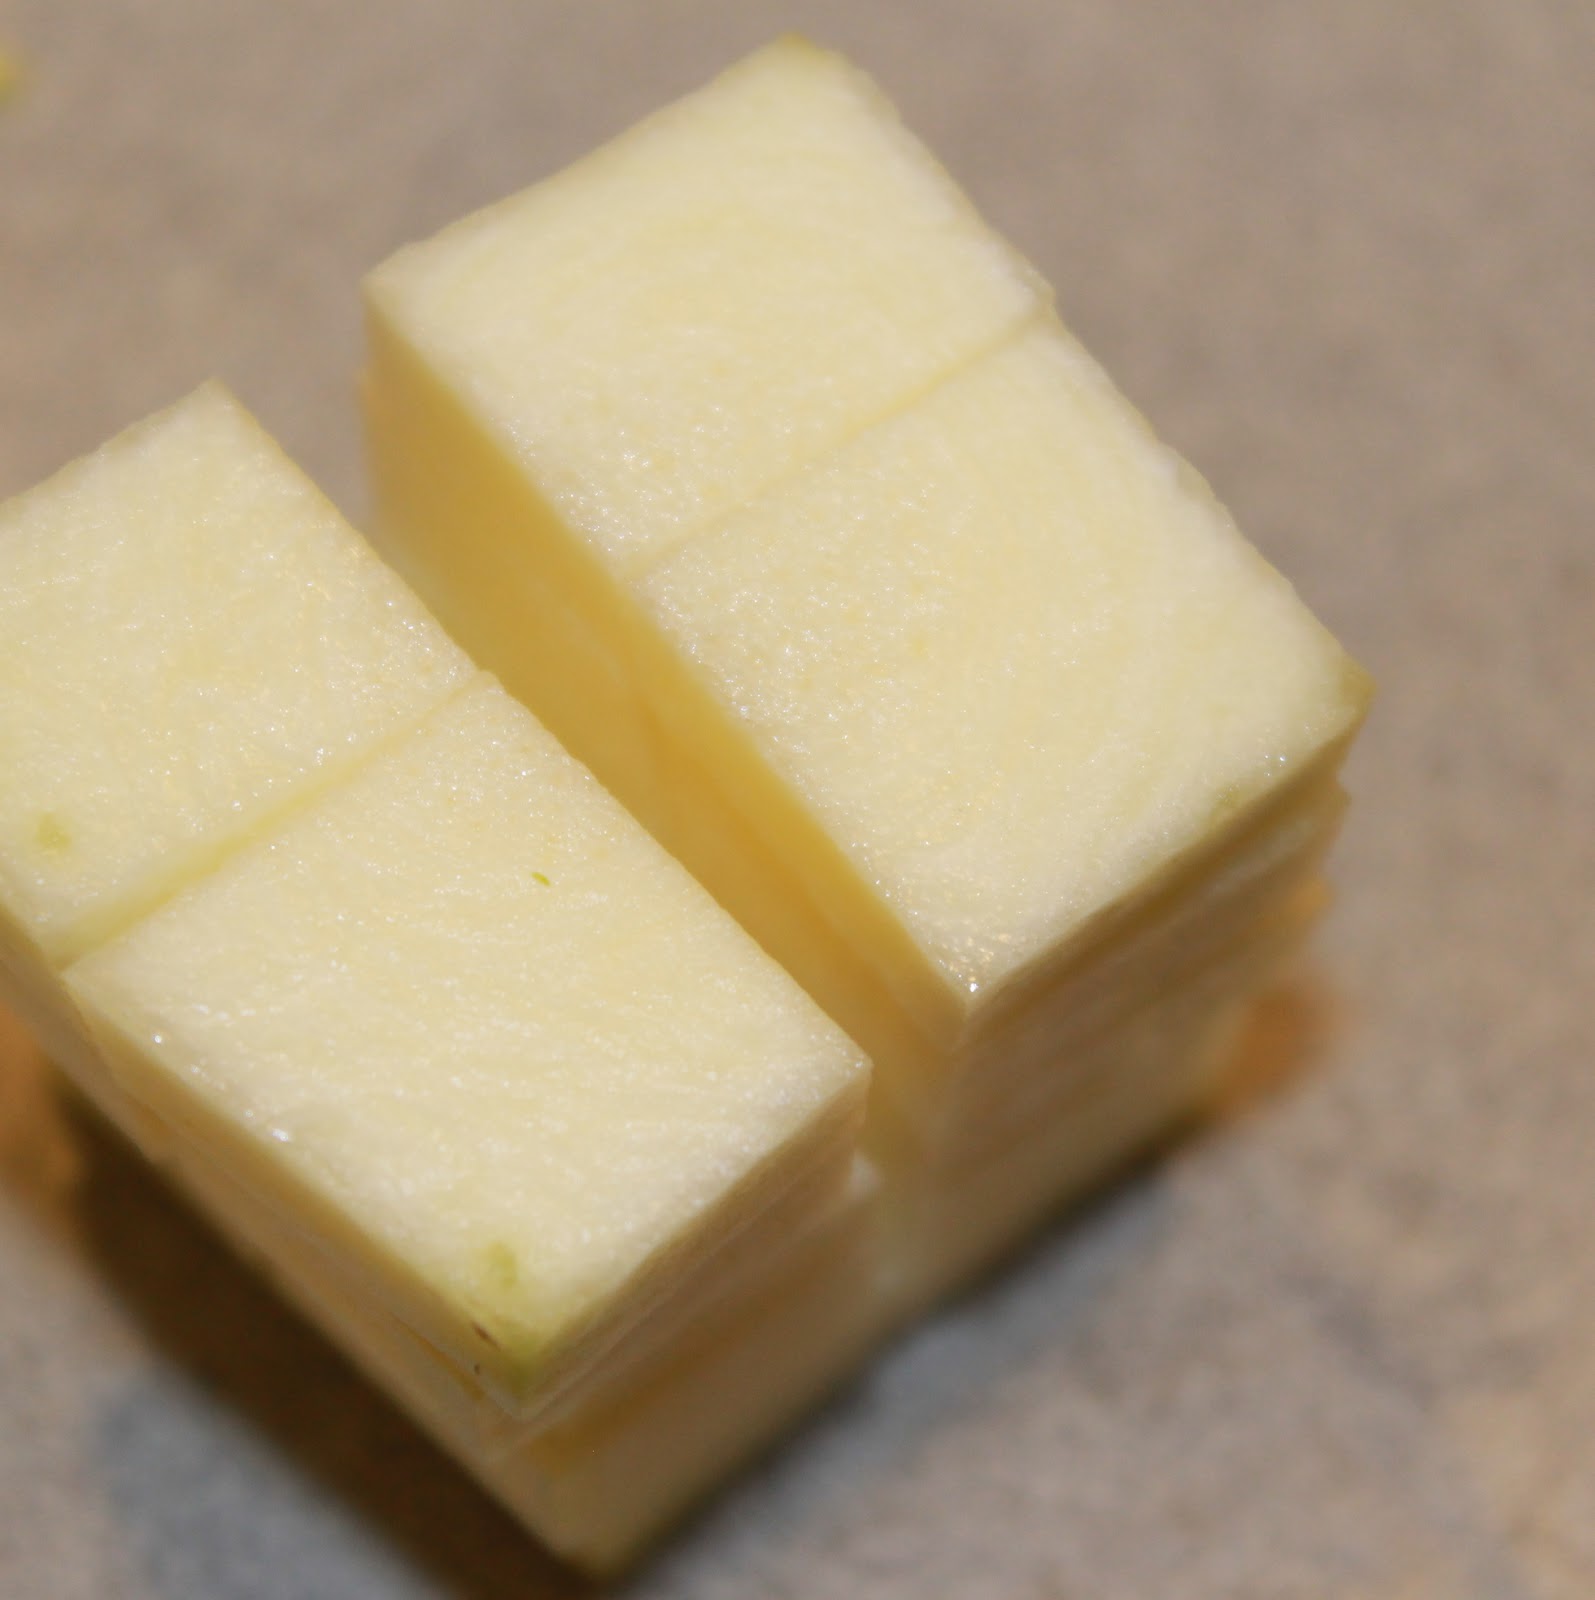
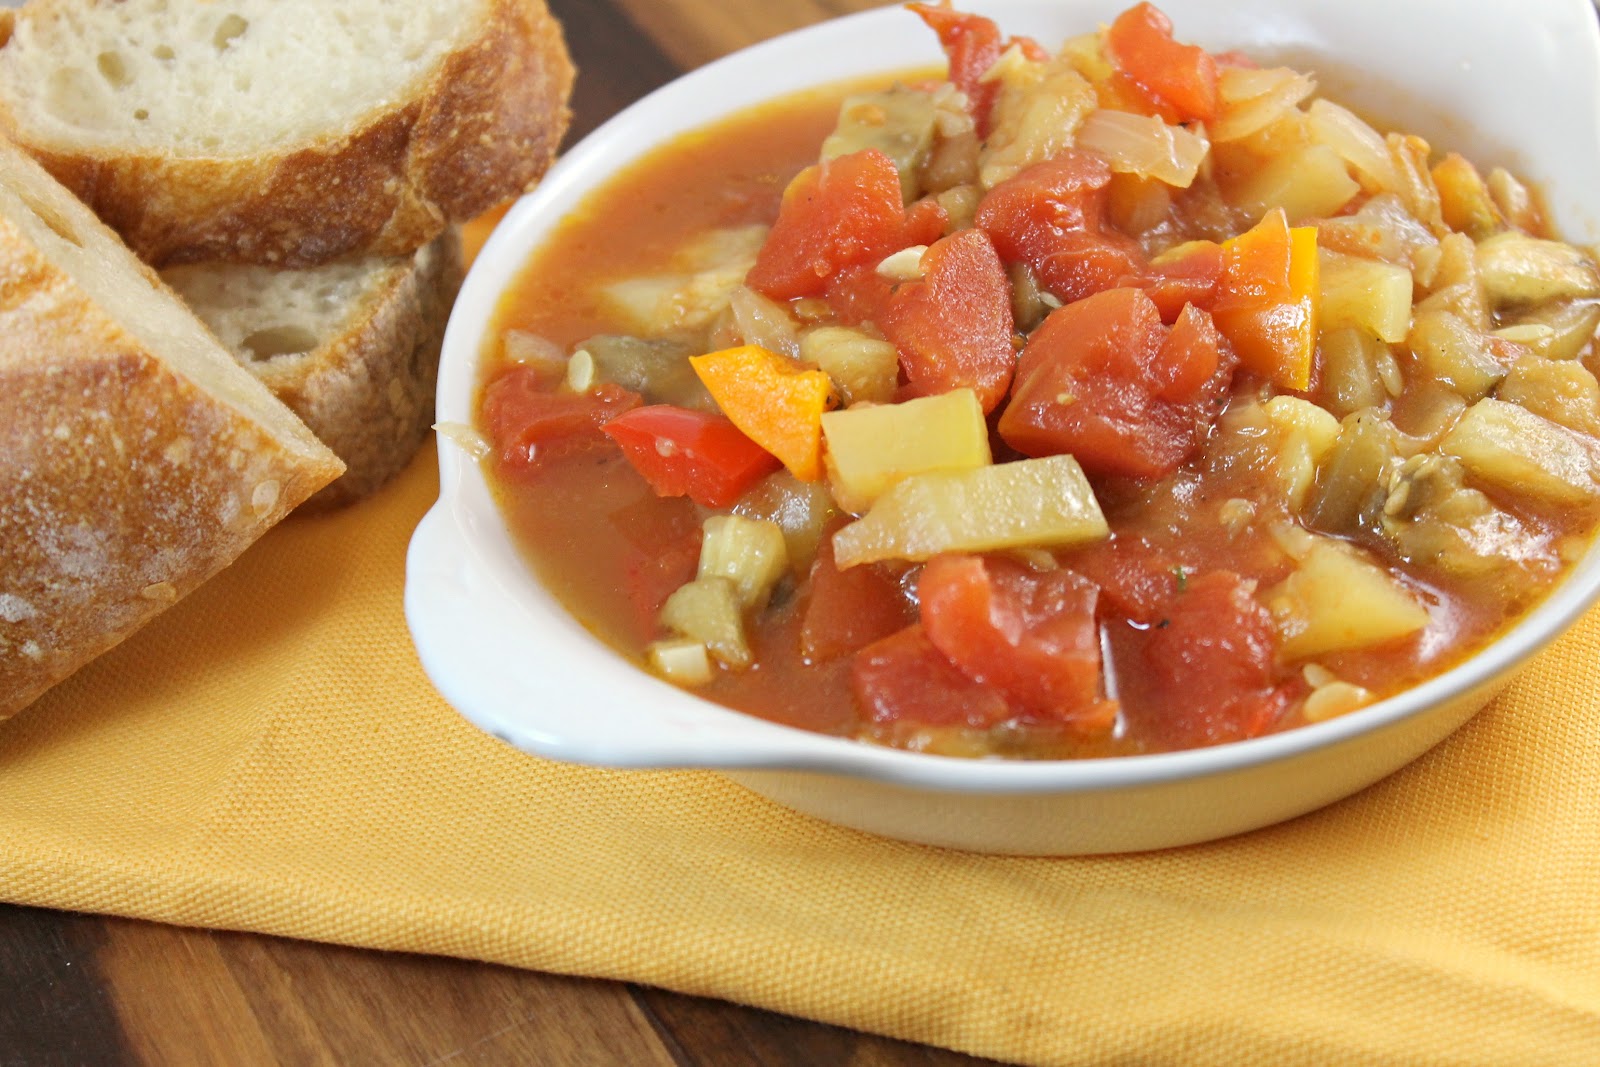
With the influx of vegetables in my life from my CSA, I am swimming in quite a large amount of highly perishable produce. So to preserve (and use) a bunch of my CSA veggies, I decided to try my first hand at Ratatouille. I looked at a bunch of recipes online and they can get really quite complex! There are some that cook each vegetable separately to bring out the flavor of each, some that layer the ingredients into a beautiful casserole. Well, I’m making this on a weeknight after work. So this is one of the easier versions, a one pot wonder if you will. One day, I will make the other version, but tonight, I just want a delicious meal that I can freeze for later.
So what is ratatouille, besides a really cute kids movie? It’s basically a stewed vegetable dish, usually served with bread, or maybe egg noodles or polenta (something to sop up all the deliciousness). There are many different recipes for the dish, but most include eggplant, zucchini, peppers, and onions. The spices can range from thyme or marjoram to herbes de Provence.
I found this recipe on MarthaStewart.com and kind of messed with the ratio of ingredients, so be sure to check out the original recipe to see if that is more to your liking.
Ingredients:
1/4 cup olive oil (or enough to cover the bottom of your pot)
1 medium onion, chopped (I used a sweet onion)
4 cloves garlic, minced
3 small eggplants, cubed
2 large zucchini, cubed
Salt and ground pepper, to taste
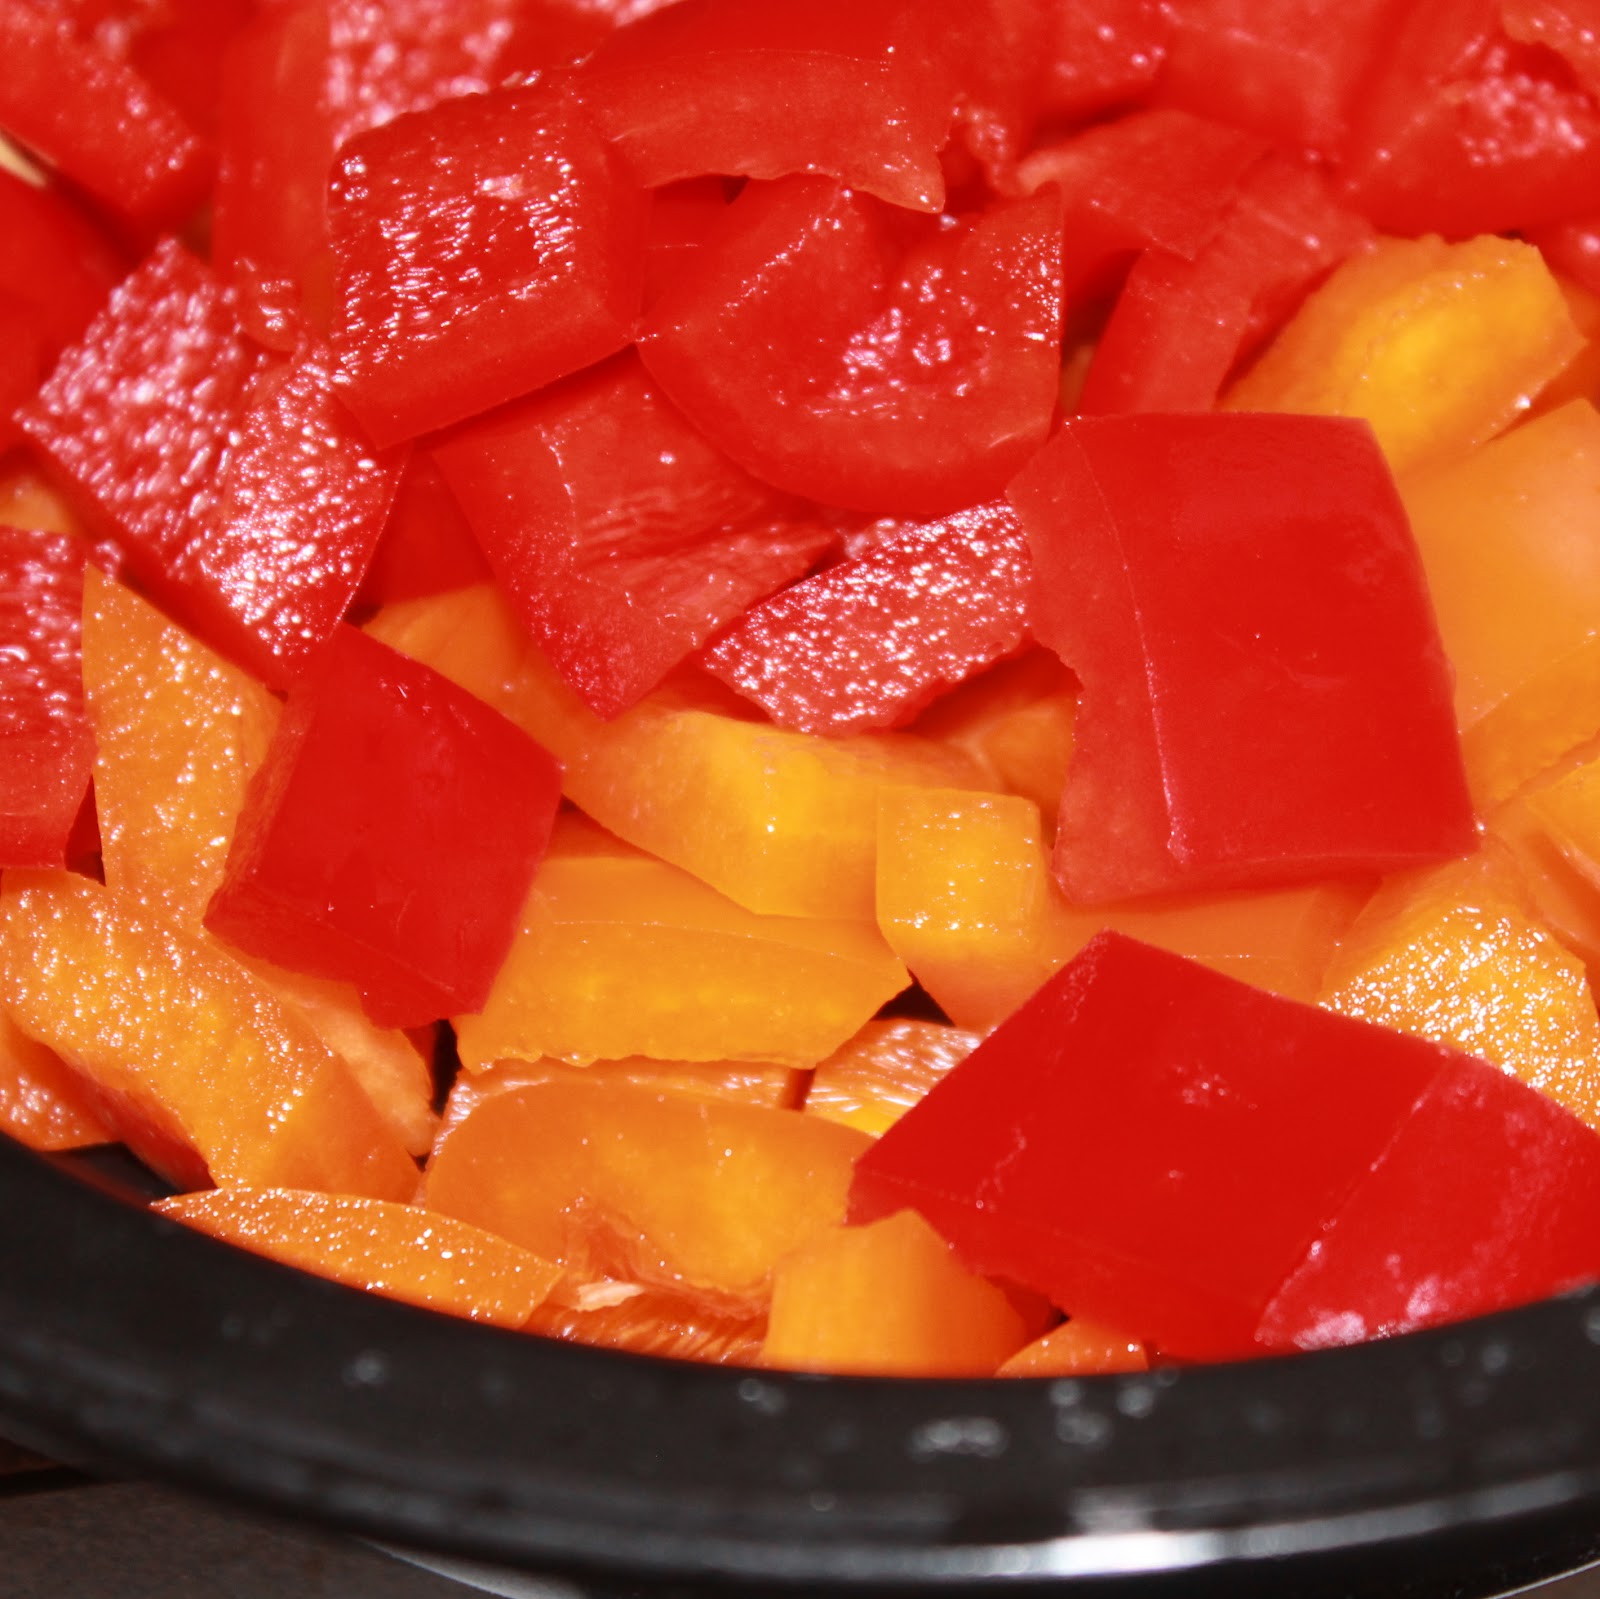
2 yellow or bell peppers, ribs and seeds removed, cubed (use any color pepper you want)
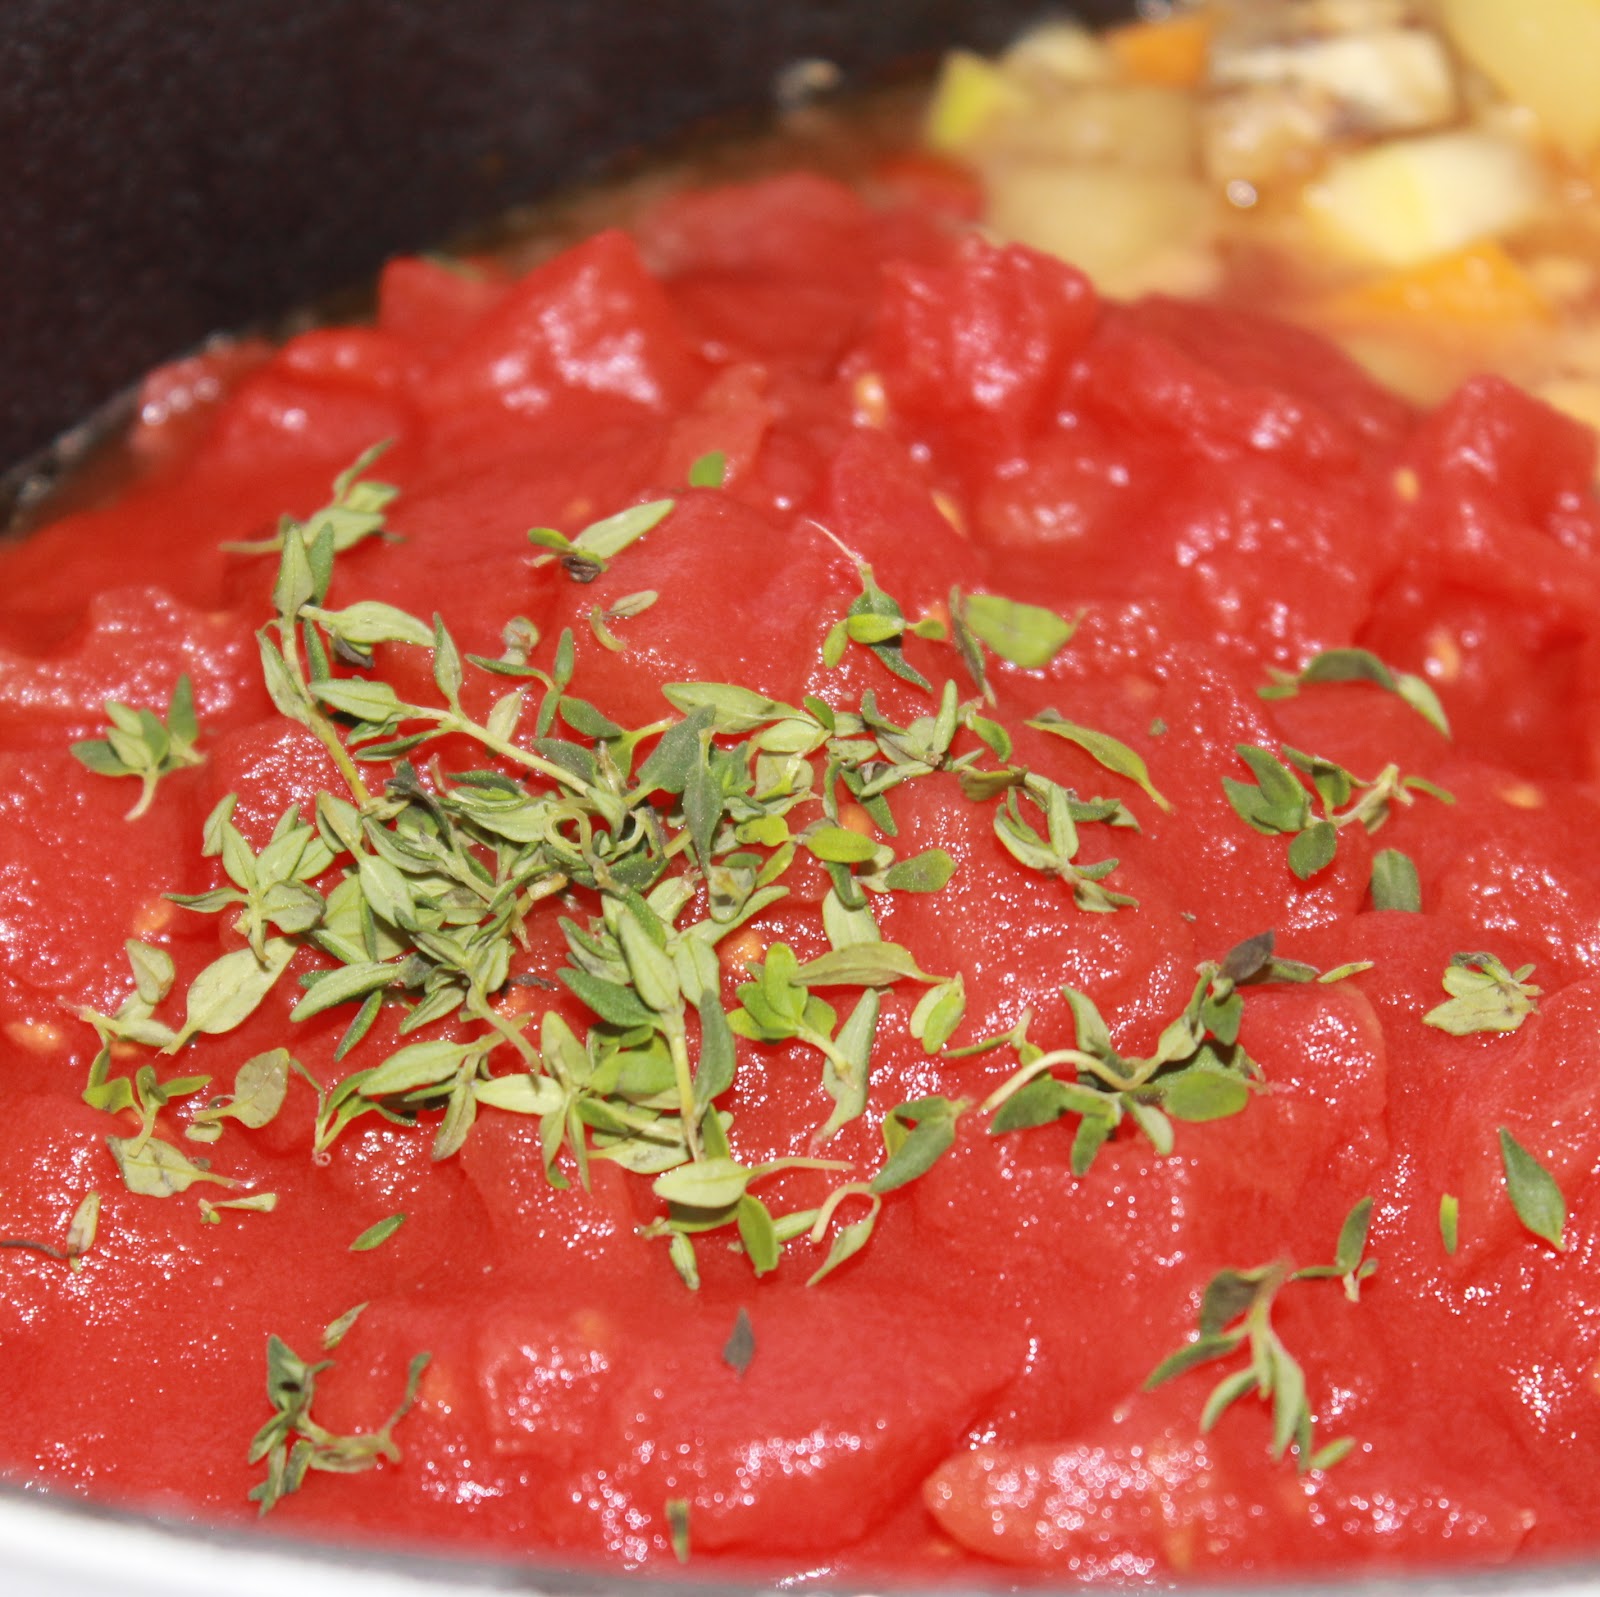
1 can (28 ounces) diced tomatoes
2 teaspoons fresh thyme
Chopped fresh basil, for garnish
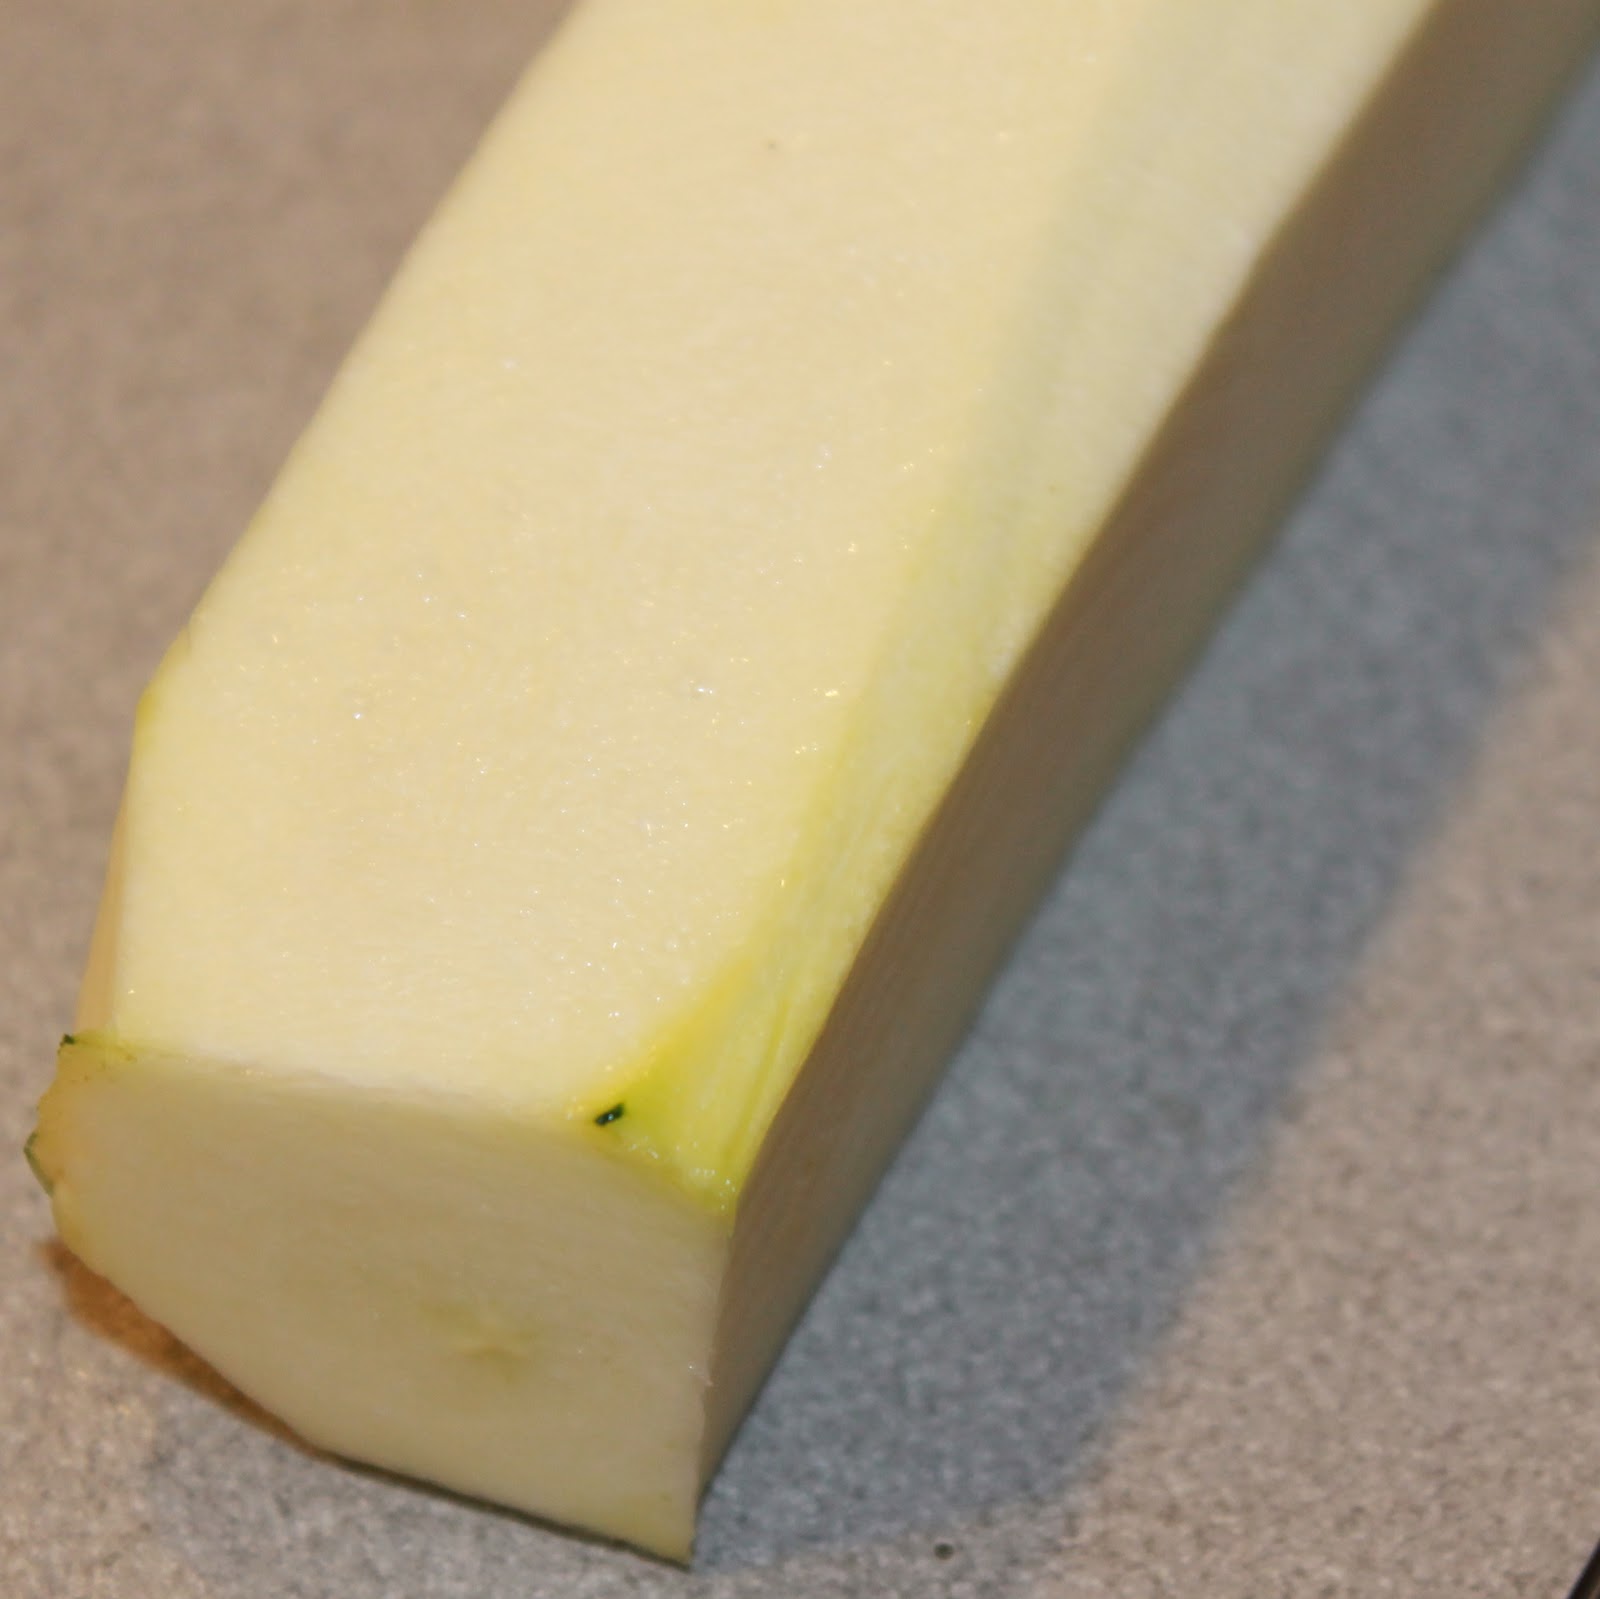
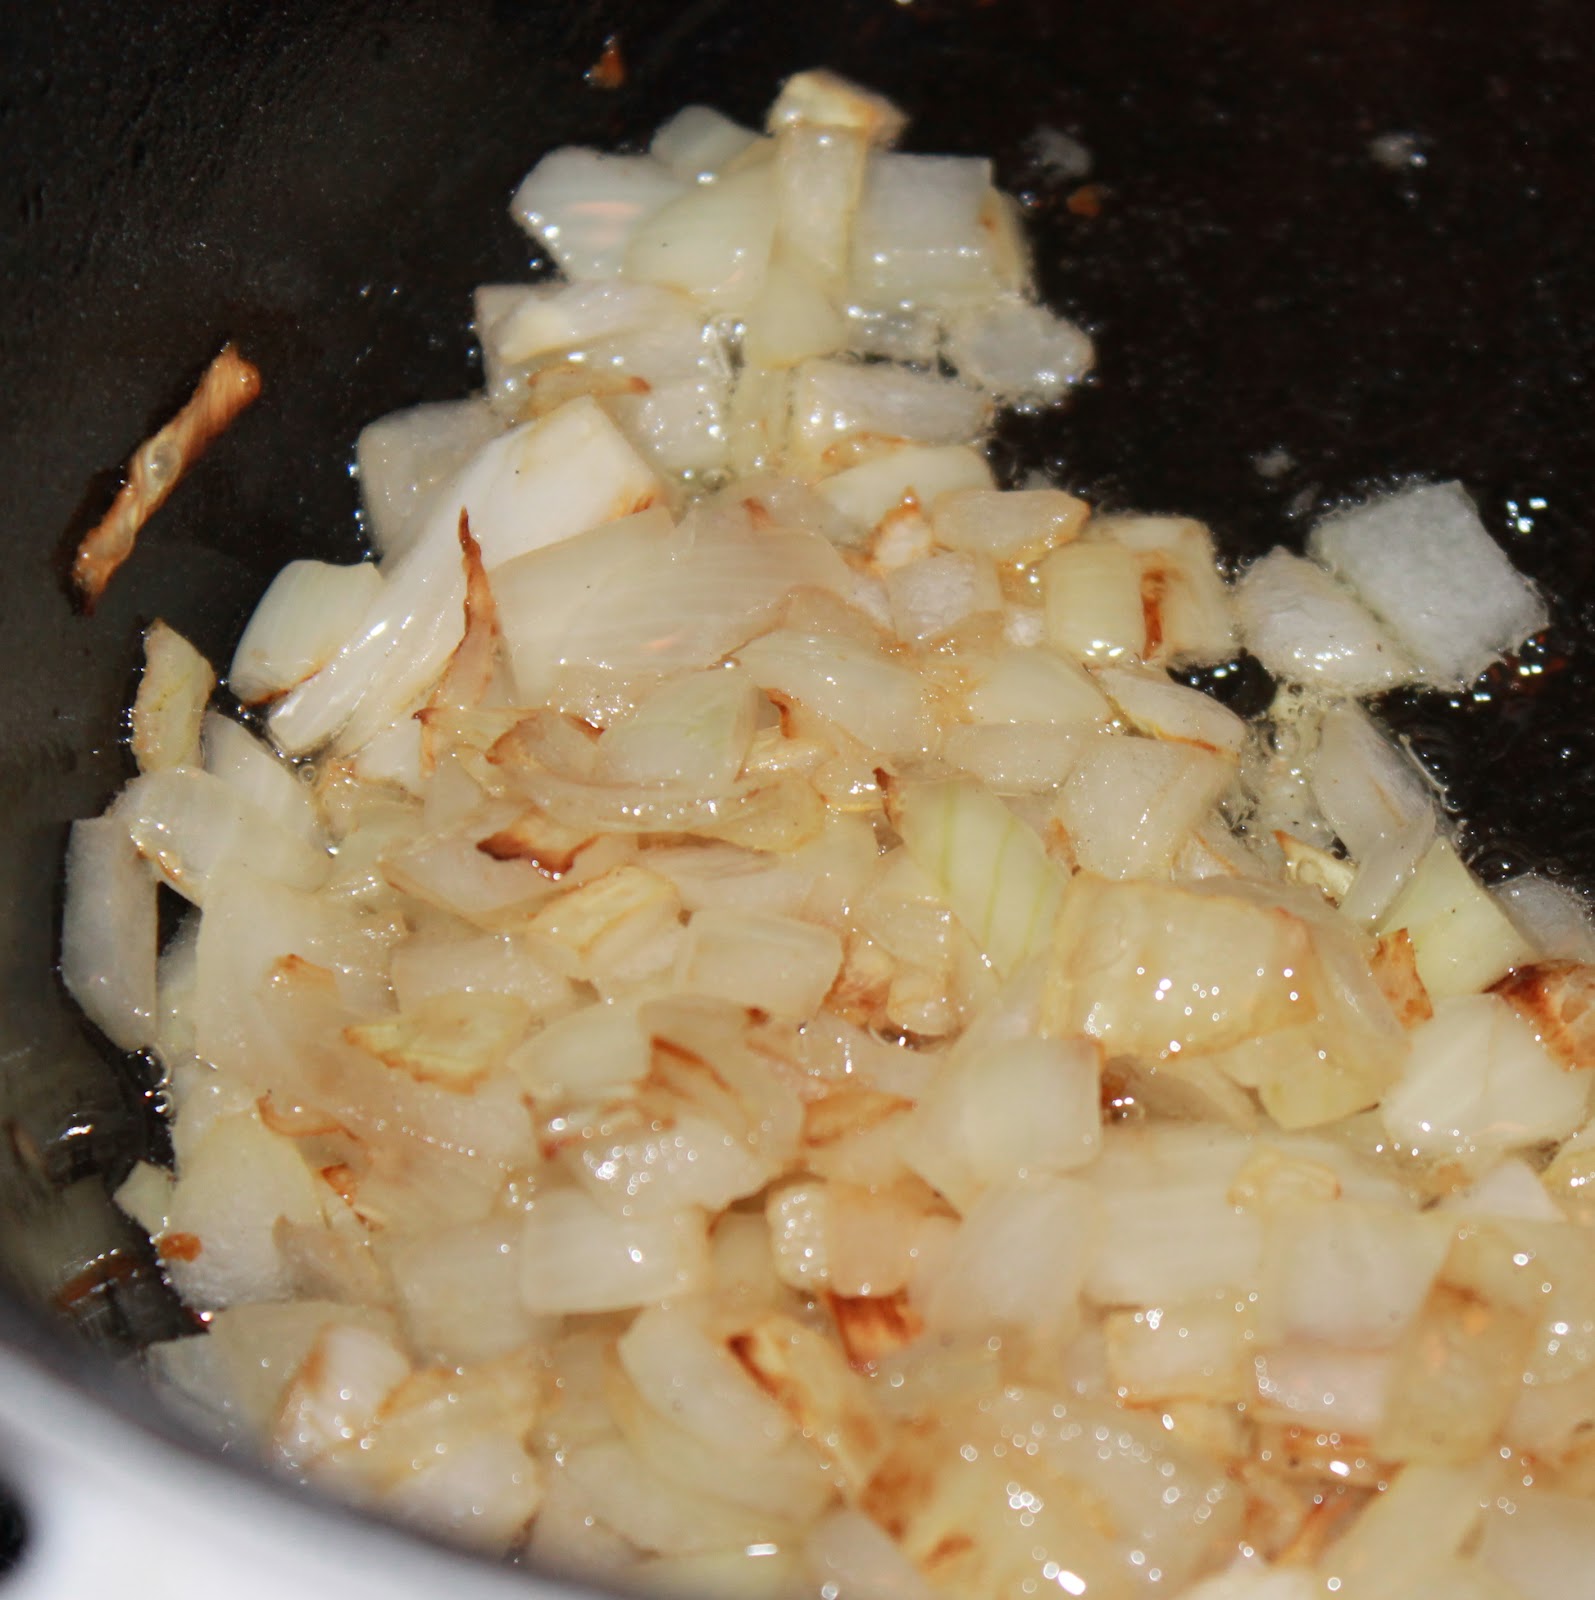
To make, add the olive oil to a Dutch oven or other large pot that has a lid. Heat over medium heat. While waiting to heat, chop your onions, garlic, eggplant, and zucchini.
I want to take a minute to discuss a method of cutting eggplant. I googled this just as I was about to make the recipe so it was new to me too and it worked quite well. I found the method on recipetips.com.
To cut the zucchini, remove the skin using a knife by cutting the zucchini into a square shape (or close to a square.)
Slice the zucchini into smaller square disks.
Stack a few of them, and cut into fours to make smaller squares. This doesn’t have to be uniform, you just want them to be the same general shape so they cook evenly.
Add the onions to the pot and stir occasionally. Cook for 5 minutes.
Add the garlic and cook for another minute. Stir in the eggplant and zucchini and season with salt and pepper. Add 3/4 cup of water, cover, and simmer for about 5 minutes, stirring once half way through. While waiting for the 5 minutes to pass, chop your peppers.
Add the peppers to the pot and simmer, covered, for another 5 minutes.
Add the tomatoes and thyme and bring to a boil.
Reduce heat to medium-low, partially cover, and simmer for 15 to 20 minutes. The recipe said to stir often. I didn’t. I got distracted and walked away. Oh well.
Remove from heat and serve. Top with a few slices of basil.
If freezing, leave the basil out and freeze.
For being vegetarian, doesn’t this look fabulously hearty?
I paired mine with day old bread which was a perfect amount of crispiness to go with the veggies. It may not be terribly pretty, but it was comforting and really flavorful.
I ate one serving and froze the rest for nights when I don’t have time to cook. I’m glad I did or I’d still be sitting here eating it!
Today is my first of five different blog posts over the summer with a resolution on how to eat healthier. T-fal is hosting a 2012 Healthy Summer Challenge where I and five other bloggers will work towards a healthier lifestyle through some changes in our diet, exercise, etc. I will, of course, share my food resolutions rather than my exercise ones because, well, I’m a food blogger! 🙂 My first resolution of the summer is to eat more vegetables.
I find one of the easiest ways to do this is to find vegetables you actually like. No one is forcing you to eat broccoli if you don’t like it. Why not try that baby bok choy you’ve seen in the supermarket, or maybe throw a few slivers of radishes in your next salad instead of cheese? The change also doesn’t have to be extreme. Try to incorporate 1-3 more vegetables into your diet per week and go from there.My veggie intake is also being aided by joining a CSA, or Community Supported Agriculture (I use Red Earth Farm). I did a CSA last year as well, but this year, I get to choose what vegetables are in my share! The CSA has just begun so I plan on trying out as many new vegetables as I can to expand my veggie horizons.
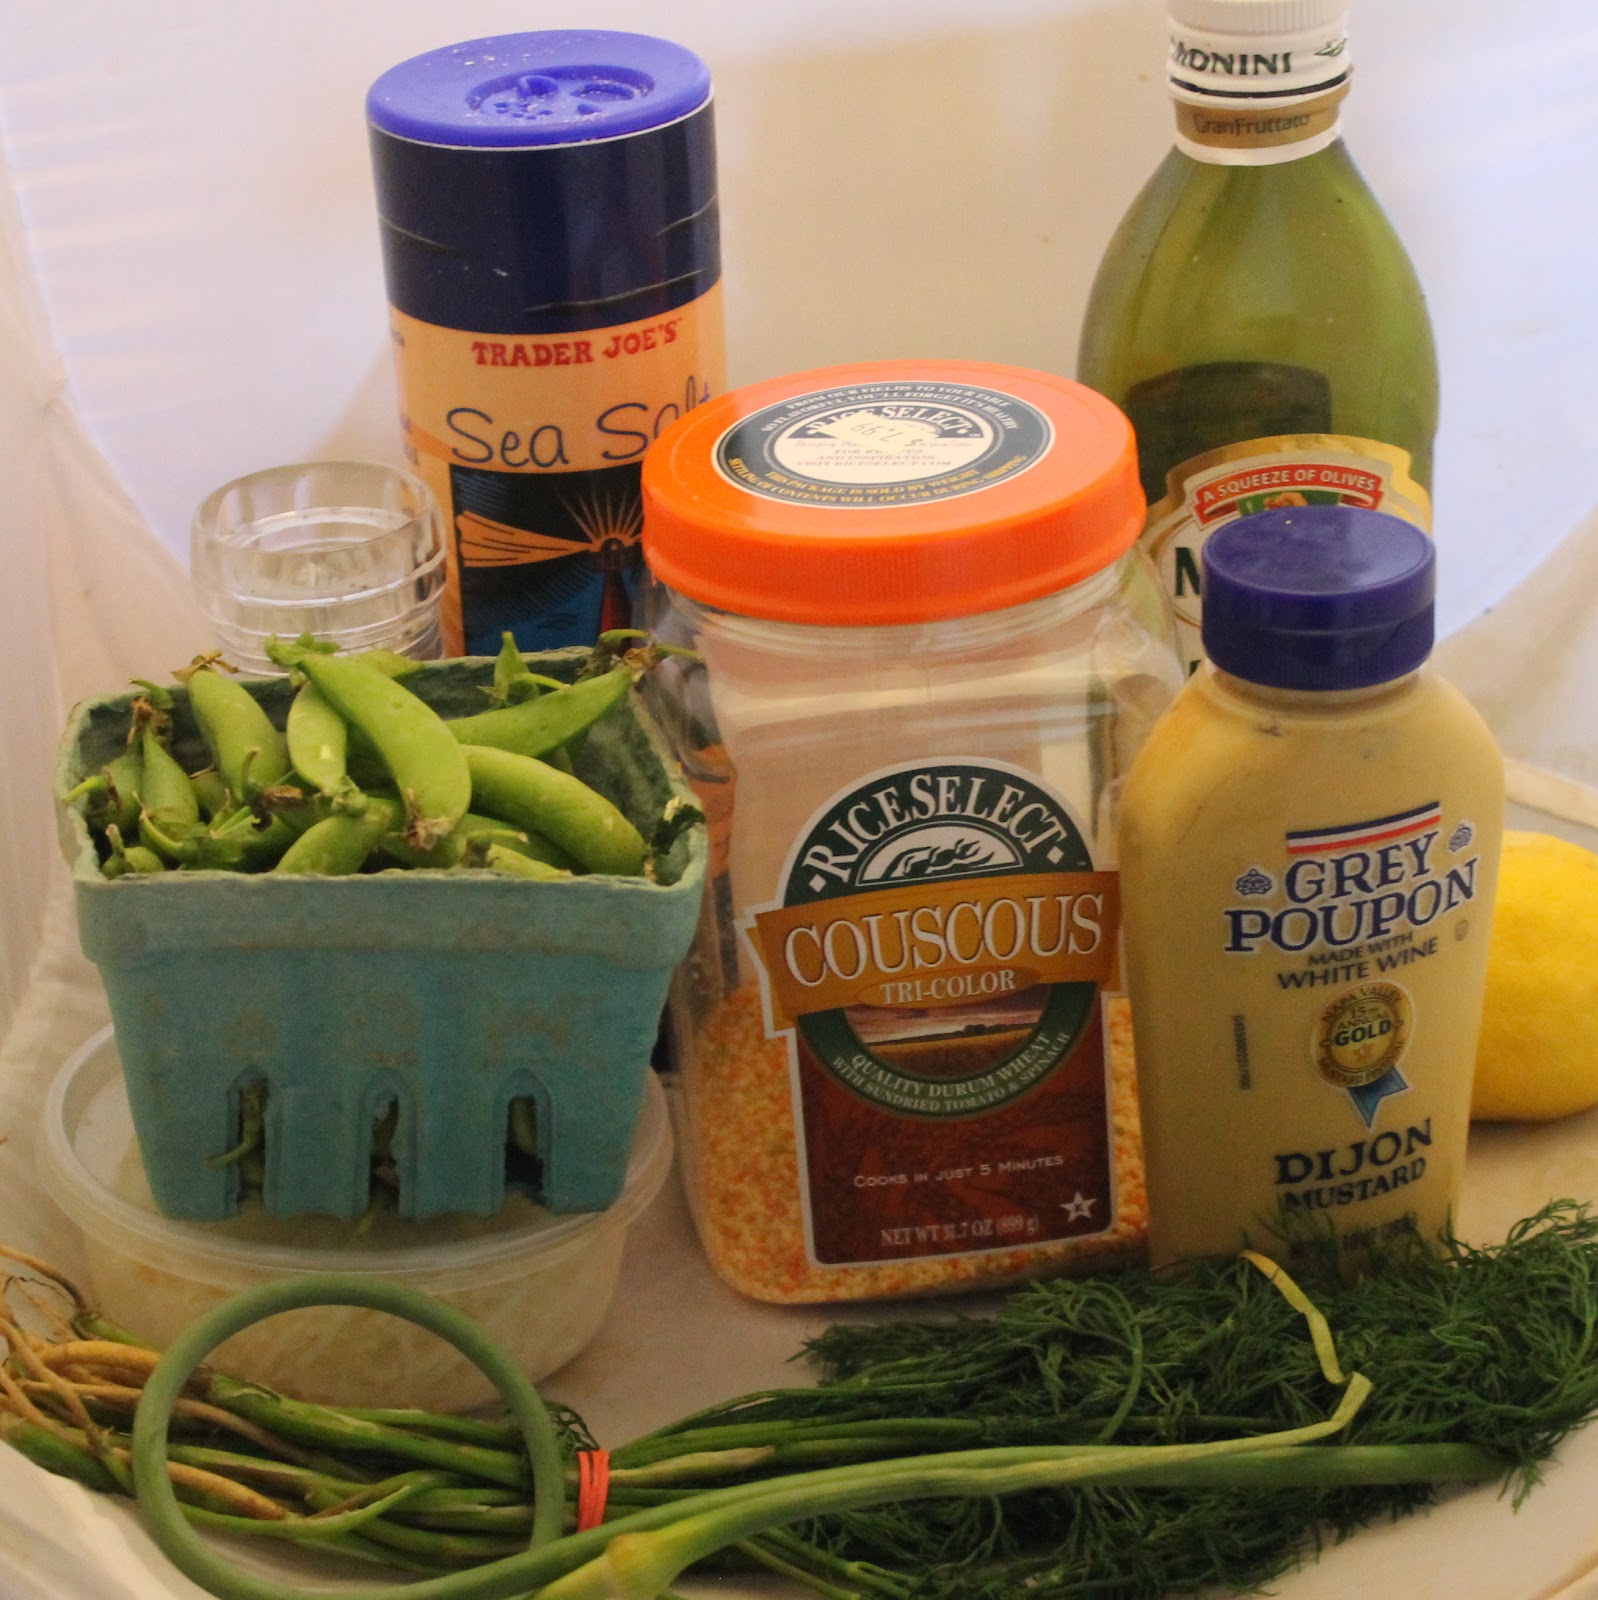
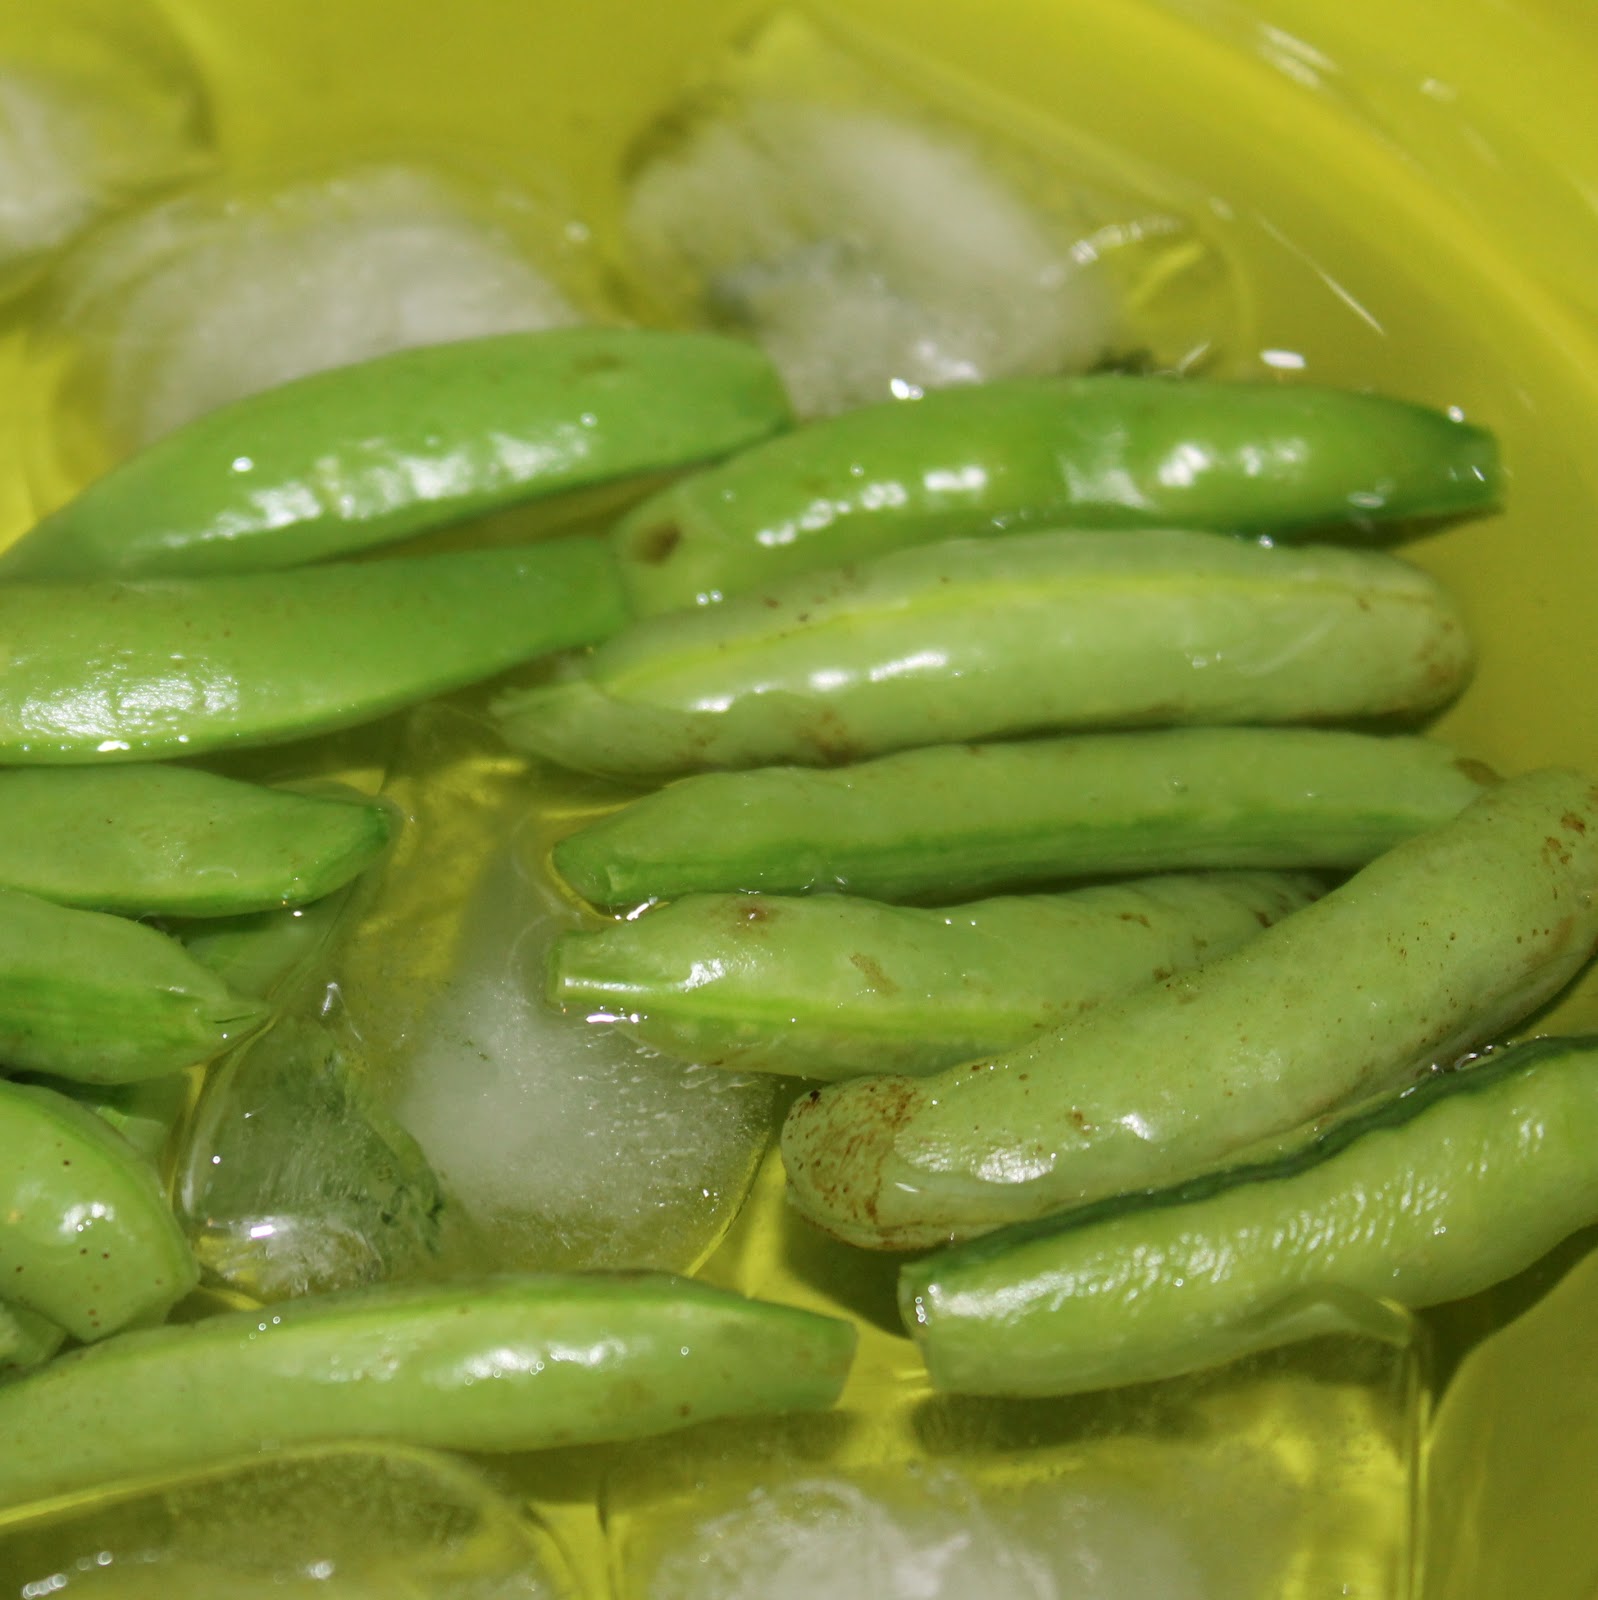
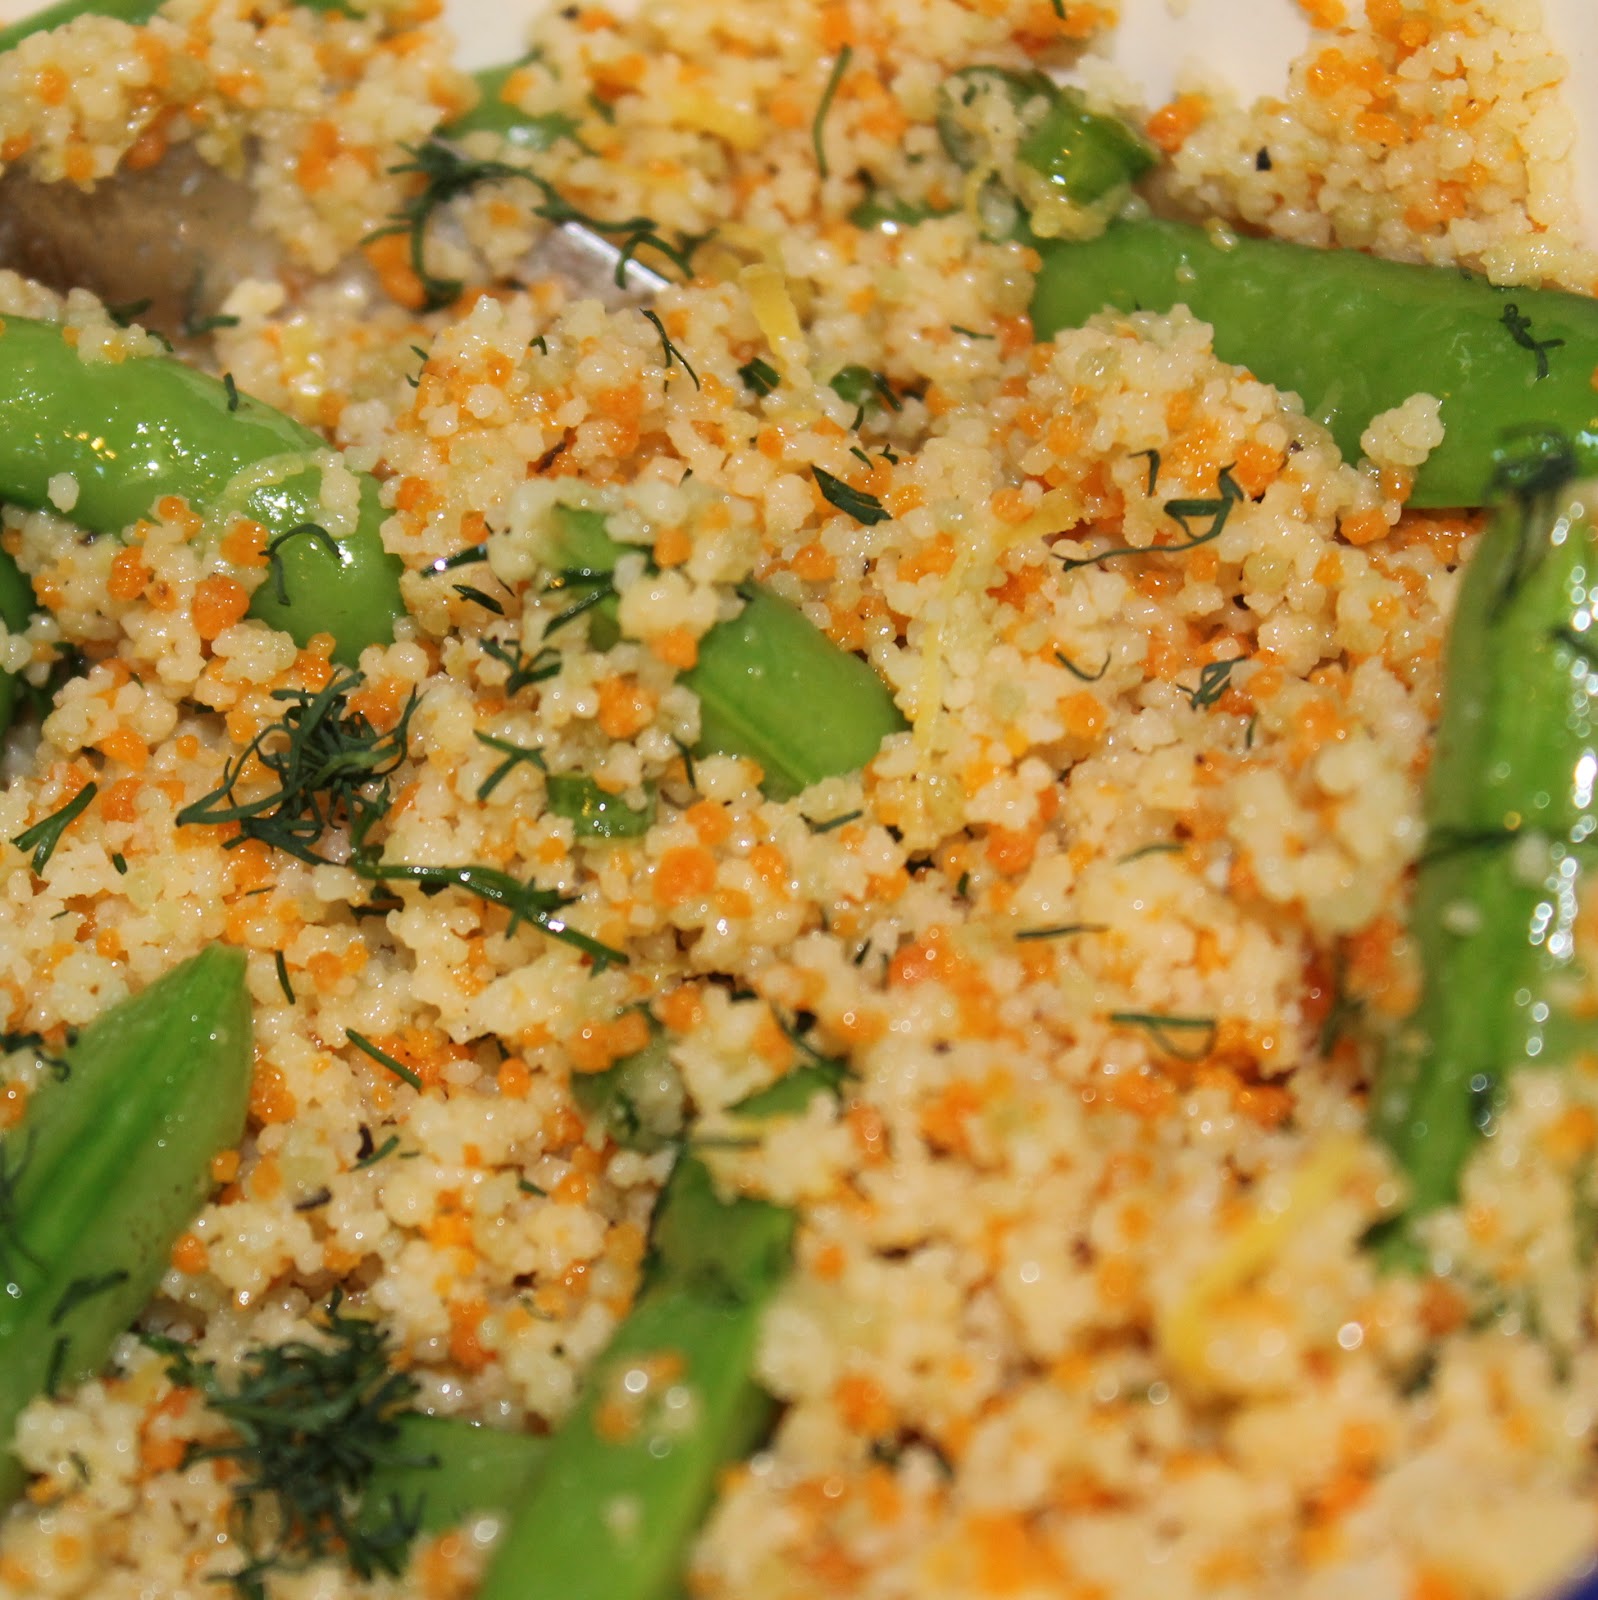
From last year’s share, I already know kale and I are not friends. Swiss chard is another toughie for me. But, I found out I really enjoy radishes. And zucchini. And a ton of other yummy veggies. So I can’t wait to see what comes my way this year! My first post uses one of my favorite vegetables: sugar snap peas. Even if you aren’t a normal pea fan, try these little guys out. I enjoy them more for the texture than for the taste honestly, the crunch is just so wonderful.
This recipe is a wonderful option for those that aren’t the biggest fan of vegetables and don’t want to just eat steamed veggies. The peas are mixed in with couscous and a vinaigrette that adds a ton of flavor.
Ingredients:
1 cup couscous
1 cup water
8 cups water
6 ounces sugar snap peas, trimmed
The zest and juice of 1 lemon (grab a larger lemon if you can)
1 tablespoon extra-virgin olive oil
1 teaspoon Dijon mustard
1/2 teaspoon sugar (I used Stevia just because that’s what I had)
1/2 teaspoon kosher salt
1/4 teaspoon black pepper
1/2 teaspoon chopped garlic scapes
1 tablespoon minced dill
2 tablespoons shredded Parmesan cheese
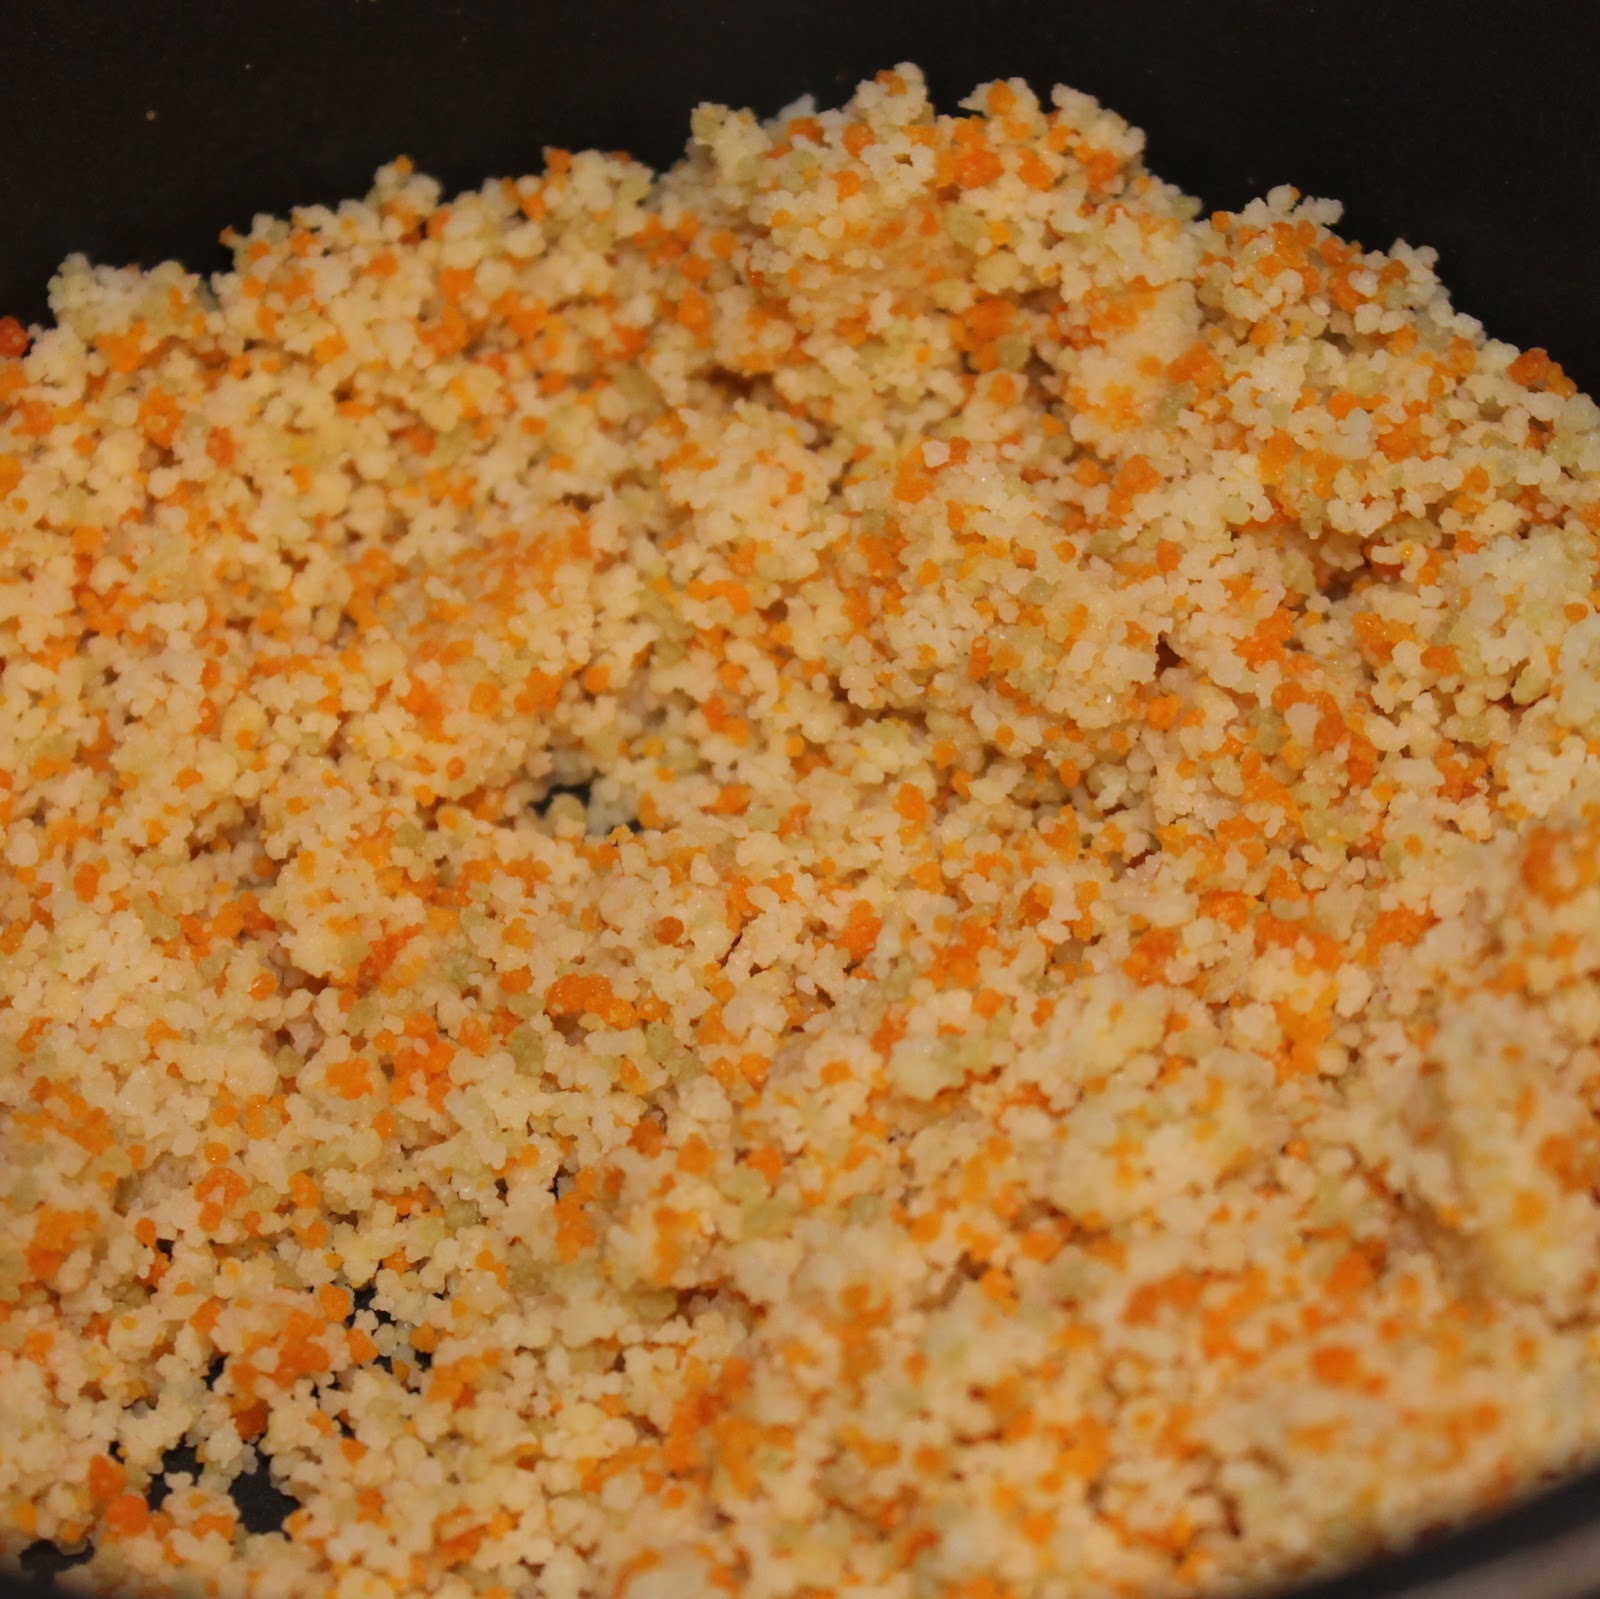
Begin by cooking your couscous. Add 1 cup of water to a small pot and bring to a boil. Add the couscous, mix, cover, and remove from heat. Allow to sit for about 5 minutes and fluff with a fork.
While waiting for the couscous to absorb the water, bring 8 cups of water to a boil in a large pot. Add the peas and cook for 30 seconds. Drain and add to an ice bath to stop the cooking process.
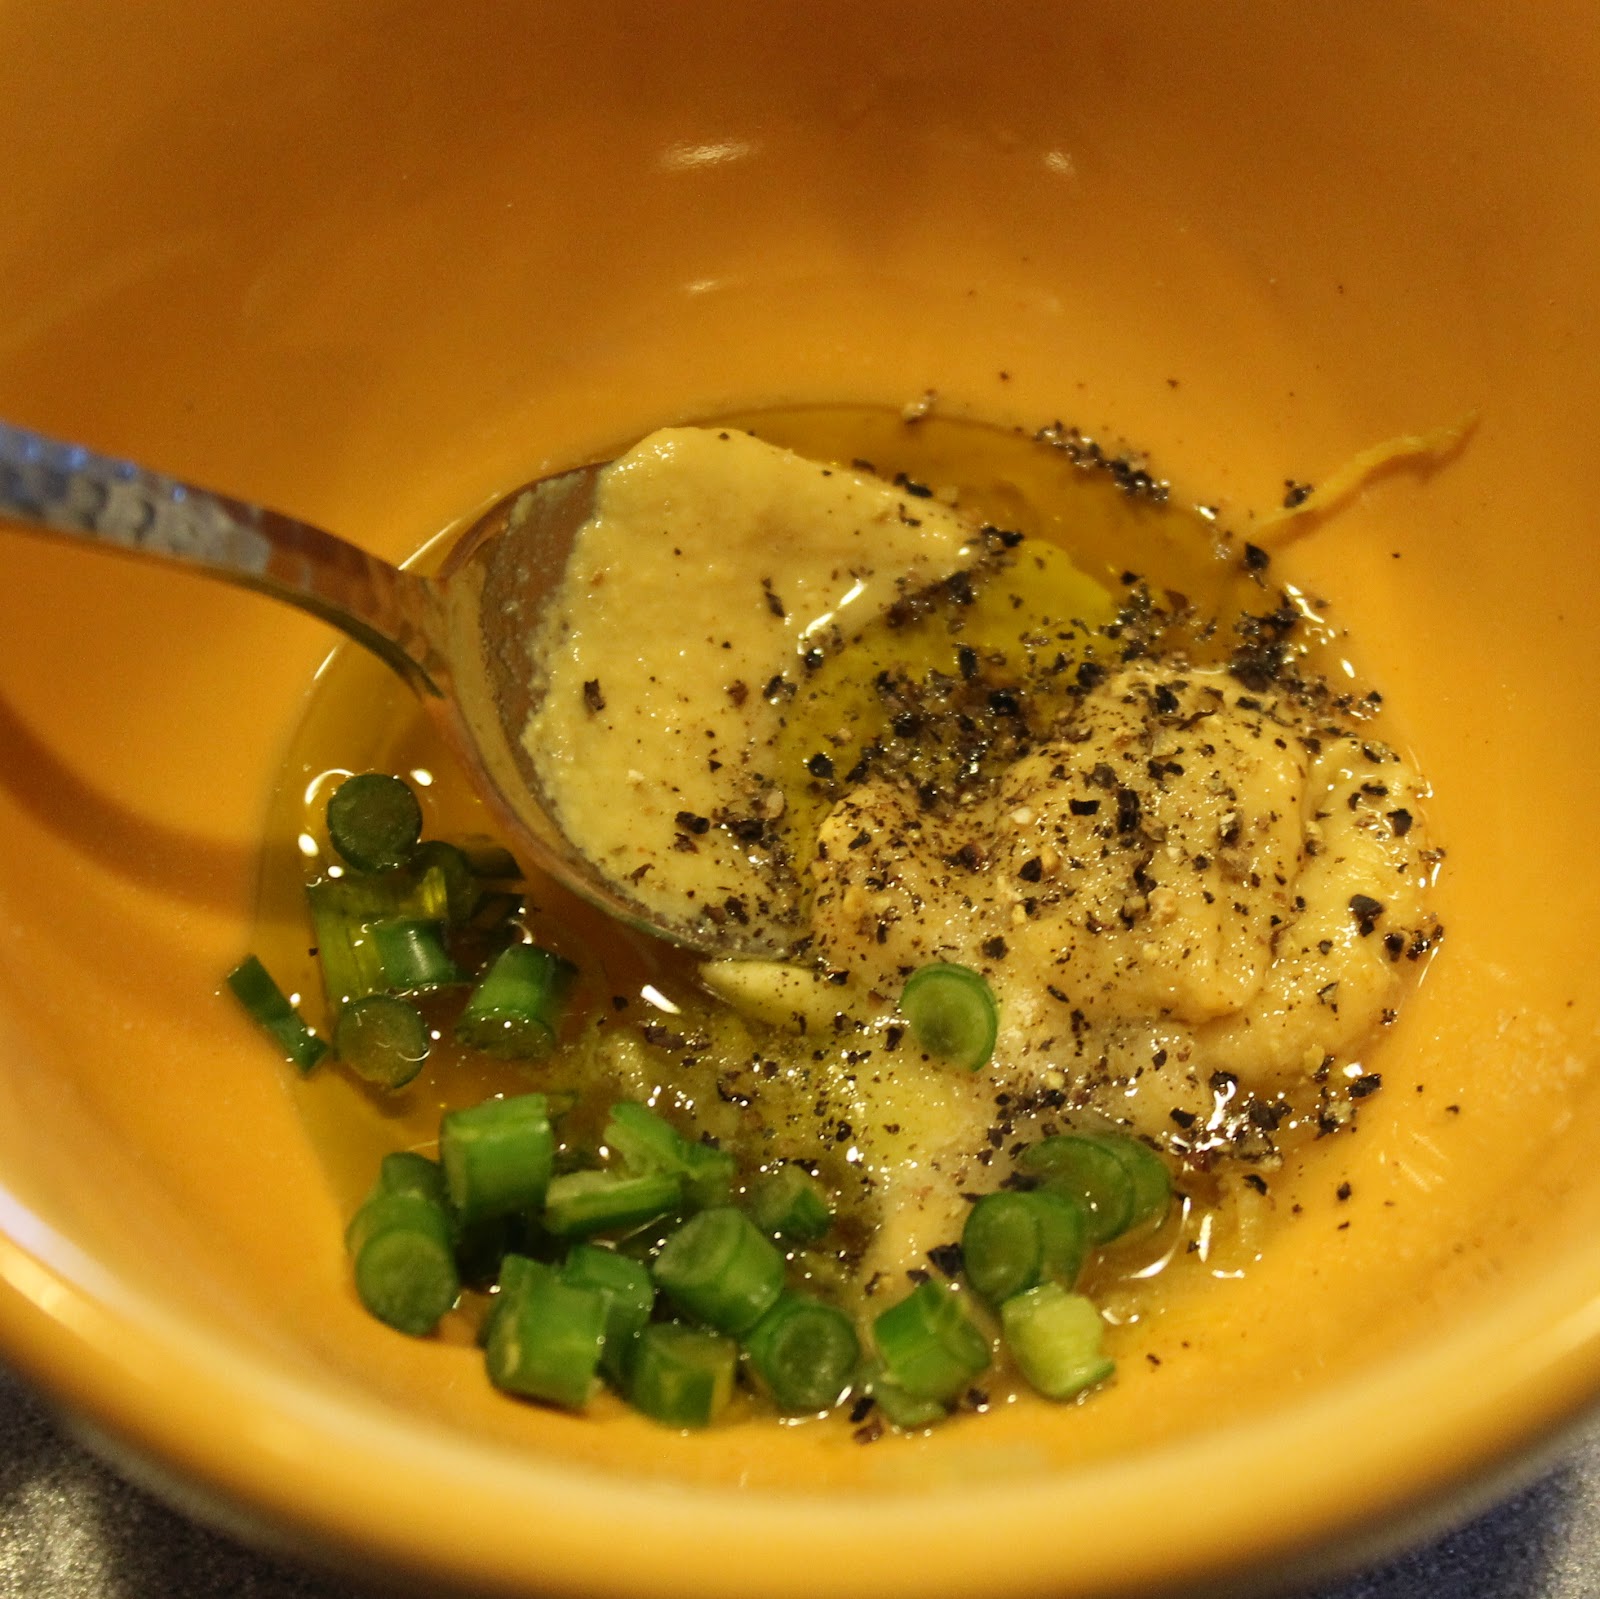
Combine the lemon zest, lemon juice, olive oil, mustard, sugar, salt, pepper, and scapes in a bowl. (Garlic scapes are the green part that grows out of the earth while the bulb is growing in the ground. They have a subtle garlic taste which is really appealing. They can usually be found in the spring and early summer. You can substitute in 2 minced garlic cloves if you don’t have scapes. They were in my CSA share this week too!)
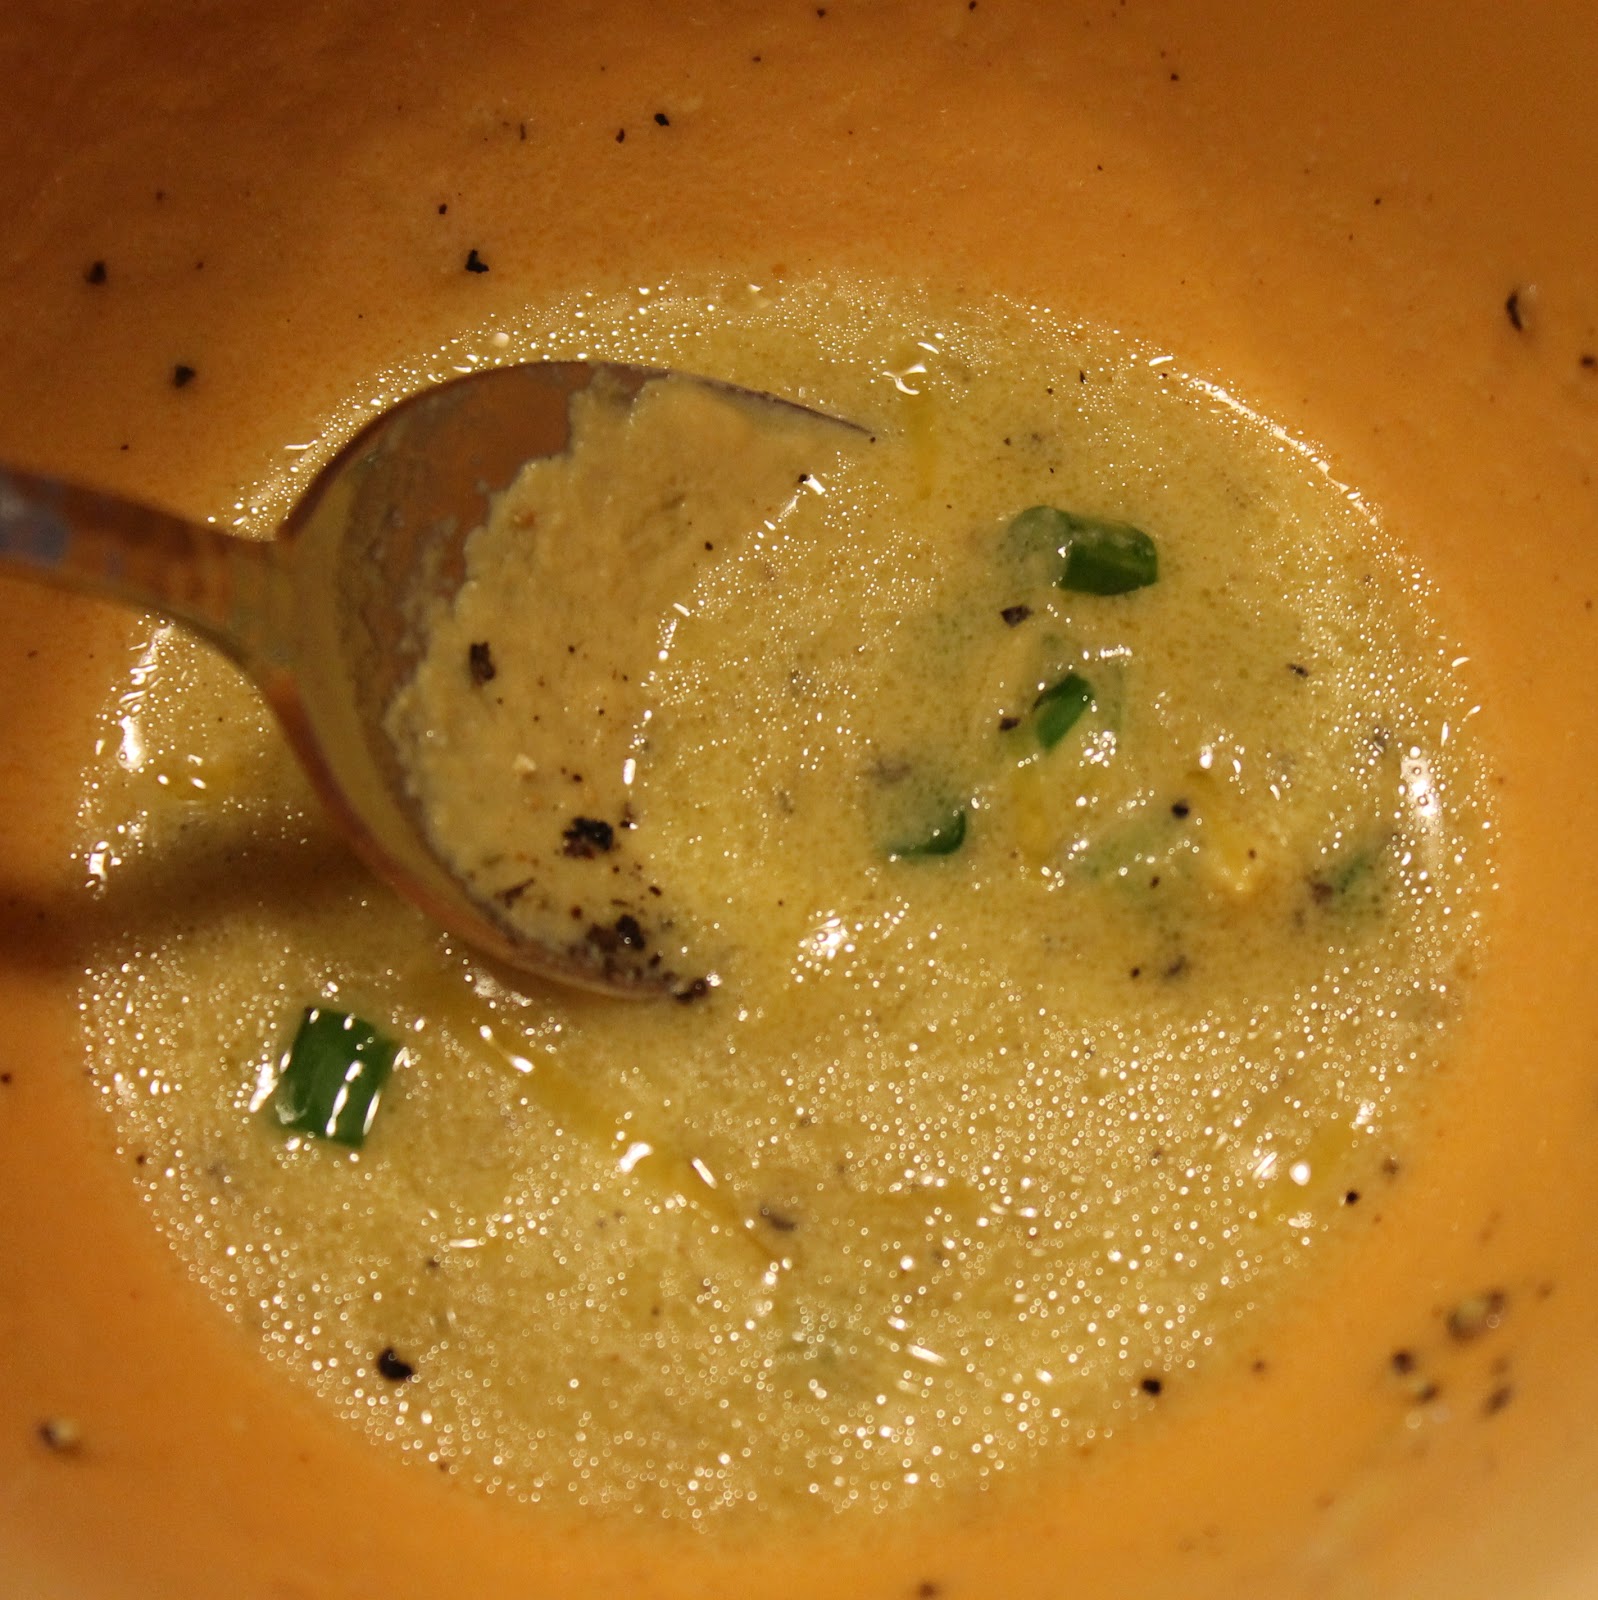
Stir with a whisk.
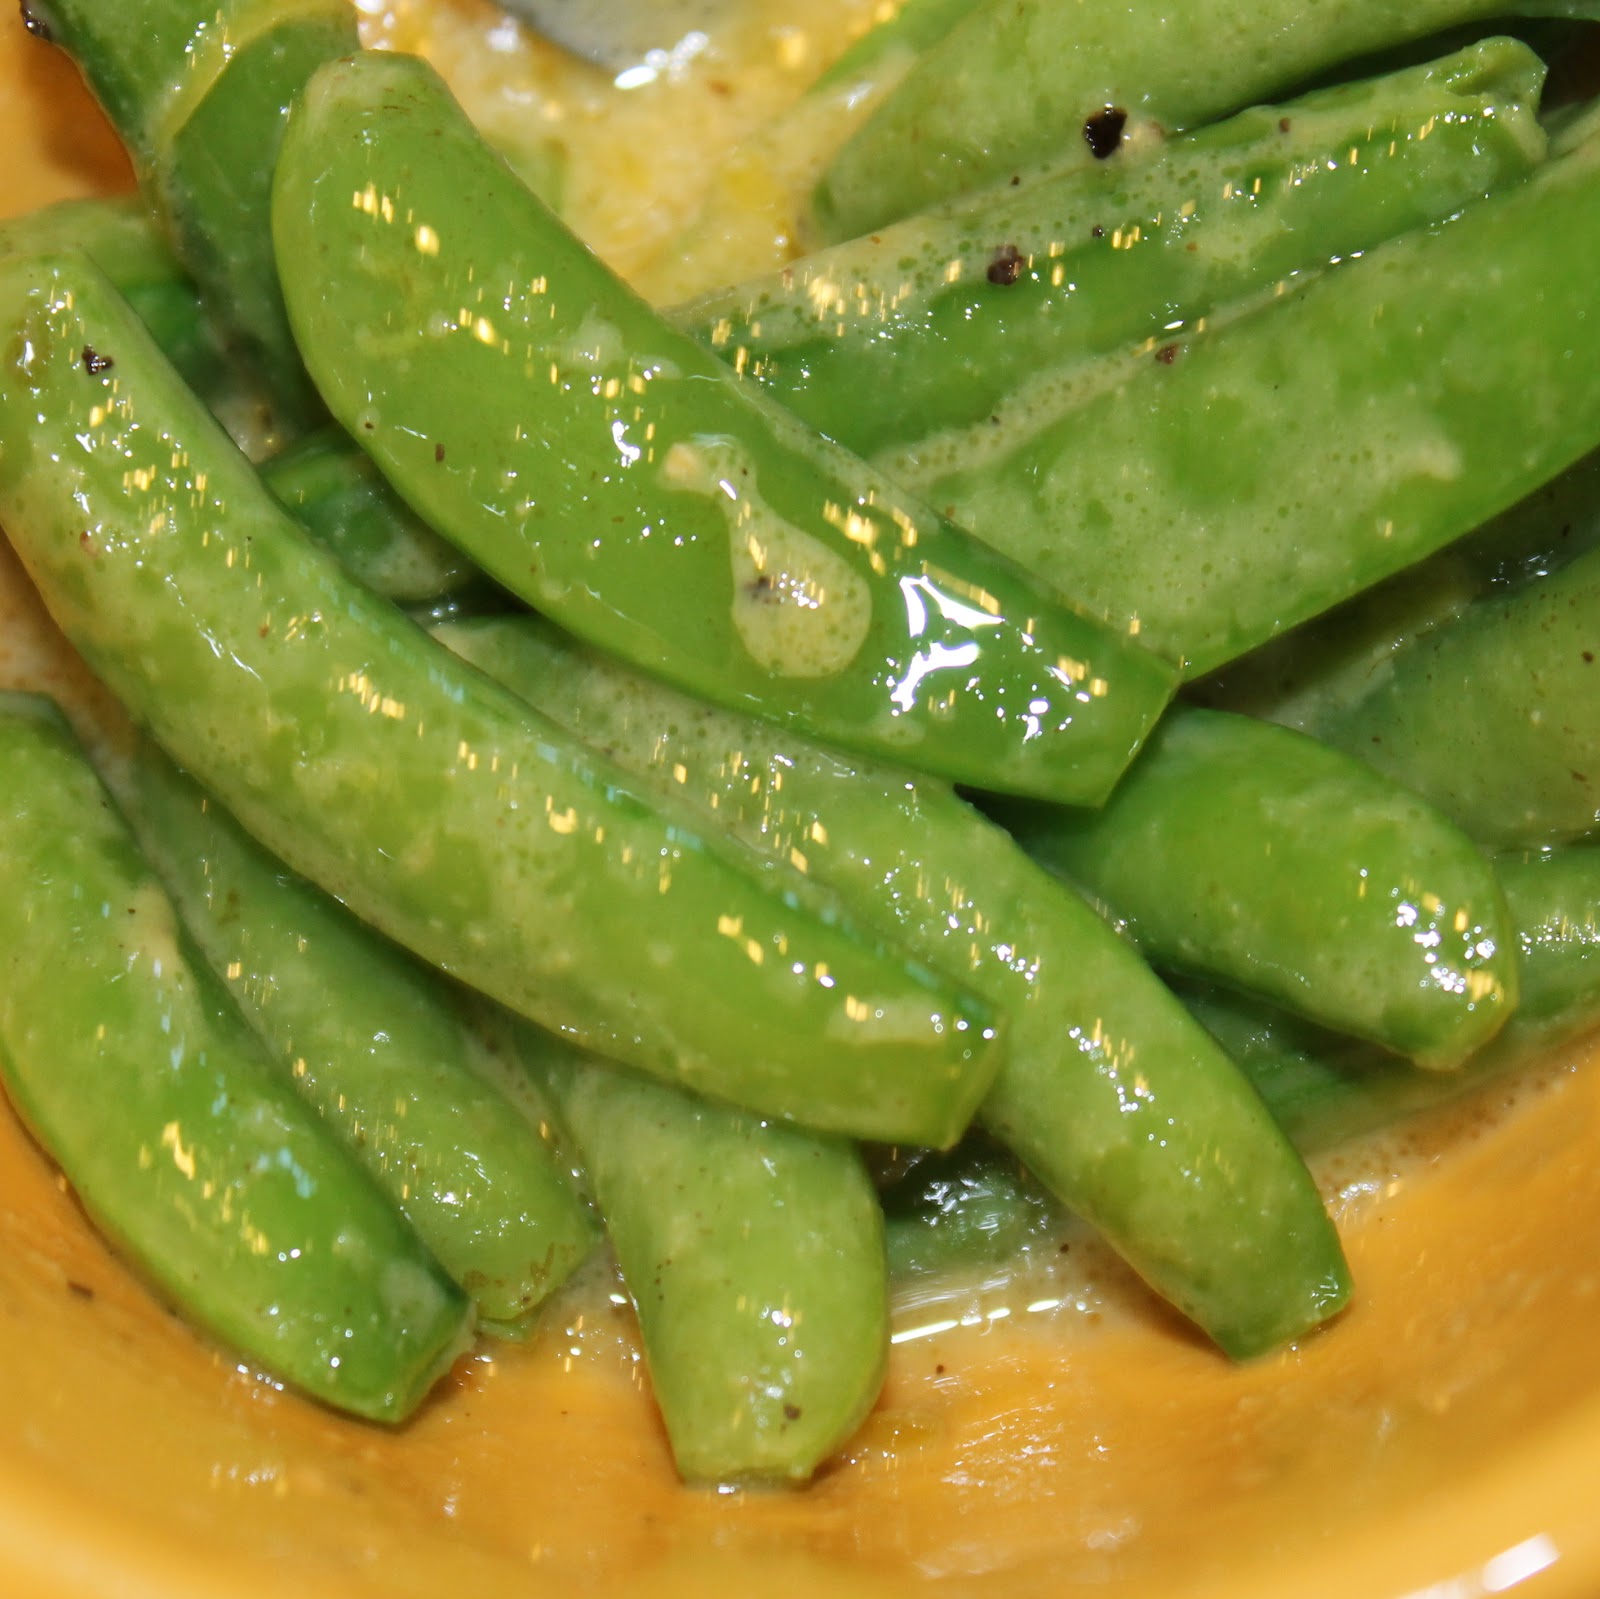
Add the peas and toss to coat.
Combine the peas with the couscous and 1 tablespoon minced dill.
Top with Parmesan cheese and serve.
I ate this with a simple grilled salmon and it was just perfect. The dressing with the peas helps bring out their fresh taste and the couscous is a wonderful complement. I actually saved some of this for lunch the next day and it was great then too!
Every food blogger dreams of walking out of their day job and never looking back to pursue a full-time career in food. Most keep this as a fun little pipe dream to think about while sipping on their morning coffee. Michael Natkin, however, did the unthinkable. He took a sabbatical from his job as a software engineer and spent 6 months immersed in food, experiencing Italy and Israel through food with his family and interning in the kitchen at Cafe Flora. He dove into the world of food full time this year.
His blog, Herbivoracious, has been going strong since 2007. If you’ve never seen it, go there. Now. I’ll wait…. Fantastic, right?!
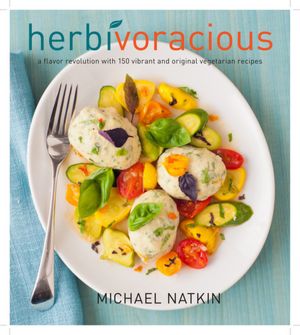
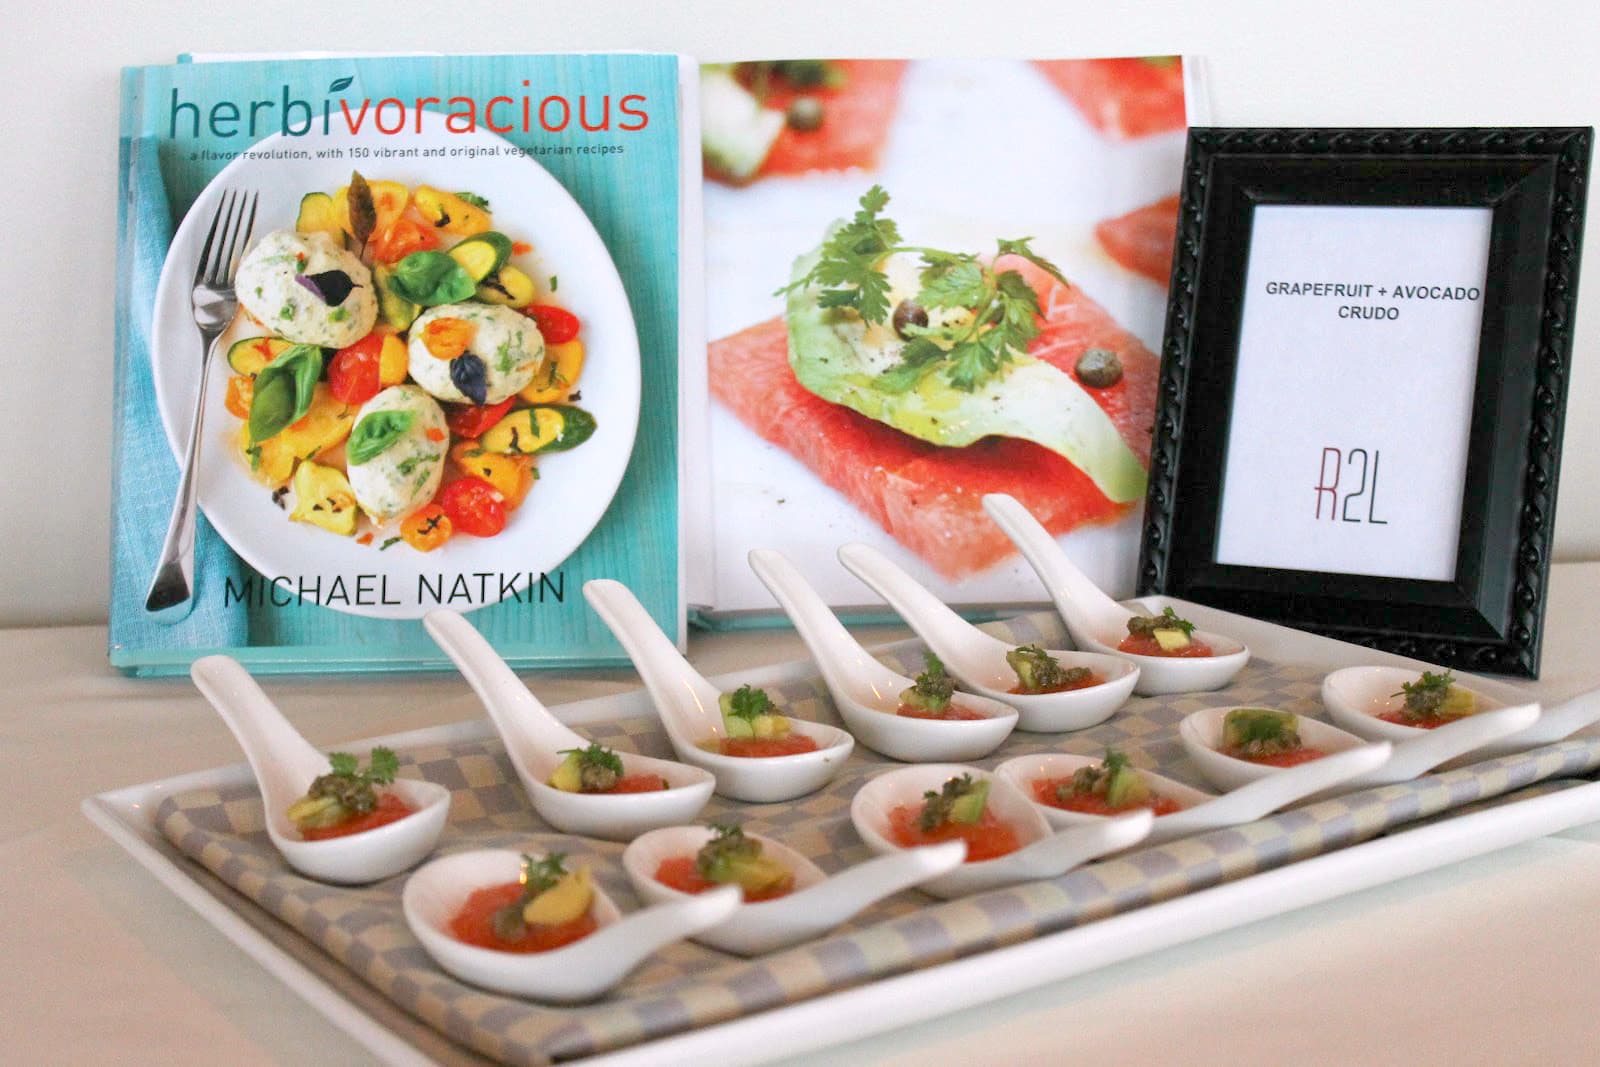
Michael’s cookbook based off his super popular blog, Herbivoracious: A Flavor Revolution with 150 Vibrant and Original Vegetarian Recipes, was released on May 9. Michael has been touring America to promote his book and recently came through Philadelphia. He hosted a food blogger event at the fantastic R2L, where local bloggers (like yours truly) were treated to bites from the kitchen and the opportunity to chat with Michael himself.
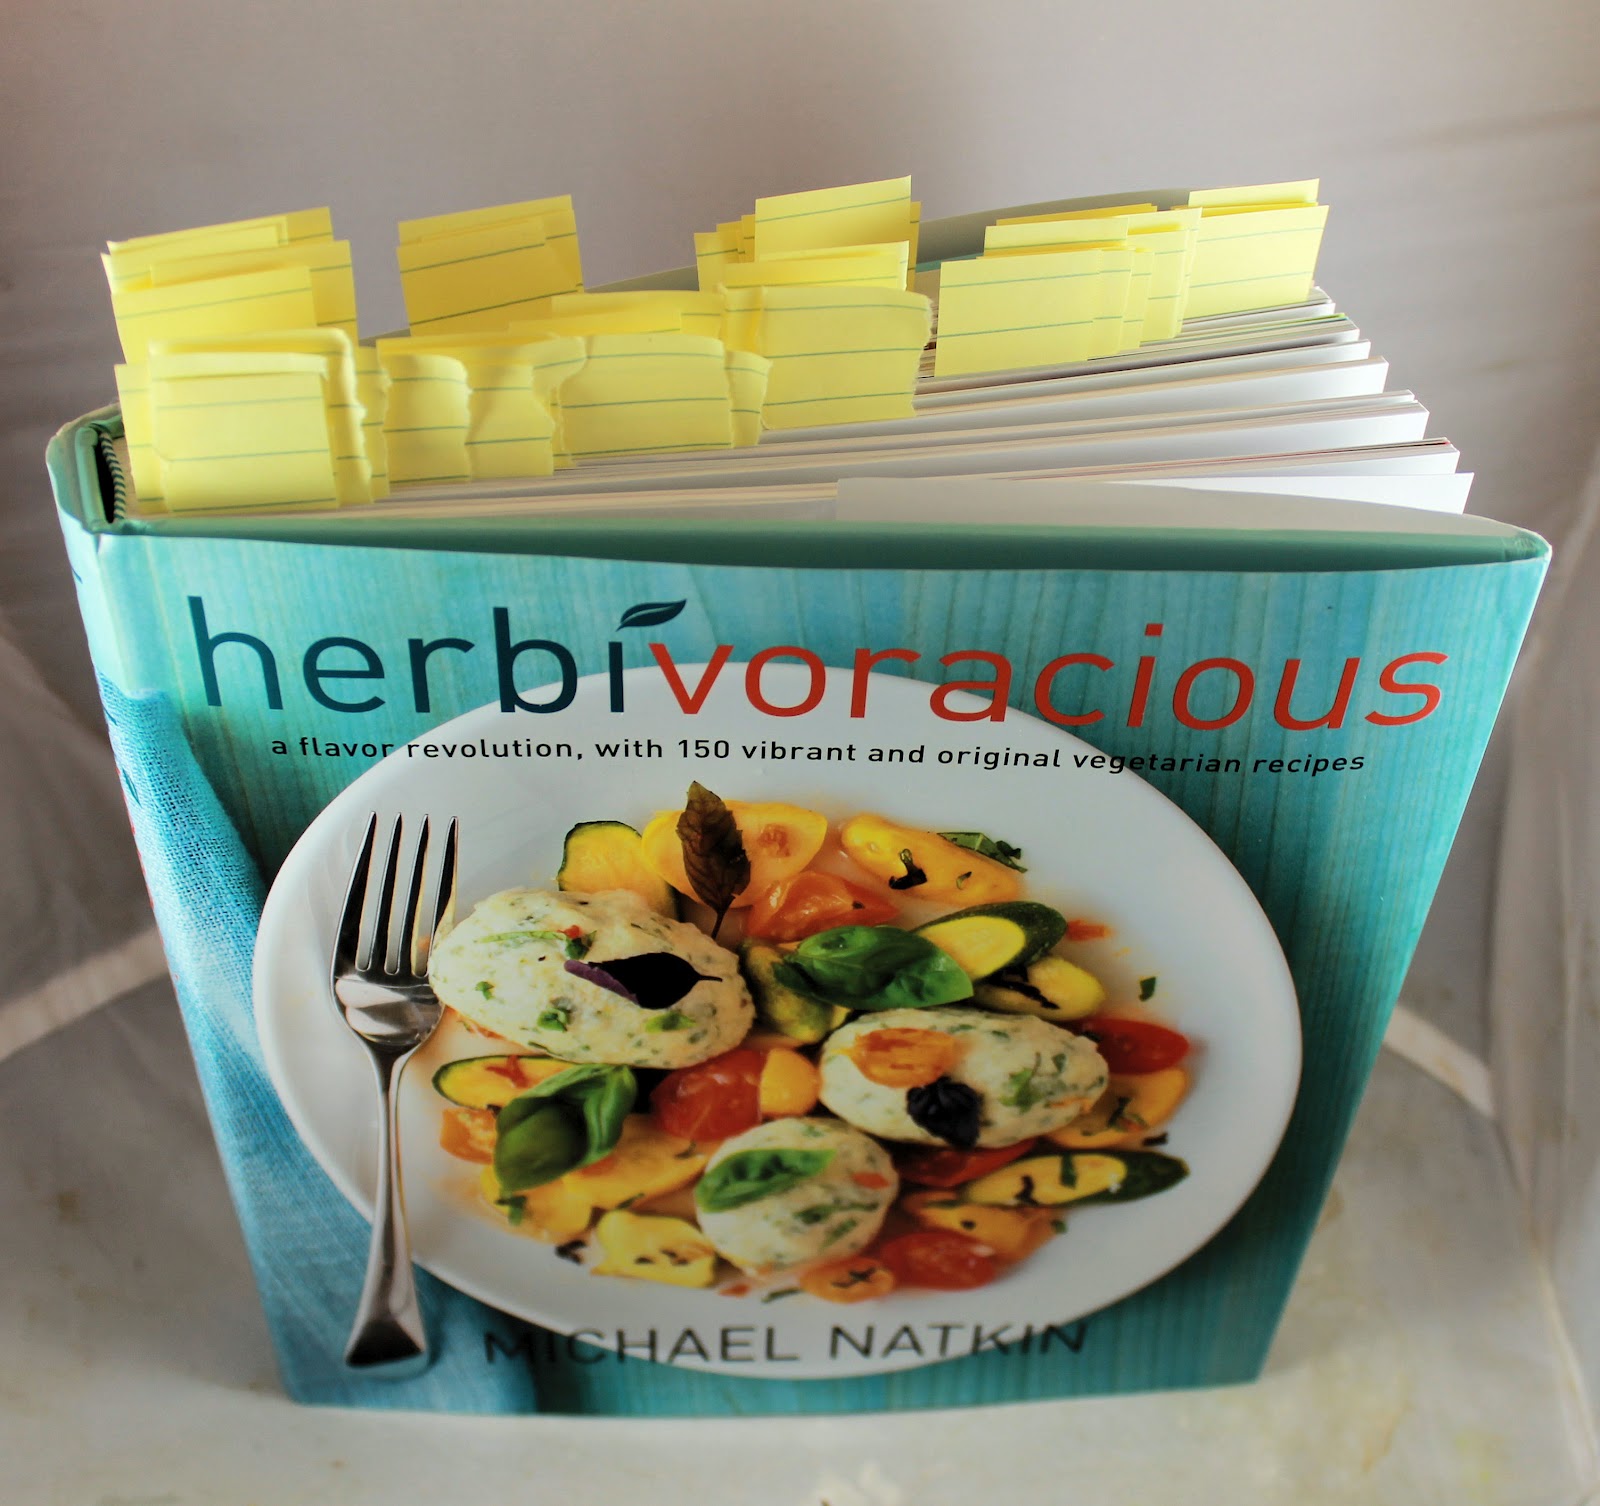
So, the cookbook is vegetarian. It honestly doesn’t even need to be mentioned though because the recipes inside the pages of this book are not wimpy, skimpy meals. As his blog states “You Don’t Have To Be A Vegetarian To Love This Cookbook!” and he is so right. The recipes are really inventive and sound so appetizing that you won’t even wonder where the meat is. Michael kindly allowed me to pick any recipe I wanted from the book to use for this post and boy did I have a problem. I am not exaggerating when I tell you I tagged over 50 recipes as possibilities.
see?
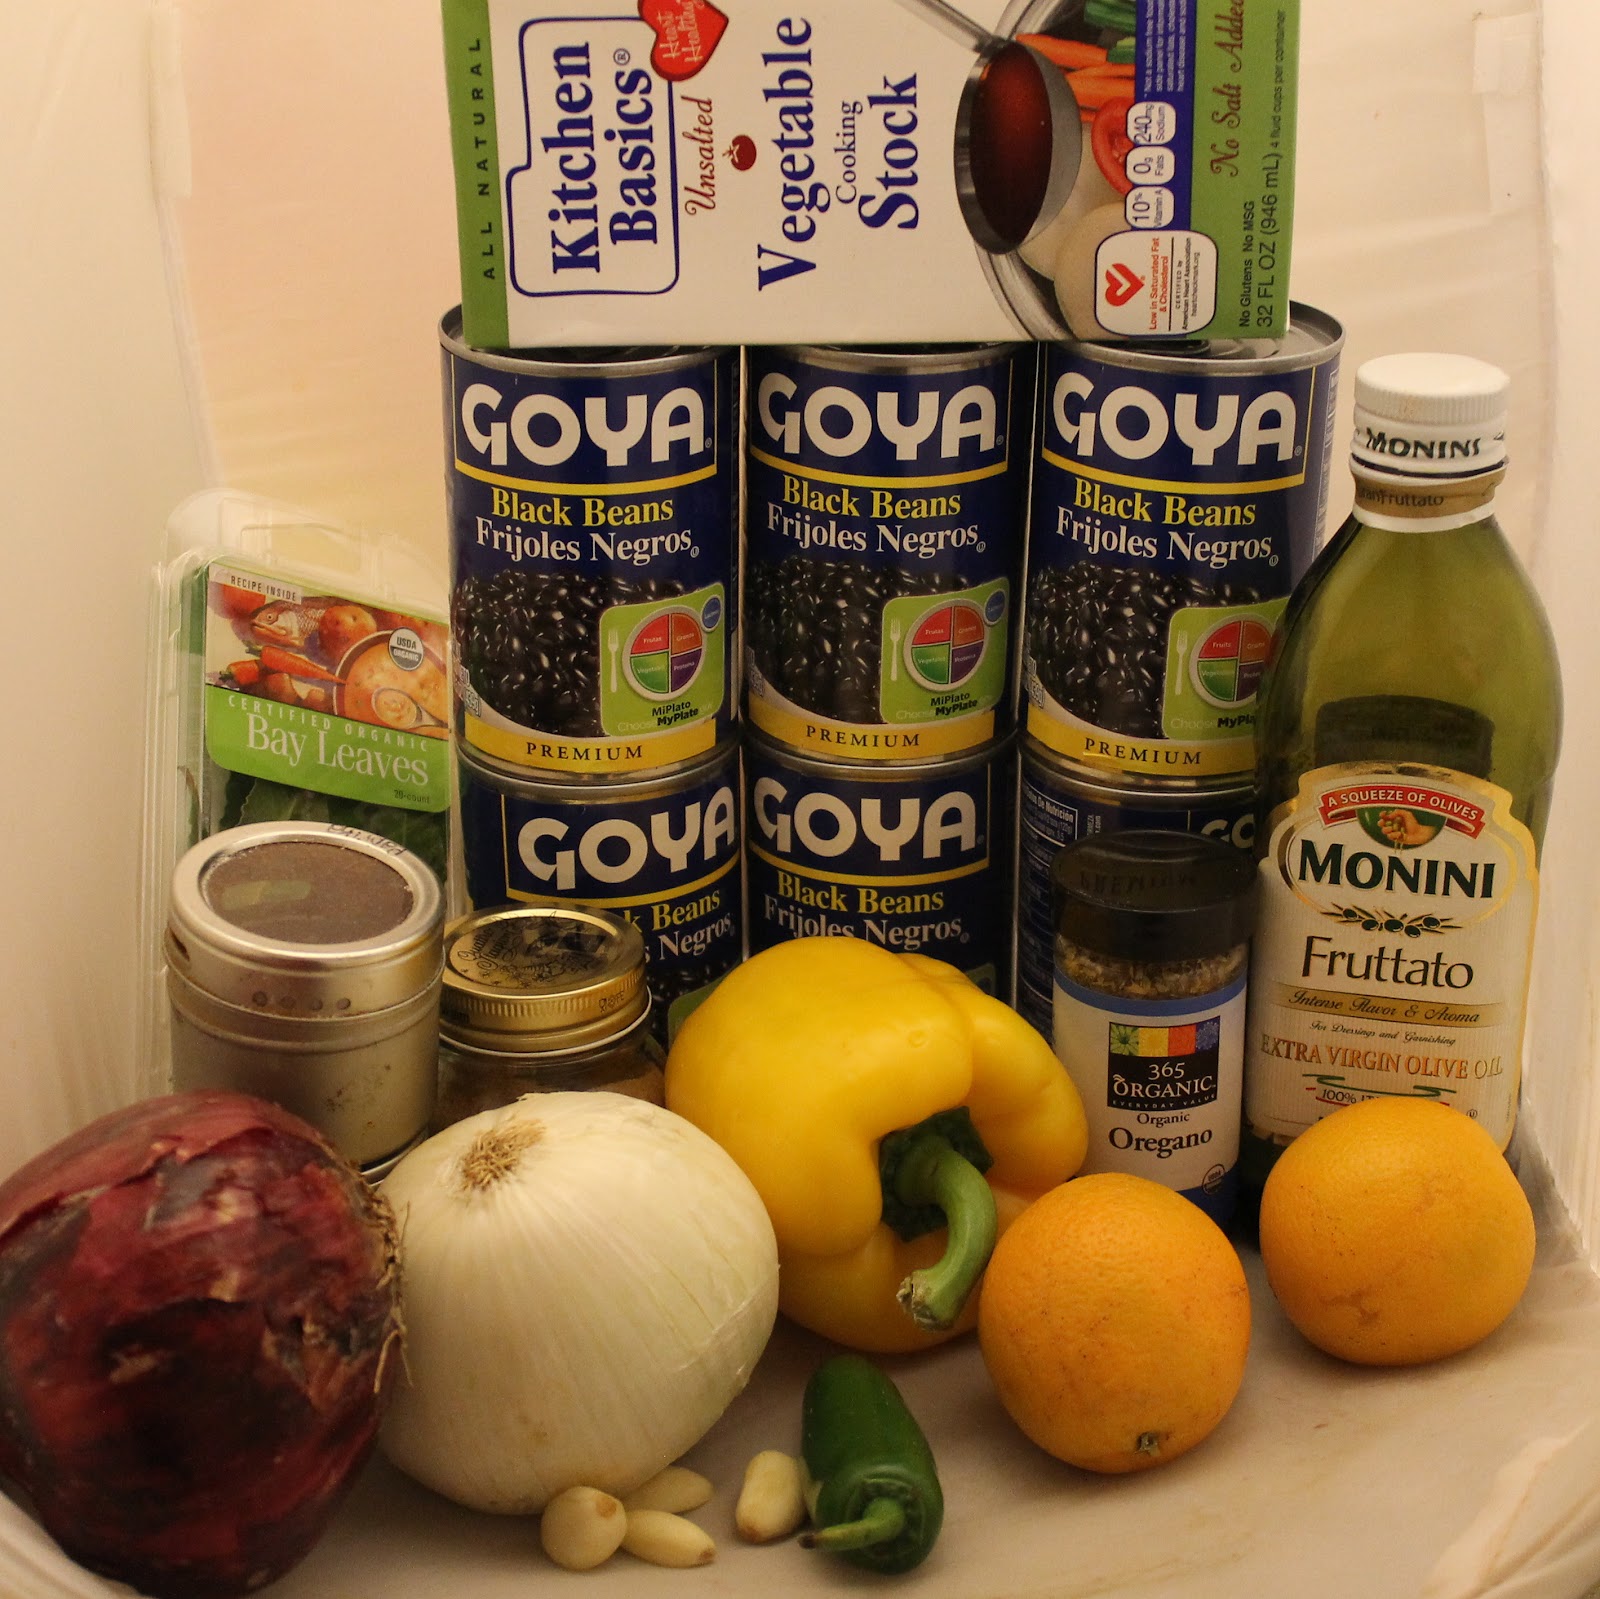
I finally decided on this recipe for Black Bean Soup with Orange Jalapeno Salsa when I mentioned it to my boyfriend and his eyes lit up. I altered the recipe ever so slightly, so check out the original at the link. You should check it out anyways because Michael gives some really great tips prior to the recipe.
Ingredients:
6 cans black beans
Vegetable broth
2 bay leaves
3 tablespoons olive oil
1 white onion, diced
1 yellow bell pepper, diced
4 cloves garlic, minced
1 tablespoon dried oregano
1 teaspoon dried cumin
1 teaspoon paprika
1/2 teaspoon ground chipotle
6 mandarin oranges (or fewer, larger oranges)
1/4 cup red onion, finely diced
1jalapeno pepper, finely diced
1 handful cilantro leaves
salt to taste
Sour cream
Each recipe in the cookbook mentions any dietary restrictions that are satisfied within the recipe. This soup is vegetarian, vegan if the sour cream is omitted, and is gluten-free. This recipe serves 6.
Naturally, the day after I made my Grilled Tomato Orzo Salad in a Tomato Bowl pretending it was summer, the weather decided to do a 180 and veer into rainy cold sadness. Sigh. So what better way to use some of my Lipman Tomatoes than to make Creamy Tomato Soup? I found this recipe on Food Network and I had most of the ingredients already, win! I changed the recipe slightly for my tastes.
Ingredients:
3 tablespoons olive oil
1 red onion, chopped
1 carrot, unpeeled and chopped
3 cloves minced garlic
12 plum tomatoes, roughly chopped
1 teaspoon sugar
1 tablespoon tomato paste
1/4 cup packed chopped fresh basil leaves, plus julienned basil leaves, for garnish
3 cups chicken stock
1 teaspoon kosher salt
1 teaspoons freshly ground black pepper
1/2 cup heavy cream
Croutons, for garnish
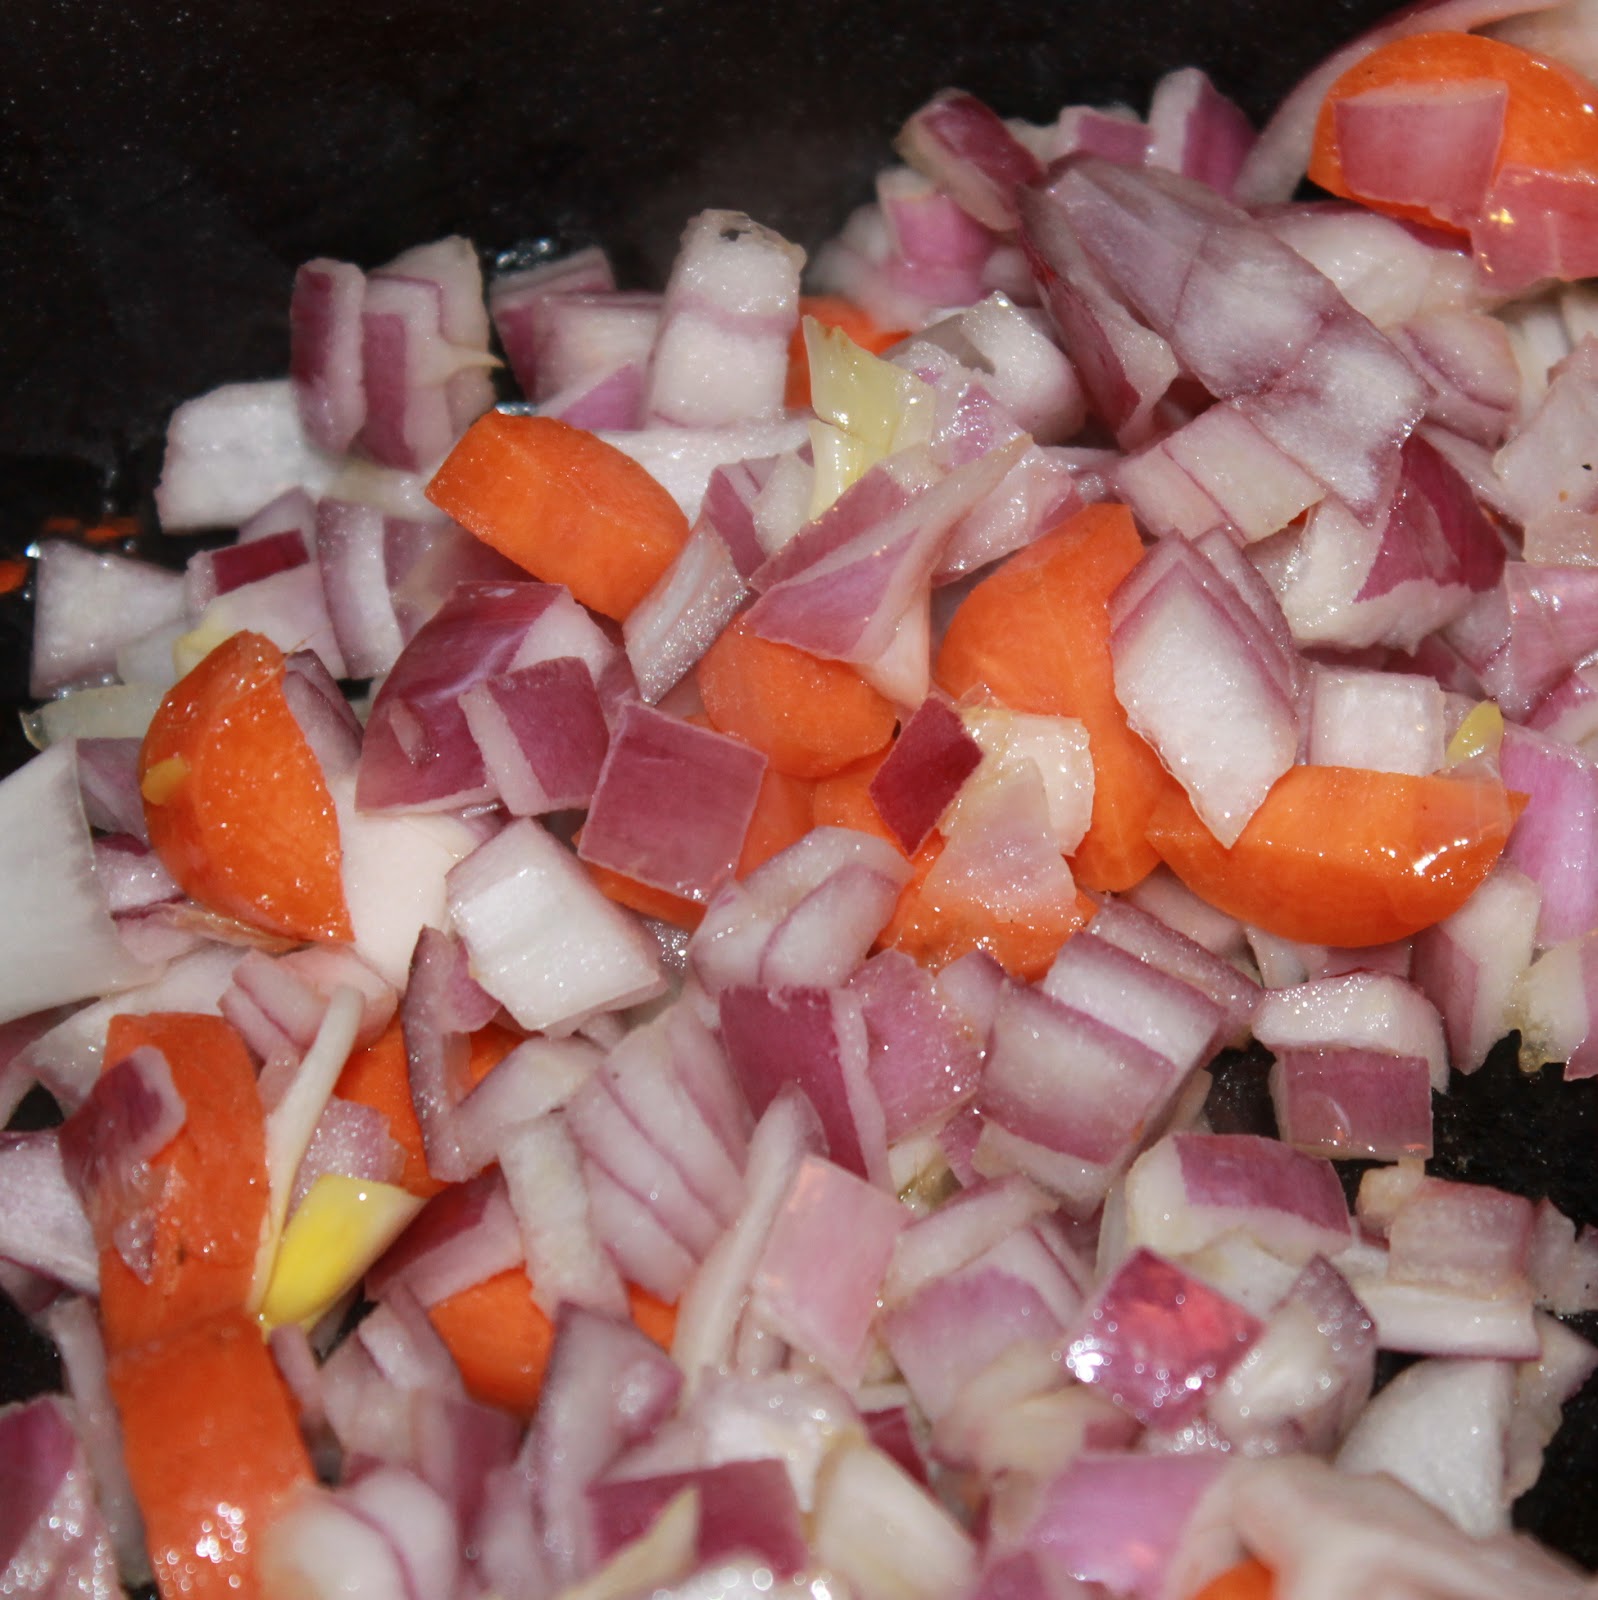
Heat a large pot or a Dutch oven over medium-low heat. Add the olive oil. Chop the onion and carrot.
Saute for 10 minutes.
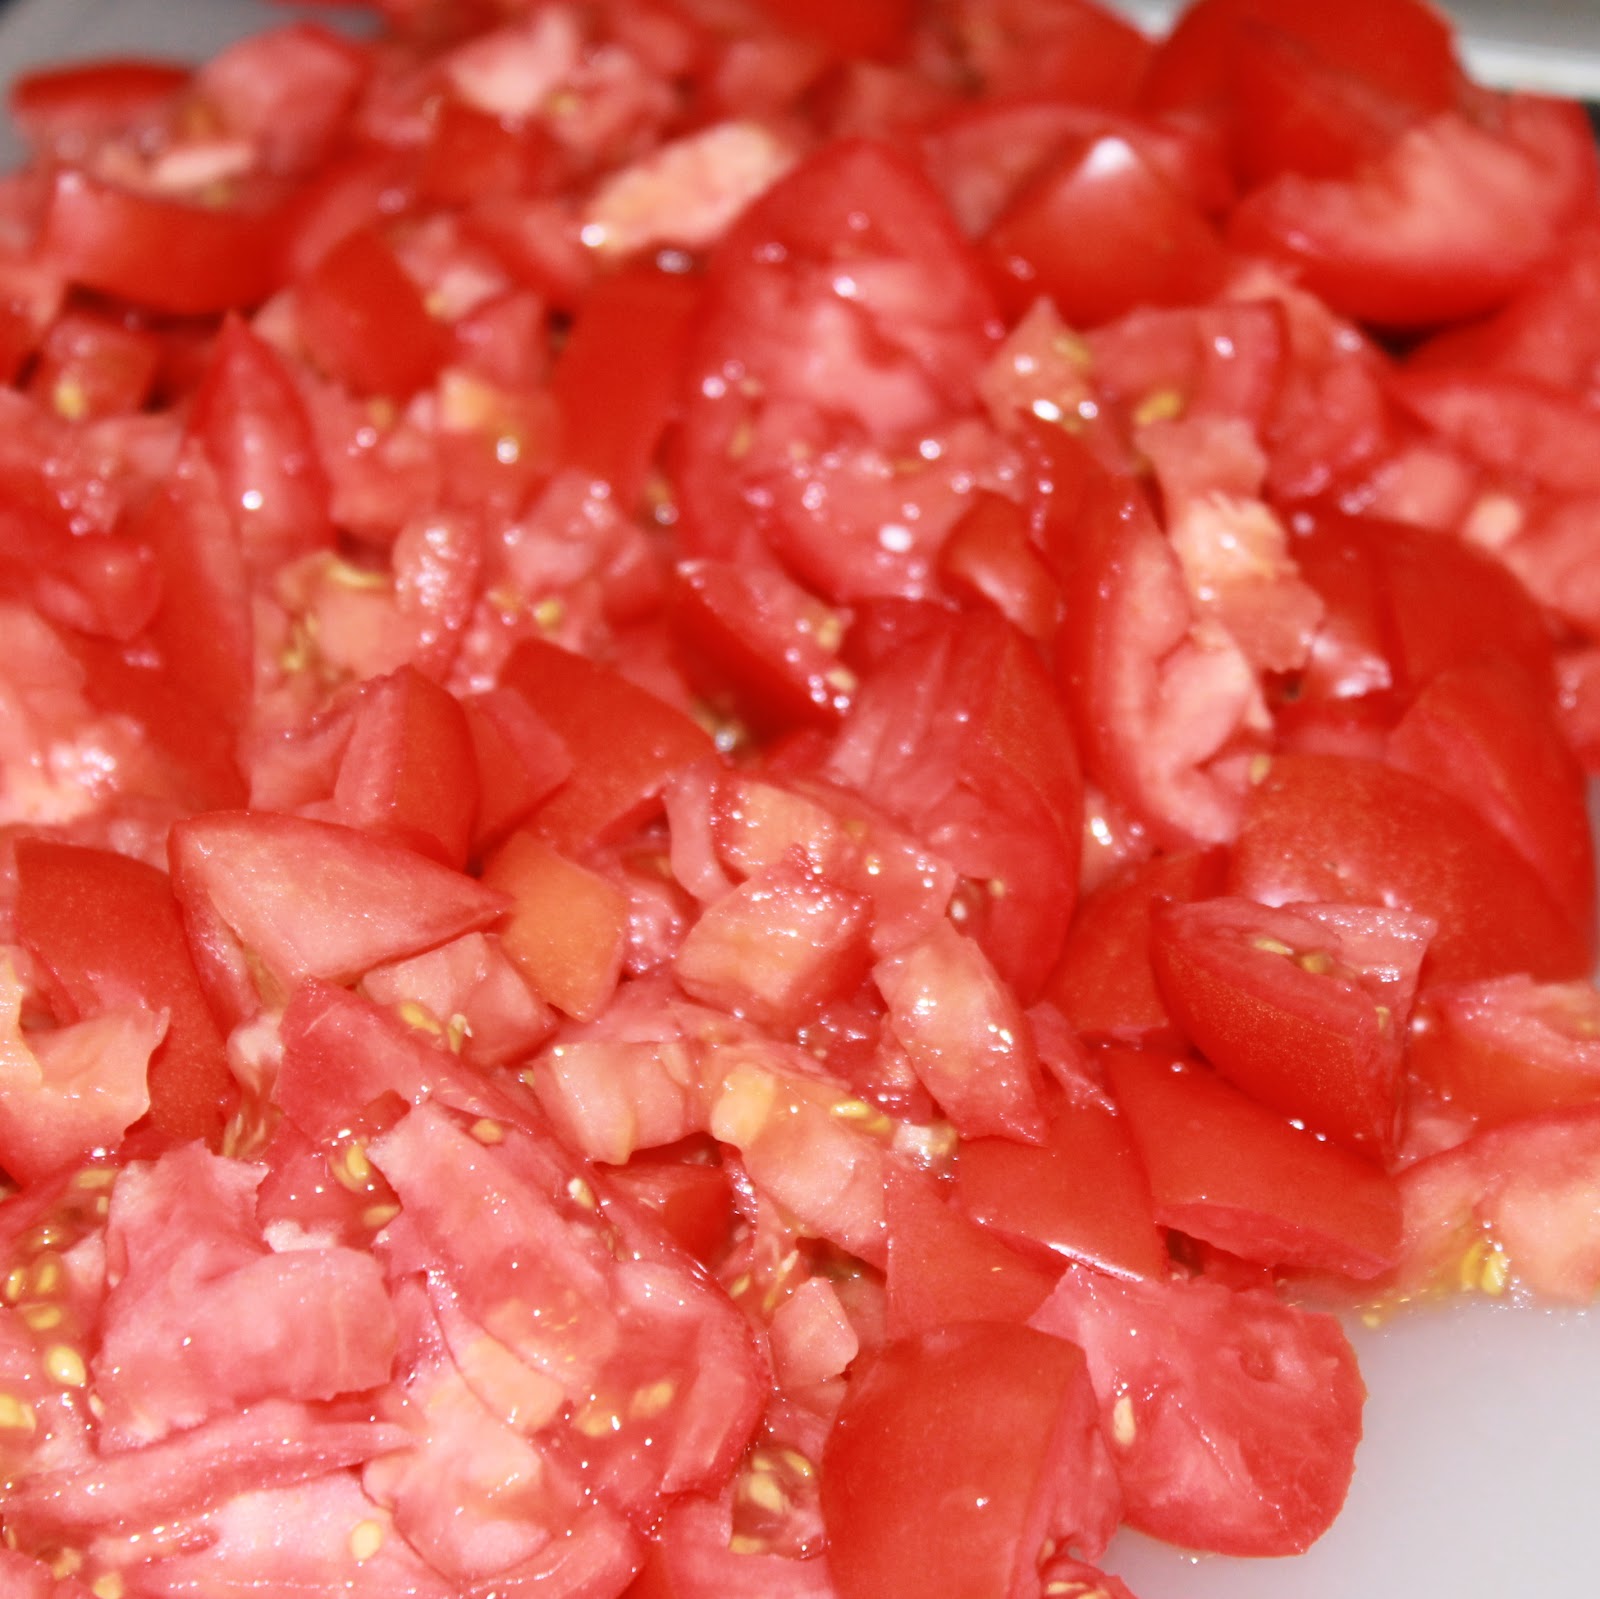
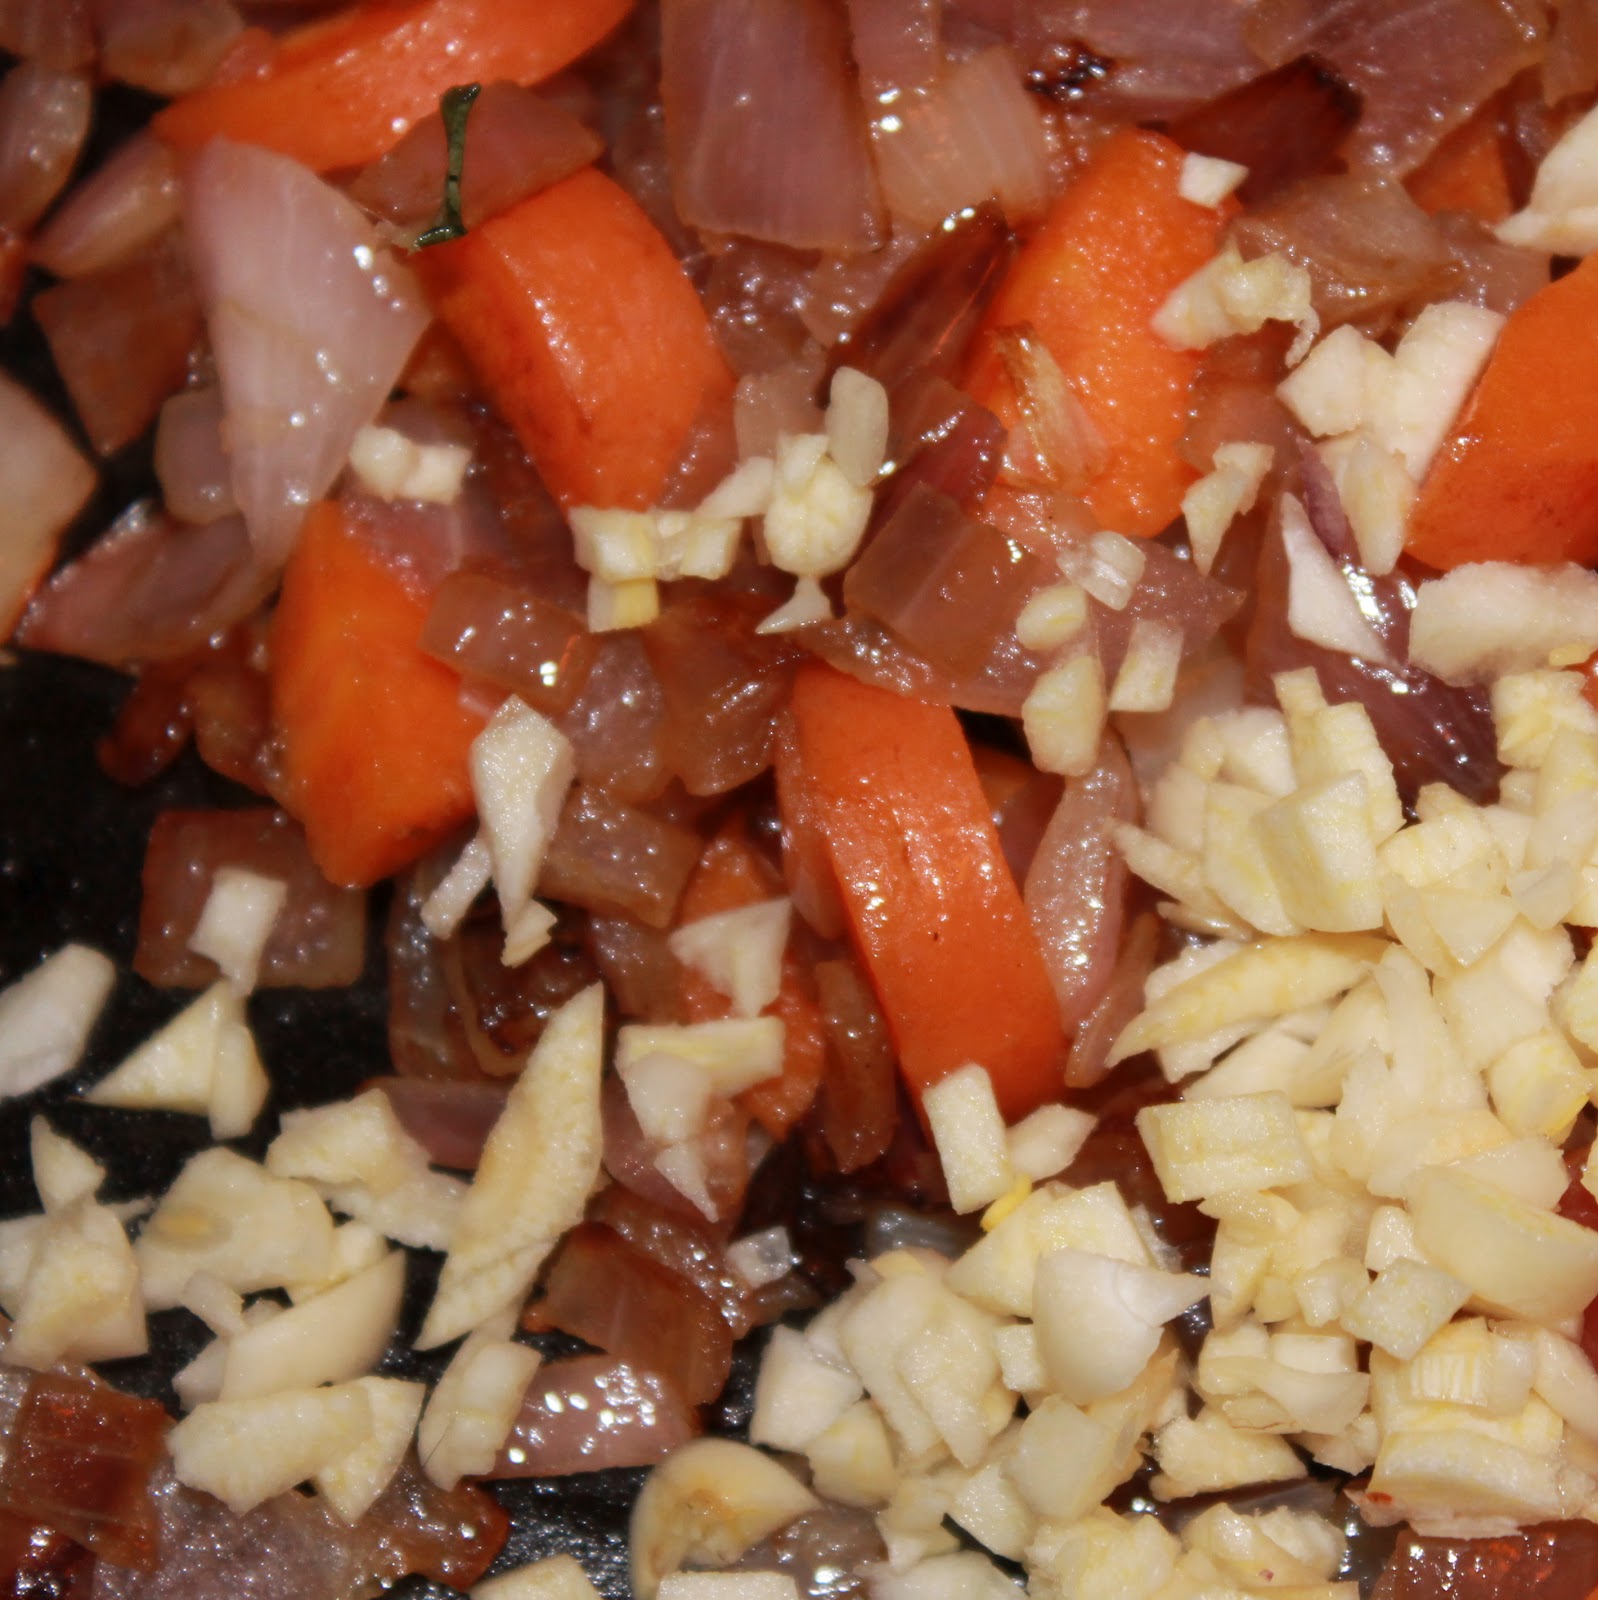
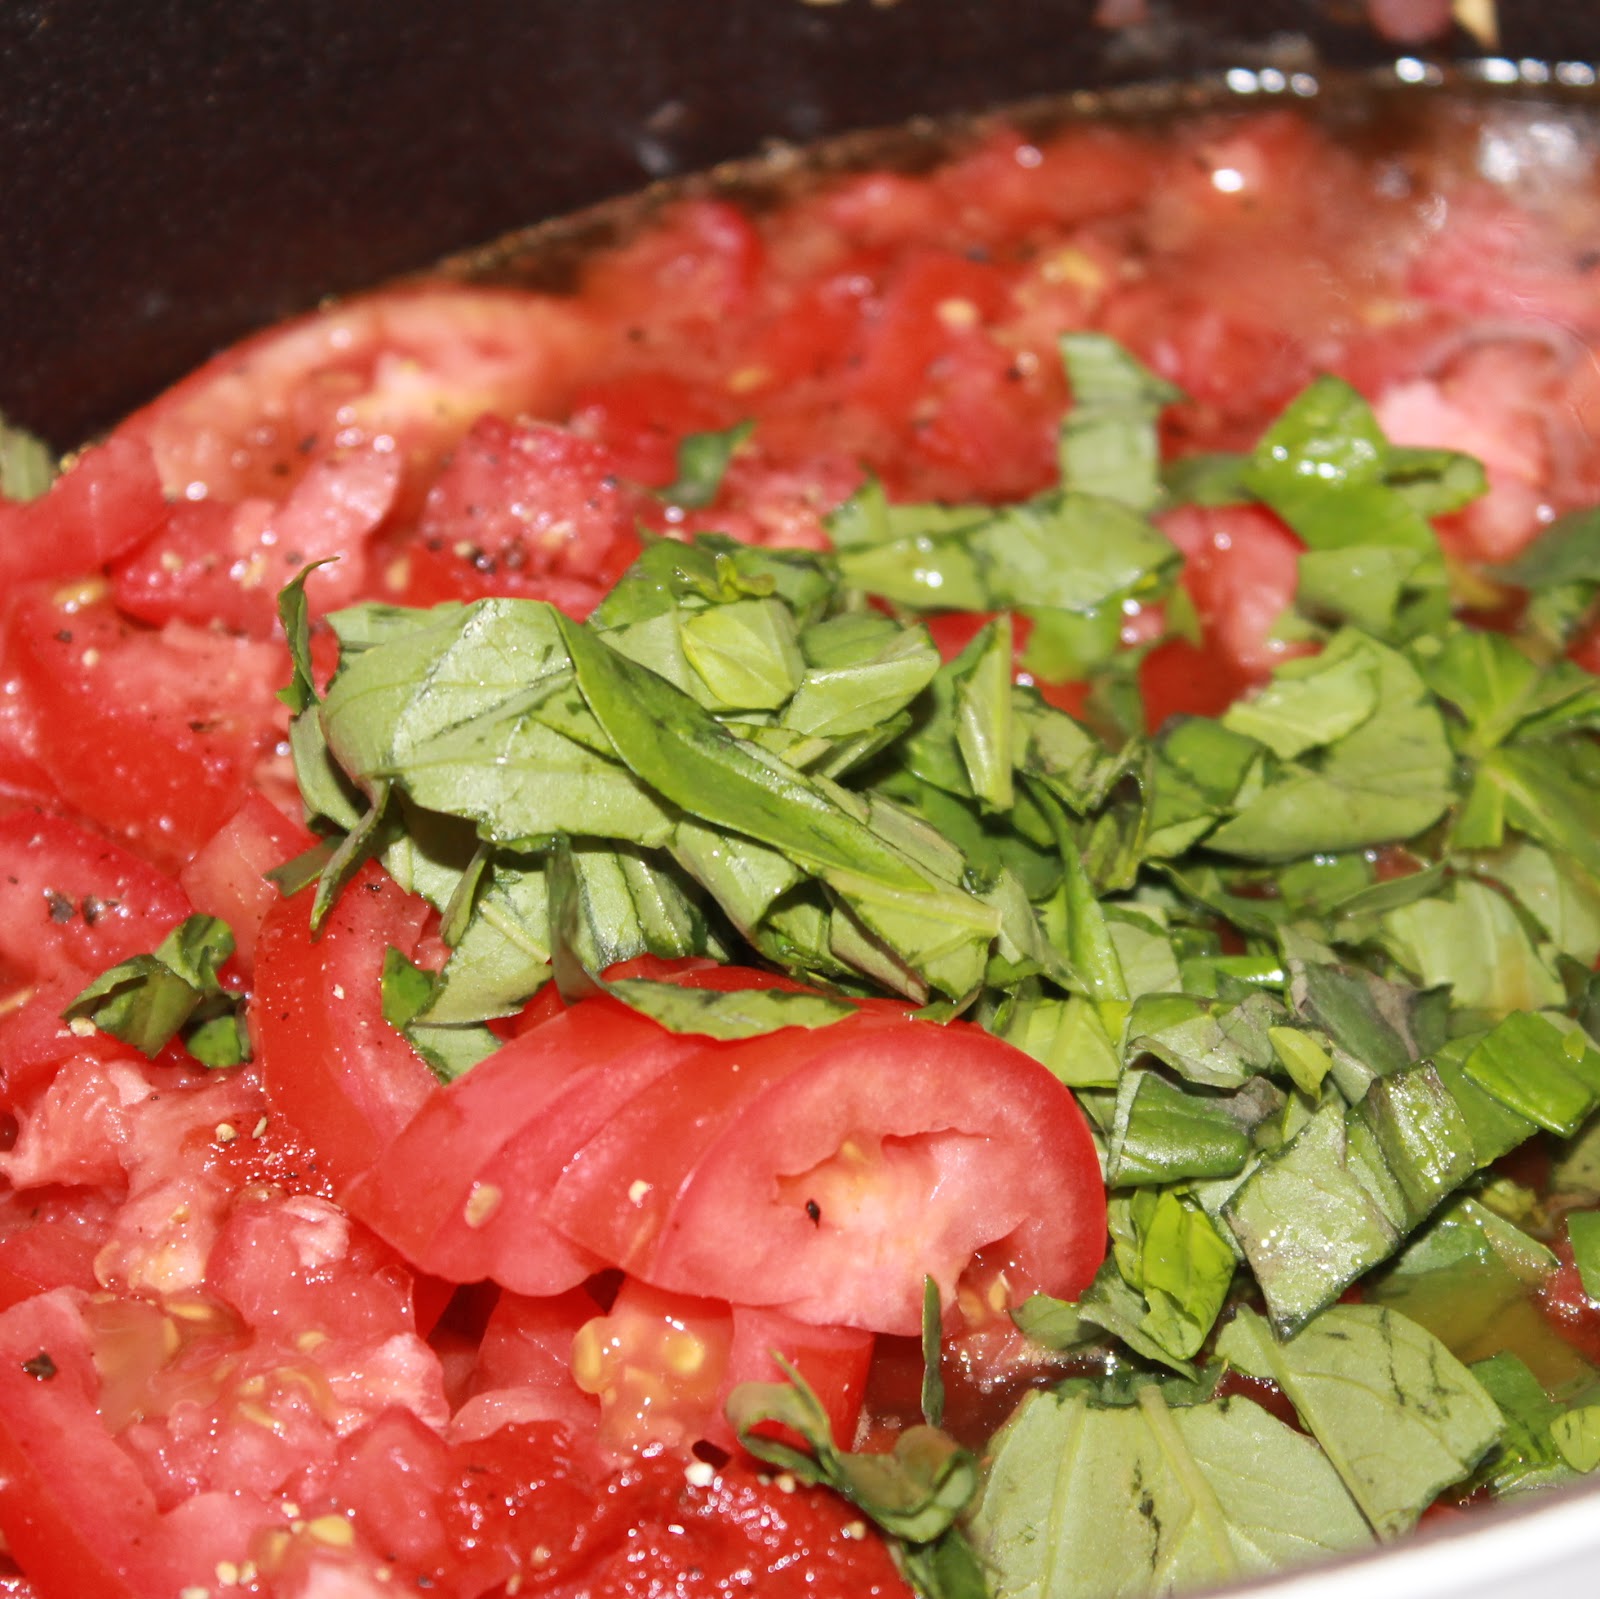
While waiting for the onion and carrot to soften, mince the garlic and set it aside. Roughly chop the tomatoes. Chop the basil.
Add the garlic to the pot and cook for 1 minute.
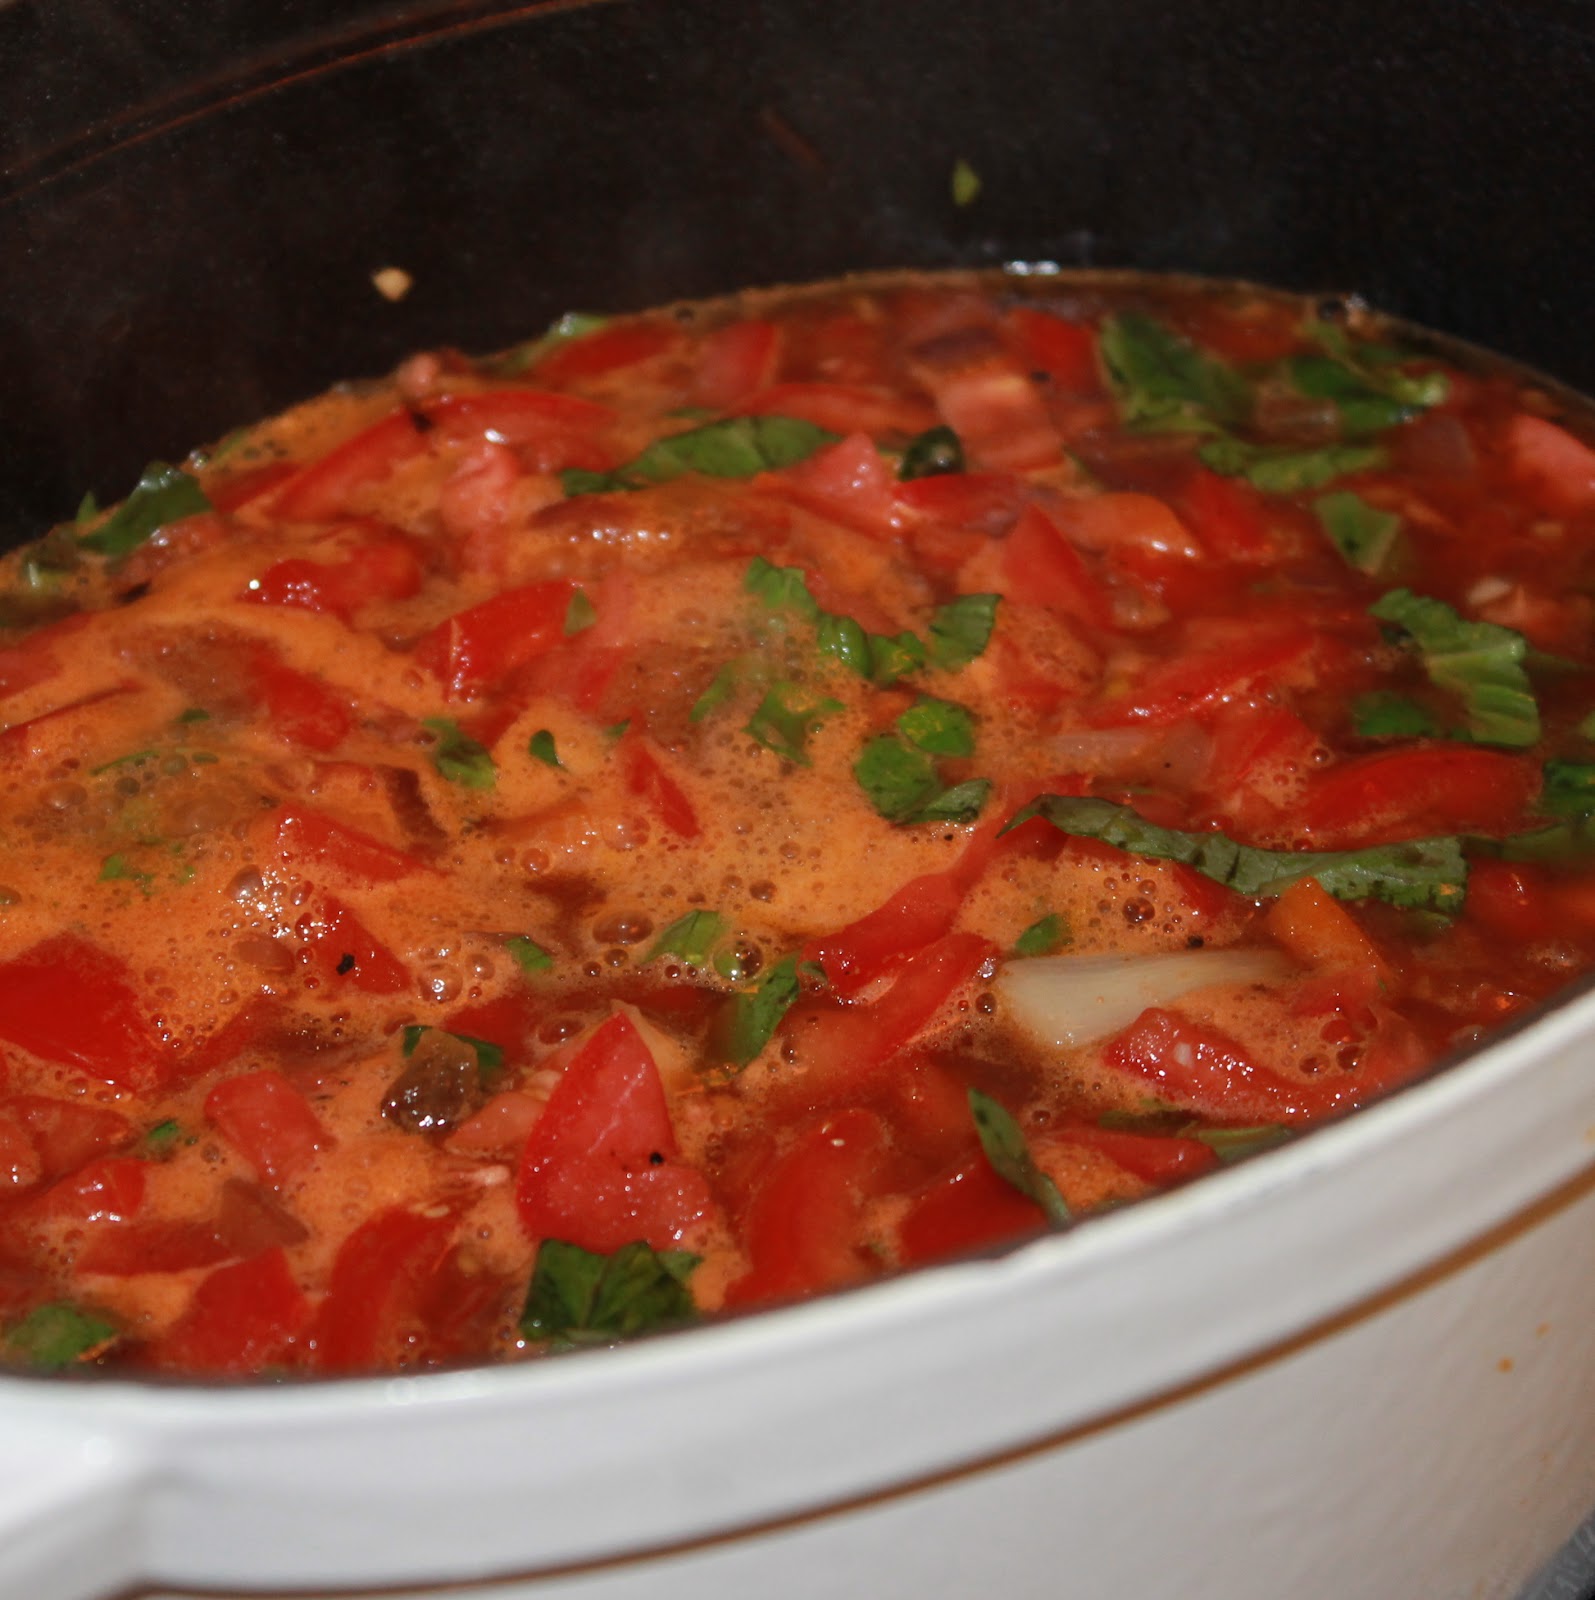
Add the tomatoes, sugar, tomato paste, basil, chicken stock, salt and pepper to the pot.
Stir well and bring to a boil.
Lower the heat and simmer, uncovered, for 30 minutes.
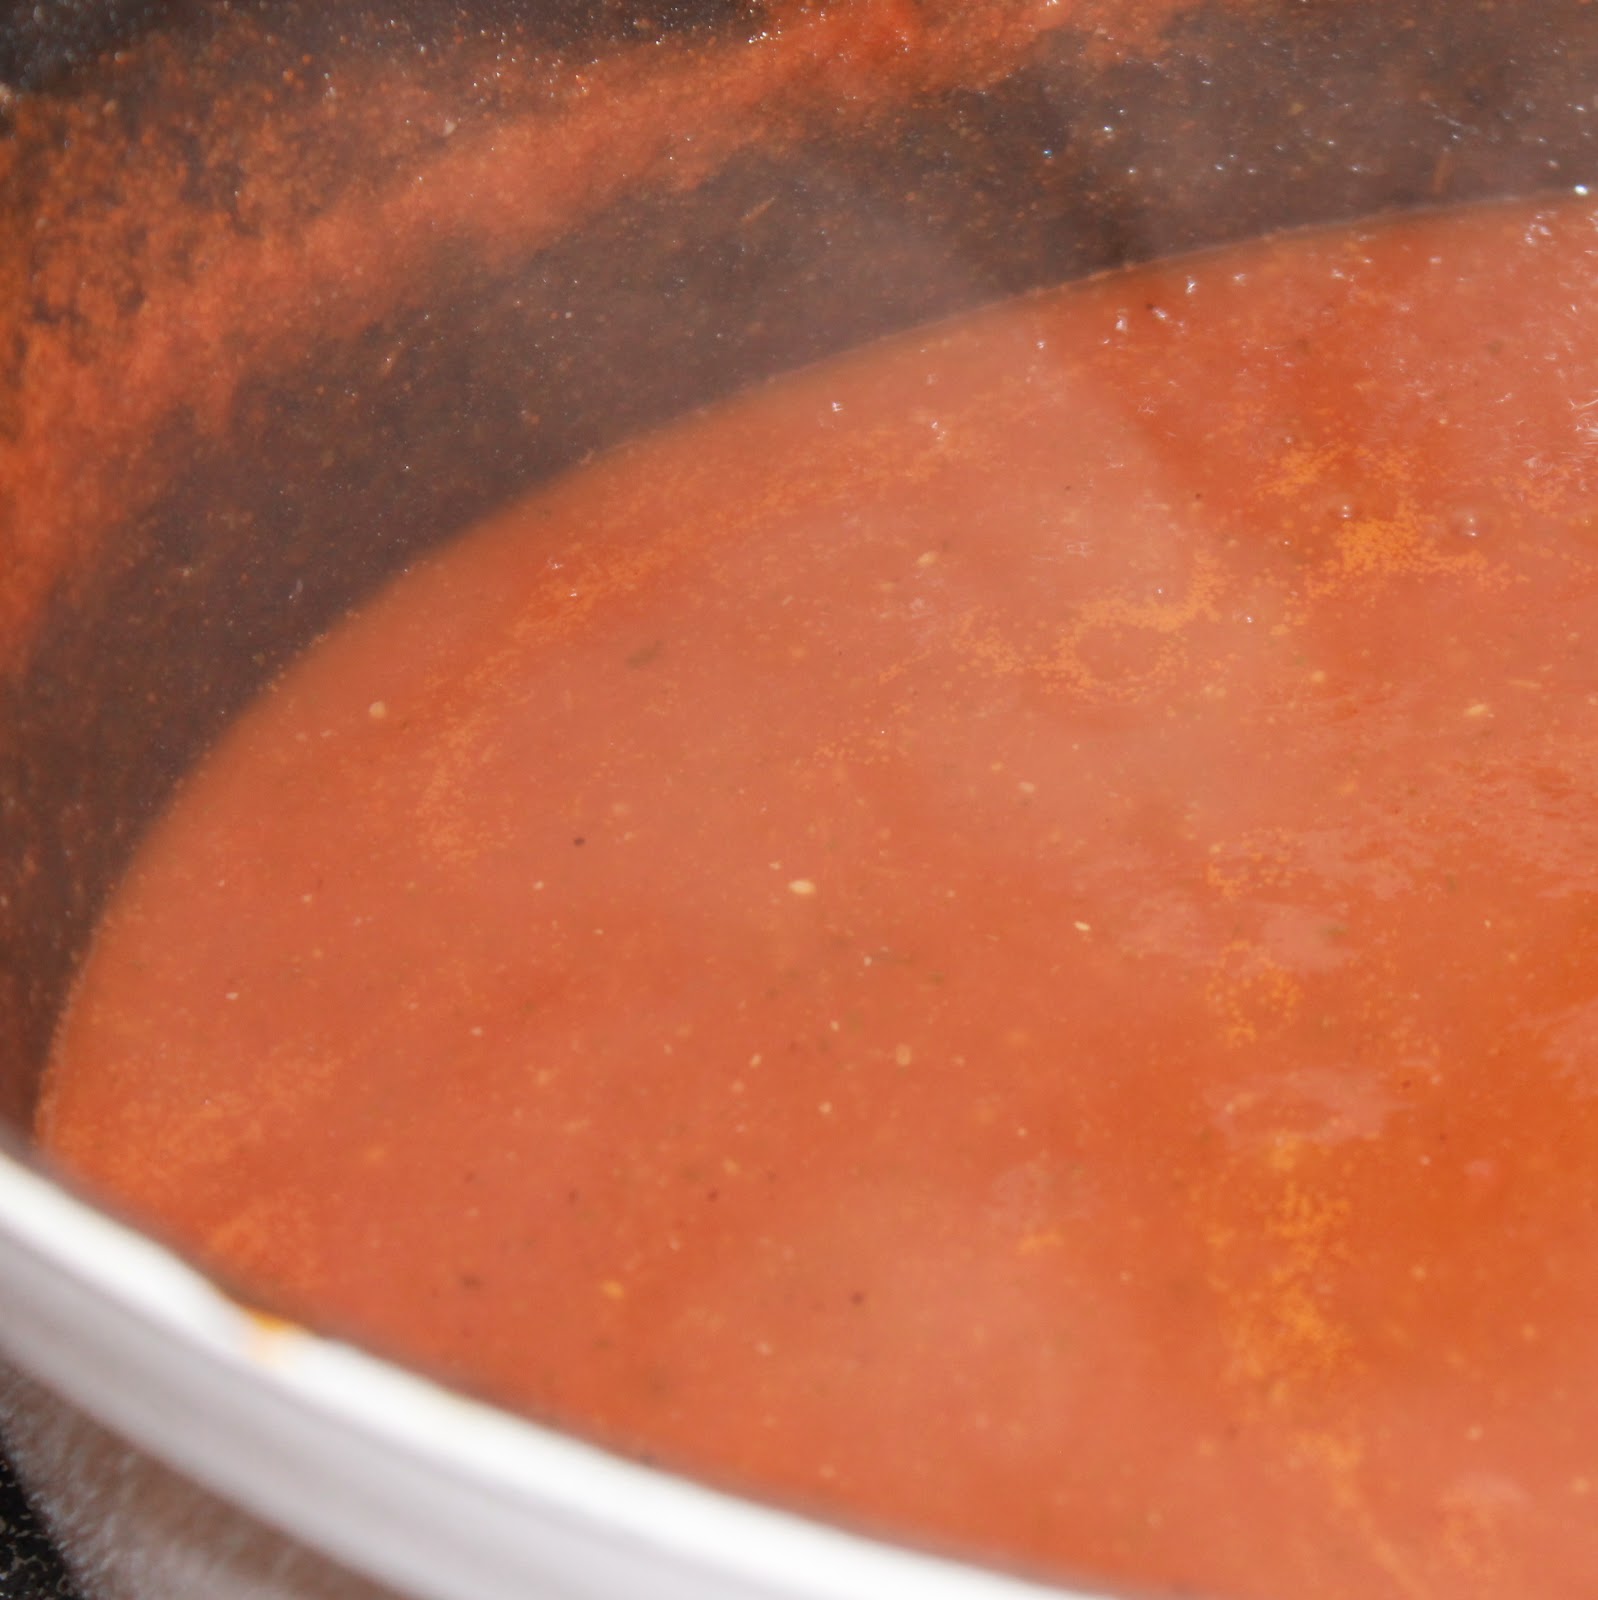
If you have an immersion blender, at this stage, use to puree the soup. If you don’t, remove half the mixture and add it to a blender. Blend until smooth; be sure to keep the center of the top off of the blender and cover with a paper towel. Repeat with remaining mixture. Return to the pot over medium-low heat.
The soup is honestly good to go at this point. Feel free to just stop here.
To make a creamy soup, add the cream to the soup and mix.
Serve with basil and croutons.
Oh my goodness. Not only is this super easy, but it is absolutely delicious.
Because the soup is made with so many fresh tomatoes, it’s important to use tomatoes at their peak.
This is a wonderfully thick soup so it’s a meal in itself, but rainy, cold days always make me want a favorite childhood staple:
Note: The original recipe used a food mill but I don’t have one. And I was not willing to peel the tomatoes so I blended them, and it worked out great. The soup ended up completely creamy.
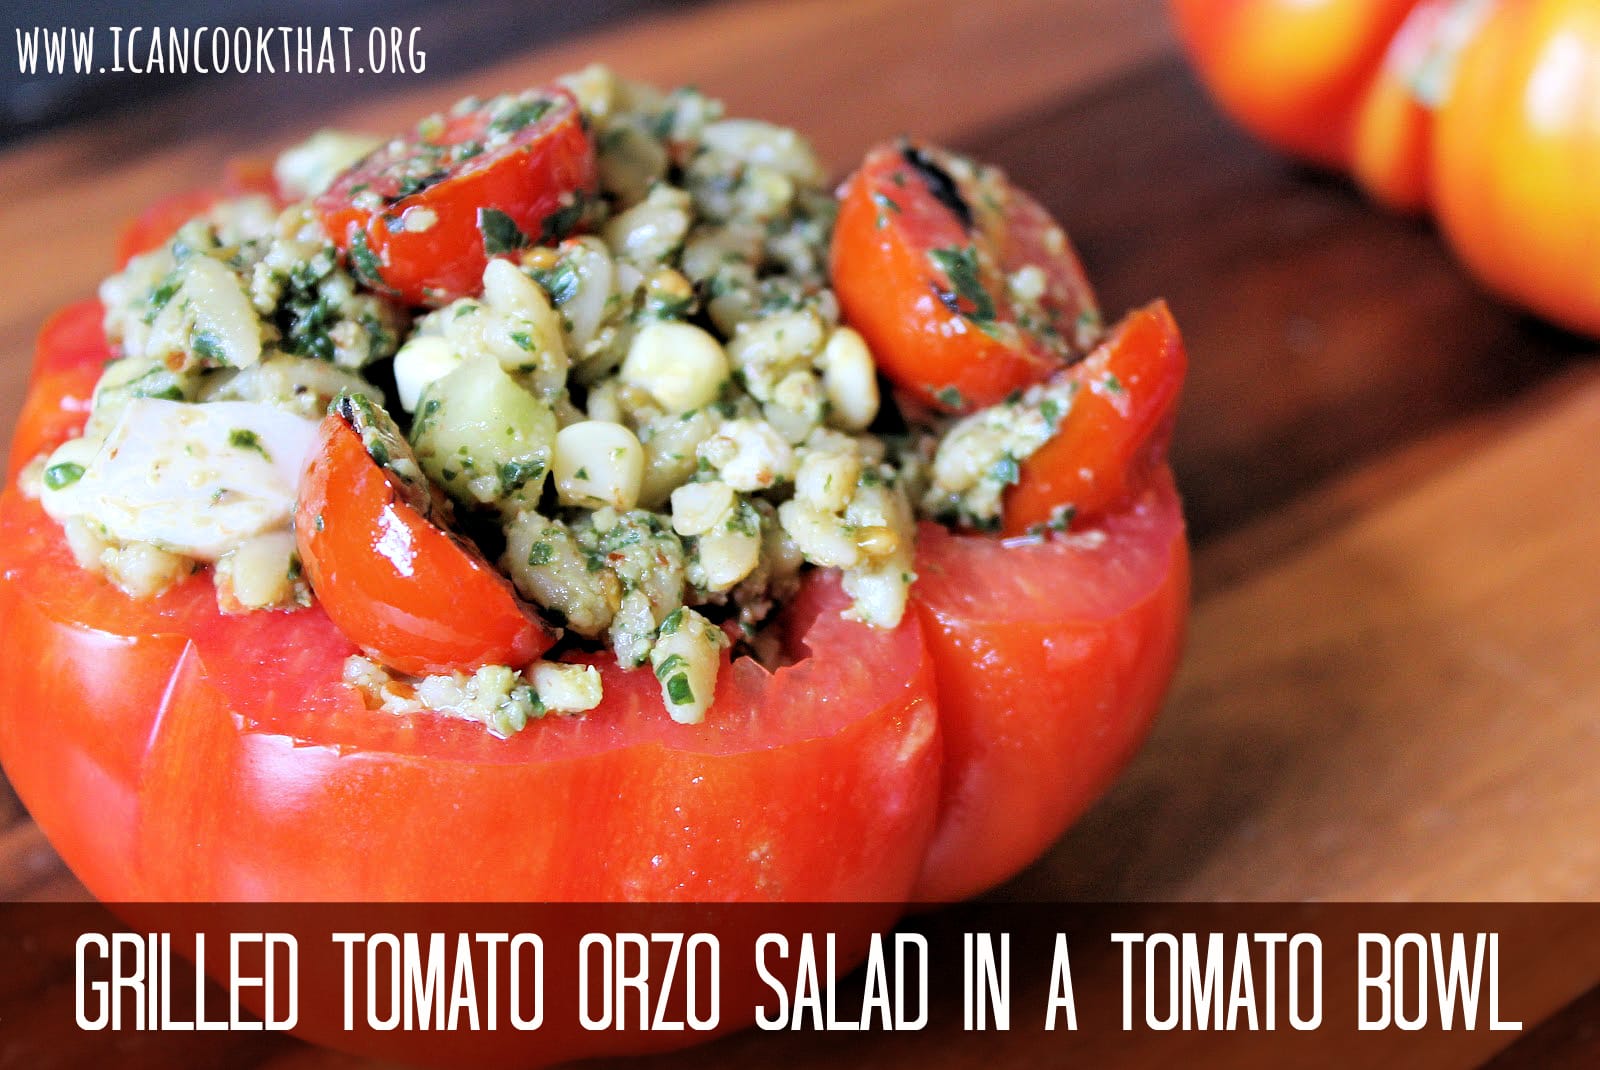
We have been having such a warm spring in Philadelphia. So if the weather is going to pretend it is summer, I will as well! To me, summer means tomatoes, corn, pesto, pasta salad, and of course, grilling.
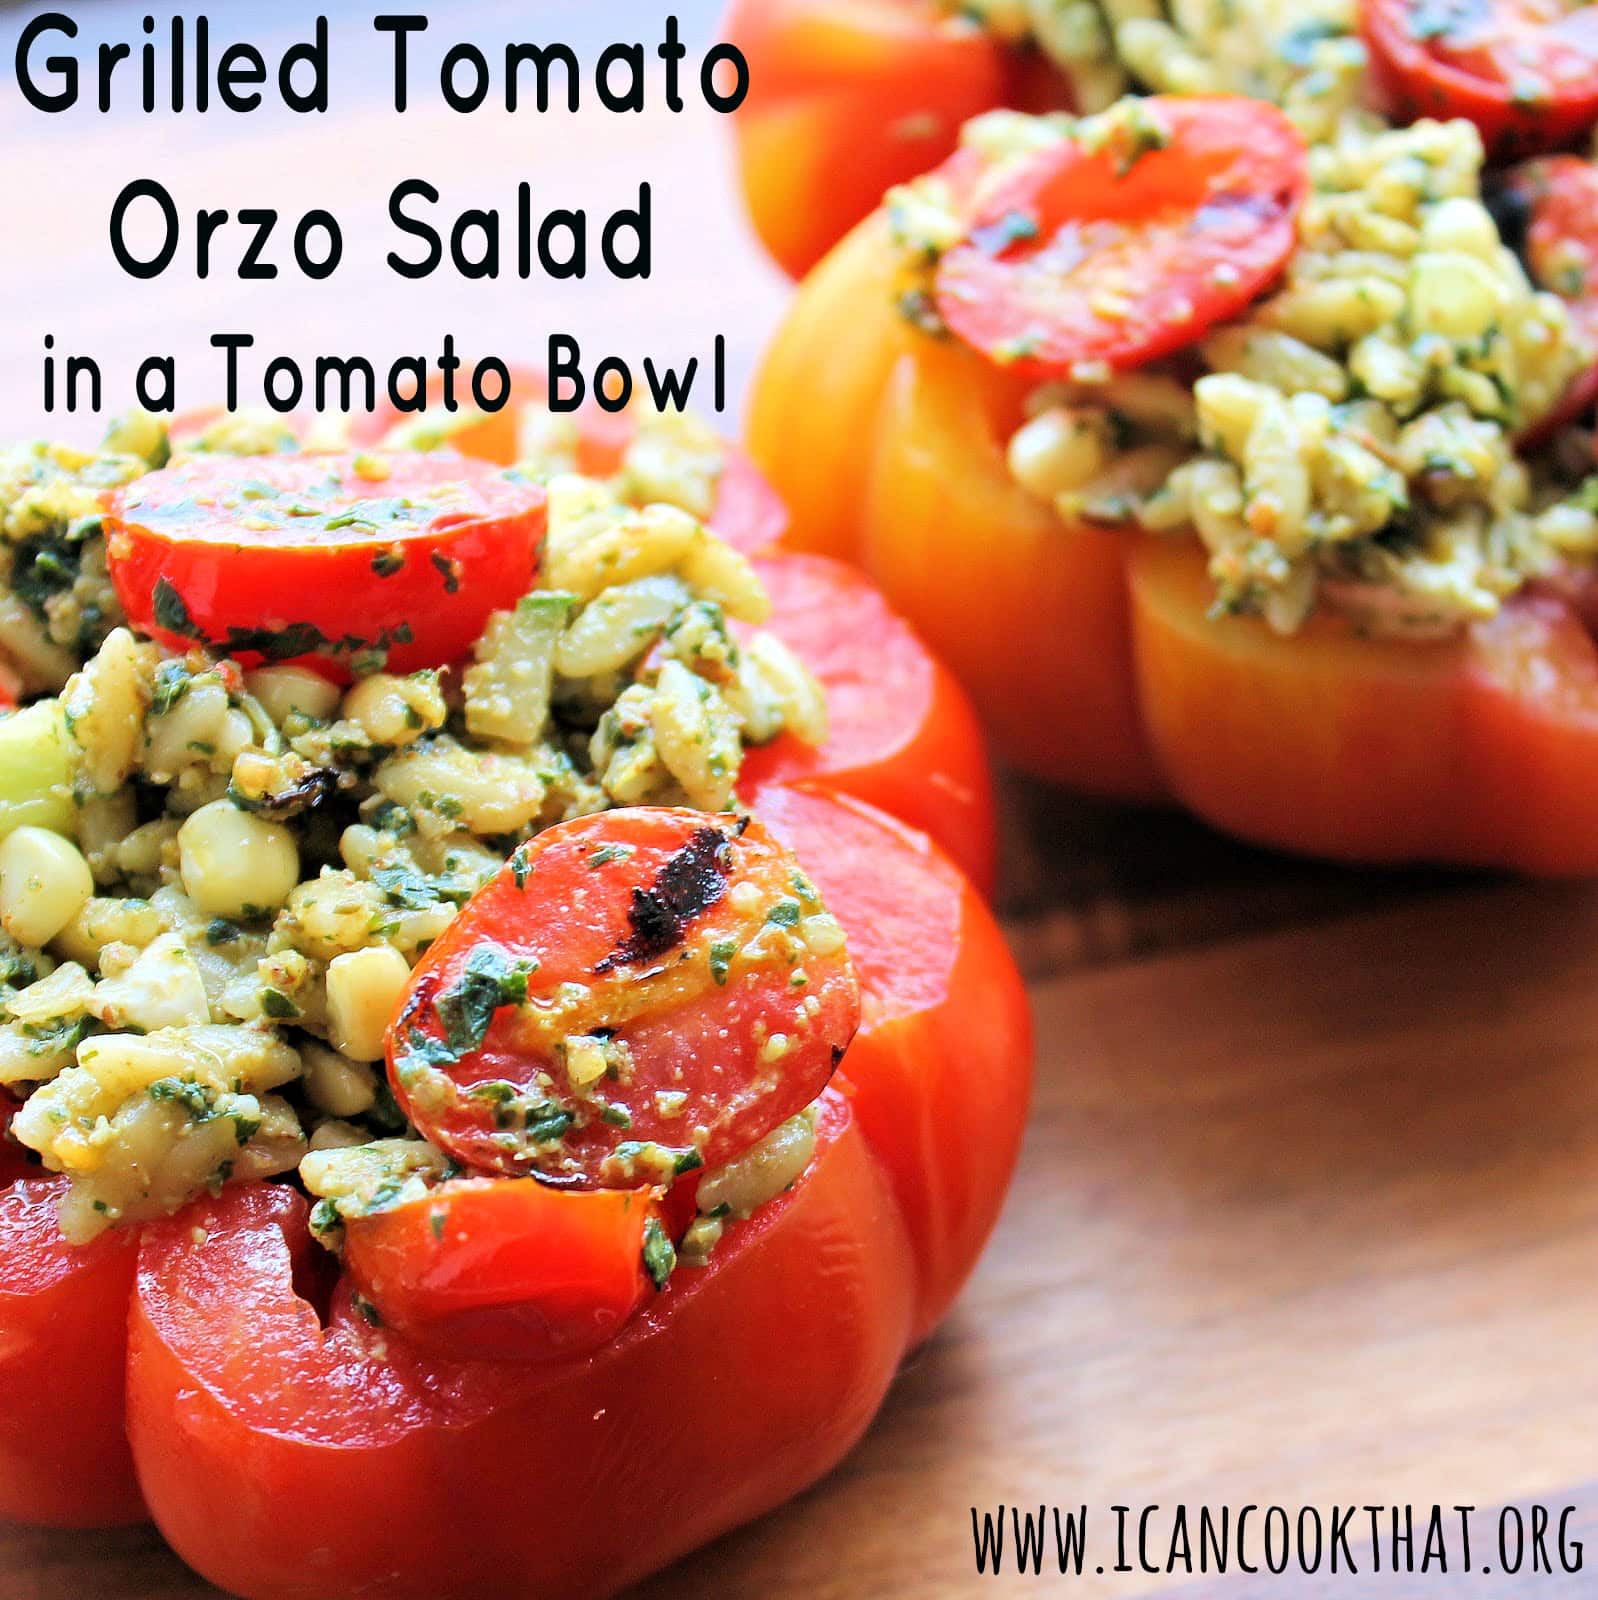
Before I go into this recipe for Grilled Tomato Orzo Salad in a Tomato Bowl, first I want to tell you about Lipman Tomatoes. Lipman Tomatoes, a business-to-business company that has been supplying tomatoes and other vegetables to grocery stores and restaurants for 70 years, is about to launch a consumer-focused brand and website. Lipman contacted me about developing a recipe to celebrate their launch, which is the perfect opportunity for me to give into my “summer fever”. I decided to make a Grilled Tomato Orzo Salad served in a Tomato Bowl. (Update: the site is now live! Check out my recipe here!)
Lipman sent me an awesome assortment of their tomatoes. I decided to use the grape tomatoes for grilling, and the Vintage Ripe (a beautiful heirloom tomato) as my tomato bowls. The assortment also came with some cherry tomatoes and plum tomatoes so expect me to be on quite the tomato kick in the coming days!
Ingredients:
4 large Vintage Ripe tomatoes
1 cup orzo
4 cups vegetable broth
1 pint grape tomatoes
1 tablespoon olive oil
1 corn on the cob (or 1/3 cup frozen corn kernels, thawed)
8 oz mozzarella balls (if you cant get marinated mozzarella balls, even better!)
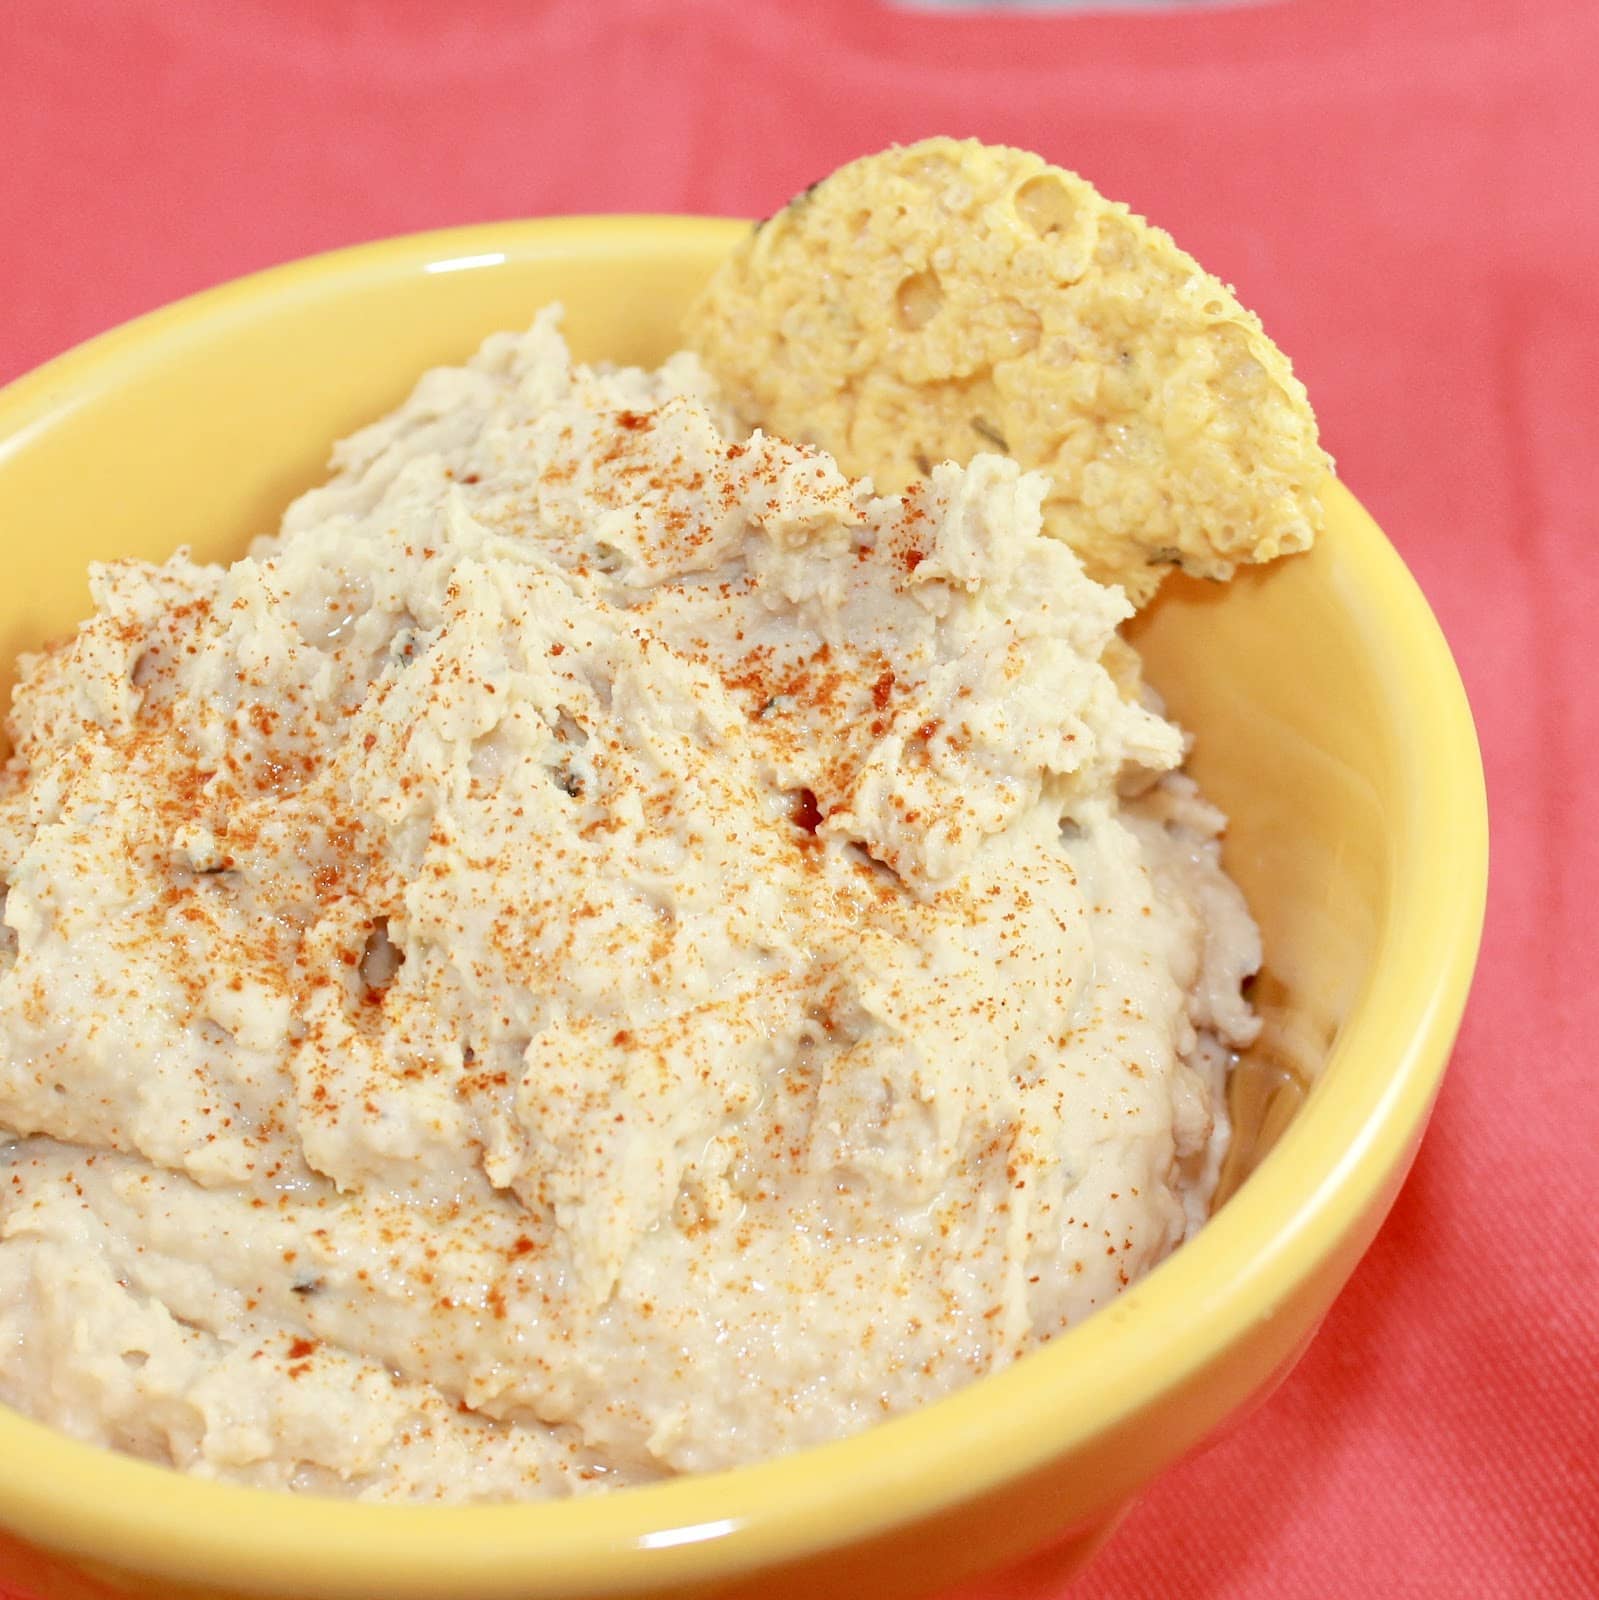
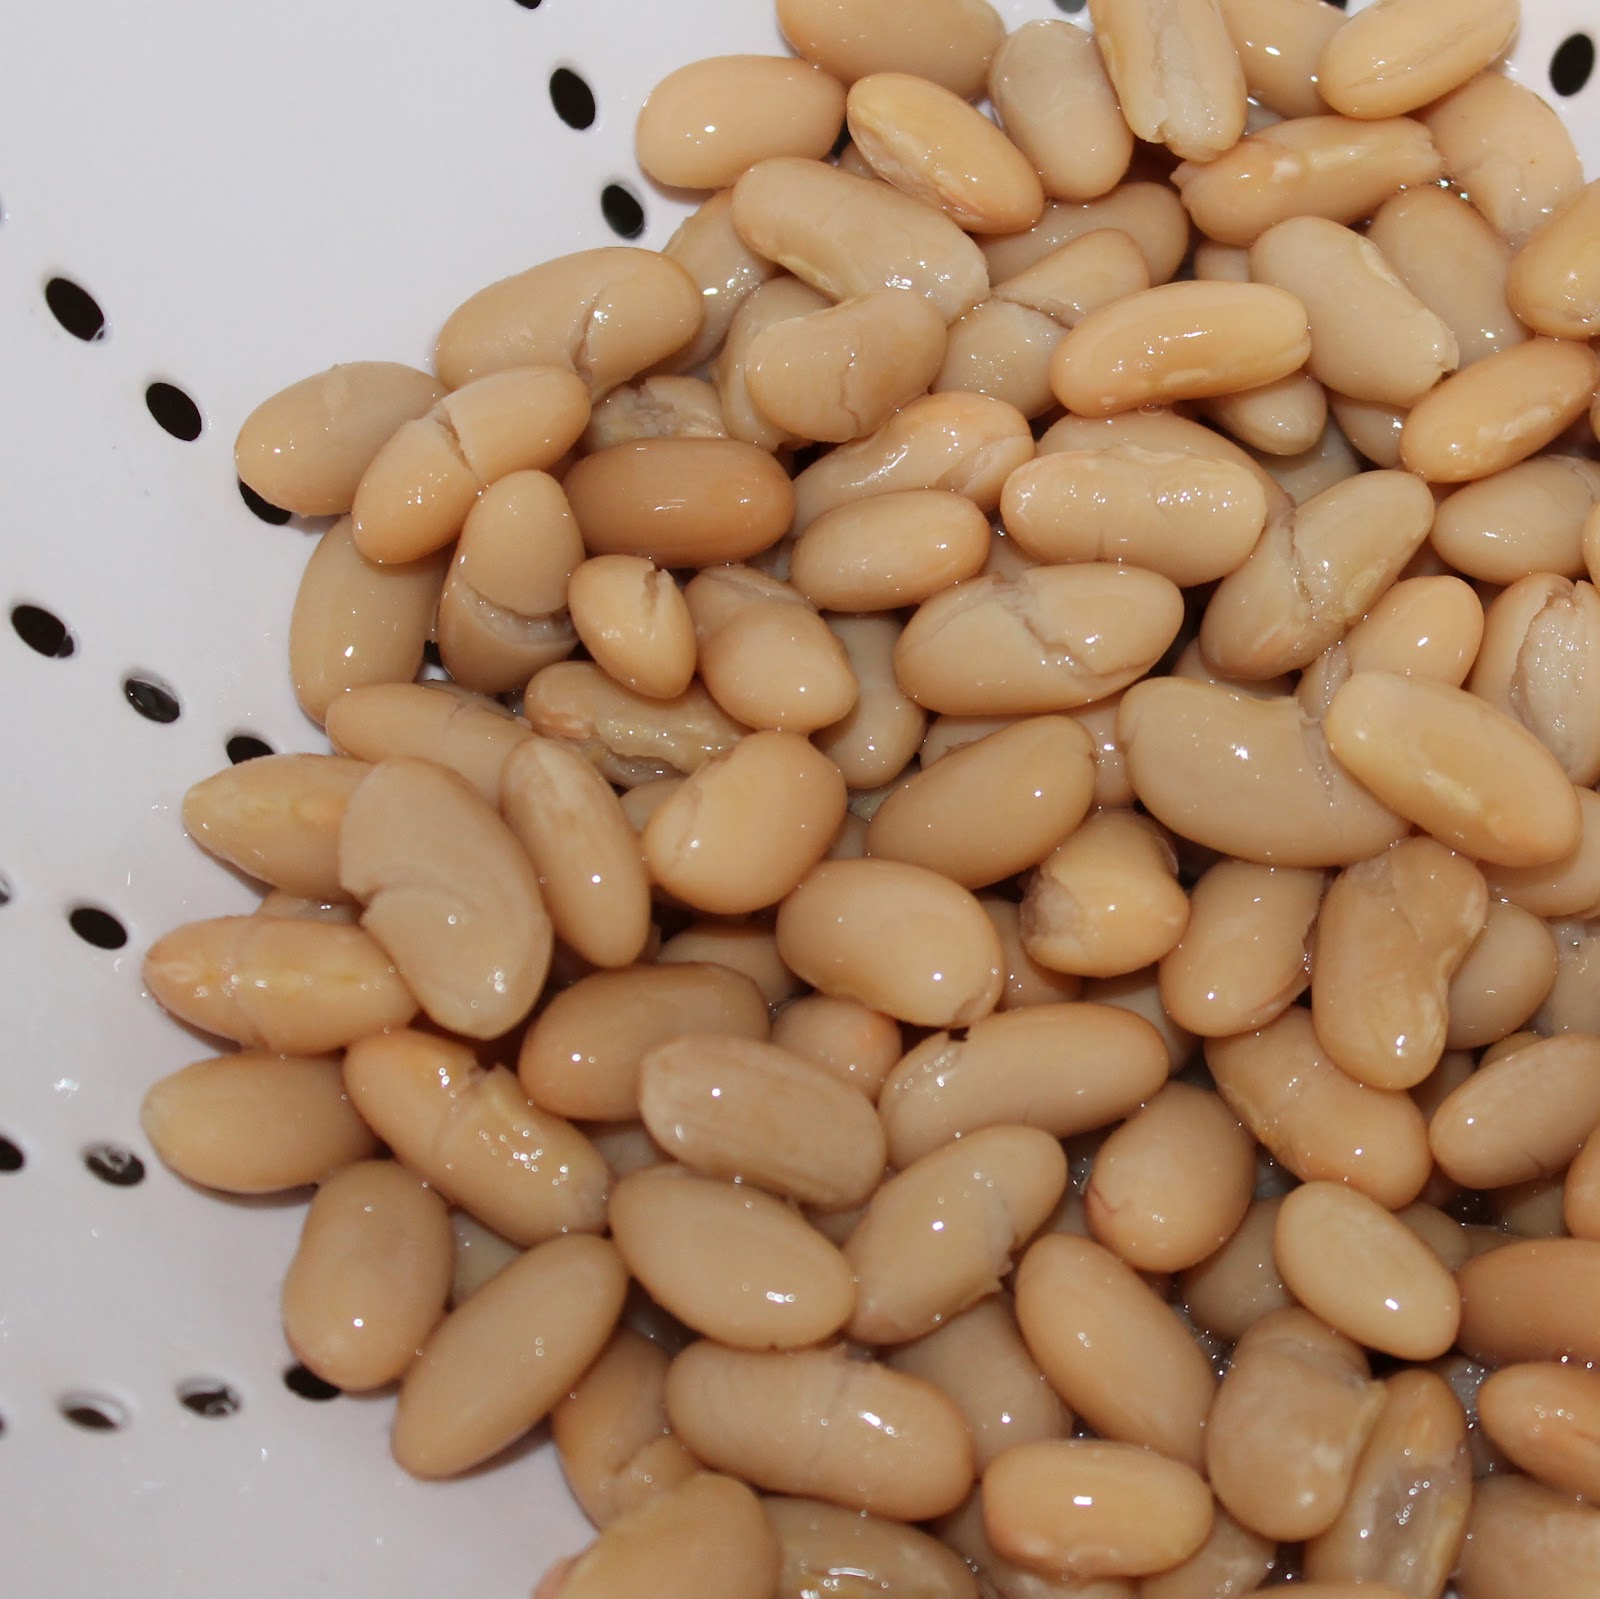
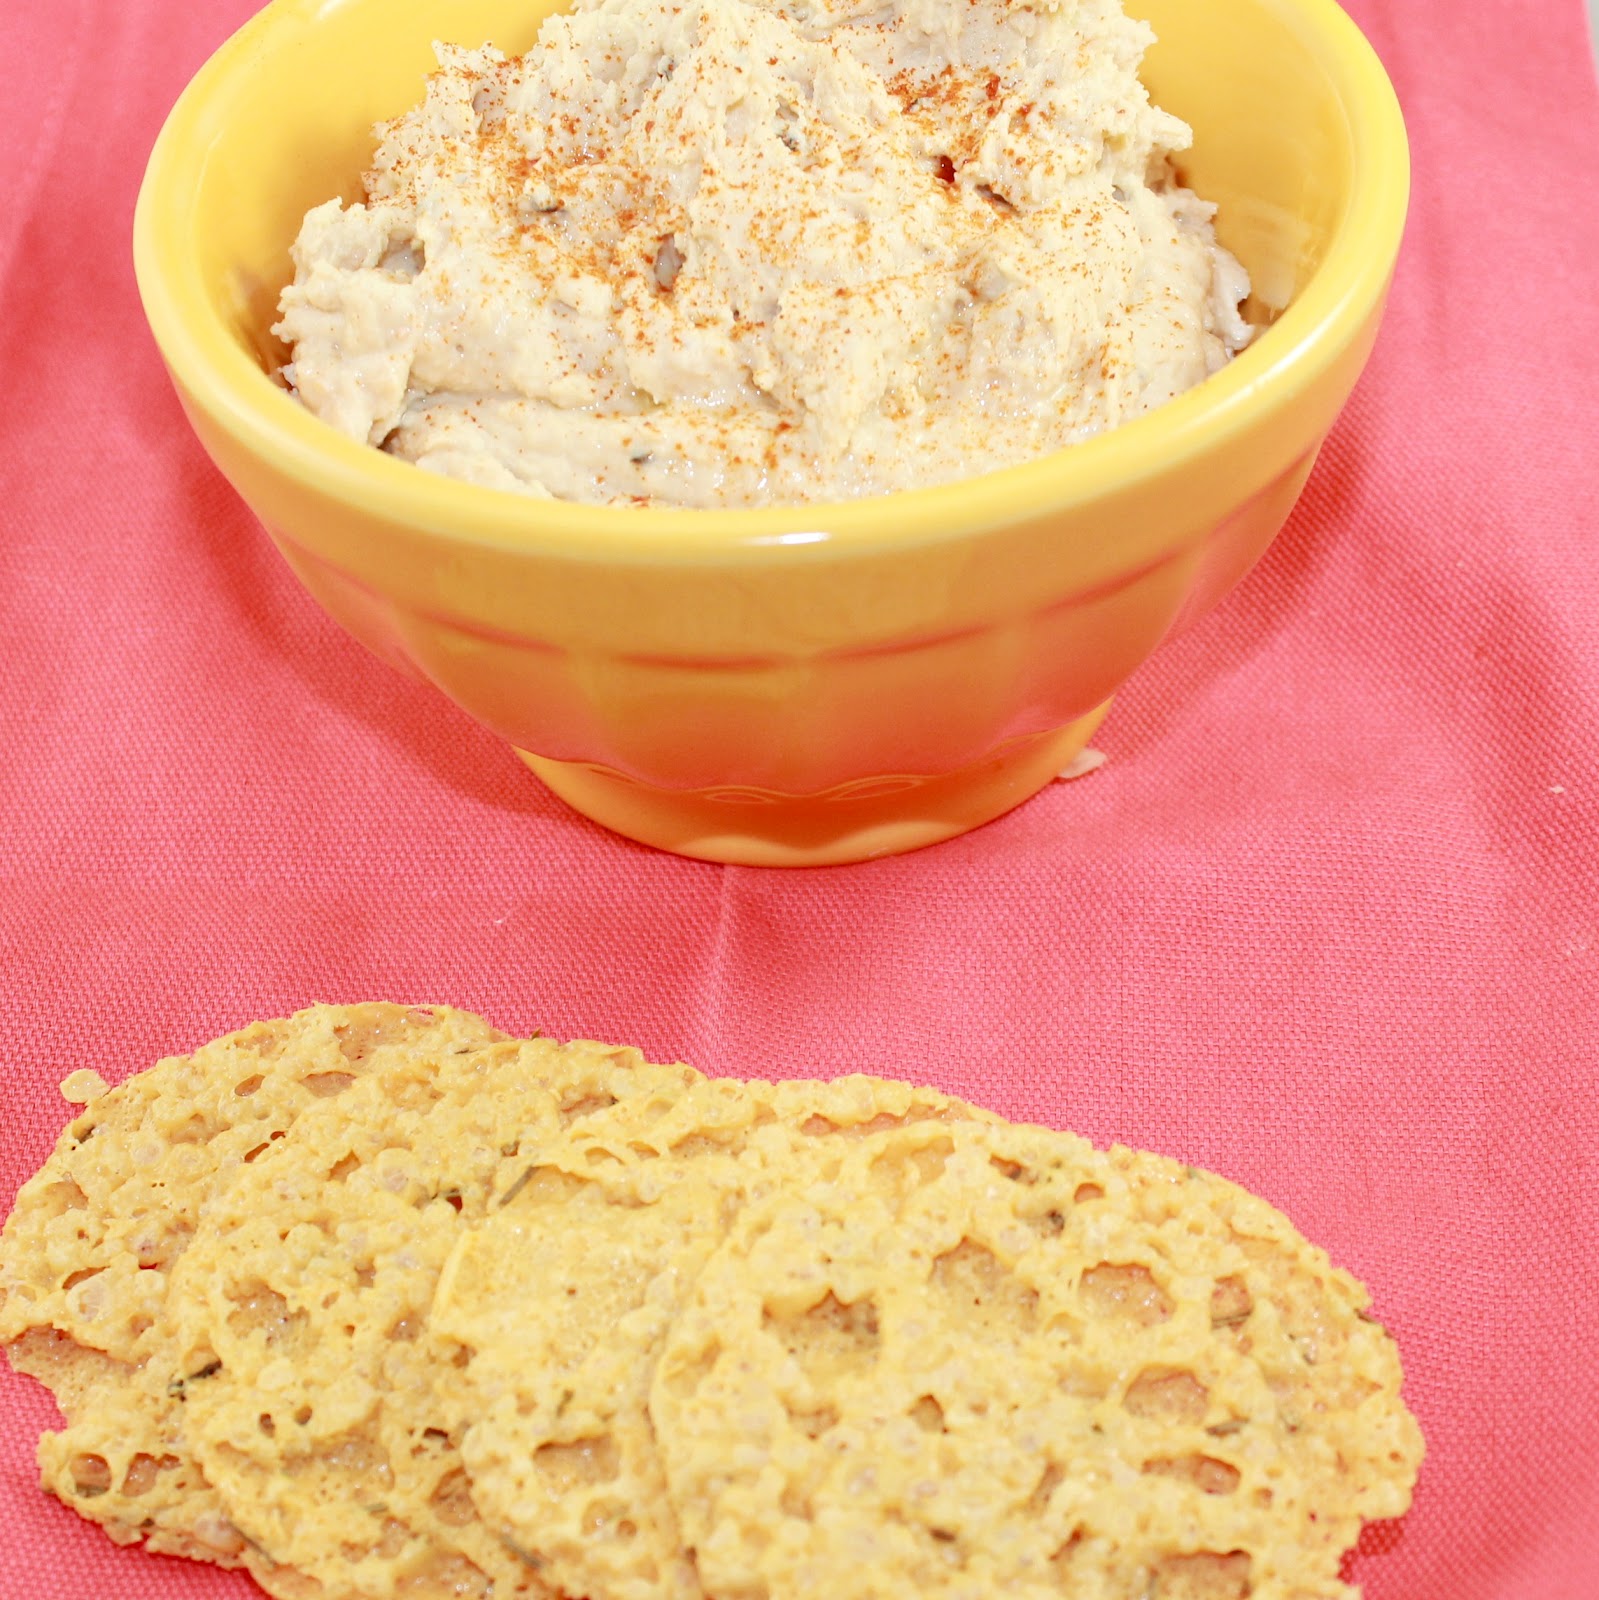
Have you ever had a craving for something that you just can’t shake? Even after eating? I desperately wanted hummus. And even after filling up on delicious pizza I still wanted that hummus. But I don’t have any chickpeas in my place right now. (Note to self: stock up on cans of chickpeas so that I am never in this terrible situation again) So I went in search of a recipe for hummus that I could use something, anything else I happened to have on hand. White bean hummus to the rescue! (I found this recipe in Southern Living)
Ingredients:
2 garlic cloves, minced
1 teaspoon chopped fresh rosemary
1 (15.5-ounce) can cannellini beans, rinsed and drained
the juice and zest of 1 lemon
2 tablespoons tahini
1/2 teaspoon salt
1/4 teaspoonpaprika, plus more for garnish
1/4 cup olive oil
Rinse and drain your cannellini beans.
Add all the ingredients except for the olive oil to a food processor and blend. You may need to stop the food processor one or two times to scrape the sides to make sure everything is evenly blended.
While the food processor is running, add an even stream of the olive oil until well blended. Add to a bowl and sprinkle with some paprika. Serve with pita chips, cucumber, or green peppers.
Due to my craving, I had none of these on hand. Junk. But I did have some of the Kitchen Table Bakers Rosemary Parmesan Crisps that went perfectly with the hummus!
Oh so satisfying.
Cannellini beans make one fantastic hummus, who knew?
The hummus was nice and creamy. And I loved the fresh rosemary!
I’d suggest adding some extra fresh chopped rosemary on top for added flavor. You can store this overnight or for a few days beforehand. I like to bring it with me as a snack at work.