Note: This is a sponsored post, powered by BrandBacker. I was sent samples of Parmigiano Reggiano cheese to make this post. Opinions are mine alone.
Some ingredients are so wonderful, that you don’t need much else to make a beautiful dish. Parmigiano Reggiano is most certainly one of those ingredients.
Parmigiano Reggiano cheese is made in the provinces of Parma, Reggio Emilia, Modena, Bologna, and Mantua, Italy. Made by a collective of farmers and producers, Parmigiano Reggiano has just three ingredients: milk, salt, and rennet. with over eight centuries of cheese making experience, every wheel of Parmigiano Reggiano cheese is carefully tended to by workers who wipe, brush, and turn them every ten days. The outsides of the wheels dry over time to form a natural and edible rind. The wheels are typically aged for 18 to 36 months, with 24 months being the most common. So how do you know you have real Parmigiano Reggiano cheese? Look for the pin-dots on the rind, which are imprinted on every wheel.
This process results in a hard, dry cheese with a pale gold rind and a straw colored interior with a wonderful rich and sharp flavor. Pre-grated Parmigiano Reggiano cheese doesn’t do the freshly grated stuff justice. And the best way to highlight the flavor of freshly grated Parmigiano Reggiano is in this super simple recipe for Cacio e Pepe, or translated to Cheese and Pepper.
Traditional Cacio e Pepe is made with just 4 ingredients, but my Cacio e Pepe (Cheese and Pepper Pasta) has 7 ingredients – pasta, freshly grated Parmigiano Reggiano, pepper, salt, garlic, butter, and olive oil. The result is a simple but decadent pasta dish with the most luxurious, silky cheese sauce.
Ingredients:
1 (16 oz) box linguine
salt, for the pasta water
8 tablespoons (1 stick) unsalted butter
2 tablespoons olive oil
2 teaspoons freshly ground black pepper, plus more for serving
1 large garlic clove, very thinly sliced
2 1/2 cups freshly grated Parmigiano Reggiano, plus more for serving
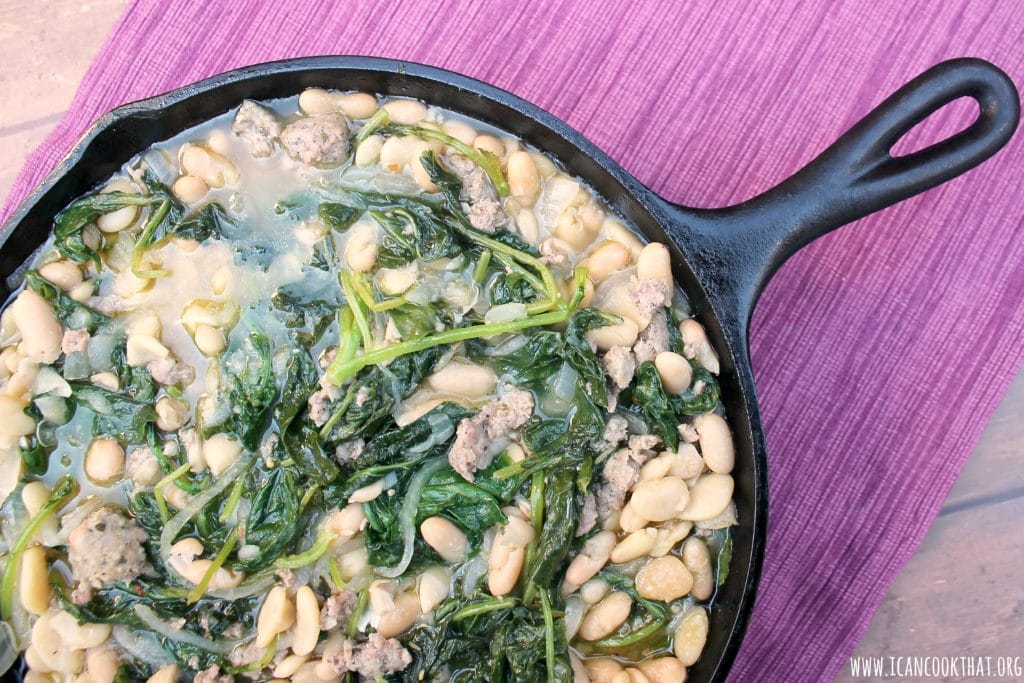
As the weather gets a little cooler, I begin to gravitate toward more comfort food recipes, like this Skillet Sausage White Bean and Kale Stew. Not necessarily bad-for-you recipes, recipes that are simple but flavorful and filling.
To me, there are very few things as comforting as this stew with ground sausage, cannellini beans, and kale. (I’m referring to this as a stew, but there is very little broth in this Skillet Sausage White Bean and Kale Stew. It’s meant to be that way.) Something magical when these ingredients are cooked with onions and garlic!
This recipe for Skillet Sausage White Bean and Kale Stewis adapted from Simply Recipes, where it was originally intended to be a side. My version is pretty similar, but I make enough for it to be a nice dinner on its own; just serve with a side of crusty bread to sop up that wonderful sauce!
Ingredients:
2 tablespoons olive oil
1 large white onion, thinly sliced
4 large garlic cloves, thinly sliced
1 pound hot Italian sausage, casings removed (for gluten-free, make sure to use gluten-free sausage)
2 (5 oz) containers baby kale, divided
1 1/4 cups beef stock, divided
2 (15 oz) cans cannellini beans, rinsed and drained (or any white beans you prefer)
My husband says he doesn’t like soup, but he honestly just doesn’t like thin broth soups, like traditional chicken noodle soup. So I’m always in search of soup recipes that are thicker based — not necessarily from cream. Pureed vegetable soups have become a favorite in my house!
This recipe from Saveur for Red Lentil and Butternut Squash Soup mentions that it originates from Palestine, but I haven’t been able to find a similar butternut squash and red lentil soup to confirm that. No matter where this recipe originally comes from, the result is a perfect colder weather soup- creamy, filling, with a little bit of heat!
Ingredients:
1/4 cup olive oil
4 cloves garlic, minced
3 medium carrots, chopped
2 stalks celery, chopped
1 medium white onion, chopped
1 teaspoon ground cumin
1/2 teaspoon crushed red chile flakes
1 pound peeled, seeded, and chopped butternut squash
salt and pepper, to taste
6 cups chicken stock (or vegetable stock to make vegetarian/vegan)
I came across a recipe for Sri Lankan Coconut and Turmeric Chicken Curry a while back, but was unable to find all of the ingredients to actually make it. (Curry leaves are difficult to come by near me!)
Recently, I just gave up and decided to make it with some substitutions.
This recipe from Delicious.com, even with my adjustments, is so fantastic that I can only imagine how good the original is!
Ingredients:
1 medium white onion, roughly chopped
~1 1/2 inch piece ginger
3 garlic cloves, crushed
1 small jalapeno, seeds and membranes removed
8 boneless skinless chicken thighs
4 tablespoons coconut oil, divided
1 tablespoon ground turmeric
1 tablespoon ground cumin
2 teaspoons ground coriander
2 teaspoons smoked paprika
3 cardamom pods, smashed
1 piece of cinnamon
2 whole cloves
3 bay leaves
1 (13.5 oz) can coconut milk, well shaken
1 cup chicken stock
2 tablespoons cashews, finely chopped, plus extra to serve
I’m seriously loving using my pressure cooker! My husband was out of town while I was experimenting with this recipe, so I enlisted the help of a couple of friends to be my taste testers. Luckily they were willing to oblige!
The unsuspecting friends showed up without knowing what exactly I was planning on preparing – they are very trusting! 🙂
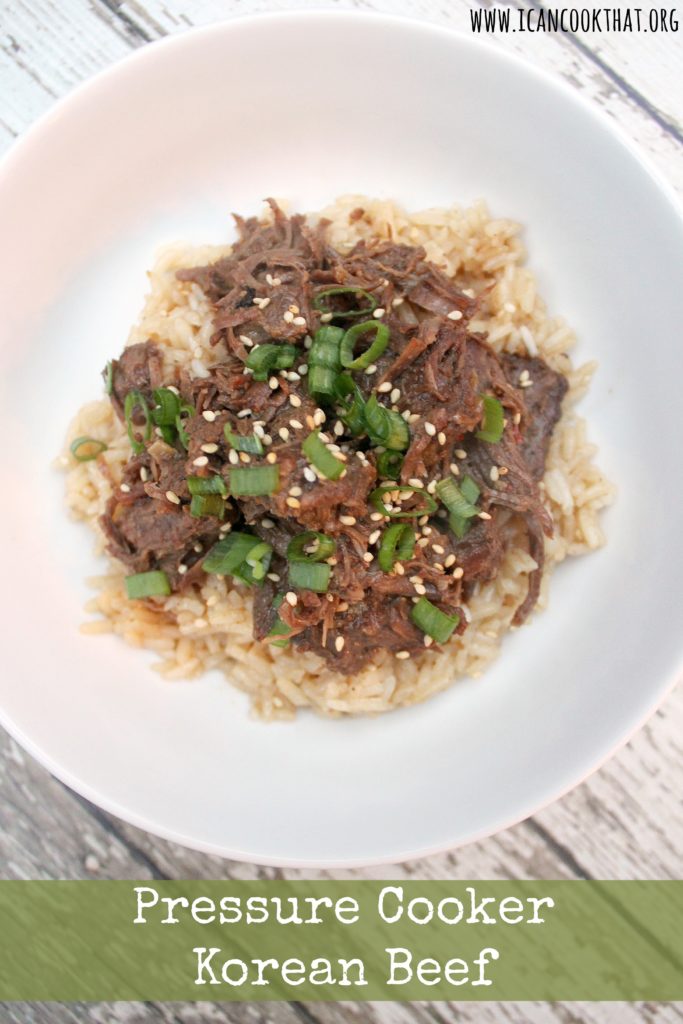
I had a craving for bulgogi recently, so I decided to make a pressure cooker Korean beef. Bulgogi is typically made with thin, marinated slices of beef that are then barbecued. The marinade is usually a mixture of soy sauce, sugar, sesame oil, ginger, and garlic with a touch of crushed red pepper.
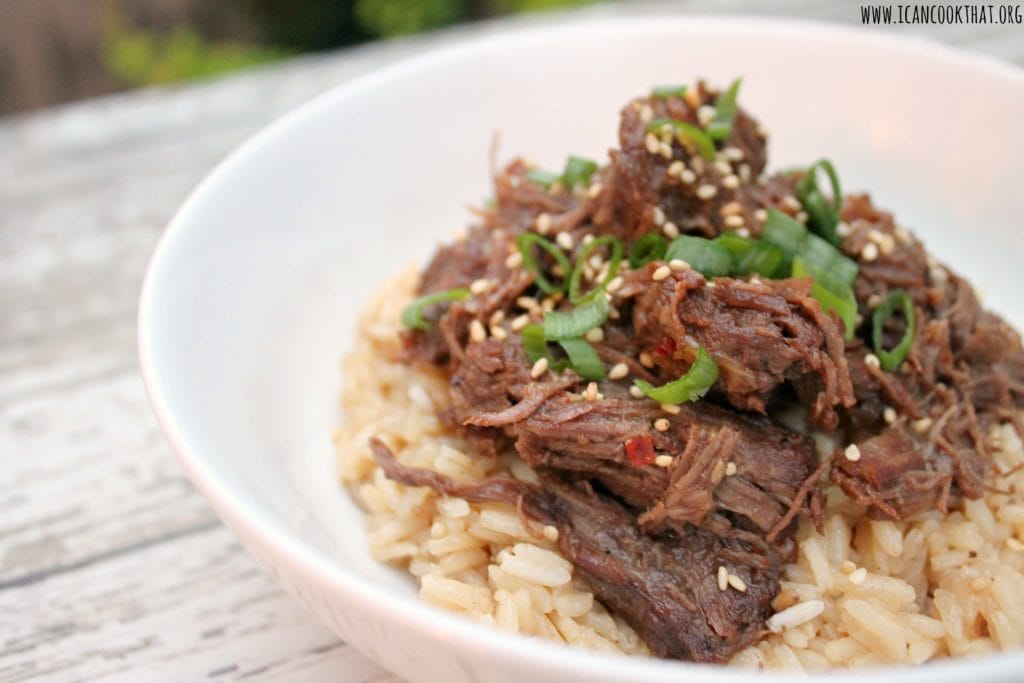
This recipe is inspired by the flavors of bulgogi, but instead of grilling thinly sliced beef, it instead uses chuck roast beef and a pressure cooker to make a super tender, shredded version.
Ingredients (serves 8):
1 tablespoon vegetable oil, plus more if needed
4 lbs chuck beef, cut into cubes, excess fat trimmed
1 small onion, chopped
6 garlic cloves, minced
1 to 2 tablespoons beef stock
1/2 cup brown sugar, lightly packed
1/2 cup reduced sodium soy sauce (or coconut aminos to make gluten free)
1 tablespoon sesame oil
1/2 teaspoon crushed red pepper flakes
1 teaspoon fresh ginger, minced
green onions, sliced, for garnish
white sesame seeds, for garnish
4 cups cooked rice
To make, cut the beef into large chunks. Season with salt and pepper. (Go light on the salt, the soy sauce will provide all the salt you need!)
Press the “saute” function on your pressure cooker. Press the “cook time” button and increase the time to 25 or 30 minutes (it took me about 25 minutes to brown up all of my meat.) Press the “adjust” button and choose “more/high.” Press “on/start.” The pressure cooker will beep five times when it is preheated.
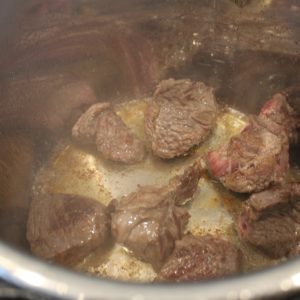
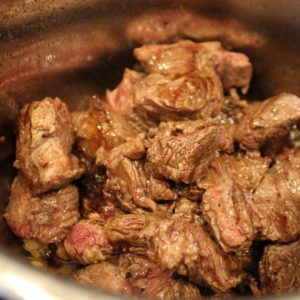
Carefully add the vegetable, oil and then add some meat to the pressure cooker (without crowding the beef).
Brown the meat on all sides. Remove from the pressure cooker and continue with the remaining beef.
When done browning the last batch, remove the final pieces and set aside. Press “stop/cancel” to turn off the saute function.
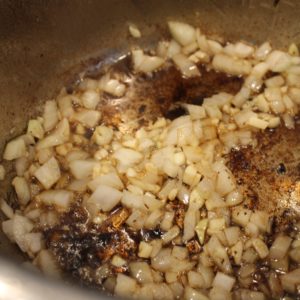
If needed, add a bit more vegetable oil. Add the onions and garlic to the pot and saute until fragrant, about 3 minutes.
Add a little bit of beef stock (1 or 2 tablespoons) to the pressure cooker and scrape the browned bits from the bottom of the pressure cooker using a wooden or plastic spoon.
In a small bowl, stir together the brown sugar, soy sauce (or coconut aminos), sesame oil, red pepper flakes, and ginger.
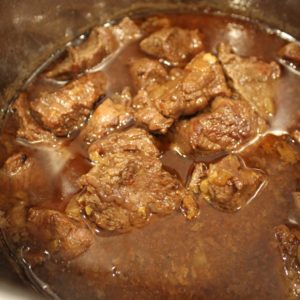
Add back in all of the beef to the pressure cooker, as well as any juices from the beef.
Pour in the soy sauce mixture, evenly covering the beef.
Close the lid, ensuring that the steam valve is closed. Select the meat/stew pressurized cooking function. Press the “adjust” button and choose “more/high” to set it for 45 minutes. Press “on/start” to begin cooking.
Once the unit has reached optimal cooking pressure (~15 minutes), the unit will beep once and start counting down from 45 minutes. You’ll notice that the pressure release valve (red) rises up during this time.
The pressure cooker will beep 3 times to alert you when cooking has finished. It will automatically go on to “keep warm” mode for up to 6 hours. Once cooking is complete, turn off the pressure cooker by pressing “stop/cancel” and unplugging the power cable.
Let the unit cool down for 15 to 20 minutes, or until the float valve drops down. Using an oven mitt, move the pressure release value to the “release” position to let out any remaining pressure in the unit. Wait again for the float value to drop down before opening the pressure cooker.
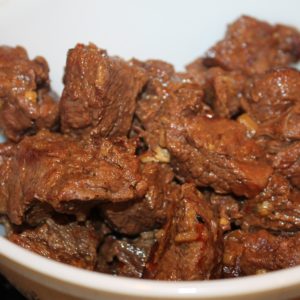
The meat should be really tender.
Remove the meat from the pot, keeping the liquid in the pot, and shred with two forks. Add to a large bowl.
Measure out about 1 cup of the cooking liquid and add to the bowl.
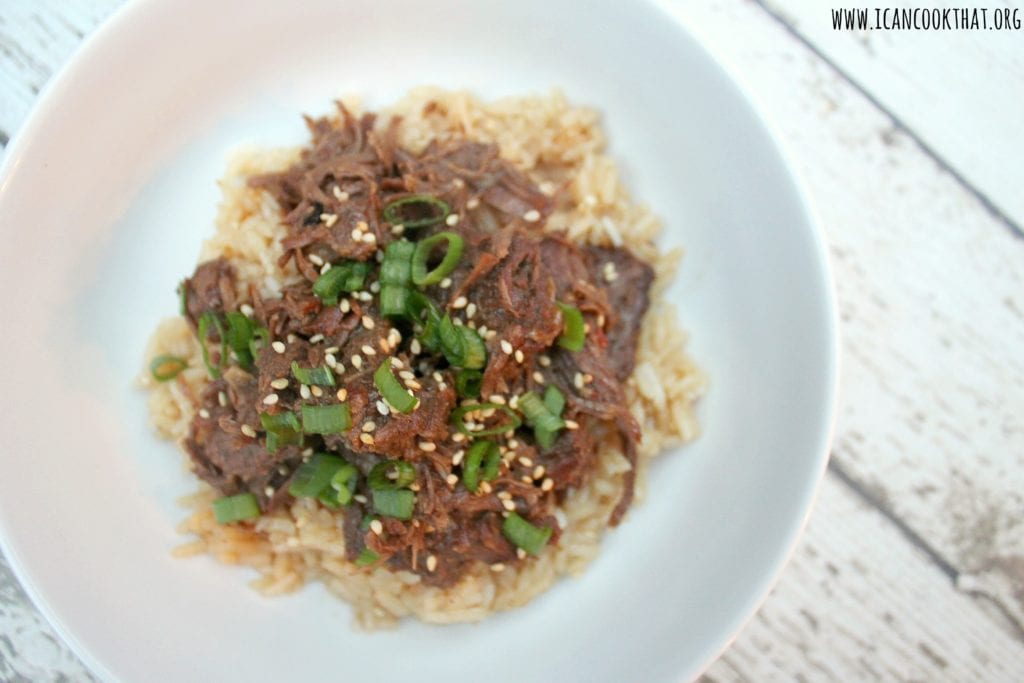
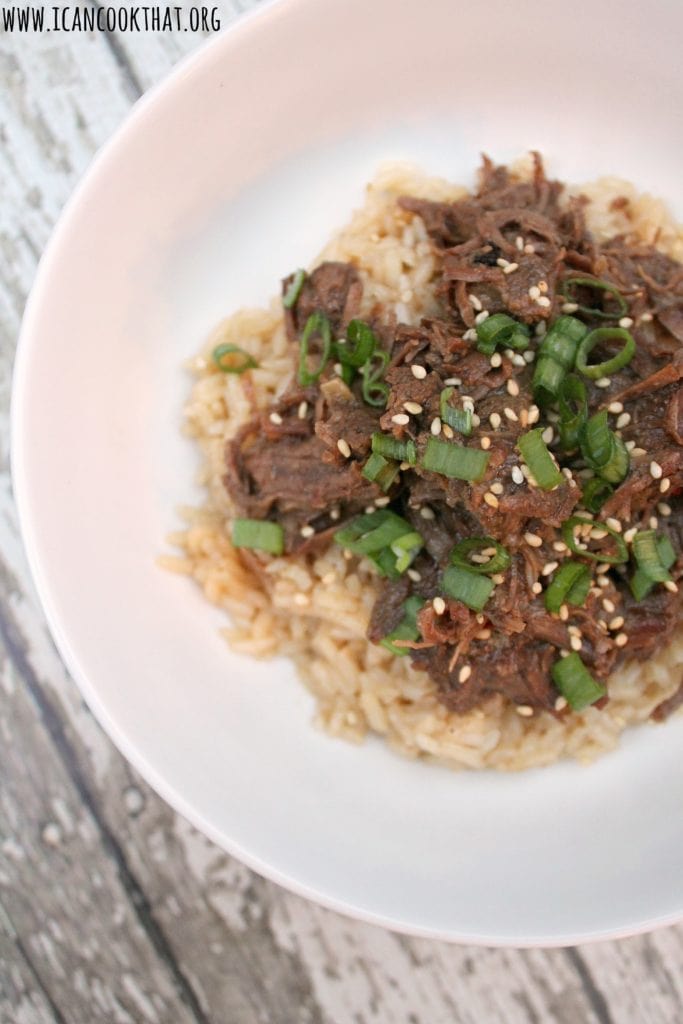
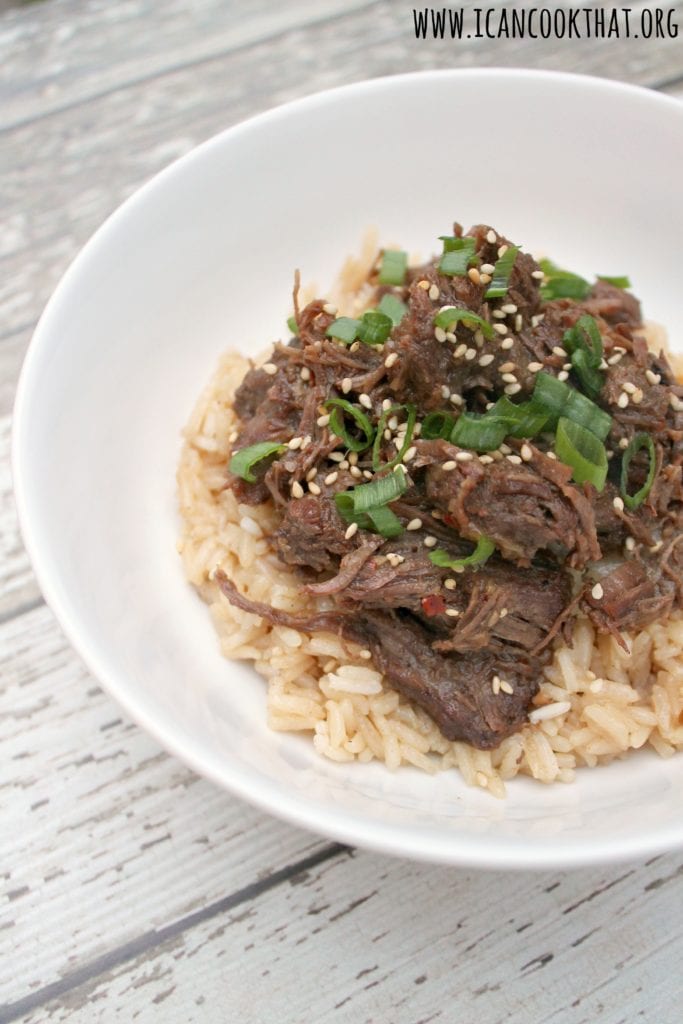
Fill bowls with rice and top with the shredded beef. Garnish with sesame seeds and green onions and serve.
The beef is wonderfully flavorful and juicy. My friends and I just gobbled this up! It’s most certainly not spicy so if you prefer some heat, add a bit more crushed red pepper.
This is a great make ahead dish as well. If doing so, add some more of the cooking liquid to the container before refrigerating, so that when you reheat it, there is still plenty of juicy liquid to drizzle over the top!
I also made the rice in the Cosori Multicooker and it came out great! (Tip: if you have extra cooking liquid, substitute some of that in for the water/broth in your rice.)
If you’re looking for more information about the Cosori Multicooker, check out my review post here (plus a recipe for Barbacoa Beef Tacos).
4 lbs chuck beef, cut into cubes, excess fat trimmed
1 small onion, chopped
6 garlic cloves, minced
1 to 2 tablespoons beef stock
1/2 cup brown sugar, lightly packed
1/2 cup reduced sodium soy sauce (or coconut aminos to make gluten free)
1 tablespoon sesame oil
1/2 teaspoon crushed red pepper flakes
1 teaspoon fresh ginger, minced
green onions, sliced, for garnish
white sesame seeds, for garnish
4 cups cooked rice
Instructions
To make, cut the beef into large chunks. Season with salt and pepper. (Go light on the salt, the soy sauce will provide all the salt you need!)
Press the “saute” function on your pressure cooker. Press the “cook time” button and increase the time to 25 or 30 minutes (it took me about 25 minutes to brown up all of my meat.) Press the “adjust” button and choose “more/high.” Press “on/start.” The pressure cooker will beep five times when it is preheated.
Carefully add the vegetable, oil and then add some meat to the pressure cooker (without crowding the beef).
Brown the meat on all sides. Remove from the pressure cooker and continue with the remaining beef.
When done browning the last batch, remove the final pieces and set aside. Press “stop/cancel” to turn off the saute function.
If needed, add a bit more vegetable oil. Add the onions and garlic to the pot and saute until fragrant, about 3 minutes.
Add a little bit of beef stock (1 or 2 tablespoons) to the pressure cooker and scrape the browned bits from the bottom of the pressure cooker using a wooden or plastic spoon.
In a small bowl, stir together the brown sugar, soy sauce (or coconut aminos), sesame oil, red pepper flakes, and ginger.
Add back in all of the beef to the pressure cooker, as well as any juices from the beef.
Pour in the soy sauce mixture, evenly covering the beef.
Close the lid, ensuring that the steam valve is closed. Select the meat/stew pressurized cooking function. Press the “adjust” button and choose “more/high” to set it for 45 minutes. Press “on/start” to begin cooking.
Once the unit has reached optimal cooking pressure (~15 minutes), the unit will beep once and start counting down from 45 minutes. You’ll notice that the pressure release valve (red) rises up during this time.
The pressure cooker will beep 3 times to alert you when cooking has finished. It will automatically go on to “keep warm” mode for up to 6 hours. Once cooking is complete, turn off the pressure cooker by pressing “stop/cancel” and unplugging the power cable.
Let the unit cool down for 15 to 20 minutes, or until the float valve drops down. Using an oven mitt, move the pressure release value to the “release” position to let out any remaining pressure in the unit. Wait again for the float value to drop down before opening the pressure cooker.
The meat should be really tender.
Remove the meat from the pot, keeping the liquid in the pot, and shred with two forks. Add to a large bowl.
Measure out about 1 cup of the cooking liquid and add to the bowl.
Fill bowls with rice and top with the shredded beef. Garnish with sesame seeds and green onions and serve.
I’ve mentioned before that my smoke alarms in my house are… sensitive. If I roast anything in the oven, they tend to go off. So when possible, I try to find alternate means to cook my food. In the summer, that means a ton of grilling. And as the weather cools off, my slow cooker becomes my best friend!
My latest Hungry Harvest (note: this is a referral link) included 2 pounds of red potatoes, so I wanted to try cooking the potatoes in my slow cooker.
This recipe for Slow Cooker Garlic Red Potatoes works well as a side to a recipe that already is using up your oven, like a roast turkey or chicken. It’s also a good option for a night that you can set the slow cooker in the early afternoon, and let it do its thing while you go about your day. When it’s dinner time, your side is all set, and you can quickly whip up a seafood dish, or sautéed chicken in no time!
Note: I was sent a Cosori Premium 6qt multicooker in order to write this post. Opinions are mine alone.
I’m not going to lie, pressure cookers have always kind of intimidated me. I was under the impression that they were difficult to use, and easy to mess up.
Well, after trying out the Cosori Premium 6qt pressure cooker over the past couple of weeks, I’m here to tell you they are actually quite easy to use!
source: cosori.com
Pressure cookers are definitely having a moment right now, but they’ve actually been around since the 1600’s in some form or another. Pressure cookers use steam pressure to help cook food faster. When cooking tough meat, pressure cookers help tenderize the meat and cook it surprisingly quickly in the process.
source: cosori.com
The Cosori Premium 6qt pressure cooker is actually a multicooker – it’s a pressure cooker, hot pot, steamer, slow cooker, food warmer, sauté pan, yogurt maker, and rice cooker – all in one! The unit has 17 smart cooking programs, but you can also adjust the cooking time, temperature, and pressure cooking levels to customize your cooking.
source: cosori.com
I couldn’t wait to test the pressure cooker out! I immediately thought of barbacoa – super tender and shredded meat (typically lamb or beef) with seasonings, so it’s time to try making Pressure Cooker Barbacoa Beef Tacos!
We eat a lot of tacos in my house, so I knew this would be a perfect test of the pressure cooker’s ability. This recipe actually uses two of the features available -” sauté/brown” and “meat/stew” pressure cooking. The Cosori premium pressure cooker is quite large (6 quarts!), so I decided to make a huge batch for future dinners. (It’s always helpful to have a full freezer for busy fall weeknights.)
Note: If you’ve been considering purchasing the Cosori Premium 6qt pressure cooker, click on this link and use code UCS9PK3K to receive 10% off! (The code is only good through October 31, 2018, so be sure to purchase before then!)
Ingredients: (makes 12 servings)
6 garlic cloves
1 medium onion, peeled and quartered
1 chipotle in adobo, plus 3 tablespoons chipotle in adobo sauce
2 tablespoons ground cumin
2 tablespoons ground oregano
1 teaspoon ground cinnamon
½ teaspoon ground cloves
zest and juice of 1 lime
2 tablespoons apple cider vinegar
2 cups beef broth, plus a tablespoon or two, divided
Romanesco is an intriguing little veggie. I don’t come across it terribly often, but when I do, I love using it in recipes like this recipe for Pasta with Roasted Romanesco and Capers.
Romanesco is similar to normal broccoli and cauliflower, and can be prepared the same ways. However, the flavor of Romanesco is much more muted. I personally love it roasted and tossed with pasta. The below recipe is heavily inspired by Bon Appetit’s Pasta with Roasted Romanesco and Capers recipe.
I received Romanesco in my latest Hungry Harvest (note: this is a referral link) and couldn’t wait to make this recipe!
Ingredients:
¼ cup sliced almonds
¼ cup plus 3 tablespoons olive oil; plus more for drizzling
2 tablespoons drained capers, divided
Salt, to taste
1 medium Romanesco, cored, cut into small florets
8 garlic cloves, thinly sliced
½ teaspoon crushed red pepper flakes, plus more for serving
½ cup dry white wine (or chicken/vegetable broth, if preferred)
One of my favorite new-ish shows is PBS’s No Passport Required with Marcus Samuelsson. Each episode explores the immigrant communities and food within different U.S. cities. There have only been 6 shows, but I’m hooked. Each episode includes Chef Samuelsson meeting, hanging out, and eating with members of the different immigrant communities in Detroit, New Orleans, Chicago, Queens, Miami, and Washington, D.C.
Not only is the show really interesting and informative, it’s difficult to not get hungry while watching,! PBS luckily includes some recipes on their website. But there was one I was hoping they’d post and at least as of this post, it’s not there: Ful Medames from the Washington, D.C. episode which highlighted the Ethiopian community in our nation’s capital.
Ful Medames is a breakfast dish of mashed fava beans, topped with hard boiled eggs, feta cheese, tomato, and jalapeno. I’ve had a bag of dried fava beans sent to me from Bob’s Red Mill in my pantry for a while now, and I knew they were destined for this recipe. Not only does Ful Medames sound fantastic, but my husband is currently training for a marathon, and this sounded like the perfect fuel after a long training run.
Ful Medames gets a lot of its flavor from a spice blend called berbere. Berbere is an Ethiopian spice mixture that usually includes chilies, garlic, ginger, basil, fenugreek, coriander, and cardamom. It is spicy, but I adjusted so this version doesn’t have too much heat. Feel free to add more for spiciness. For my local Philadelphians, I found berbere in The Head Nut in Reading Terminal, but there are recipes online to make your own at home if you don’t live near a spice shop. Penzey’s also has a version of berbere.
My version isn’t terribly authentic, but the general idea is there. I used soft boiled eggs instead, solely because I don’t love hard boiled eggs. Feel free to substitute in hard-boiled.
Note: Before cooking with the fava beans, be sure to soak them overnight.
Ingredients:
1 1/2 cups dried fava beans, soaked overnight
5 cups water, plus more as needed
4 tablespoons olive oil, divided, plus more for serving
1 medium sized onion, finely chopped
4 garlic cloves, minced
1 1/2 teaspoons berbere, divided
3/4 teaspoon cumin, divided
Salt and pepper, to taste
4 eggs (omit for vegan)
1 tomato (or ~4 oz cherry tomatoes), finely chopped
1 jalapeno, seeds and membranes removed, finely chopped
I’ve mentioned before that once warmer weather is here, I make it a priority to use my grill instead of my oven/stovetop whenever I can, like with this recipe for Grilled Lamb Pita Pockets. It keeps the temperature down in my house, and it’s super easy to grill! Plus, who doesn’t love the flavor that grilling adds to food?
I had a craving for lamb this week, so I decided to make grilled lamb pita pockets for dinner one night. I grilled lamb meatballs on skewers and then topped the meatballs with a drizzle of tzatziki and a Greek-inspired pesto sauce with some extra feta and cucumbers for good measure. I unfortunately didn’t have any tomatoes on hand, but would strongly suggest adding chopped tomatoes as well!
One of my favorite summer foods is corn. A nice grilled corn on the cob just makes my day!
But I had never tried Elote before, so I figured it was time to do so!
Elote, or corn on the cob in Spanish, is a Mexican grilled corn brushed with a creamy mixture of mayo, sour cream, cotjia cheese, chili powder, and cilantro.
The result is absolutely crave-worthy!
Ingredients:
1/4 cup mayonnaise
1/4 cup sour cream
1/2 cup grated Cotija cheese, plus more for serving
1/2 teaspoon chili powder, plus more for serving
2 garlic cloves, finely minced
1/4 cup finely chopped cilantro, plus more for serving
4 ears corn, shucked (if possible, keep an inch or so of the stalk for easy eating)
Now that grilling season is in full swing, I am grilling anything and everything I can, and yes, that includes Grilled Clams in Lemon Butter Sauce!
This recipe for grilled clams is SO easy, and can be made completely on your grill (just make sure you have a cast iron or other grill-safe pot for the sauce, if not, you can make it on your stovetop).
It’s an awesome appetizer to share with friends, just don’t forget the crusty bready for dipping!
Ingredients:
3 dozen clams
2 sticks salted butter (1 cup)
the juice and zest of 1 lemon
2 garlic cloves, finely minced or pressed through a garlic press
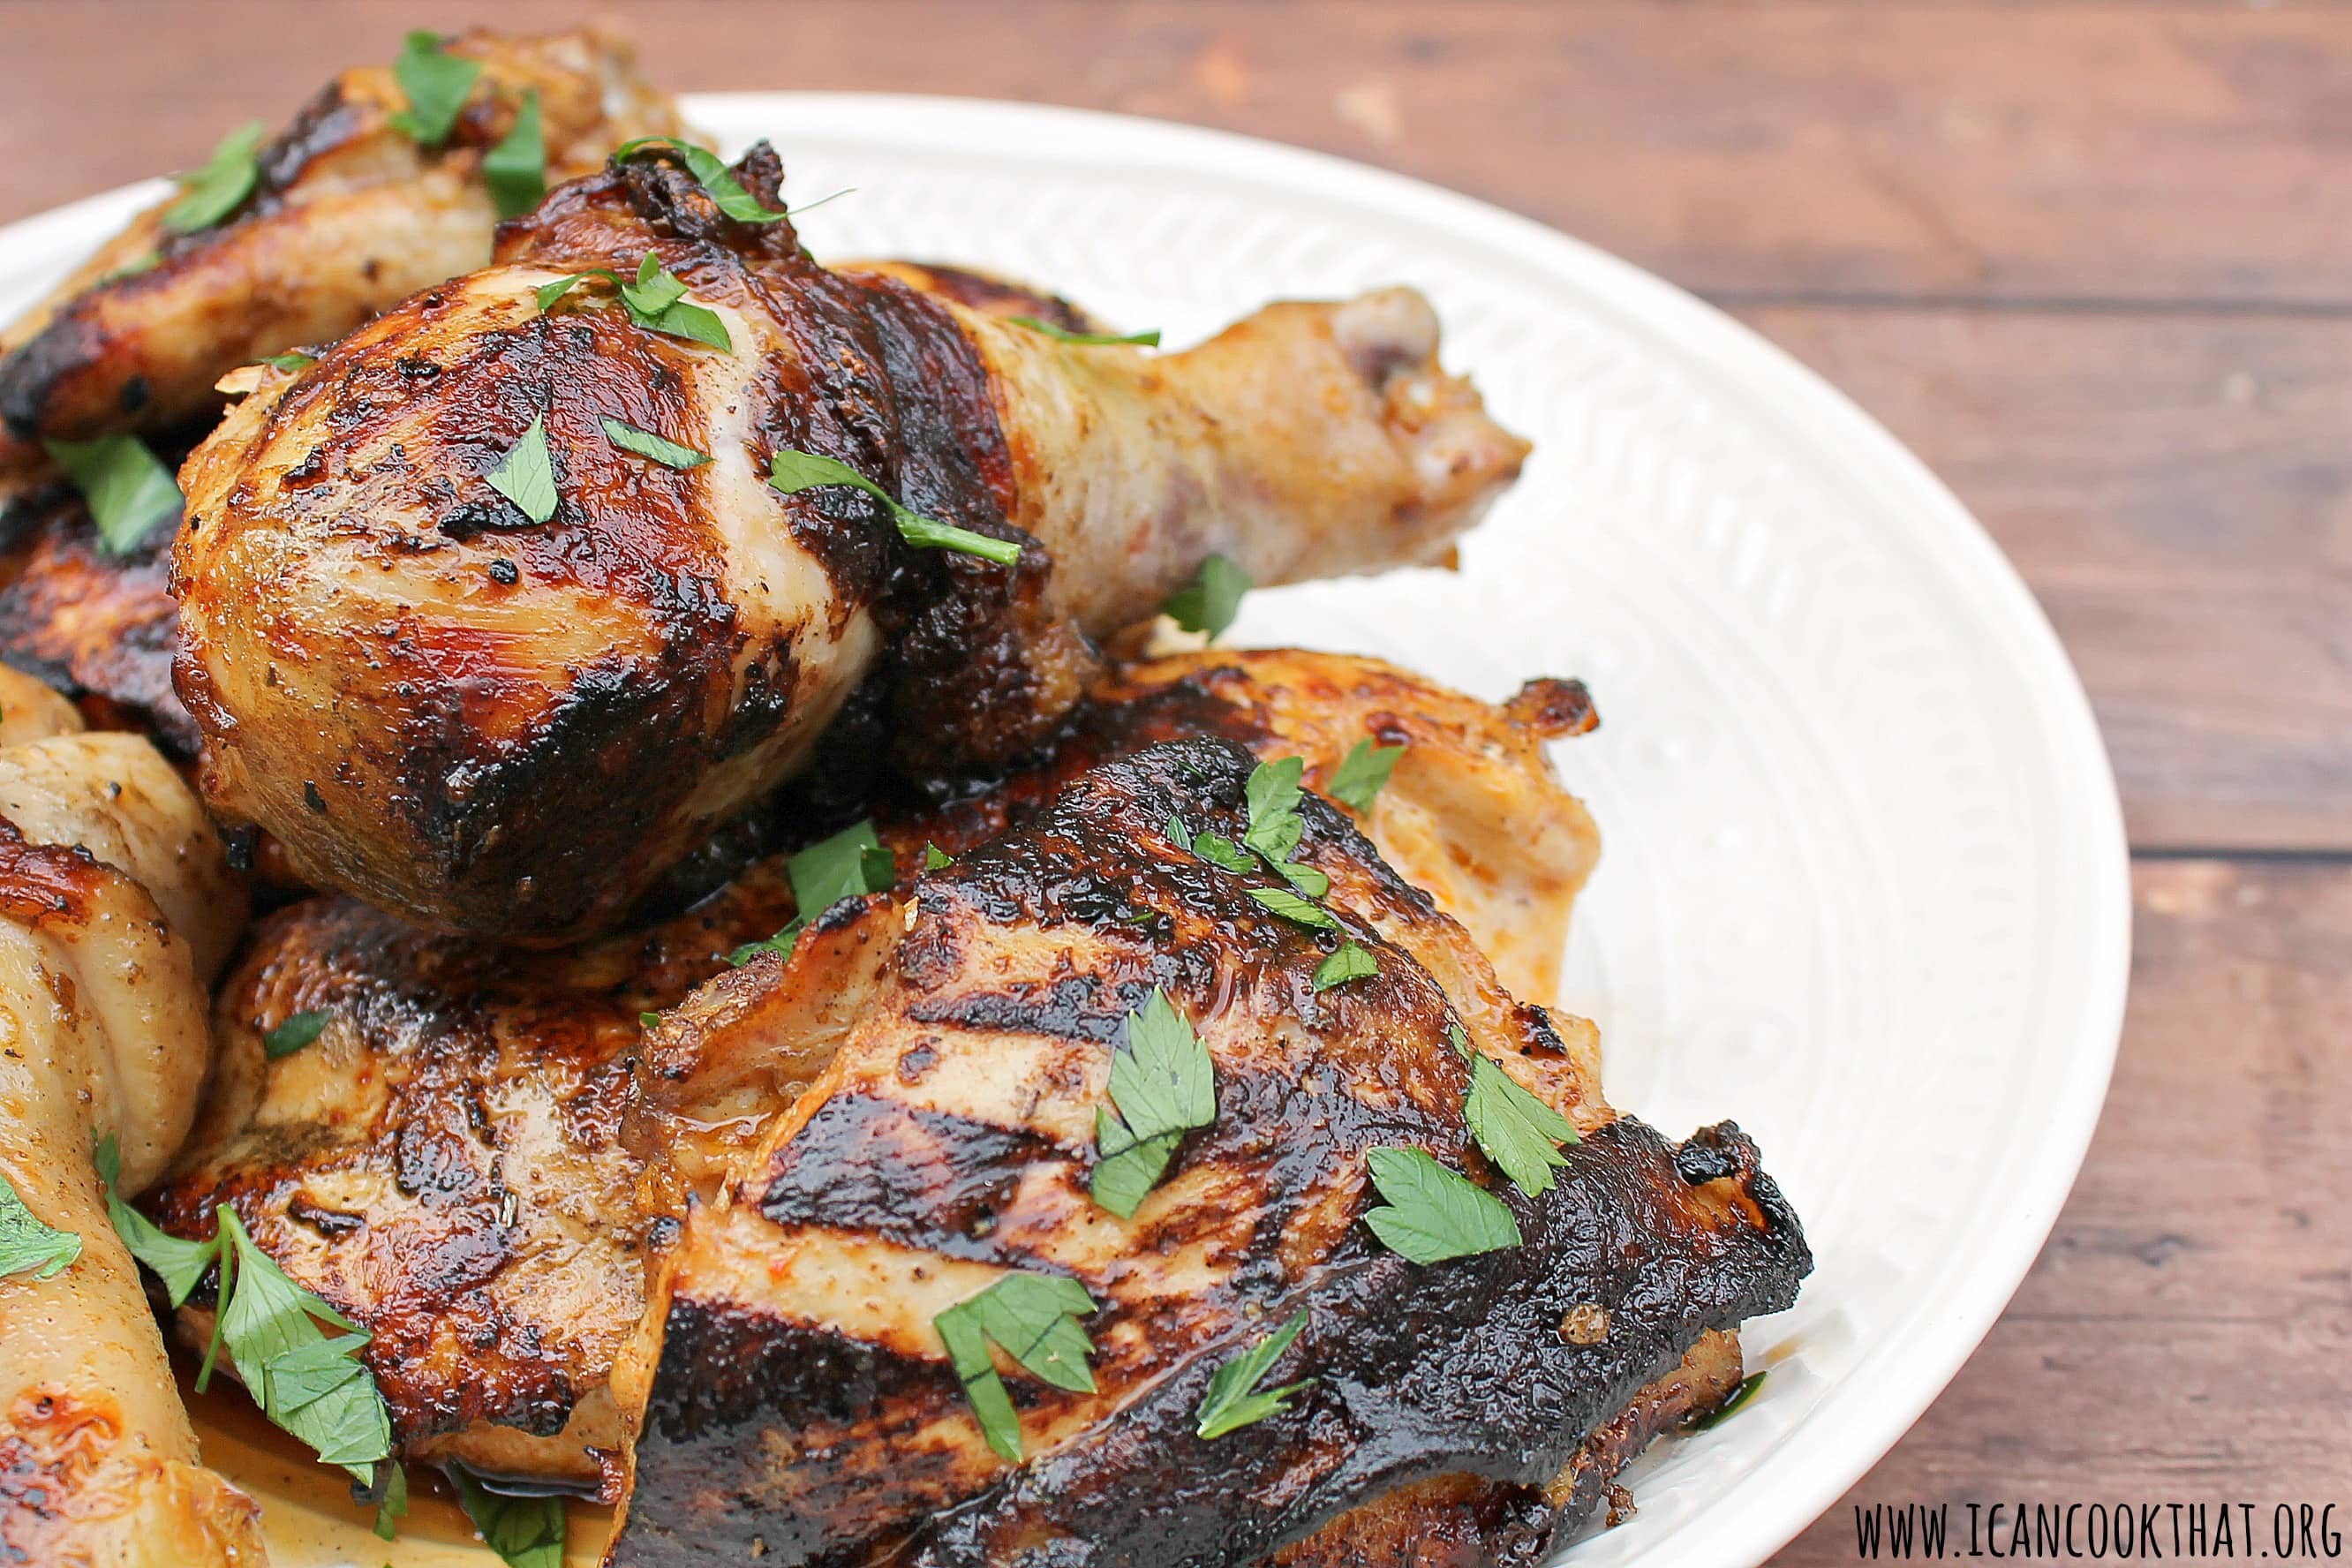
Psst. Save this recipe for Easy Grilled Marinated Chicken. It will definitely become a go to grilling recipe for you! If you’ve been following my blog for a while, you probably know how much I love my grill. I would grill absolutely everything if I could (and honestly, I’ve tried, including grilled guacamole, a grilled cocktail, and a grilled cheese plate.)
So, be prepared for plenty of grilling recipes this summer! I wanted to start off a bit simple – an easy grilled marinated chicken recipe.
This does involve some prep time, you want the chicken to sit in the marinade for a few hours at least. For the most flavor, add the chicken to the marinade the night before.
Note: I was sent a box of Vidalia onions to make this post. Opinions are mine alone.
When I first received a box of Vidalia onions, I knew I had to make French Onion Soup. The sweetness of the onions, especially after caramelizing, is perfect for this recipe.
French Onion Soup is a favorite of mine. Who doesn’t love comforting soup with a bunch of bread and cheese goodness on top?
My version below is adapted from a recipe I found on Food Network.
Note: I was sent a copy of The Freds at Barneys New York Cookbook for review. All opinions are mine alone.
The Freds at Barneys New York Cookbook is the definitive cookbook by the celebrated chef and managing director (Mark Strausman) of Freds at Barneys New York, one of New York’s most beloved restaurants with locations in Los Angeles and Chicago.
Barneys New York, with its flagship store on Madison Avenue, is a world-famous cutting-edge fashion destination, and a true New York phenomenon. And since 1996, Barneys’ restaurant Freds at Barneys New York–named after found Barneys Pressman’s son Fred–has been offering in food what Barneys offers in fashion: a luxury destination that provides a level of personal service second to none, where the food keeps their celebrity clientele coming back for more.
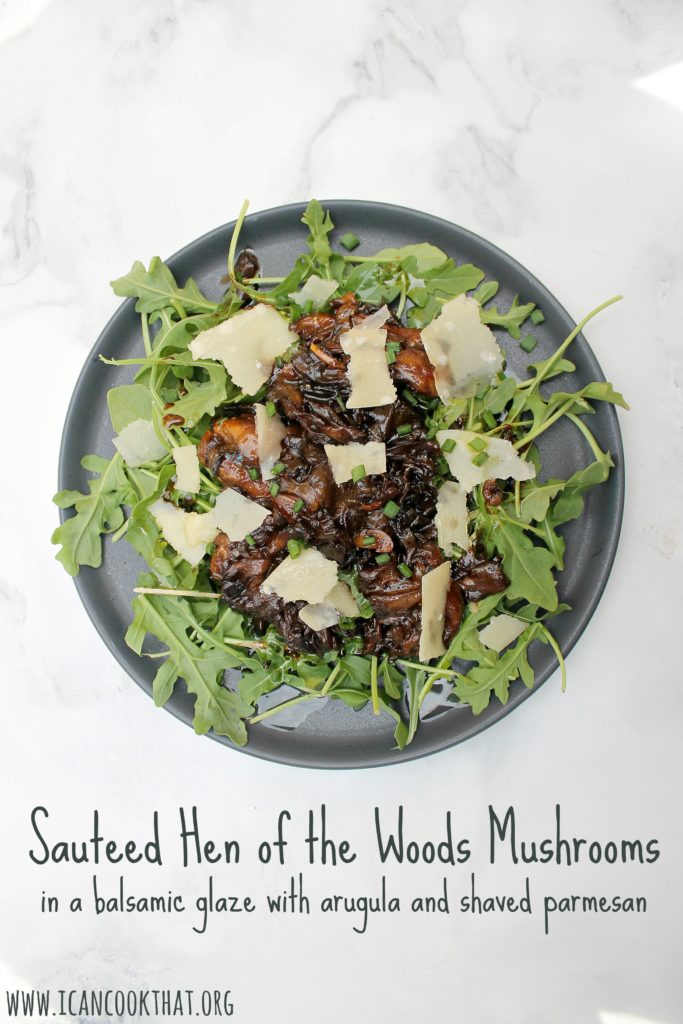
In The Freds at Barneys Cookbook, Strausman invites you into the kitchen of this restaurant institution and teaches you how to bring a piece of New York chic into your own home. The cookbook is filled with awesome recipes from the restaurant, such as Belgian Fries or Estelle’s Chicken Soup, Mark’s Madison Avenue Salad or Chicken Paillard, Traditional Bolognese (or Vegan!) or Cheese Fondue Scrambled Eggs, and commemorates all of the delicious recipes Freds has served over the years at the Madison Avenue, Chelsea, Beverly Hills, and Chicago locations.
This recipe for sauteed hen of the woods mushrooms caught my eye. I love mushrooms, especially hen of the woods mushrooms. Also known as maitake mushrooms, these mushrooms have a feathery texture but pack some hearty flavor.