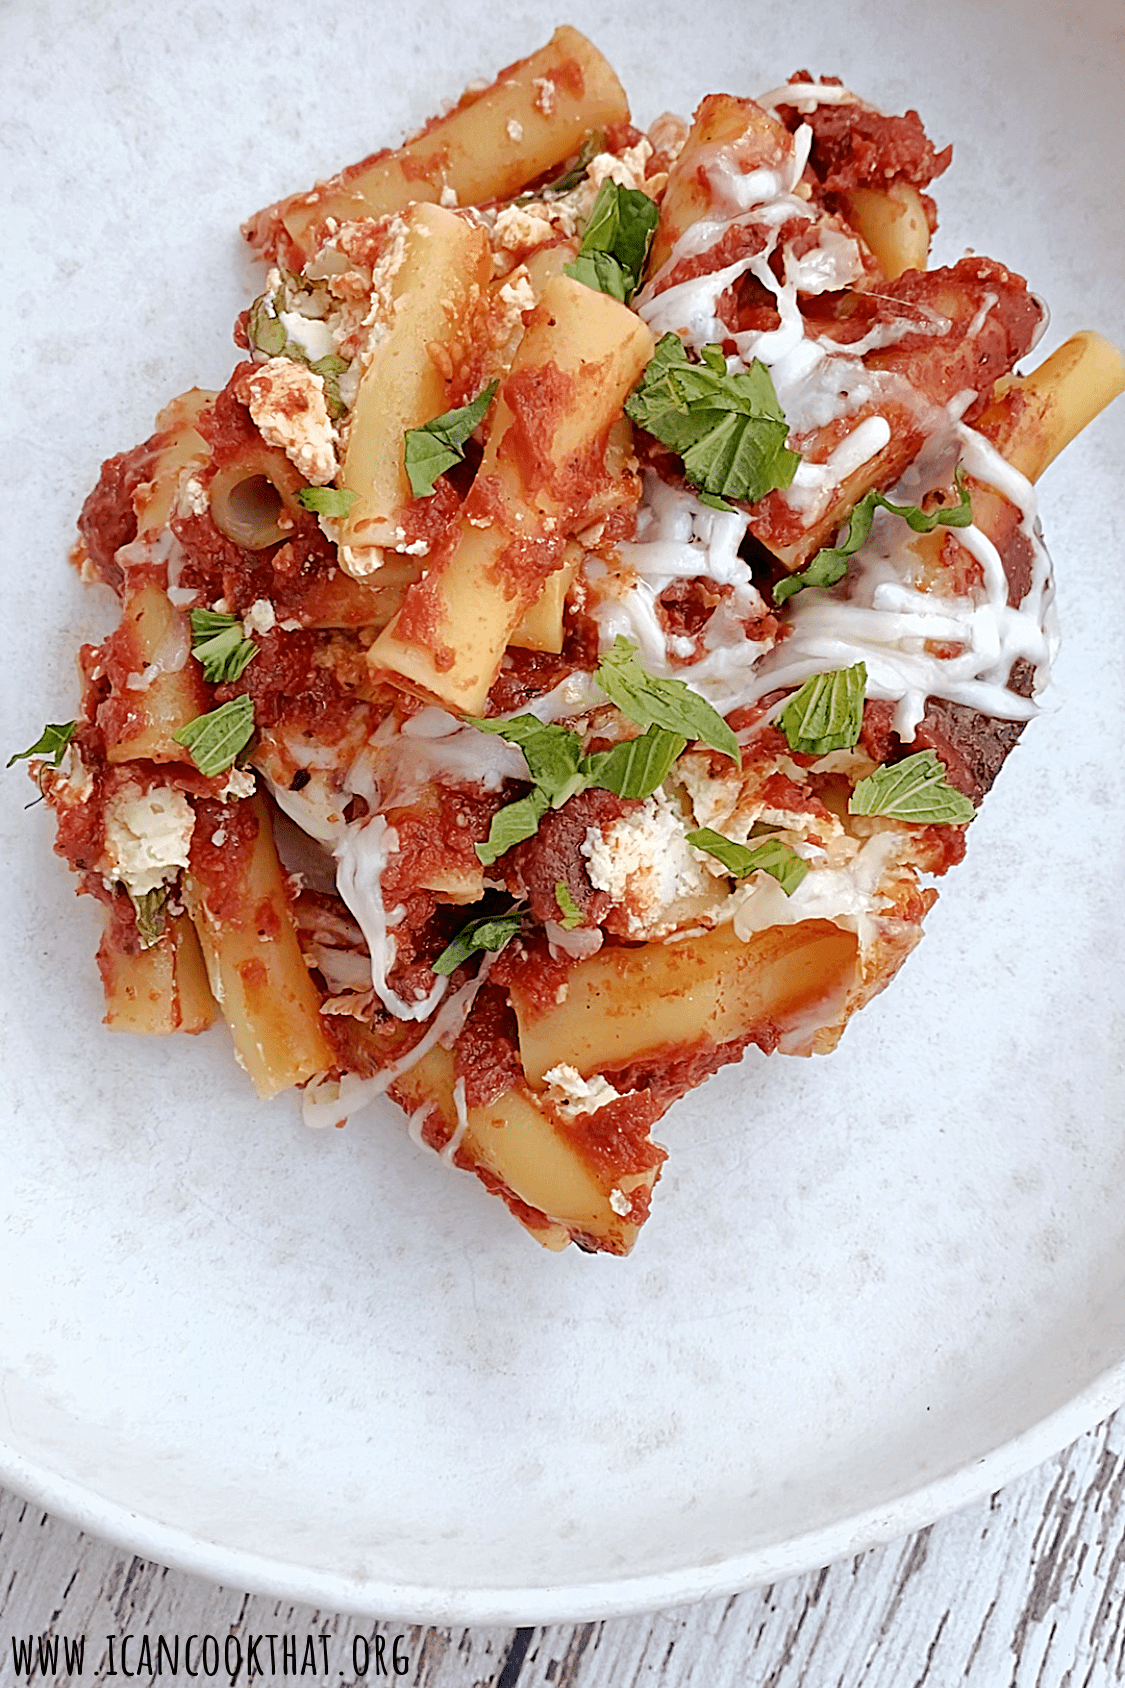
Slow Cooker Baked Ziti

A friend reached out to me with a food challenge: how to make baked ziti that will be hot and ready when they come back from a christening. A Slow Cooker Baked Ziti recipe seemed like the perfect solution!

Naturally, I had to do some experimenting so that I could give her a recipe to use that I know will work for her needs.

This recipe for Slow Cooker Baked Ziti involves layering ingredients in your slow cooker (paid link). letting it cook for 2 1/2 hours, and then adding some mozzarella cheese on top for ultimate cheesiness!

Ingredients:

  • 1 (28 oz) can crushed tomatoes
  • 1 (28 oz) can tomato puree
  • 1 (15 oz) can tomato sauce
  • 1 tablespoon tomato paste
  • 1 tablespoon Italian seasoning
  • 1 teaspoon garlic powder
  • 1 teaspoon onion powder
  • 1 (15 oz) container ricotta cheese
  • 2 large eggs
  • 1/2 cup chopped fresh basil leaves
  • salt and pepper, to taste
  • 1 tablespoon olive oil
  • 1 (16 oz) box ziti pasta
  • 1 cup grated parmesan cheese
  • 1 cup shredded mozzarella cheese

Continue reading Slow Cooker Baked Ziti

Homemade Baked Beans

Barbecue season is upon us, and many of us are hoping to enjoy some socially distant outdoor time with friends and family. So I wanted to share the perfect recipe to bring along to a barbecue: homemade baked beans!

This recipe takes about an hour and a half to make but can be made ahead of time. The beans can be served warm or at room temperature.

Ingredients (makes 10 servings):

  • 1 tablespoon olive oil
  • 1/2 pound bacon, chopped
  • 1 onion, chopped
  • 3 garlic cloves, minced
  • 1 bell pepper, chopped (I used a yellow pepper)
  • 2 (15 oz) cans pinto beans, drained and rinsed
  • 2 (15 oz) cans red kidney beans, drained and rinsed
  • 3/4 cup ketchup
  • 1/2 cup packed brown sugar
  • 1/4 cup molasses
  • 1/2 tablespoon hot sauce (I used Tobasco Chipotle)
  • 1 tablespoon Worcestershire sauce
  • 1 1/2 tablespoons stone ground mustard (or any mustard you prefer)
  • 1/2 teaspoon each of salt and black pepper

Continue reading Homemade Baked Beans

Baked Stuffed Artichokes

Note: I received a box of produce from Misfits Market in order to write this post. Opinions are mine alone.

I really like stuffed artichokes, but the idea of making them has always kind of intimidated me. I finally got up the courage to try them out when I received a box from Misfits Market with four lovely artichokes inside.

If you’ve never heard of Misfits Market, it was born from a mission to bring delicious, fresh, and affordable misfit produce to people everywhere and reduce food waste at a scale that creates positive and lasting impact.

Every box of Misfits produce benefits farmers, helps prevent food waste, and ultimately helps save the environment. Misfits is Philadelphia and New Jersey based but is rapidly expanding. The company rescues produce from regional farms and distributes it throughout the Northeast in three business days or less.

Misfits Market has two sizes of boxes: the Mischief and the Madness with a variety of fruits and veggies in each one. You can learn more about them here.

You’ll see more posts from me showing how I used my box, but let’s get back to the artichokes! My mother-in-law makes a batch of stuffed artichokes around Christmas and I am always amazed with the amount of work they can take! So this version for Baked Stuffed Artichokes is a bit of a cheat. Cutting them in half and baking them takes some of the “stuffing” work out, but not all of it.

Ingredients:

  • 4 artichokes
  • 3 lemons, juiced
  • 4 tablespoons (1/2 stick) unsalted butter
  • 1 large shallot, minced
  • 3 garlic cloves, minced
  • 1/4 cup dry white wine
  • 2 cups Italian breadcrumbs
  • 1 tablespoon fresh parsley, chopped, plus more to taste
  • salt and pepper, to taste

Continue reading Baked Stuffed Artichokes

Baked Chicken Parmesan

Happy Carnevale! Carnevale is celebrated in Italy 40 days before Easter. It is the last hurrah before Lent begins. (It’s similar to Mardi Gras). The word “carnevale” actually means “no meat” in Latin, so the best way to celebrate this holiday is with some protein before fasting begins for Lent.

Redpack Tomatoes sent me a package of assorted canned tomatoes to get me in the spirit of Carnevale, and included some tasty recipes to go along with it. I decided to make Chicken Parmesan, one of my favorite comfort foods. I adapted the recipe from Redpack, but decided to bake the chicken rather than pan fry it, so here is my recipe for Baked Chicken Parmesan.

Redpack is also offering one reader the chance to win the same kit I was sent! It includes:

  • 1 20-oz can of Redpack crushed tomatoes
  • 1 28-oz can of Redpack whole peeled tomatoes
  • 1 28-oz can of Redpack diced tomatoes
  • 1 6-oz can of Redpack tomato paste


Details on how to enter after the recipe below.


Redpack is also hosting a Facebook promotion running until March 4 where 1,000 Redpack followers will win a Redpack branded apron each week. One grand prize winner will receive a pasta stock pot, pasta-related serveware, and a selection of Redpack products.


Ingredients:

  • 3/4 cup Italian breadcrumbs
  • 3/4 cup grated Parmesan cheese
  • 1 cup flour
  • 2 eggs, lightly beaten
  • 4 boneless skinless chicken breasts
  • cooking spray
  • 3 tablespoons extra virgin olive oil
  • 4 cloves garlic, minced
  • 3 shallots, peeled and chopped
  • 1 (28 oz) can Redpack Crushed Tomatoes in Thick Puree
  • 1 teaspoon fresh oregano
  • 3 tablespoons chopped fresh parsley
  • 1/4 teaspoon crushed red pepper
  • 1/2 cup chopped fresh basil
  • 3/4 cup shredded mozzarella cheese

Continue reading Baked Chicken Parmesan

Baked Avocado and Feta Wontons

With the holidays fast approaching, everyone needs some new appetizer and hors d’oeuvres options for guests. Nasoya must have known I was in need of some new creative recipes, because they sent me a great holiday entertaining kit to try out their Wonton Wraps. The kit included some fun inventive recipes using wonton wraps, so I wanted to share one of them with you!


These Baked Avocado and Feta Wontons come together in 30 minutes and are the perfect bite-sized hors d’oeuvres for your next party. The wraps are filled with a mixture of avocados, sun-dried tomatoes, and feta cheese and are served with a lime flavored dipping sauce.


Note: I was sent a holiday entertaining kit to review Nasoya wonton wraps. My opinions are my own.


Ingredients:

  • 2 large avocados, chopped into bite sized pieces
  • 4 tablespoons chopped sun-dried tomatoes
  • 1/4 cup crumbled feta cheese
  • 1/2 tablespoon minced garlic
  • 2 tablespoons red onion, finely chopped
  • 24 Nasoya Wonton Wraps
  • 1 egg white
  • the juice of 3 limes
  • 2 tablespoons olive oil
  • salt and pepper, to taste

Continue reading Baked Avocado and Feta Wontons

Slow-Baked Chicken Thighs w/ Tomato, Fennel & Lemon

I am a huge fan of quick and easy meals, or “set it and forget it” meals — when I come home after work, I want to eat within 45 minutes of being home! But, on Sundays I have the time to experience the magic that is slow roasting — something beautiful and delicious happens when food cooks at a low temperature for a long period of time.

I originally thought I might change this into a slow cooker recipe so that I could once again, set and forget it. But the recipe called for basting the chicken over a period of time so I thought I should stick to the original method of cooking. (I have never basted anything before; how I managed to avoid this technique for almost three decades is beyond me.)

Past the basting part, this recipe really isn’t very labor-intensive. You do need to give yourself around 2 and a half hours to make it though, so this is definitely a weekend recipe.  This recipe is in the latest issue of Cooking Light. And it’s worth the wait. This is one of the best chicken meals I’ve made in recent memory.

Ingredients:

  • 2 tablespoons butter, divided
  • 1 cup(~1 larger bulb) fennel bulb, cut into thin slices
  • 1/4 teaspoon kosher salt
  • 1 pounds skinless, boneless chicken thighs
  • 1 (28-ounce) can whole plum tomatoes, drained
  • 6 garlic cloves, smashed and torn into large pieces
  • 2 lemons, sectioned
  • 1 tablespoon fresh thyme leaves
  • 1 (1-ounce) slice whole-wheat bread
  • 1 tablespoon grated Parmesan cheese
  • 3 tablespoons chopped fresh flat-leaf parsley

Continue reading Slow-Baked Chicken Thighs w/ Tomato, Fennel & Lemon

Baked Black Beans with Chorizo

You can never have too many party appetizers in your cooking arsenal. I wanted to try something a little different than the apps I’ve been posting recently. This dish is a layered dip with black beans, chorizo, tomatoes, and cheese and would be perfect for watching the game or any other party!

Ingredients:

  • 1 tablespoon olive oil
  • 1 cup diced Spanish chorizo
  • 1 1/2 cups chopped onion
  • 1 jalapeño pepper, sliced
  • 1/2 teaspoon salt
  • 1/2 teaspoon ground cumin
  • 5 garlic cloves, minced
  • 3/4 cup fat-free, lower-sodium chicken broth
  • 2 (15-ounce) cans black beans, rinsed and drained
  • 1 cup chopped seeded tomato
  • 1 cup (4 ounces) shredded Monterey Jack cheese
  • 1/4 cup thinly sliced green onions

Continue reading Baked Black Beans with Chorizo

Vegan Chocolate Chip Walnut Cookies

I personally am not vegan. But as more of my friends dabble in veganism, I have been getting more requests to do some vegan friendly recipes. I’m honestly finding vegan baking to be relatively easy; most of the substitute ingredients are already in my pantry!

I received a bag of One Degree Organics Sprouted Spelt Flour along with some vegan baking recipes that sounded really tasty! I have never made a vegan cookie before so I appreciated the nudge towards trying and decided to make some Vegan Chocolate Chip Walnut Cookies.

Sprouted Spelt Flour works generally like normal flour, you just need to adjust your dry-to-wet ingredient ratio (less dry ingredients or more wet ingredients). Sprouted Spelt Flour contains more fiber, vitamins, and essential fatty acids than regular flour so it seems like a generally good switch to make. (I’m not giving up eating cookies, but hey, at least I’ve increased my fiber!)  🙂


One Degree Organics prides itself on using only organic foods grown using natural veganic methods for its grains used in its cereal, bread, and flours. The company also does not add any synthetic ingredients and practices sustainable growing methods. One Degree Organics actually includes a QR code and alphanumeric code on each package so that you can learn about where that specific product came from and the family of farmers behind it. Pretty cool right?


So I was really excited to use their Sprouted Spelt Flour in this recipe! Because this is my first time baking vegan cookies, I kept the recipe mostly intact. I did add some walnuts for a bit of crunch which resulted in these Vegan Chocolate Chip Walnut Cookies!

Ingredients:

  • 1 1/3 cup One Degree Organic Sprouted Spelt Flour
  • ¼ cup Coconut Palm Sugar
  • ½ teaspoon baking powder
  • ¼ teaspoon sea salt
  • 1/3 cup + 2 tablespoons maple syrup
  • 1 ½ teaspoons vanilla powder or extract
  • ¼ cup + 3 tablespoons melted coconut oil
  • ½ cup vegan chocolate chips
  • 1/4 cup walnut pieces

Continue reading Vegan Chocolate Chip Walnut Cookies

Pretzel-Crusted “Fried” Chicken

Did you know that April 26 is National Pretzel Day? In celebration, Quirk Books is having a few bloggers post pretzel recipes this week on their blog. And today is my post! So if I’ve peaked your interest with the title of this post (Pretzel-Crusted “Fried” Chicken), head on over to their website to check it out!


Don’t forget to check out the other delicious posts featured as well!


Lemon Earl Grey Squares

My sister and dad have their birthdays within 2 days of each other. And this year, my mom was away on Mother’s Day so we didn’t get to celebrate. So when I went home to celebrate the birthdays of my sister and dad, I wanted to bring a little something for my mom as well. When the last issue of Cooking Light had a recipe for Lemon Early Grey Squares, I knew they would be perfect. My mom is obsessed with everything bergamot. She’s also a huge citrus (specifically lemon) fan. I hope she likes them!

Ingredients:

For the Crust:

  • Cooking spray
  • 5 3/5 ounces all-purpose flour (about 1 1/4 cups)
  • 1/3 cup powdered sugar
  • 2 Earl Grey tea bags, divided
  • 1/8 teaspoon salt
  • 8 tablespoons chilled butter, cut into pieces

For the Filling:

  • 1/4 cup fresh lemon juice (about 2 lemons worth)
  • 1 cup granulated sugar
  • 2 tablespoons all-purpose flour
  • 1/2 teaspoon baking powder
  • 2 teaspoons grated lemon rind (about 2 lemons worth)
  • 3 large eggs
  • 1 tablespoon powdered sugar

Continue reading Lemon Earl Grey Squares

Coconut Lemon Poppy Seed Muffins

Muffins are the perfect Sunday baking activity to set yourself up for breakfasts throughout the week. I haven’t made a batch in so long so I’m happy I finally had time to do so! I was given the opportunity to try Tropical Traditions Coconut Oil and I thought the best way to try the oil out would be in baking. (I adapted this recipe for Coconut Lemon Poppy Seed Muffins from the 1 Mix, 100 Muffins cookbook.)


Coconut oil can be used like butter in its solid state and like oil in its liquid state. It does have a slight coconut flavor to it so it’s a great way to enhance the flavor of many dishes. These Coconut-Lemon Poppy Seed Muffins have just a hint of coconut that is really complementary to the Lemon flavor.


Tropical Traditions is also sponsoring a giveaway! One lucky reader will win their very own jar of coconut oil! Details below.


Ingredients (this recipe makes a dozen muffins):
2 cups all-purpose flour, leveled with a knife
1 tablespoon baking powder
1/8 teaspoon salt
2 eggs
1 cup milk
6 tablespoons Coconut Oil, melted and allowed to cool slightly
the zest of 2 lemons
1/2 cup sugar, plus 1 tablespoon sugar
2 tablespoons poppy seeds

Note: The method I will list below is the one I ended up using for this recipe. And the reason I used this method was because I completely forgot to add in the sugar and poppy seeds at the correct time! Anyways, the muffins turned out fine. Whew.
Preheat your oven to 400 degrees. Line a cupcake/muffin pan with 12 paper liners. Add 6 tablespoons coconut oil to a small saute pan over medium heat until completely melted. Remove from heat and reserve.
Sift the flour, baking powder, and salt. (If you have a stand mixer, add the dough hook and turn it on low for a minute or two. It will break up all the chunks, just as good as sifting!)


In a separate bowl, lightly beat the eggs.


Add the milk, melted coconut oil, and lemon rind. And mix with a whisk to combine.


Make a well in the flour mixture and add the wet mixture to the bowl.


Stir until just combined (I used the lowest setting on my stand mixer. You can just use a spatula.)


Add the sugar and poppy seeds, stirring until just combined.


Add the batter to the muffin pan. To get equal sized muffins, use a small ladle or an ice cream scoop to portion out the batter.


Bake the muffins for 20-22 minutes; you want the muffins to have risen and be slightly golden brown on top, or when a toothpick inserted into the center of the cupcake comes out clean.


Allow to cool for 5 minutes in the pan and then remove.


So everyone knows how delicious normal Lemon Poppy Seed Muffins are.  The coconut oil brings the muffins from good to great!


They are so fragrant. I was having trouble photographing them because I kept trying to eat them!


There is definitely a taste of coconut present without it being overwhelming; I find that coconut can really overtake a dish sometimes.


The lemon still shines through and is wonderfully sweet (due to all that sugar!)


Disclaimer: Tropical Traditions provided me with a free sample of this product to review, and I was under no obligation to review it if I so chose.  Nor was I under any obligation to write a positive review or sponsor a product giveaway in return for the free product.
So on to the giveaway!

Win 1 quart of  Gold Label Virgin Coconut Oil!
Tropical Traditions is America’s source for coconut oil. Their Gold Label Virgin Coconut Oil is hand crafted in small batches by family producers, and it is the highest quality coconut oil they offer. You can read more about how virgin coconut oil is different from other coconut oils on their website: What is Virgin Coconut Oil? You can also watch the video they produced about Gold Label Virgin Coconut Oil:
Tropical Traditions also carries other varieties of affordable high quality coconut oil. Visit their website to check on current sales, to learn about the many uses of coconut oil, and to read about all the  advantages of buying coconut oil online. Since the FDA does not want us to discuss the health benefits of coconut oil on a page where it is being sold or given away, here is the best website to read about the health benefits of coconut oil.
To enter, use the widget below. You have 8 chances to win (Writing a comment is mandatory, the rest are optional)! Giveaway ends this Friday, May 11 at 11:59PM EST. Good luck!

a Rafflecopter giveaway

<a href=”https://rafl.es/enable-js”>You need javascript enabled to see this giveaway</a>.
Guest Post from Christina of Spaghetti & Meatballs

I am so excited to announce my first guest post on I Can Cook That! I couldn’t ask for a better first guest poster. This delicious risotto recipe comes from Christina of Spaghetti & Meatballs. I’ve mentioned on here quite a few times my affinity for risotto. It was actually the first dish I made that helped me realize cooking isn’t nearly as difficult as I imagined. This particular risotto is a must try: the creaminess you expect from a risotto without the 30 minutes of constant stirring!
But first, a little bit about Christina and her blog. Christina invites us to explore Italian through her blog. She is a truly wonderful writer (she works as a freelance writer in the Philadelphia area) with posts that contain not only recipes that make your mouth water, but information about Italian food products (tomatoes, pasta, etc.), commentary on interesting articles from magazines, and a look into some of her family’s Italian food traditions. Definitely take the time to check out her blog, it is a great source of information, recipes, and just an overall great read!

So before I ramble on, let me pass it on to Christina:

Risotto is so deliciously decadent that it can turn any dinner into a special occasion. But despite my soft spot for the dish, risotto was relegated to the once-in-awhile section of my recipe book. Every risotto I’d made required significant prep time – including at least 30 minutes of nonstop stirring as the rice cooked.
Then I found a Real Simple risotto recipe that sounded too good to be true. Instead of constantly stirring, waiting for the rice to thicken, you just pop the entire pot into a preheated oven. I’d never heard of making risotto this way, but since Real Simple is one of my favorite recipe sources, I decided to take the leap.
Ingredients:
(this makes 4 servings)
2 tablespoons unsalted butter
1 shallot, chopped
kosher salt and black pepper
1/2 cup dry white wine
3 cups low-sodium vegetable stock
1 cup Arborio rice
1 cup frozen peas
4 ounces flat-leaf spinach, roughly chopped (about 2 cups)
1/4 cup grated Parmesan (1 ounce), plus more for serving
Heat the oven to 425° F. Melt the butter in an ovenproof pot over medium-high heat. Add the shallot, ½ teaspoon salt, and ¼ teaspoon pepper. Cook, stirring often, until the shallot is soft.
Pour in the wine and stir until it has almost evaporated. Then stir in the broth and rice. Bring the mixture to a boil.
Cover the pot and put it in the preheated oven. Cook until the rice is tender and creamy, about 20 minutes. (While the risotto cooked, I had plenty of time to chop spinach and grate Parmesan for the next step.)
Stir in peas, spinach, Parmesan, ½ teaspoon salt, and ¼ teaspoon pepper.
Sprinkle with additional Parmesan and serve.
The risotto turned out just as creamy and rich as others I’ve made the traditional way. I’m thrilled I found a time-saving technique for one of my favorite dishes that doesn’t sacrifice taste for convenience.
I can’t believe I’ve made it 26 years of my life without knowing this technique. It’s brilliant! And the colors are just beautiful. Thank you so much for sharing this with us Christina! To check out additional recipes and posts from Spaghetti & Meatballs, pop on over to her blog!

Snickerdoodles

I am back in cookie baking mode. This time around, I’m going the more traditional route. First on my list, classic snickerdoodles.

Ingredients

  • 3/4 cup granulated sugar
  • 2/3 cup light brown sugar
  • 1/2 cup butter, softened
  • 1 teaspoon vanilla extract
  • 1 large egg
  • 1 1/2 cups all-purpose flour (about 6 3/4 ounces)
  • 1 teaspoon baking powder
  • 1/2 teaspoon ground cinnamon
  • 1/4 teaspoon salt
  • 1/3 cup granulated sugar
  • 1 1/2 teaspoons ground cinnamon

Continue reading Snickerdoodles

Mushroom Mac and Cheese

I grew up in a mac & cheese from the box household. You know, the kind with the powered stuff that you add to the macaroni, plus butter and milk. My mom (inexplicably) referred to this as baked macaroni and cheese, so I didn’t even realize that baked mac & cheese was the actual way it was supposed to be cooked until much later in life. As absolutely delicious as I assume traditional baked mac and cheese is, I can’t justify taking all that time to make it (maybe on a weekend some day). Apparently I’m not alone on that thought, because Cooking Light Fresh Foods Superfast cookbook had a somewhat sped up version. This version adds in some mushrooms to make a hearty Mushroom Mac and Cheese.
Ingredients:
Sherry-Roasted Mushrooms
  1 package cremini mushrooms
  1 tablespoon olive oil
  Salt and pepper, to taste
  2 garlic cloves, thinly sliced
  Cooking Spray
  2 tablespoons dry sherry
  2 teaspoons chopped fresh oregano
8 ounces (half a box) uncooked elbow macaroni
1/4 cup all-purpose flour
1 small can of evaporated milk
1 cup (4 ounces) shredded fontina cheese
Fresh oregano leaves, for garnish

Preheat the oven to 450 degrees. Combine the mushrooms, olive oil and garlic cloves on a baking sheet coated with cooking spray. Season with salt and pepper.

Bake at 450 degrees for 15 to 20 minutes or until browned. While the mushrooms are cooking, bring a pot of water to a boil. Add the macaroni and cook according to package directions. Drain and set aside.
When the mushrooms are finished cooking, add to a small bowl. Stir in the sherry and oregano. Reserve. Keep the oven on but lower the temperature to 400 degrees.
Add flour to a large pan and gradually add the evaporated milk, stirring with a whisk. Cook over medium heat for 6 minutes or until thick and bubbly, continue to stir constantly.  Add the cheese and season with salt and pepper. I must have been all sorts of lazy this day because I didn’t even feel like shredding the cheese. I instead tore off small pieces and added it to the milk mixture, this ended up working out just fine.
Remove from heat and stir in the mushroom mixture and the pasta.
Add the pasta mixture to a 2 quart baking dish that’s been sprayed with cooking spray. Bake the pasta at 400 degrees for 25 minutes, or until it bubbles. Sprinkle with oregano leaves and serve.
Oh happy creamy deliciousness. I loved this pasta, especially when I got some of the crunchy baked parts in a bite. In retrospect, I really wish I added a light layer of panko on top, just to add more crunch to the dish. But even without that extra crunch, this mac & cheese was really good!
I think this method can be applied to many versions of mac & cheese to make it quicker. Use Gruyere or Cheddar instead of fontina. Add sage instead of oregano, or use truffles/truffle oil, the possibilities are endless!
Mushroom Mac & Cheese

Total Time: 1 hour

Yield: 4 servings

Ingredients

  • 1 package cremini mushrooms
  • 1 tablespoon olive oil
  • Salt and pepper, to taste
  • 2 garlic cloves, thinly sliced
  • Cooking Spray
  • 2 tablespoons dry sherry
  • 2 teaspoons chopped fresh oregano
  • 8 ounces (half a box) uncooked elbow macaroni
  • 1/4 cup all-purpose flour
  • 1 small can of evaporated milk
  • 1 cup (4 ounces) shredded fontina cheese
  • Fresh oregano leaves, for garnish

Instructions

  1. Preheat the oven to 450 degrees. Combine the mushrooms, olive oil and garlic cloves on a baking sheet coated with cooking spray. Season with salt and pepper.
  2. Bake at 450 degrees for 15 to 20 minutes or until browned. While the mushrooms are cooking, bring a pot of water to a boil. Add the macaroni and cook according to package directions. Drain and set aside.
  3. When the mushrooms are finished cooking, add to a small bowl. Stir in the sherry and oregano. Reserve. Keep the oven on but lower the temperature to 400 degrees.
  4. Add flour to a large pan and gradually add the evaporated milk, stirring with a whisk. Cook over medium heat for 6 minutes or until thick and bubbly, continue to stir constantly. Add the cheese and season with salt and pepper. I must have been all sorts of lazy this day because I didn’t even feel like shredding the cheese. I instead tore off small pieces and added it to the milk mixture, this ended up working out just fine.
  5. Remove from heat and stir in the mushroom mixture and the pasta.
  6. Add the pasta mixture to a 2 quart baking dish that’s been sprayed with cooking spray. Bake the pasta at 400 degrees for 25 minutes, or until it bubbles. Sprinkle with oregano leaves and serve.
Schema/Recipe SEO Data Markup by Yummly Rich Recipes
0.1
https://icancookthat.org/2011/12/mushroom-mac-and-cheese.html

Pumpkin Sticky Buns with Caramel-Pecan Drizzle

Today I wrote my first guest post over at A Culinary Journey with Chef Dennis. His page is truly stunning so I am honored to be the guest post this week. Stop on by Chef Dennis’ blog to see my post on Pumpkin Sticky Buns with Caramel-Pecan drizzle!
I think you are well aware of my pumpkin obsession by now (I have twelve other posts on here using pumpkin!) so I really wanted to do something special to round out my bakers dozen of pumpkin recipes. The recipe does take some time, so this would definitely be a weekend choice. But you can refrigerate the dough or even freeze it once it is shaped into the sticky buns. I hope you enjoy my post!
Exit mobile version