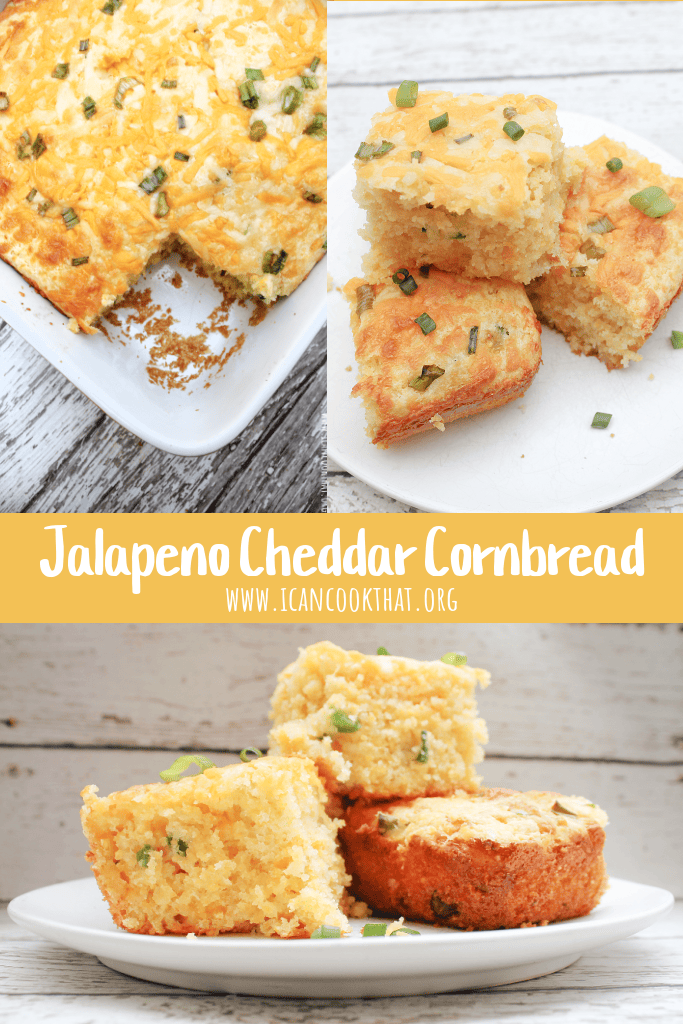
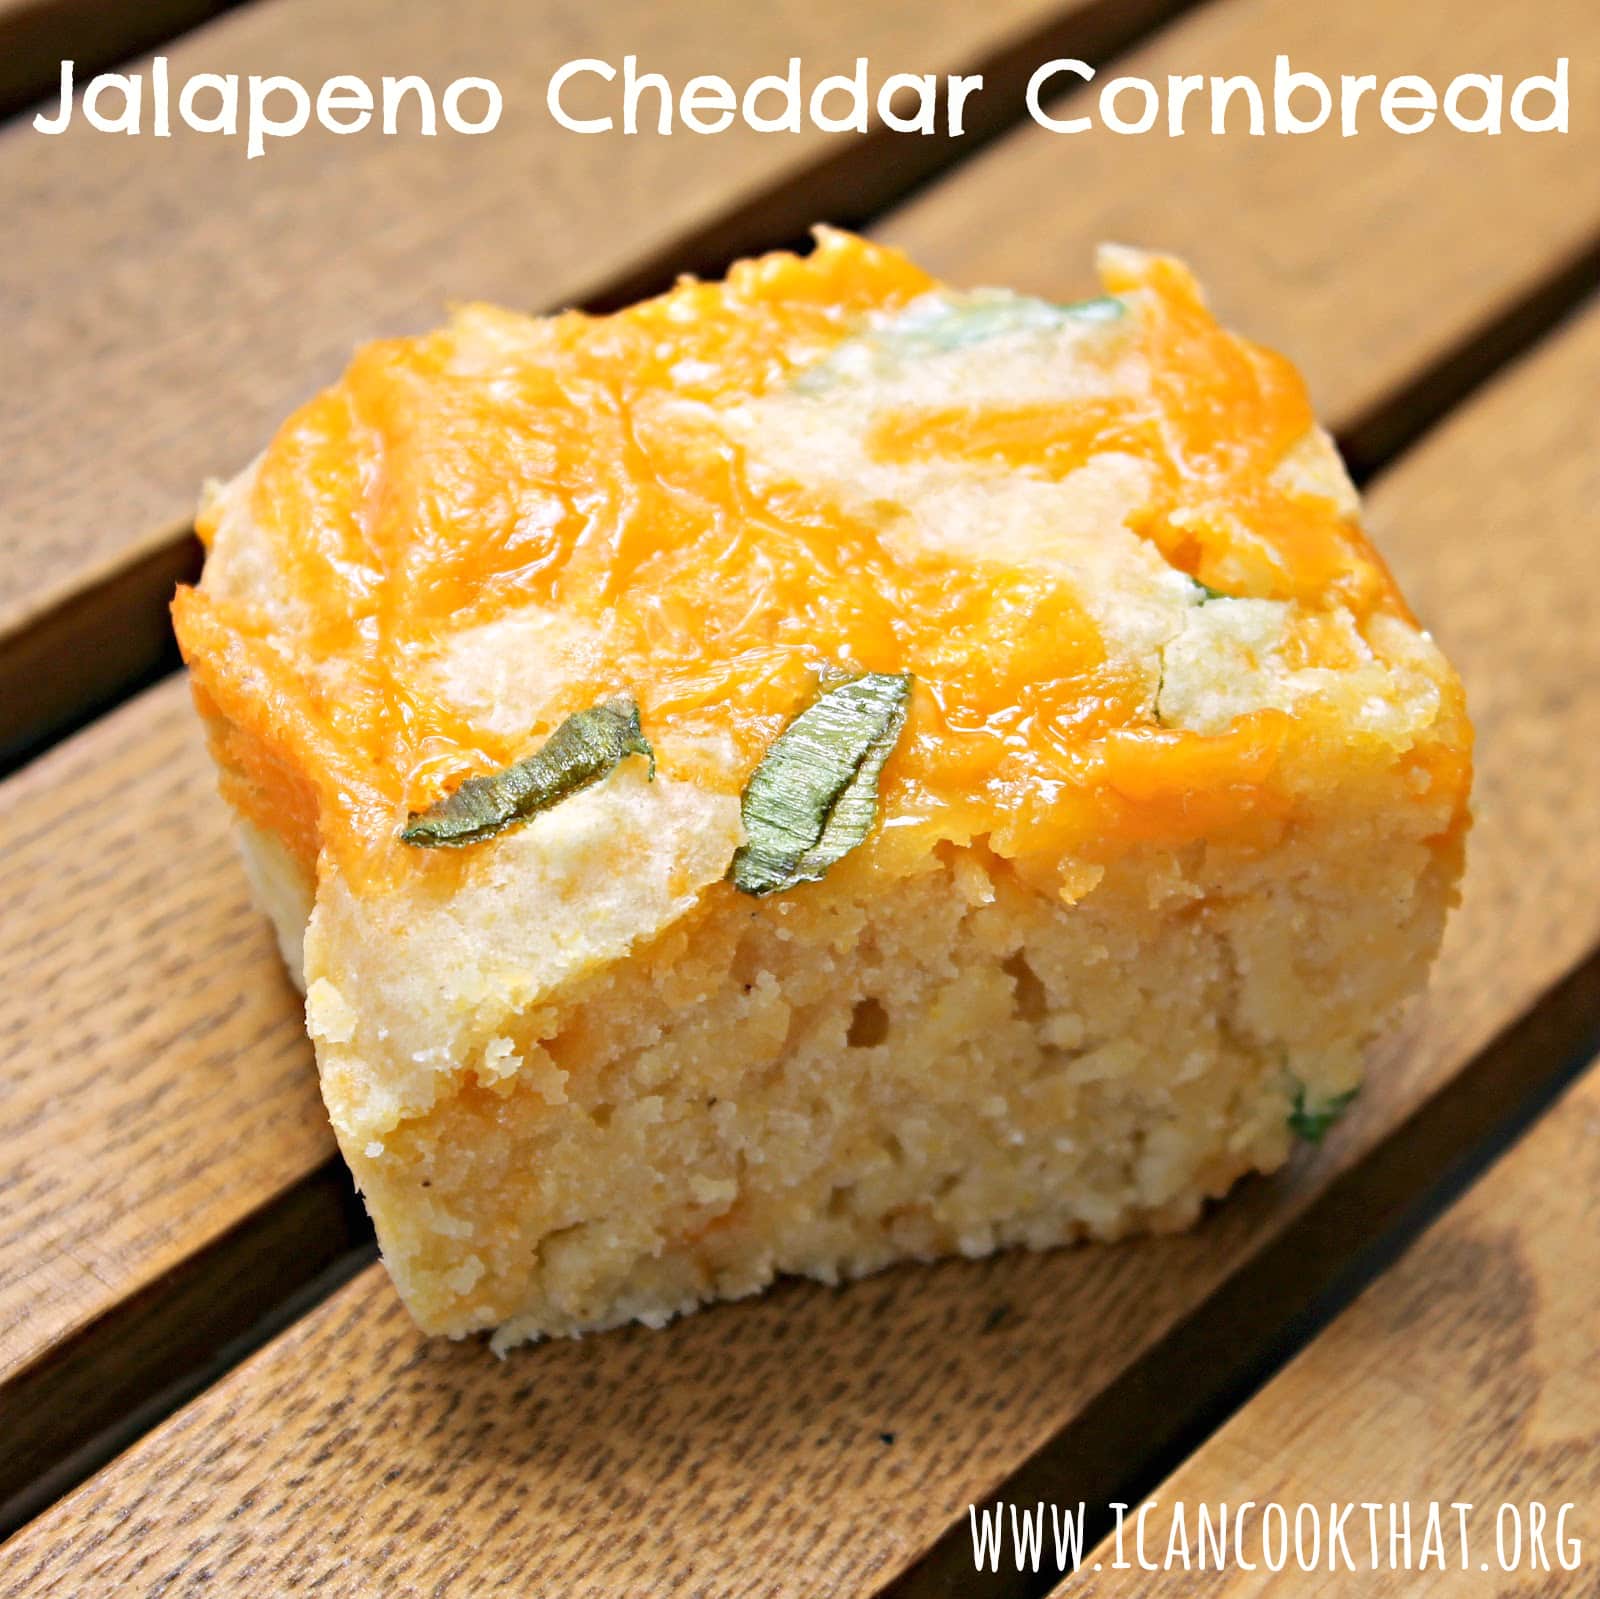
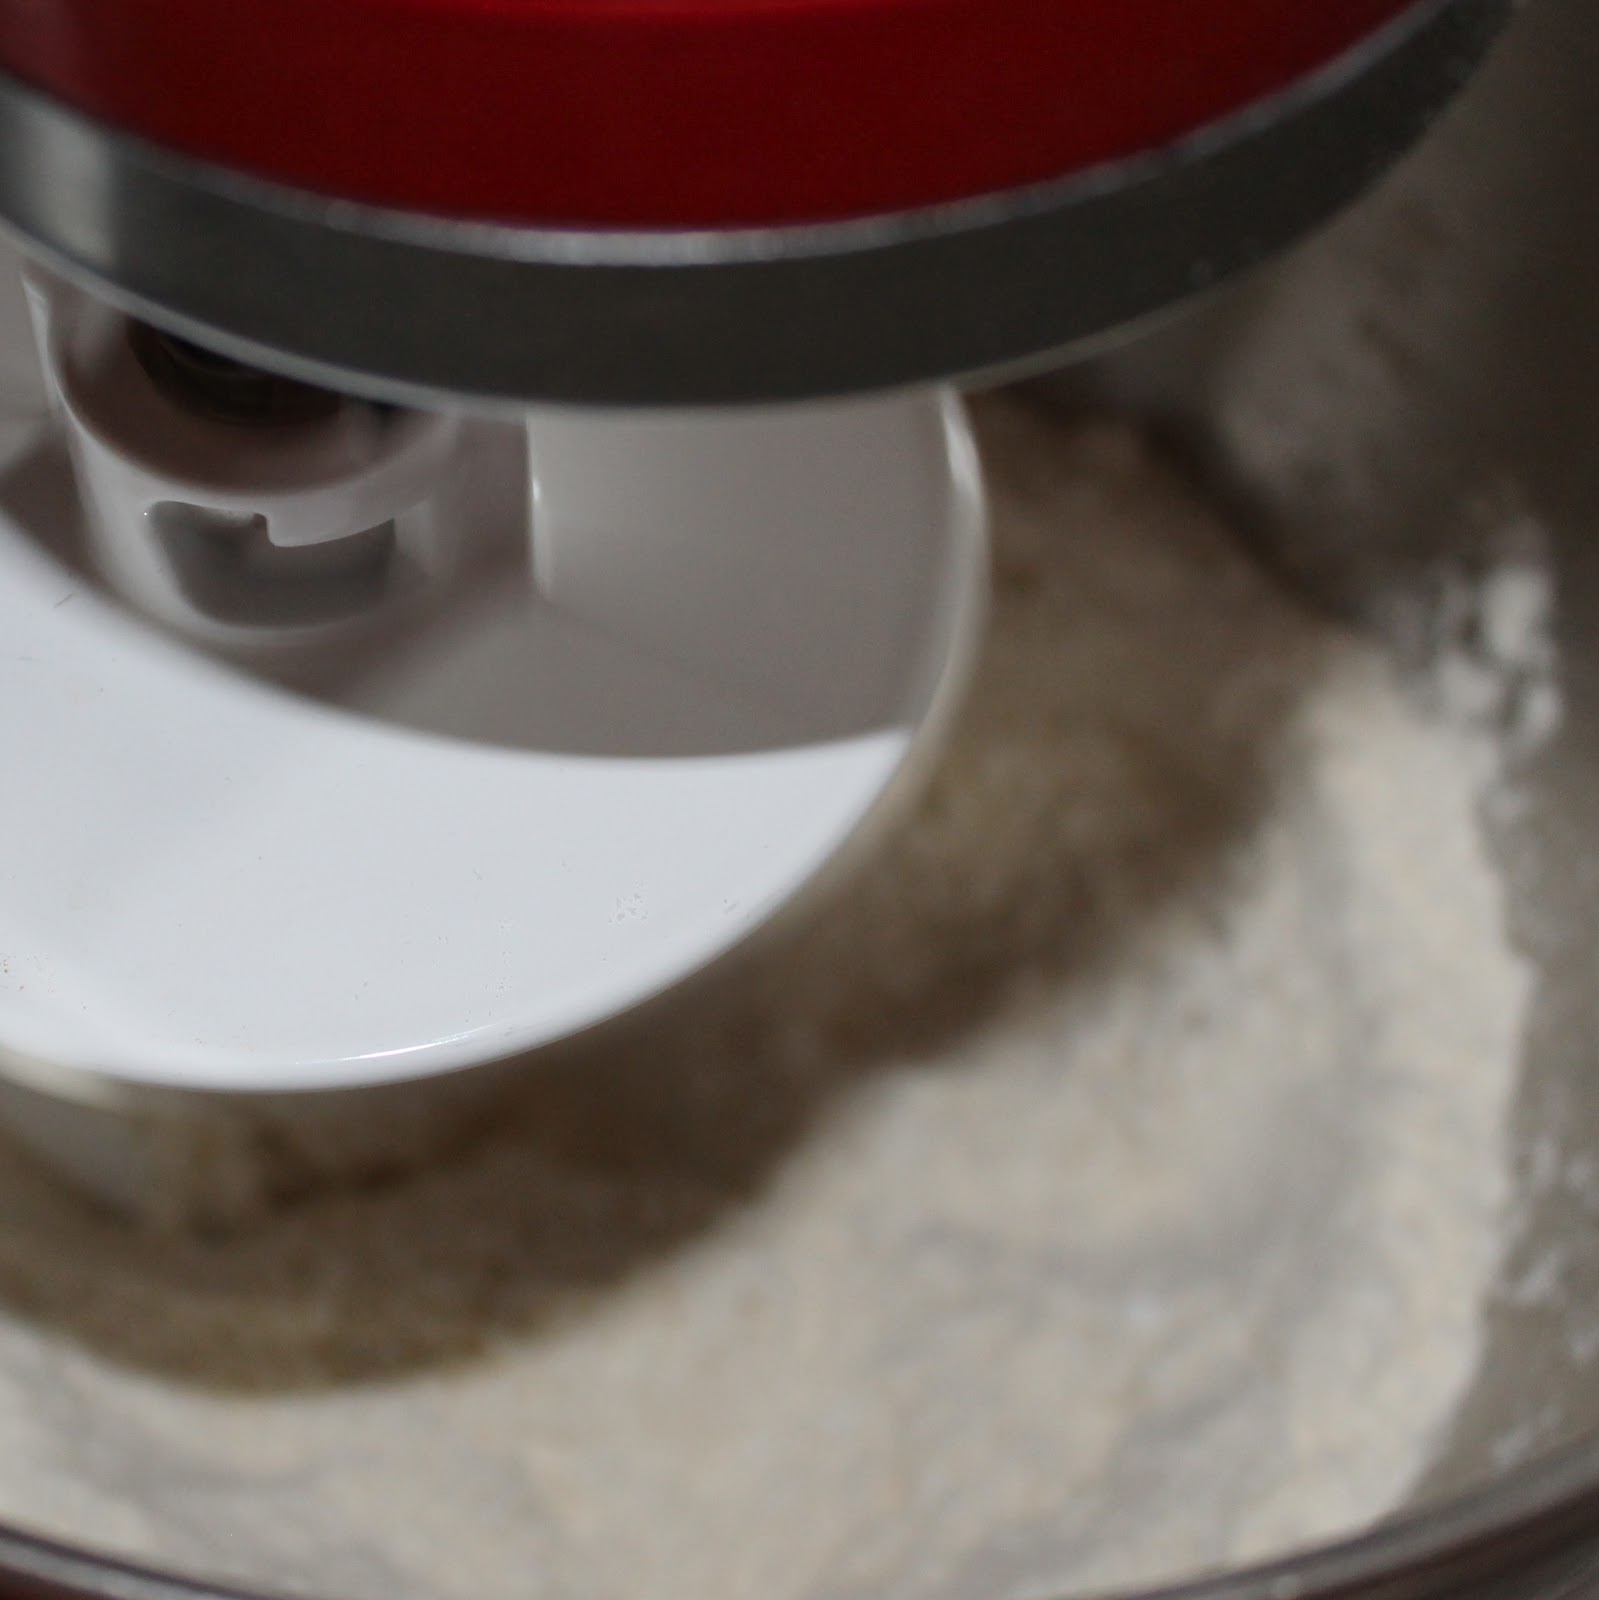
I am in love with all things warm-weather related, but one of my favorite parts of summer is the outdoor eating (surprise surprise). I used to work at a camp on the Chesapeake in Maryland and would spend one day a year stuffing myself with steamed Old Bay crabs. I now have friends who live in the general area and was thrilled when they decided to have a crab feast this past weekend. I, of course, wanted to bring something to eat with me and really had a hard time deciding what was appropriate: I needed a complimentary food that didn’t involve a fork and knife (when you’re covered in Old Bay, the last thing you’re reaching for is a fork). I finally realized the perfect accompaniment: cornbread!
This Jalapeno Cheddar Cornbreadis one awesome recipe, just be sure to limit your intake of these delicious squares, they are pretty darn decadent!
Ingredients:
3 cups all-purpose flour
1 cup yellow cornmeal
1/4 cup sugar
1 1/2 tablespoons baking powder
2 teaspoons kosher salt
2 cups whole milk
4 large eggs, lightly beaten
1/2 pound (2 sticks) unsalted butter, melted, plus extra to grease the pan
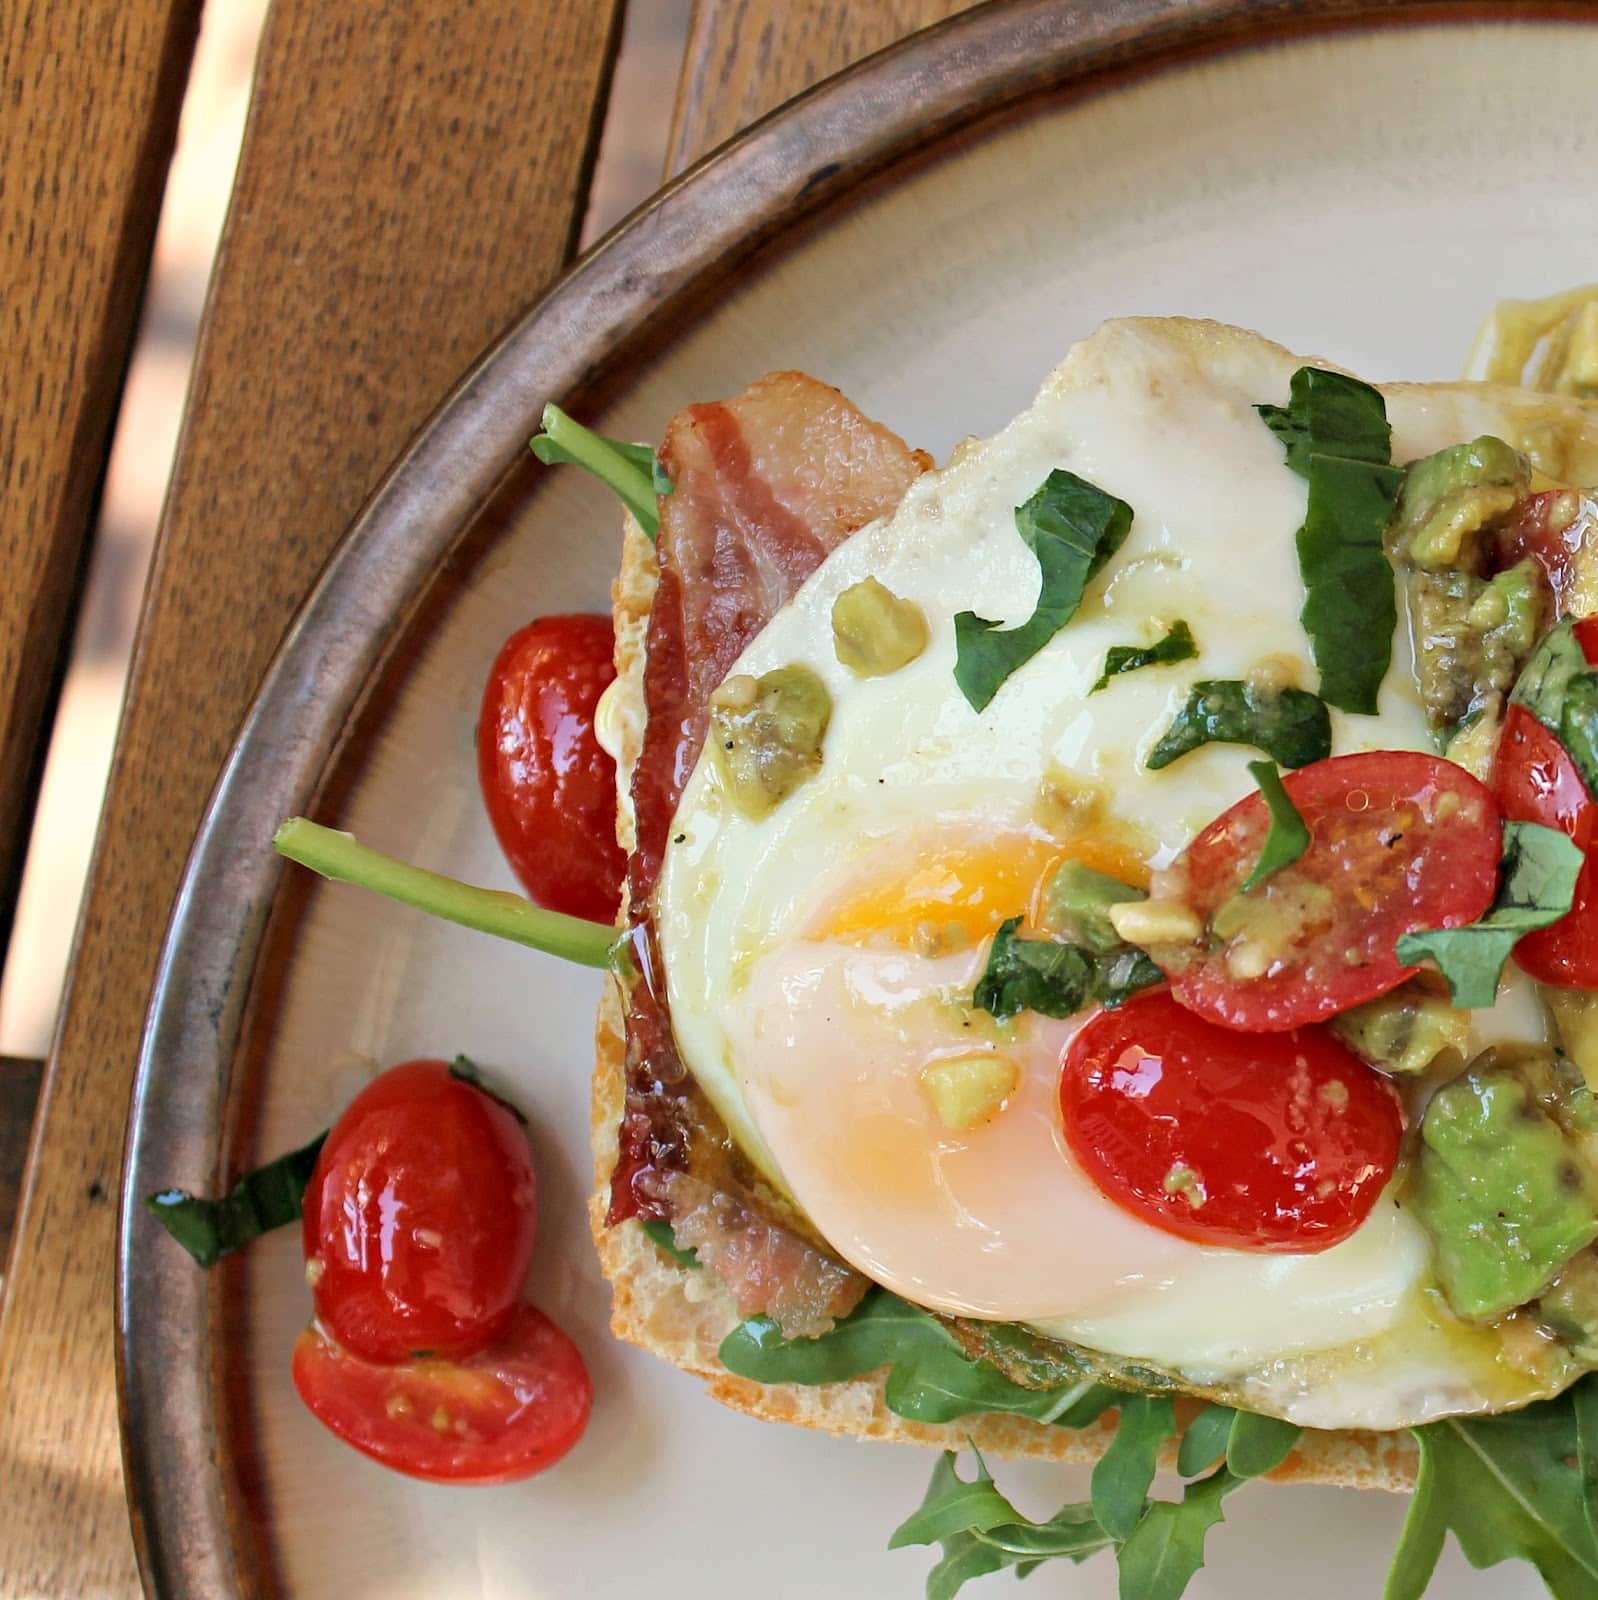
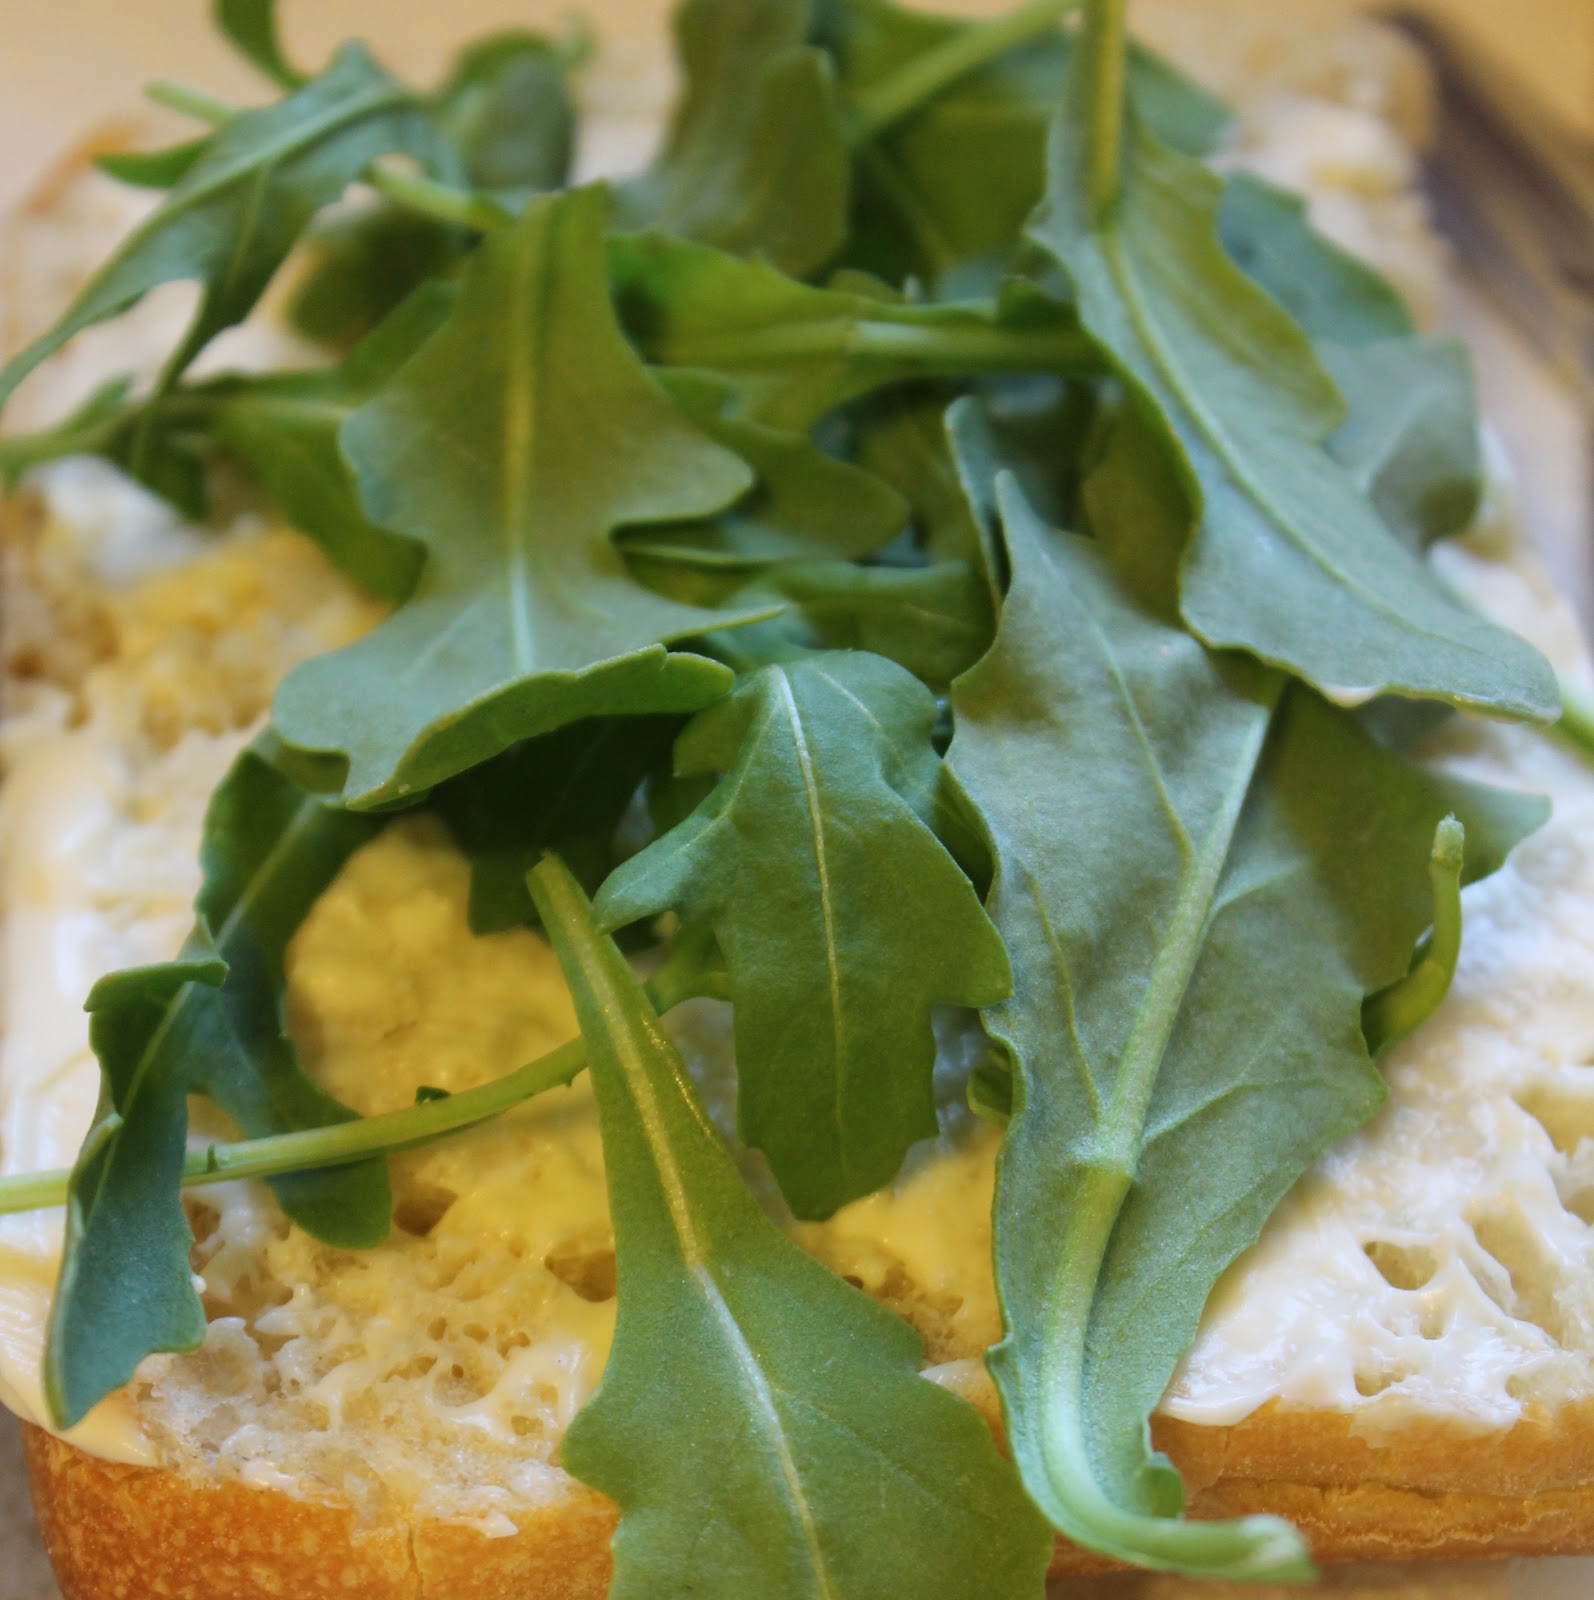
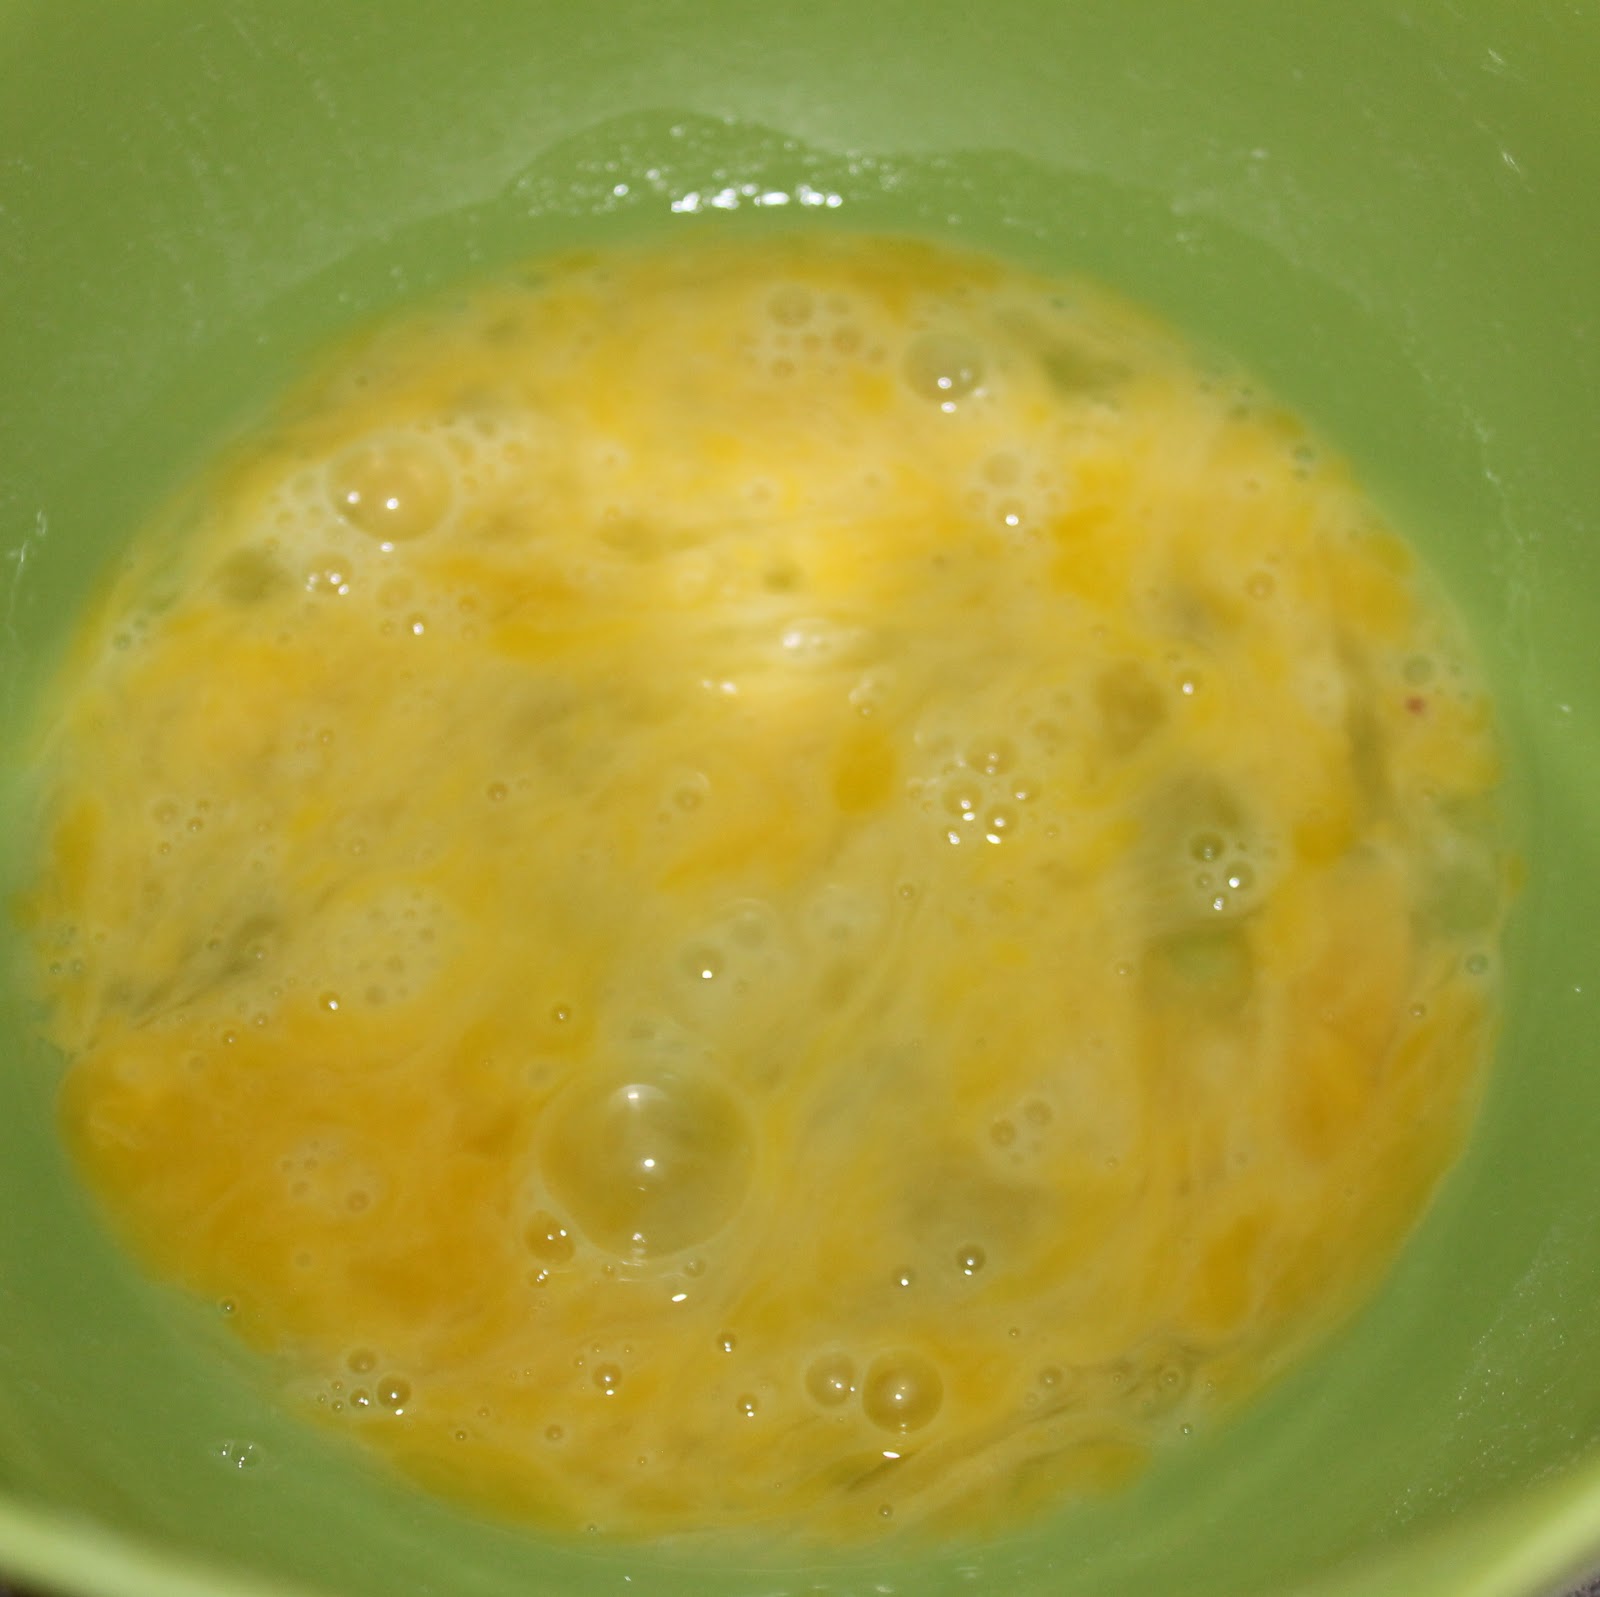
When I came across this recipe, my first thought was “why don’t people make Egg BLTs more often”? Why is this not a common brunch menu choice? Egg sounds like a logical upgrade to a traditional BLT. The addition of avocado to this just takes it over the top. I found this recipe on myrecipes.com and switched it around a bit, but the general idea is the same.
Ingredients (makes two servings):
1/2 cup halved grape tomatoes
1/2 avocado, diced
1 tablespoon chopped fresh basil
1 garlic clove, minced
1 tablespoon extra virgin olive oil
Salt and pepper to taste
1 teaspoon red wine vinegar, divided
2 large eggs
2 teaspoons mayonnaise
2 pieces of ciabatta bread (or 2 ciabatta rolls)
1 cup firmly packed arugula
4 thick bacon slices, cooked
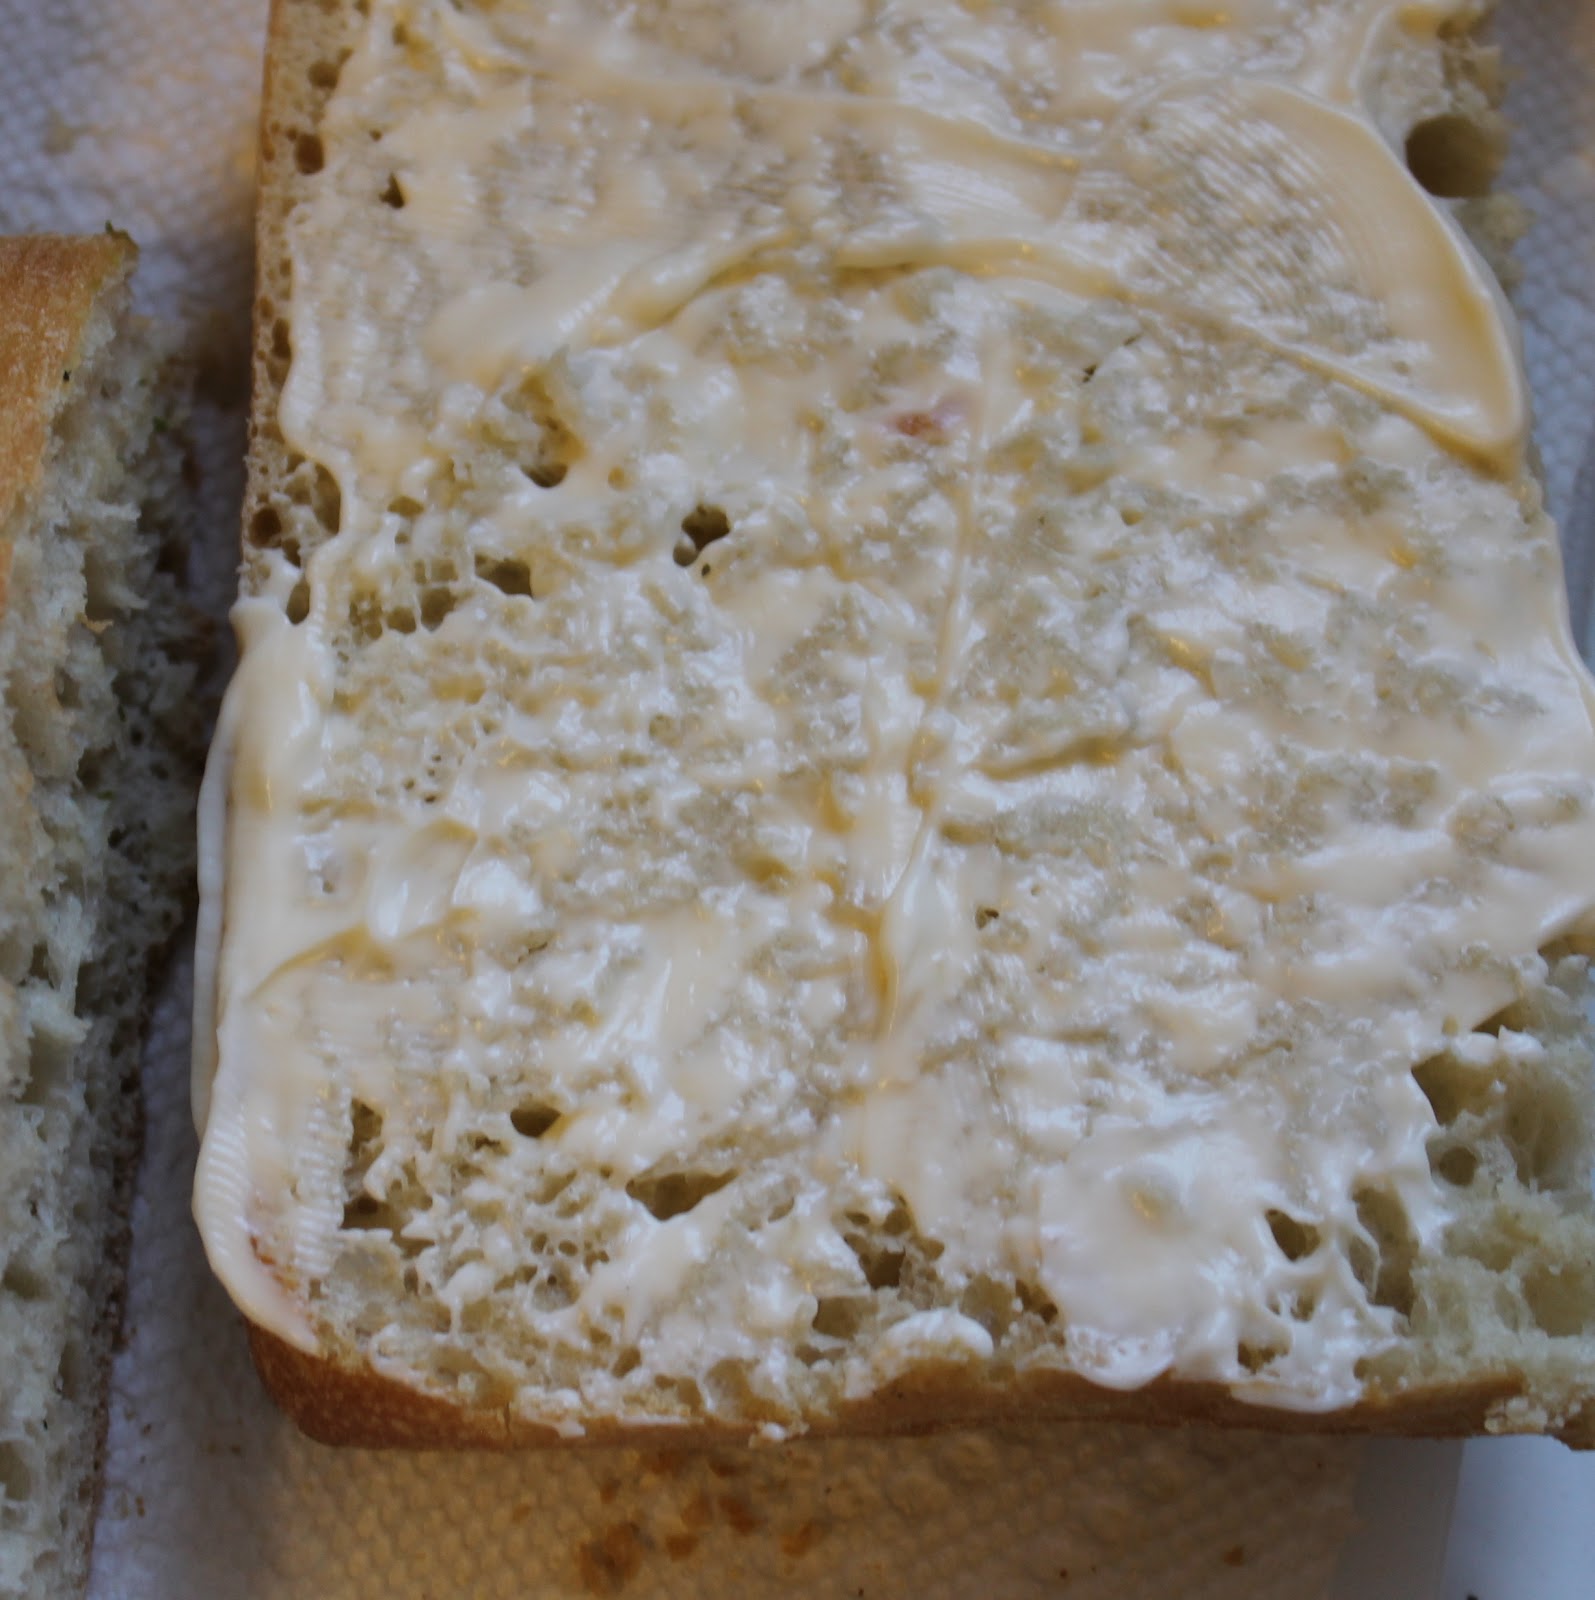
I bought one of those “bake at home” ciabatta breads that you pop in the oven for about 10 minutes. I thought some “freshly baked” bread would be nice with this dish. You can use whatever bread you happen to find if ciabatta is not available.
Cook the bacon according to package directions. Transfer to a paper towel to drain excess fat.
Combine the tomatoes, avocado, basil, garlic, olive oil, red wine vinegar, salt and pepper in a bowl.
Cook eggs over easy (or whatever style you prefer). To cook them over easy, heat a saute pan over low heat and spray with cooking spray. Crack one egg into the pan. Season with salt and pepper if desired (I honestly don’t think you need it ) and cook until the whites become opaque. To make sure the yolk cooks slightly, I add a top to the saute pan. Repeat with the second egg.
Now it’s all assembly. Spread 1 teaspoon mayonnaise on a slice of bread.
Add 1/2 cup arugula.
2 bacon slices (I tore them in half to fit nicely)
and the egg.
Top with the tomato avocado mixture.
This is the fanciest BLT I’ve ever seen.
It was fantastic too. I kept saying over and over again how yummy each bite was!
This recipe is so great because you can substitute whatever you want. Mess up the egg? Stick a scrambled egg on there instead. Hate arugula? Substitute baby spinach leaves. I suggest adding some extra sliced basil on top of the whole dish to add some extra freshness!
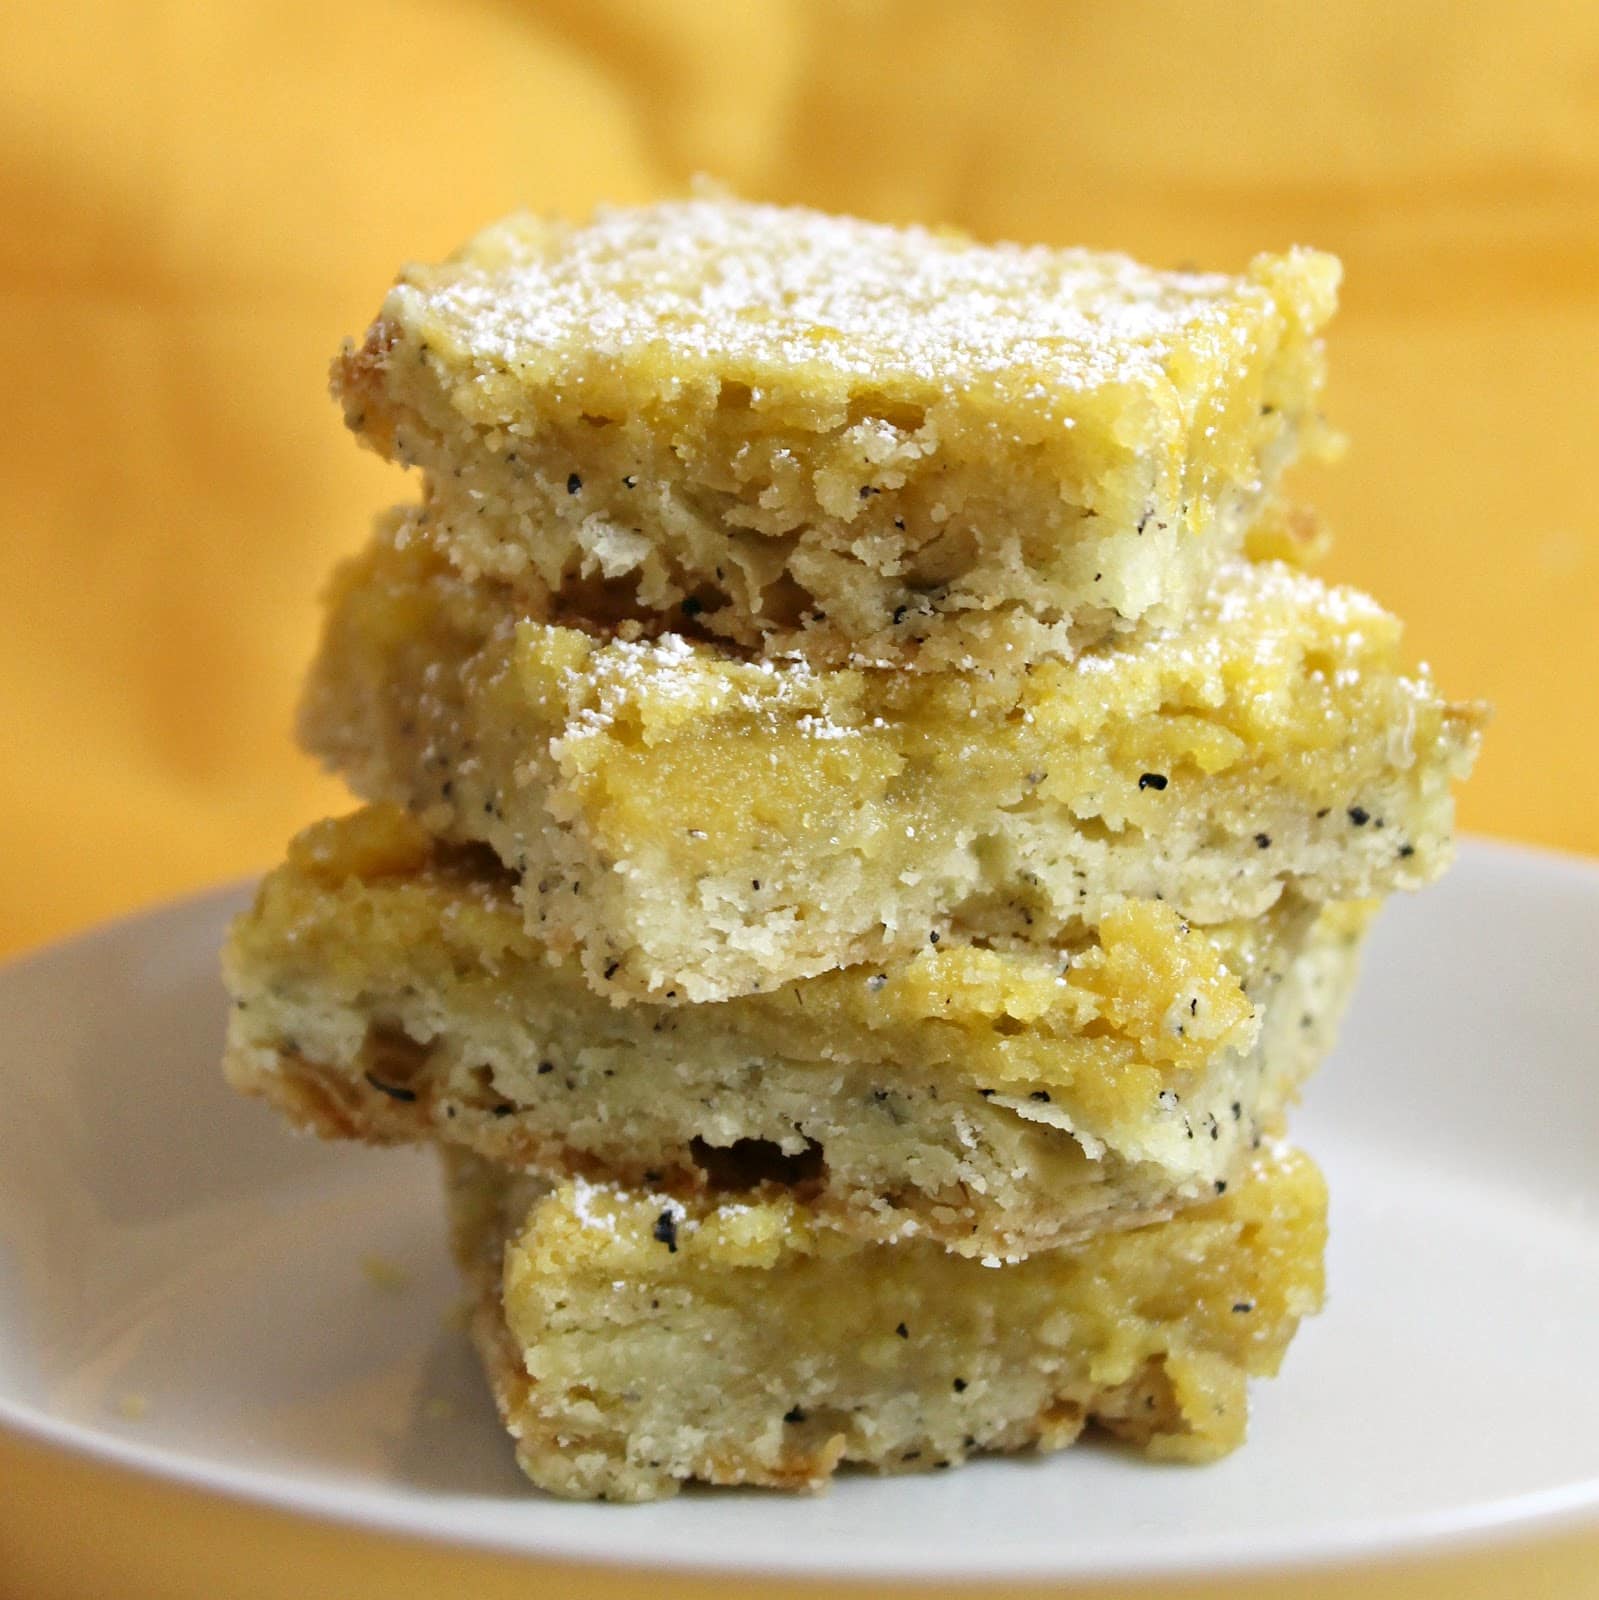
My sister and dad have their birthdays within 2 days of each other. And this year, my mom was away on Mother’s Day so we didn’t get to celebrate. So when I went home to celebrate the birthdays of my sister and dad, I wanted to bring a little something for my mom as well. When the last issue of Cooking Light had a recipe for Lemon Early Grey Squares, I knew they would be perfect. My mom is obsessed with everything bergamot. She’s also a huge citrus (specifically lemon) fan. I hope she likes them!
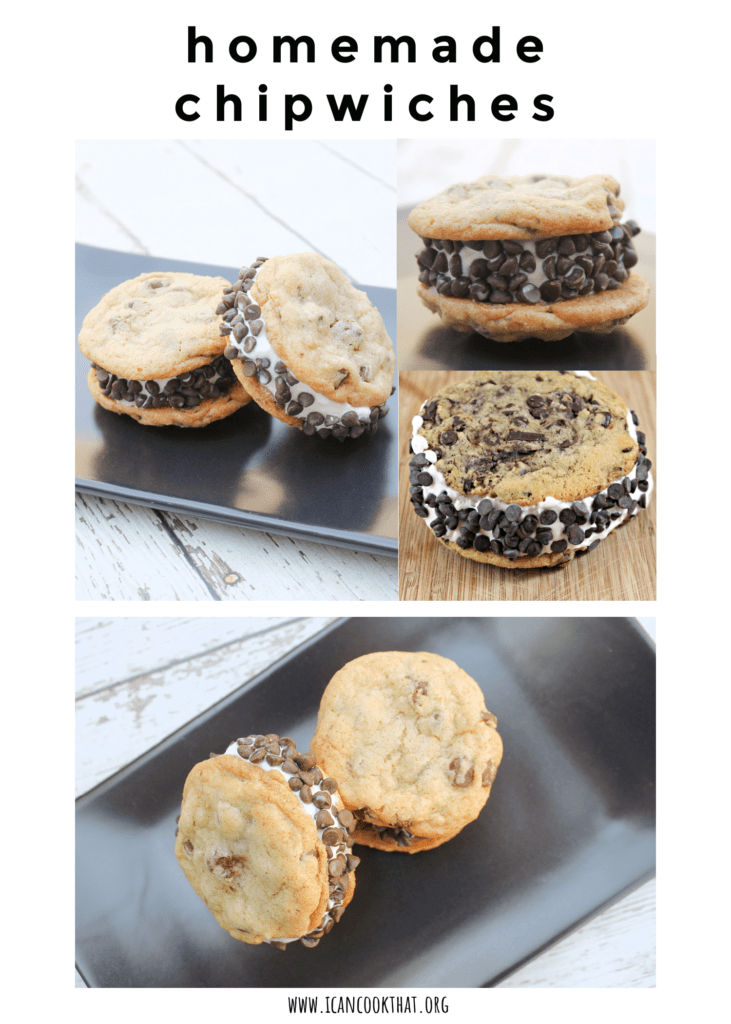
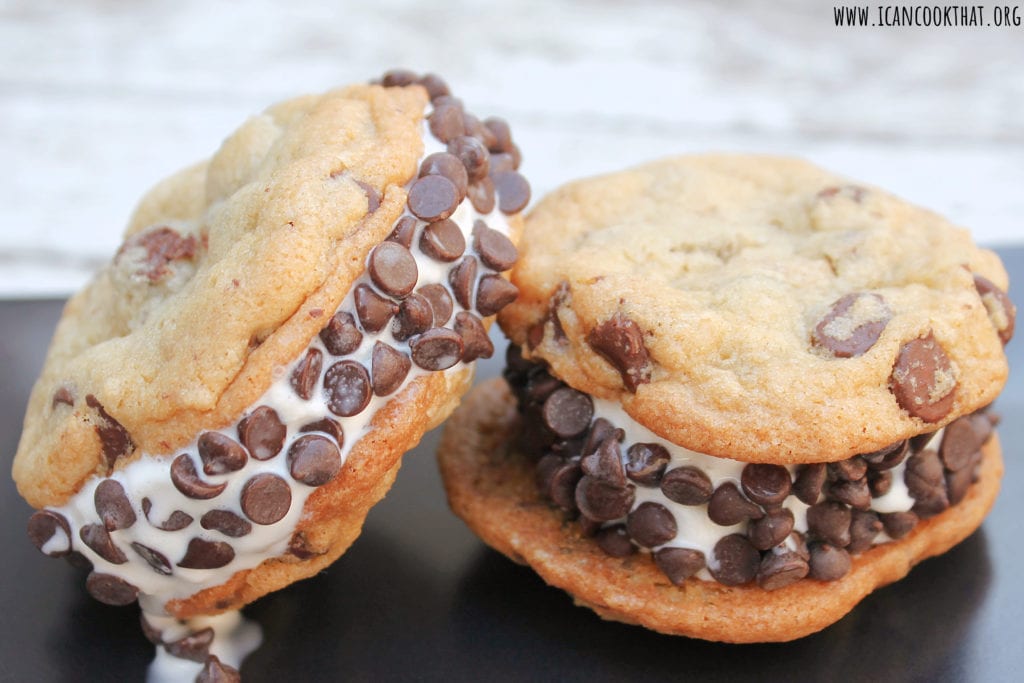
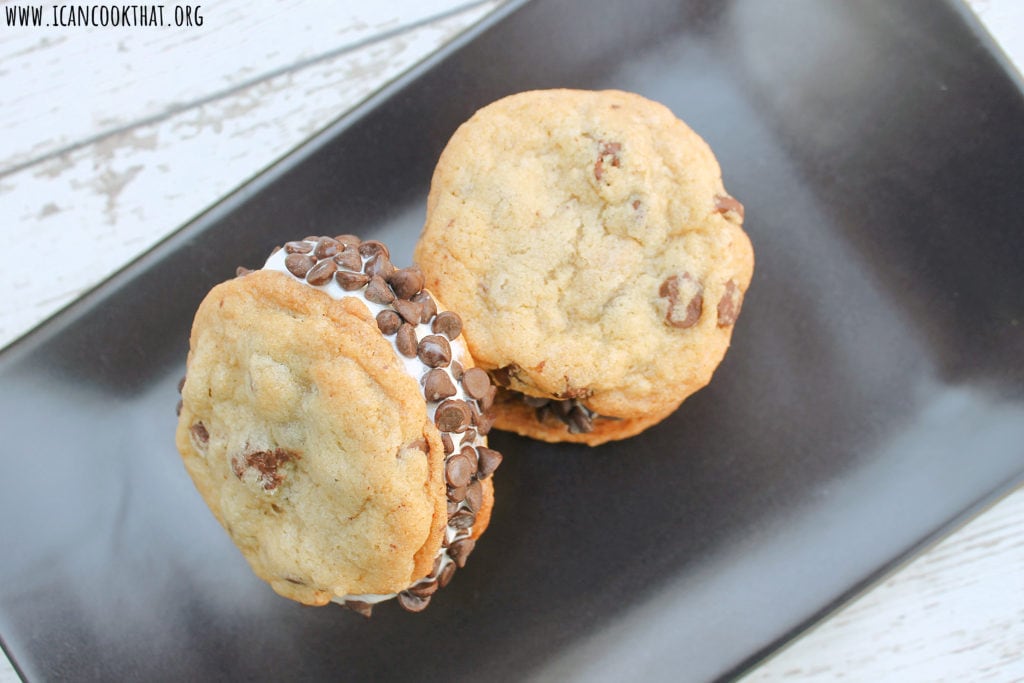
I have many childhood memories of me chasing down the ice cream truck to get my absolute favorite ice cream treat: a Chipwich. I mean, honestly, what more could you ask for in a dessert? Two chocolate chip cookies with ice cream sandwiched in between. Mmm.
So I was, well, horrified, to find out that the Chipwich brand name is no longer in existence as of 2007. At that time, Nestle bought the rights to the name and stopped all production because it competed with their “Chocolate Chip Cookie Sandwich.” I mean, come on. The name Chipwich is exponentially more catchy. But hey, whatever floats their boat.
Since finding out this information, I can’t get the idea of making my own Homemade Chipwiches or Chocolate Chip Cookie Sandwiches out of my head.
I was sent an Airbake cooking sheet recently and wanted to test it out. The Airbake Nonstick Insulated sheets are pretty snazzy. They are made of 100% aluminum and are comprised of two sheets surrounding a layer of air. This is said to reduce the temperature of the metal that actually comes in contact with the food which should result in more even baking. Airbake also claims that cookie bottoms won’t burn, win! (They also have natural sheets if you don’t want nonstick)
I decided to use a recipe from David Lebovitz for Salted Butter Chocolate Chip Cookies because the only way I can think to enhance my homemade chipwiches would be to add a little salt to bring out the flavor.
Ingredients (makes about 12 hand-sized chipwiches, make cookies larger if desired):
4 ounces salted butter, at room temperature
2/3 cup packed light brown sugar
1/2 cup granulated sugar
1 large egg, at room temperature
1/2 teaspoon vanilla extract
1 1/3 cup flour
1/2 teaspoon baking soda
1/2 teaspoon flaky sea salt or kosher salt
1 1/3 cups semisweet chocolate chips
1 pint vanilla ice cream (or your favorite ice cream)
Most of the time when I explain my blog to someone, they bring up Julie and Julia. I have yet to watch the movie, and I am only a few chapters into the book, so I’m not exactly sure how many similarities I have to Julie. However, it goes without saying that Julia Child is an inspiration to most, if not all, food bloggers, cooks, and home cooks. August 15, 2012 is Julia Child’s 100th birthday. To celebrate, JC100 was launched. It is a national campaign involving restaurants, chefs, bookstores, and bloggers. The goal is to “raise one million voices in tribute to Julia”. When I was asked to participate, I jumped at the chance. The campaign started 100 days before Julia’s birthday on May 7.
The first recipe was a classic Omelette Roulee, a Rolled Omelette which Julia described as “dinner in half a minute.” Well, I found one thing I have in common with Julie (not Julia): I am not a big egg fan. The idea of eating an omelette at all, let alone for dinner, didn’t make me happy. So I passed over the recipe so that the first recipe I posted could be something I truly love. JC100 is sending me a new recipe each week so I should have a summer full of Julia Child recipes on here!
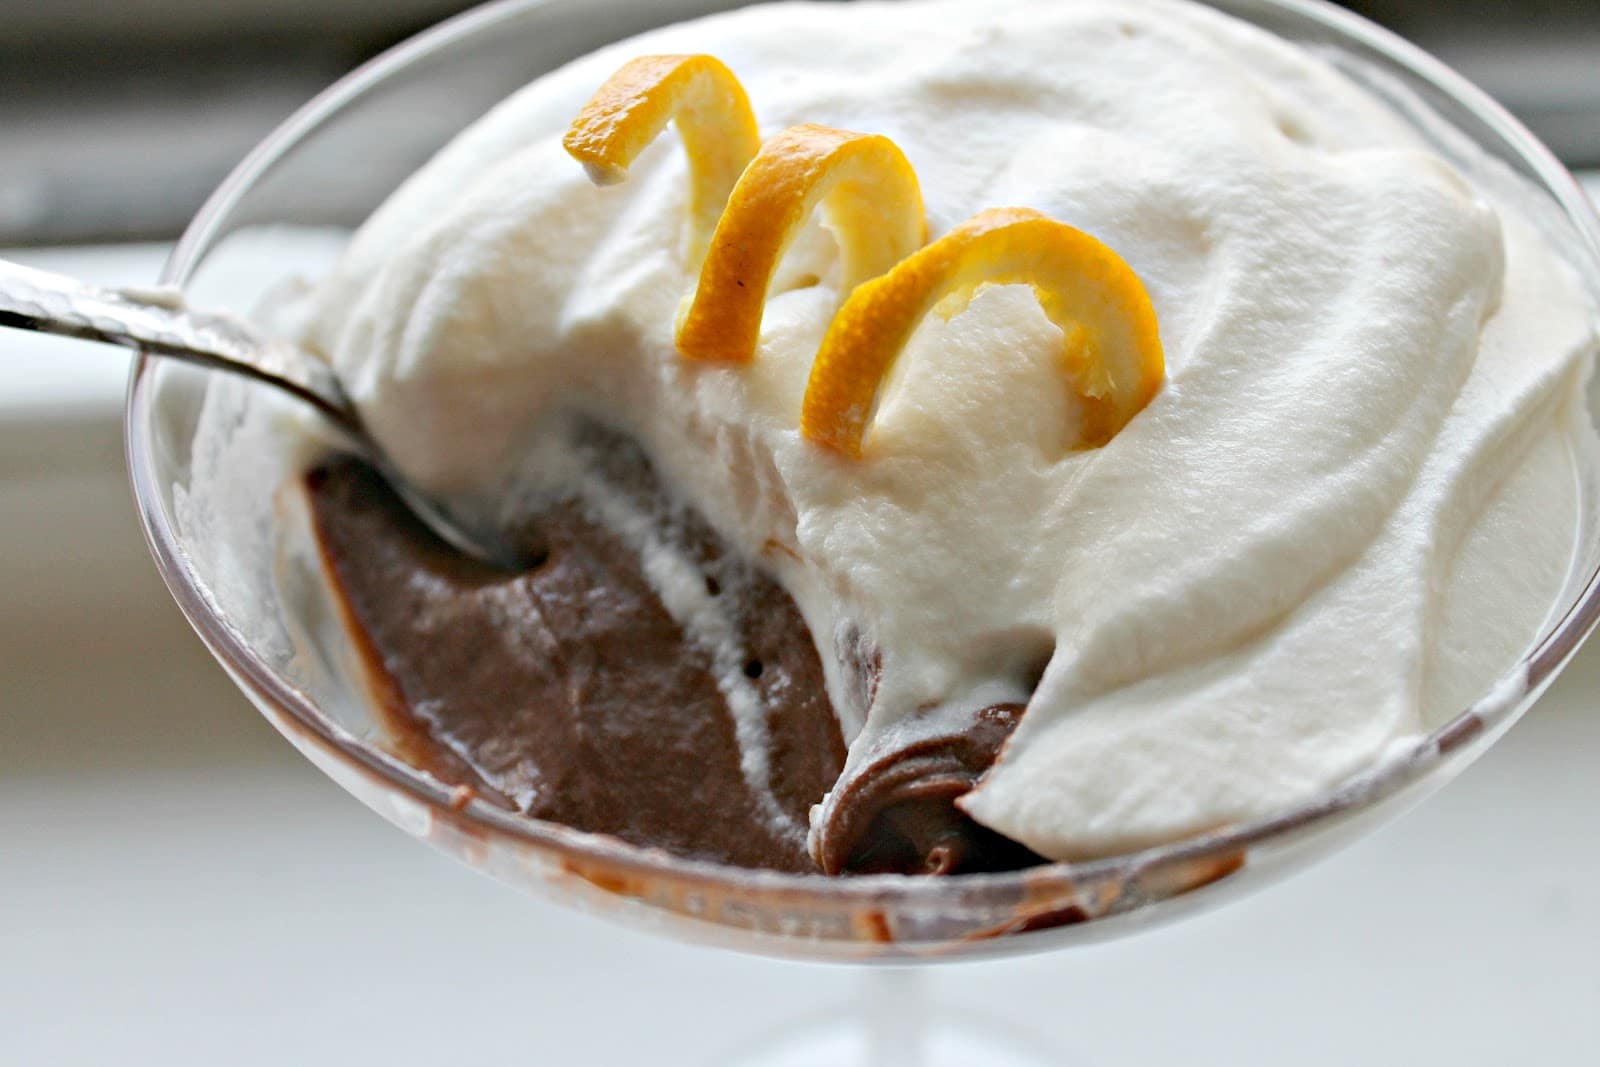
This week, the recipe was right up my alley: chocolate mousse! This chocolate mousse is a winner. Instead of the typical mousse made with cream and egg white, this one is made of egg yolks, sugar, and butter. I also made a fresh whipped cream to top off the mousse.
Ingredients:
4 eggs, separated
3/4 cup sugar
1/4 cup orange liqueur
A pan of barely simmering water
A basin of cold water
6 ounces or squares semi-sweet baking chocolate
4 tablespoons of strong coffee (I used espresso granules dissolved in boiling water)
1 1/2 sticks softened unsalted butter
pinch of salt
1 tablespoon sugar
1/2 cup heavy whipping cream
1 tablespoon sugar
1/2 teaspoon vanilla
1/2 teaspoon orange liqueur
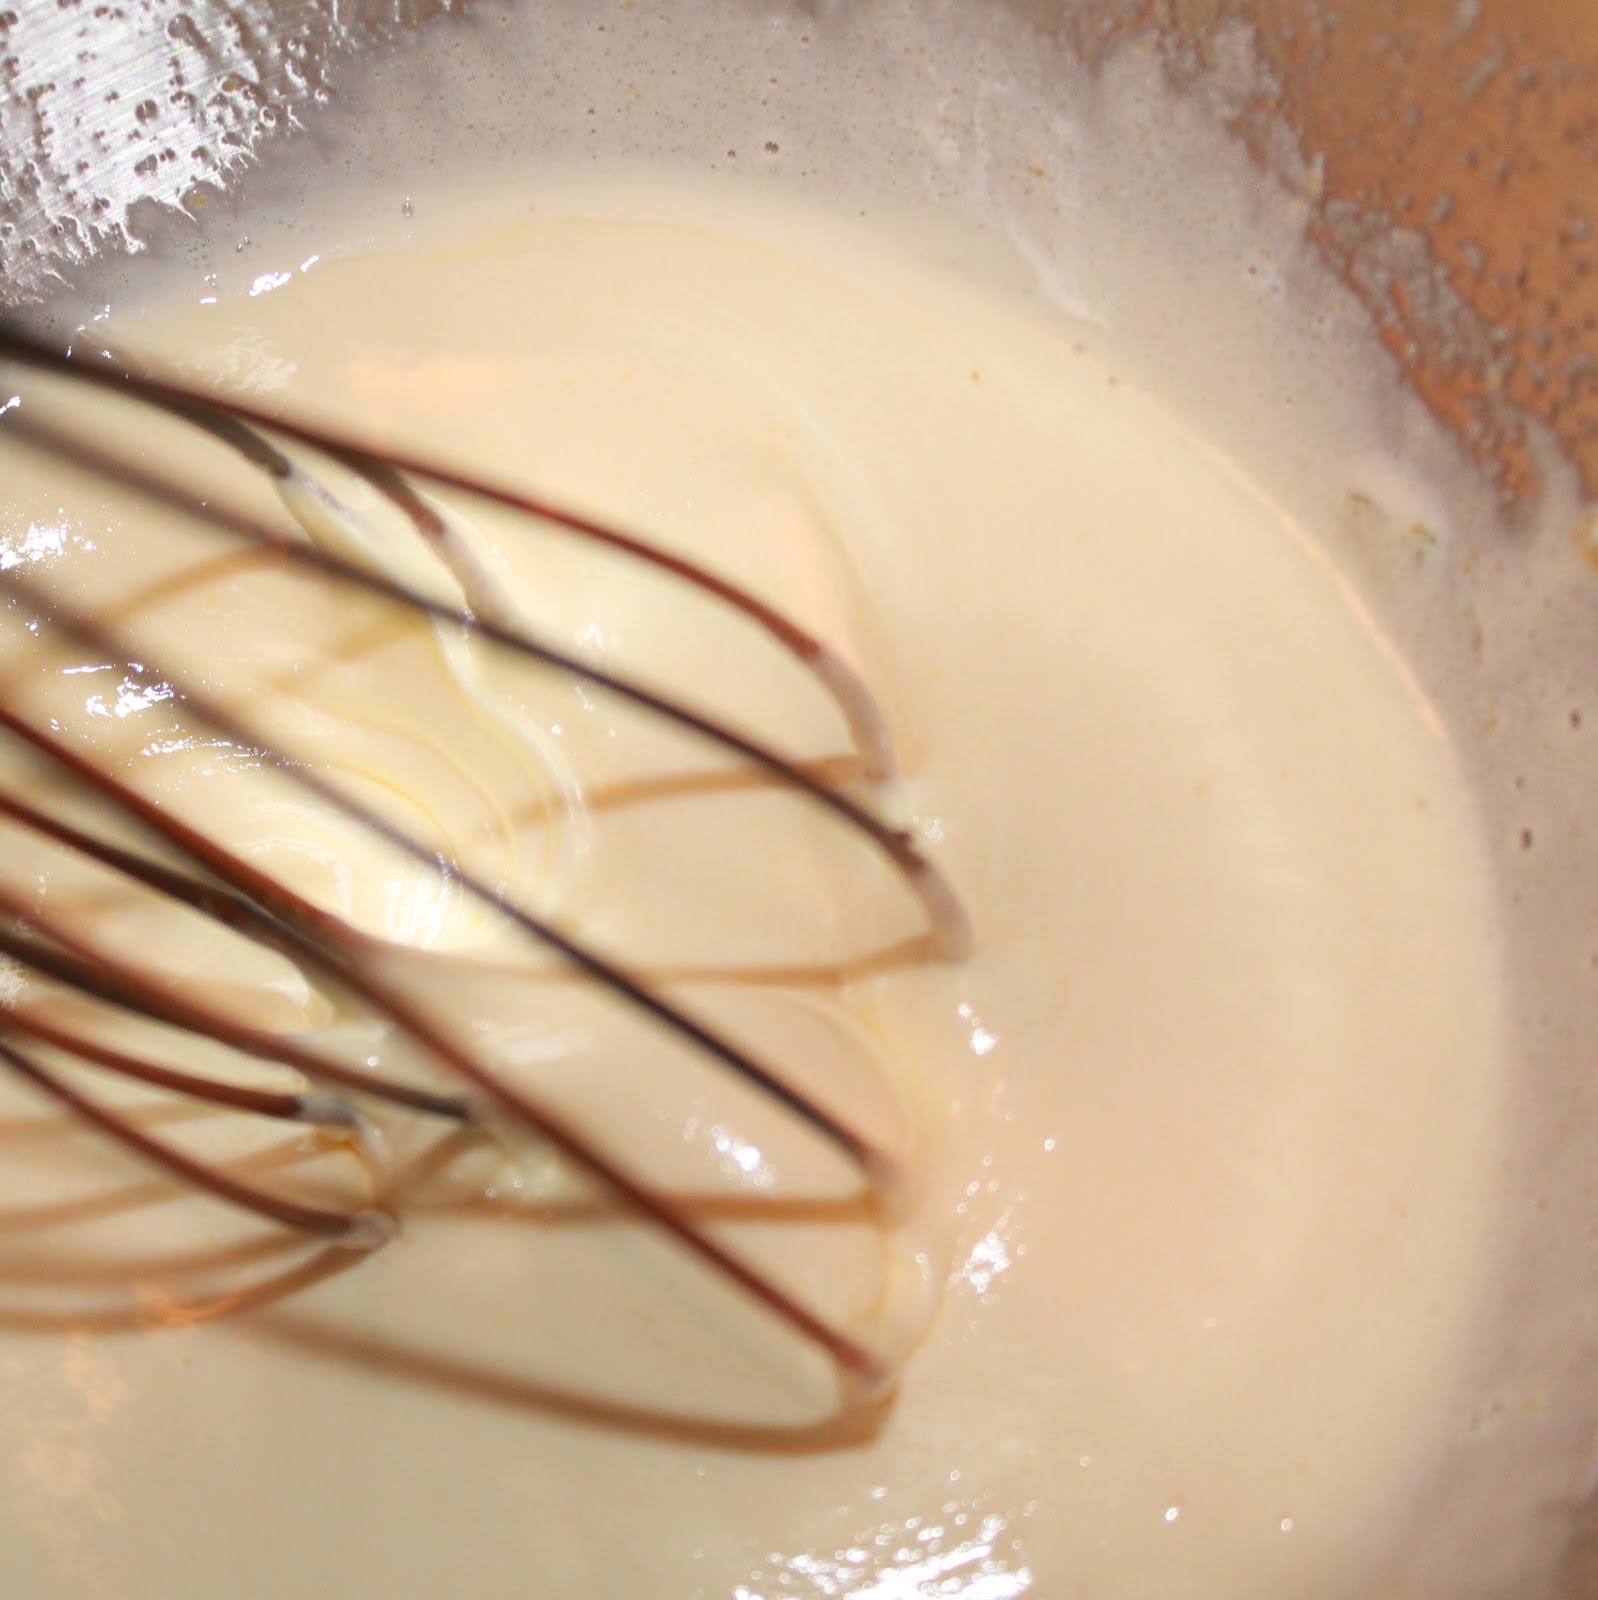
To make, prepare your two waters. Add a small pot filled with water to the stove over medium heat. Bring to just below a simmer. Add ice to a medium sized bowl and fill with water.
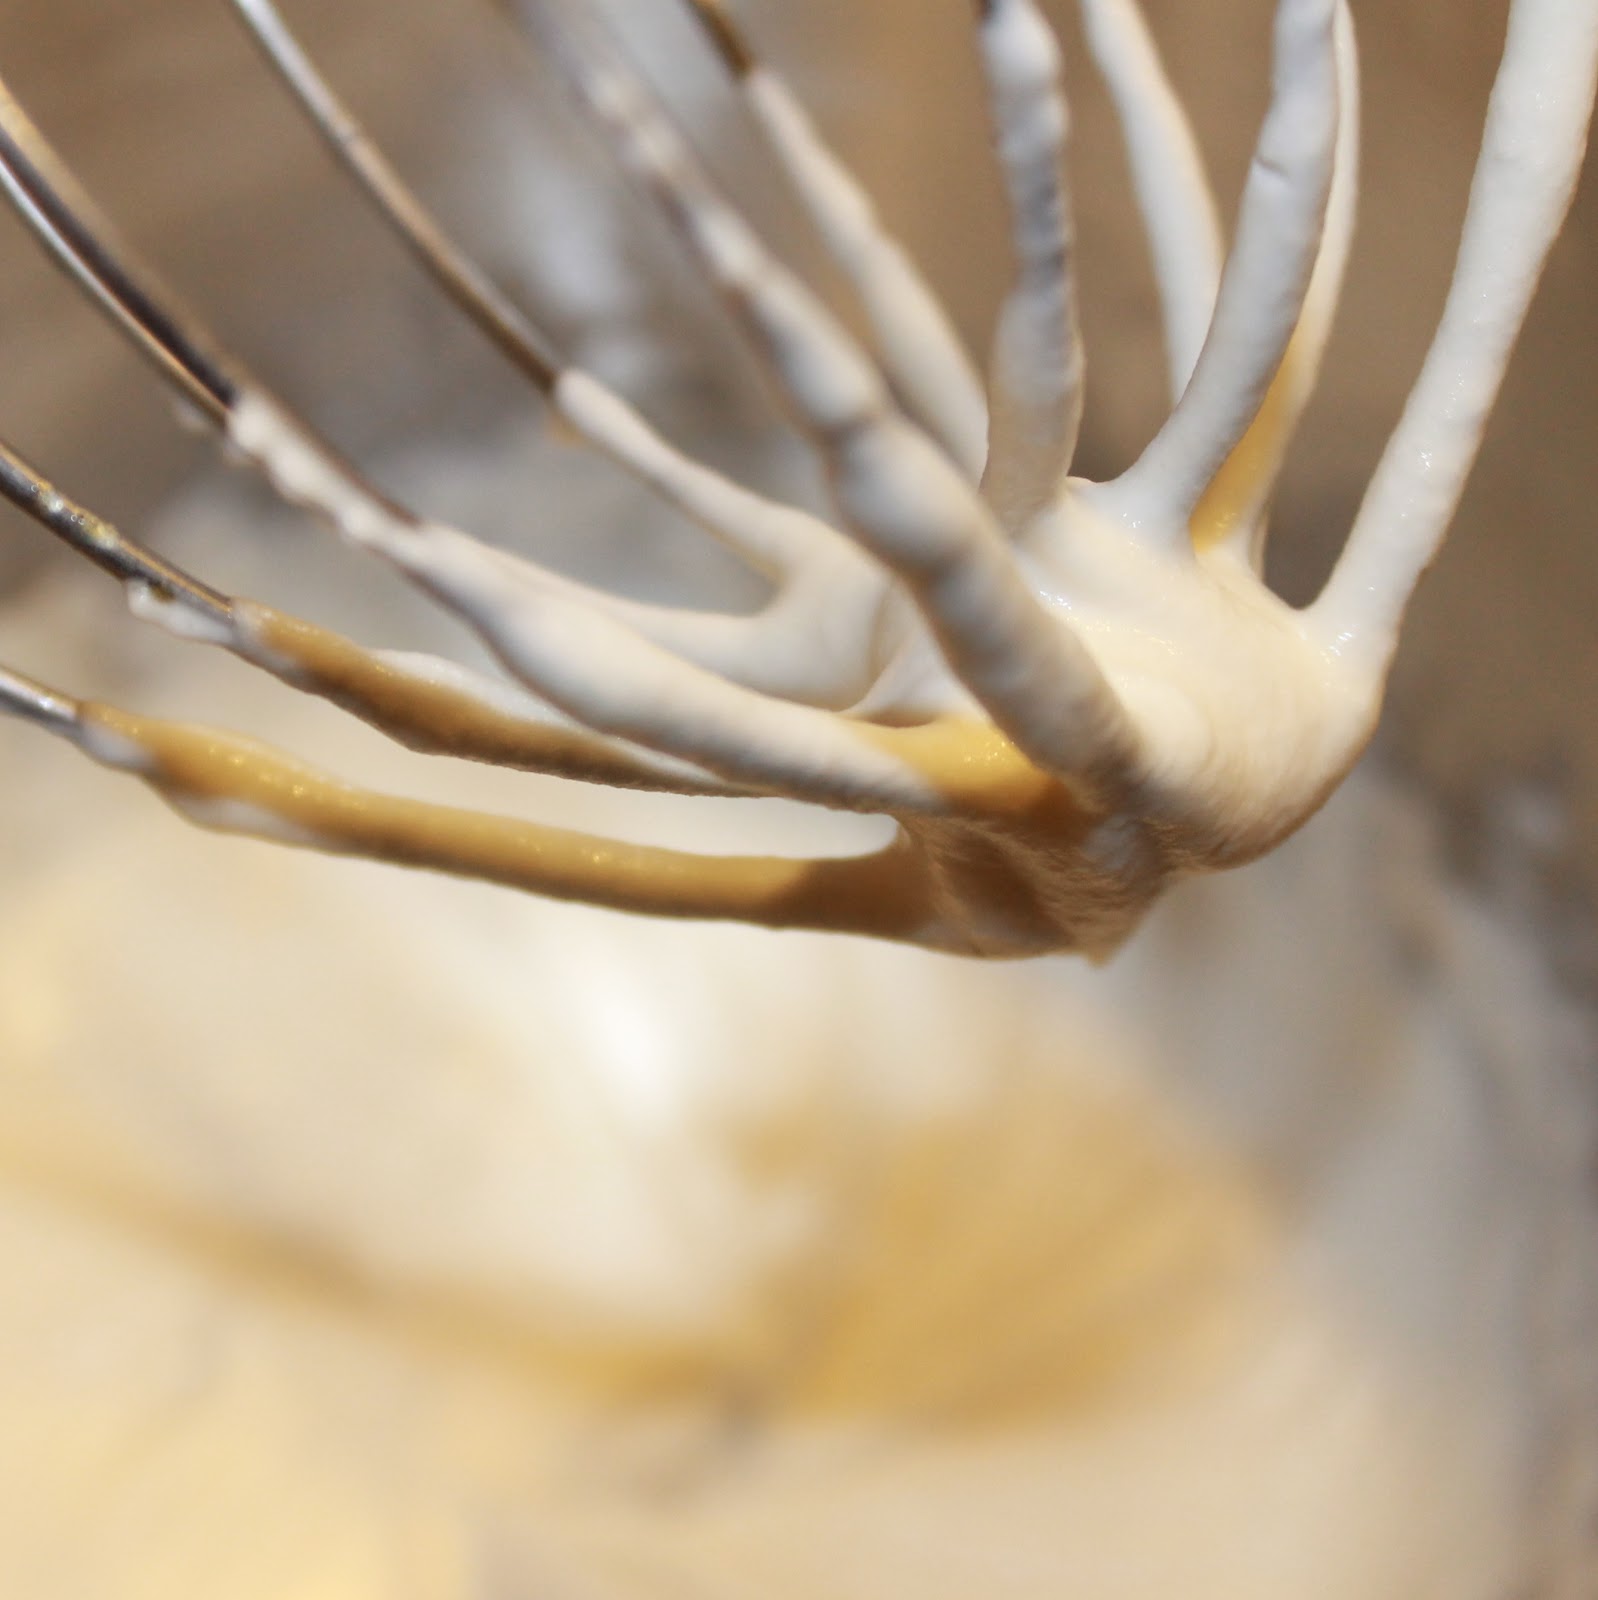
Add the egg yolks to a medium sized bowl; you want it to be stainless steel or porcelain. Reserve the egg whites for later use.
Add the sugar and beat until the mixture is thick, pale, yellow, and falls upon itself forming a ribbon. Add the orange liqueur.
Place the bowl over the simmering water and and continue to beat for 3 to 4 minutes, or until the mixture is foamy. (Keep the simmering pot over the heat, you’ll use it again soon)
Move the bowl to on top of the ice water bowl and beat for another 3 to 4 minutes. The mixture should again form ribbons and have the consistency of mayonnaise.
Add the chocolate and 4 tablespoons coffee to a small saute pan.
Melt the chocolate and coffee mixture over the hot water.
Remove from heat and slowly beat in the butter a little at a time to make a smooth cream.
Add the chocolate mixture to the egg-sugar mixture and mix to combine.
So, what you’re supposed to do at this stage is beat the egg whites and salt in a separate bowl until soft peaks form. Add the 1 tablespoon sugar and beat until stiff peaks are formed. Add 1/4 of the egg whites to the chocolate mixture and then fold in the rest of the egg whites.
That was on a different page. Which I apparently decided not to read. So my “mousse” had more of a pudding consistency. Oops. It was still delicious!
Refrigerate for 2 hours before serving.
To make the whipped cream, add the cream to a bowl. Using a hand mixer, mix the cream on medium/high until frothy.Add the sugar, vanilla and orange liqueur. Beat on medium/high until stiff peaks form, and the mixture resembles whipped cream.
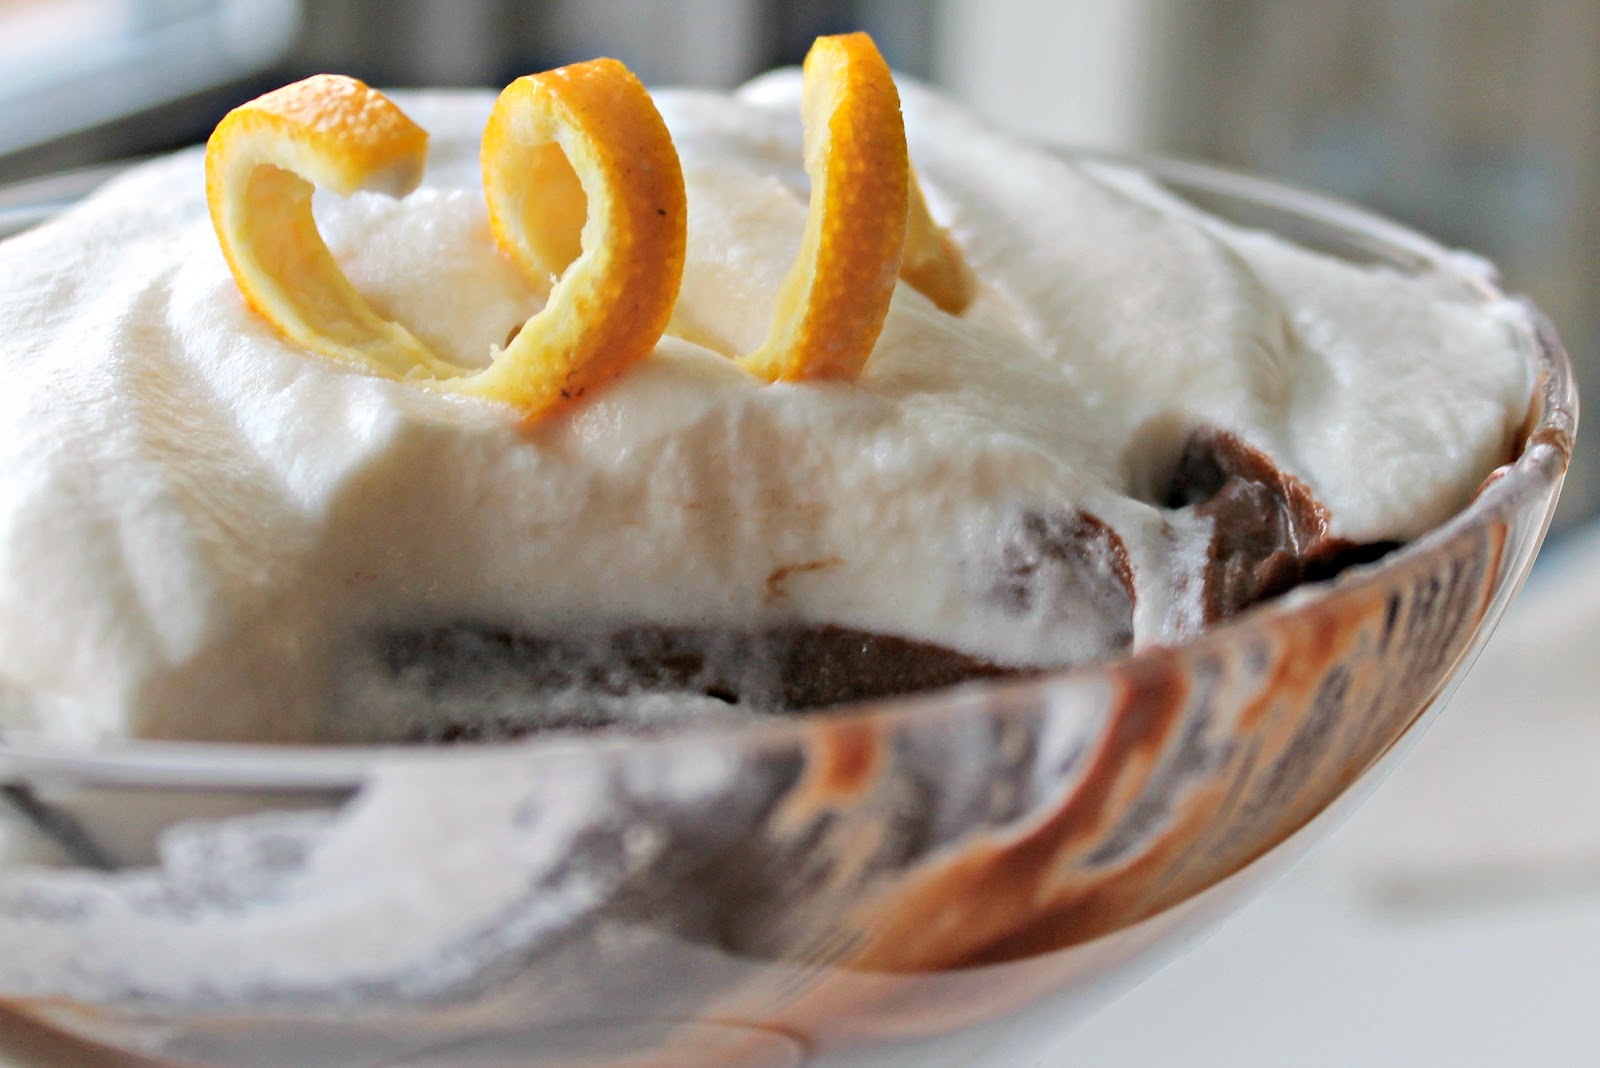
To serve, scoop the mousse into individual bowls and top with fresh whipped cream.
Despite my colossal mistake, this dessert turned out really well! The mousse had a silky consistency that I really enjoyed. I couldn’t necessarily taste the coffee or the orange liqueur, but I could taste that there was something special in there.
The whipped cream was a great complement. The orange liqueur was a bit more pronounced in the whipped cream which worked really well with the mousse.
I’m bummed I messed up Julia Child’s recipe, but, to quote Julia herself “try new recipes, learn from your mistakes, be fearless, and above all have fun!” I learned that I really need to read a recipe all the way through before starting to make a recipe, something I am guilty of on more than one occasion. So I may not have had the right consistency, but the flavor was still there. I’ll call it a win!
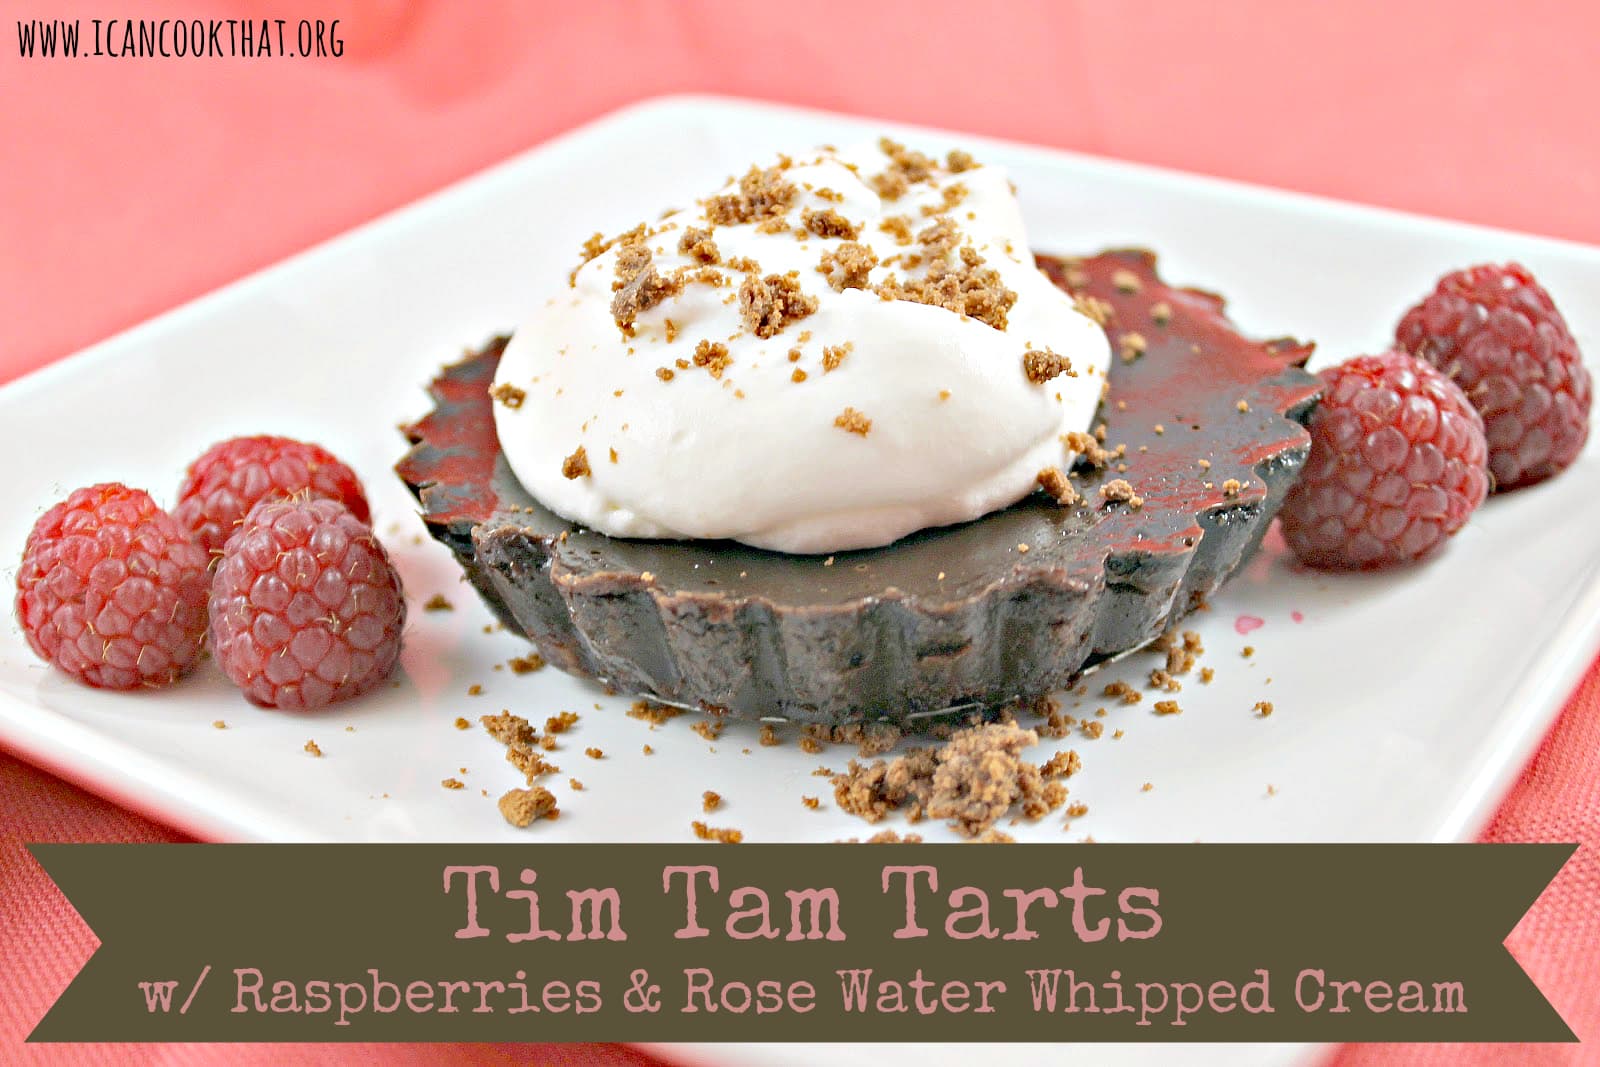
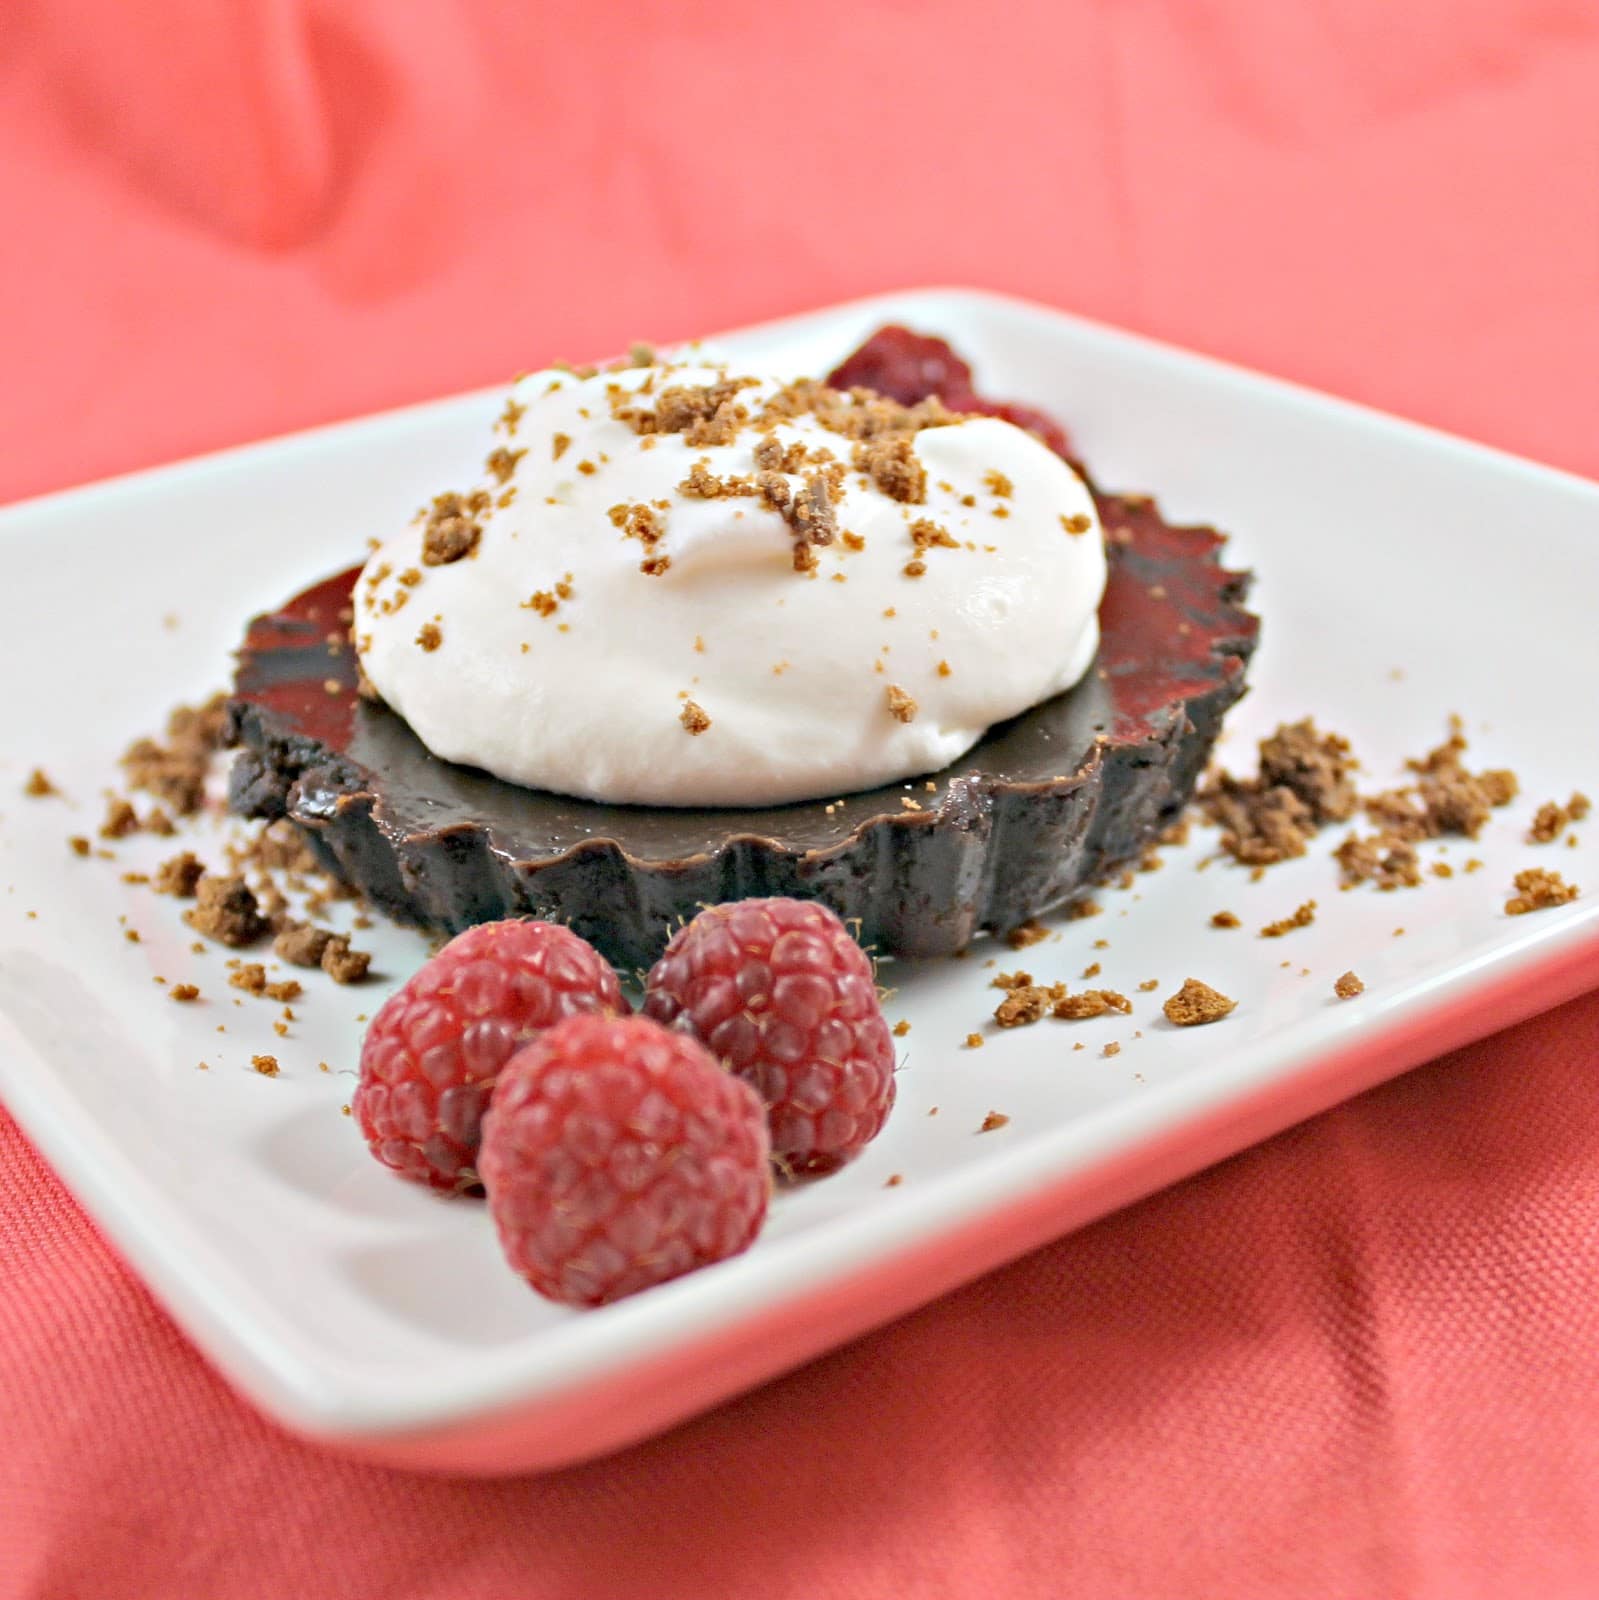
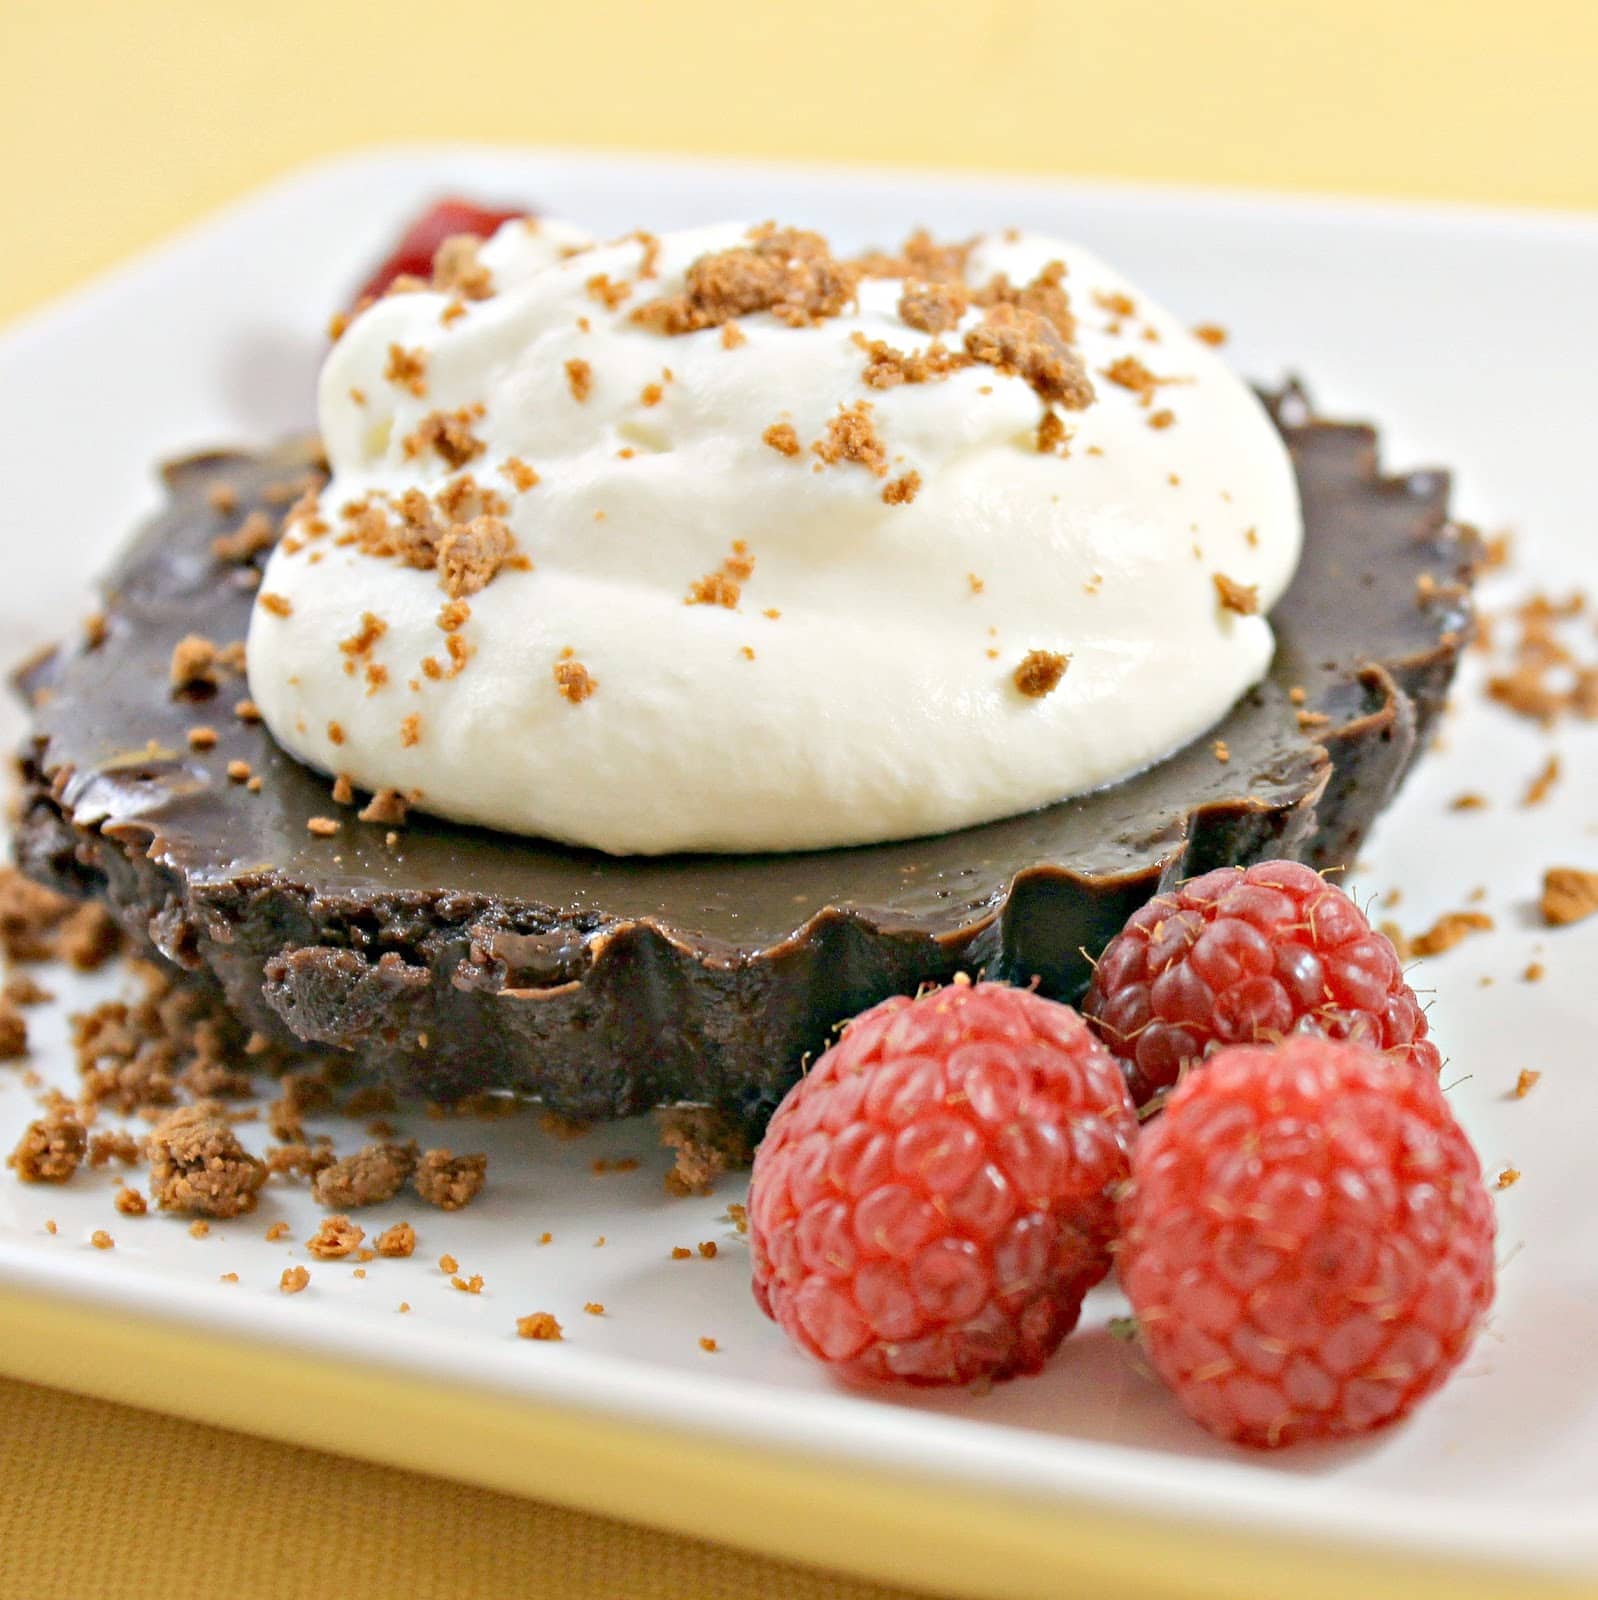
Tim Tam Tarts. Isn’t that oh so fun to say? A Tim Tam is a chocolate cookie from Arnott’s in Australia. You might see them every now and then in America, but don’t be fooled, those are made by Pepperidge Farm and I’m sorry, they just don’t live up to the originals. These happy little biscuits covered in chocolate are absolutely delicious. Their motto is “The Most Irresistible Chocolate Biscuit” but I think it’s more appropriately “Visitors to Australia’s Biggest Australian Obsession”. Seriously. They are the best.
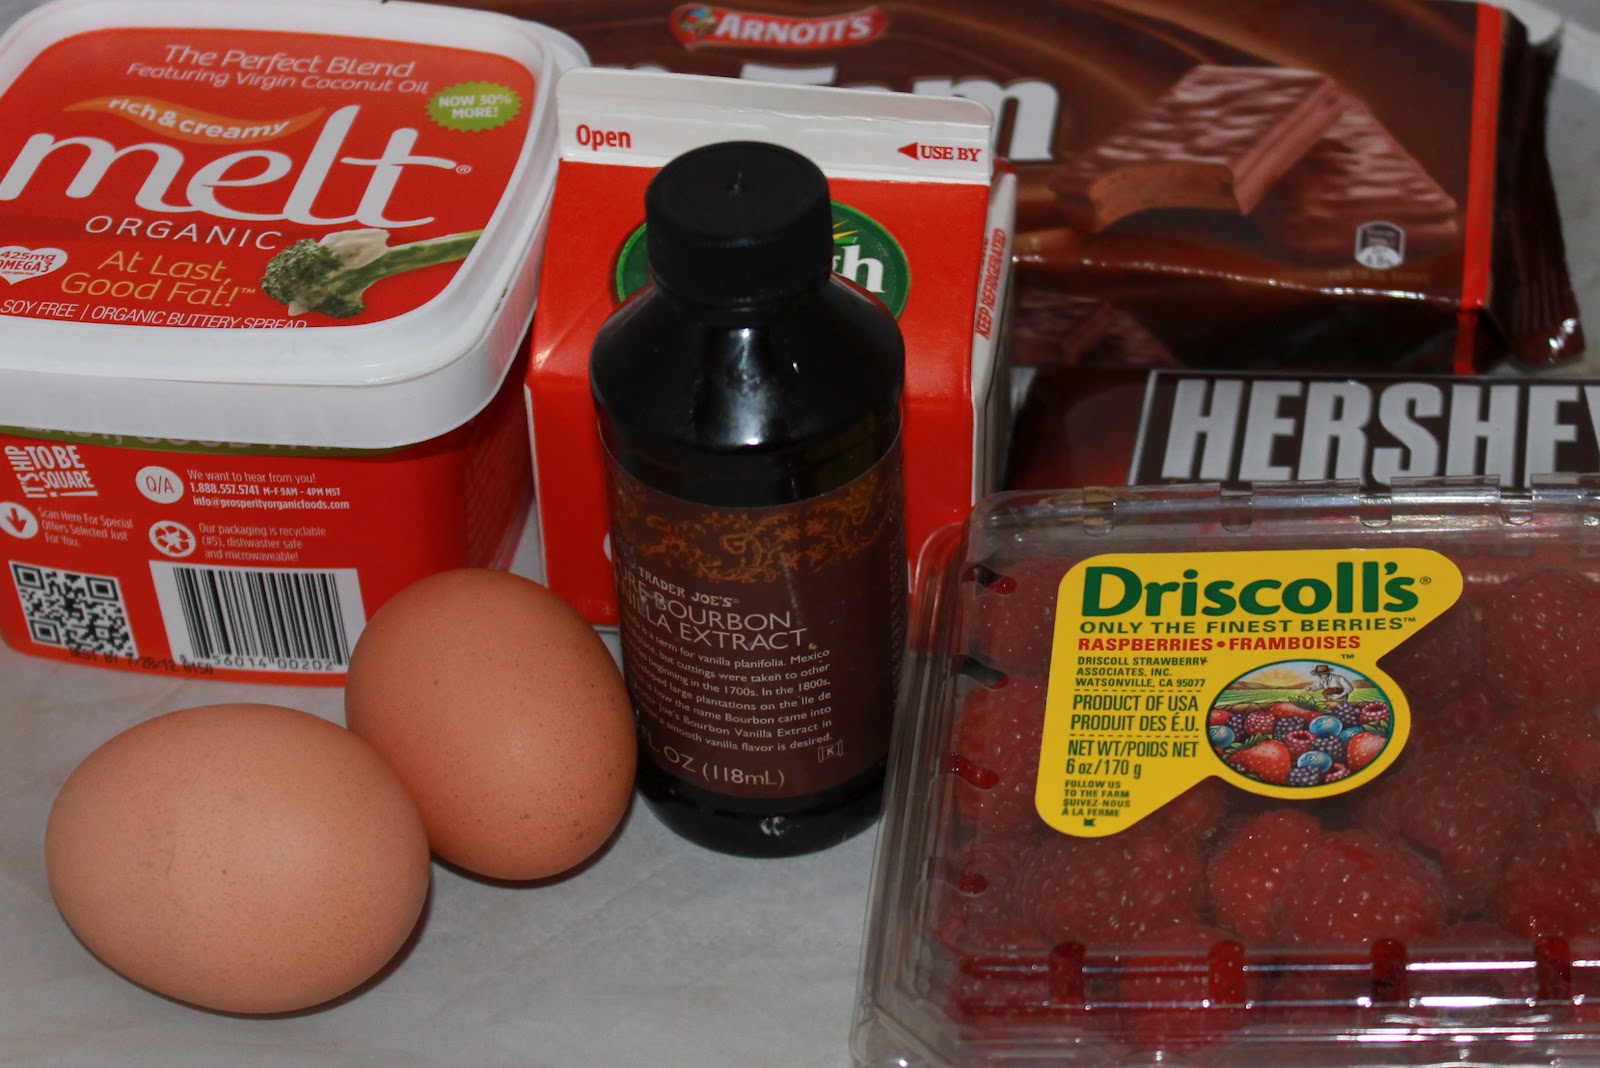
So when one of my friends traveled to Australia recently and asked what I’d like, I basically yelled in her face “TIM TAMS!” which can be quite alarming to someone who has zero idea what a Tim Tam is. I clearly made an impression, because she returned with two boxes! Now, Tim Tams are perfectly delicious on their own, maybe with some milk. But I’m a food blogger, so I had to try to turn the cookies into something even better. A Dark Chocolate Tart with Tim Tam Crust, Raspberries, and Rose Water Whipped Cream? YES! (I adapted this recipe for Tim Tam Tarts with Raspberries and Rose Water Whipped Cream from taste.com.au)
Note: I am currently taking the Melt Buttery Spread Challenge and am substituting any and all butter/oils with Melt. I wrote a review of Melt a while back, which you can read here. If you can’t find Melt in your supermarket, use other coconut oil spreads, or just butter in this recipe)
Ingredients:
For the tart:
1 box of original Tim Tams
2 ounces Melt , melted (about 1 tablespoon in its original form)
1 cup heavy whipping cream
~7 oz dark chocolate (200g if you’re using a scale), roughly chopped (I used almost 5 dark chocolate candy bars!)
1 teaspoon vanilla extract
2 egg yolks
Raspberries and Rose Water Whipped Cream, to serve
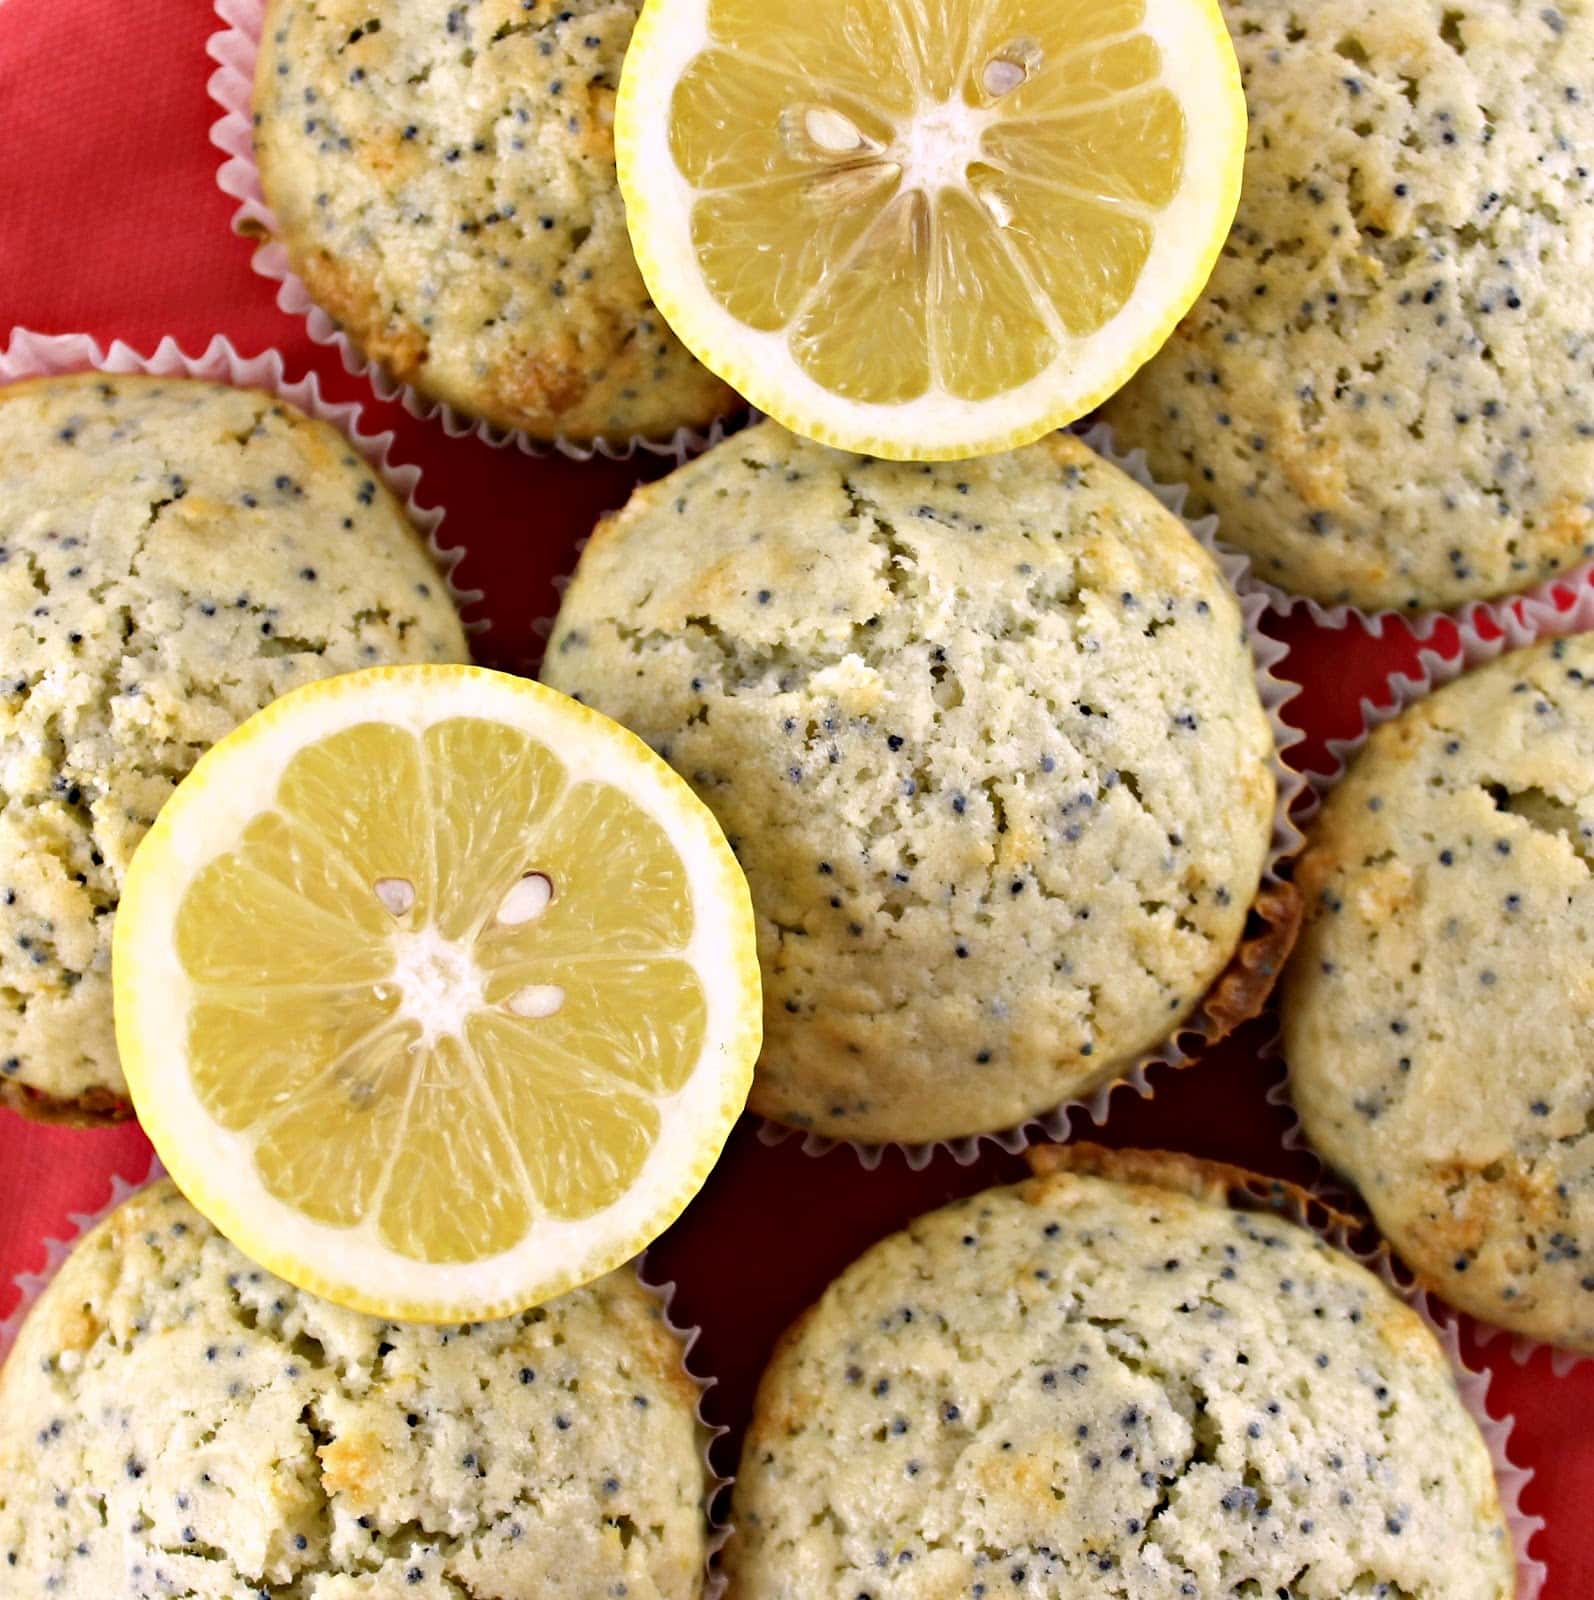
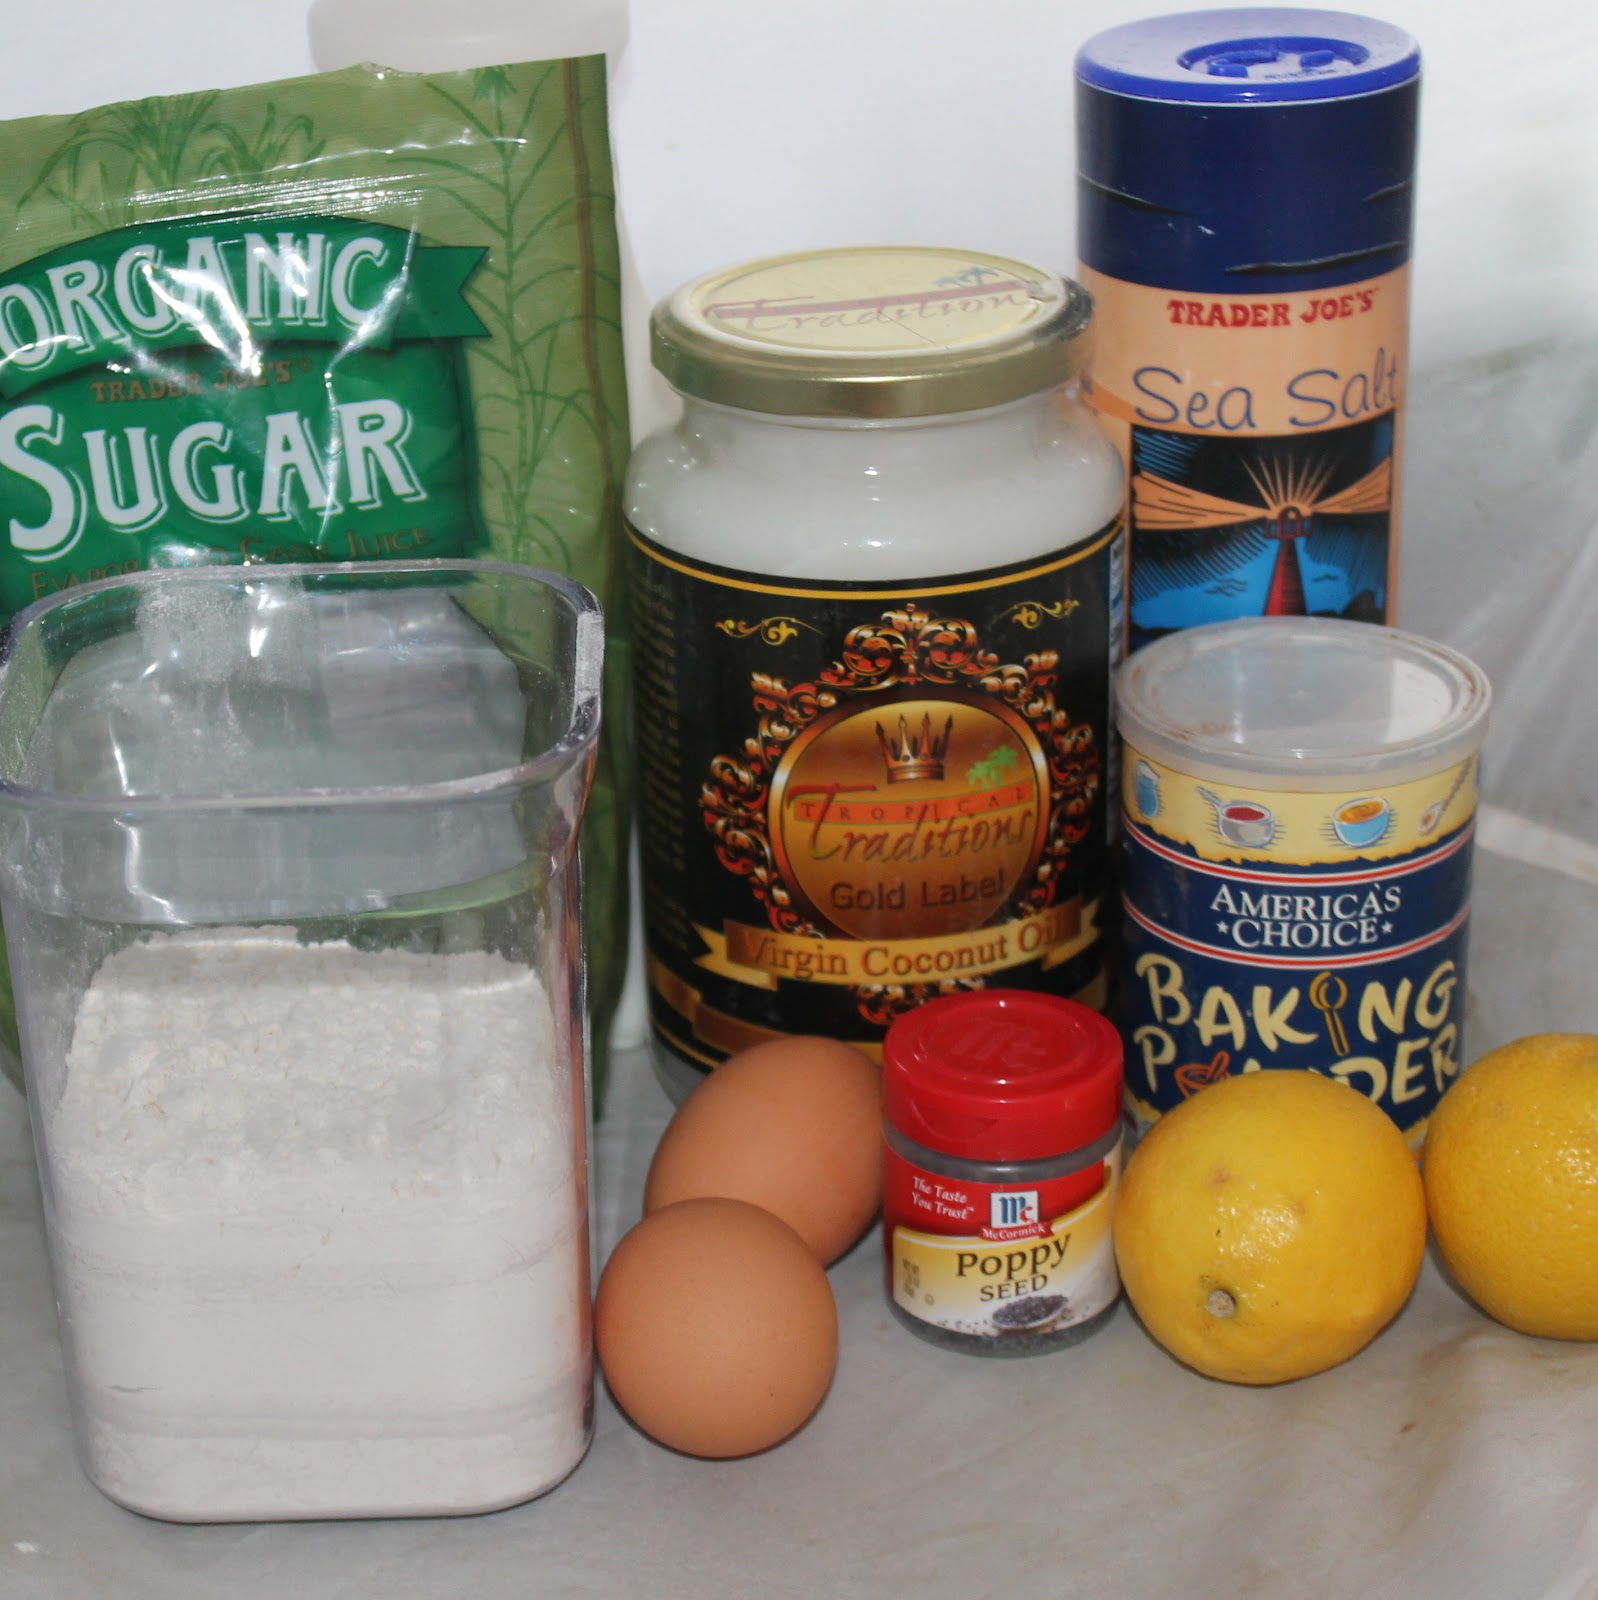
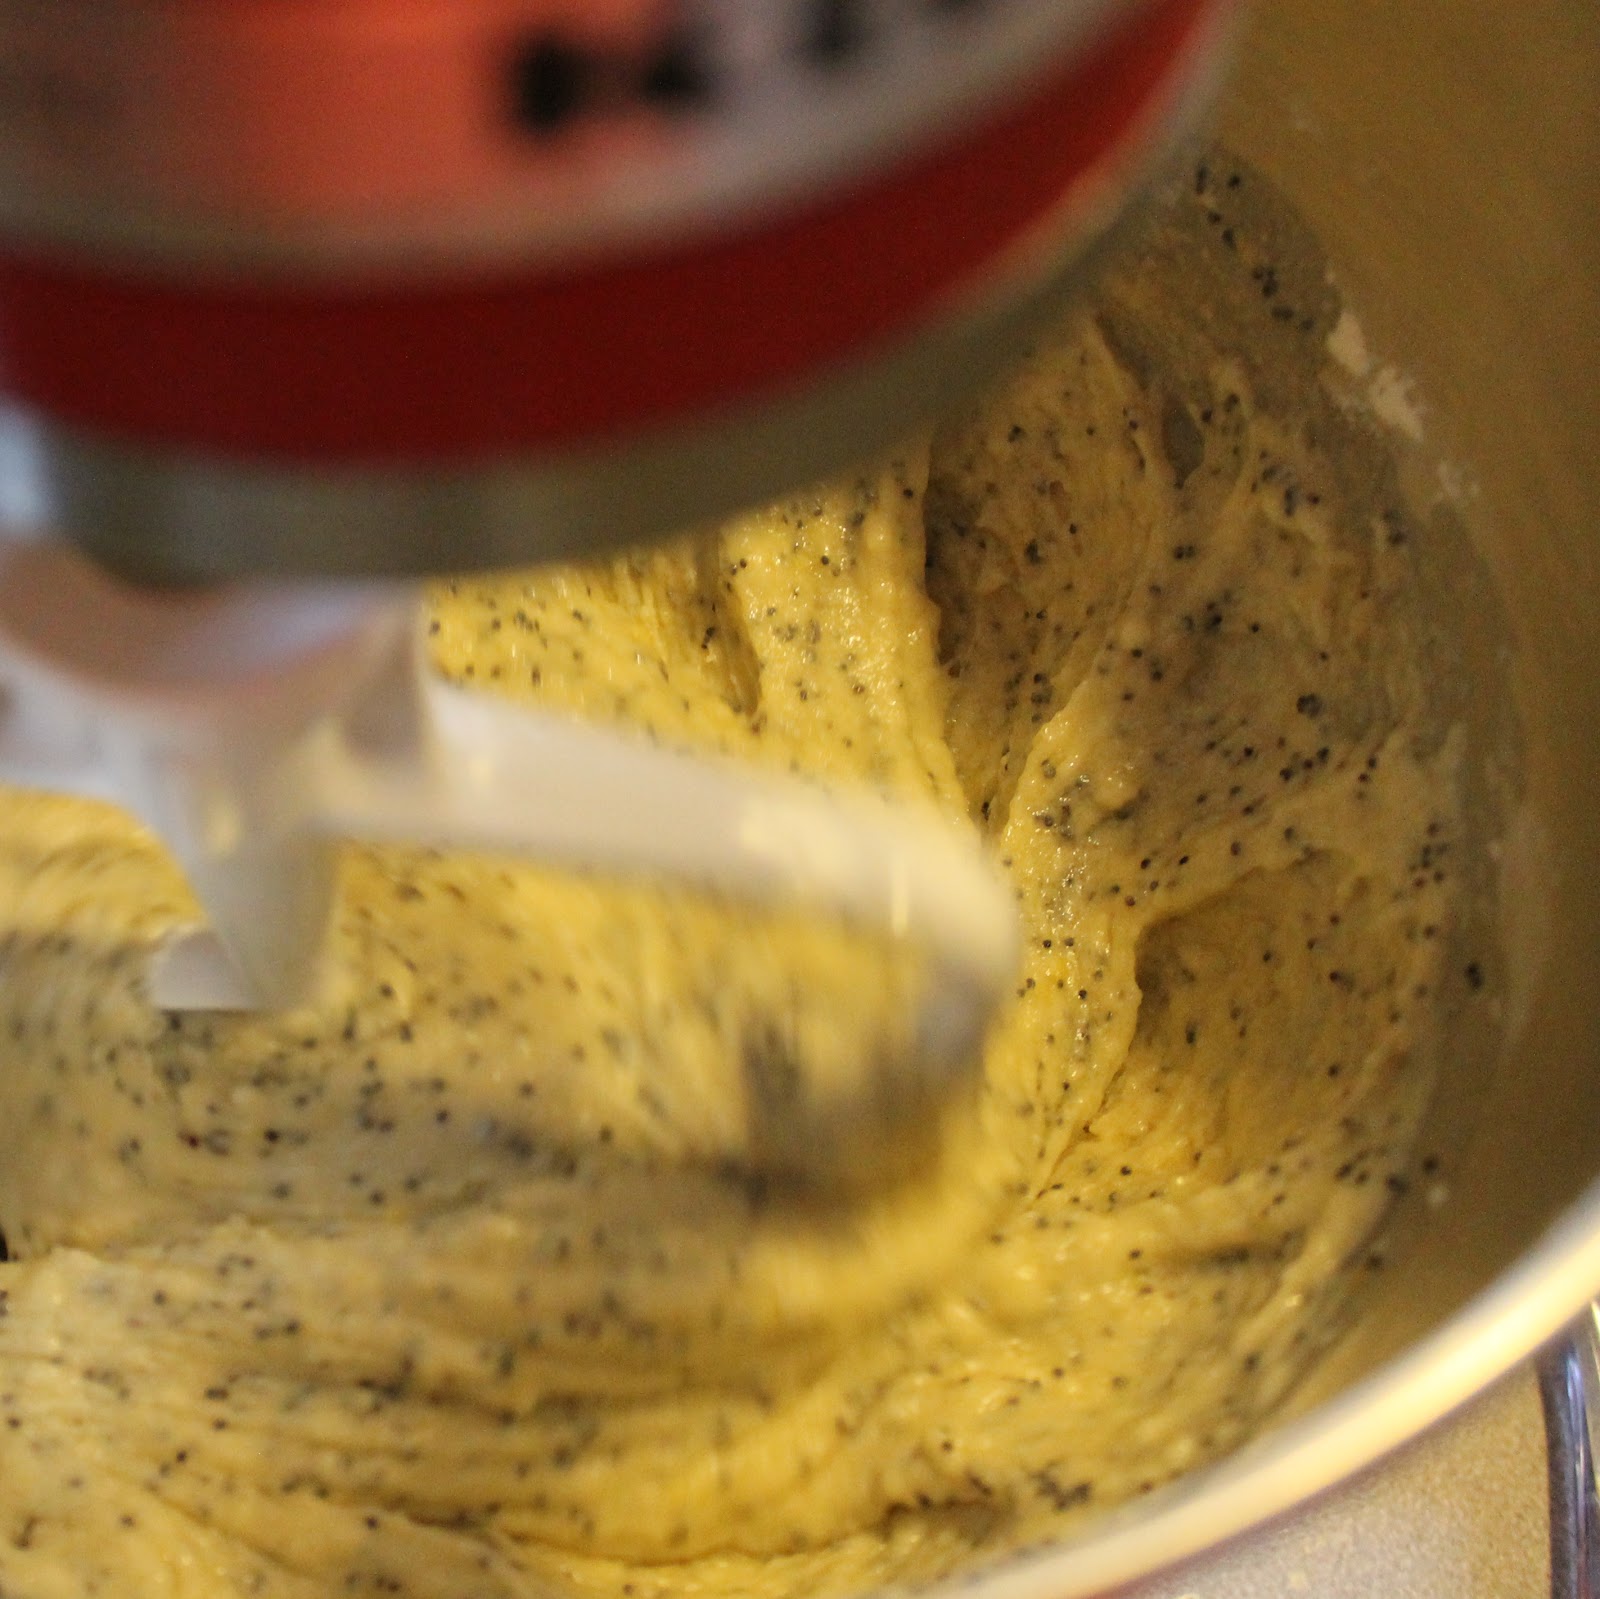
Muffins are the perfect Sunday baking activity to set yourself up for breakfasts throughout the week. I haven’t made a batch in so long so I’m happy I finally had time to do so! I was given the opportunity to try Tropical Traditions Coconut Oil and I thought the best way to try the oil out would be in baking. (I adapted this recipe for Coconut Lemon Poppy Seed Muffins from the 1 Mix, 100 Muffins cookbook.)
Coconut oil can be used like butter in its solid state and like oil in its liquid state. It does have a slight coconut flavor to it so it’s a great way to enhance the flavor of many dishes. These Coconut-Lemon Poppy Seed Muffins have just a hint of coconut that is really complementary to the Lemon flavor.
Tropical Traditions is also sponsoring a giveaway! One lucky reader will win their very own jar of coconut oil! Details below.
Ingredients (this recipe makes a dozen muffins):
2 cups all-purpose flour, leveled with a knife
1 tablespoon baking powder
1/8 teaspoon salt
2 eggs
1 cup milk
6 tablespoons Coconut Oil, melted and allowed to cool slightly
the zest of 2 lemons
1/2 cup sugar, plus 1 tablespoon sugar
2 tablespoons poppy seeds
Note: The method I will list below is the one I ended up using for this recipe. And the reason I used this method was because I completely forgot to add in the sugar and poppy seeds at the correct time! Anyways, the muffins turned out fine. Whew.
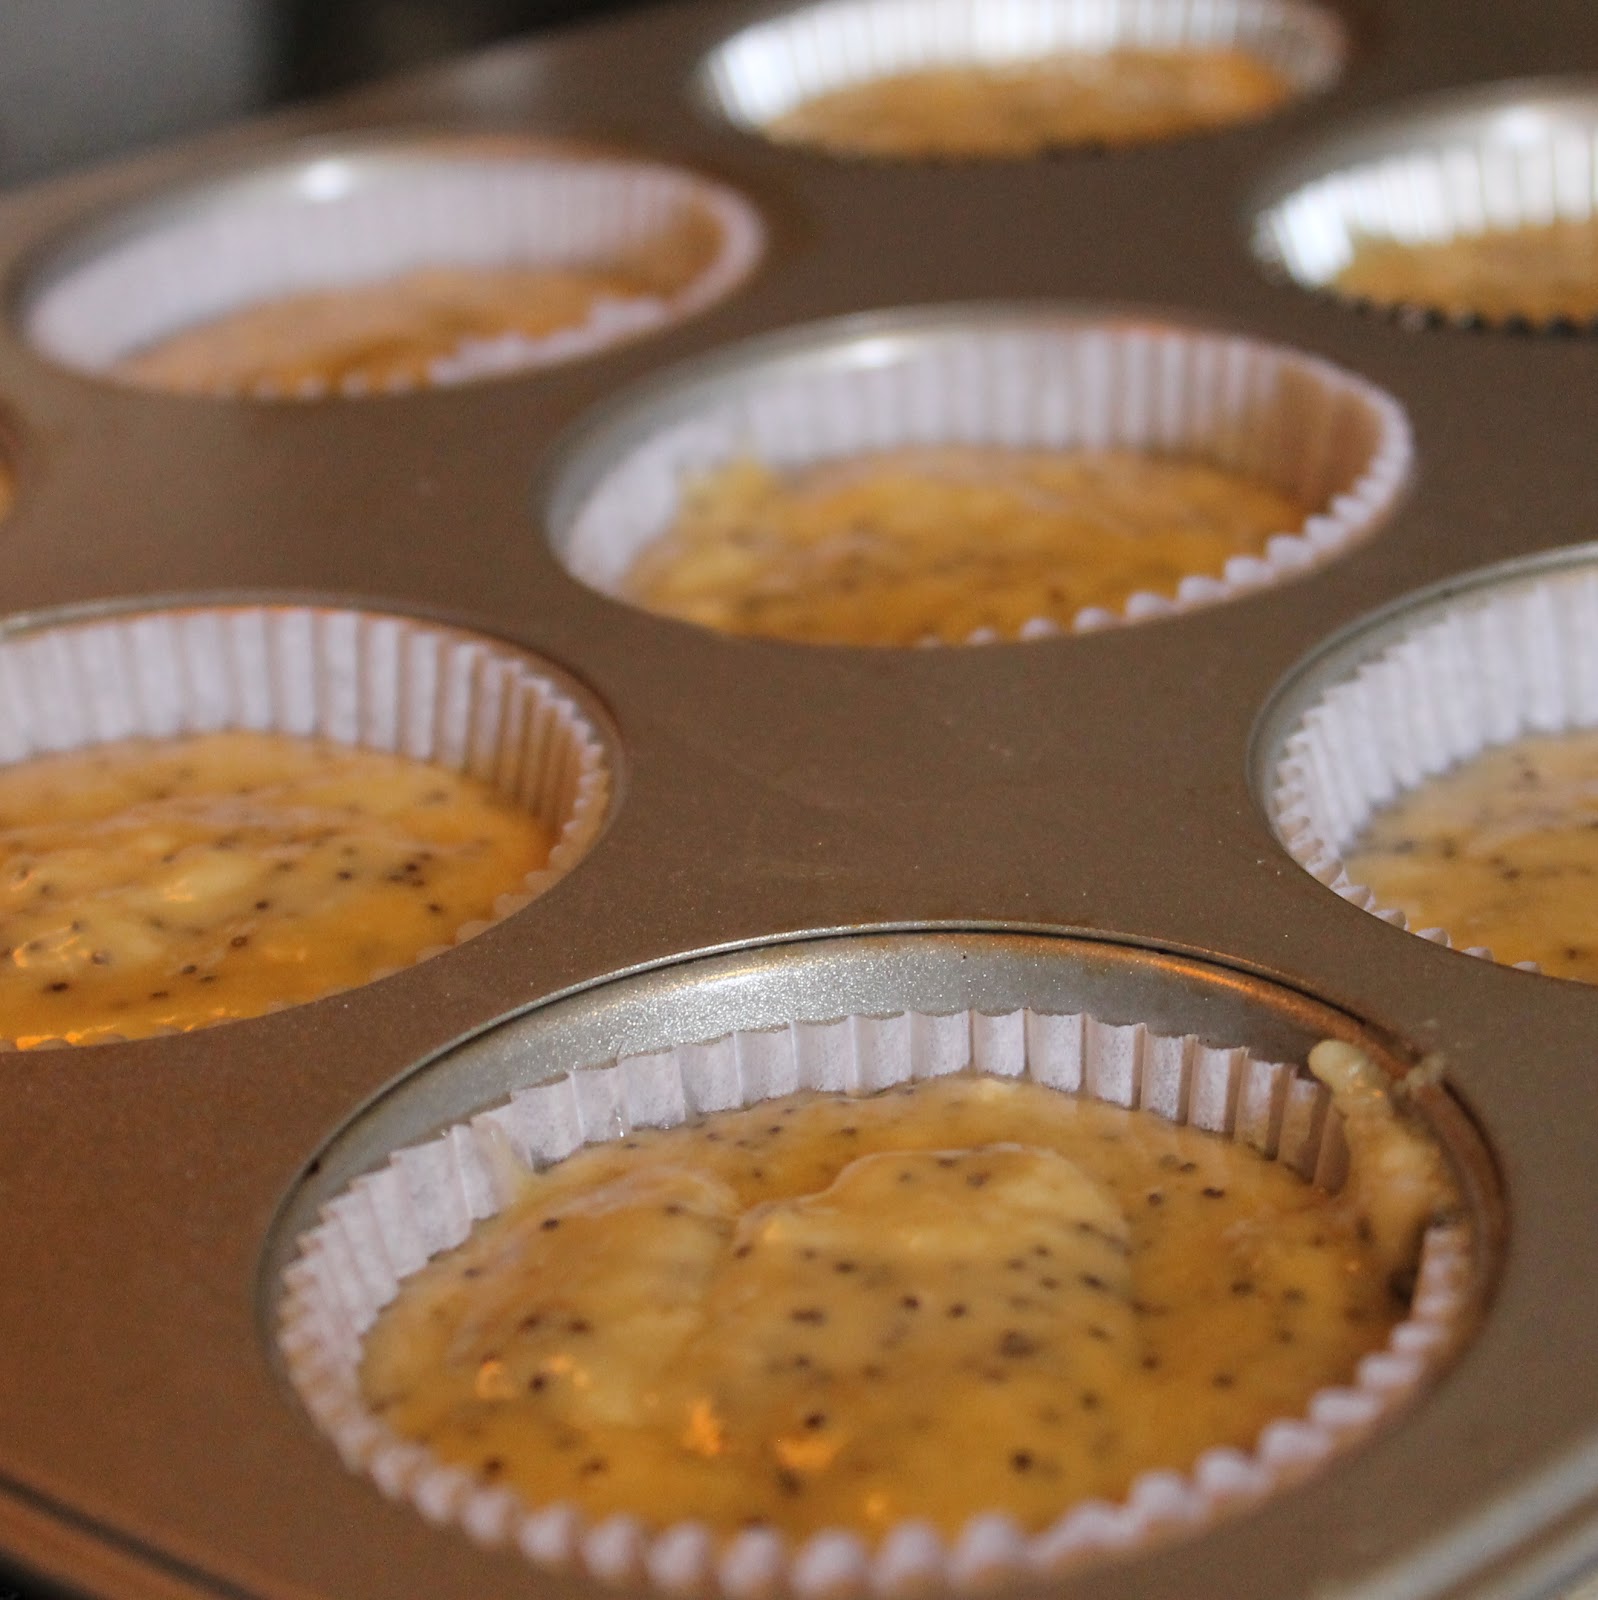
Preheat your oven to 400 degrees. Line a cupcake/muffin pan with 12 paper liners. Add 6 tablespoons coconut oil to a small saute pan over medium heat until completely melted. Remove from heat and reserve.
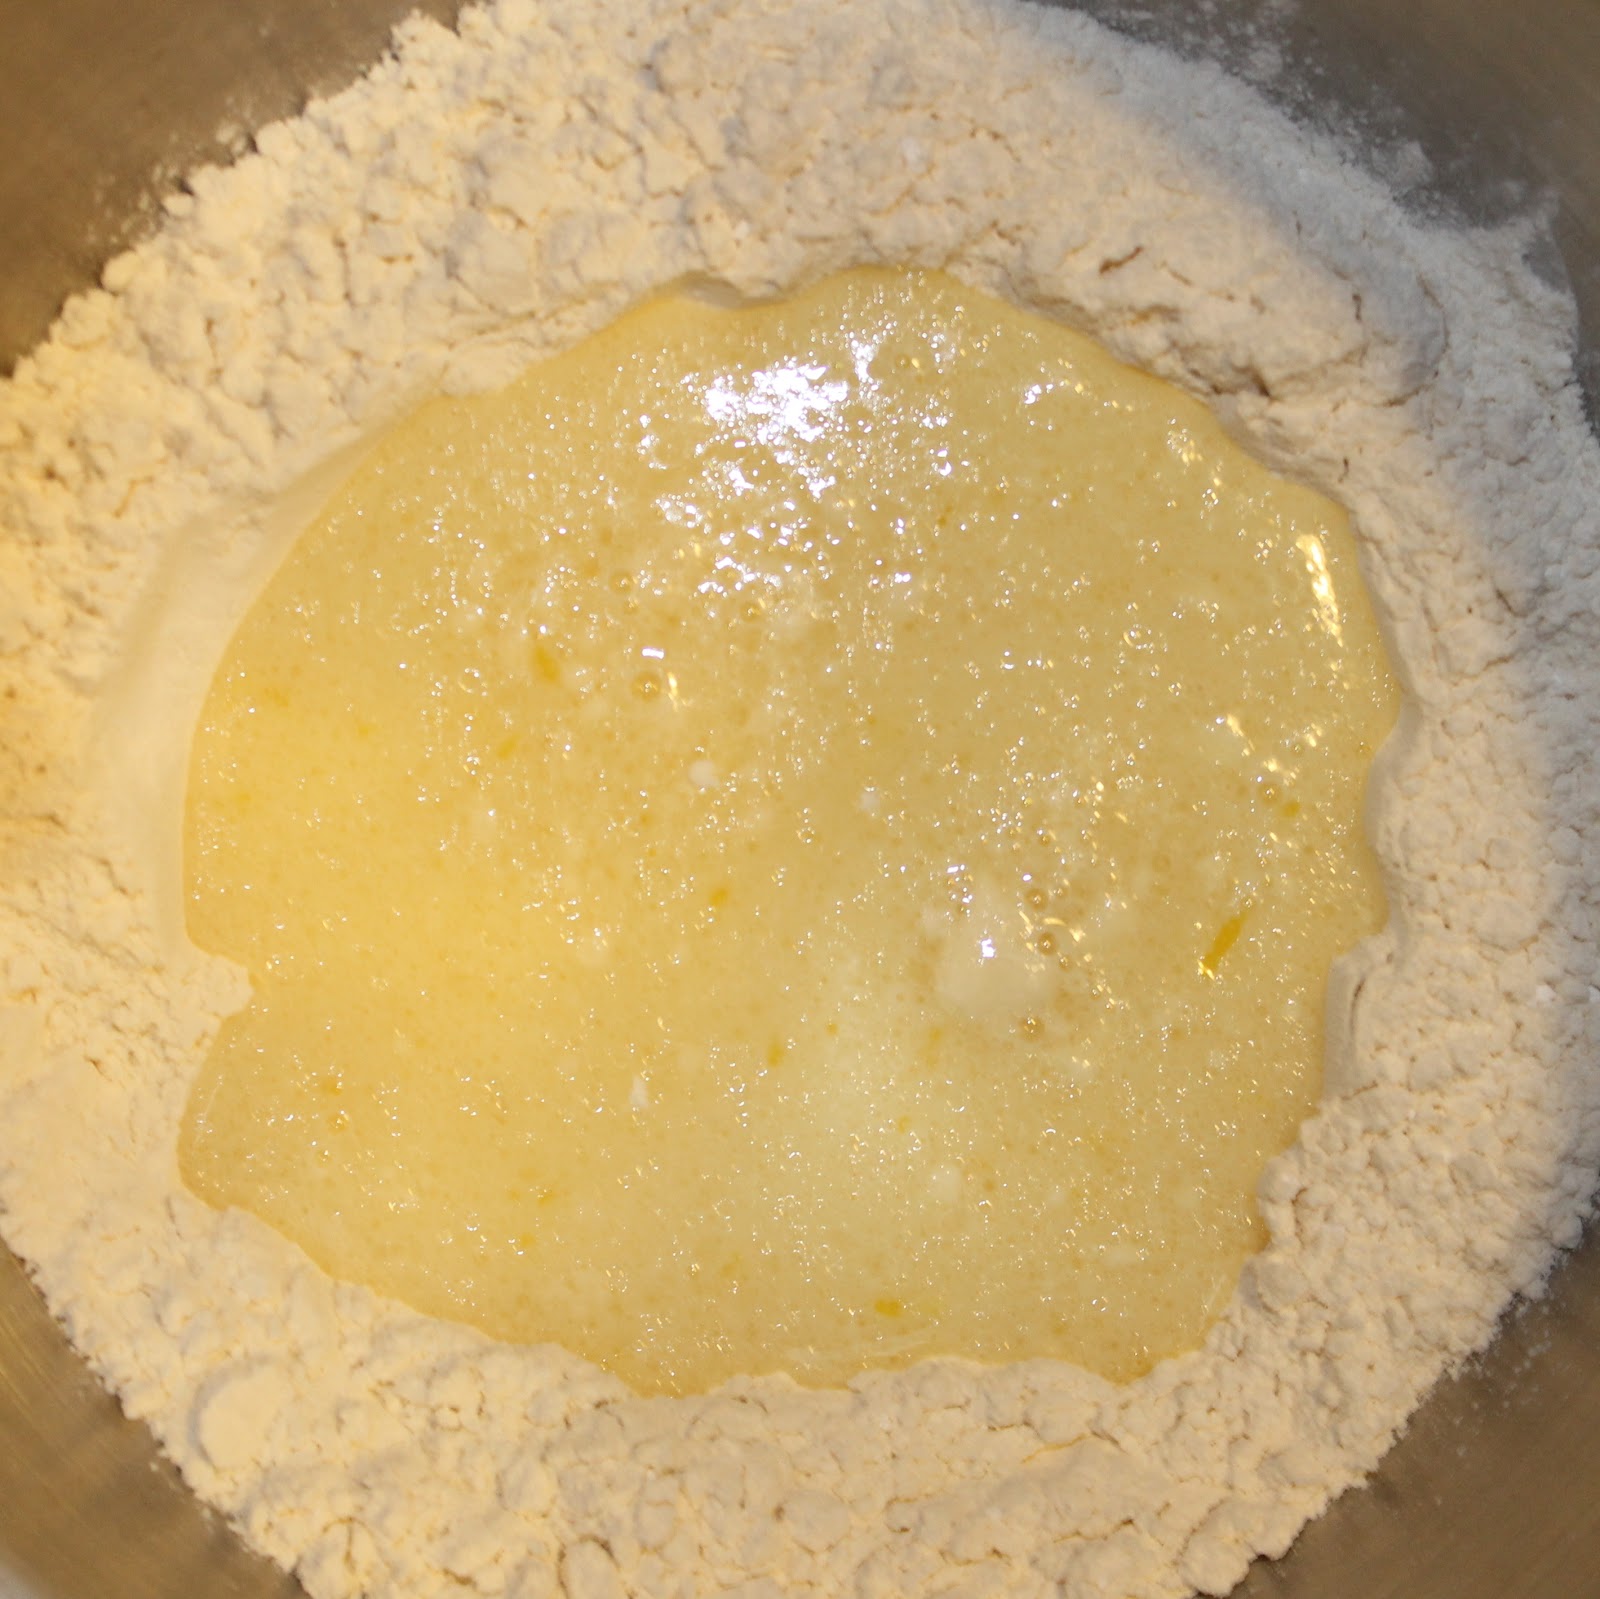
Sift the flour, baking powder, and salt. (If you have a stand mixer, add the dough hook and turn it on low for a minute or two. It will break up all the chunks, just as good as sifting!)
In a separate bowl, lightly beat the eggs.
Add the milk, melted coconut oil, and lemon rind. And mix with a whisk to combine.
Make a well in the flour mixture and add the wet mixture to the bowl.
Stir until just combined (I used the lowest setting on my stand mixer. You can just use a spatula.)
Add the sugar and poppy seeds, stirring until just combined.
Add the batter to the muffin pan. To get equal sized muffins, use a small ladle or an ice cream scoop to portion out the batter.
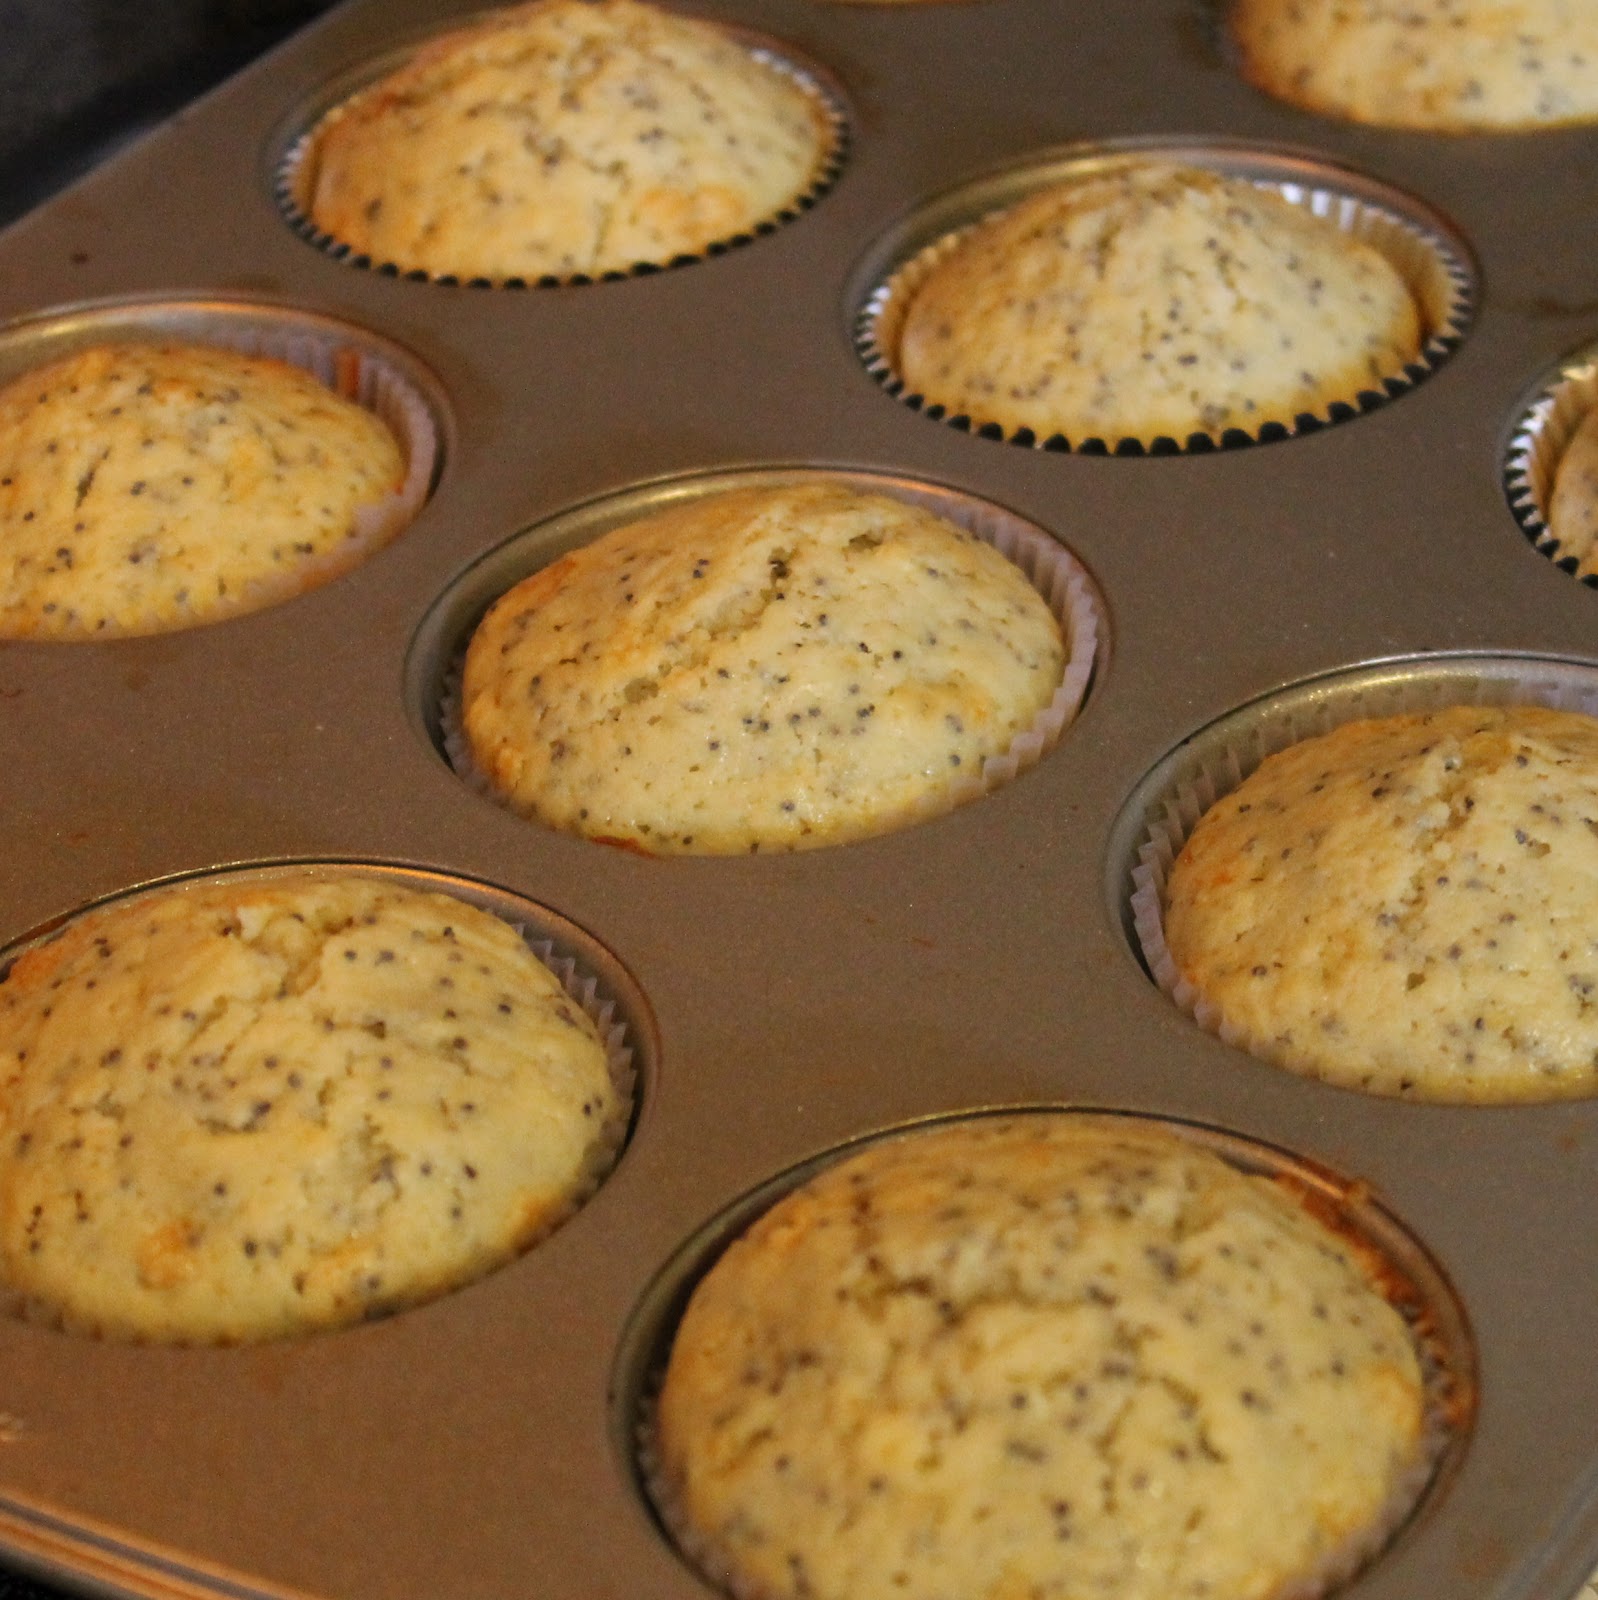
Bake the muffins for 20-22 minutes; you want the muffins to have risen and be slightly golden brown on top, or when a toothpick inserted into the center of the cupcake comes out clean.
Allow to cool for 5 minutes in the pan and then remove.
So everyone knows how delicious normal Lemon Poppy Seed Muffins are. The coconut oil brings the muffins from good to great!
They are so fragrant. I was having trouble photographing them because I kept trying to eat them!
There is definitely a taste of coconut present without it being overwhelming; I find that coconut can really overtake a dish sometimes.
The lemon still shines through and is wonderfully sweet (due to all that sugar!)
Disclaimer: Tropical Traditions provided me with a free sample of this product to review, and I was under no obligation to review it if I so chose. Nor was I under any obligation to write a positive review or sponsor a product giveaway in return for the free product.
Tropical Traditions is America’s source for coconut oil. Their Gold Label Virgin Coconut Oil is hand crafted in small batches by family producers, and it is the highest quality coconut oil they offer. You can read more about how virgin coconut oil is different from other coconut oils on their website: What is Virgin Coconut Oil? You can also watch the video they produced about Gold Label Virgin Coconut Oil:
Tropical Traditions also carries other varieties of affordable high quality coconut oil. Visit their website to check on current sales, to learn about the many uses of coconut oil, and to read about all the advantages of buying coconut oil online. Since the FDA does not want us to discuss the health benefits of coconut oil on a page where it is being sold or given away, here is the best website to read about the health benefits of coconut oil.
To enter, use the widget below. You have 8 chances to win (Writing a comment is mandatory, the rest are optional)! Giveaway ends this Friday, May 11 at 11:59PM EST. Good luck!
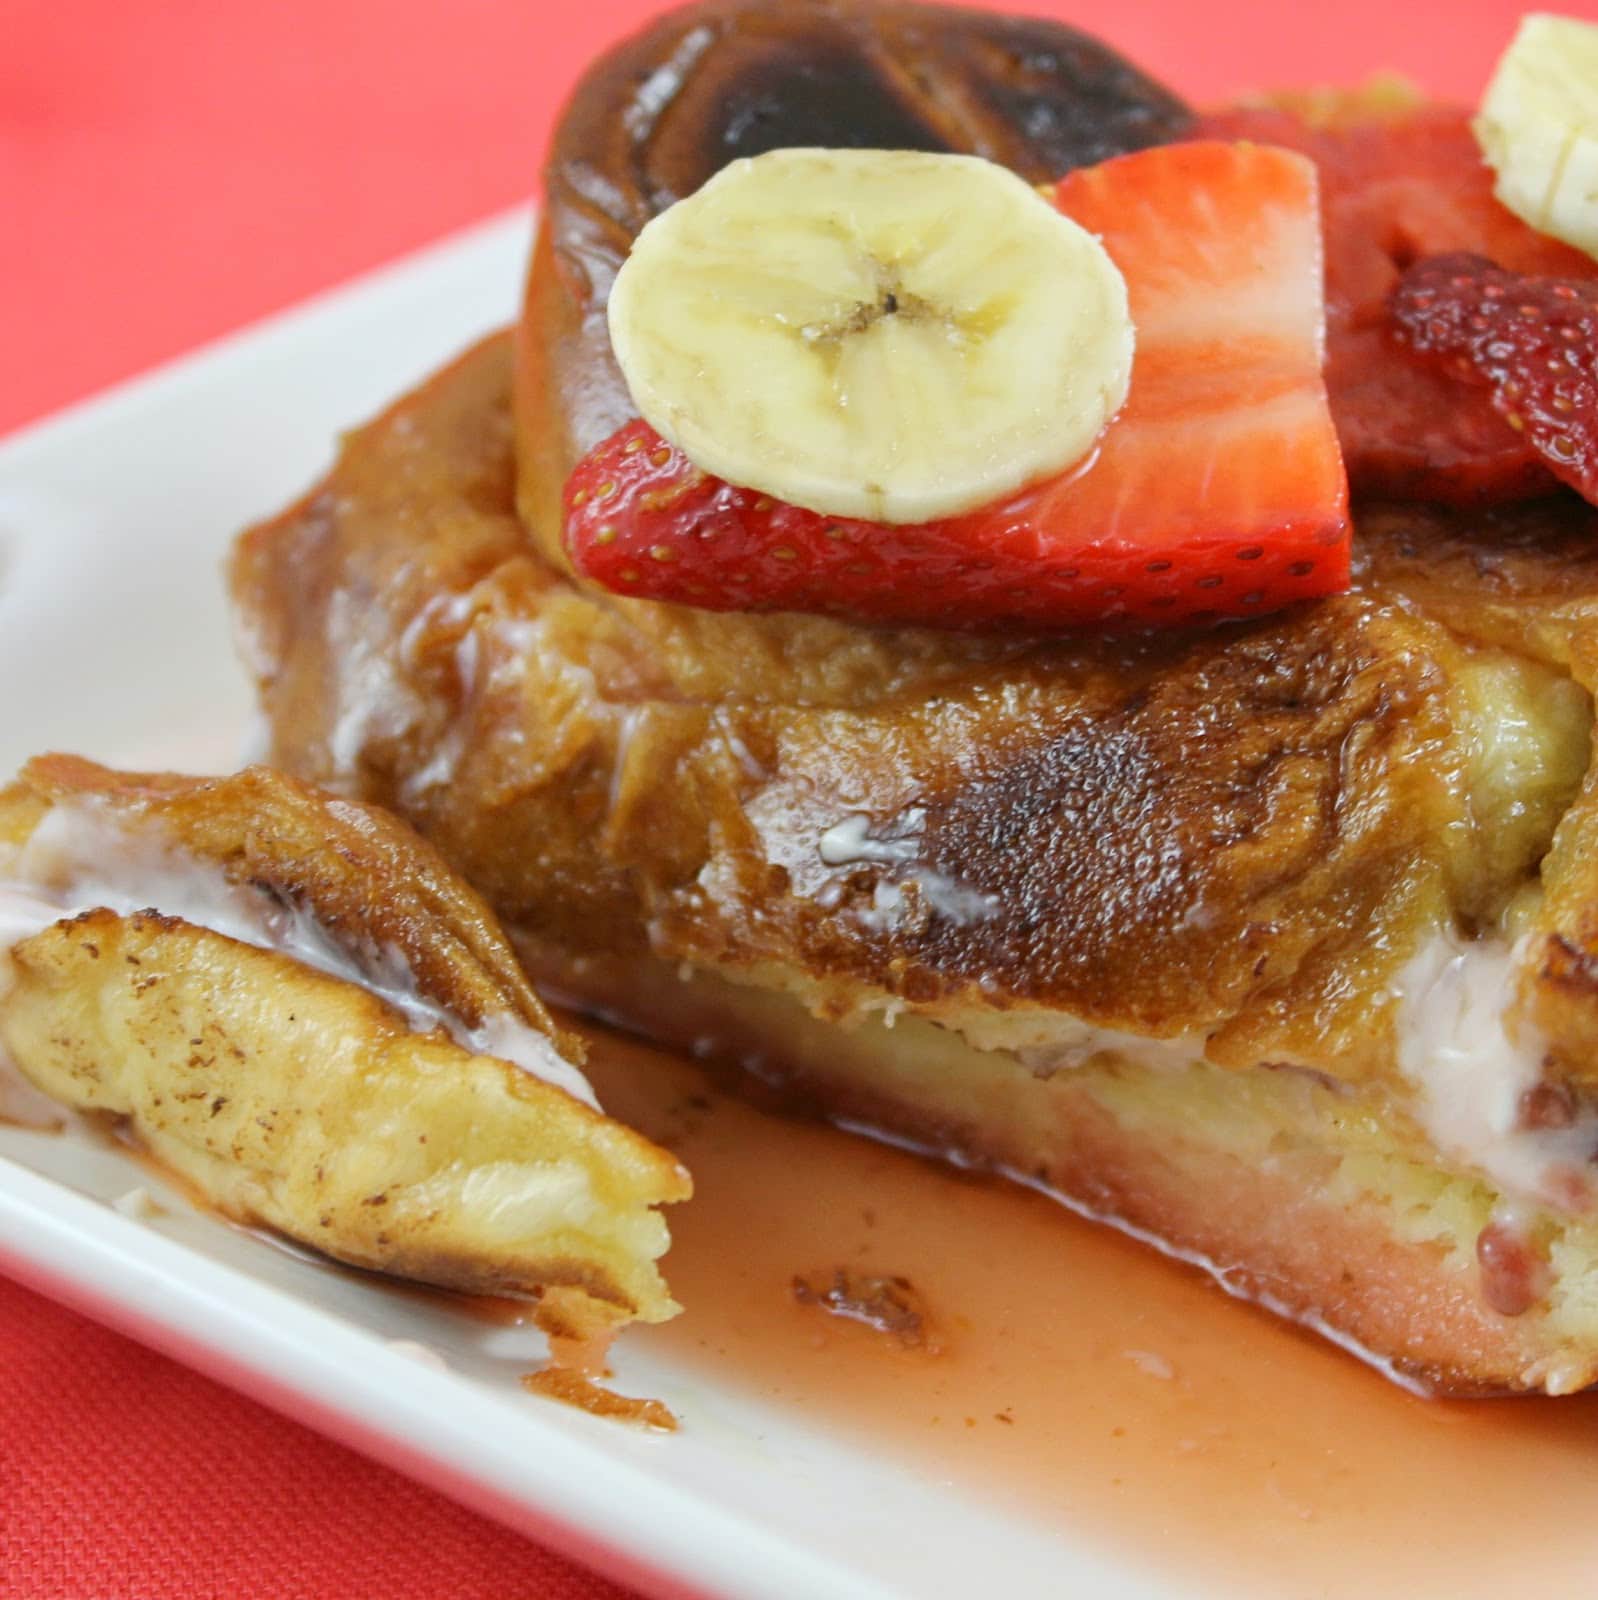
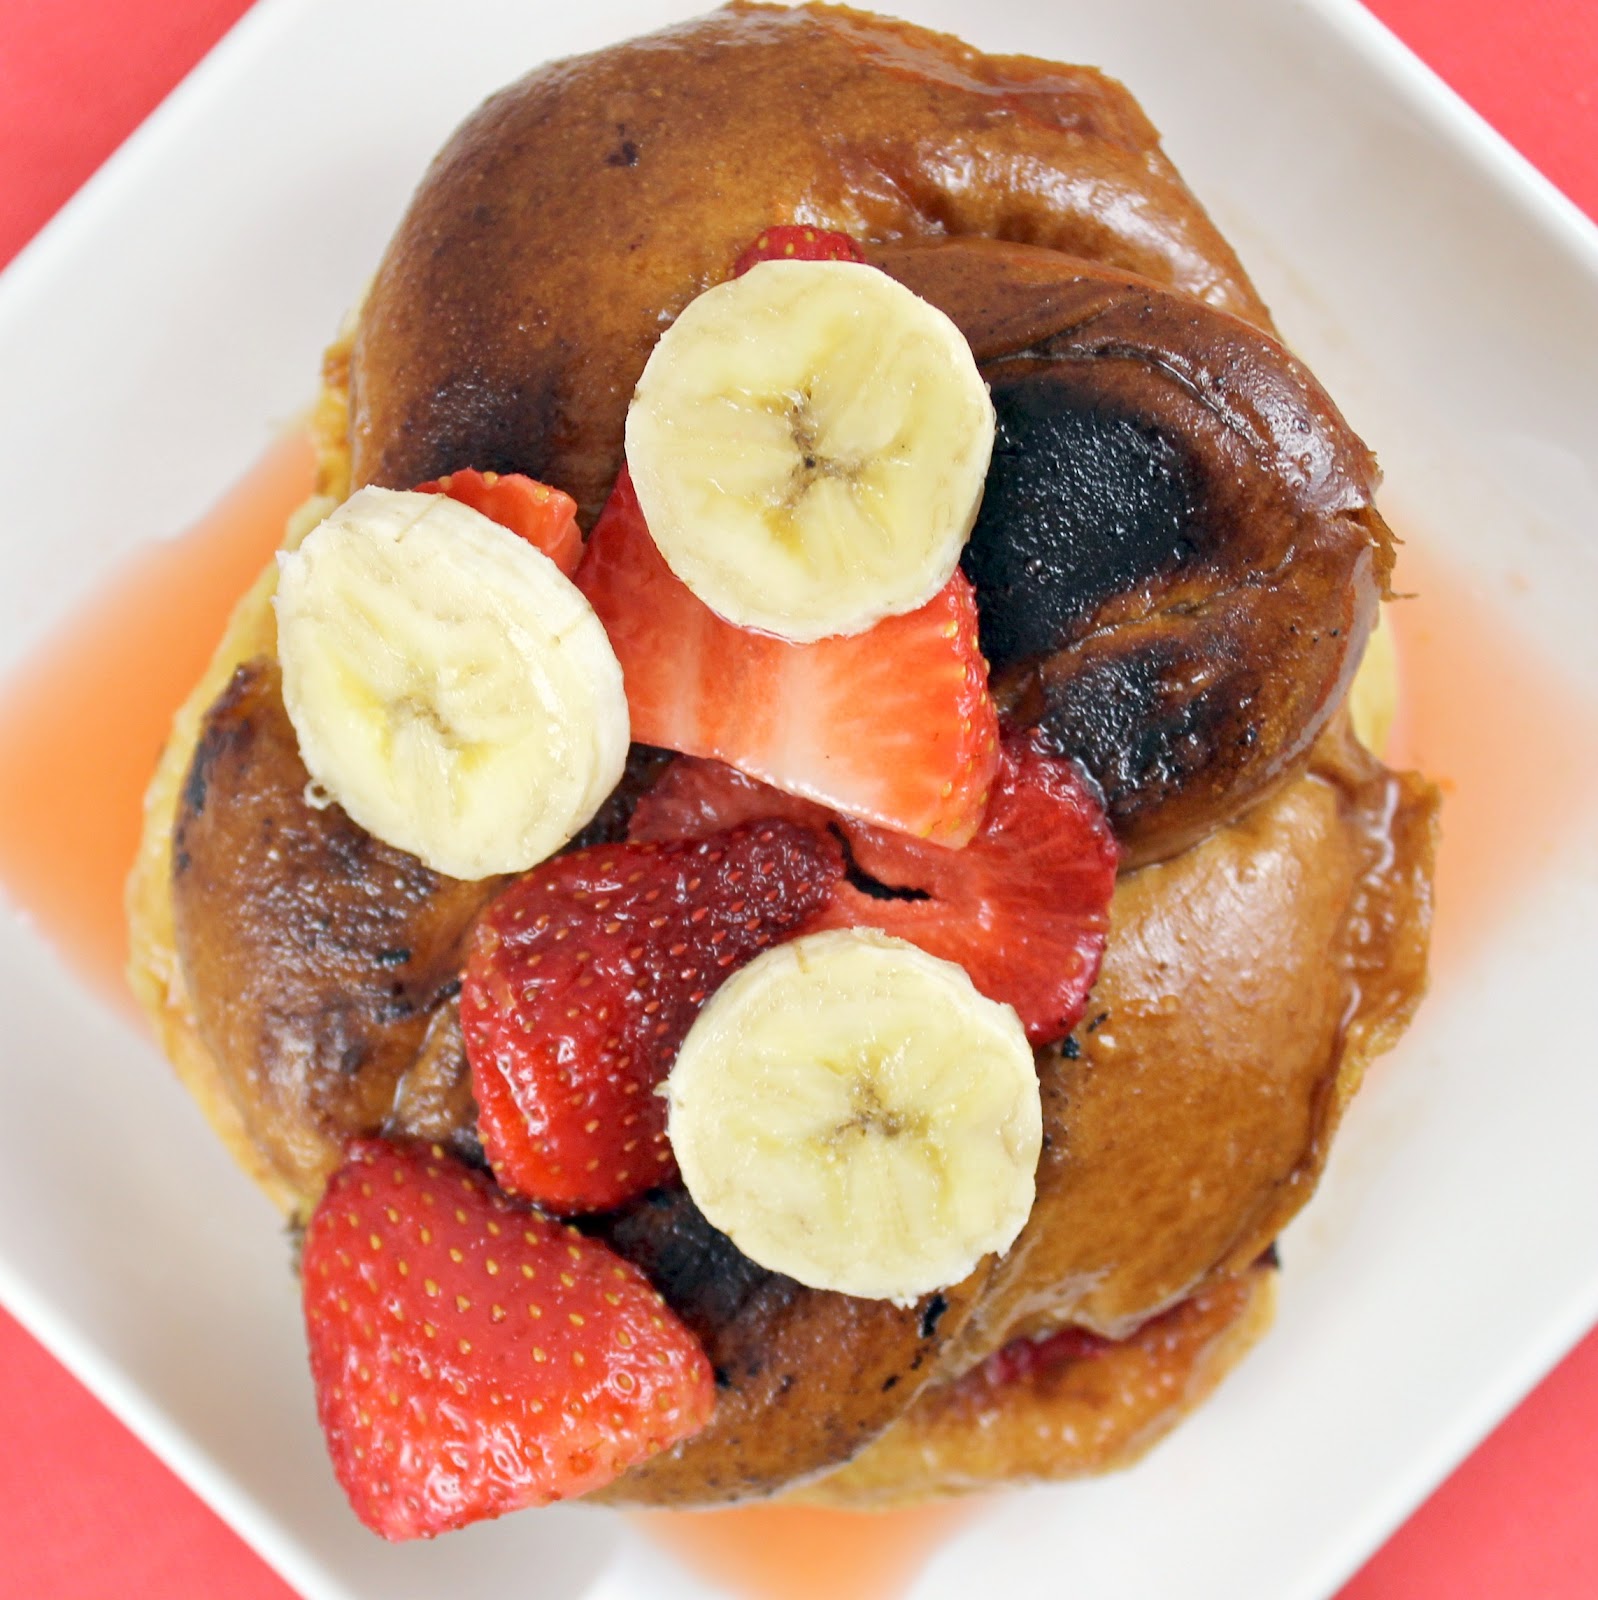
It’s spring! And spring means (among other things) that strawberries are back in season. So what better way to use them than for a delicious weekend brunch? This Strawberry Banana Stuffed French Toast uses strawberries three ways: fresh, in a strawberry sauce, and for an extra touch of strawberry goodness, in a strawberry jam. And because I love bananas, I threw in a couple slices of that as well. I found the strawberry sauce recipe here and my French toast recipe is based off of this post.
Ingredients:
4 challah rolls
2 eggs, beaten
1/2 cup vanilla almond milk (unsweeted)
2 tablespoons sugar
1 1/4 cup sliced strawberries, divided
3 tablespoons honey
the juice and zest of one lemon
4 ounces low fat cream cheese
1 tablespoon strawberry jam
1/4 teaspoon vanilla extract
1 banana, sliced
1 tablespoon butter
Begin by slicing the challah rolls in half. In a large bowl, add the eggs, almond milk and 2 tablespoons sugar.
Add the roll halves and mix to coat.
Cover and refrigerate for one hour.
one hour later
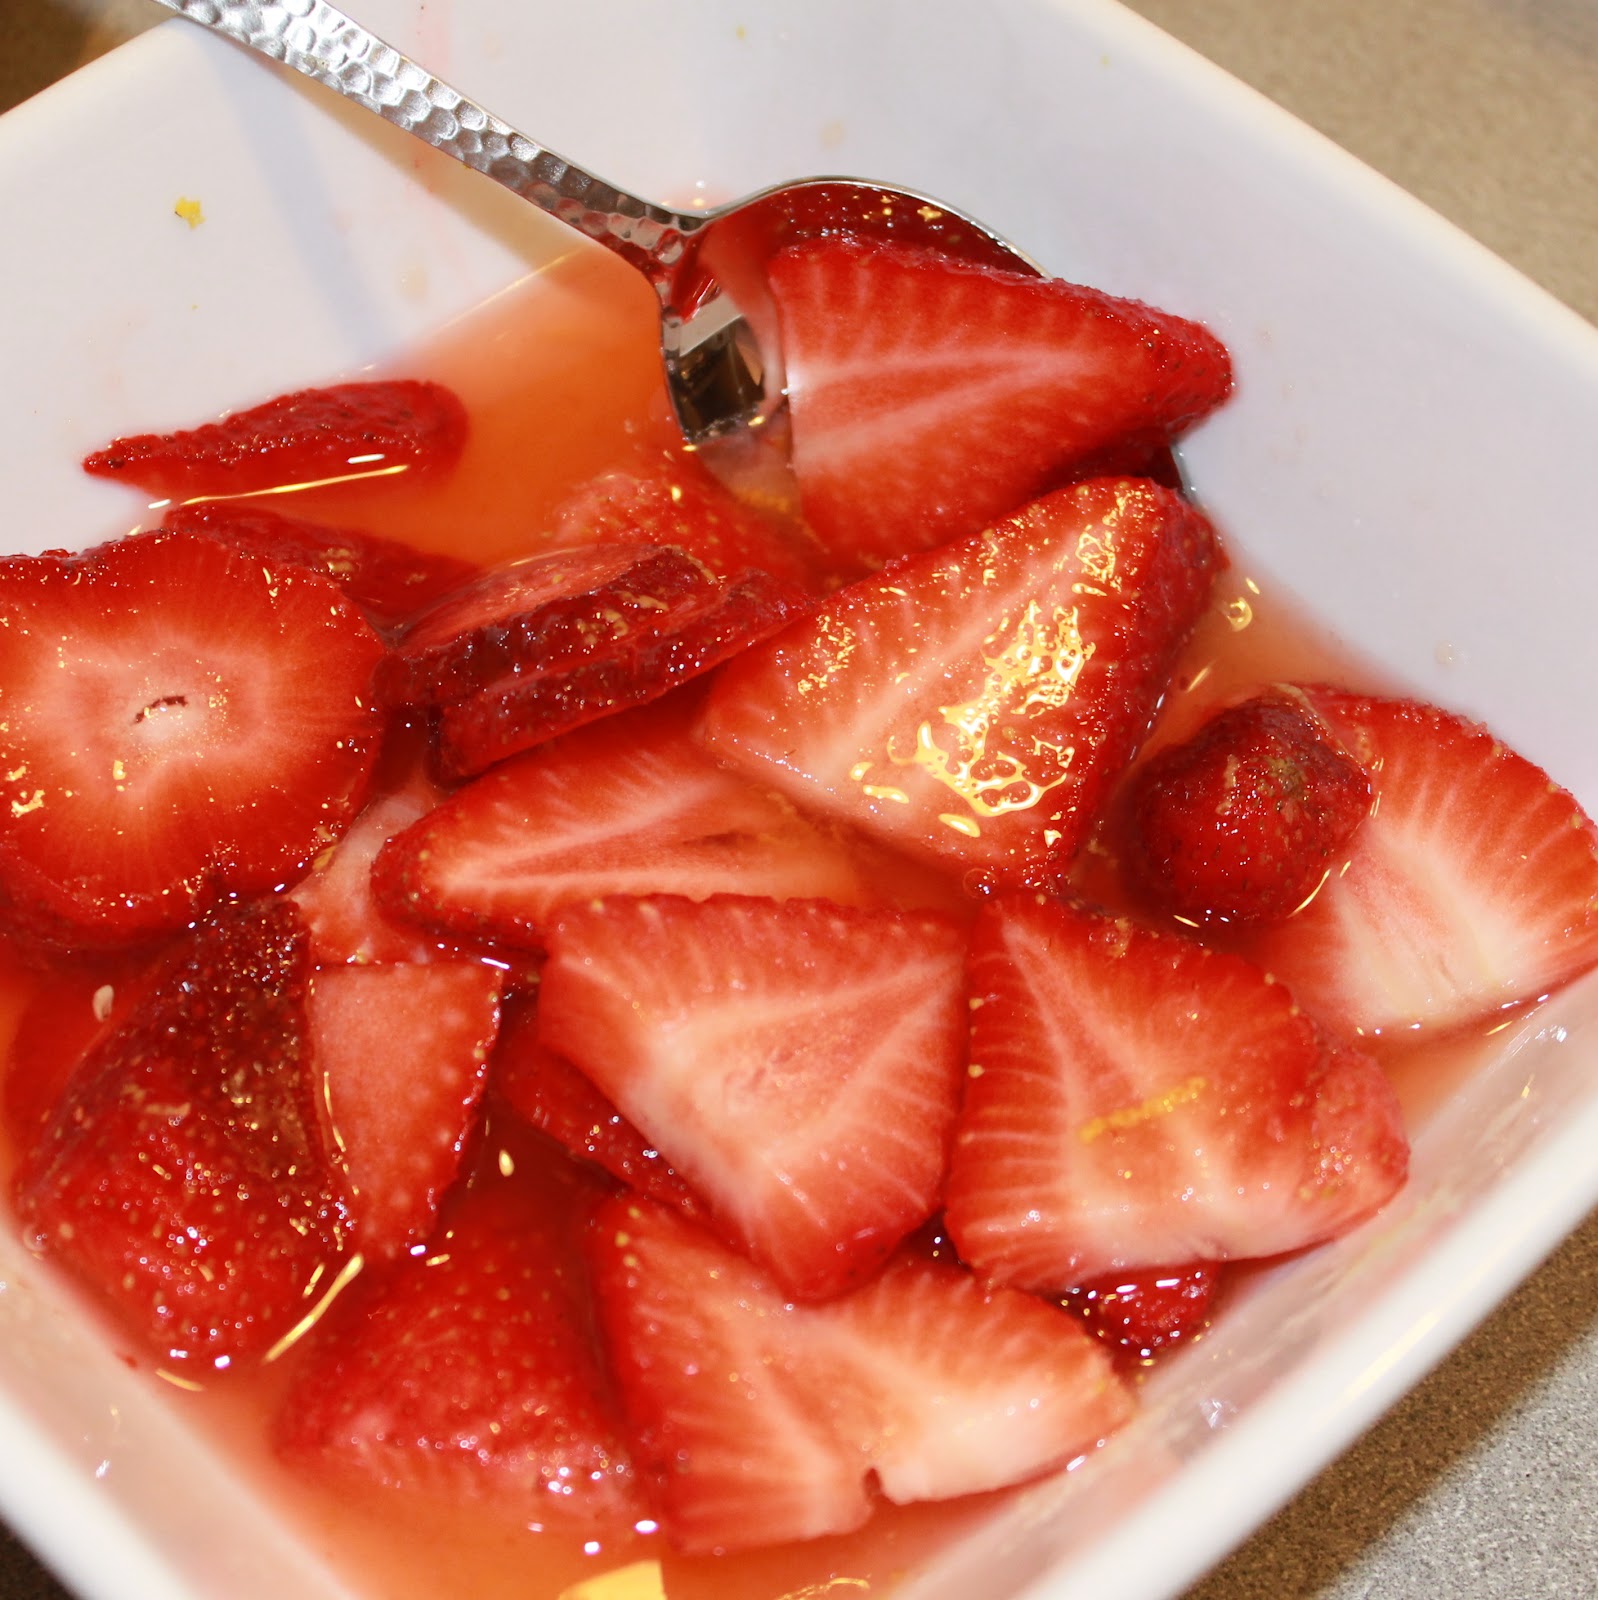
Add 1 cup sliced strawberries, 3 tablespoons honey, and the lemon juice and zest to a bowl and mix to combine.
Allow to stand for 1 hour. (I actually ended up leaving both for over an hour. Whoops.)
one hour later
Combine the cream cheese, vanilla extract and strawberry jam.
Slice the rest of your strawberries and your banana.
Heat a saute pan over medium high heat and add 1 teaspoon butter. Add 1 set of challah rolls to the saute pan and cook for three minutes.
Flip and cook for three more minutes.
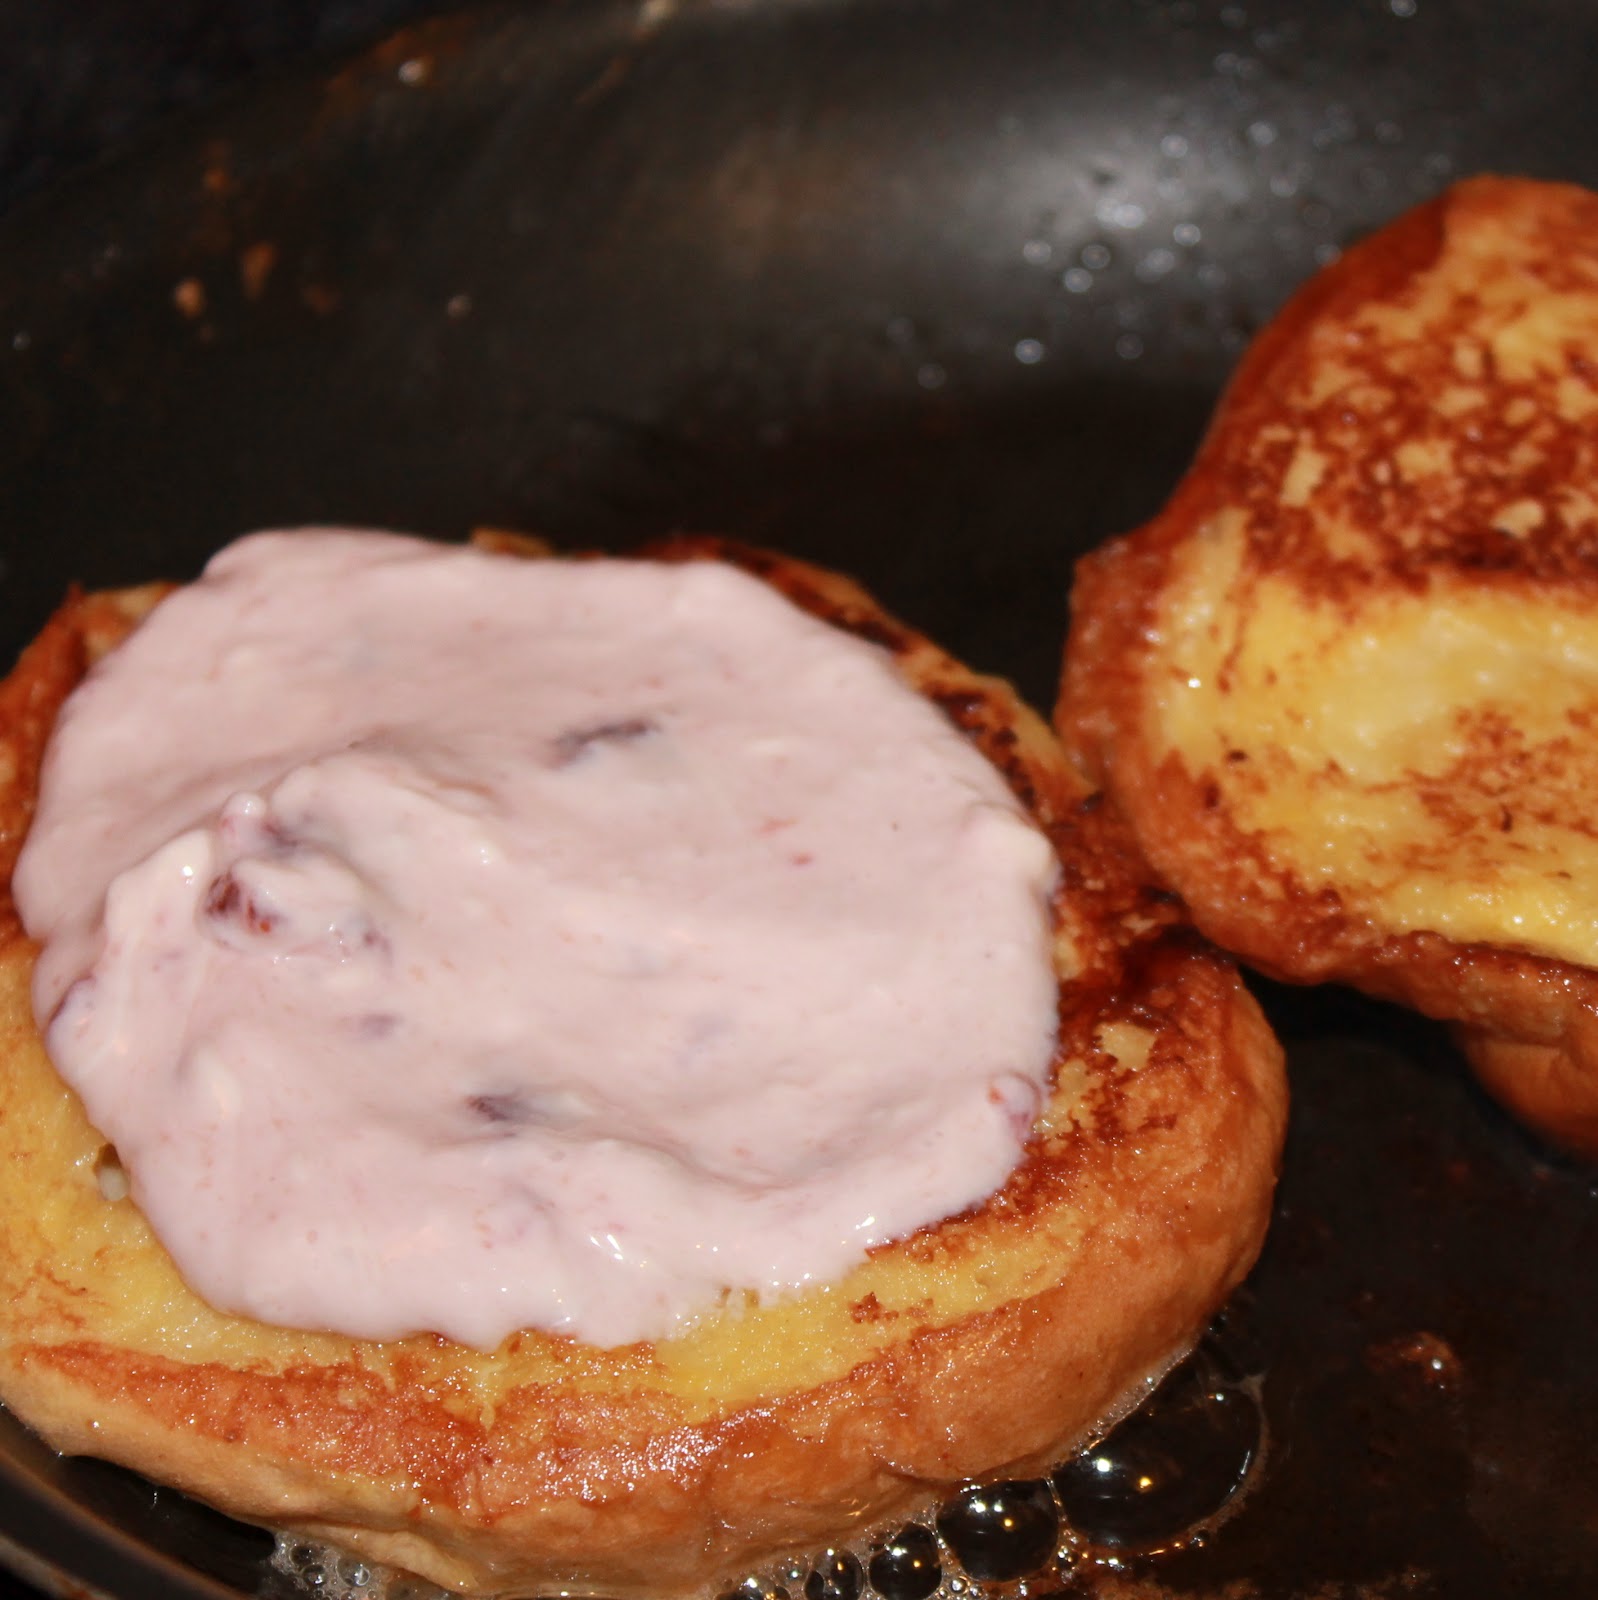
While waiting for the side to cook, add 1 tablespoon of the cream cheese mixture to one piece of roll.
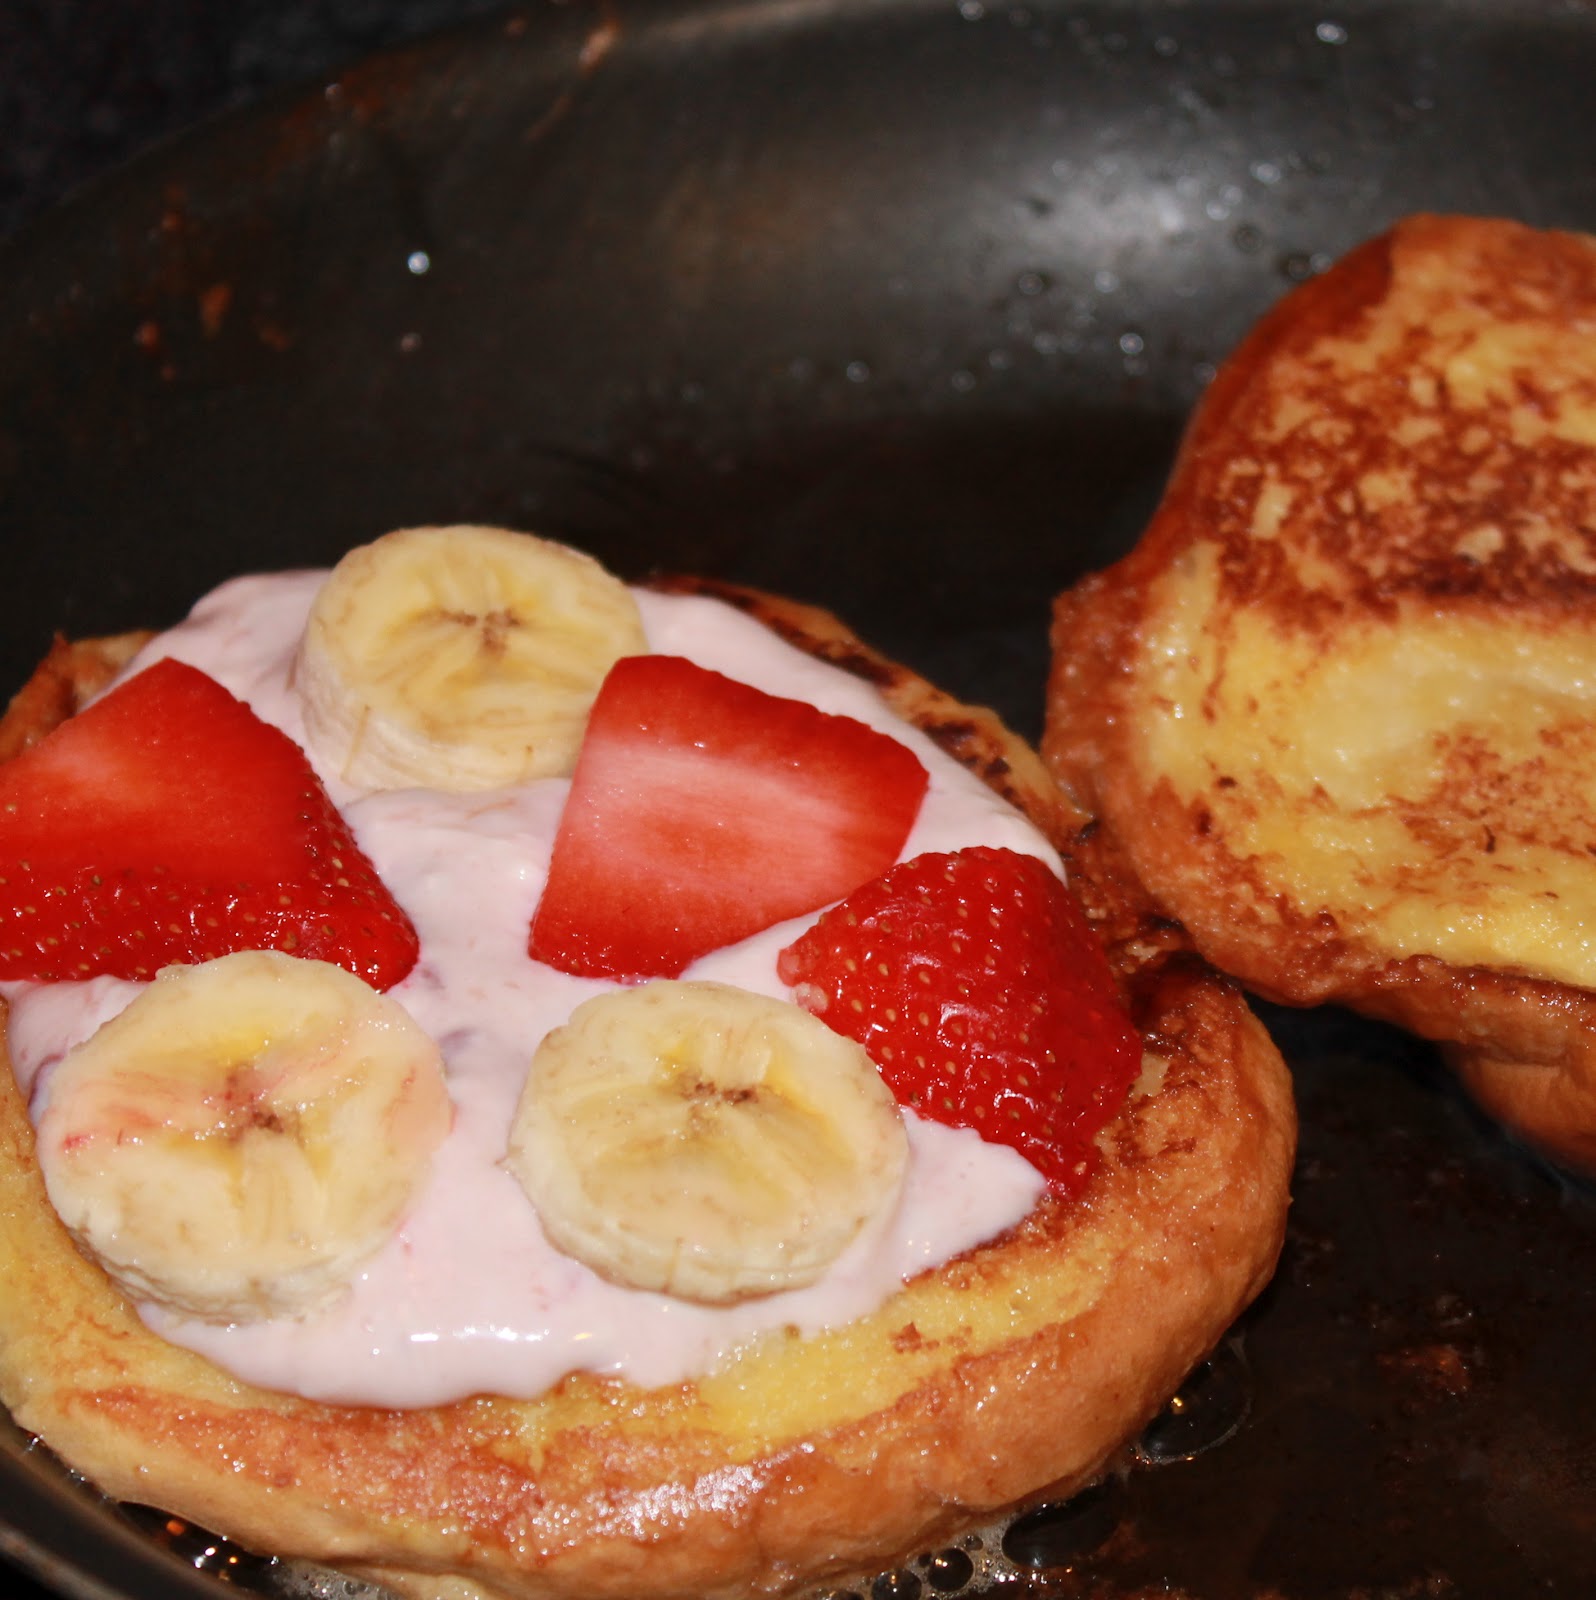
Add slices of strawberry and banana.
When the bread is done cooking, assemble the pieces of bread. Add one to two tablespoons of the strawberry sauce and a few more slices of banana.
Repeat with remaining rolls. How good does that look?
The challah rolls were crispy while the cream cheese mixture was nice and creamy.
The strawberry sauce was tangy, just enough to complement the sweetness of the rest of the French toast.
And as usual, I am a big fan of the already portioned serving. It gives me a better chance of not being a piggy. 🙂
I loved this! I wish I could eat this every spring day. Except I think people would begin to judge me…
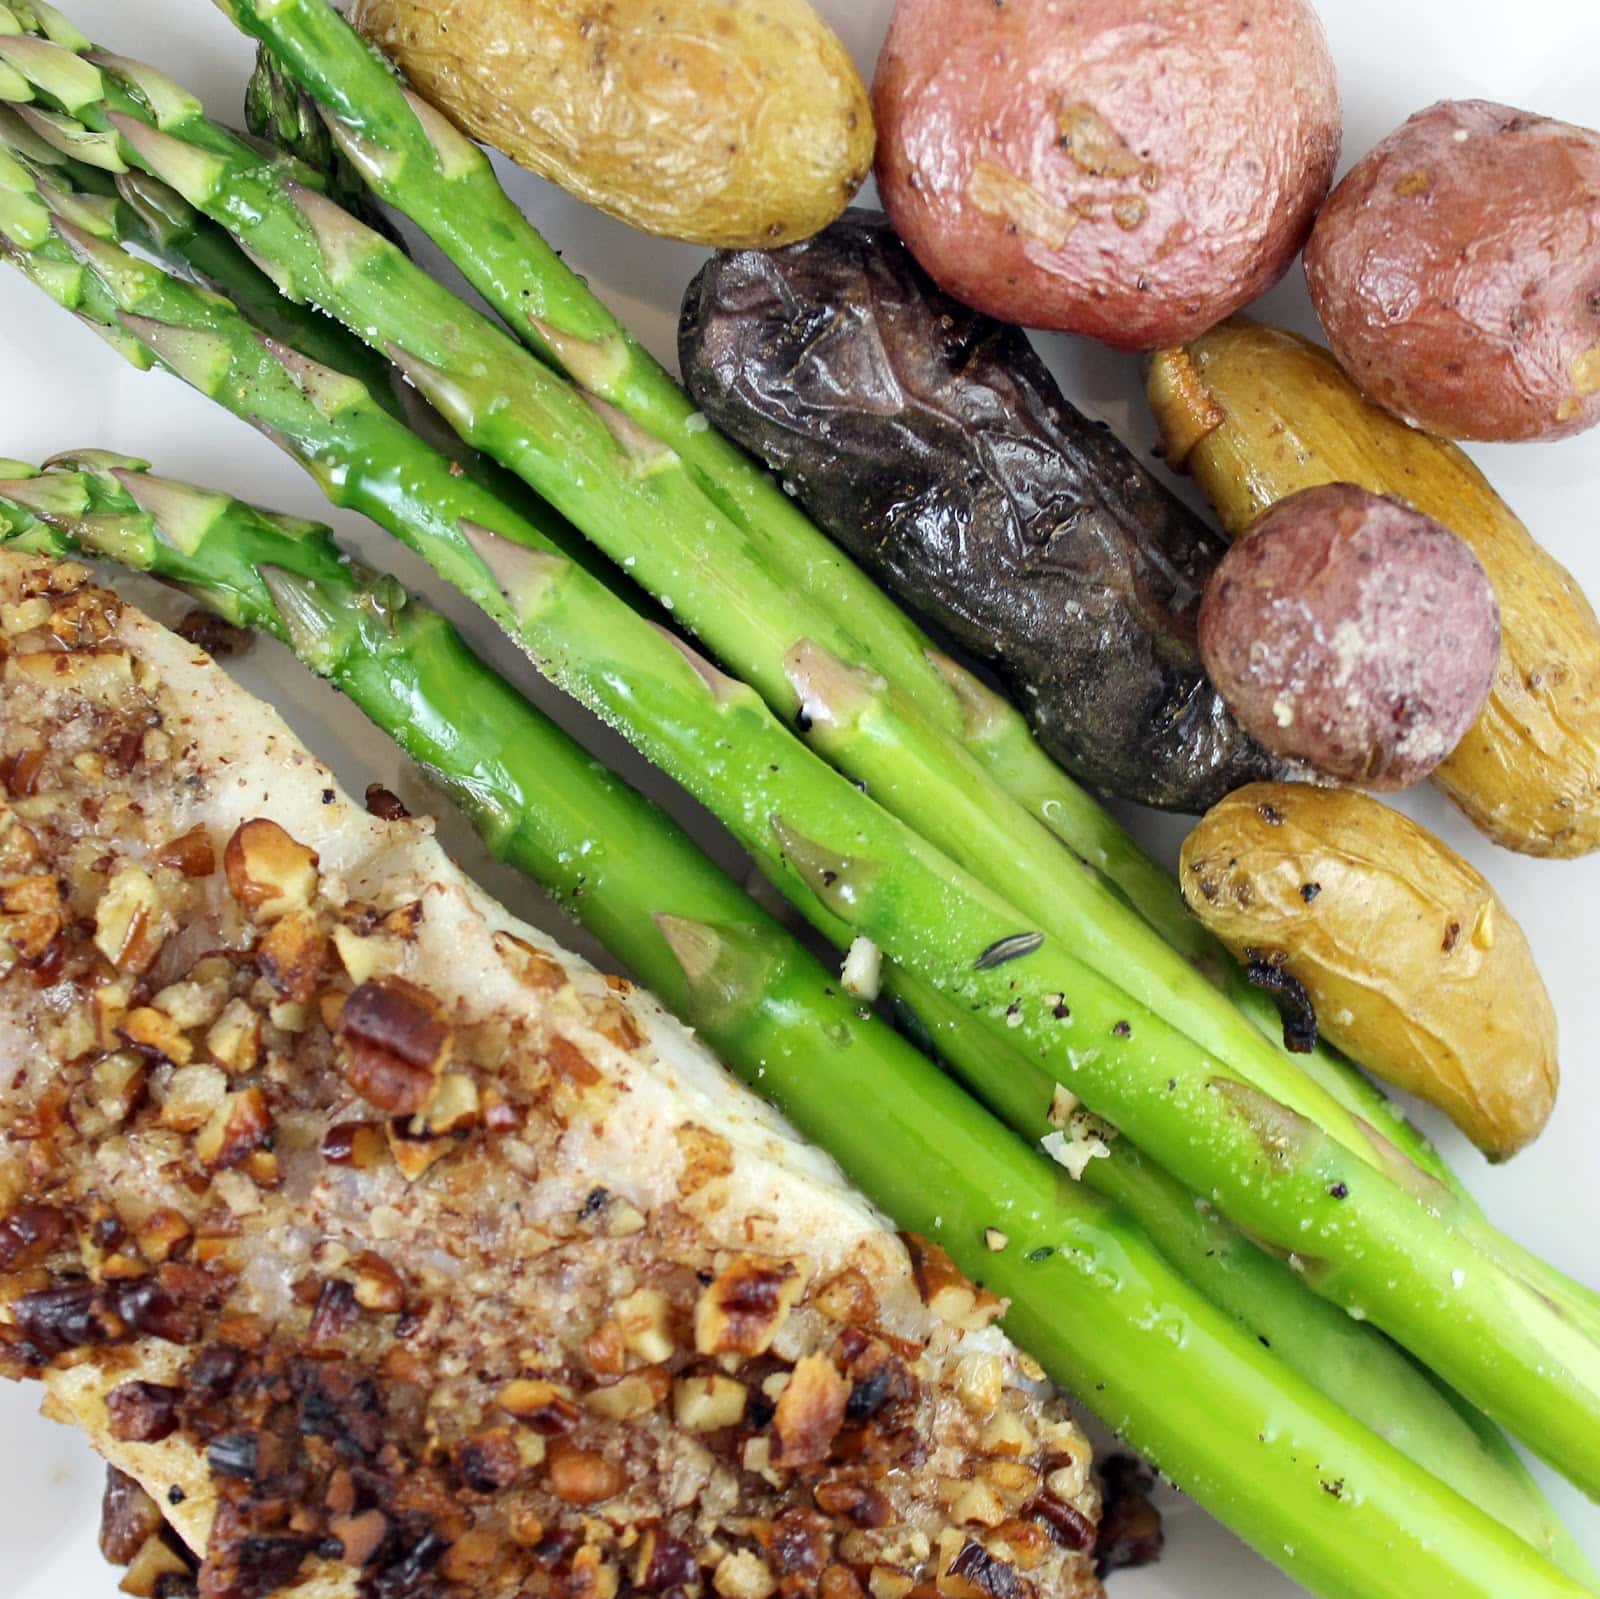
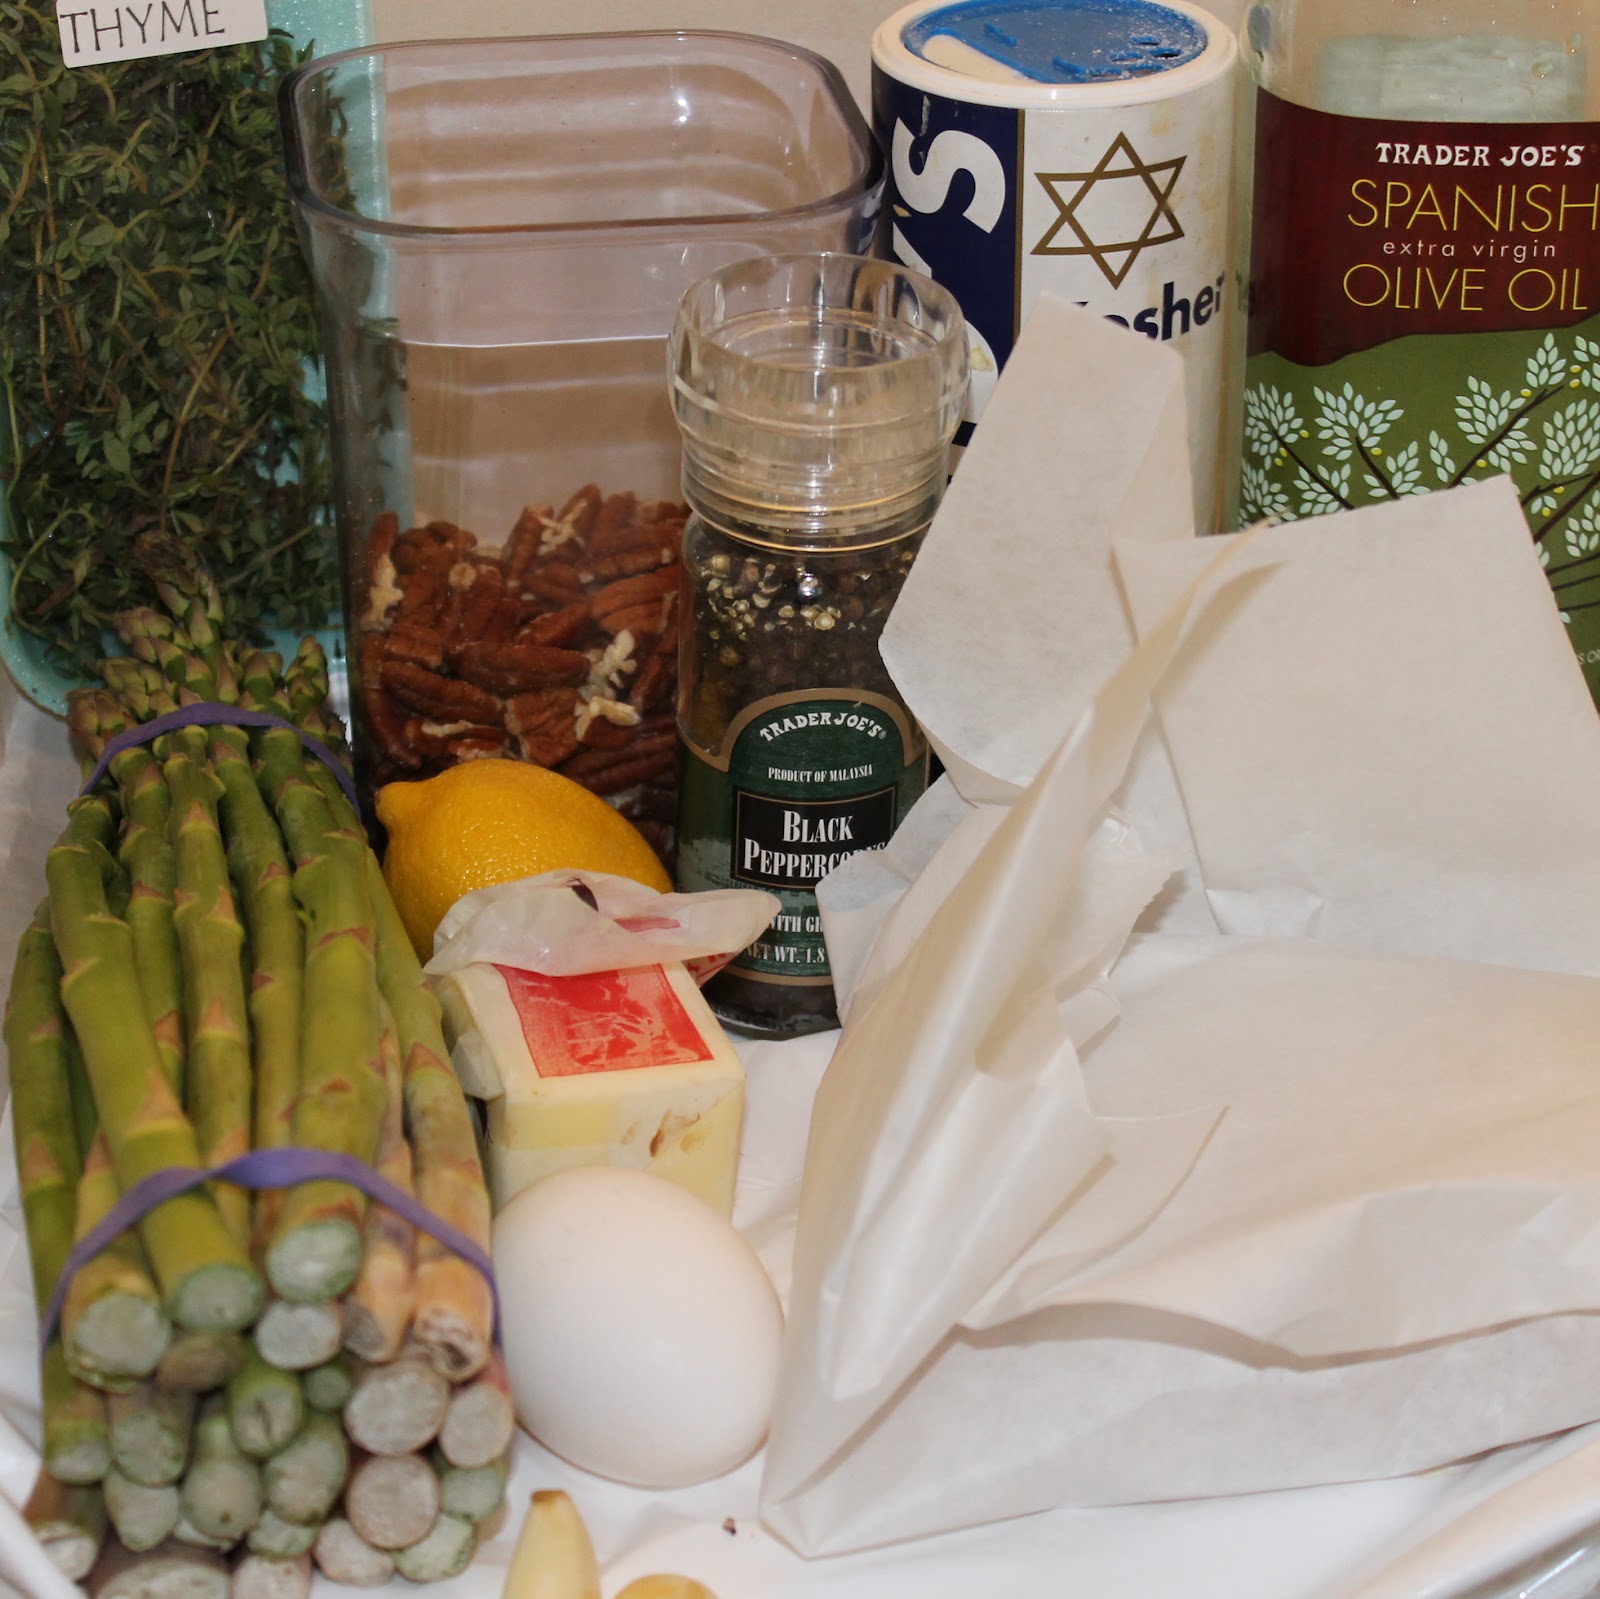
I have a confession. Despite cooking most nights a week (and making leaps and bounds over the past year and a half as to what I am able to cook) I still struggle to pull an entire meal together at one time, i.e. a protein and two sides. Unless it is a one-pot kind of meal, I tend to just make the protein and be done with it, or I make a huge batch of the side and have that as my dinner. So with Cooking Lightt’s April issue including 40 Meals Under 40 Minutes, I thought it was the perfect opportunity to tackle making an entire meal. I used their Hazelnut-Crusted Halibut with Roasted Asparagus and Roasted Red Potatoes as a base for this meal – Pecan Crusted Halibut with Roasted Asparagus and Potatoes.
Ingredients:
1 tablespoon butter
2 teaspoons extra-virgin olive oil, divided
2 (6-ounce) halibut fillets, skin still on
1 egg white, lightly beaten
Salt and pepper, to taste
1/2 cup finely chopped pecans
2 garlic cloves, thinly sliced
1 pound asparagus, trimmed
Cooking spray
1 teaspoon chopped fresh thyme
2 lemon wedges
1 tablespoon olive oil
Salt and pepper, to taste
2 shallots, thinly sliced
2 handfuls of small potatoes (I used red, fingerling, and purple) – Very scientific, I know
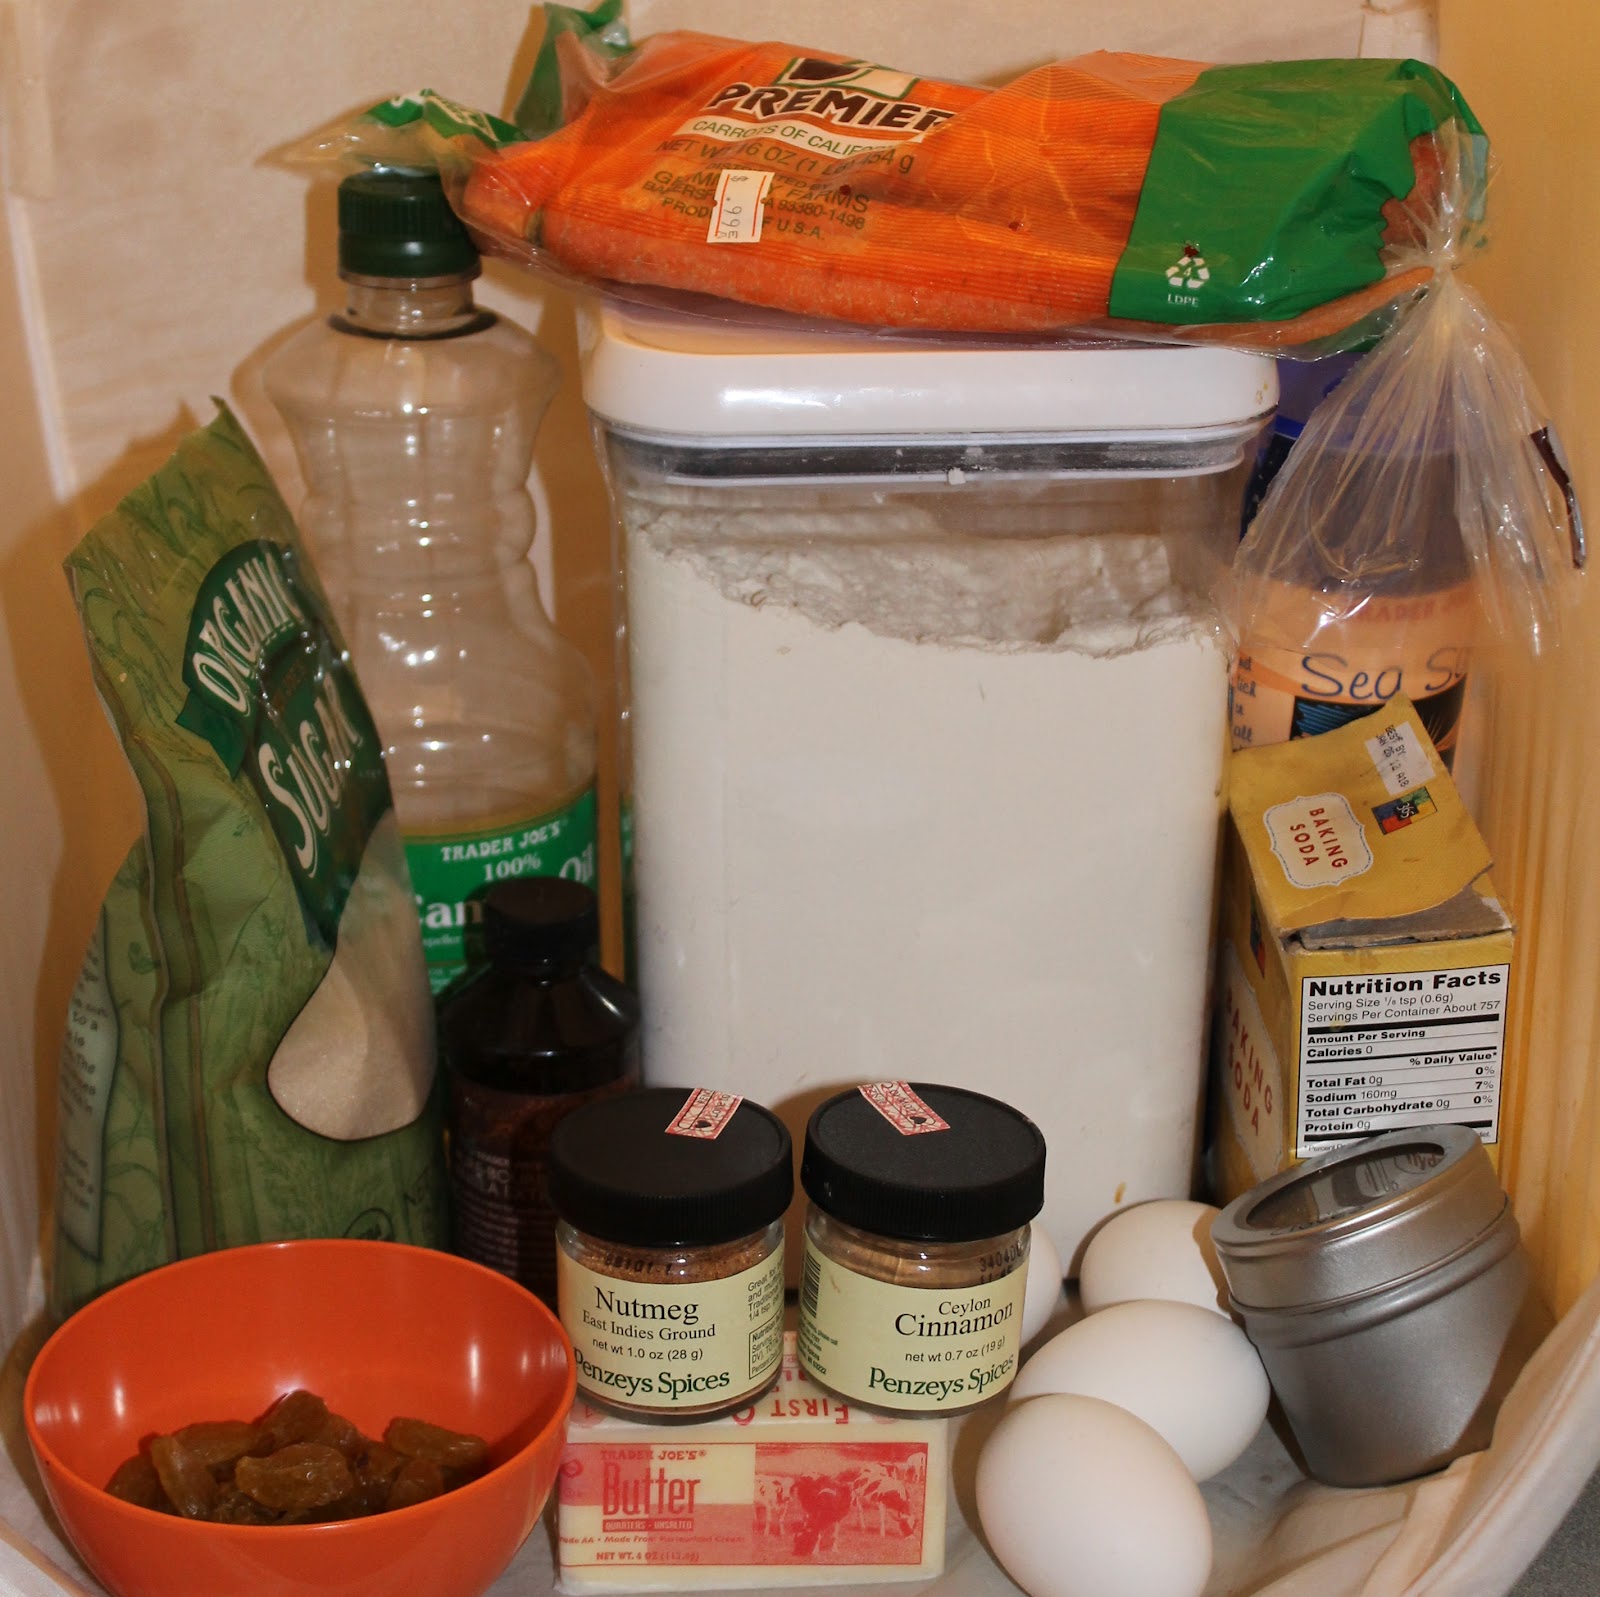
Every Easter, we have this adorable little bunny cake that shows up for dessert. I honestly don’t know what bakery we get it from, but it always makes me smile. So I thought I’d try to recreate it. Obviously, a bunny would be filled with carrots, so I decided to make a Bunny Carrot Cake with cream cheese frosting, covered in coconut.
I used a recipe from David Lebovitz for the cake and frosting, and used Betty Crocker‘s instructions on how to make it into a bunny.
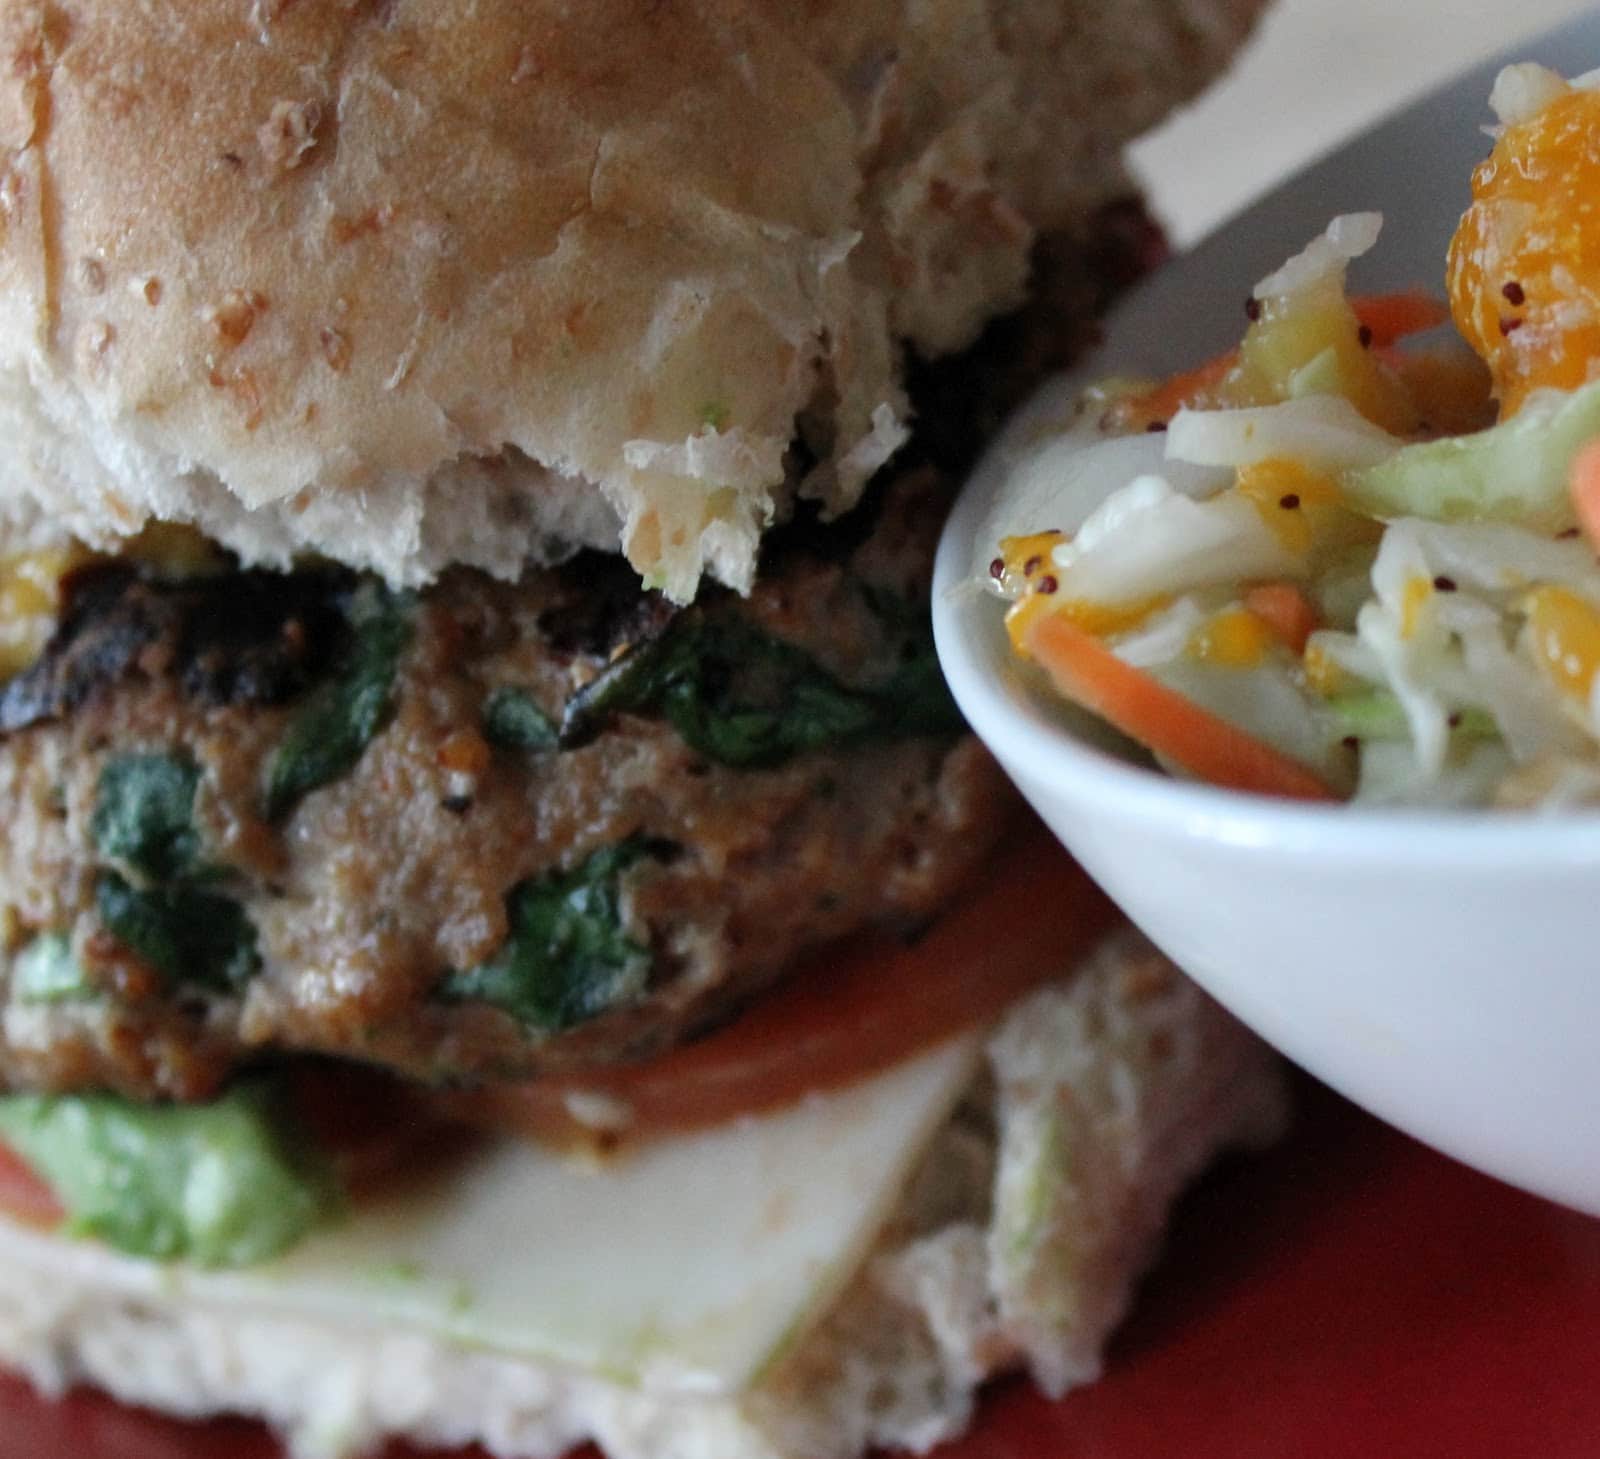
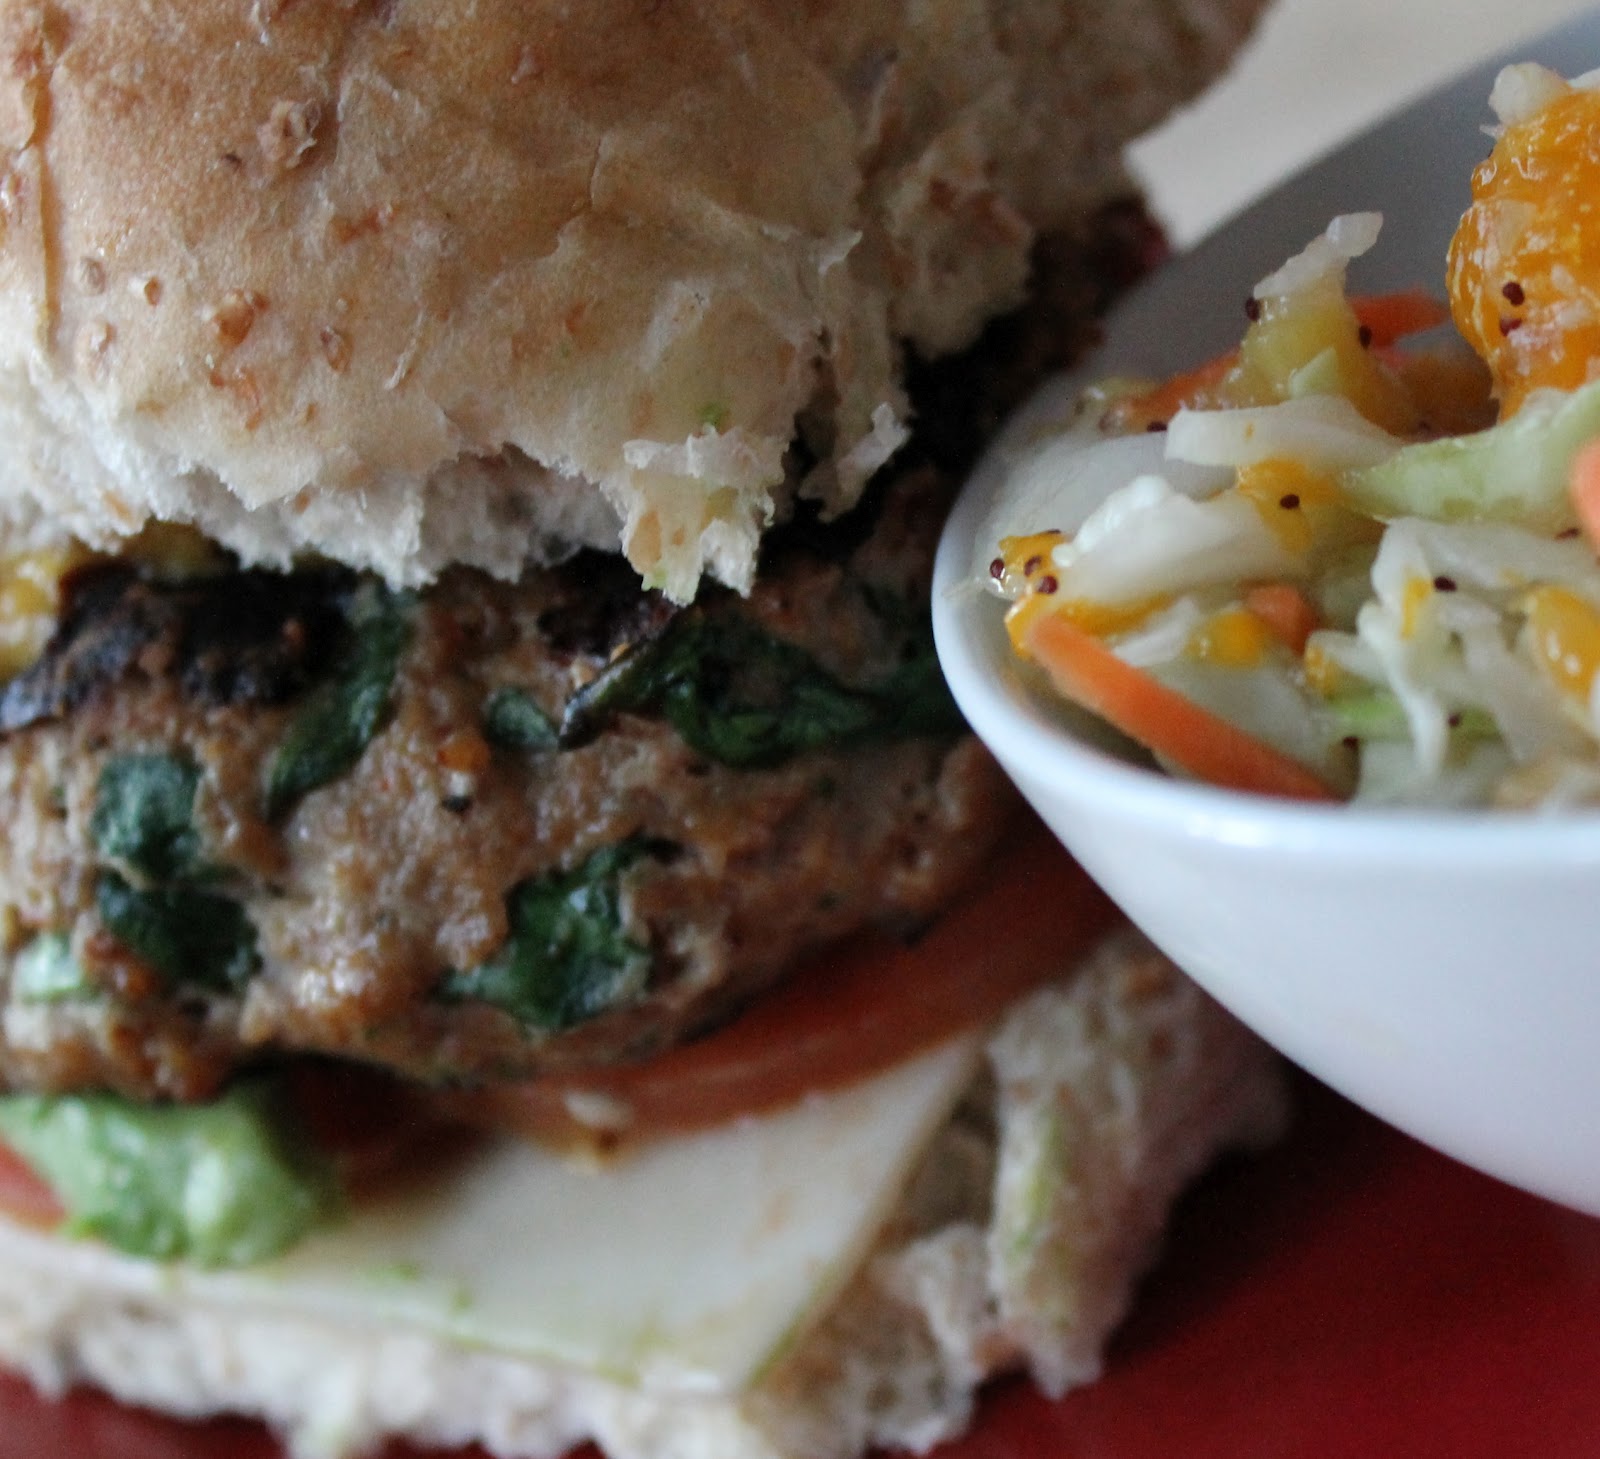
I have another amazing guest post for you today! Adrienne, from Positively Cooking, agreed to share one of her delicious recipes with us. Positively Cooking is chock full of delicious and nutritious meals that use easy to find ingredients. Her Gourmet Turkey Burger with Island Slaw is not only beautiful (I mean, look at these photos) but it is a healthy and delicious meal as well. Check out her recipe below and be sure to pop over to Positively Cooking to see all of the other mouth watering recipes her blog has to offer!
A savory, juicy burger is pretty hard to beat. When that burger is full of nutrients, easy on your waistline, easy on your budget, and needless to say tastes delicious, a burger is near impossible to beat.Using ingredients you probably already have in your kitchen, I have developed my Gourmet Turkey Burger w Island Slaw from my own personal cravings for a filling, tasty meal.
You don’t need to wait until sweet summertime to enjoy burgers from the grill. Since I am an Ohio girl (and stuck inside during the winter months… ugh), I grilled mine stovetop on a griddle and also tried it on my George Foreman – both will leave your burgers beautifully cooked through and juicy. That being said, I am already looking forward to enjoying this recipe with some Sangria this weekend because hey, enjoying refreshing dishes like this helps an Ohio girl like me get through the winter!Enjoy!
Gourmet Turkey Burgers
1 lb. ground turkey
1 bell pepper, chopped and seeded
3 cloves garlic, crushed
2 cups spinach, roughly chopped
1 egg, beaten
½ cup breadcrumbs
¼ cup Parmesan cheese
1 tbsp. chili powder
1 tsp. salt
Honey Mustard, to garnish
Avocado, to garnish
Cheese slices, to garnish
Whole wheat buns
In a medium-size mixing bowl, place your ground turkey. Add in all ingredients [OTHER than garnishes – Honey Mustard, Avocado, and Cheese] Combine thoroughly.
With meat-mixture, form into one big “ball” and divide into 4-6 even sections. Form each section into a burger patty. [Tip: make the center of your patty thinner than the rim, to ensure it is cooked through.]
Grilling? Place patties on foil, and grill at medium-high heat for about 8 minutes on each side. Remember, your George Foreman counts!
Cooking stovetop?Lightly coat skillet with cooking spray. Cook patties over medium-high heat for 8-10 minutes, turning once.
Serve your burgers with desired toppings [As mentioned before, I suggest honey mustard, avocado, cheese, and of course Island Slaw]
Tips: Sub ground beef for the ground turkey if that is what you prefer.
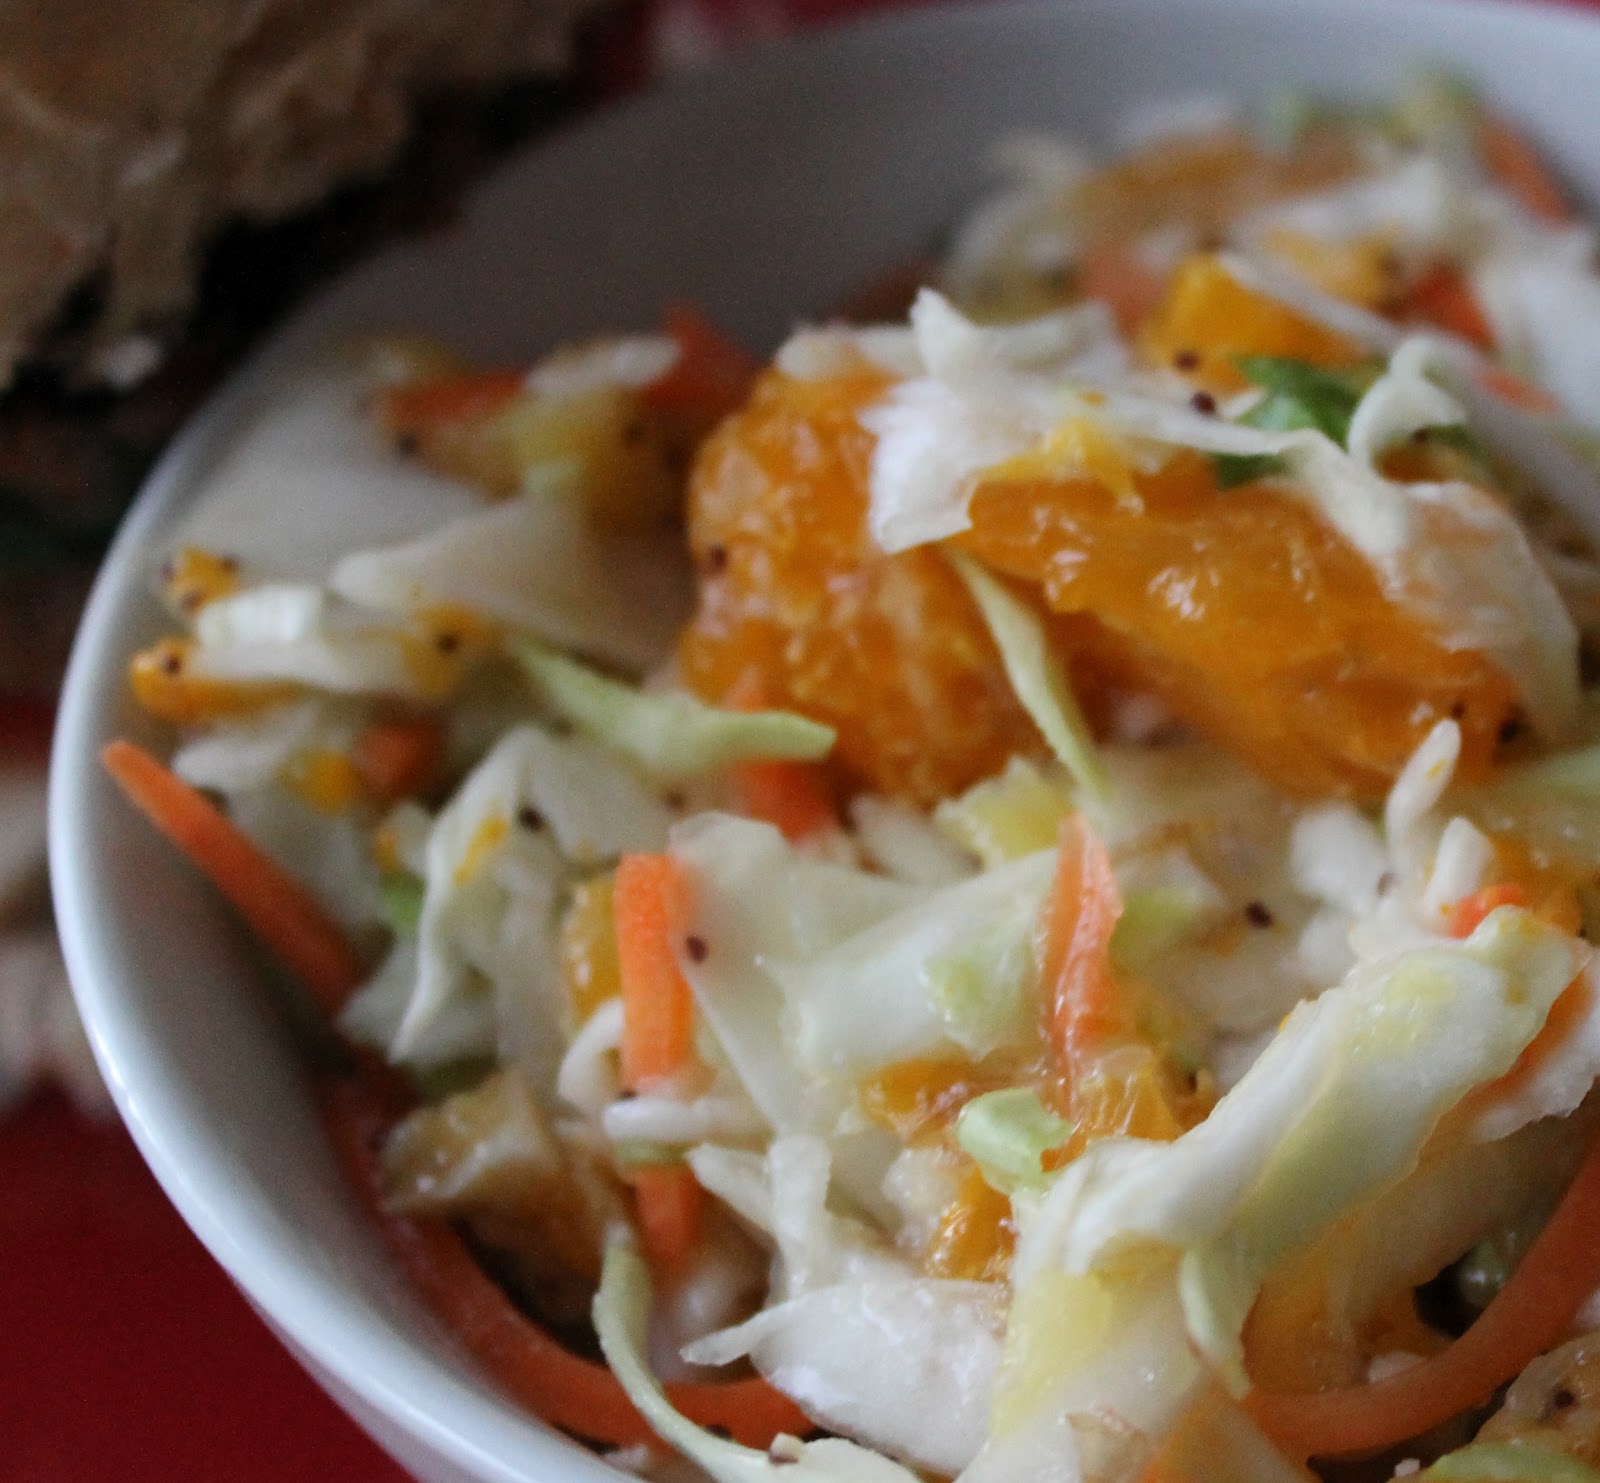
Island Slaw
1 bag shredded cabbage
¾ cup All-Natural Light Coleslaw Dressing OR Light Poppyseed Dressing
1 can pineapple tidbits, drained
1 can mandarin oranges, drained
½ cup walnuts, crumbled
In a medium bowl, combine all ingredients for coleslaw. Mix thoroughly. Refrigerate until ready to serve.
Tips: I encourage you to enjoy the Island Slaw right on top of your Gourmet Turkey Burger
Doesn’t this sound like the perfect way to make you feel like warmer weather really is just around the corner? The Island Slaw has such beautiful colors in it; pineapple, mandarin oranges and walnuts together must be heavenly! And that is one snazzy looking burger; I love that it has spinach as well as chili powder to add some extra flavor.
Many thanks to Adrienne for sharing this recipe! Don’t forget to stop over at Positively Cookingto say hello and check out all the other yummy meals Adrienne has cooked up! (Some of my personal favorites include Blackberry Salmon, Skinny and Spiced Jalapeno Poppers, and Coconut French Toast with Sauteed Peaches)
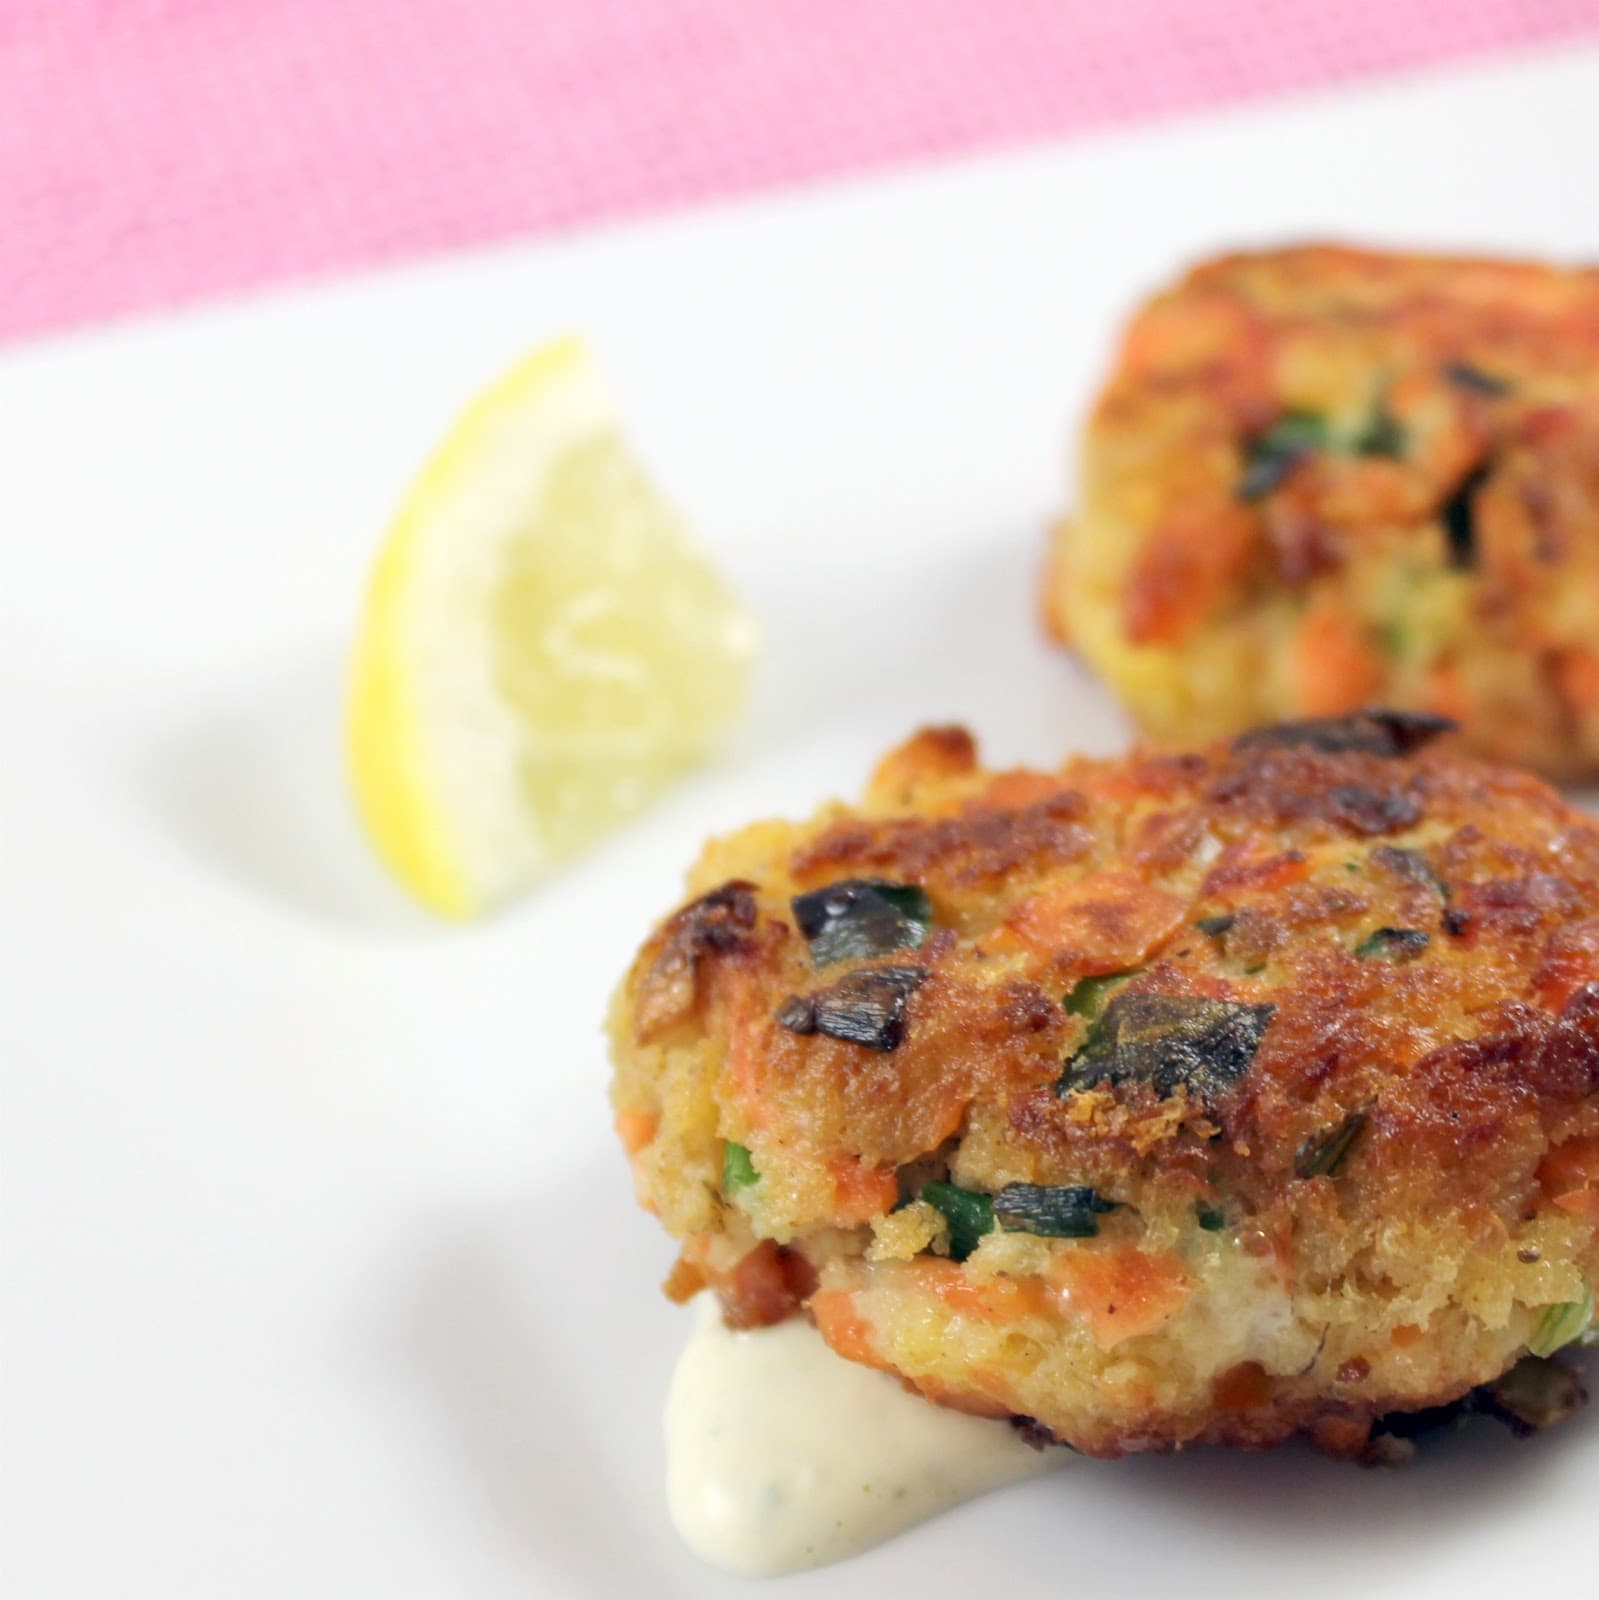
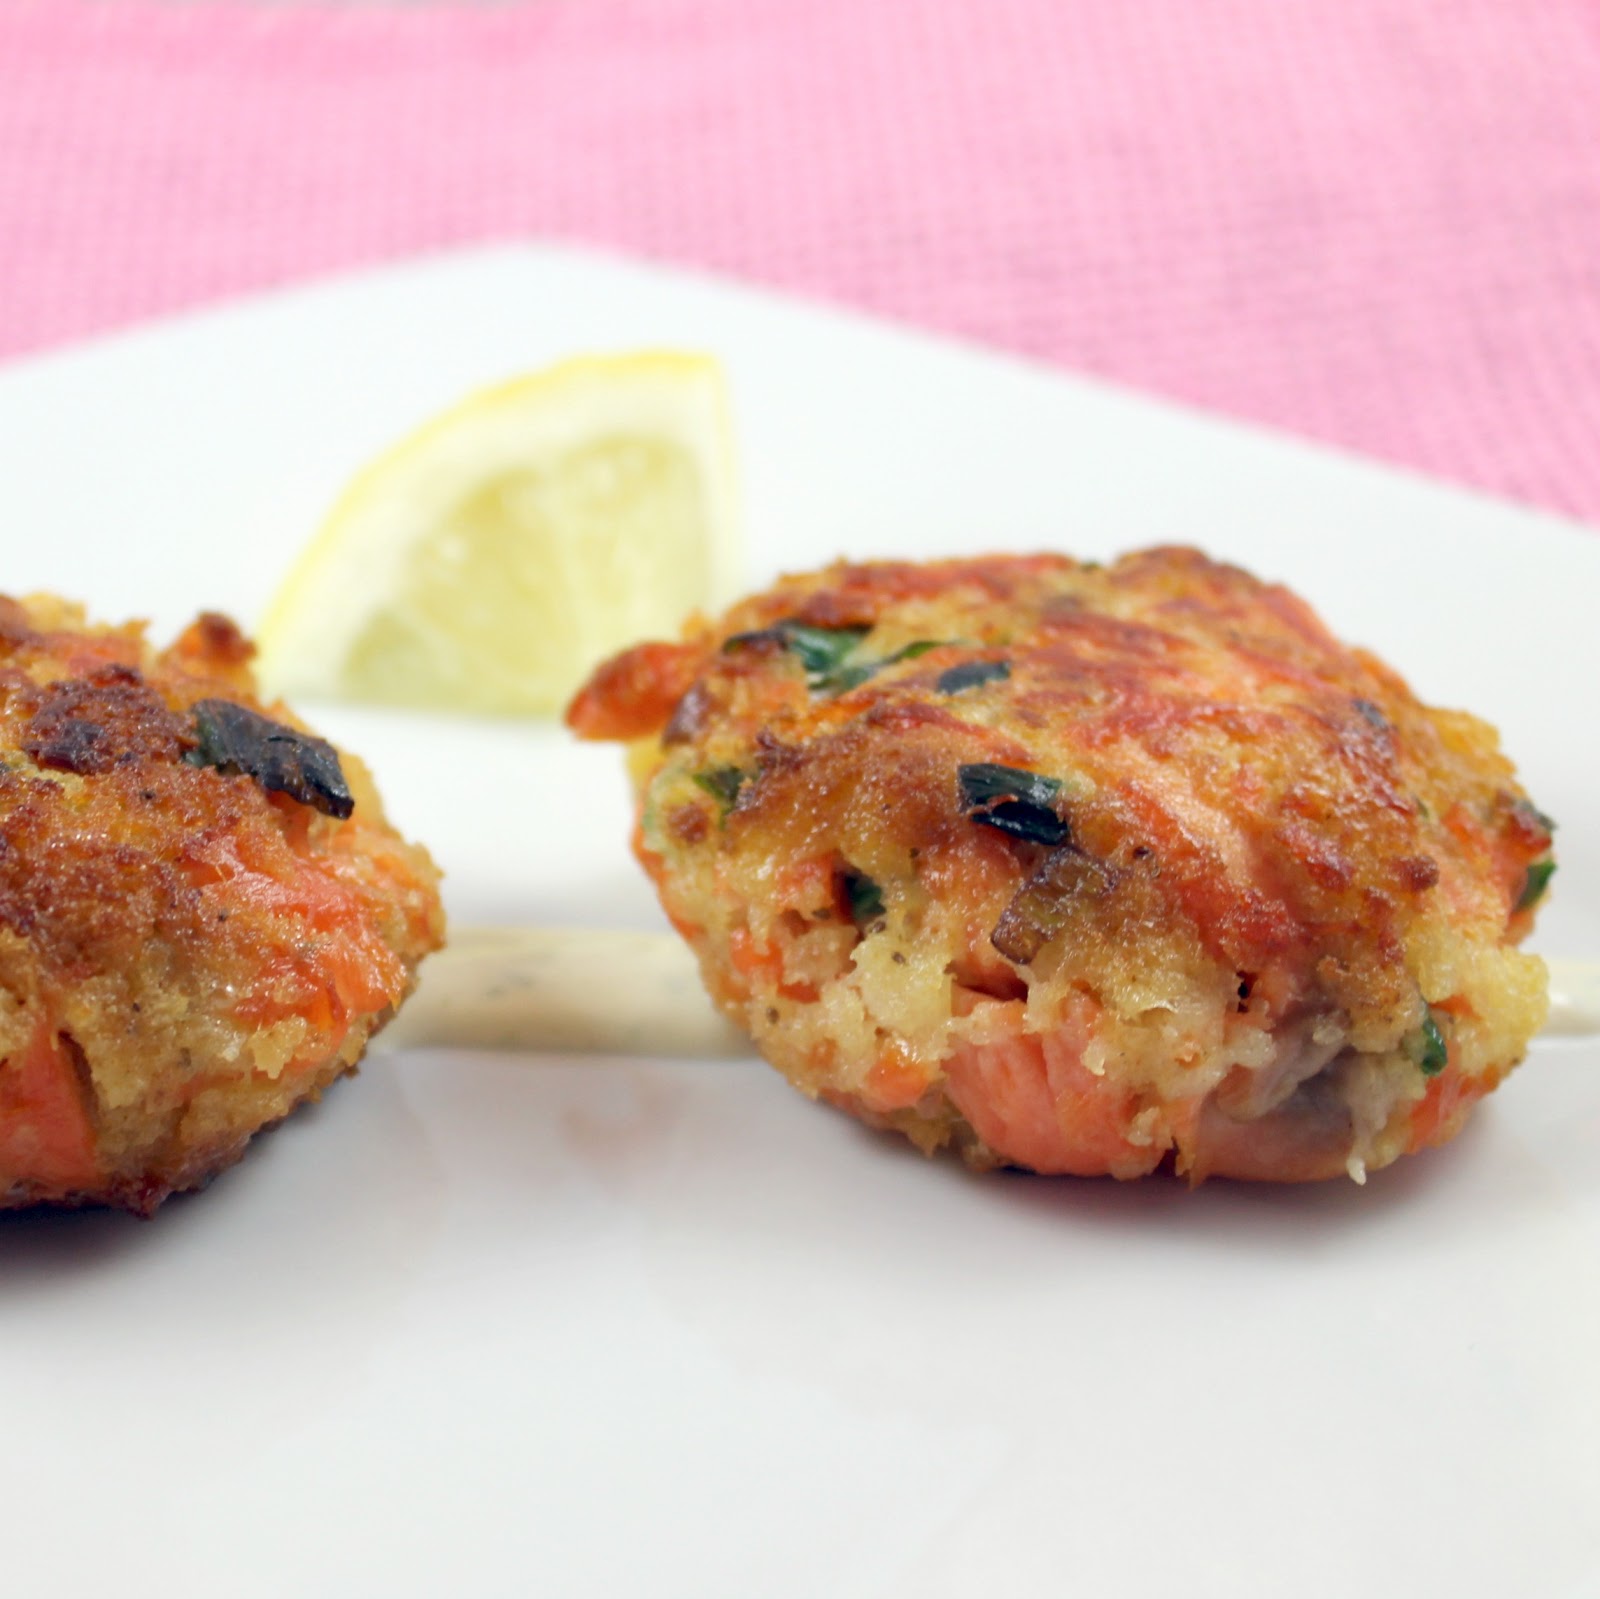
I am so excited to share this recipe with you. I loved it so much! I found this recipe from Saveur and knew I had to try it. This recipe is perfect for a Friday night meal, but I suggest making them ahead of time if you can. They need to be chilled for at least one hour so that they retain their shape when cooking.
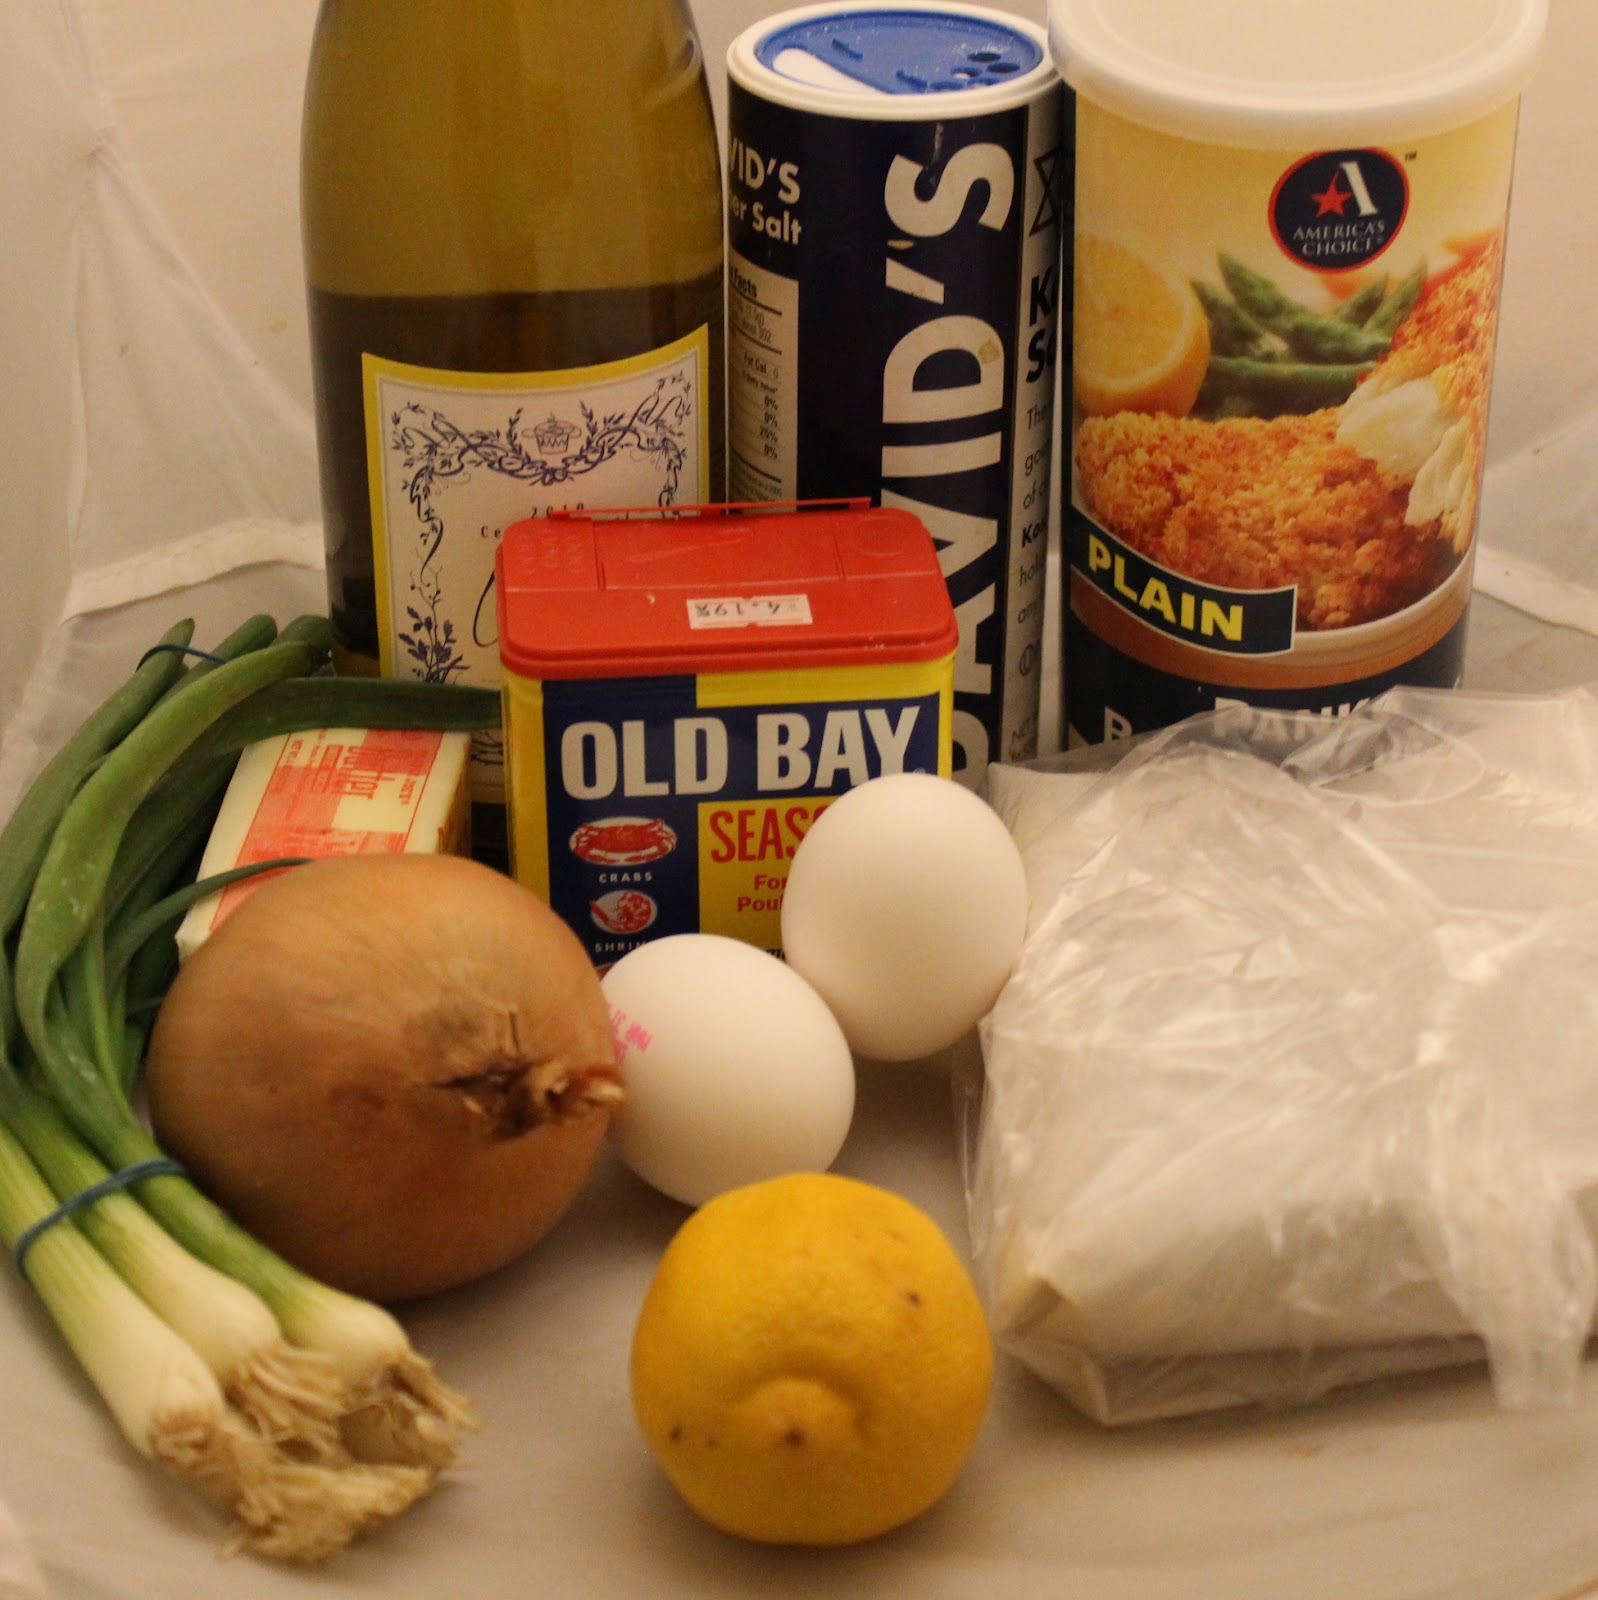
Ingredients:
1/2 cup white wine
3 tbsp. Old Bay seasoning, divided
1 tbsp. plus 1 tsp. kosher salt, divided
1 1-lb. boneless salmon filet
1 1/2 cups panko bread crumbs
3 tbsp. unsalted butter, melted
4 scallions, finely chopped
2 eggs, beaten
Juice of 1 lemon
Canola oil for frying, or olive oil to pan fry
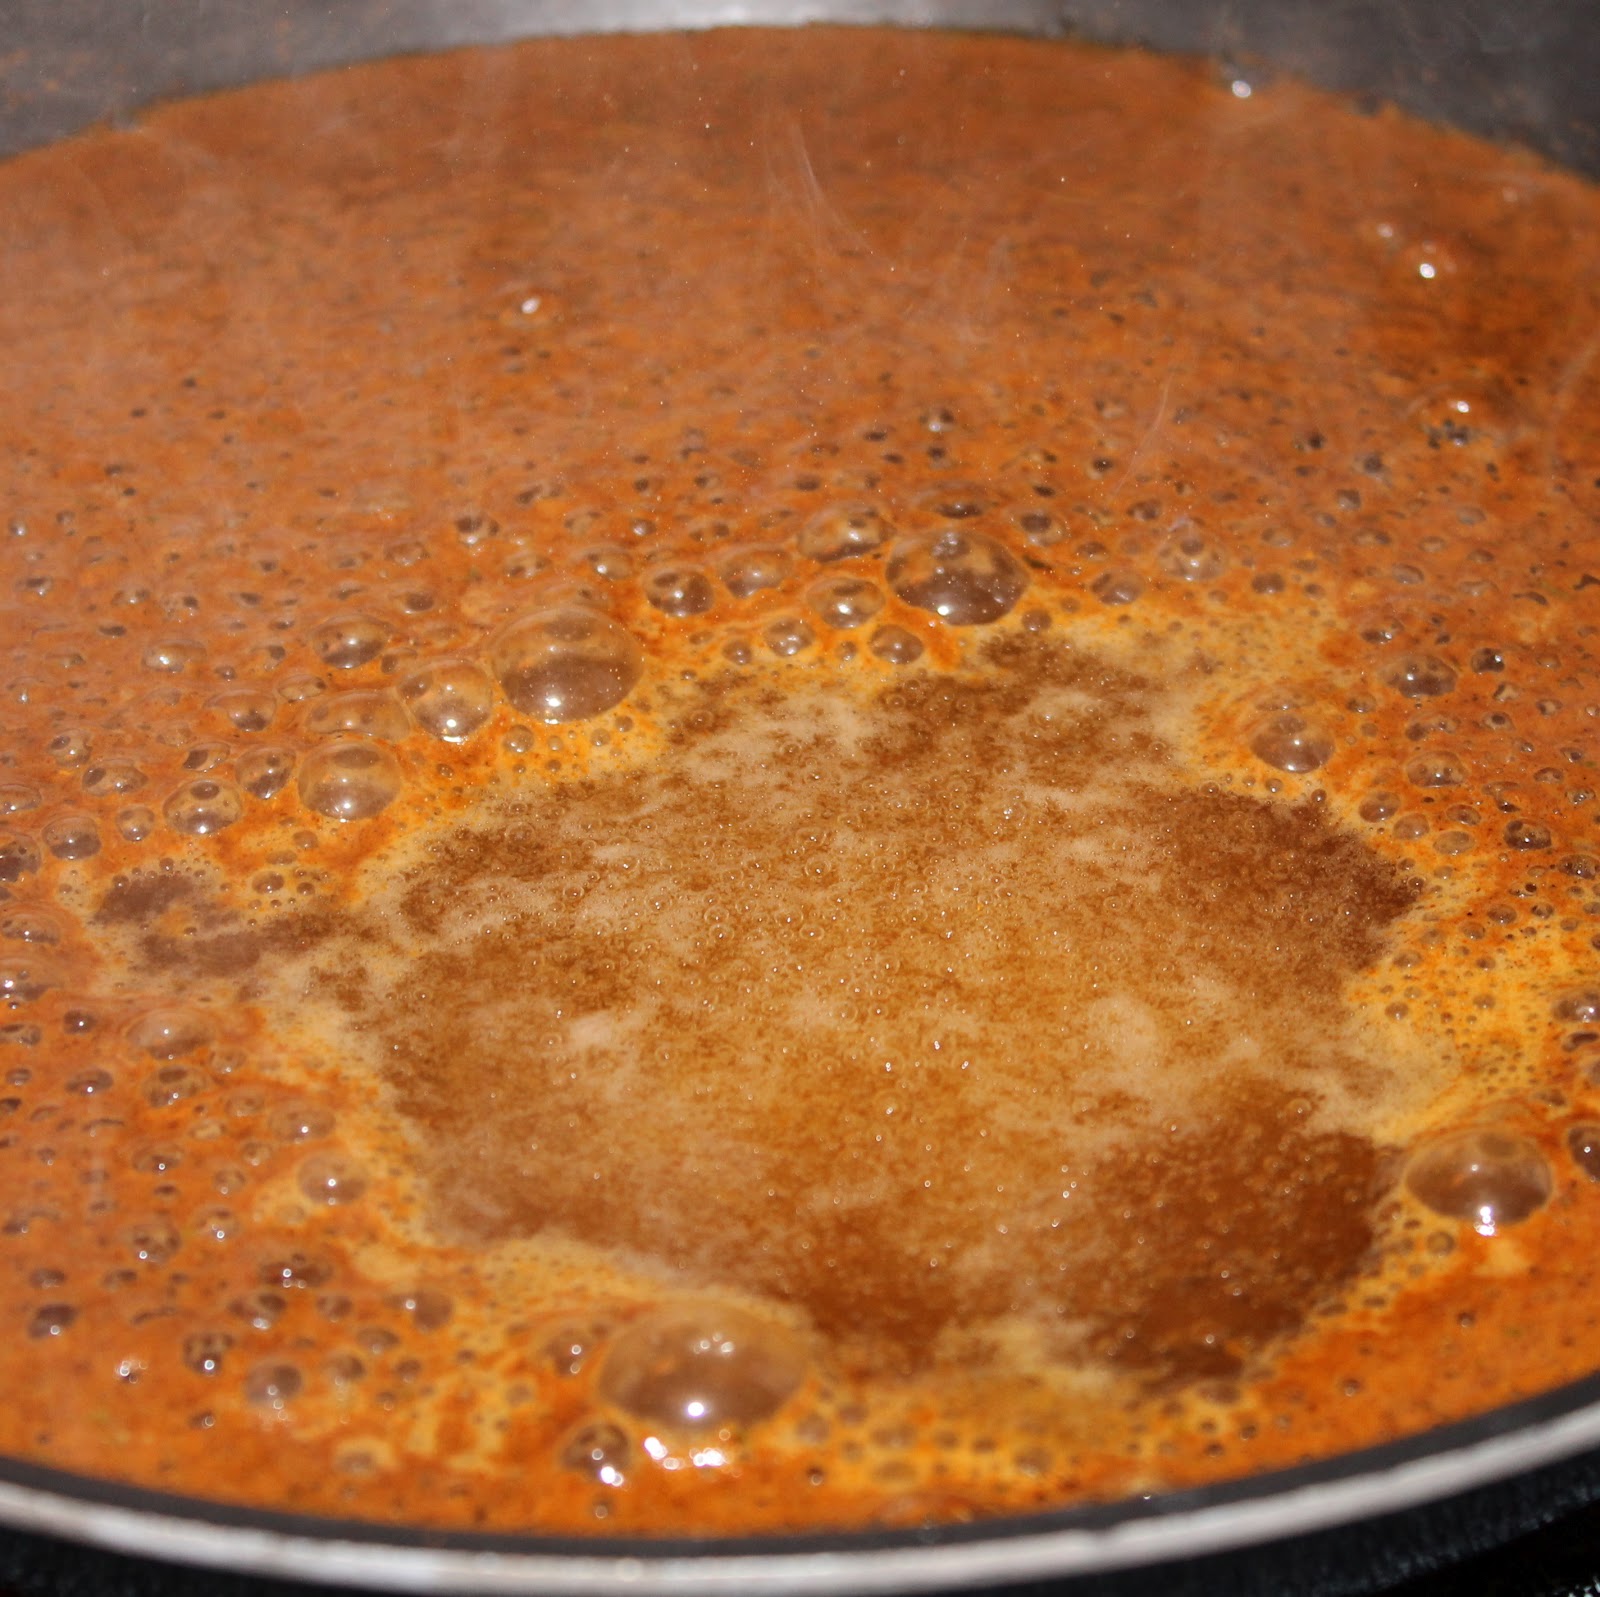
To make, add 4 cups water, wine, 2 tablespoons Old Bay, and 1 tablespoon salt in a large saute pan (make sure you have a top for the saute pan). Bring to a boil.
Add the salmon, skin side down.
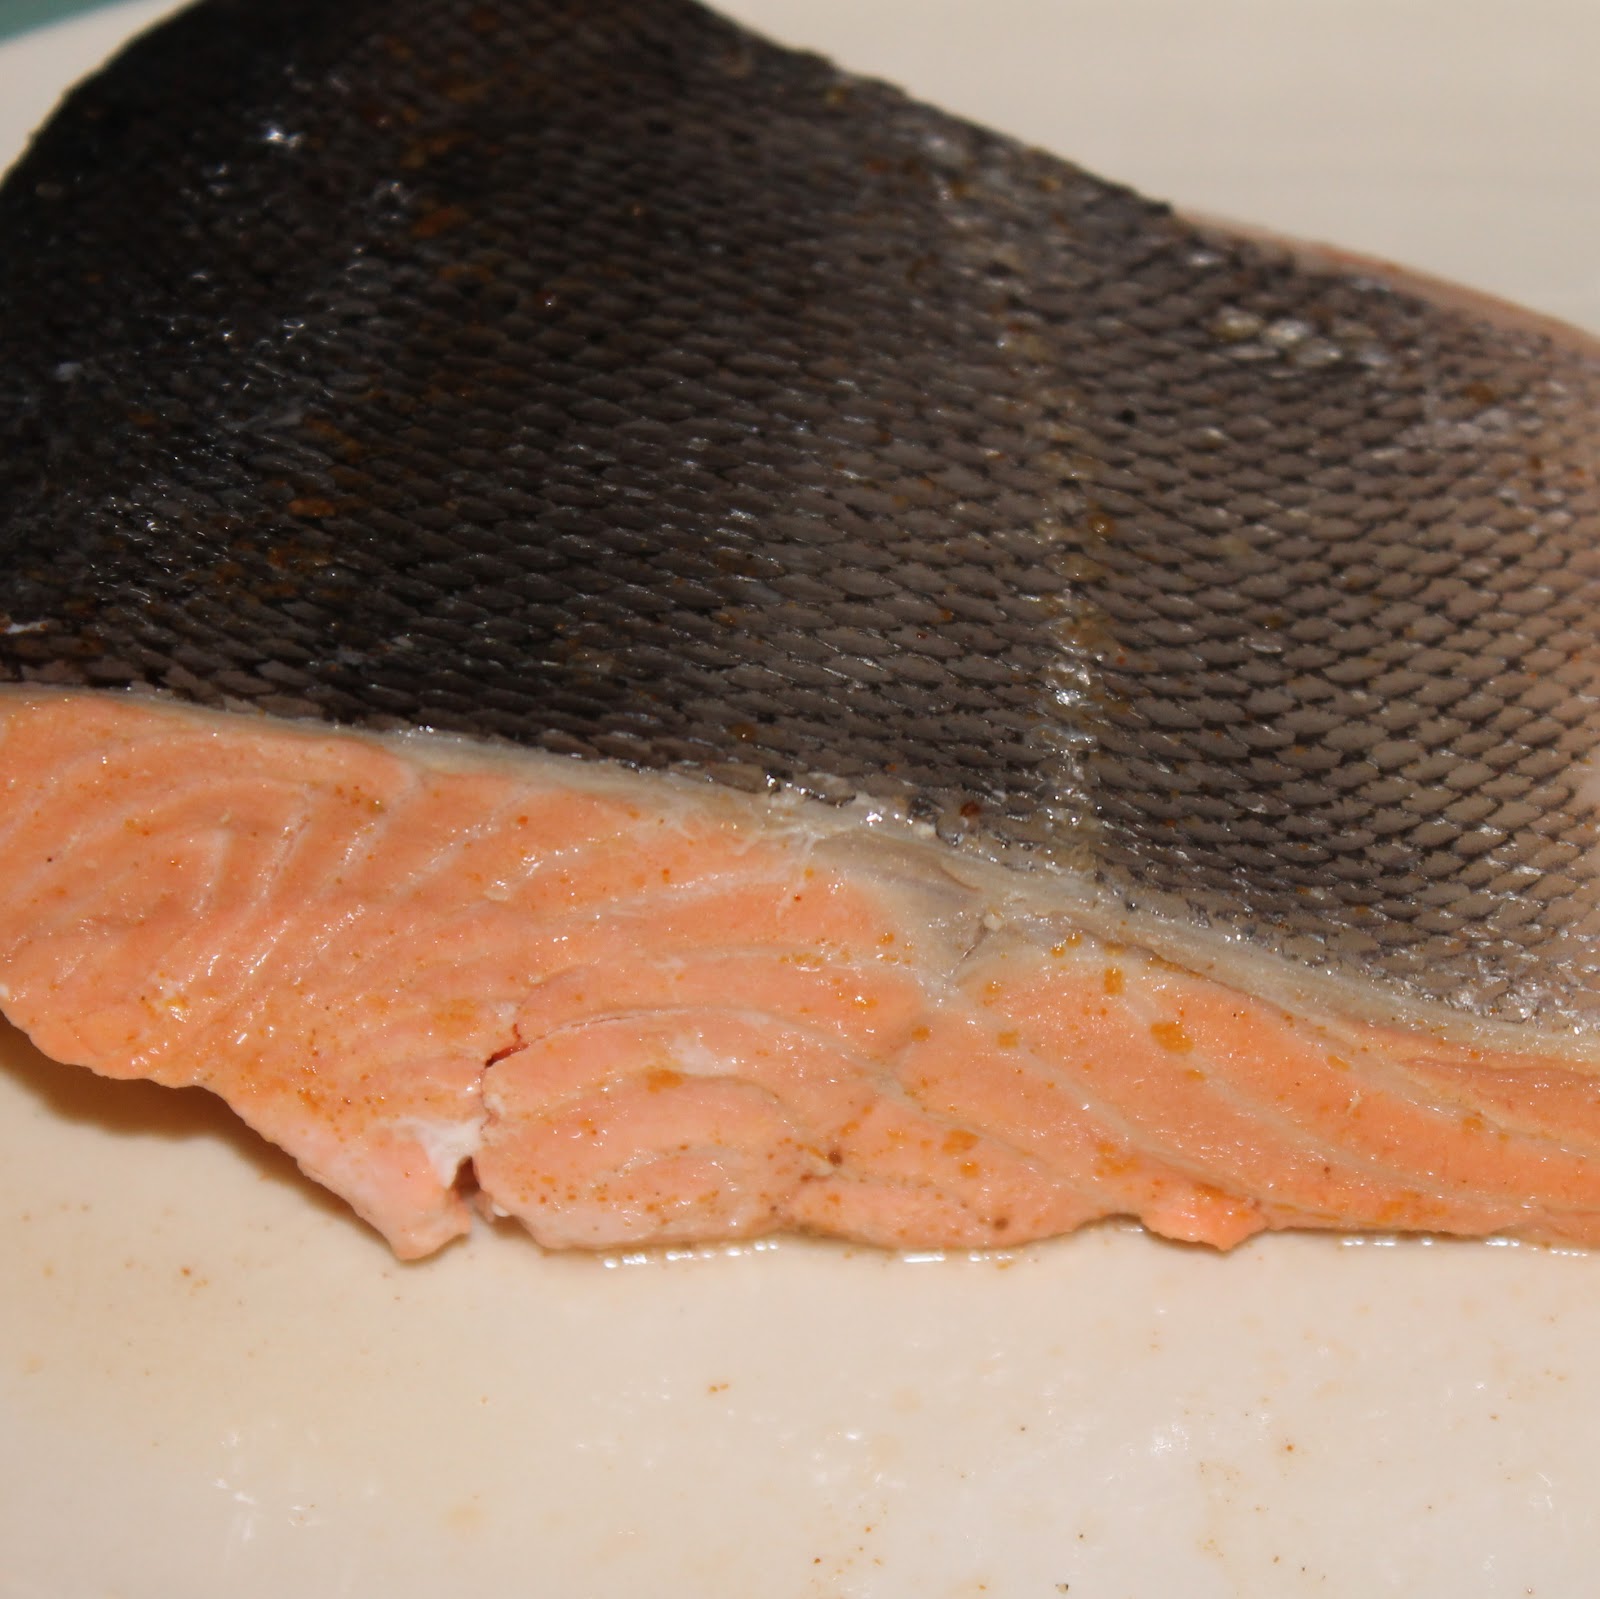
Turn off the heat and cover the salmon. Let the salmon cook in the liquid for 10 minutes. Transfer the salmon to a plate skin side up and let cool. The salmon will not be fully cooked through.
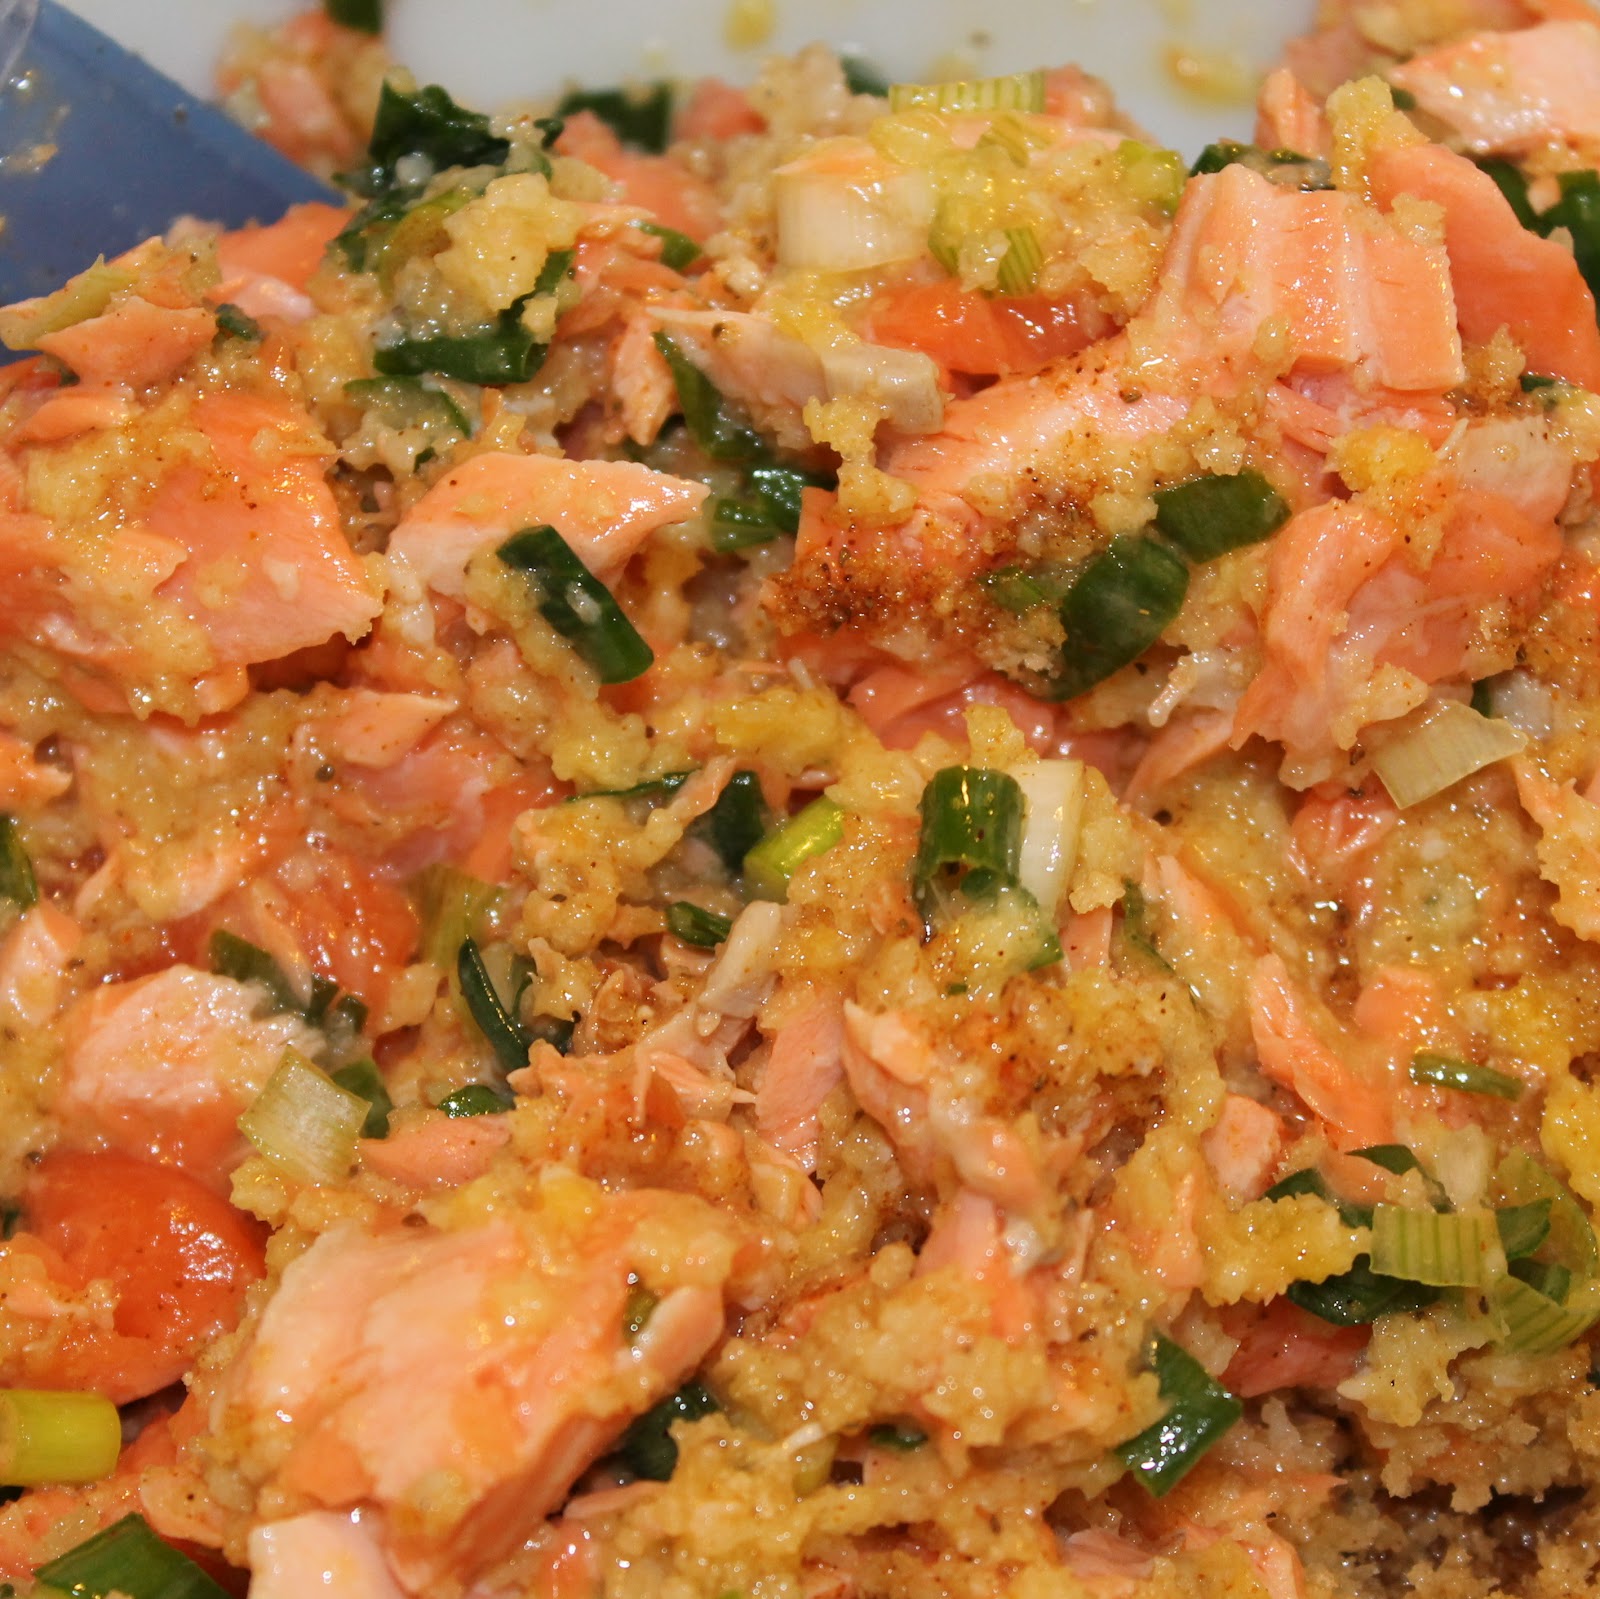
Peel off the skin and discard. Break the salmon into small pieces and place in a bowl with the remaining Old Bay and salt as well as the bread crumbs, butter, scallions, eggs and lemon juice. Stir and refrigerate for 30 minutes.
Using a 1/3-cup measuring cup to evenly size the croquettes, form the 1/3 cup mixtures into patties with your hands. Transfer to a parchment paper lined baking sheet. (I ended up with 8 patties plus one little baby patty). Refrigerate for at least an hour (I refrigerated mine overnight).
You can fry the patties in canola oil in 1/2″ of oil at 325 degrees, but I decided to just pan fry mine in a little olive oil. Cook for 3 minutes on each side. Transfer to a paper towel to remove excess oil then serve.
Serve with a wedge of lemon and a lemon tarragon aioli. To make the aioli, add 1/2 cup mayo, 2 tablespoons chopped fresh tarragon, the juice of 1/2 a lemon, 1 minced garlic clove, and 1 teaspoon of Dijon mustard, and 1/4 teaspoon Old Bay in a food processor. Refrigerate for 30 minutes and serve.
I served three croquettes per person with 1 teaspoon aioli.
I loved the flavor of this so so much! The Old Bay comes through in the salmon croquette, and an extra squeeze of lemon on top brings this from good to great.
The aioli was really nice with it too! I had some tarragon in my fridge so I decided to make it and I was afraid tarragon wouldn’t go with the salmon. That wasn’t an issue at all; they worked great together!
This is a great quick night meal if you have the ability to plan ahead and prep the night before. If not, just make sure to give yourself a good 2-3 hours to make the whole thing which doesn’t make it very feasible for a weeknight.
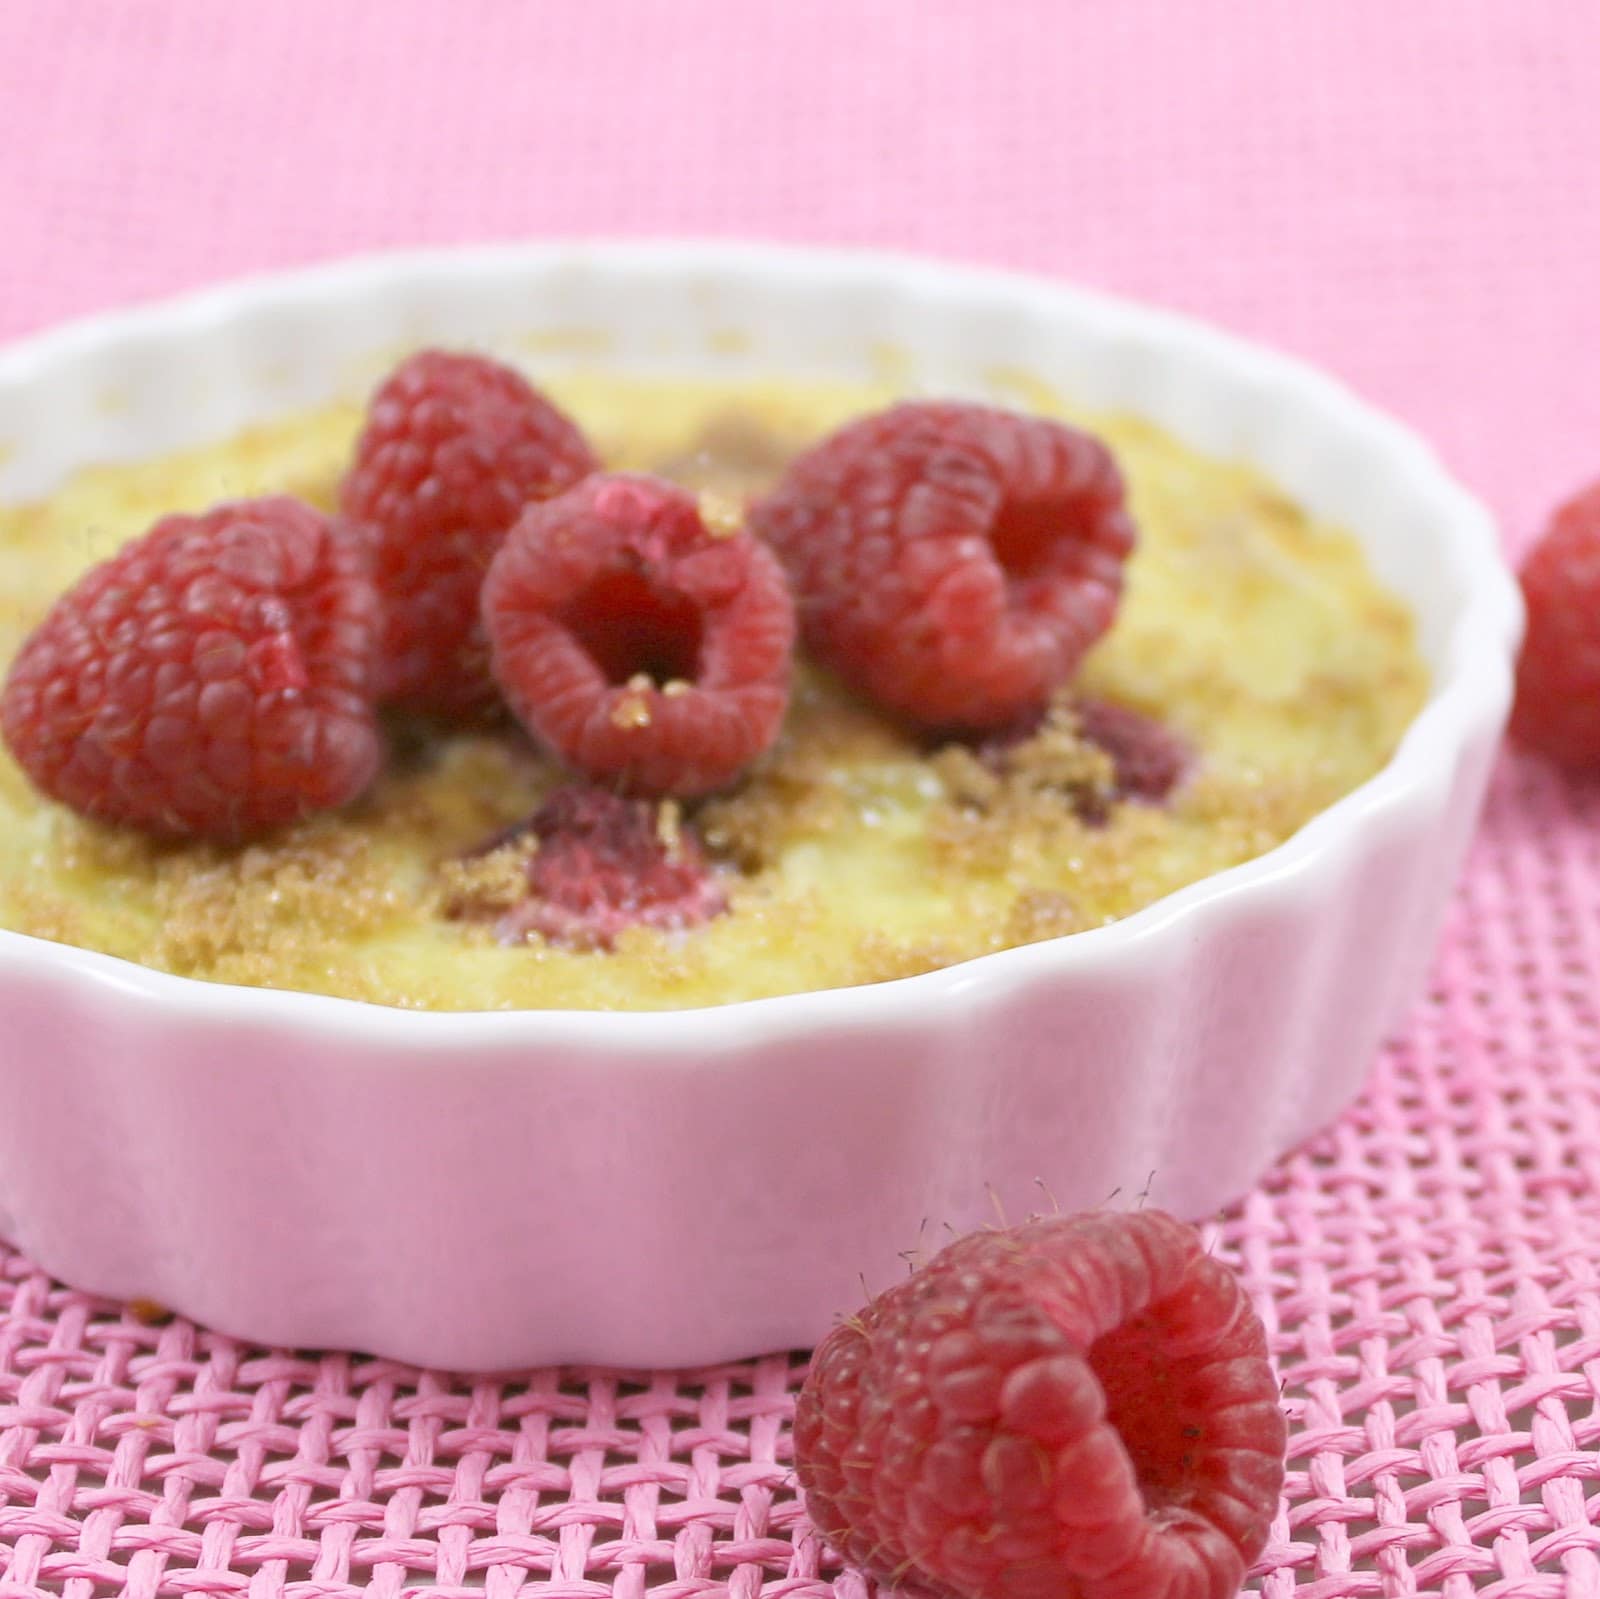
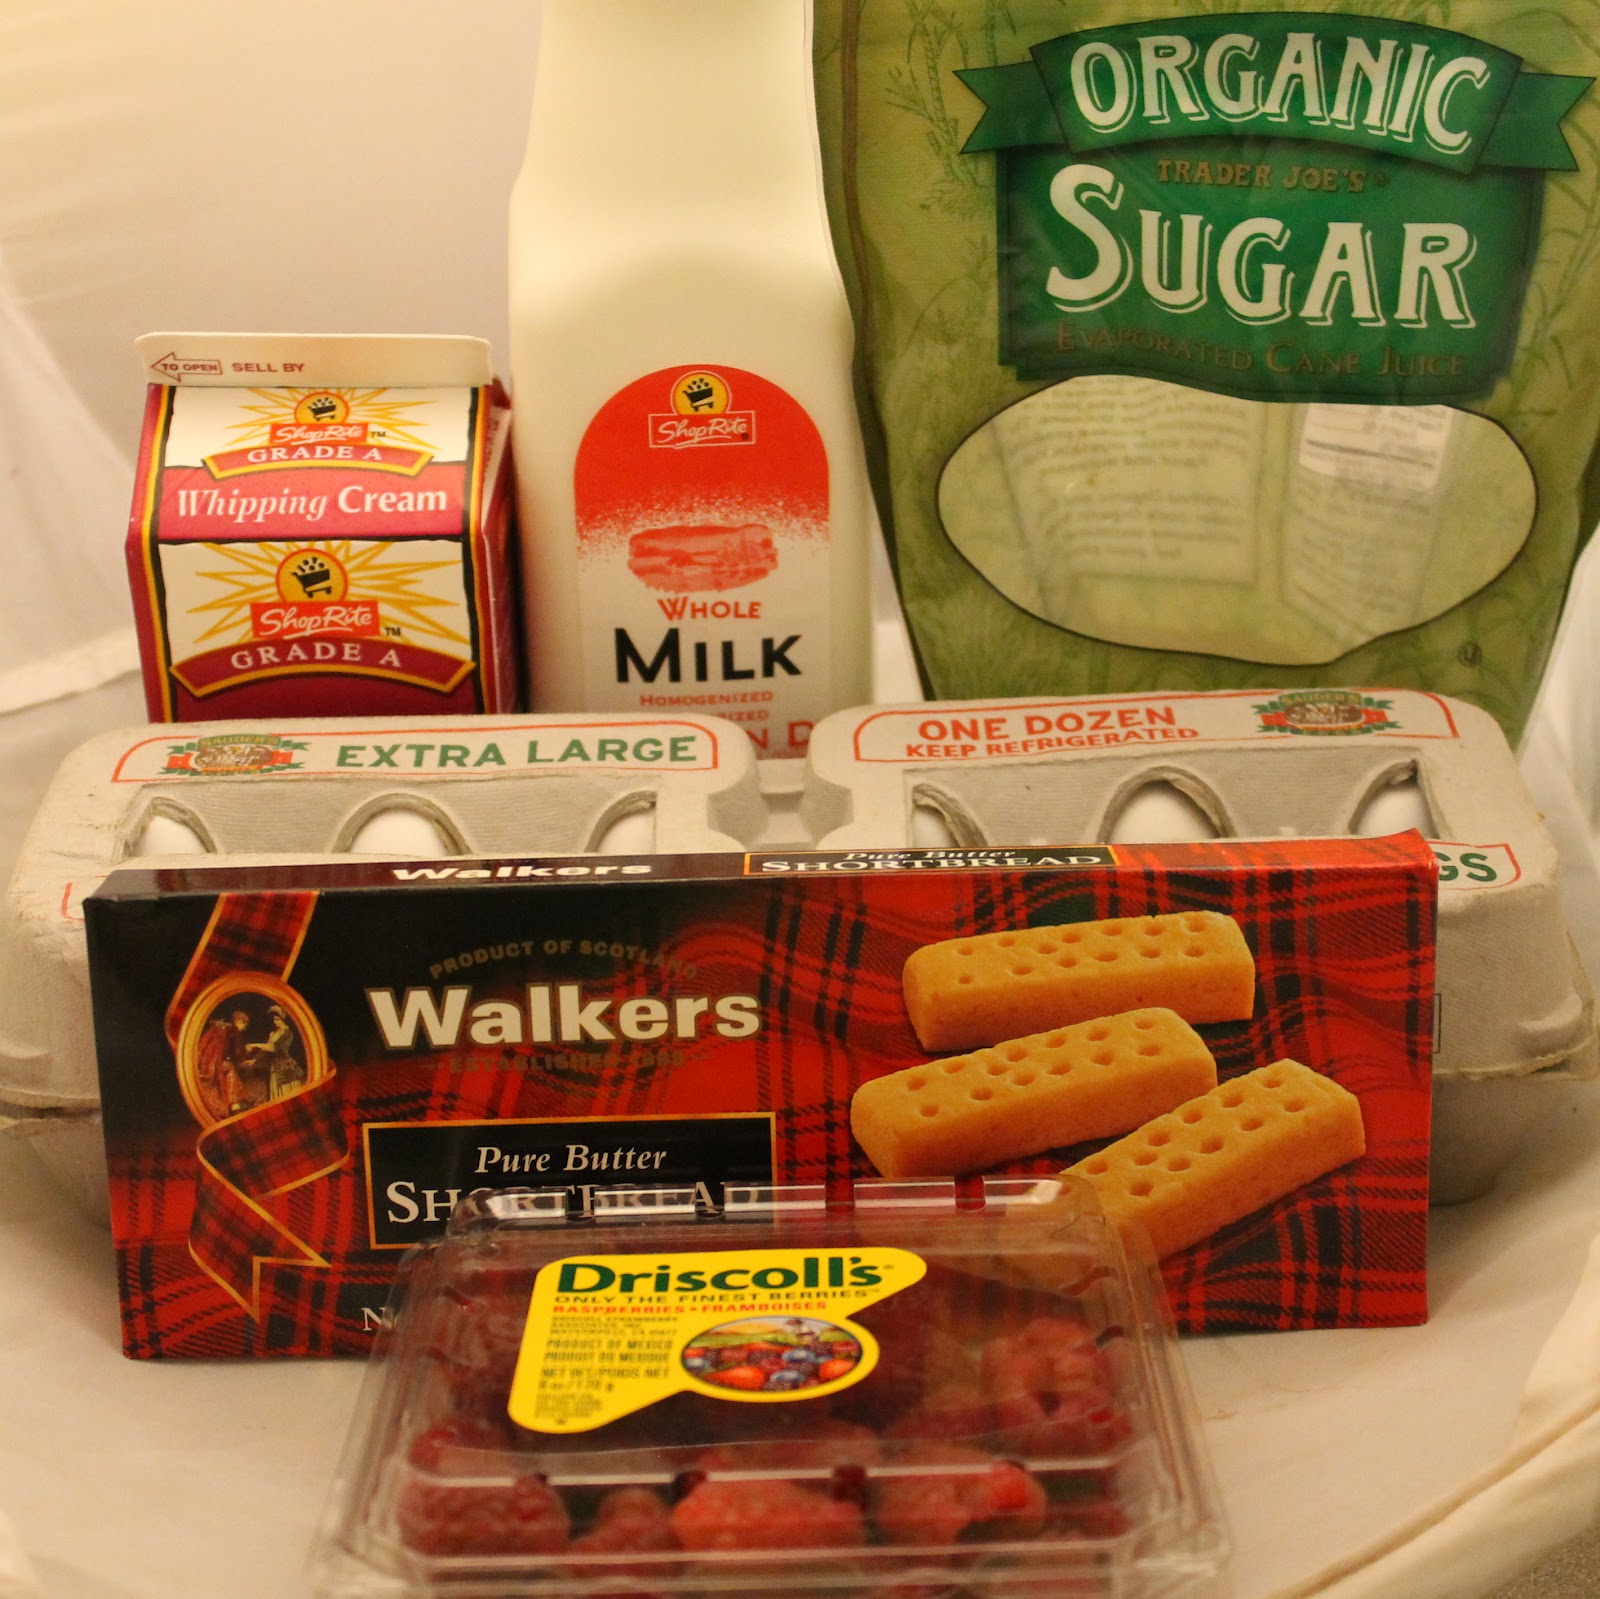
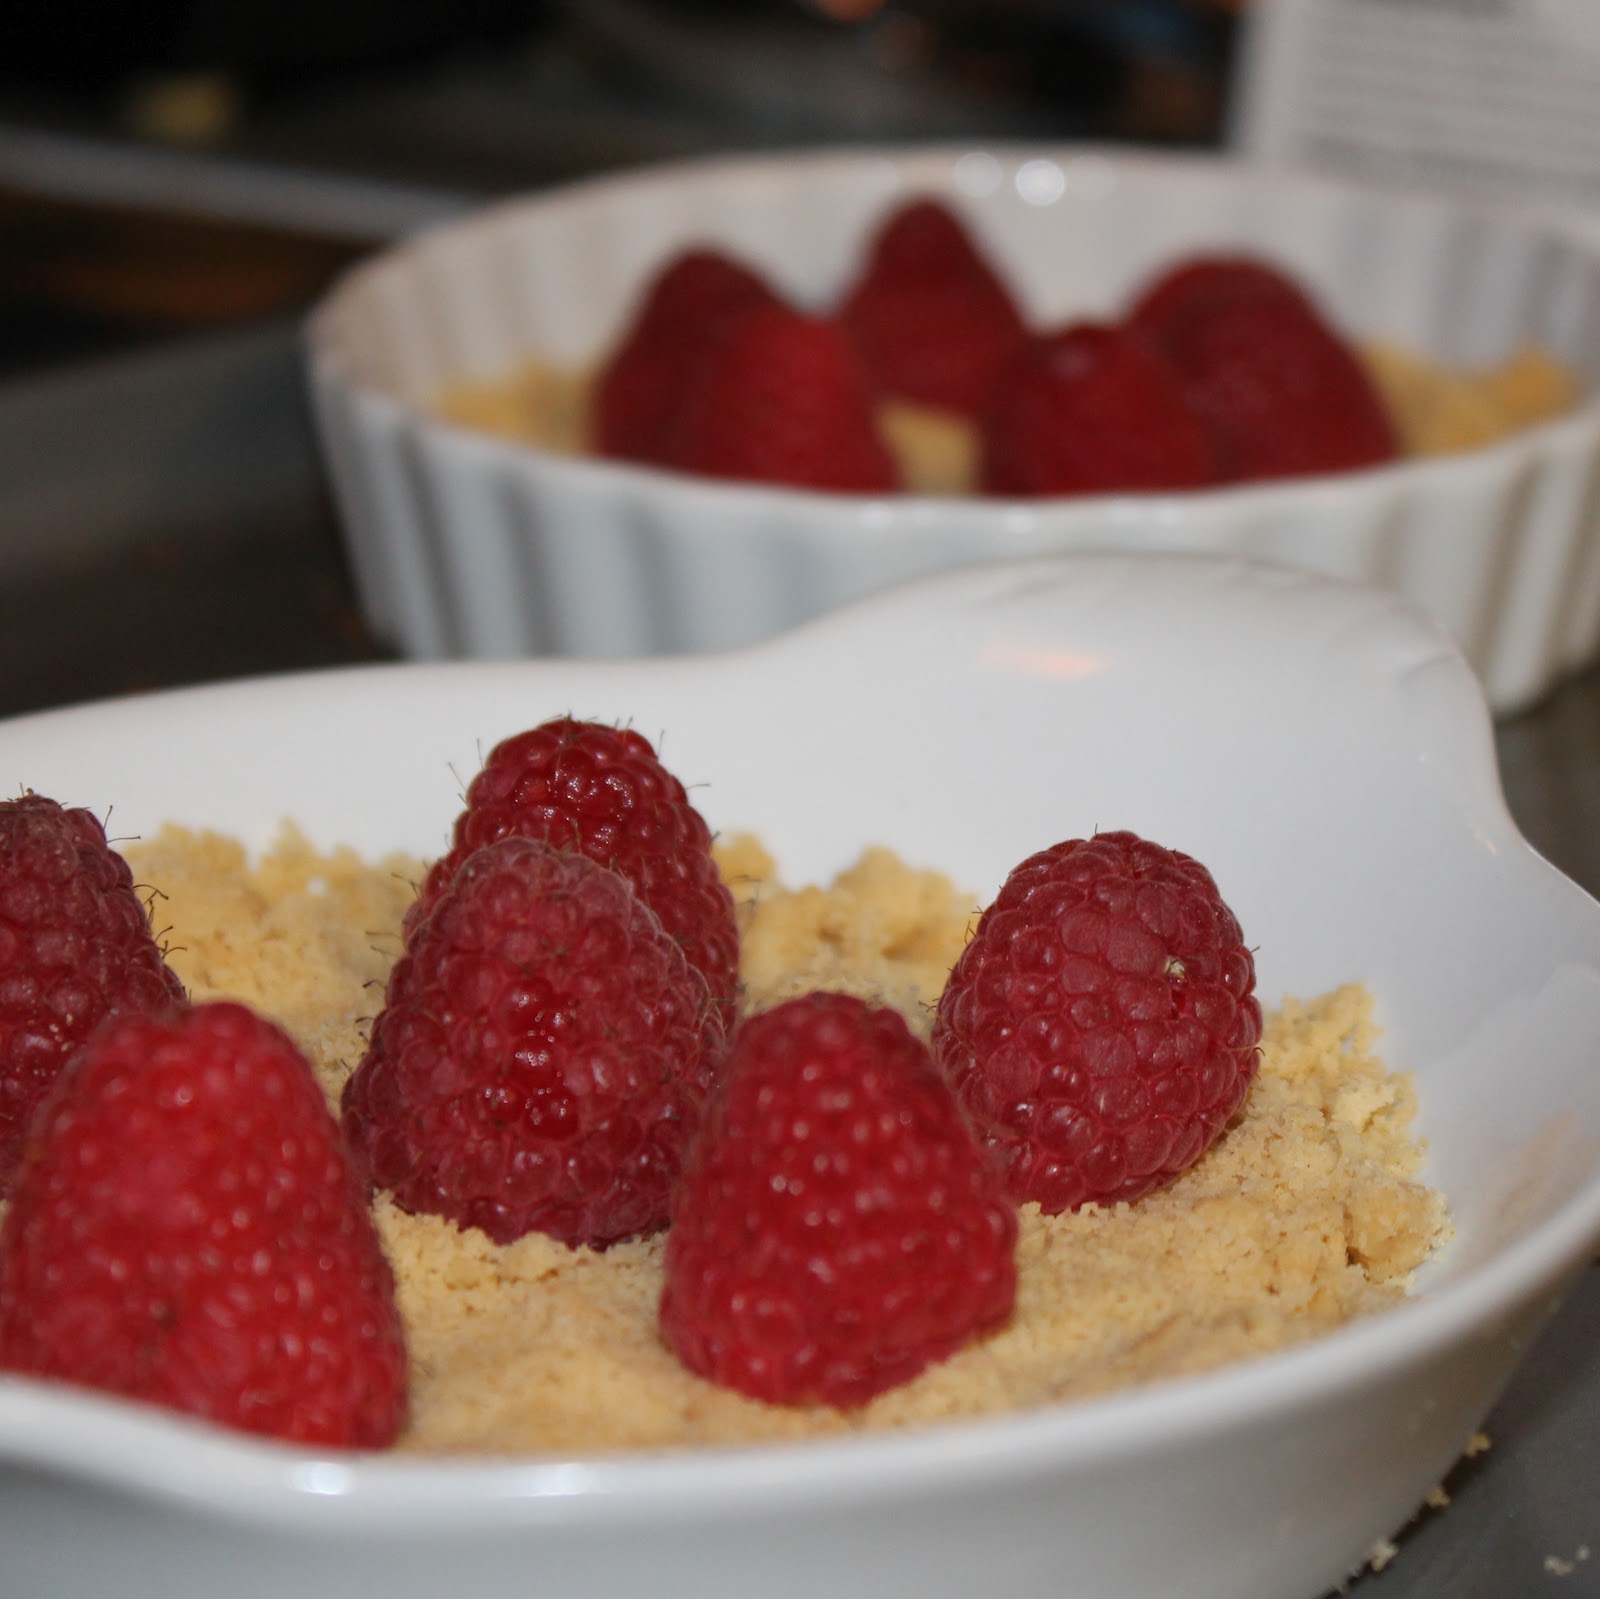
Last week, I was contacted by Walkers Shortbread about a recipe photo challenge they are hosting. Walkers asked a bunch of bloggers to make one of the recipes off their site and photograph the end result. They even offered to send me the Walkers ingredient needed to make the recipe. I came across their Raspberry Creme Brulee recipe and I knew I had to make it. It’s a traditional creme brulee, with a Walkers Shortbread crust and raspberries. How fantastic does that sound?
Ingredients:
2 cups whole milk
4 egg yolks
1/3 cup sugar
1/3 cup heavy cream
1/2 pint Raspberries (fresh)
1 pkg. (5.3 oz) Walkers Shortbread Fingers
light brown sugar, to taste
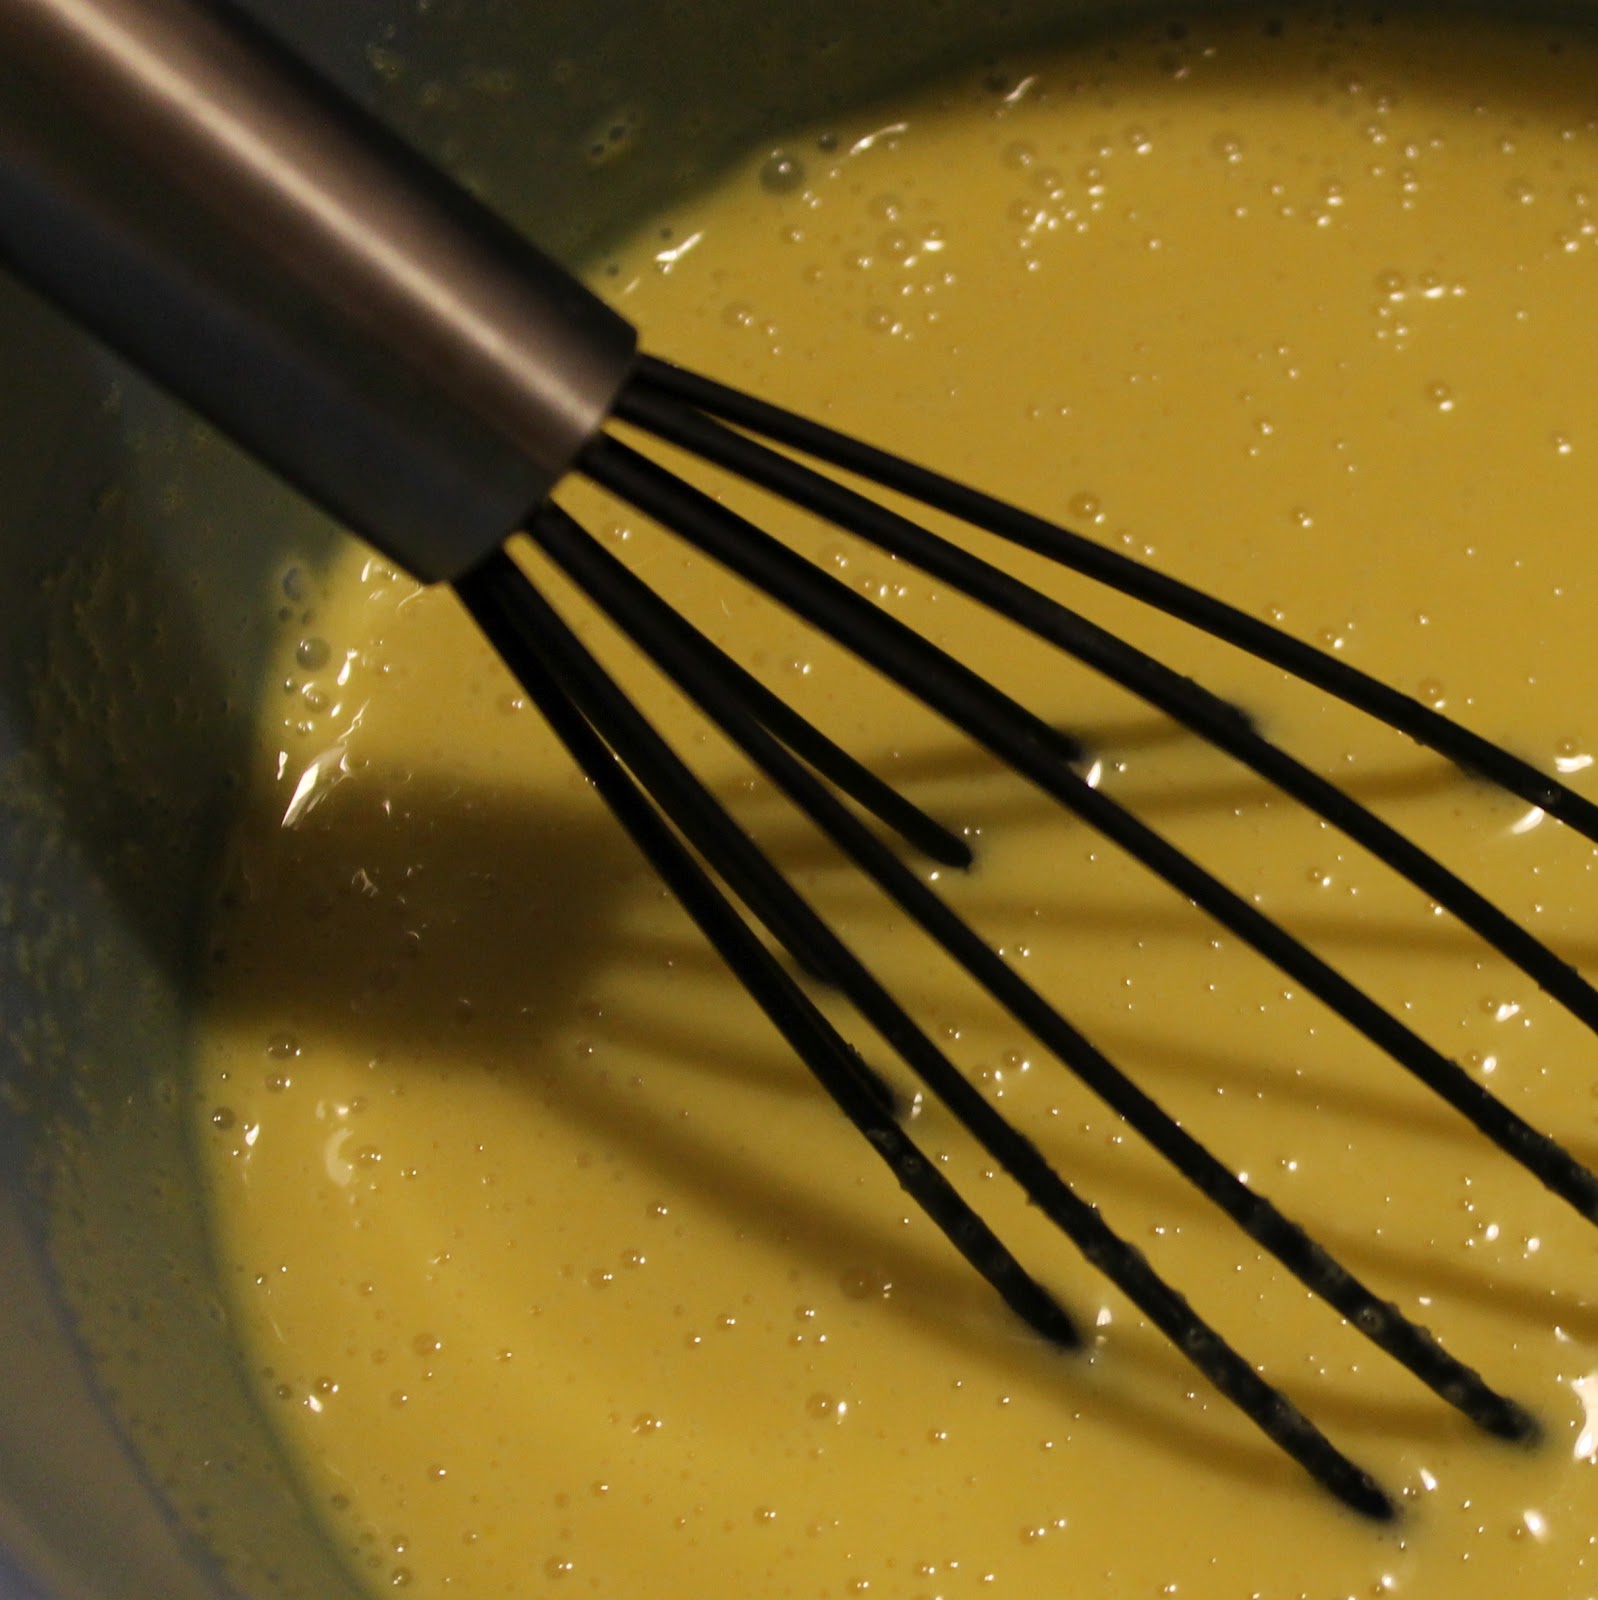
Preheat the oven to 300 degrees. Add the milk to a medium saucepan and bring to a boil. While waiting for the milk to boil, add the egg yolks, sugar and heavy cream to a medium sized bowl. Whisk to combine.
Add 3/4 cup of the boiled milk to the egg mixture, whisking constantly. This tempers the eggs so that they don’t cook when you add the rest of the milk. Once incorporated, add the rest of the milk in a steady stream.
Take a box of Walkers Shortbread Fingers. Using a metal spoon, break the shortbread (while still in the plastic package) into fine crumbs.
Add the shortbread crumbs to the bottom of four ramekins. Add the raspberries to the ramekins.
Pour the custard (the egg and milk mixture) into the ramekins. Be sure to leave some room at the top.
Bake for 40 minutes at 300 degrees, or until a knife inserted into the center of the custard comes out clean.
Transfer to a rack and cool to room temperature. Chill the custard for at least two hours (I chilled mine overnight).
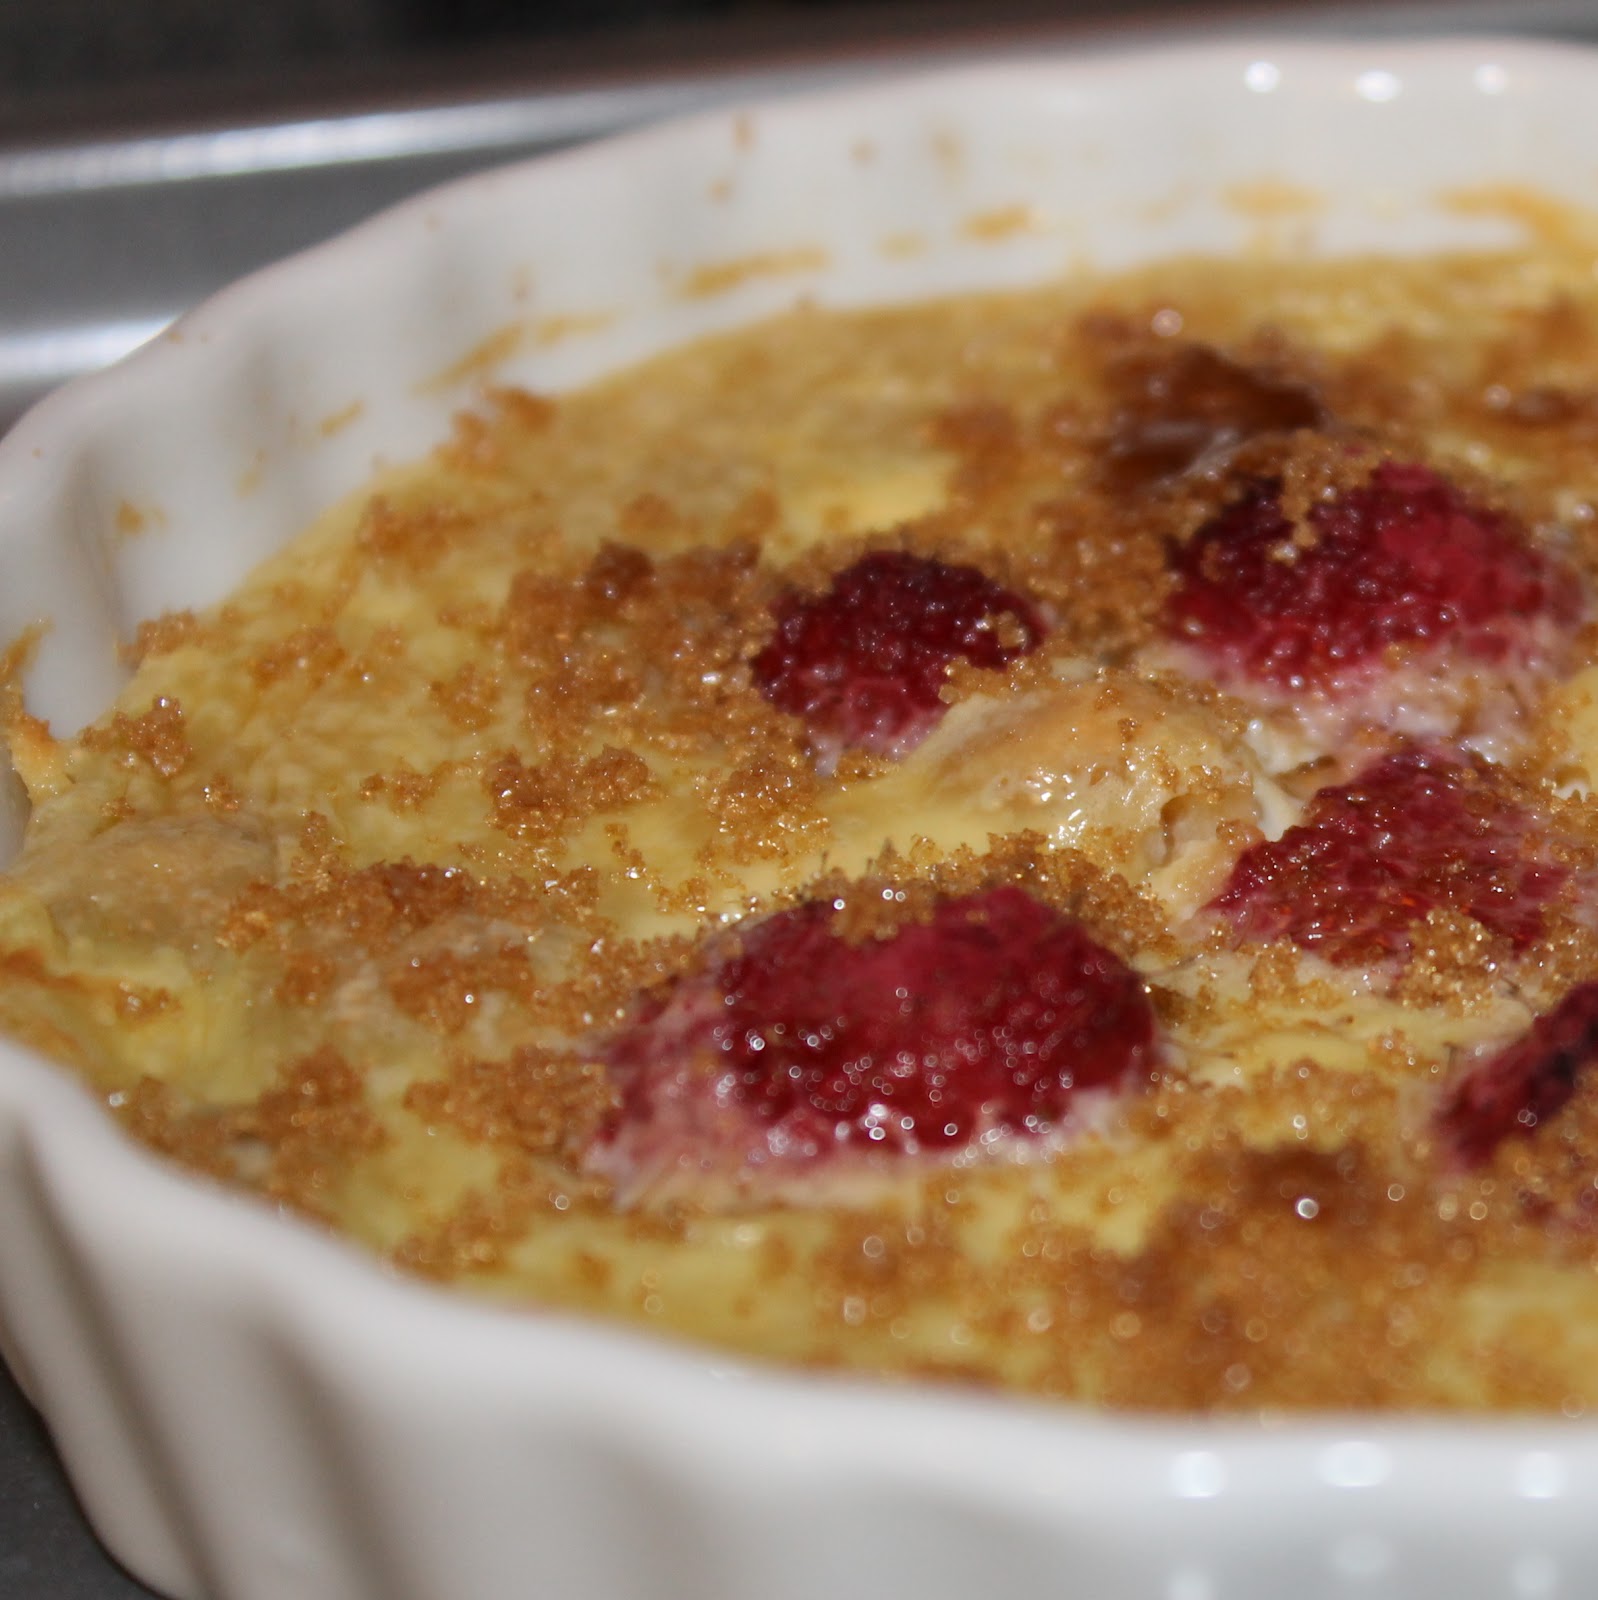
When ready to caramelize preheat your broiler to high. Sprinkle a thin coating of light brown sugar on each chilled custard. Place under the broiler for 2 minutes or until the sugar is melted and golden brown. (Check on the custard after 1 minute, the broiler works quickly!)
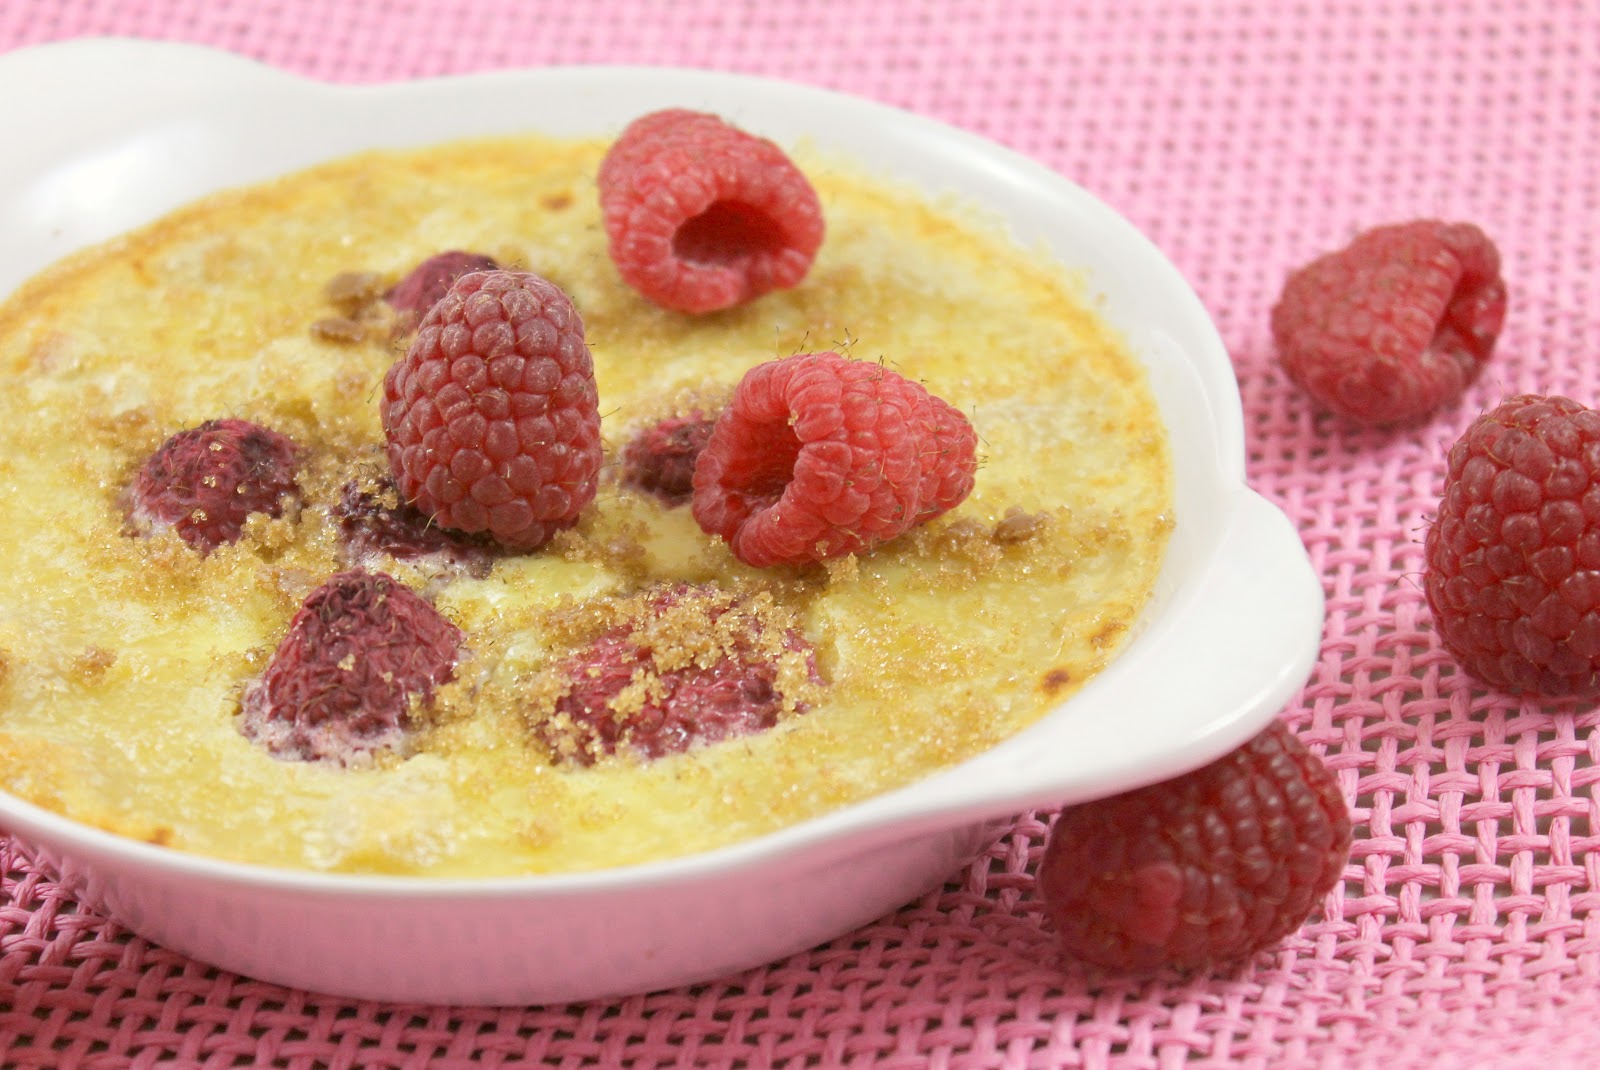
Remove and serve.
So. I hated it.
Hehe. Of course I’m kidding. This dessert was absolutely awesome. I can’t stop thinking about it. Plus look how pretty it is!
This has everything that attracts you to a traditional creme brulee: creamy, sweet, and a nice crunch from the crust and the broiled top.
But it also has little delicious bursts of raspberry. Yum!
I loved the incorporation of the Walkers shortbread crust. I think every creme brulee needs to have one of these delicious cookie crusts.
This could easily be changed to incorporate other berries as well. What a great recipe!
Note: I was provided no compensation other than samples of Walkers Shortbread fingers. All opinions are my own.
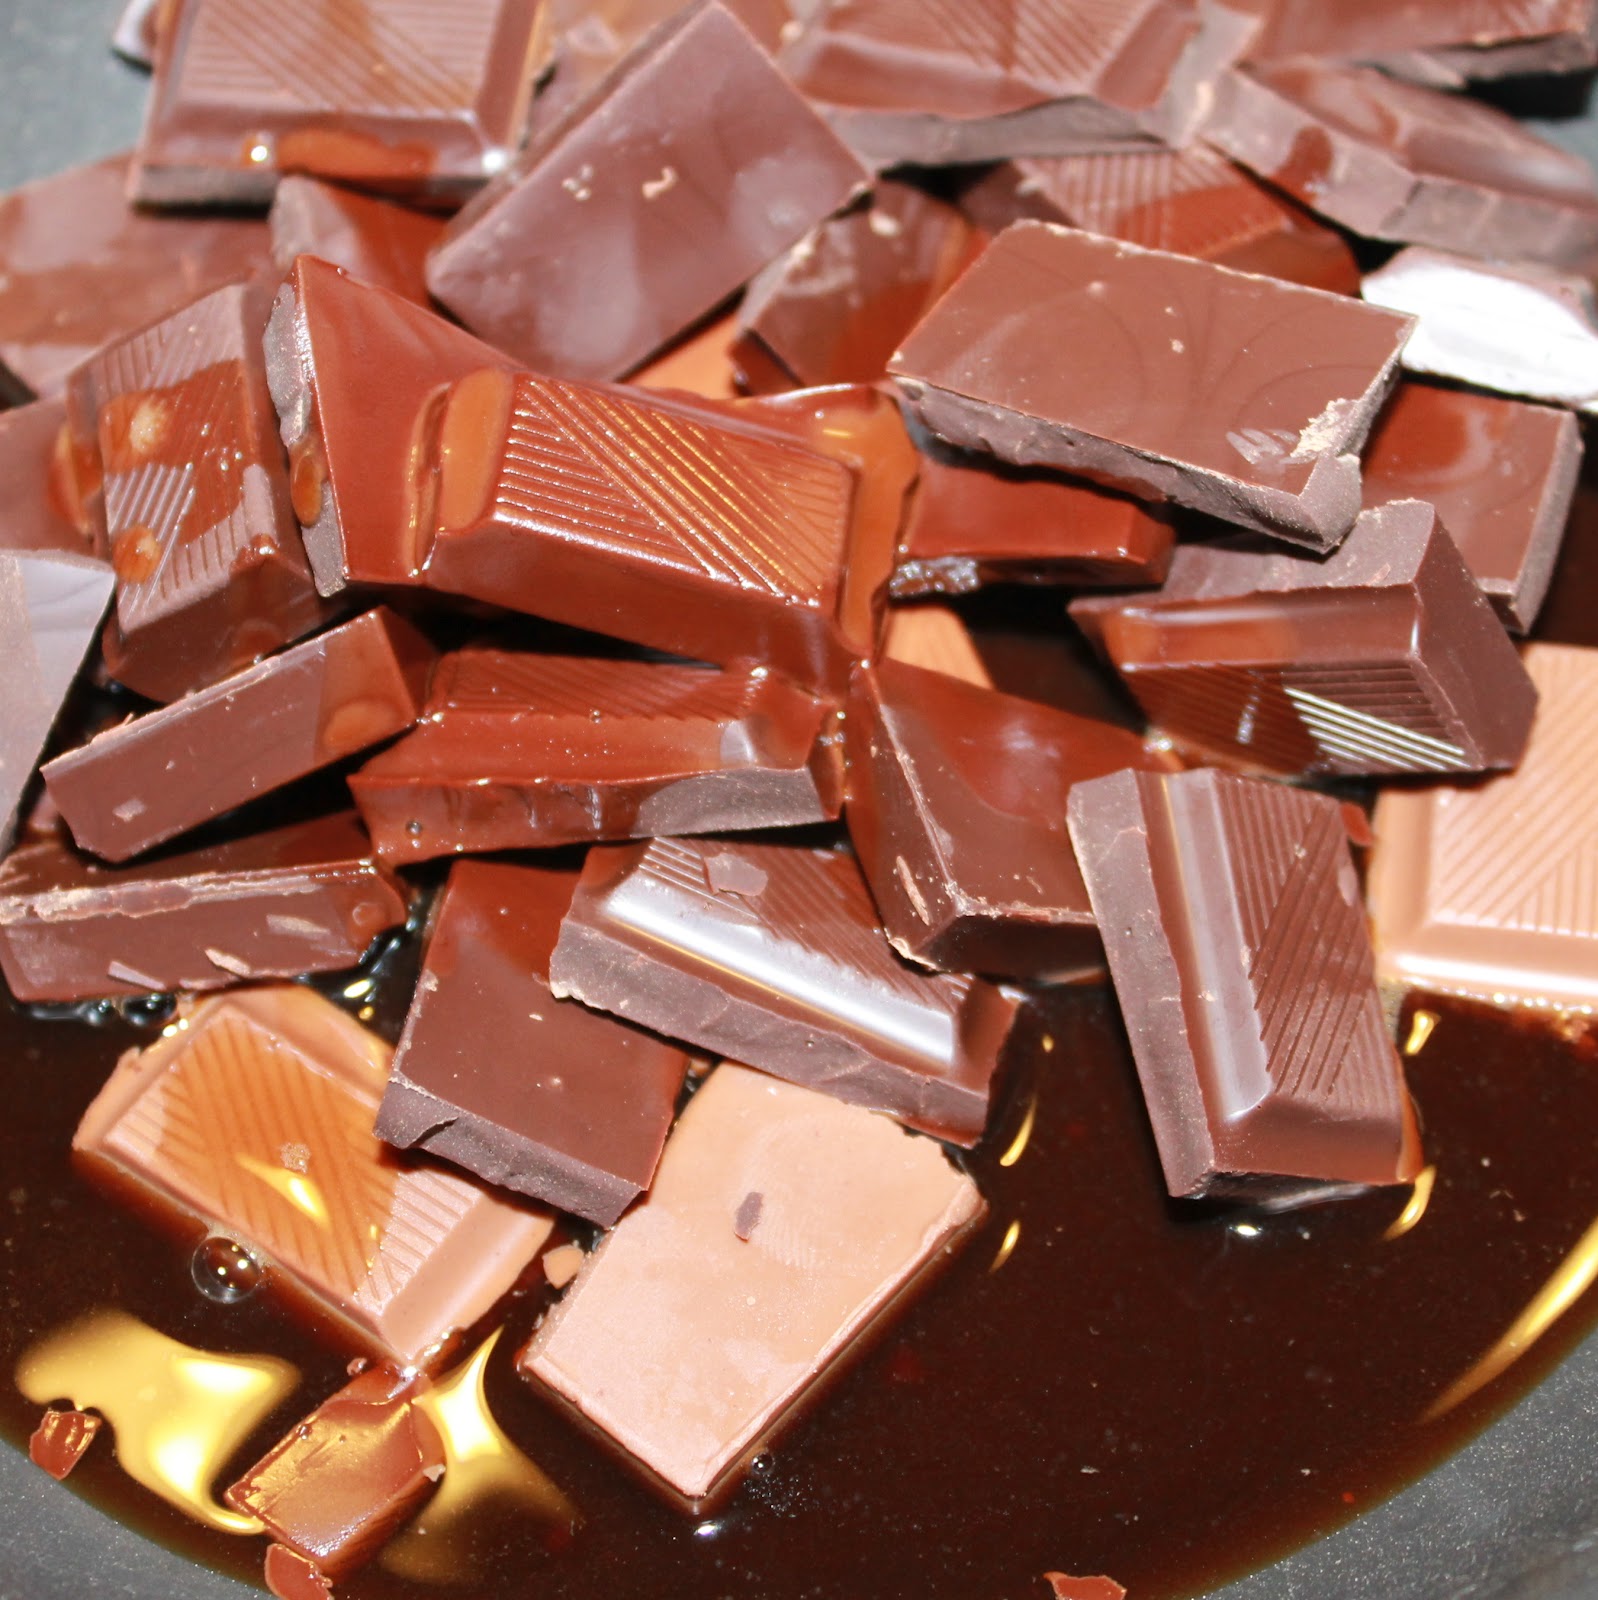
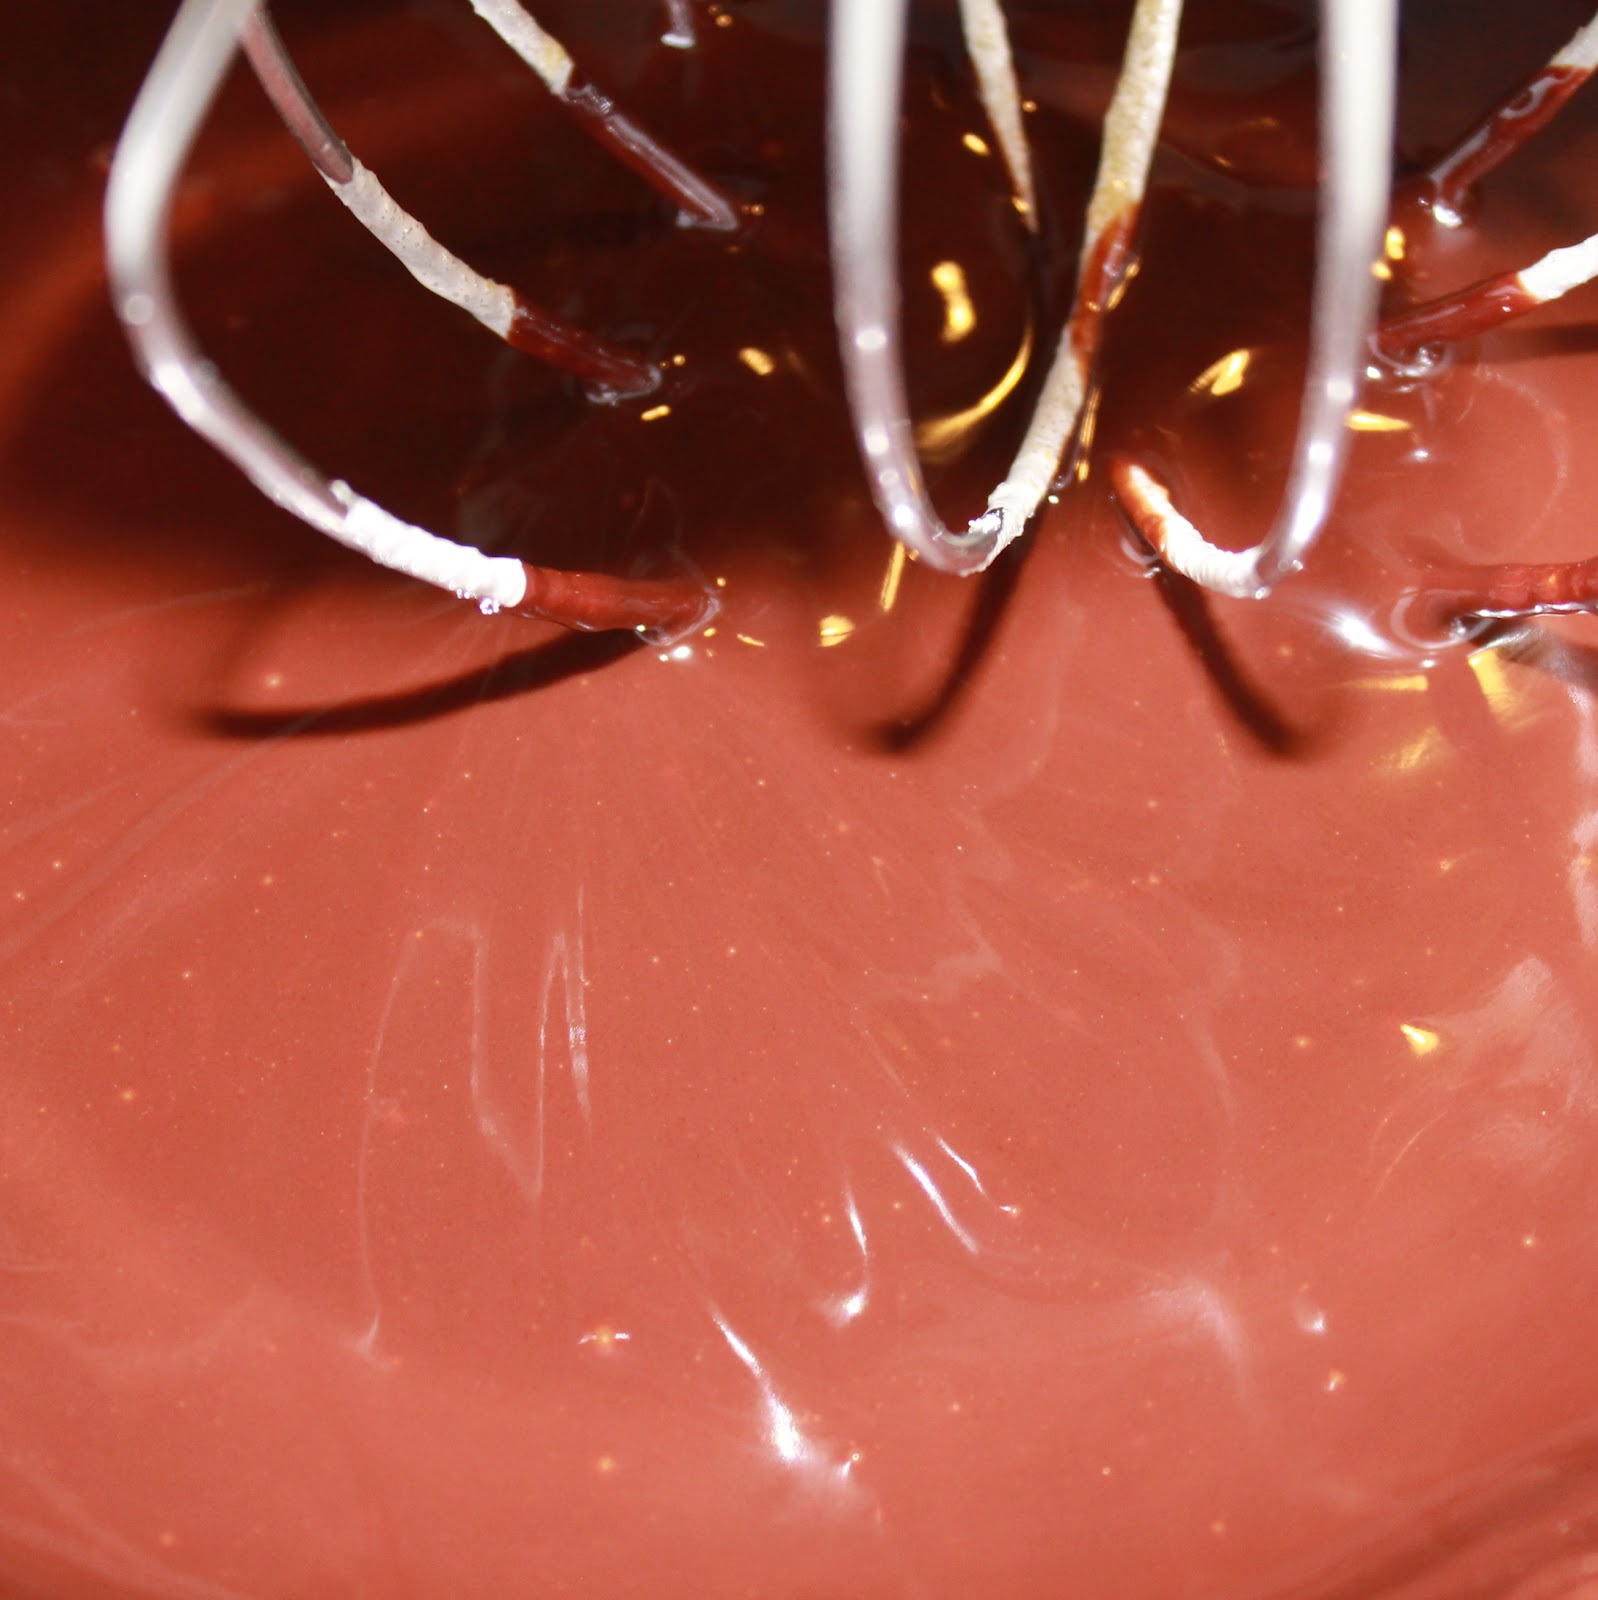
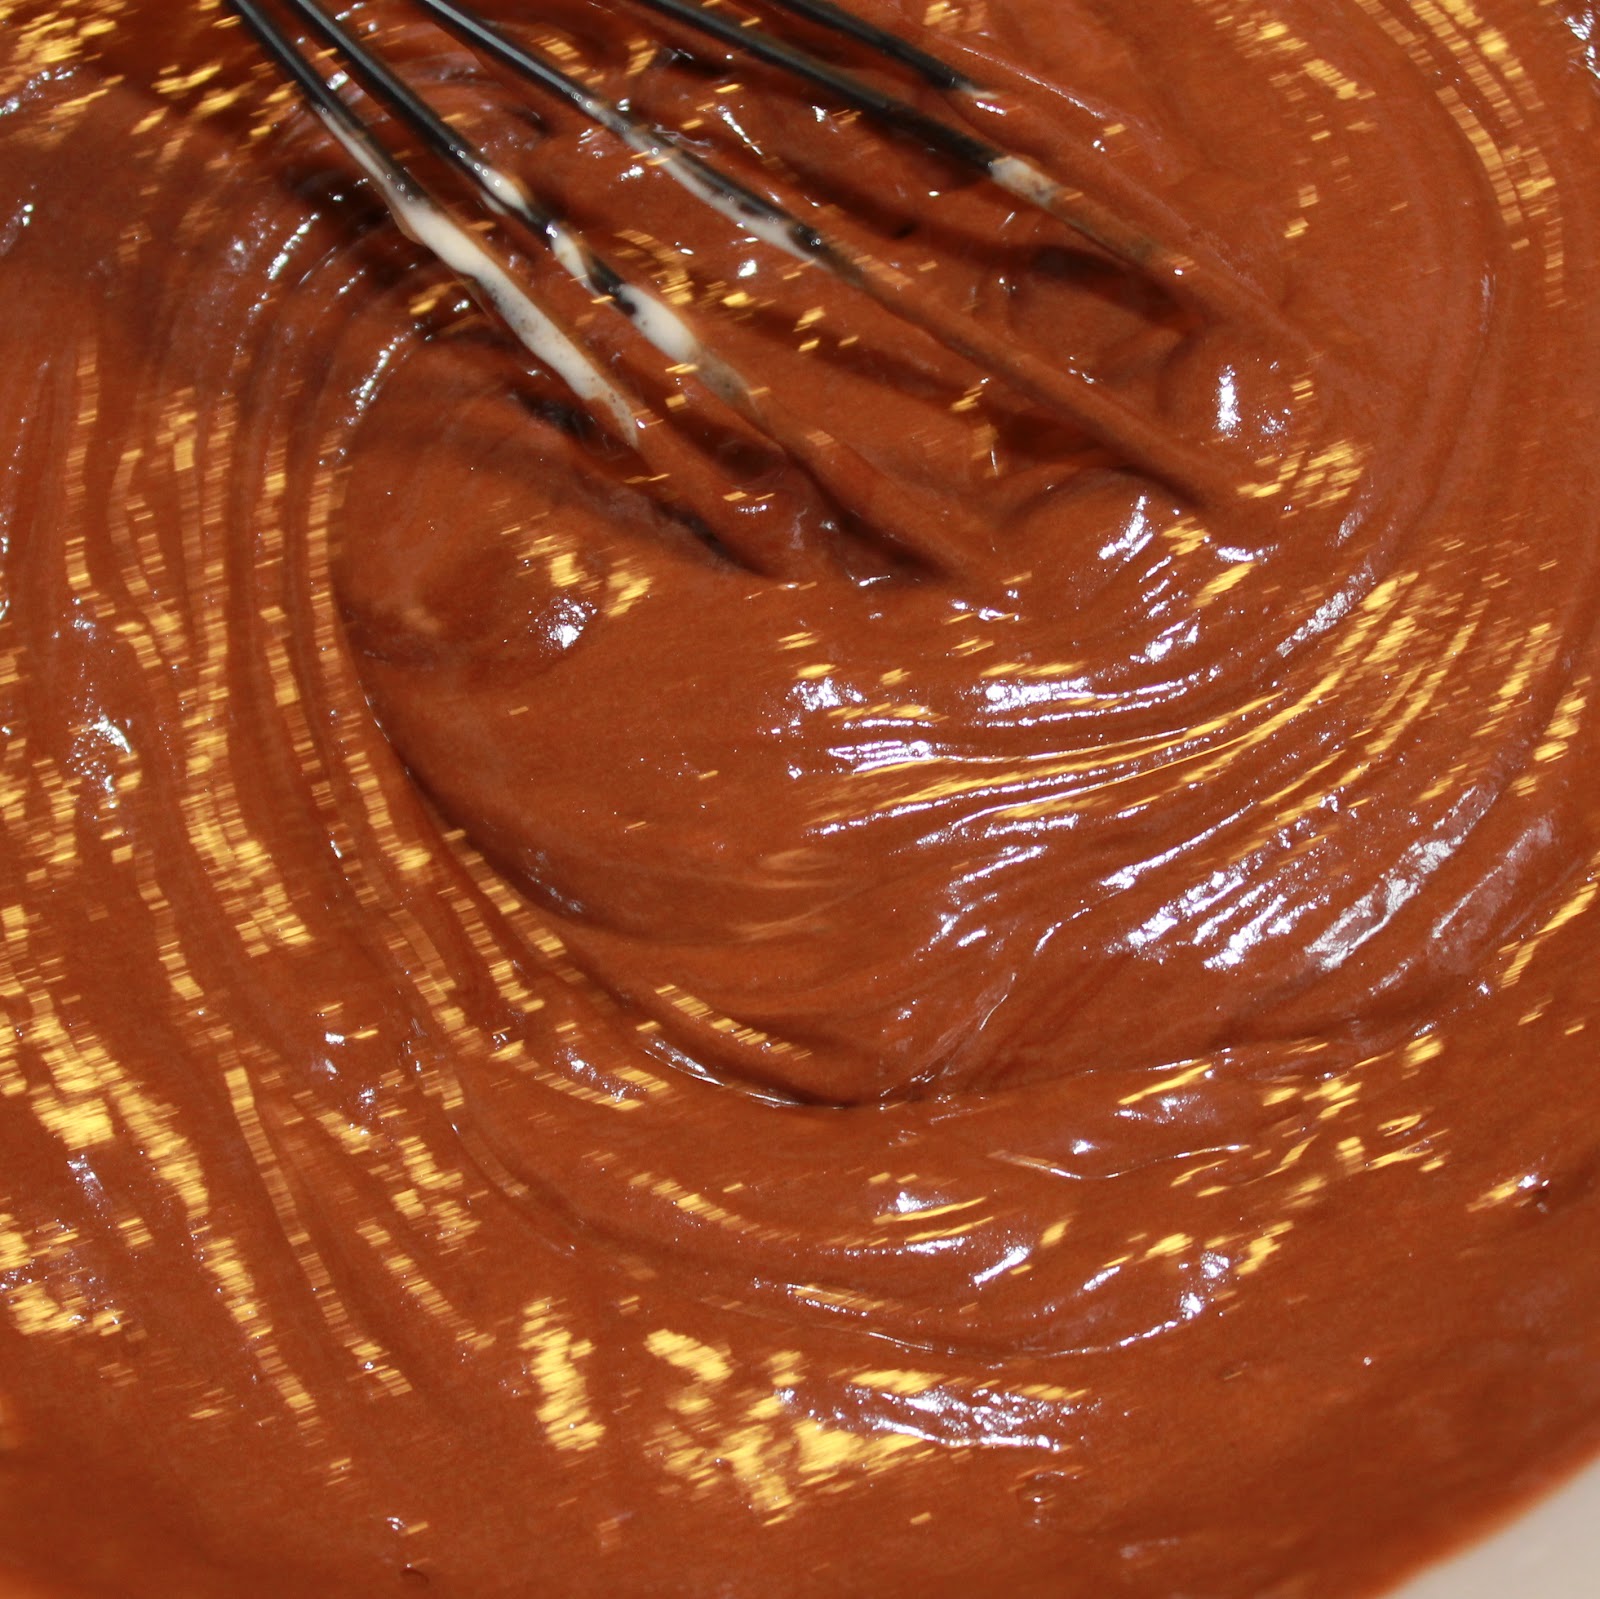
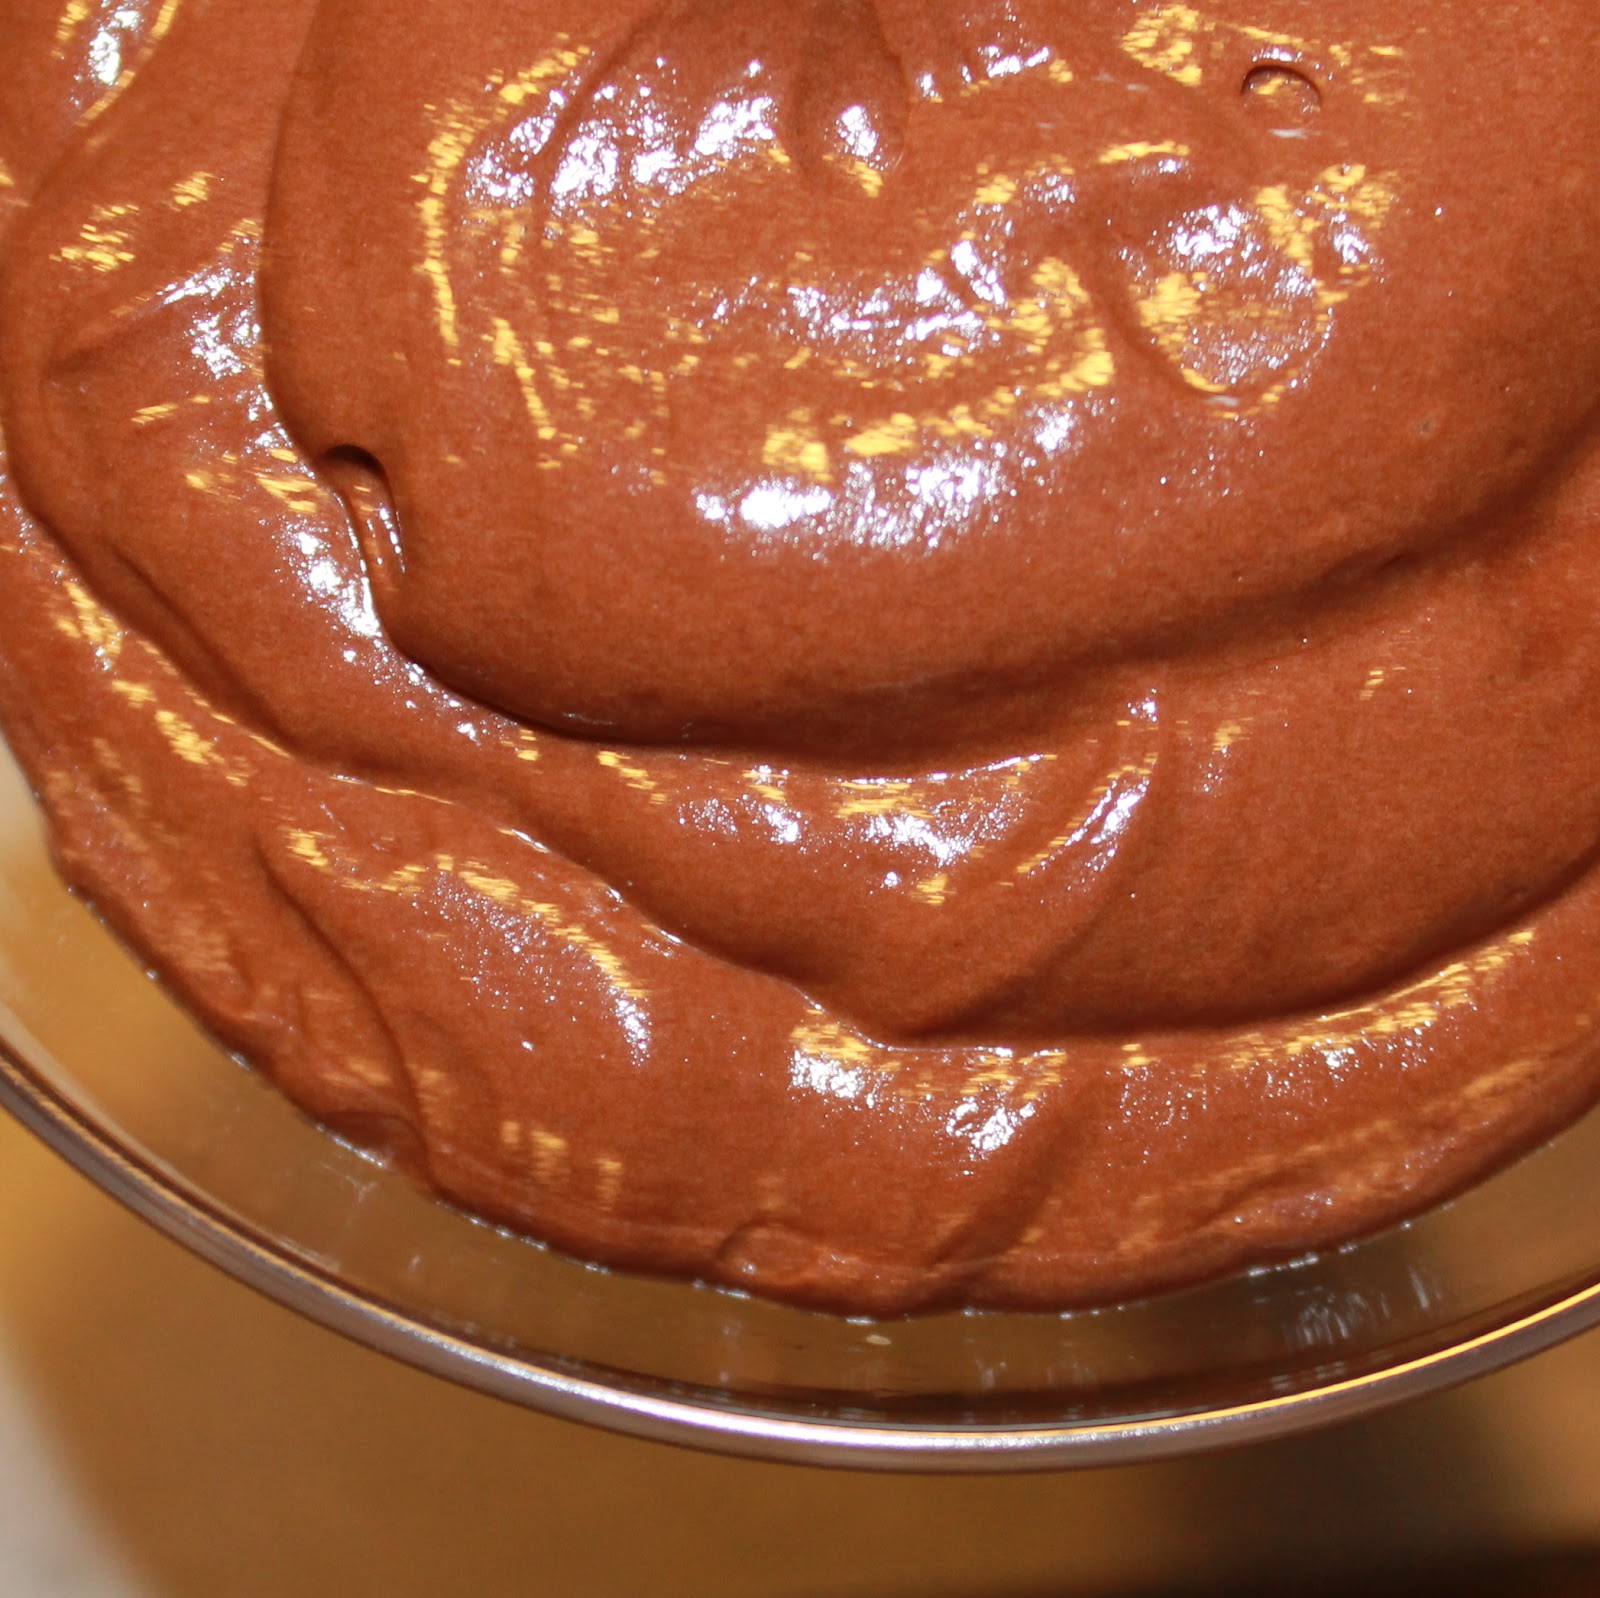
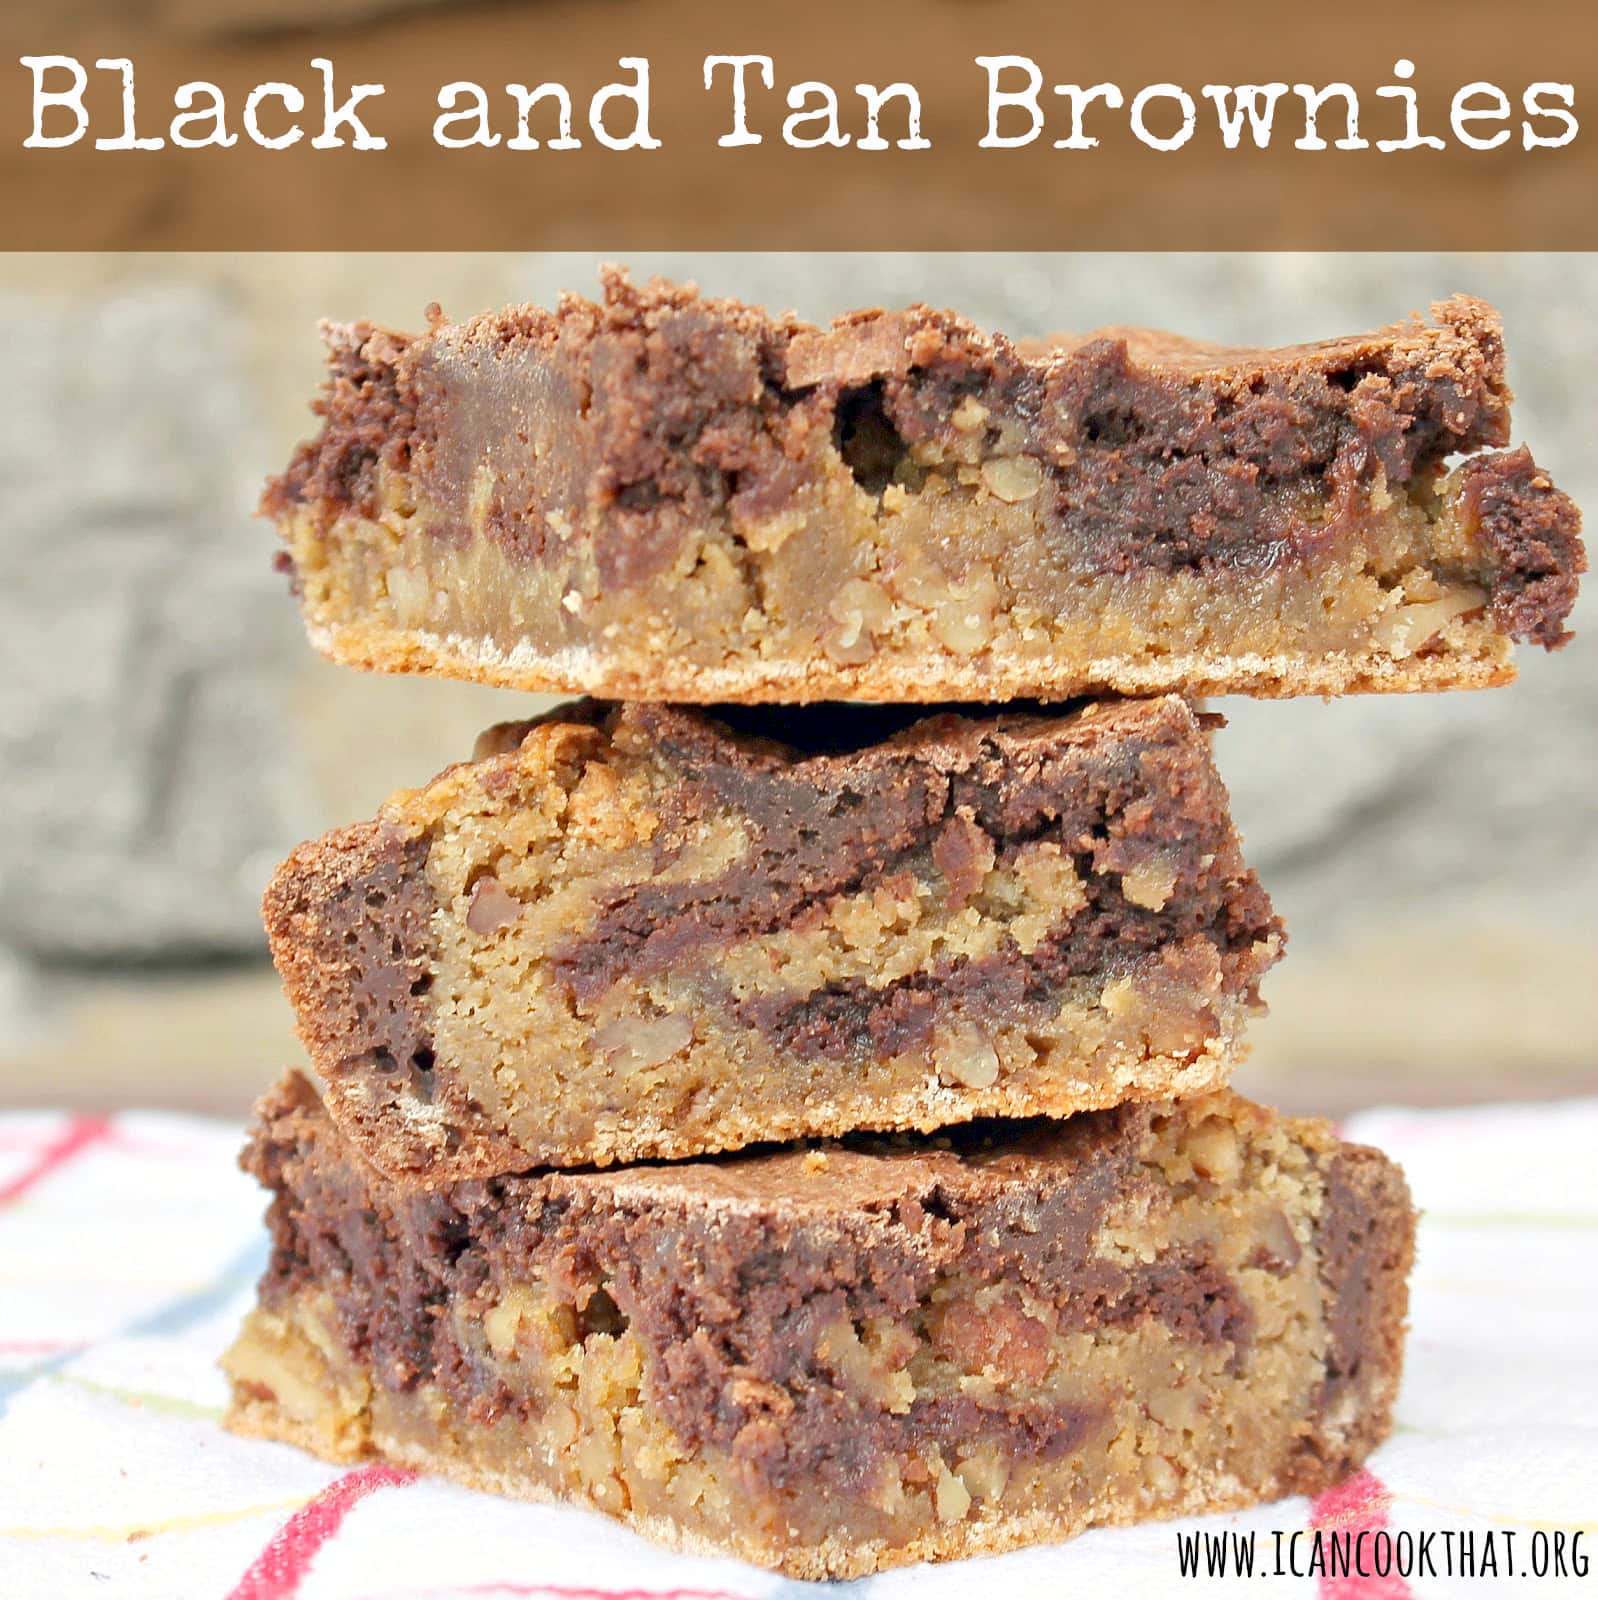
I mentioned these delicious brownies in my “A Taste of Ireland” post over the weekend. They were so yummy that I thought they deserved their own post. Also, because it’s technically two brownie recipes together, I thought step-by-step photos might prove helpful. Enjoy!
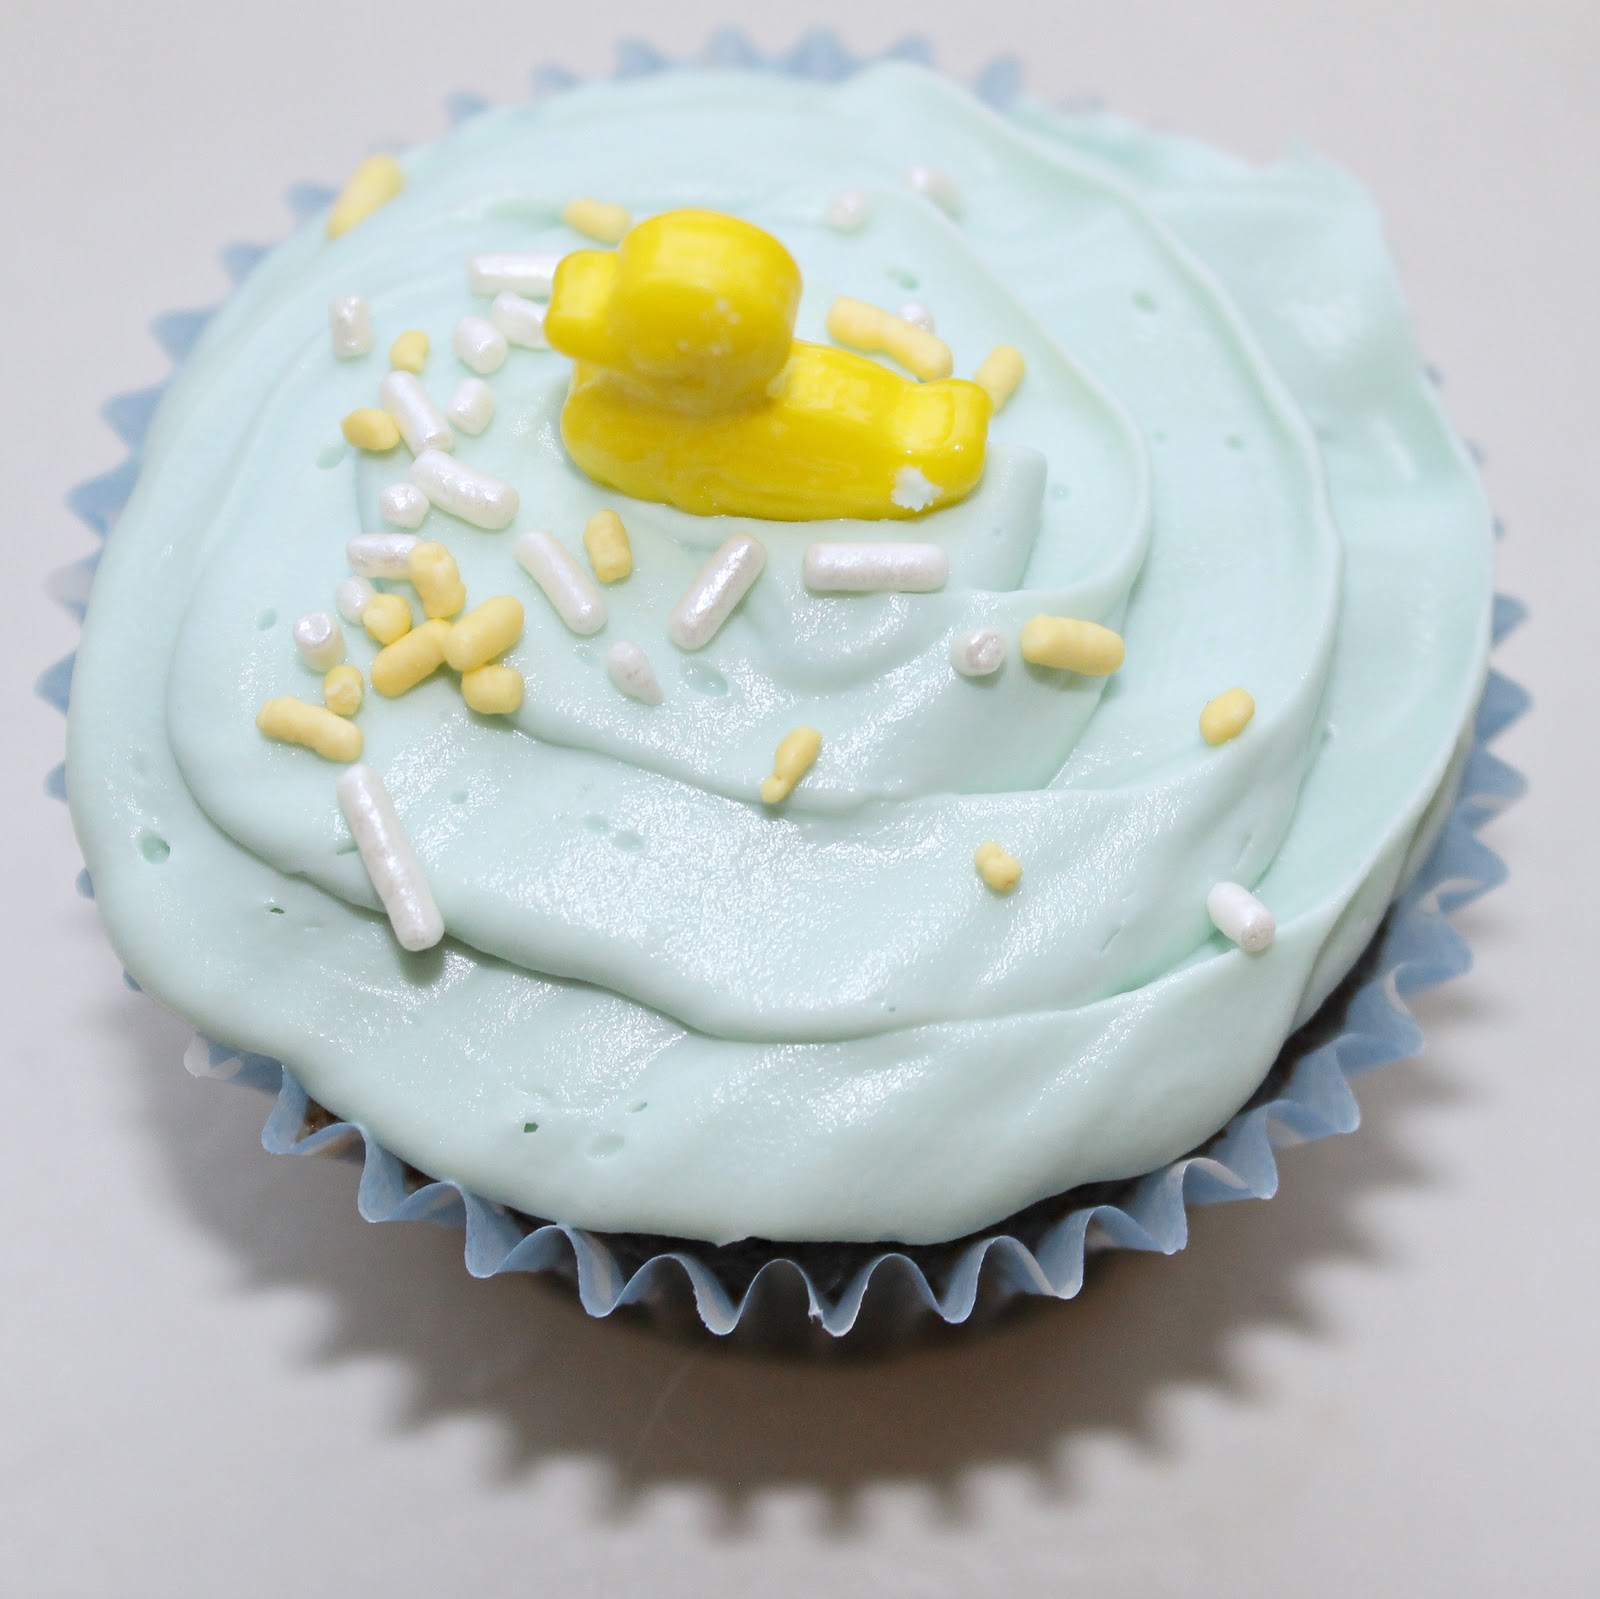
We recently had a baby shower for one of my co-workers. She’s a big chocolate fan, so I went in search of a super chocolately cupcake that I could make for the shower. Lauren’s Latest had a great recipe that incorporated dark chocolate and cocoa powder, perfect! I used an altered buttercream recipe from my Guinness Cupcakes so that I could have a white icing that I could dye blue. She is having a boy so I went with a duck theme!
Cupcake ingredients:
3/4 cup butter
12 oz dark chocolate
3/4 cup packed brown sugar (I used light)
3/4 cup granulated sugar
3/4 cup unsweetened cocoa powder
3/4 teaspoon salt
3/4 teaspoon baking soda
1 1/2 cup flour
3 eggs
3/4 cup milk
3/4 cup low fat sour cream
1 1/2 teaspoon vanilla extract
Buttercream ingredients:
1 stick of butter, softened
3 cups powdered (confectioner’s) sugar
2 teaspoons vanilla extract
Milk, as needed to get to desired consistency
4-5 drops blue food dye
So I did something that is typically a big no-no in baking. I took Lauren’s recipe and multiplied it by three to make 24 cupcakes. And (thankfully) it turned out a-ok! So feel free to use my multiplied version. Be sure to check out Lauren’s page though to see how beautiful hers came out, especially with that chocolate icing, yum!
Begin by preheating your oven to 350 degrees. Line a cupcake pan with paper liners.
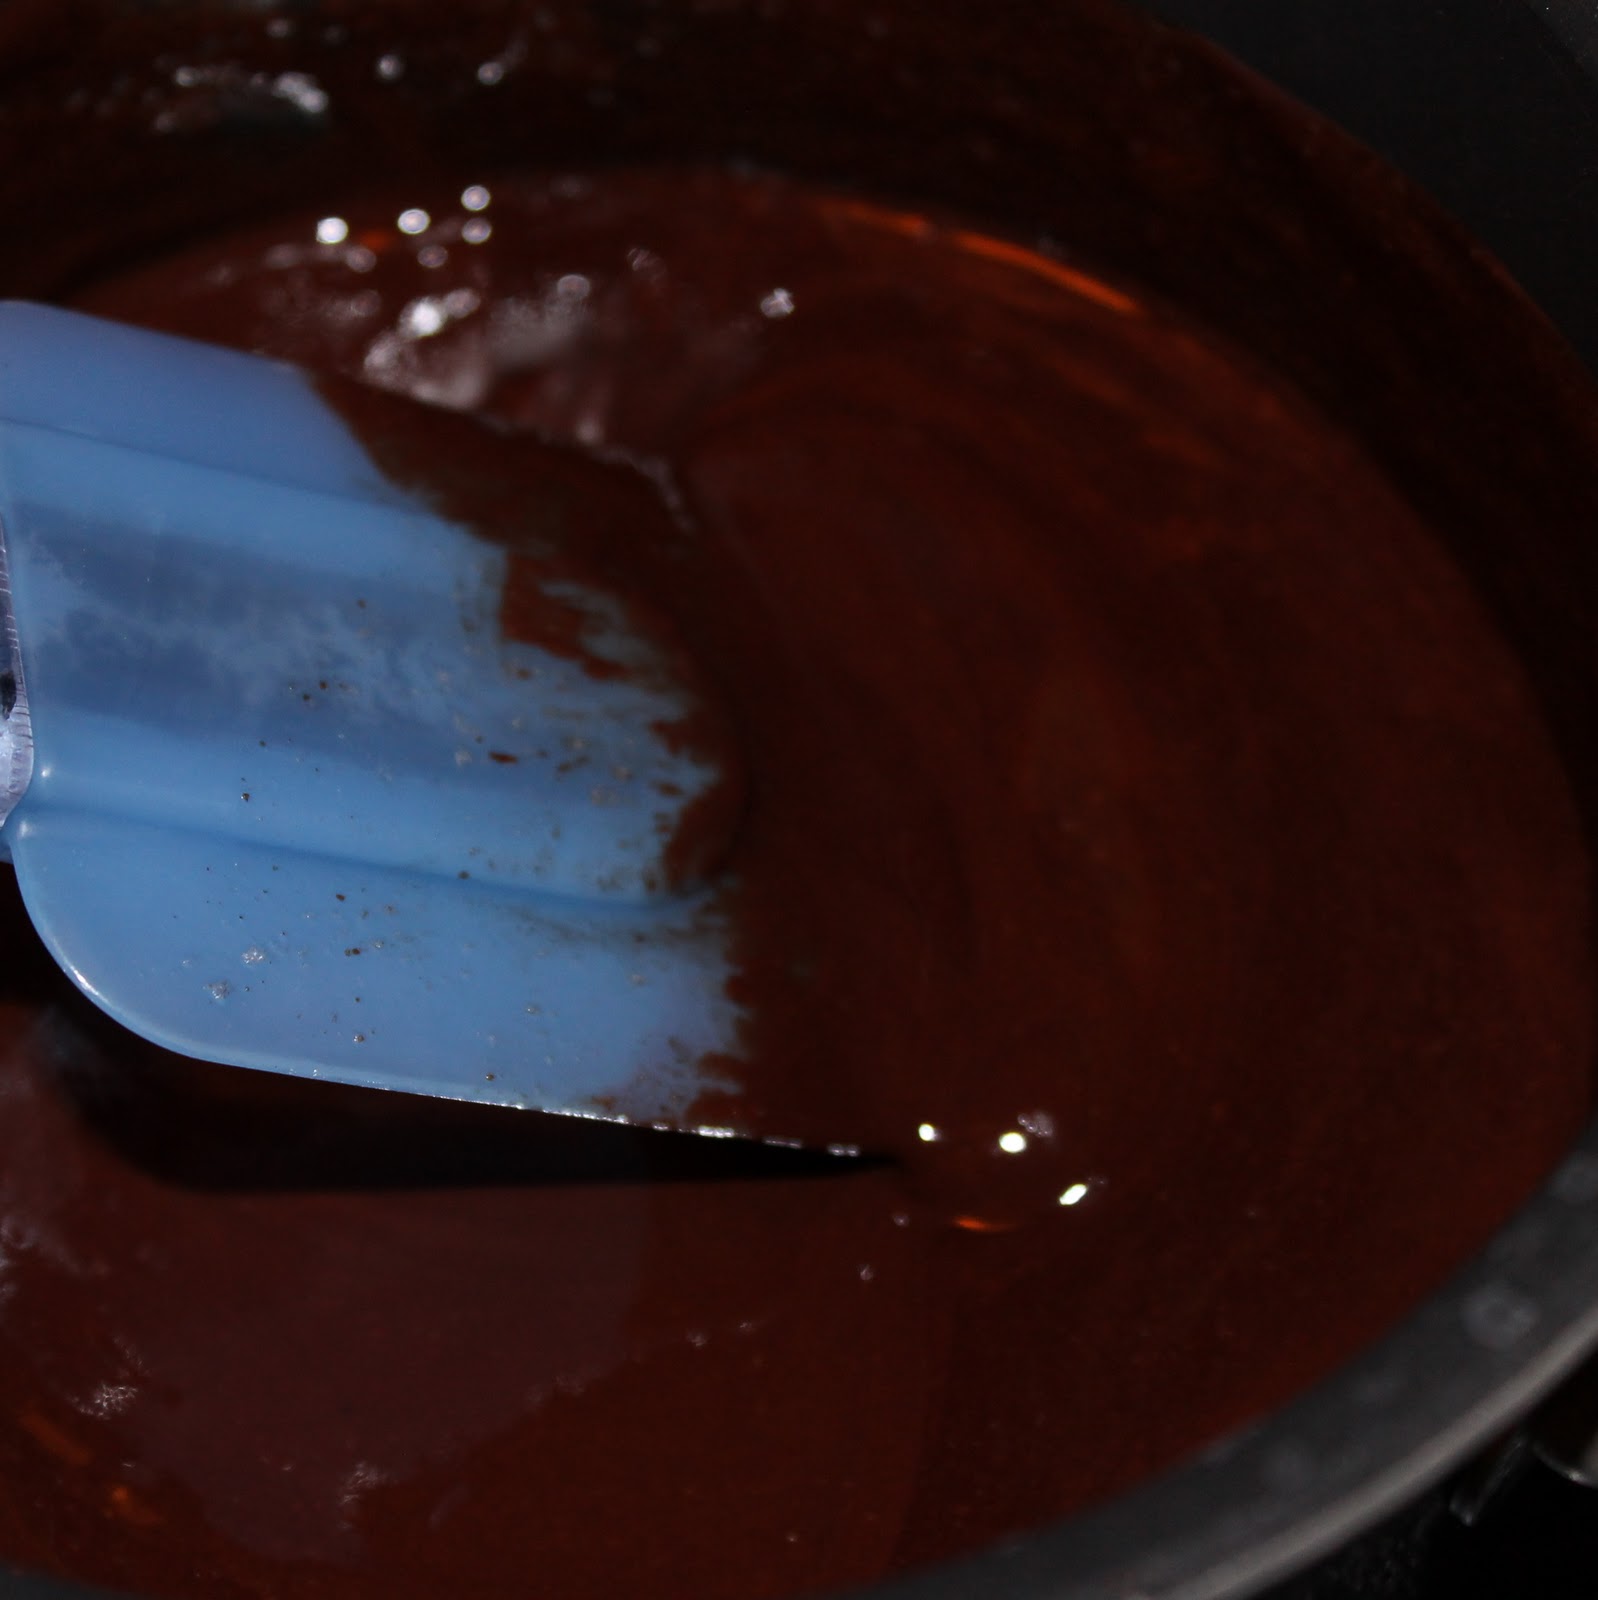
In a small pot, melt the butter and chocolate over medium low heat, stirring until smooth. When combined, remove from heat and allow to cool.
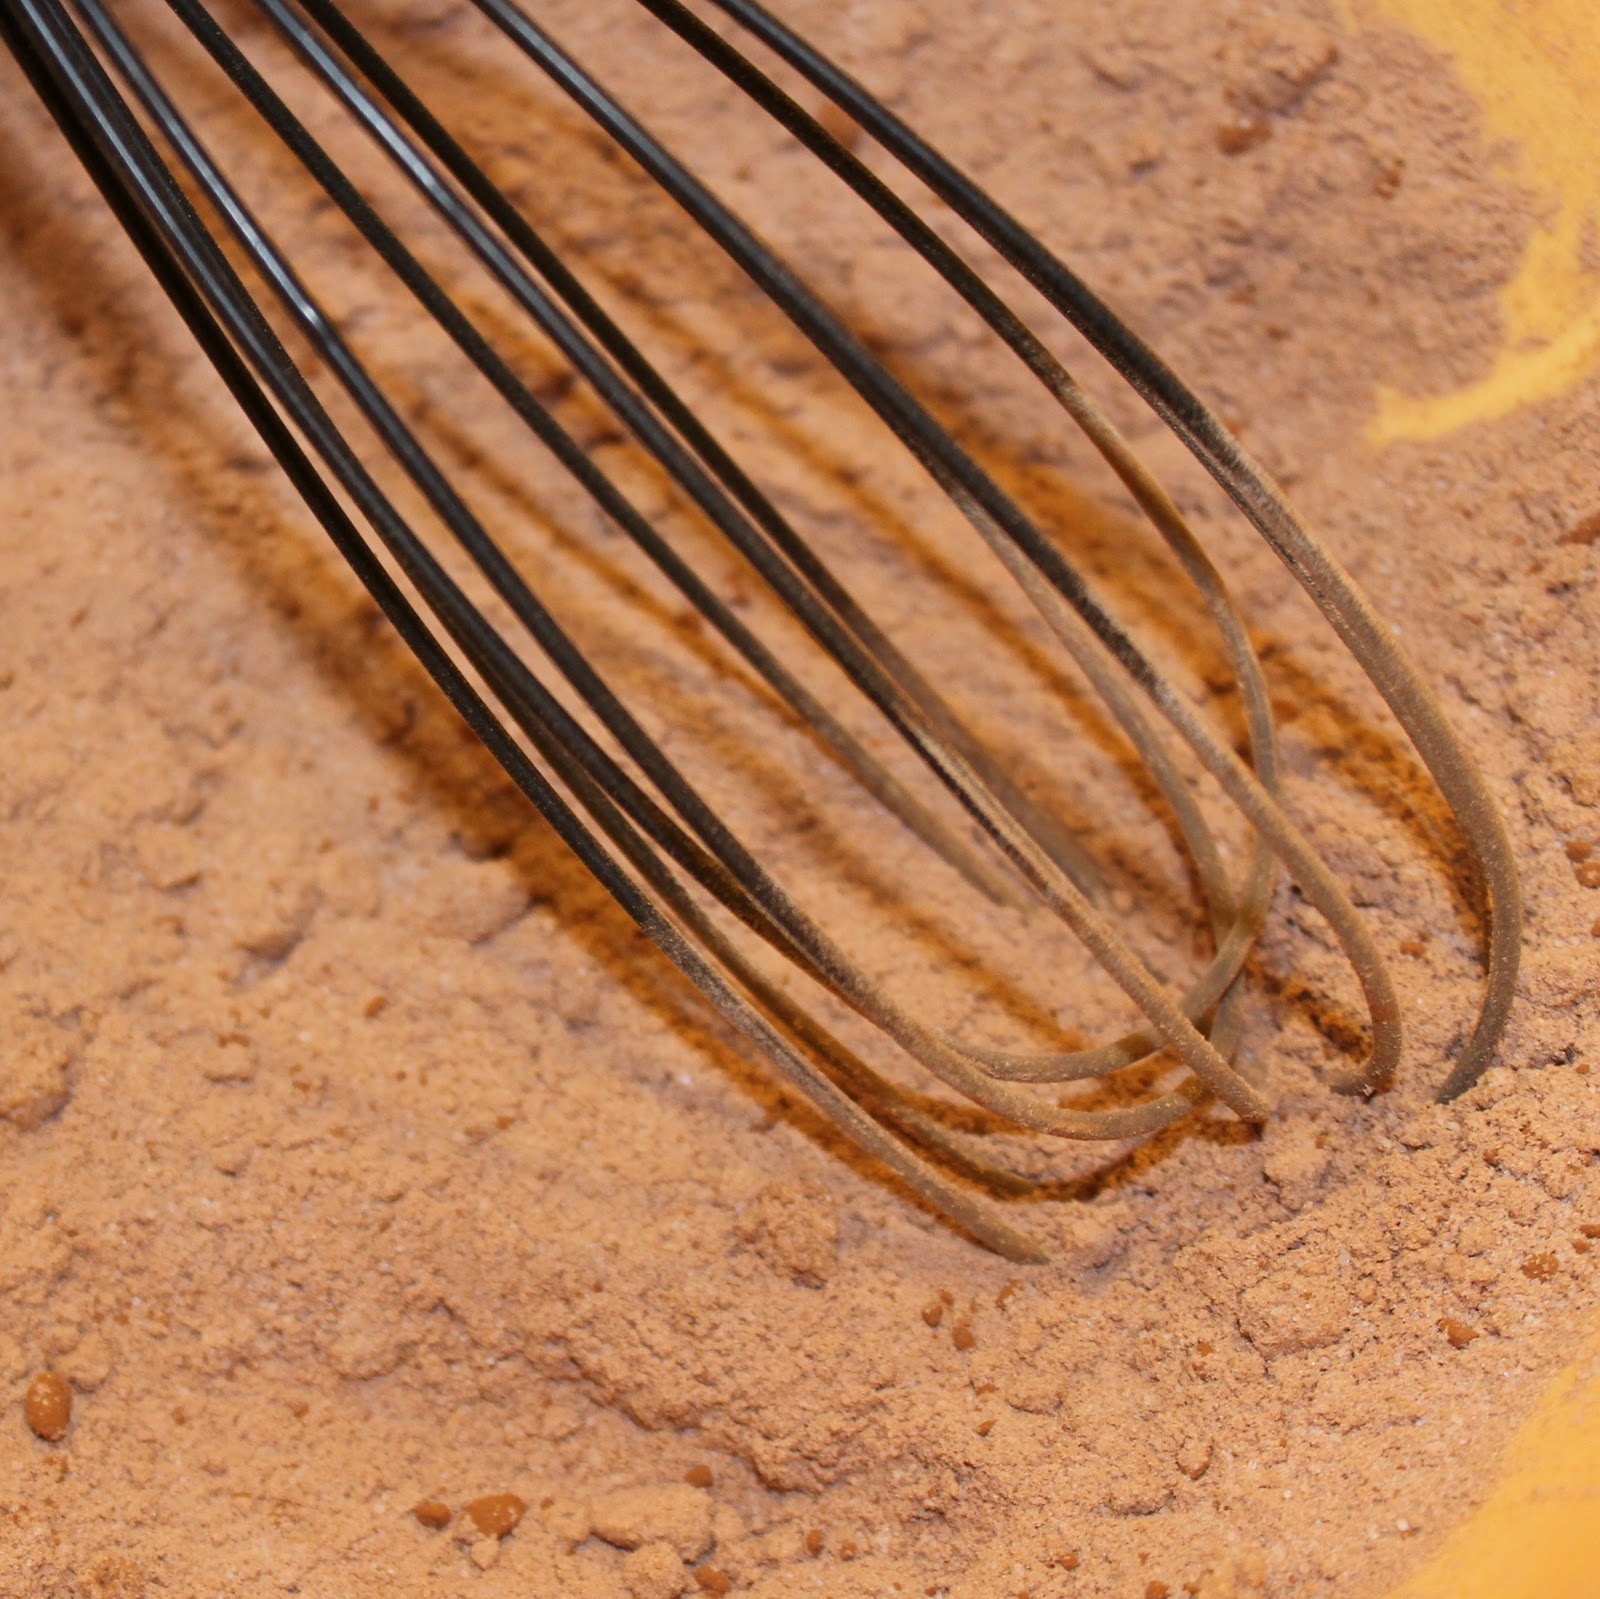
While the butter and chocolate are melting / cooling, add the brown sugar, granulated sugar, cocoa powder, salt, baking soda and flour in a large bowl.
Mix to combine.
In a small bowl, combine the eggs, milk, sour cream and vanilla.
Make a well in the dry mixture.
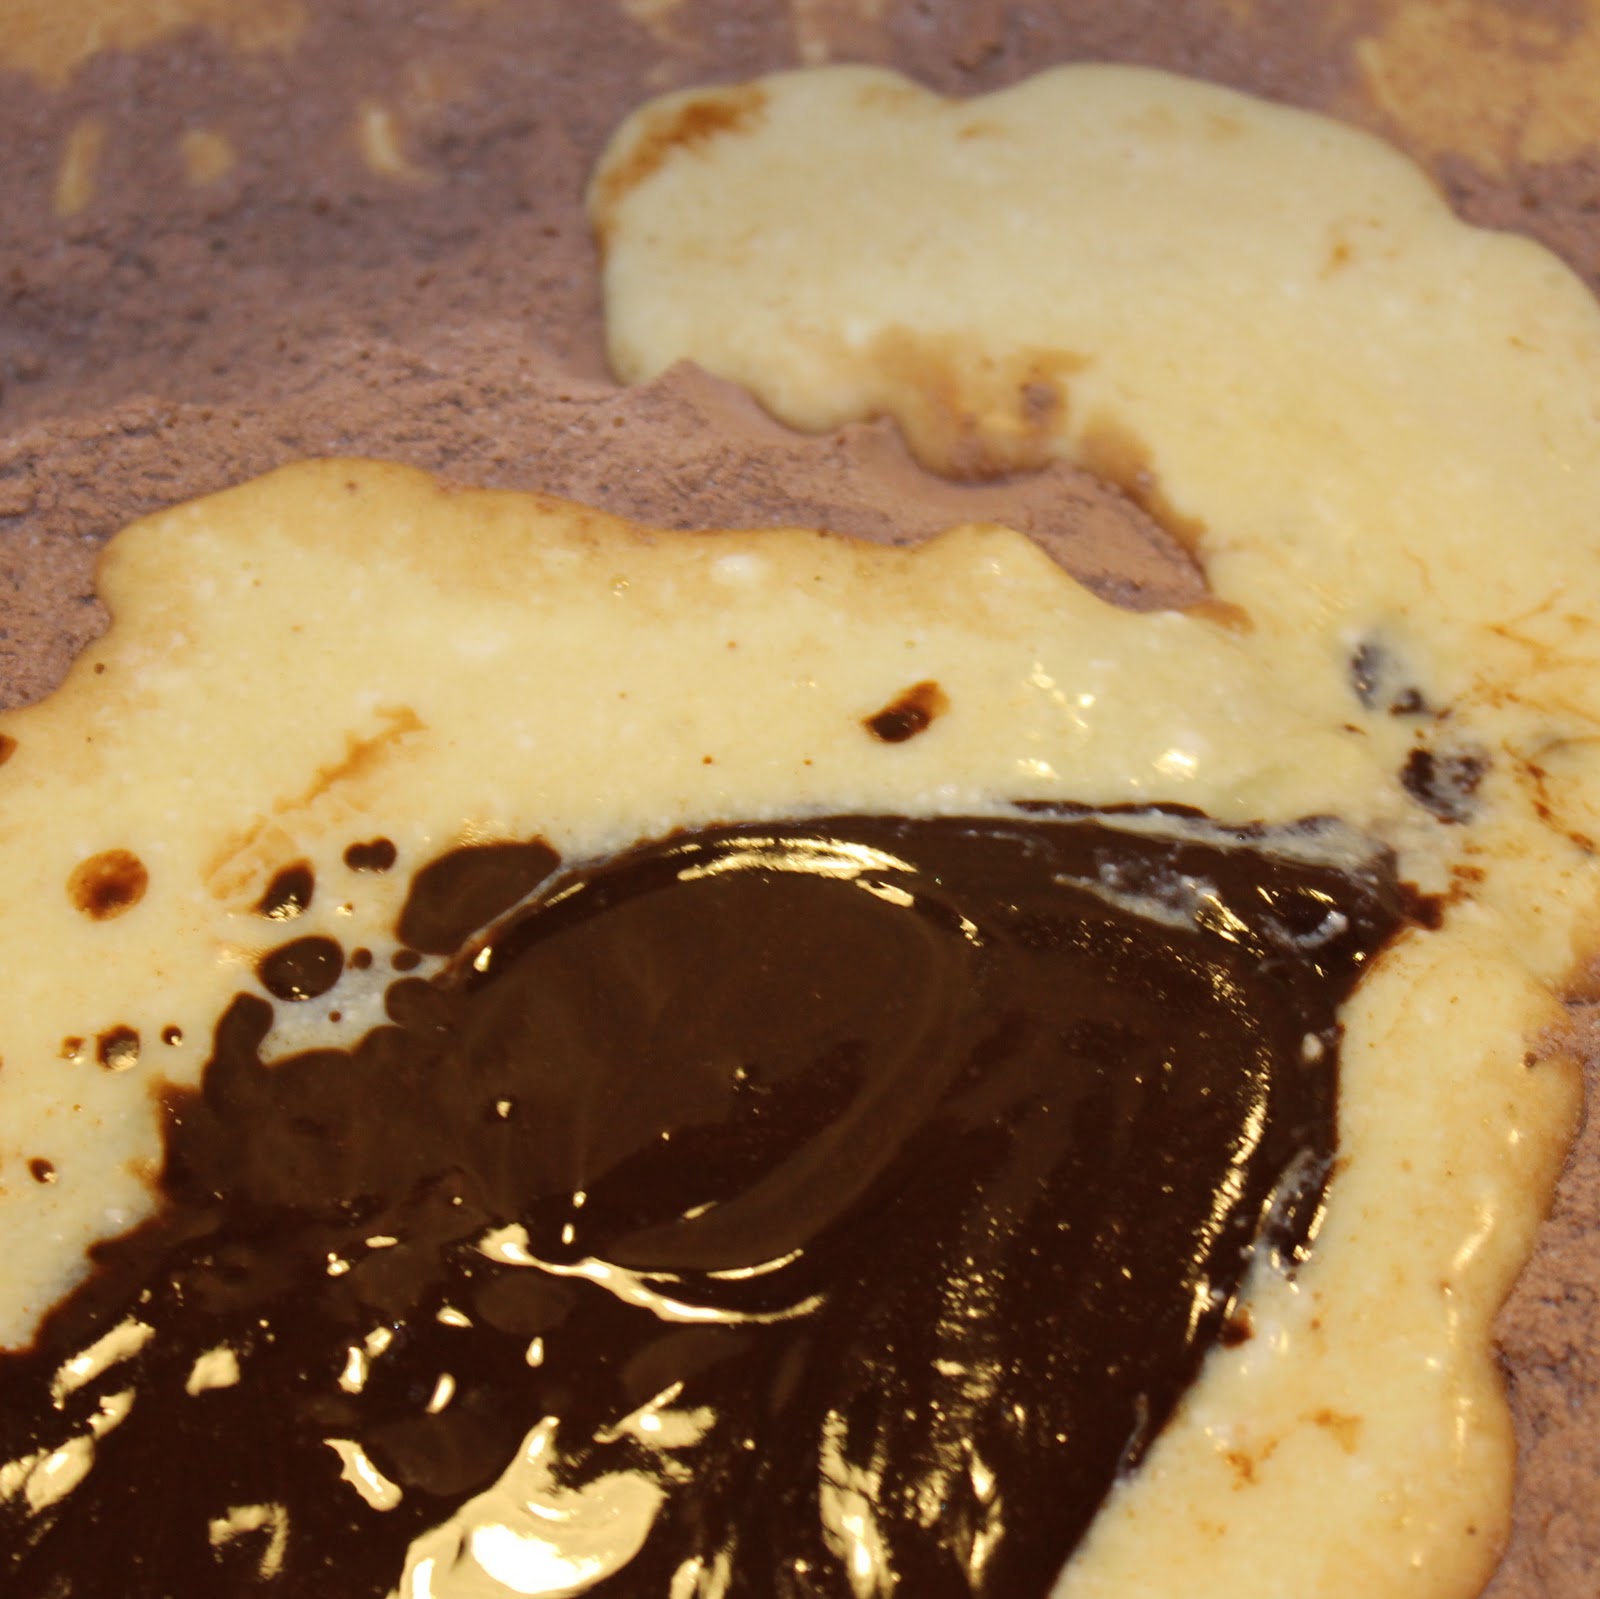
Pour the wet ingredients into the well.
Mine overflowed. Oops@
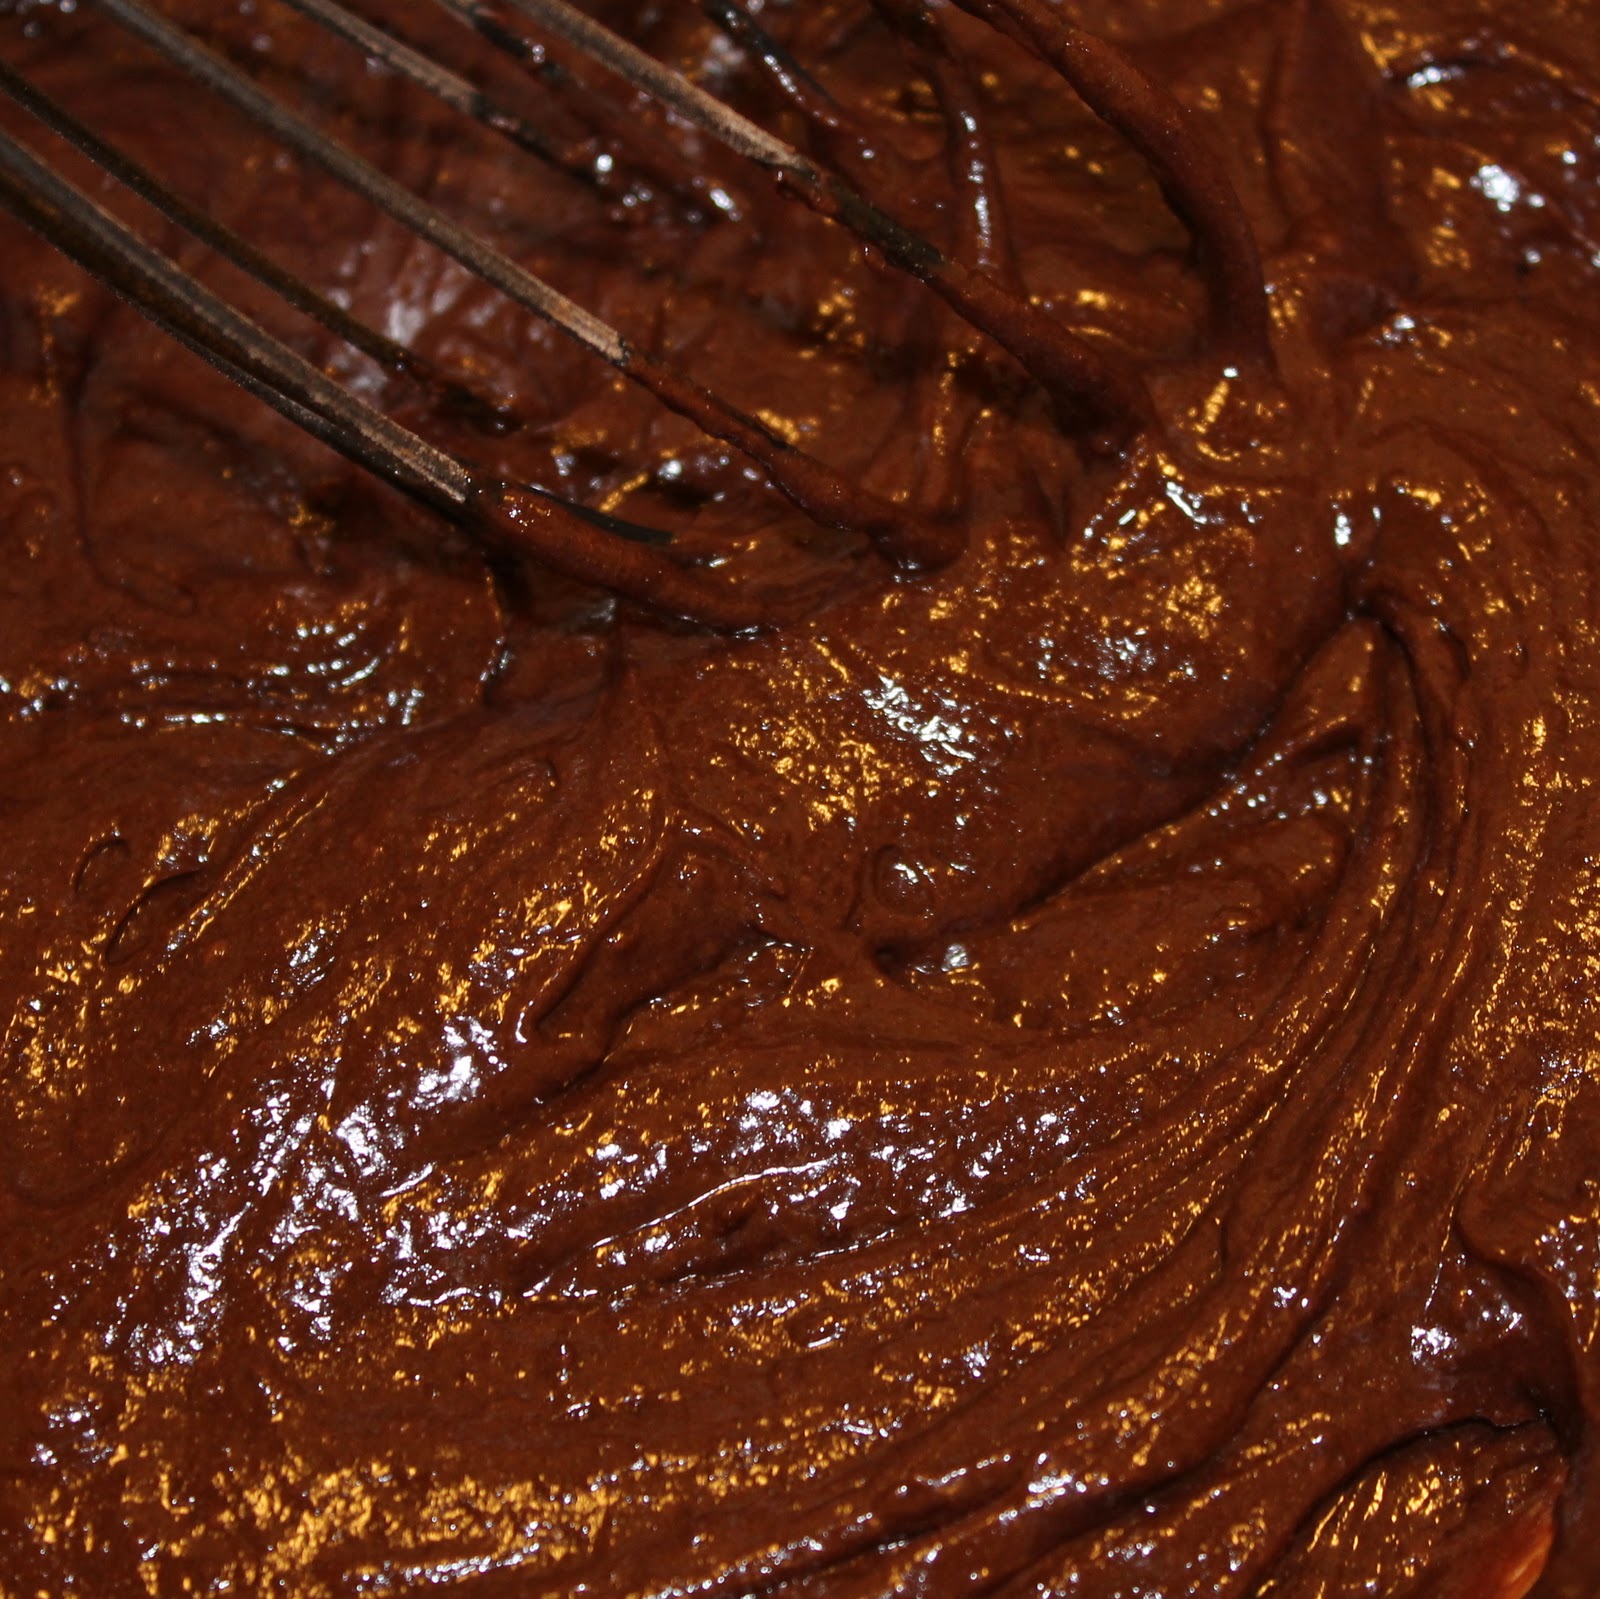
Incorporate the dry ingredients into the wet ingredients as well as the cooled butter-chocolate mixture until just combined.
Add half of the mixture to the cupcake tins (the recipe makes 24 so you will have enough batter for 24 cupcakes). I use an ice cream scoop to at least attempt to divide the batter evenly.
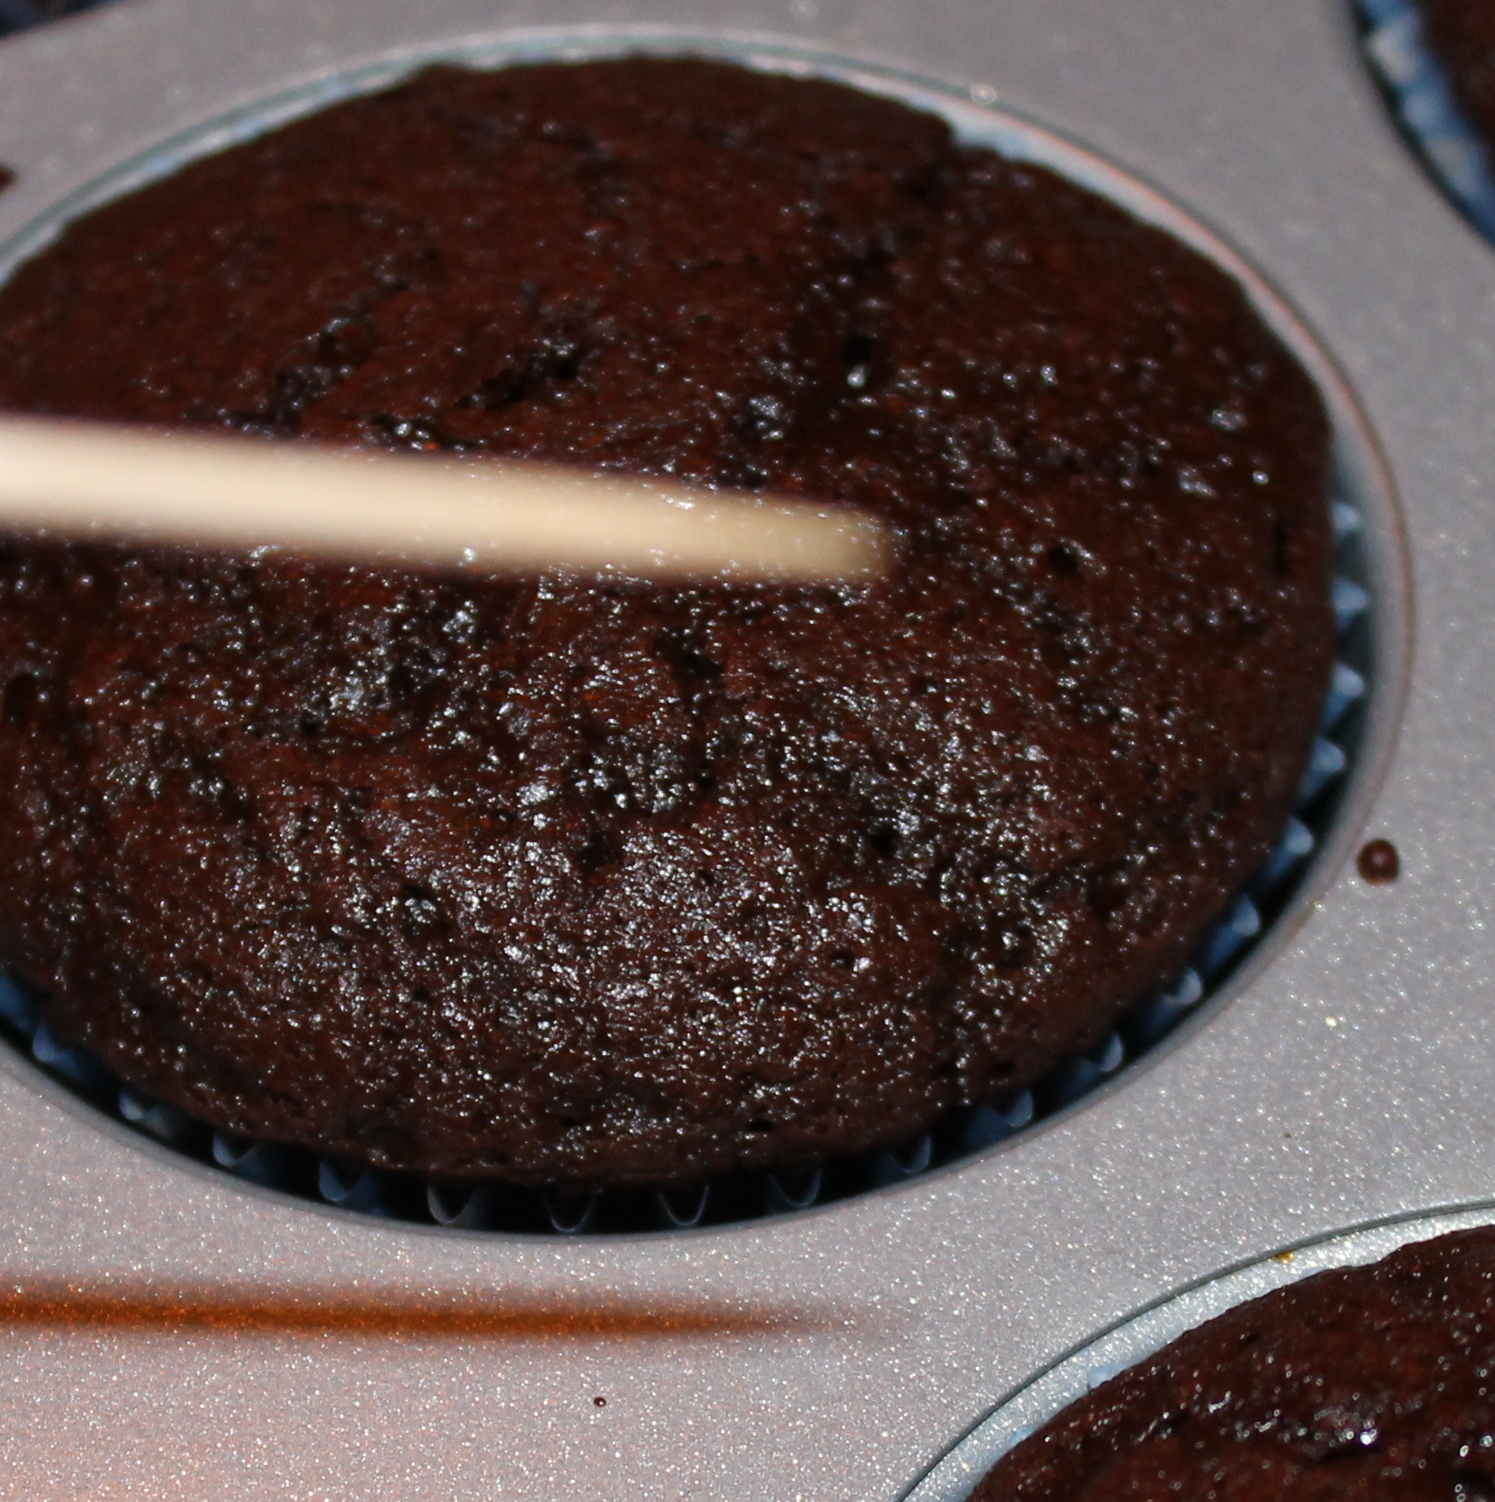
Bake at 350 degrees for 20 minutes or until a toothpick inserted into a middle cupcake comes out clean.
Allow to completely cool before decorating.
To make the icing, use a hand mixer to beat butter until smooth. Add half of the sugar and beat until smooth. Add other half of the sugar and repeat. If the mixture is too thick, add a bit of milk to thin and beat until smooth. (Note: be careful to not add too much, a little bit of milk goes a very long way!)
I added 4-5 drops of blue food coloring to get a light blue color. The icing became water for my ducks.
How cute are these?
I used a pastry bag to add the icing, but you can also put the icing into a plastic zip lock bag and cut off one of the bottom corners to squeeze the icing out. It doesn’t have to be perfect (mine definitely aren’t!), the ducks splashing makes ripples in the water 🙂
I ordered the ducks and the sprinkles from The Bakers Confections, which you can buy on Etsy.
You’re probably thinking, super, they are adorable. But are they tasty?
They sure are! The double chocolate makes it a really nice dense cupcake, fully of chocolately flavor. The sour cream keeps them nice and moist.
My cupcakes were snatched up in minutes, so I think they were a hit!
Thanks to Lauren for posting such a fantastic cupcake recipe!