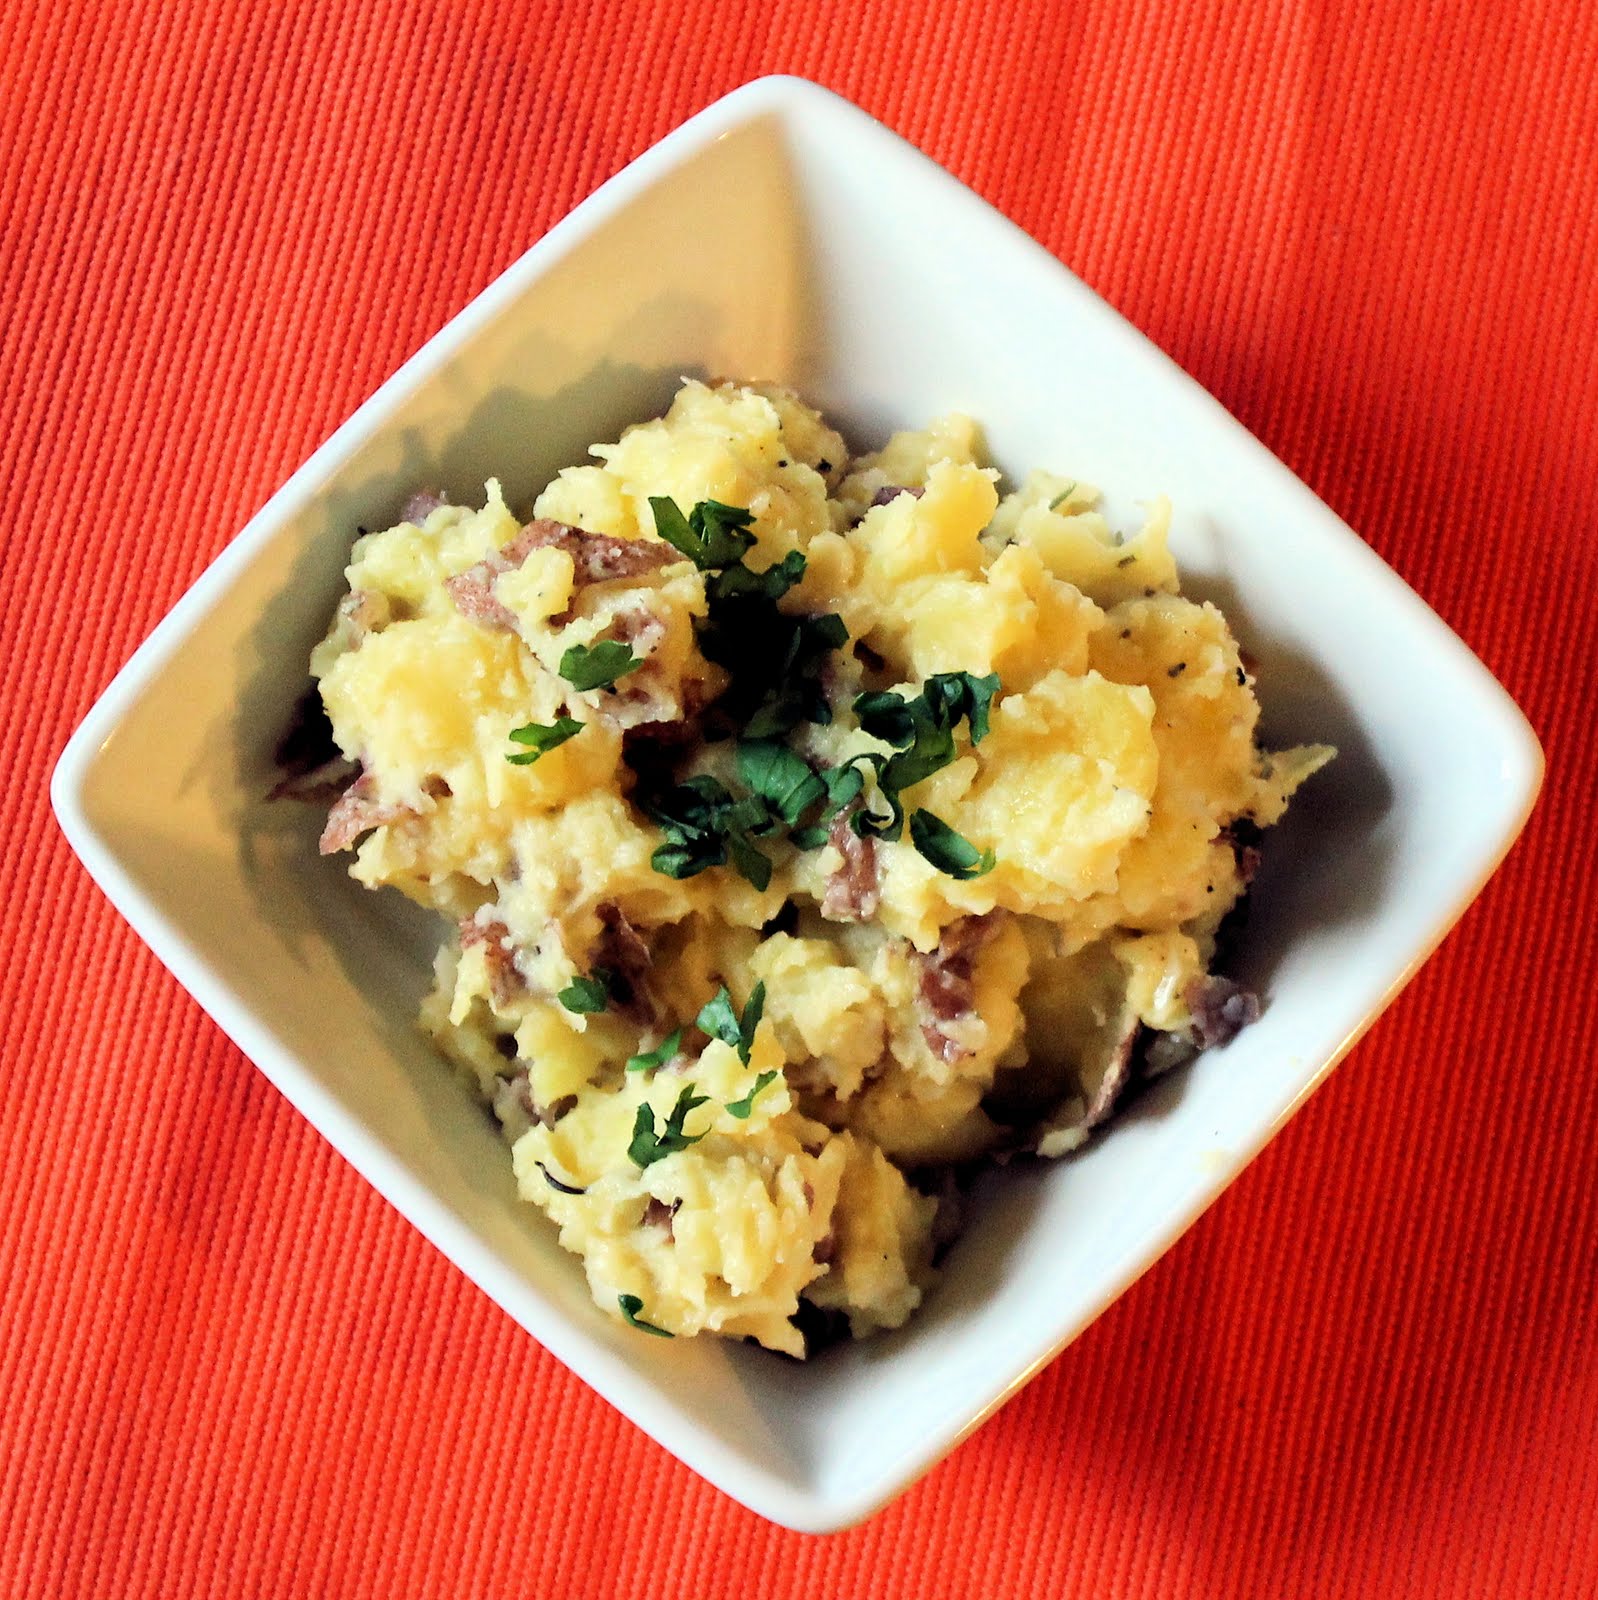
I made Sauteed Chicken with Fennel and Rosemary, and needed something starchy to soak up some of the sauce. The recipe suggested polenta or mashed potatoes, so I thought I’d make smashed potatoes and incorporated some of the same ingredients found in the main dish. I had a bag of red potatoes from my CSA share so I luckily had all ingredients on hand.
Ingredients:
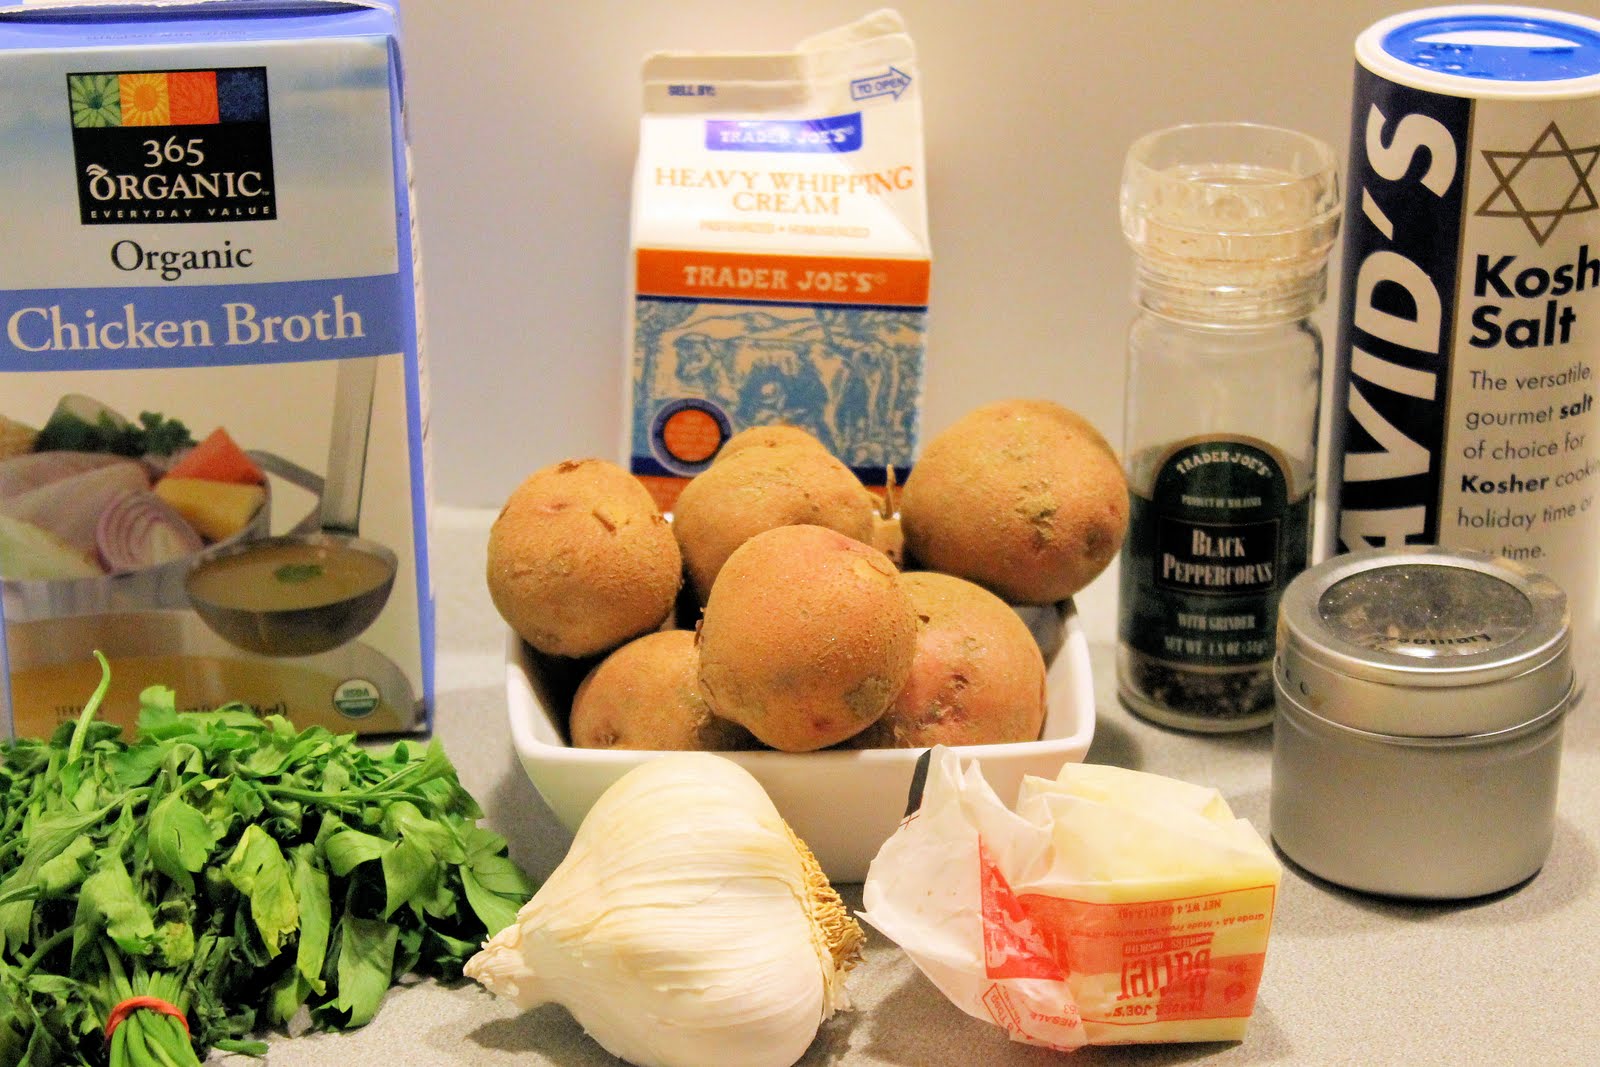
1 bag of red potatoes (I had enough to fill up a medium sized bowl)
3 garlic cloves, minced
2 tablespoons butter
1 tablespoon heavy cream
1/4 cup chicken stock
Salt and pepper, to taste
1 teaspoon dried rosemary
1 teaspoon fresh chopped parsley
Wash your red potatoes thoroughly, making sure to remove all dirt.
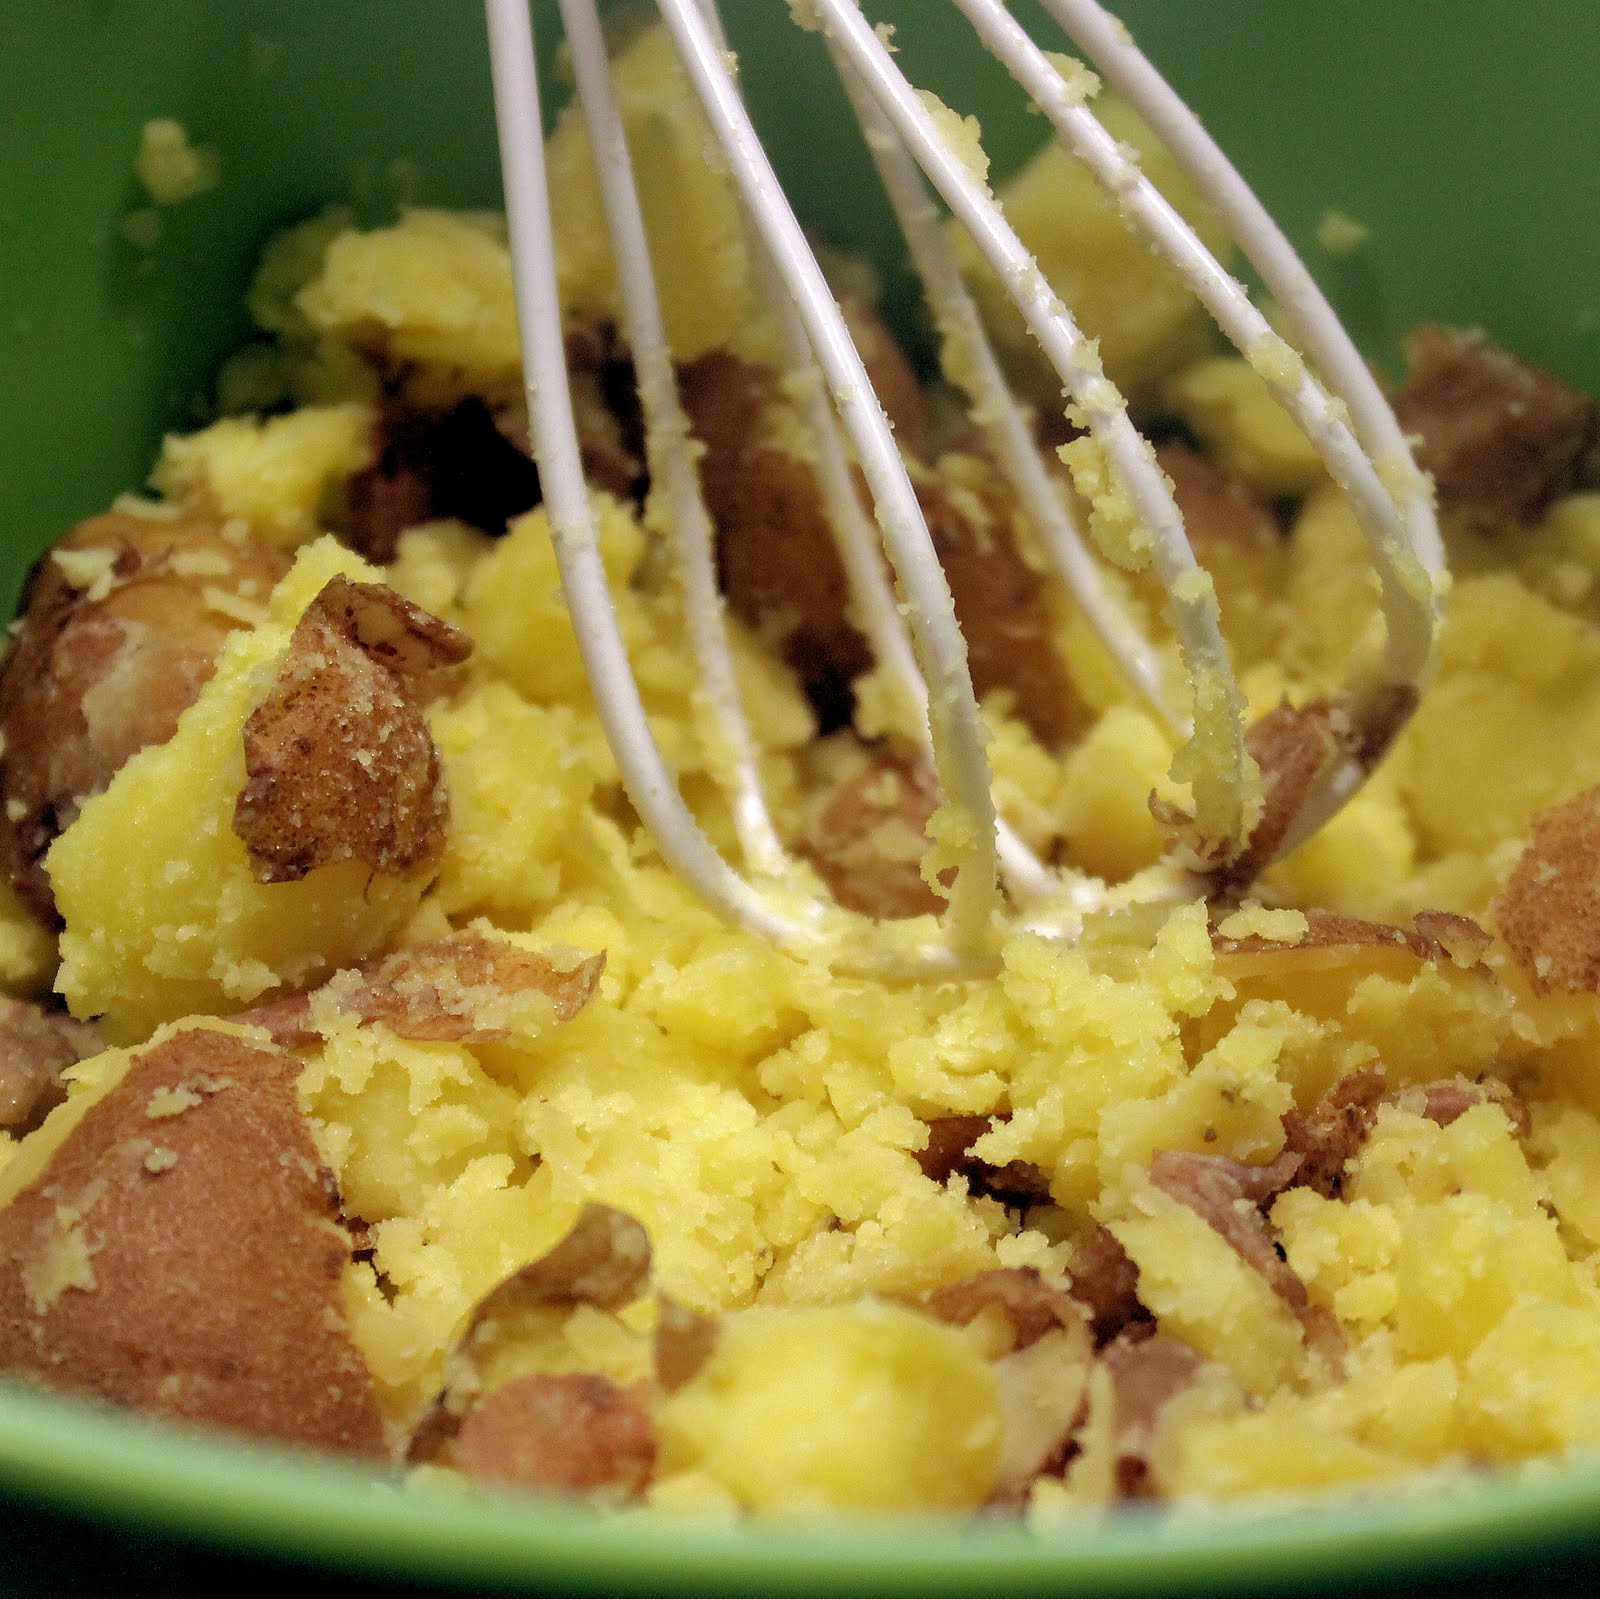
Halve any red potatoes that are larger than the average size. Bring a pot of salted water to a boil. Drop in the red potatoes and cook until fork tender, about 15 minutes.
Drain the potatoes and add to a medium sized bowl. using a large spoon or a whisk, smash each of the potatoes. Don’t go overboard, you want them to be chunky.
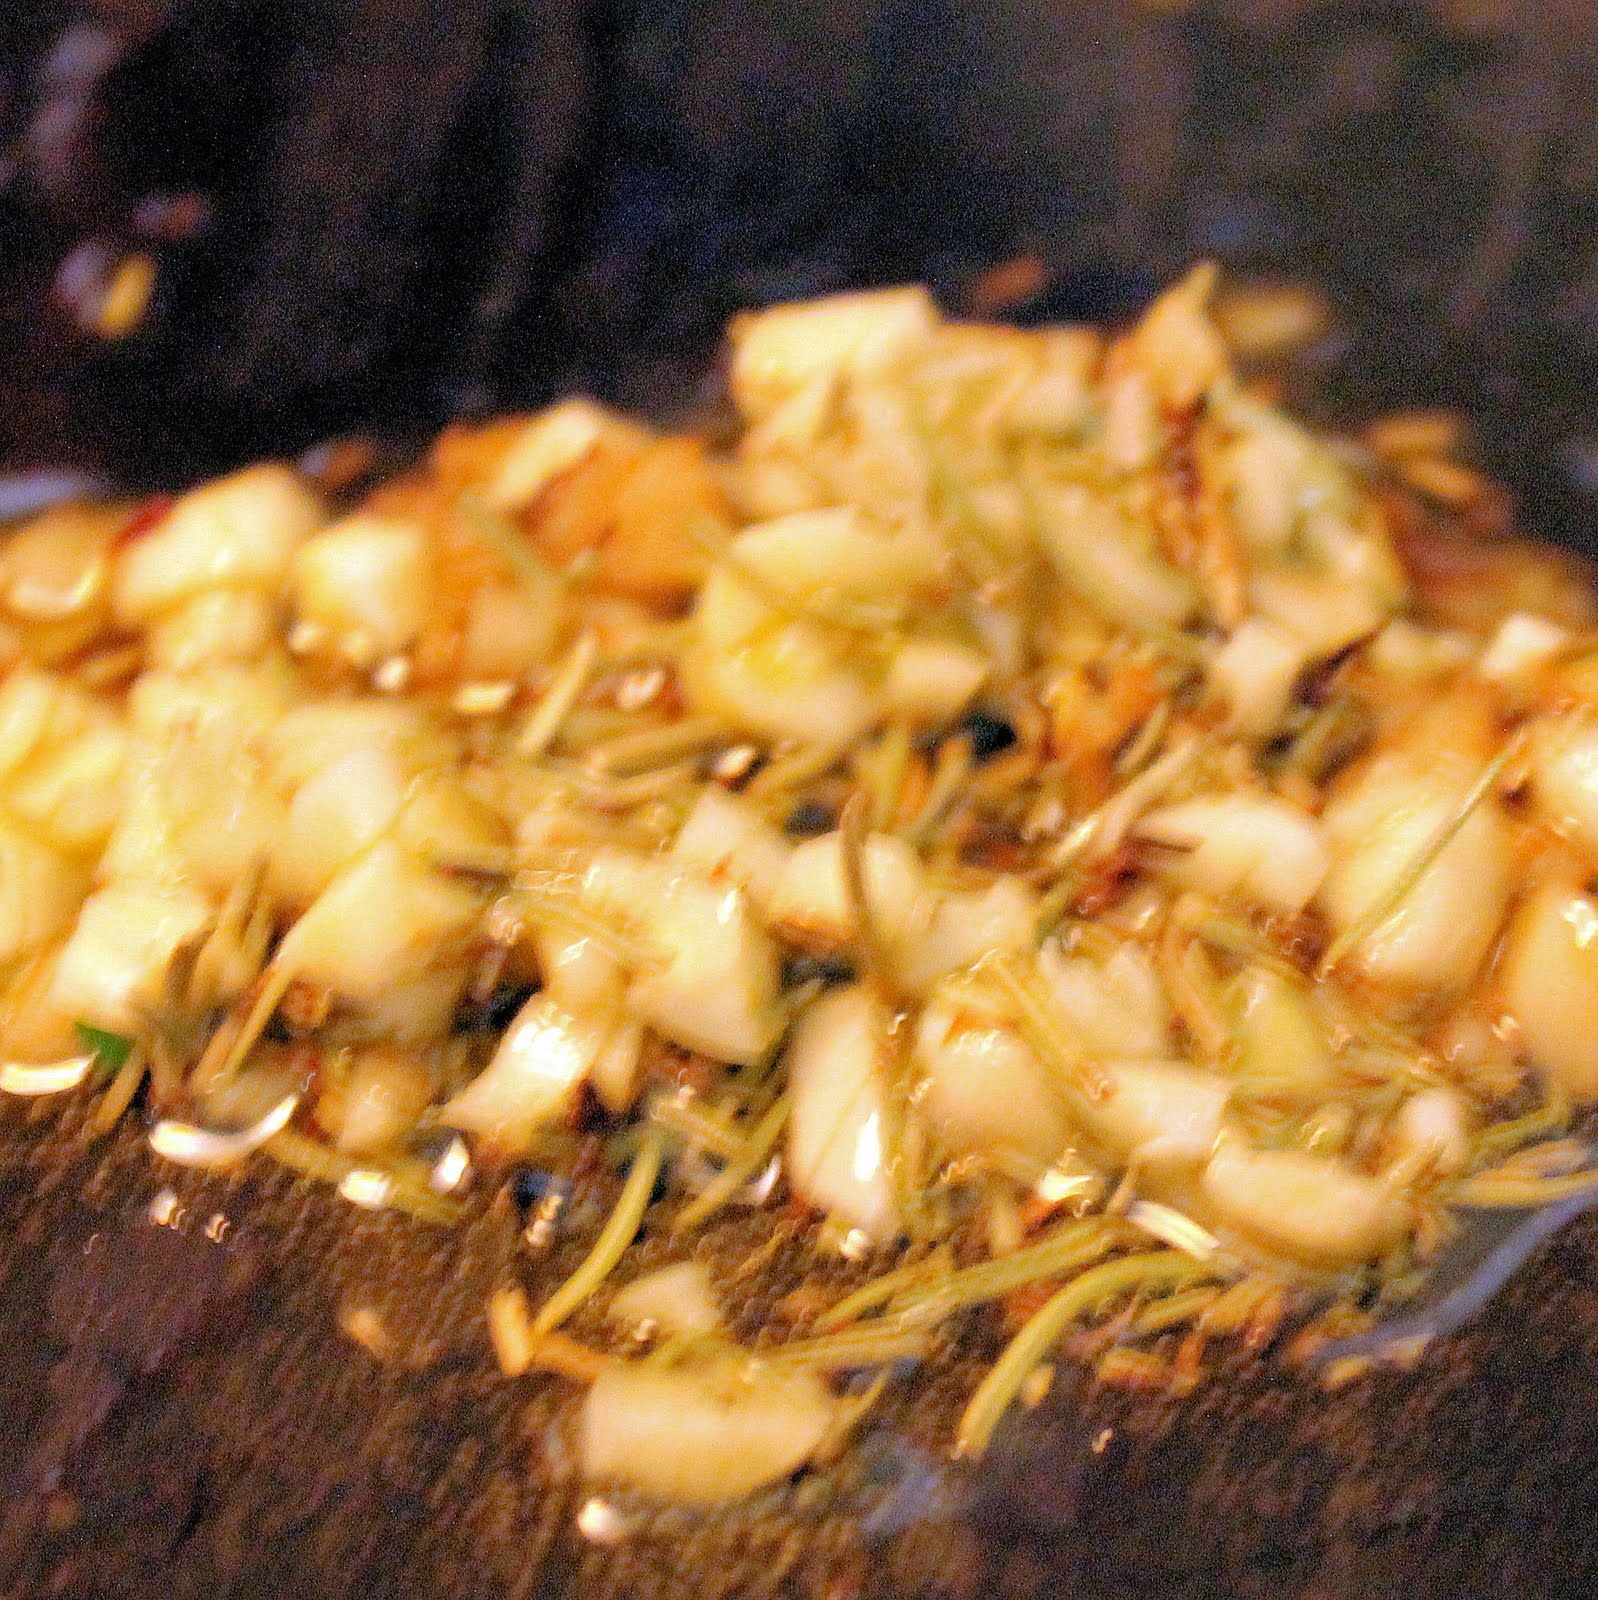
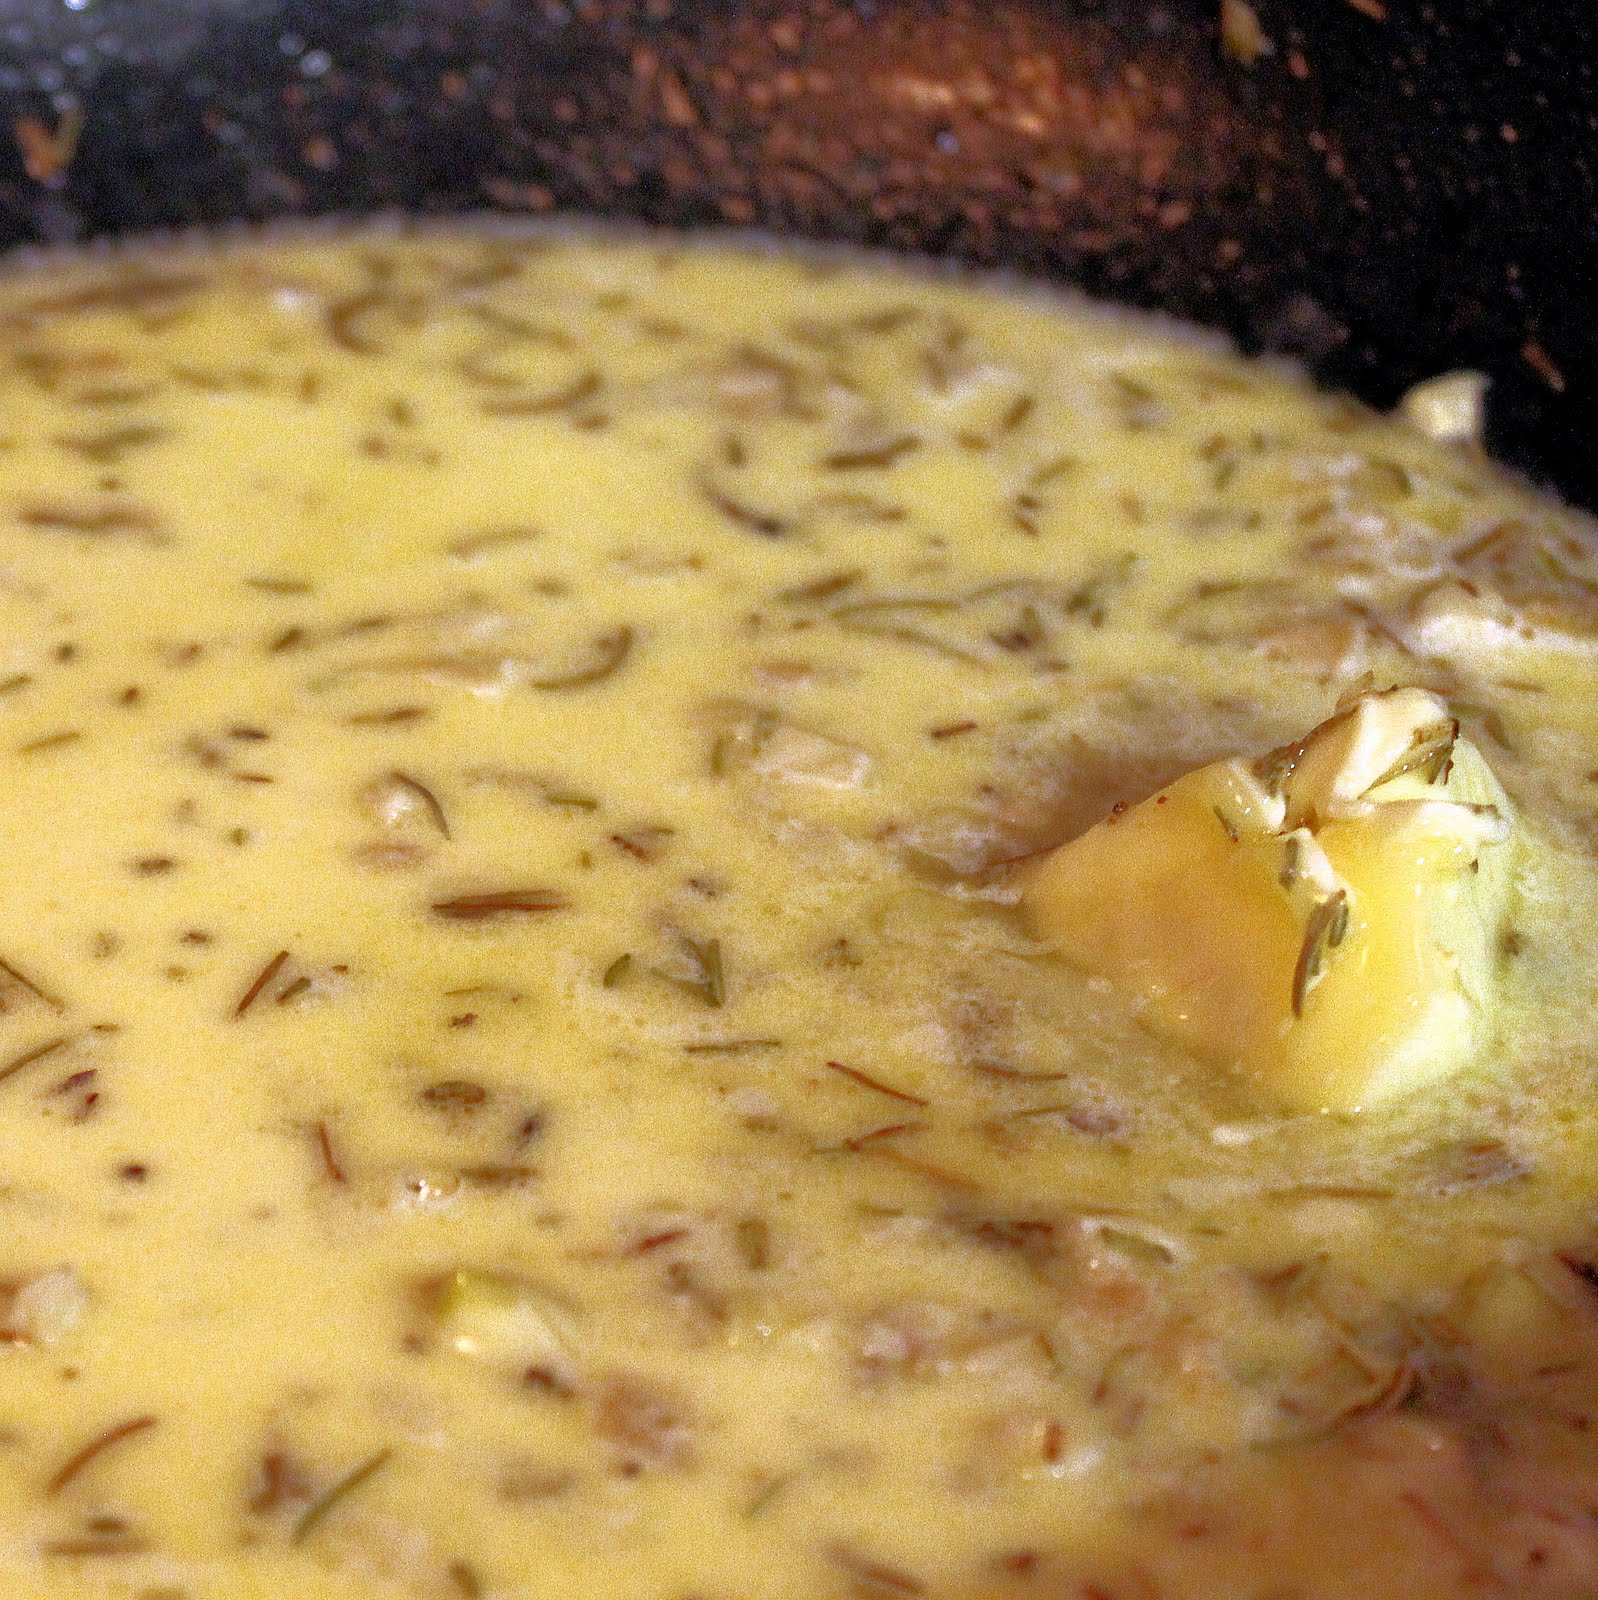
In a saute pan, add a small amount of the butter, rosemary and the minced garlic over medium heat. Cook for 1 minute.
Lower the heat and add the chicken stock, stirring. Add the rest of the butter and the cream and stir to combine.
When the butter has melted, pour over the smashed potatoes and stir to combine.
Season with salt and pepper, to taste. Top with parsley.
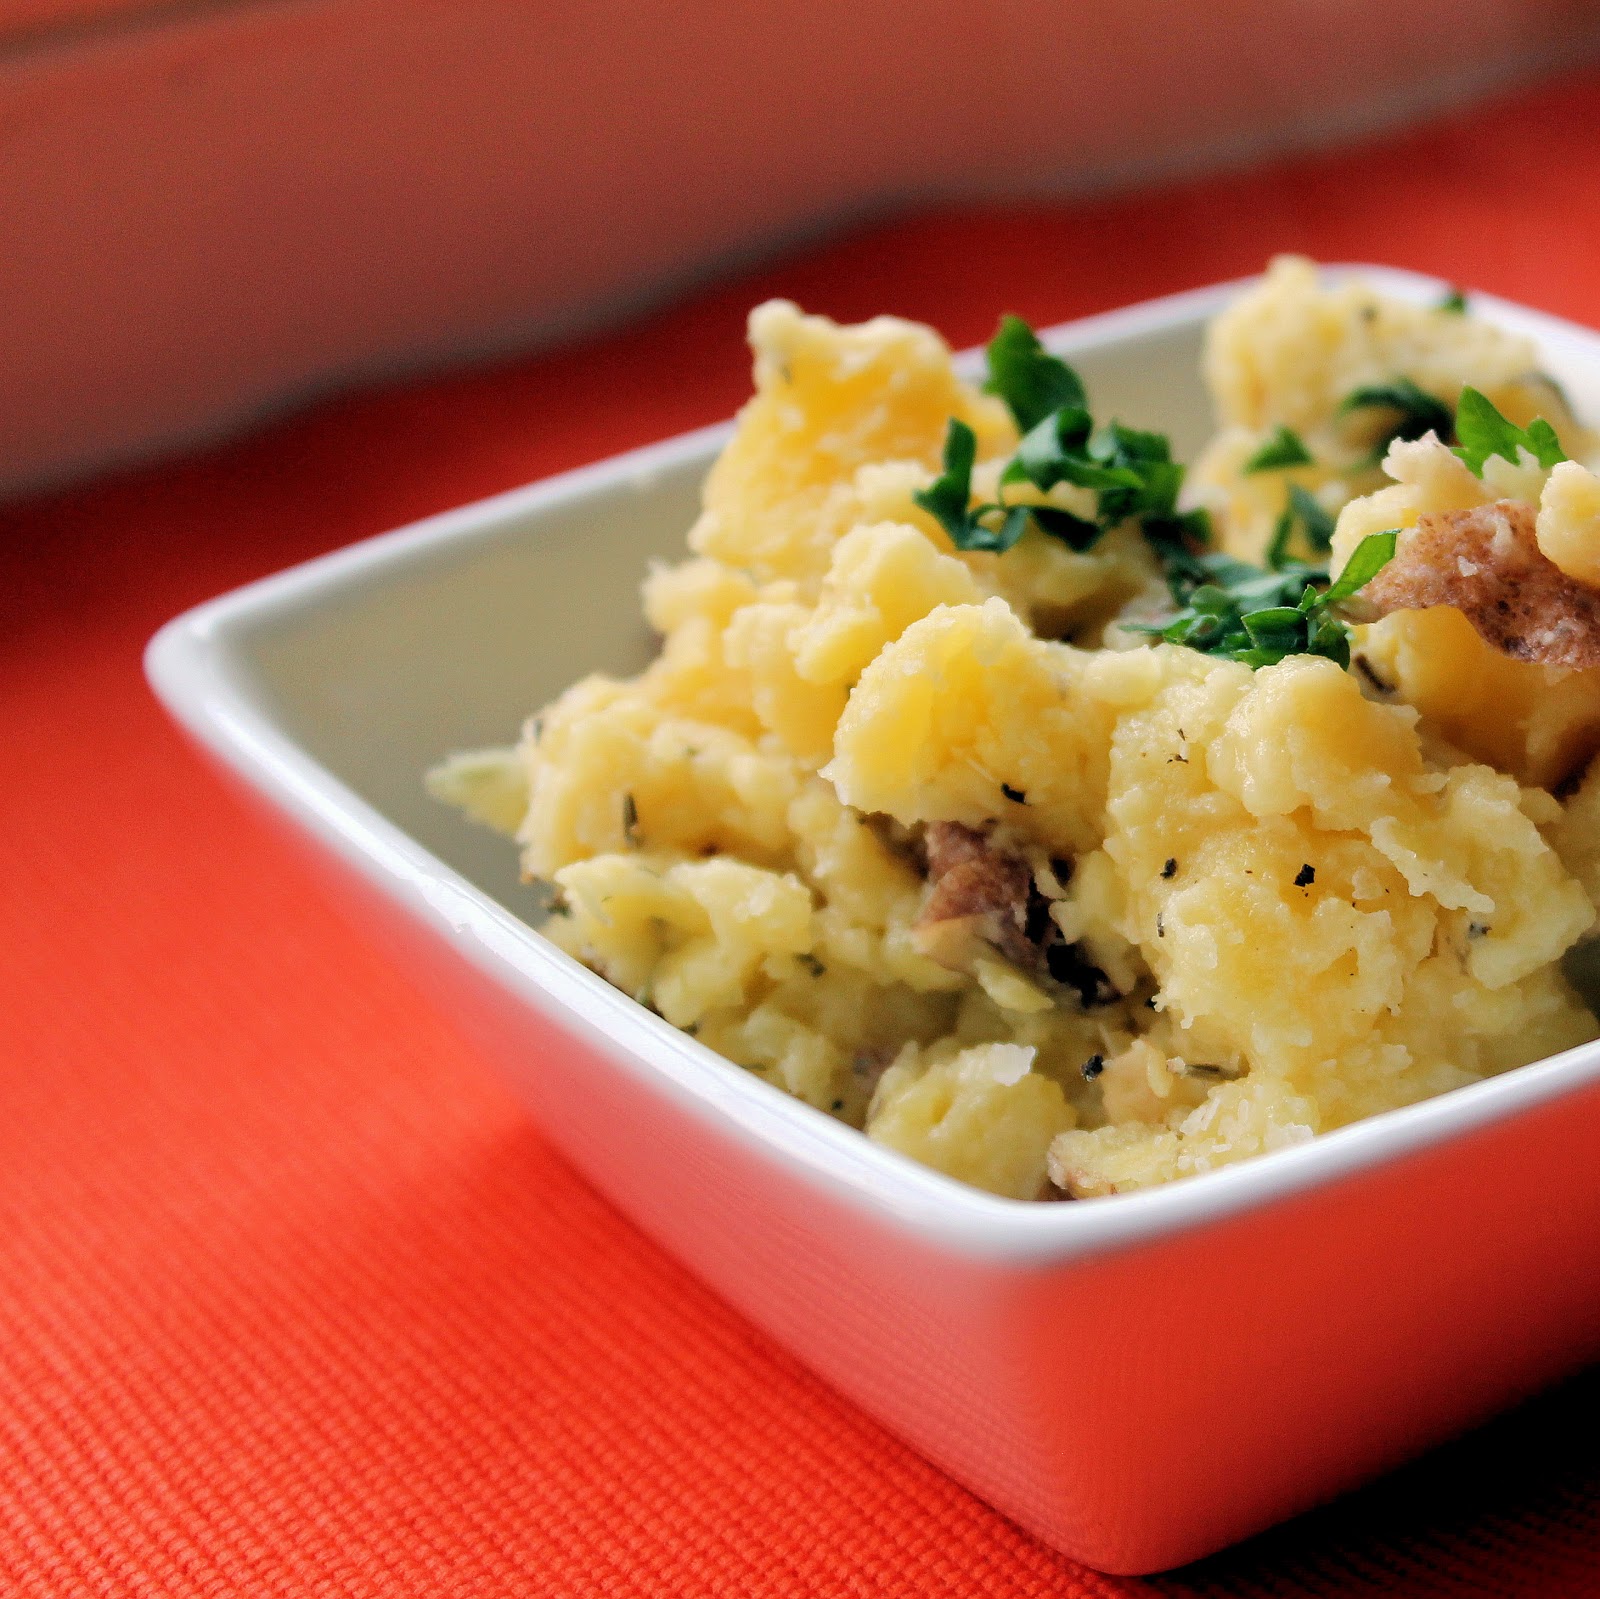
These were absolutely delicious. Creamy and flavorful, the rosemary and parsley worked so well with the potatoes. I prefer smashed potatoes to mashed potatoes solely because you get to keep the skins on the potatoes. Not only does it make the dish prettier, it also adds texture.
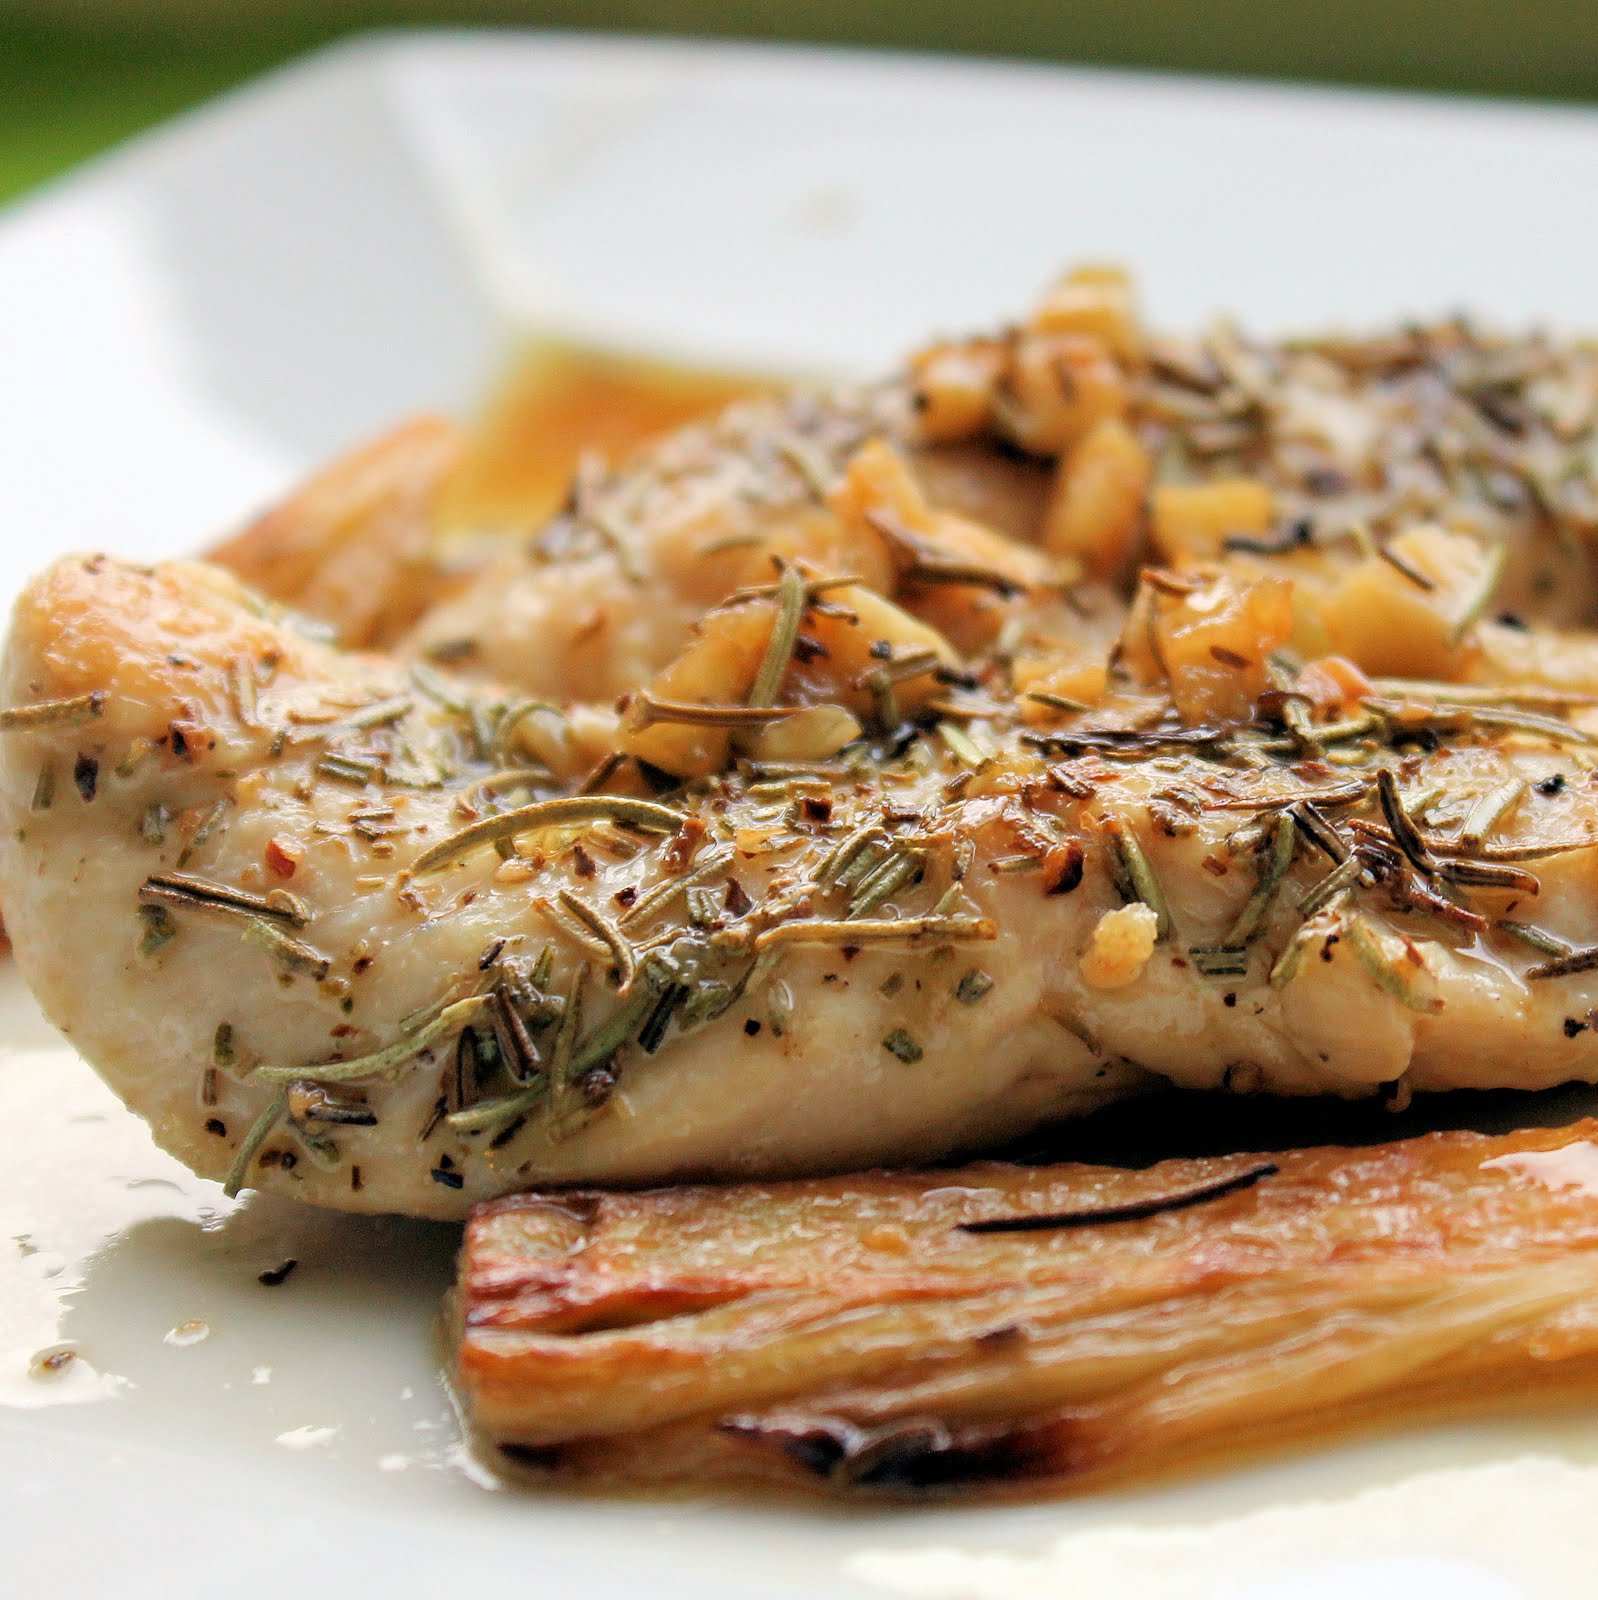
Wow. I haven’t used chicken in a recipe in over a month. I think it is time to finally give poultry it’s time in the limelight. I received fennel in my CSA share and thought this recipe for Sauteed Chicken Breasts with Fennel and Rosemary from Food & Wine sounded like a perfect use of the ingredient.
As a plus, I had all of the ingredients already in my kitchen, with the exception of the chicken.
Ingredients:
2 tablespoons olive oil
2 large fennel bulbs, thinly sliced
2 tablespoons fresh rosemary, plus more for garnish
1/2 teaspoon salt
1 cup canned low-sodium chicken broth or homemade stock. divided
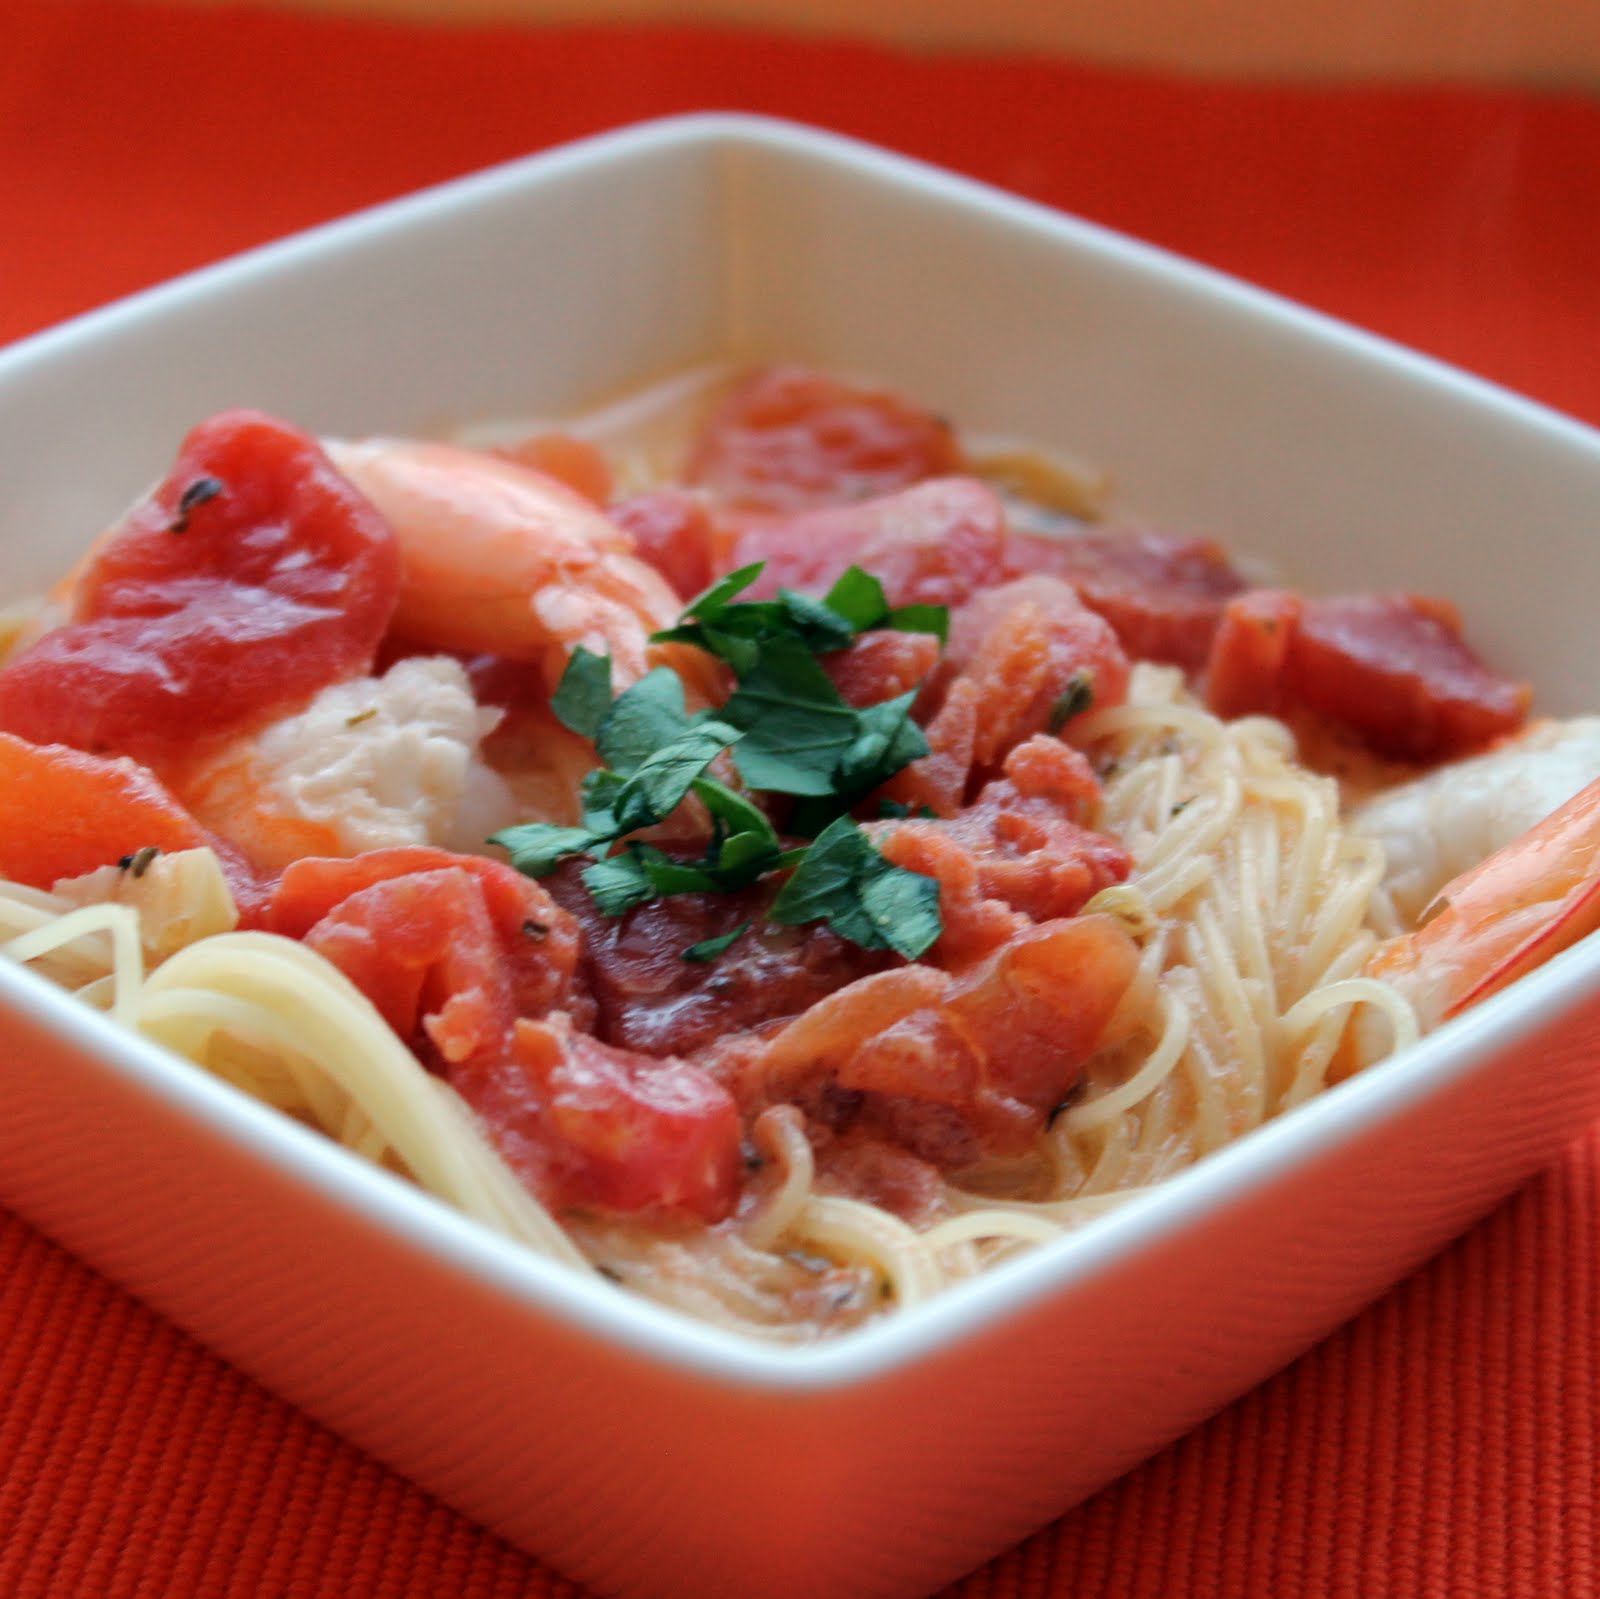
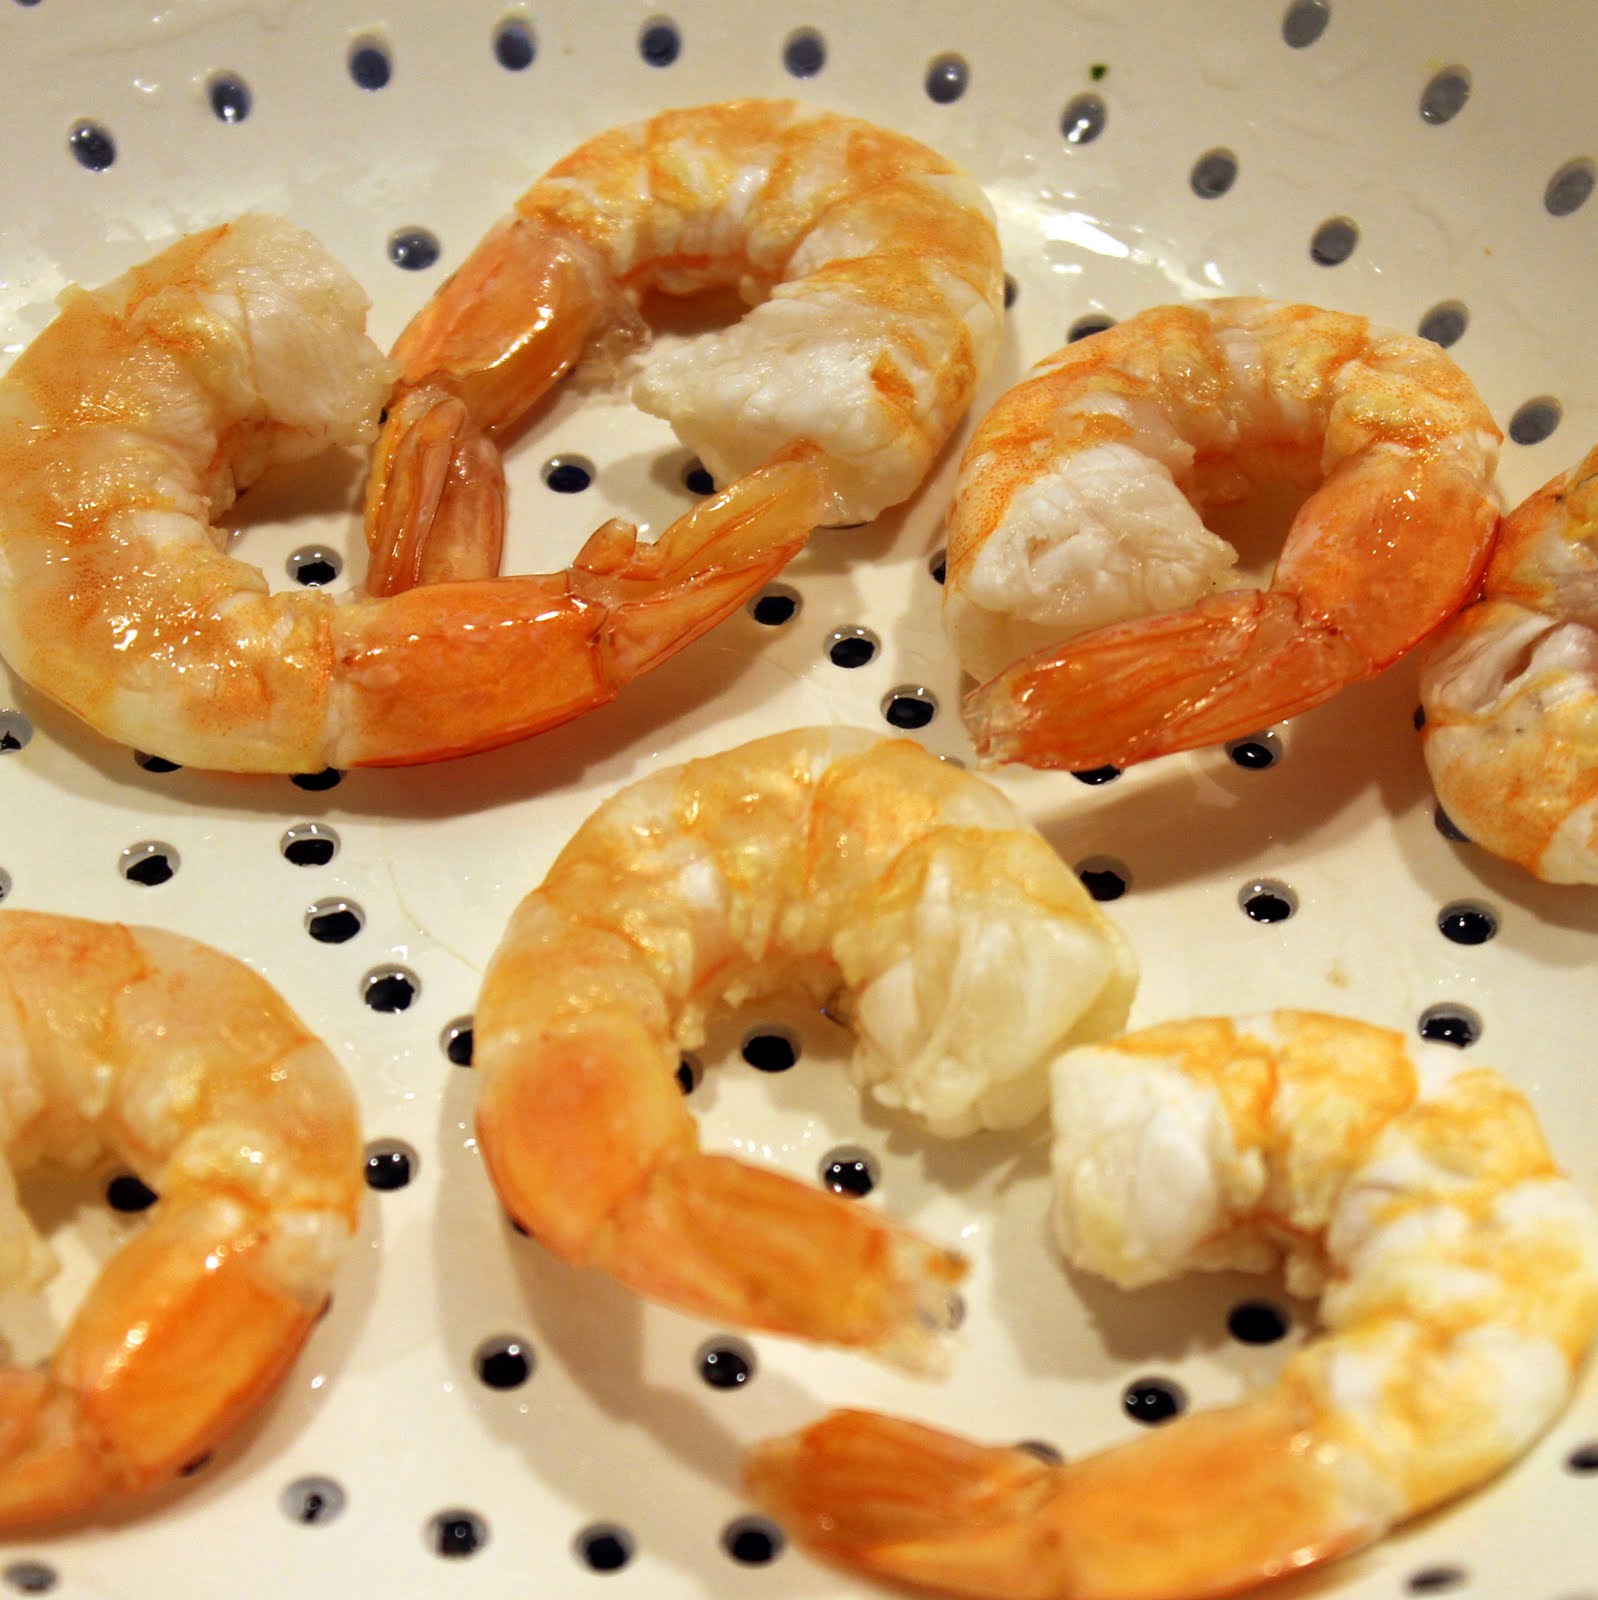
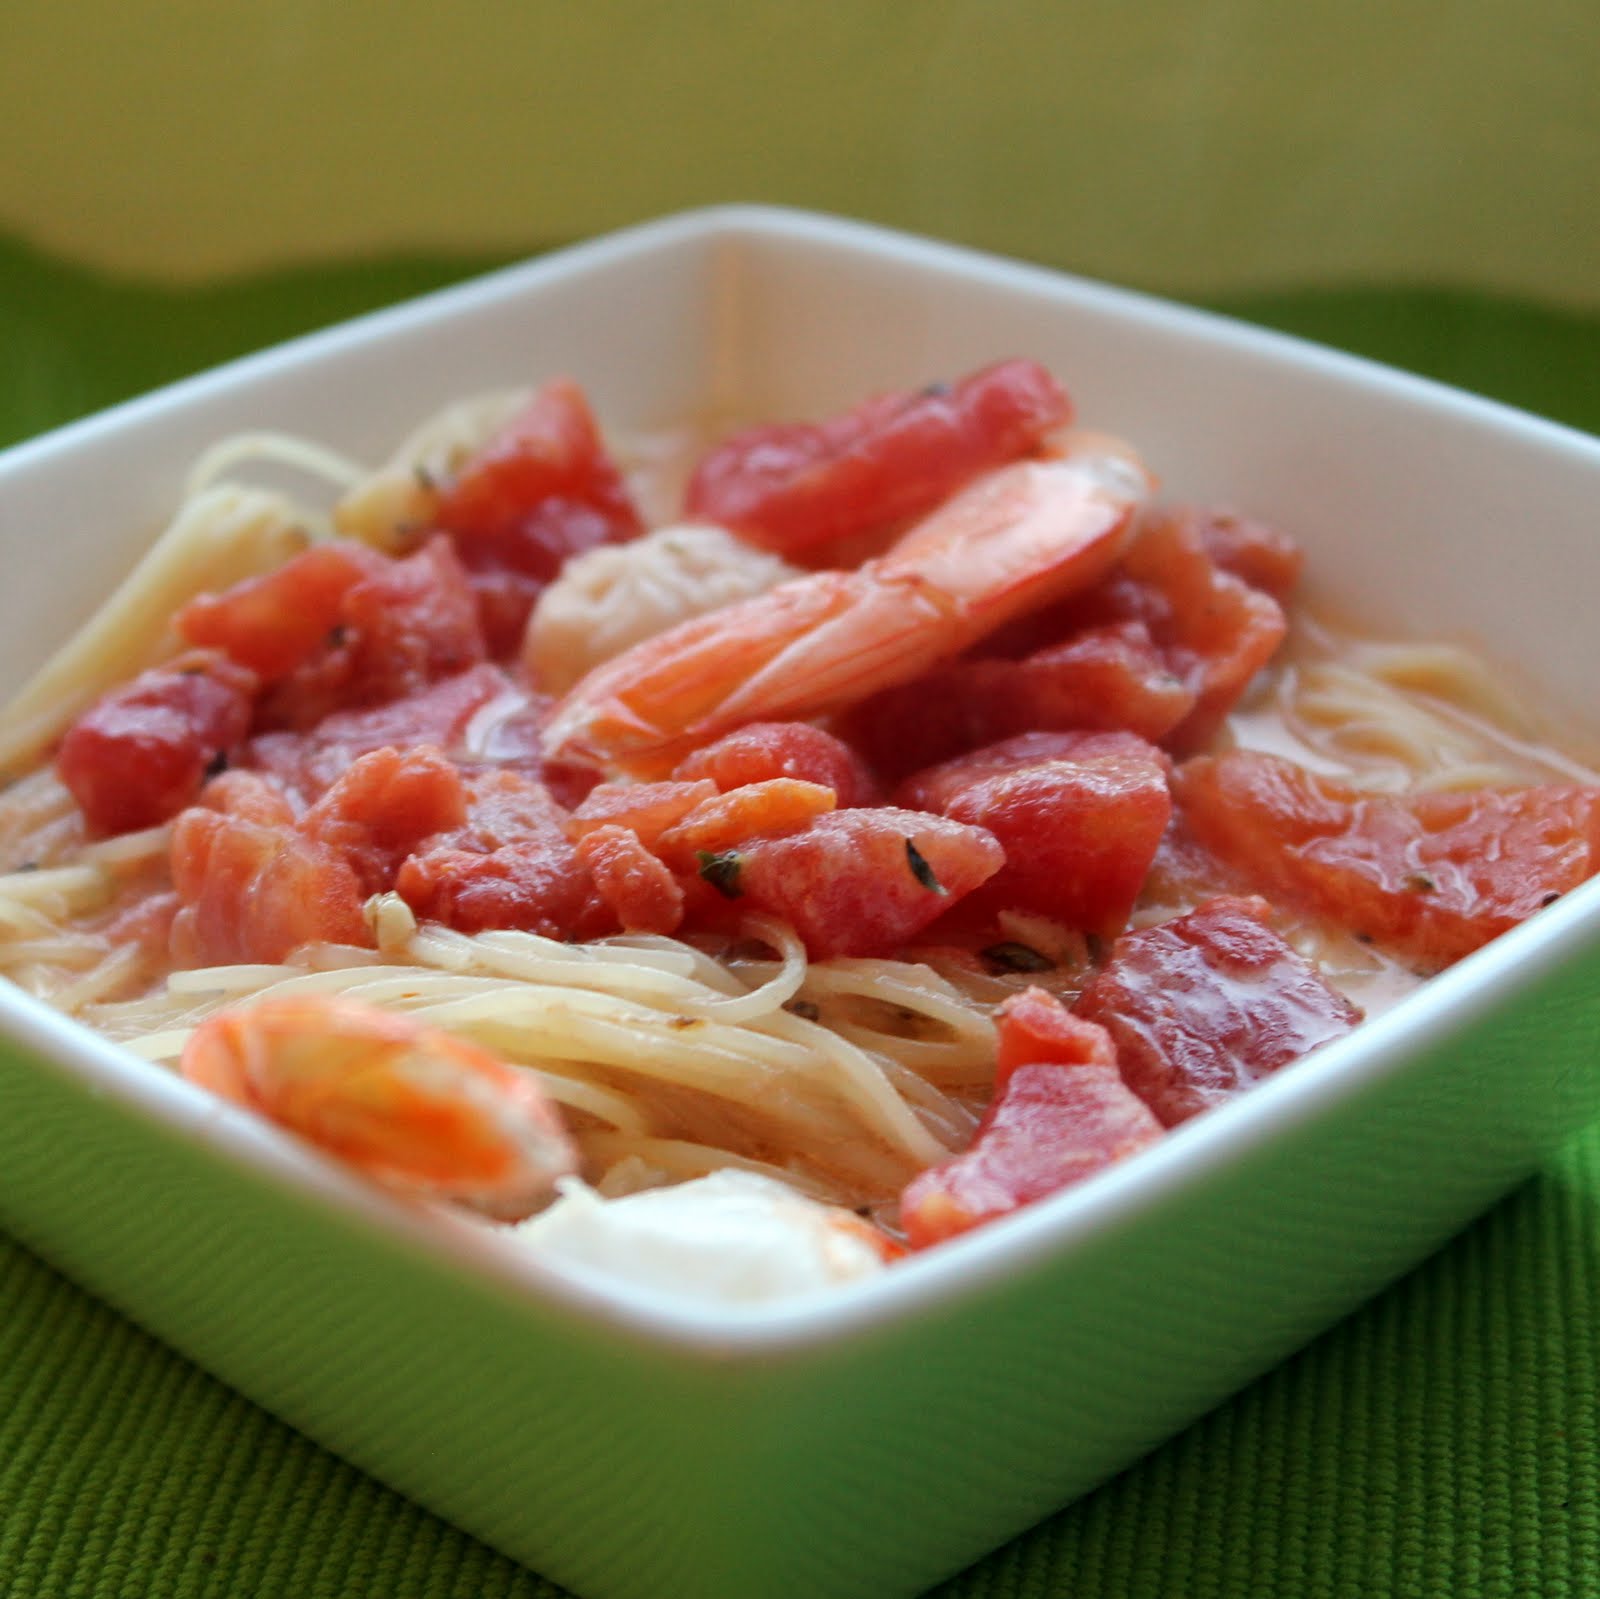
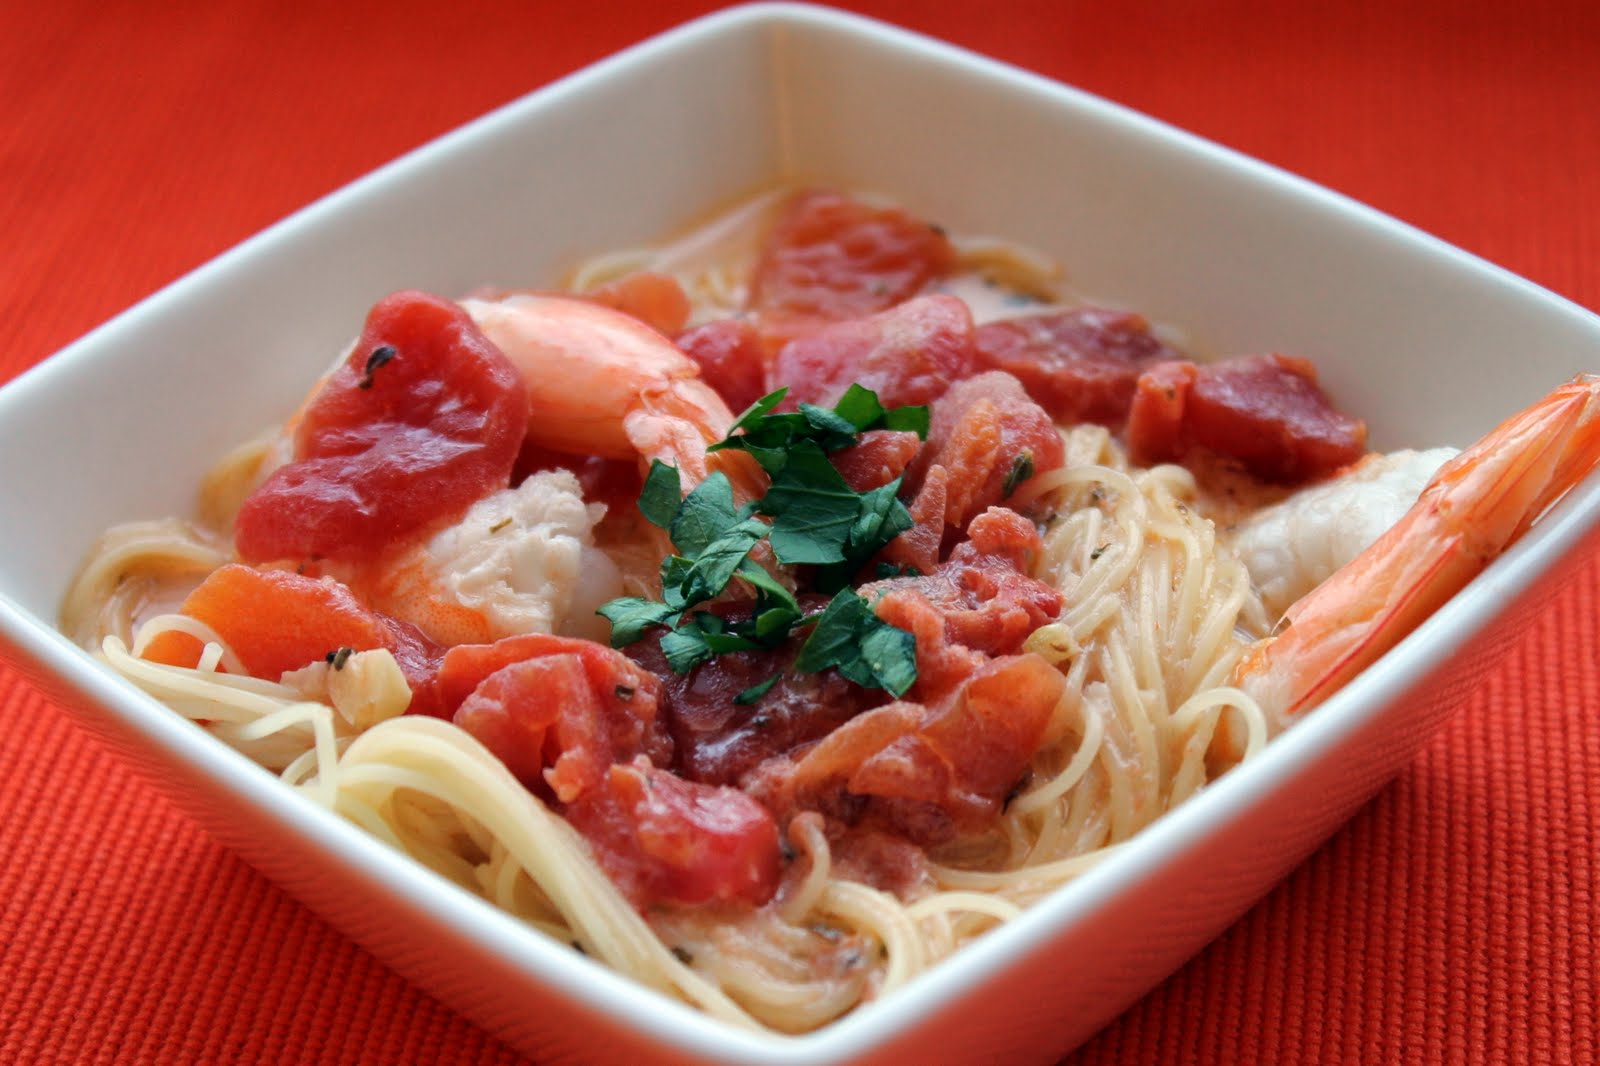
This weekend, I realized I was running low on tomato sauce in my freezer, so I whipped up a new batch to hopefully last me a couple months. I was left with an extra can of diced tomatoes and I also had some leftover capellini pasta from my Capellini with Clams and Saffron dish. Gourmet had a really delicious sounding recipe that incorporated both of these ingredients. The recipe is so quick, it is perfect for a week night dinner.
Ingredients:
1tablespoon olive oil
8 already cooked shrimp, deveined with the tails still attached, thawed
3 garlic cloves, minced
1/4 teaspoon dried oregano
1/2 cup sweet (red) vermouth
1 (14- to 15-oz) can diced tomatoes
1/4 cup heavy cream
Juice from 1/2 a lemon
1/2 a box of capellini
Salt and pepper, to taste
1/2 teaspoon fresh chopped parsley, optional
The original recipe is linked above. I had already-cooked shrimp in my freezer (I meant to buy raw shrimp and misread the label, sigh) so I had to alter the recipe to make up for the precooked shrimp. My shrimp still had the tails attached because I think those are more attractive. Feel free to use whatever form of shrimp you’d like.
Start by thawing your shrimp. I just ran them under cold water for 3 minutes and allowed to dry in a colander.
Cook pasta according to directions. Drain and set aside. Heat the olive oil over medium-high heat. Add the minced garlic and cook for 1-2 minutes.
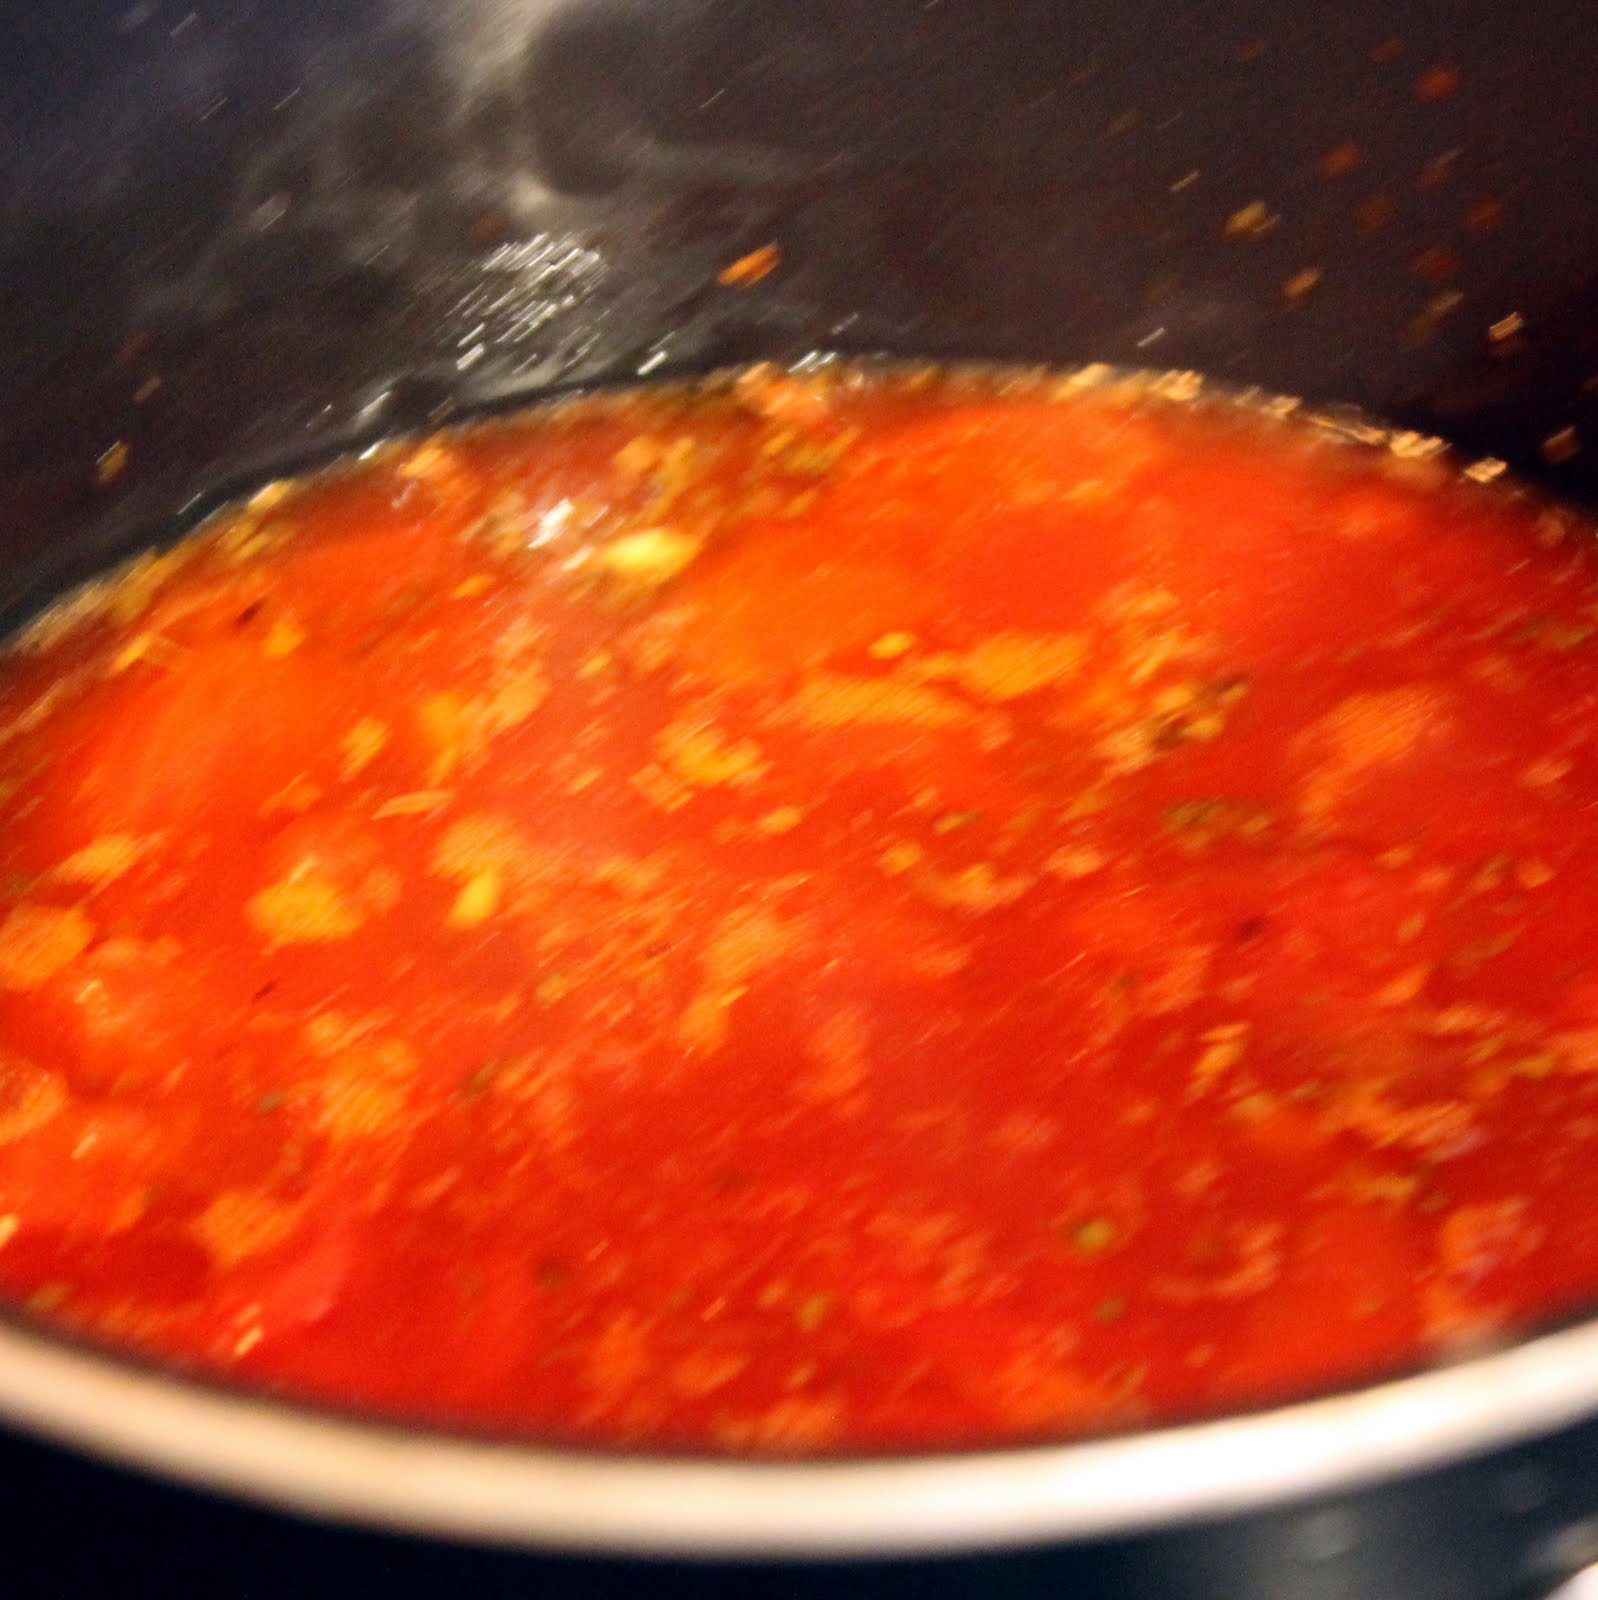
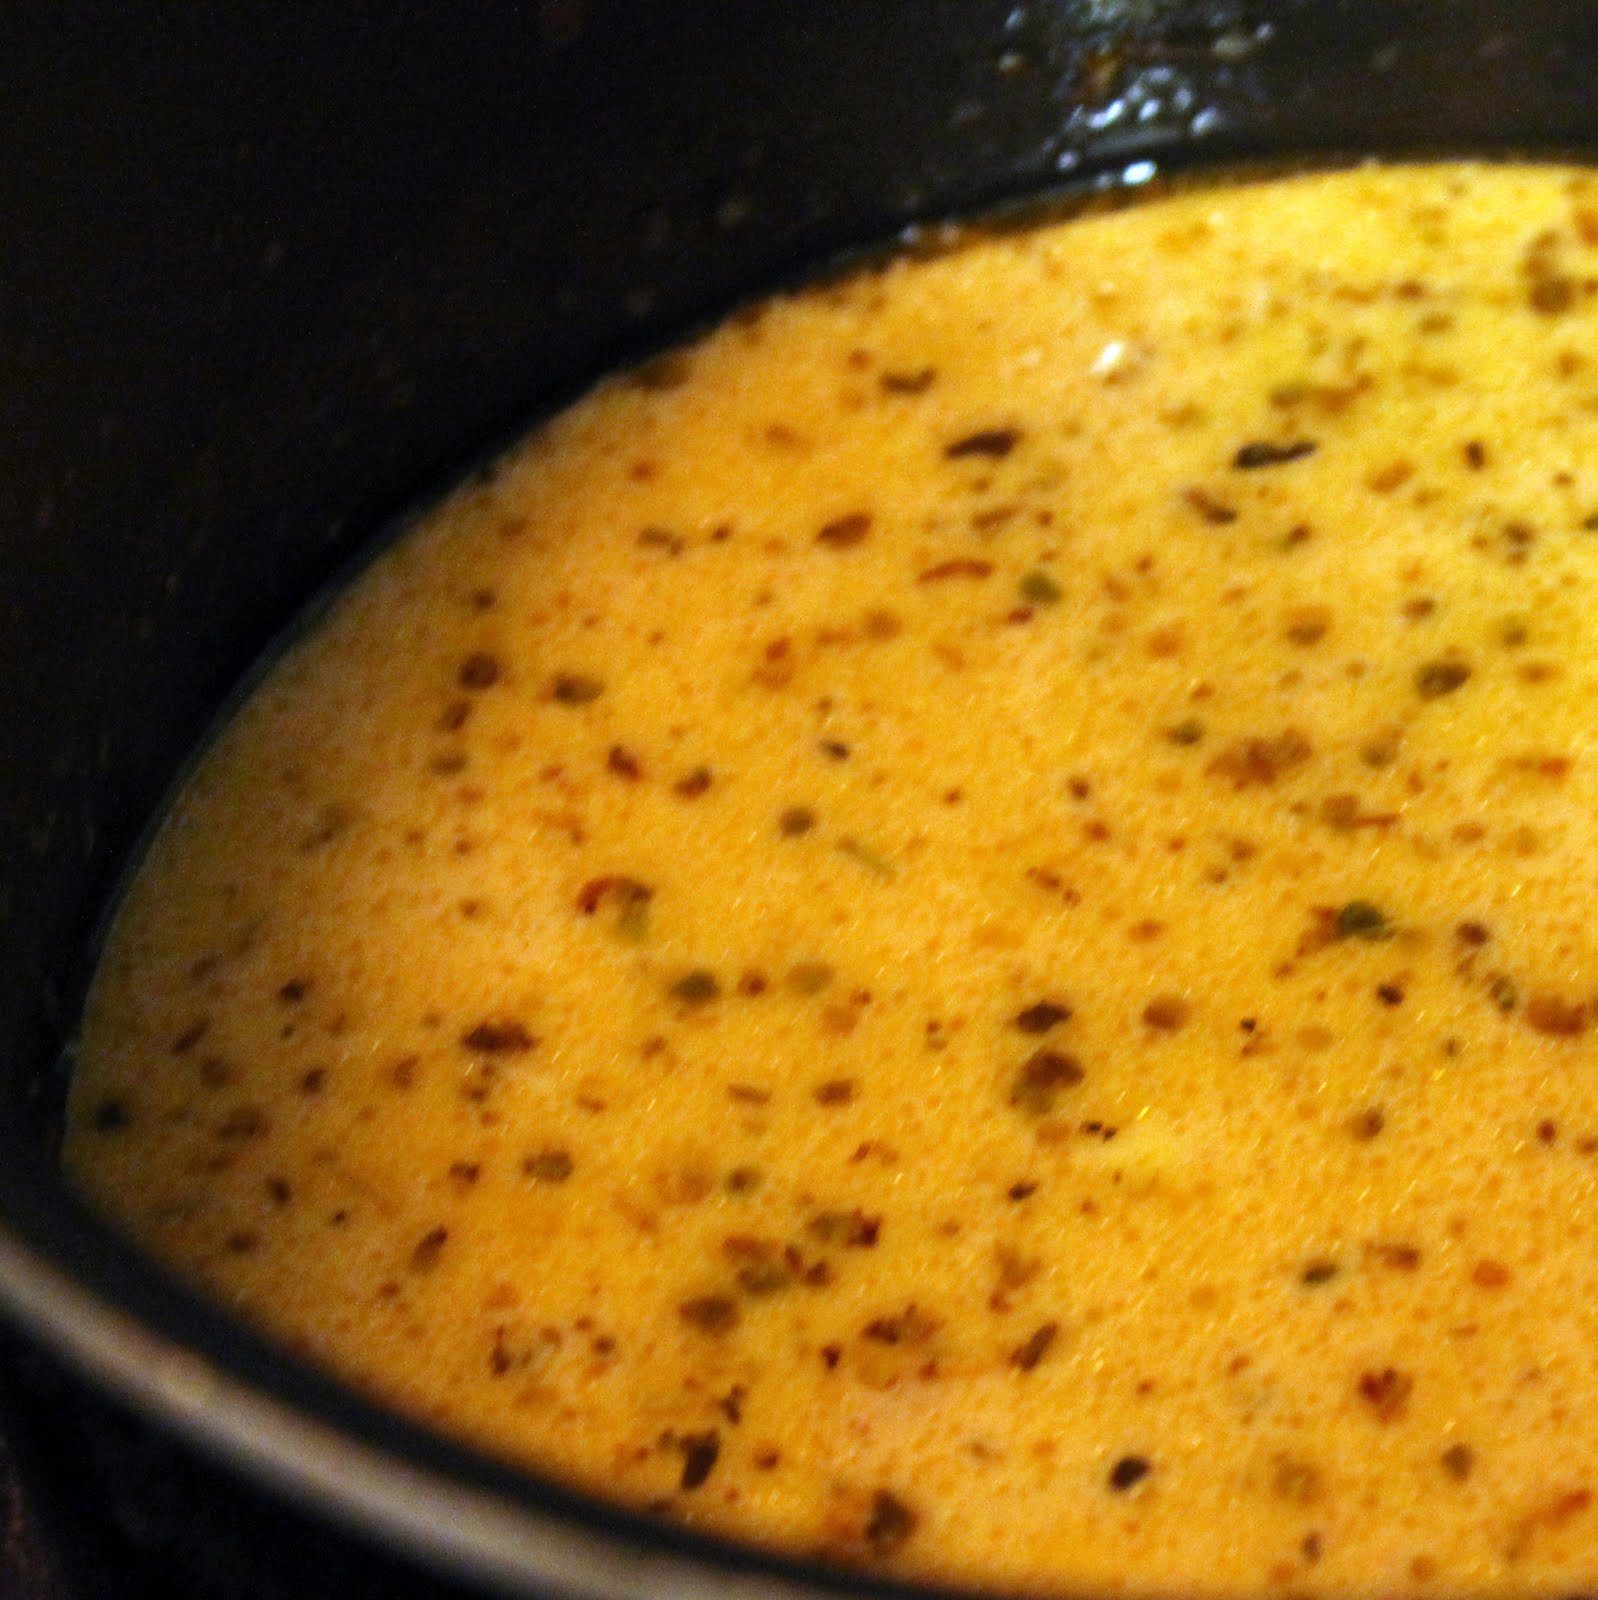
Add the tomatoes and vermouth. and stir to combine. I left in the tomato juice from the diced tomatoes. You can drain the tomatoes before adding for a more chunky sauce. Heat until simmering.
Add cream and season with salt and pepper. Simmer for about 1 minute. Add in lemon juice.
Top the pasta with 2 shrimp per serving and spoon the broth over the pasta. Add the chopped parsley on top.
The sauce had a nice sweetness to it, but I think it could be further enhanced with a pinch of crushed red pepper to add a bit of heat. I regret not having fresh shrimp for this dish because the shrimp were relatively forgettable in my version. I like that my sauce was a little thinner than the original. I think this would be great (without the shrimp) as a reheated lunch after the pasta has had time to sit in the sauce.
It comes as no surprise that I am a huge fan of Cooking Light. I attribute a good portion of my interest in cooking to their magazine. When I was living at home after college, my mom brought the December copy home on a whim from the supermarket. Everything sounded so delicious, I jumped right in, trying to make as many recipes as possible. The rest is history. I am now Cooking Light obsessed.
The issue that got me hooked. Courtesy of cookinglight.com
So when I heard that Cooking Light had made it’s own app for iPad and iPhone, I was overjoyed. The “Quick & Healthy Menu Maker App” is genius. How often do you prepare a nice healthy main course only to wreck it with some ridiculous side that ends up negating the healthiness of the original dish? Or, if you’re like me, how many times do you struggle to find a side that would complement the other components of the meal?
Here’s a little blurb about what the app actually is and why it is such a useful tool:
The Quick & Healthy Menu Maker offers more than 300 recipes and lets users design create delicious, quick menus in an interactive way. Users simplyswipe through the gorgeous photos to create a complete and healthy menu, selecting one entrée and then adding two sides plus one dessert. The app calculates nutrition per serving in real time—calories, sodium, and saturated fat. If a menu meets or exceeds Cooking Light’s nutrition recommendations, the app lets the user know with green and red indicators. There are thousands of possible menu combinations.
The second to last sentence is what truly makes this app worthwhile in my opinion. “If a menu meets or exceeds Cooking Light’s nutrition recommendations, the app lets the user know with green and red indicators.” How fantastic is that??
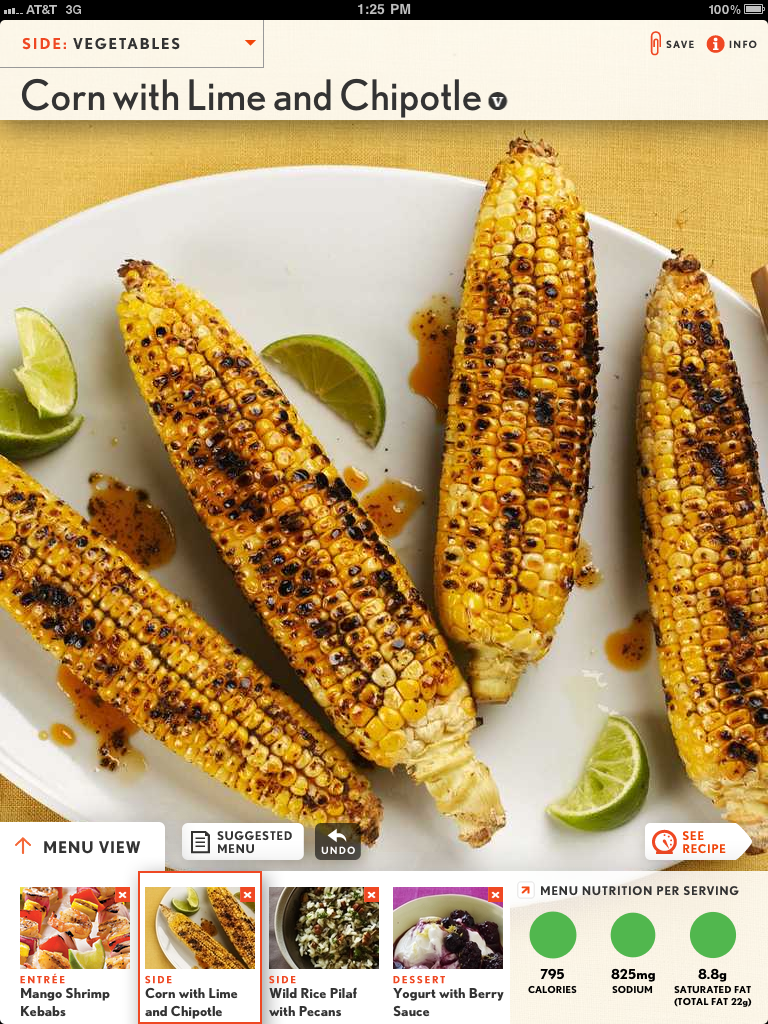
A friend and I decided to try the app out for ourselves. After finding, oh, 20 different combinations that made our stomachs growl, we finally went with:
Mango Shrimp Kabobs, Corn with Lime and Chipotle, Wild Rice Pilaf with Pecans, and Yogurt with Berry Sauce. How wonderful does this dinner look? (If you click on the photo above, it will enlarge so you can actually read what it says.) The photo above is a screen shot from the Corn. I received corn as part of my CSA share this week so I was excited to see this recipe. I came across the recipe by scrolling through the “vegetable” sides. I then clicked the “suggested menus” button and that gave me suggestions for a main meal, another side, and a dessert.
I will post my attempt at the recipes in a different post. This post is getting too long
So, overall we had the following thoughts about the App:
Pros:
Love the suggested menu option. Not only are there multiple suggestions, but you can use it by starting off with any part of the meal: Main dish, Side, or Dessert. Genius!
You have the option to save a specific recipe you enjoy or the whole menu
You can also e-mail the recipe or menu straight from the app.
The nutrition per serving is very helpful. Includes all parts of the dish. It also breaks down fat and sodium content.
The photos are spectacular. I was so hungry after playing around with the app!
Cons/Suggested Improvements:
There is no “search” feature. So if you find a recipe you love and don’t save it, you have to scroll through a bunch of other recipes before finding it again. Bummer.
It would be nice if there was a way to choose ingredients you had on hand and have menus/recipes suggested that include those recipes.
Another possible improvement: adding a shopping list feature. It would make the app more useful in the supermarket.
The app is so large, it crashed the iPad a few times. Slightly frustrating but not a deal breaker.
I think I’ve already managed to scroll through all of the recipes, so I hope the app is continuously updated with new and delicious meals!
When I tried to e-mail the menu to myself, I realized there is no way to do so. You have to go through recipe by recipe and e-mail them out.
I personally am a Droid aficionado. I hope this becomes available for my beloved Android in the near future!
Overall, I think the pros outweigh the cons. It really is a well made app and is really quite useful.
So if you managed to stay with me this entire time, I have a little reward. Cooking Light was kind enough to give me five free codes to their app! To be eligible to receive one of these codes you must meet the following requirements:
Have an iPhone or iPad (this is kind of mandatory, sorry)
Be willing to write either a blog post review of the app on your own site OR a guest review post on my site OR just send me an e-mail with your thoughts about the app
To enter, leave me a comment letting me know if you’d write your review as a guest blogger or if you’ll have it on your own site (please include a link to your site). If you are not comfortable writing a whole post on the app, an e-mail with feedback about the app is also perfectly fine. In a separate comment, post whether you’ve liked my facebook page or if you’re following me on twitter (excuse my shameless plug.) If you become a facebook fan AND follow me on twitter, post two separate comments letting me know, they will each count as an individual entry. Please be sure to include your e-mail address as well so I can contact you if you win. Note: you do not need to do all three; just leaving a comment will count as an entry.It would also be much appreciated if you’d direct people to this post to allow more people a chance to win! I will choose 5 lucky winners using random.org. Entries must be received by Friday, July 22 at 5:00 pm EST. Good luck!
Note: if you have used the Cooking Light App and have any comments, don’t hesitate to e-mail me at icancookthat@icancookthat.org. I’d love to hear your opinions! To read up on another blogger’s thoughts on the app, check out Katie K. is Losing It. She has used the app on a few posts so far, and has found some great recipes.
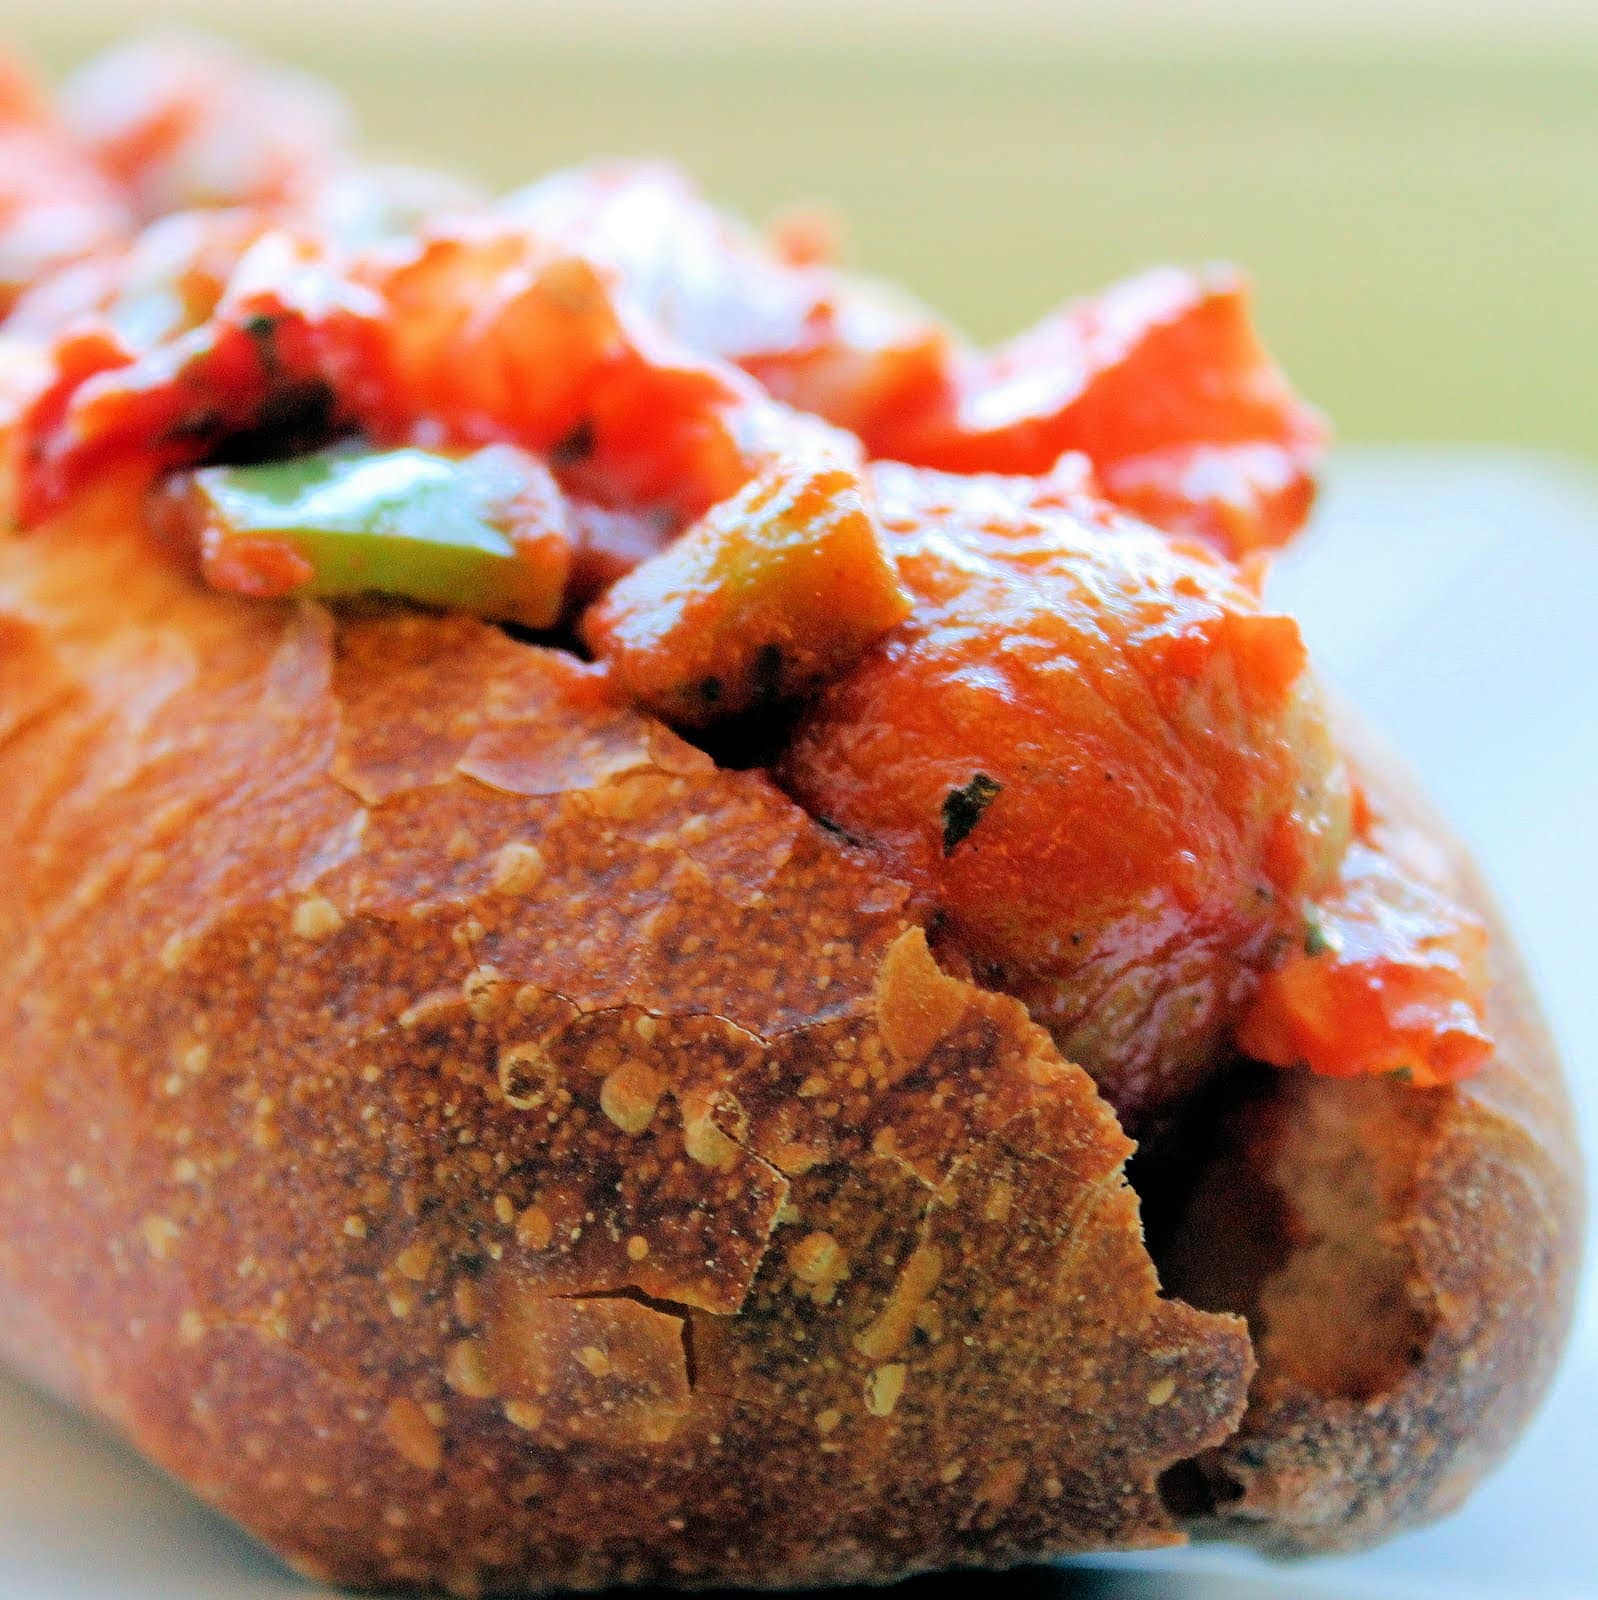
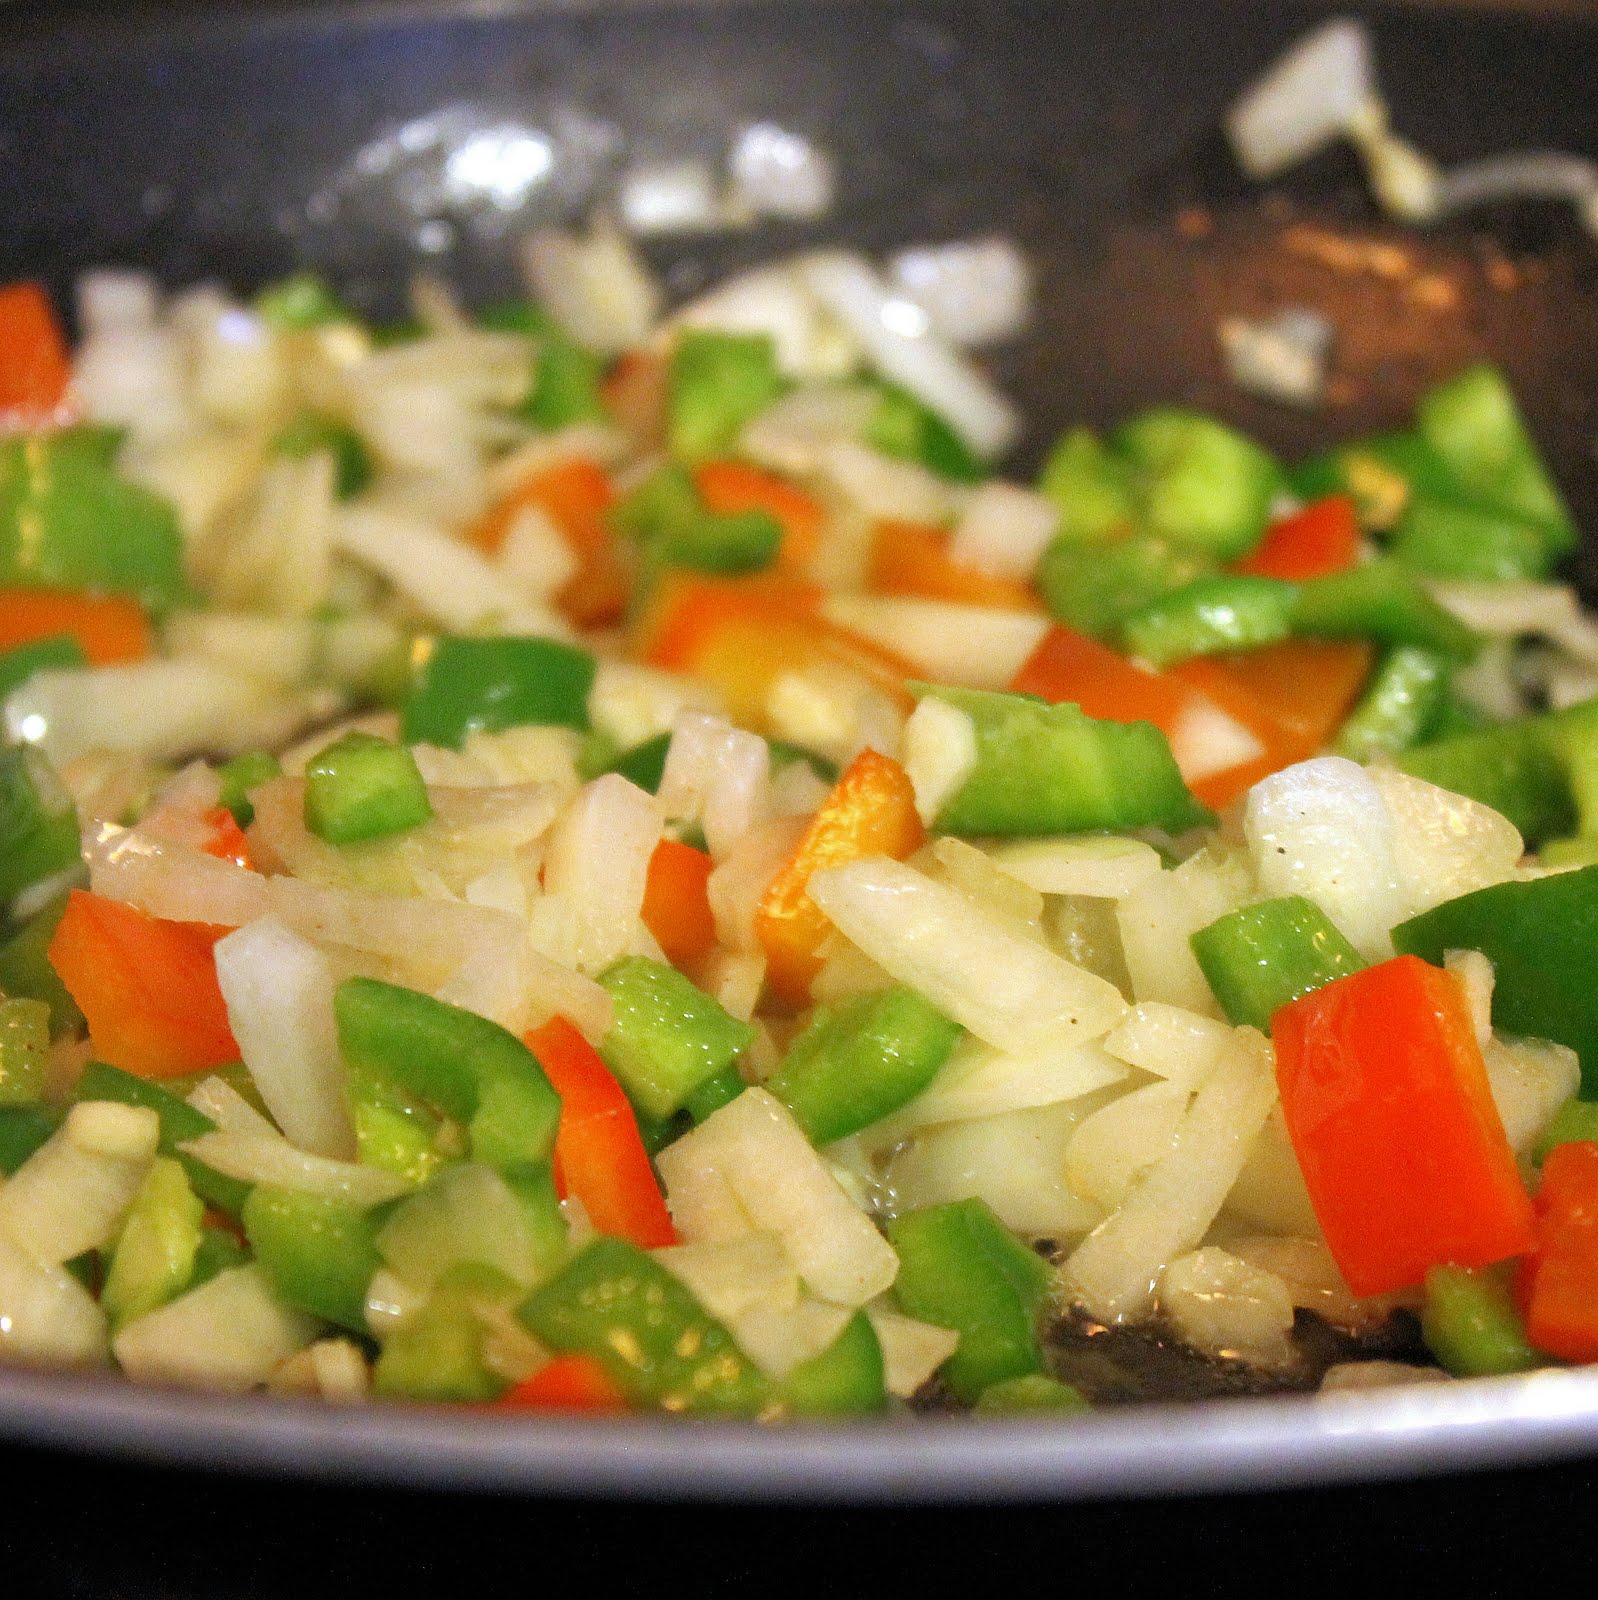
I love making sausage and peppers. It is such a simple meal to make and is always well received. Sausage and peppers are a hearty meal and work well in both hot summer months as a sandwich, and also during the fall and winter as a chunky stew or over pasta. I purchased sweet Italian sausage to make a soup (which I have yet to actually make) that only required one sausage. I also had some peppers from my CSA share this week so this was a great option for dinner without having to purchase a bunch of new ingredients.
Ingredients:
4 sausages (I used sweet Italian. feel free to use hot sausages instead)
2 green peppers, chopped
1 red pepper, chopped
1 onion, chopped
3 garlic cloves, minced
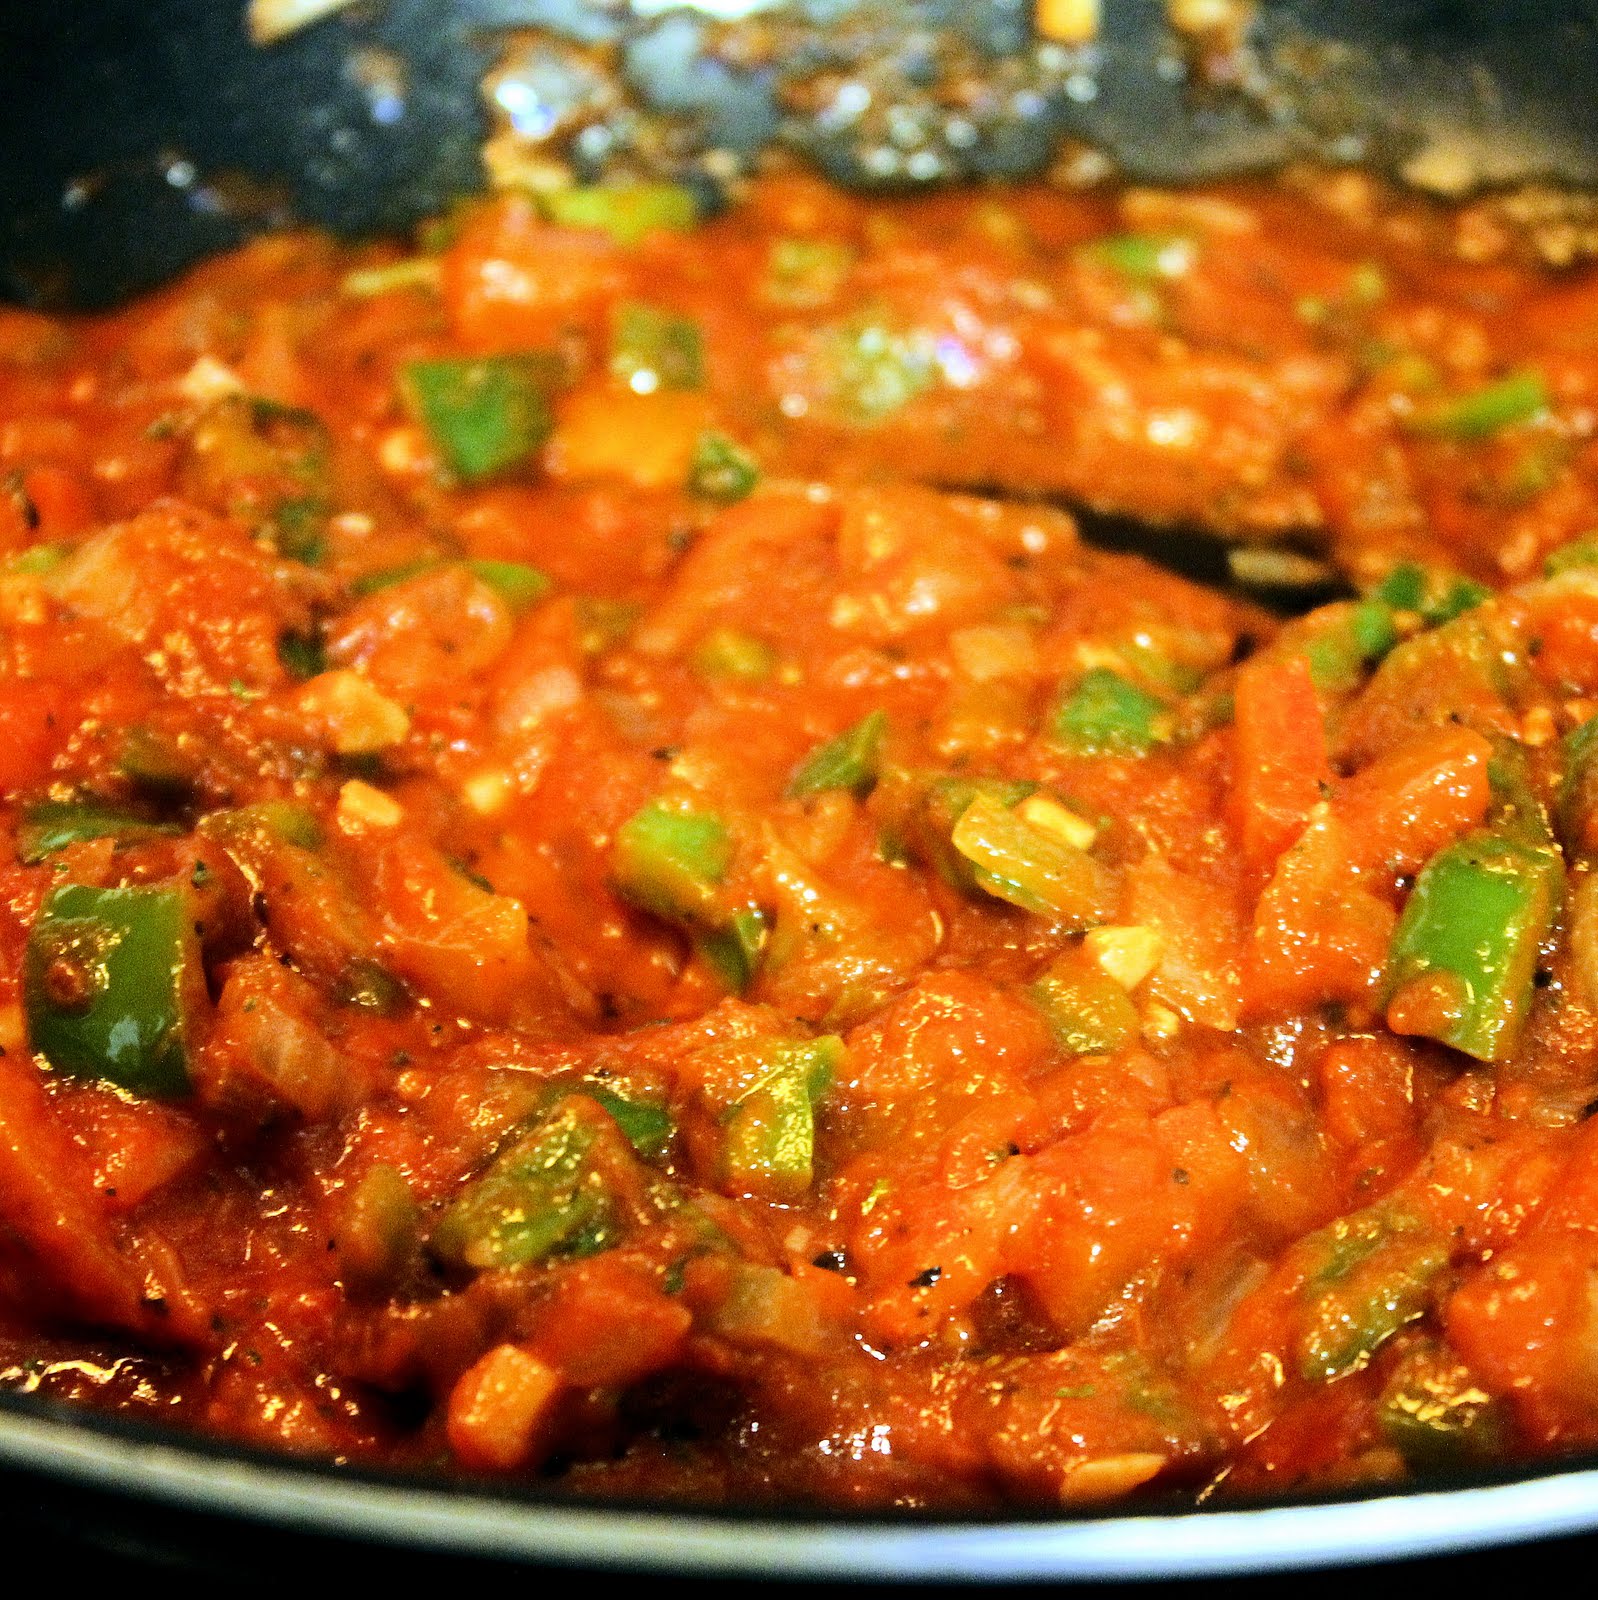
1 1/2 cups crushed tomatoes
1 tablespoon tomato paste
1 teaspoon dried parsley
1 teaspoon dried basil
1 teaspoon dried oregano
Salt and pepper to taste
1 tablespoon olive oil
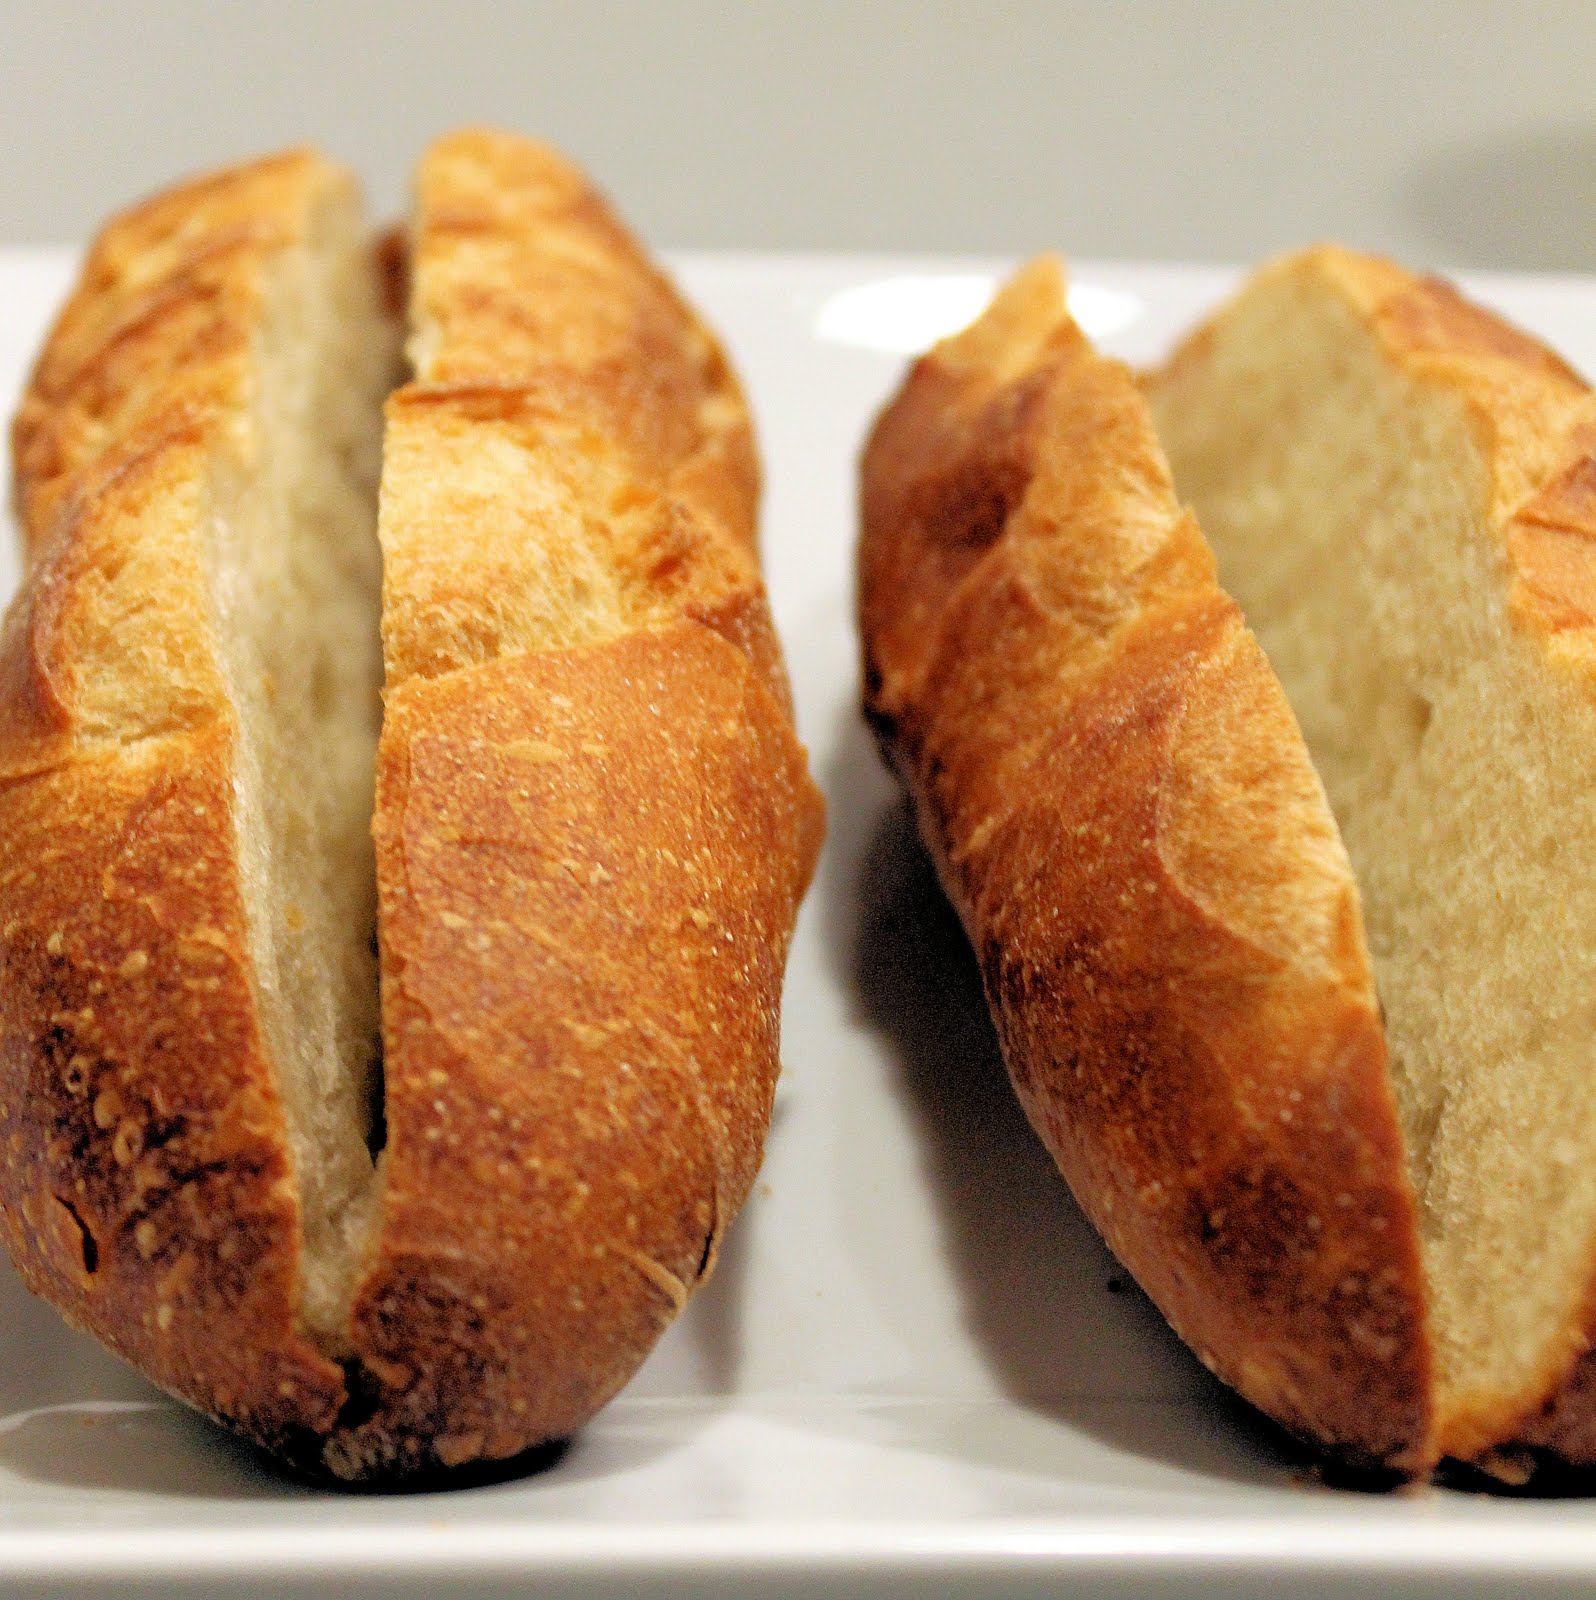
4 rolls
1 teaspoon fresh parsley, chopped (optional)
1 teaspoon grated Parmesan cheese (optional)
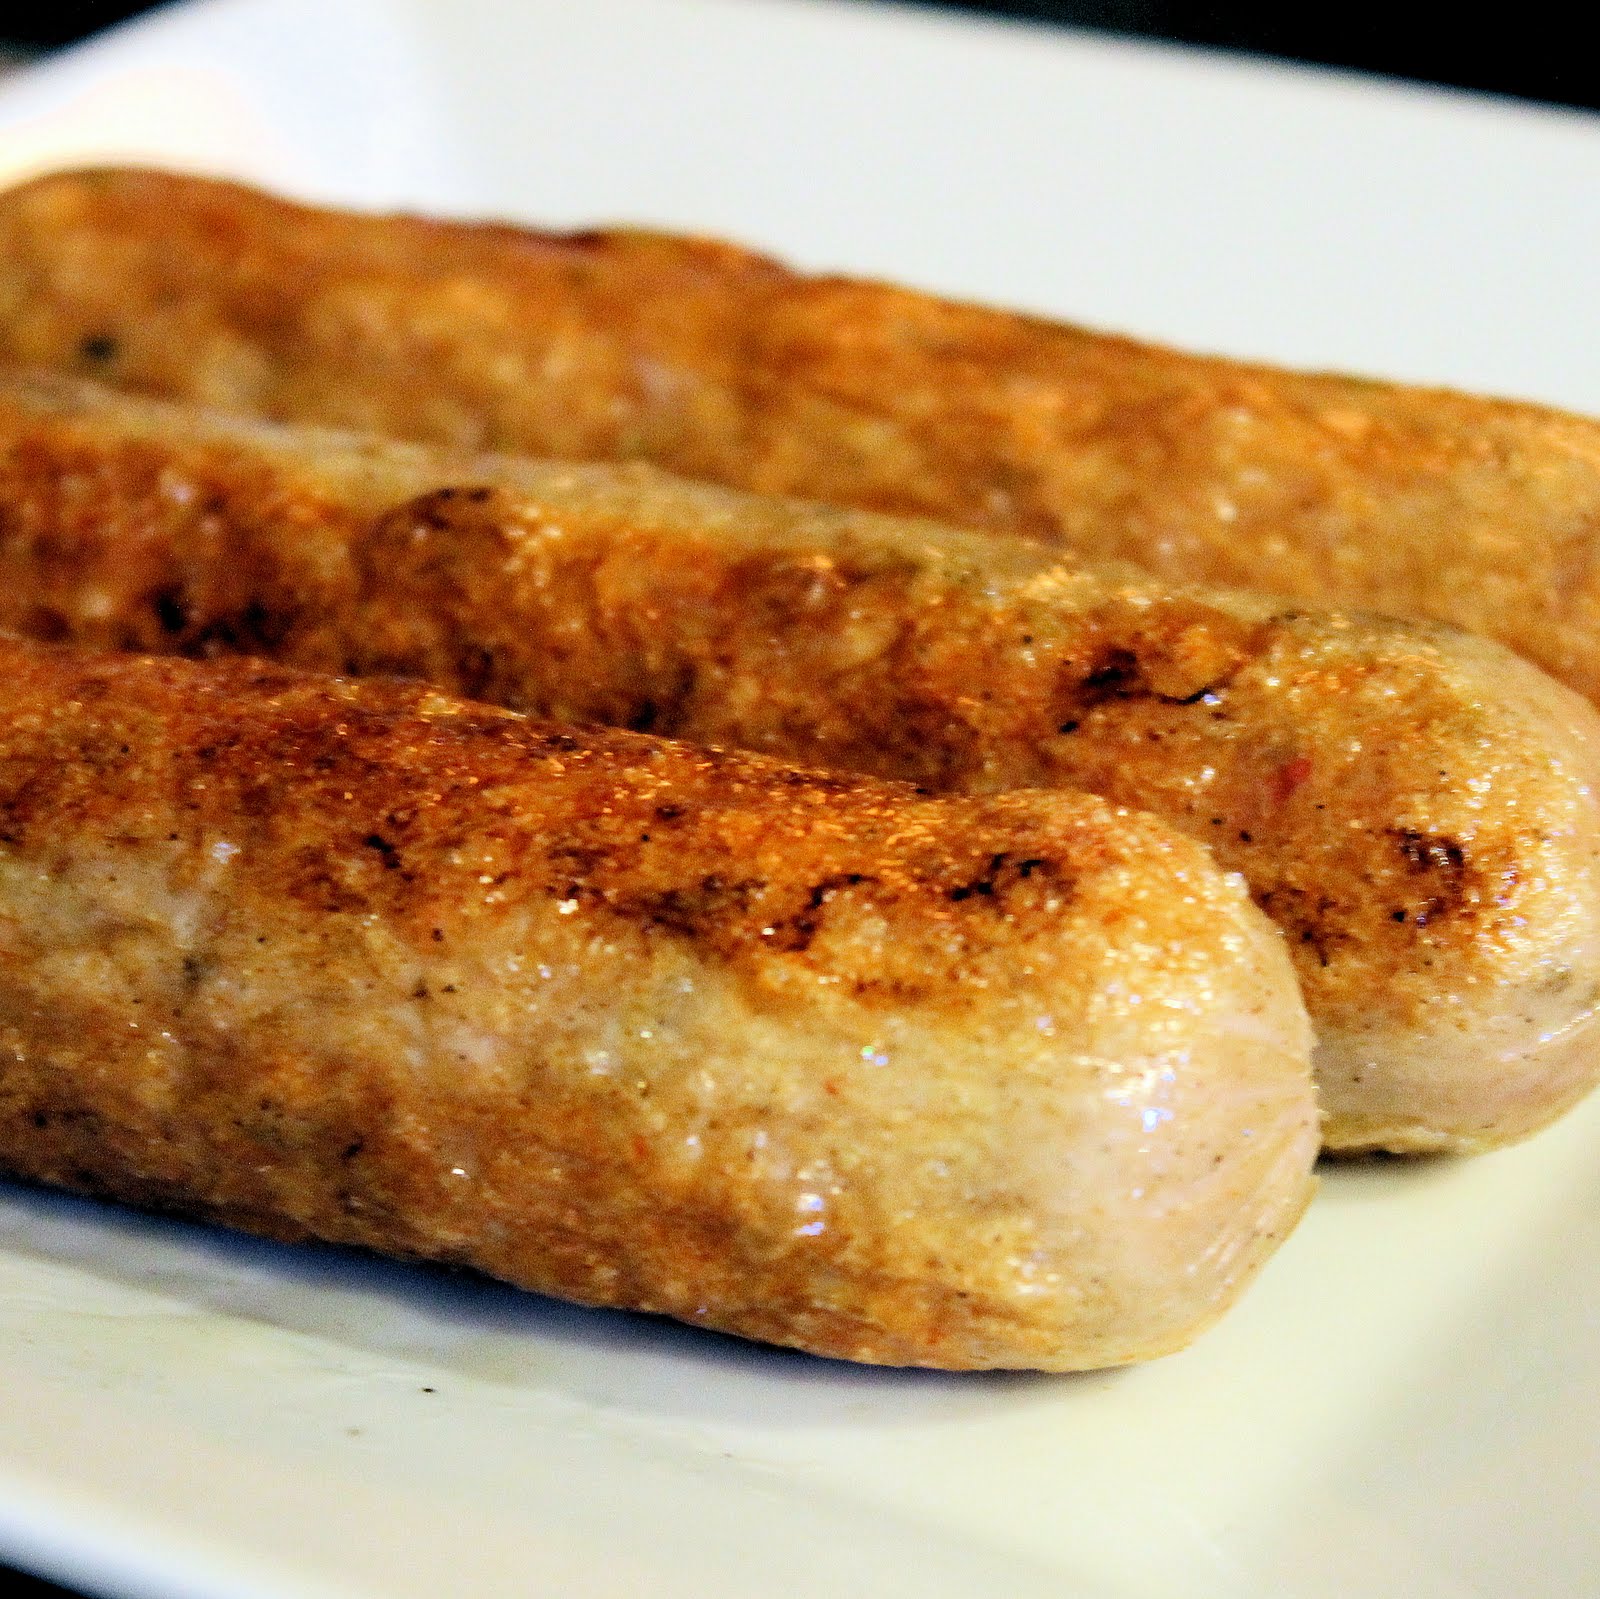
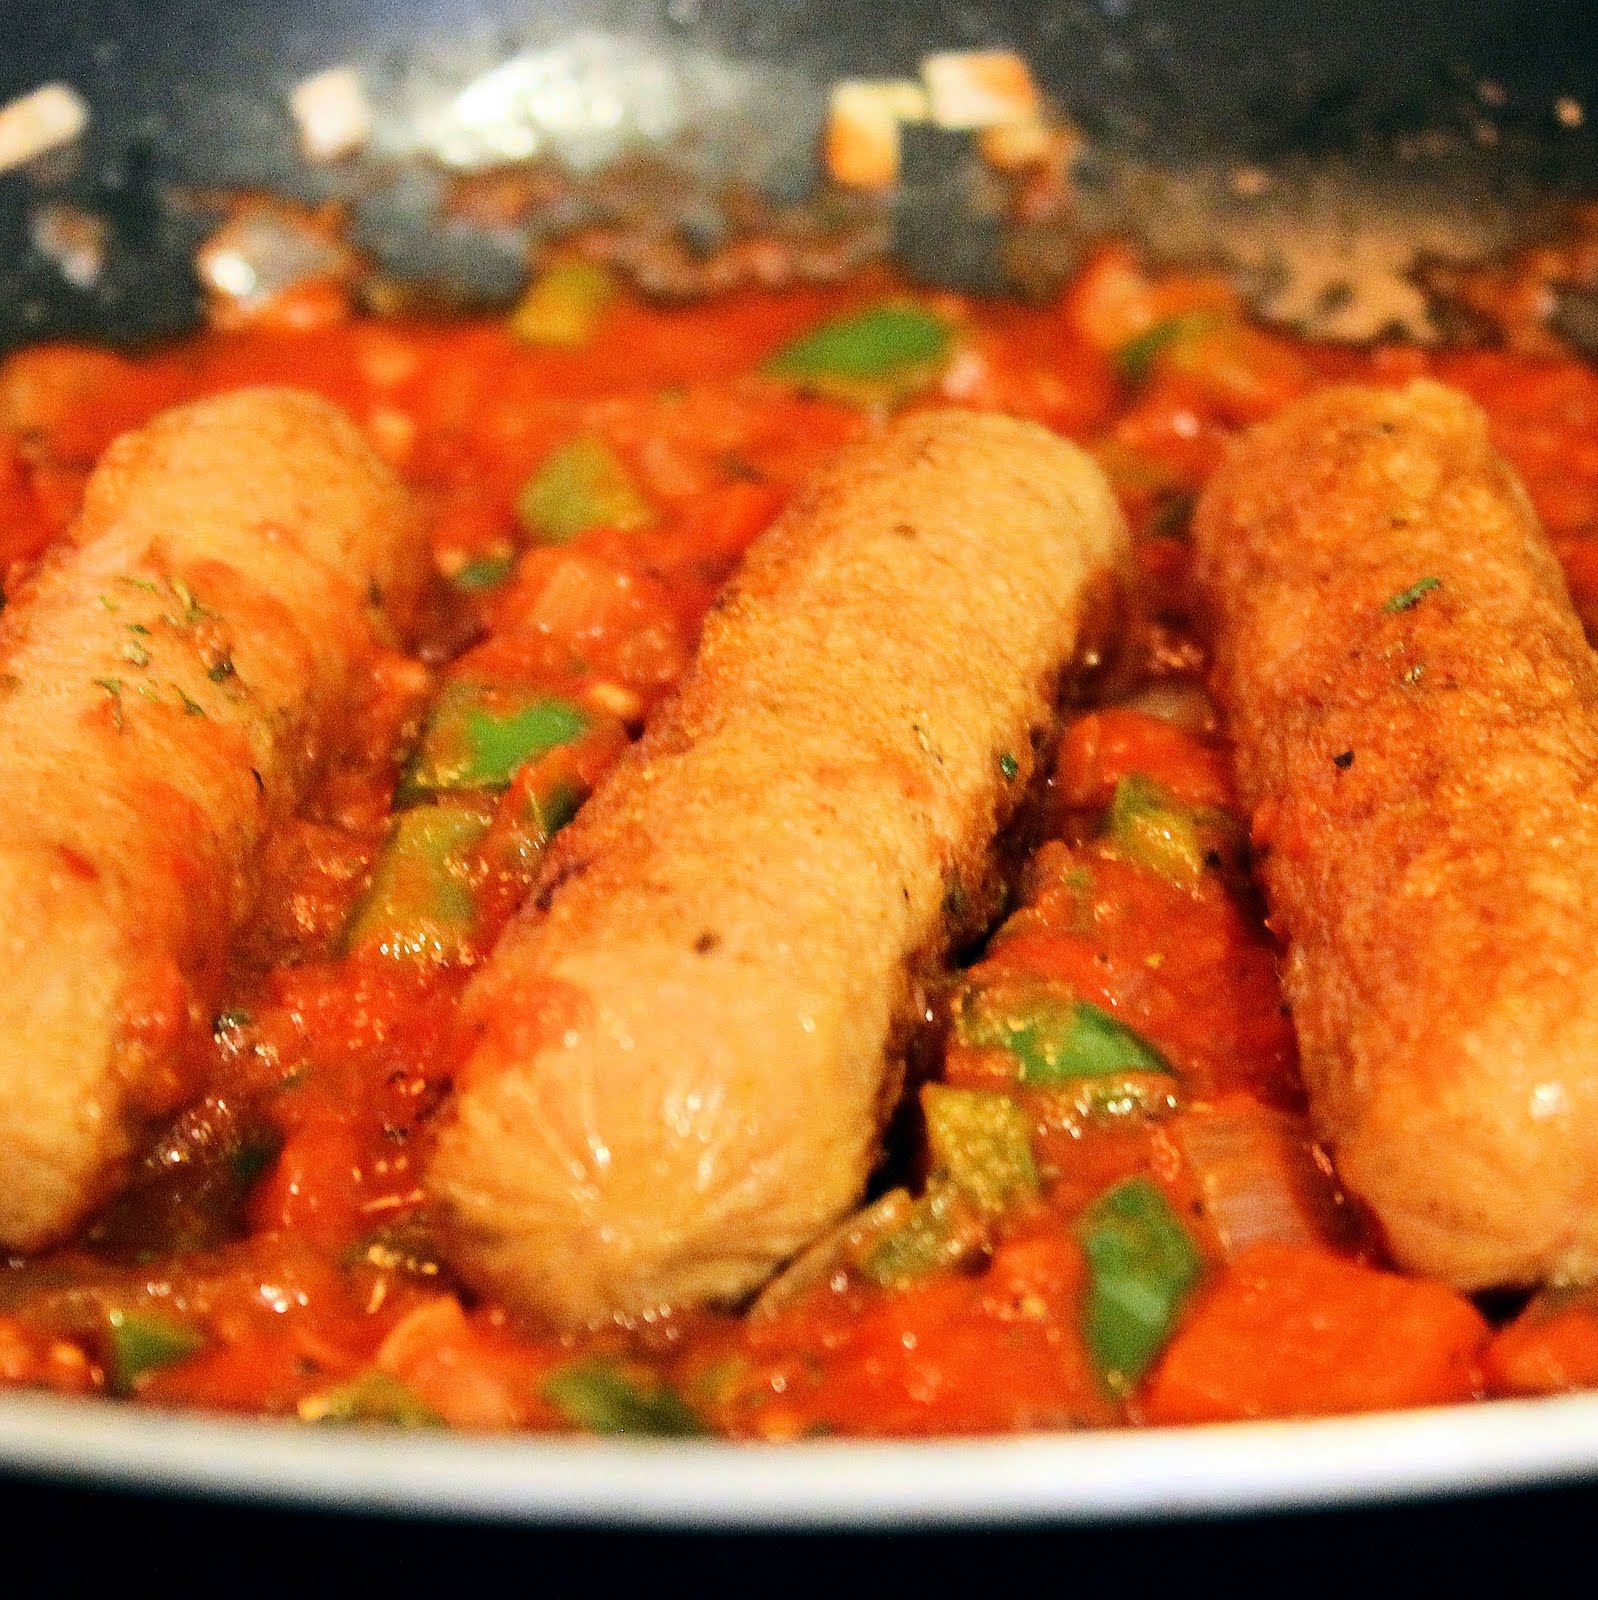
Add 1 tablespoon olive oil to a saute pan over medium-high heat. When heated, add the sausages and cook until browned, turning the sausages so they cook evenly.
While the sausages are cooking (about 10 minutes), chop your garlic, onion, and peppers.
Remove the sausages from the pan and set aside.
Using the same saute pan, lower the hear to medium. Add the garlic, onions, and peppers to the pan and cook until fragrant, about 5 minutes.
Add the 1.5 cups of crushed tomatoes. Feel free to add a bit more if you’d prefer yours a little more “saucy.” Add in the tomato paste, basil, dried parsley, and dried oregano.
Stir to combine. Bring to a simmer and add in the sausages. Season with salt and pepper.
Cook for 3-5 more minutes or until the sausages are warm. Cut the rolls almost in half, but not fully. You want the sauce to be able to settle at the bottom of the bun.
To serve, add 1 sausage to each bun. Spoon the onions, peppers, and tomato mixture over the sausage. Add some Parmesan cheese and/or parsley if you prefer.
If you have an outdoor grill, you can alter this recipe to grill the sausages and add to the pan at the end. This recipe can also be used over pasta, just chop up the sausage into bit sized pieces. This is a pretty messy meal so be sure to have plenty of napkins on hand. Enjoy!
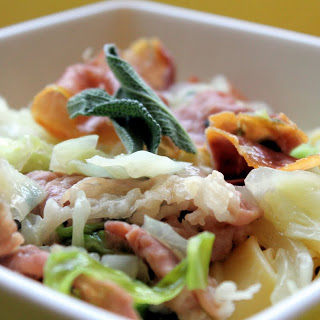
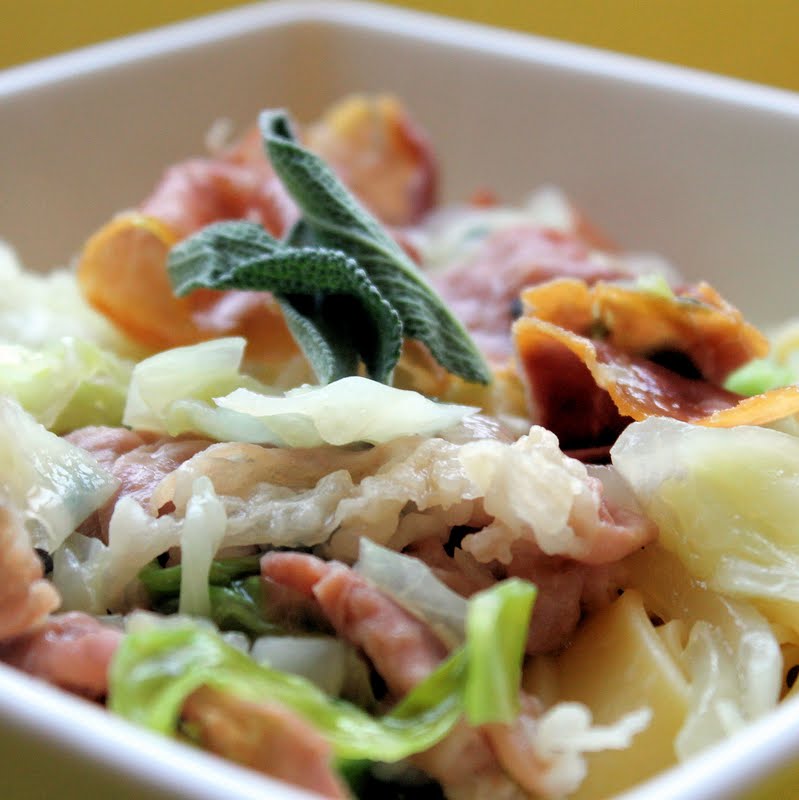
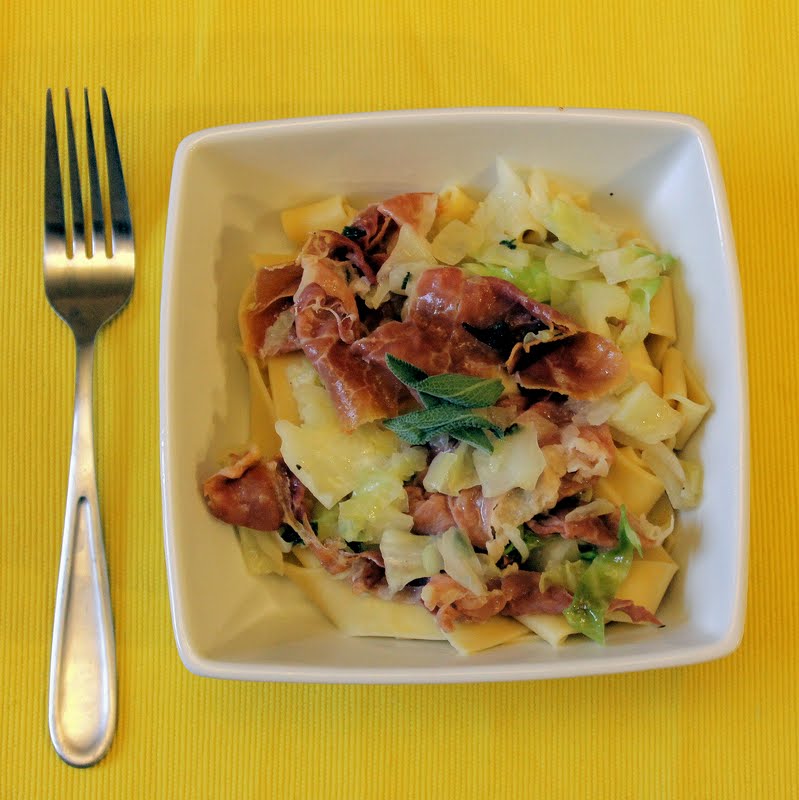
My CSA share this week came with cabbage. I highly doubt most people would jump for joy over cabbage. I honestly had no idea what kind of meal outside of corned beef and cabbage even used this green. So it took some sleuthing for me to find a recipe that sounded like something I’d like. Cabbage plus pasta and prosciutto? That’ll do. (I found this recipe on My Recipes)
Ingredients:
1 package of pappardelle
1 tablespoon olive oil
Salt and pepper, to taste
1/2 onion, chopped
1/2 a head of cabbage, chopped
1 cup low sodium chicken broth
1/4 pound thinly sliced prosciutto torn into smaller pieces
2 tablespoons unsalted butter
2 tablespoons chopped fresh sage
Cook pasta according to package directions. Drain and set aside.
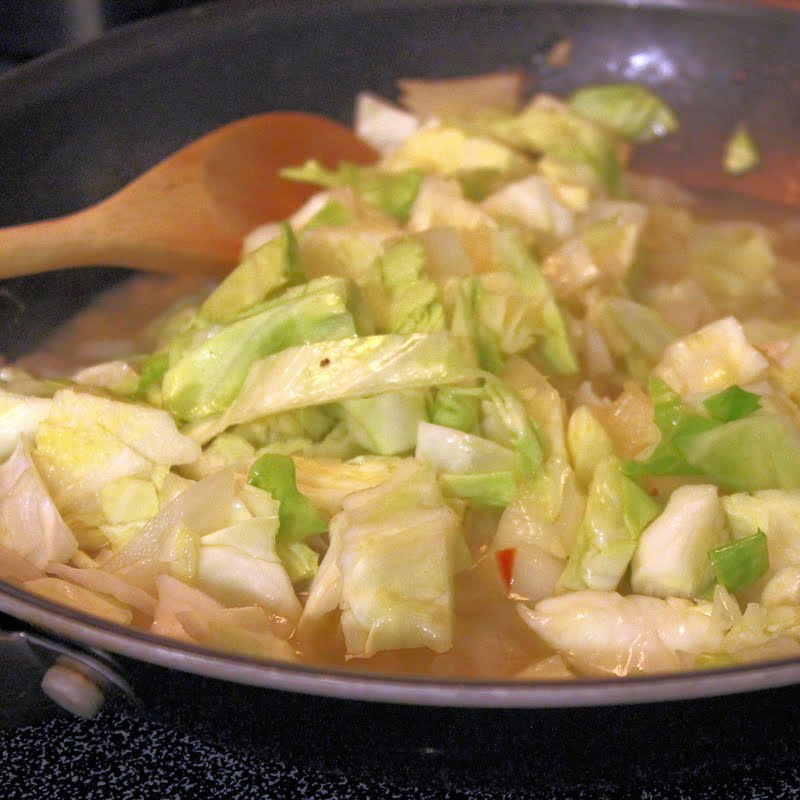
While the pasta is cooking, heat the olive oil in a saute pan over medium-high heat. Add the chopped onion and salt and pepper. Cook until softened, about 5 minutes.
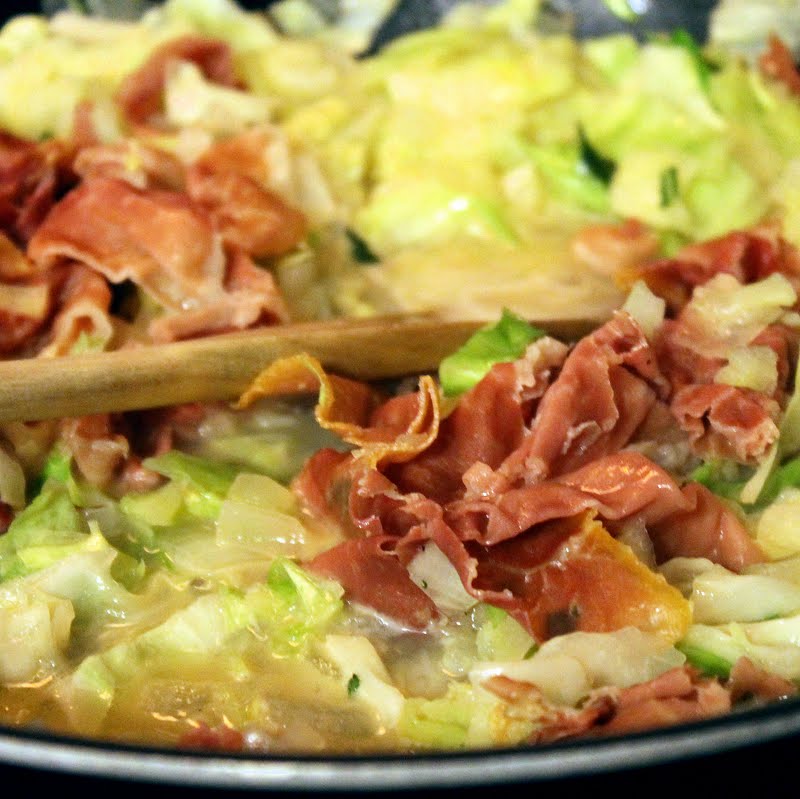
While the onion is cooking, chop the cabbage, tear the prosciutto, and chop the sage. After the onion is soft, add the cabbage and broth. Cook for 2 to 3 minutes or until the cabbage begins to wilt.
Stir in the prosciutto, butter and chopped sage. Cook while stirring until the butter melts.
Spoon over the pasta and serve.
So I’m not going to run out to the supermarket and buy all the cabbage they have to offer. But this dish was actually quite tasty. The sage and prosciutto were a great complement to the cabbage. My only complaint is I have no clue why the recipe called for pappardelle. I found it to be super difficult to eat with such thick pasta. If you plan on making this, go for another type of pasta that can still grab some of the prosciutto, cabbage and sage in every bite.
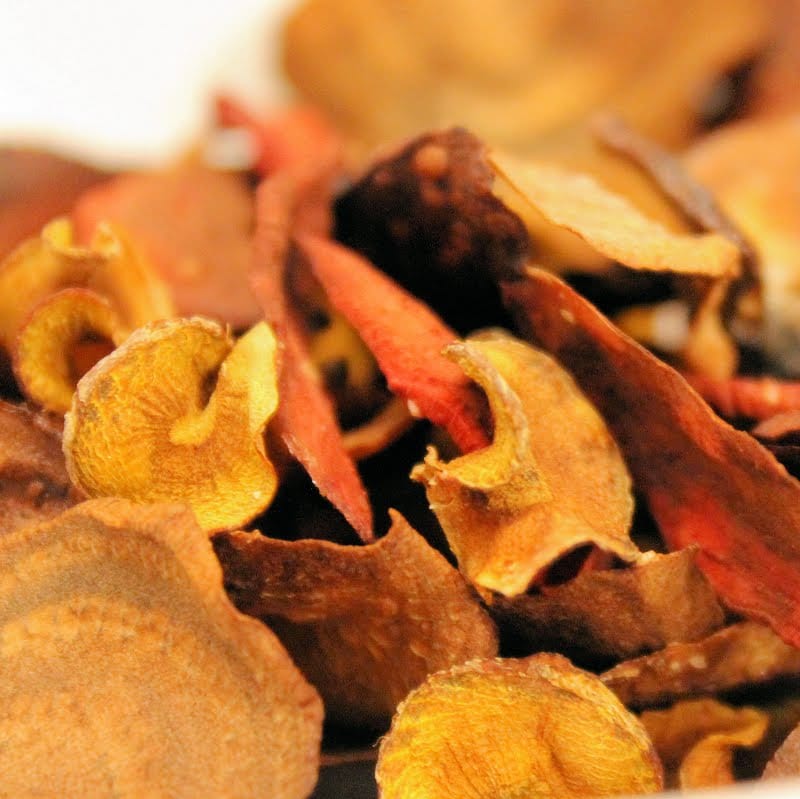
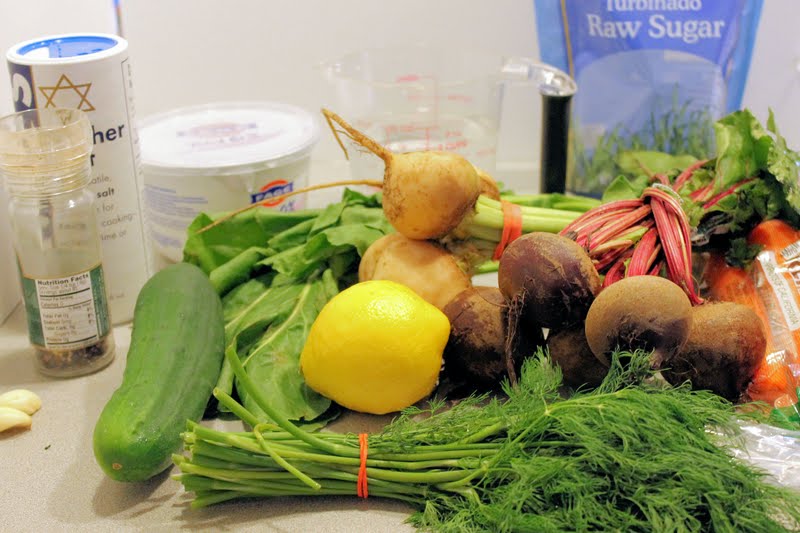
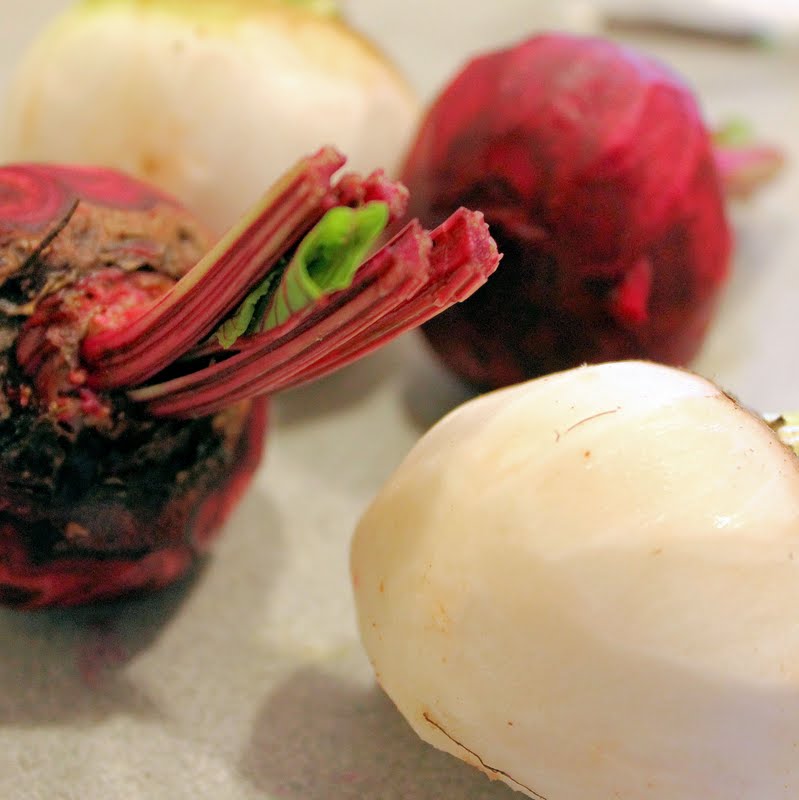
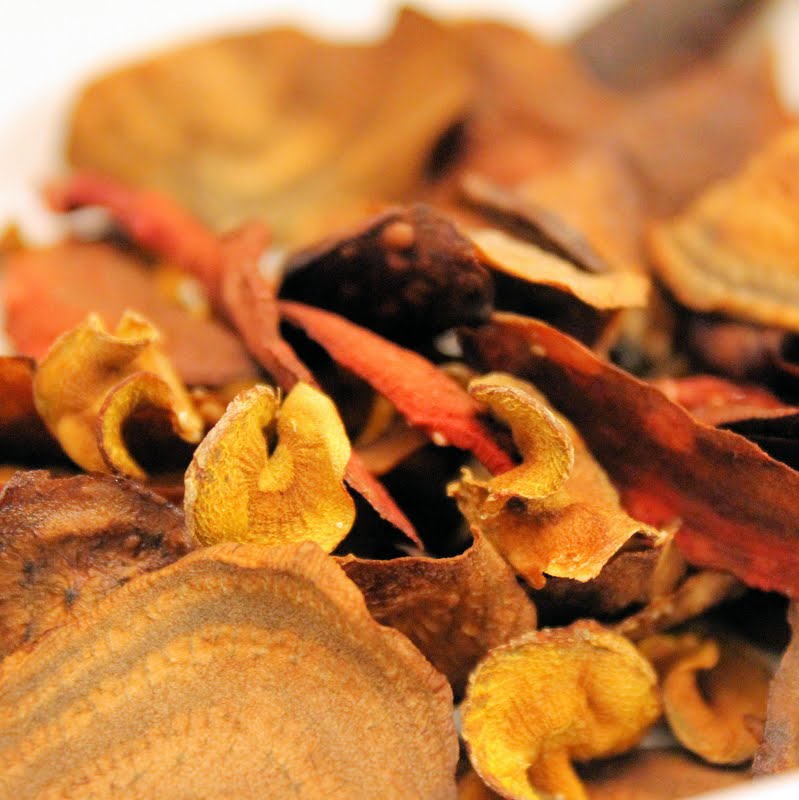
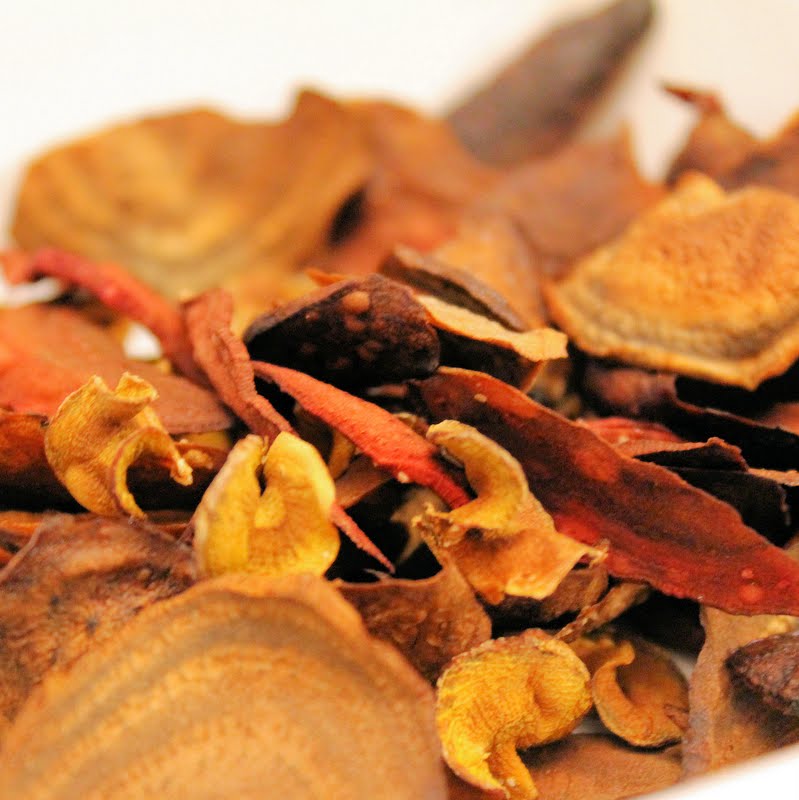
I came across a recipe for beet chips recently and was intrigued. It seemed relatively easy, didn’t involve frying the beets (I don’t have a deep fryer, and the idea of deep frying something kind of makes me sick), and appeared to be a great way for me to use some of the beets I received in my CSA share. I decided to bring it a step further and try to make carrot chips at the same time as well as a dip to go with them. I had both normal beets and white beats so I was really hoping this would turn out colorful!
The tiny ones are carrots, the others are red & white beets
Ingredients for chips:
2 white beets
2 red beets
2 large carrots
Salt and pepper to taste
2 cups water
2 cups sugar
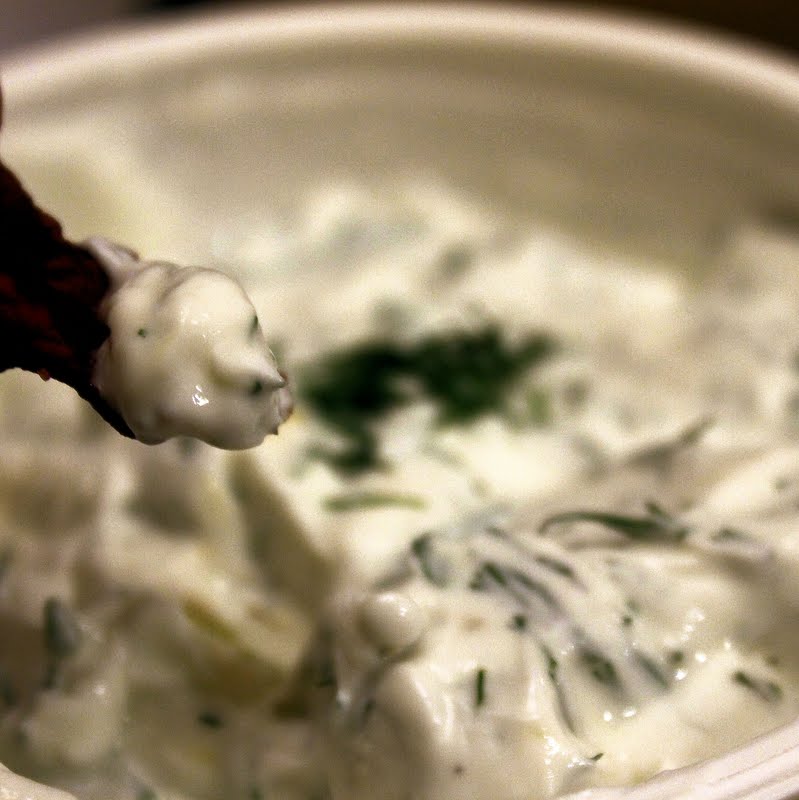
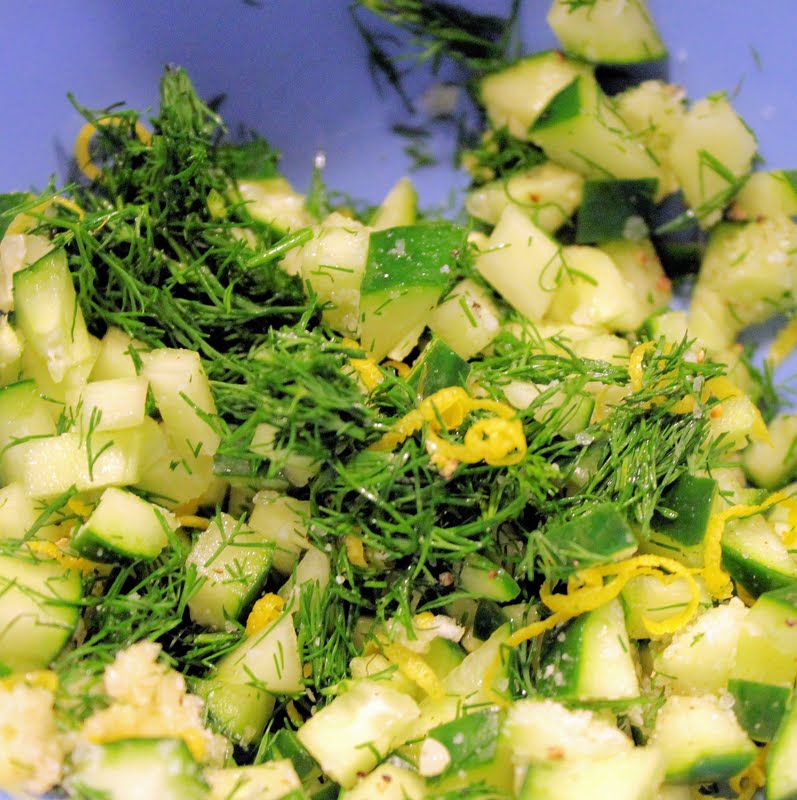
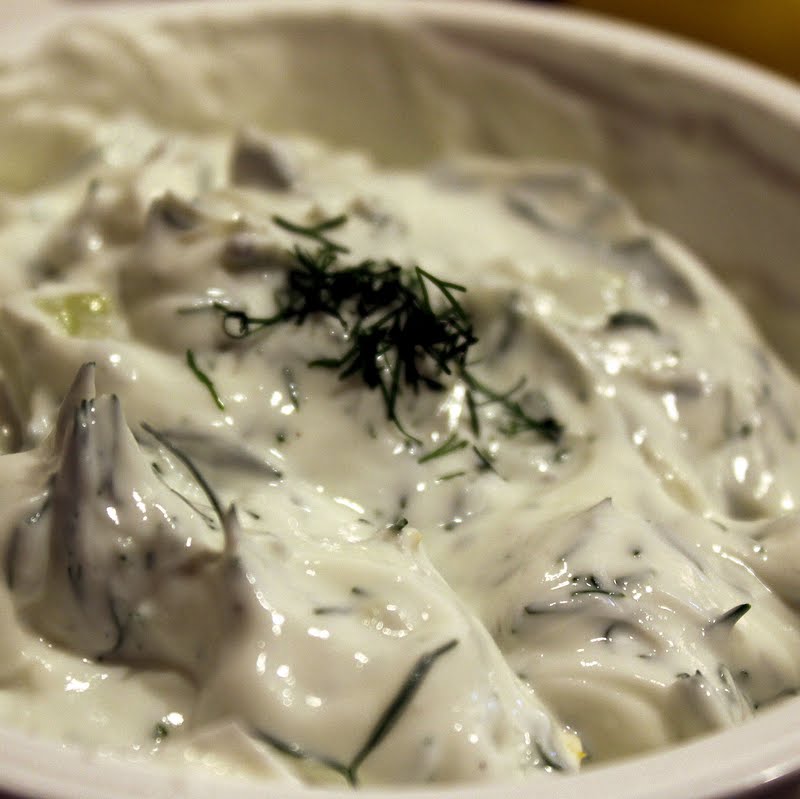
Ingredients for tzatziki:
1 container of Greek yogurt (I used 0%)
1/4 cup fresh chopped dill
Juice and zest of 1 lemon
2 garlic cloves, minced
1/2 a cucumber, finely chopped
Salt and pepper to taste
To begin, combine the water and sugar in a saute pan and bring to a boil. While the mixture is heating, peel the beets with a vegetable peeler. Chop off most of the leaves on top, but leave a bit to use as a handle when using the mandoline slicer.
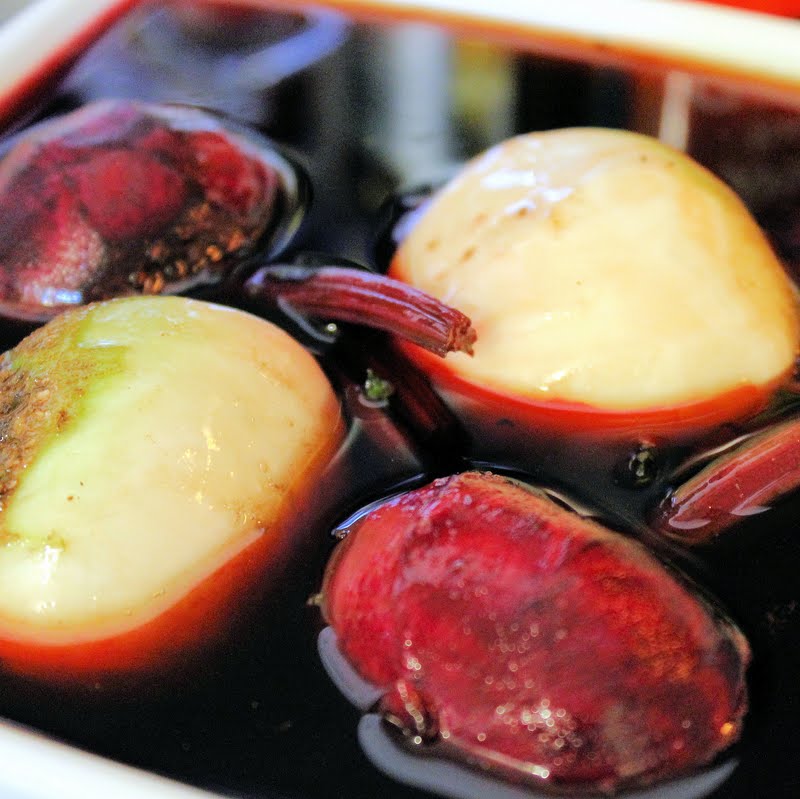
When the liquid has boiled, remove from heat and add the beets to the liquid. Let sit for 15 minutes.
I used raw sugar, which is why it’s brown
Preheat the oven to 325 degrees. While the beets are soaking, use a mandoline slicer to thinly slice the carrots. After 15 minutes, remove the beets, dry them off with a paper towel, and thinly slice with the mandoline slicer. Arrange on a baking sheet sprayed with cooking spray and season with salt and pepper.
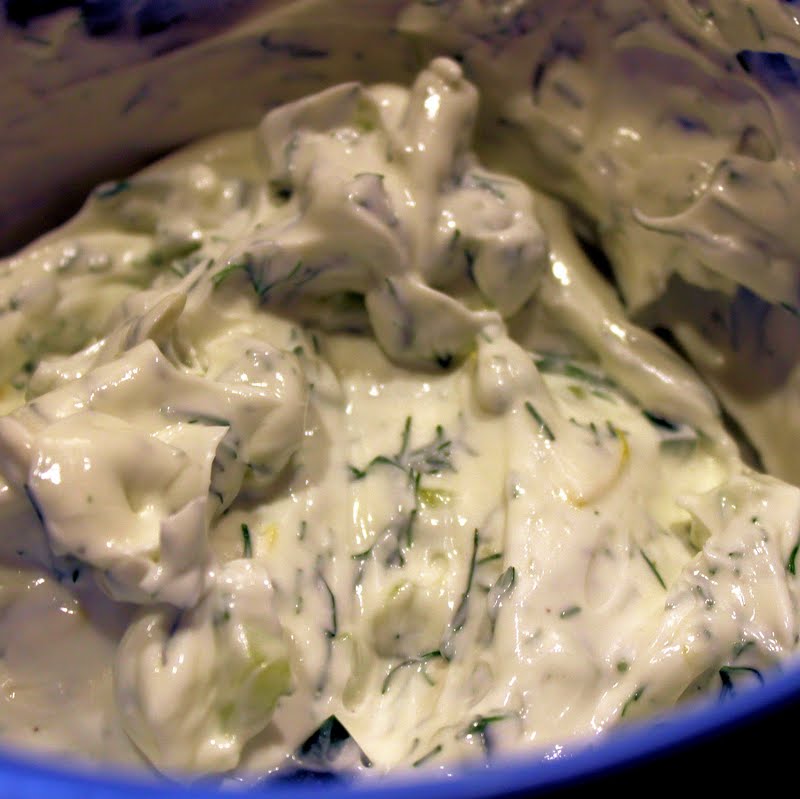
Cook for 40 minutes or until they begin to crisp slightly. While the chips are baking, prepare the tzatziki. Combine the chopped dill, lemon, zest, garlic, cucumber, salt and pepper in a medium sized bowl.
Mix in the Greek yogurt.
Cover and refrigerate until the chips are done.
Allow the chips to cool on the baking sheet for about 10 minutes after removing them from the oven. Carefully remove from the baking sheet.
The beets and especially the carrots really shrink up, so if you can, use quite large beets and carrots. I think mind turned out too tiny for my liking. I also think I sliced them a bit too thin, they really don’t seem like they’d stand up to the dip too well.
they are fun looking though!
Place the chips in a bowl and serve with the tzatziki. Enjoy!
This recipe makes a whole lot of tzatziki, probably more than you’ll use on the chips. Tzatziki is great with pita chips, as a condiment on grilled meats, stuffed grape leaves, and crudites so you’ll have plenty of options to use the rest of the dip.
Beet and Carrot Chips with Tzatziki
Cuisine: Appetizer, Sides, Vegetarian
Author: I Can Cook That
Ingredients
Ingredients for chips:
2 white beets
2 red beets
2 large carrots
Salt and pepper to taste
2 cups water
2 cups sugar
Ingredients for tzatziki:
1 container of Greek yogurt (I used 0%)
1/4 cup fresh chopped dill
Juice and zest of 1 lemon
2 garlic cloves, minced
1/2 a cucumber, finely chopped
Salt and pepper to taste
Instructions
To begin, combine the water and sugar in a saute pan and bring to a boil. While the mixture is heating, peel the beets with a vegetable peeler. Chop off most of the leaves on top, but leave a bit to use as a handle when using the mandoline slicer.
When the liquid has boiled, remove from heat and add the beets to the liquid. Let sit for 15 minutes.
Preheat the oven to 325 degrees. While the beets are soaking, use a mandoline slicer to thinly slice the carrots. After 15 minutes, remove the beets, dry them off with a paper towel, and thinly slice with the mandoline slicer. Arrange on a baking sheet sprayed with cooking spray and season with salt and pepper.
Cook for 40 minutes or until they begin to crisp slightly. While the chips are baking, prepare the tzatziki. Combine the chopped dill, lemon, zest, garlic, cucumber, salt and pepper in a medium sized bowl.
Mix in the Greek yogurt.
Cover and refrigerate until the chips are done.
Allow the chips to cool on the baking sheet for about 10 minutes after removing them from the oven. Carefully remove from the baking sheet.
Place the chips in a bowl and serve with the tzatziki.
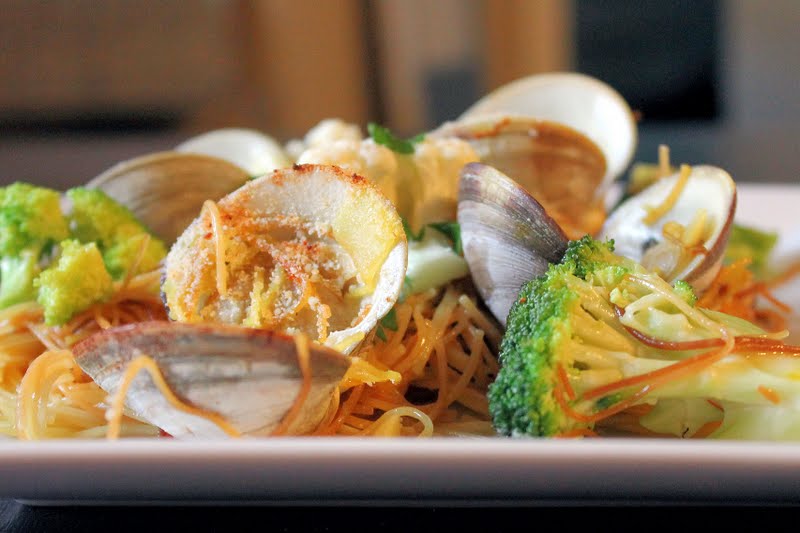
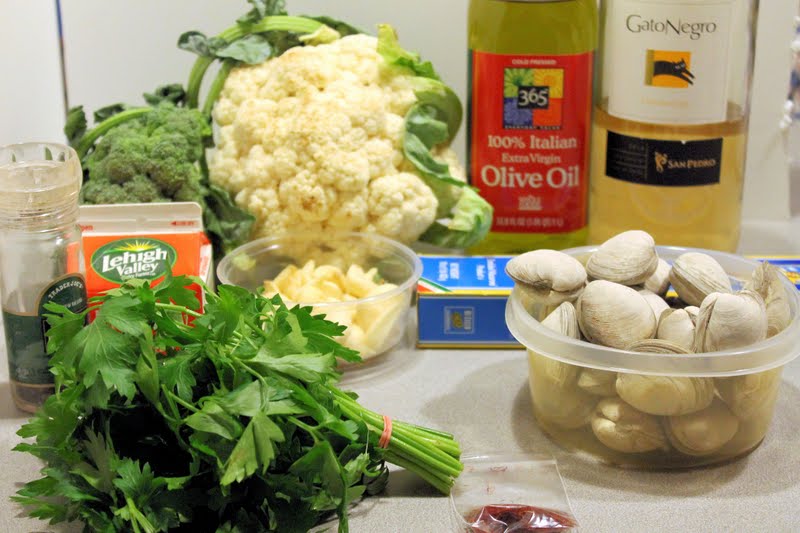
I am a huge Top Chef fan. So much that my parents bought me the Top Chef cookbook a few years back. However, when I moved, I stored it away and completely forgot about it. I recently found the cookbook again and came across Ilan’s dish: Fideos with Clams and Saffron. My CSA share this week came with broccoli, cauliflower and onion so I thought this would be a perfect way to use these ingredients. Note: I switched up the way this recipe was cooked, used less cream, and added onions and Parmesan. Otherwise, the recipe is pretty close to the original printed version.
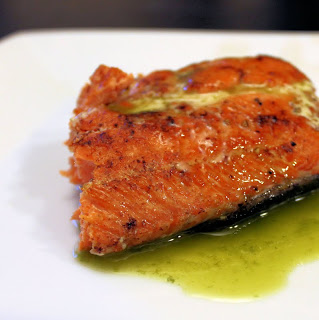
Yes. Another salmon recipe. I can’t help it, I love the stuff. And when you are able to purchase a salmon fillet that looks as gorgeous as this one did, you have no choice but to keep it simple and let the natural delicious salmon flavor shine through. This recipe takes less than 20 minutes, and can be made even more quickly if you make the basil oil the day before.
Ingredients (serves 4):
1 tablespoon butter
1 tablespoon olive oil
1 pound salmon fillet, skin still on
Salt and pepper, to taste
Basil oil
1/2 cup fresh basil, firmly packed
1/4 cup olive oil
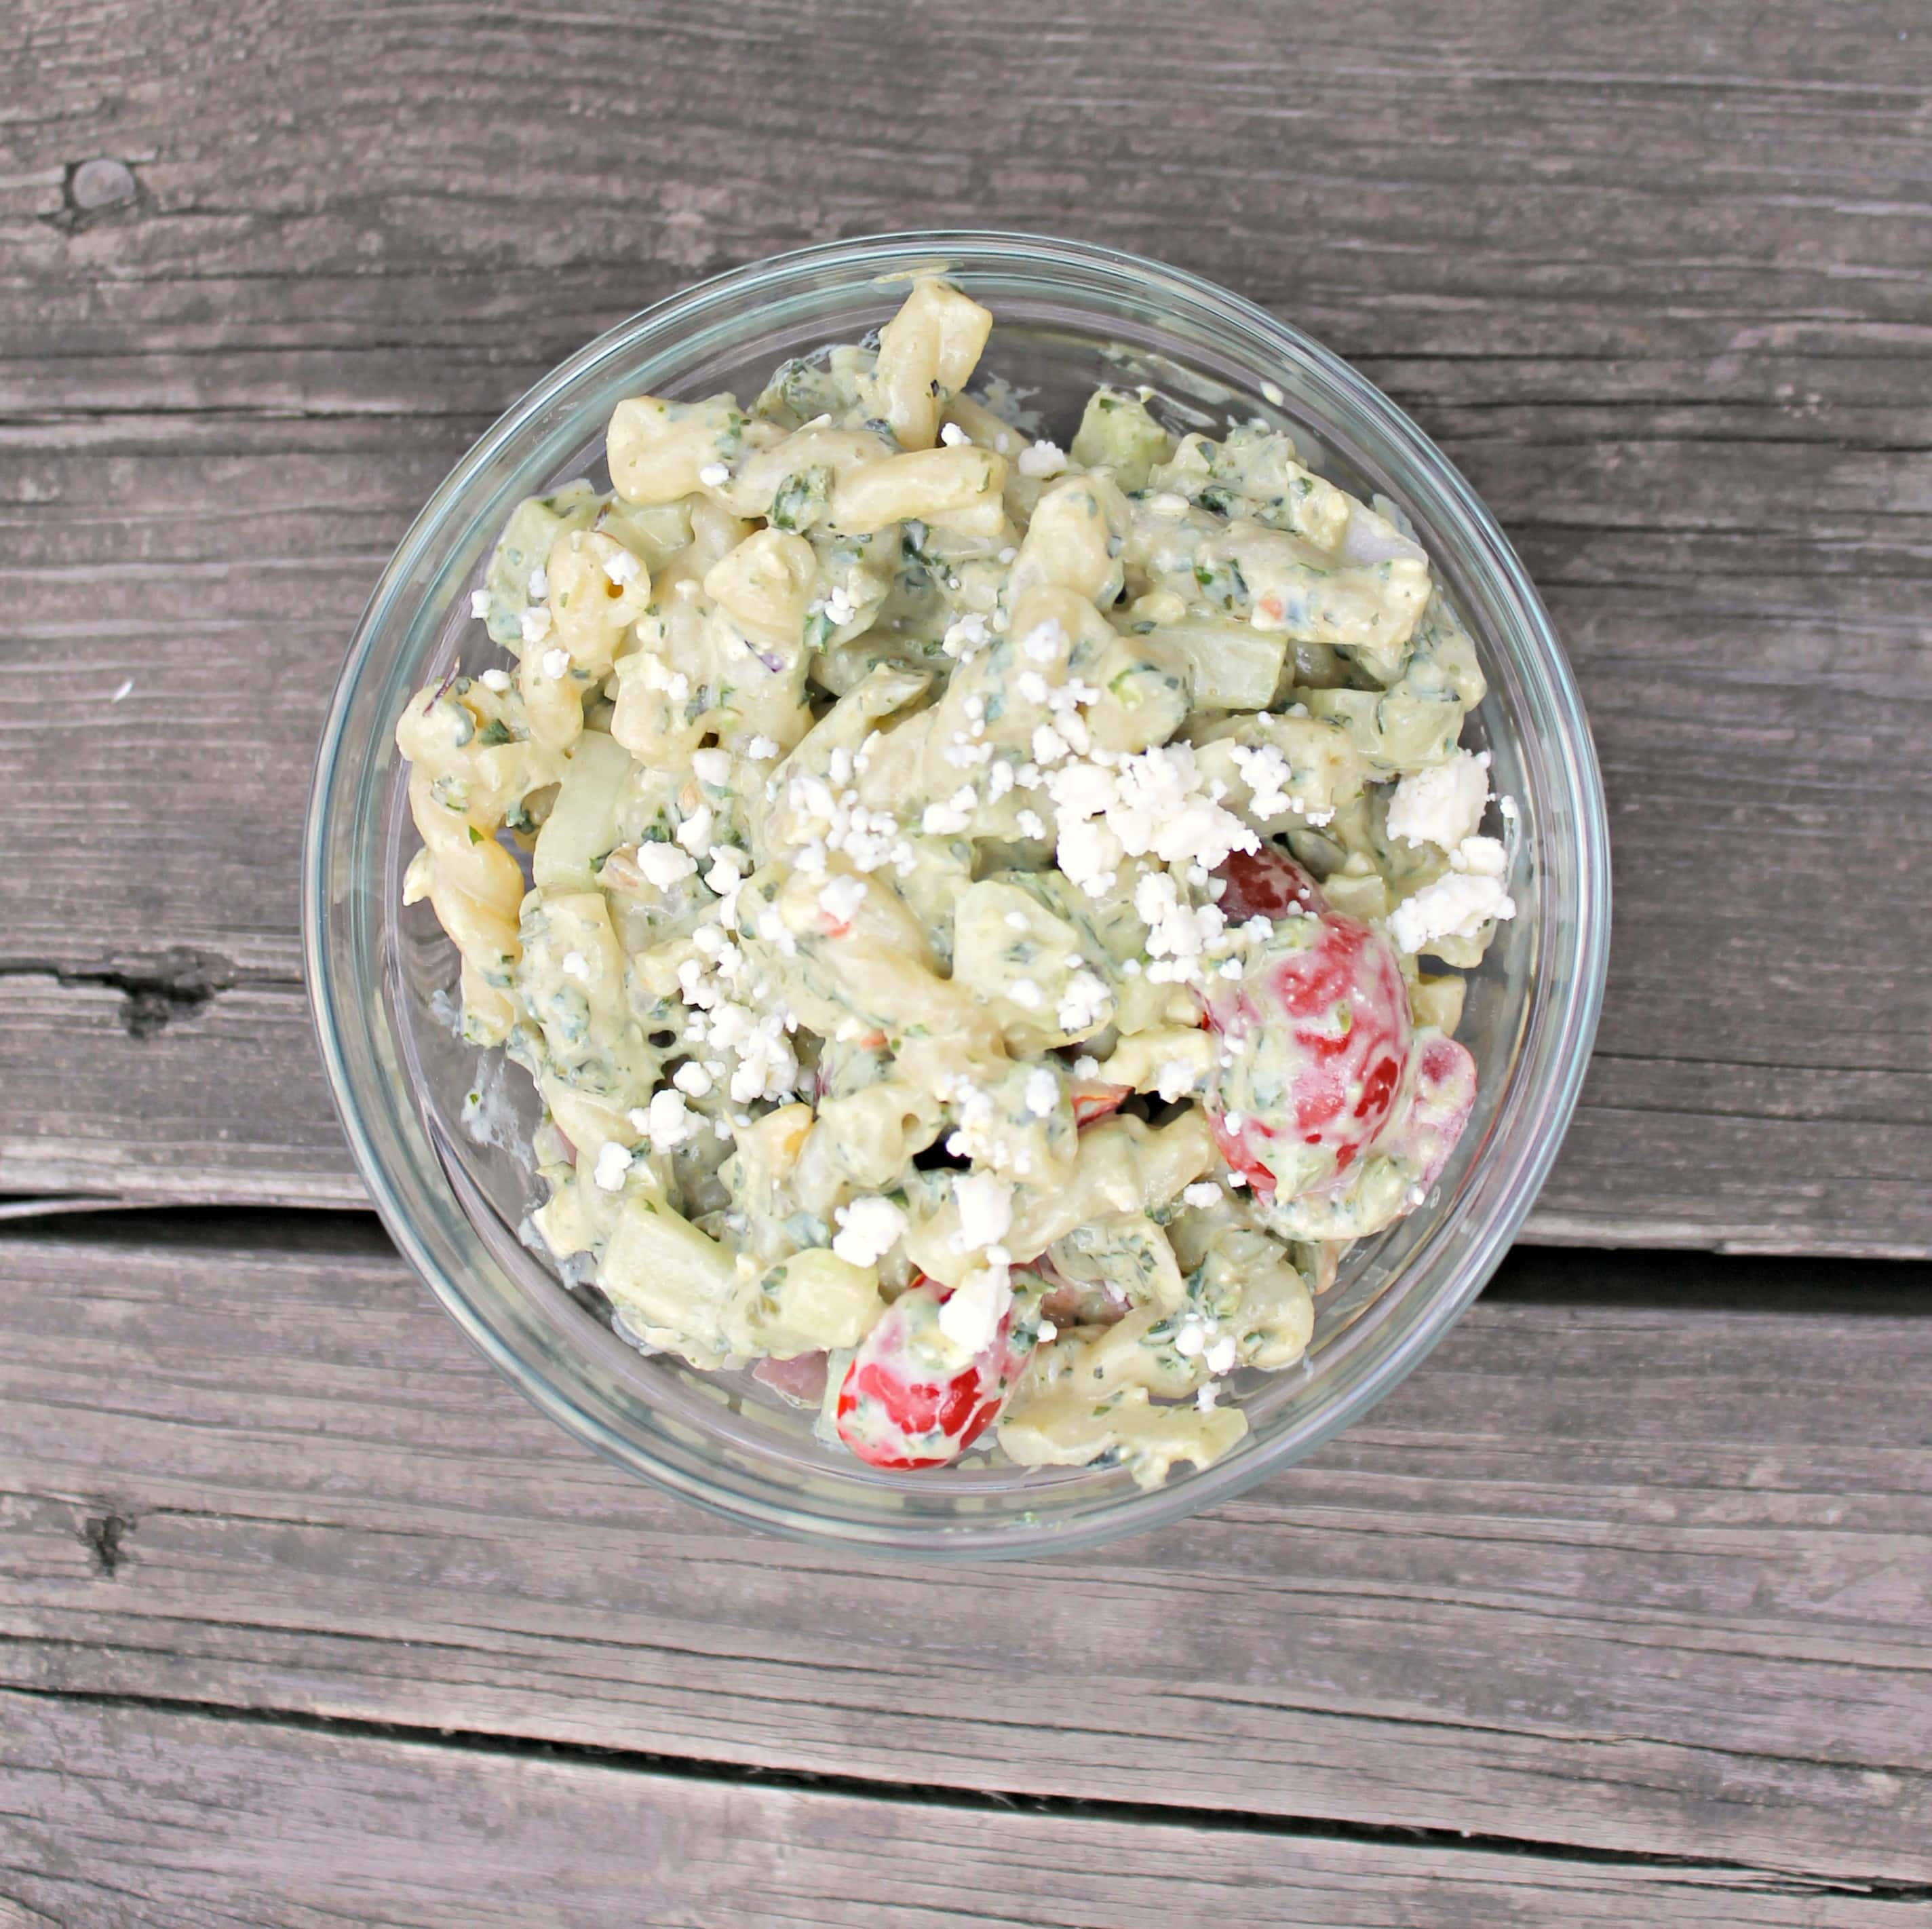
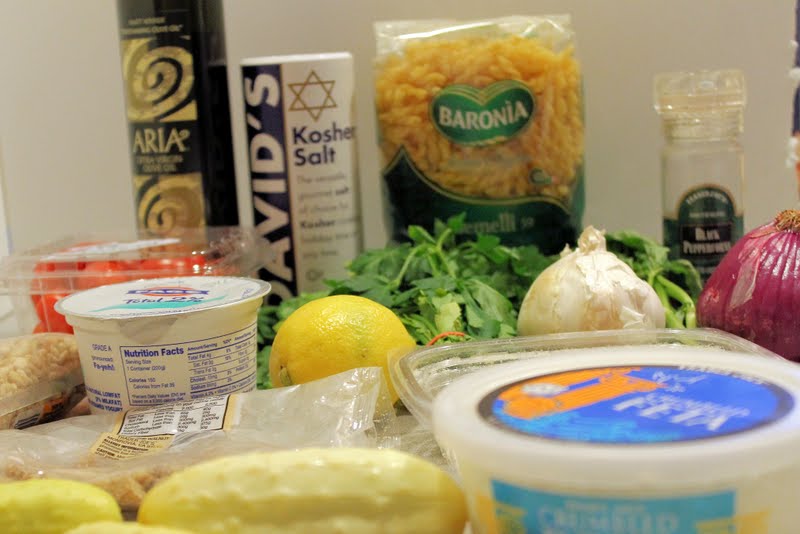
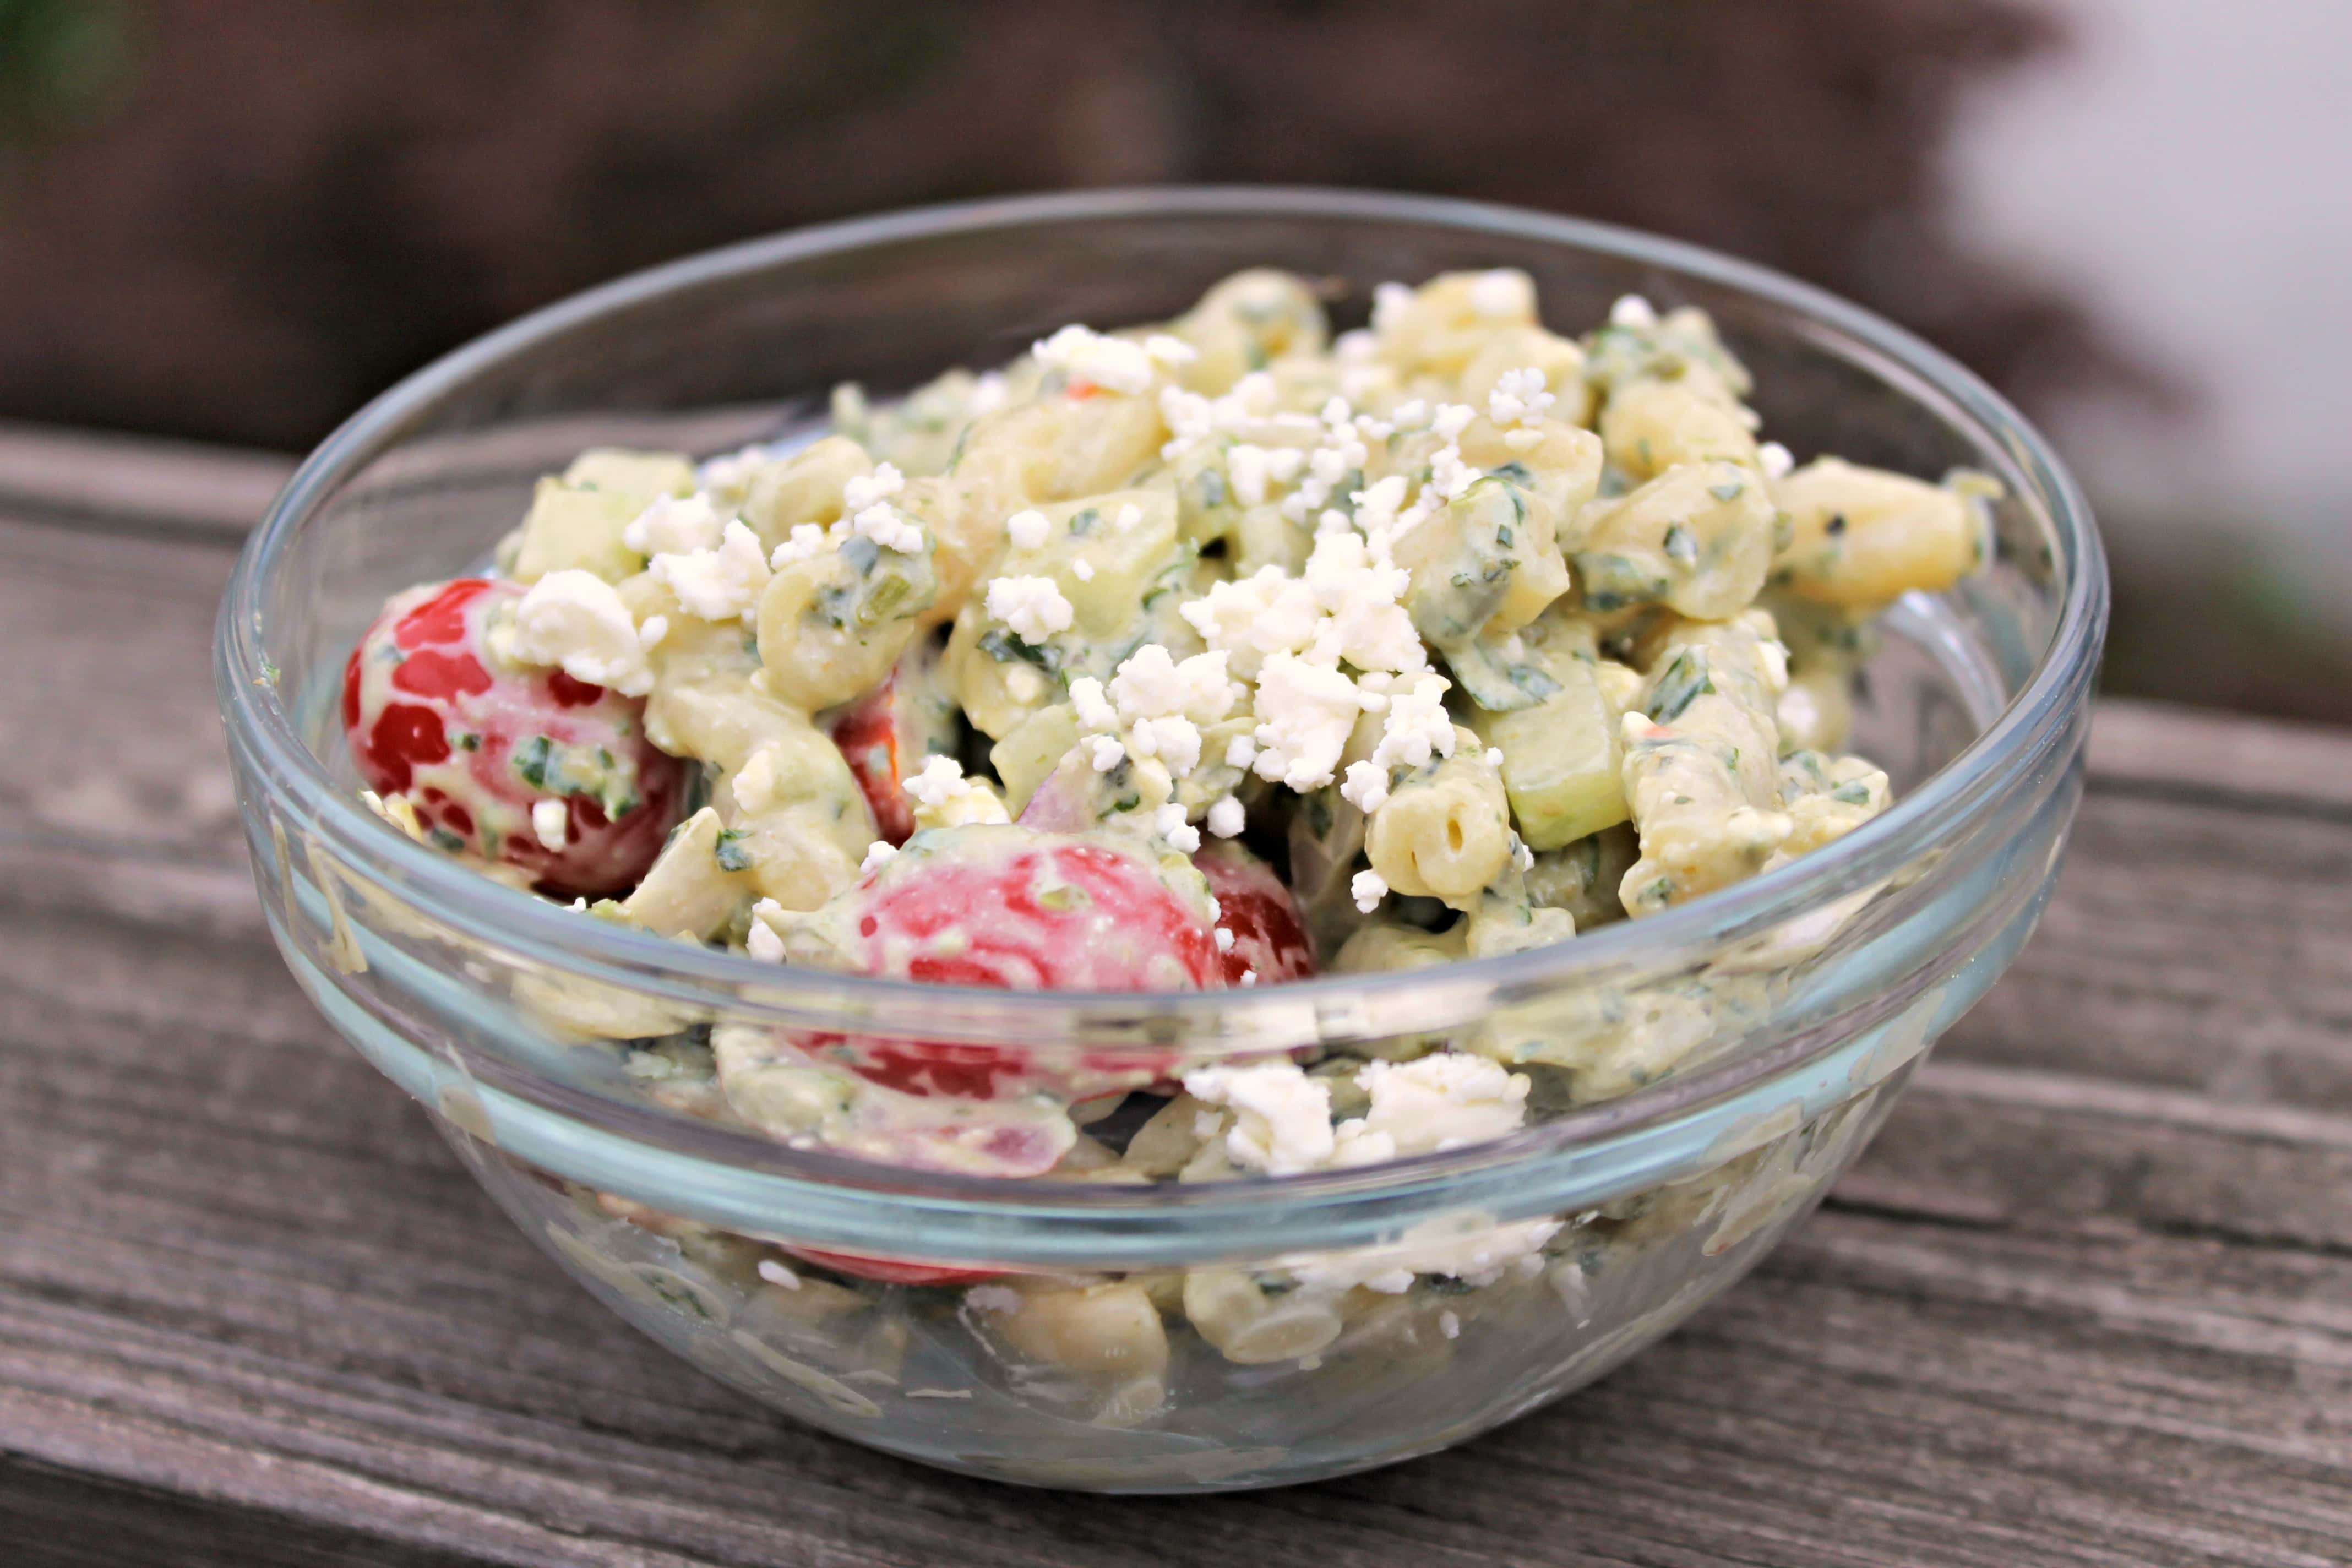
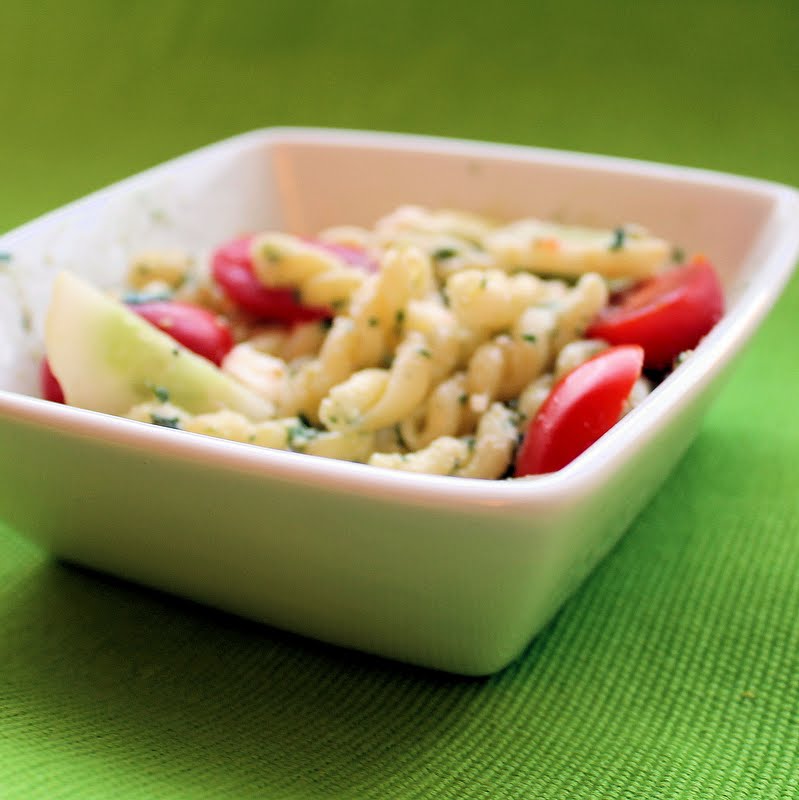
I am in a pasta salad making mood, so I decided to make one more batch for this weekend. I already made one pasta salad for this weekend, but I have a bunch of these ingredients on hand from other recipes and I don’t want them to go bad over the long weekend. I used a recipe from My Recipes as a base and substituted ingredients I already had, and ended up with this Pesto Pasta Salad!
Ingredients for the pesto:
1 or 2 bunches of packed fresh basil
1 bunch of packed fresh parsley
4 garlic cloves, minced
Juice and zest from 1 lemon
1/2 teaspoon salt
1/4 teaspoon pepper
1/3 cup walnuts (or toasted pine nuts)
1/2 cup olive oil
1/2 cup grated Parmesan cheese
Ingredients for the salad:
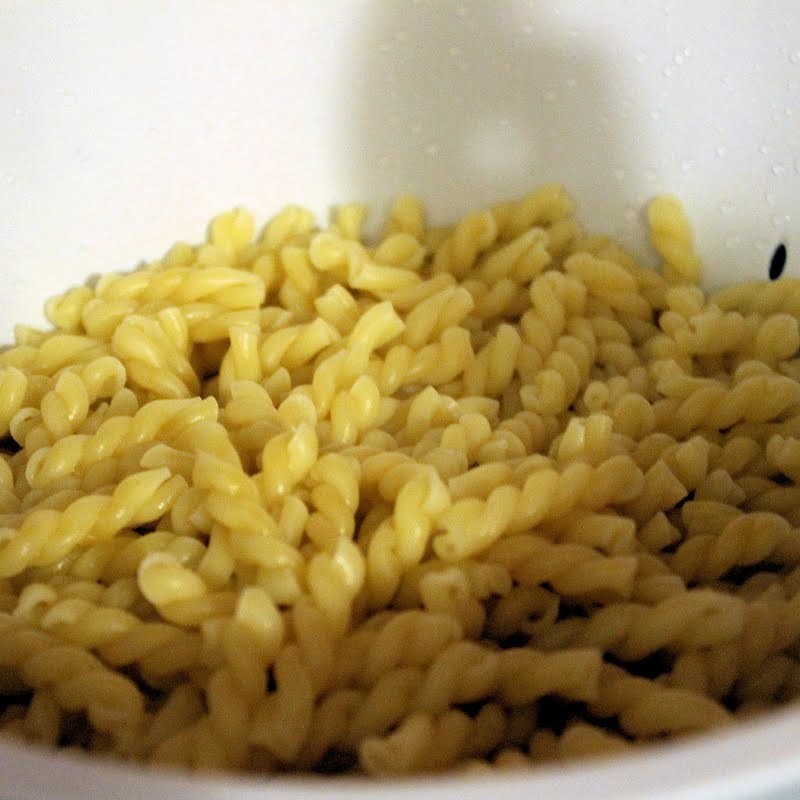
1 box gemelli or other short pasta
1 small container plain 2 percent Greek yogurt
1 pint cherry or grape tomatoes, halved
3 small cucumbers, sliced
1 red onion, chopped
1/2 cup feta cheese
Cook the pasta according to the “al dente” directions on the package. Drain and run under cold water. Set aside.
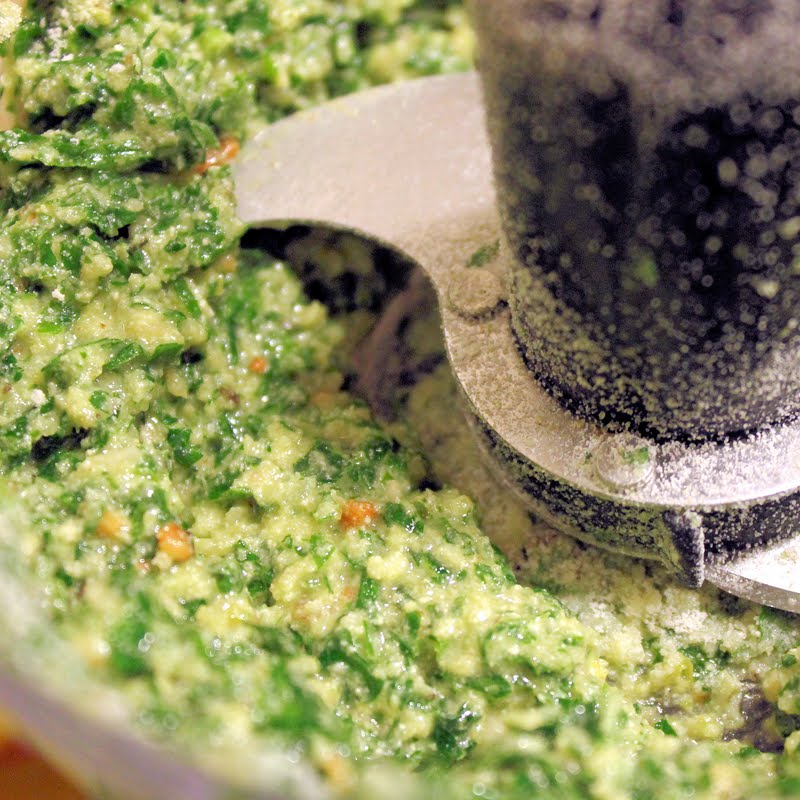
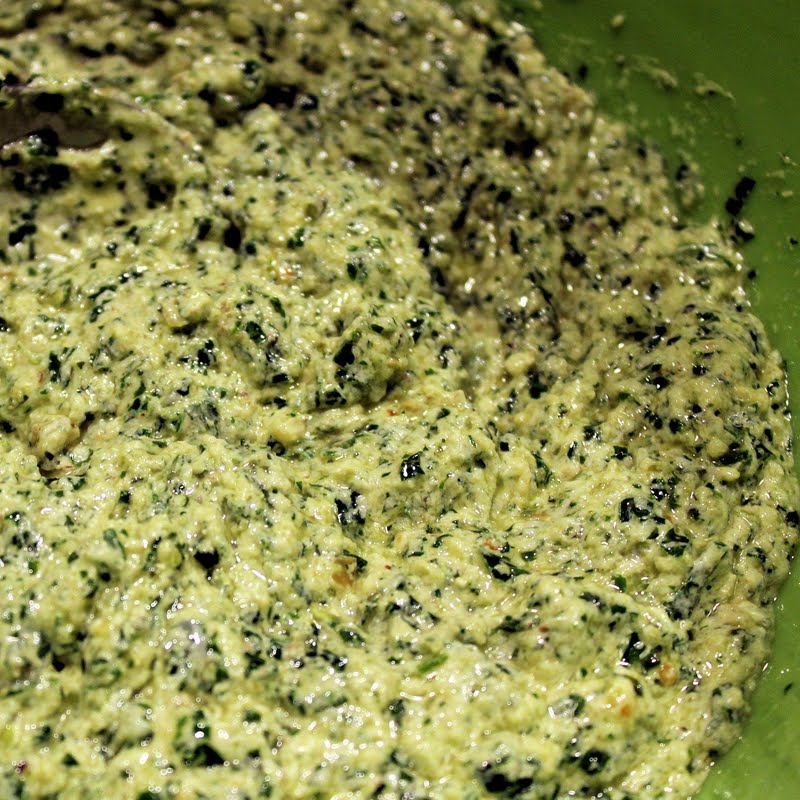
To make the pesto, combine the basil, parsley, garlic, lemon juice, lemon zest, salt, pepper and walnuts in a food processor. (I ended up being just short of 1/3 cup walnuts, so I also added in a few toasted pine nuts.) Blend until smooth. Pour in olive oil and blend until there is a thick paste. Add the Parmesan and combine until blended. Add more salt and pepper, to taste.
Prepare all of your vegetables. After chopping the red onion, run it under cold water to remove some of the bite. Slice your cucumbers and halve your tomatoes.
Combine the pesto and Greek yogurt in a large bowl.
Add the pasta and vegetables and toss to coat.
Because I am making this for the weekend, I only made a tiny batch fully mixed so I could taste it. The pesto mixture is so so creamy that you honestly might not even need the feta. The tomatoes and red onions add a wonderful contrast to the pesto and the cucumbers add a nice crunch to the salad. I will try to take some photos this weekend of the fully assembled salad, but if it is anything close to what I just sampled, I think my friends will be happy.
Cook the pasta according to the “al dente” directions on the package. Drain and run under cold water. Set aside.
To make the pesto, combine the basil, parsley, garlic, lemon juice, lemon zest, salt, pepper and walnuts in a food processor. (I ended up being just short of 1/3 cup walnuts, so I also added in a few toasted pine nuts.) Blend until smooth. Pour in olive oil and blend until there is a thick paste. Add the Parmesan and combine until blended. Add more salt and pepper, to taste.
Prepare all of your vegetables. After chopping the red onion, run it under cold water to remove some of the bite. Slice your cucumbers and halve your tomatoes.
Combine the pesto and Greek yogurt in a large bowl.
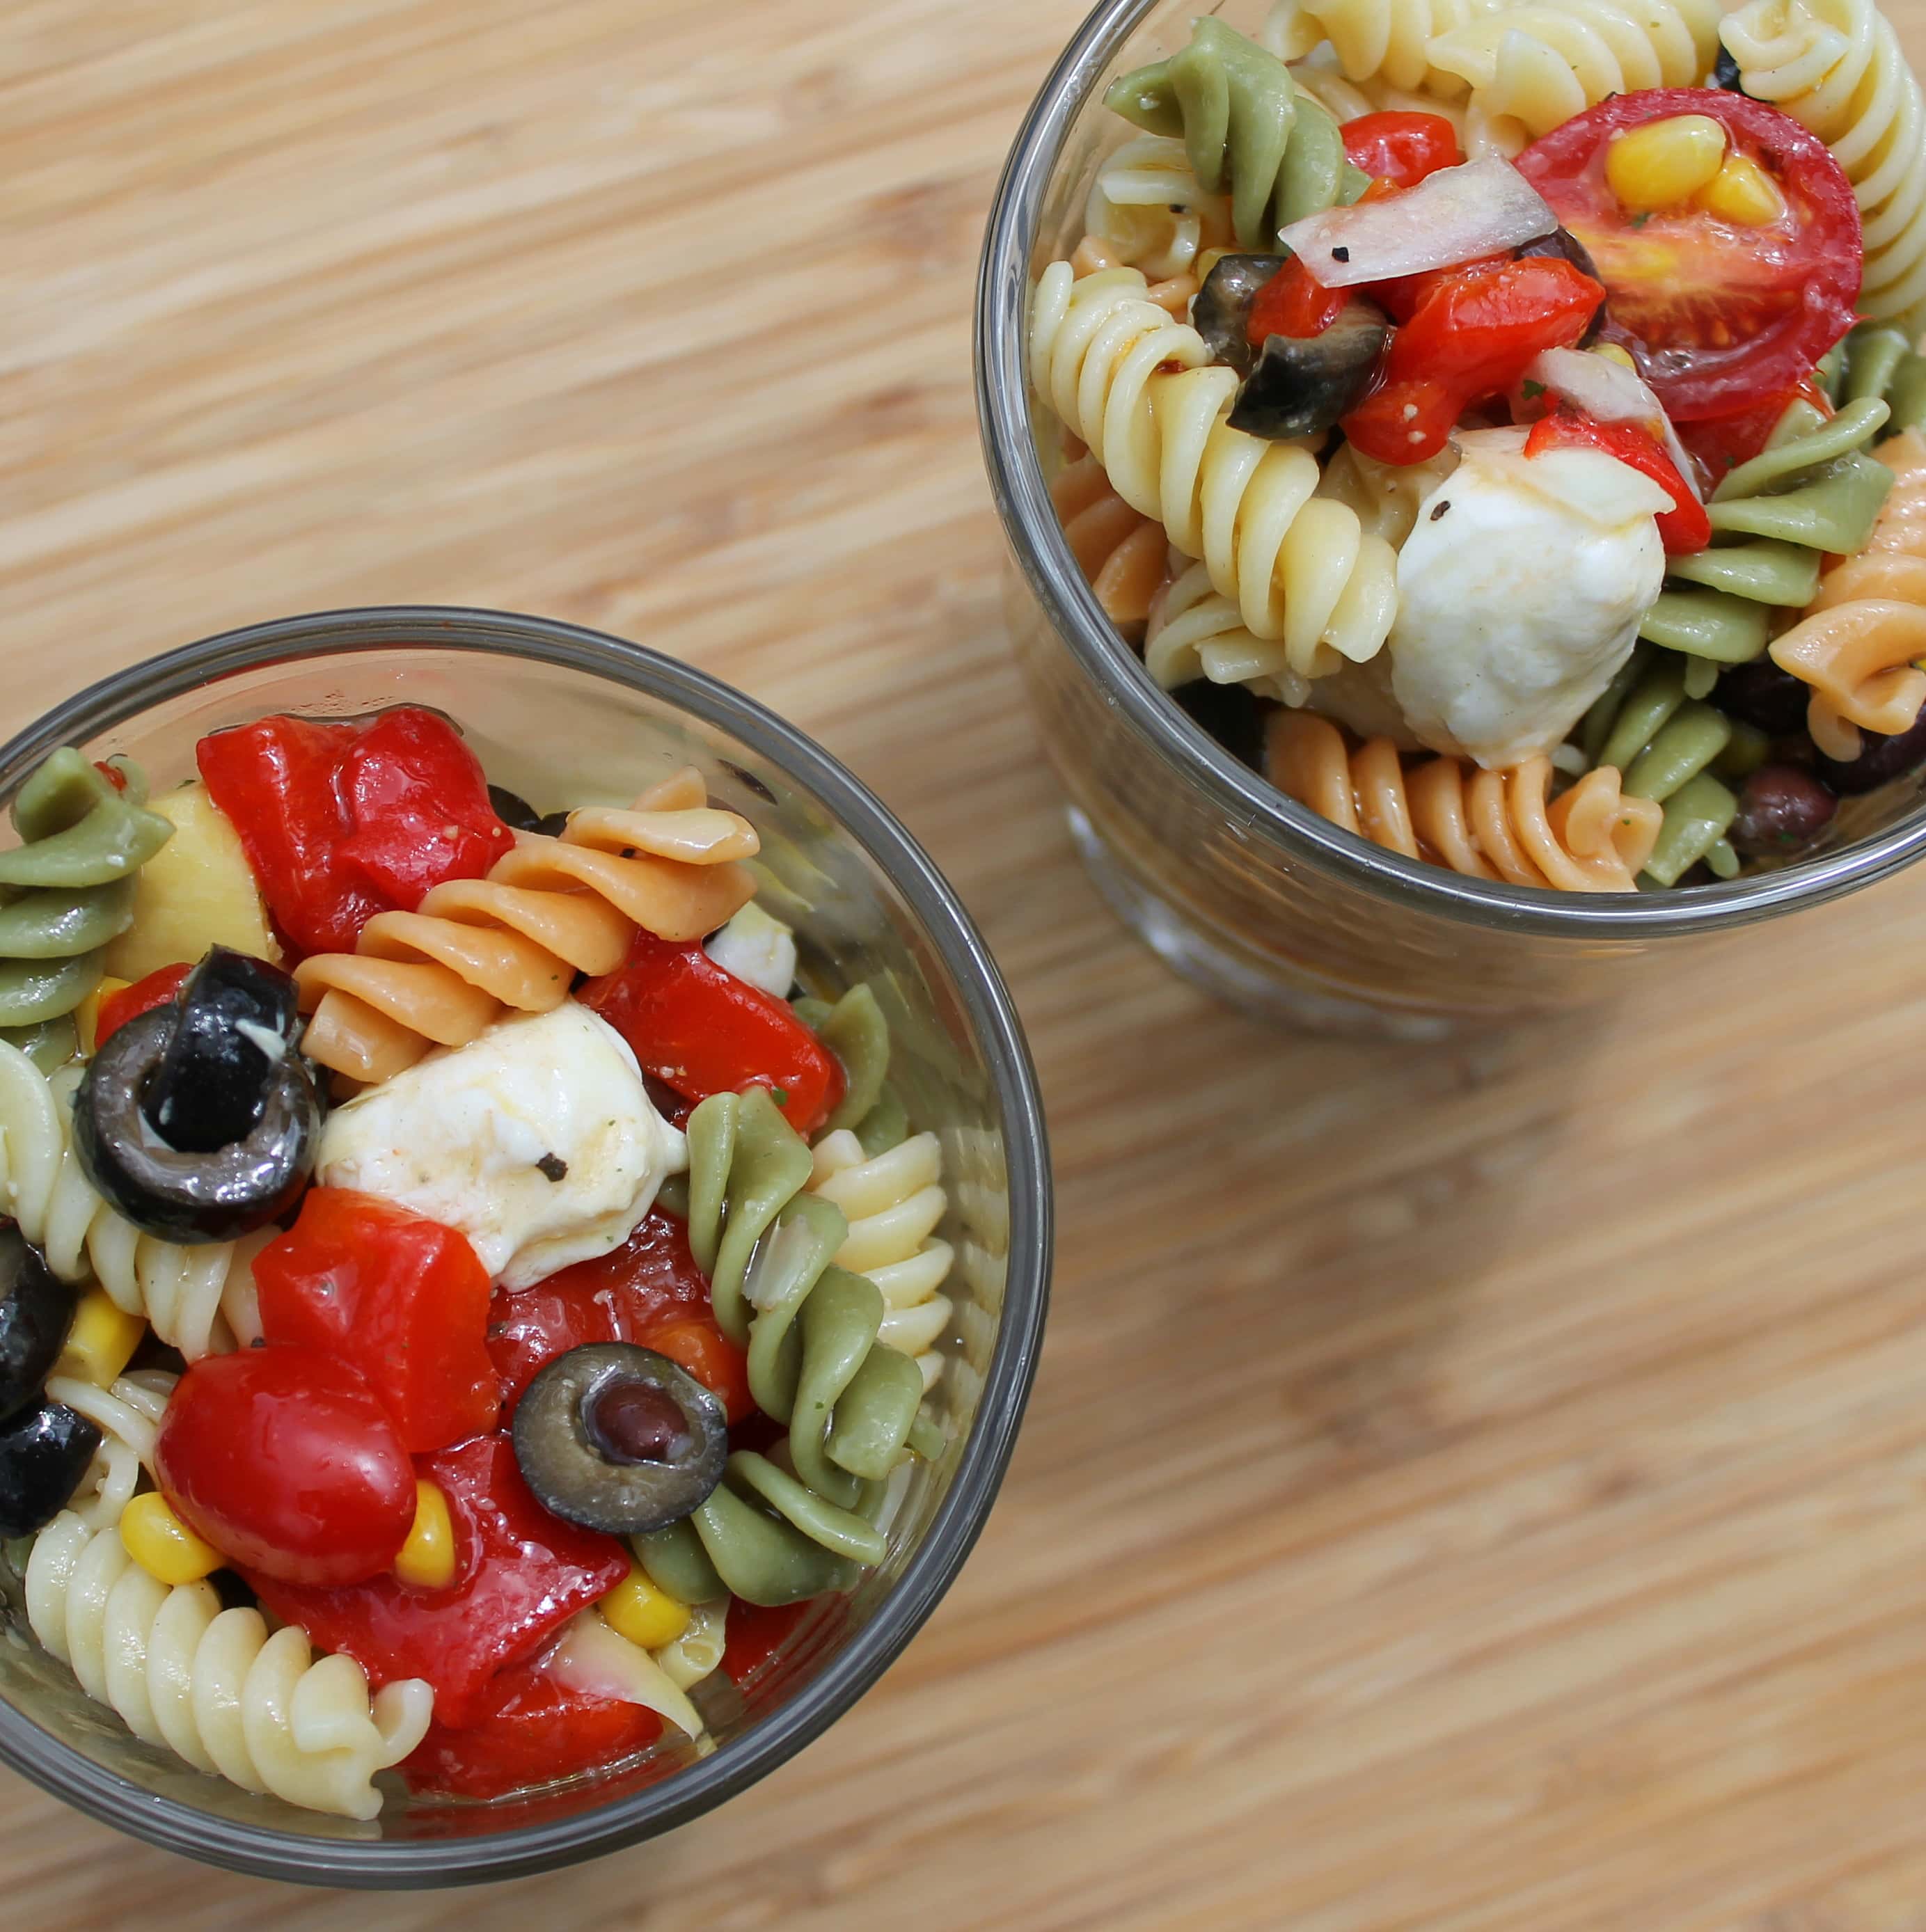
It’s almost July 4th weekend, so I am preparing a bunch of dishes for me to trek down to the beach.
I tend to make food that can marinate for a day or two so that I have time to make it without rushing around right before we leave. This time around, I decided to make a pasta salad based off my mom’s version.
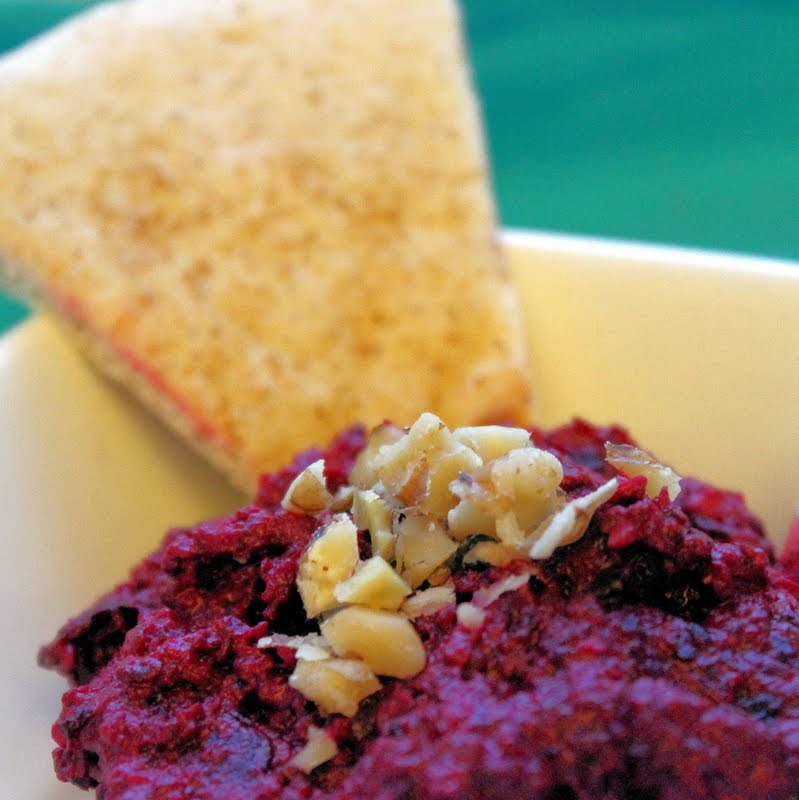
There is a restaurant in Philadelphia called Zahav that serves modern Israeli food. I went there for my birthday last December, and am still thinking about their tasty hummus and absolutely fantastic salatim, a selection of 8 little salads that you scoop up with their house baked laffa. All of the salads were really delicious, but the pureed beet salad was by far the happiest surprise offered. So when my CSA share came with beets this time around, I knew exactly what I was going to make… or try to make at least. I basically made a hummus, substituting in roasted beets for the chickpeas. My version is probably not all that close, to the one served as Zahav but I’m still happy with the results.
Ingredients:
1 bunch of beets (mine came with 5)
2 tablespoons tahini
The juice and zest of 2 lemons
2 garlic cloves, minced
1 teaspoon cumin
1 tablespoon olive oil
Salt and pepper, to taste
Walnuts, for topping
To roast the beets, preheat your oven to 450 degrees. Remove the tops, wash to remove all dirt, and arrange on a baking sheet. Drizzle with the olive oil and add a generous amount of salt.
Cook for 40 minutes or until you can easily stick them with a fork. My beets were on the smaller side, so you may need to up the time to 1 hour.
Allow to cool completely. Remove the skin of the beets by rubbing them with a paper towel. This is surprisingly easy, I promise.
Roughly chop the beets.
Add the beets, tahini, lemon juice, lemon zest, cumin, garlic, salt and pepper to a food processor.
Process until smooth.
Transfer to a serving dish and top with chopped walnuts. Serve with cucumbers, pita, broccoli, cauliflower, or anything else you’d like to dip in this lovely little dish.
If you’d prefer, you can add in a can of rinsed chickpeas to make a beet hummus. Another alternative would be to add some Green yogurt, to taste, to make a creamier version of this dish. Enjoy!
I had some left over goat cheese from my Orecchiette with Swiss Chard, Red Peppers and Goat Cheese dish. When I was looking for recipes, I came across this one for Shrimp Tomato Basil Linguine with Warm Goat Cheese Rounds from Cooking Light. I had no clue how seafood and goat cheese would be together, but was willing to find out!
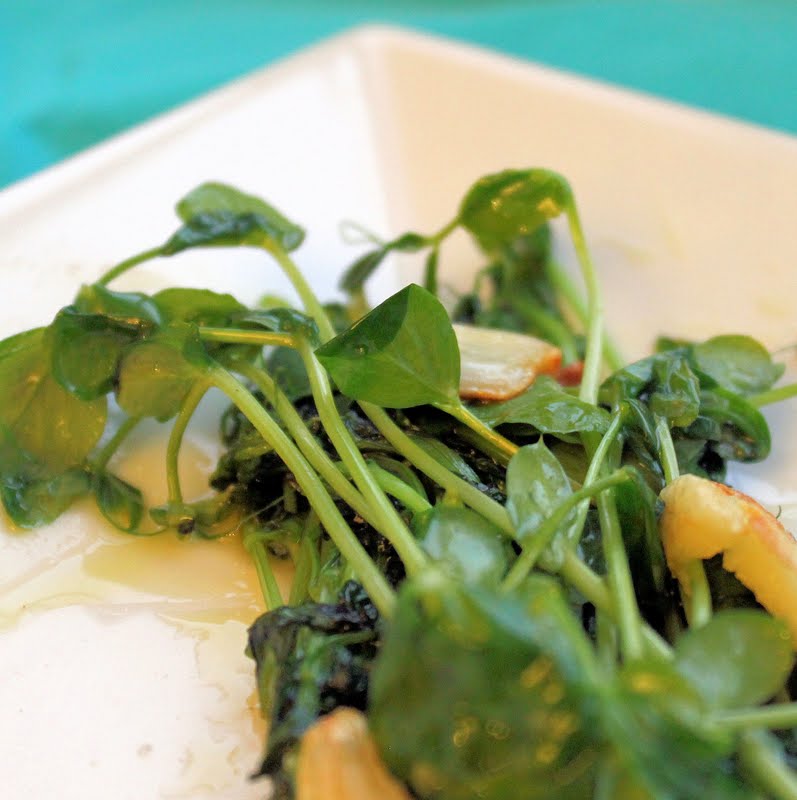
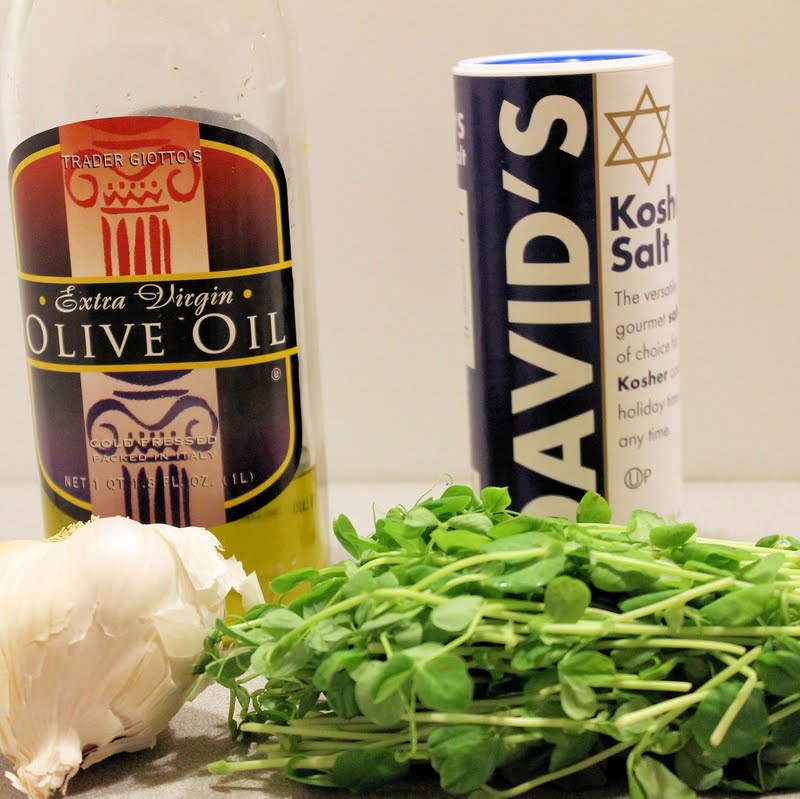
Pea tendrils (or pea shoots) are the leaves from a snow pea plant. They have a bit of a spinach-pea taste, delicate and very tasty. Before receiving them in my CSA share, I just thought they were used in a stir fry or as a topping. But these little guys are really delicious in a simple saute.
Ingredients:
Pea tendrils
1 teaspoon olive oil
3 garlic cloves, smashed and cut in half
Salt, to taste
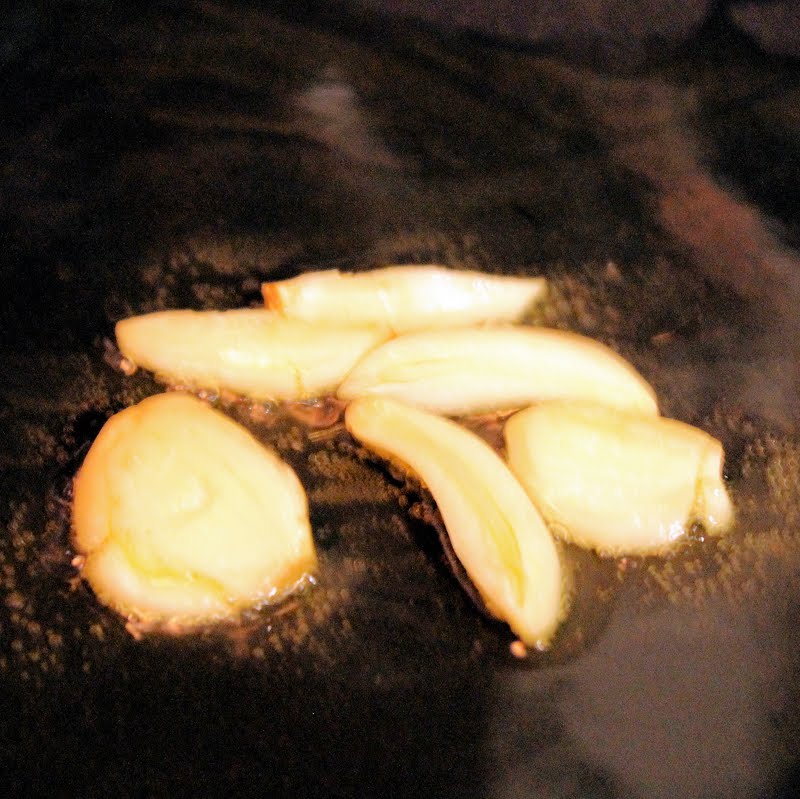
Heat the olive oil in a saute pan over medium-low heat. Add the garlic cloves and cook for 2 minutes, until sizzling but not browned.
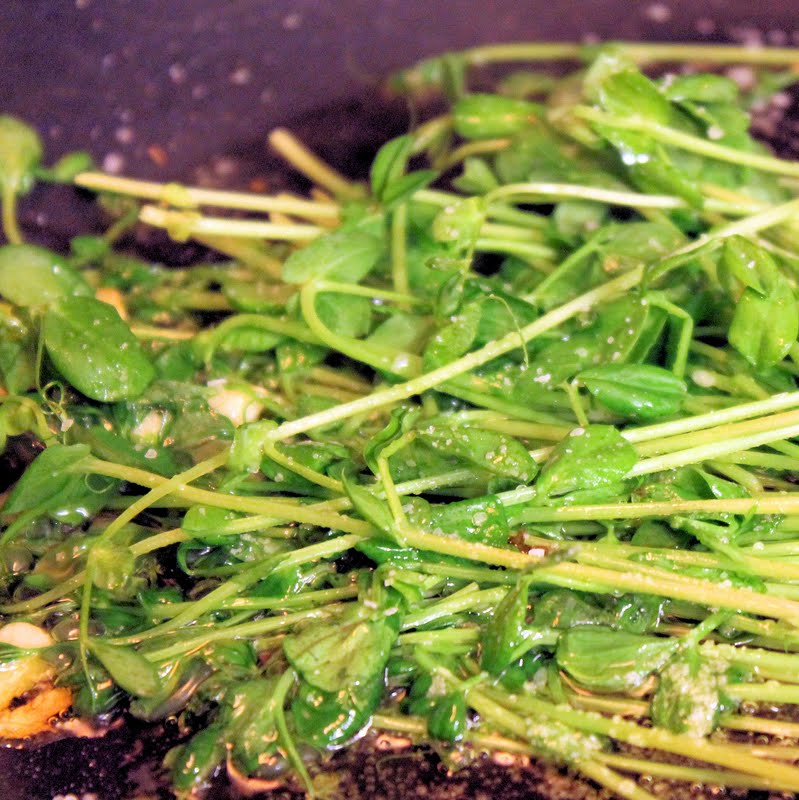
You can either remove the garlic, or keep it in there to add more garlicky flavor. Add the pea tendrils and salt to taste.
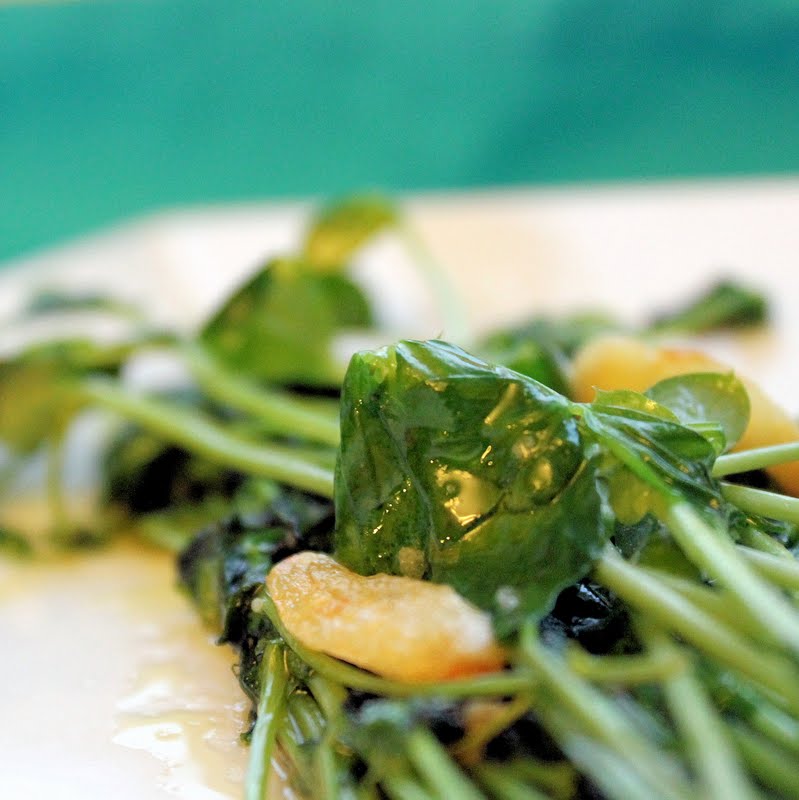
Saute for 1-2 minutes until slightly wilted but still maintaining its shape. That’s it! So simple, so yummy.
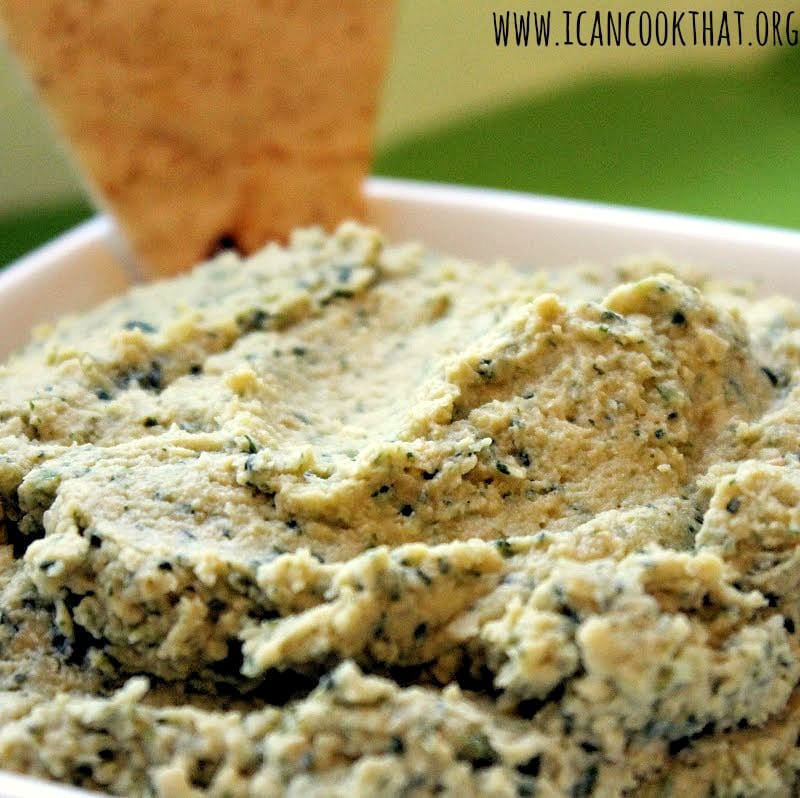
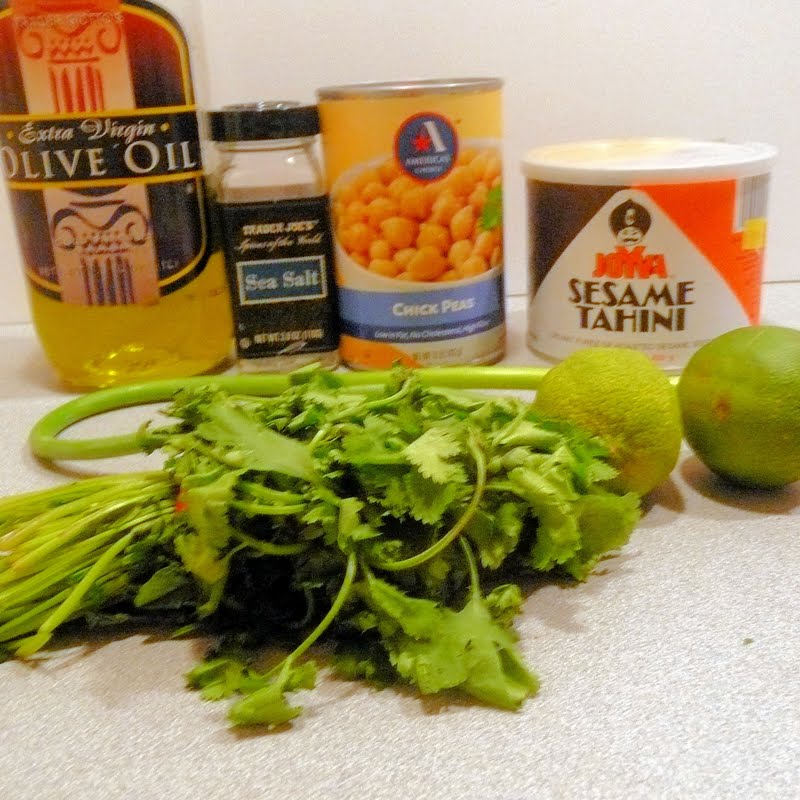
I can never have enough hummus, it is one of my favorite snacks (although I tend to eat so much of it, it’s not really a snack!) I’ve had hummus on the brain for a while now. Be Well Philly must have read my mind, because they posted this great Cilantro Lime hummus recipe that I just had to try. As a plus, cilantro came in my CSA share this week!