I thought it might be helpful to make a Thanksgiving Recipe Round Up by adding all of my favorite Thanksgiving-friendly recipes to one post, so they are easier to find. This time of year is busy enough, you shouldn’t have to search for all of these yummy options! Just click on a photo to go to the full post and recipe.
Main protein:
I have yet to roast an entire turkey myself, so these options are more for a smaller family Thanksgiving, or even in addition to the full turkey if you’re having a huge crowd!
Herb Infused Turkey Breast
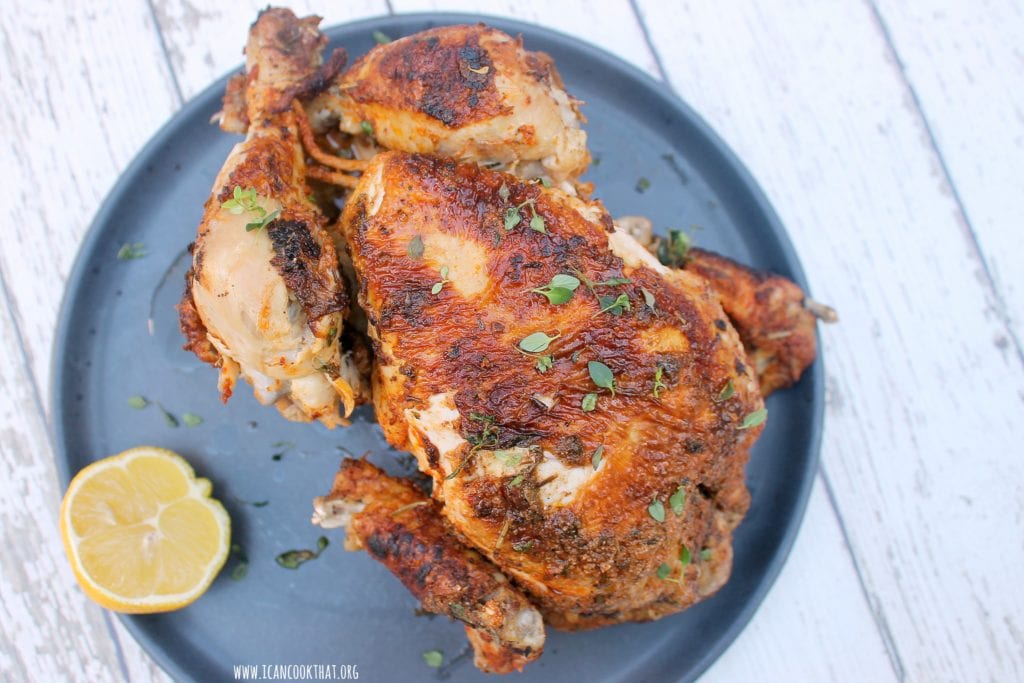
Pressure Cooker Whole Chicken
Sides:
Let’s be honest. Thanksgiving is ALL about the sides! Here are some of my favorites. Some traditional, some not so much.
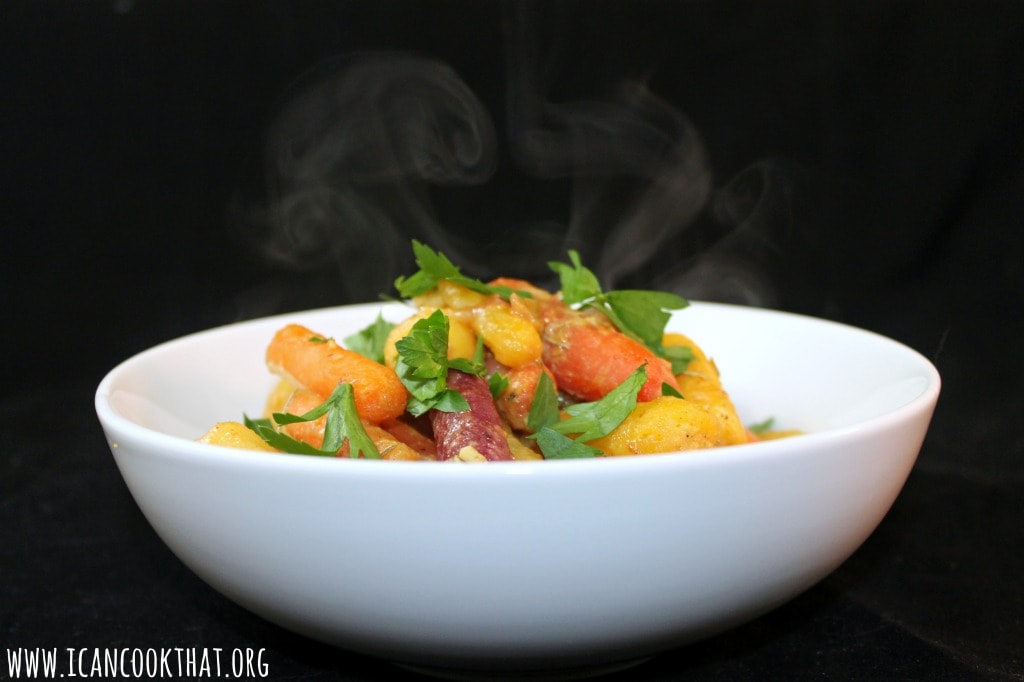
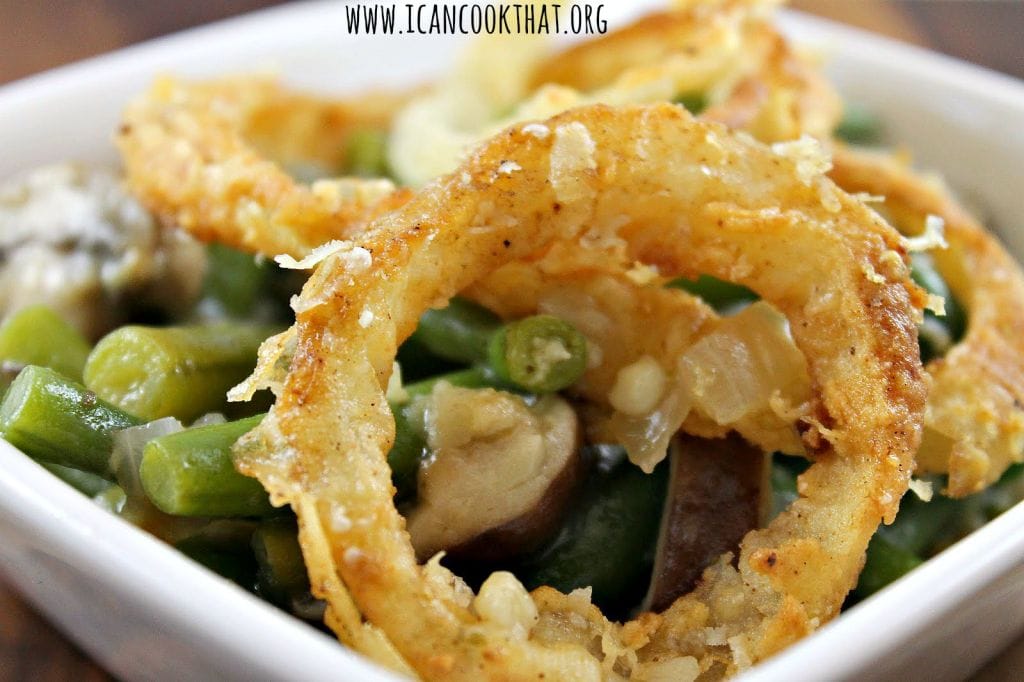
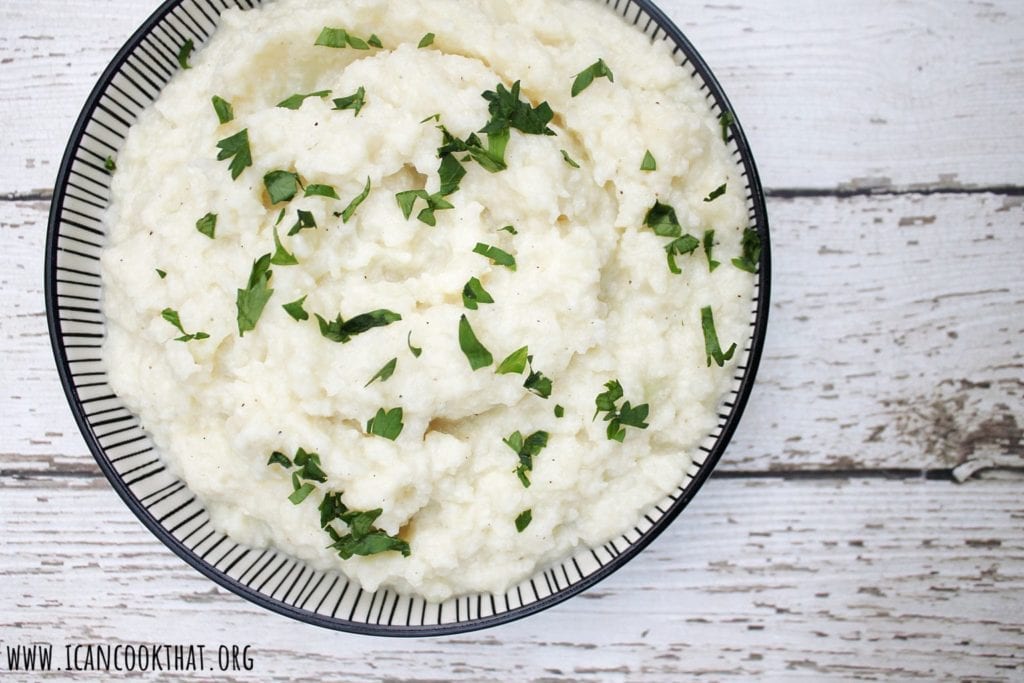
Slow Cooker Garlic Red PotatoesCreamy Mashed PotatoesMashed Potatoes with Mushroom SaucePressure Cooker Mashed Sweet PotatoesCouscous with Dried Cranberries and Pine NutsApple-Sage Stuffing CupsCardamom Glazed CarrotsHoney Mustard Roasted Rainbow CarrotsBalsamic Honey Roasted CarrotsSlow Cooker Creamed CornGreen Bean Casserole with Mushrooms and Fried OnionsSlow Cooker Cranberry SauceCherry-Port Cranberry SauceCranberry-Pomegranate SauceSteamed Spinach with Curry Butter
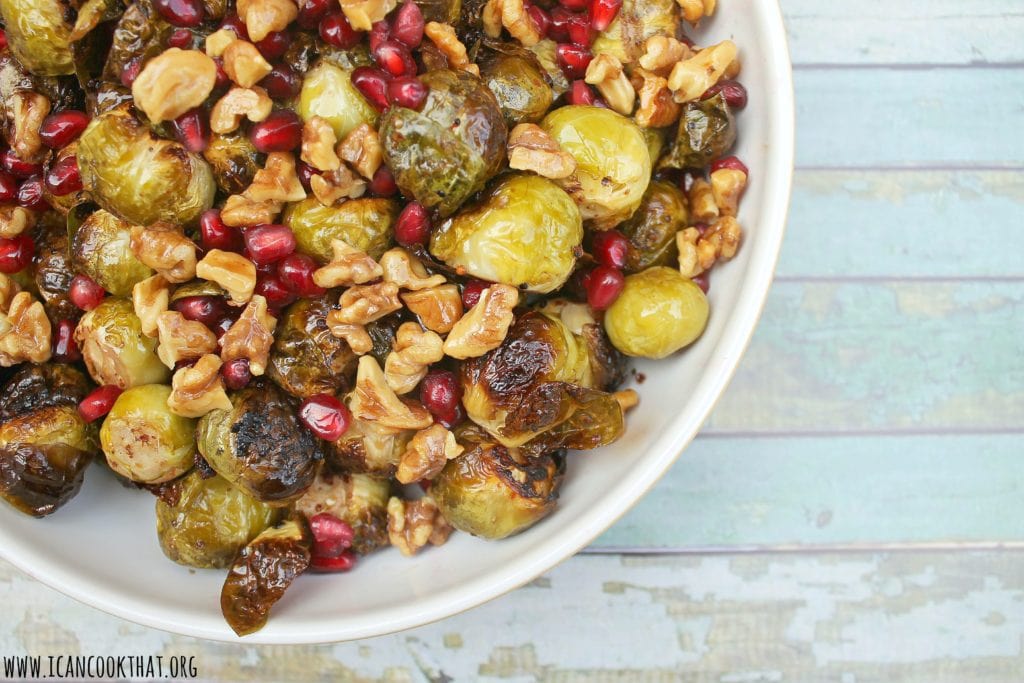
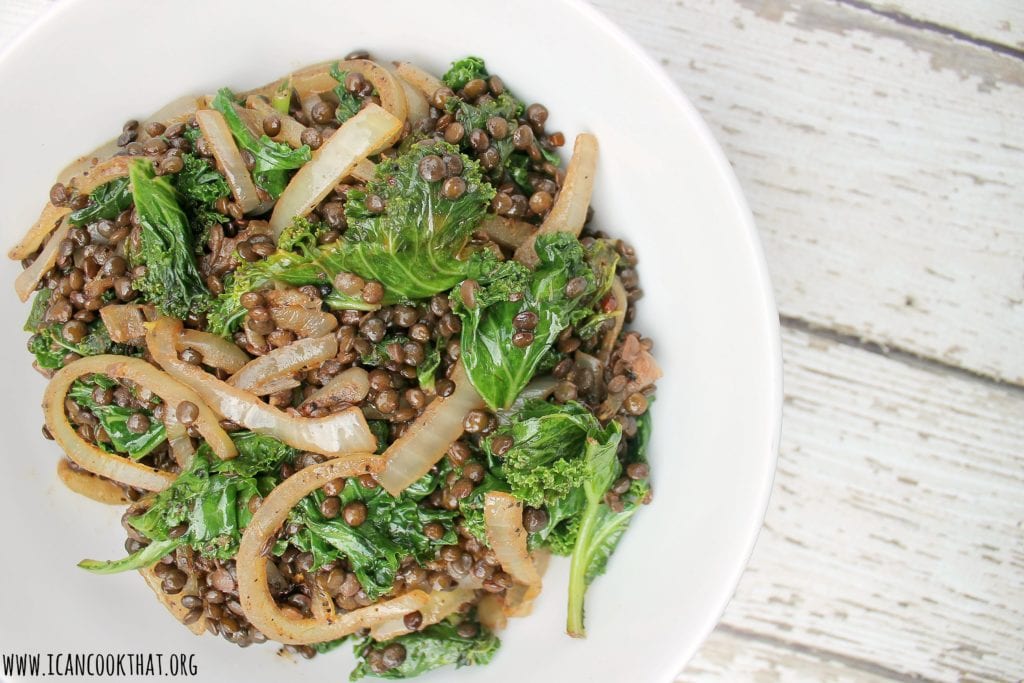
Cauliflower with Anchovy BreadcrumbsPressure Cooker Cauliflower PureeLemon BroccoliPomegranate Mustard Roasted Brussels SproutsBrowned Butter and Lemon Brussels SproutsWinter Risotto with Farro and Arborio RiceMoroccan Black Lentils with Kale and OnionsFarro with Vidalia Onion and Asparagus
Desserts:
I hope you saved room!
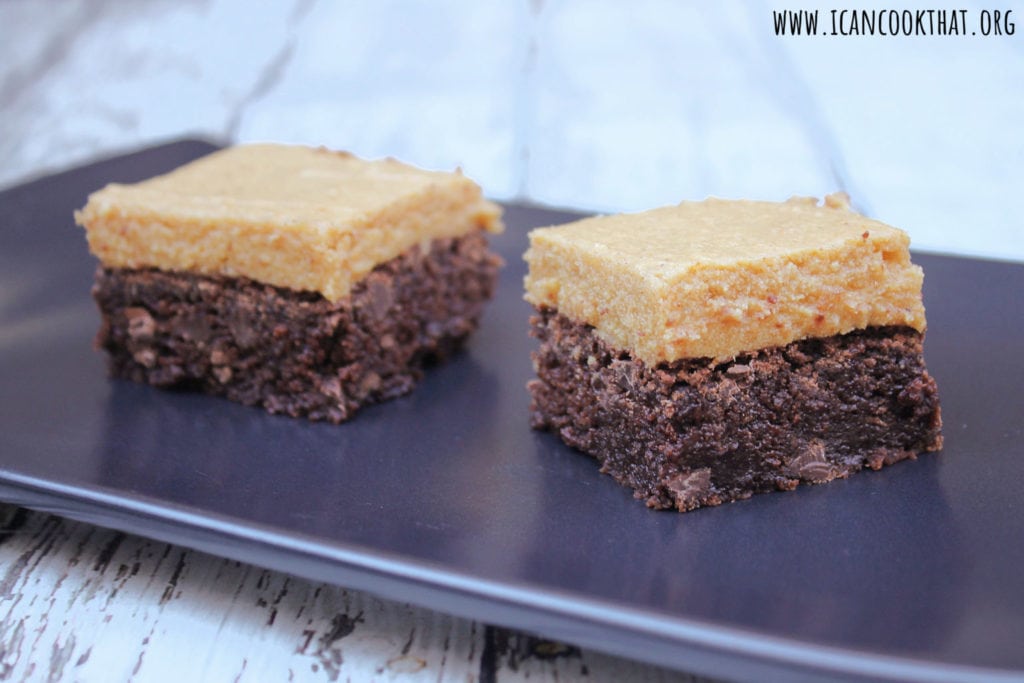
Nutella-Swirled Pumpkin Cheesecake Bars
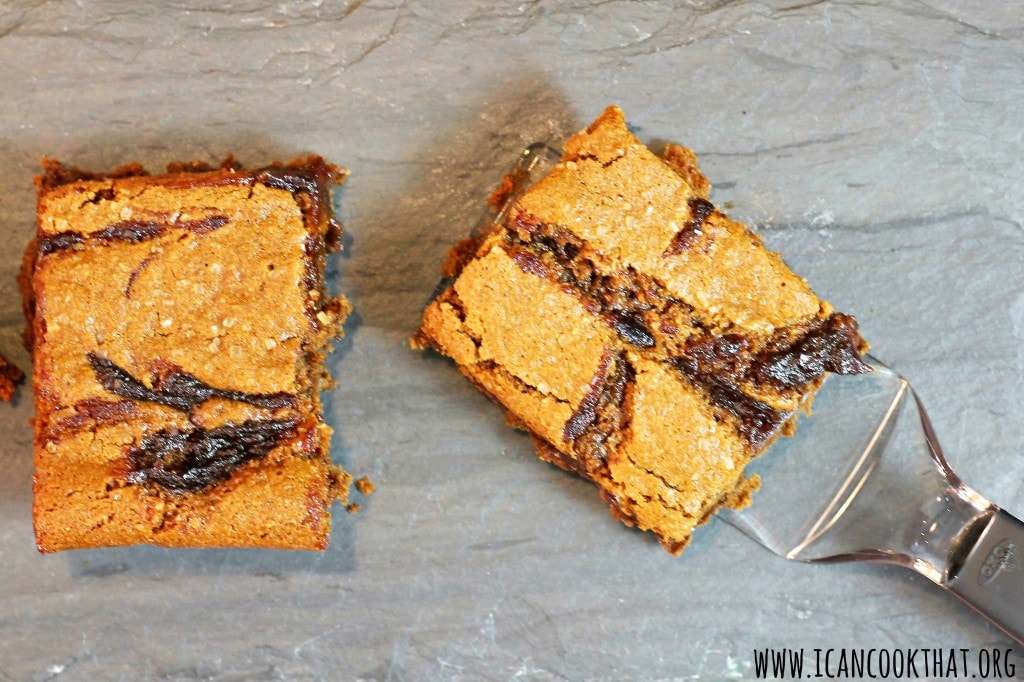
Pumpkin Cake BitesMini Chocolate Swirled Pumpkin PiesChocolate Pumpkin Cake with Cinnamon Cream Cheese FrostingChocolate Hazelnut CakeFlourless Chocolate Cake with Dark Chocolate GanacheVery Berry PieApple Butter Swirled Gingerbread BarsCaramel Apple PieSpiced Apple Two Bite Tarts
What are some of your favorite Thanksgiving recipes?
Note: I was sent a copy of AMERICAN COOKIE: The Snaps, Drops, Jumbles, Tea Cakes, Bars & Brownies That We Have Loved for Generations for review. Opinions are mine alone.
Every cookie recipe has a back story, from the chocolate chip cookie to thumbprint cookies. What’s truly interesting about these back stories is how they align with the shaping of American baking through the generations. I love cookbooks that provide a back story to the recipes, like AMERICAN COOKIE: The Snaps, Drops, Jumbles, Tea Cakes, Bars & Brownies That We Have Loved for Generations by Anne Bryn. Did you know that the first snickerdoodle cookie recipes were actually bars? Or that the first Girl Scout Cookies were baked at home to help raise money to send girls to camp?
Source: Penguin Random House
I assume I’m not alone in associating different recipes with different parts of my own life. I can’t look at a Peanut Butter Cookie without thinking of my family’s recipe, passed down from my great grandmother, or snack on a Neiman Marcus “$250” cookies without recalling many December weekends spent making them with my mom as a child.
I was first introduced to rugelach cookies — a cookie made by rolling a triangle of dough around a sweet filling — by my mother-in-law. She makes them every Christmas and has since my husband was little. So when I saw a recipe for Apricot and Raisin Rugelach in AMERICANCOOKIE, I knew I had to try them as a nod to my mother-in-law’s fantastic baking every December. This recipe differs from my mother-in-law’s version but the general idea is still there.
Rugelach cookies were first brought to America from Austrian-Hungarian immigrants, and has over time been adapted and modernized by Jewish-American bakers. Apparently, the original dough was quite time consuming to make. Somewhere along the line, cream cheese was added to rugelach dough, resulting in an easy to work with and flaky dough. Rugelach cookies have become a staple in many American households, and typically include raisins, nuts, spices and jam or preserves as a filling.
Ingredients:
Dough:
1 cup (2 sticks) unsalted butter, at room temperature
8 oz cream cheese, at room temperature
1/2 teaspoon salt
2 cups all purpose flour, plus more for rolling the dough
As someone who does her best to cook a bunch of meals over the weekends to eat during the week, my slow cooker is one of my most used appliances. I recently tried to move it into a closet to declutter my kitchen, but I keep asking my husband to help me retrieve it so often that he’s questioning its removal from our counter top.
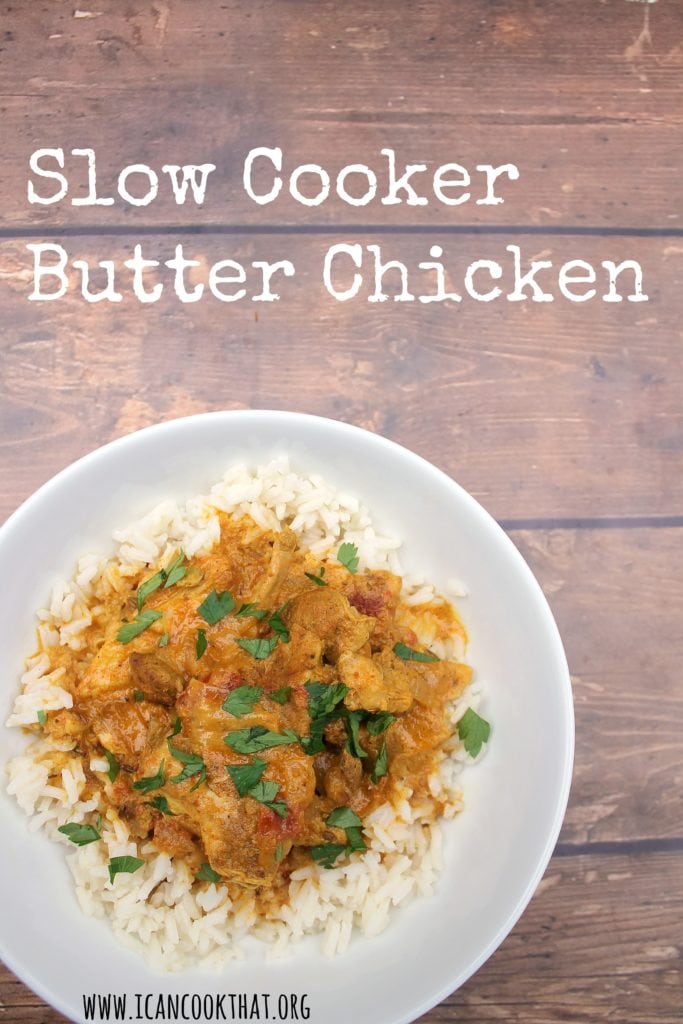
One of my favorite takeout meals is Butter Chicken, so I wanted to learn how to make a version at home.
I based this recipe off a recipe from NY Times food, but adjusted it for the slow cooker, because we all know how much I love a slow cooker recipe. My version makes about 8 servings.
Ingredients:
1 ½ cups Greek yogurt
Juice and zest of 1 lemon
1 ½ tablespoons ground turmeric
2 tablespoons garam masala
2 tablespoons ground cumin
3 lbs boneless skinless chicken thighs
4 tablespoons unsalted butter, divided
1 ½ tablespoons vegetable oil, divided
2 onions, chopped
4 garlic cloves, minced
3 tablespoons grated fresh ginger
1 tablespoon cumin seeds
1 cinnamon stick
4 whole tomatoes from a 14oz can of whole tomatoes (~1/2 of the can), chopped
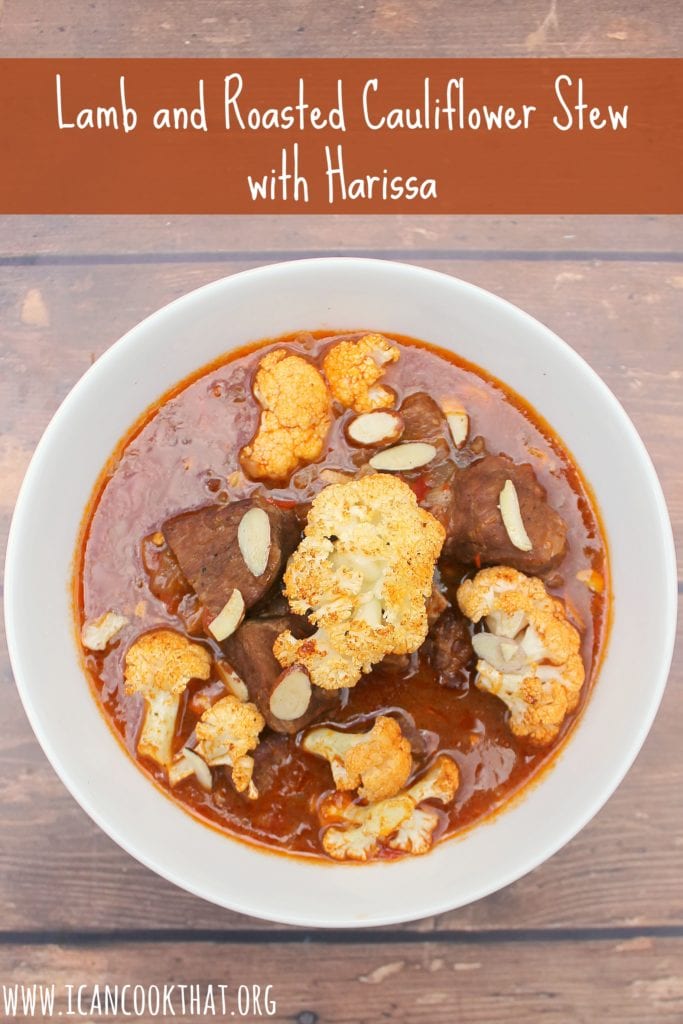
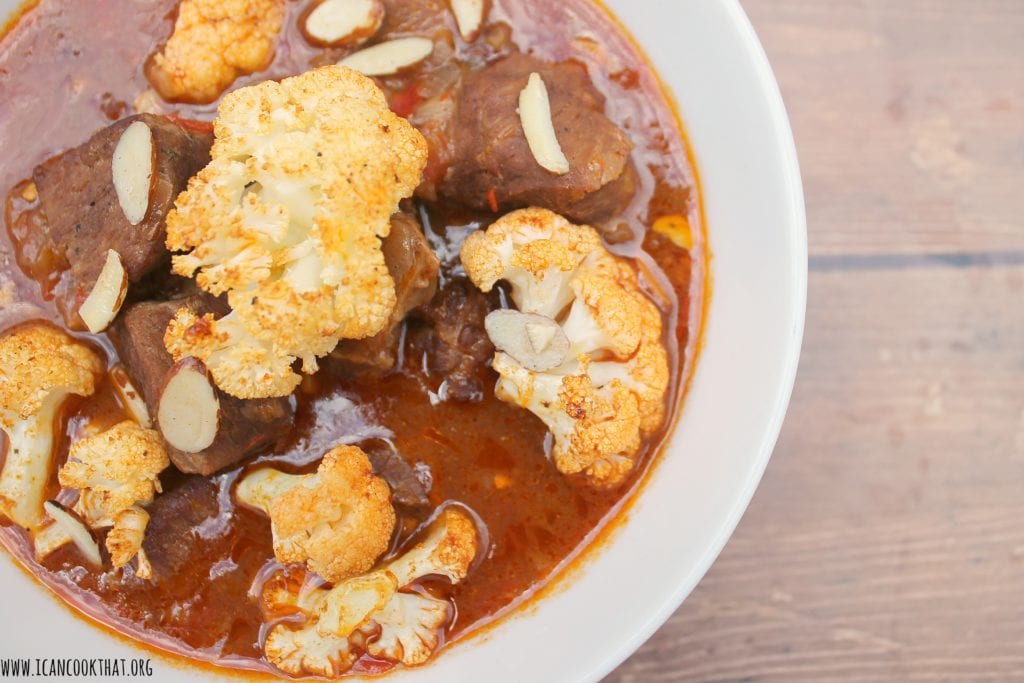
It really takes me a while to adjust to colder weather. I feel like I’m always freezing! So a warm and hearty meal is a must this time of year, especially a soup or stew.
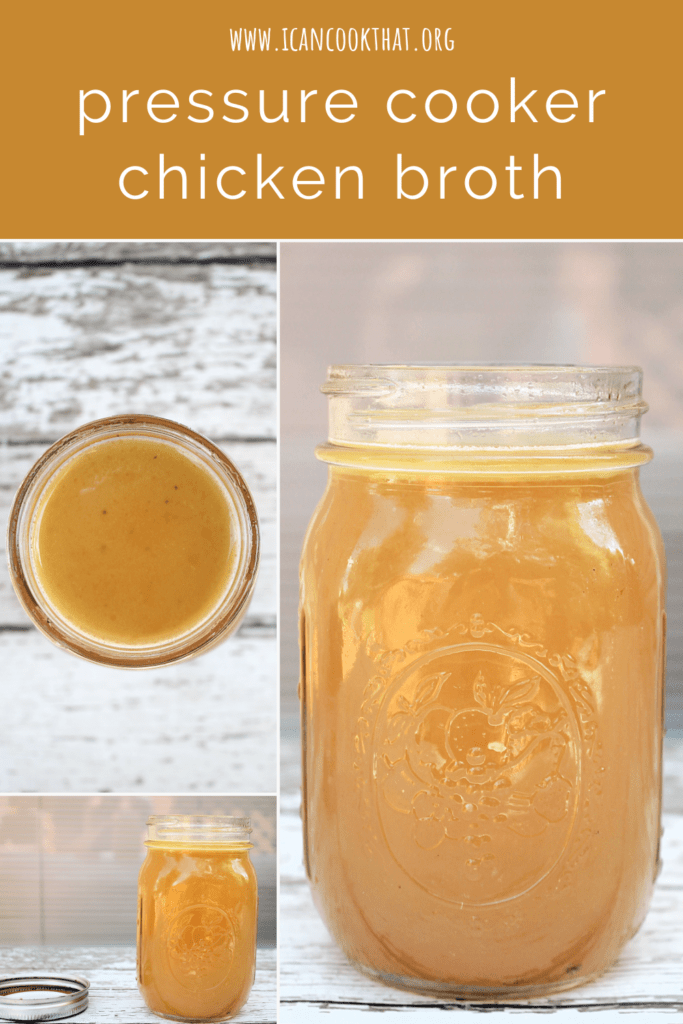
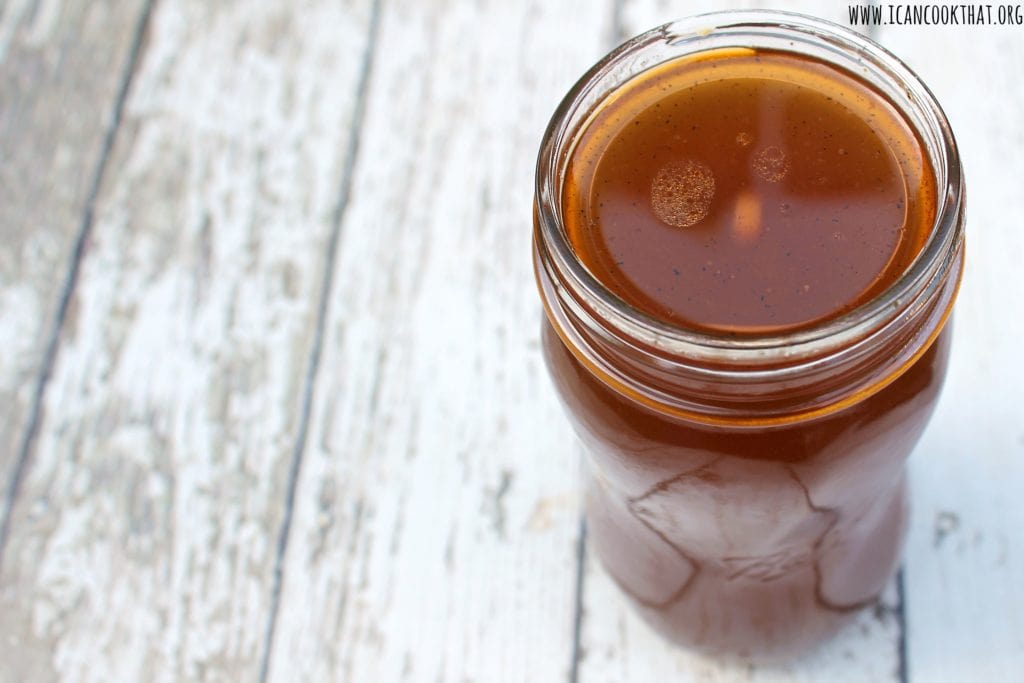
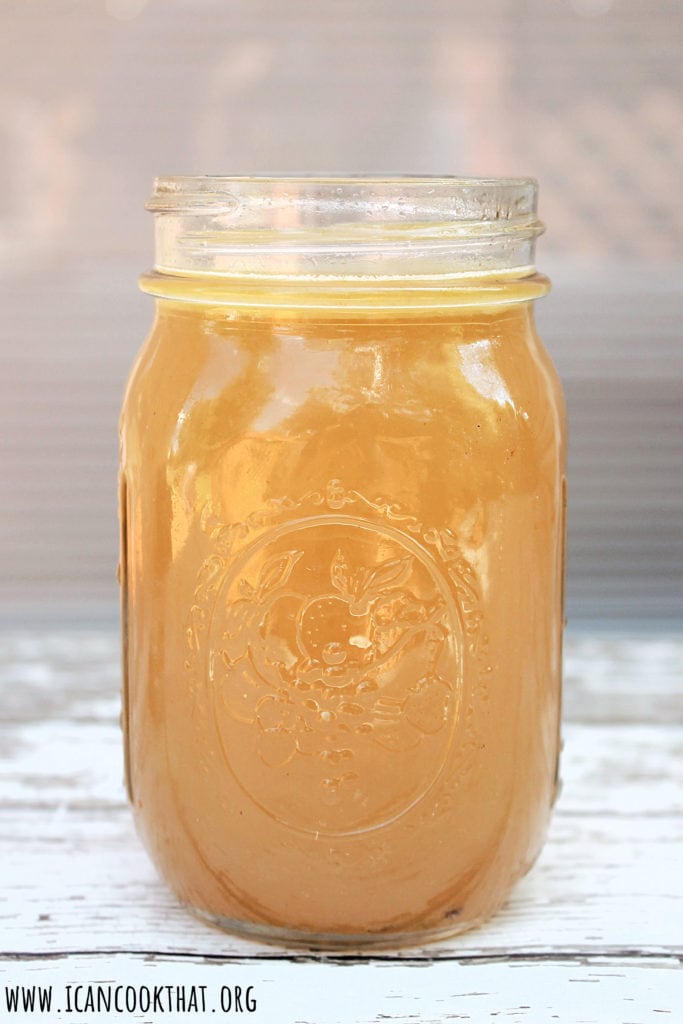
I don’t know if it’s just me, but I go through a ton of chicken broth and stock — I never seem to be able to keep enough on hand!
So when I was making my Pressure Cooker Whole Chicken, I knew homemade Pressure Cooker Chicken Broth would be the natural next step.
Making your own broth or stock is a super easy (and affordable) way to get the most out of your whole chicken!
Just a quick summary on the difference between stock and broth: both simmer bones and/or meat in water with onions, carrots, celery, and aromatics but stock is left unseasoned (no salt) while broth is seasoned.
Ingredients:
1medium sized onion, quartered
2carrots, cut into large chunks
2stalks celery
6 clovesgarlic
2bay leaves
2 sprigs fresh rosemary
2 sprigs fresh thyme
10 whole peppercorns, omit for stock
1/2 teaspoon salt, omit for stock
the bones of 1 chicken carcass
8cupswater, or as needed
Note: If you’re making this immediately following making a chicken in your Pressure Cooker, you won’t need as much water.
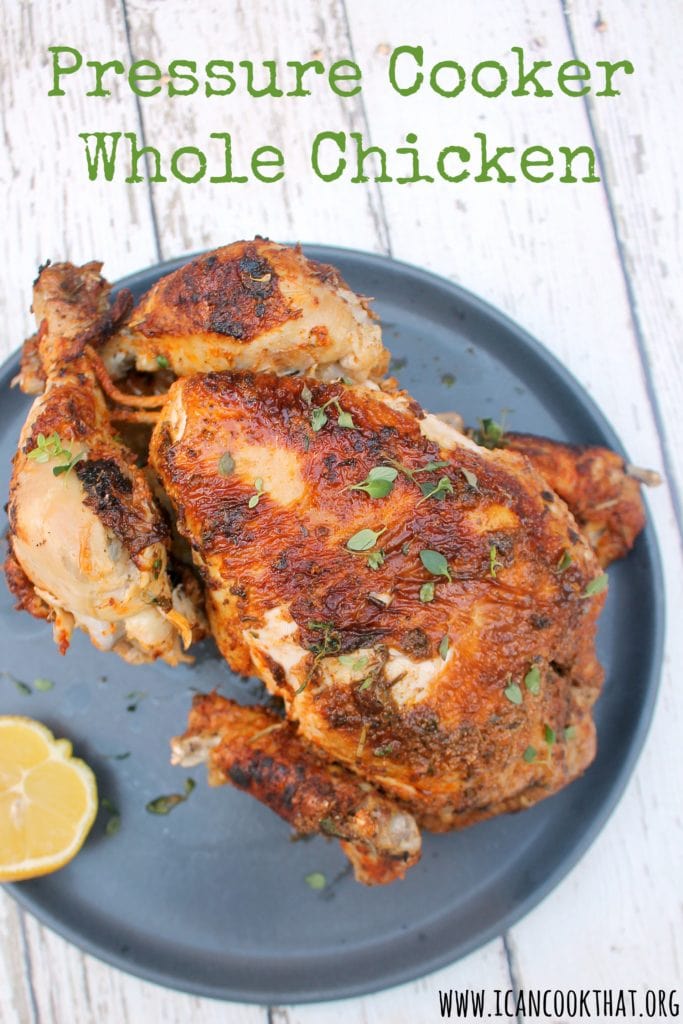
My husband has been on a pretty solid streak of making himself salads for weekday lunches. Nothing terribly fancy: lettuce, tomatoes, cucumbers, a protein, and some olives or cheese with homemade dressing. For the protein, he tends to use canned tuna, beans, or rotisserie chicken. So when I heard that you can make your own “rotisserie” chicken in a pressure cooker, I knew I had to try it! May I introduce you to: Pressure Cooker Whole Chicken!
The recipe is quite straightforward… season your chicken, brown on all sides, and then pressure cook. Pressure cooking doesn’t result in crispy skin, but boy does the meat stay juicy!
Note: This is a sponsored post, powered by BrandBacker. I was sent samples of Parmigiano Reggiano cheese to make this post. Opinions are mine alone.
Some ingredients are so wonderful, that you don’t need much else to make a beautiful dish. Parmigiano Reggiano is most certainly one of those ingredients.
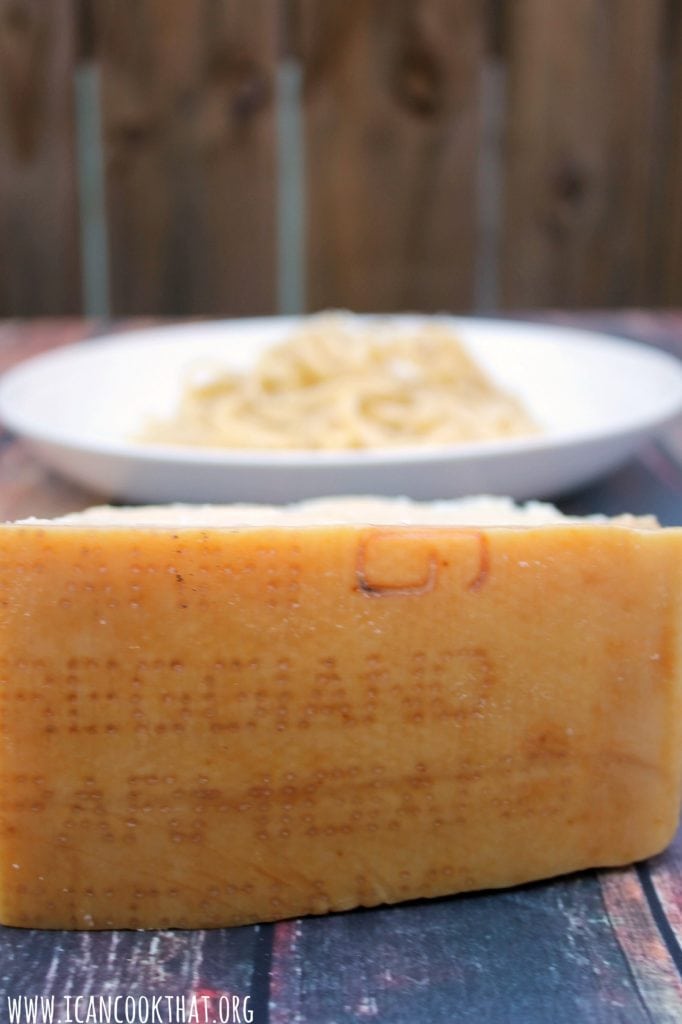
Parmigiano Reggiano cheese is made in the provinces of Parma, Reggio Emilia, Modena, Bologna, and Mantua, Italy. Made by a collective of farmers and producers, Parmigiano Reggiano has just three ingredients: milk, salt, and rennet. with over eight centuries of cheese making experience, every wheel of Parmigiano Reggiano cheese is carefully tended to by workers who wipe, brush, and turn them every ten days. The outsides of the wheels dry over time to form a natural and edible rind. The wheels are typically aged for 18 to 36 months, with 24 months being the most common. So how do you know you have real Parmigiano Reggiano cheese? Look for the pin-dots on the rind, which are imprinted on every wheel.
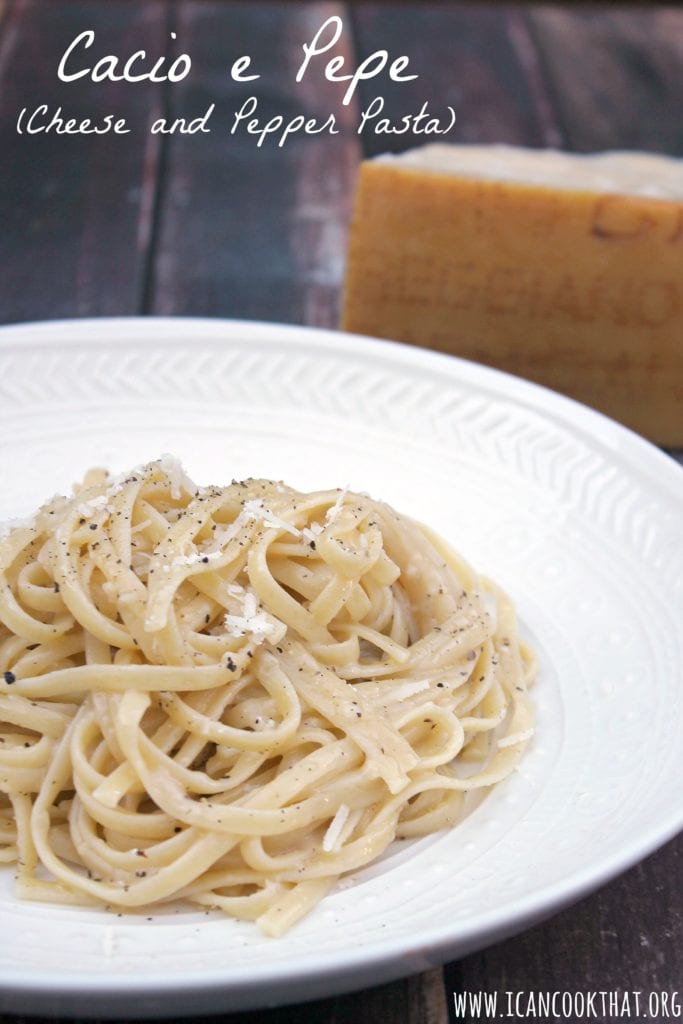
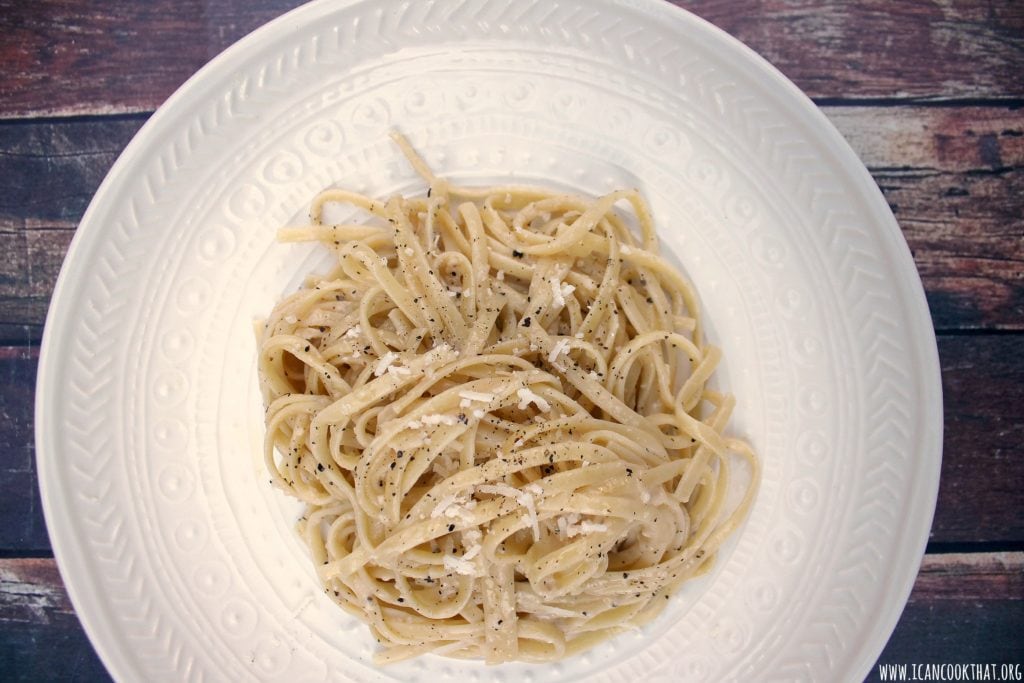
This process results in a hard, dry cheese with a pale gold rind and a straw colored interior with a wonderful rich and sharp flavor. Pre-grated Parmigiano Reggiano cheese doesn’t do the freshly grated stuff justice. And the best way to highlight the flavor of freshly grated Parmigiano Reggiano is in this super simple recipe for Cacio e Pepe, or translated to Cheese and Pepper.
Traditional Cacio e Pepe is made with just 4 ingredients, but my Cacio e Pepe (Cheese and Pepper Pasta) has 7 ingredients – pasta, freshly grated Parmigiano Reggiano, pepper, salt, garlic, butter, and olive oil. The result is a simple but decadent pasta dish with the most luxurious, silky cheese sauce.
Ingredients:
1 (16 oz) box linguine
salt, for the pasta water
8 tablespoons (1 stick) unsalted butter
2 tablespoons olive oil
2 teaspoons freshly ground black pepper, plus more for serving
1 large garlic clove, very thinly sliced
2 1/2 cups freshly grated Parmigiano Reggiano, plus more for serving
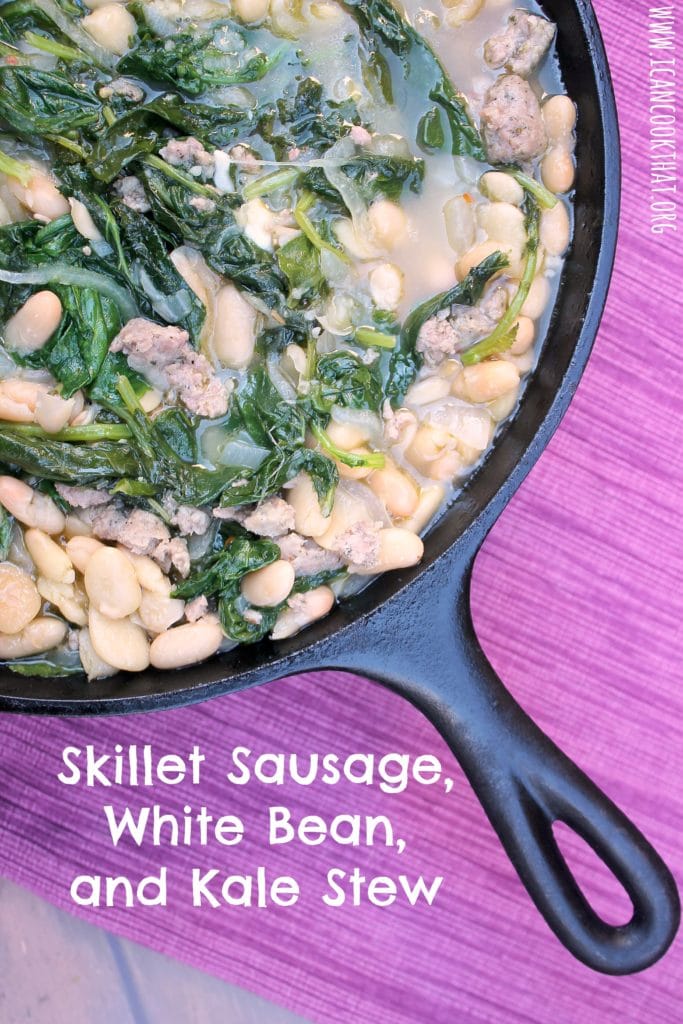
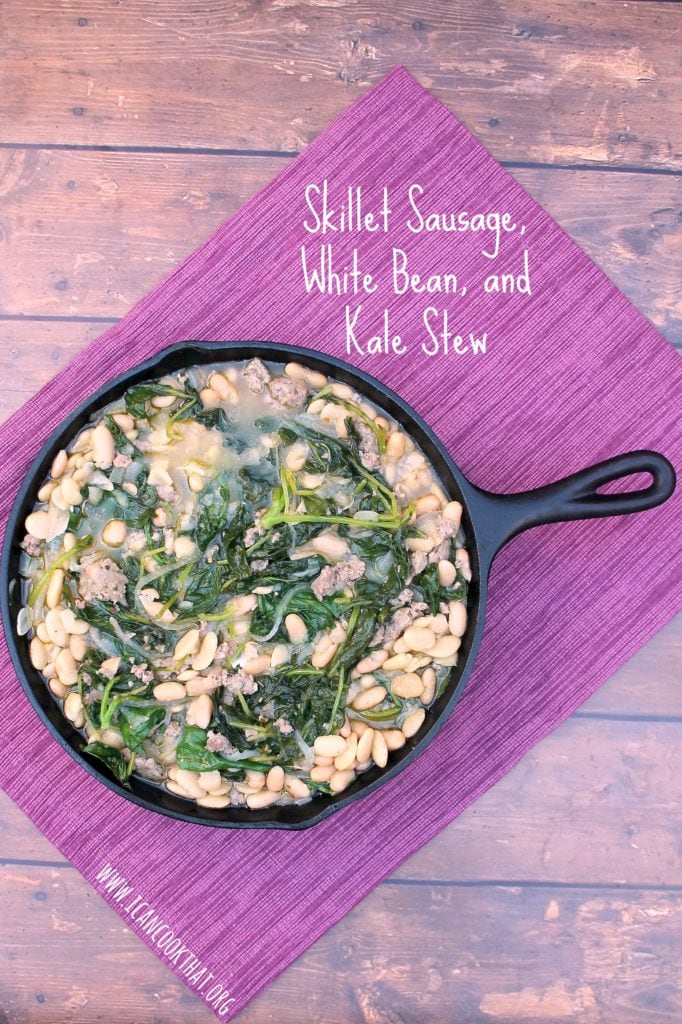
As the weather gets a little cooler, I begin to gravitate toward more comfort food recipes, like this Skillet Sausage White Bean and Kale Stew. Not necessarily bad-for-you recipes, recipes that are simple but flavorful and filling.
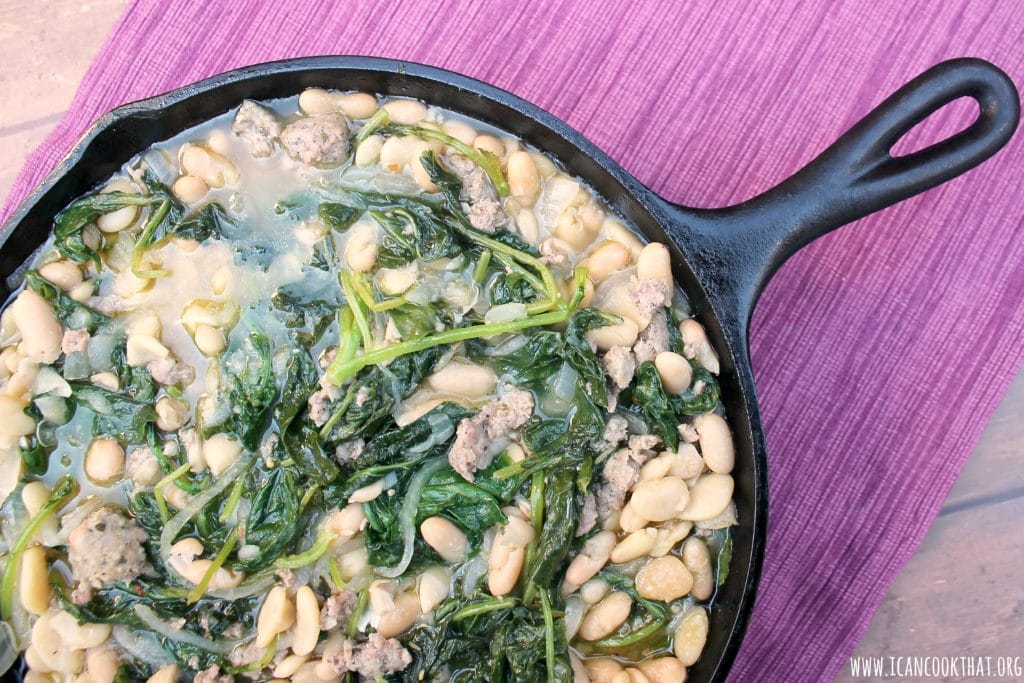
To me, there are very few things as comforting as this stew with ground sausage, cannellini beans, and kale. (I’m referring to this as a stew, but there is very little broth in this Skillet Sausage White Bean and Kale Stew. It’s meant to be that way.) Something magical when these ingredients are cooked with onions and garlic!
This recipe for Skillet Sausage White Bean and Kale Stewis adapted from Simply Recipes, where it was originally intended to be a side. My version is pretty similar, but I make enough for it to be a nice dinner on its own; just serve with a side of crusty bread to sop up that wonderful sauce!
Ingredients:
2 tablespoons olive oil
1 large white onion, thinly sliced
4 large garlic cloves, thinly sliced
1 pound hot Italian sausage, casings removed (for gluten-free, make sure to use gluten-free sausage)
2 (5 oz) containers baby kale, divided
1 1/4 cups beef stock, divided
2 (15 oz) cans cannellini beans, rinsed and drained (or any white beans you prefer)
My husband says he doesn’t like soup, but he honestly just doesn’t like thin broth soups, like traditional chicken noodle soup. So I’m always in search of soup recipes that are thicker based — not necessarily from cream. Pureed vegetable soups have become a favorite in my house!
This recipe from Saveur for Red Lentil and Butternut Squash Soup mentions that it originates from Palestine, but I haven’t been able to find a similar butternut squash and red lentil soup to confirm that. No matter where this recipe originally comes from, the result is a perfect colder weather soup- creamy, filling, with a little bit of heat!
Ingredients:
1/4 cup olive oil
4 cloves garlic, minced
3 medium carrots, chopped
2 stalks celery, chopped
1 medium white onion, chopped
1 teaspoon ground cumin
1/2 teaspoon crushed red chile flakes
1 pound peeled, seeded, and chopped butternut squash
salt and pepper, to taste
6 cups chicken stock (or vegetable stock to make vegetarian/vegan)
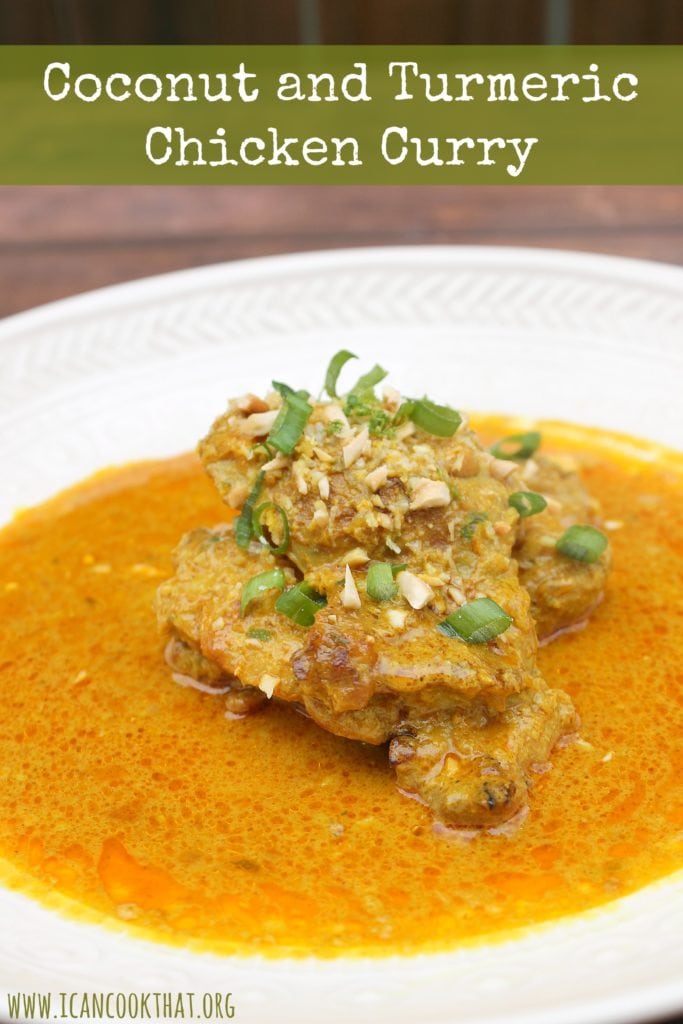
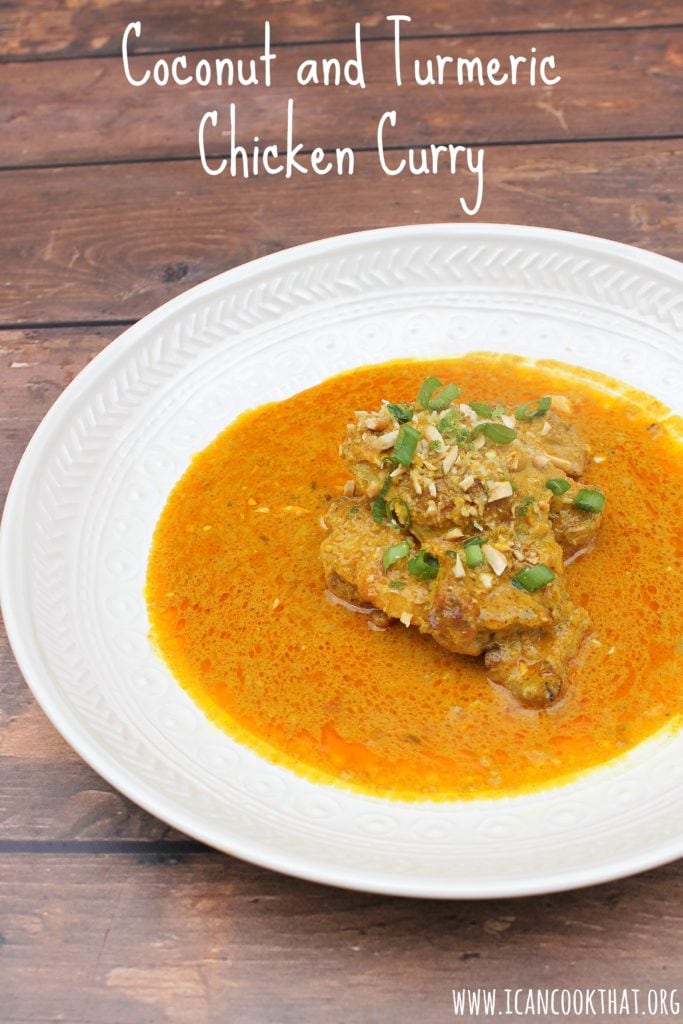
I came across a recipe for Sri Lankan Coconut and Turmeric Chicken Curry a while back, but was unable to find all of the ingredients to actually make it. (Curry leaves are difficult to come by near me!)
Recently, I just gave up and decided to make it with some substitutions.
This recipe from Delicious.com, even with my adjustments, is so fantastic that I can only imagine how good the original is!
Ingredients:
1 medium white onion, roughly chopped
~1 1/2 inch piece ginger
3 garlic cloves, crushed
1 small jalapeno, seeds and membranes removed
8 boneless skinless chicken thighs
4 tablespoons coconut oil, divided
1 tablespoon ground turmeric
1 tablespoon ground cumin
2 teaspoons ground coriander
2 teaspoons smoked paprika
3 cardamom pods, smashed
1 piece of cinnamon
2 whole cloves
3 bay leaves
1 (13.5 oz) can coconut milk, well shaken
1 cup chicken stock
2 tablespoons cashews, finely chopped, plus extra to serve
I’m seriously loving using my pressure cooker! My husband was out of town while I was experimenting with this recipe, so I enlisted the help of a couple of friends to be my taste testers. Luckily they were willing to oblige!
The unsuspecting friends showed up without knowing what exactly I was planning on preparing – they are very trusting! 🙂
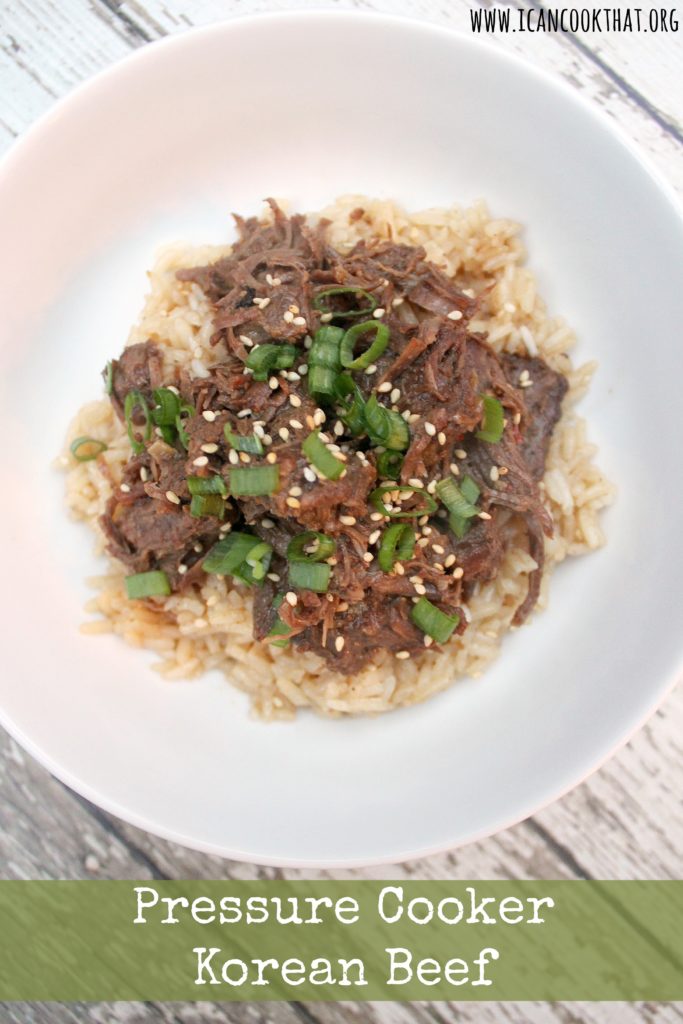
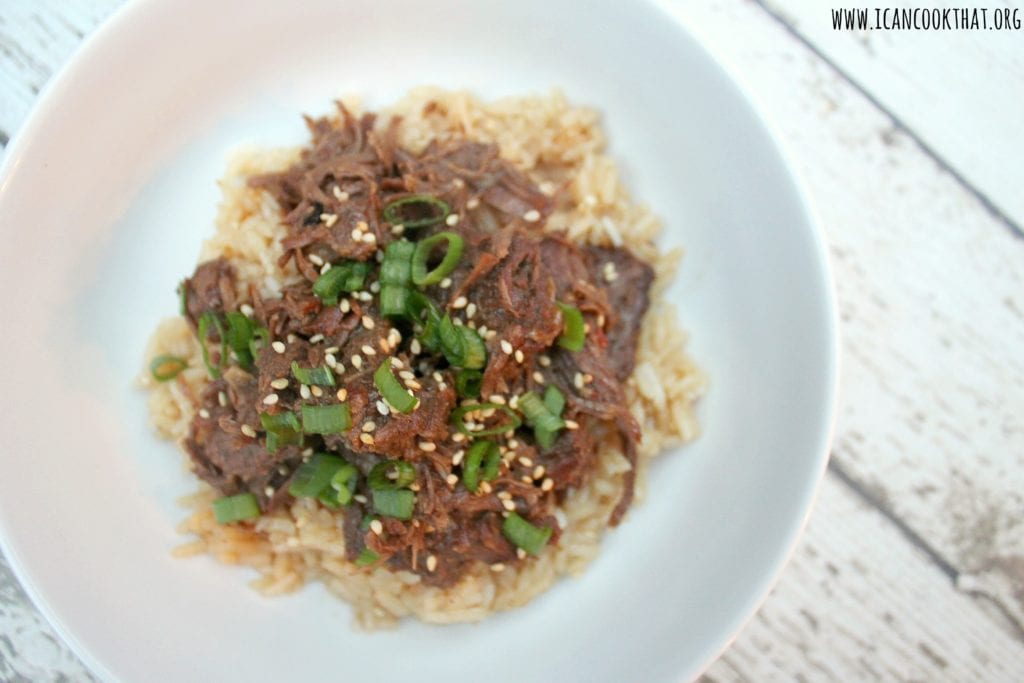
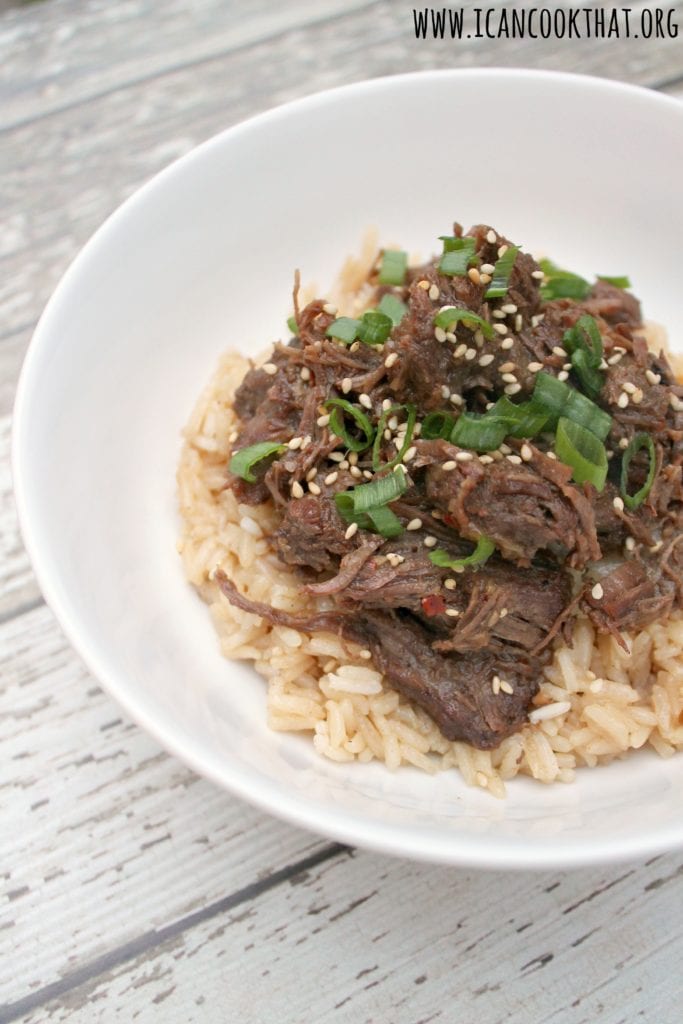
I had a craving for bulgogi recently, so I decided to make a pressure cooker Korean beef. Bulgogi is typically made with thin, marinated slices of beef that are then barbecued. The marinade is usually a mixture of soy sauce, sugar, sesame oil, ginger, and garlic with a touch of crushed red pepper.
This recipe is inspired by the flavors of bulgogi, but instead of grilling thinly sliced beef, it instead uses chuck roast beef and a pressure cooker to make a super tender, shredded version.
Ingredients (serves 8):
1 tablespoon vegetable oil, plus more if needed
4 lbs chuck beef, cut into cubes, excess fat trimmed
1 small onion, chopped
6 garlic cloves, minced
1 to 2 tablespoons beef stock
1/2 cup brown sugar, lightly packed
1/2 cup reduced sodium soy sauce (or coconut aminos to make gluten free)
1 tablespoon sesame oil
1/2 teaspoon crushed red pepper flakes
1 teaspoon fresh ginger, minced
green onions, sliced, for garnish
white sesame seeds, for garnish
4 cups cooked rice
To make, cut the beef into large chunks. Season with salt and pepper. (Go light on the salt, the soy sauce will provide all the salt you need!)
Press the “saute” function on your pressure cooker. Press the “cook time” button and increase the time to 25 or 30 minutes (it took me about 25 minutes to brown up all of my meat.) Press the “adjust” button and choose “more/high.” Press “on/start.” The pressure cooker will beep five times when it is preheated.
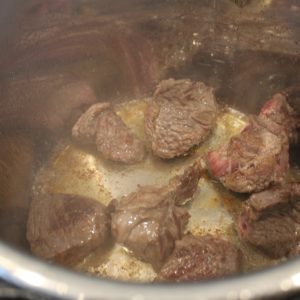
Carefully add the vegetable, oil and then add some meat to the pressure cooker (without crowding the beef).
Brown the meat on all sides. Remove from the pressure cooker and continue with the remaining beef.
When done browning the last batch, remove the final pieces and set aside. Press “stop/cancel” to turn off the saute function.
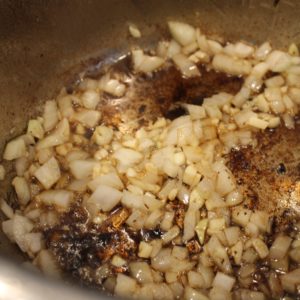
If needed, add a bit more vegetable oil. Add the onions and garlic to the pot and saute until fragrant, about 3 minutes.
Add a little bit of beef stock (1 or 2 tablespoons) to the pressure cooker and scrape the browned bits from the bottom of the pressure cooker using a wooden or plastic spoon.
In a small bowl, stir together the brown sugar, soy sauce (or coconut aminos), sesame oil, red pepper flakes, and ginger.
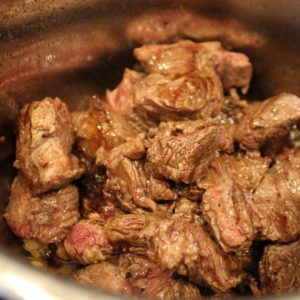
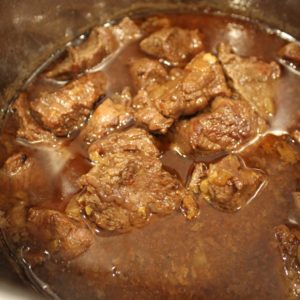
Add back in all of the beef to the pressure cooker, as well as any juices from the beef.
Pour in the soy sauce mixture, evenly covering the beef.
Close the lid, ensuring that the steam valve is closed. Select the meat/stew pressurized cooking function. Press the “adjust” button and choose “more/high” to set it for 45 minutes. Press “on/start” to begin cooking.
Once the unit has reached optimal cooking pressure (~15 minutes), the unit will beep once and start counting down from 45 minutes. You’ll notice that the pressure release valve (red) rises up during this time.
The pressure cooker will beep 3 times to alert you when cooking has finished. It will automatically go on to “keep warm” mode for up to 6 hours. Once cooking is complete, turn off the pressure cooker by pressing “stop/cancel” and unplugging the power cable.
Let the unit cool down for 15 to 20 minutes, or until the float valve drops down. Using an oven mitt, move the pressure release value to the “release” position to let out any remaining pressure in the unit. Wait again for the float value to drop down before opening the pressure cooker.
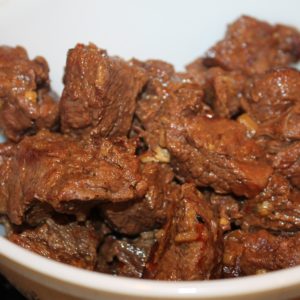
The meat should be really tender.
Remove the meat from the pot, keeping the liquid in the pot, and shred with two forks. Add to a large bowl.
Measure out about 1 cup of the cooking liquid and add to the bowl.
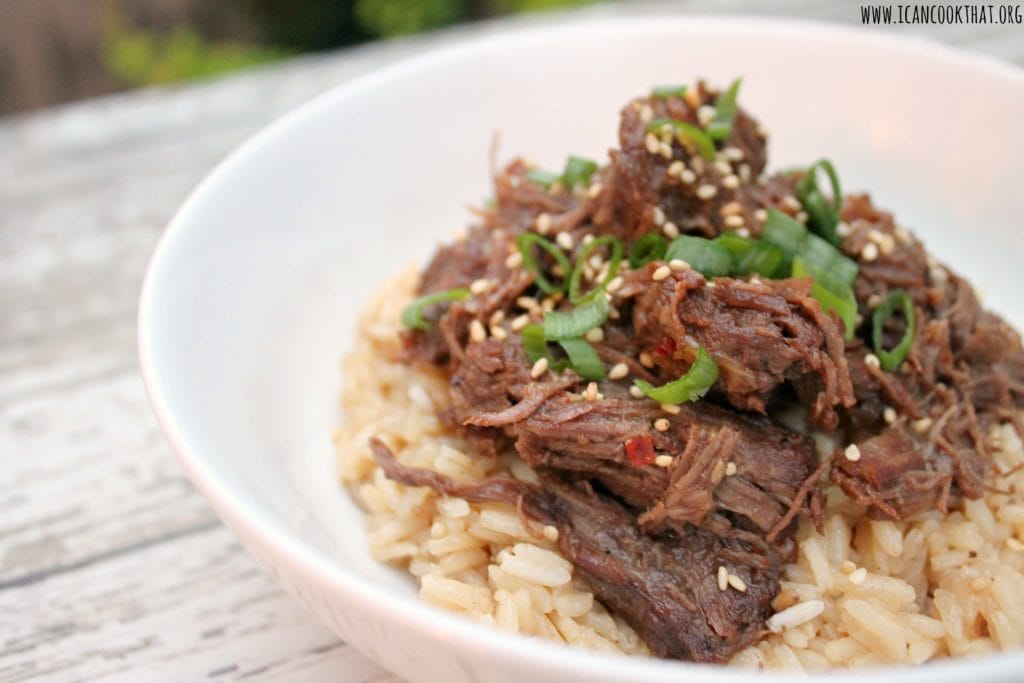
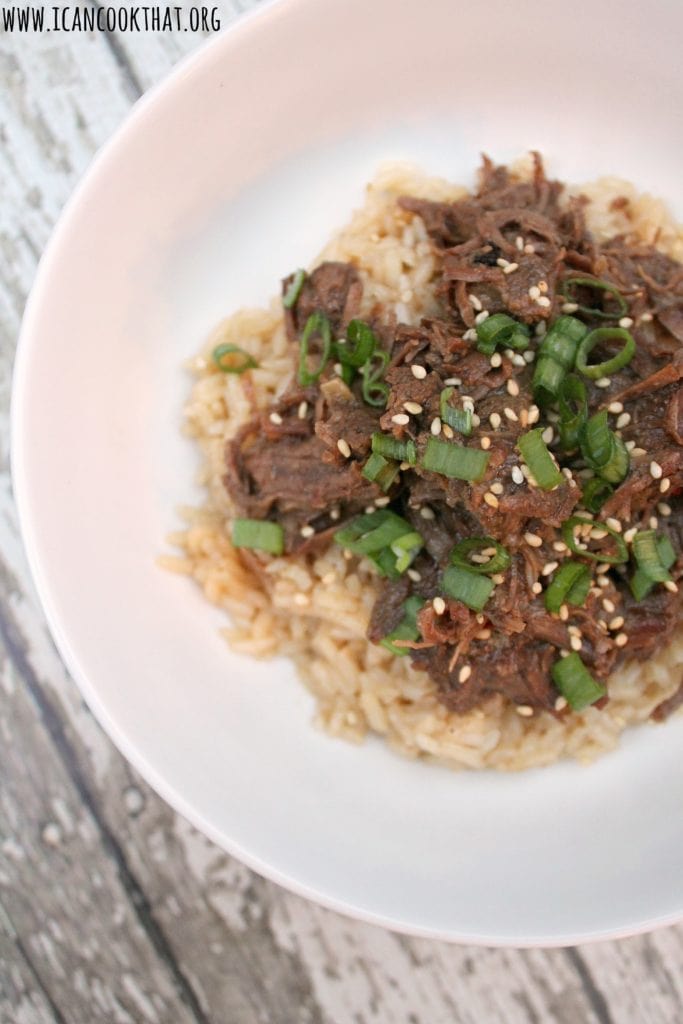
Fill bowls with rice and top with the shredded beef. Garnish with sesame seeds and green onions and serve.
The beef is wonderfully flavorful and juicy. My friends and I just gobbled this up! It’s most certainly not spicy so if you prefer some heat, add a bit more crushed red pepper.
This is a great make ahead dish as well. If doing so, add some more of the cooking liquid to the container before refrigerating, so that when you reheat it, there is still plenty of juicy liquid to drizzle over the top!
I also made the rice in the Cosori Multicooker and it came out great! (Tip: if you have extra cooking liquid, substitute some of that in for the water/broth in your rice.)
If you’re looking for more information about the Cosori Multicooker, check out my review post here (plus a recipe for Barbacoa Beef Tacos).
4 lbs chuck beef, cut into cubes, excess fat trimmed
1 small onion, chopped
6 garlic cloves, minced
1 to 2 tablespoons beef stock
1/2 cup brown sugar, lightly packed
1/2 cup reduced sodium soy sauce (or coconut aminos to make gluten free)
1 tablespoon sesame oil
1/2 teaspoon crushed red pepper flakes
1 teaspoon fresh ginger, minced
green onions, sliced, for garnish
white sesame seeds, for garnish
4 cups cooked rice
Instructions
To make, cut the beef into large chunks. Season with salt and pepper. (Go light on the salt, the soy sauce will provide all the salt you need!)
Press the “saute” function on your pressure cooker. Press the “cook time” button and increase the time to 25 or 30 minutes (it took me about 25 minutes to brown up all of my meat.) Press the “adjust” button and choose “more/high.” Press “on/start.” The pressure cooker will beep five times when it is preheated.
Carefully add the vegetable, oil and then add some meat to the pressure cooker (without crowding the beef).
Brown the meat on all sides. Remove from the pressure cooker and continue with the remaining beef.
When done browning the last batch, remove the final pieces and set aside. Press “stop/cancel” to turn off the saute function.
If needed, add a bit more vegetable oil. Add the onions and garlic to the pot and saute until fragrant, about 3 minutes.
Add a little bit of beef stock (1 or 2 tablespoons) to the pressure cooker and scrape the browned bits from the bottom of the pressure cooker using a wooden or plastic spoon.
In a small bowl, stir together the brown sugar, soy sauce (or coconut aminos), sesame oil, red pepper flakes, and ginger.
Add back in all of the beef to the pressure cooker, as well as any juices from the beef.
Pour in the soy sauce mixture, evenly covering the beef.
Close the lid, ensuring that the steam valve is closed. Select the meat/stew pressurized cooking function. Press the “adjust” button and choose “more/high” to set it for 45 minutes. Press “on/start” to begin cooking.
Once the unit has reached optimal cooking pressure (~15 minutes), the unit will beep once and start counting down from 45 minutes. You’ll notice that the pressure release valve (red) rises up during this time.
The pressure cooker will beep 3 times to alert you when cooking has finished. It will automatically go on to “keep warm” mode for up to 6 hours. Once cooking is complete, turn off the pressure cooker by pressing “stop/cancel” and unplugging the power cable.
Let the unit cool down for 15 to 20 minutes, or until the float valve drops down. Using an oven mitt, move the pressure release value to the “release” position to let out any remaining pressure in the unit. Wait again for the float value to drop down before opening the pressure cooker.
The meat should be really tender.
Remove the meat from the pot, keeping the liquid in the pot, and shred with two forks. Add to a large bowl.
Measure out about 1 cup of the cooking liquid and add to the bowl.
Fill bowls with rice and top with the shredded beef. Garnish with sesame seeds and green onions and serve.
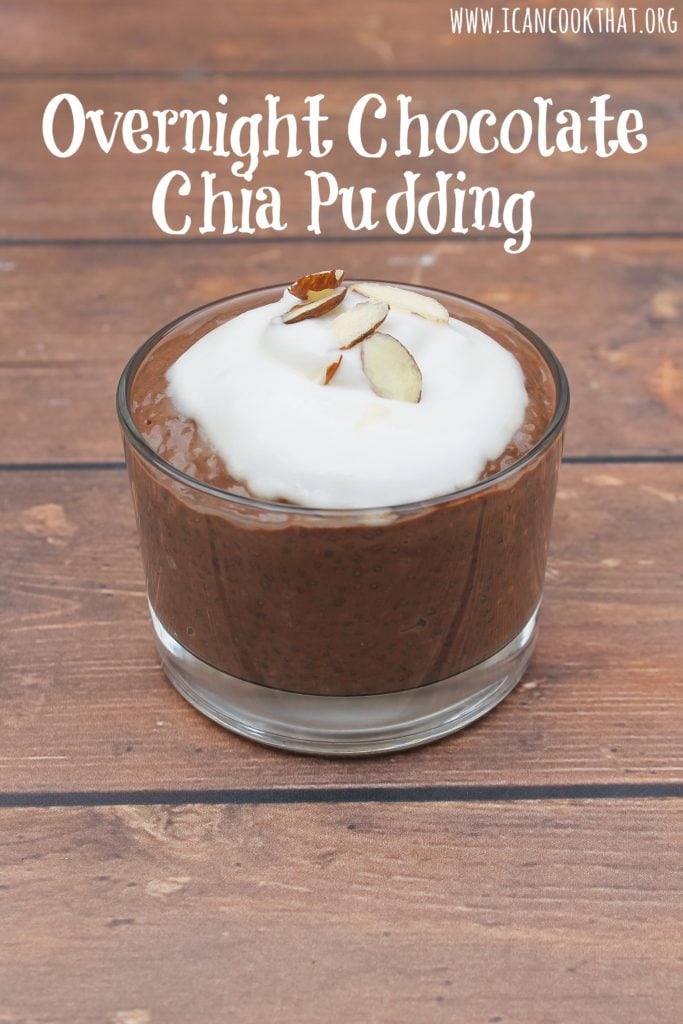
I have such a sweet tooth. Seriously, if I could get away with eating ice cream and only ice cream for the rest of my life, I probably would. So, I am constantly looking for ways to satisfy my sweet tooth without, well, eating a pint of ice cream.
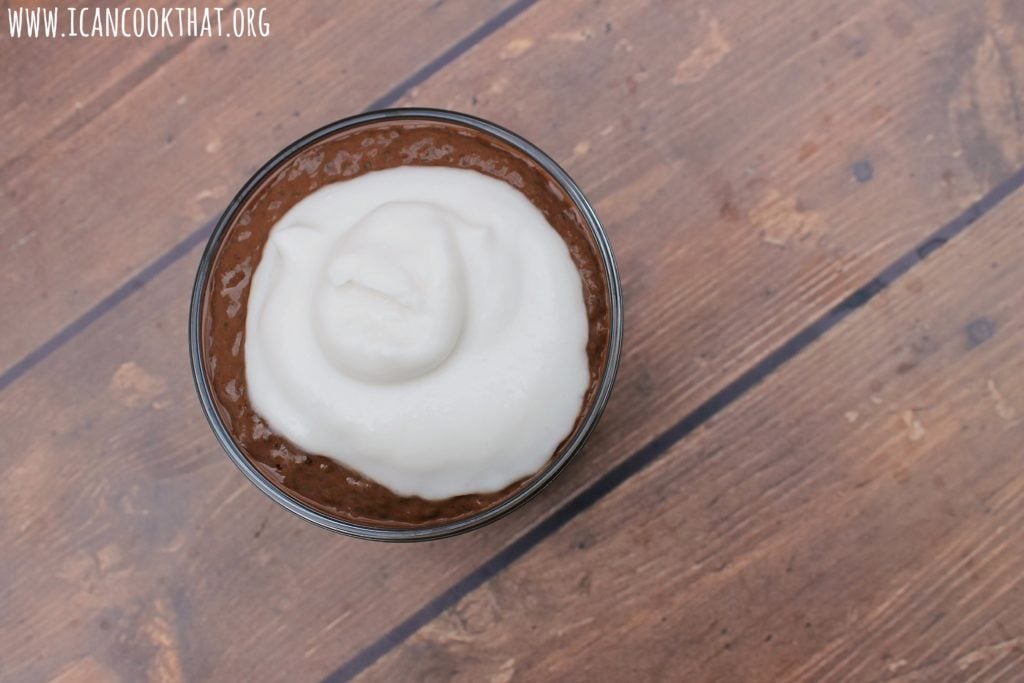
Cue this recipe for Overnight Chocolate Chia Pudding — its dairy-free, gluten free, and vegan. And, it tastes amazing!
The Coconut Almond Whipped Cream really puts it over the top. But the pudding is pret-ty darn awesome on its own!
Ingredients:
Chocolate Chia Pudding:
2 cups unsweetened almond milk
1/2 cup dark chocolate chips (check the label to make sure they are vegan)
If you follow me on Instagram, you’ve probably noticed a lot of my stories have shown my breakfasts, lunches, and afternoon snacks at work. (In case you missed it, you can see the stories on Instagram below my profile in my highlights.) I have been doing a review of Snap Kitchen Meal Plans!
source: snapkitchen.com
Like most people, I find it pretty difficult to prep healthy (and tasty) meals for weekday breakfast and lunch. I prefer a hot meal, which means I tend to just eat reheated leftovers for lunch (when there are leftovers, that is!) So I was quite interested in trying out some of the offerings from Snap Kitchen’s Low Carb Meal Plan.
source: snapkitchen.com
Snap Kitchen was founded in 2010 in Austin, Tx and provides healthy, handmade meals for busy people. It was established on the principle that real food should be convenient and delicious. Snap Kitchen now spans two states with on demand delivery and 35+ shops located throughout Austin, Dallas, Houston and Philadelphia. Plus, they give back to their local communities by donating all non-purchased food to local charities.
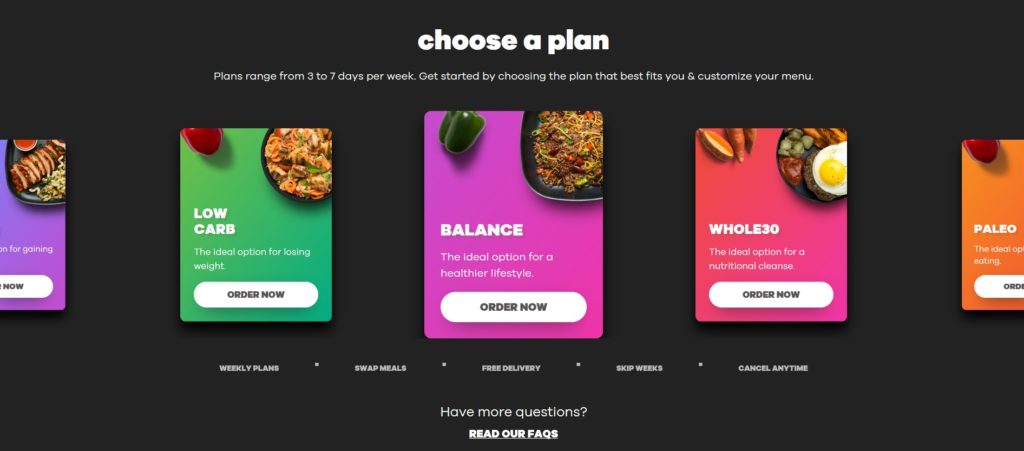
The Meal Plans are weekly subscriptions of healthy food that can be picked up at your local Snap Kitchen, or delivered to your house. The plans are 3, 5, or 7 day subscriptions where you can choose which meals you’d like. Options include high protein, low carb, balance, whole30, paleo, and build your own.
To set up a subscription, visit snapkitchen.com and click on “meal plans” in the upper right corner.
Scroll down to “choose a plan” and choose whichever plan you’d like to try by clicking “order now” on the respective plan.
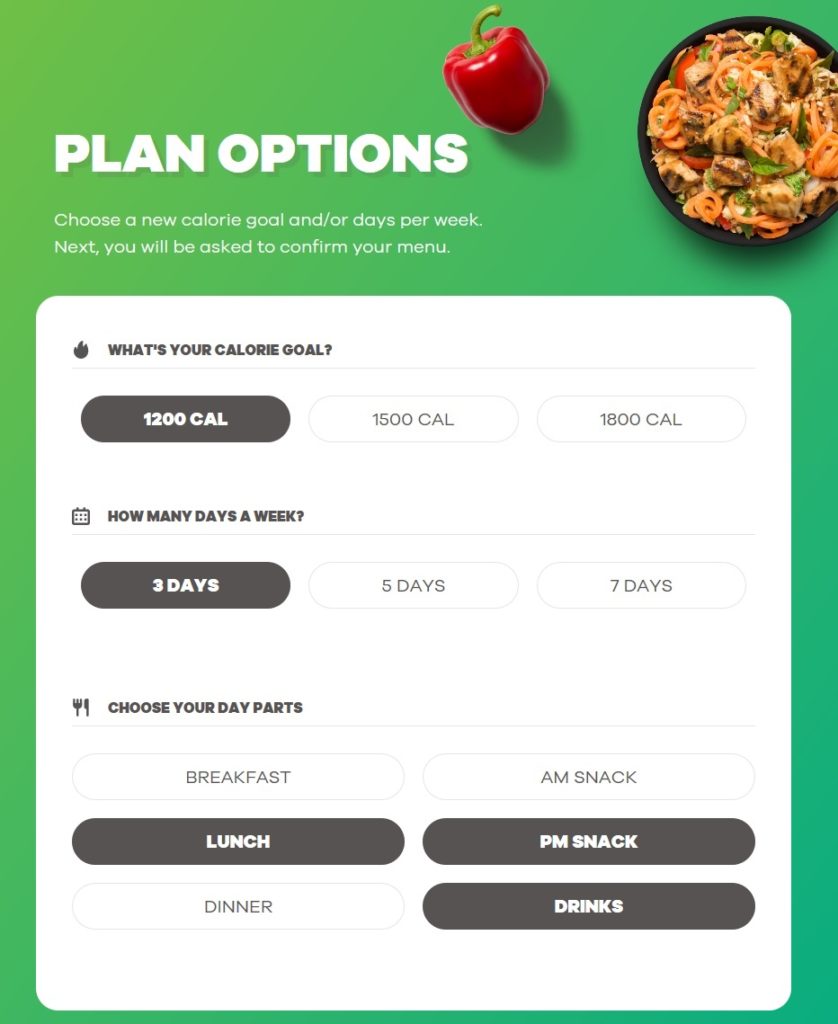
Then set up your plan options: calorie goal, how many days a week you’d like food for, and which meals you’d like to subscribe to. Click “next” when finished.
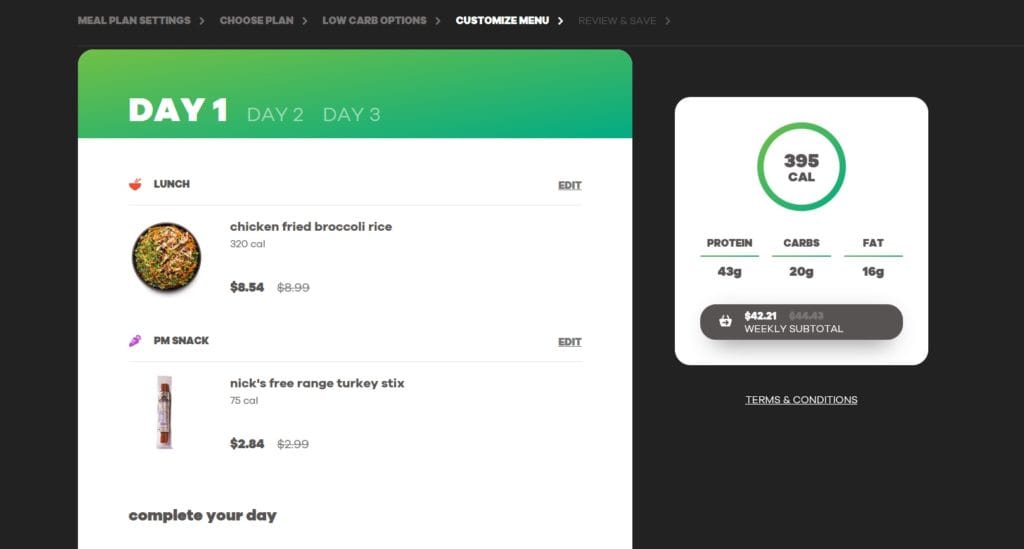
The next page lets you customize your order. Don’t like the option provided? Click “edit” and click “change or add items.”
Scroll through dietician recommended items and choose whichever sounds good to you.
You can review each day of your plan for the week ahead and edit as you see fit. When finished, checkout, choose to pickup or have delivered along with date.
The food comes nicely packaged and ready for your week ahead.
Pretty simple, right? So, how does it actually taste?
I’ve been pleasantly surprised with both the variety and the quality of the food. Some I naturally liked better than others, but the proportions great and the variety kept me interested. When something in my order wasn’t available, I received a text before delivery with options for substitution.
The first week, I ordered breakfast, lunch, and an afternoon snack. The second week, I decided to just do lunch and afternoon snack. I appreciate that I can change what I get each week if I want, as I decide what makes the most sense for me.
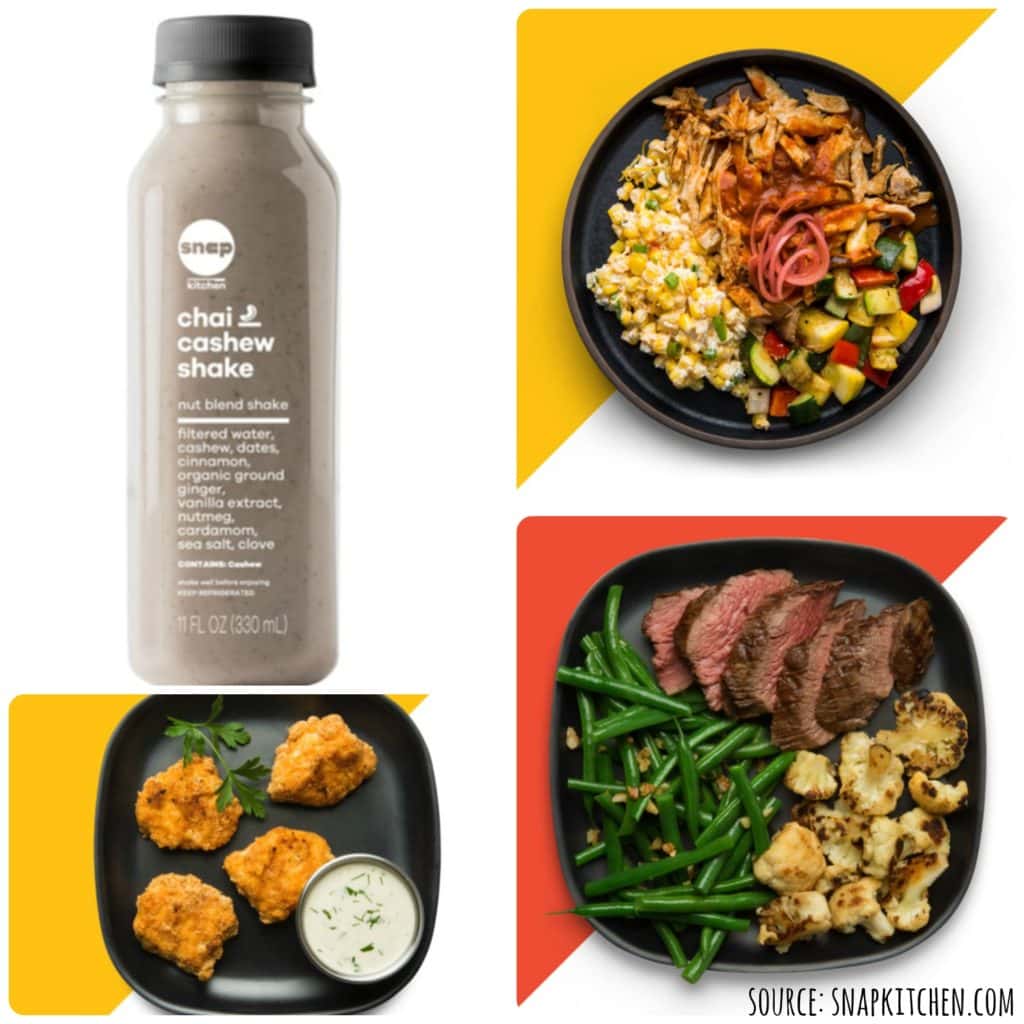
Some of my favorites so far include: the chai cashew shake, the bbq chicken plate, the naked beef, and the almond crusted chicken nuggets.
Naturally, at home prep and meal planning is the most affordable option for tasty and healthy weekday lunches. However, I know that this is something I can’t consistently commit to doing, so I love Snap Kitchen as an option.
I haven’t done whole30 myself, but I can imagine this being a huge time saver and help to stay on track. It takes a lot of the guesswork out of what you can and cannot eat over those 30 days!
If you live in or near Austin, Dallas, Houston and Philadelphia, definitely check out Snap Kitchen. If you’re curious, but don’t want to commit to a plan, you can also drop in to your local store and take home some options to try.
Check out my Instagram highlights to see my real-time opinions on my Snap Kitchen meals!
I’ve mentioned before that my smoke alarms in my house are… sensitive. If I roast anything in the oven, they tend to go off. So when possible, I try to find alternate means to cook my food. In the summer, that means a ton of grilling. And as the weather cools off, my slow cooker becomes my best friend!
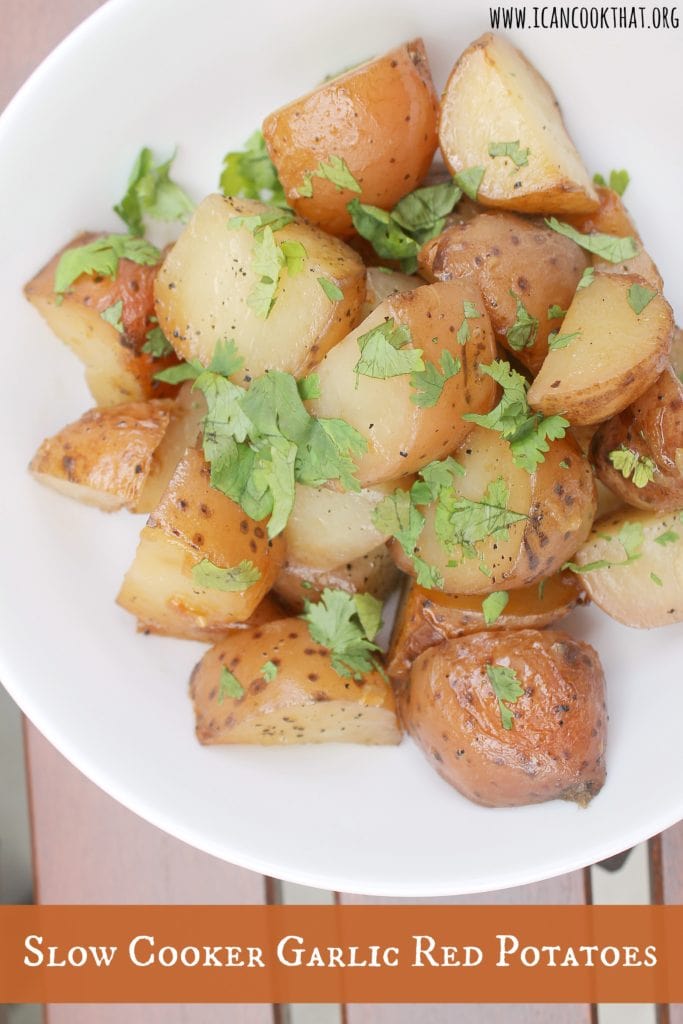
My latest Hungry Harvest (note: this is a referral link) included 2 pounds of red potatoes, so I wanted to try cooking the potatoes in my slow cooker.
This recipe for Slow Cooker Garlic Red Potatoes works well as a side to a recipe that already is using up your oven, like a roast turkey or chicken. It’s also a good option for a night that you can set the slow cooker in the early afternoon, and let it do its thing while you go about your day. When it’s dinner time, your side is all set, and you can quickly whip up a seafood dish, or sautéed chicken in no time!
I’ve mentioned before that my husband is an avid runner. He’s currently training for a marathon, so I’ve been trying to support his training with more food geared toward fueling him both before and after his runs. It’s important to fuel up with something protein rich after working out to help promote muscle recovery.
These Peanut Butter Chocolate Chip Protein Cookies are a yummy choice after a long run, while still satisfying my husband’s sweet tooth.
The cookies are made with peanut butter, protein powder and almond flour, so they are surprisingly filling too.