I really don’t like winter. I know we are having quite a mild winter in Philly this year but it goes past the cold and snow. I miss sunlight. And sitting outdoors. And most of all, I miss summer foods. So I decided it was time for a little peek into summer: Mango Couscous with Salmon. (I found the recipe on Taste of Home).
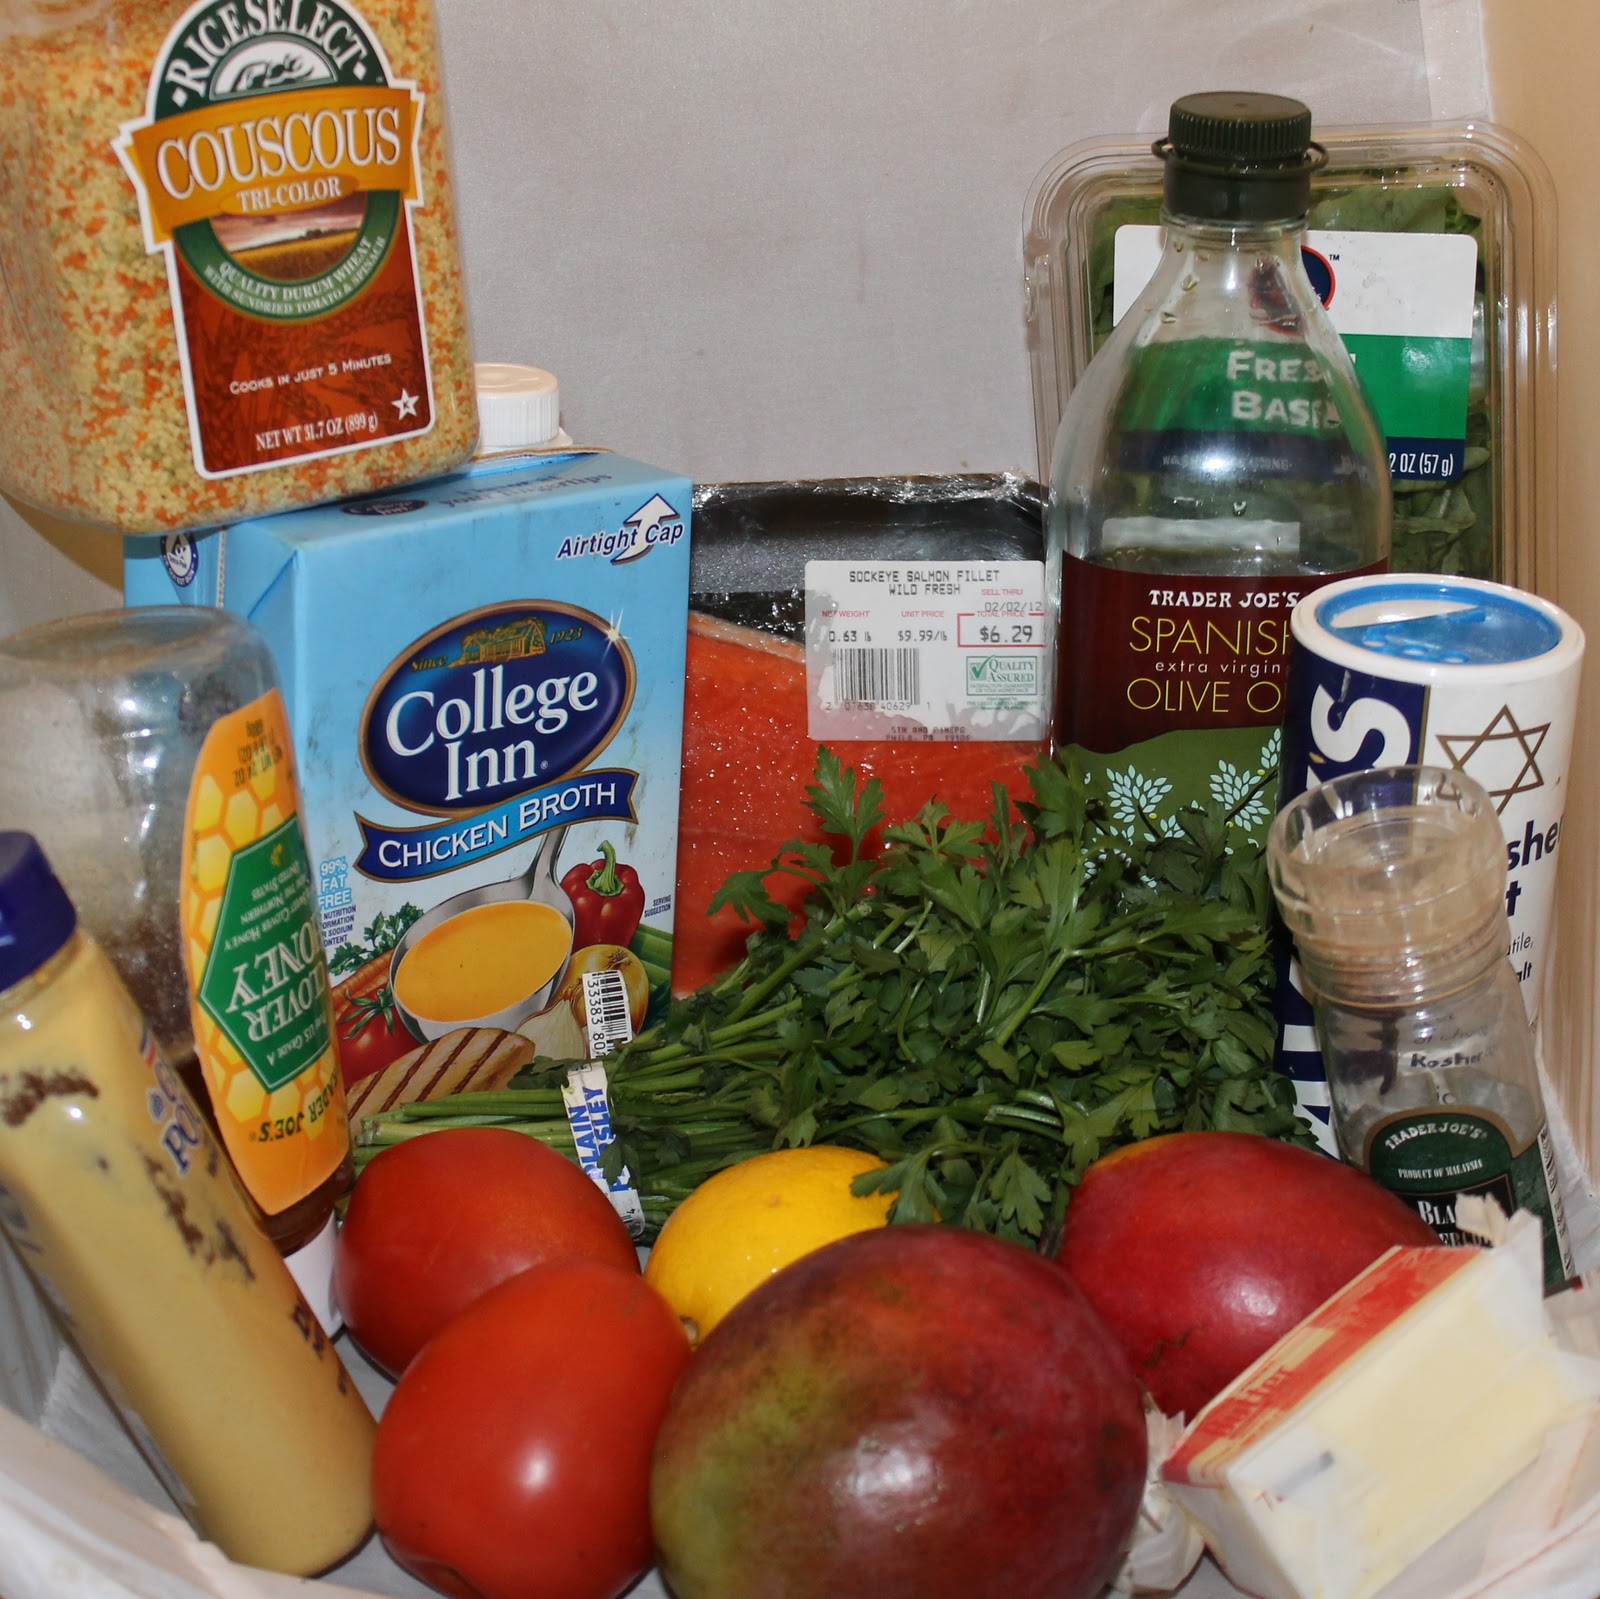
Ingredients:
Salmon:
1 tablespoon olive oil
2 garlic cloves, minced
Salt & pepper, to taste
2 tablespoons minced fresh parsley, divided
2 salmon fillets (6 ounces each)
Couscous:
1 cup chicken broth
1 tablespoon butter
1/2 cup couscous (I used tricolor, because it’s so darn pretty)
1 plum tomato, chopped
1 medium mango, peeled and chopped
Mango Sauce:
1 medium mango, peeled and cut into chunks
the juice of 1 lemon
1 tablespoon honey
2 fresh basil leaves
1 tablespoon minced fresh parsley
1 tablespoon water
1 tablespoon Dijon mustard
In a pot, bring the broth and butter to a boil. Stir in couscous. Cover and remove from heat and let stand for 5 minutes.
Stir in tomatoes, mango, and 1 tablespoon parsley.
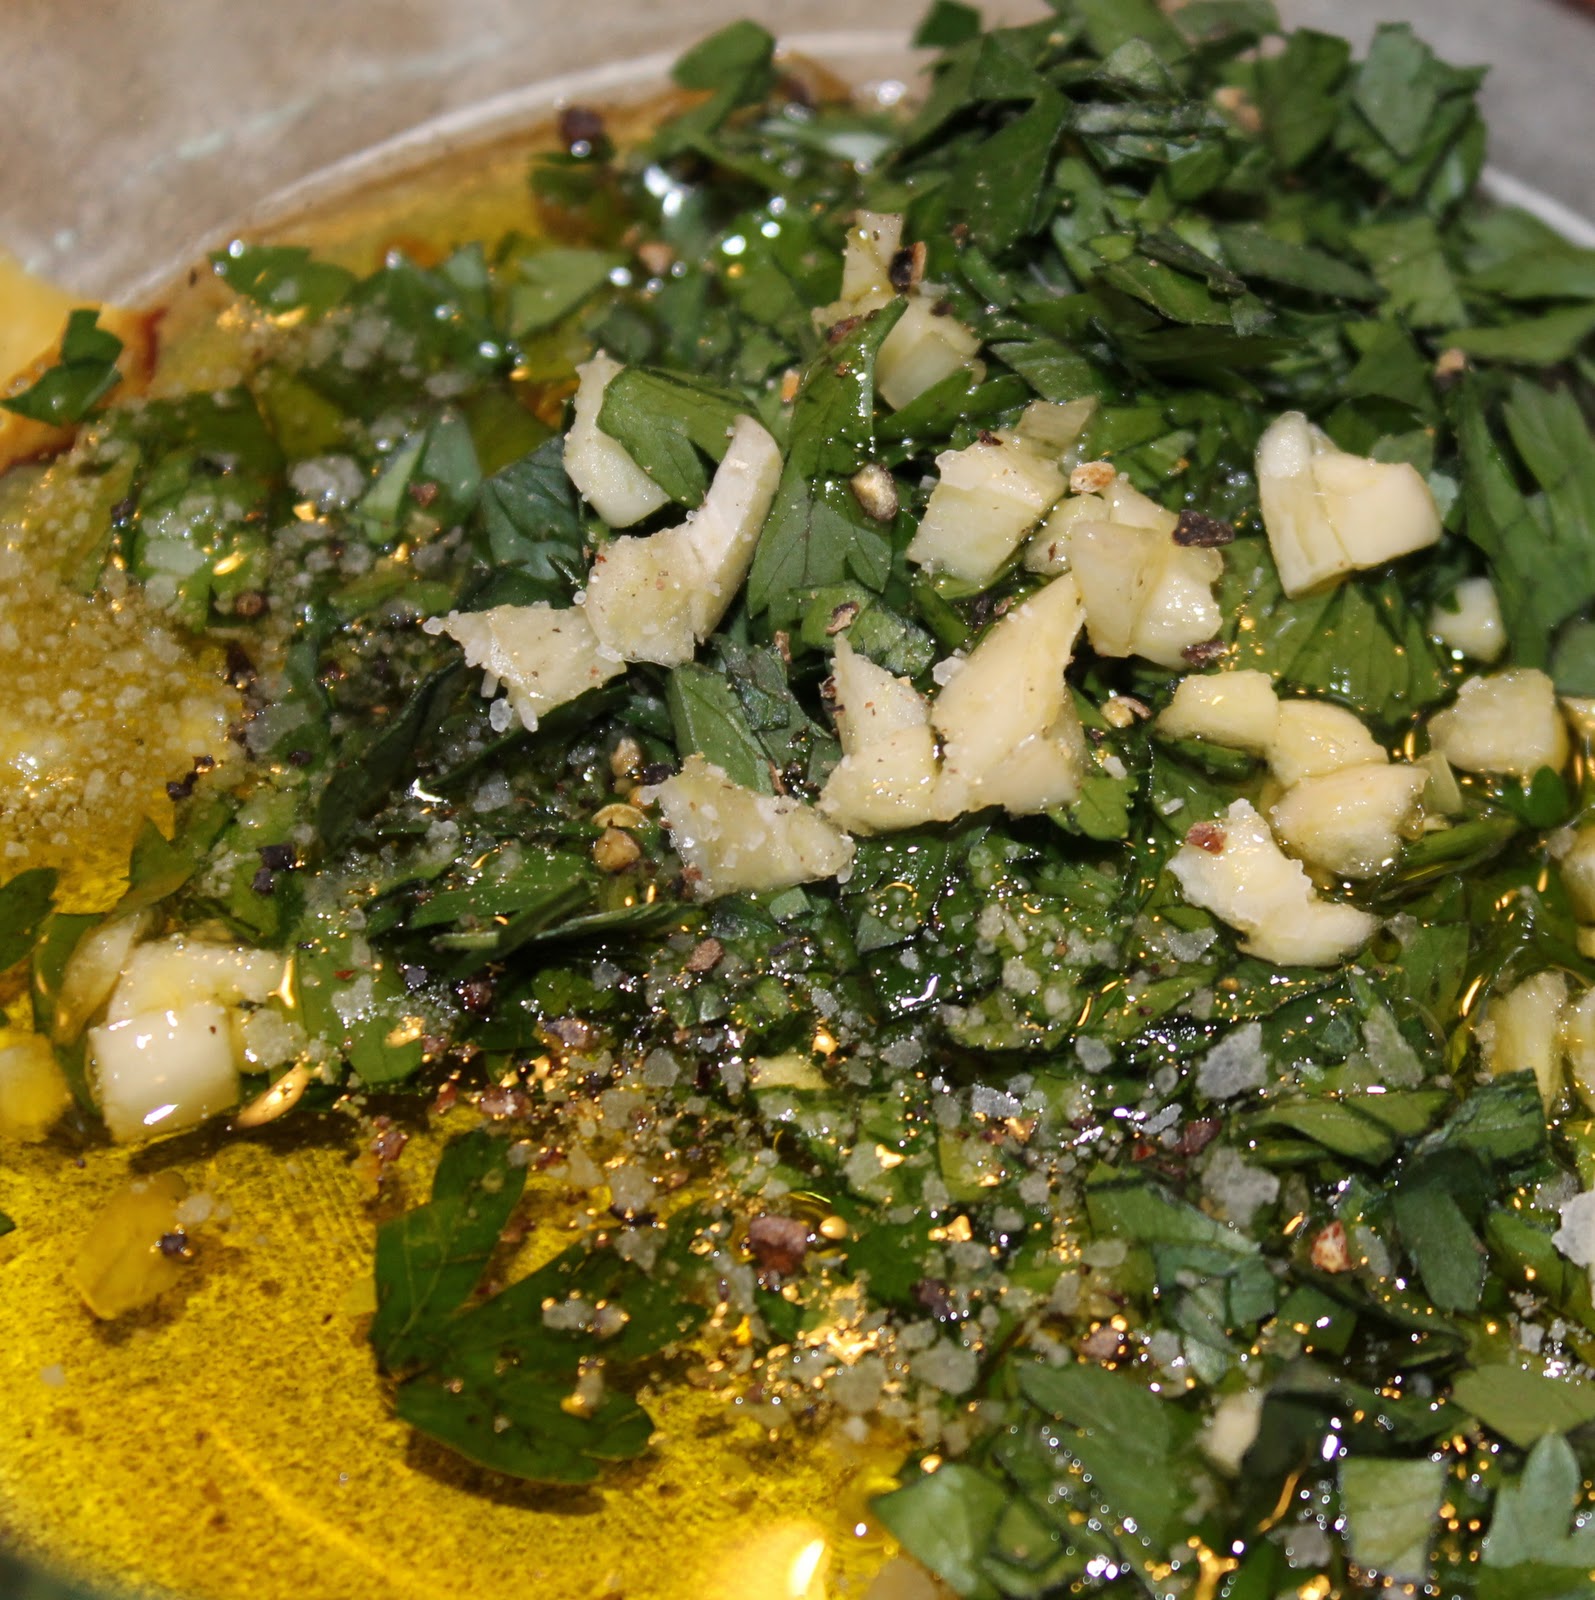
Combine the olive oil, garlic, salt, pepper, and 1 tablespoon parsley in a bowl.
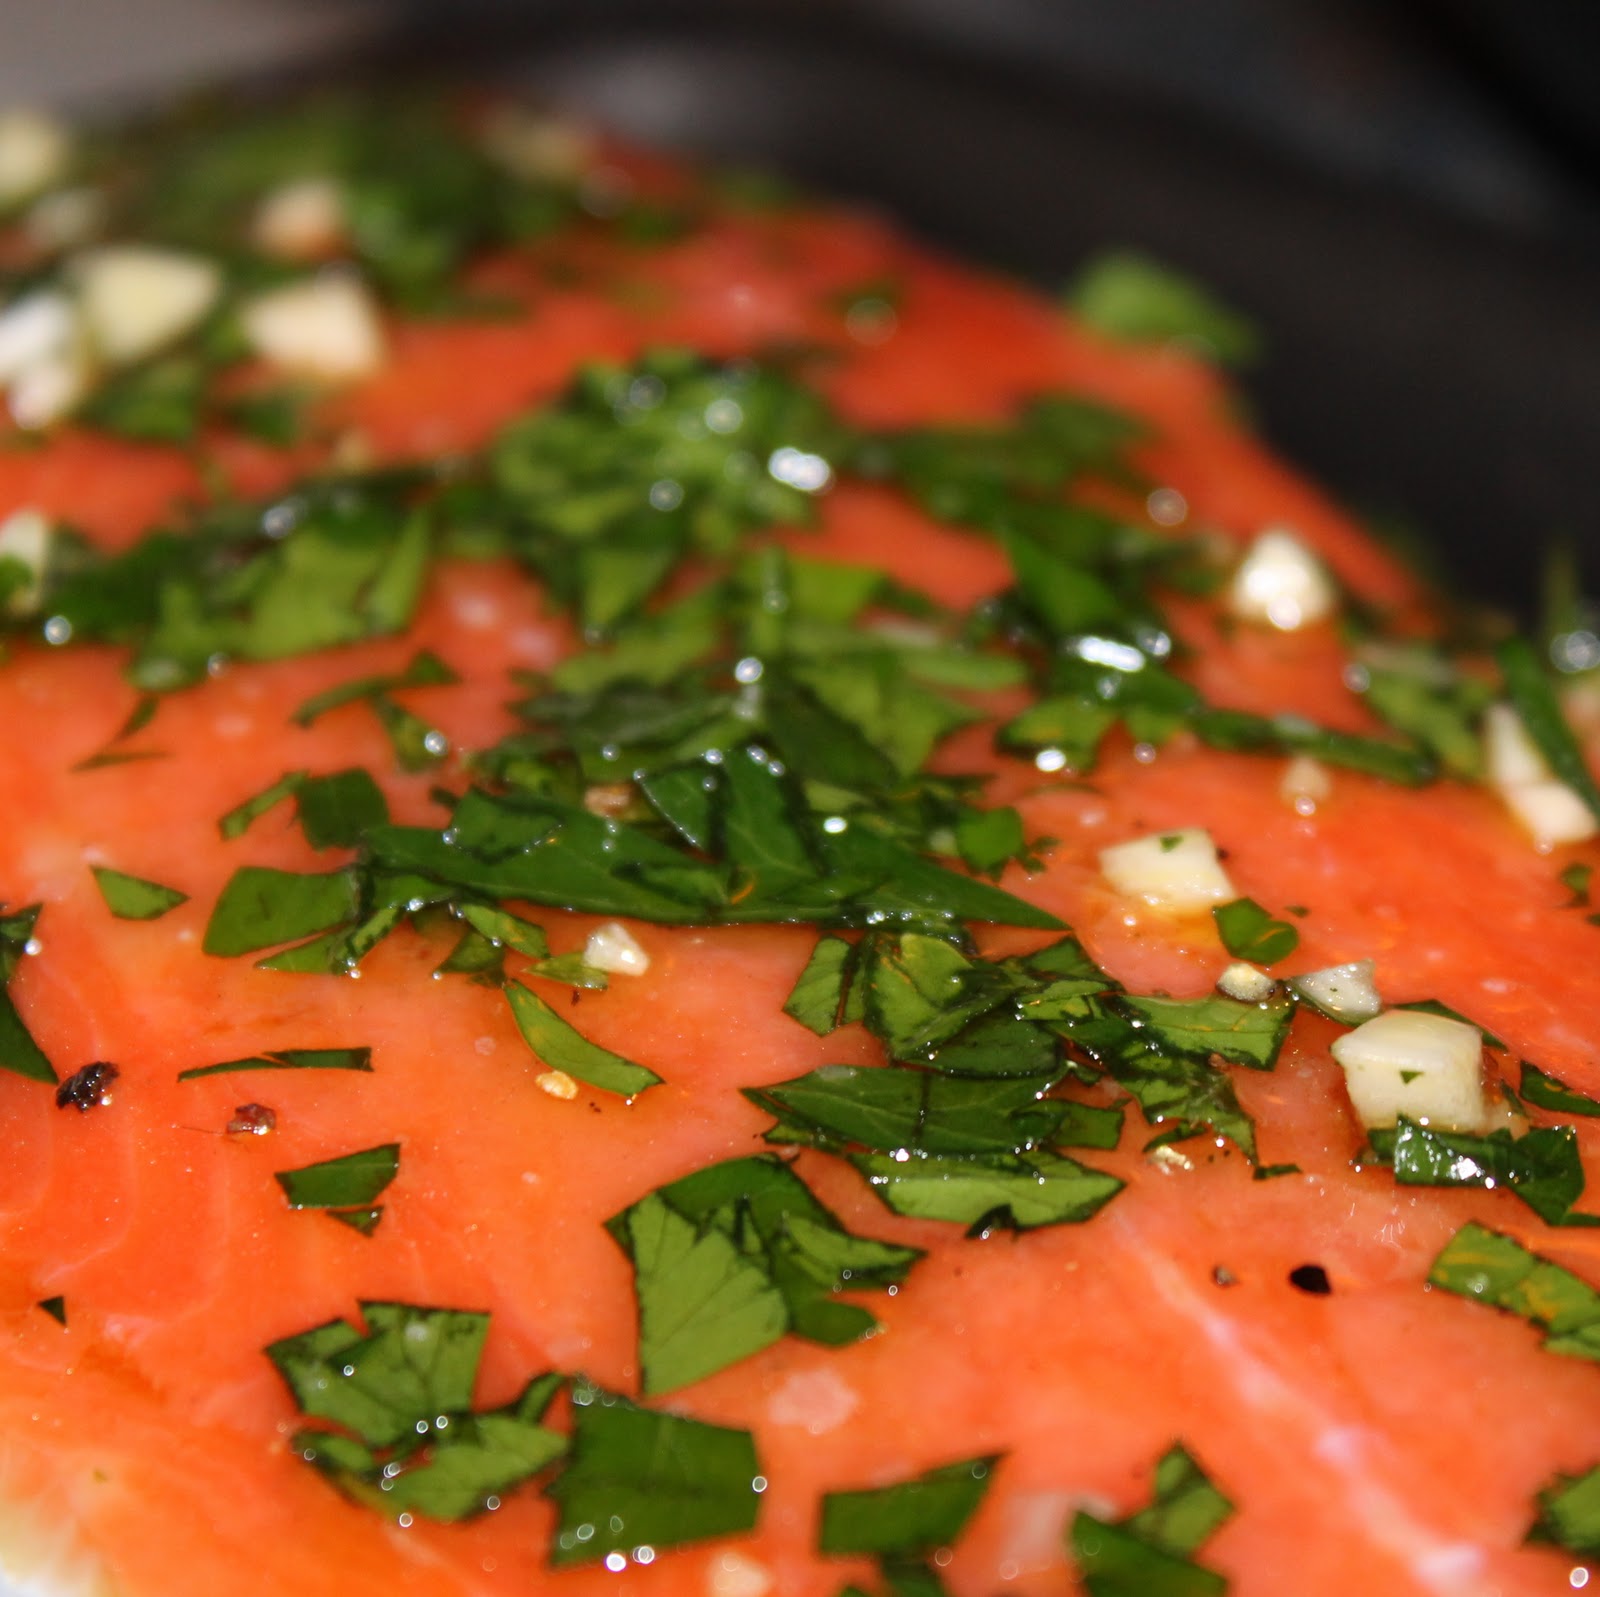
Rub on the salmon.
Heat a grill pan over medium high heat. Spray lightly with cooking spray. Add the salmon to the pan skin side up. Cook for 3 minutes. Flip the salmon and cook for 4 minutes, or until cooked to your liking.
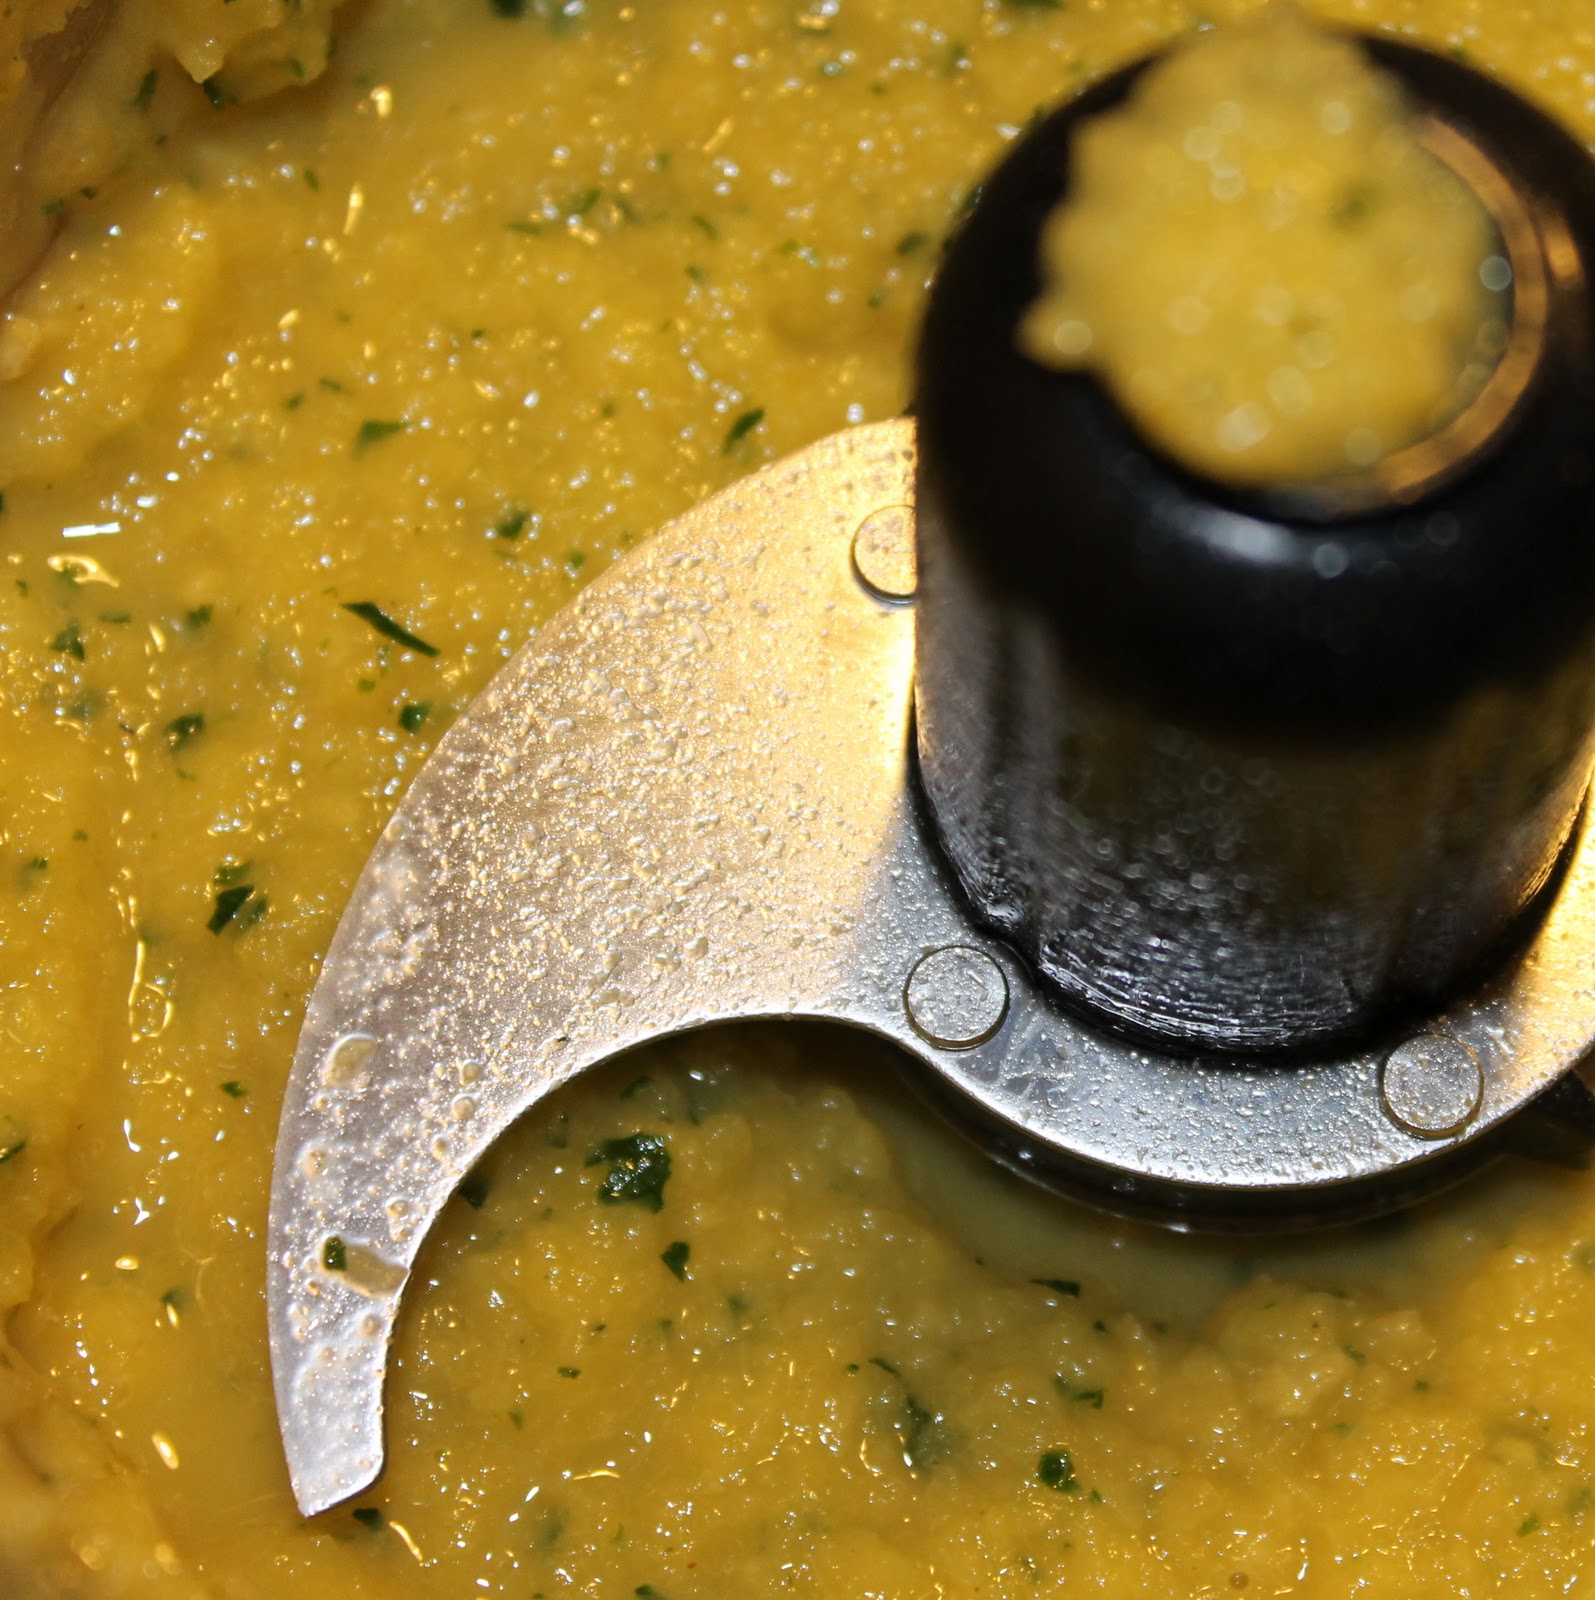
While the salmon is cooking, combine the mango, lemon, honey, basil, parsley, water, and mustard in a blender.
Puree for 1-2 minutes.
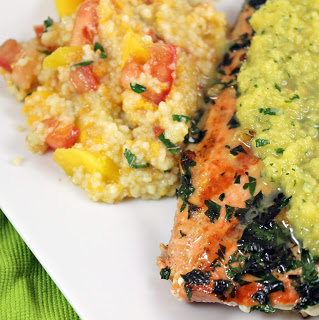
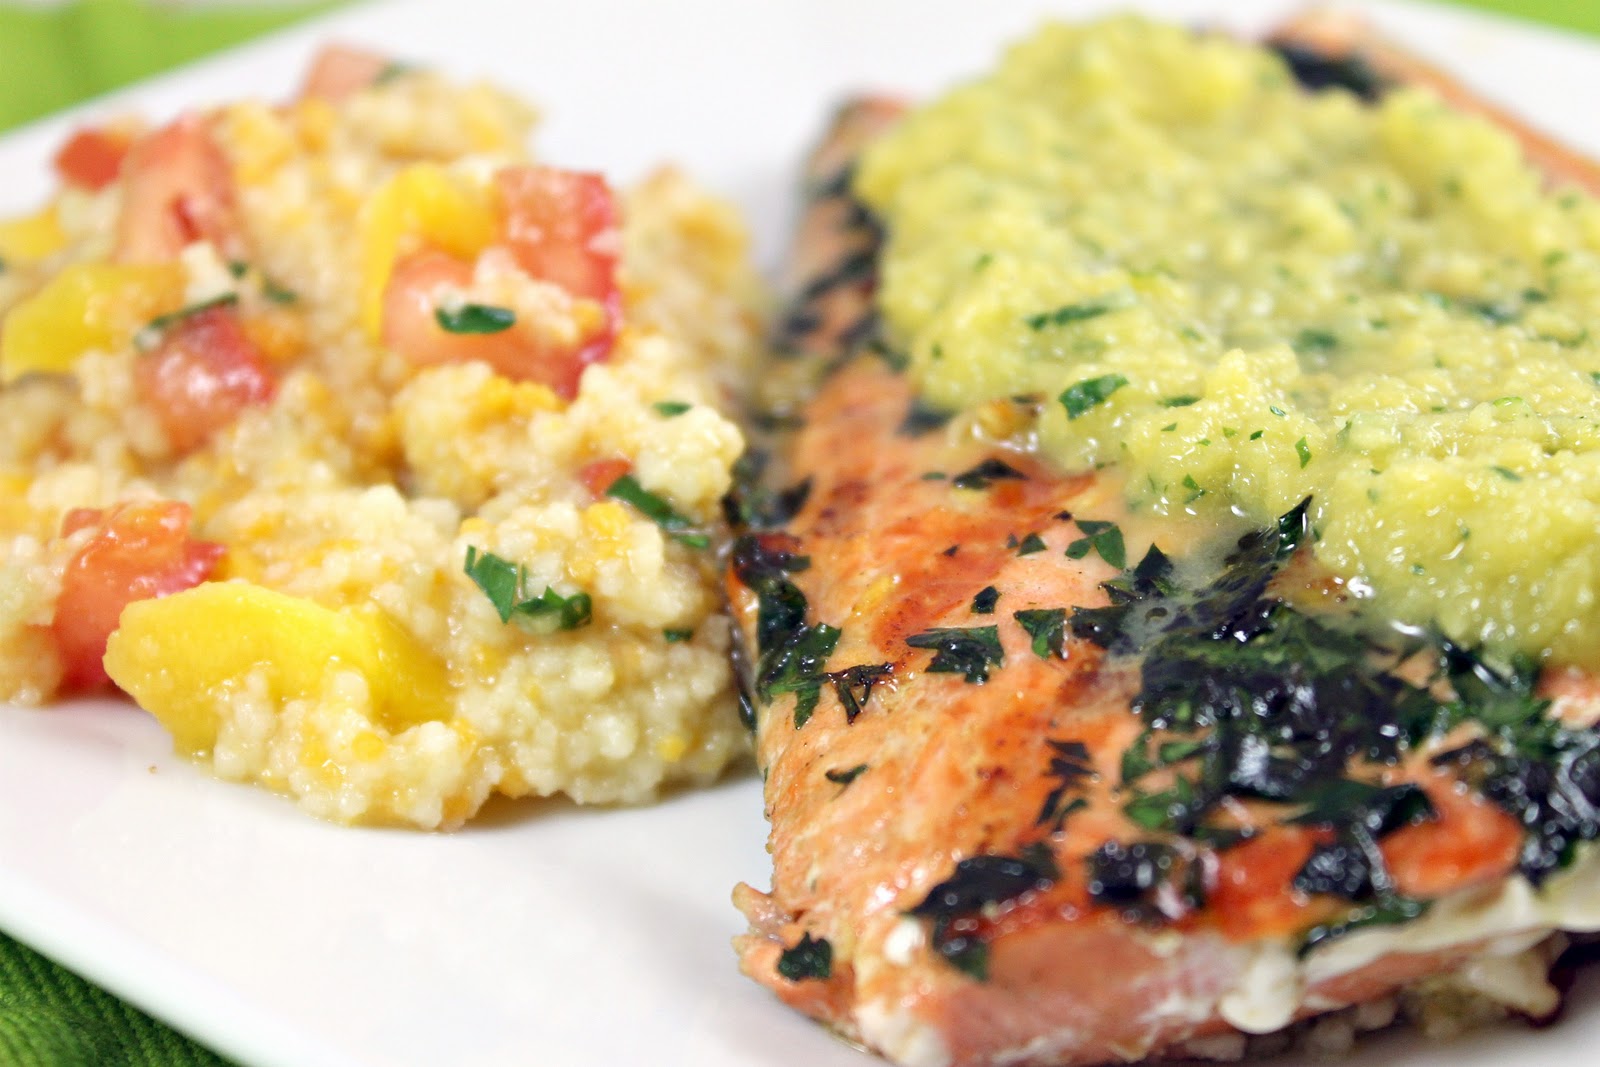
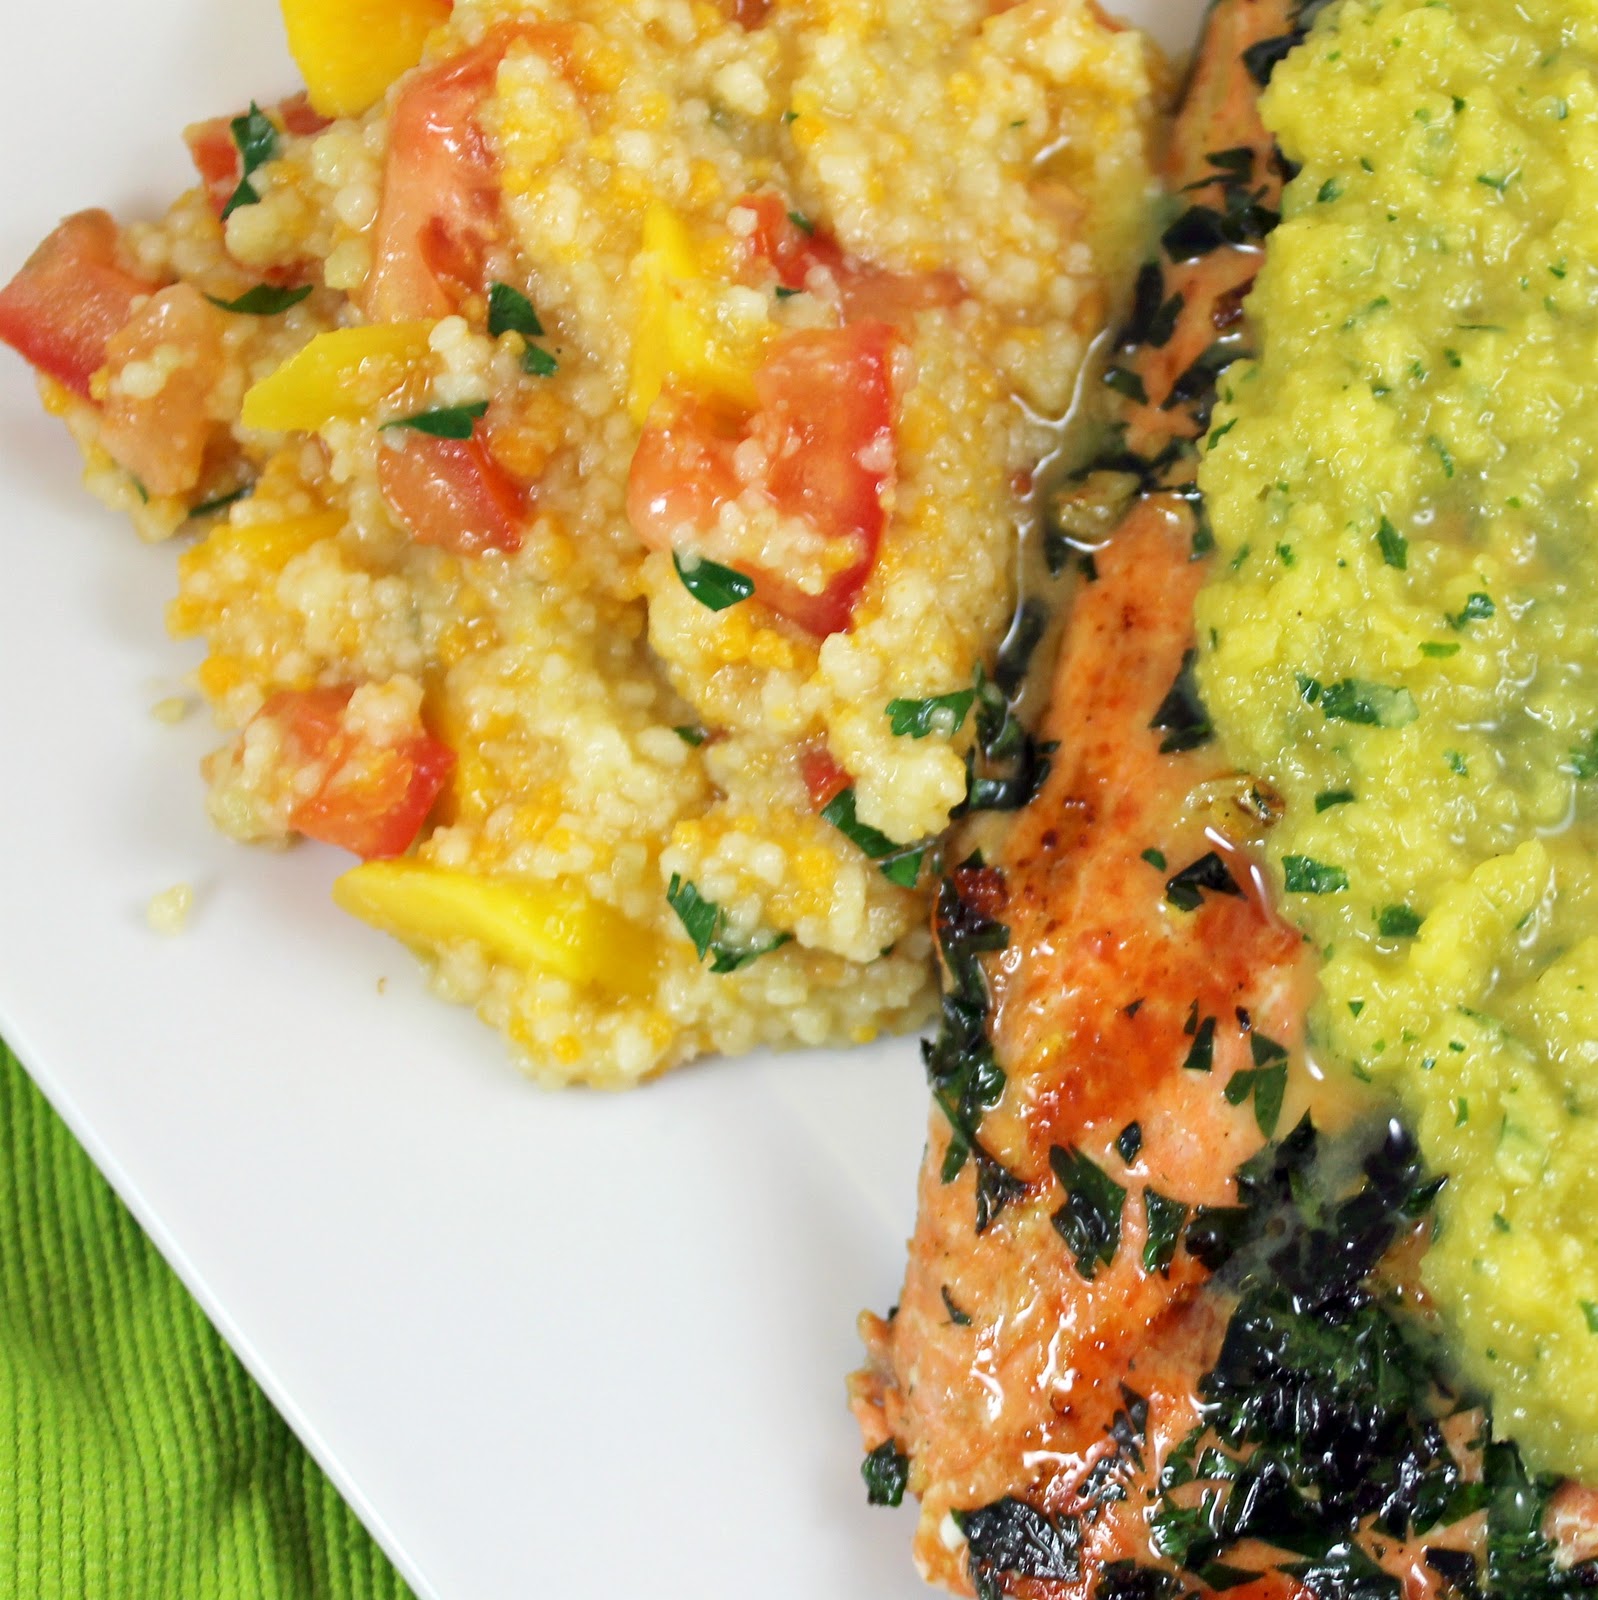
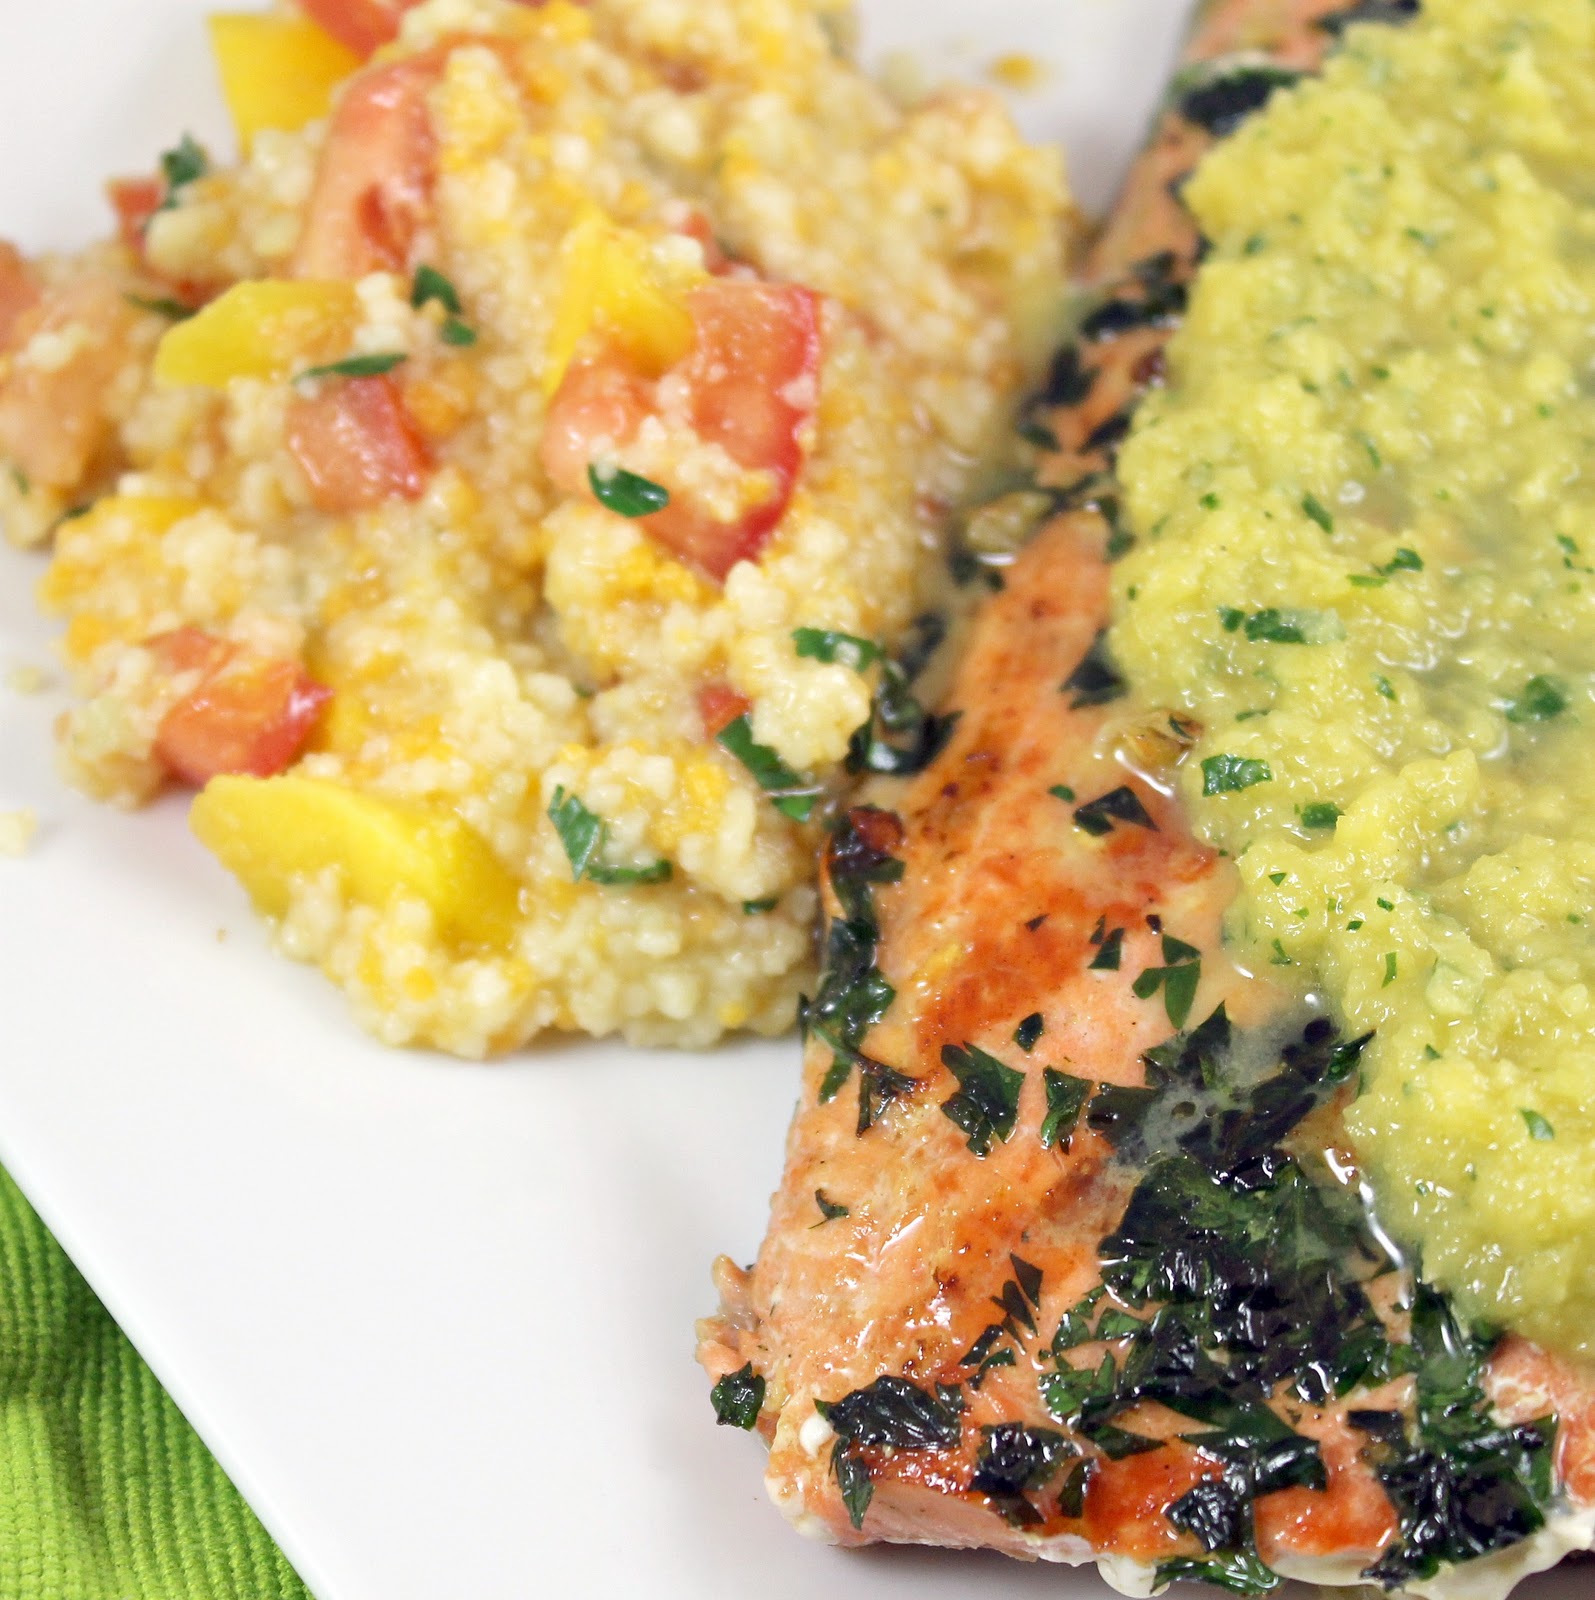
To serve, add the salmon and couscous to a plate. Spoon the sauce over the salmon.
Look at those colors!
What I love most about this dish is you get to enjoy mango two ways: sweet within the couscous and tangy within the sauce.
I made this for my boyfriend and he loved it! He was all but licking his plate clean. He even started trying to eat off of mine!
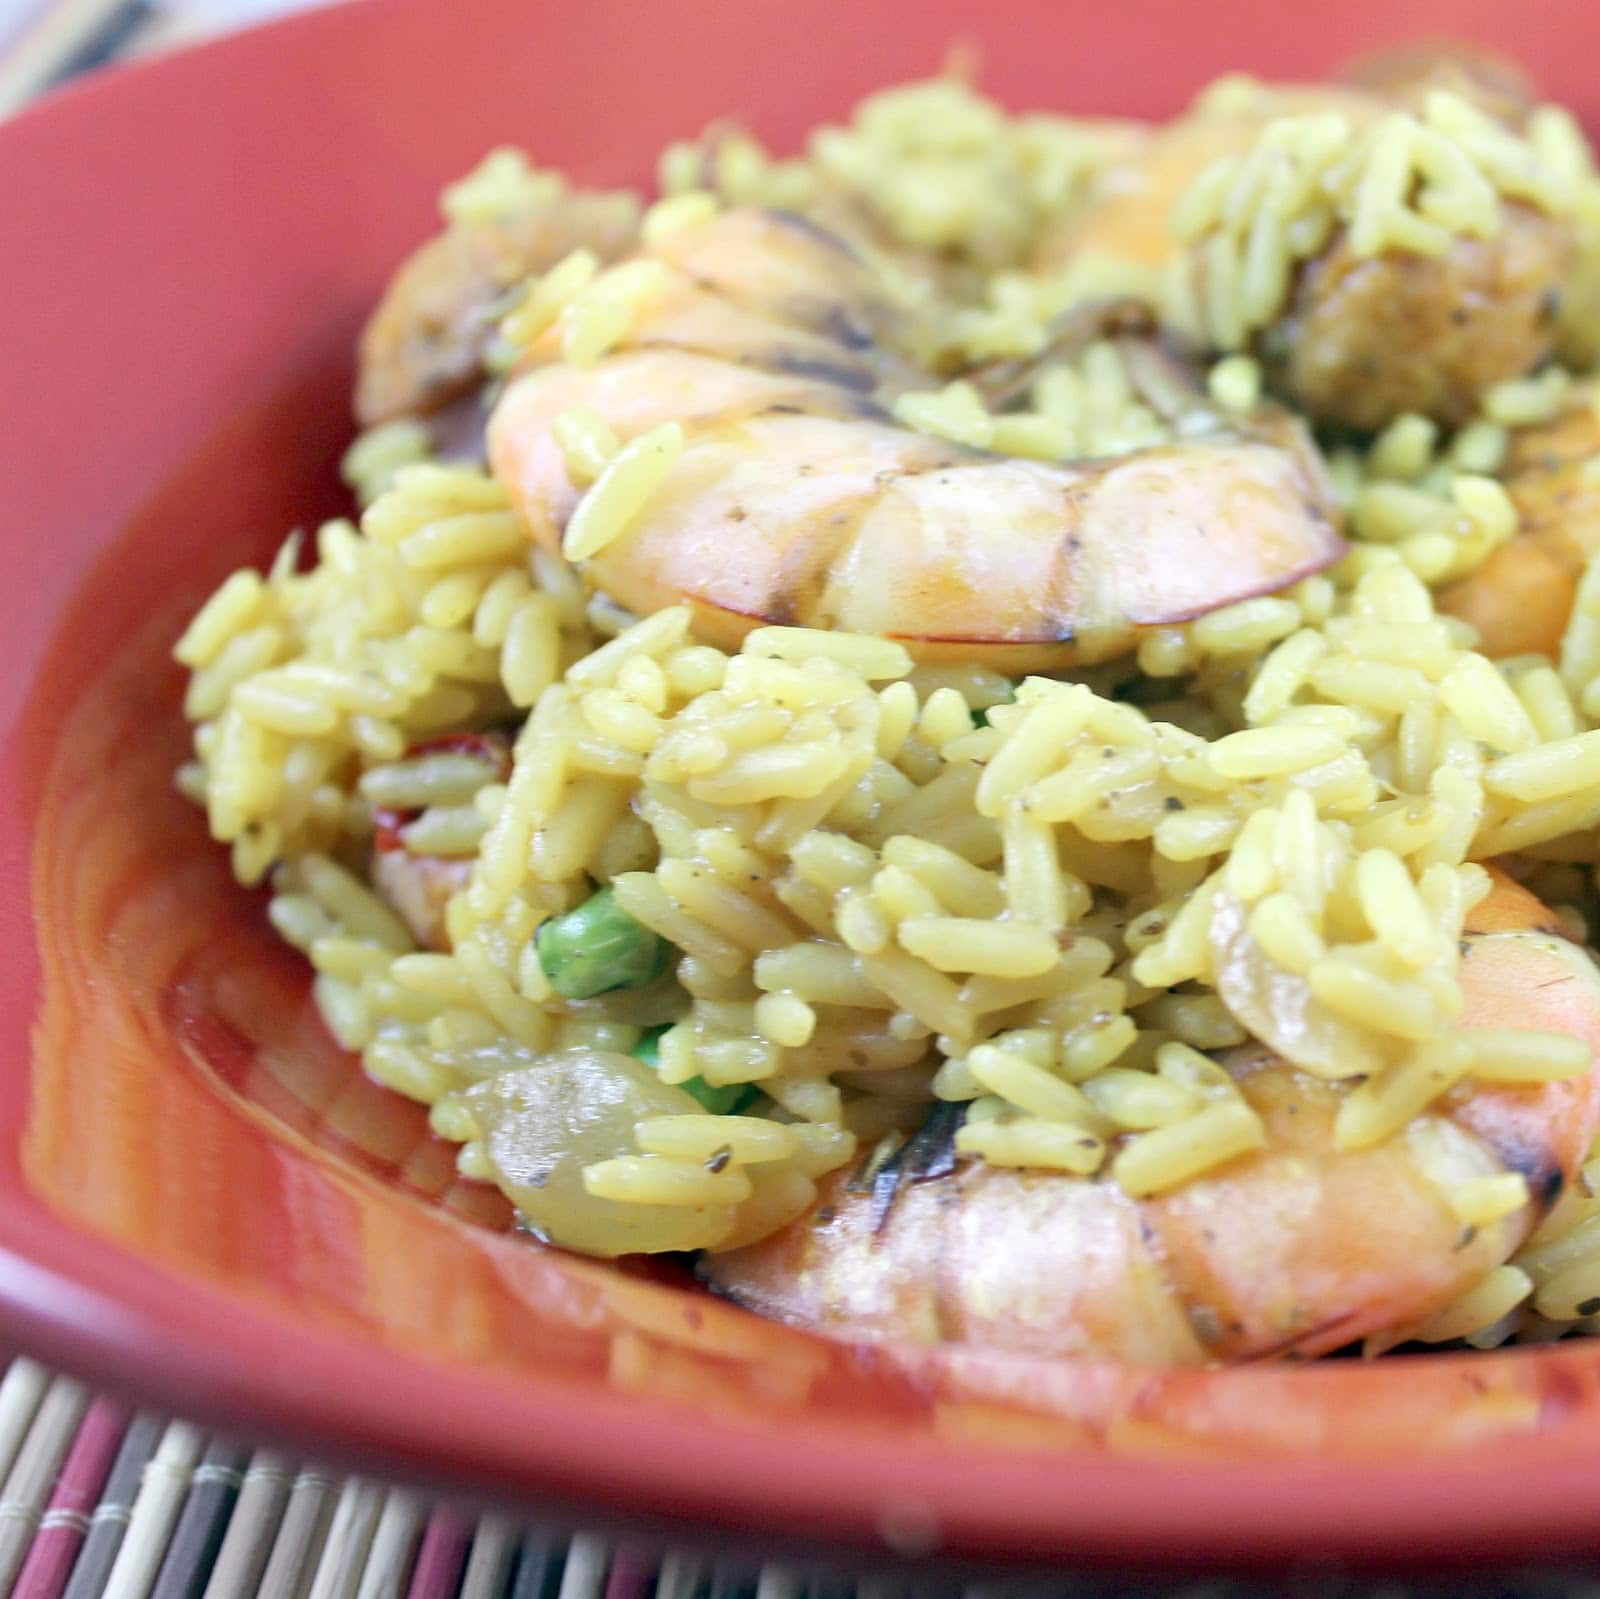
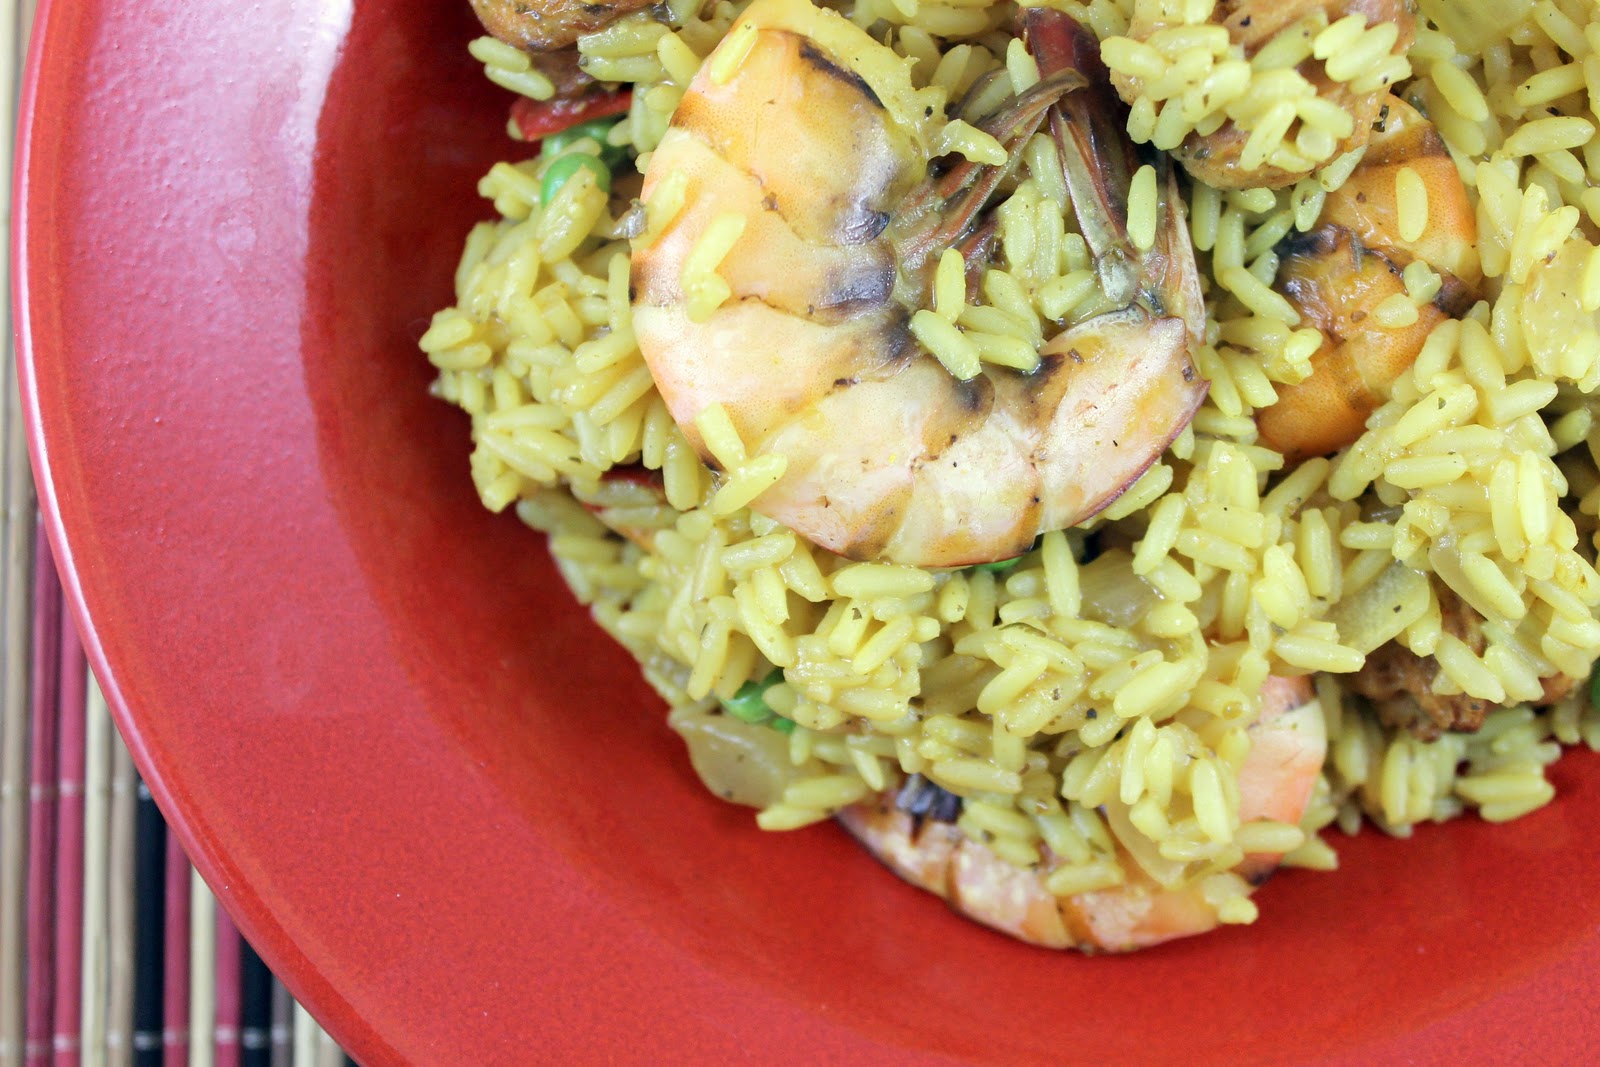
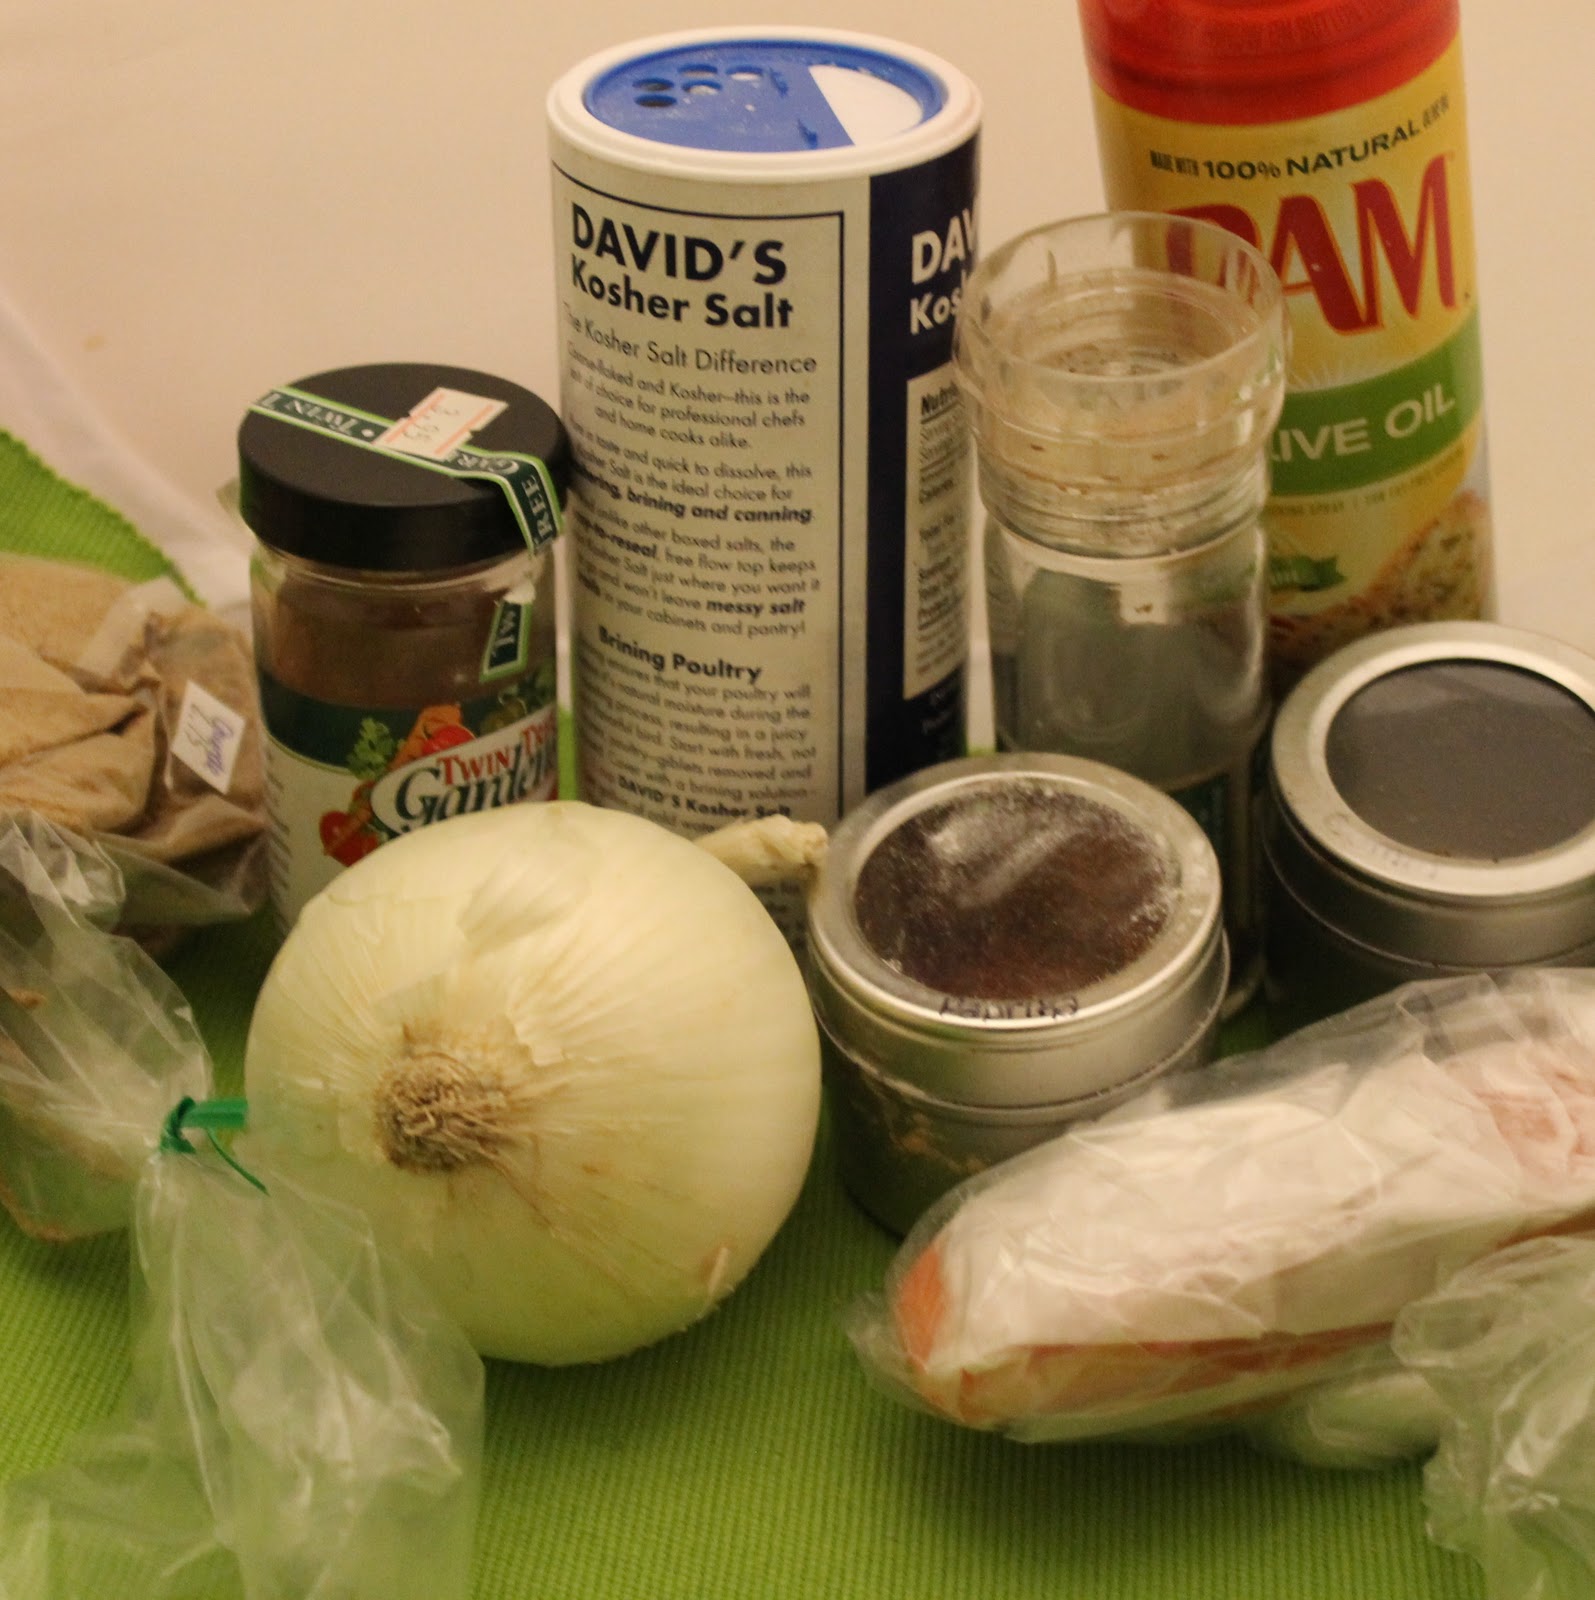
I absolutely love paella: rice, saffron, seafood… what isn’t to like? If I could, I’d eat this amazing dish once a week. Traditional paella takes a good hour at least to make, so it would be quite the task to make it all the time. However, I found a paella-like dish from Cooking Light that can be made in 30 minutes! My parents and sister recently went to Spain and brought me back some amazing, but vague, spices. One was just labeled as “paella spice” and I thought this would be the perfect opportunity to try it out.
Ingredients:
1 tablespoon extra-virgin olive oil
1/2 a white onion, chopped
2 chicken sausages, cut into pieces
2 garlic cloves, minced
1 pound large shrimp
2 cups uncooked rice
1 cup water
1 tablespoon oregano
1/4 teaspoon salt
1 teaspoon “paella spice” (sub in 1/2 teaspoon crushed saffron for this)
1/4 teaspoon paprika, smoked would be ideal
1/4 teaspoon freshly ground black pepper
2 cups chicken broth
1 cup frozen green peas
the juice of 1/2 a lemon juice
Using a Dutch oven or a heavy bottomed pan, head the olive oil over medium-high heat. Chop your onion and sausage.
Add to the pot and cook, stirring, for three minutes.
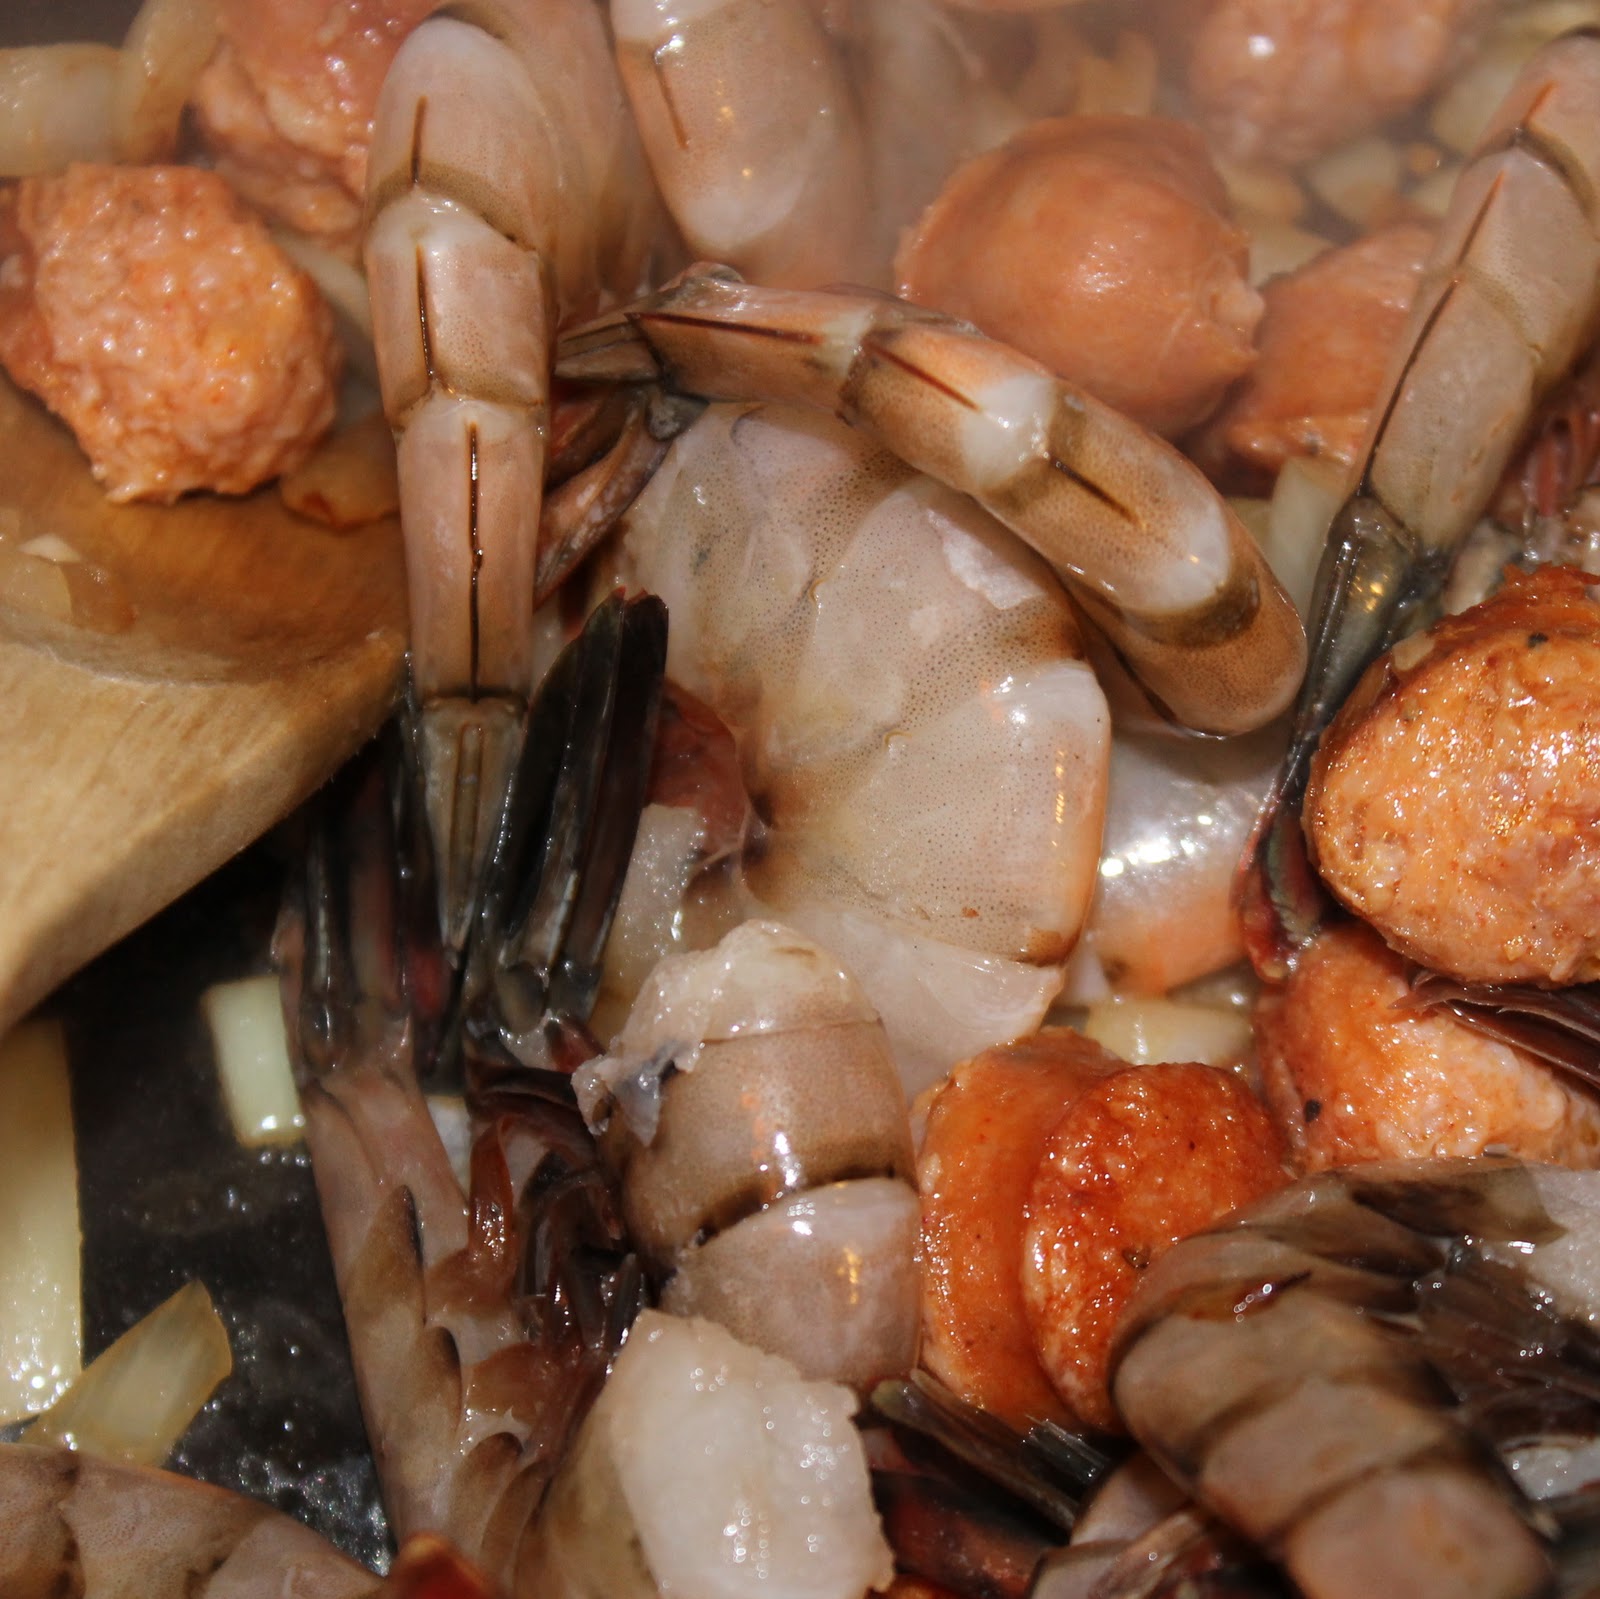
Add the minced garlic and cook, stirring, for about 30 seconds. Add the shrimp and stir in to the other ingredients.
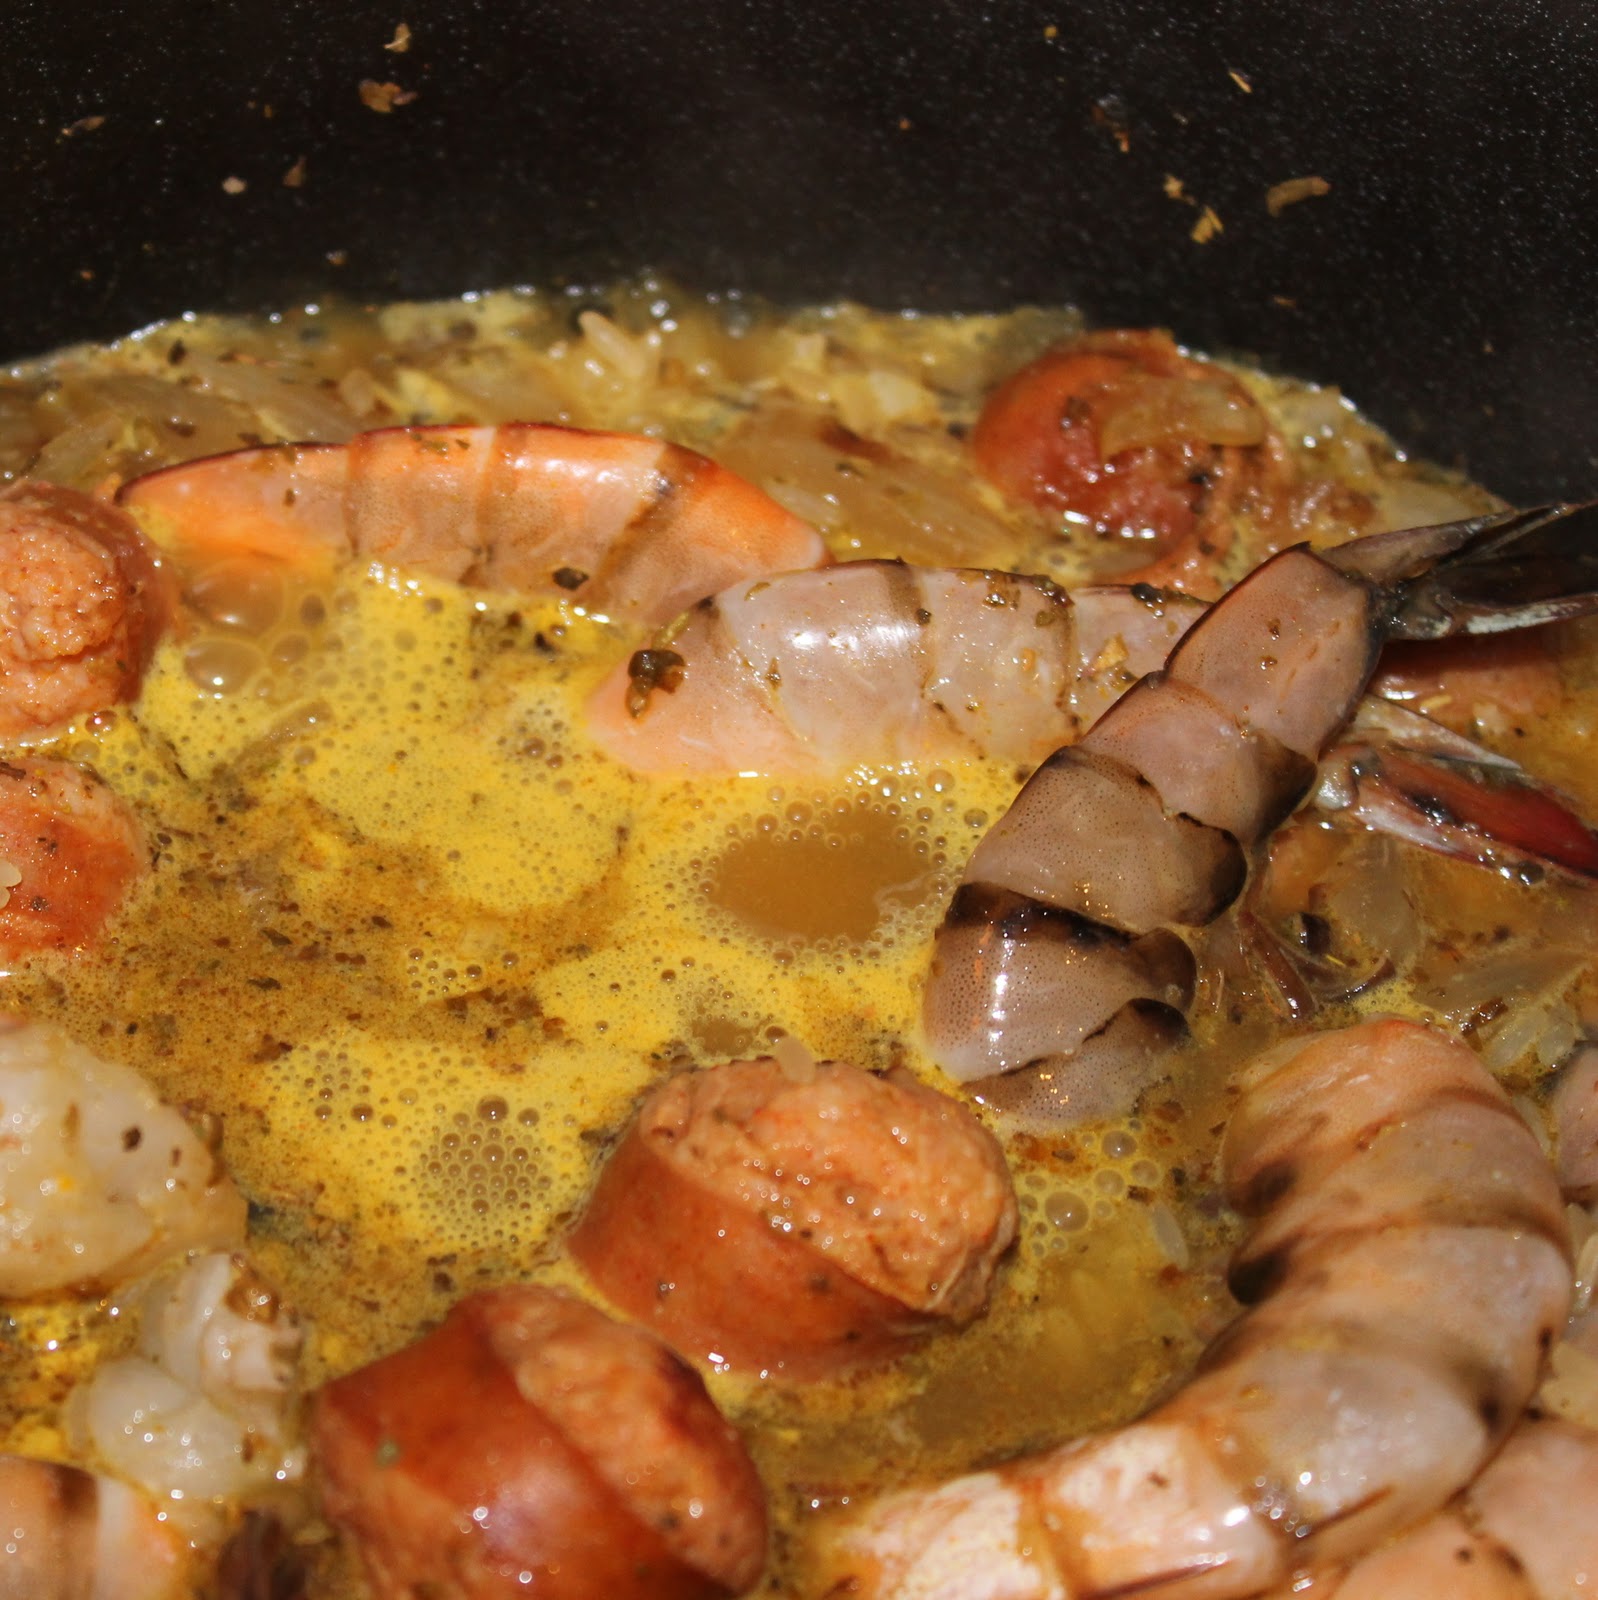
Add the rice, water, oregano, salt, paella spice (or saffron), paprika, black pepper, and chicken broth.
Mix so that the rice is coated in the liquid.
Bring to a boil and cover. Reduce the heat and simmer for 20 minutes.
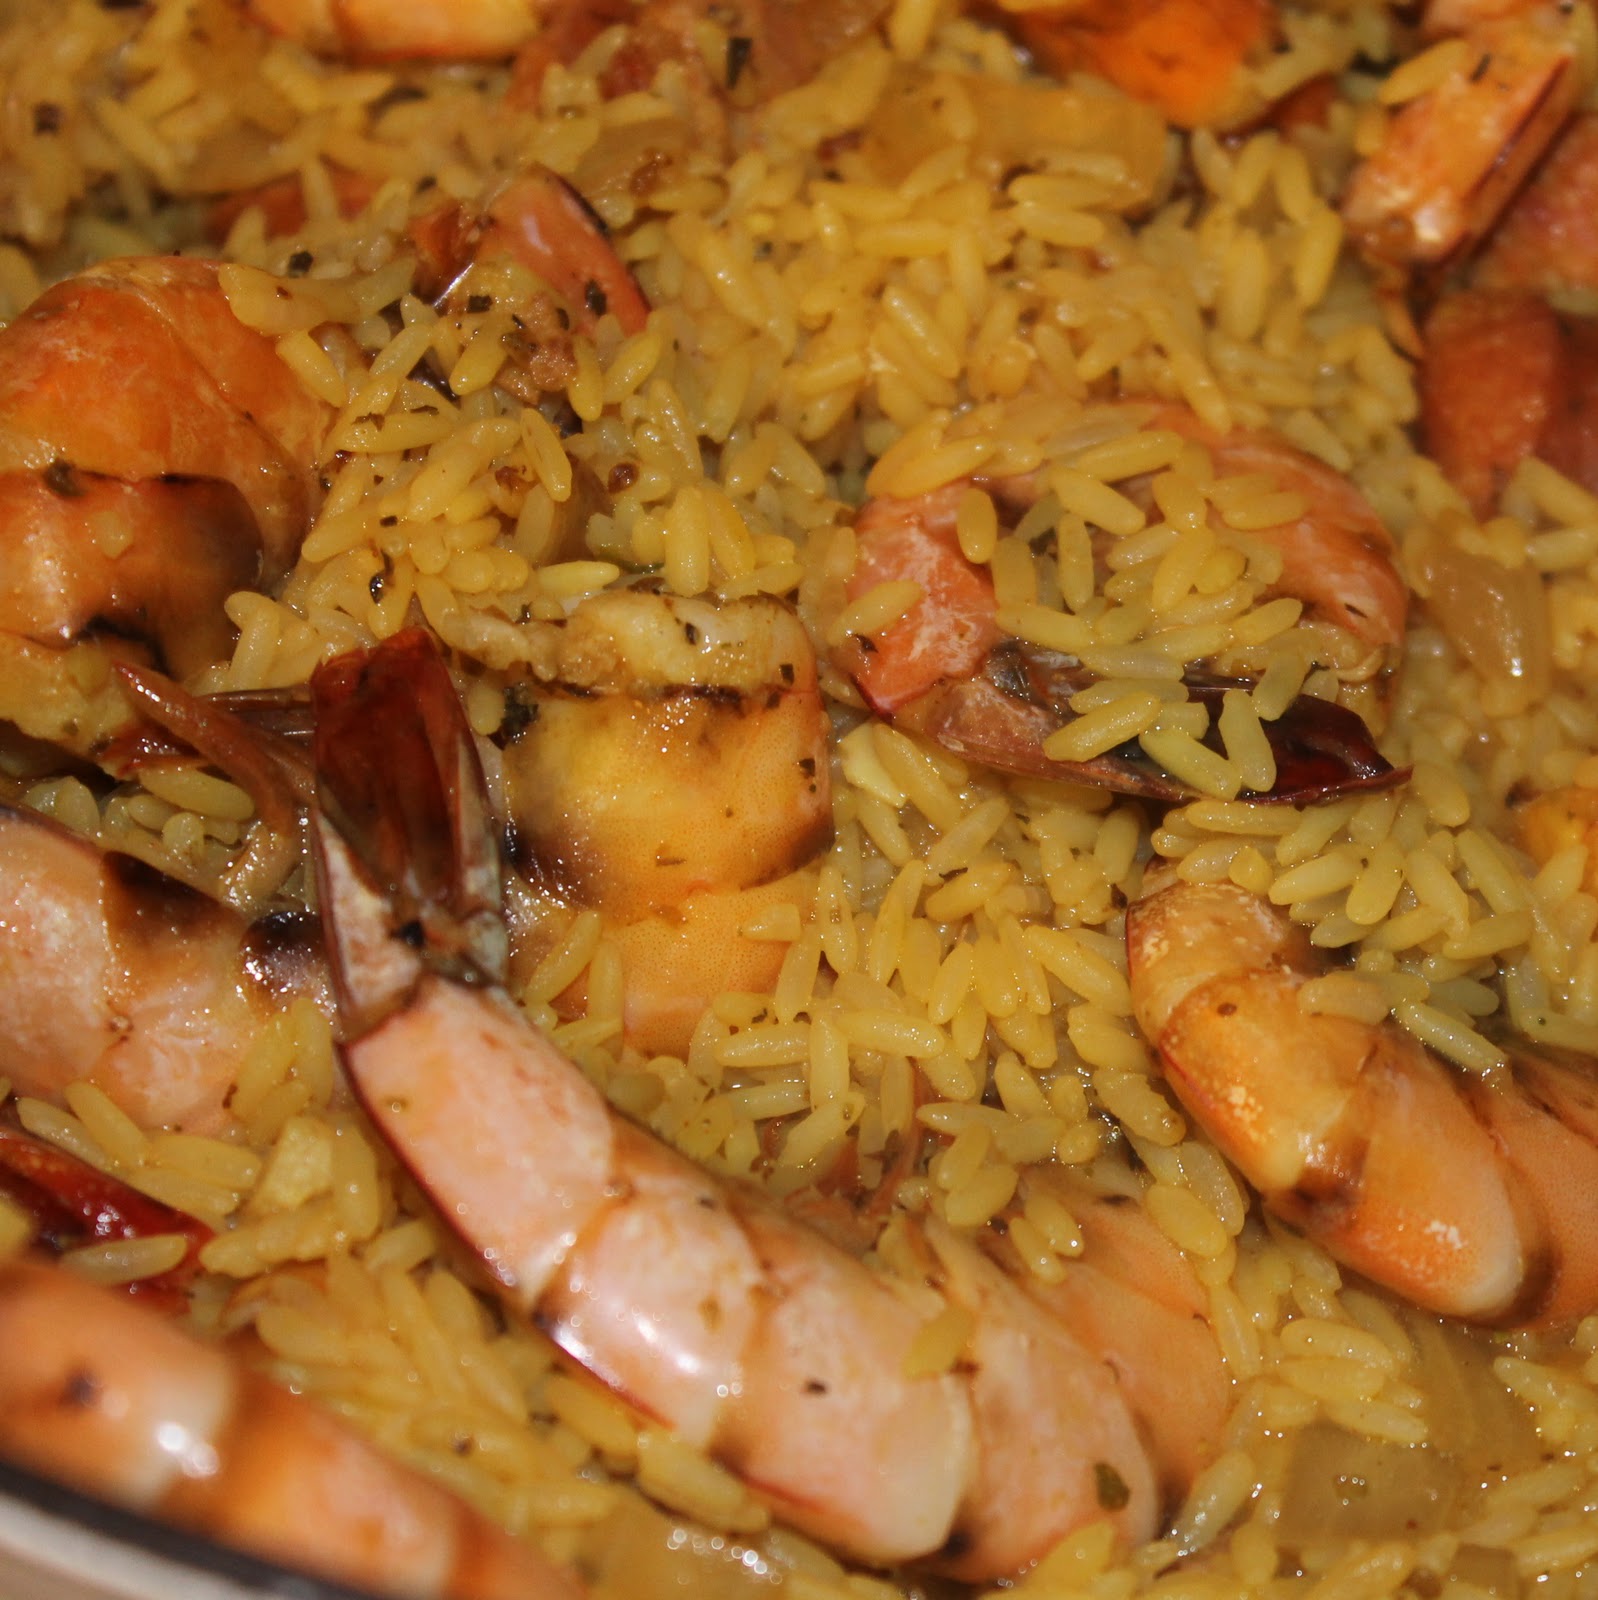
Remove from heat, stir in the peas, and squeeze with the juice of 1/2 a lemon.
So, traditional paella has that nice crispy bottom where the rice has started to stick to the pan. Twenty minutes obviously won’t give you that result. But the rice turns out fluffy and has the flavoring of not only the saffron/paella spice, but also the smokiness of the chicken sausage and a subtle fresh seafood flavor of the shrimp.
The little bit of citrus really enhances the dish. It brings out all of the flavors and adds such brightness to the rice.
I am so impressed and pleased with how this turned out. For just thirty minutes of your time, you can have a paella-type dinner prepared!
I kept the tails and shell on the shrimp so that they could soak in the liquid while cooking the rice. It helped so that the shrimp wouldn’t overcook. Also, I think it makes the paella look a bit more authentic. 🙂
If you are a bit squeamish about it, feel free to use deveined shrimp. I’d suggest not adding them to the pot until the rice is about half way cooked, so as to not overcook the shrimp.
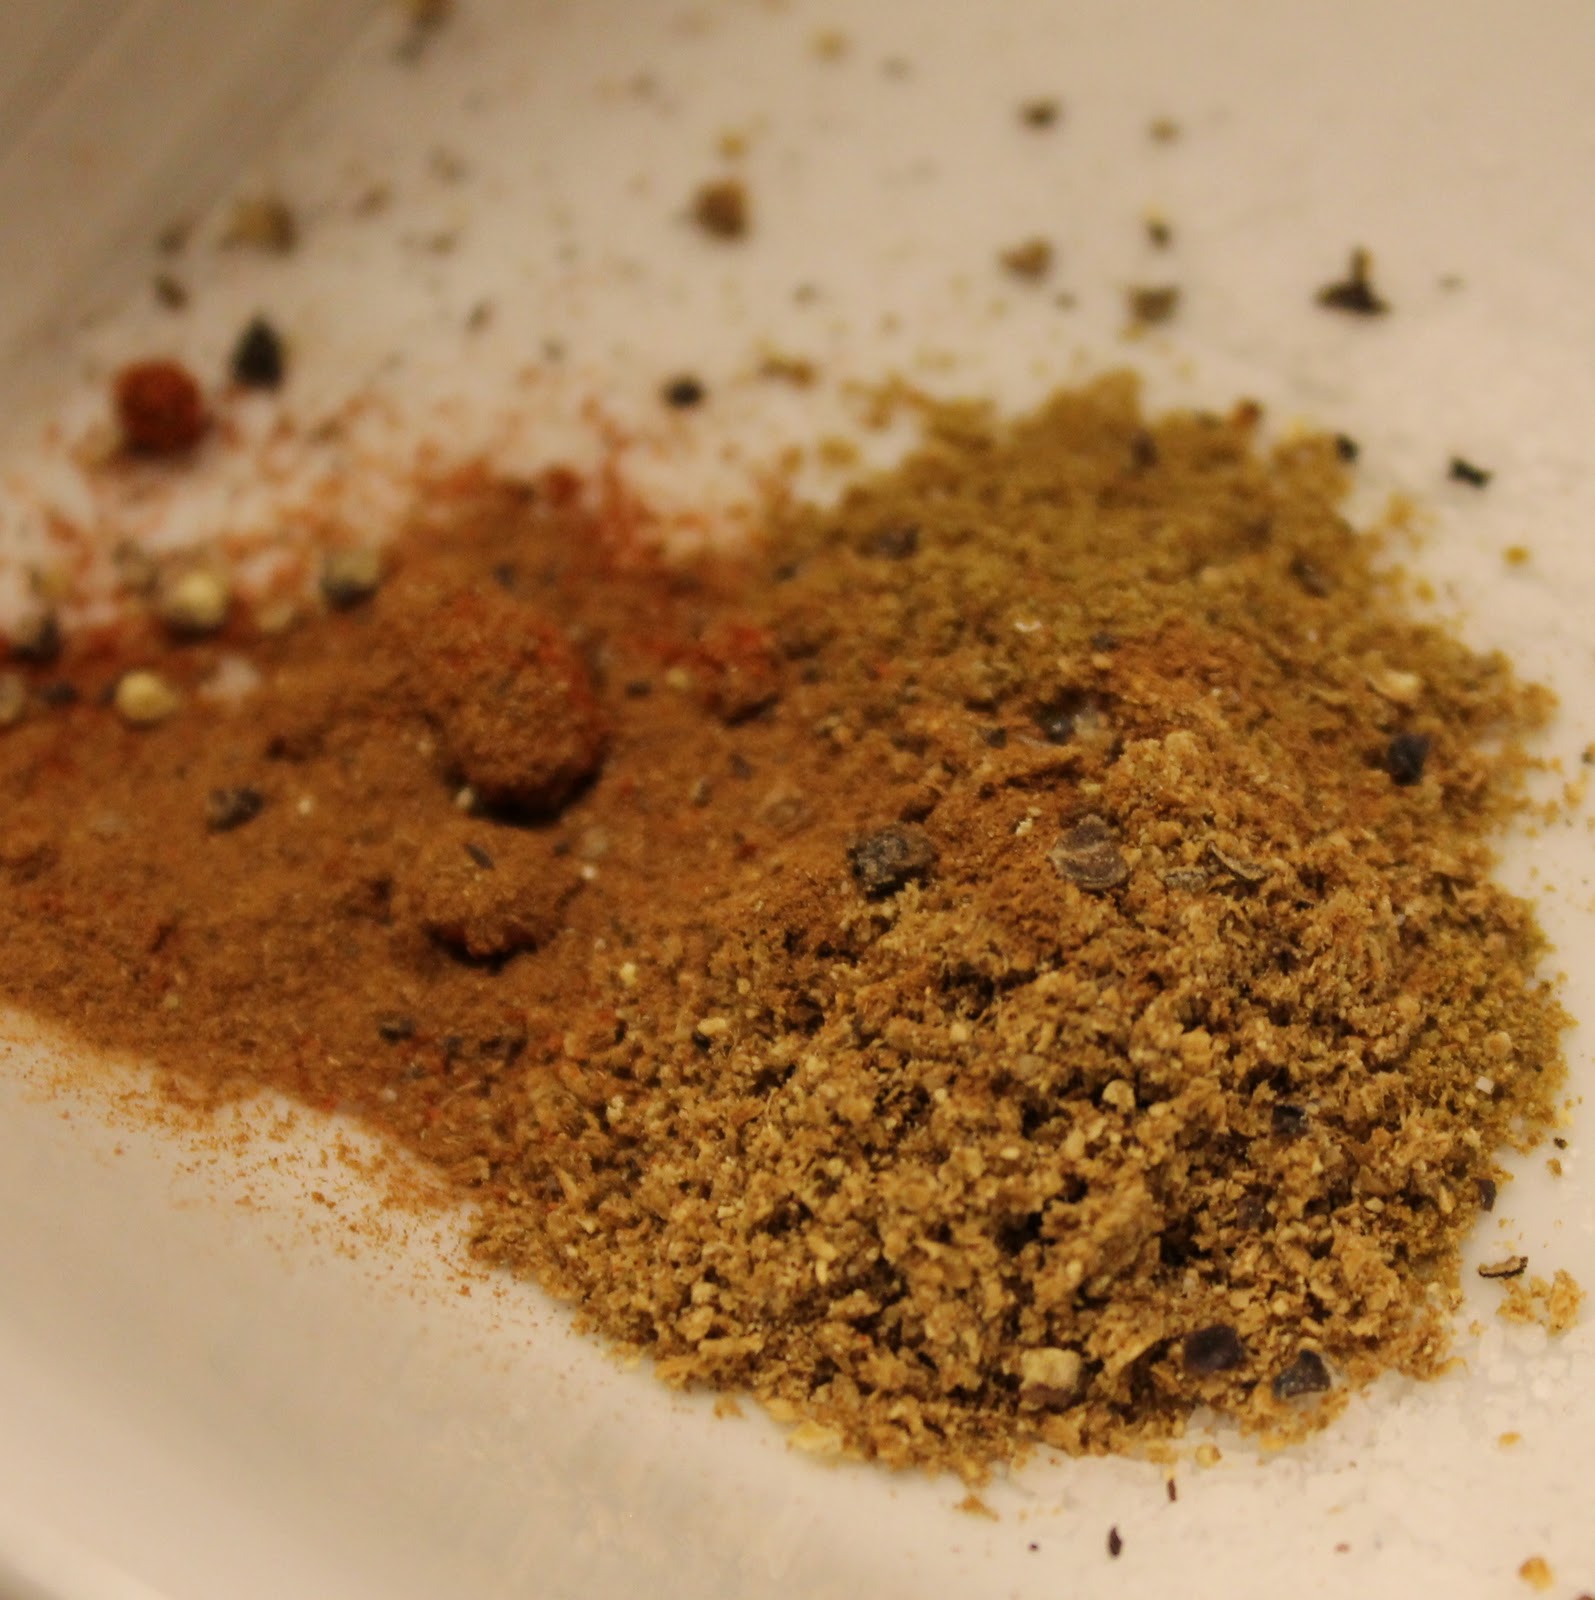
I wish I could figure out what exactly was in the “paella spice” I had because the flavor was really amazing. Saffron, tumeric, spanish paprika? Sigh. Who knows. But if you come across any pre-made paella mix, be sure to buy it and try this dish! However, I do think that using saffron would make a really solid substitute.
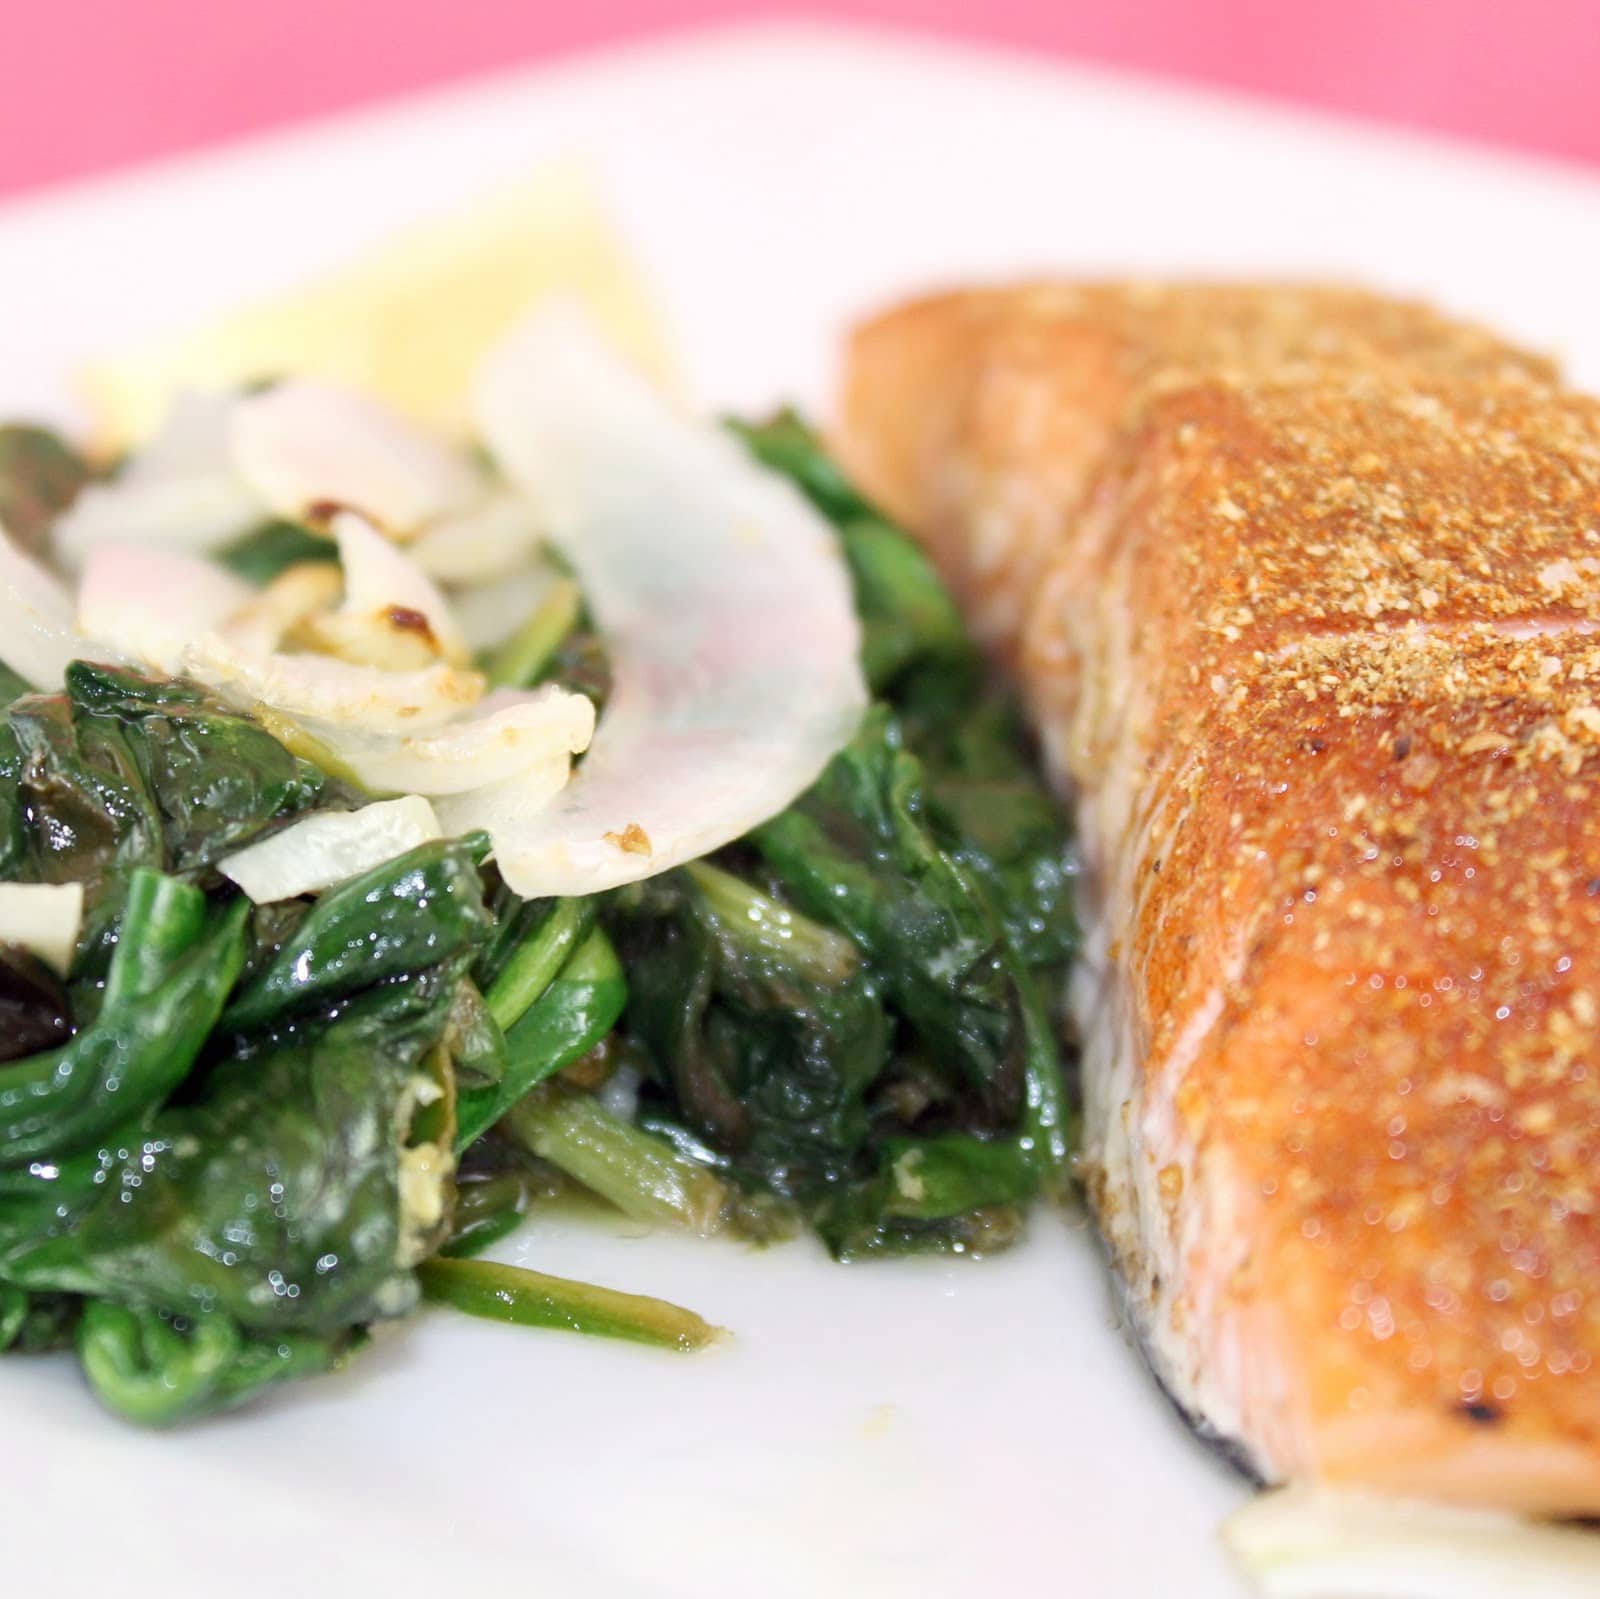
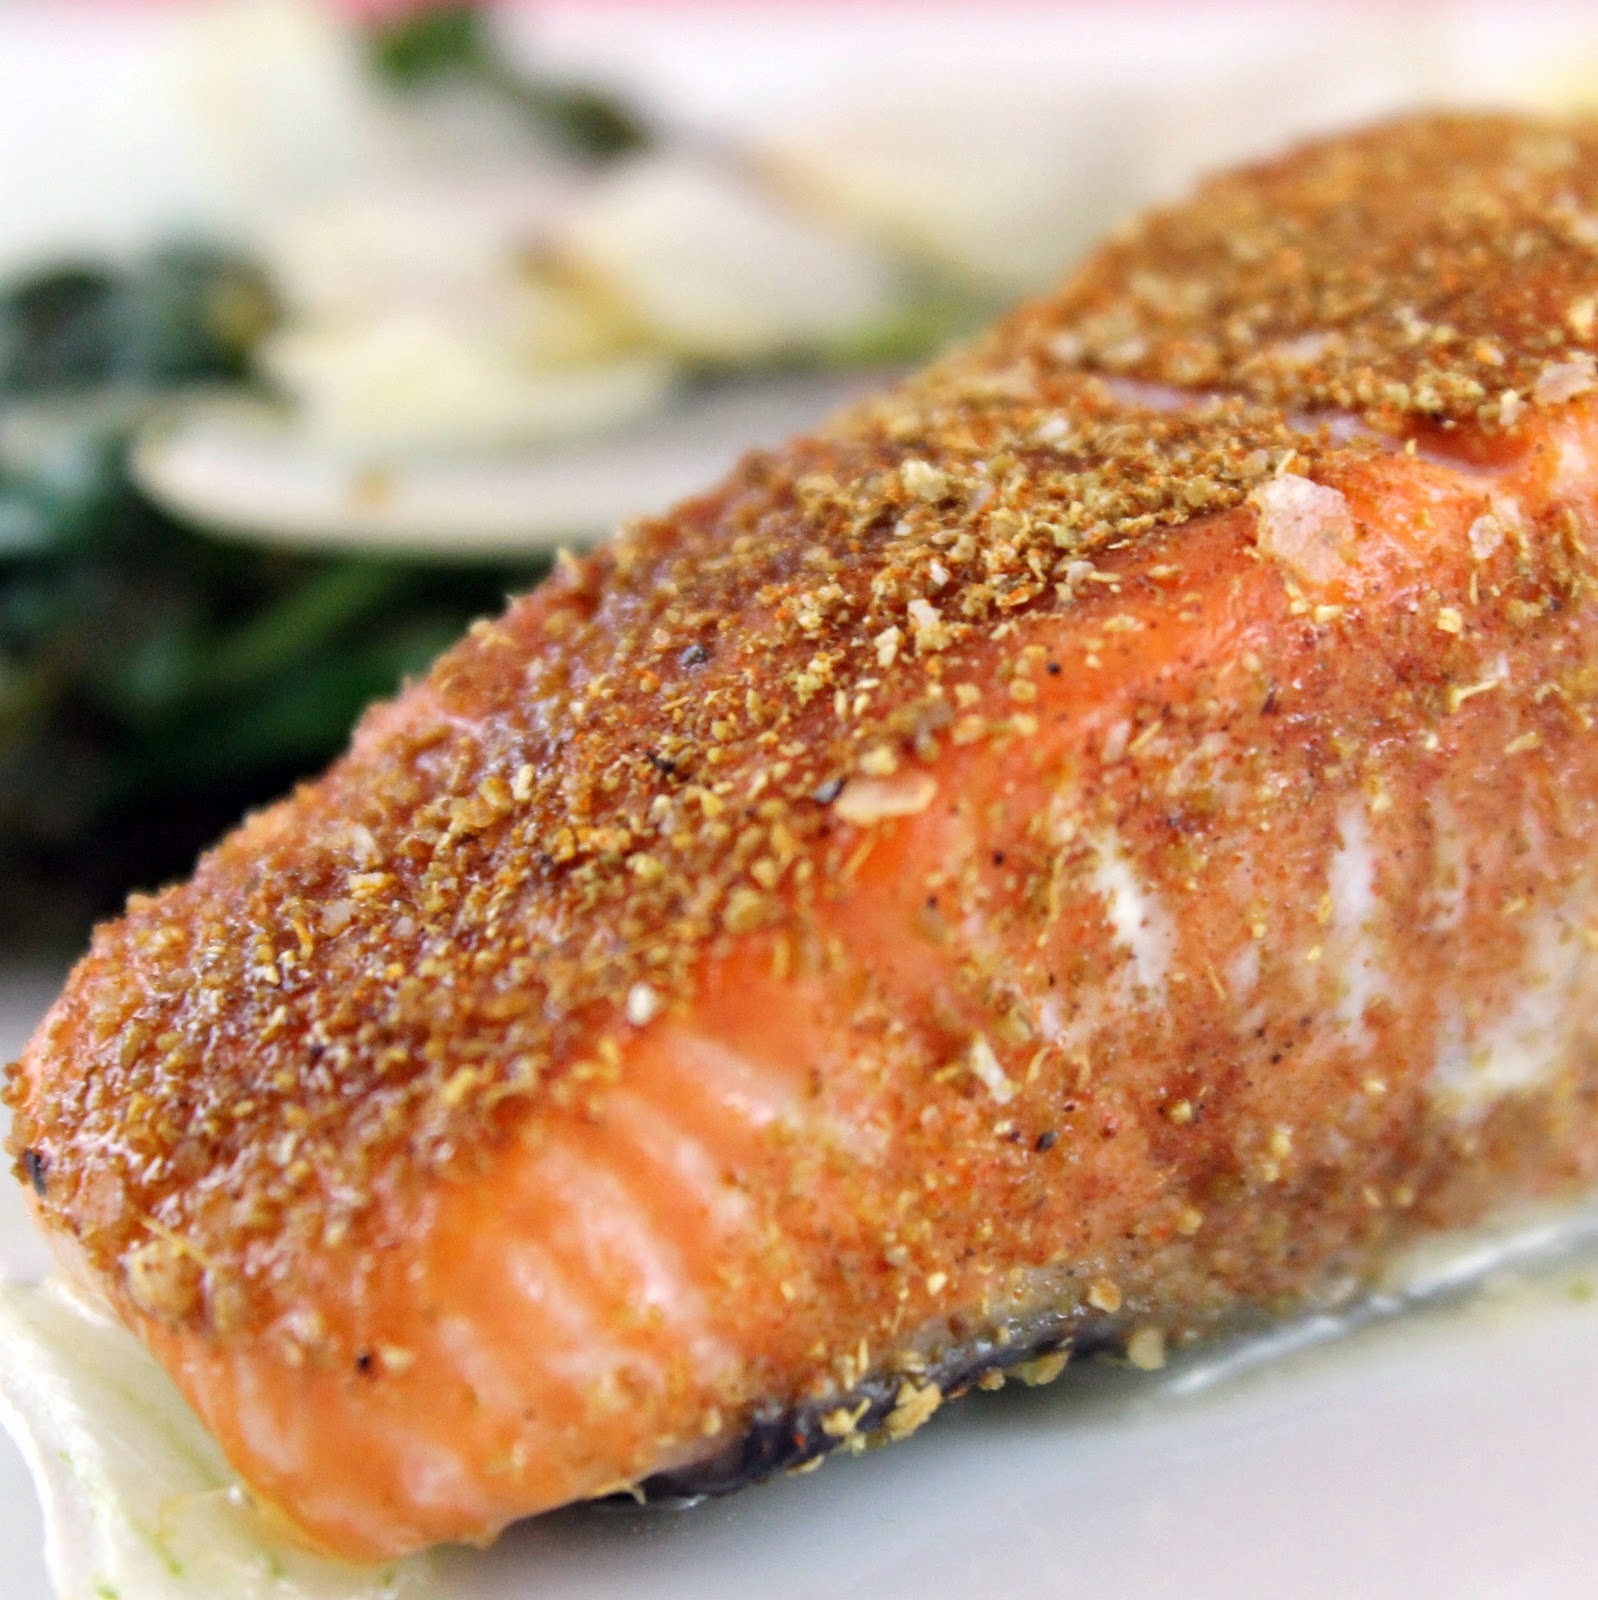
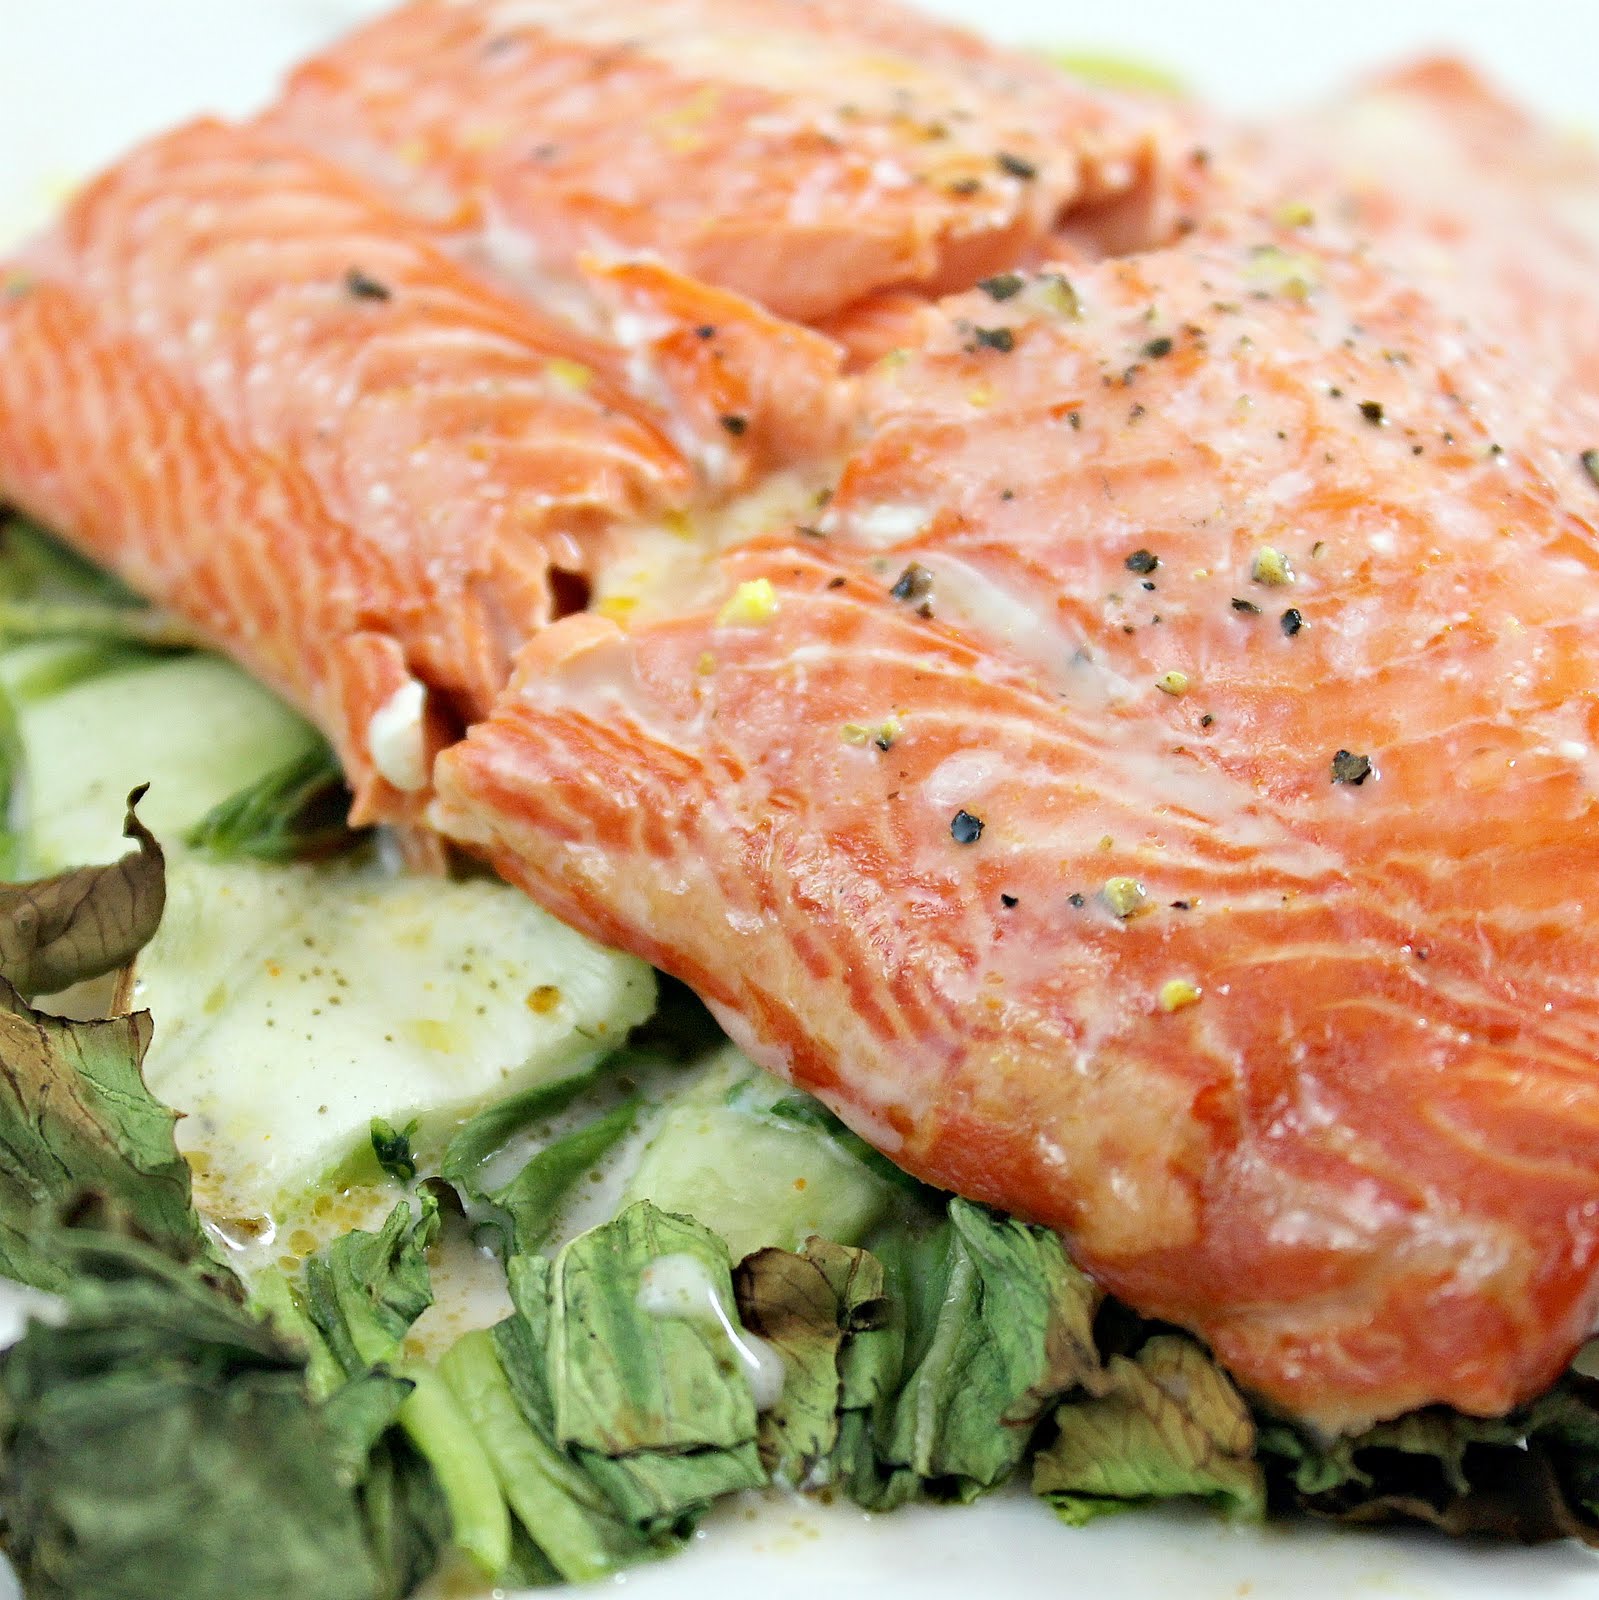
If you’re like me, you can never have too many salmon recipes. If I could, I’d eat salmon every day, so I prefer some variety with how it’s prepared. Cooking Light had a recipe that incorporated some really interesting spices: coriander, cinnamon, cumin and paprika. I was excited to see how this would turn out. The recipe also pairs the salmon with a wilted spinach, one of my favorite sides.
Ingredients (this makes one serving)
Salmon:
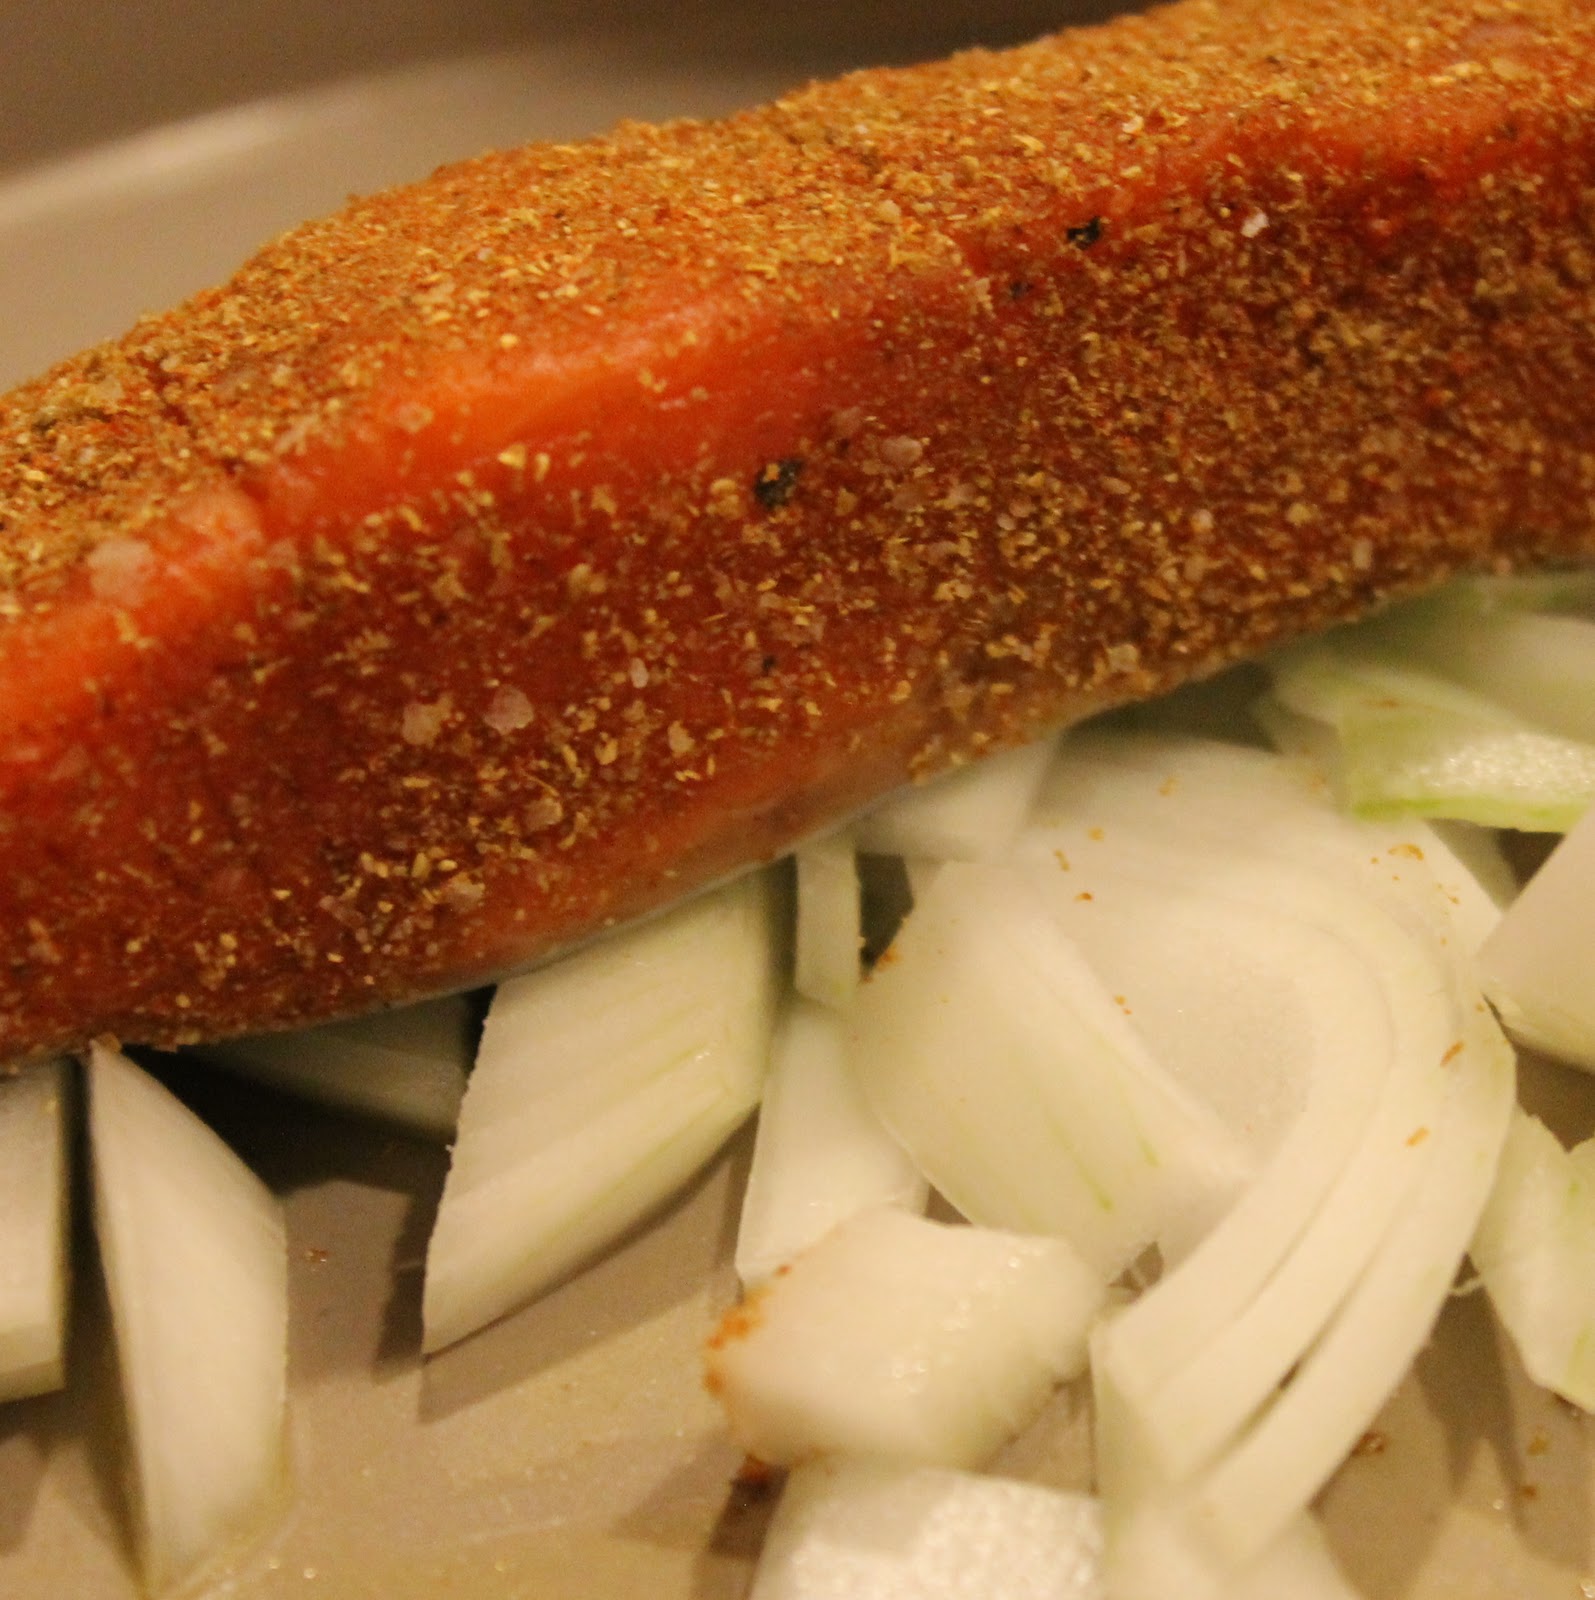
1/4 teaspoon salt
1/4 teaspoon ground cumin
1/4 teaspoon ground coriander
1/8 teaspoon paprika
a pinch of ground cinnamon
a pinch of freshly ground black pepper
1 5 oz salmon fillet
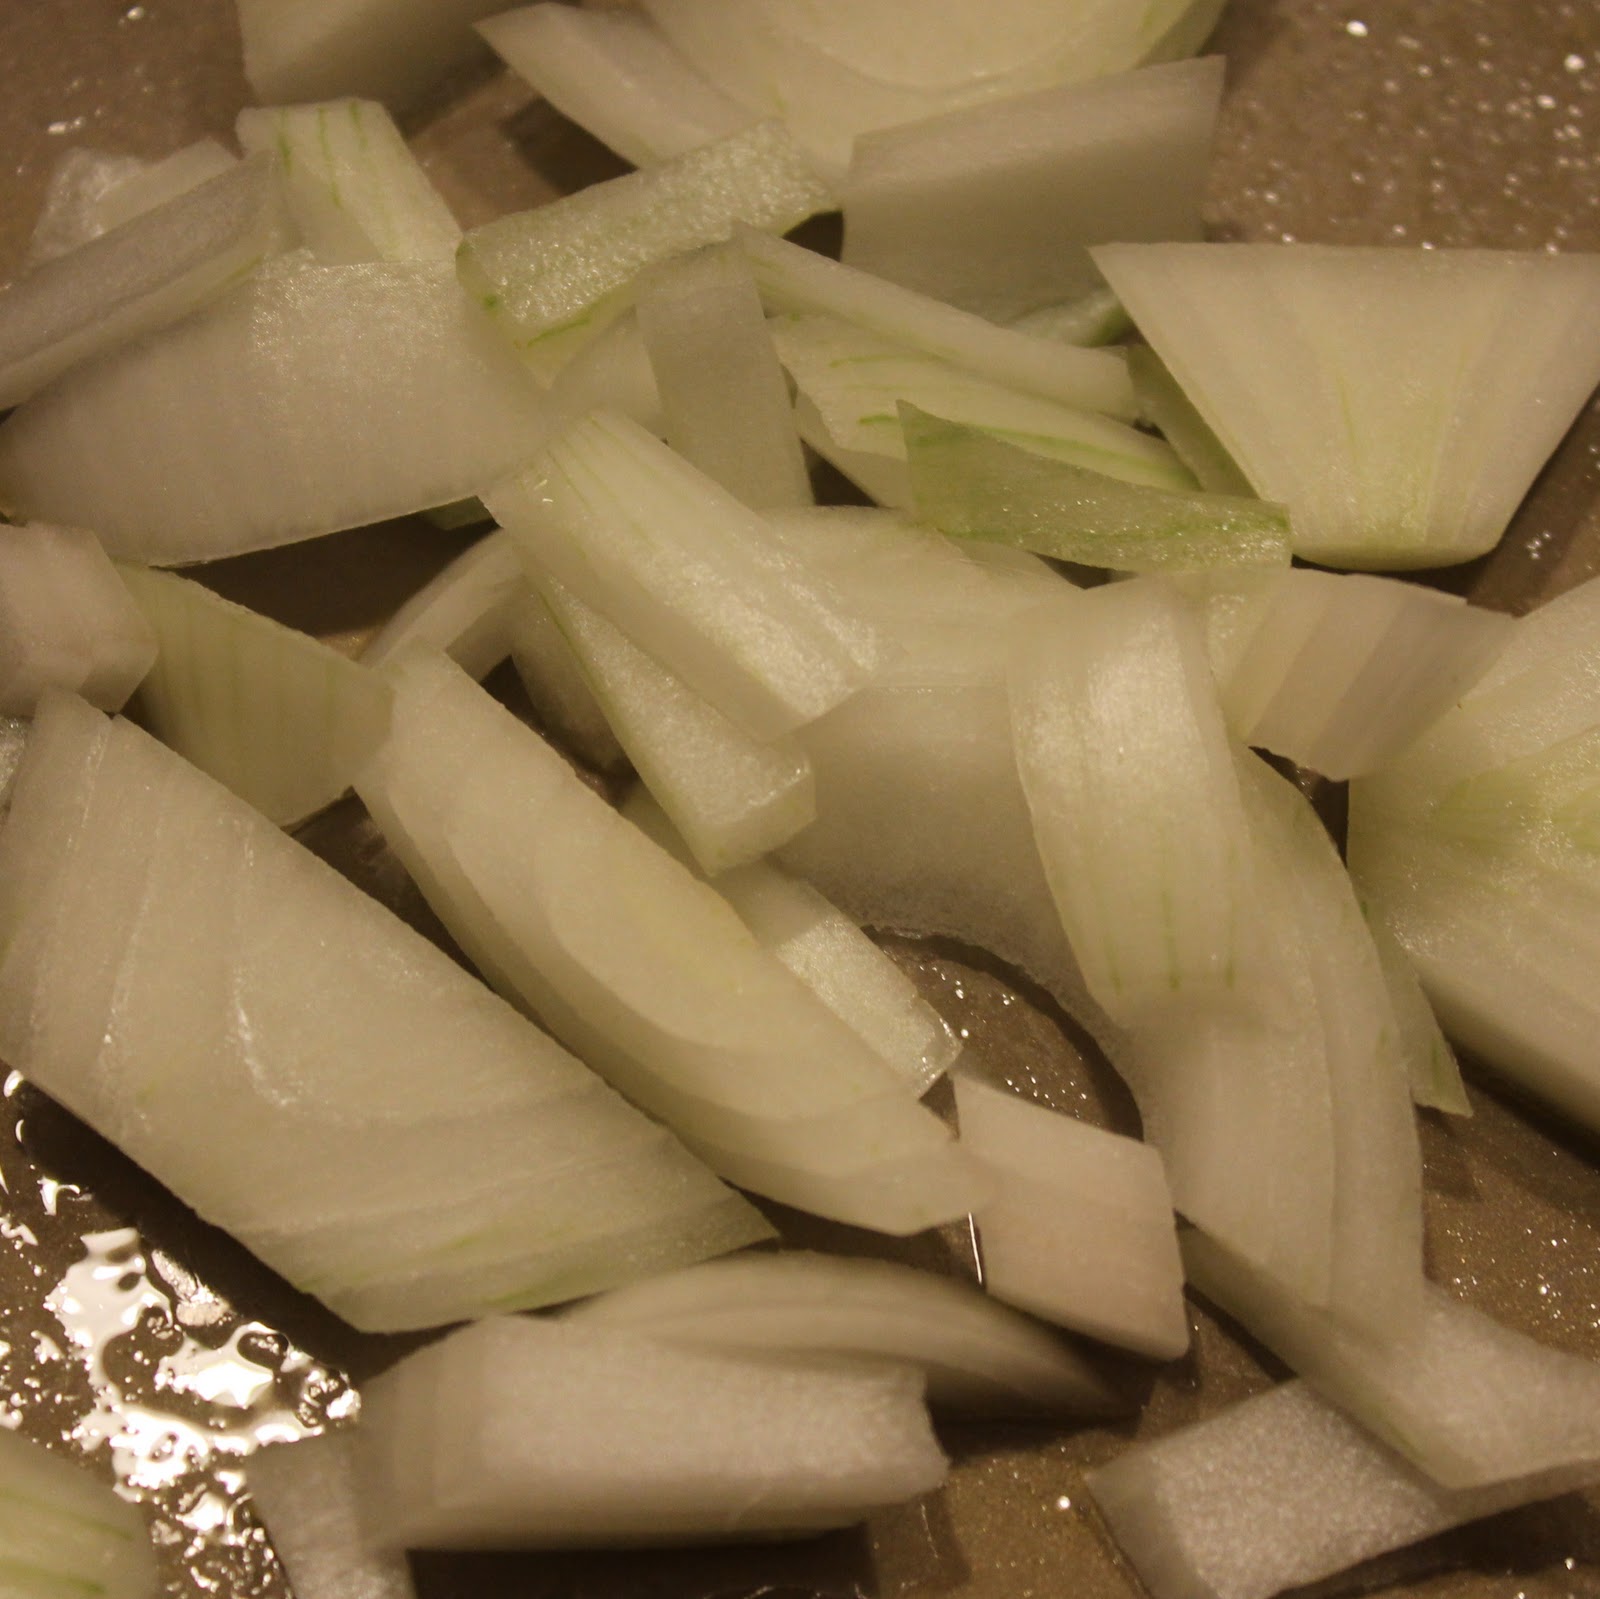
1/2 white onion, thinly sliced
Cooking spray
chopped cilantro, for garnish
lemon wedges
Spinach:
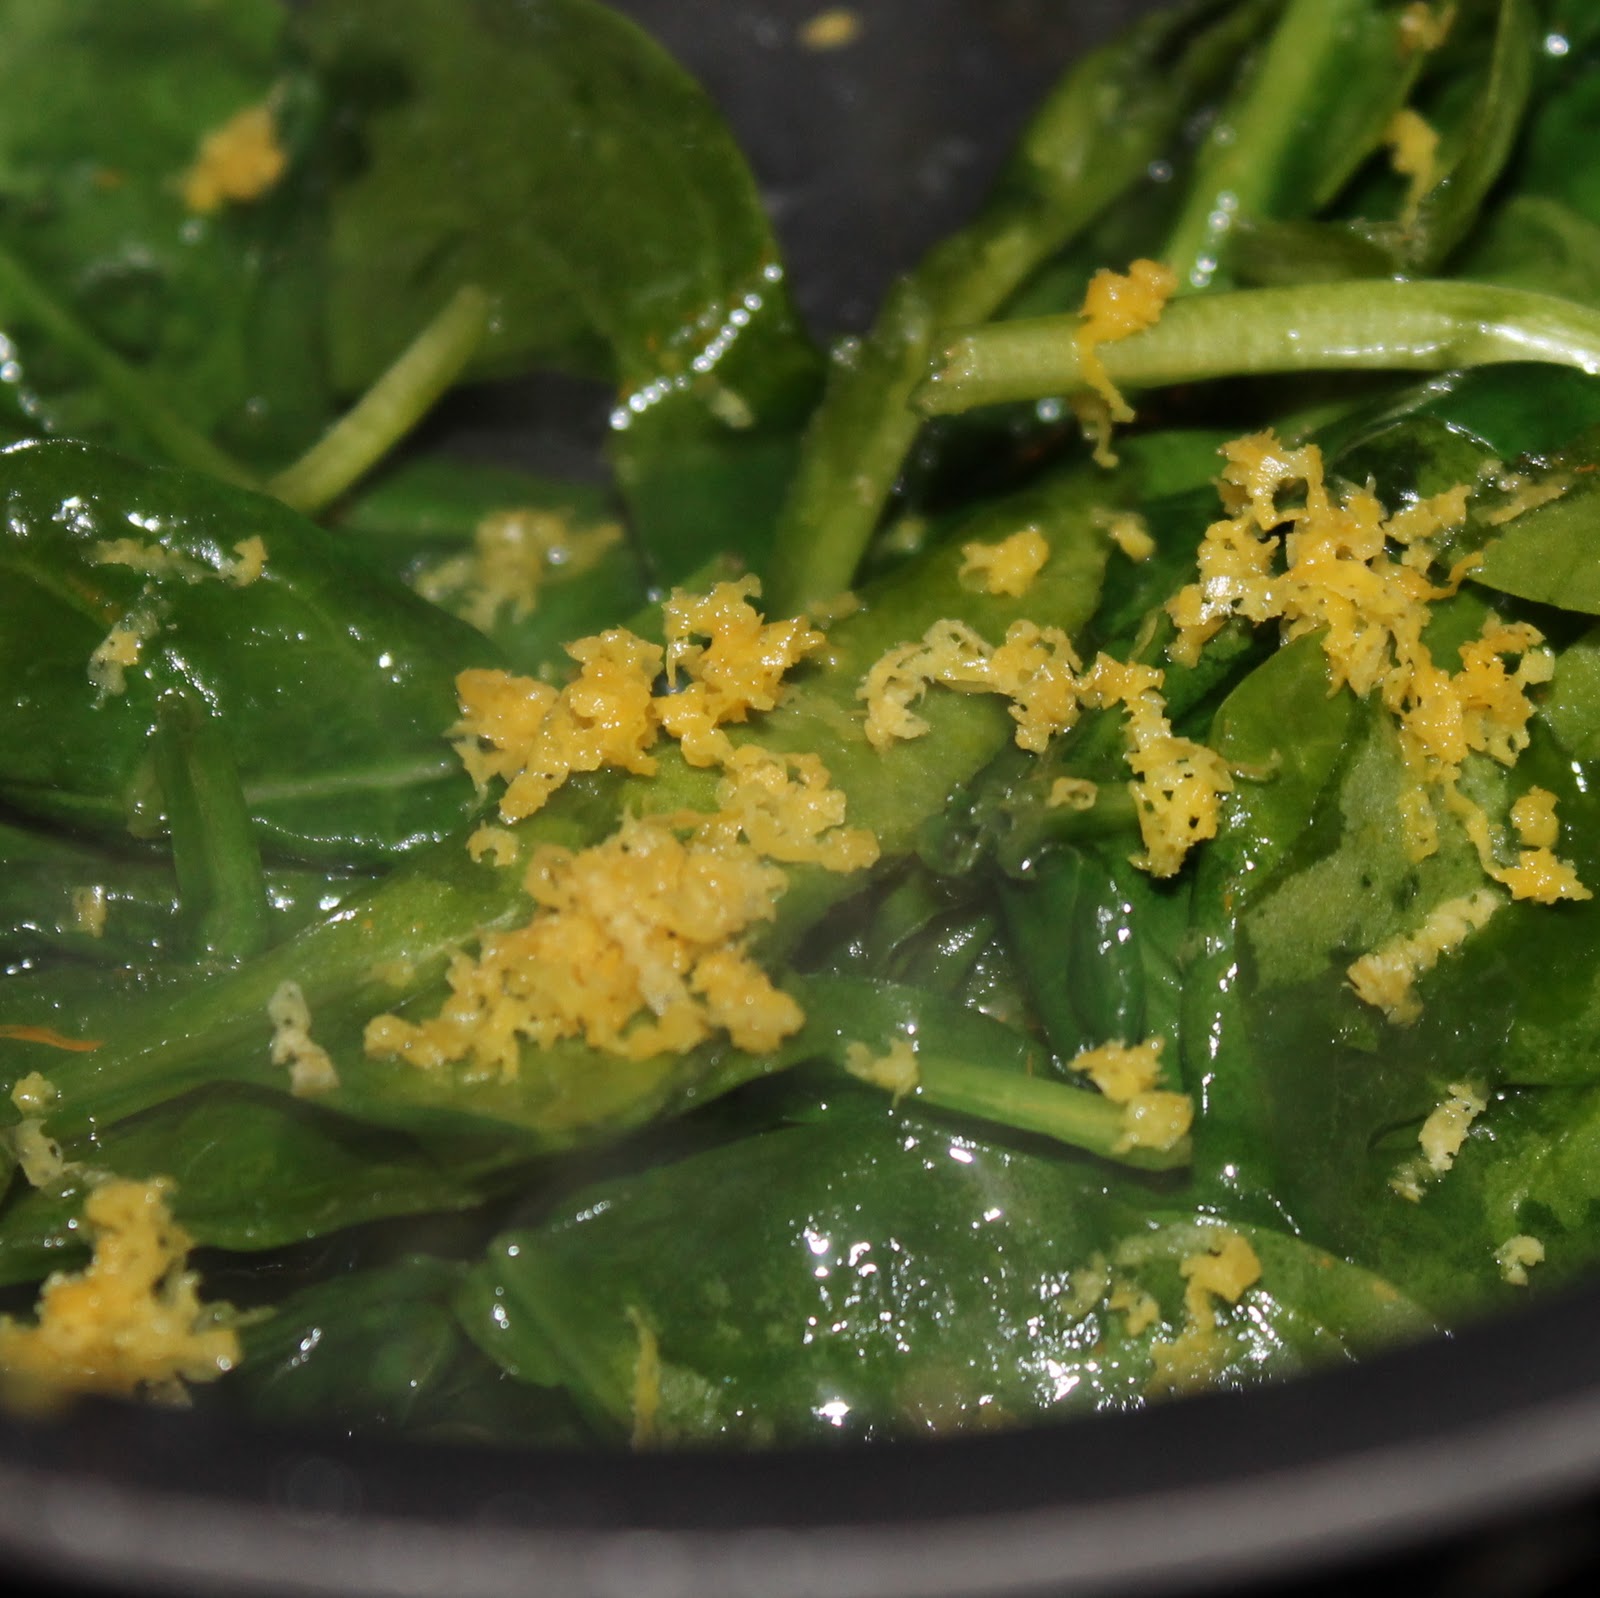
1 teaspoon olive oil
1 garlic clove, minced
2 large handfuls uncooked baby spinach
zest from one lemon
1/4 teaspoon salt
the juice of half a lemon
Preheat your oven to 400 degrees. To prepare the spice rub, combine the salt, cumin, coriander, paprika, cinnamon, and pepper in a bowl.
Rub the mixture evenly over the salmon.
Thinly slice your onion. Add the onion to a baking dish coated with cooking spray.
Add the salmon on top of the onions. Bake at 400 degrees for 20 minutes or until flaky.
When there is about 5-10 minutes left on the salmon, prepare the spinach. Heat the olive oil over medium heat. Add the garlic and saute for 1 minute.
Add one handful of spinach.
Cook for one minute, stirring. Add the remaining handful of spinach and cook for 4 minutes or until wilted, stirring frequently.
Add lemon zest and salt. Stir in juice and remove from heat.
Serve the salmon with the onions and spinach.
Sprinkle salmon with cilantro. Serve with lemon wedges.
You’d think all of those powerful spices would overwhelm the salmon. Not at all. The flavor was fantastic!
I can’t even describe it. But my taste buds did a little dance.
The lemon added a nice tanginess to the spinach, which was a great contrast to the sweet caramelized onions.
I think the next time I make this, I will check the salmon after 15 minutes of cooking. The salmon was slightly overcooked for my liking. Past that, this recipe is a definite keeper!
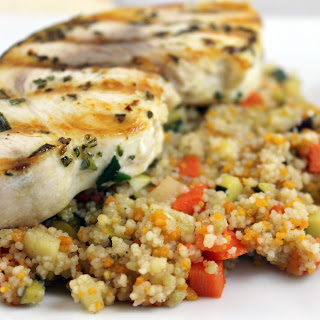
I apologize for the lack of posts! Like many, I’ve spent the past week doing a whole lot of eating, but not necessarily cooking. My parents gave me a nifty panini pan for the stove which also doubles as a grill pan. I wanted to test it out, so I decided to try Cooking Light’s Rosemary Swordfish on Vegetable Couscous.
Ingredients (this makes one serving so multiply as needed):
I love a good gyro. I never considered even trying to make one because, this may come as a surprise, but I don’t have a spit in my tiny apartment. I know, a huge oversight. So I was really excited to find this recipe for Lamb Wraps with Tzatziki Sauce, (no spit required), especially because it takes 25 minutes to make. Woo hoo! (If I haven’t convinced you to pick up the Cooking Light Fresh Foods Superfast cookbook yet, you must not be reading my posts this week).
Ingredients:
Lamb Wrap:
Cooking spray
2 lamb sausages (or 1/2 lb ground lamb)
1/2 cup chopped onions
Pepper and salt, to taste
1 cup shredded romaine lettuce
2 pocketless pitas or other flat bread
Tzatziki sauce:
1/4 cup plain reduced fat Greek yogurt
1/2 a cucumber, seeded, peeled, and finely chopped
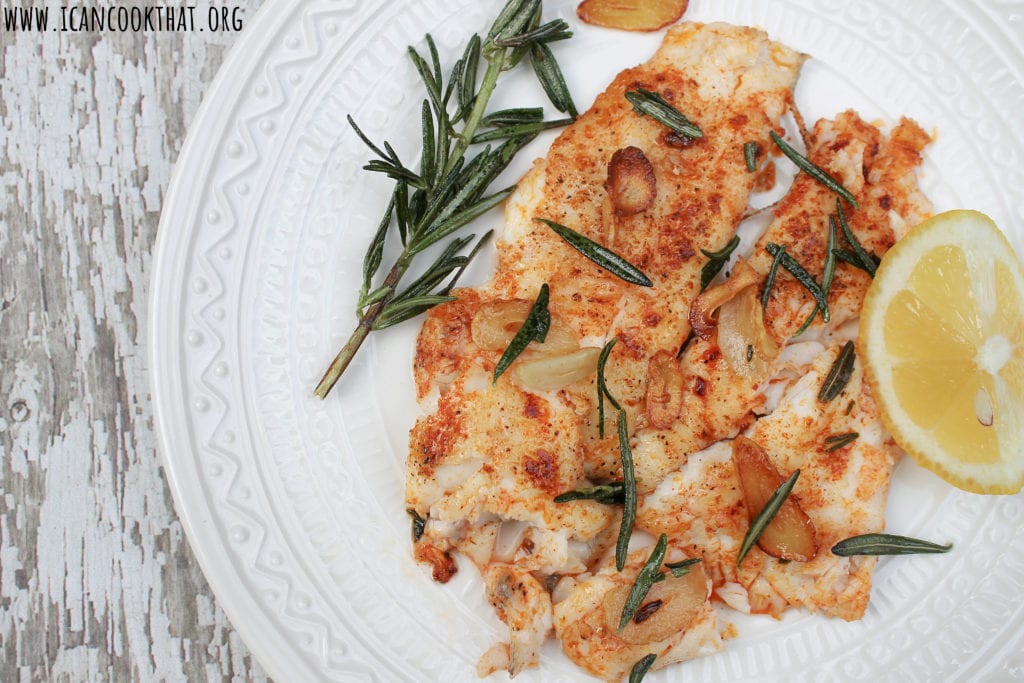
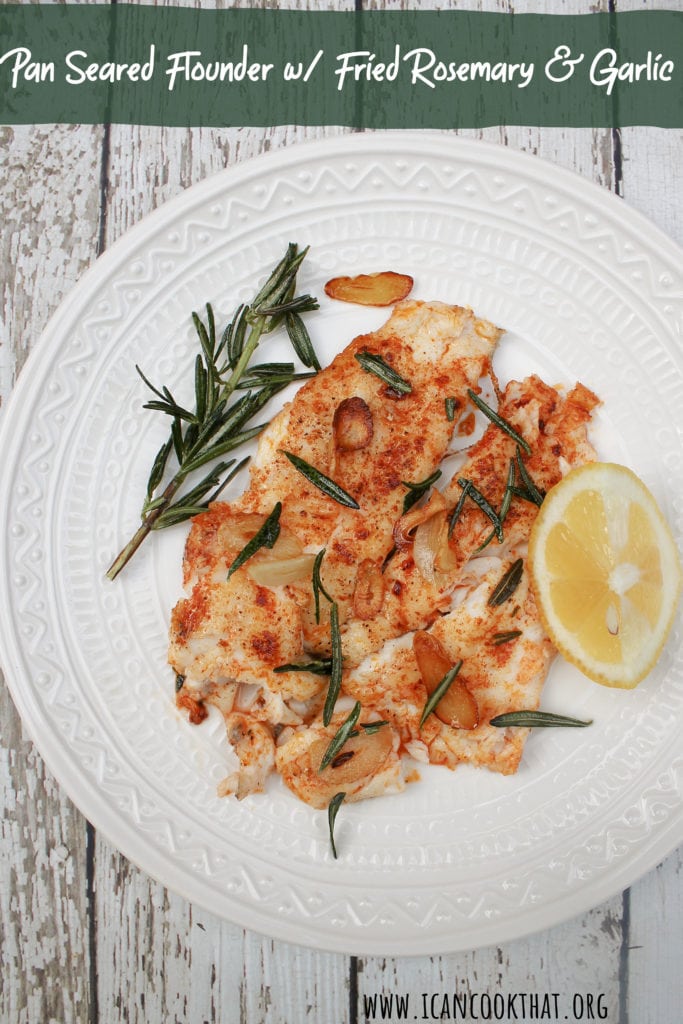
In an effort to eat more fish, I have been in search of recipes that call for fish other than salmon, my main seafood staple. I’ve made flounder once before and loved how quick it cooked up and how delicious it tasted.
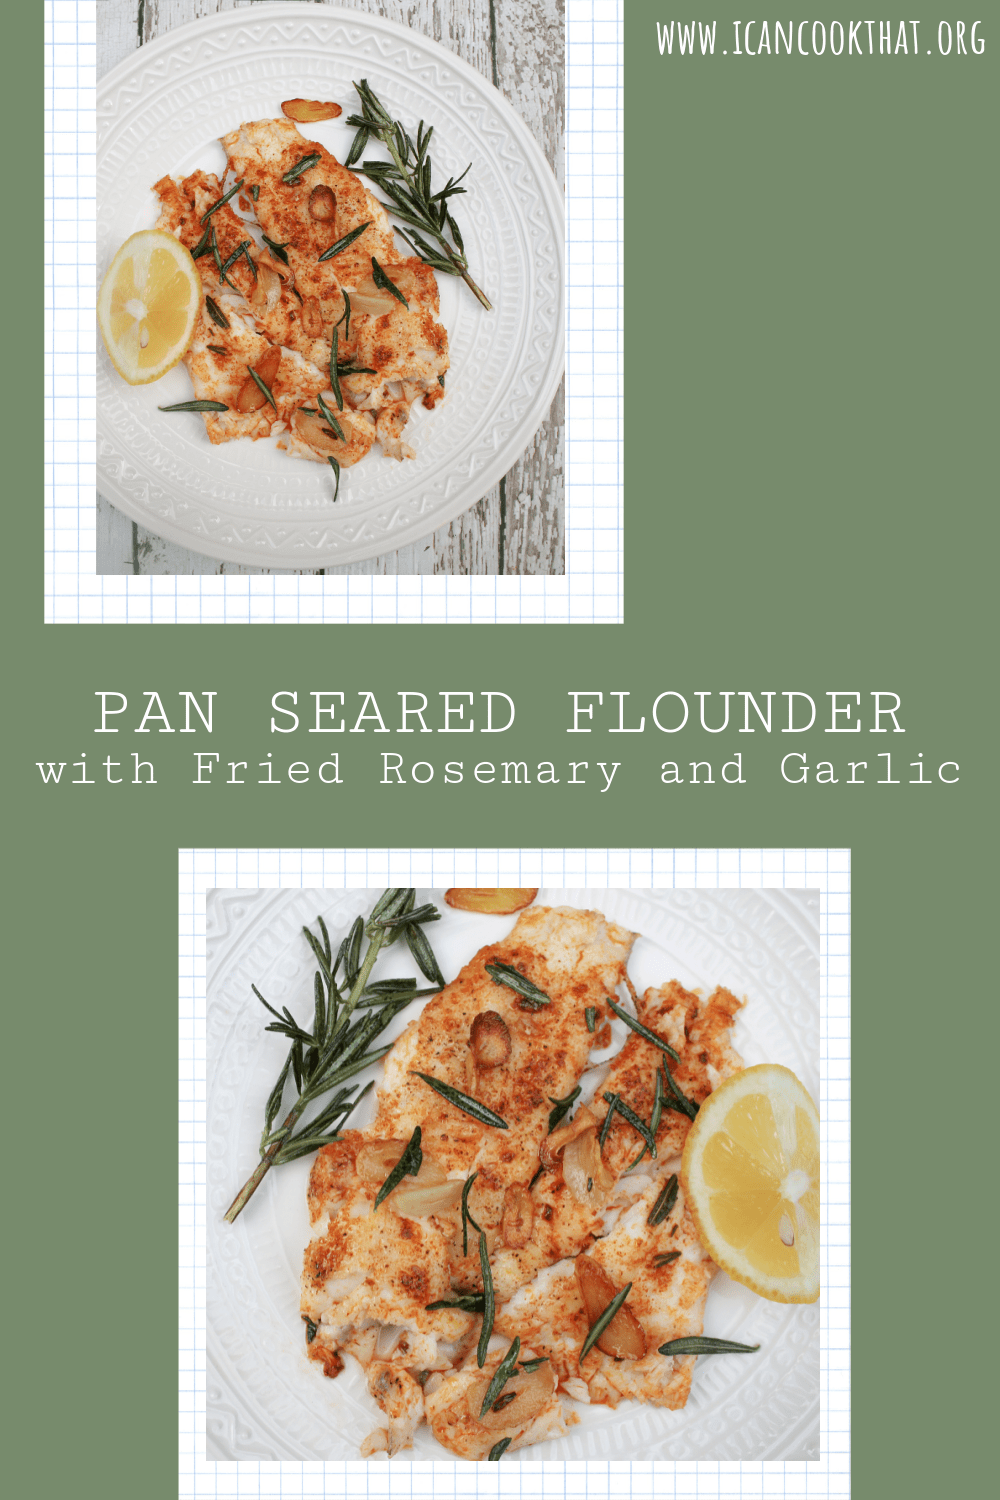
So when I found this recipe for Pan Seared Flounder with Fried Rosemary and Garlic in Cooking Light’s Fresh Food Fast cookbook, I knew I had to try it.
I’ve had the Cooking Light Fresh Foods Superfast cookbook for a while now and just finally opened it. I found so many delicious recipes that I can’t wait to try!
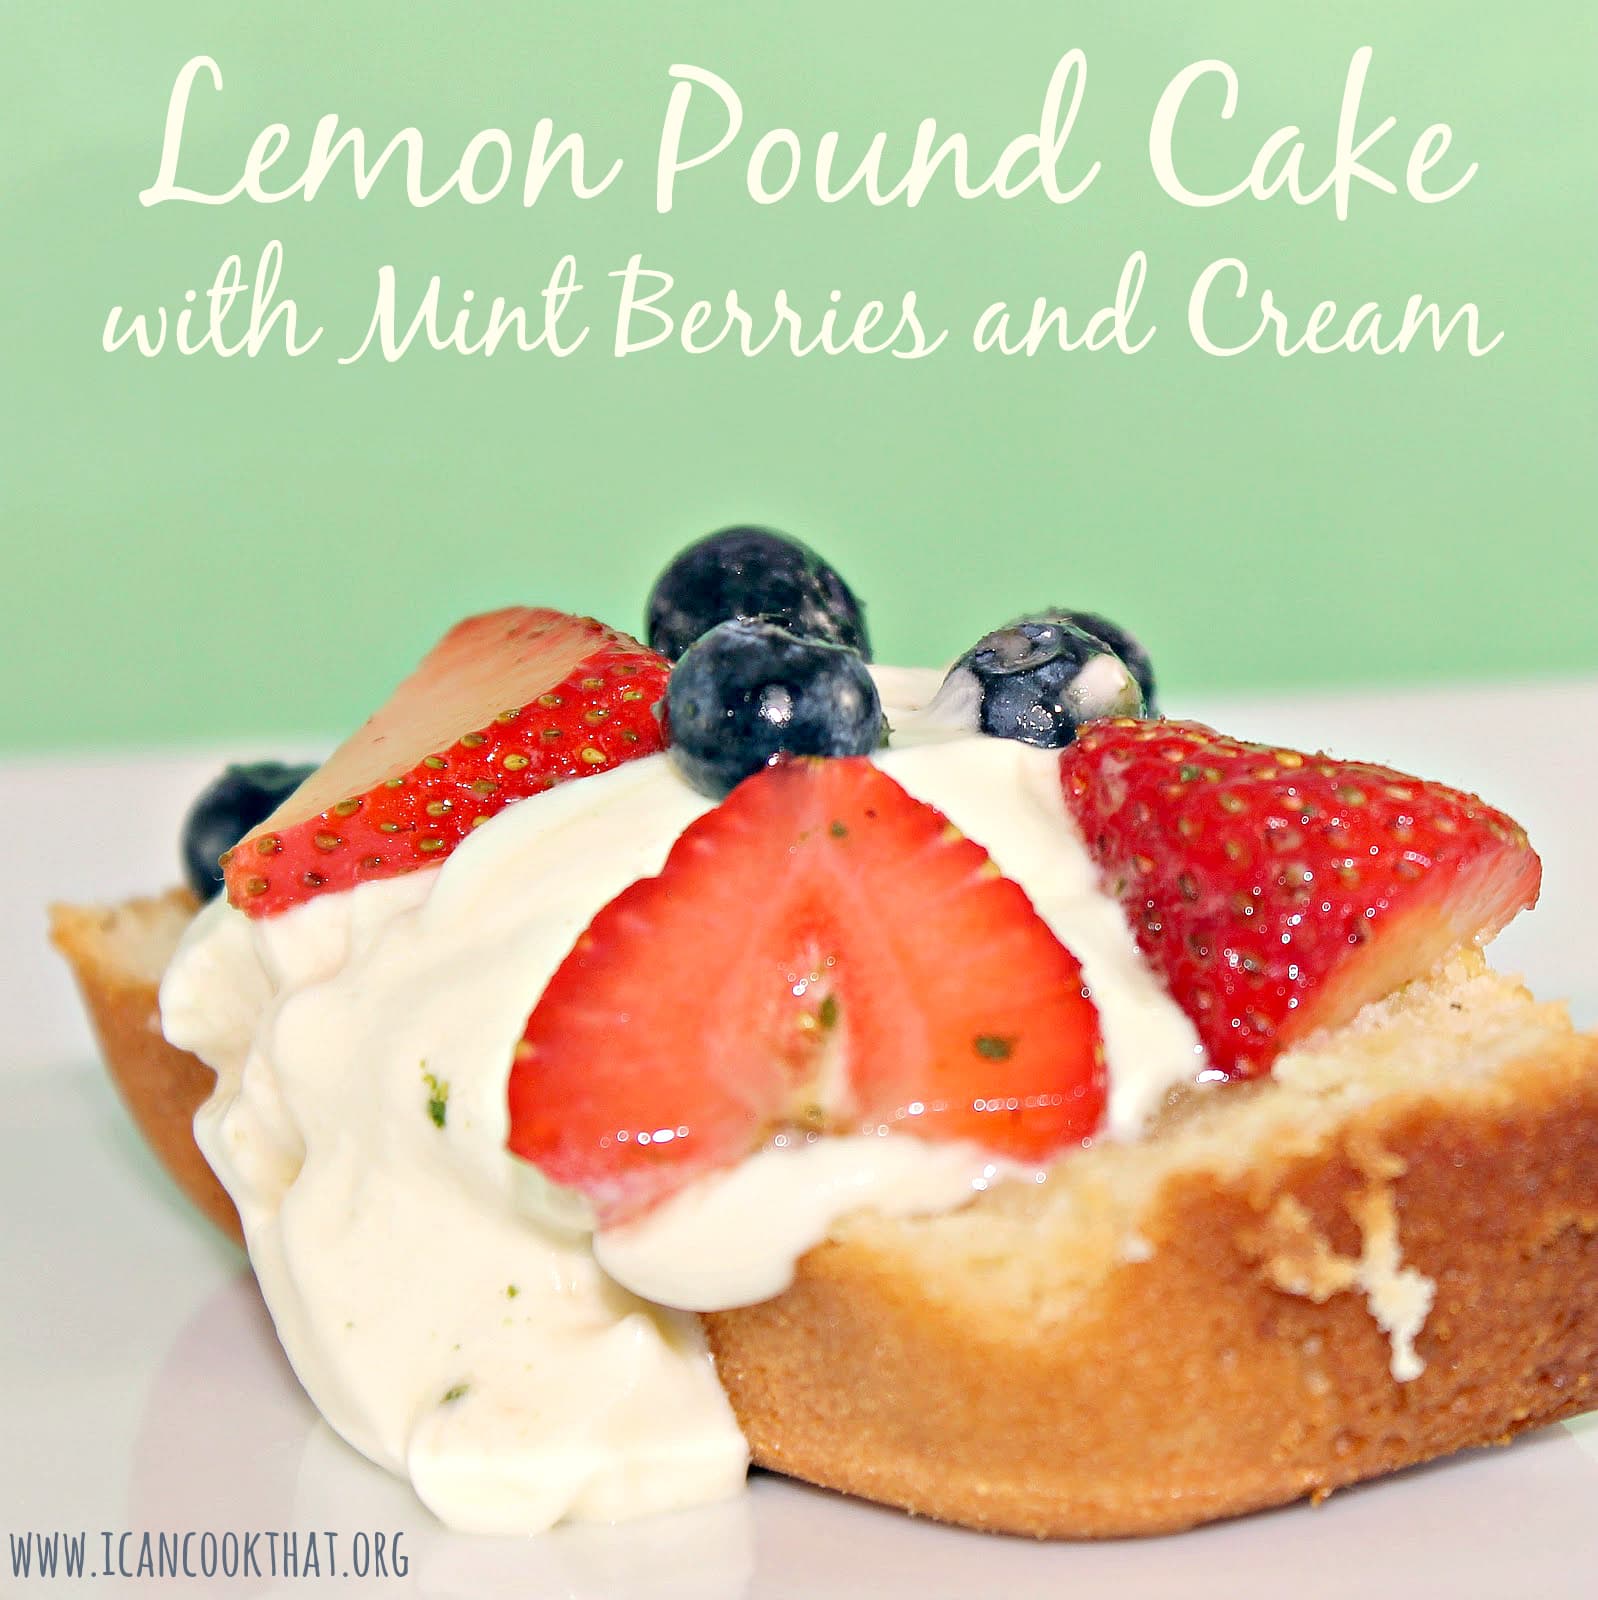
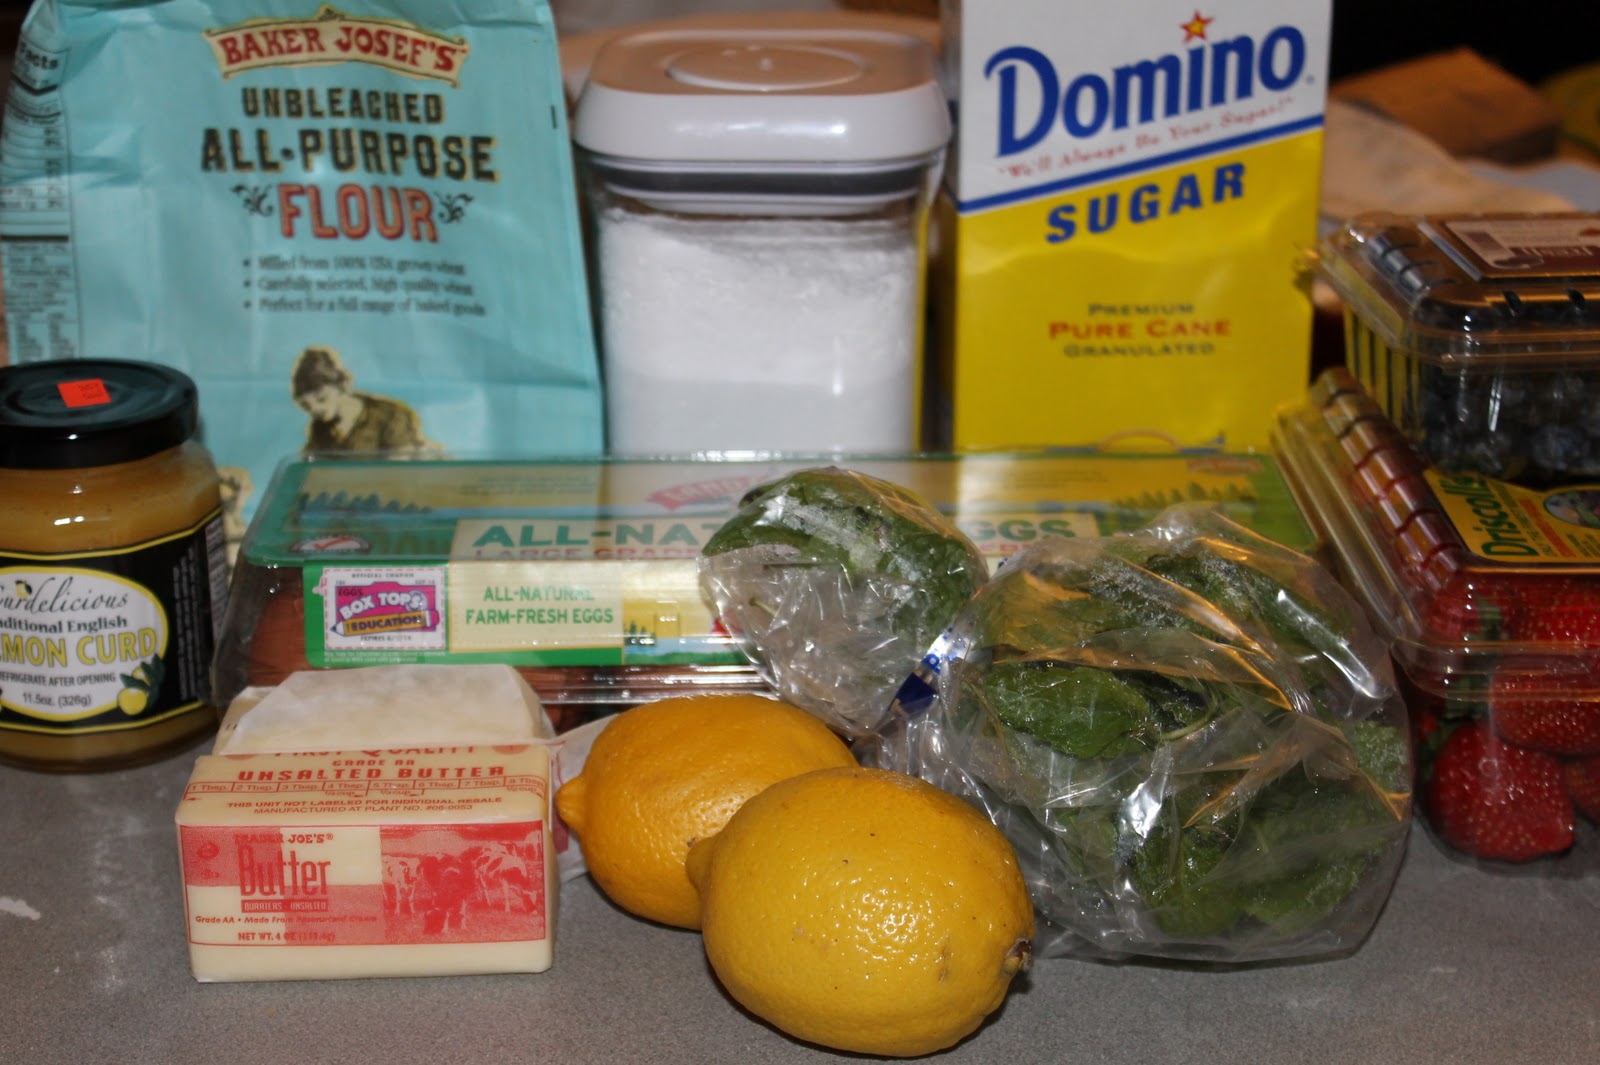
I thought I’d step away from cookies and cupcakes for the moment to make… pound cake. I don’t know why I am on such a baking kick, but at least I have the chance to try a bunch of different new recipes! I found this recipe through MyRecipes.com, originally from Southern Living. The recipe sounded absolutely fantastic so I stuck to it for the most part, but I added blueberries because, well, I like blueberries!
Ingredients:
1/4 cup sugar
1/4 cup loosely packed mint leaves
3/4 cup butter, softened
3 cups powdered sugar, divided
3 large eggs
1 1/2 cups all-purpose flour
2 1/2 cups whipping cream, divided
2 teaspoons grated lemon rind
2 tablespoons fresh lemon juice
1 (12-ounce) jar lemon curd
1 quart fresh strawberries, sliced
1 pint fresh blueberries
I promise I’ll stop my cookie binge after this post. I was looking for a somewhat “adult” cookie for a bake sale at work and I came across this recipe for Ginger Lemon Pinwheel Cookies. Ginger and lemon cookies? Hmm. This recipe takes a long time (a lot of refrigerating, freezing, etc.) so if you plan on making these Ginger Lemon Pinwheel Cookies, make sure you have a good chunk of time, around 2 hours.
but they are so pretty it’s worth it!
Ingredients
Ginger dough:
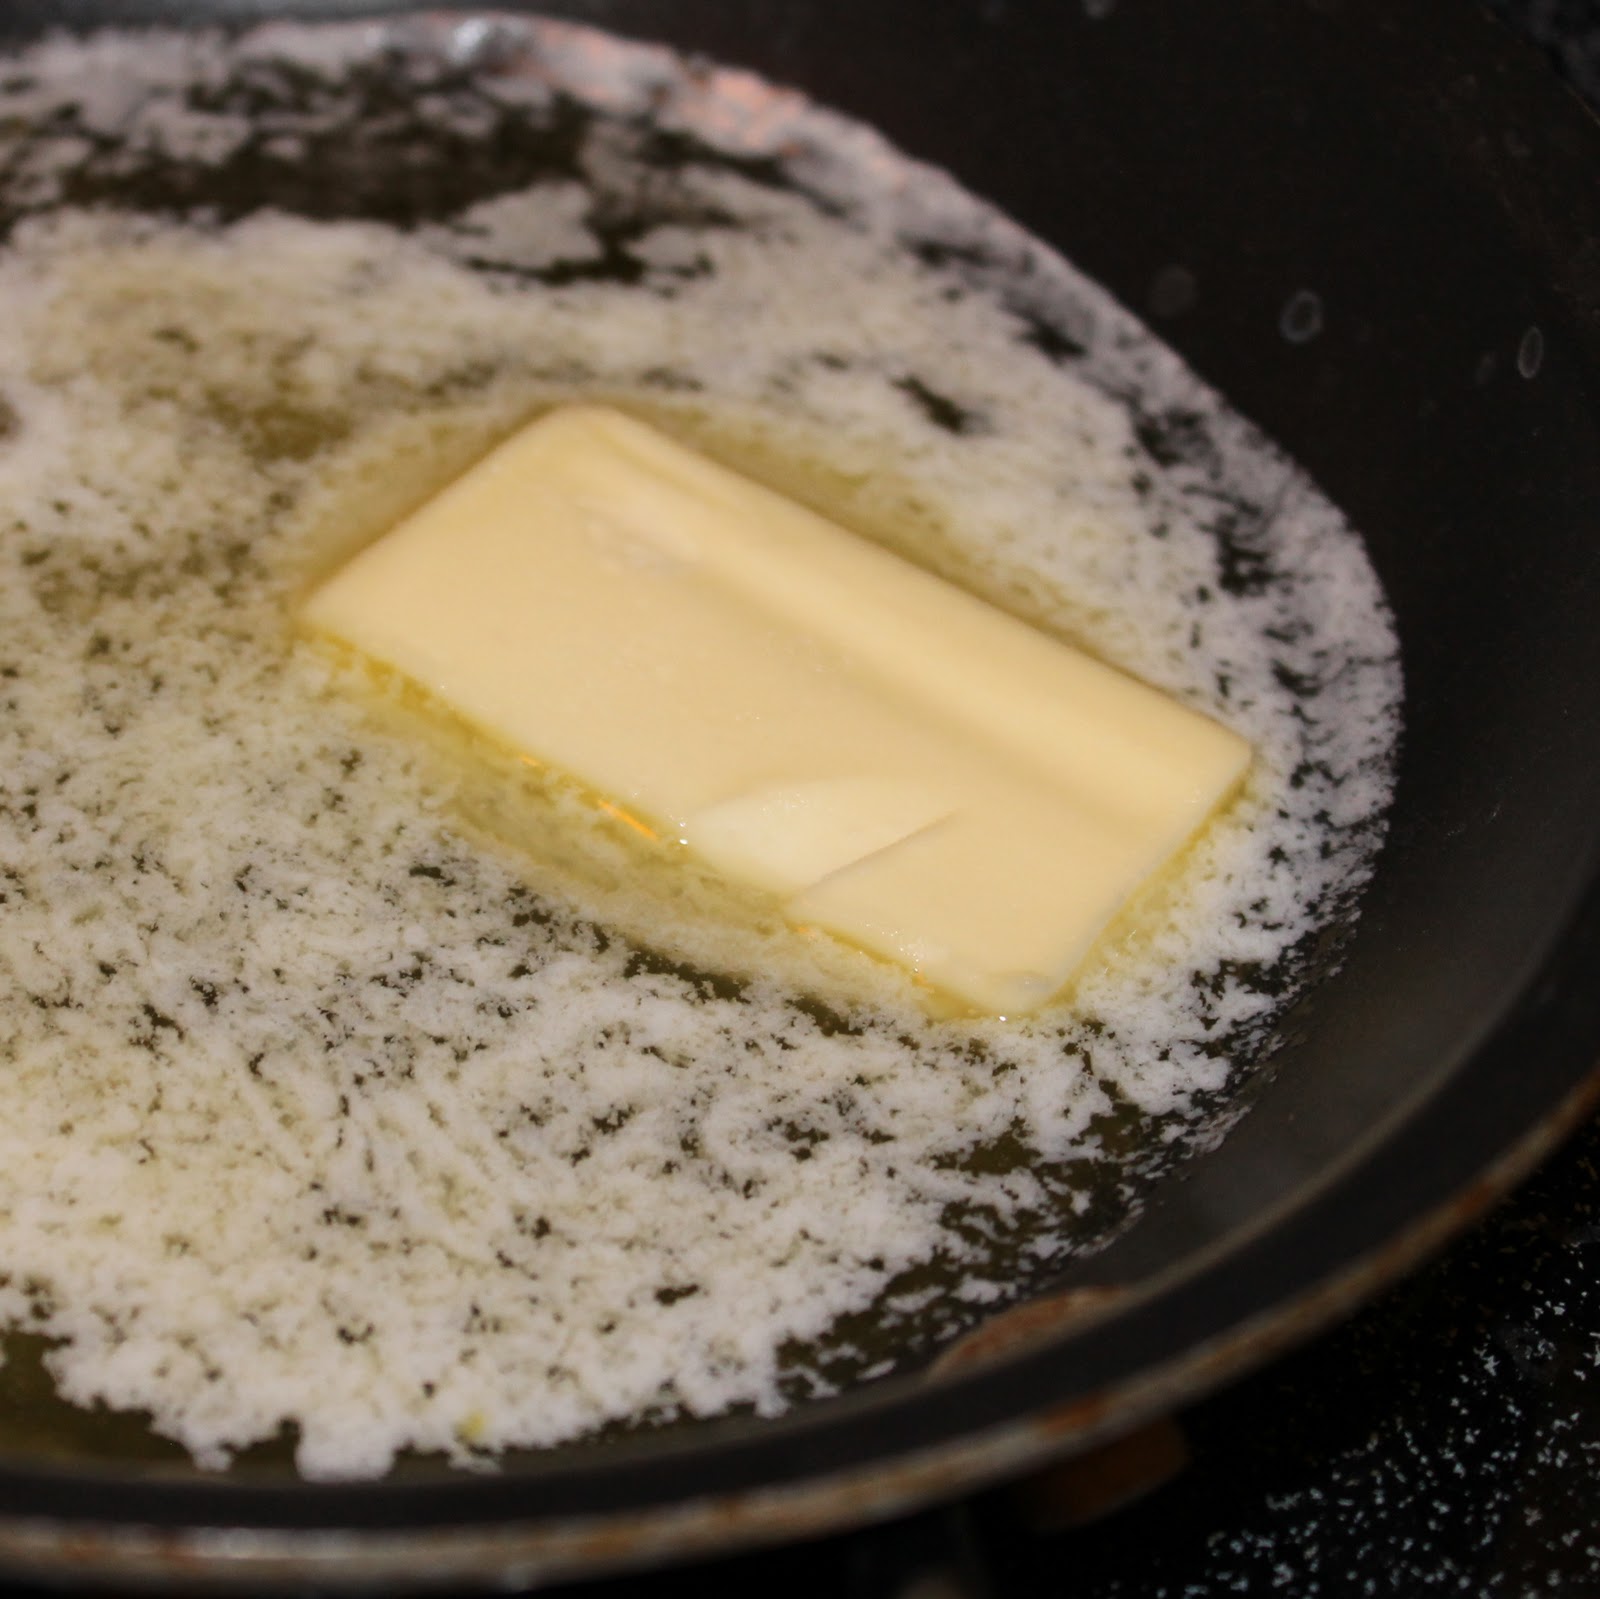
1/4 cup unsalted butter, softened
1/3 cup packed dark brown sugar
1/4 cup molasses
1 large egg yolk
1 1/3 cups all-purpose flour
3/4 teaspoon ground ginger
3/4 teaspoon ground cinnamon
1/4 teaspoon salt
1/8 teaspoon ground nutmeg
Dash of ground allspice
Lemon dough:
5 tablespoons unsalted butter, softened
2/3 cup granulated sugar
1 large egg white
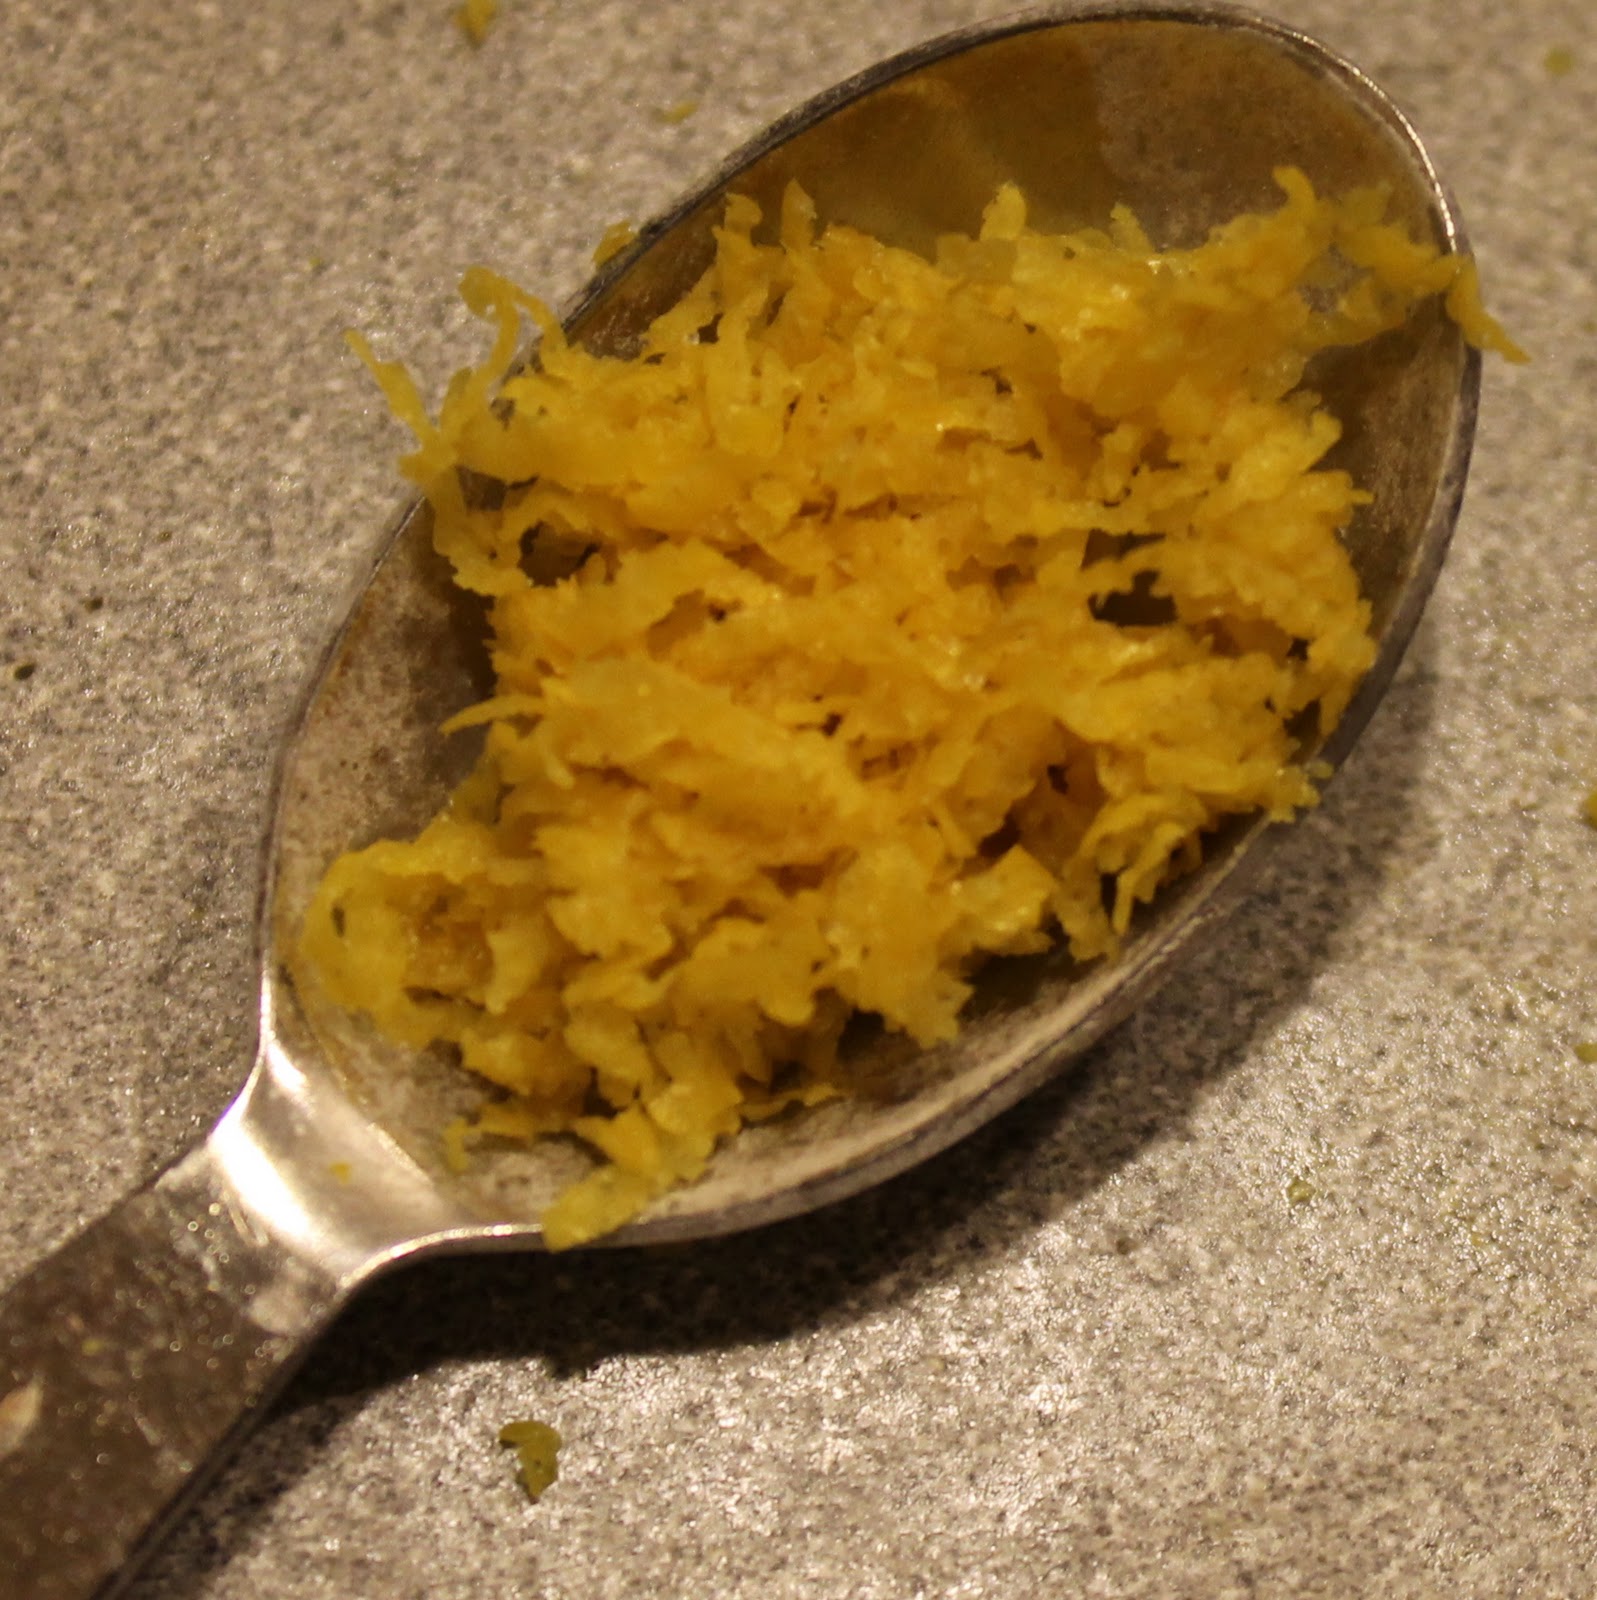
the zest of 2 lemons
1/2 teaspoon lemon juice
3/4 teaspoon vanilla extract
1 1/3 cups all-purpose flour
1/4 teaspoon salt
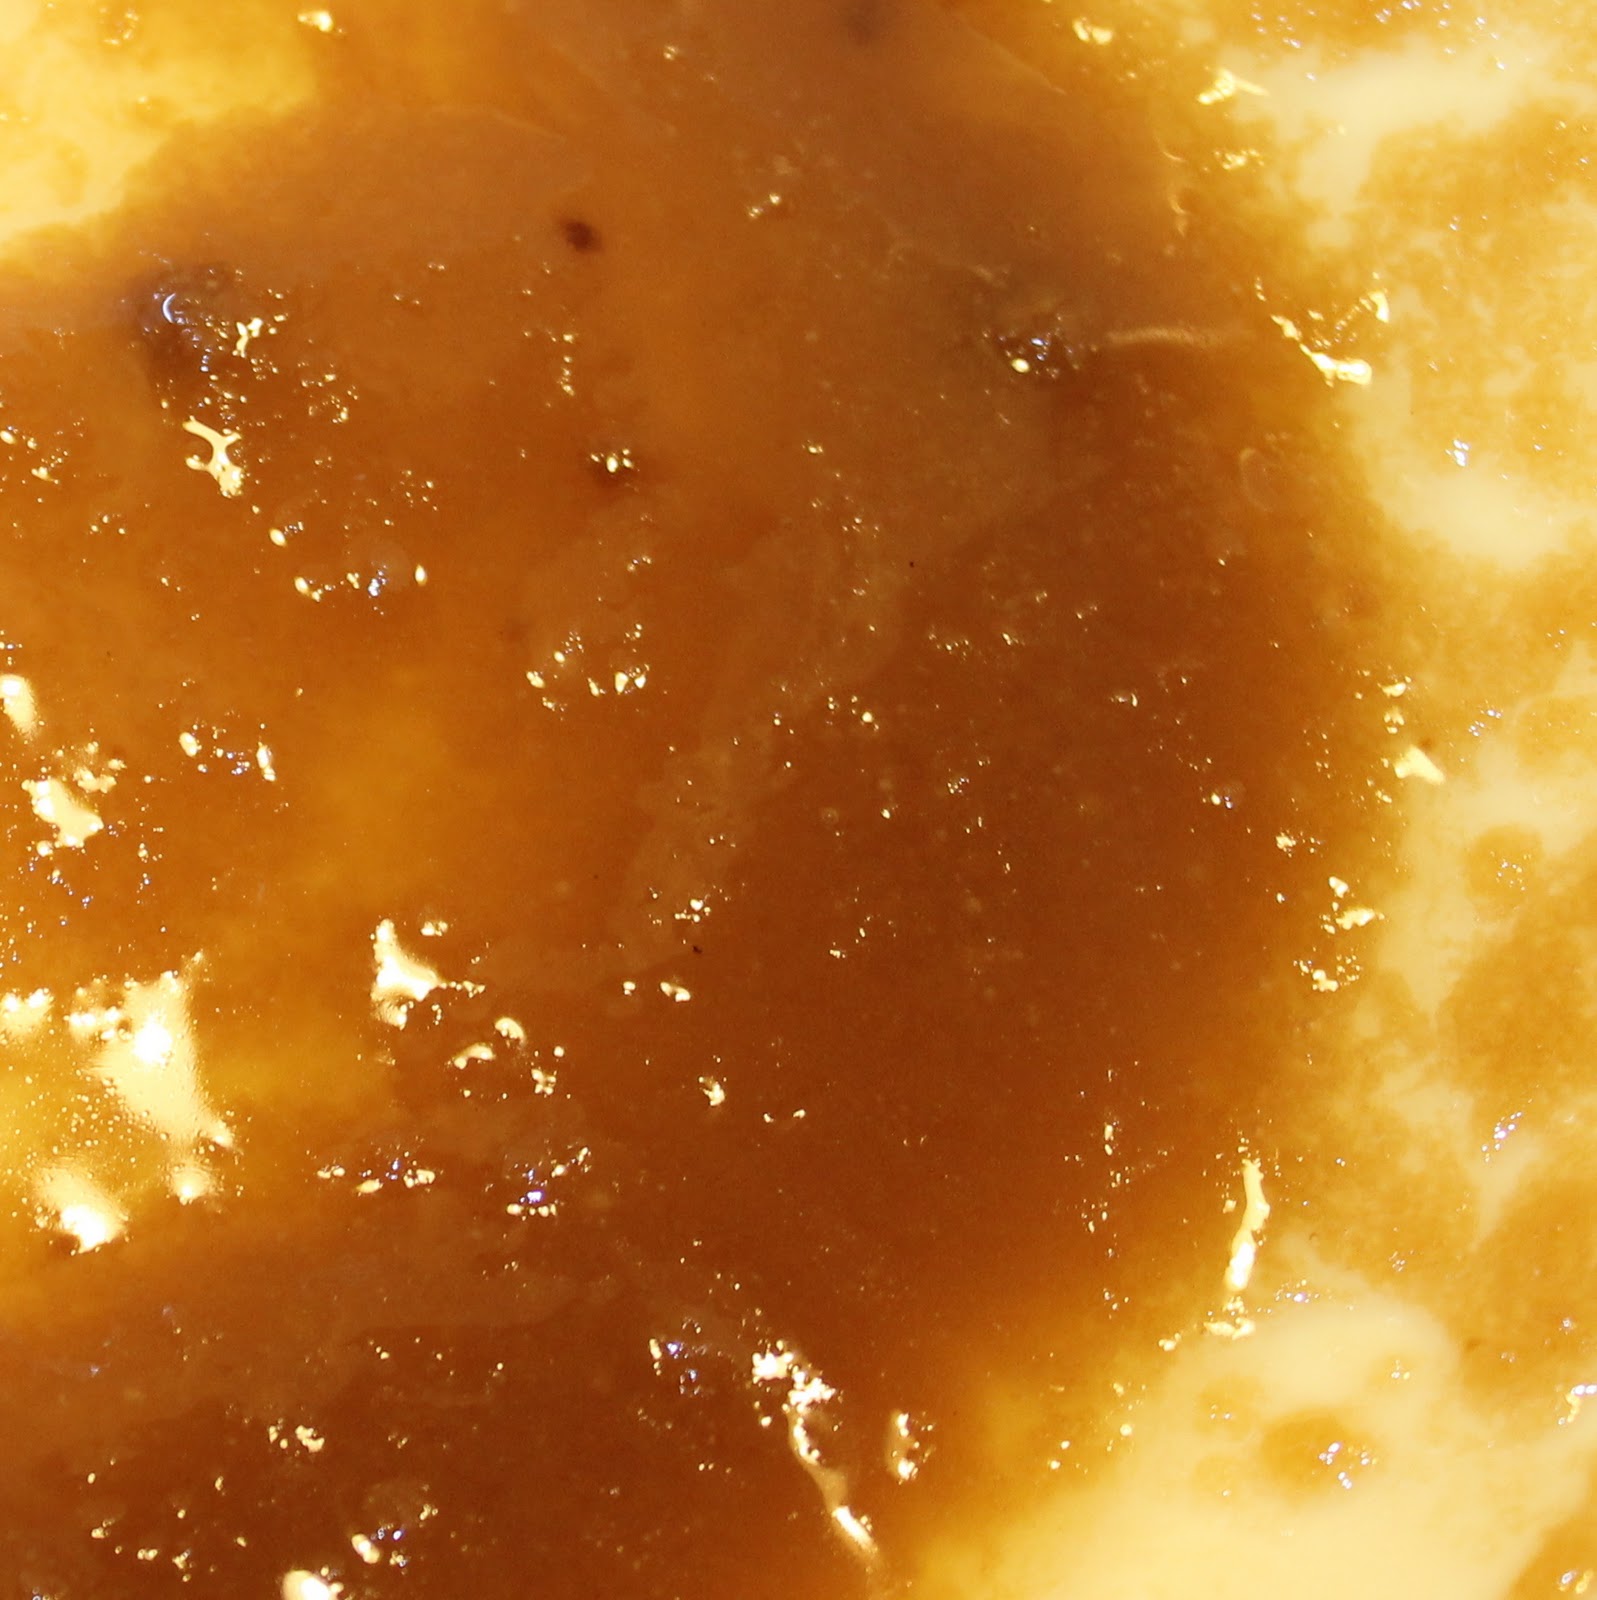
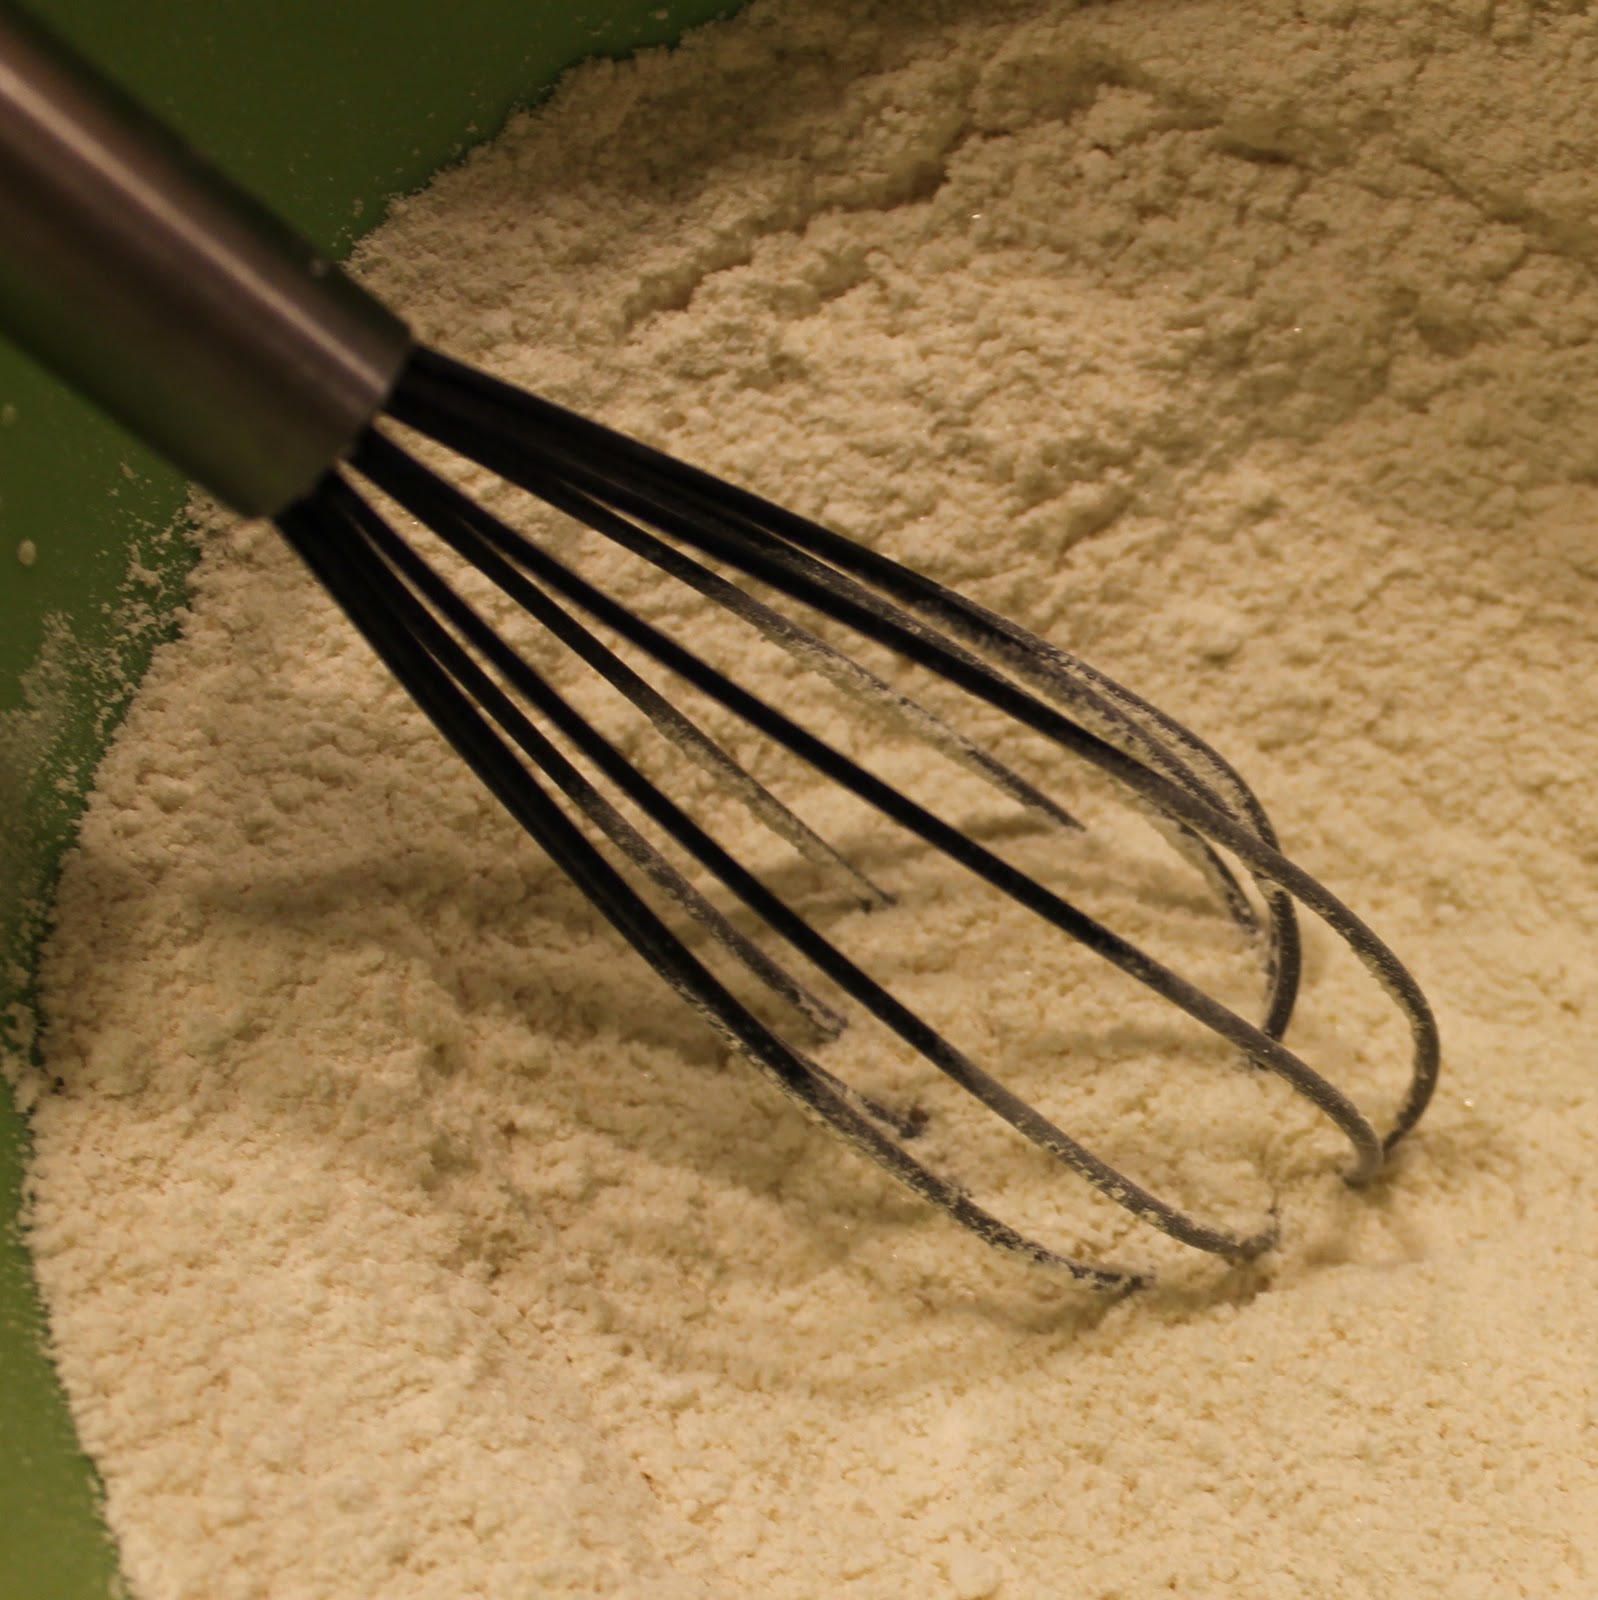
To make the Ginger Lemon Pinwheel Cookies, begin by making the ginger dough. In a medium bowl, add the flour, ginger, cinnamon, salt, nutmeg and allspice, stir with a whisk to combine.
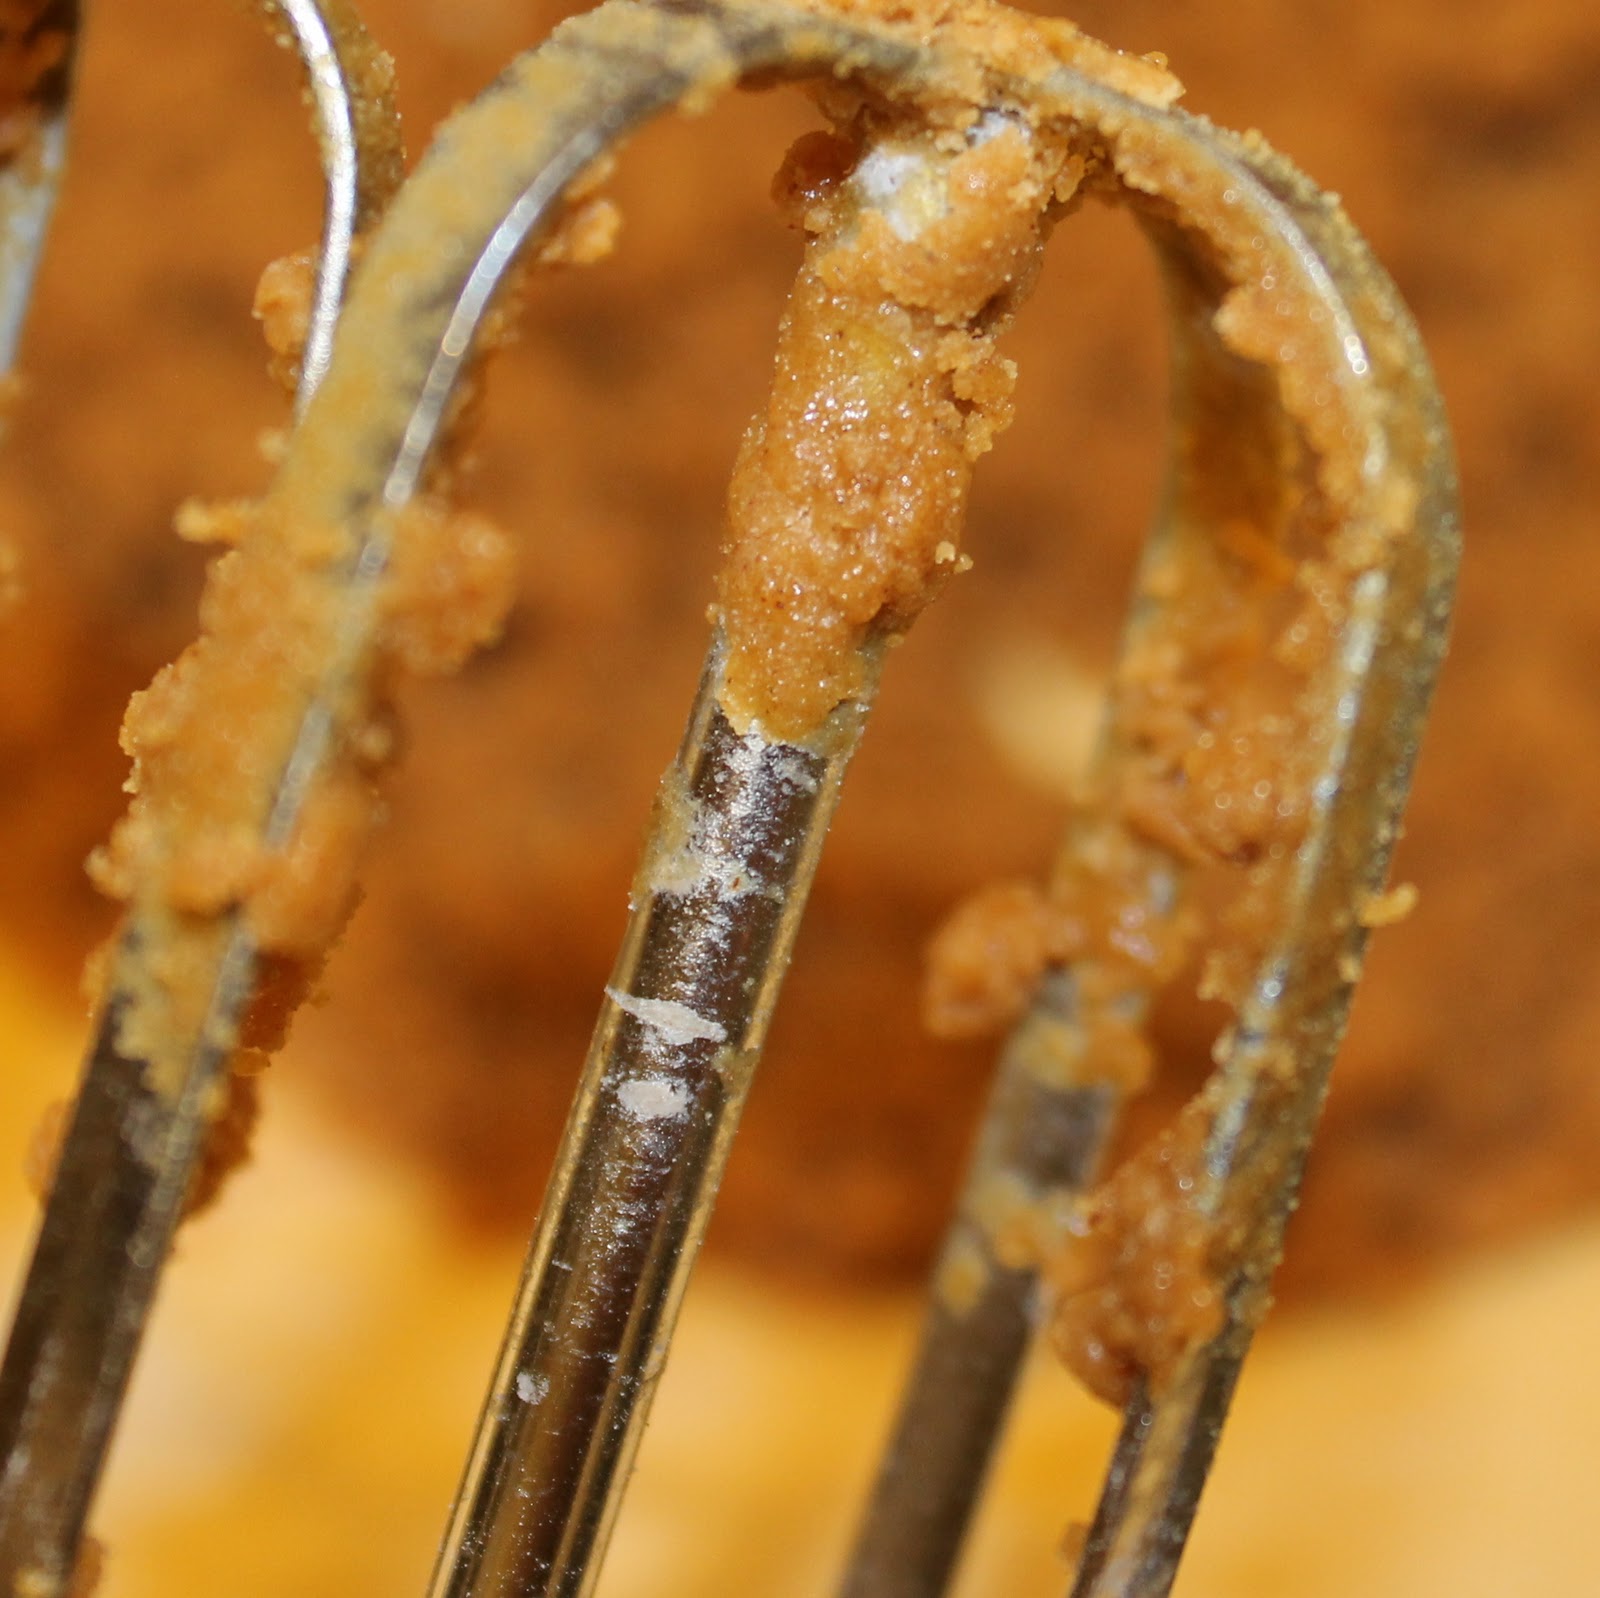
Add 1/4 cup butter and the brown sugar to a large bowl. Beat with a mixer on medium until well combined.
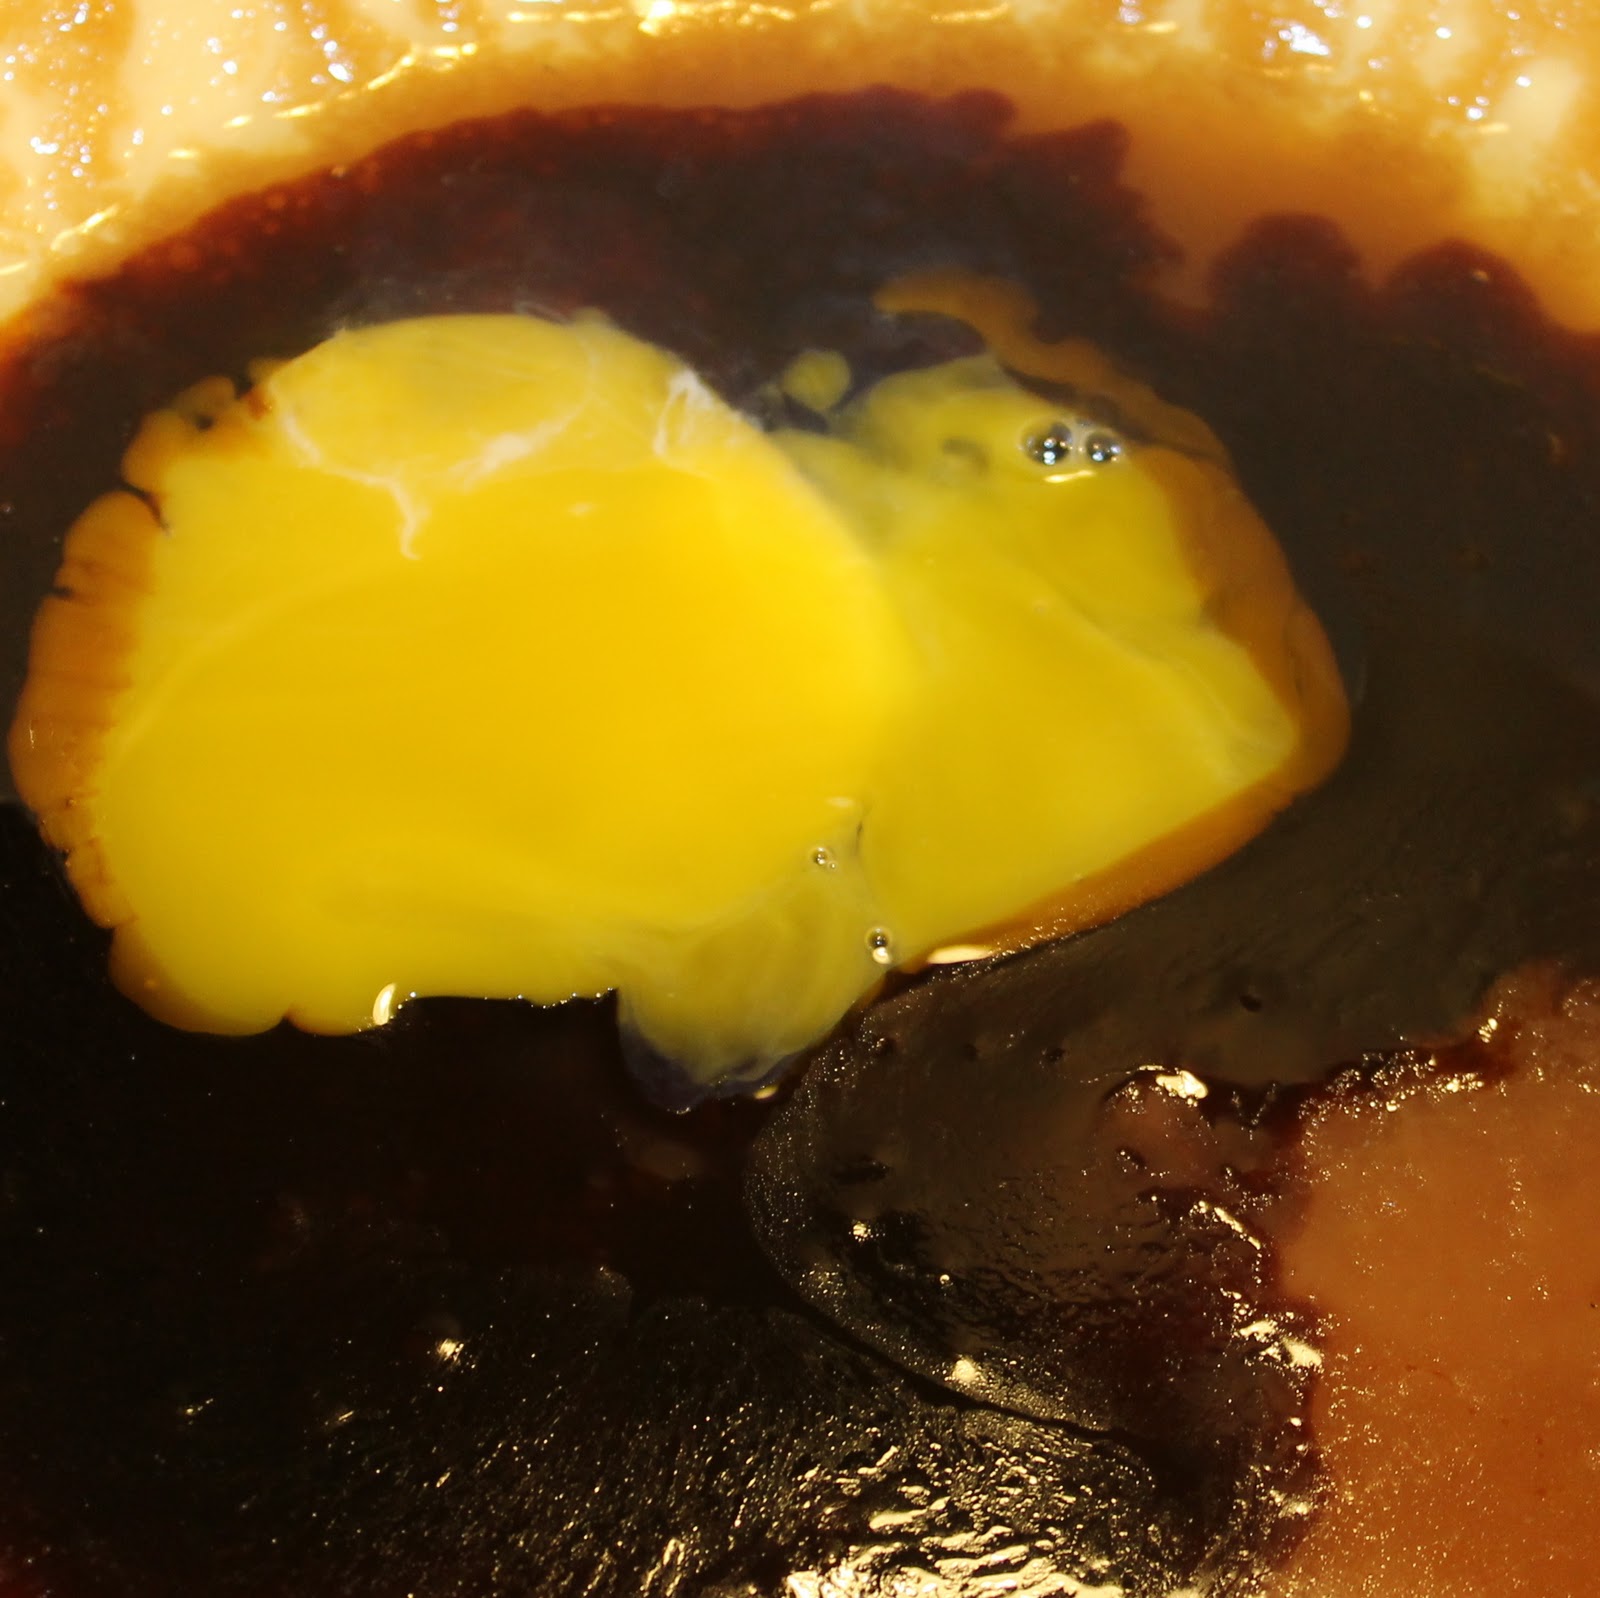
You will end up using an entire egg in this recipe. To remove the yolk from the egg white, crack the egg over a bowl carefully. Split the two ends of the egg and move the egg from shell piece to shell piece until the white falls into the bowl and the yolk is left in the shell. Reserve the egg white for the lemon dough.
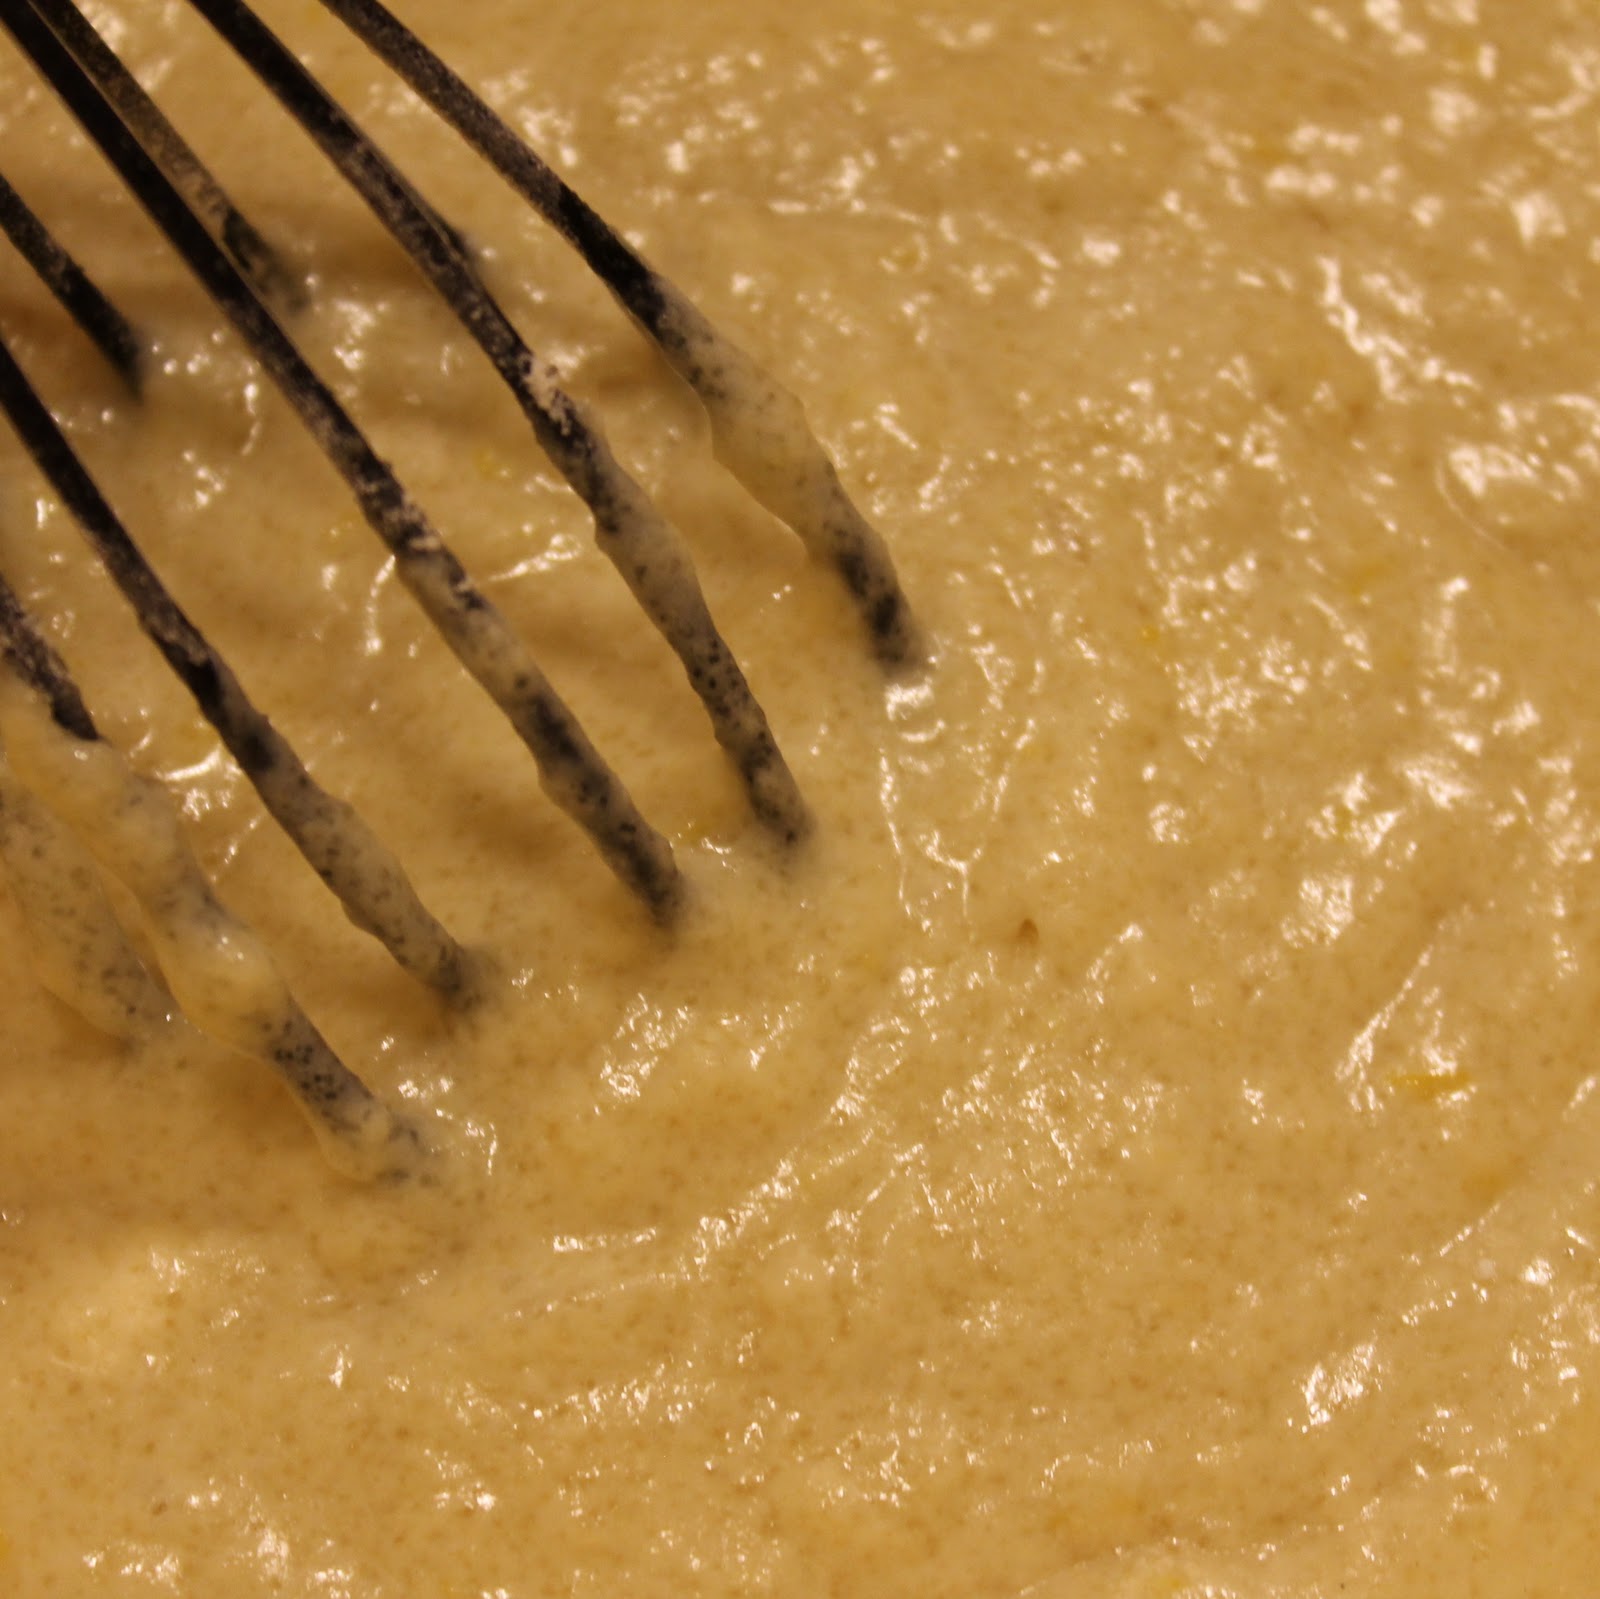
Add molasses and egg yolk to the sugar and butter. Beat until well blended.
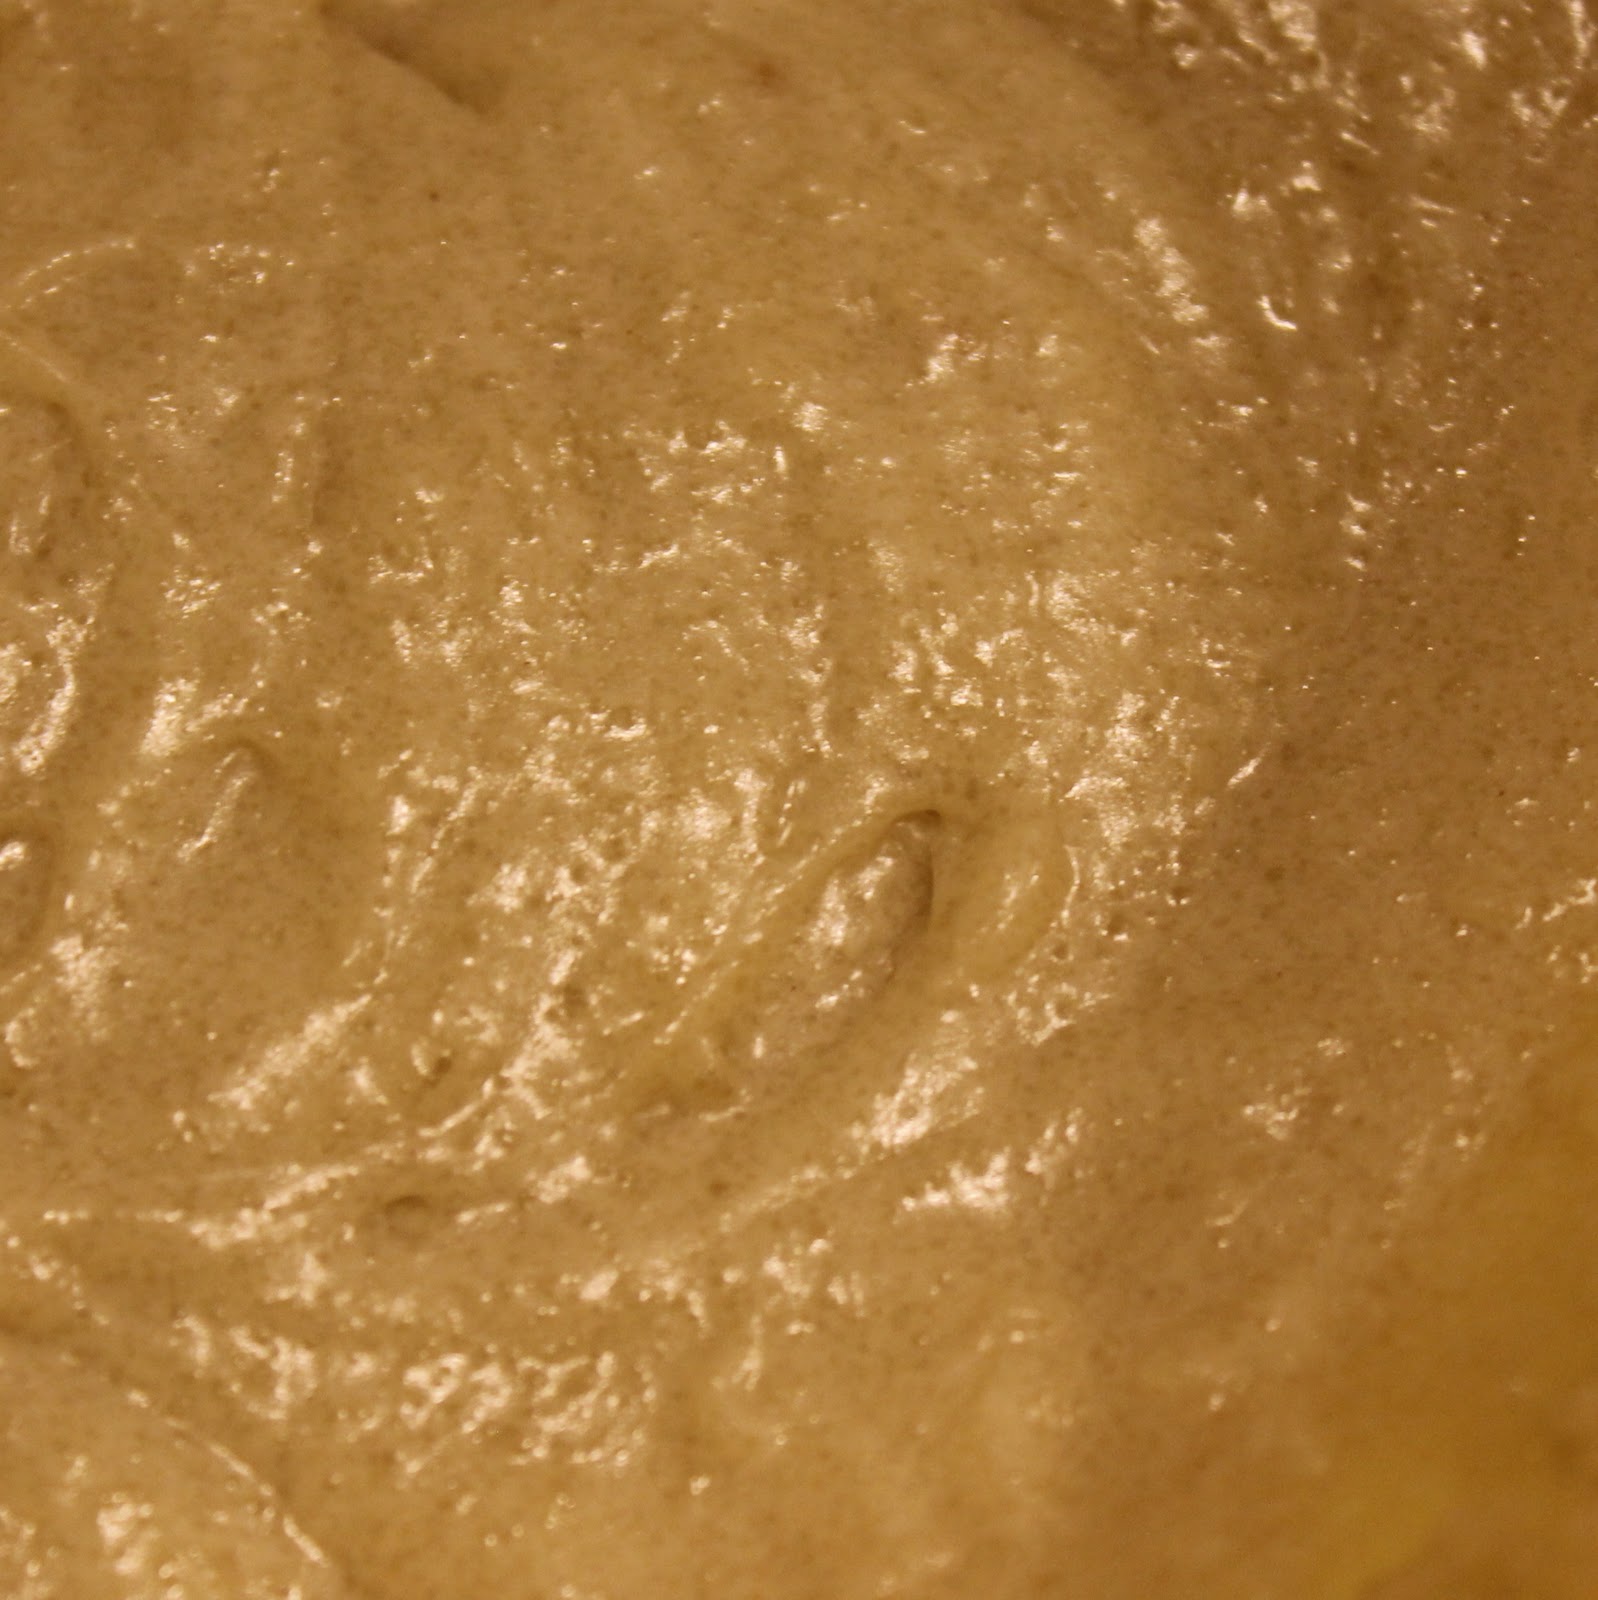
Add flour mixture to butter mixture; beat at low speed just until combined.
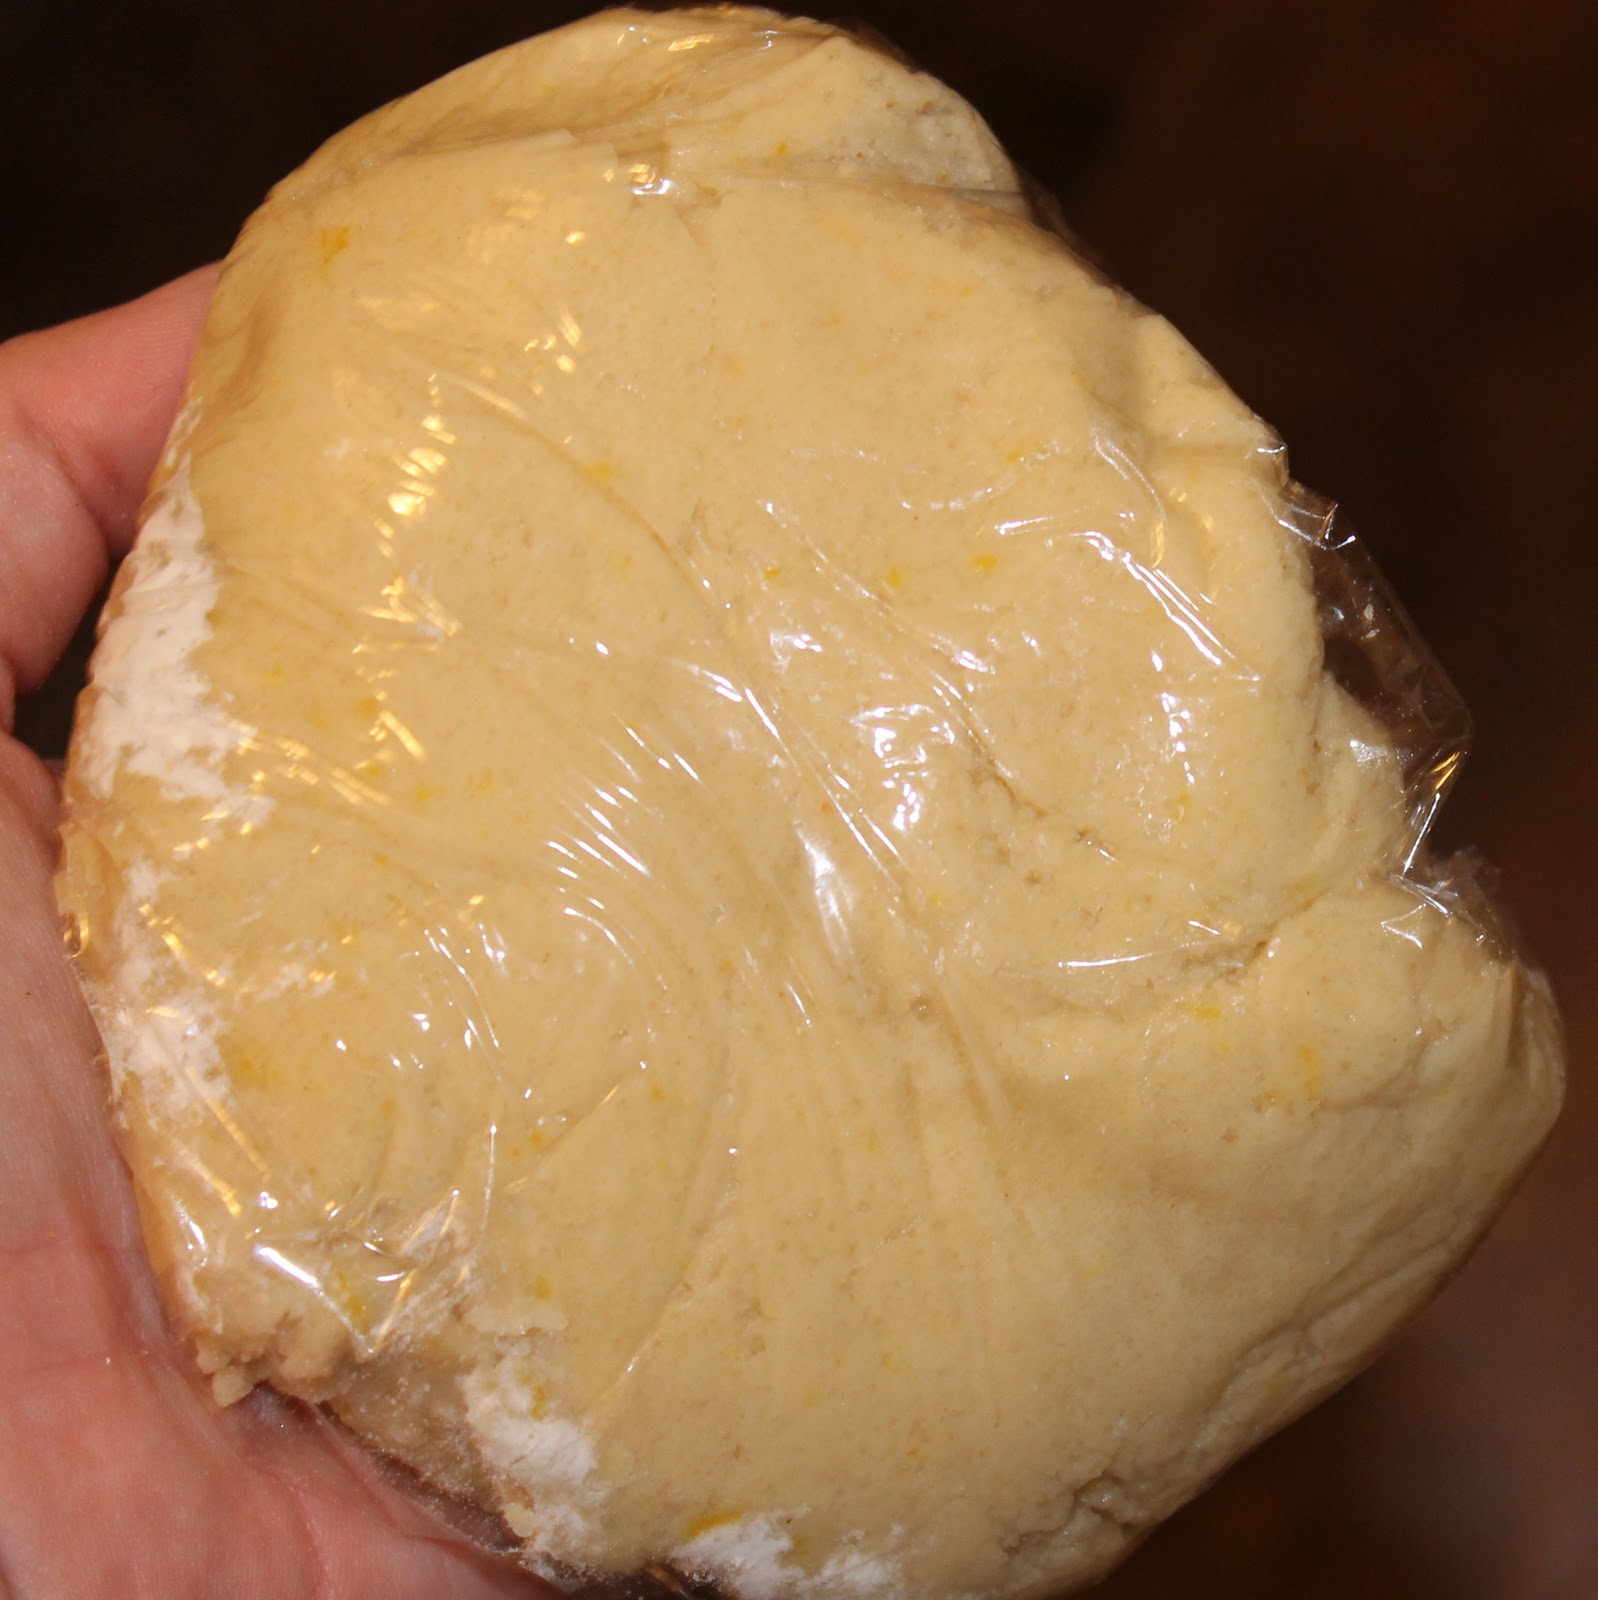
Wrap dough in plastic wrap and refrigerate for 30 minutes.
To make the lemon dough, add 5 tablespoons softened butter and the sugar in a large bowl. Mix at medium speed until blended. Add the egg white and beat until combined.
Add lemon rind, 1/2 teaspoon lemon juice, and vanilla using a mixer to blend.
In a medium sized bowl, combine the flour and salt. Add flour mixture to butter mixture and beat at low speed just until combined. Wrap dough in plastic wrap; chill 30 minutes.
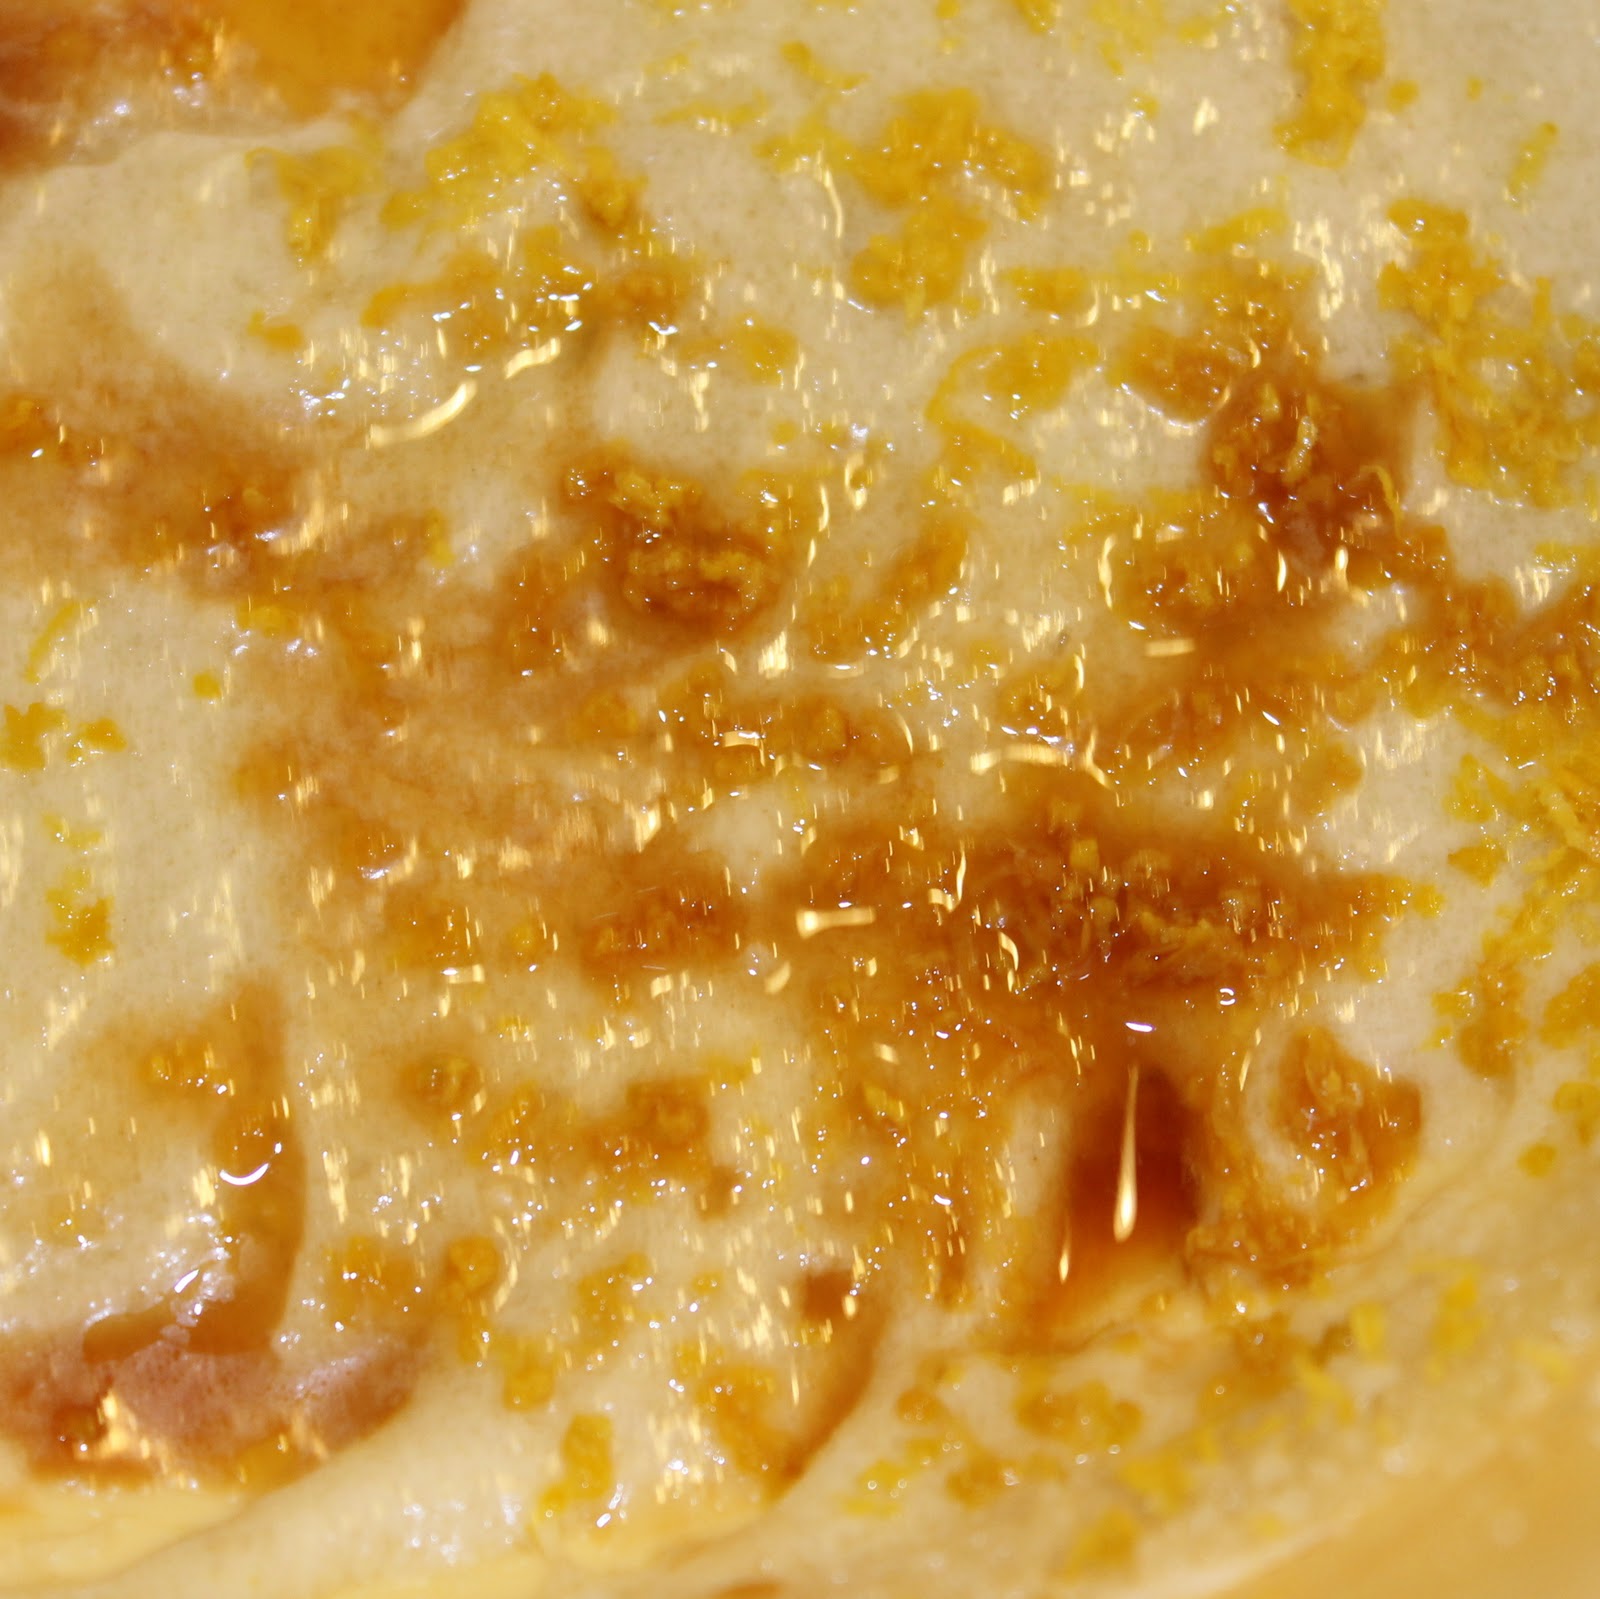
Unwrap ginger dough. Roll ginger dough between sheets of plastic wrap into a 13 x 8 1/2–inch rectangle (3/16 inch thick). (I honestly just eyeballed this). Chill 10 minutes.
Unwrap lemon dough. Roll lemon dough between sheets of plastic wrap into a 13 x 9–inch rectangle (3/16 inch thick). Basically I just tried to make it slightly thinner than the ginger dough. It doesn’t have to be perfect. Chill 10 minutes.
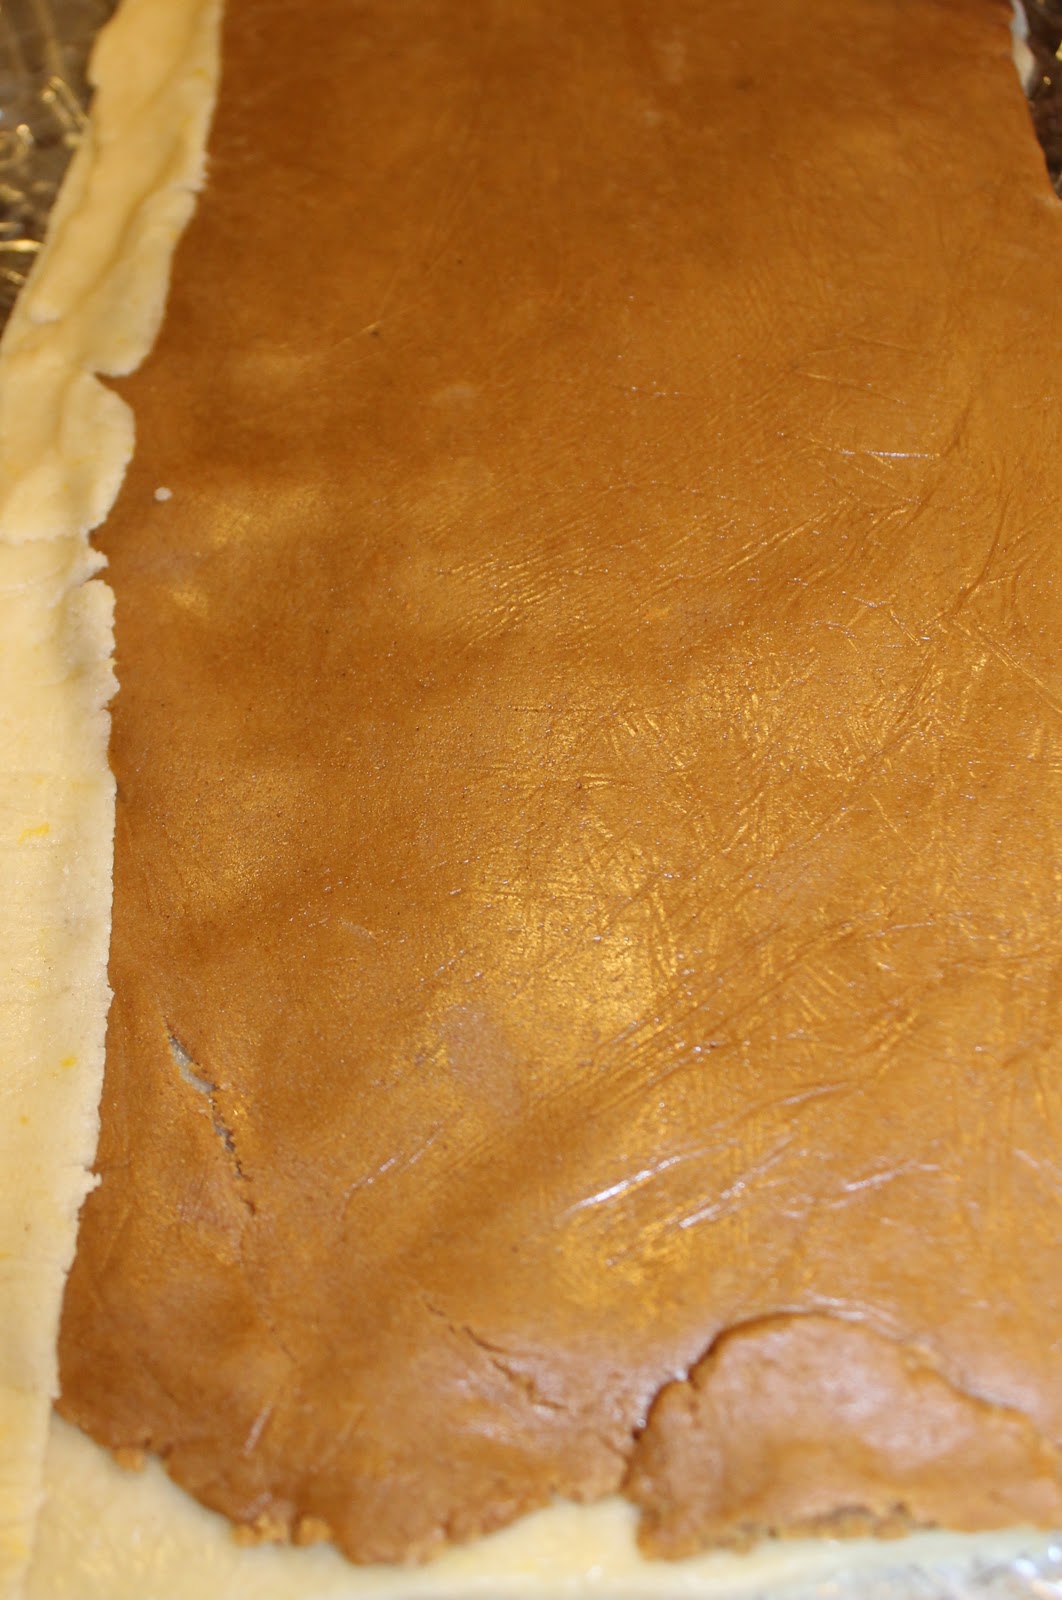
Carefully stack ginger dough on top of lemon dough, leaving a 1/2-inch border along one long edge.
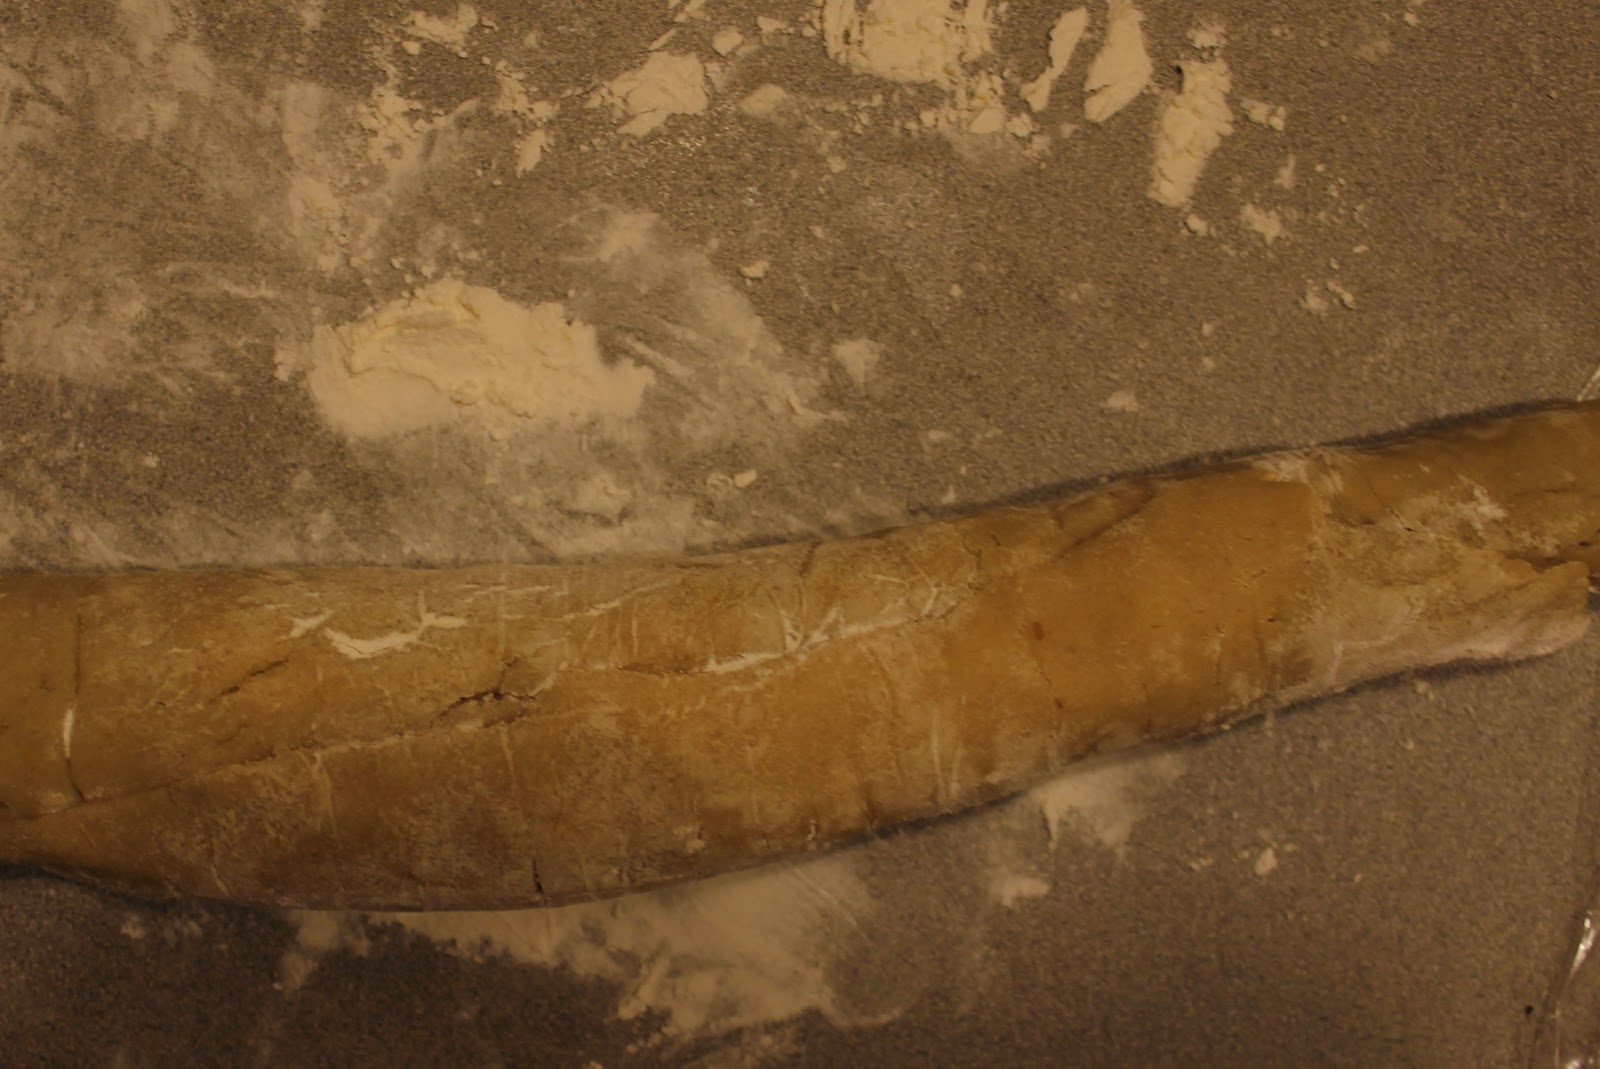
Starting with the long side without a border, roll up dough, jelly-roll fashion. Seal edges (do not seal ends of roll). Cover with plastic wrap; freeze 30 minutes.
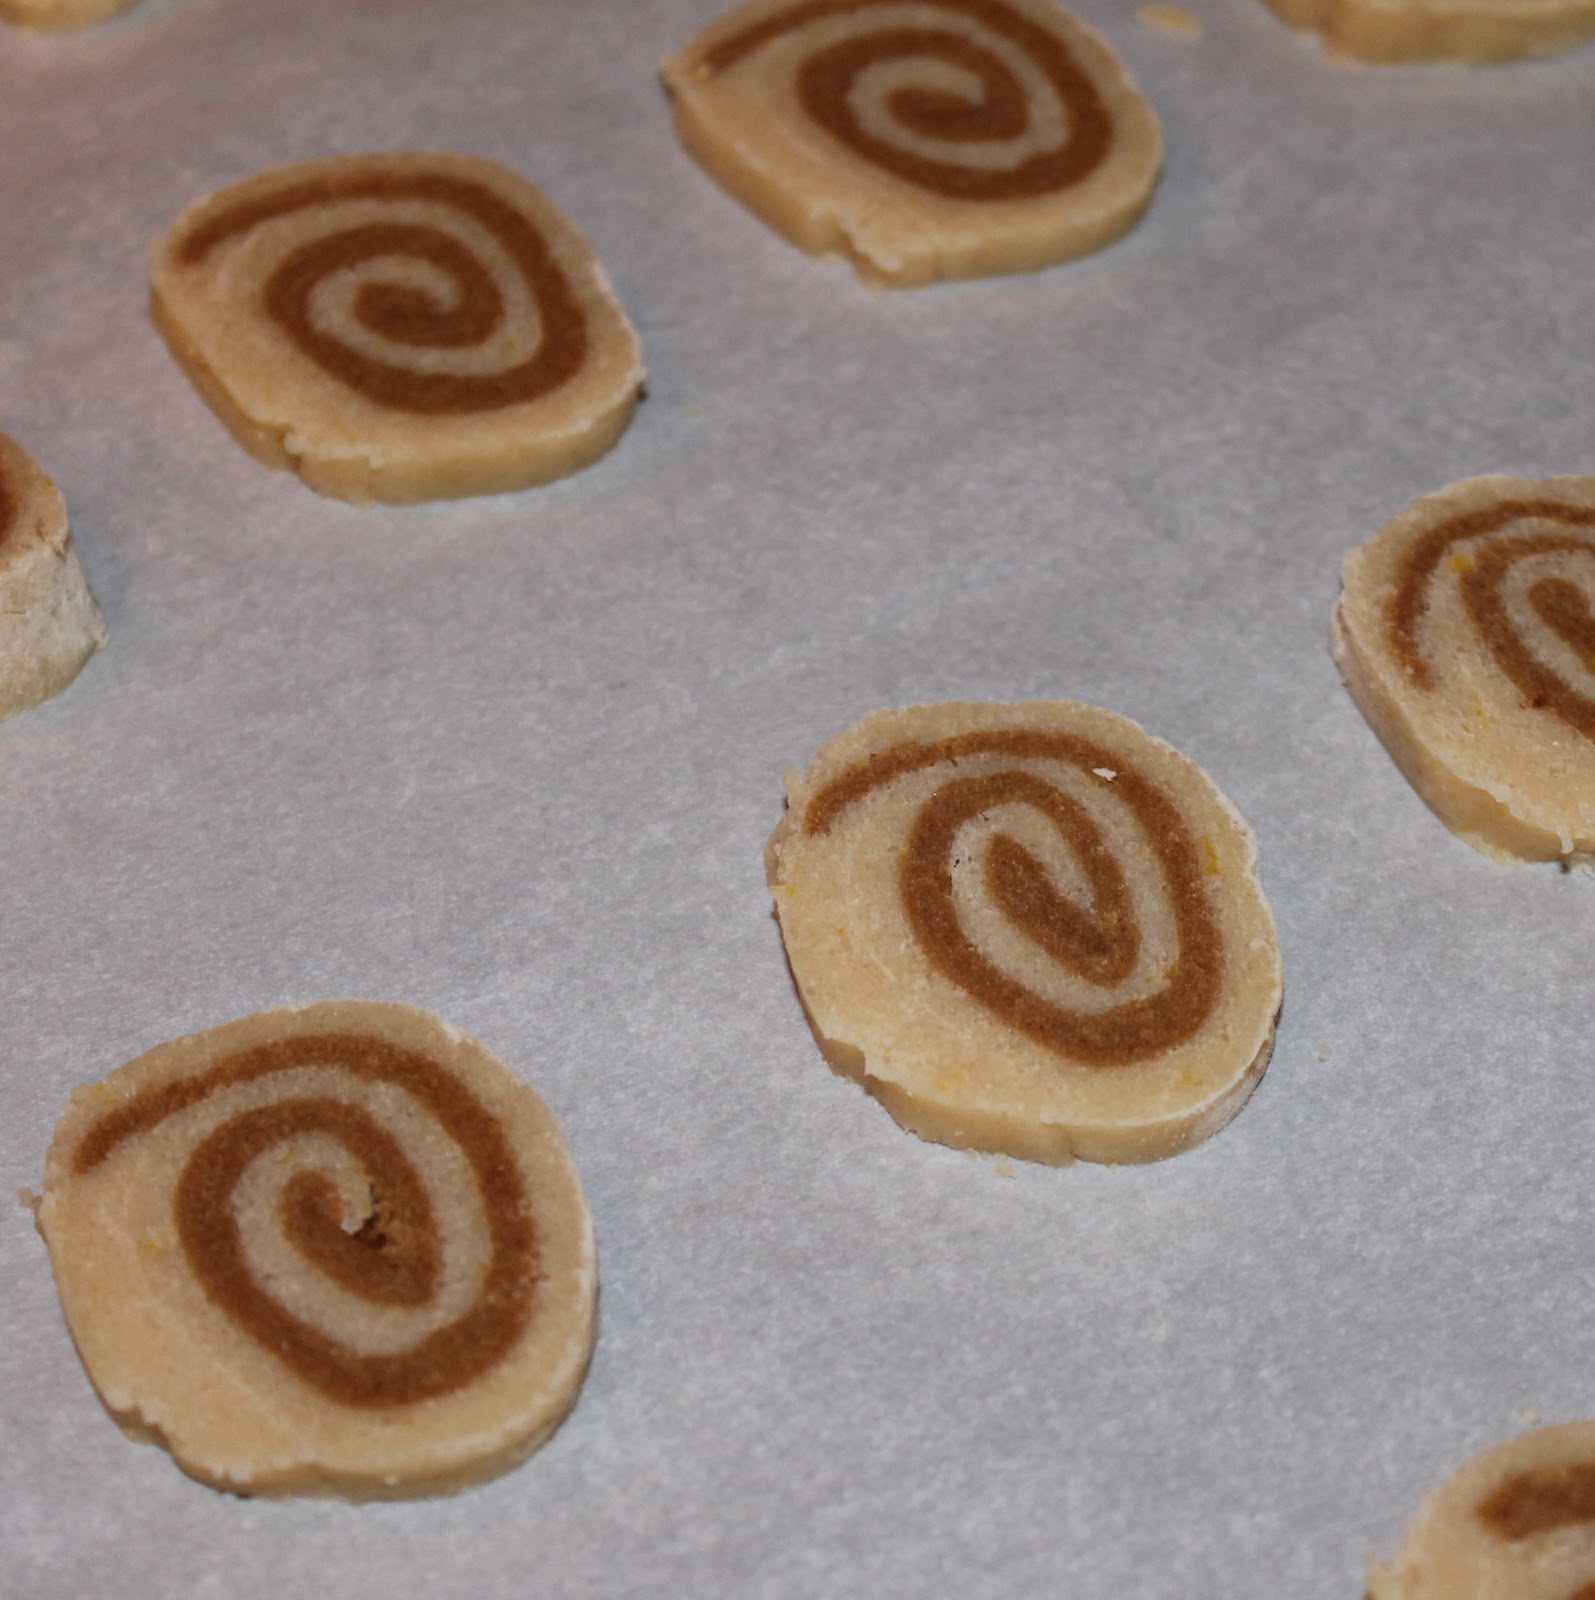
Remove the dough from the freezer. Preheat your oven to 350 degrees. Unwrap dough. Cut with a sharp knife into 40 slices (I got 39 out of mine, so close!)
Arrange slices 1 inch apart on baking sheets lined with parchment paper.
Bake one batch at a time for 9 minutes. Cool on wire racks.
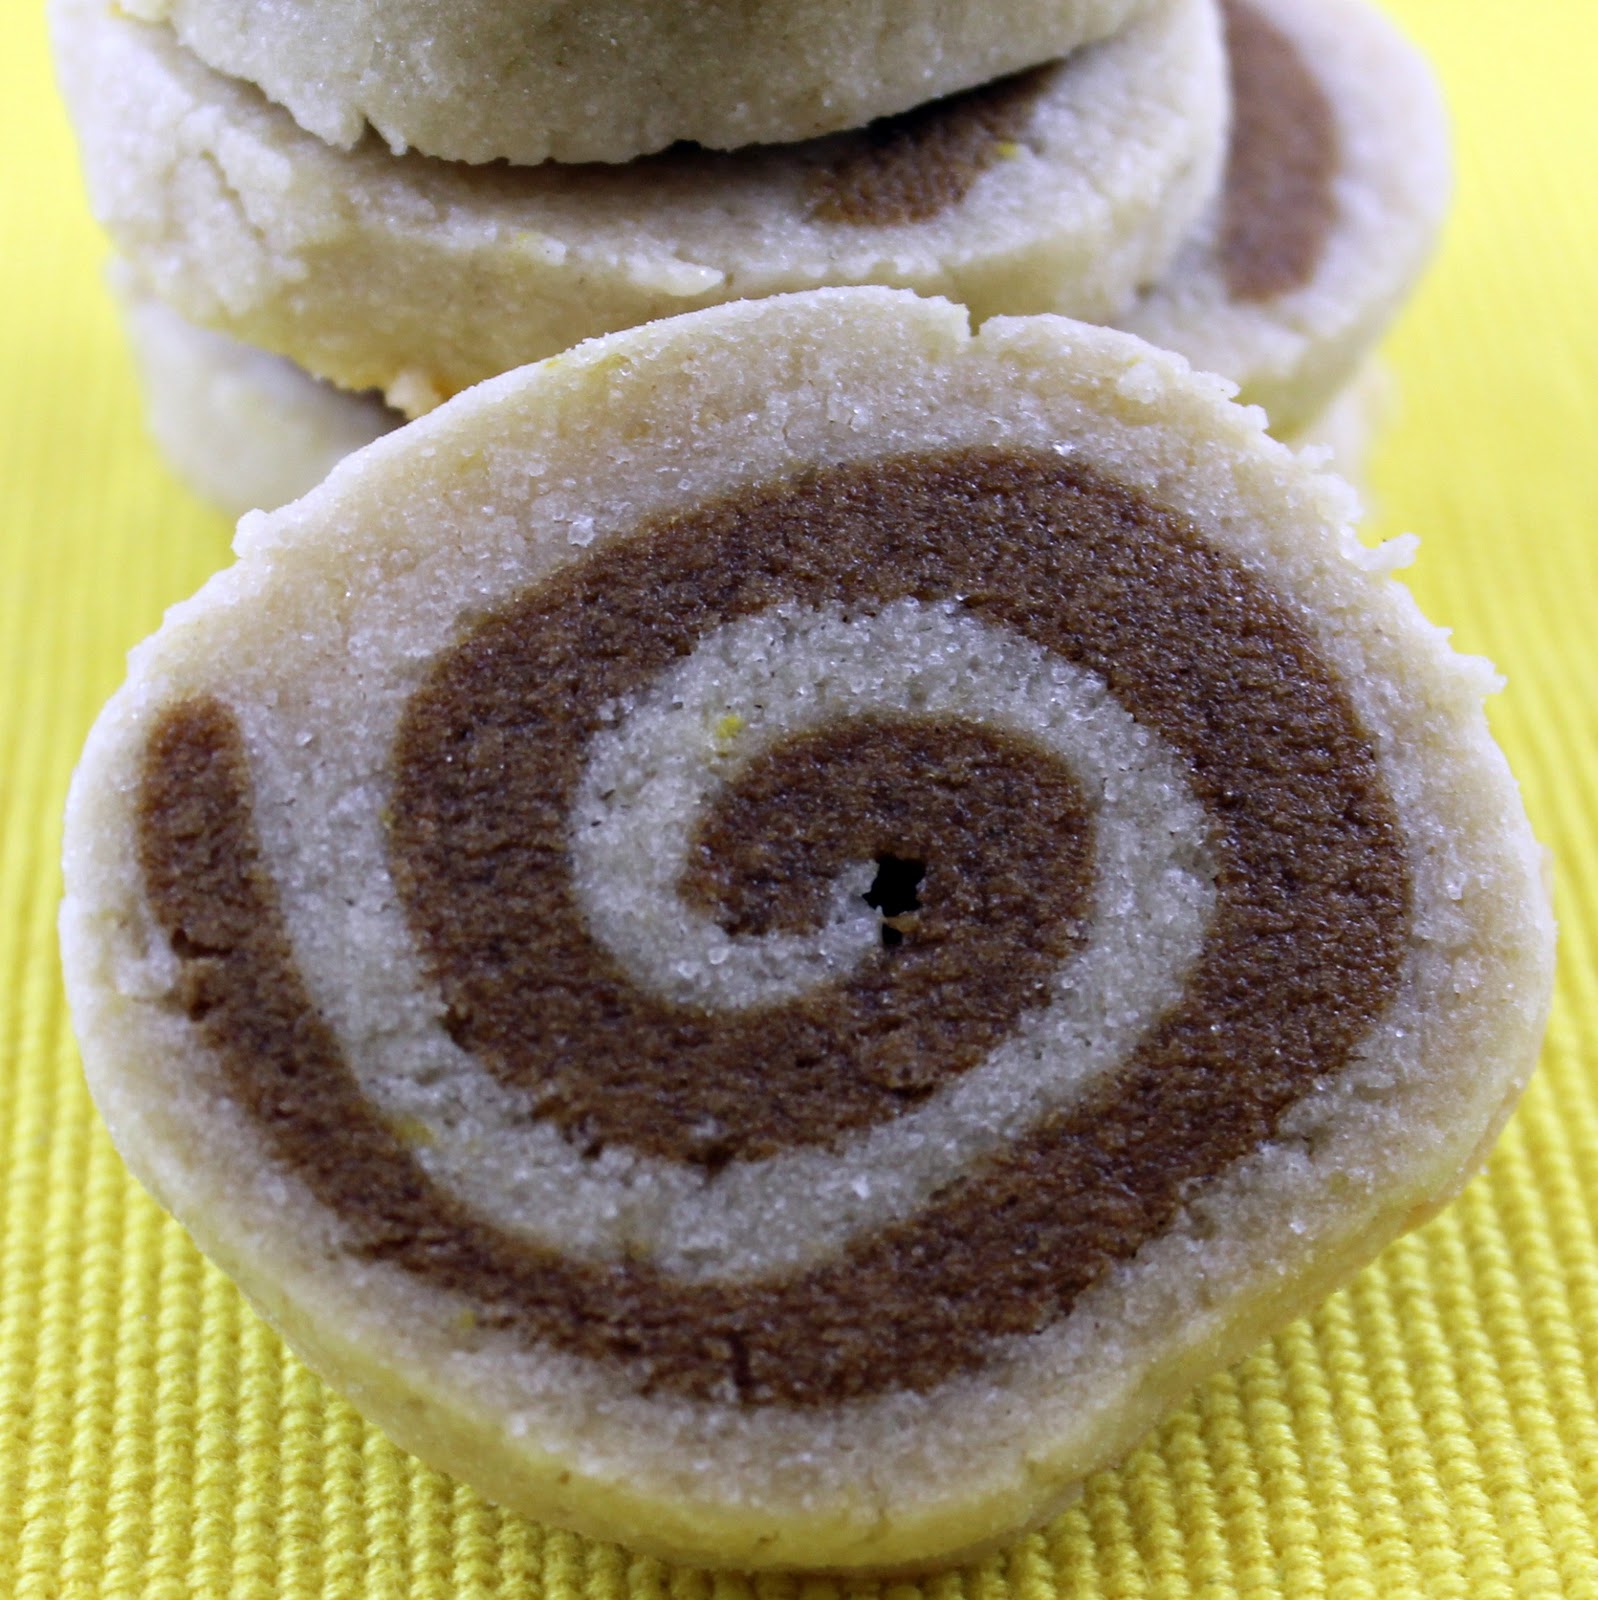
So I can’t lie, this Ginger Lemon Pinwheel Cookies recipe has to be one of the most time consuming and difficult cookie recipes I’ve ever made. But the result is pretty awesome. I was so proud of myself when they turned out looking like pinwheels!
You primarily taste the gingerbread, but the aftertaste is a light lemony flavor.
I thought these two flavors might compete with each other, but they end up being quite complimentary. Who knew?
Also, these Ginger Lemon Pinwheel Cookies are pretty snazzy looking aren’t they? 🙂
These Ginger Lemon Pinwheel Cookies are not soft chewy cookies (like a chocolate chip), they are more firm than that. They would probably be awesome dipped into some tea. Yum!
Two cookie recipes rolled together to create these yummy ginger and lemon pinwheel cookies!
Course Dessert
Keyword Cookies, Ginger, Lemon, Pinwheel
Prep Time 20 minutesminutes
Cook Time 20 minutesminutes
Chill Time 1 hourhour20 minutesminutes
Total Time 2 hourshours
Servings 40cookies
Ingredients
Ginger dough:
1/4cupunsalted buttersoftened
1/3cuppacked dark brown sugar
1/4cupmolasses
1large egg yolk
1 1/3cupsall-purpose flour
3/4teaspoonground ginger
3/4teaspoonground cinnamon
1/4teaspoonsalt
1/8teaspoonground nutmeg
Dash of ground allspice
Lemon dough:
5tablespoonsunsalted buttersoftened
2/3cupgranulated sugar
1large egg white
the zest of 2 lemons
1/2teaspoonlemon juice
3/4teaspoonvanilla extract
1 1/3cupsall-purpose flour
1/4teaspoonsalt
Instructions
Begin by making the ginger dough. In a medium bowl, add the flour, ginger, cinnamon, salt, nutmeg and allspice, stir with a whisk to combine.
Add 1/4 cup butter and the brown sugar to a large bowl. Beat with a mixer on medium until well combined.
You will end up using an entire egg in this recipe. To remove the yolk from the egg white, crack the egg over a bowl carefully. Split the two ends of the egg and move the egg from shell piece to shell piece until the white falls into the bowl and the yolk is left in the shell. Reserve the egg white for the lemon dough.
Add molasses and egg yolk to the sugar and butter. Beat until well blended.
Add flour mixture to butter mixture; beat at low speed just until combined.
Wrap dough in plastic wrap and refrigerate for 30 minutes.
To make the lemon dough, add 5 tablespoons softened butter and the sugar in a large bowl. Mix at medium speed until blended. Add the egg white and beat until combined.
Add lemon rind, 1/2 teaspoon lemon juice, and vanilla using a mixer to blend.
In a medium sized bowl, combine the flour and salt. Add flour mixture to butter mixture and beat at low speed just until combined. Wrap dough in plastic wrap; chill 30 minutes.
Unwrap ginger dough. Roll ginger dough between sheets of plastic wrap into a 13 x 8 1/2–inch rectangle (3/16 inch thick). (I honestly just eyeballed this). Chill 10 minutes.
Unwrap lemon dough. Roll lemon dough between sheets of plastic wrap into a 13 x 9–inch rectangle (3/16 inch thick). Basically I just tried to make it slightly thinner than the ginger dough. It doesn’t have to be perfect. Chill 10 minutes.
Carefully stack ginger dough on top of lemon dough, leaving a 1/2-inch border along one long edge.
Starting with the long side without a border, roll up dough, jelly-roll fashion. Seal edges (do not seal ends of roll). Cover with plastic wrap; freeze 30 minutes.
Remove the dough from the freezer. Preheat your oven to 350 degrees. Unwrap dough. Cut with a sharp knife into 40 slices.
Arrange slices 1 inch apart on baking sheets lined with parchment paper.
Bake one batch at a time for 9 minutes. Cool on wire racks.
Notes
If you make this recipe, share a photo on Instagram and tag me @icancookthat!
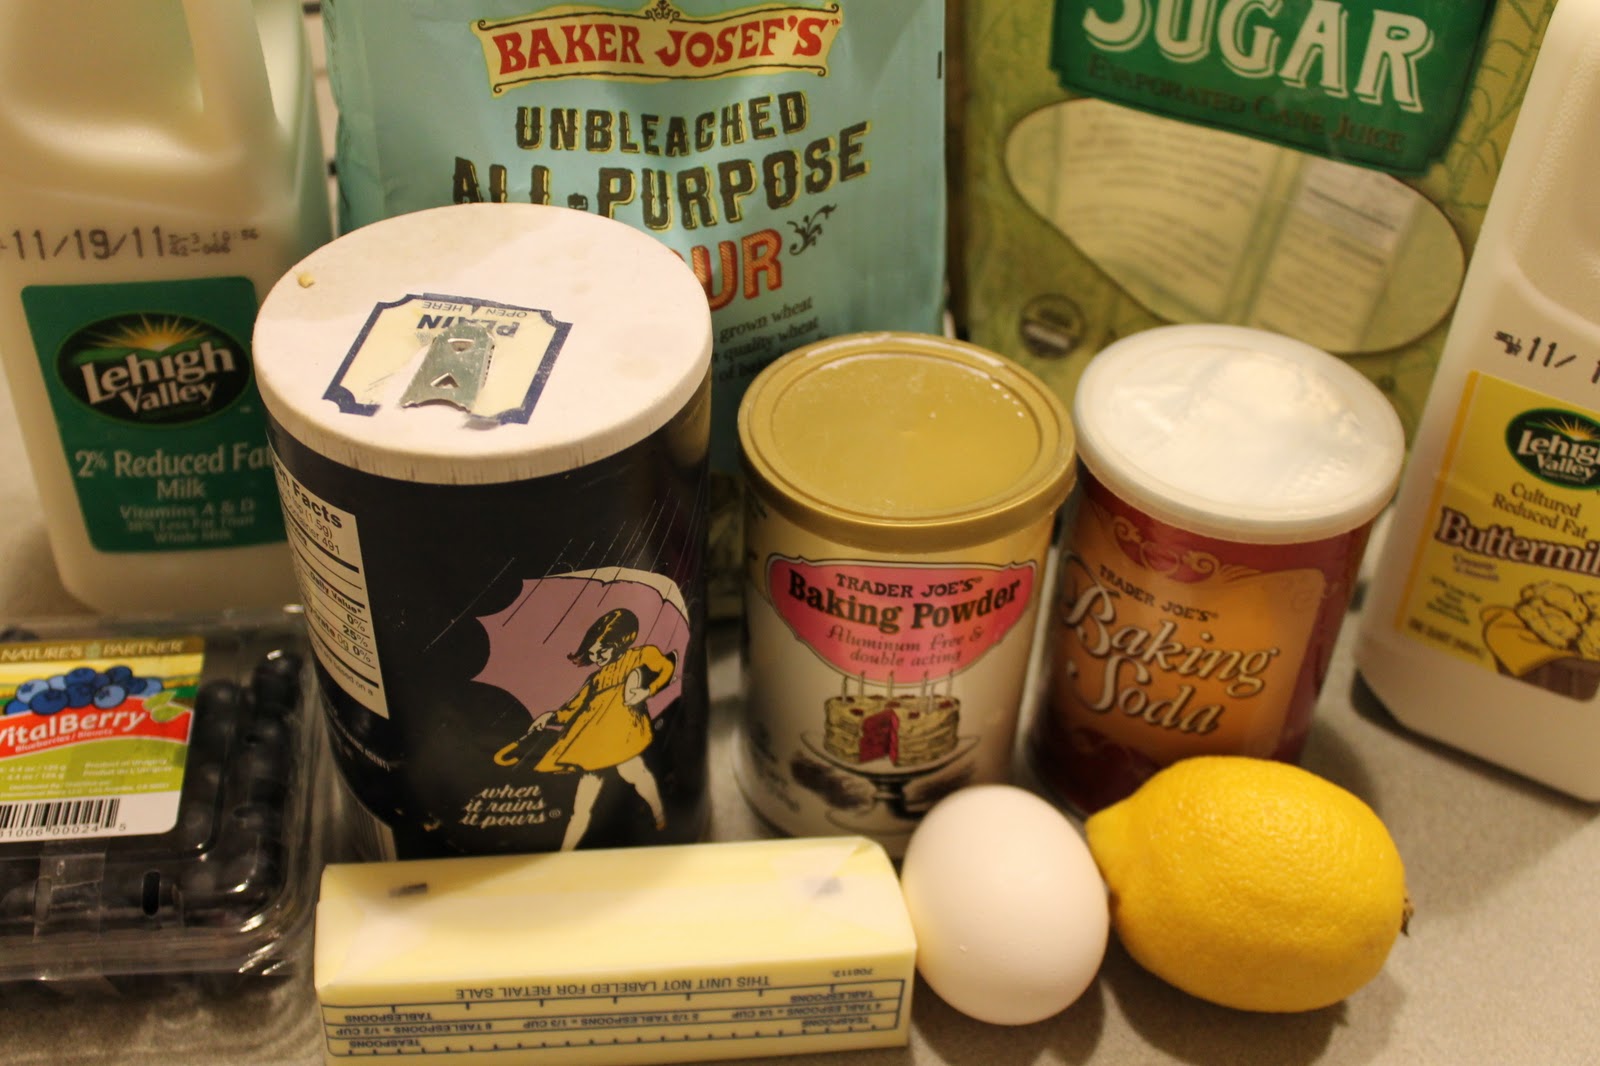
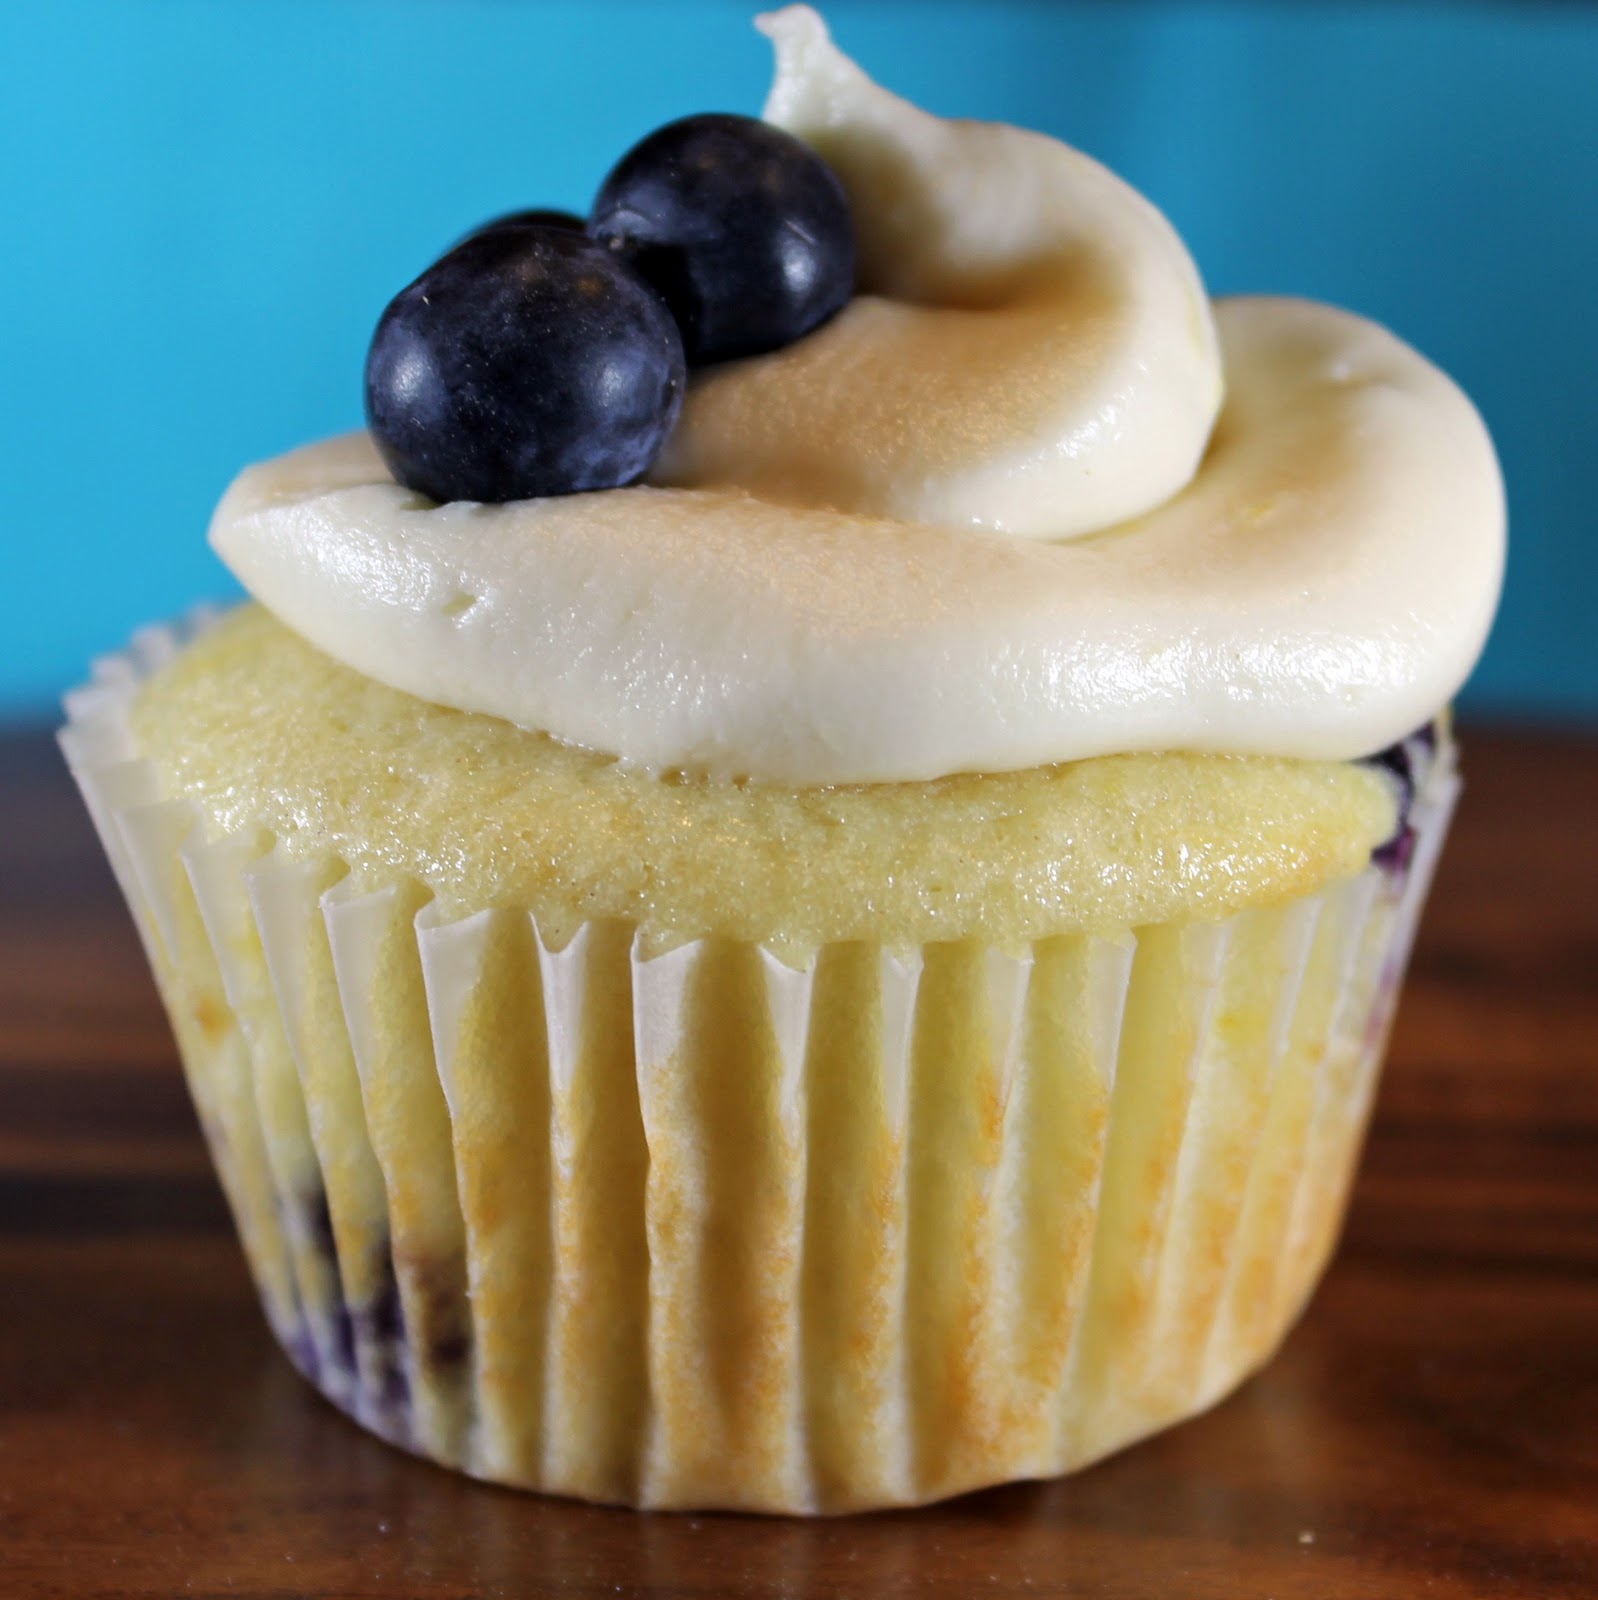
My work is hosting a bake sale this week, so I am using it as the perfect opportunity to try out these cupcakes from Cooking Light that caught my eye a while back. How fantastic do Lemon Scented Blueberry Cupcakes sound?
Ingredients:
Cupcakes:
1 1/2 cups (about 6 3/4 ounces) plus 2 tablespoons all-purpose flour, divided
10 tablespoons granulated sugar
1 1/2 teaspoons baking powder
1/4 teaspoon salt
1/8 teaspoon baking soda
1/4 cup butter, melted
1 large egg
1/2 cup low-fat buttermilk
1/2 cup 2% reduced-fat milk
1 teaspoon grated lemon rind
3/4 cup fresh or frozen blueberries, thawed
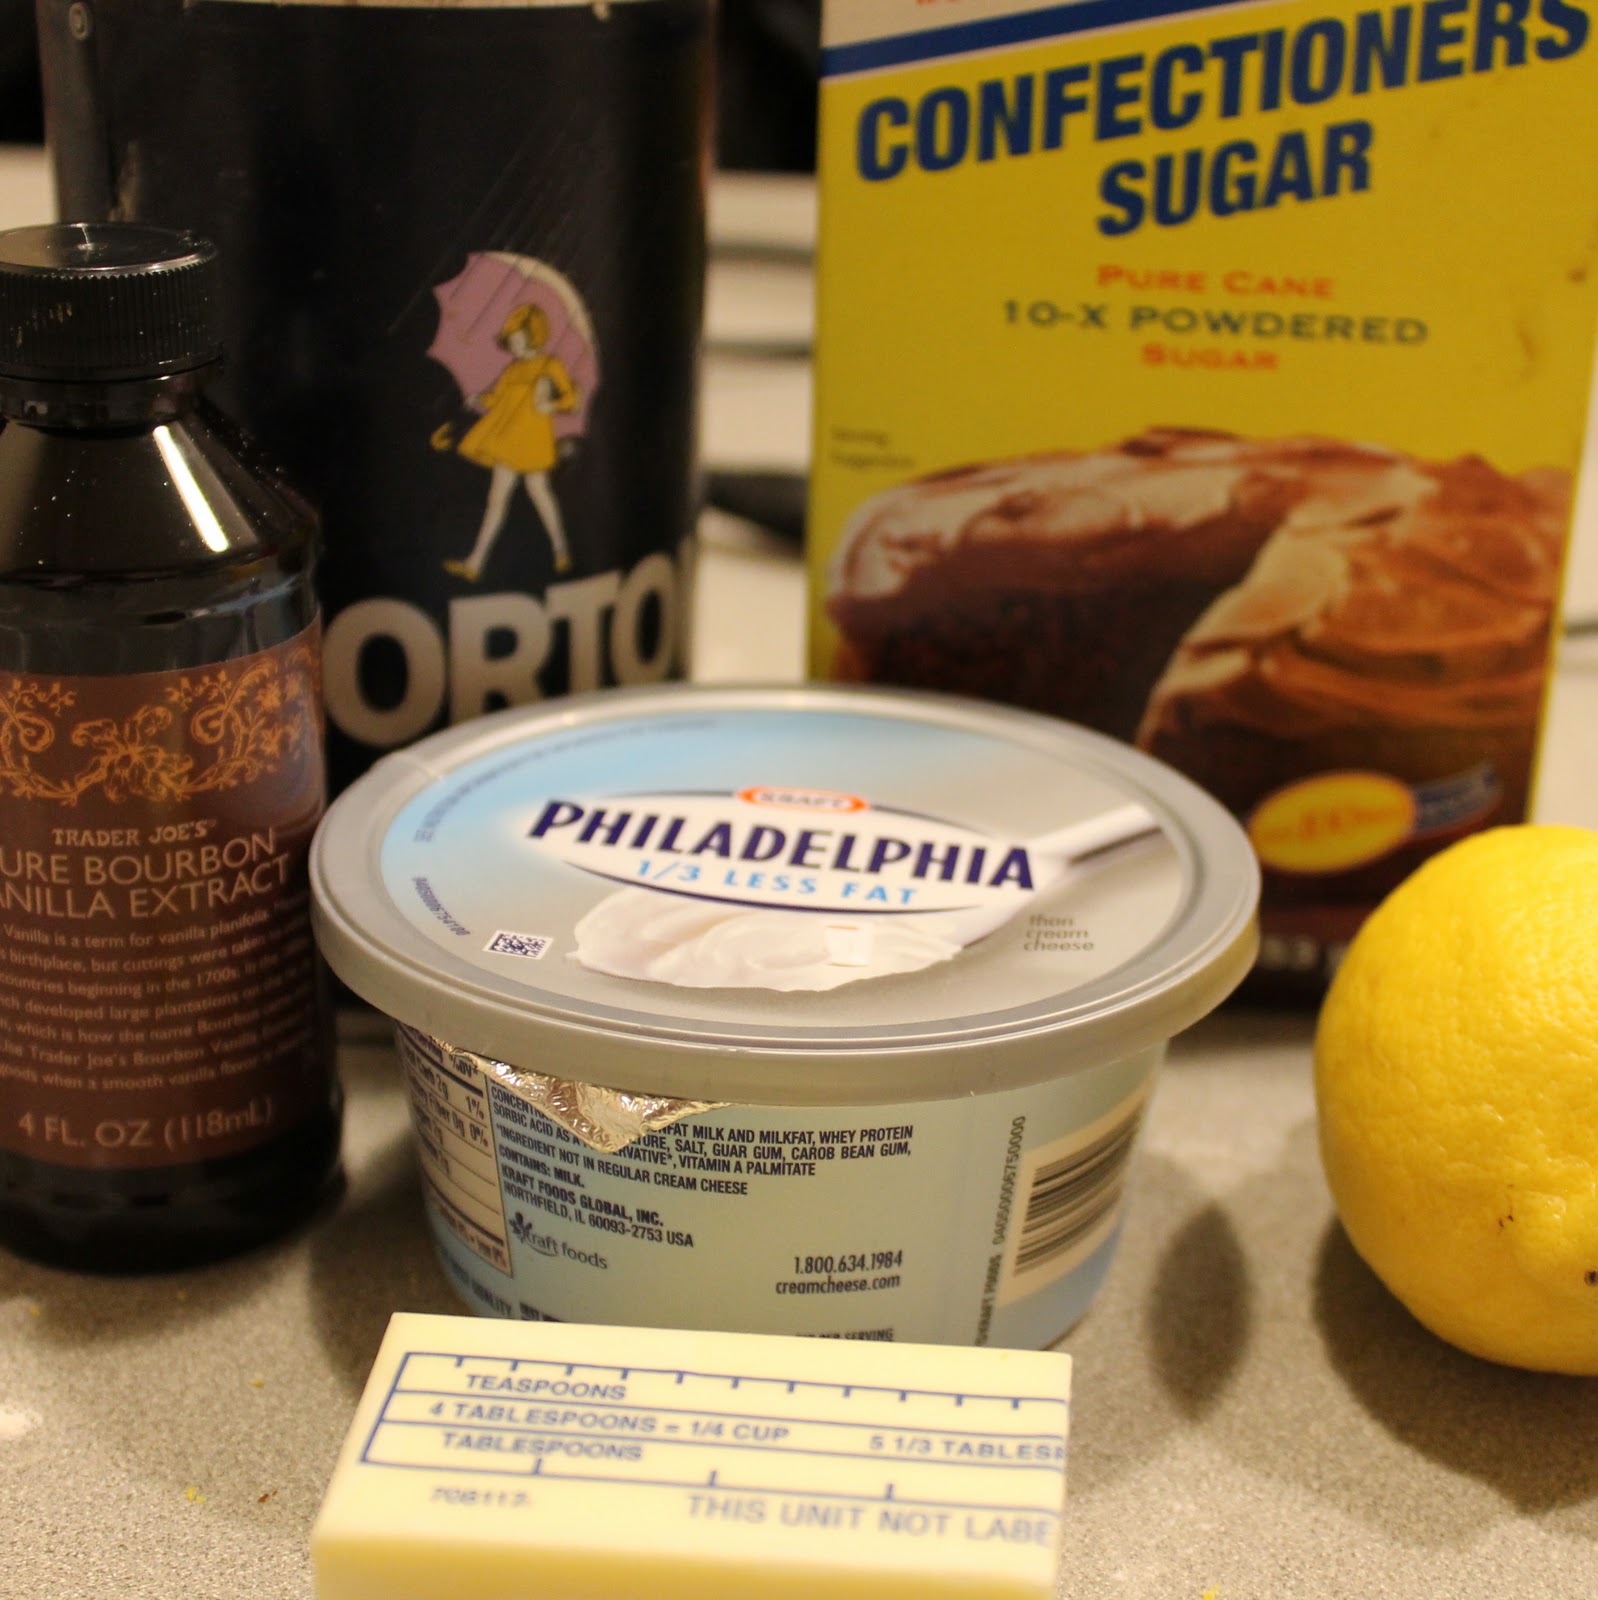
Frosting:
1/4 cup (2 ounces) 1/3-less-fat cream cheese, softened
2 tablespoons butter, softened
1 teaspoon grated lemon rind plus more for garnish
1 teaspoon vanilla extract
1/8 teaspoon salt
1 1/2 cups powdered sugar, sifted
2 teaspoons fresh lemon juice
Fresh blueberries (optional)
Preheat the oven to 350 degrees. Place paper cupcake liners into the muffin cups. Melt 1/4 cup butter over medium low heat. Zest the lemon.
Add 1 1/2 cups flour plus 1 tablespoon to a medium sized bowl. (I suggest springing for cake flour if you can find it, if not all purpose flour works just fine). Add the granulated sugar, baking powder, salt, and baking soda. Stir to combine.
Add melted butter and egg to a large bowl. Stir with a whisk to combine.
Add buttermilk, milk, and 1 teaspoon lemon rind to butter mixture (I used zest from 1 lemon), stirring with a whisk to combine.
Add the flour mixture to the buttermilk mixture, stirring until just combined.
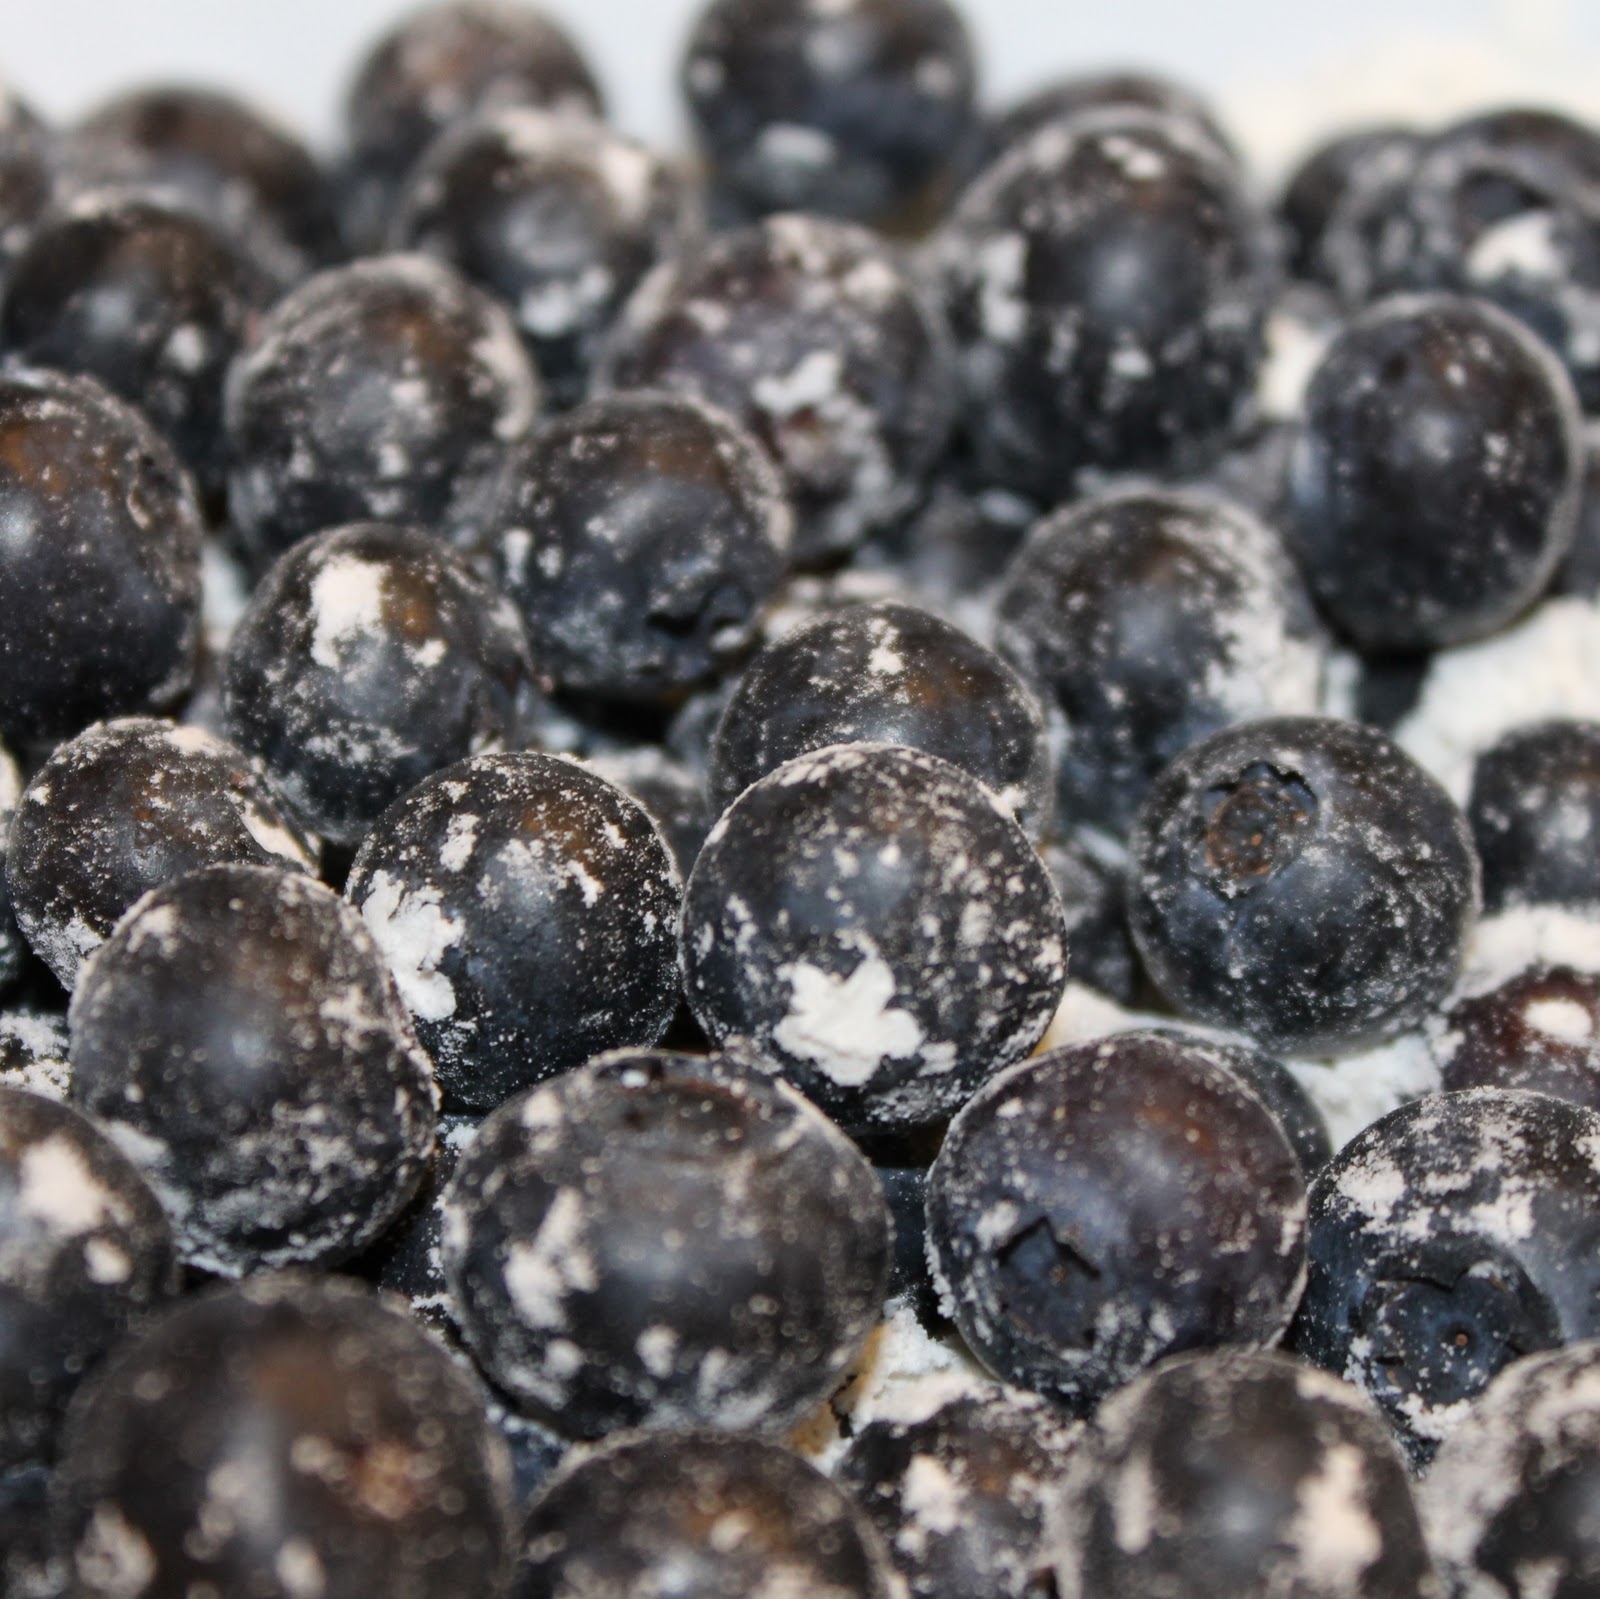
In a small bowl, toss the blueberries with 1 tablespoon flour.
Add the blueberries to the batter, stirring until just combined.
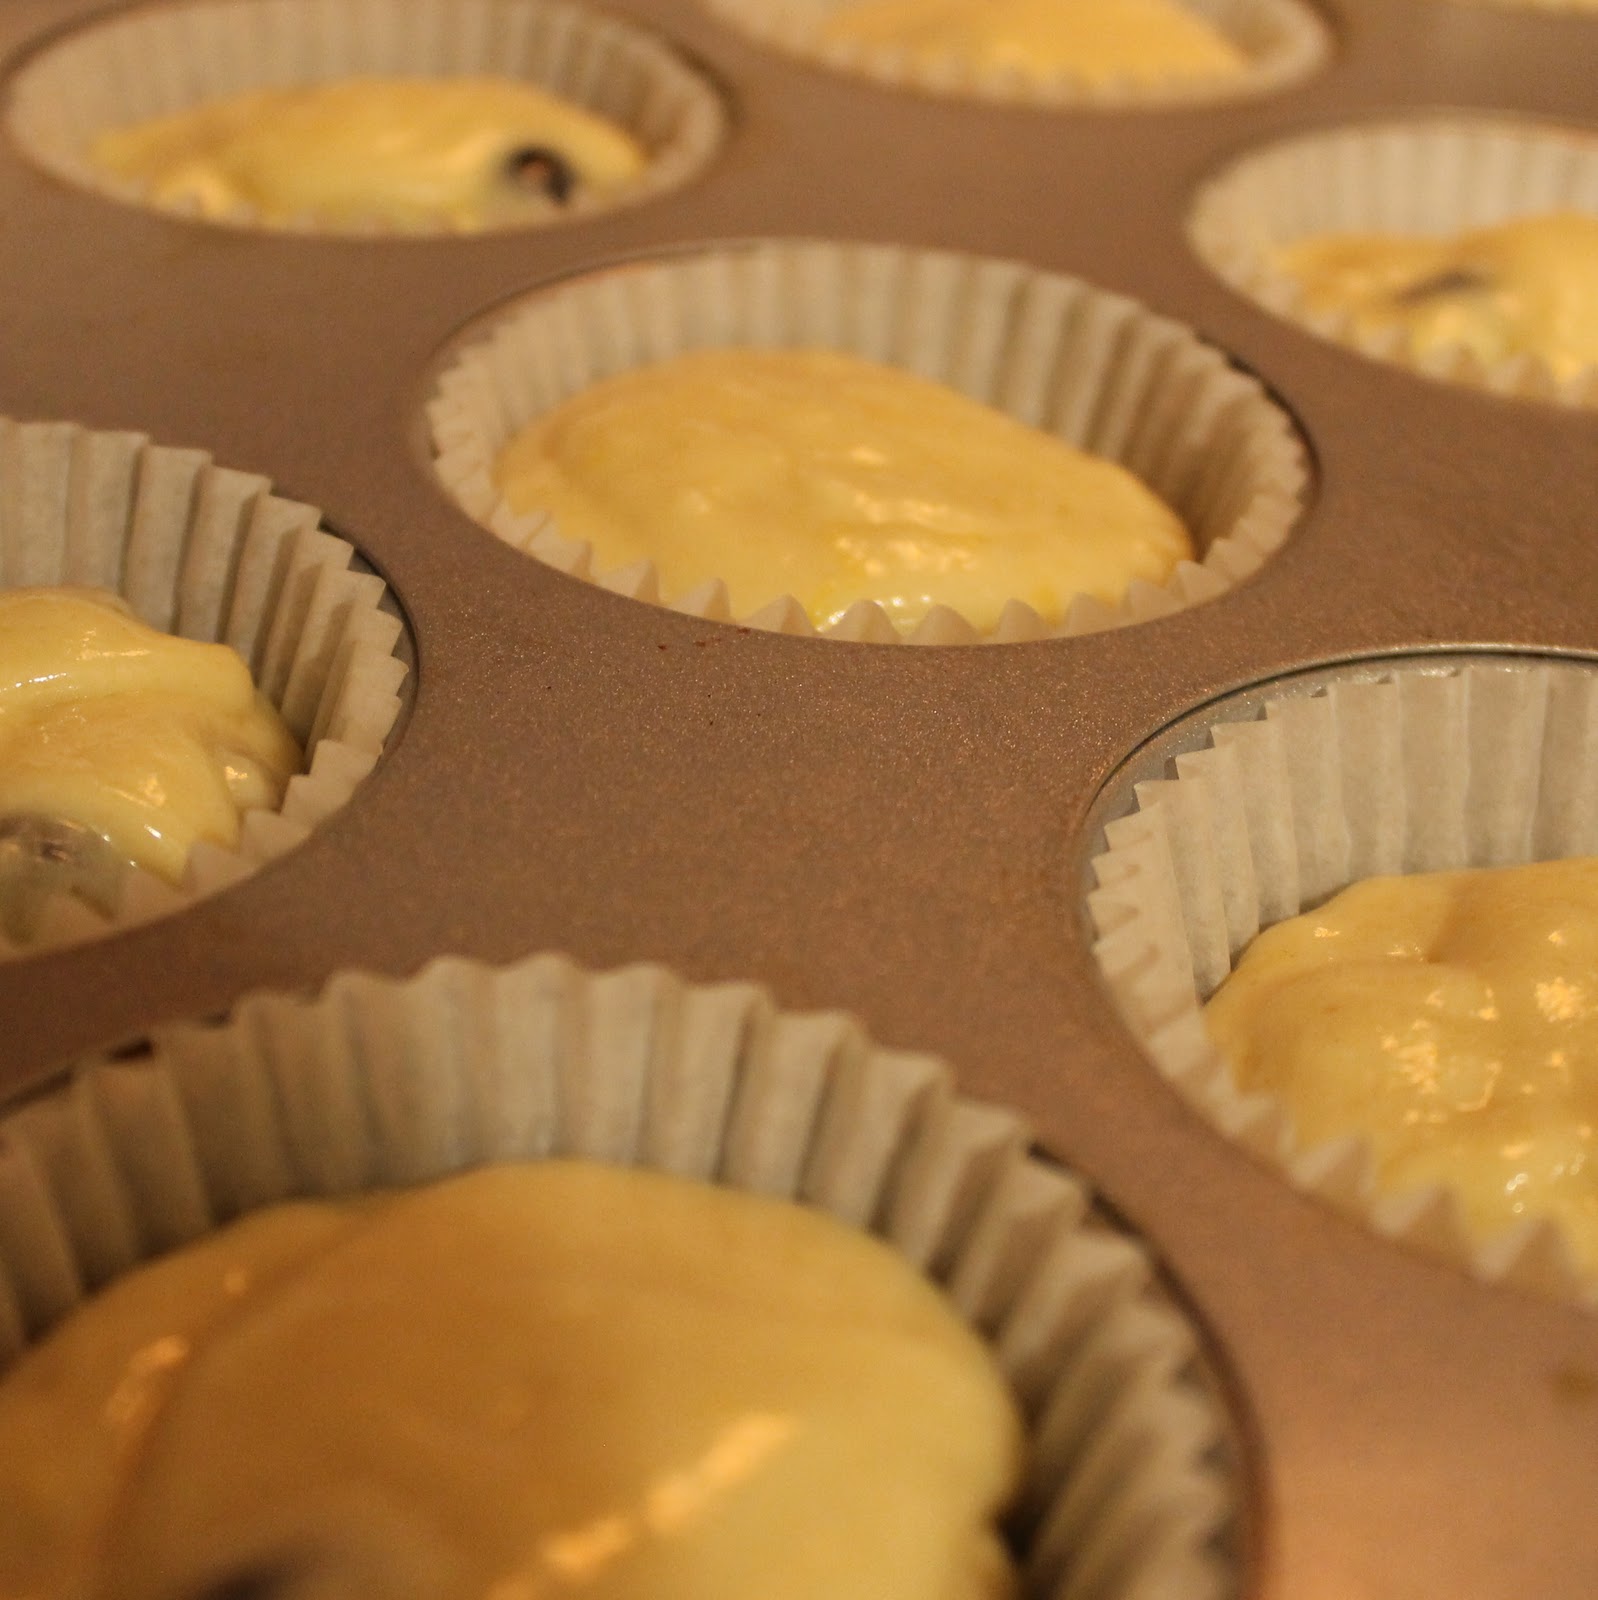
Spoon batter into the muffin cups. I use an ice cream scoop to get evenly portioned cupcakes.
Bake for 25 minutes or until a pick inserted into the center comes out clean. Cool for 5 minutes in the pan, then remove and allow to finish cooling on a wire rack.
Prepare the frosting while the cupcakes are cooling. Add cream cheese, 2 tablespoons butter, 1 teaspoon lemon rind, vanilla, and 1/8 teaspoon salt to a bowl. Using an electric mixer, beat on medium speed until just blended.
Gradually add powdered sugar mixing until just combined. Stir in lemon juice.
Add the frosting to a ziplock bag. Cut off one of the bottom corners.
Squeeze the icing on top of the cooled cupcakes. Top with blueberries and lemon zest if desired.
I absolutely loved these cupcakes. The lemon zest added great flavor to the sweet blueberry cupcake.
I am having a bit of a problem with the idea of giving these away. I want to keep them all for myself! But that is terribly selfish of me so I guess I should share their deliciousness.
Remember to refrigerate the cupcakes, the icing is part cream cheese.
1/4 cup (2 ounces) 1/3-less-fat cream cheese, softened
2 tablespoons butter, softened
1 teaspoon grated lemon rind plus more for garnish
1 teaspoon vanilla extract
1/8 teaspoon salt
1 1/2 cups powdered sugar, sifted
2 teaspoons fresh lemon juice
Fresh blueberries (optional)
Instructions
Preheat the oven to 350 degrees. Place paper cupcake liners into the muffin cups. Melt 1/4 cup butter over medium low heat. Zest the lemon.
Add 1 1/2 cups flour plus 1 tablespoon to a medium sized bowl. (I suggest springing for cake flour if you can find it, if not all purpose flour works just fine). Add the granulated sugar, baking powder, salt, and baking soda. Stir to combine.
Add melted butter and egg to a large bowl. Stir with a whisk to combine.
Add buttermilk, milk, and 1 teaspoon lemon rind to butter mixture (I used zest from 1 lemon), stirring with a whisk to combine.
Add the flour mixture to the buttermilk mixture, stirring until just combined.
In a small bowl, toss the blueberries with 1 tablespoon flour.
Add the blueberries to the batter, stirring until just combined.
Spoon batter into the muffin cups. I use an ice cream scoop to get evenly portioned cupcakes.
Bake for 25 minutes or until a pick inserted into the center comes out clean. Cool for 5 minutes in the pan, then remove and allow to finish cooling on a wire rack.
Prepare the frosting while the cupcakes are cooling. Add cream cheese, 2 tablespoons butter, 1 teaspoon lemon rind, vanilla, and 1/8 teaspoon salt to a bowl. Using an electric mixer, beat on medium speed until just blended.
Gradually add powdered sugar mixing until just combined. Stir in lemon juice.
Add the frosting to a ziplock bag. Cut off one of the bottom corners.
Squeeze the icing on top of the cooled cupcakes. Top with blueberries and lemon zest if desired.
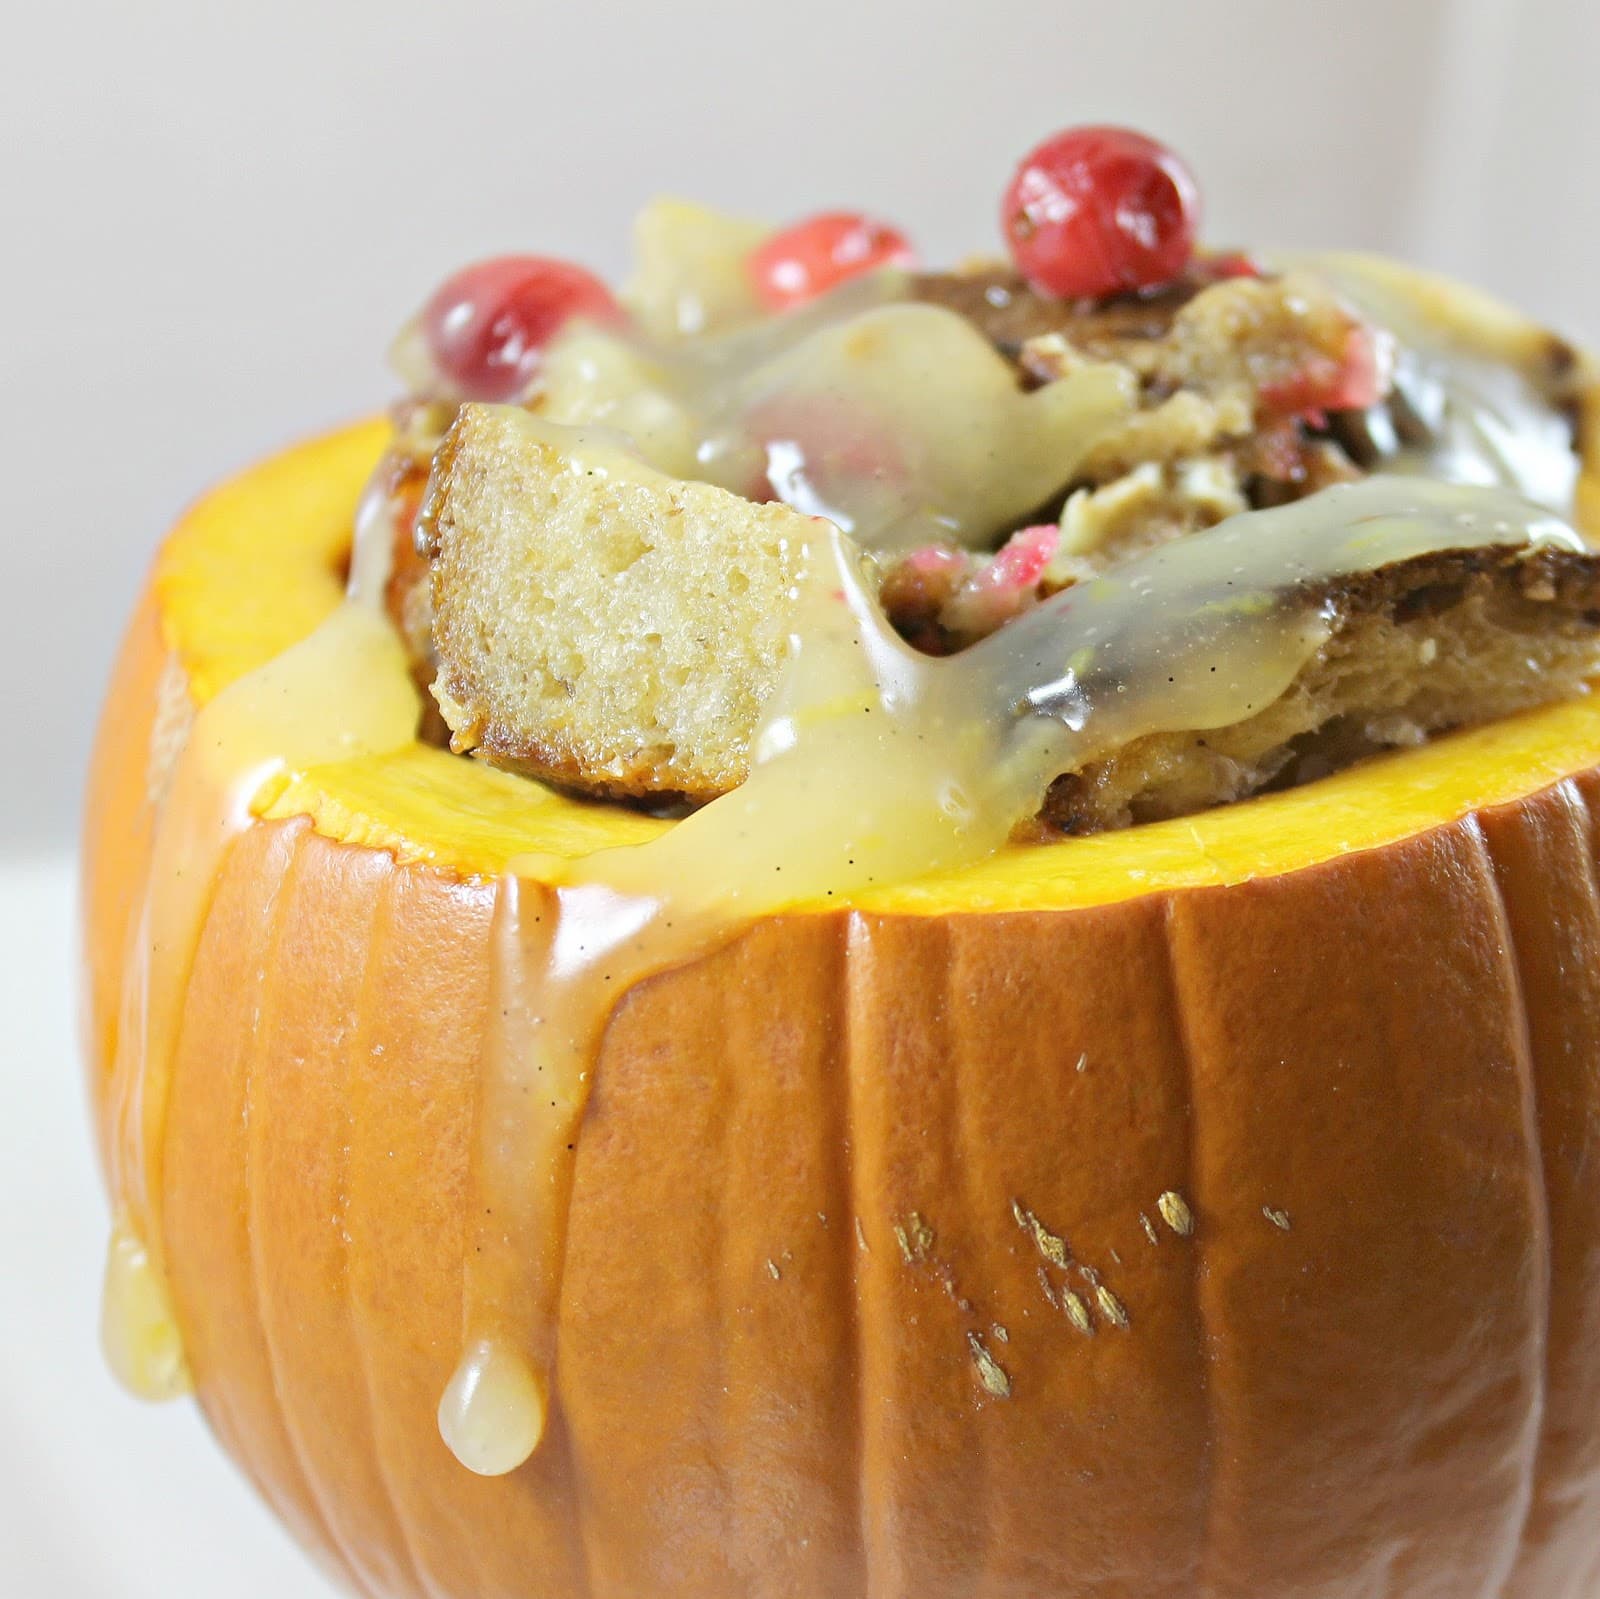
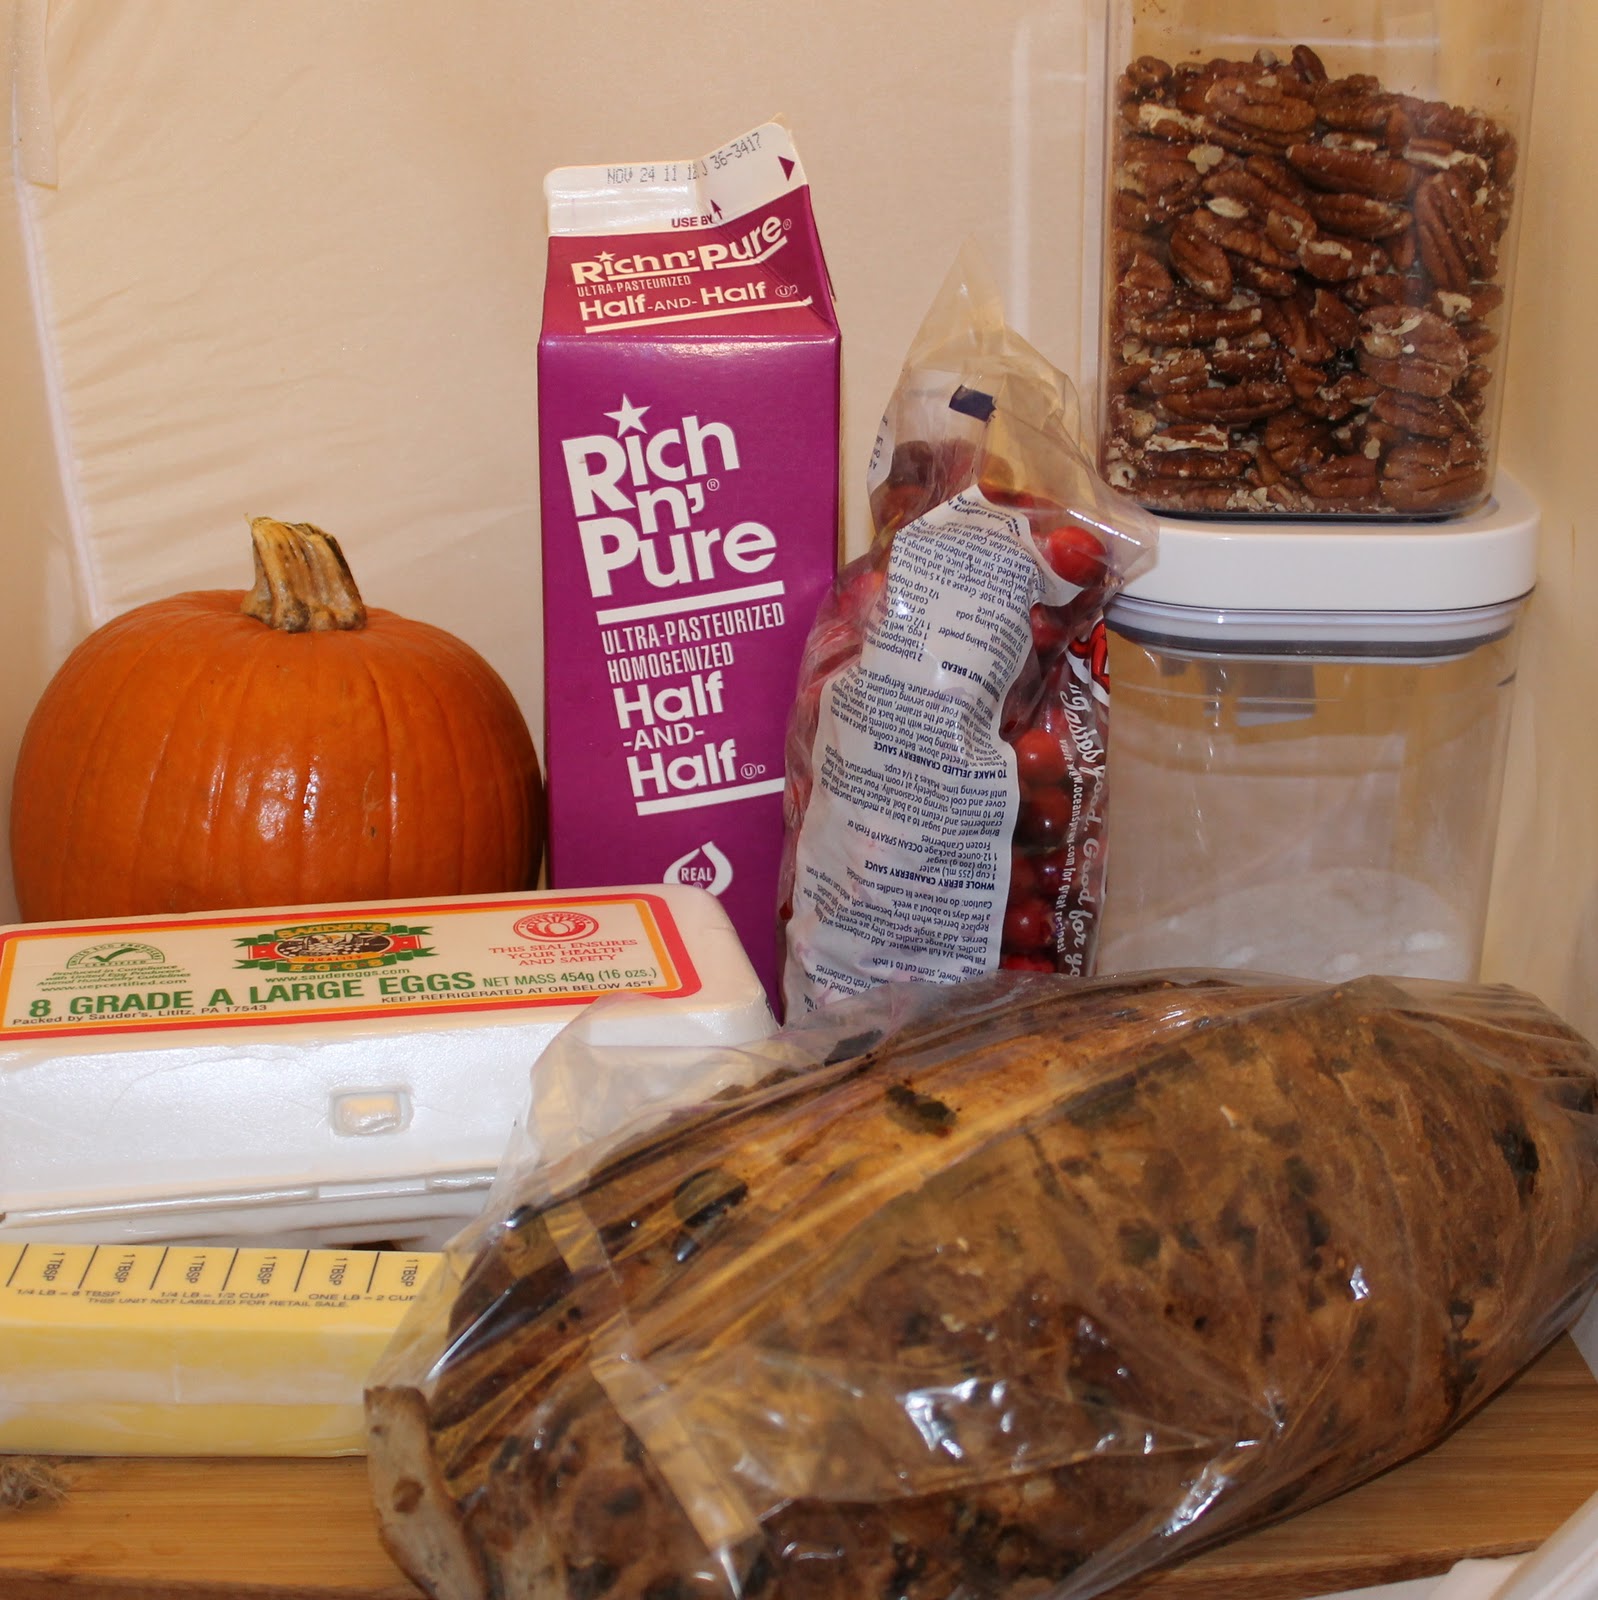
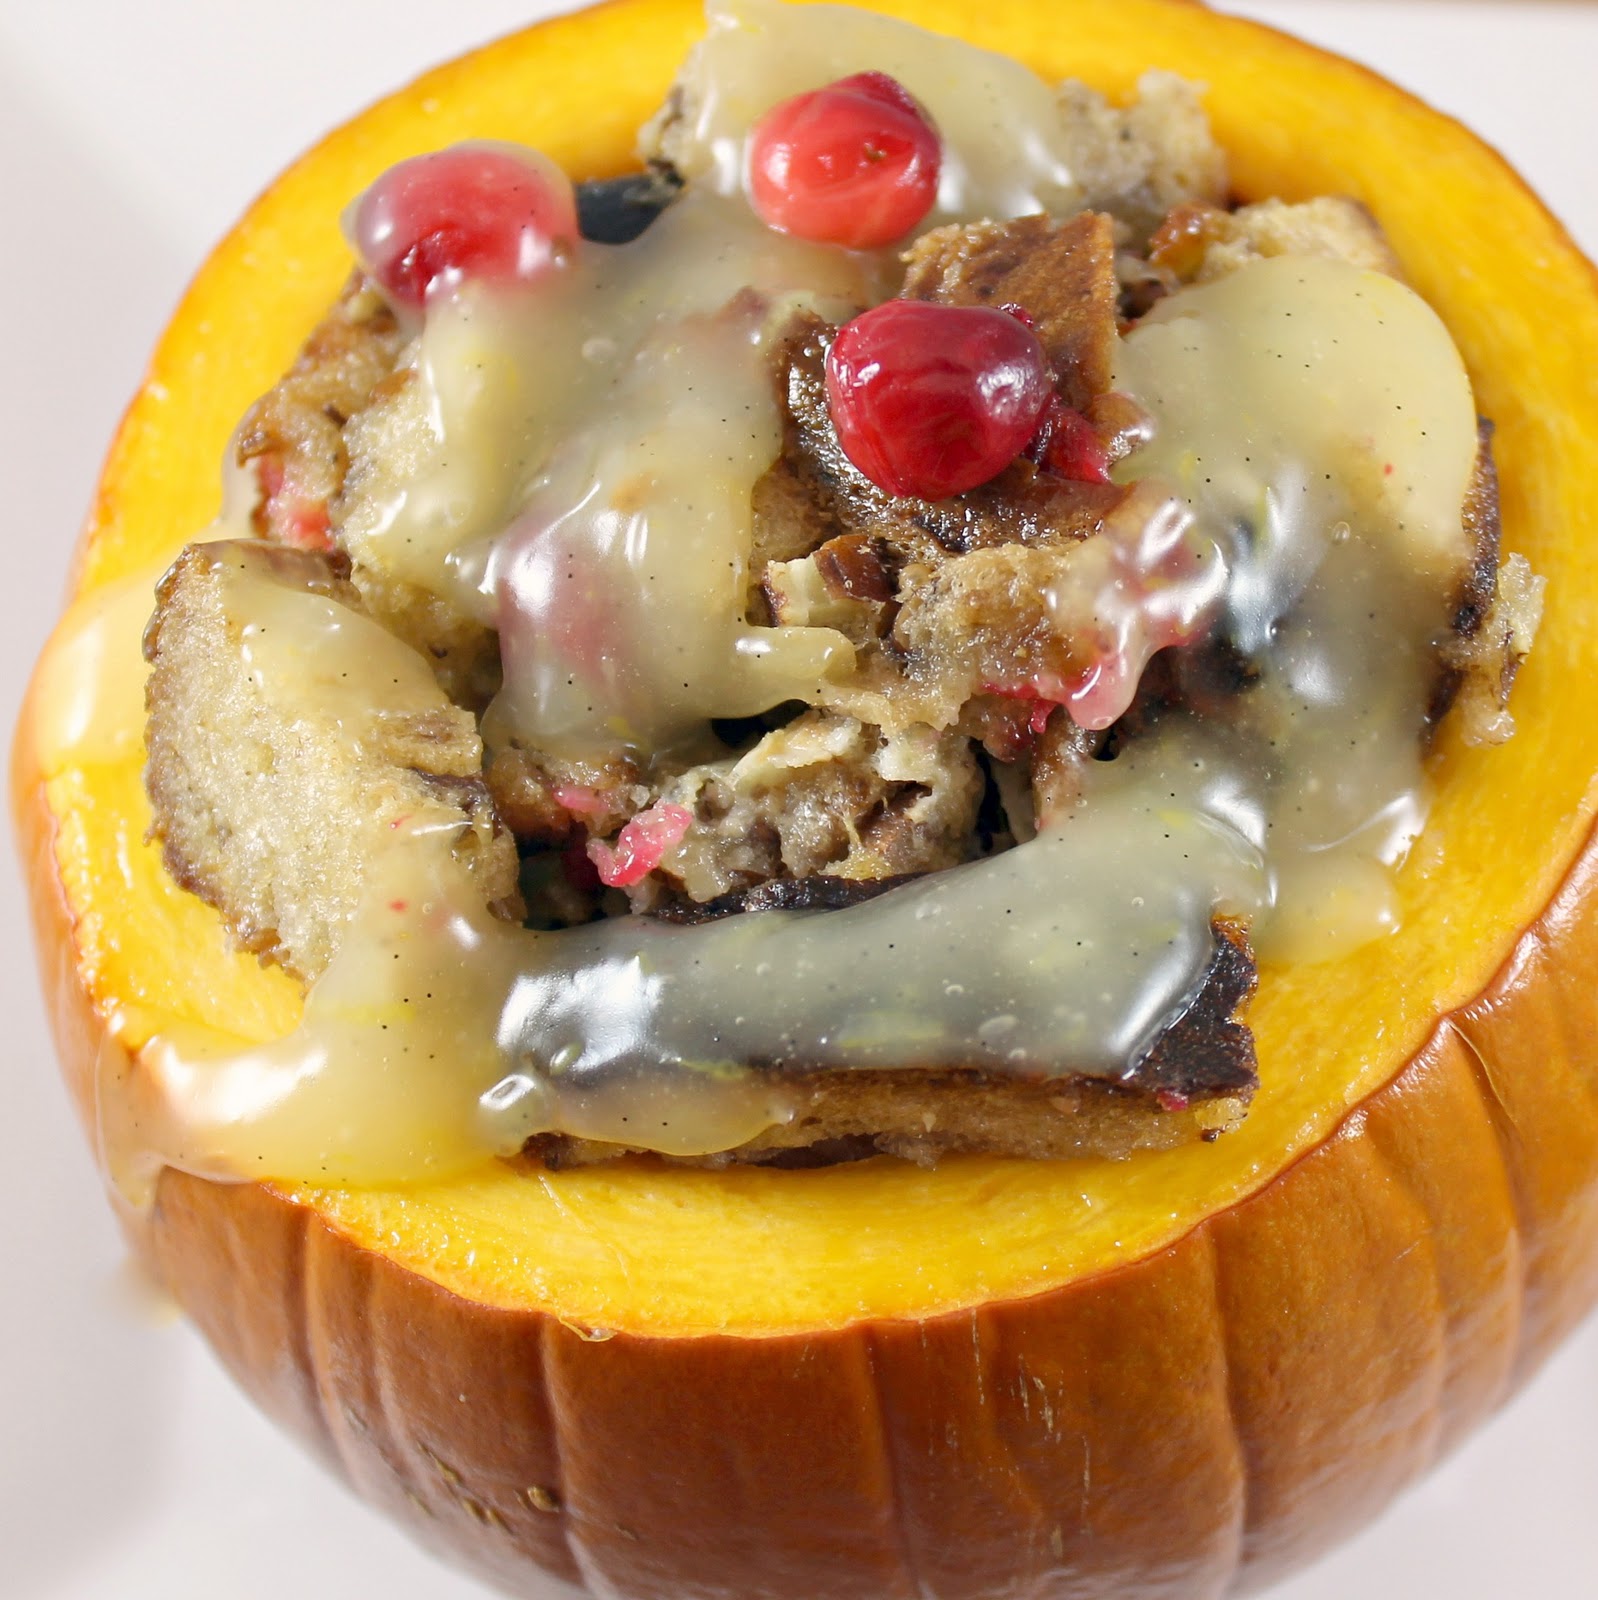
When I came across the title of this recipe, I was intrigued. I wasn’t sure if this would actually be a success, but it sounded so interesting I had to give it a try. So behold, Stuffed Pumpkin Cranberry Raisin Bread Pudding.
Ingredients:
1 pie pumpkin, about the size of your hand
1 stick of butter (1/4 cup) plus 1 teaspoon butter, melted and divided
1 teaspoon brown sugar
1 large egg
1/4 cup sugar
1/3 cup half and half
1/3 chopped pecans
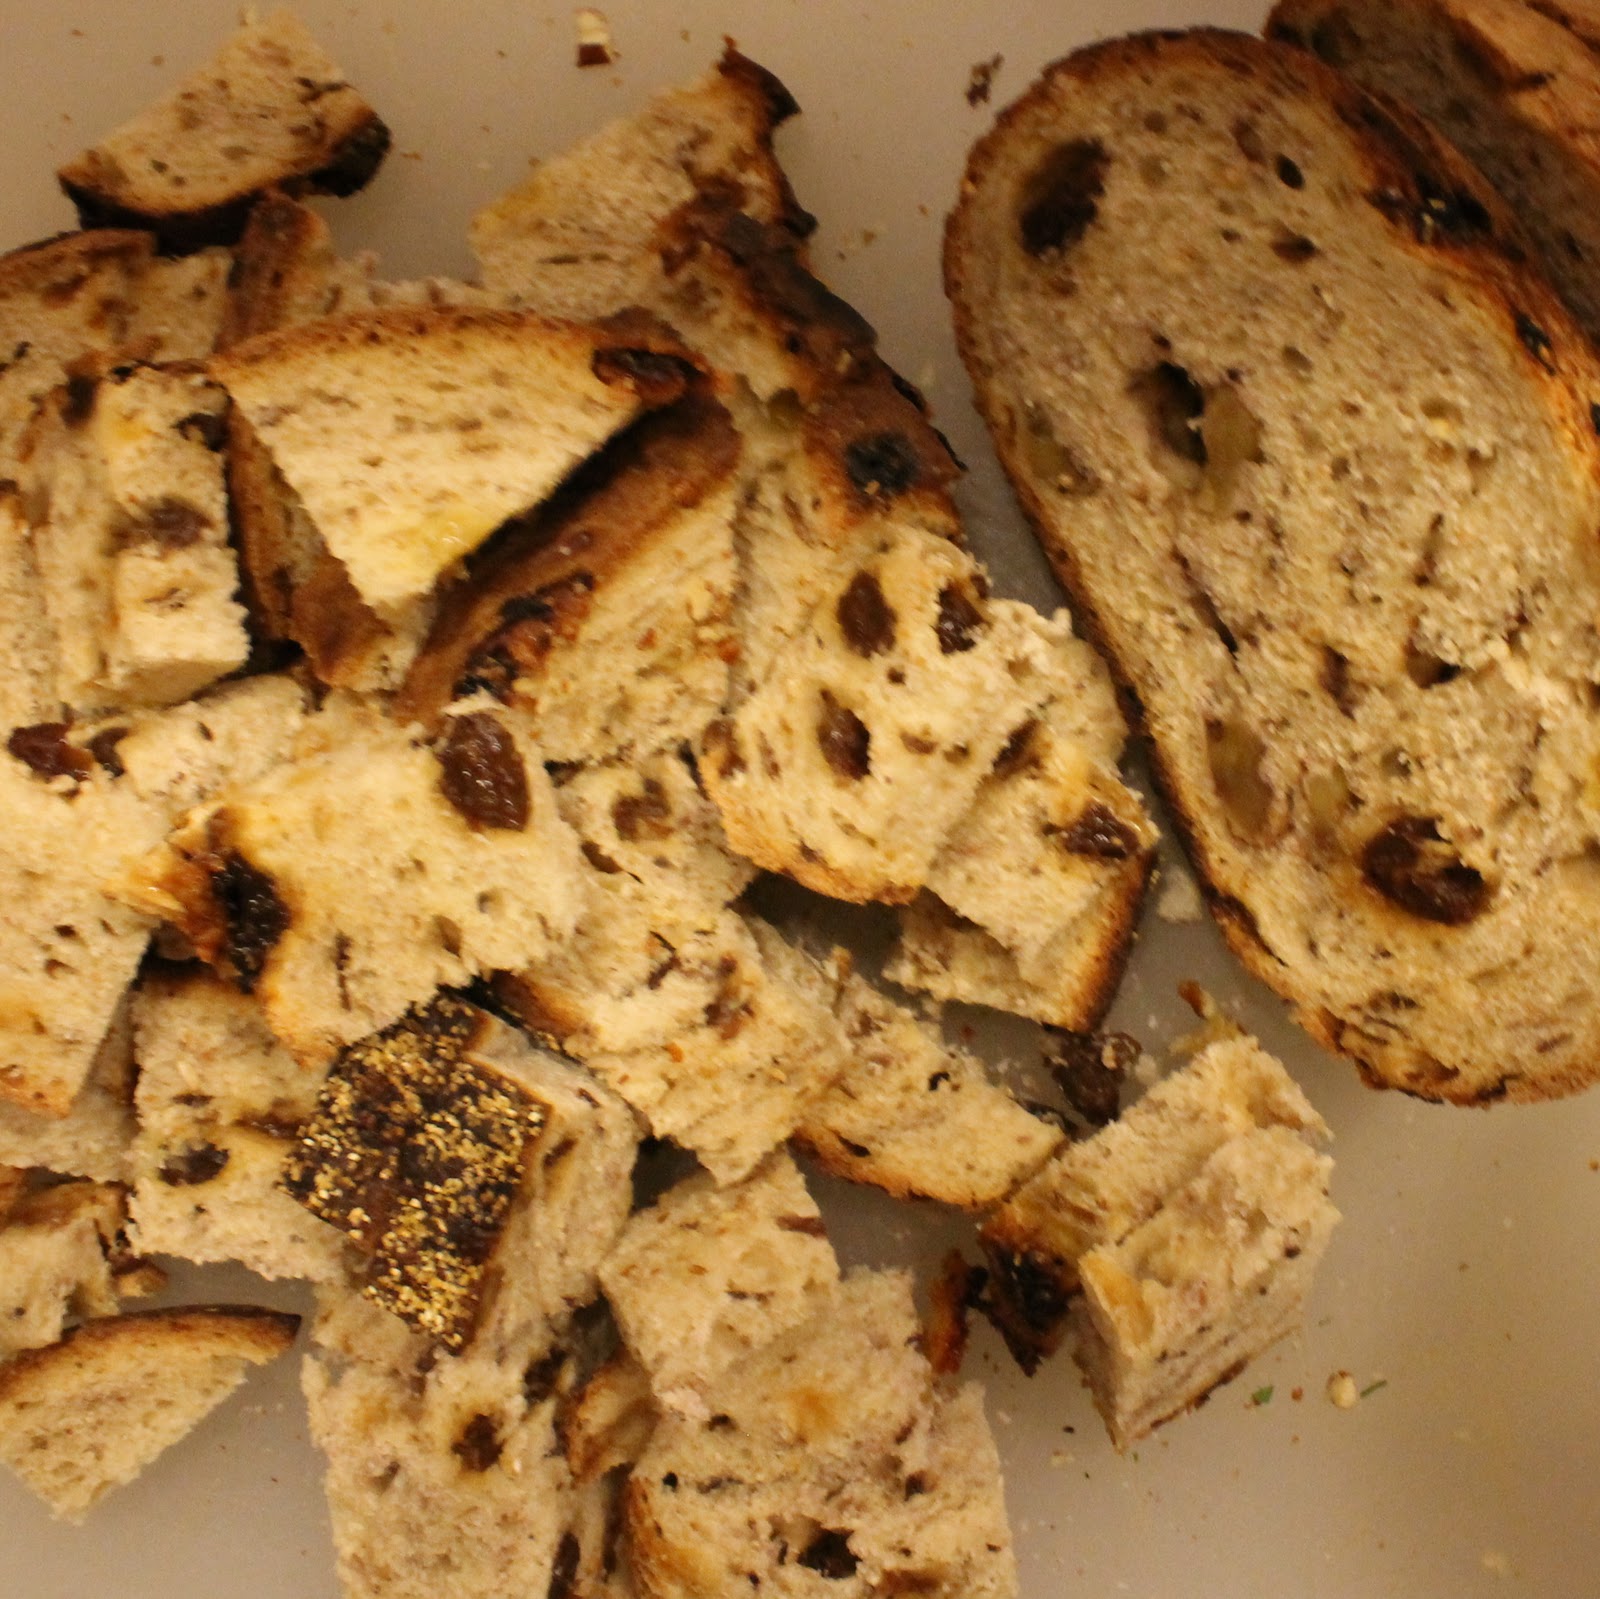
1/2 a raisin bread loaf, cut into smaller pieces
1/4 cup fresh cranberries
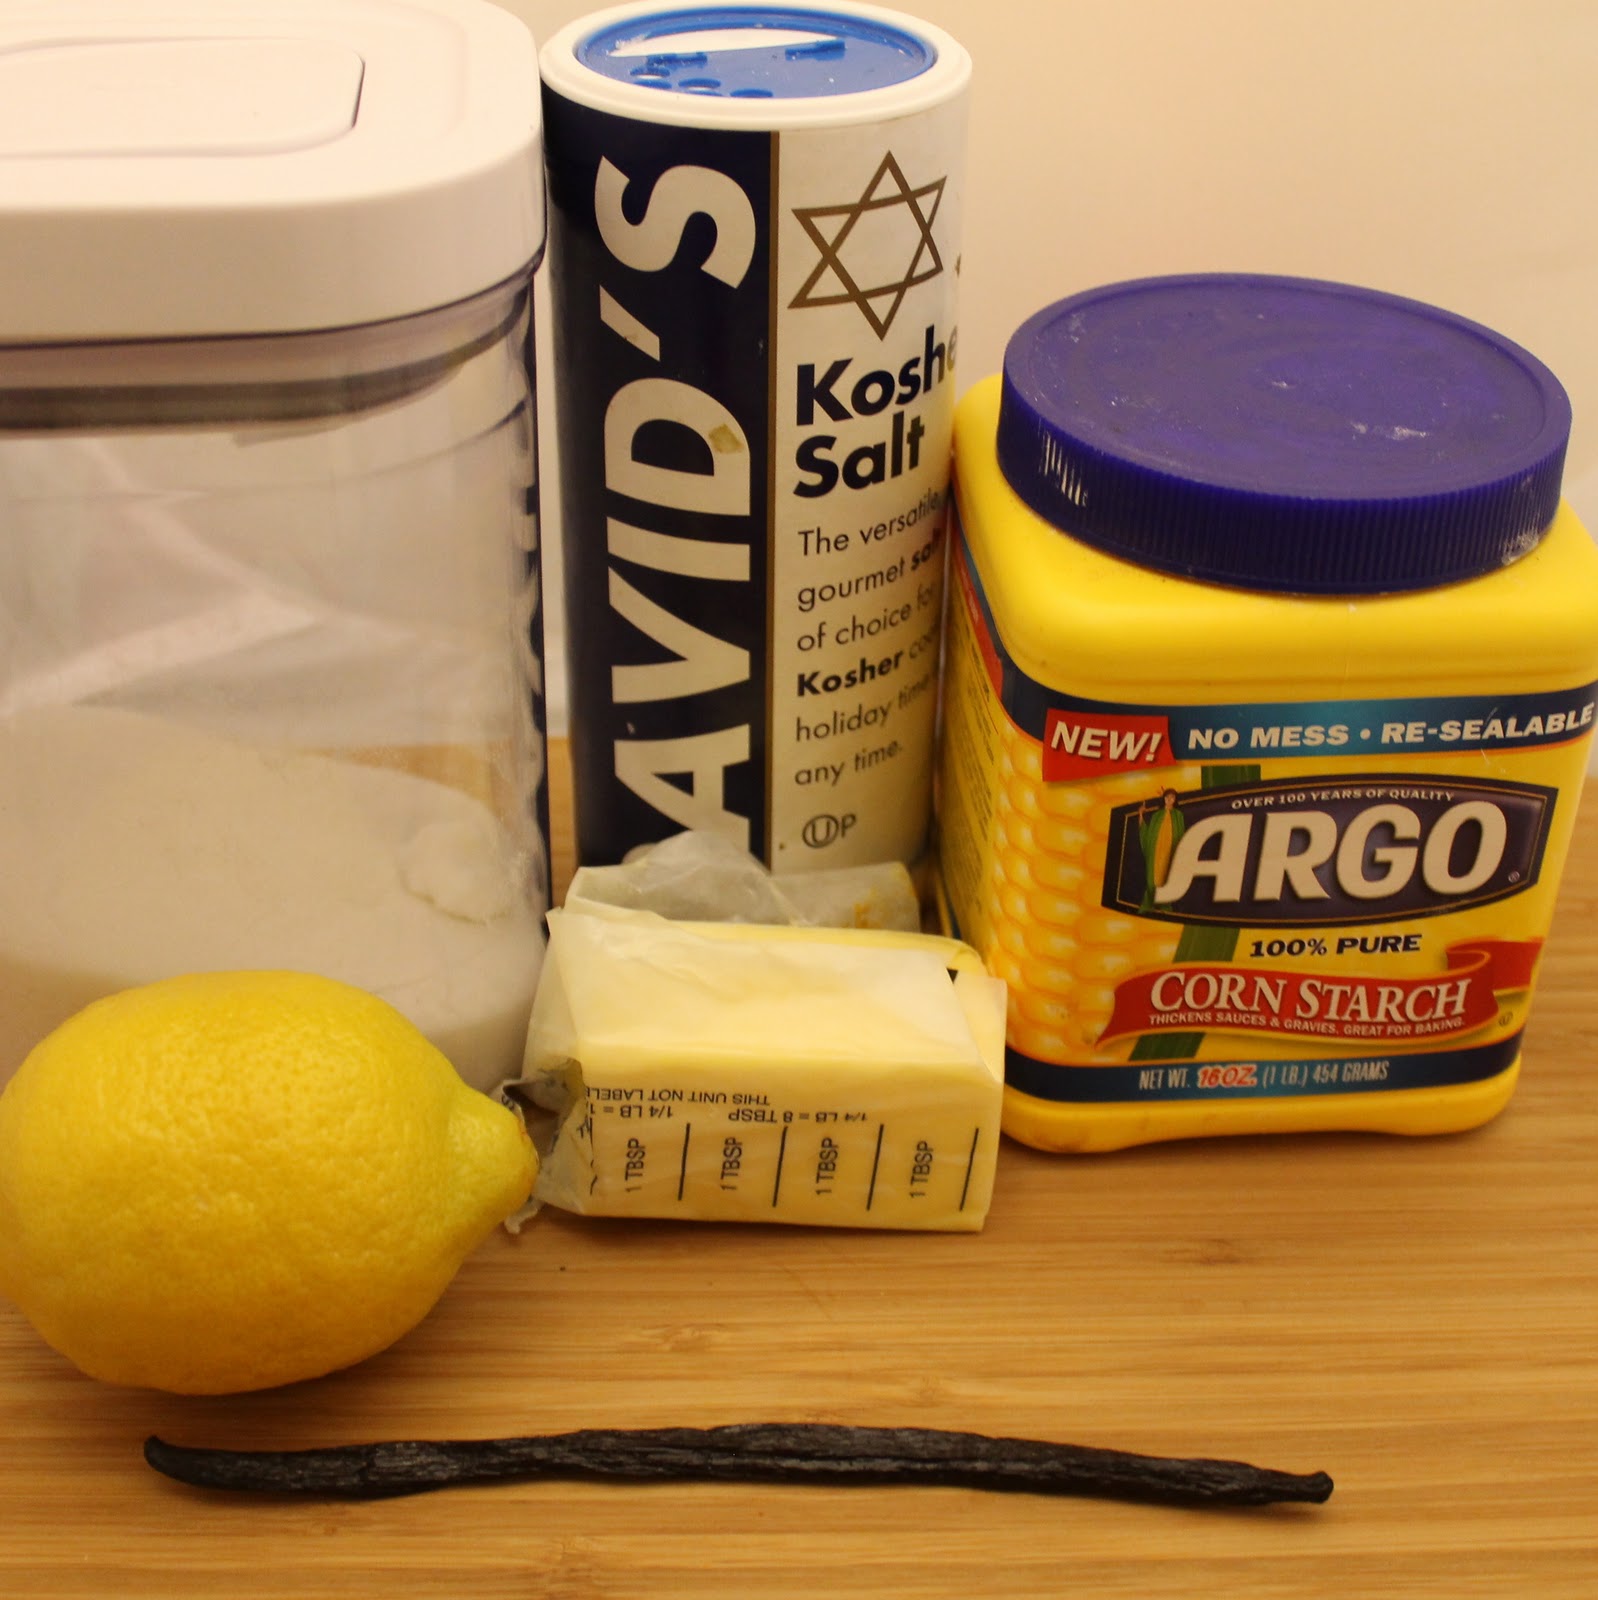
Lemon-Vanilla Sauce, to taste
1 vanilla bean, split
1/2 cup water
1/4 cup sugar
1 tablespoon cornstarch
A pinch of salt
1 teaspoon butter or margarine
1 tablespoon grated lemon rind
1/4 cup fresh lemon juice
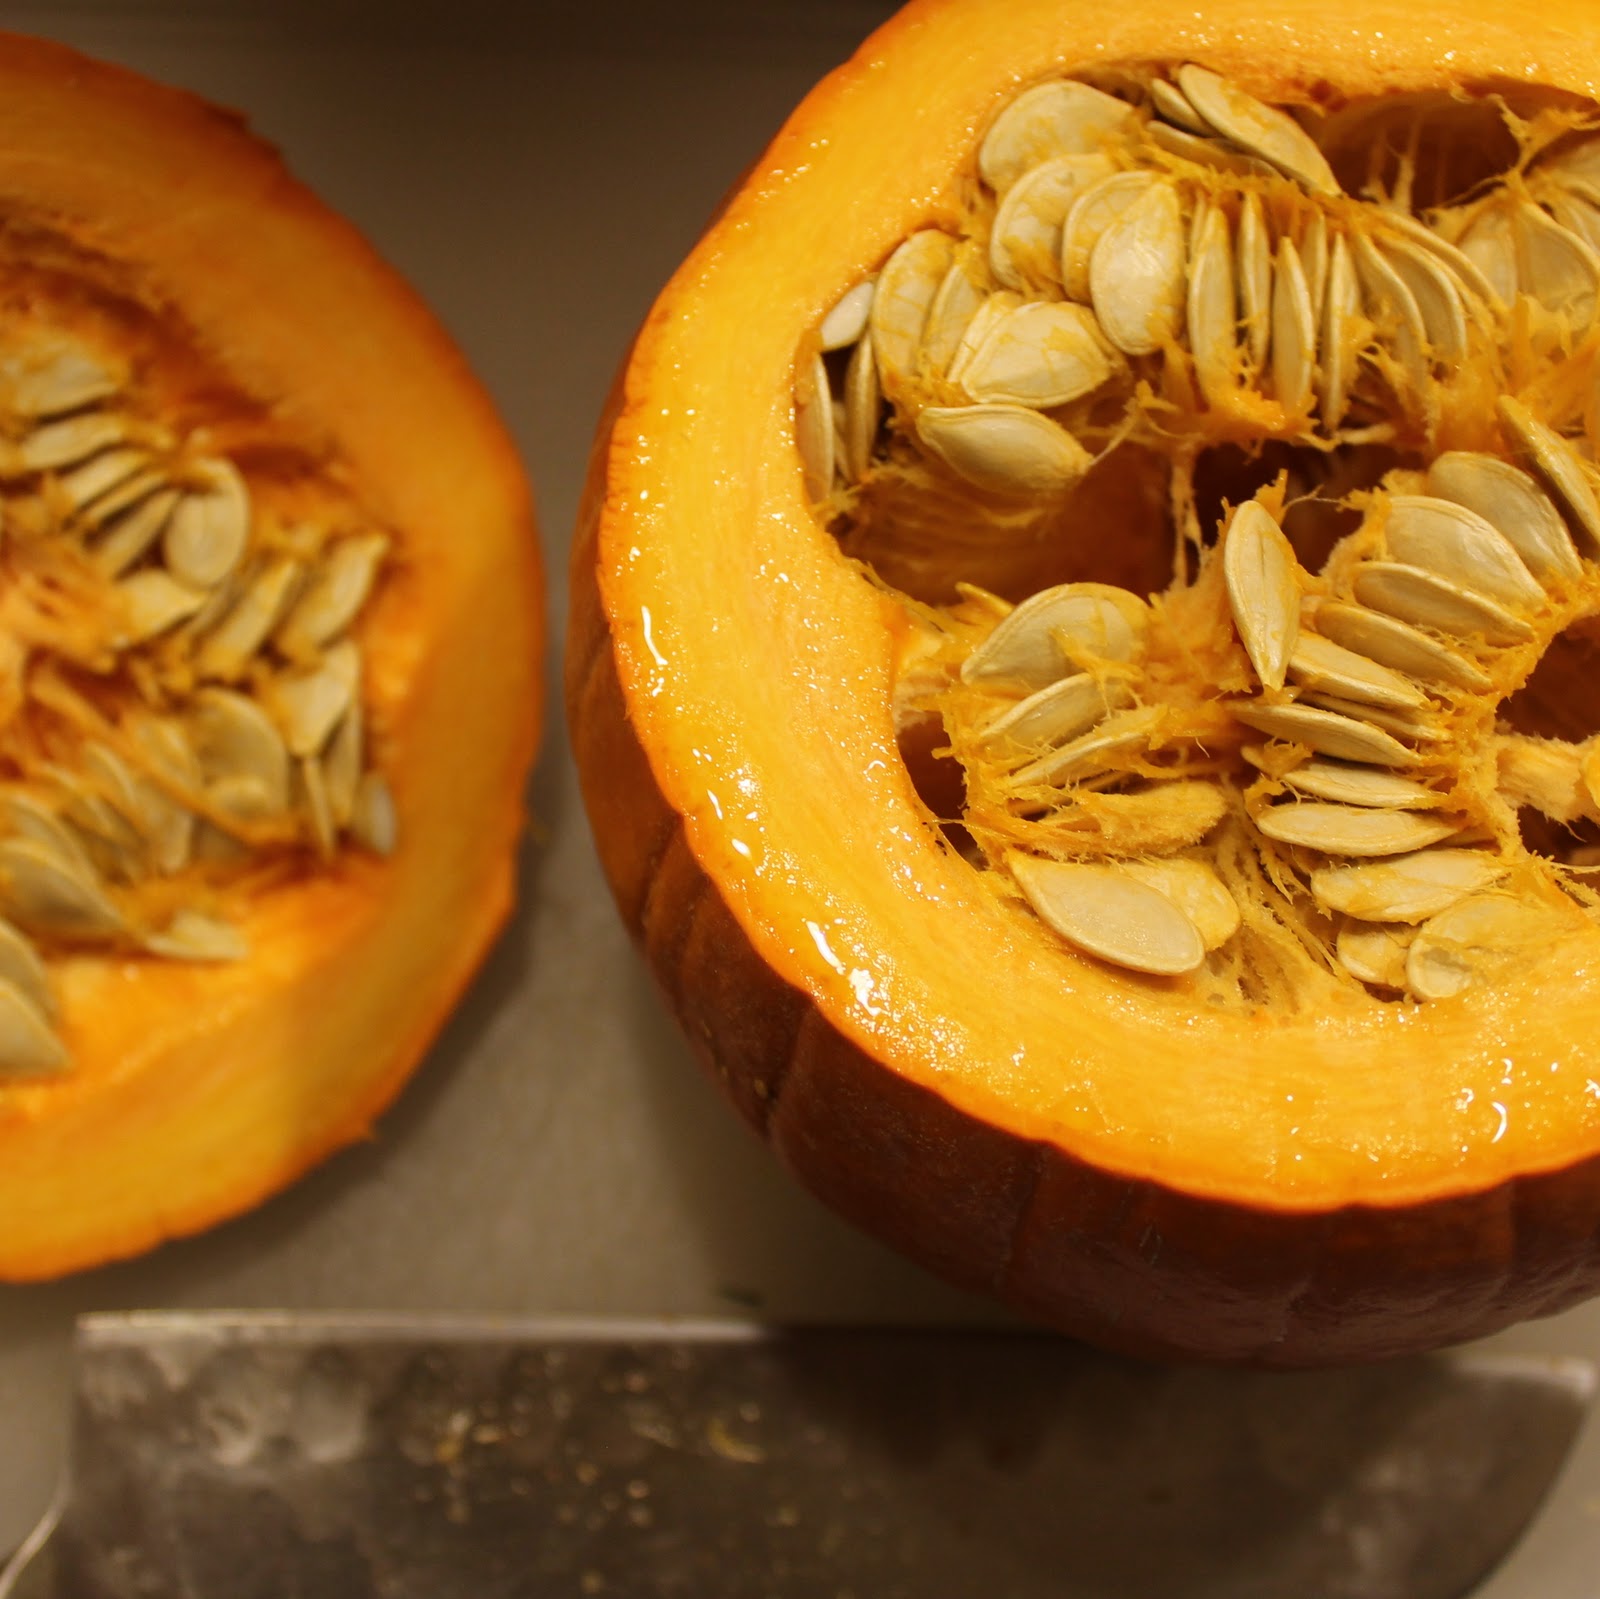
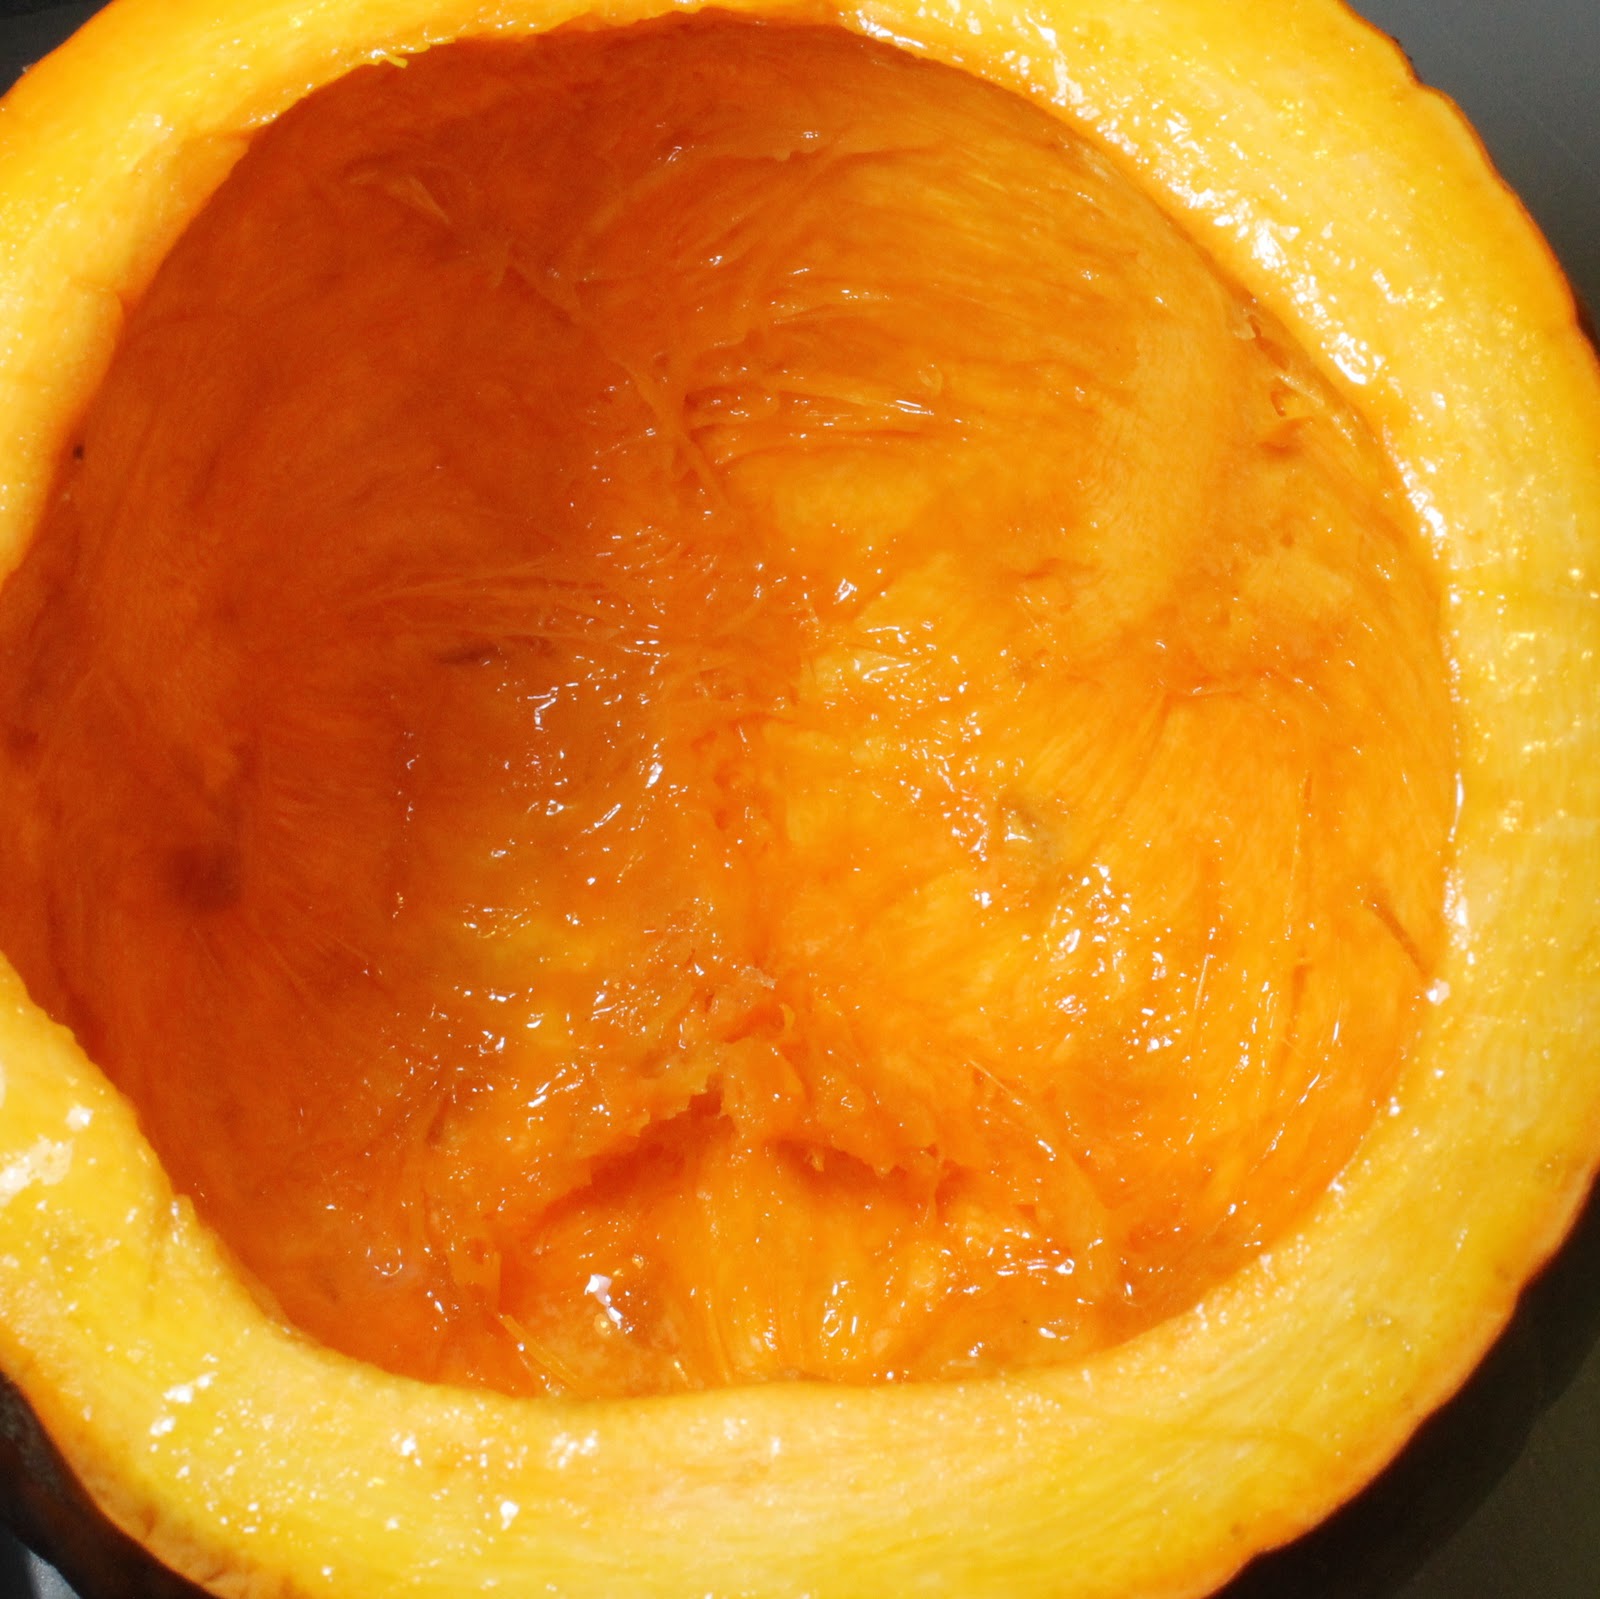
Preheat your oven to 350 degrees. Add the butter to a pot over low heat to melt. Cut off the top of the pumpkin. Reserve the lid.
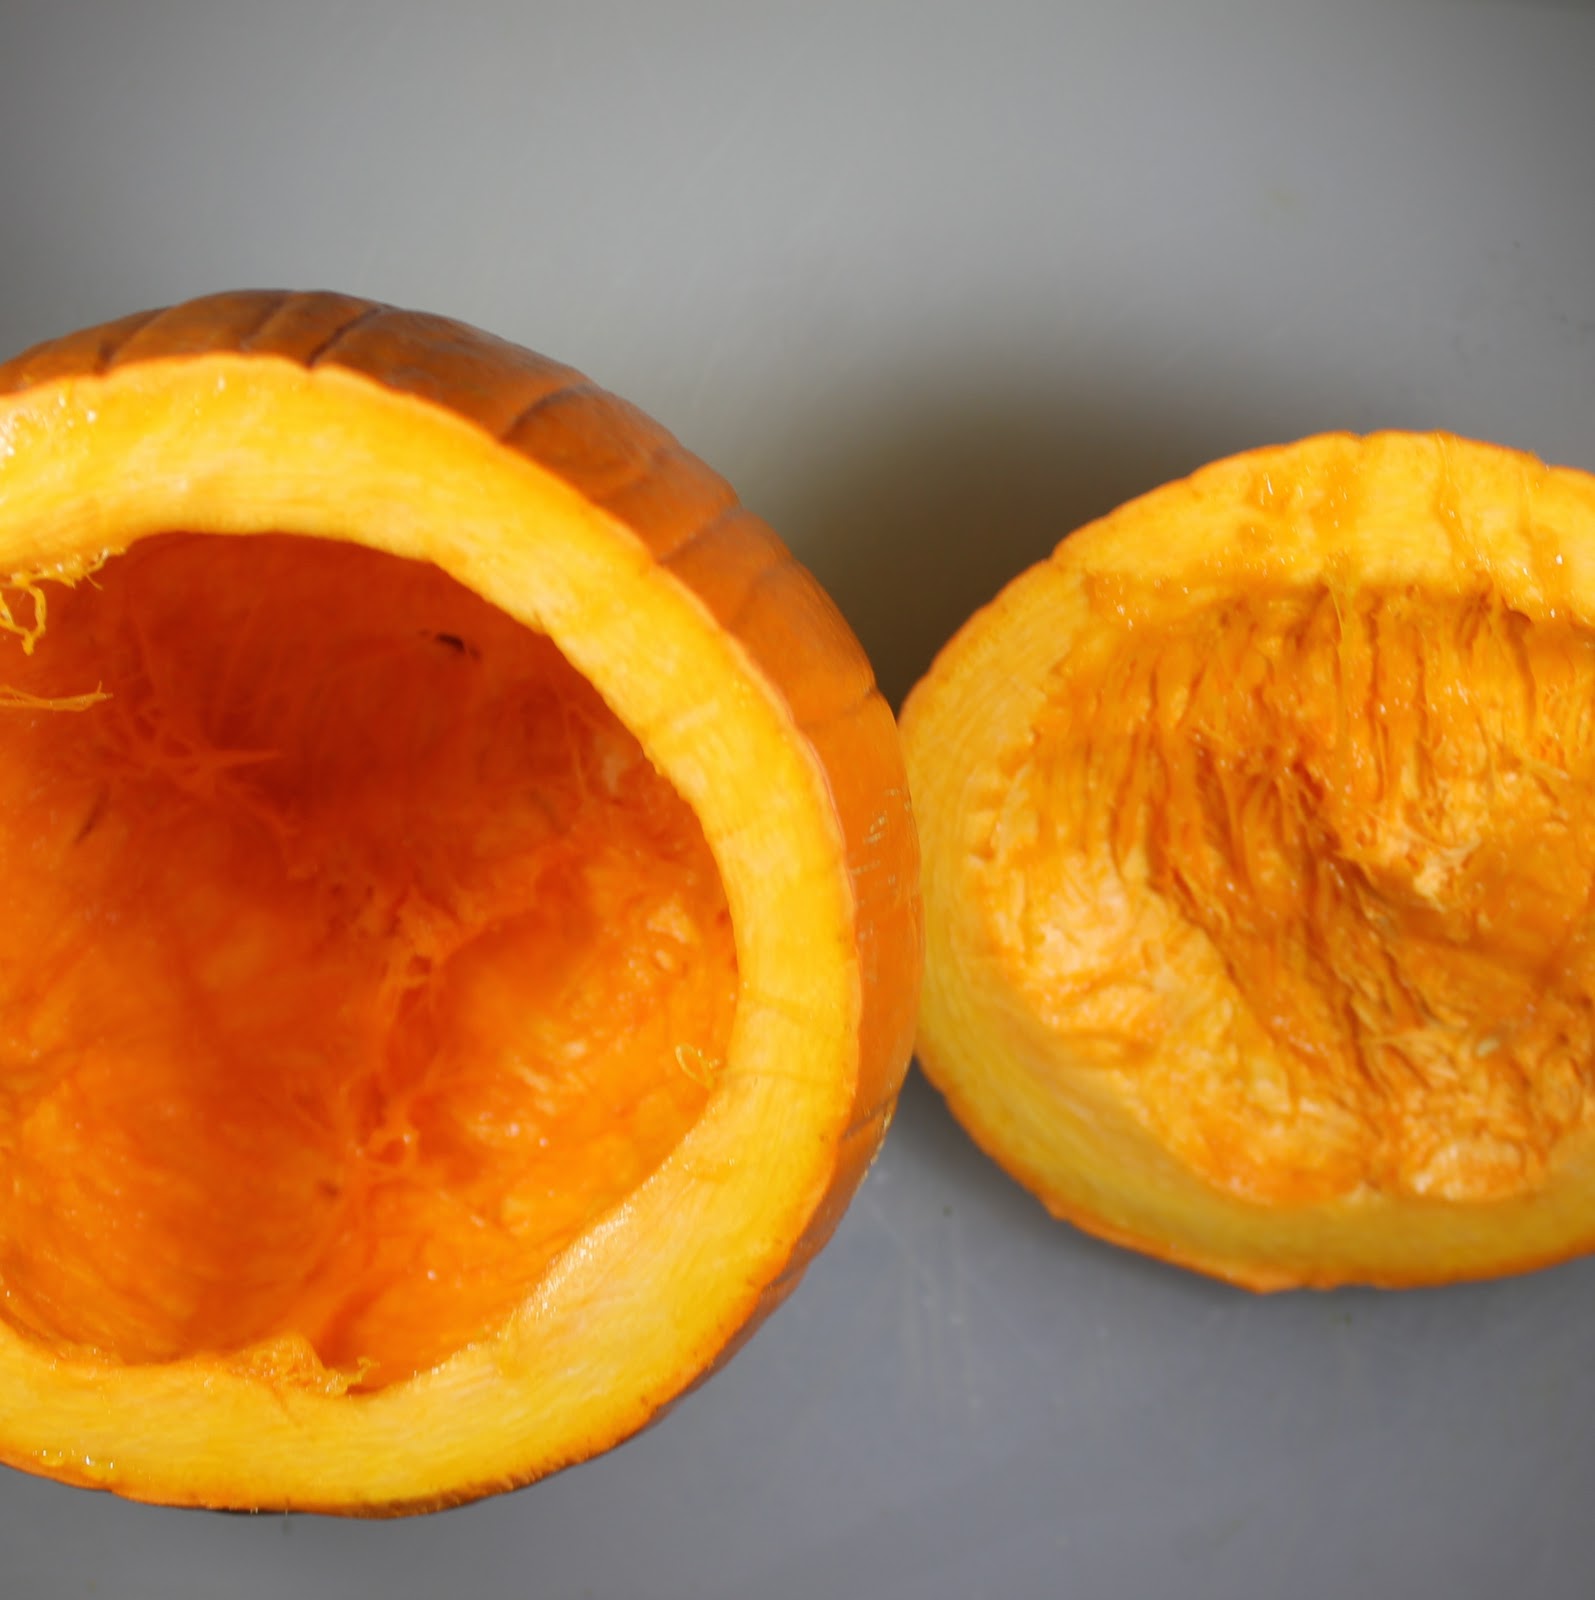
Scoop out the pumpkin seeds and pulp.
Brush the inside of the pumpkin with 1 teaspoon melted butter. Sprinkle with 1 teaspoon brown sugar.
Cut the bread into similar sized pieces.
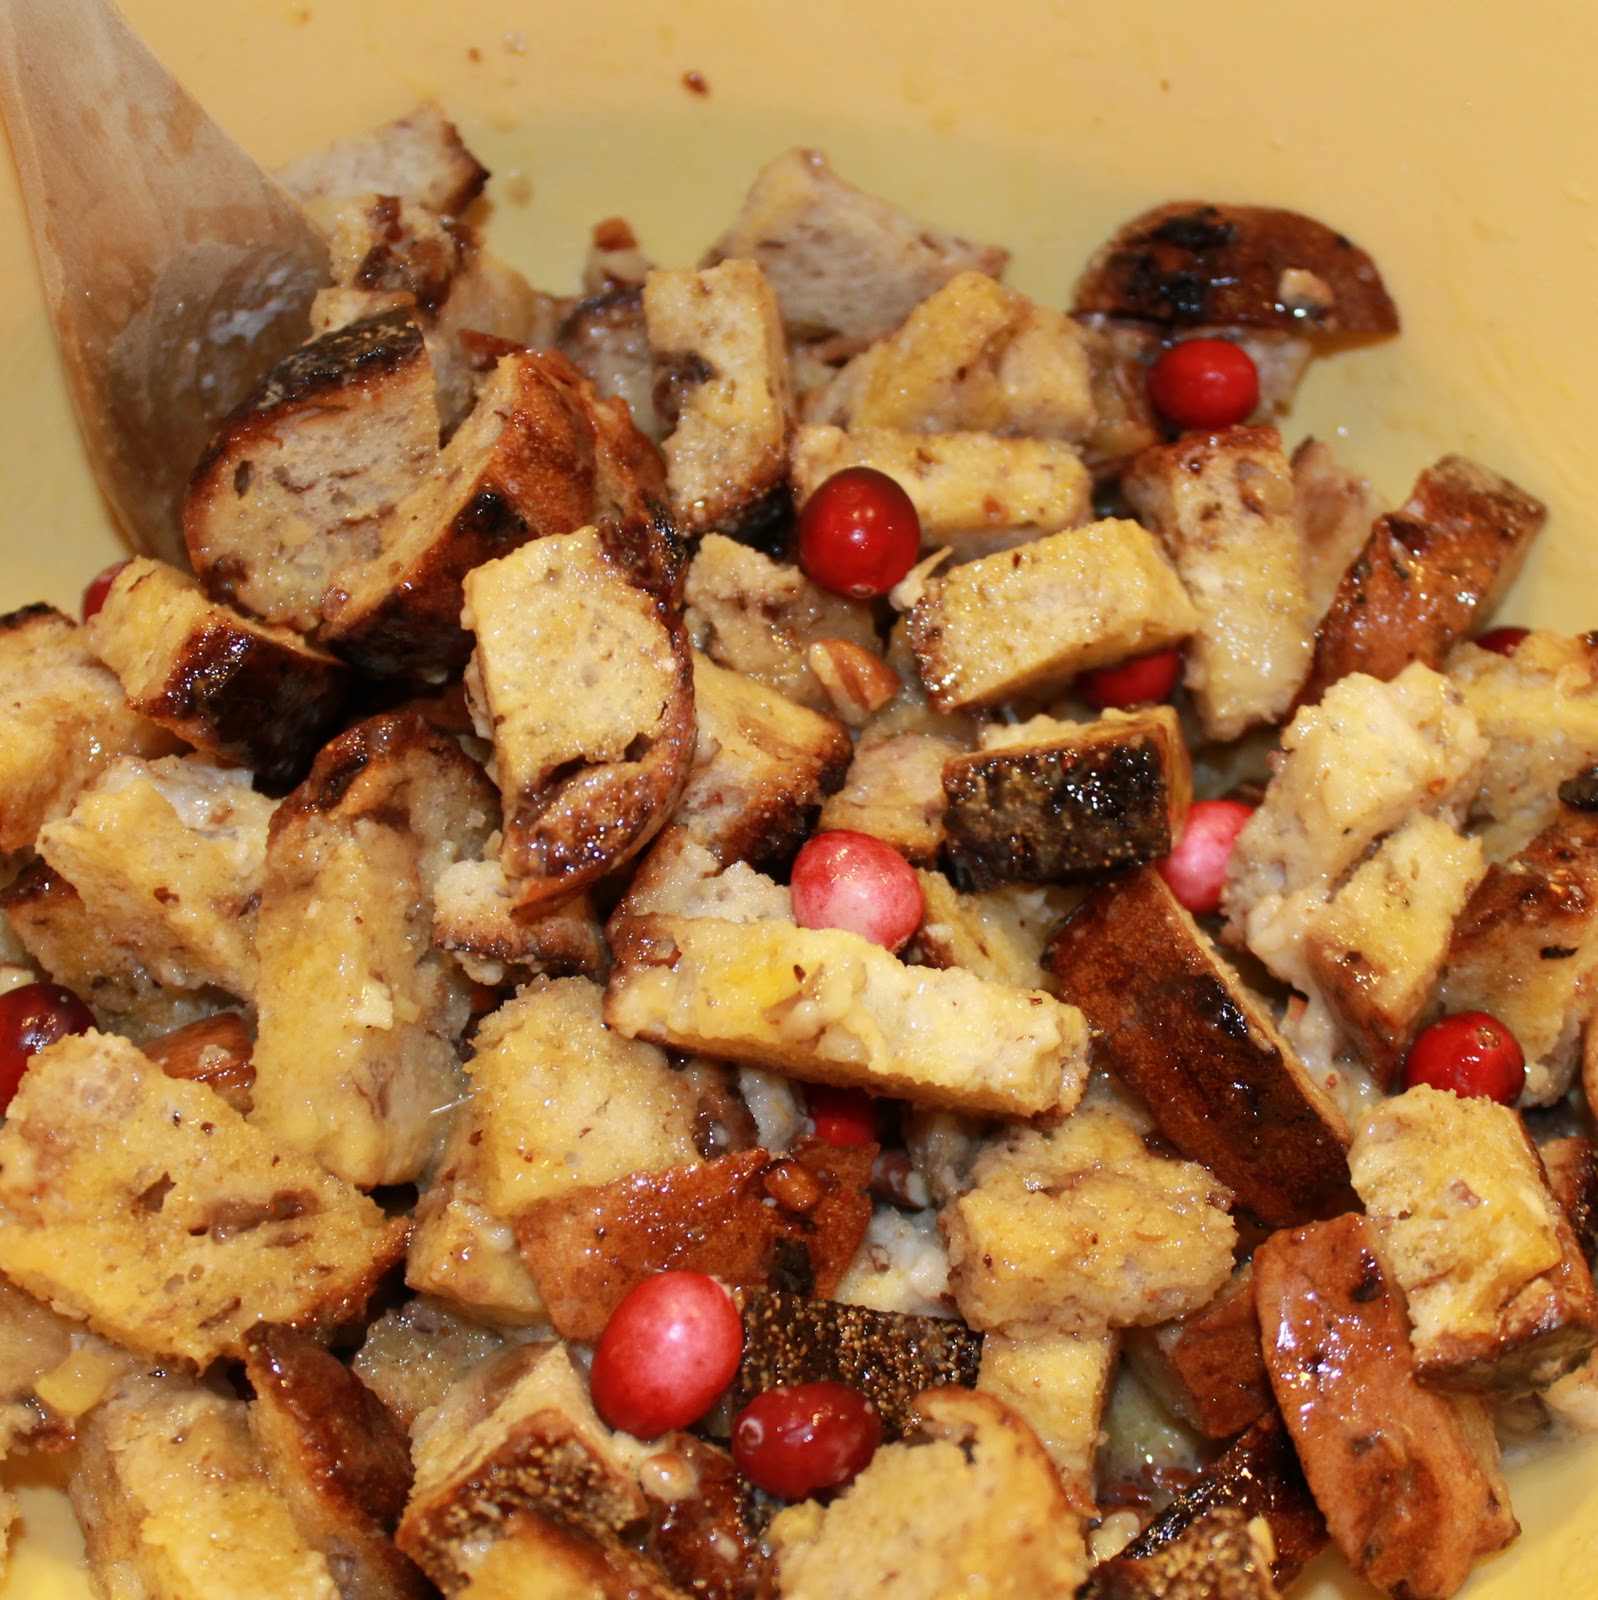
Top with the lid. Add the egg, sugar, half and half, pecans, raisin bread loaf pieces, and the remaining melted butter to a bowl and stir to combine.
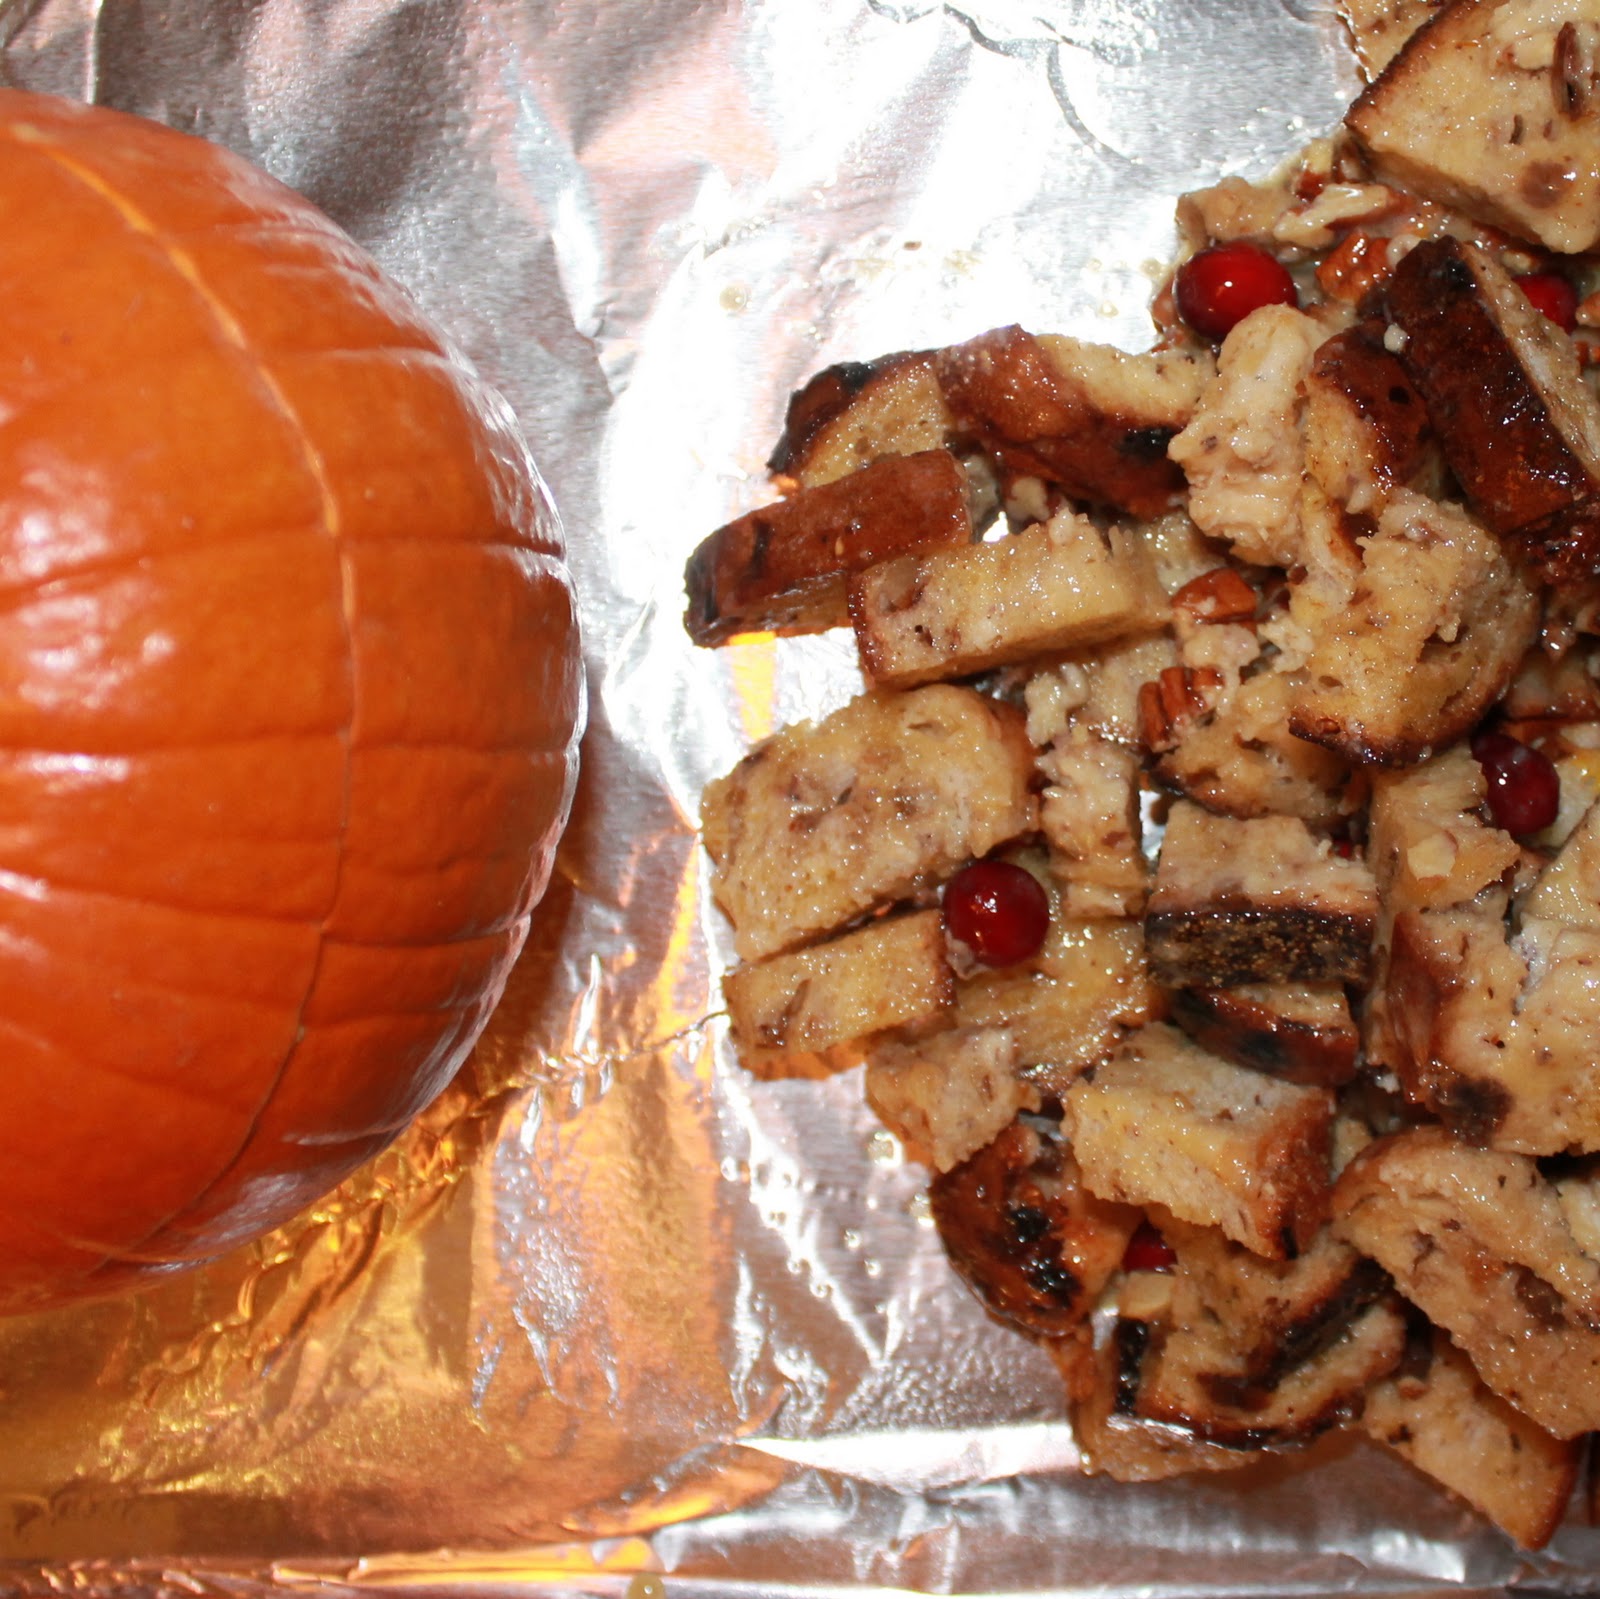
Pour the pudding mixture onto a cookie pan sprayed with cooking spray. Add the pumpkin to the cookie sheet as well.
Bake the pumpkin and bread pudding for 25 minutes. Allow to cool enough to handle and add the bread pudding to the pumpkin.
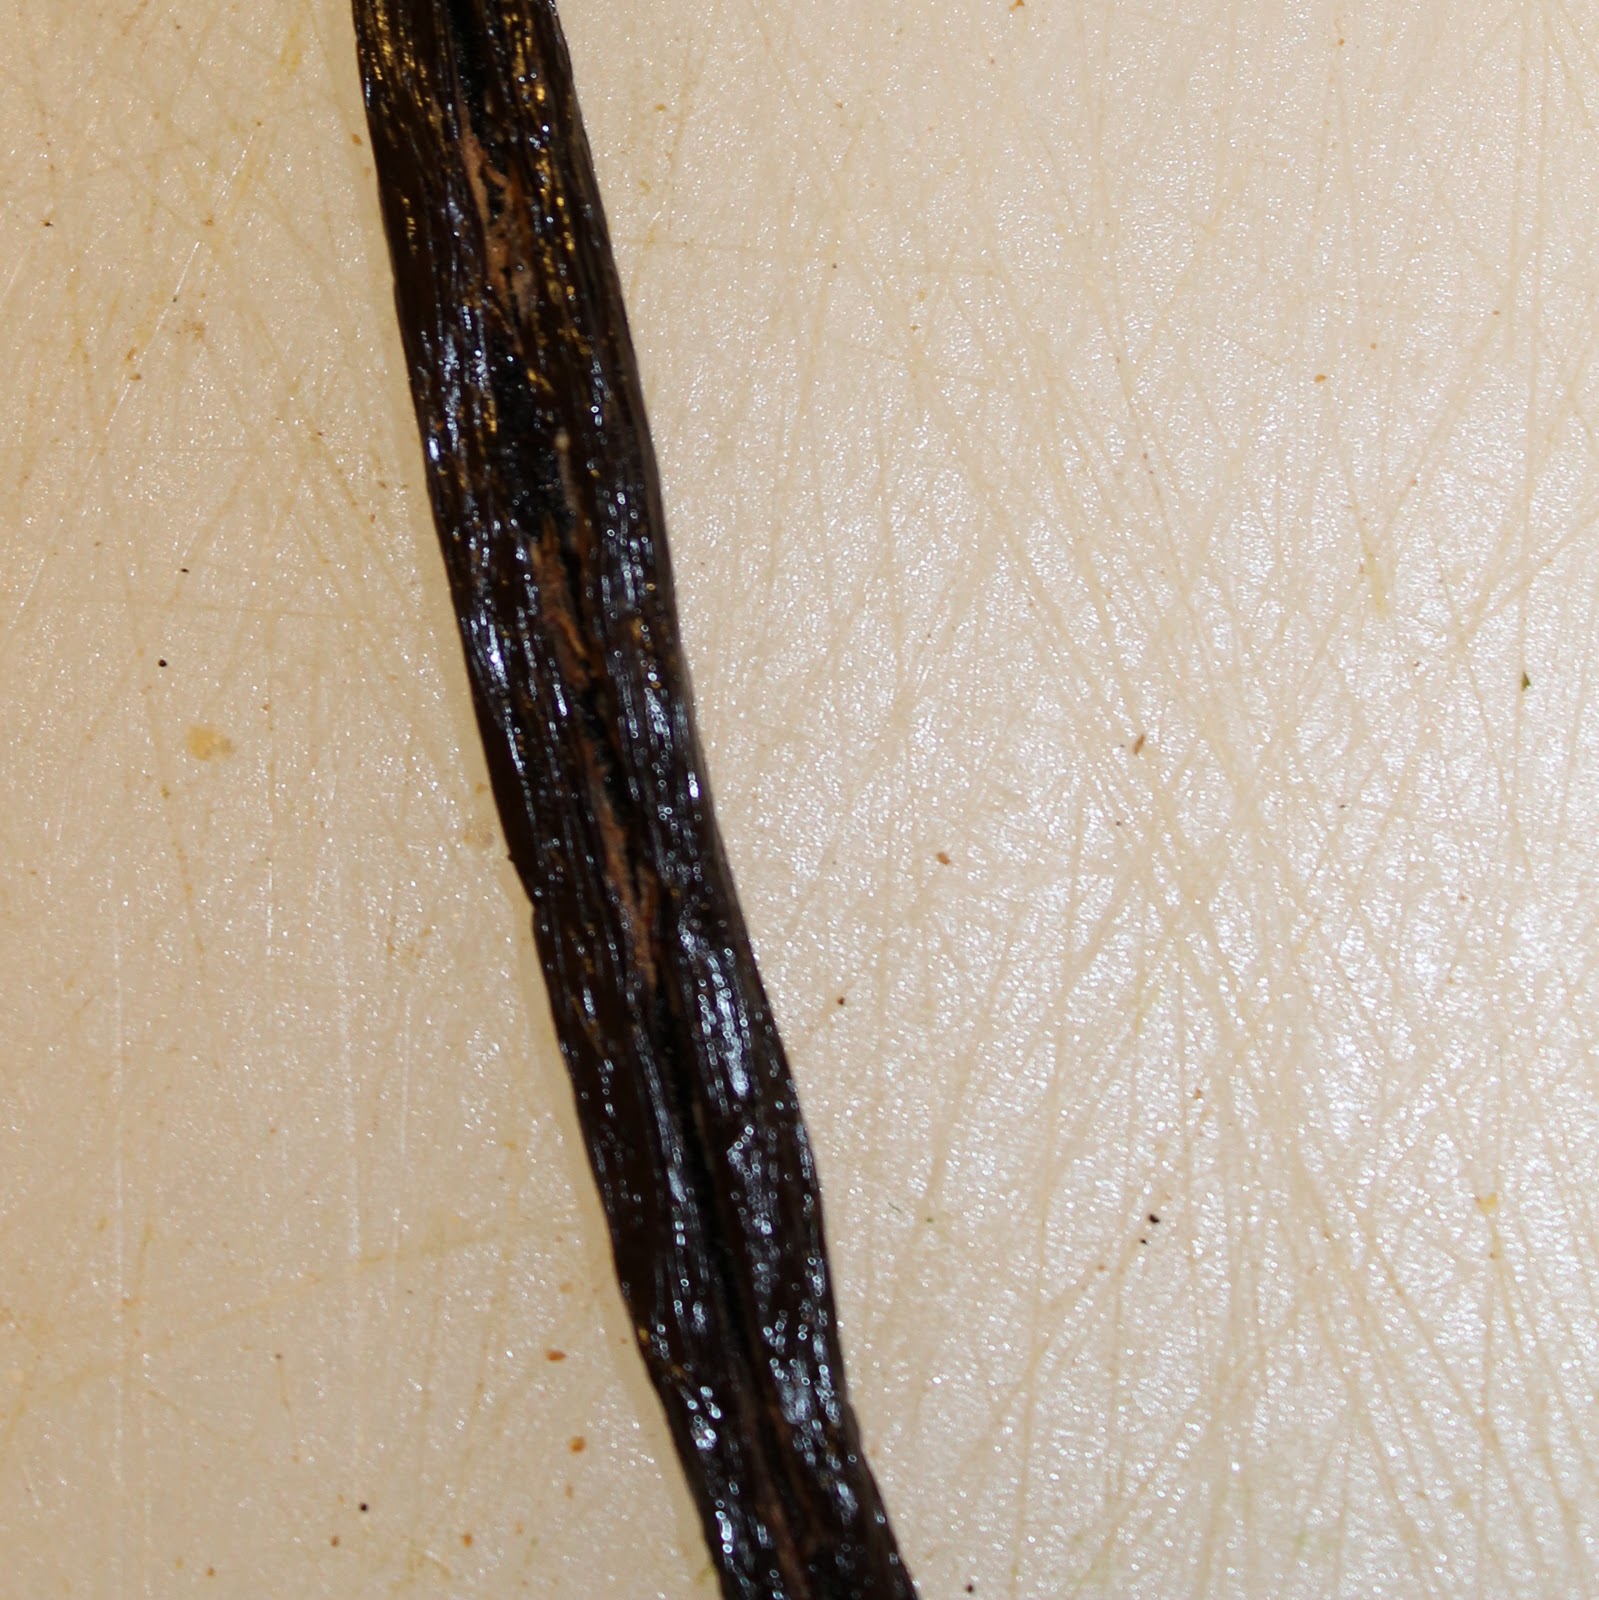
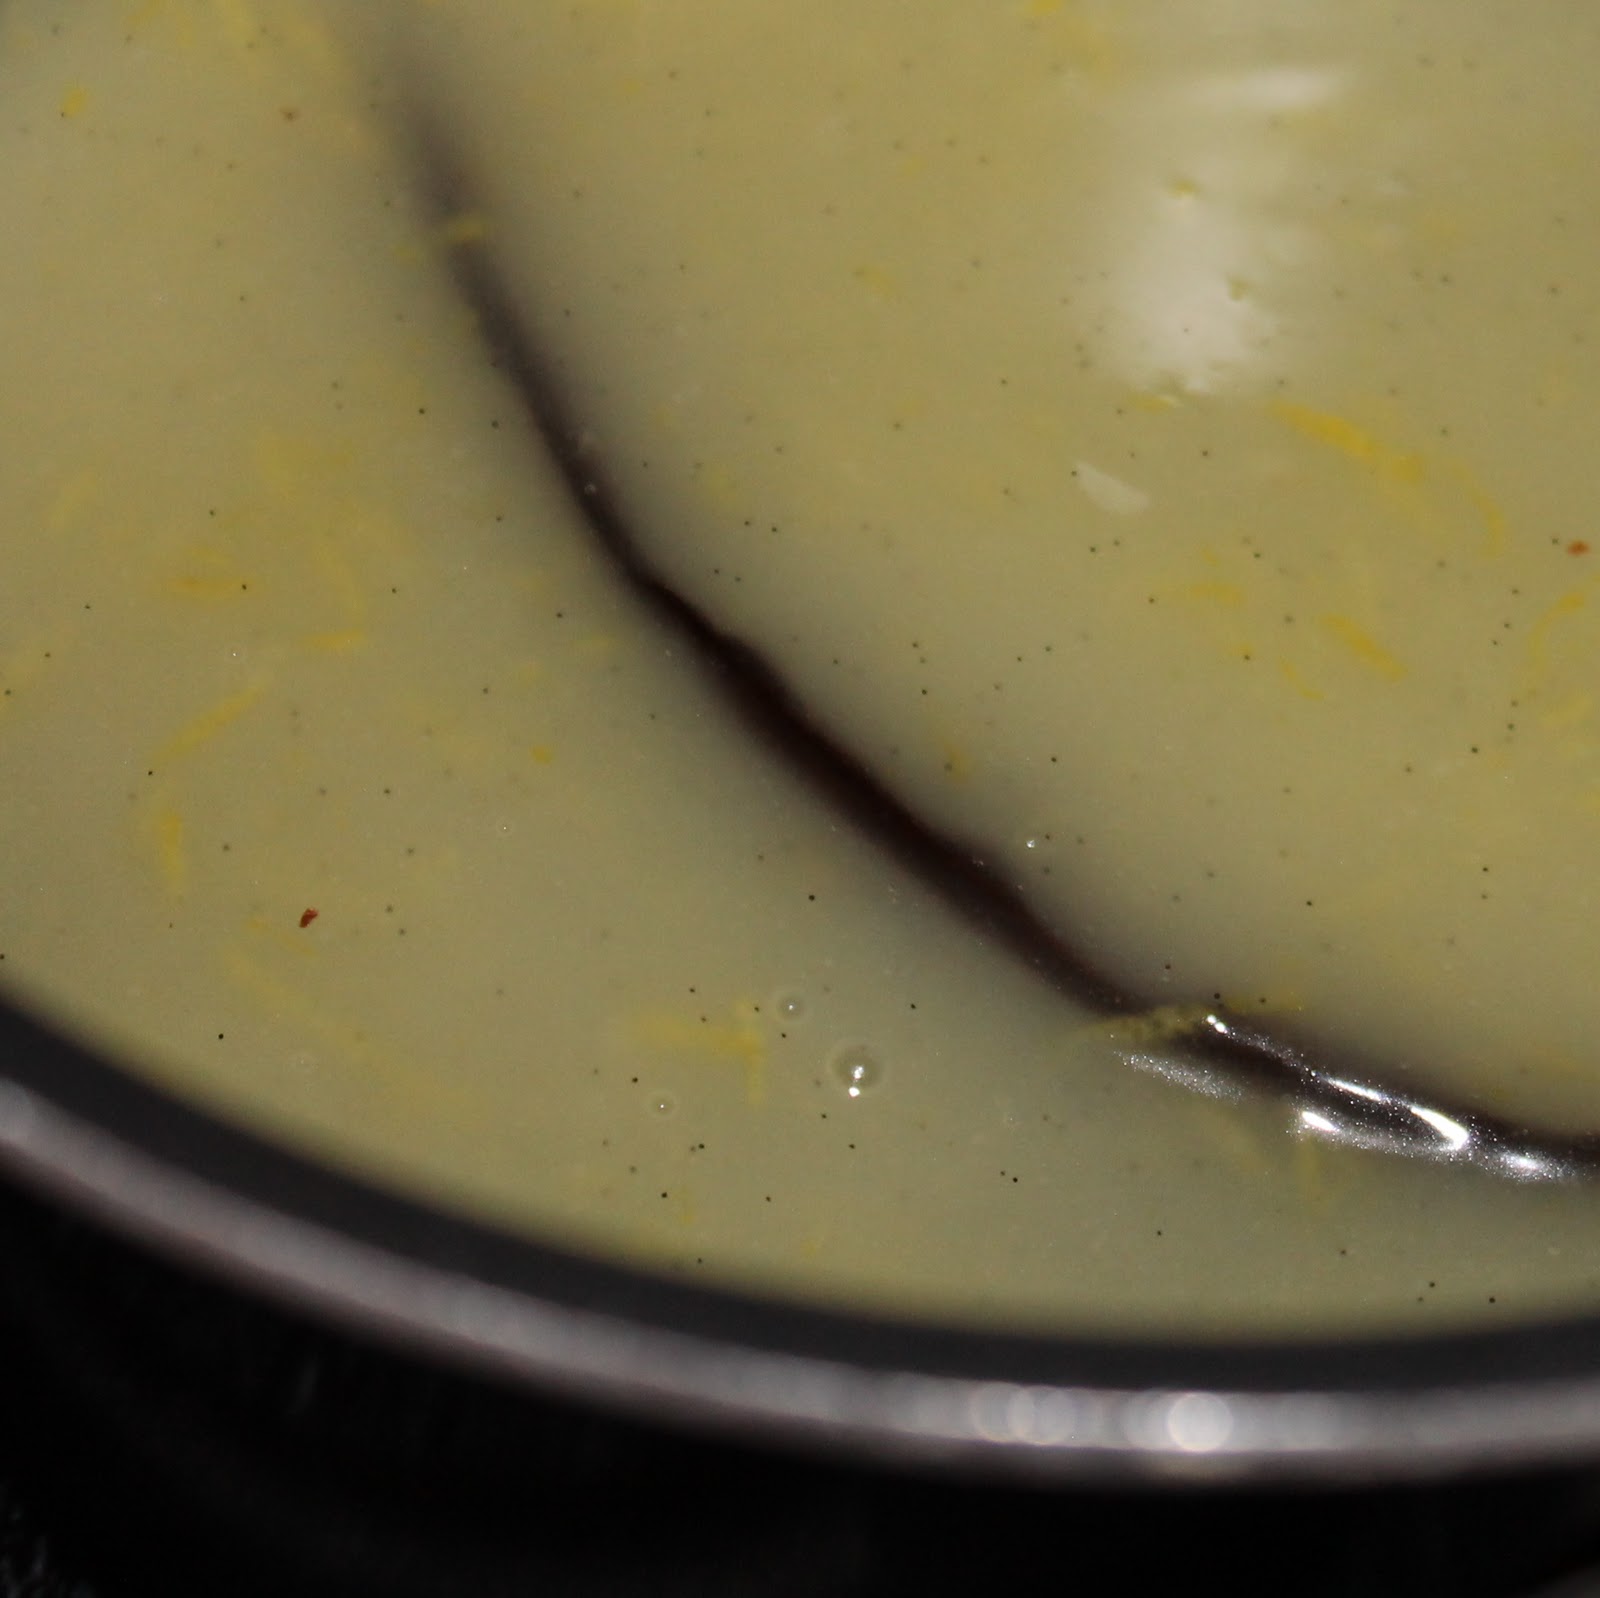
While the pumpkin and bread pudding are baking, make the lemon-vanilla sauce. Split the vanilla seed down the middle.
Add vanilla bean, water, corn starch, sugar, and salt to a saute pan over medium heat. Stir until smooth and thickened. Add the butter, lemon zest, and lemon juice. Stir to combine. Remove from heat when the mixture is warm.
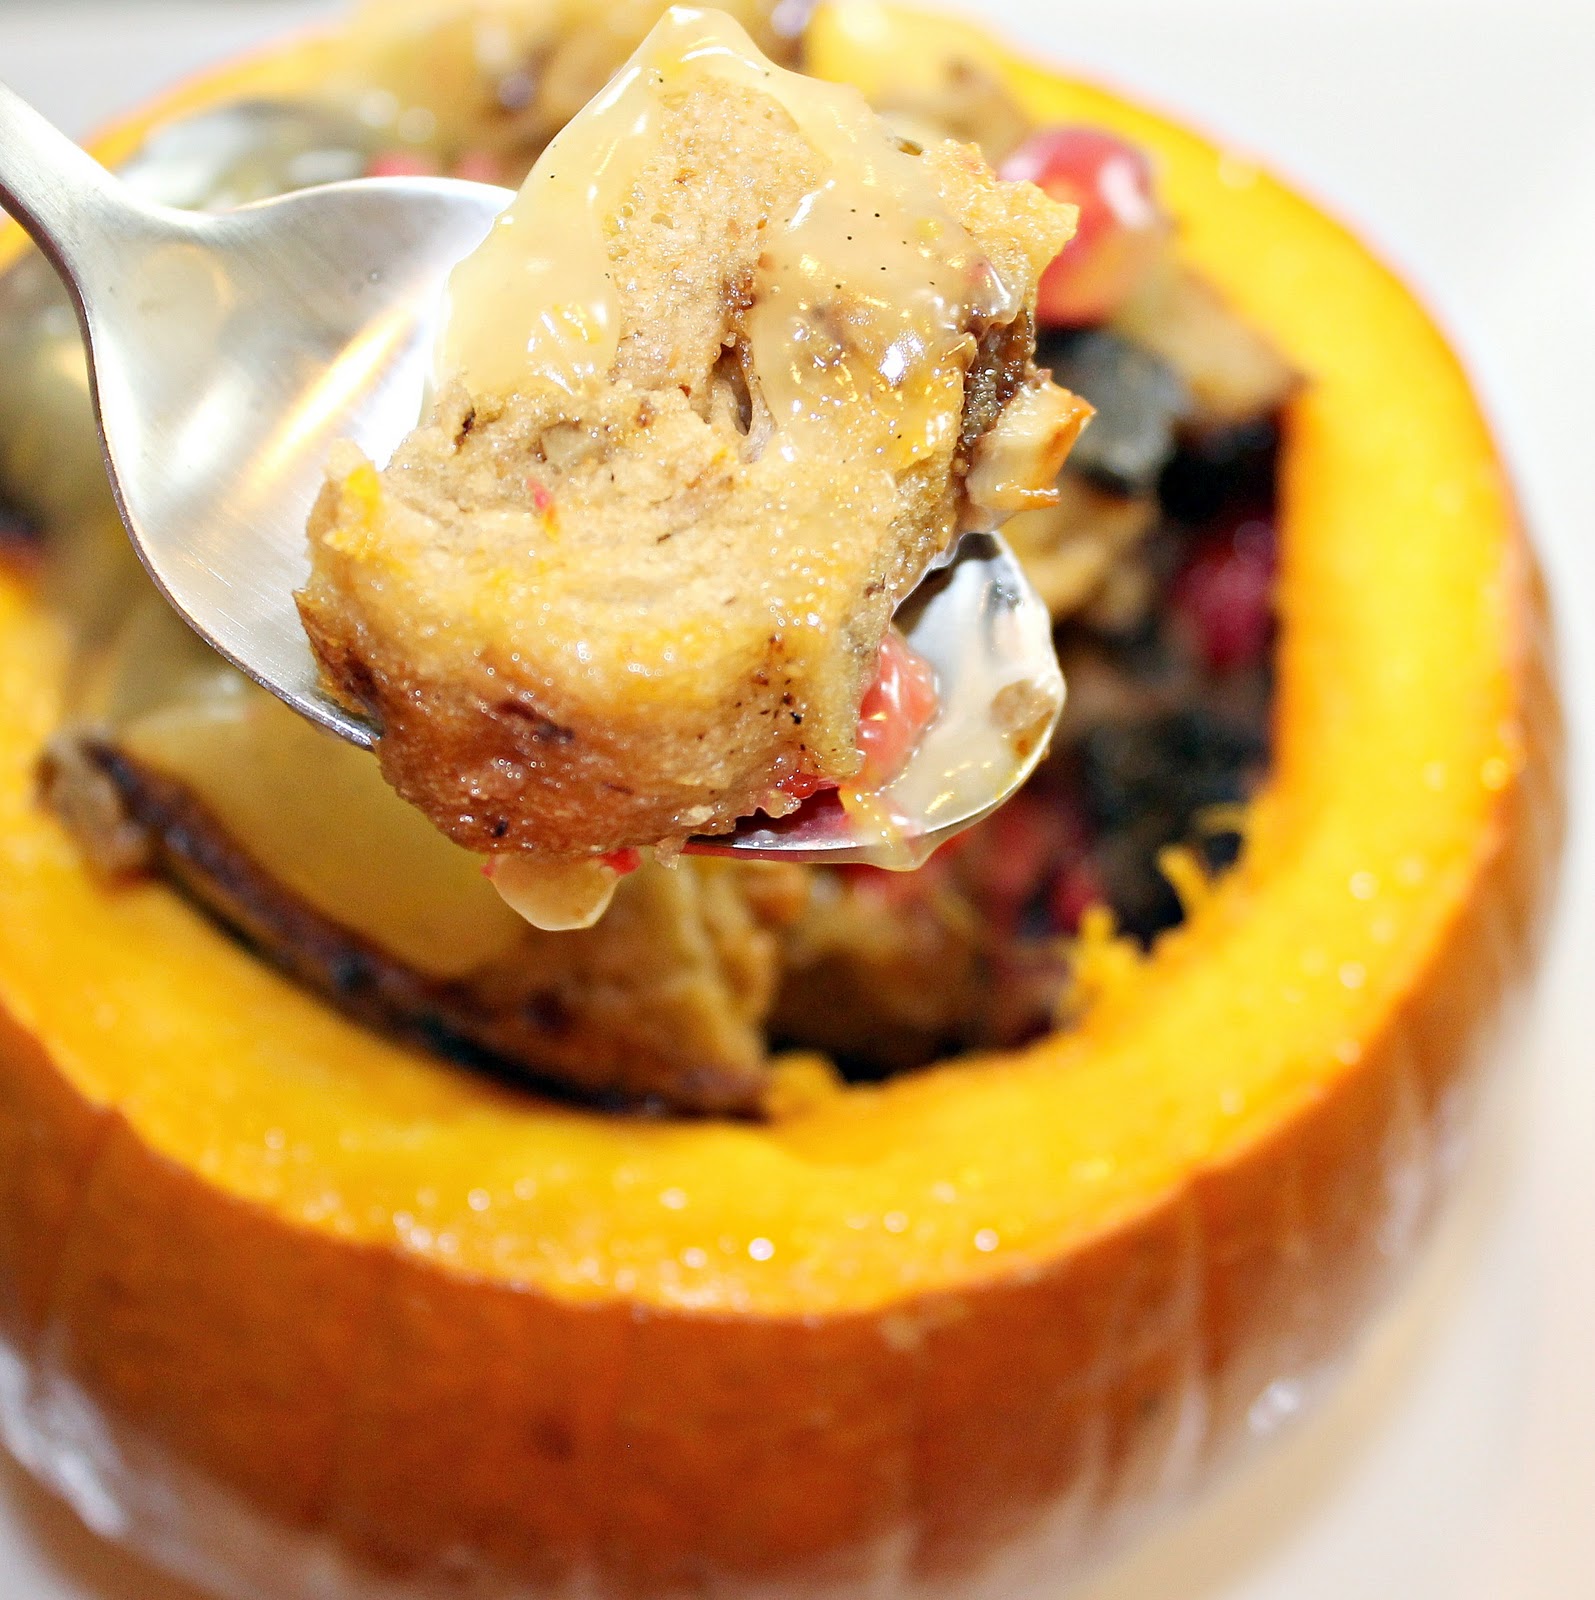
Pour the lemon-vanilla sauce over the bread pudding as desired.
Have you ever been in possession of a recipe that is so good that you almost don’t want to share it? Well, this is one of those recipes. It took a lot of internal debating before I finally decided to share this recipe with you. (Yes, it is that good).
The bread pudding is sweet and slightly toasted, adding a little bit of a crunch to the dish and the cranberries add a pop of tanginess. The lemon-vanilla sauce is citrusy and sweet at the same time.
But the best part is that the nifty presentation has an additional enhancement: you can eat the pumpkin! Yay!
The pumpkin roasts and softens in the oven, making it easy to scrape away at it bite by bite.
You can make this recipe in individual sizes if you’re really looking for a dessert presentation that wows. Just use smaller pumpkins and distribute the bread pudding among them.
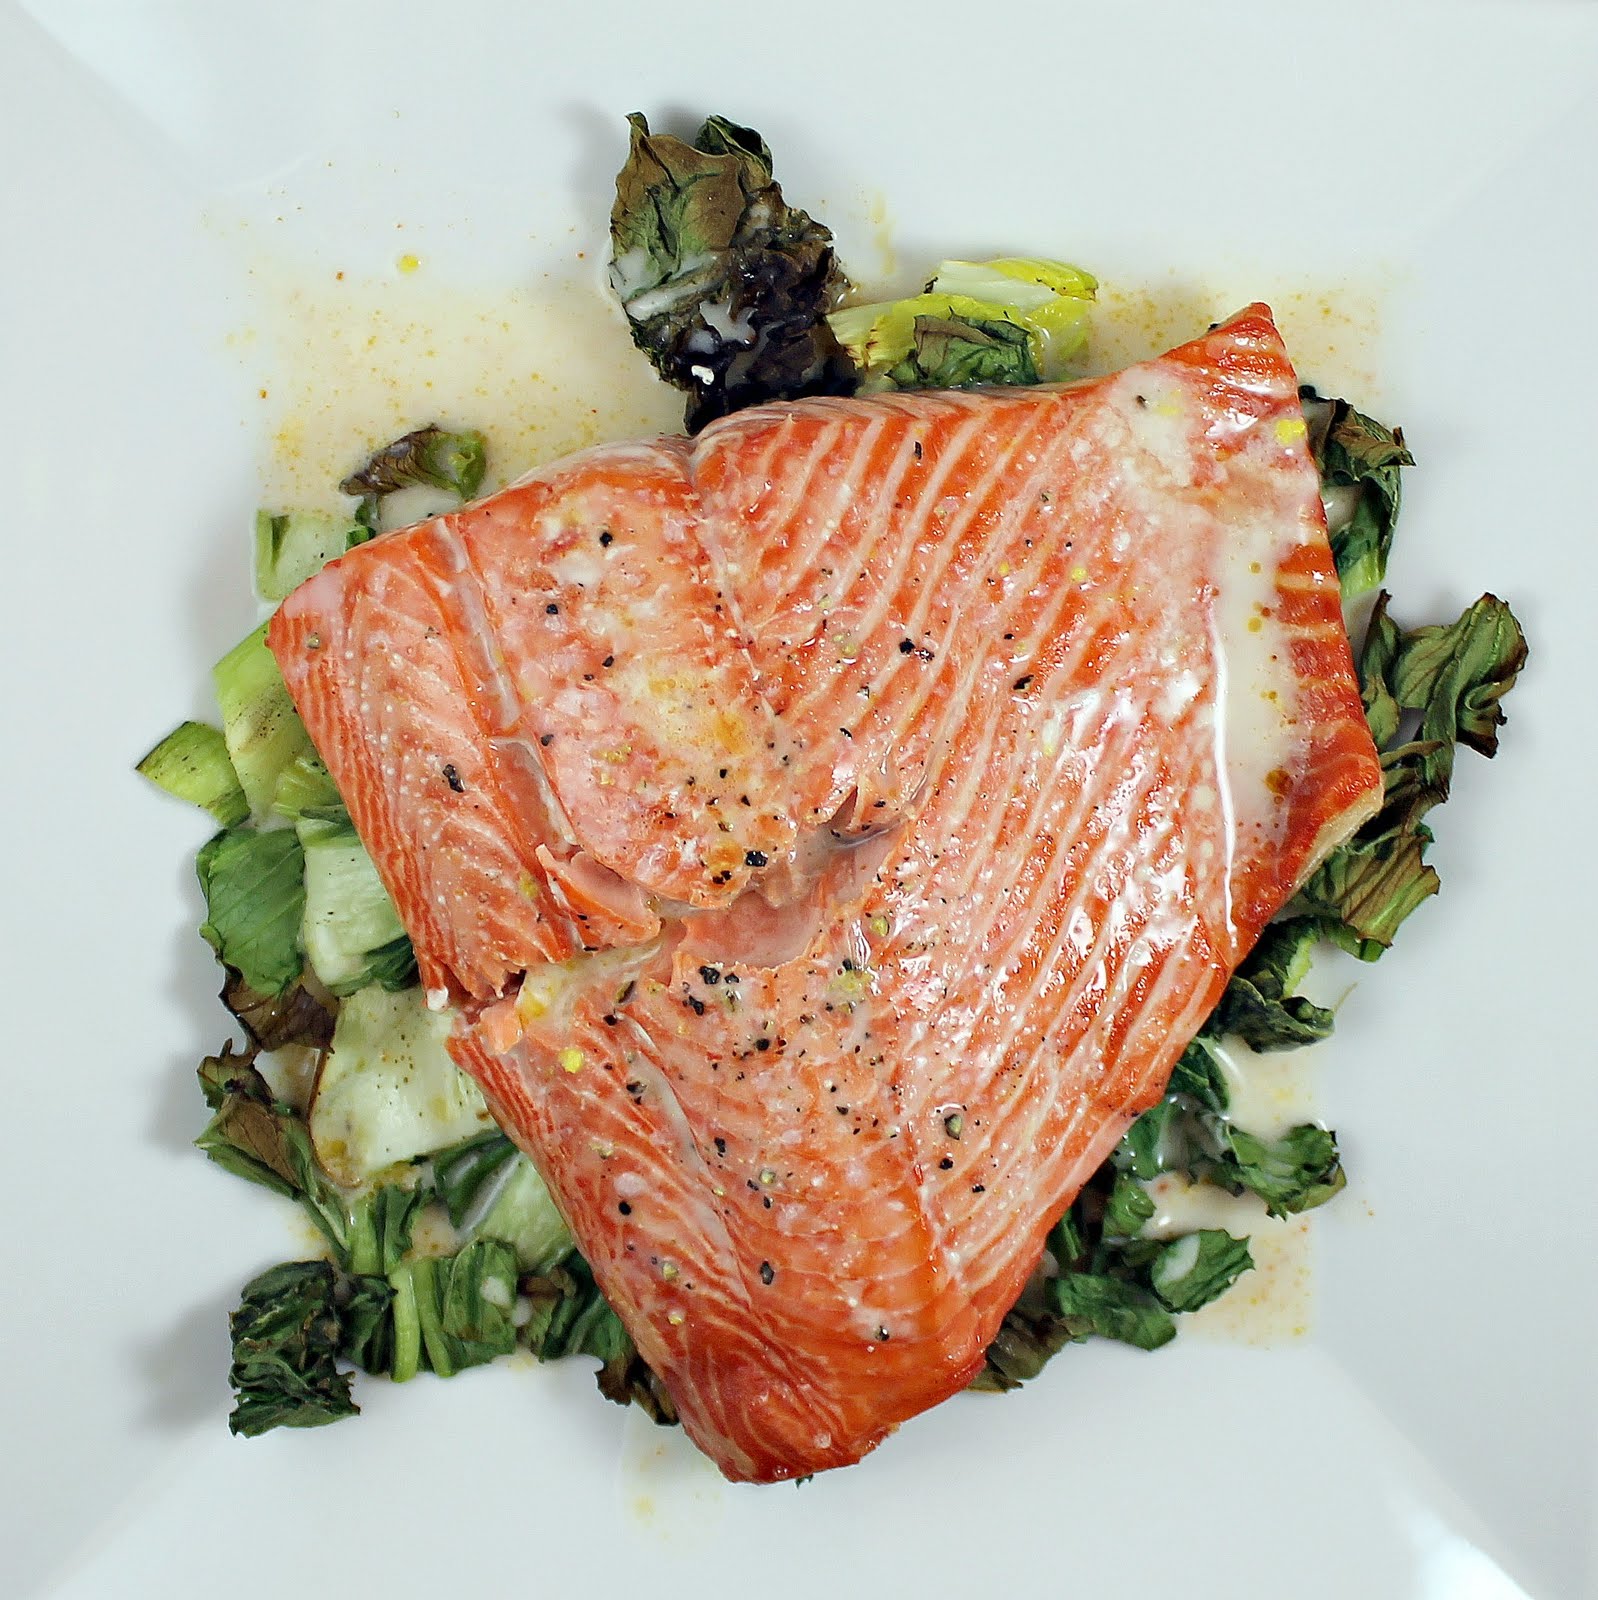
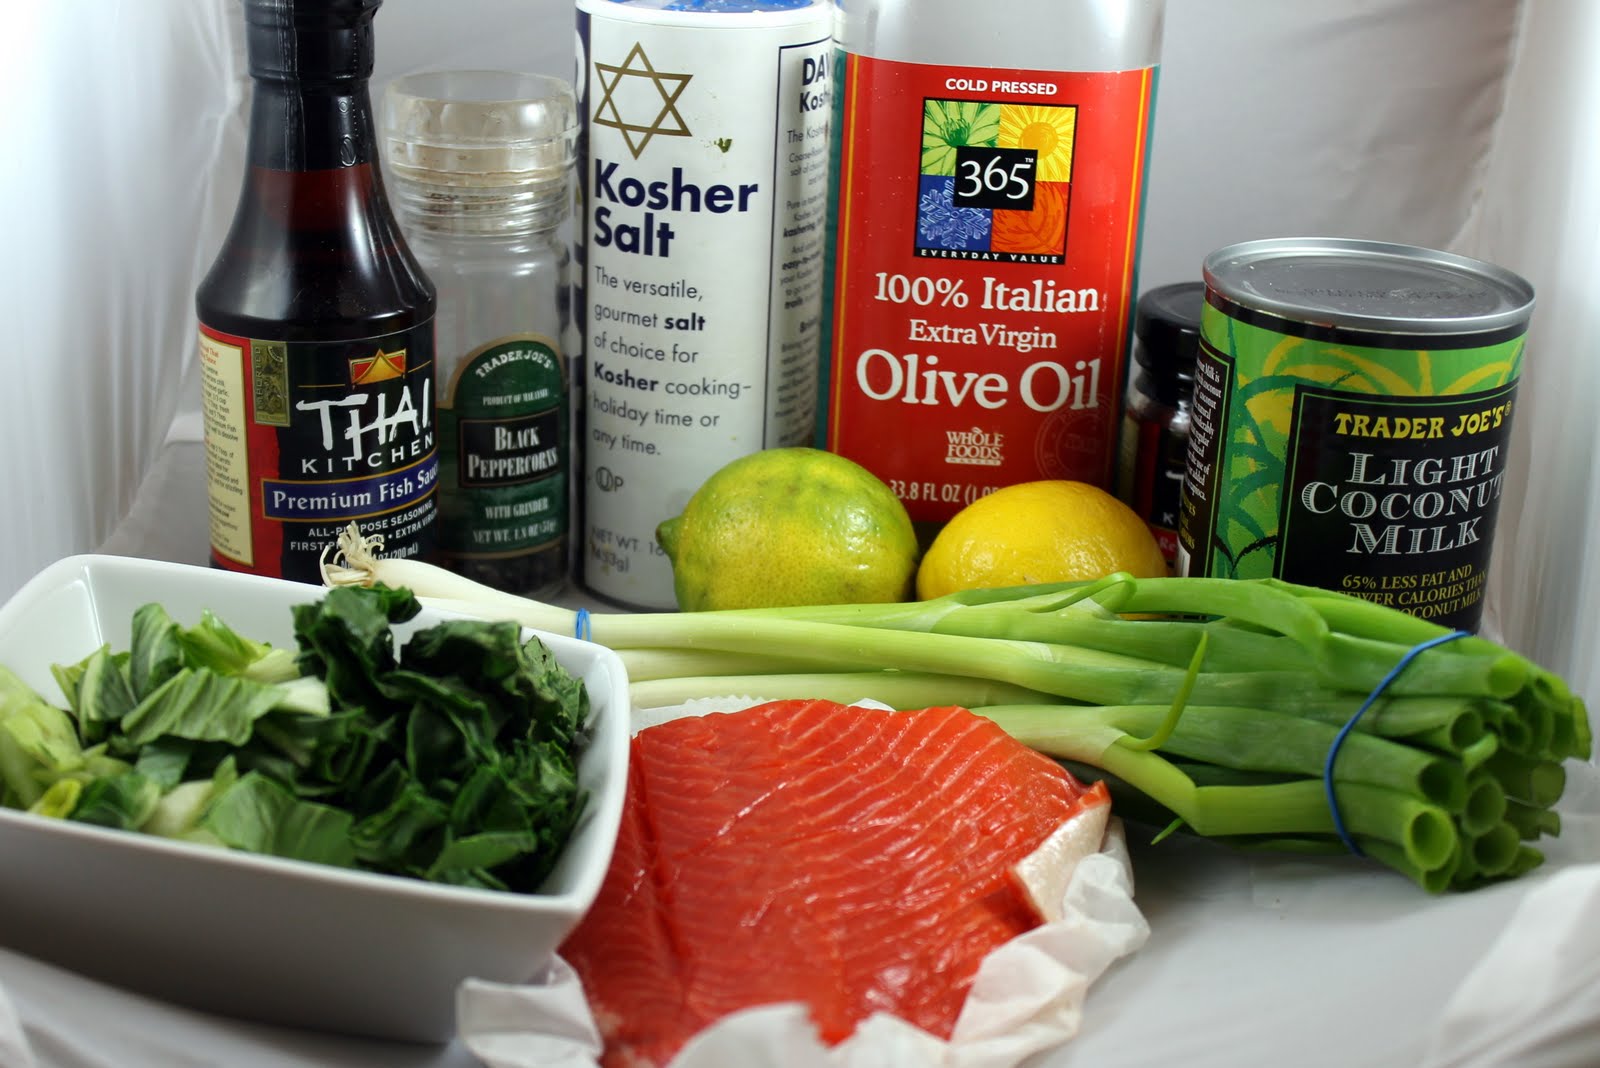
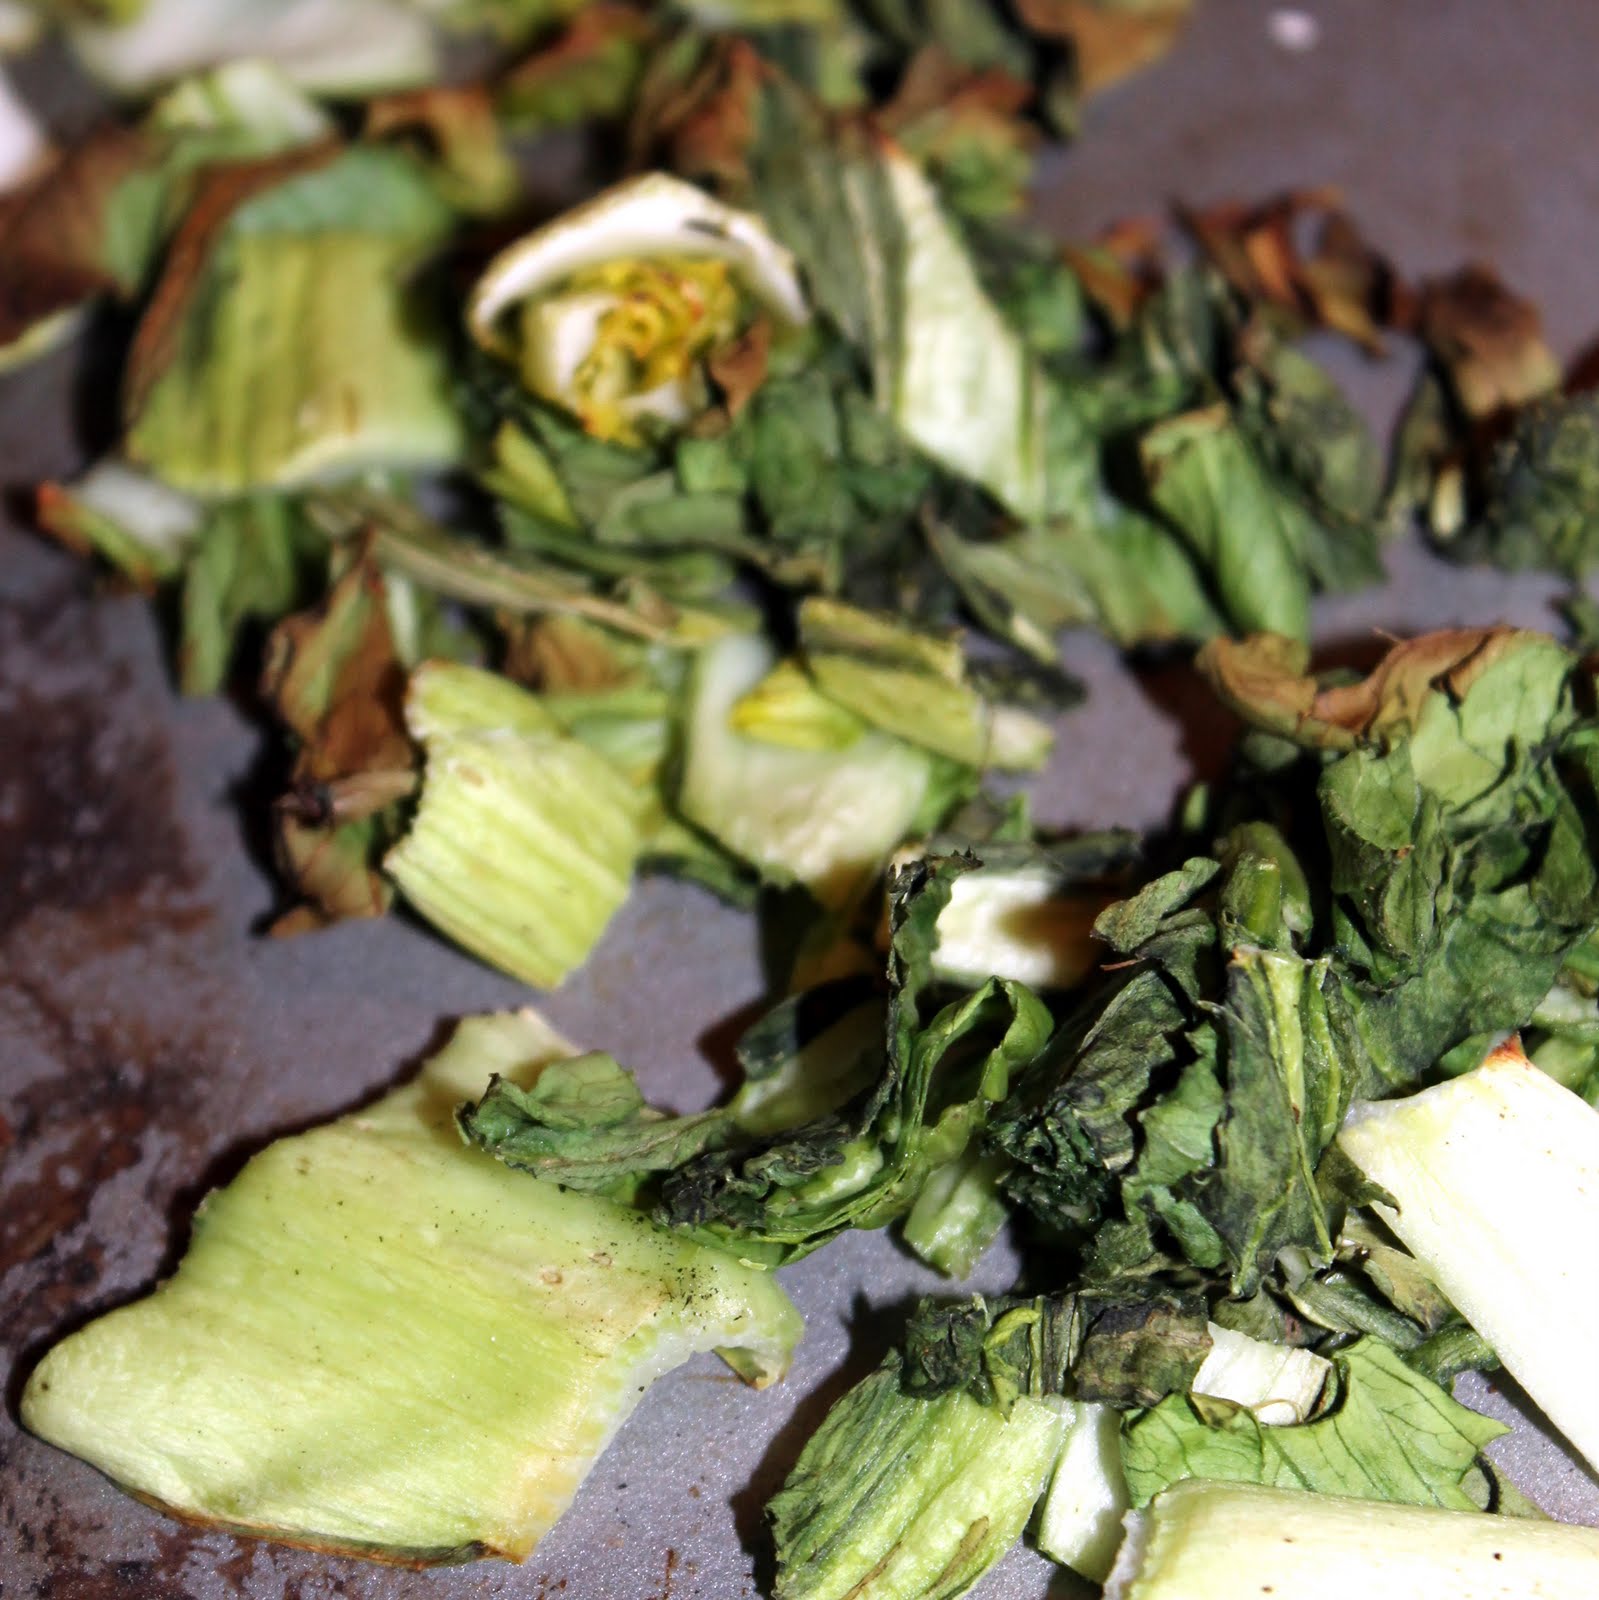
As much as I try to like bok choy, I just don’t really like the flavor. However, I received two baby bok choy in my CSA so here’s my attempt to hide the cabbage-y taste using a Bon Appetit recipe as a base that includes a Thai Red Curry sauce.
Ingredients: (this only makes 1 serving)
2 baby bok choy
1 teaspoon vegetable oil
1/4 teaspoon Thai red curry paste
1/2 can coconut milk
the zest of 1 lemon
the juice of 1 lime
2 teaspoons fish sauce
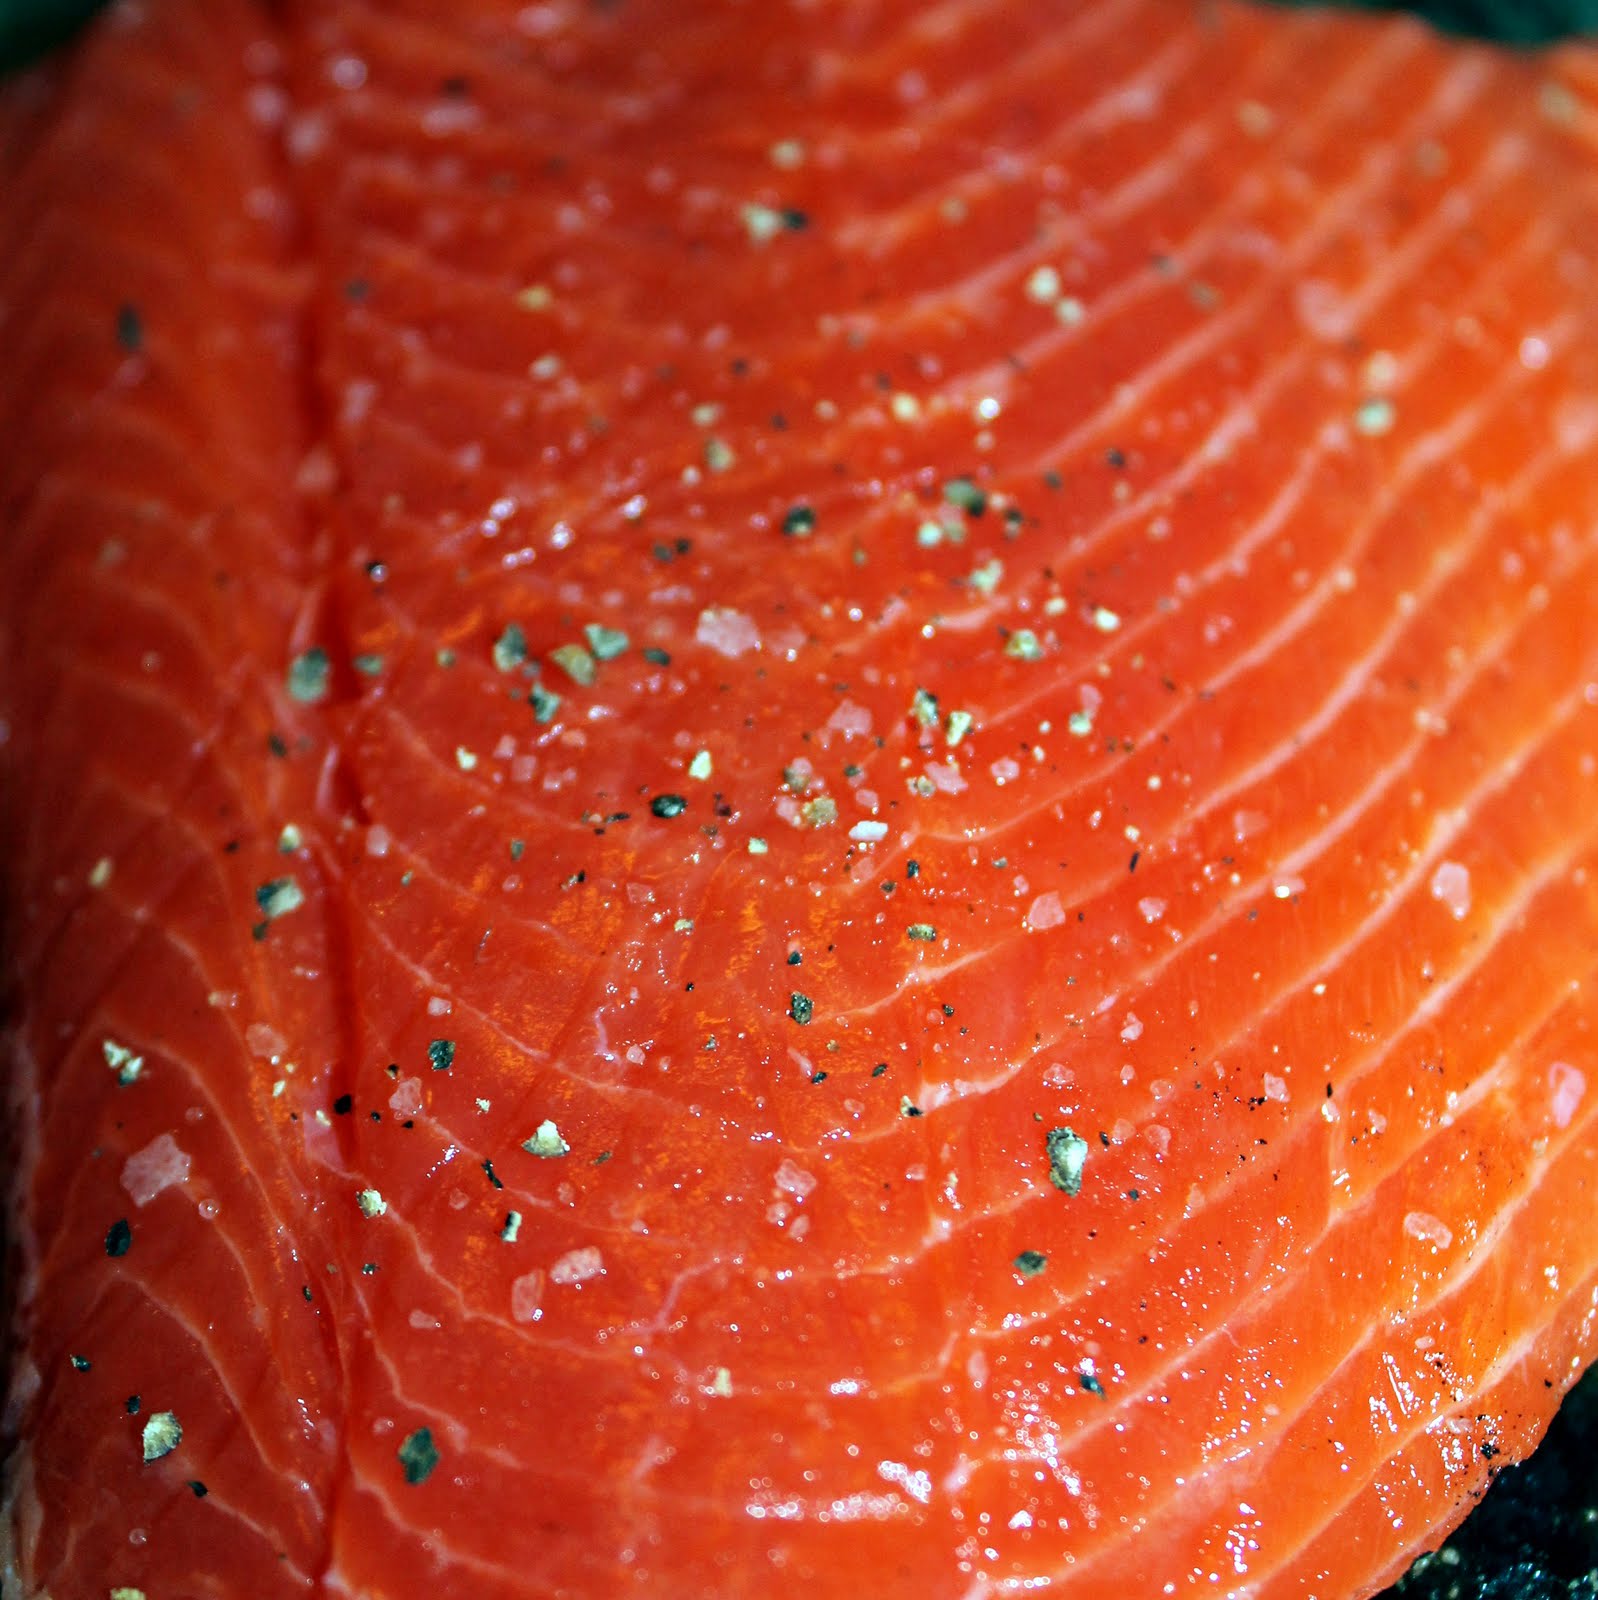
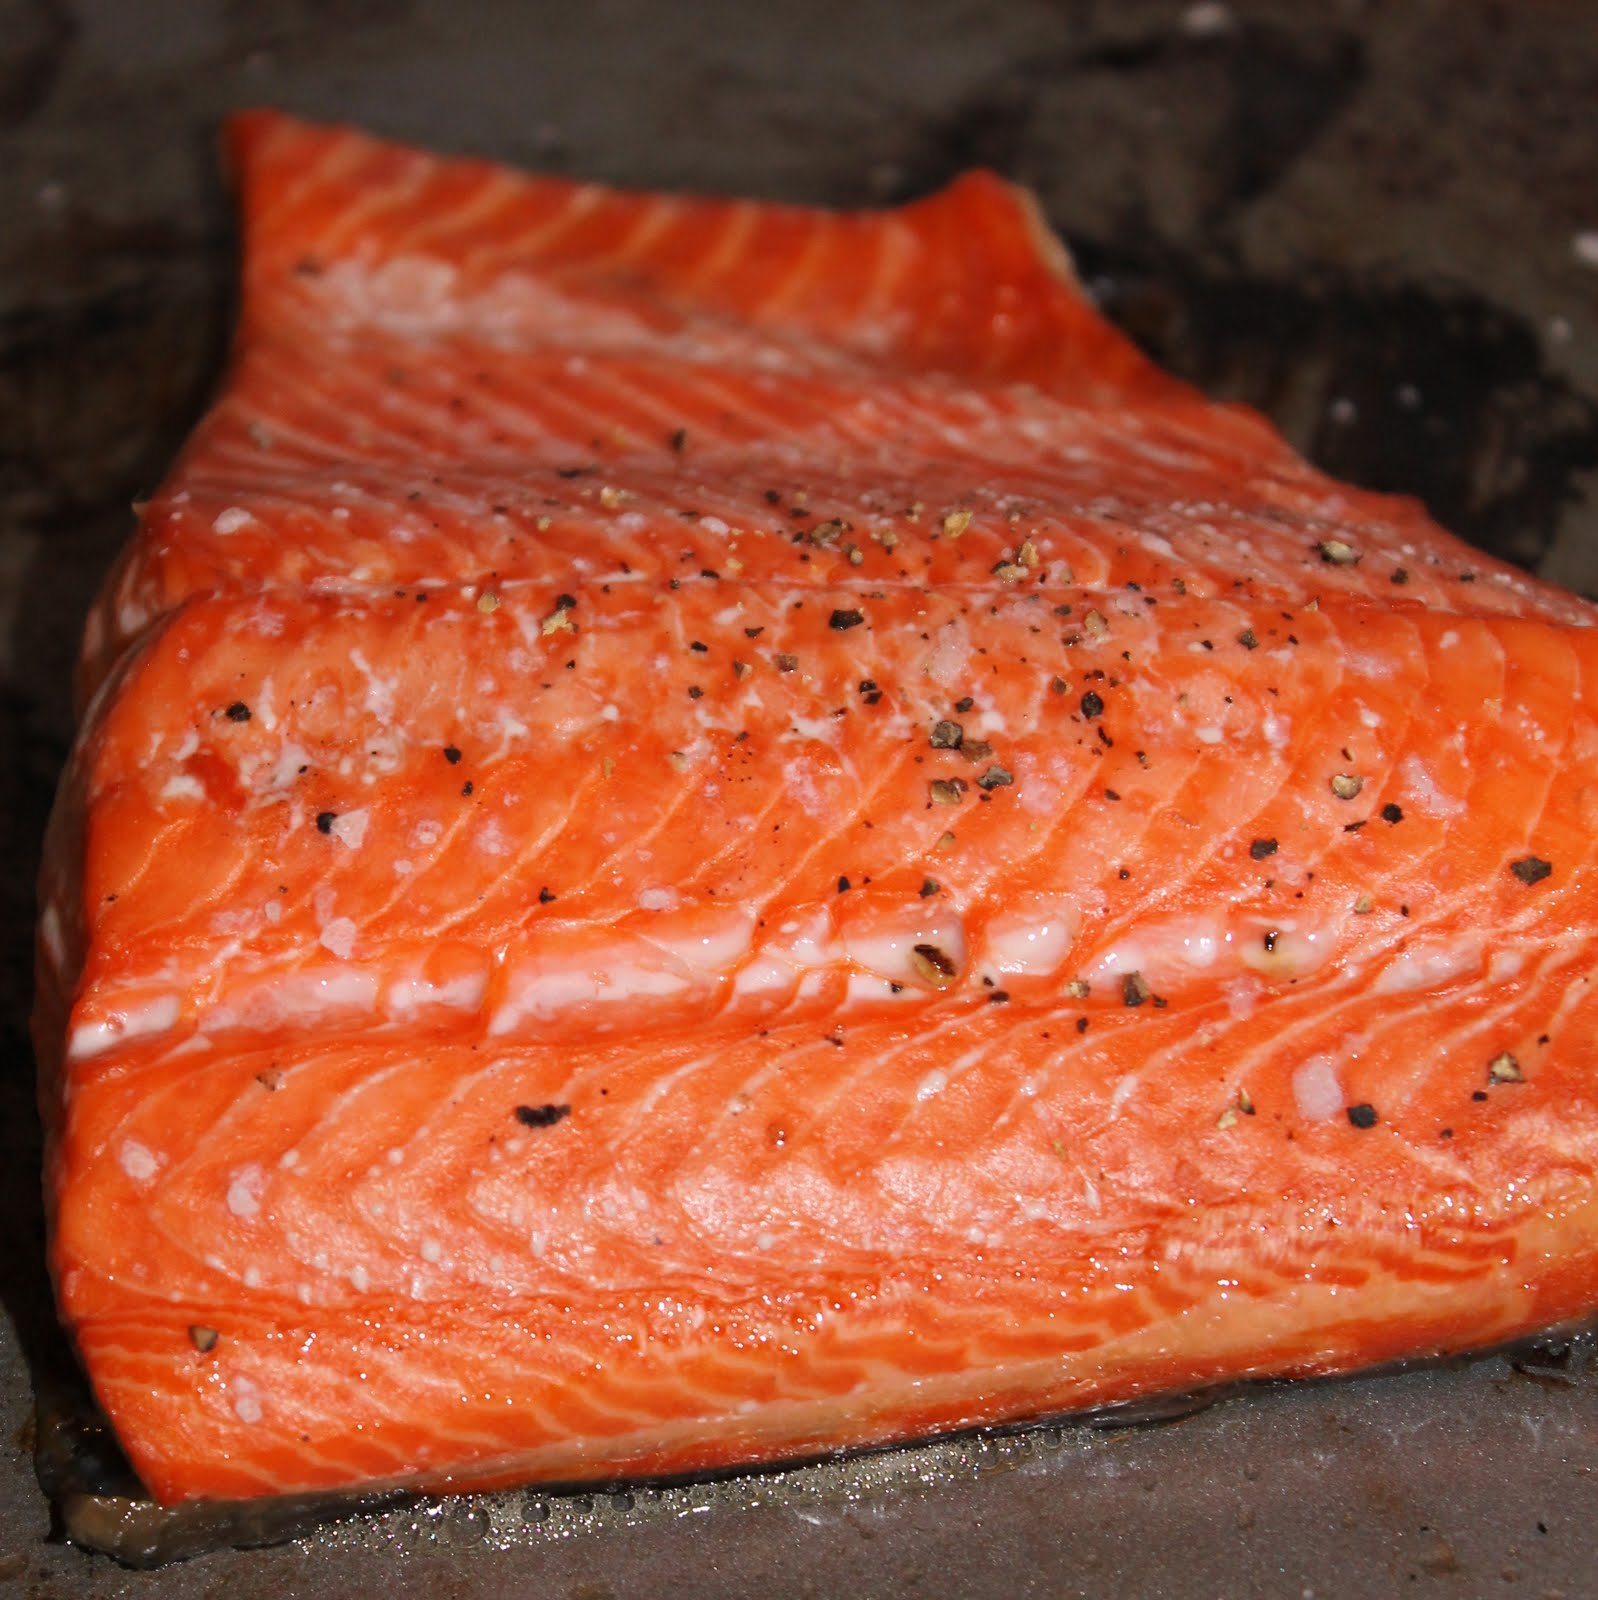
1 6-ounce salmon fillet
Chopped scallions, for garnish
Salt and pepper, to taste
Preheat your broiler.
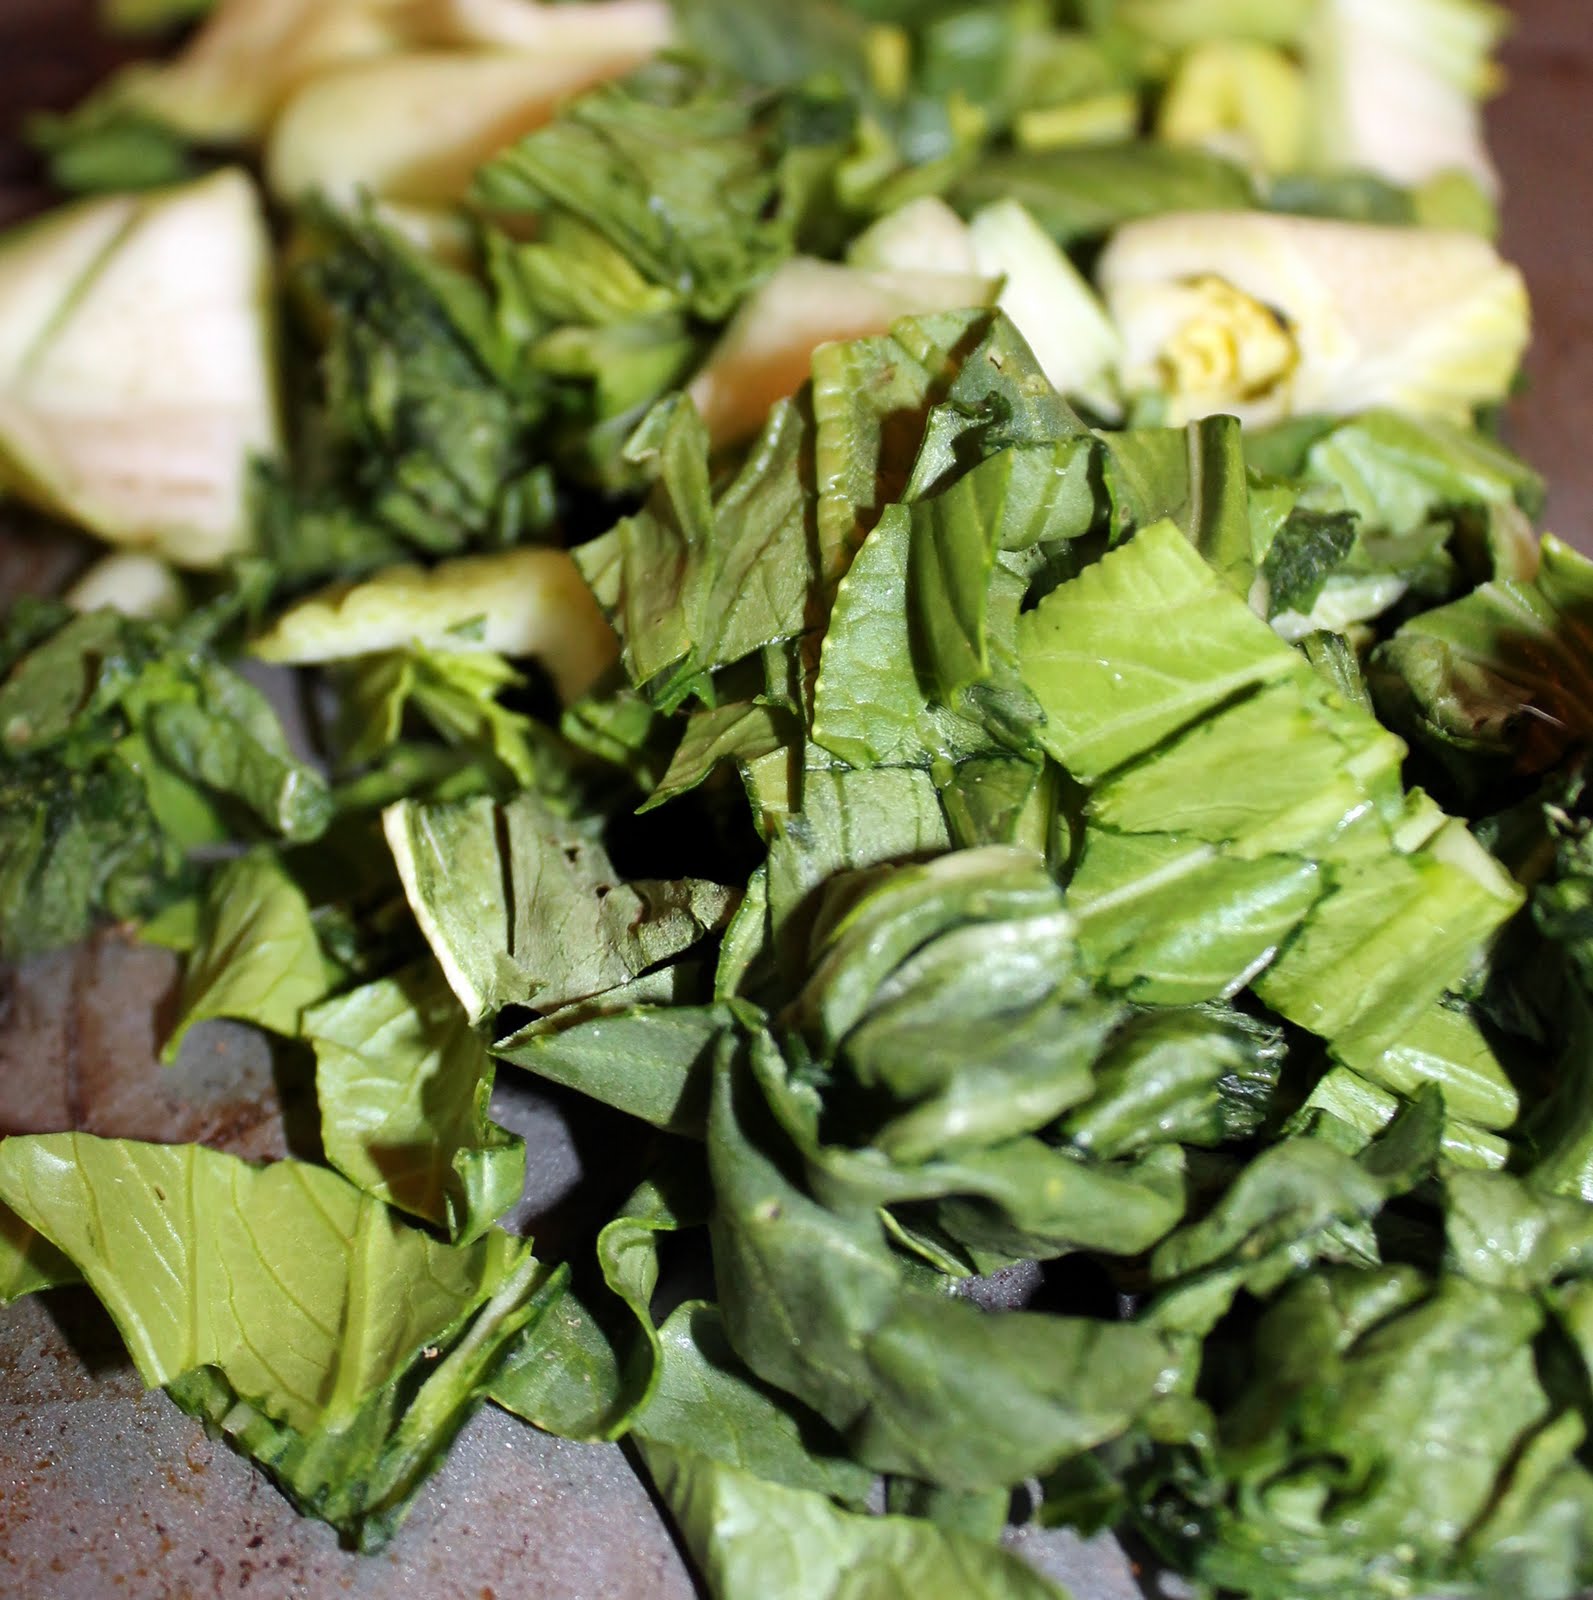
Roughly chop the baby bok choy and place on one side of a cookie sheet.
Place the salmon on the other side of the cookie sheet and season with salt and pepper.
Broil for 5 minutes. Stir the bok choy and broil for another 4 minutes, until the salmon is cooked through and the bok choy has crisped a bit.
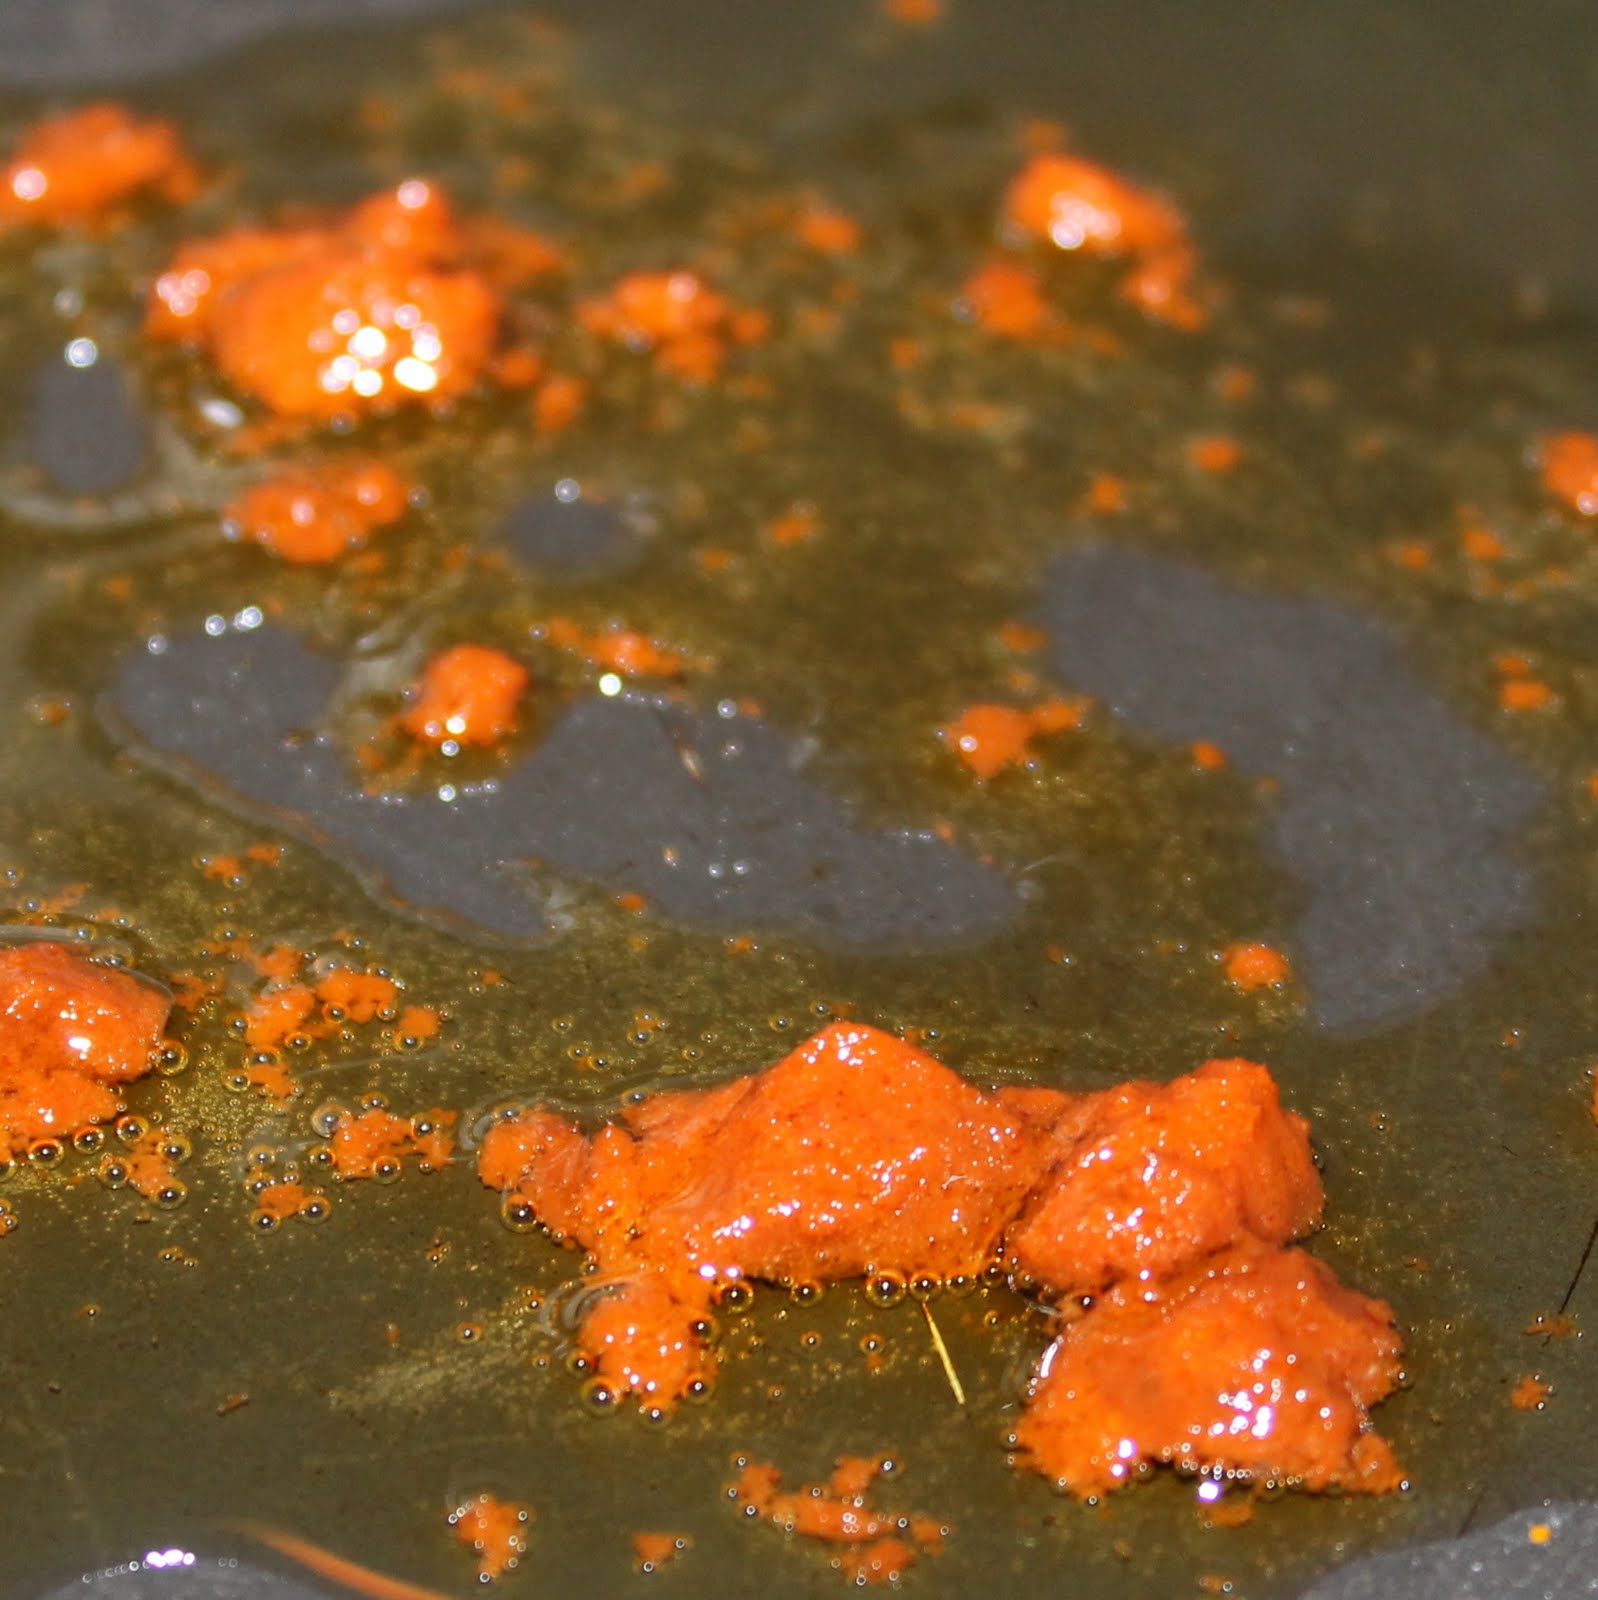
While the salmon and bok choy are cooking, heat the oil in a saute pan and add the red curry paste.
Cook for 30 seconds and add coconut milk and lemon zest. Boil until the mixture thickens slightly, about 5 minutes. Stir in lime juice and fish sauce.
To serve, add baby bok choy to a plate and top with salmon. Drizzle curry sauce over the entire plate. Top with chopped scallions if desired.
The curry sauce did a fantastic job of making the baby bok choy palatable. I still did get a hint of the taste of the baby bok choy, but it was much more subtle than just a steamed bok choy recipe. I wish the sauce had a bit more spice to it, so next time I’d probably increase the amount of the red curry paste.
I was apparently quite hungry and started eating this before I topped the salmon with scallions. Oops. But after having a few bites without the scallions and a few bites with, I strongly suggest adding them, they really work great with this dish.
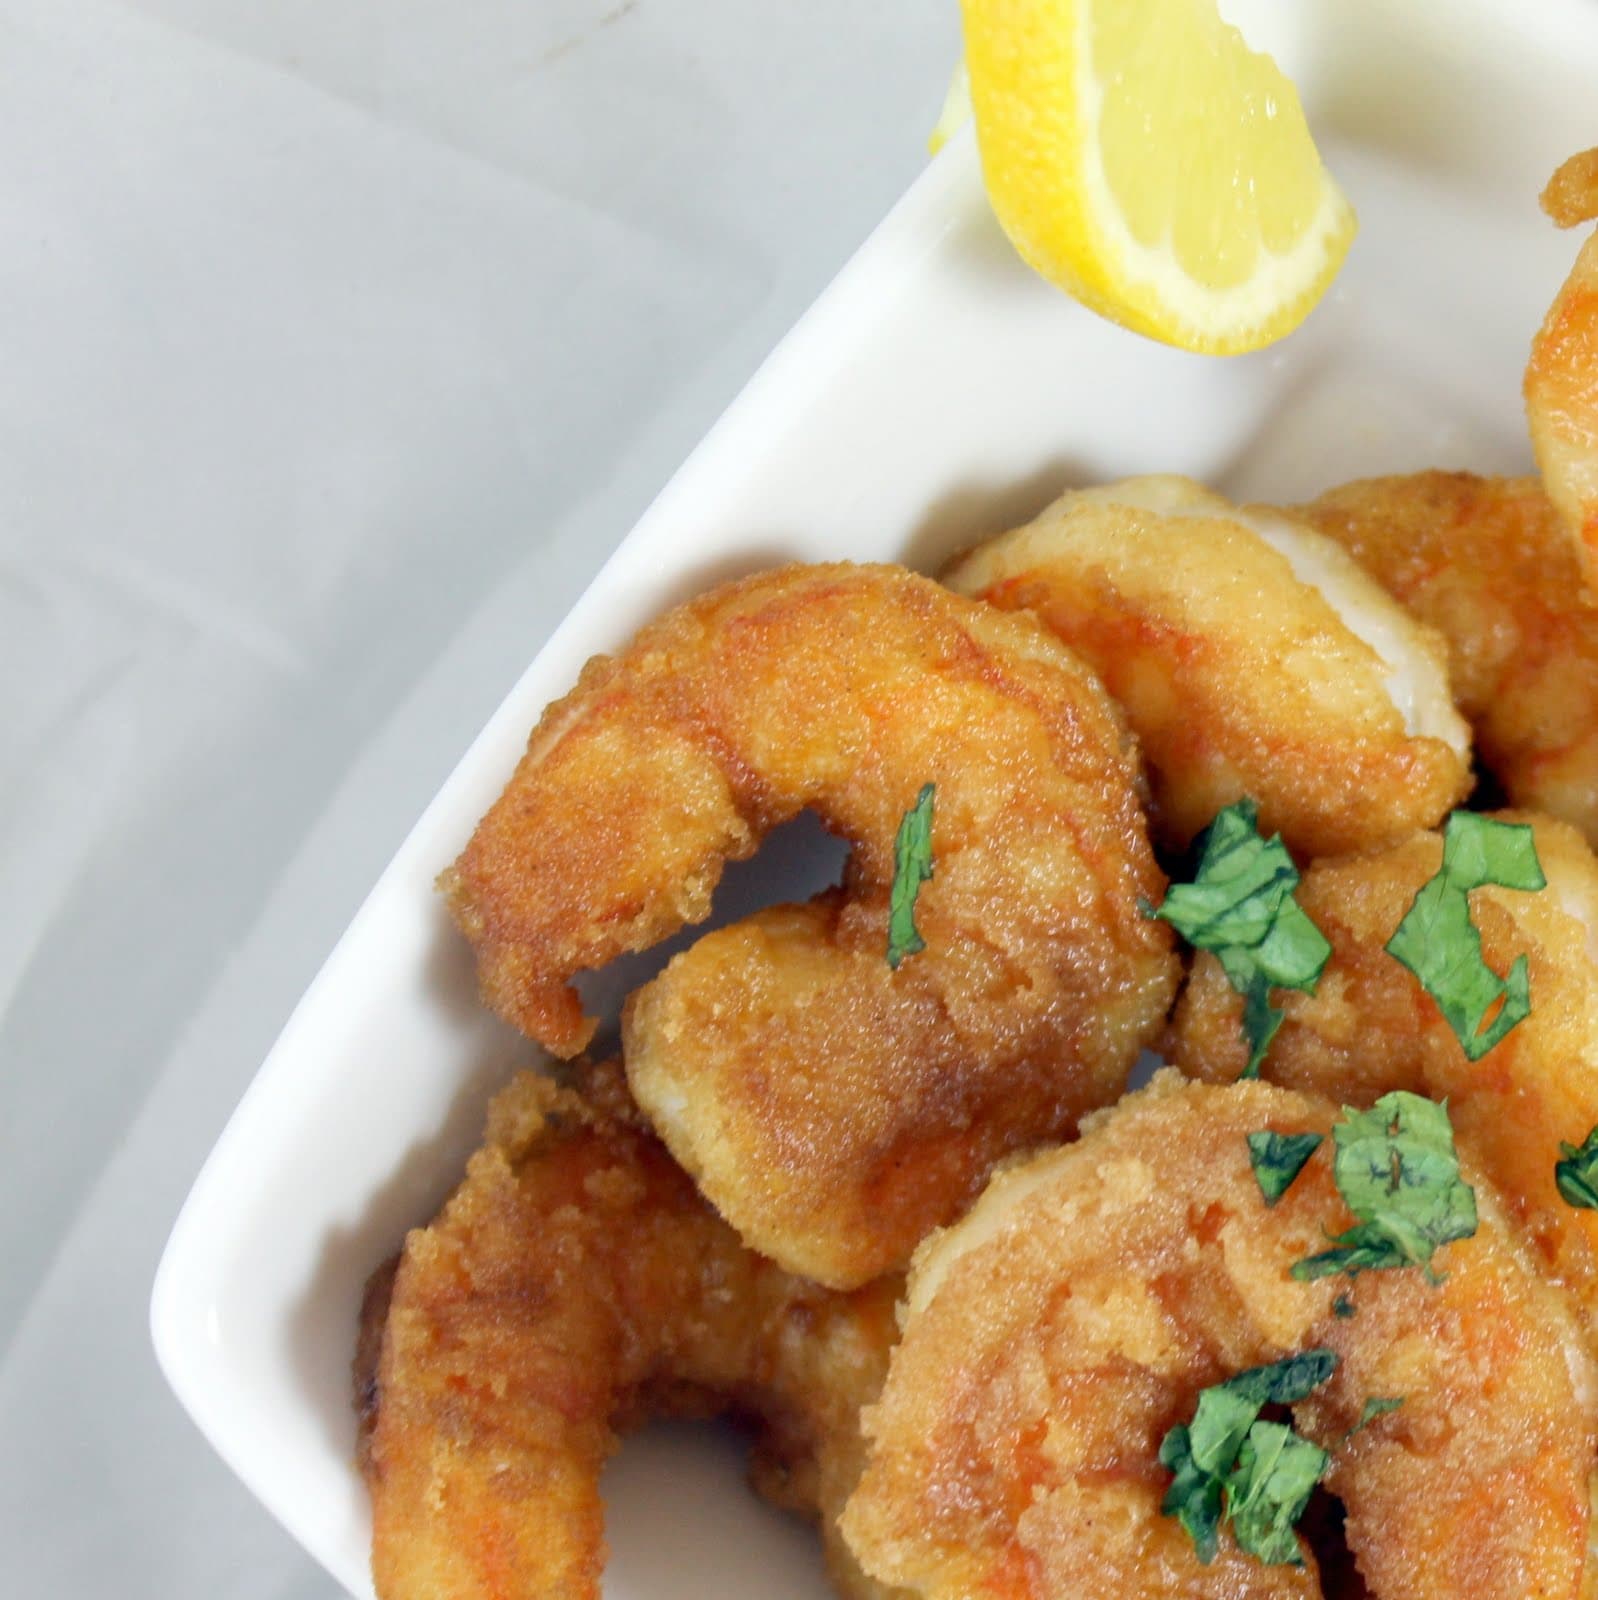
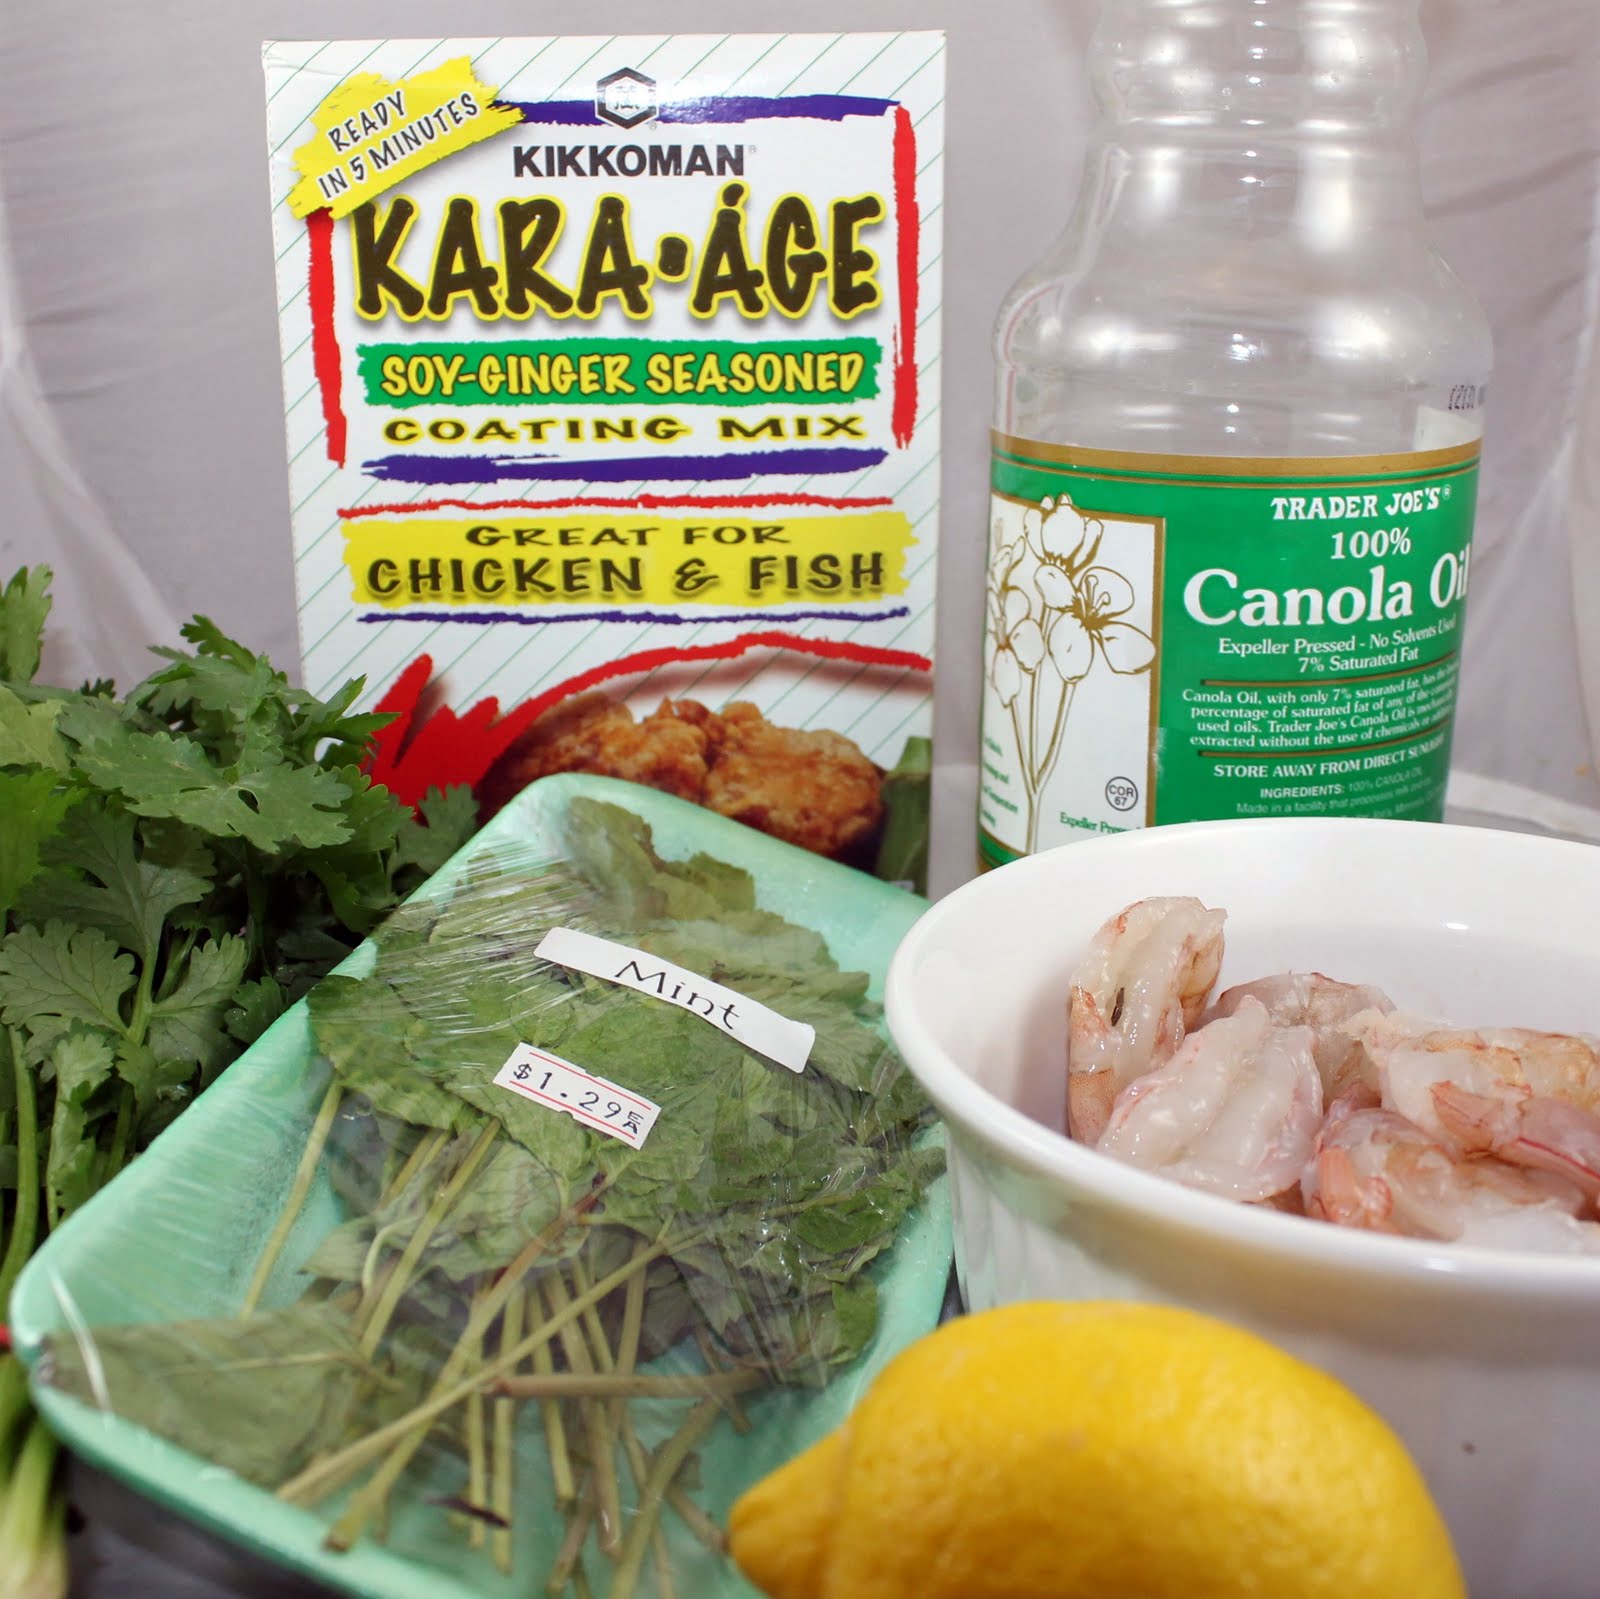
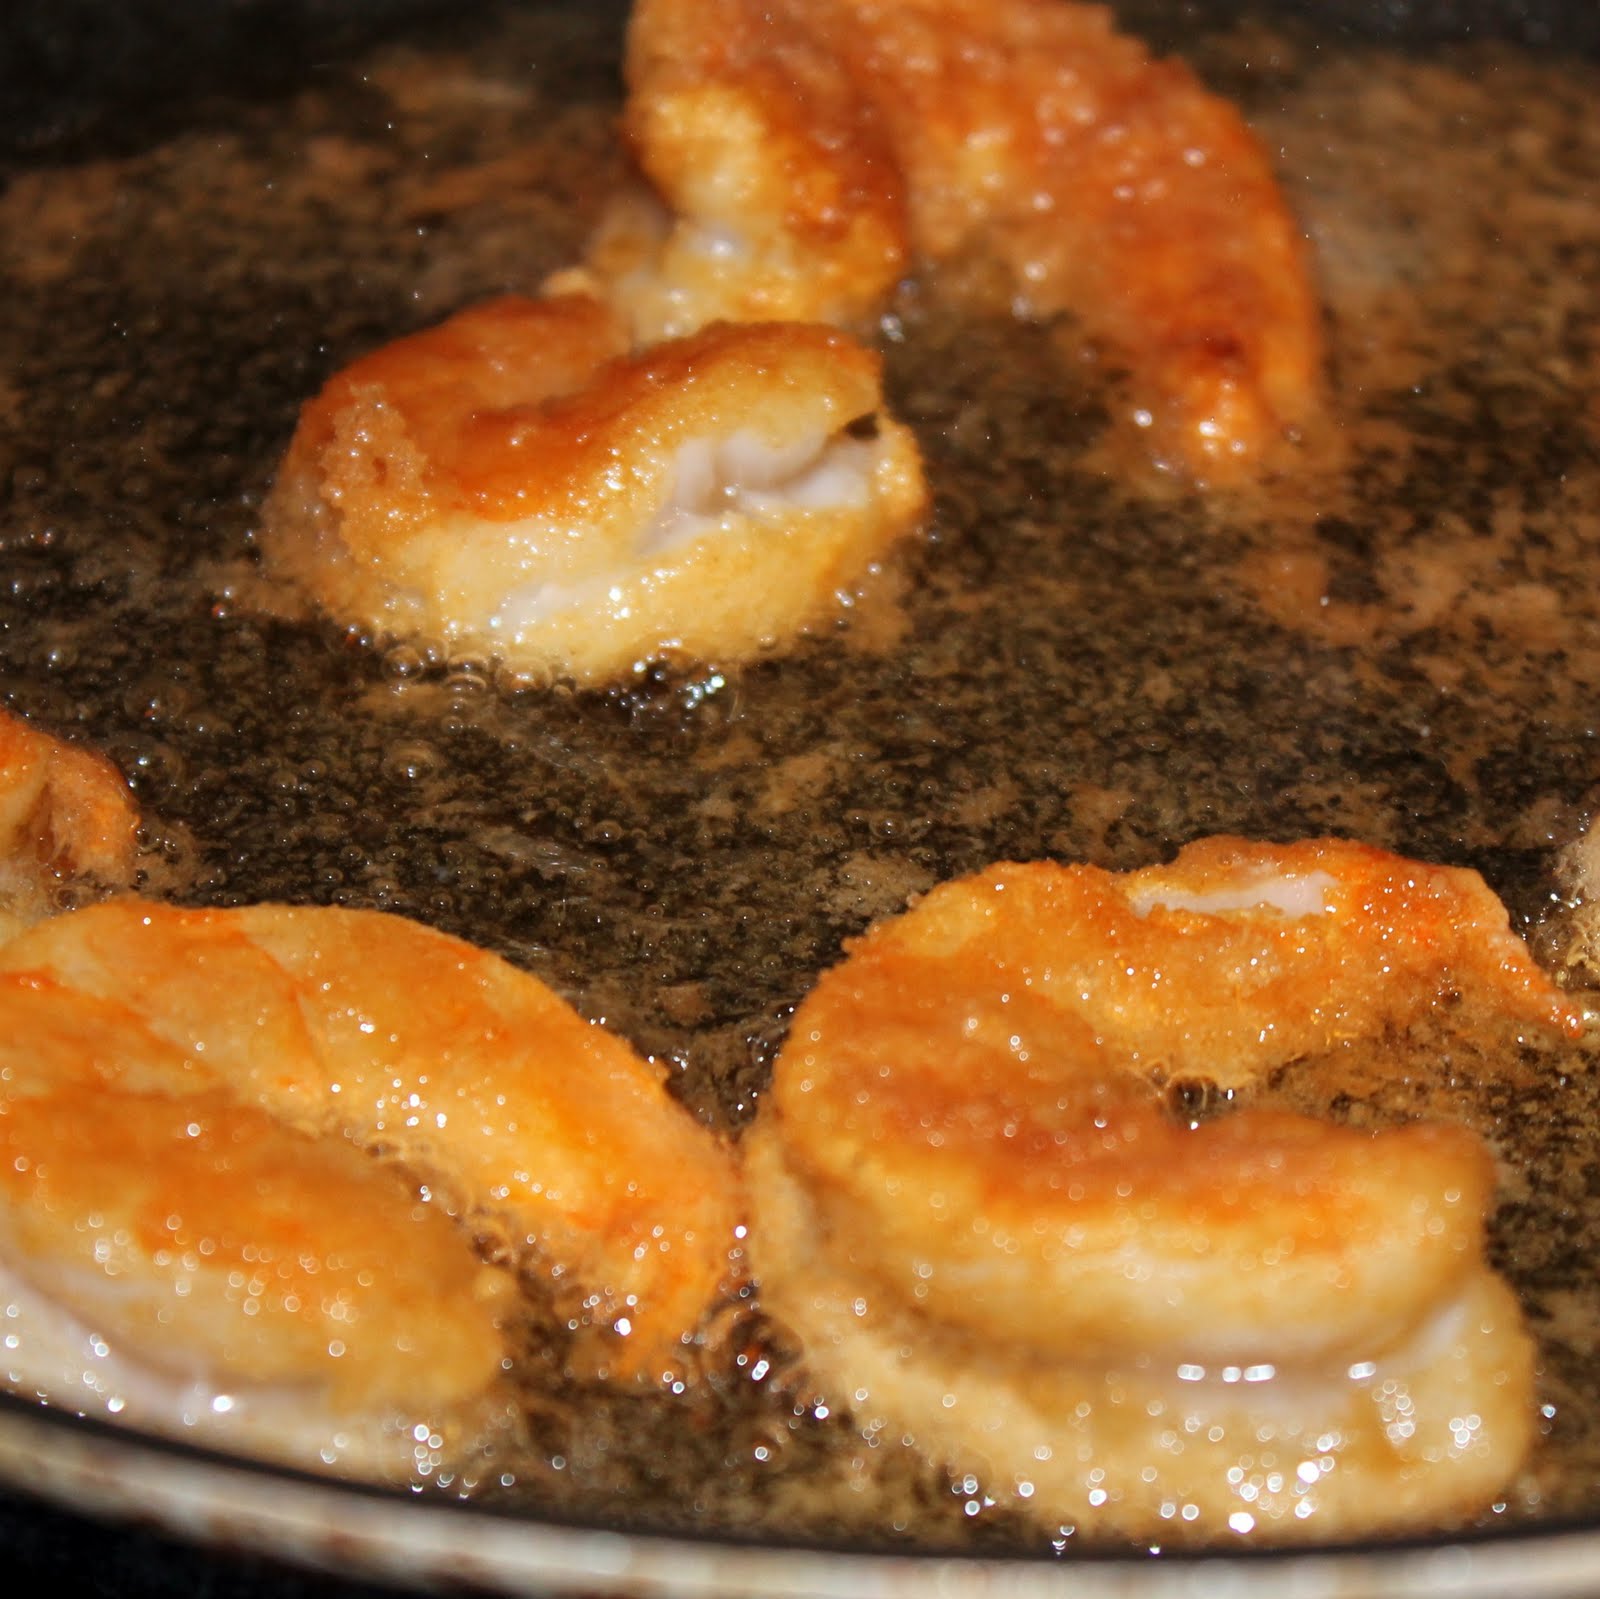
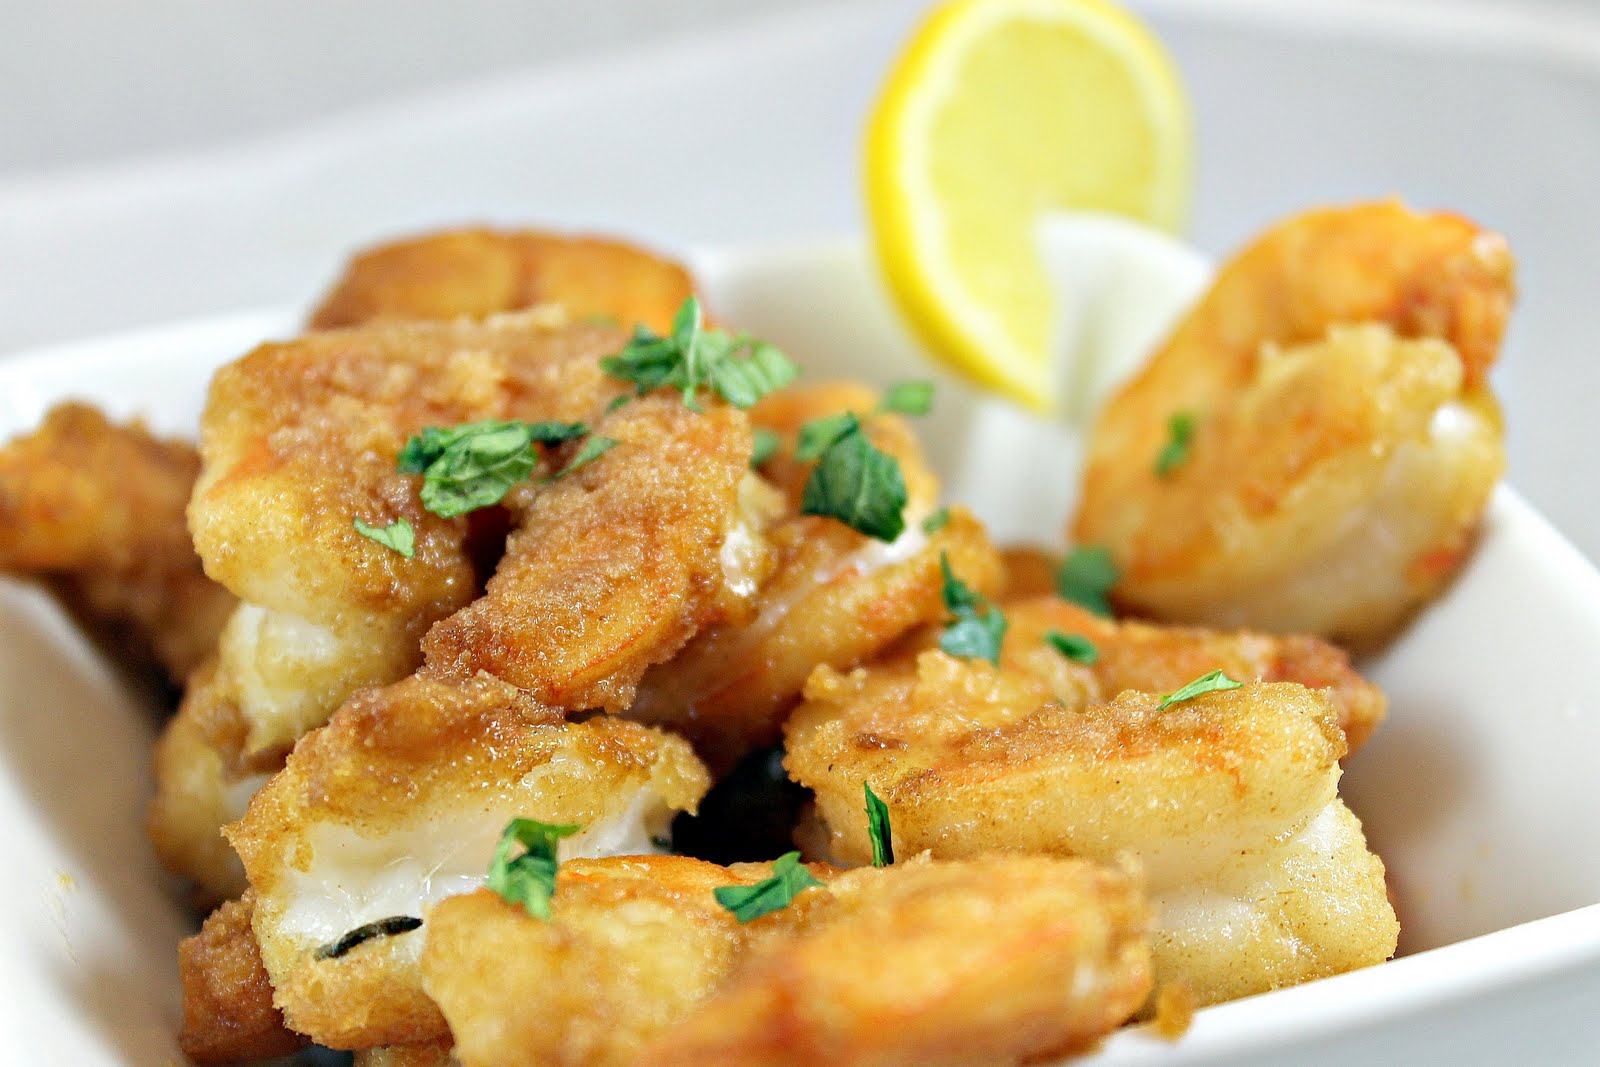
One of the best parts of starting this blog is that I get to make food outside my comfort zone. I try to make new and different recipes to expand cooking repertoire. As a member of the Foodbuzz Tastemaker Program, I received a box of Kikkoman Kara-Age Soy-Ginger Seasoned Coating Mix. Kara-Age (pronounced KAH-rah AH-geh) is a method used in Japan in which meat is coated in a soy sauce, garlic and ginger, dipped in flour, and fried. Although Kara-Age is typically used for chicken, I decided to try to make a “Kara-Age Popcorn Shrimp”.
Ingredients:
1 lb peeled and deveined shrimp (medium or small)
1 package Kikkoman Kara-Age Mix
1/3 cup canola oil
1 teaspoon chopped cilantro
1 teaspoon chopped mint
Juice from 1/2 a lemon
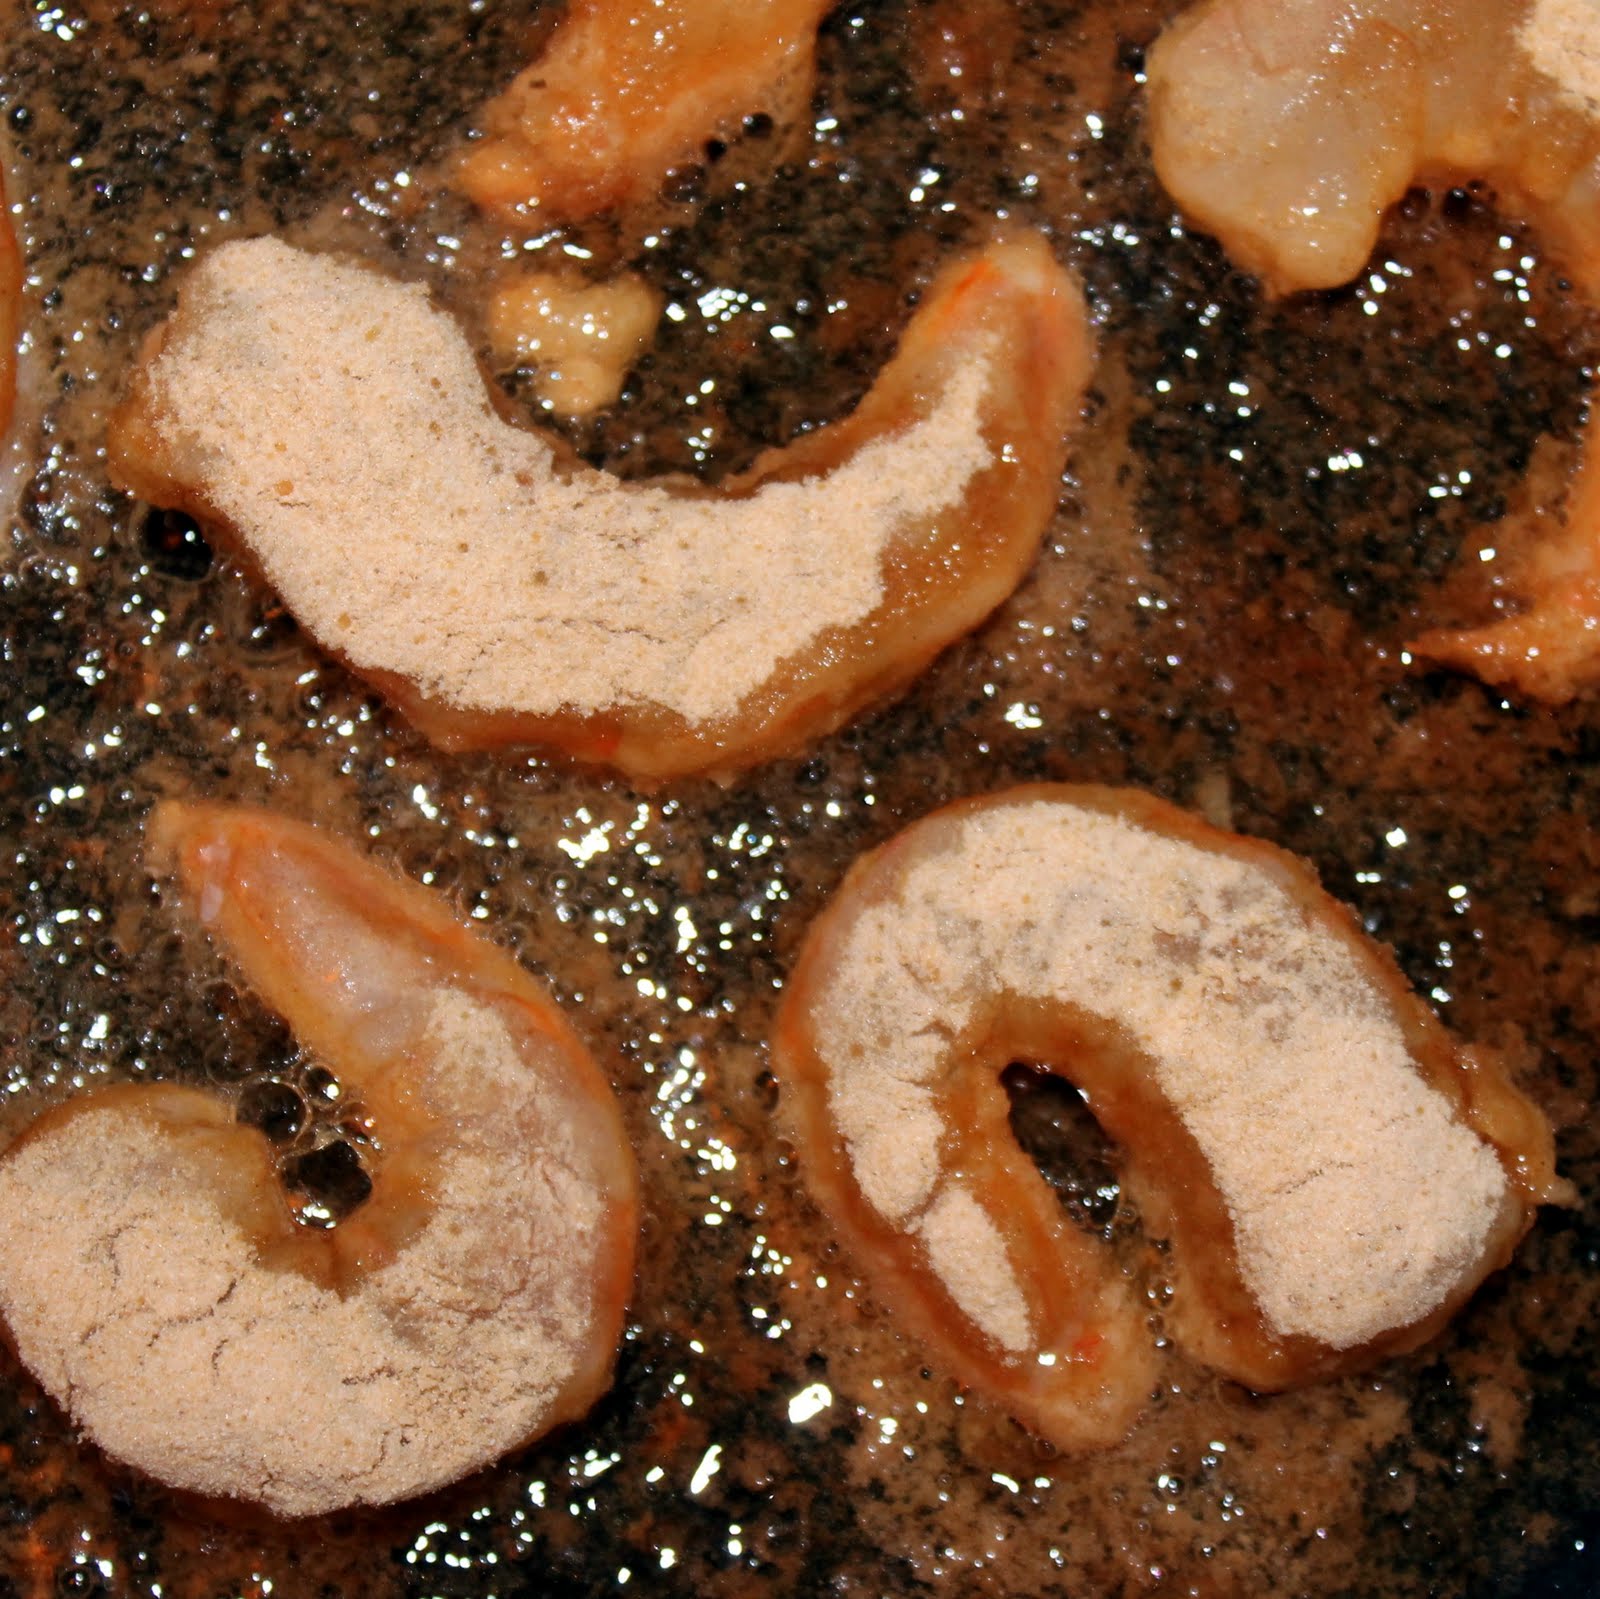
Heat the oil in a saute pan over medium heat. Depending on the size of your saute pan, you may need more or less oil- you want about 1/4 inch of vegetable oil in the pan. Heat the oil to 350 degrees.
Pour the package of Kikkoman Kara-Age Mix into a plastic bag. Add the shrimp to the bag, seal the bag, and shake well to coat each piece of shrimp evenly.
Remove shrimp from the bag and discard the remaining mix.
Pan-fry 6-8 shrimp at a time in the hot oil for about 2 minutes per side, or until shrimp is cooked.
Remove from the pan and drain on a paper towel.
Repeat with remaining shrimp. Squeeze lemon juice over the cooked shrimp and sprinkle with chopped cilantro and mint. Serve hot.
I tend to think all fried things taste the same. Well, Kikkoman just proved me wrong. The soy-ginger flavor still shines through the crispy fried coating and delivers awesome flavor. The cilantro-mint-lemon topping adds even more flavor to the dish without competing with the seasoning.
This can be served as an appetizer, or as a meal. I love how quick this was, probably 10 minutes in total to prepare and make. Very little effort for a whole lot of flavor!
To make this recipe healthier, instead of frying the shrimp, broil them on a sheet coated in olive oil. Spray the shrimp with cooking spray before broiling.
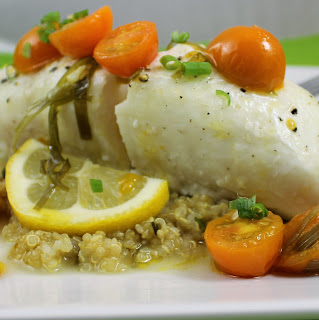
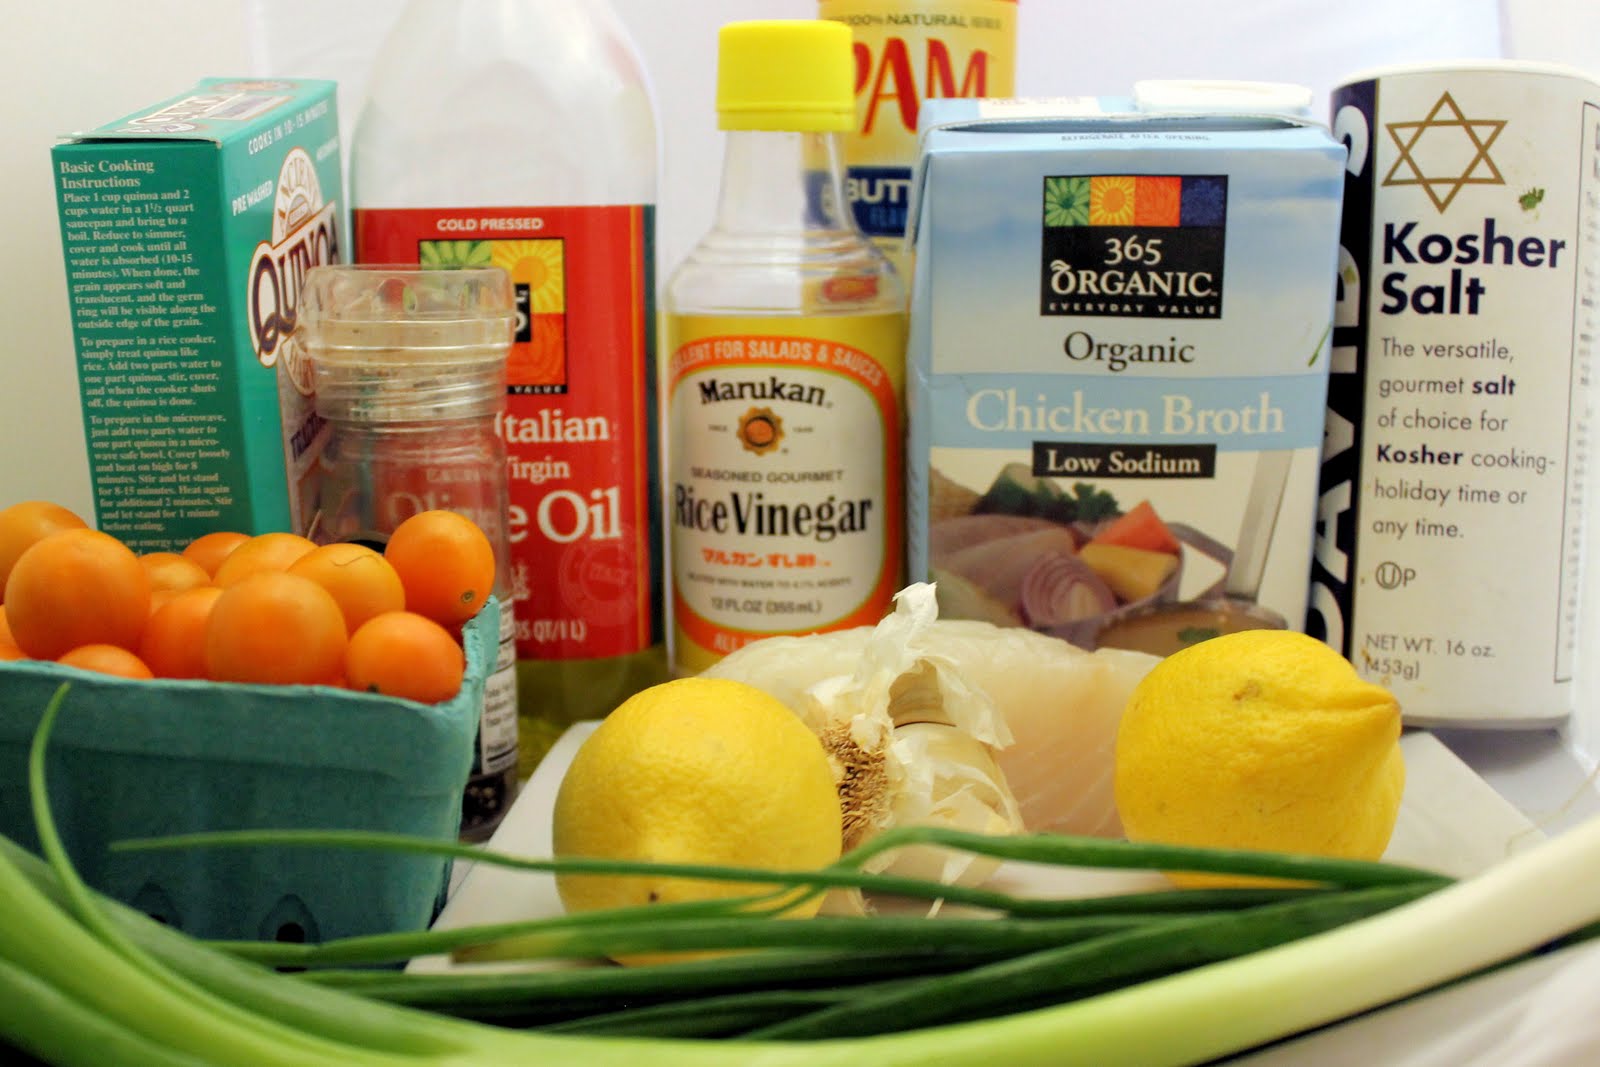
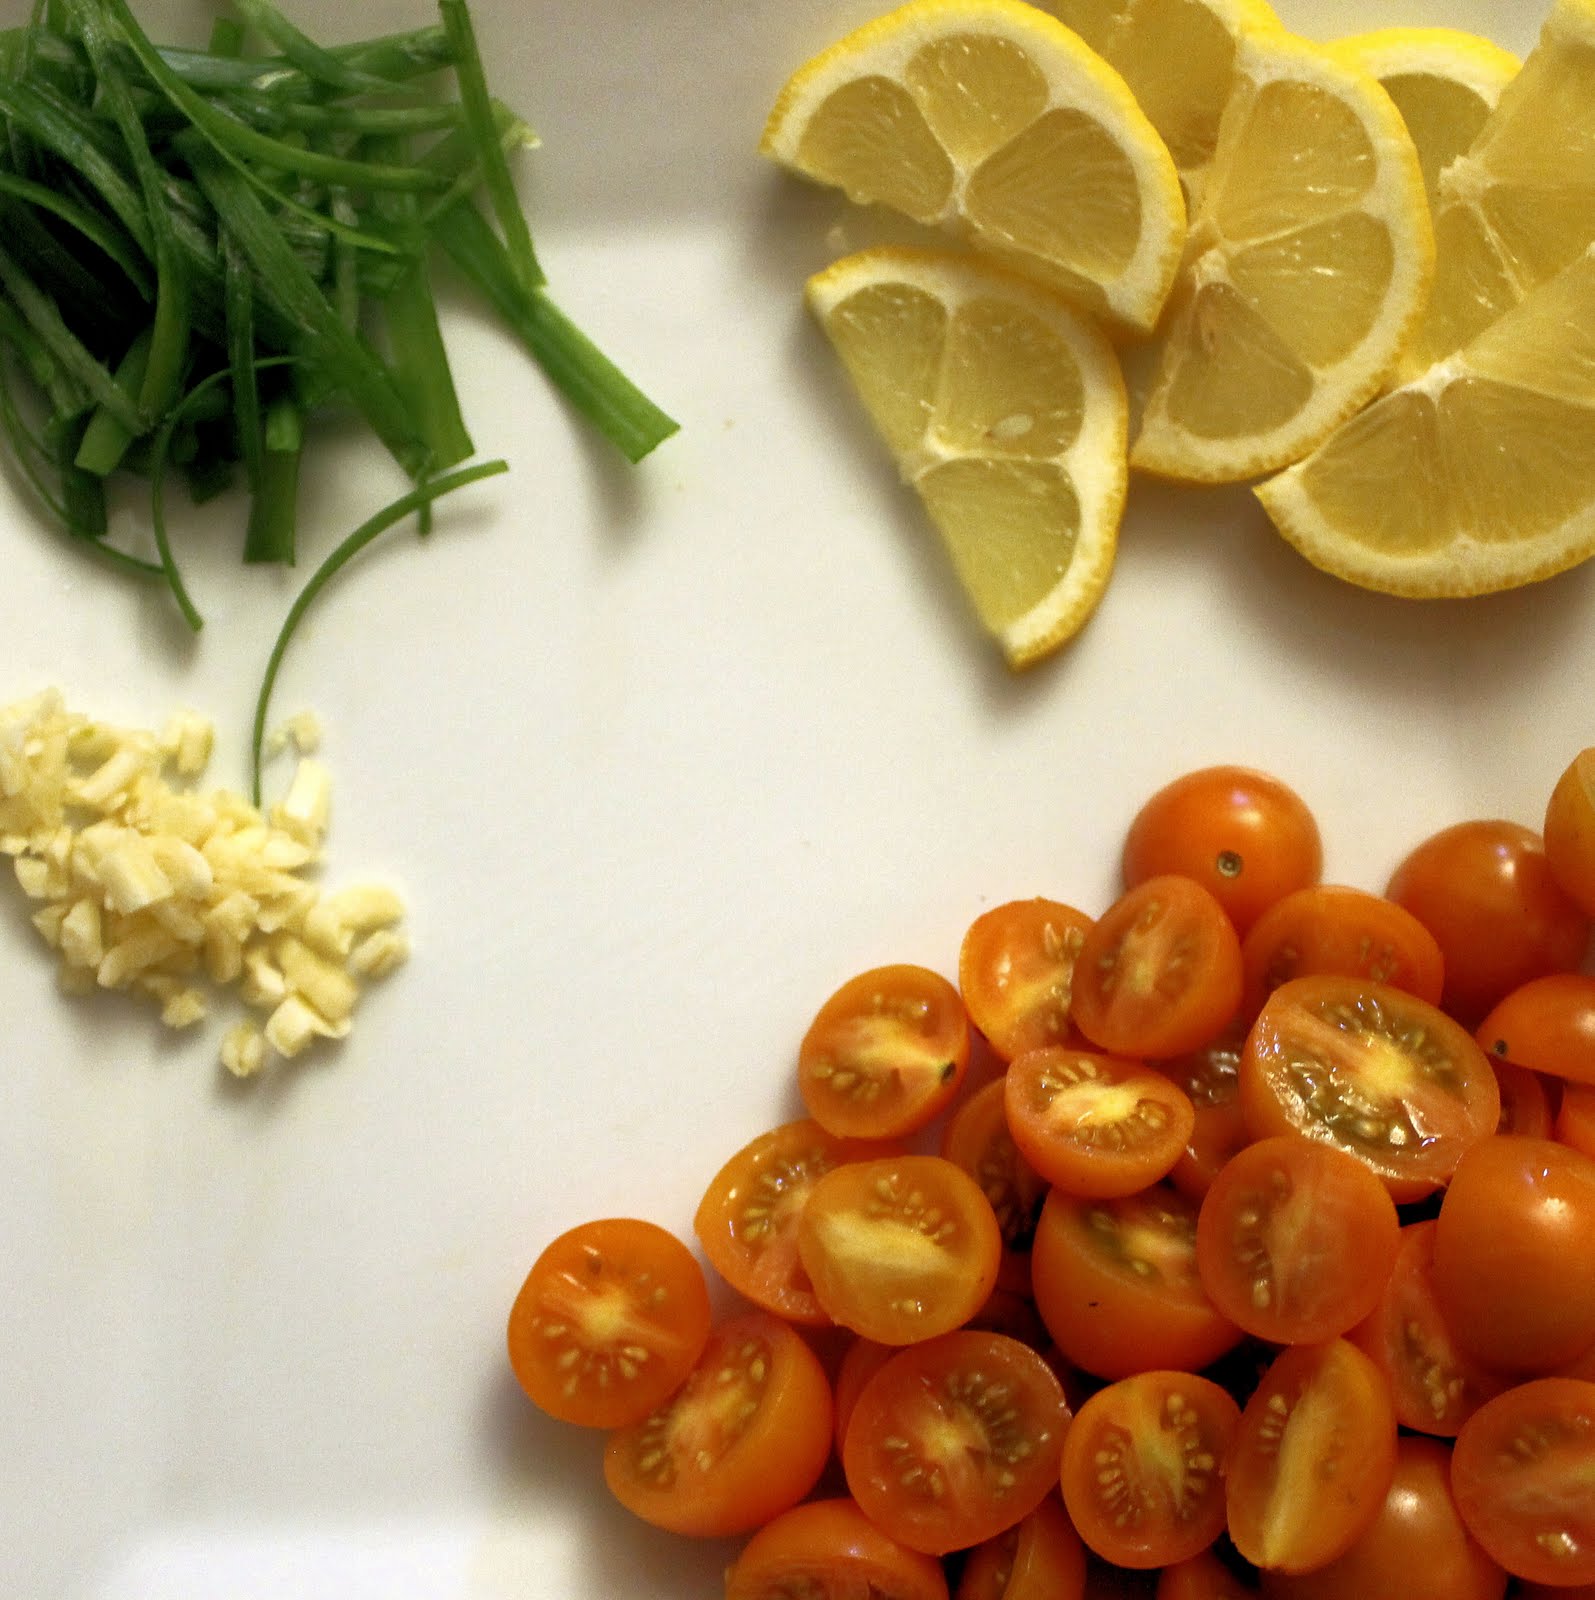
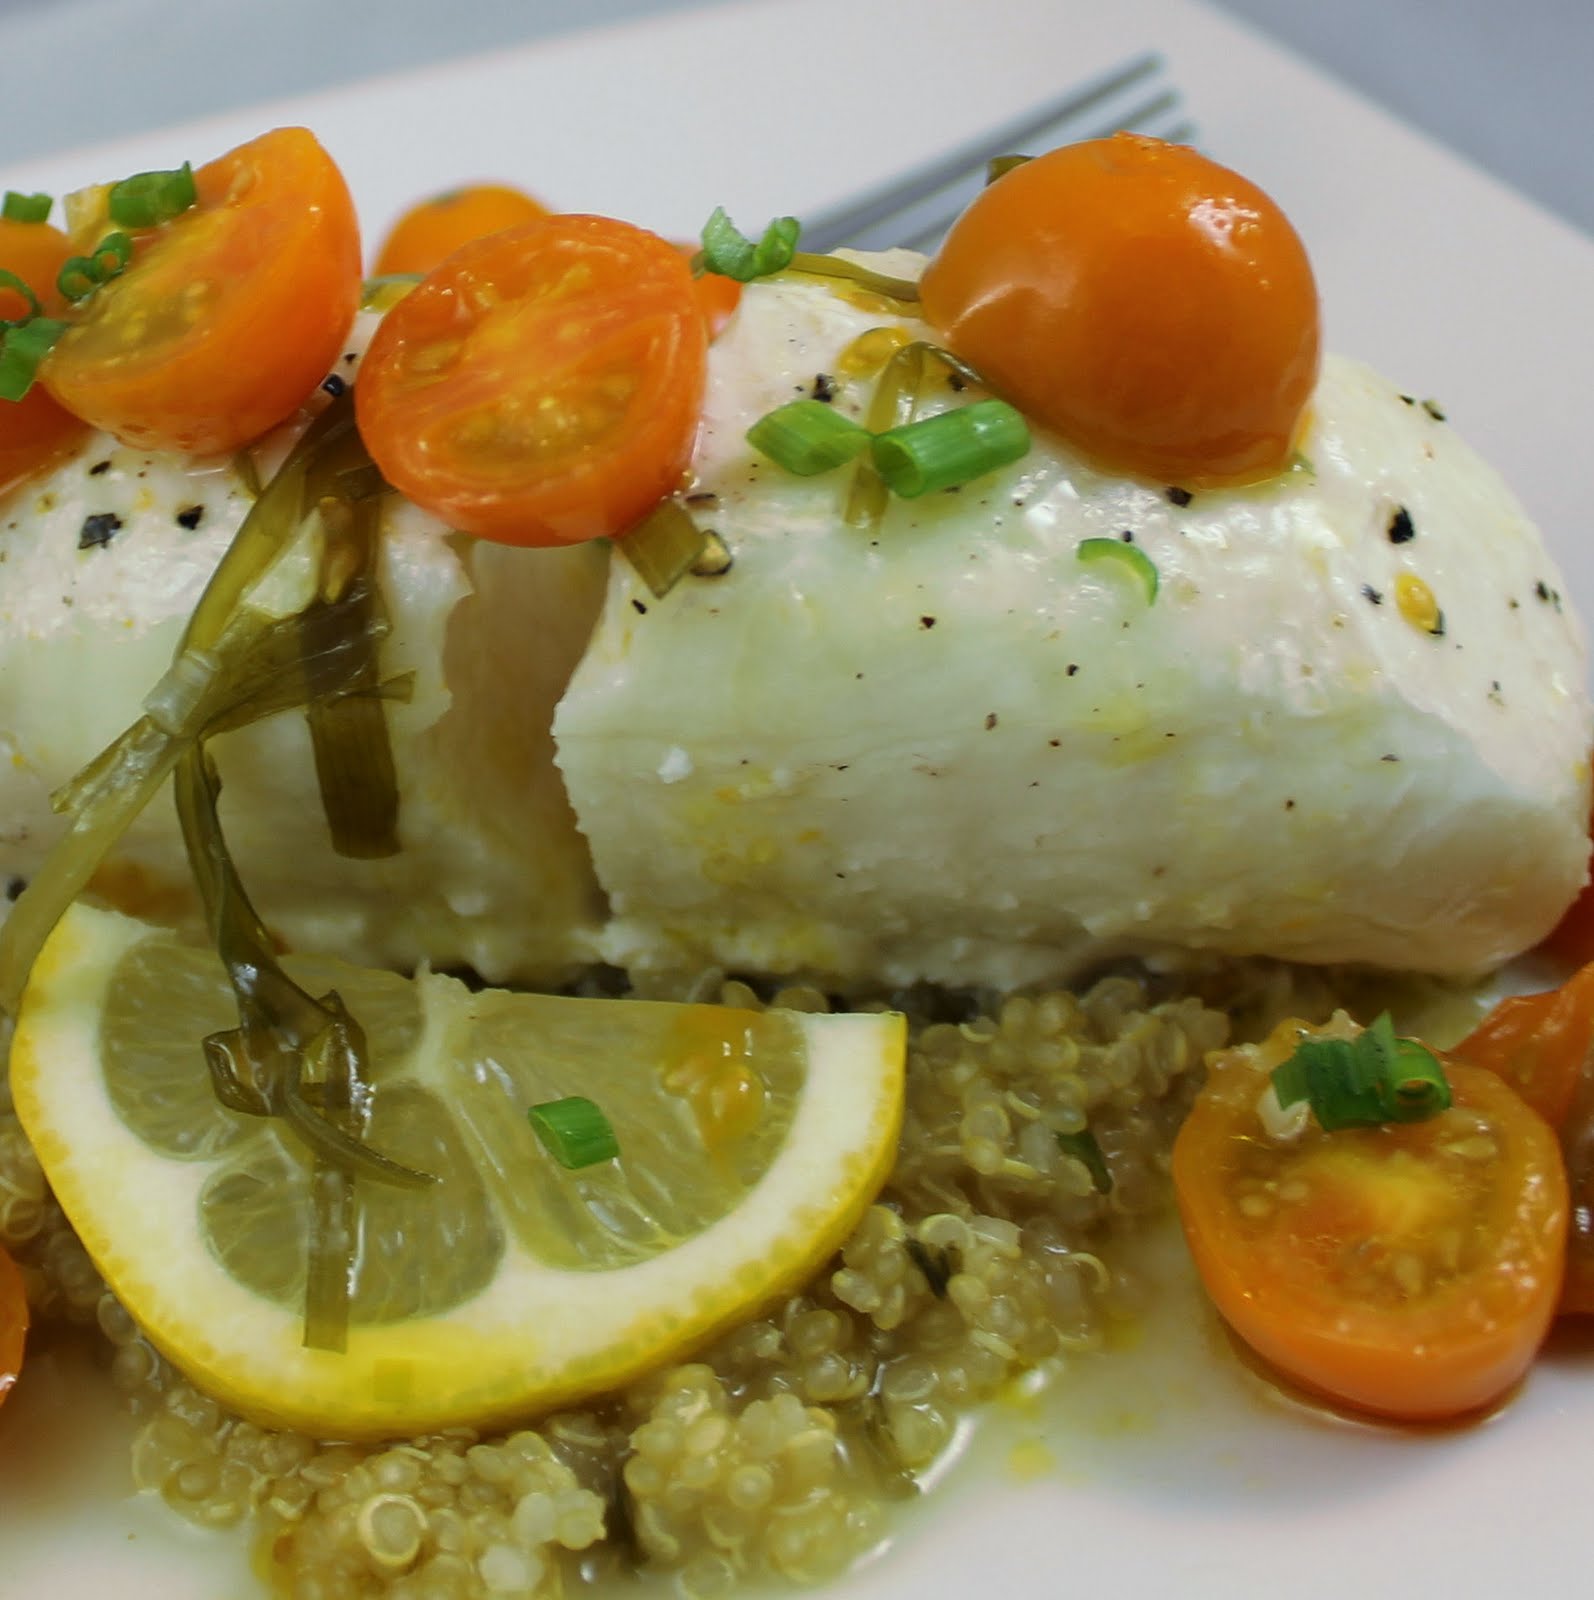
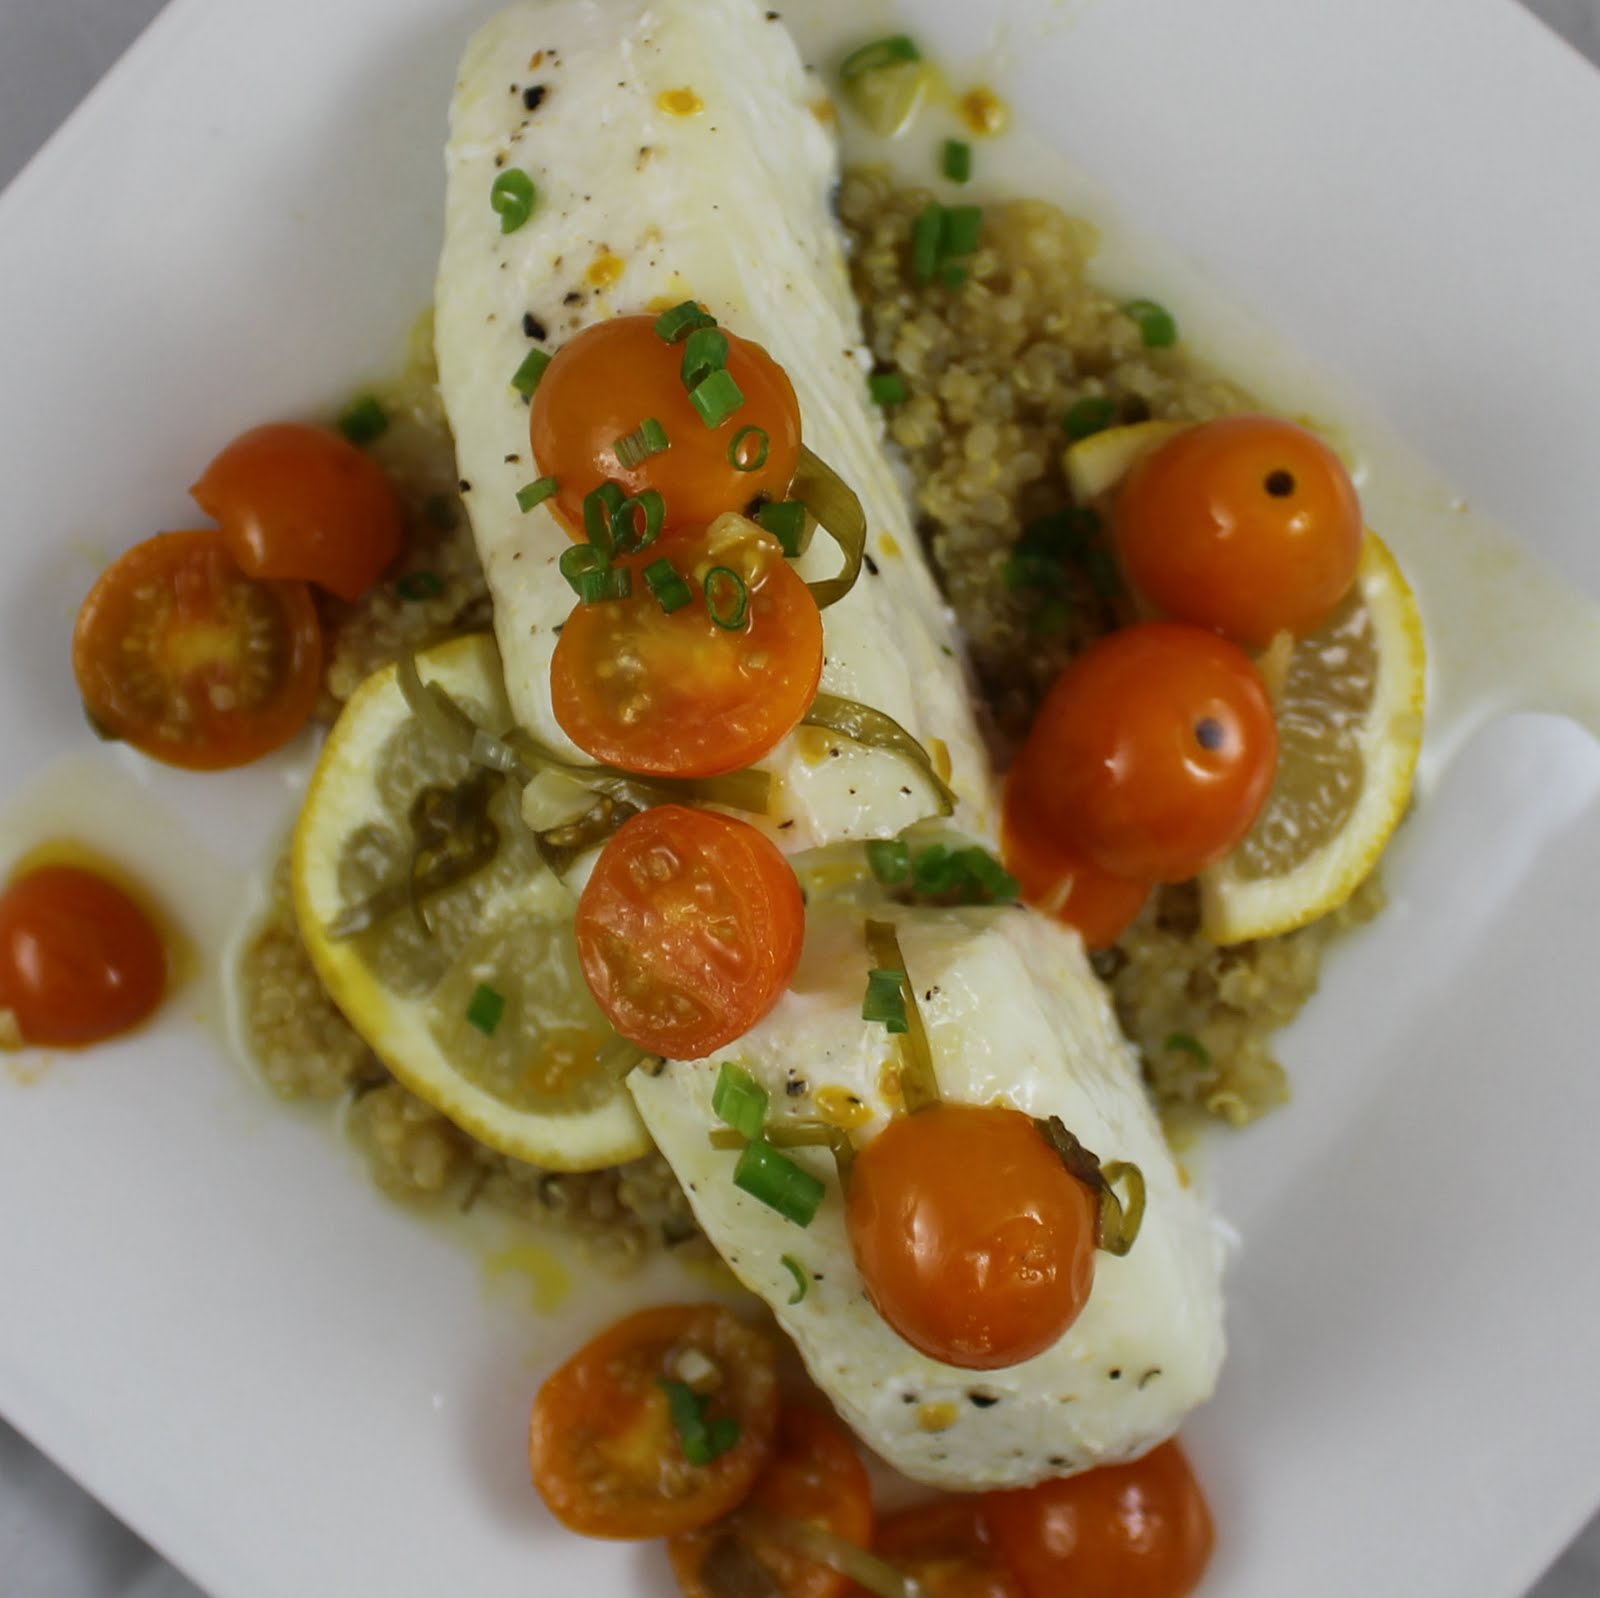
I’m still working through my tomatoes (no complaints here), and I am trying to experiment with different ways to use the tomatoes. I found this recipe for Oven-Roasted Sea Bass with Couscous and Warm Tomato Vinaigrette and used it as a base. I substituted halibut for the sea bass (Chilean sea bass is severely overfished, often illegally, and also has a high content of mercury. Try to buy Pacific halibut because Atlantic halibut is also overfished). I also used quinoa, which was already in my pantry, instead of couscous.
Cut scallion into 3-inch pieces, and those pieces into thin strips (see photo below).
Prepare your garlic, tomatoes, and lemons.
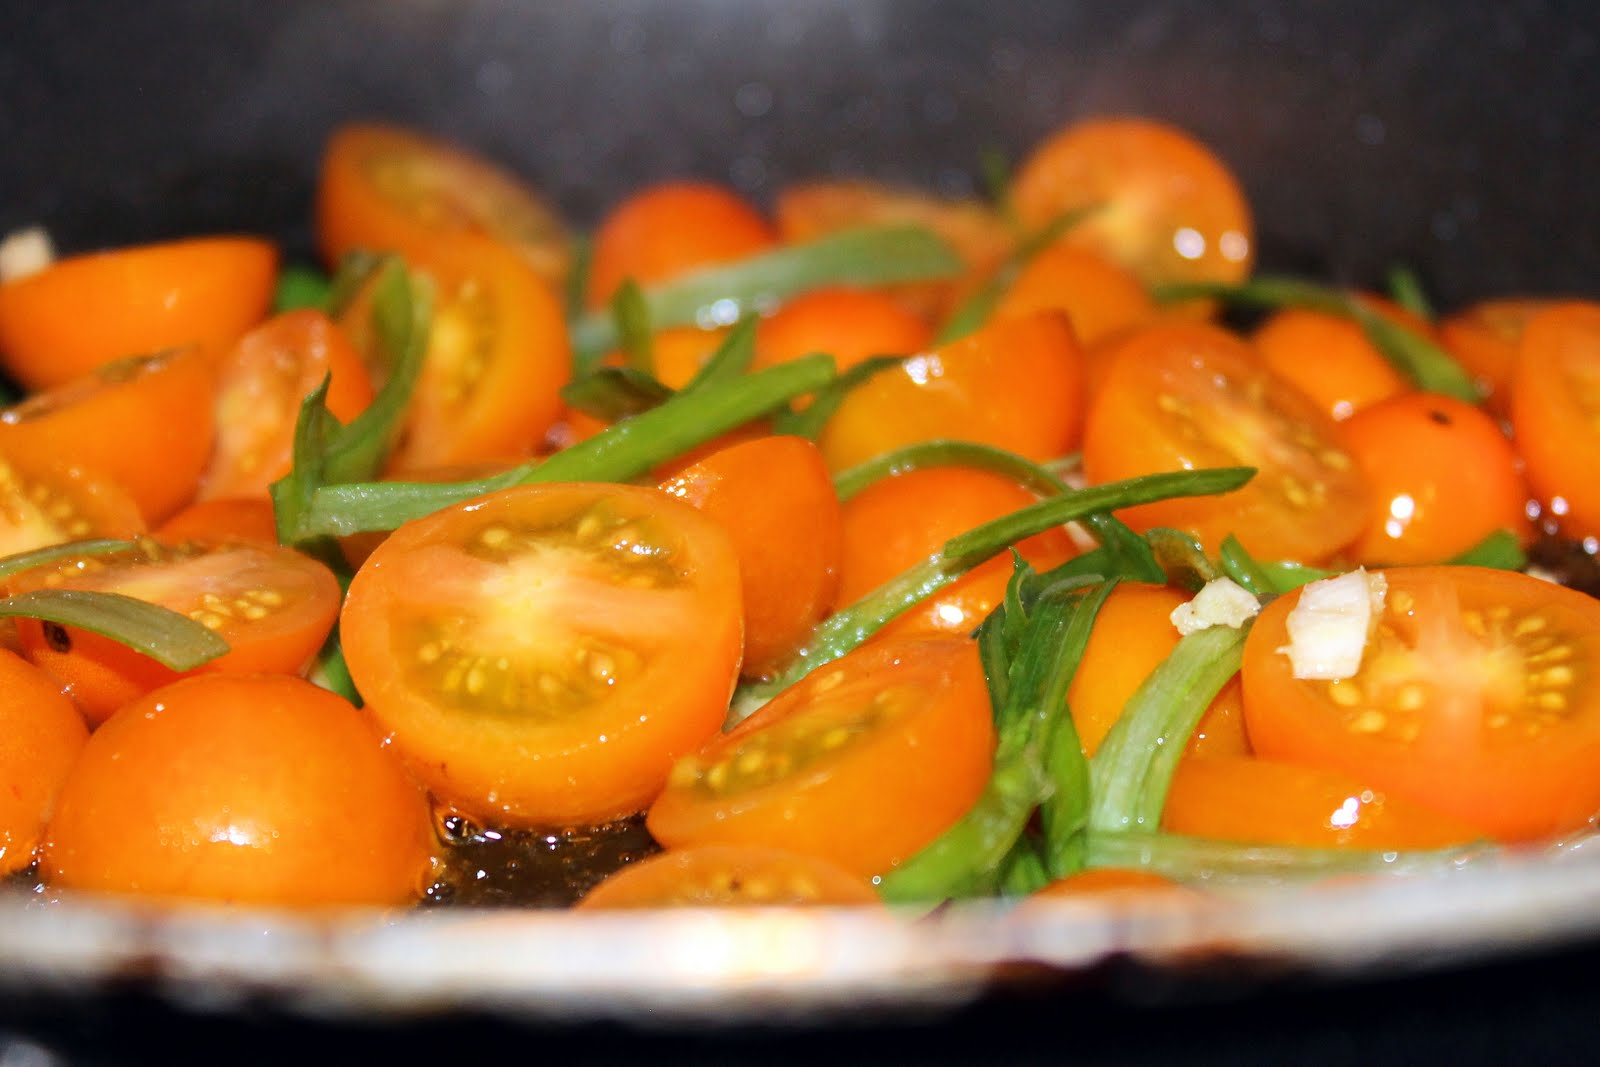
Heat oil in a saute pan over medium-high heat. Add garlic and cook for 30 seconds or until garlic begins to brown.
Add the tomato and scallions and reduce heat to medium, cooking for 1 minute.
Remove from heat; stir in 2 tablespoons lemon juice, vinegar, and 1/2 teaspoon salt. Keep warm.
Combine 1 tablespoon lemon juice, 1/4 teaspoon salt, and chicken broth in a medium saute pan and bring to a boil. Gradually stir in quinoa and chopped chives and cook for 15 minutes on low. heat Remove from heat; cover and let stand 5 minutes.
Fluff with a fork. Cover and keep warm.
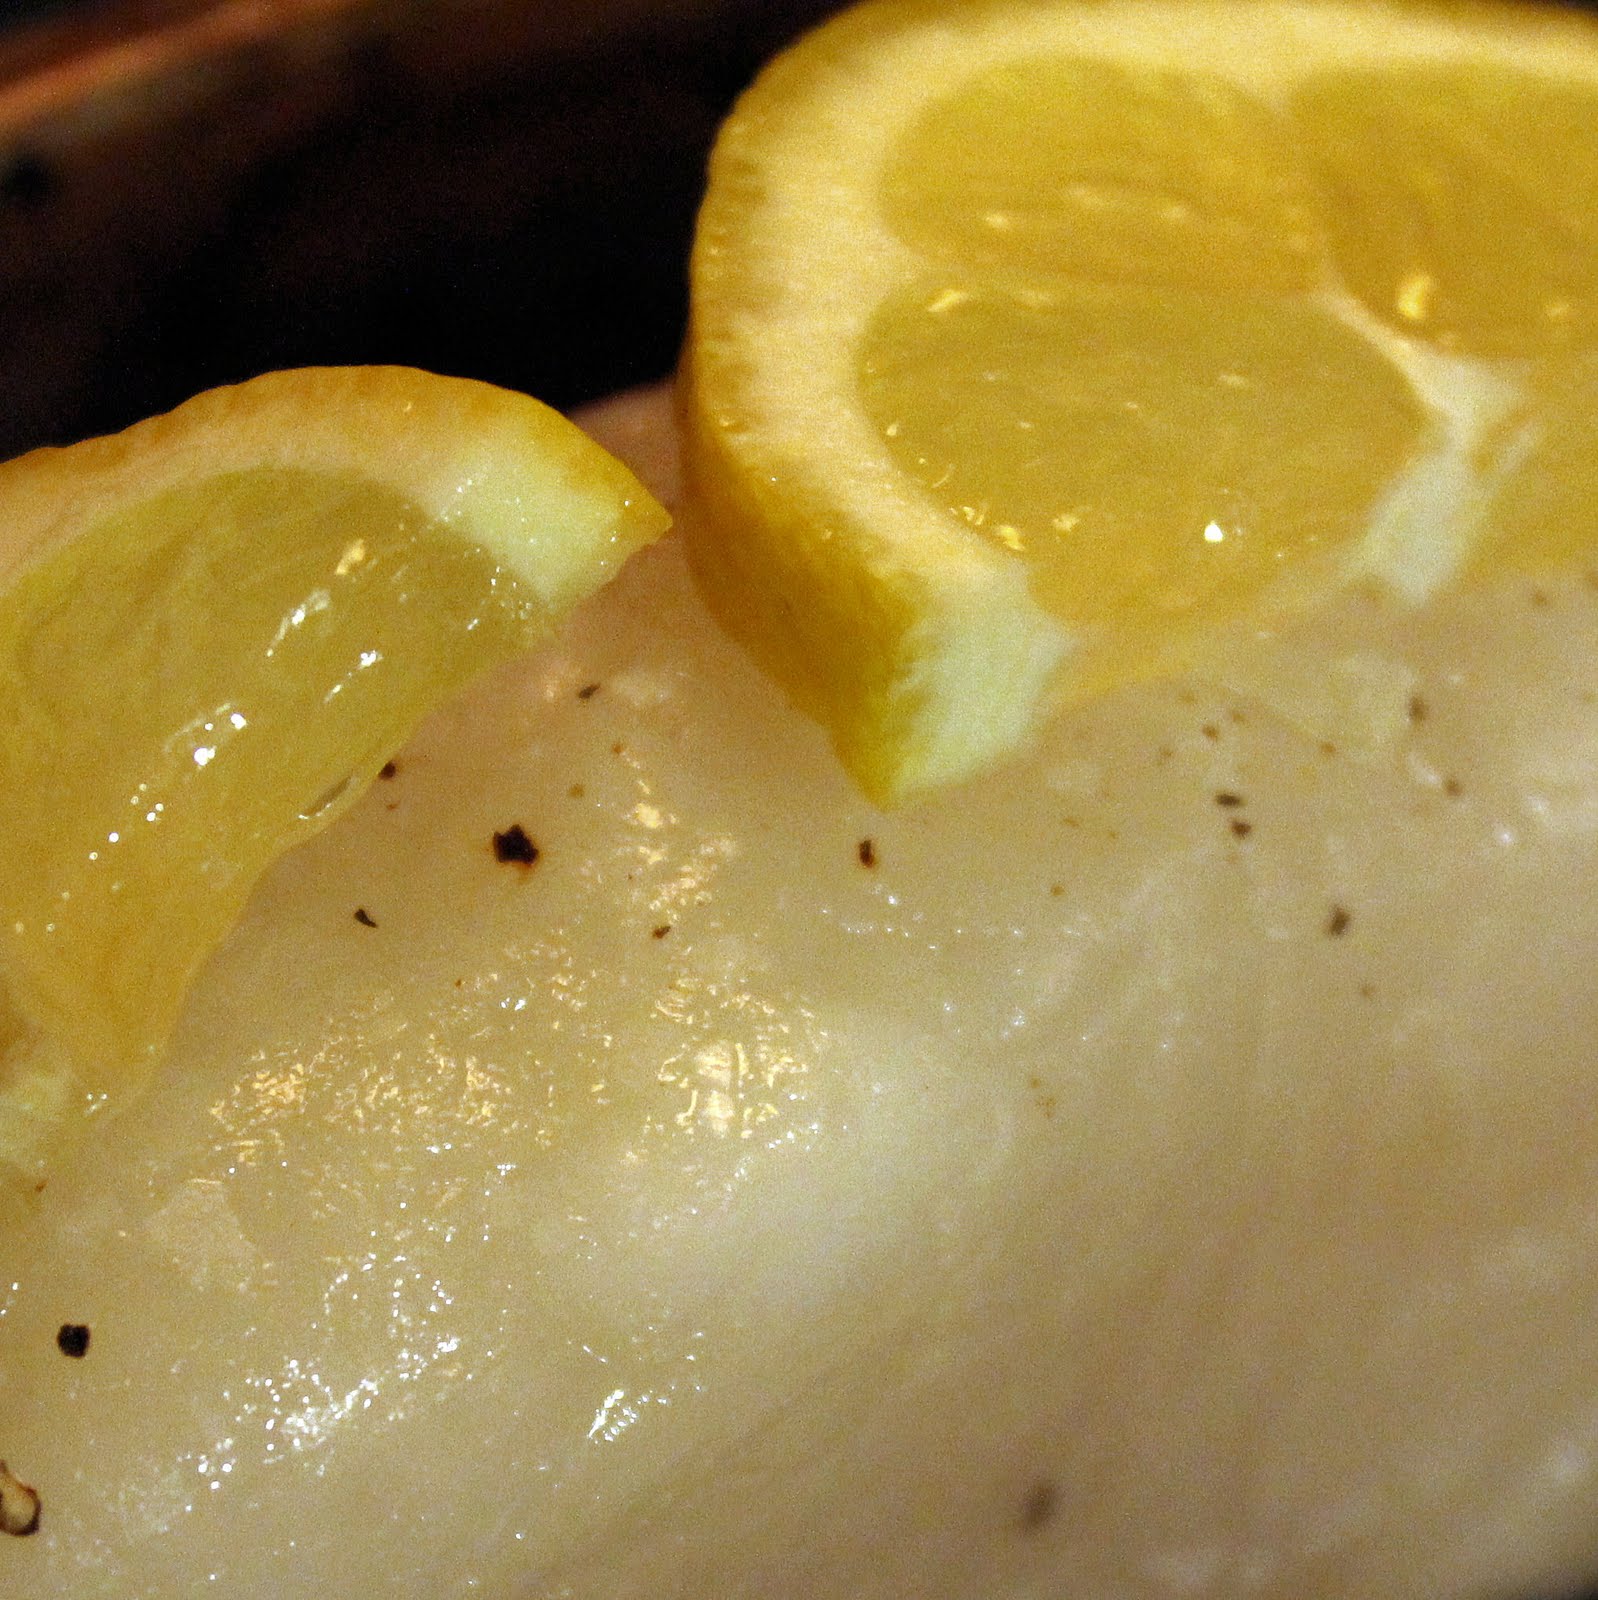
Season fish with salt and pepper. Place fillets on a baking dish coated with cooking spray. Place 4 halved lemon slices on each fillet.
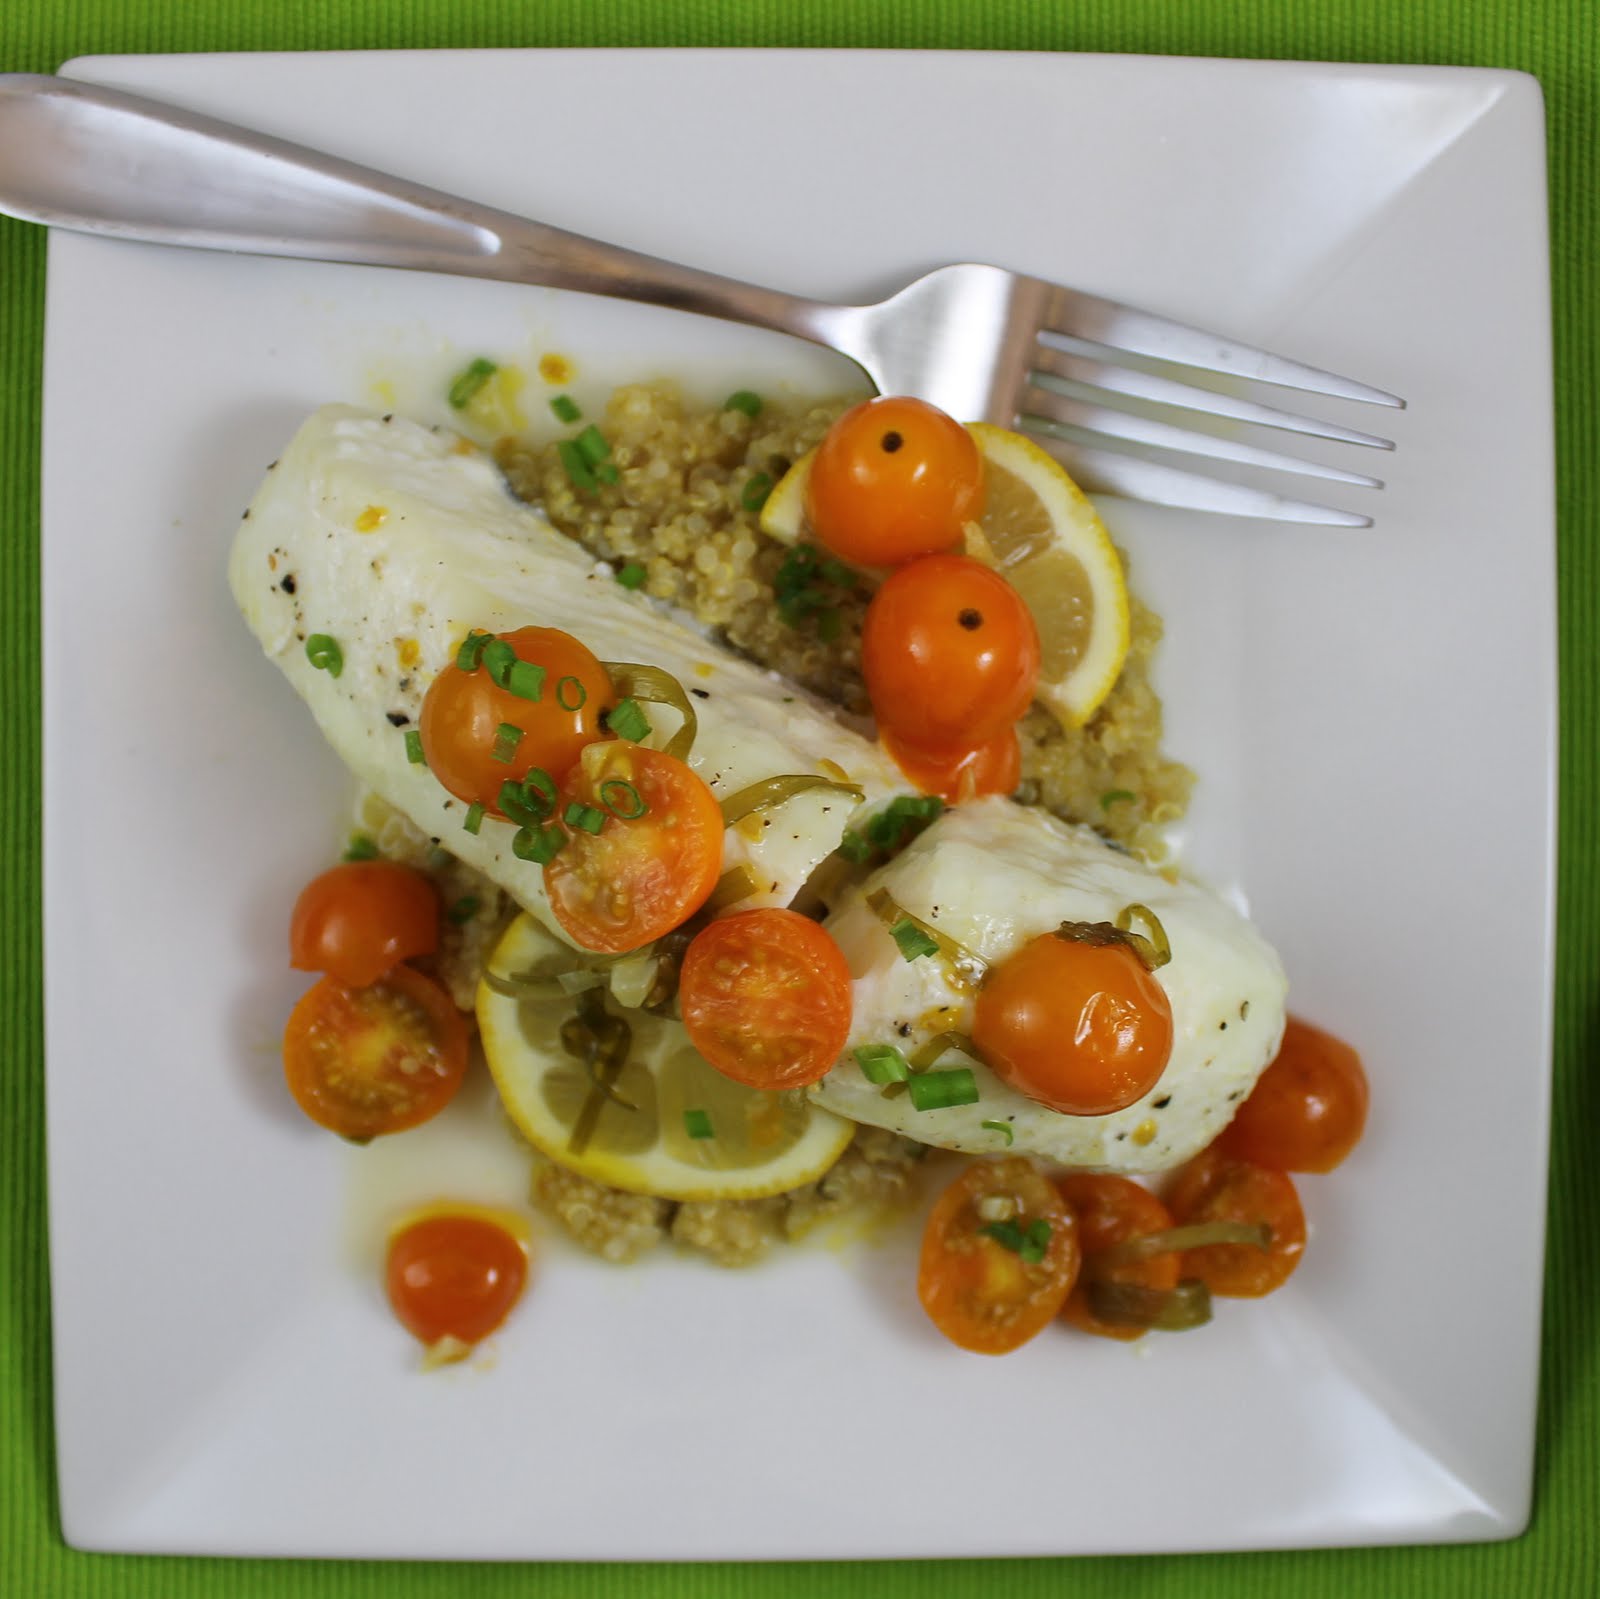
Bake at 350° for 20 minutes or until fish flakes easily when tested with a fork. Serve over quinoa, and top with vinaigrette. Garnish with more chives, if desired.
These ingredients worked SO well together. The tomatoes added a slight sweetness to the vinaigrette, which brightened up the entire dish. The quinoa added a nice earthy flavor.
Be sure to top the halibut with a lot of the tomato vinaigrette. I actually went back for more for my serving.
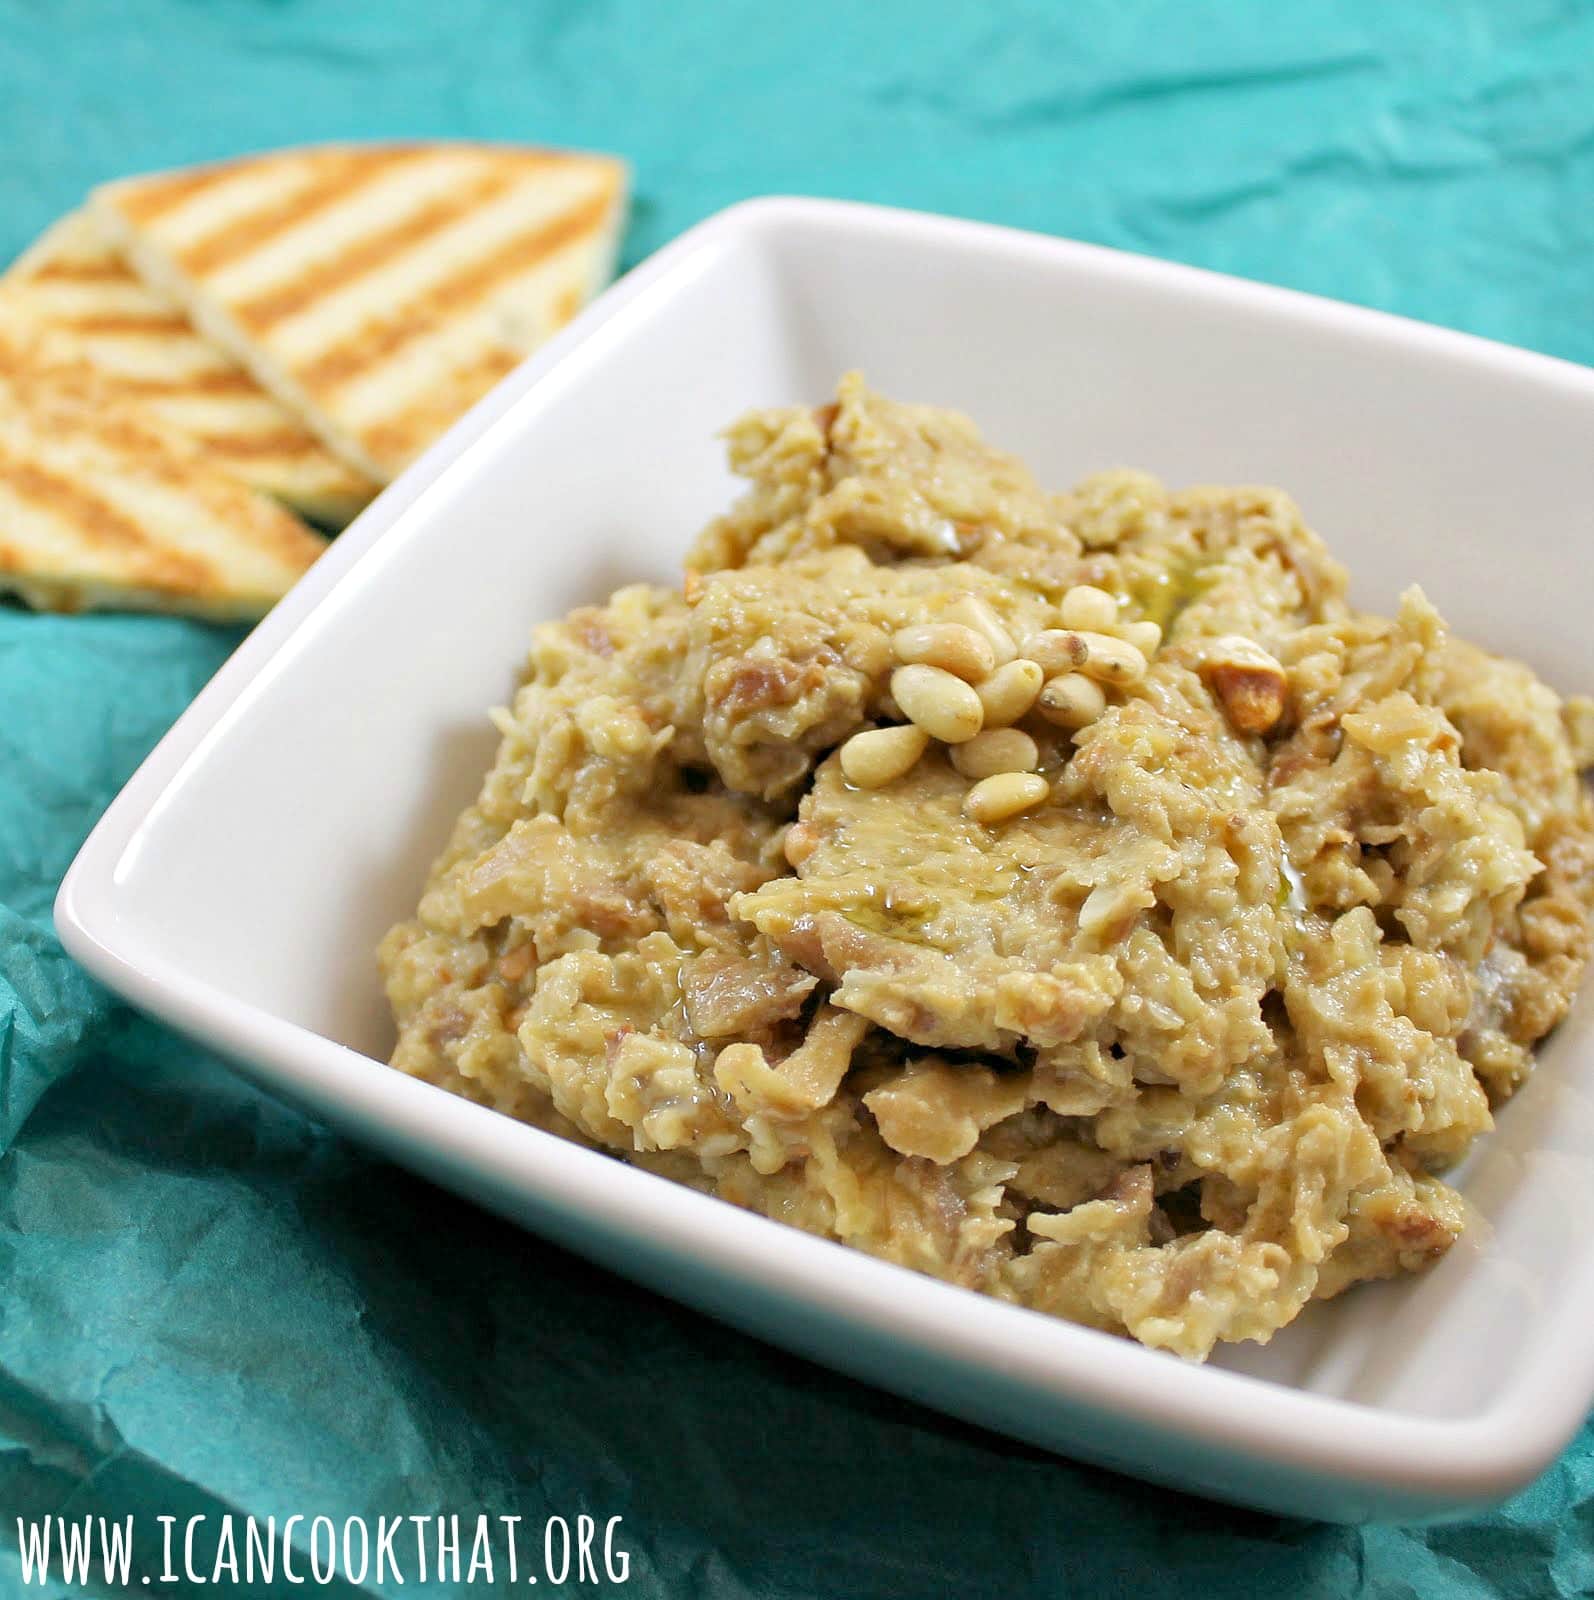
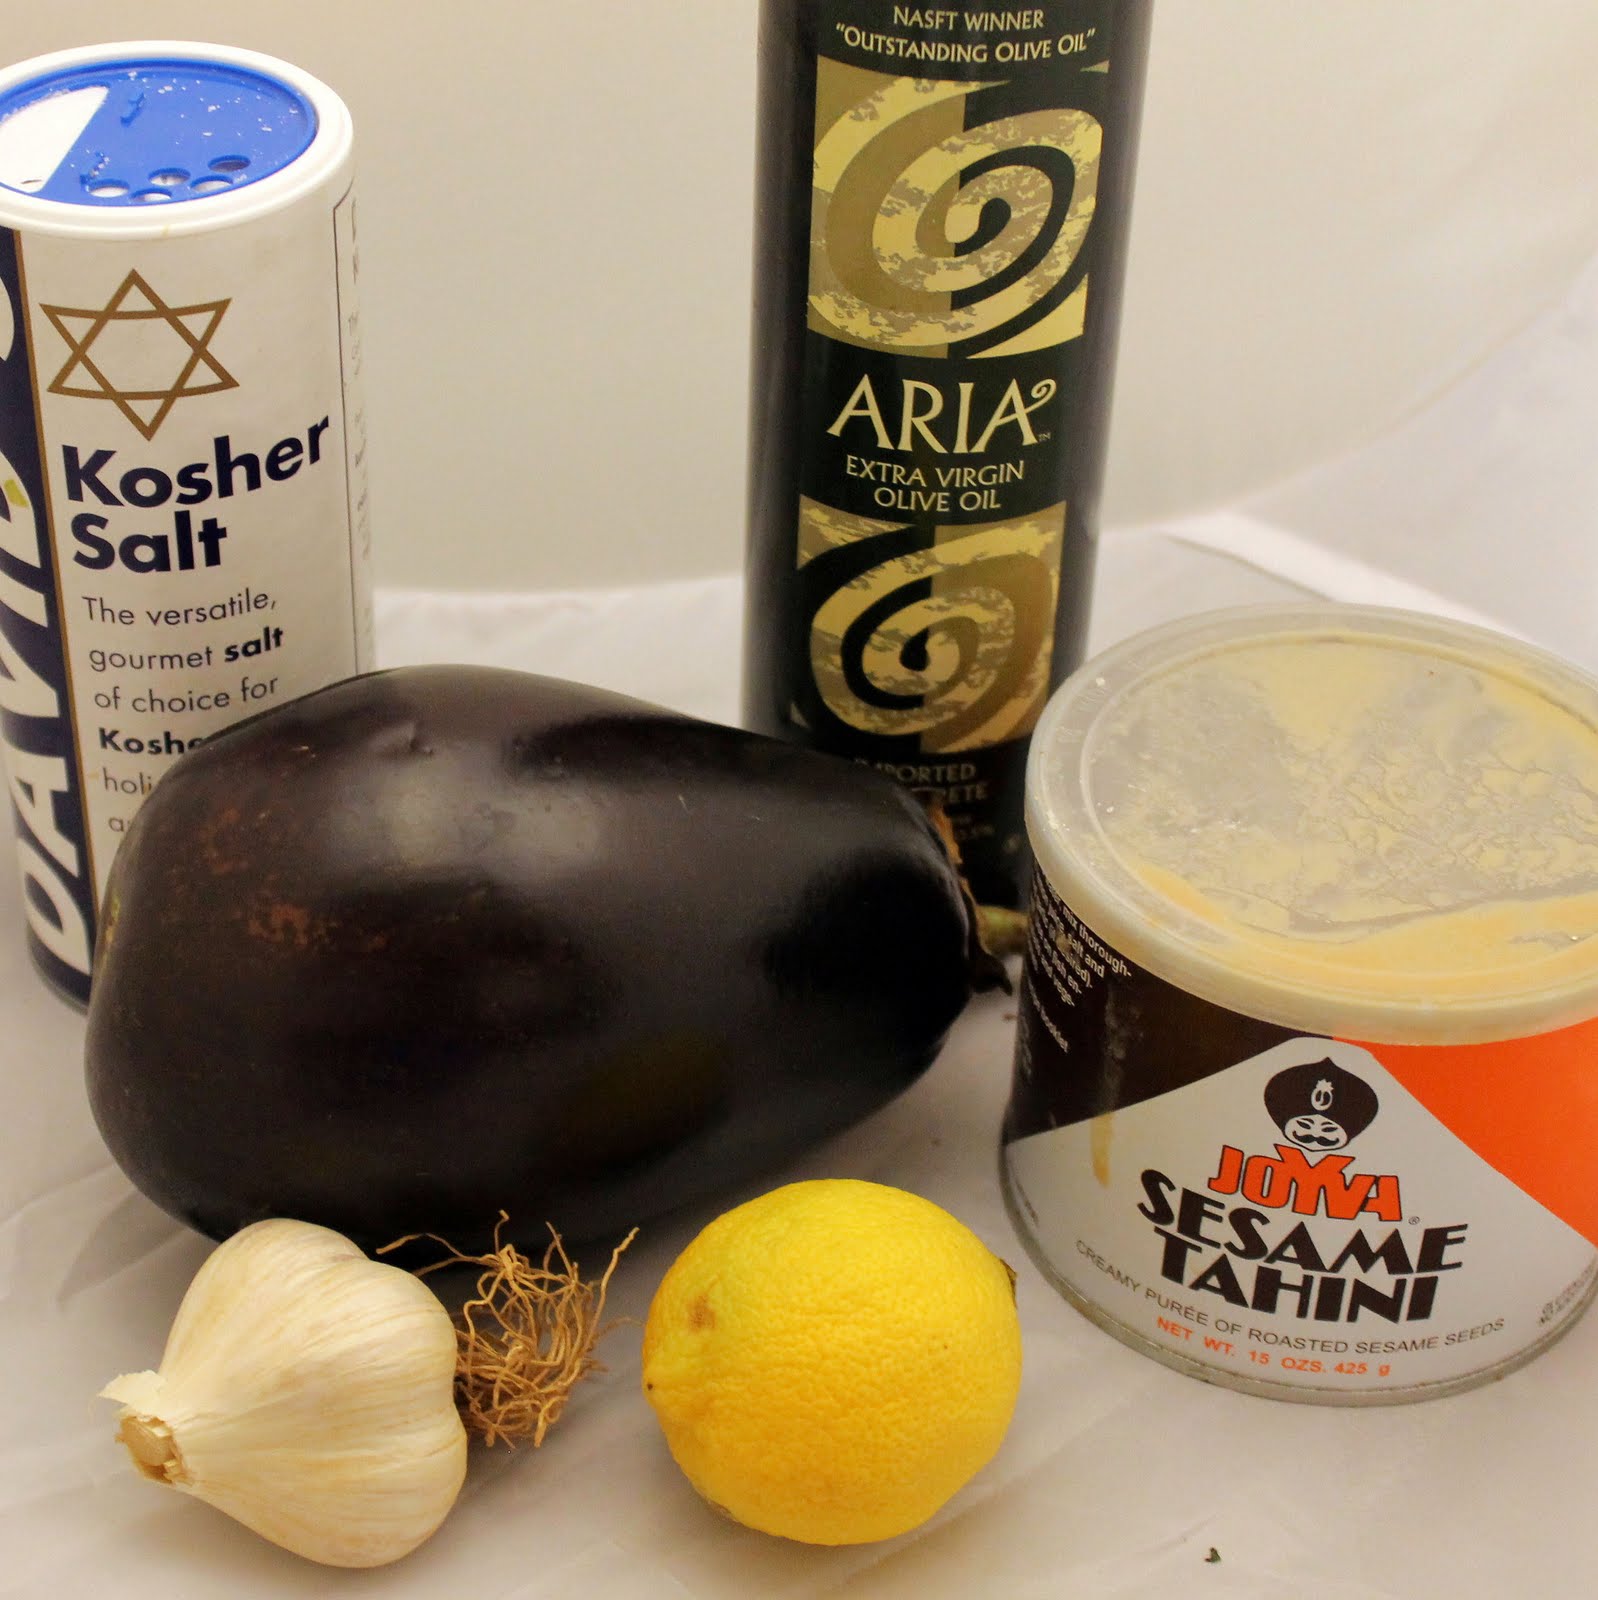
My CSA share came with eggplant this week. My mind went immediately to Baba Ghannouj, which is sort of like hummus with eggplant substituted for the chickpeas. The eggplant is grilled or baked before pureeing it to give it a smoky flavor. I have never worked with eggplant before, so I used Eating Well’s recipe as a base for my baba ghannouj.
Ingredients:
1 eggplant
2 cloves of garlic (unpeeled)
2 tablespoons lemon juice, plus zest from the lemon
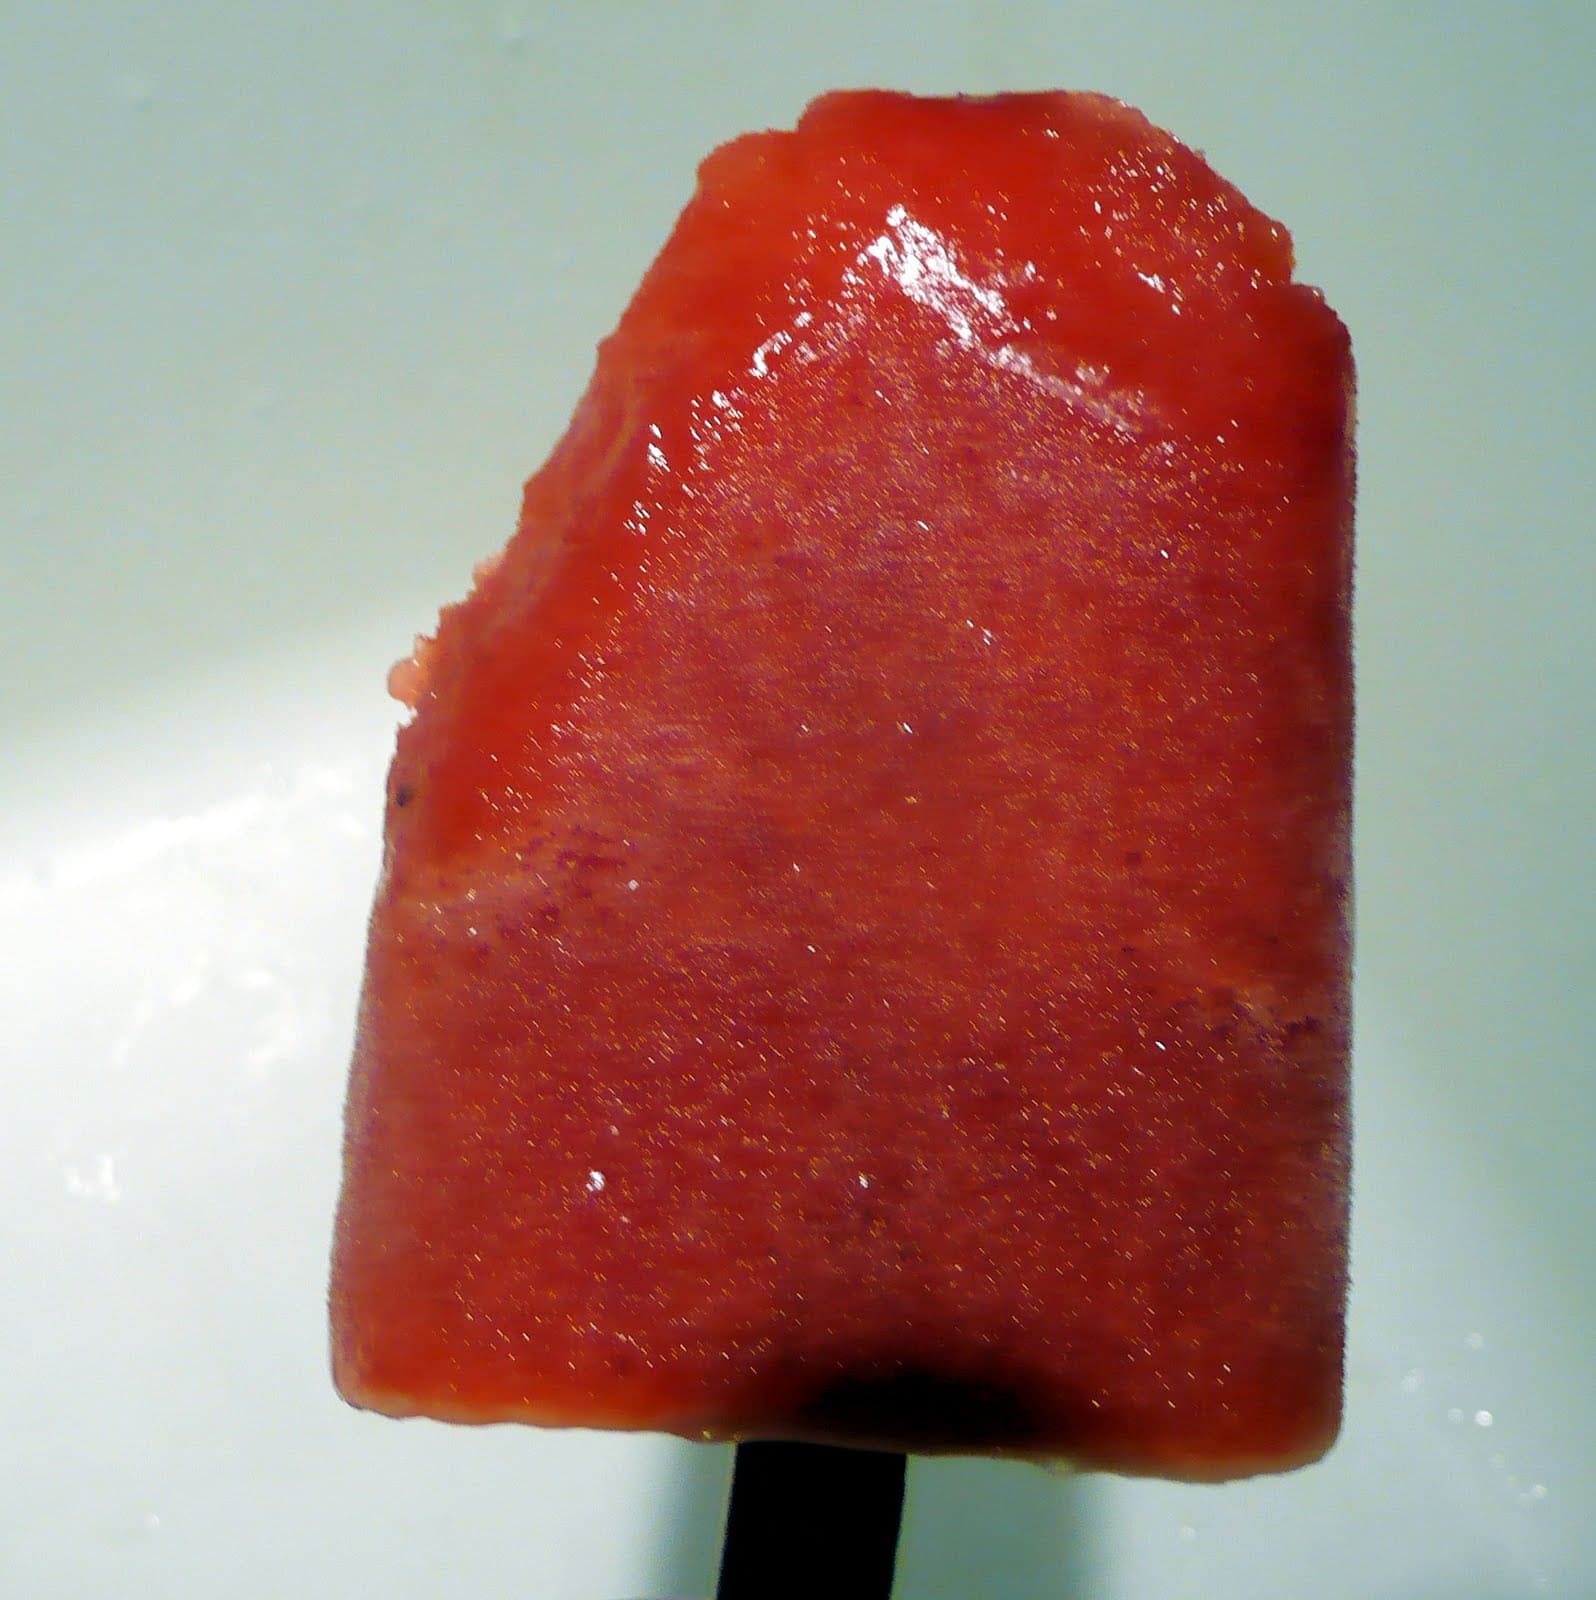
Coming back to the Philadelphia heat after nearly two weeks in Ireland was a bit of a shock to my system. I was in desperate need for a way to cool down, and what better way than through a cool dessert? Cooking Light‘s Sparkling Strawberry Pops seemed to be the perfect choice. (Please excuse the quality of these photos. I managed to lose the battery charger for my new camera, and am waiting for the replacement to be delivered so these were taken on a pretty crummy alternative.)
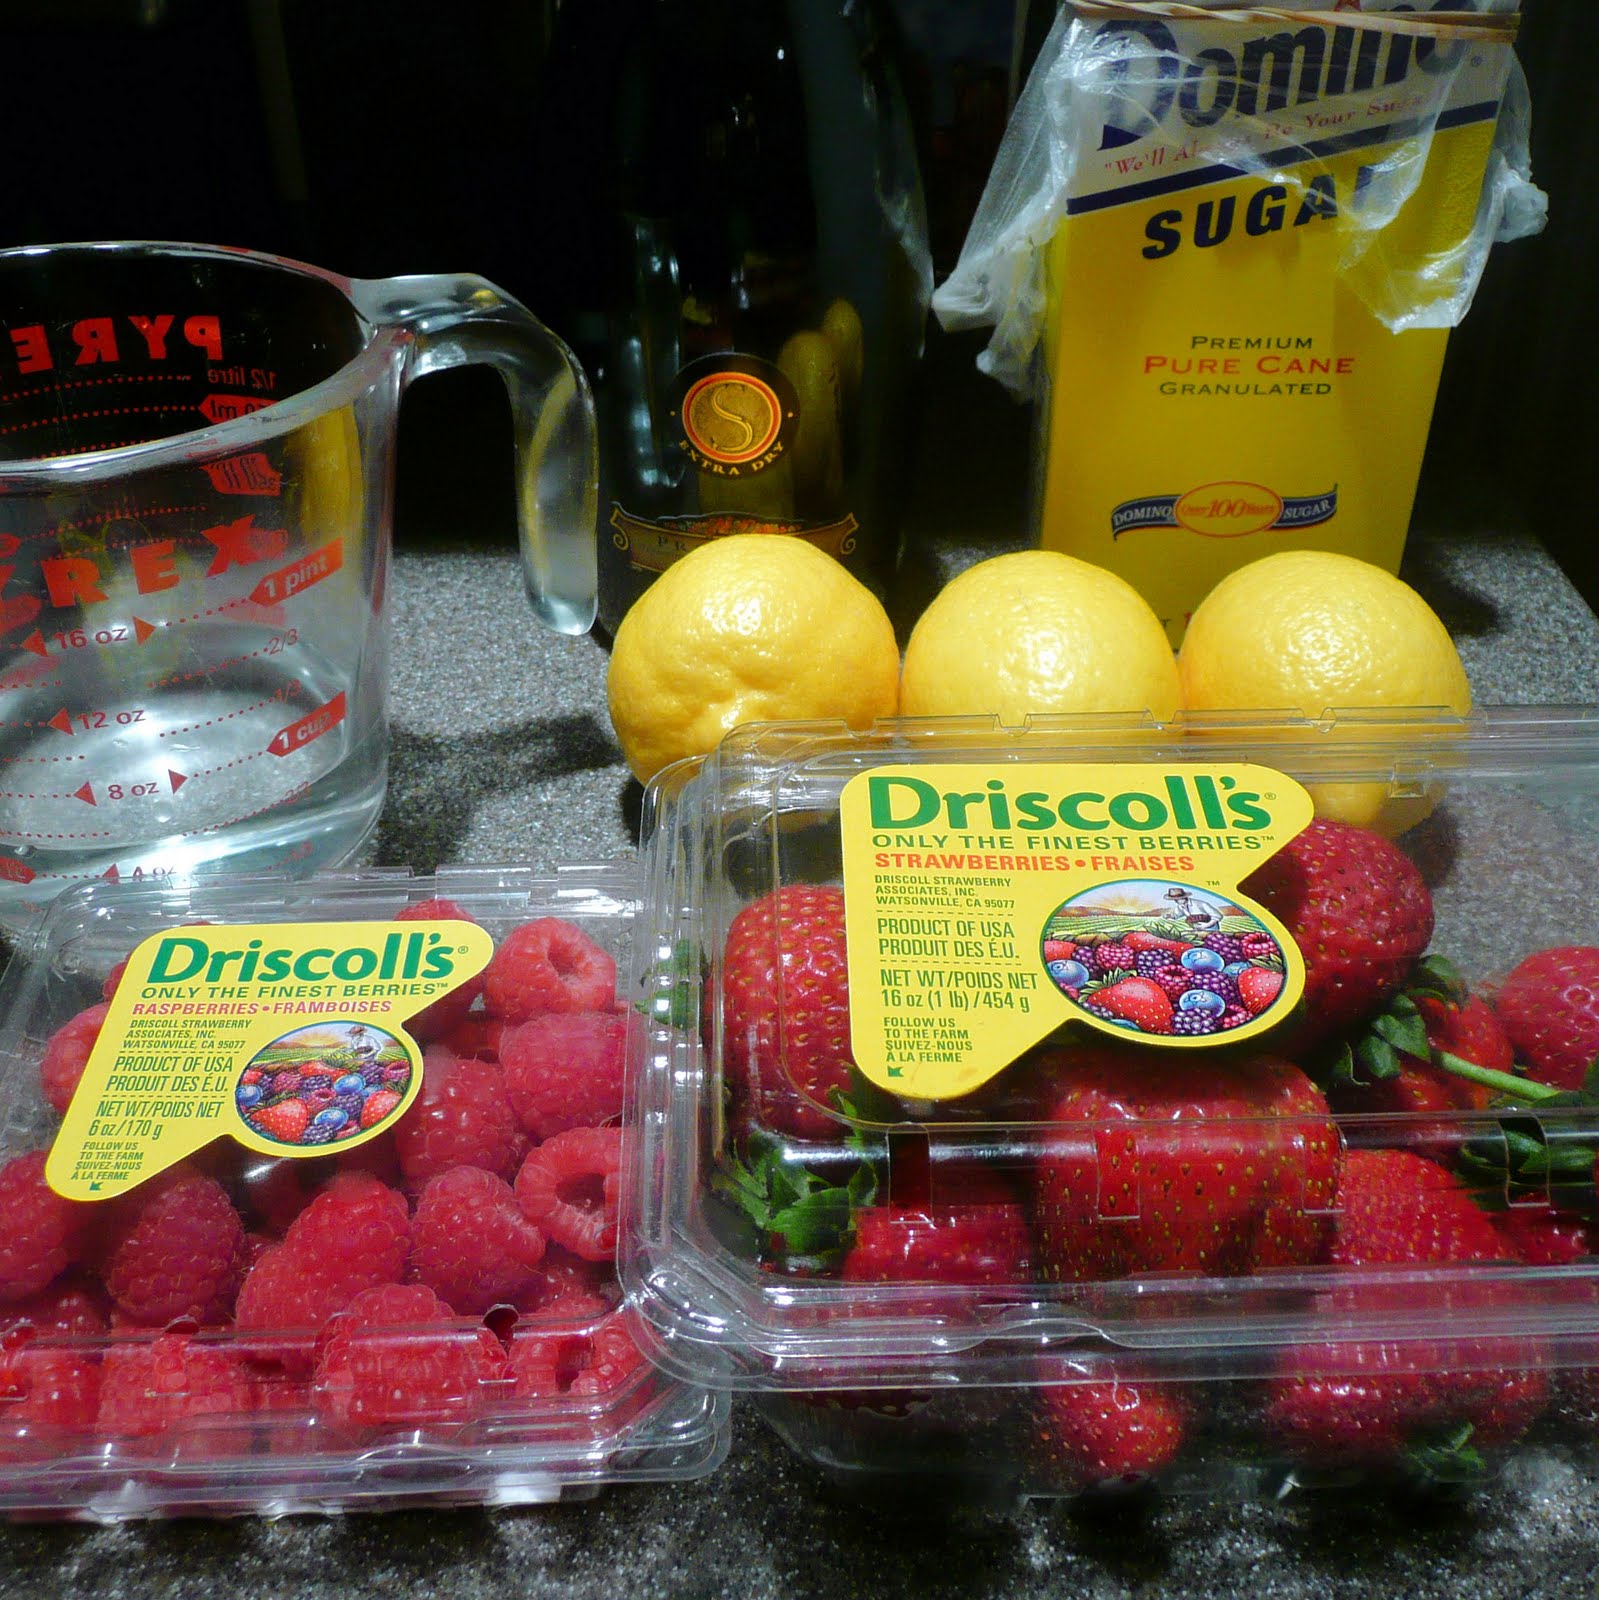
Ingredients:
1 cup sugar
1/4 cup water
3 cups sliced fresh strawberries (1 pound) or a 1 lb mixture of berries
1 tablespoon fresh lemon juice
2/3 cups chilled Sparkling Wine (I used Prosecco)
I had to change the original recipe (linked above) a bit because I realized I didn’t have any corn syrup and was just too darn lazy to go out and buy some. This recipe is also halved from the original. You will need to have a Popsicle mold to make these. If you don’t have one, this might also work just as a “water ice” type treat; try just freezing the mixture in a bowl (if anyone tries this, please let me know how it turns out).
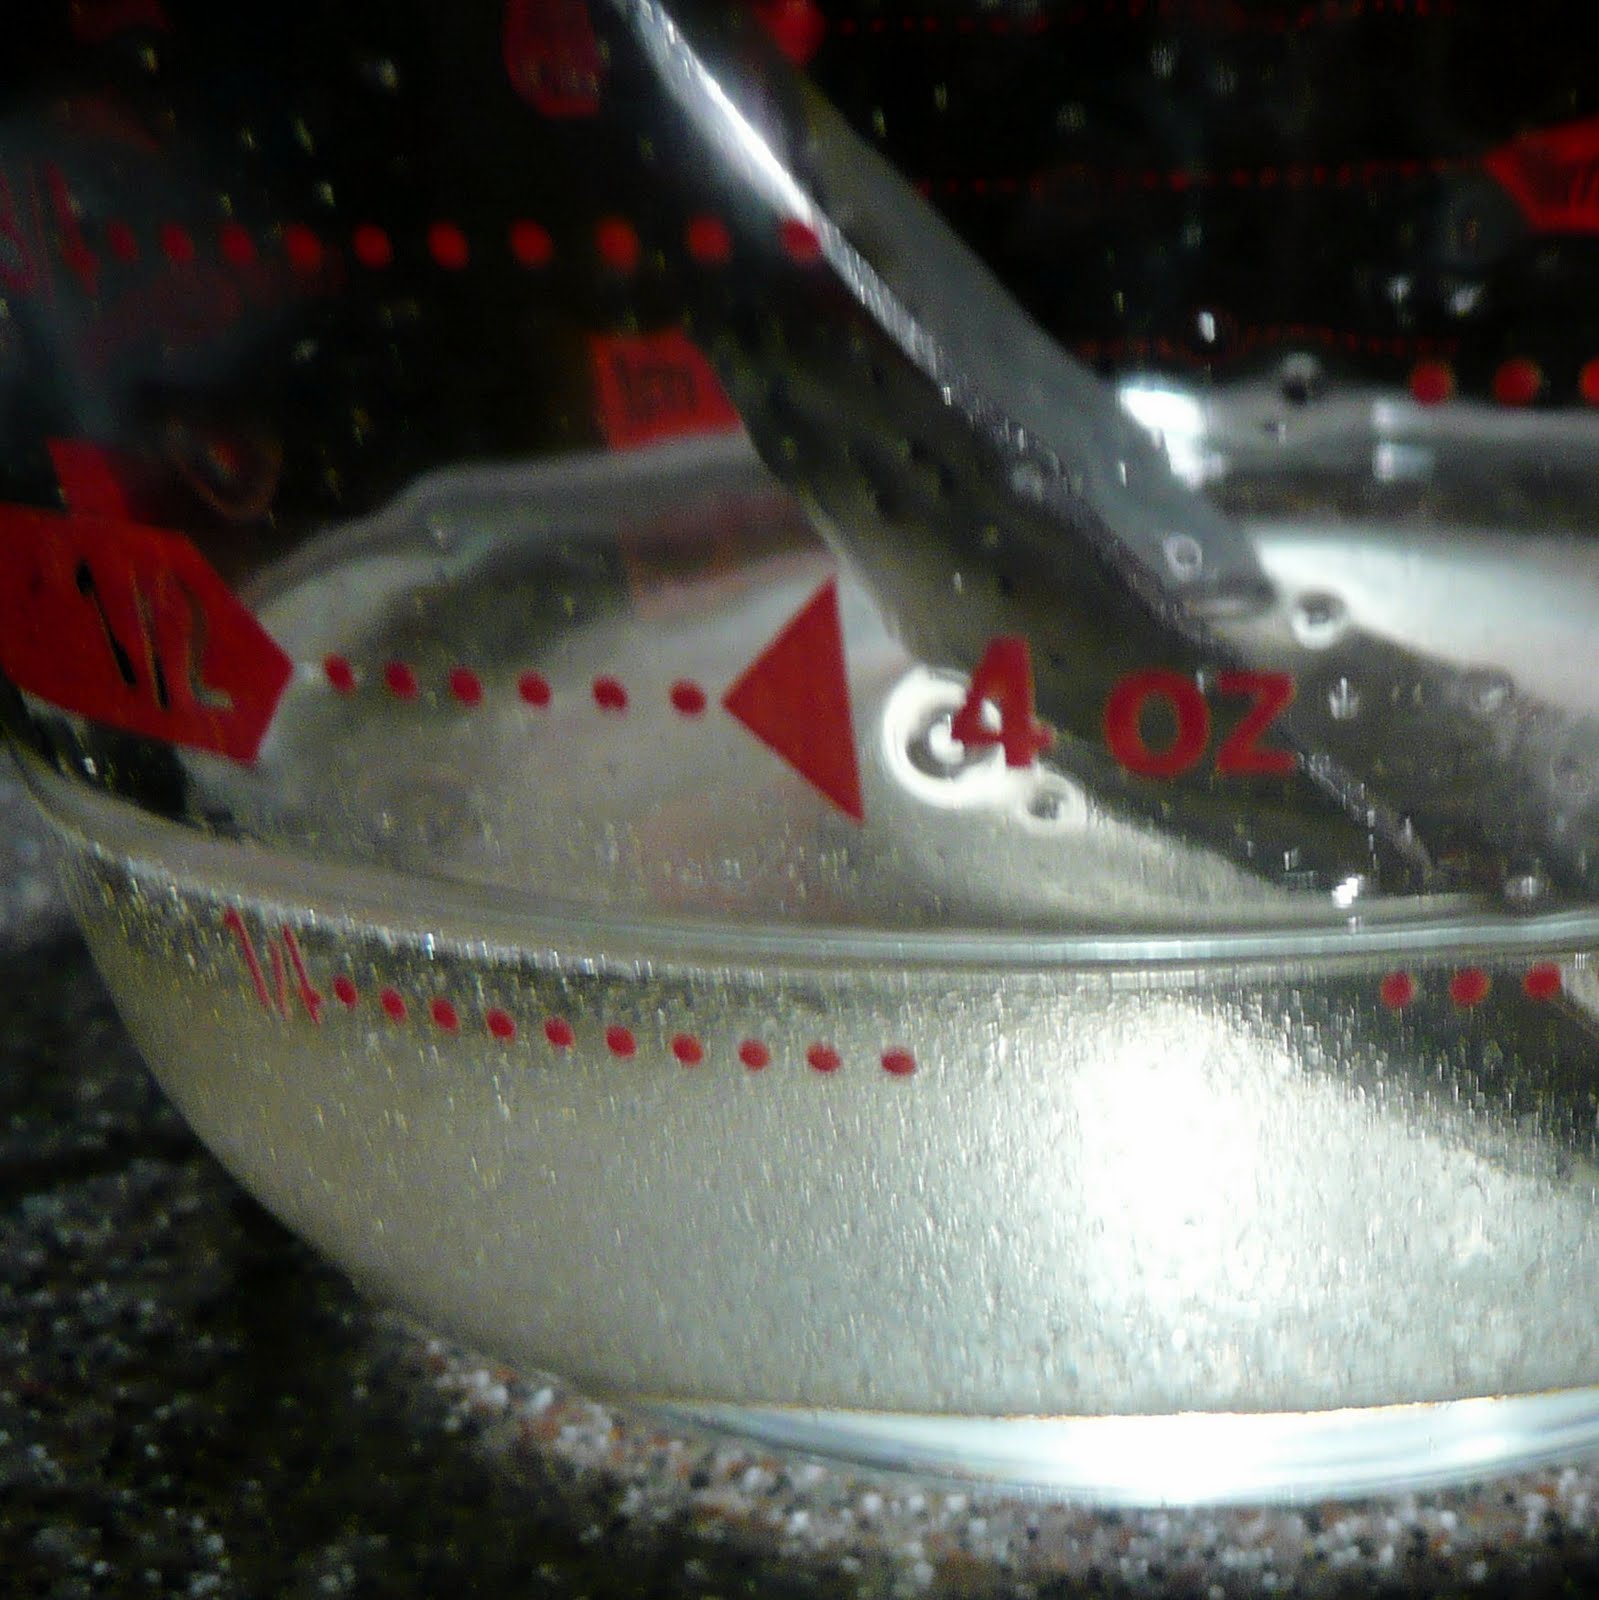
To make, combine the sugar and water in a microwave-safe bowl and microwave for 3 minutes or until it begins to boil. Remove from the microwave and stir until the sugar dissolves. It will have almost a corn syrup-like texture. Let cool.
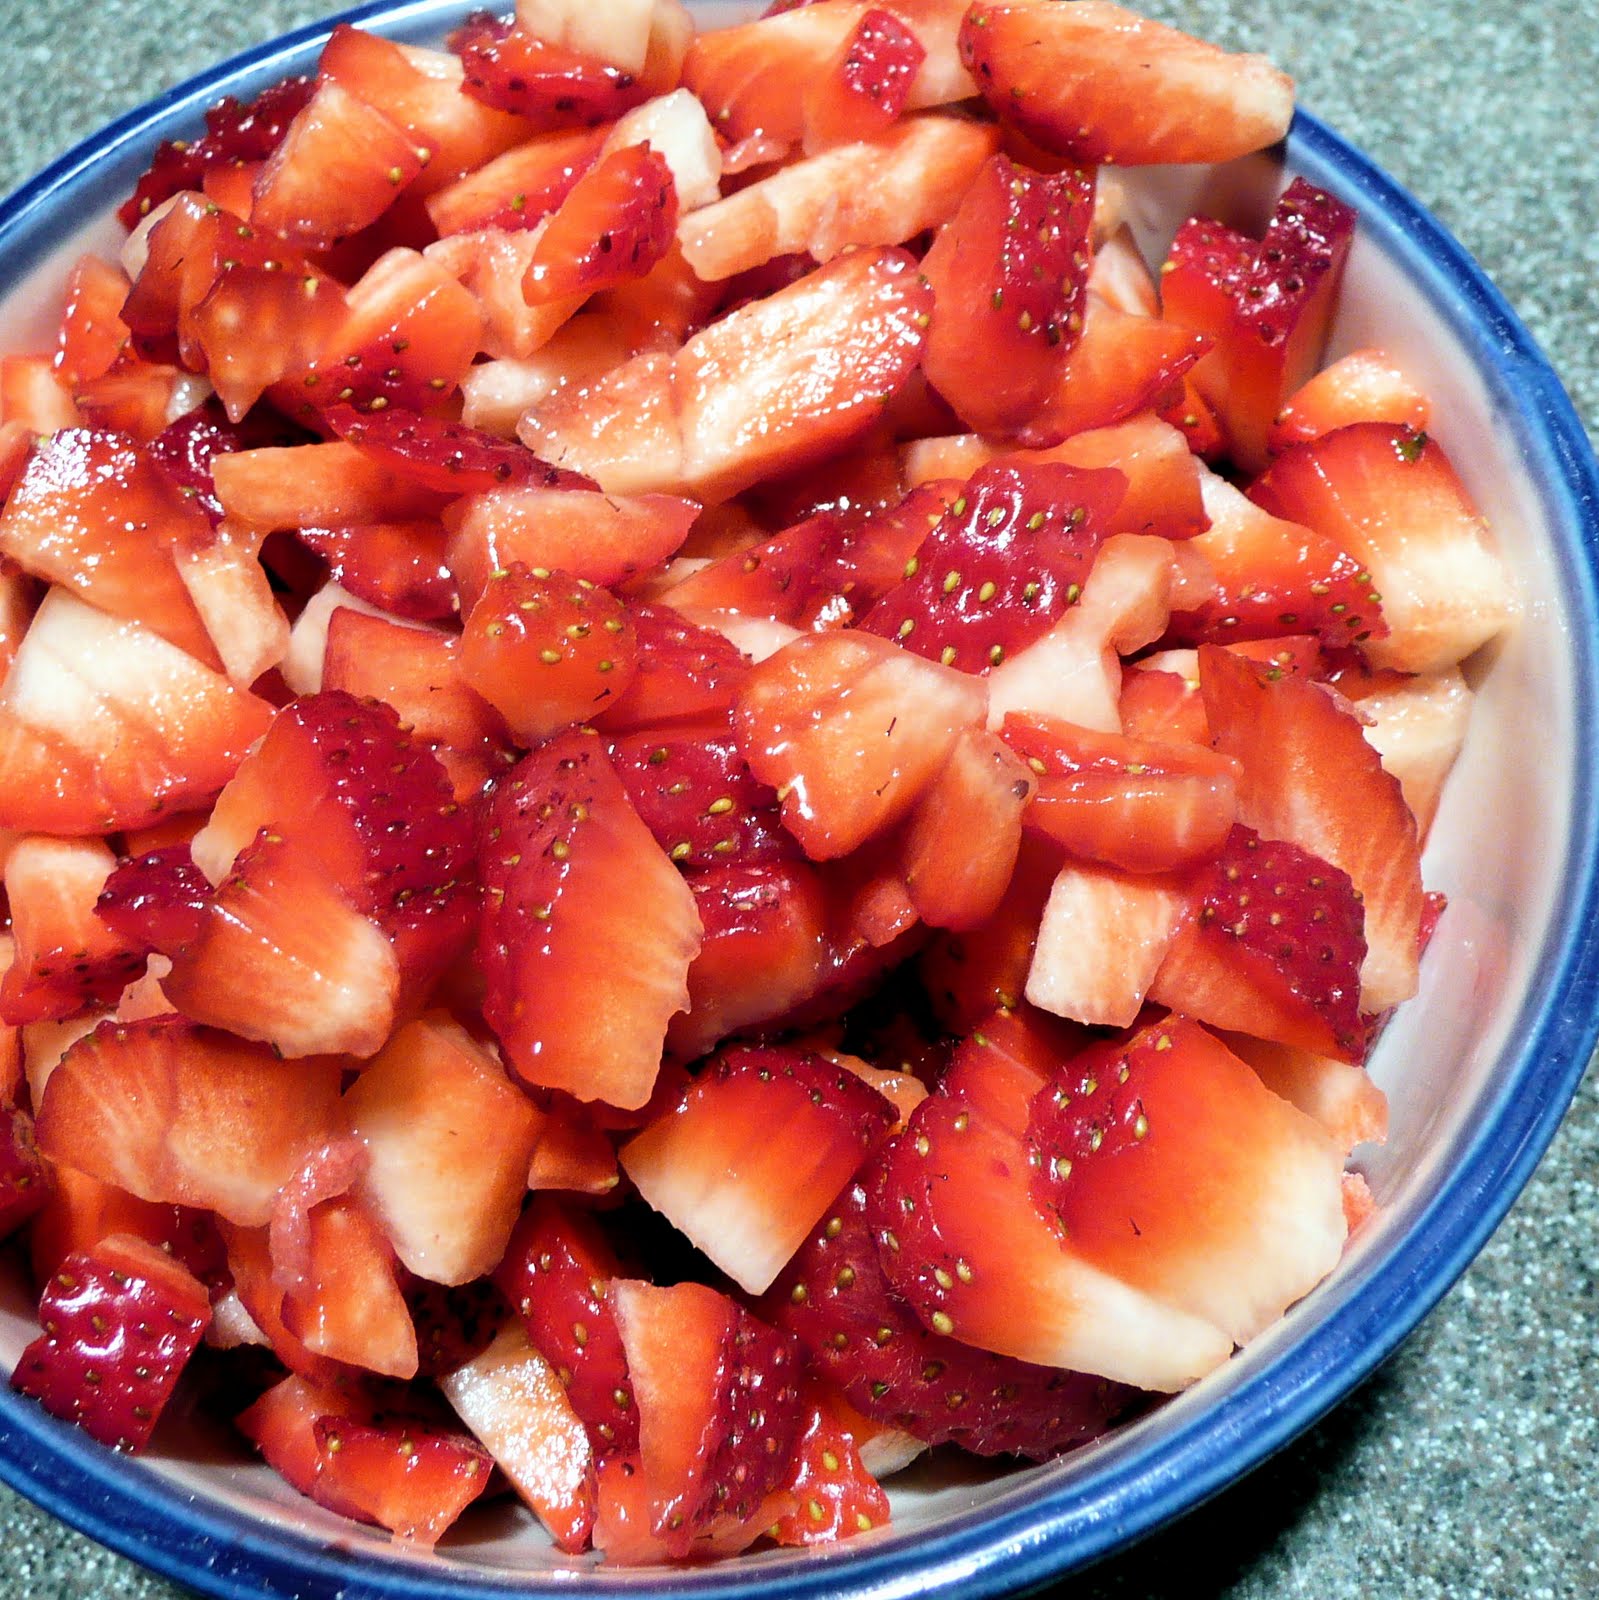
Chop your berries.
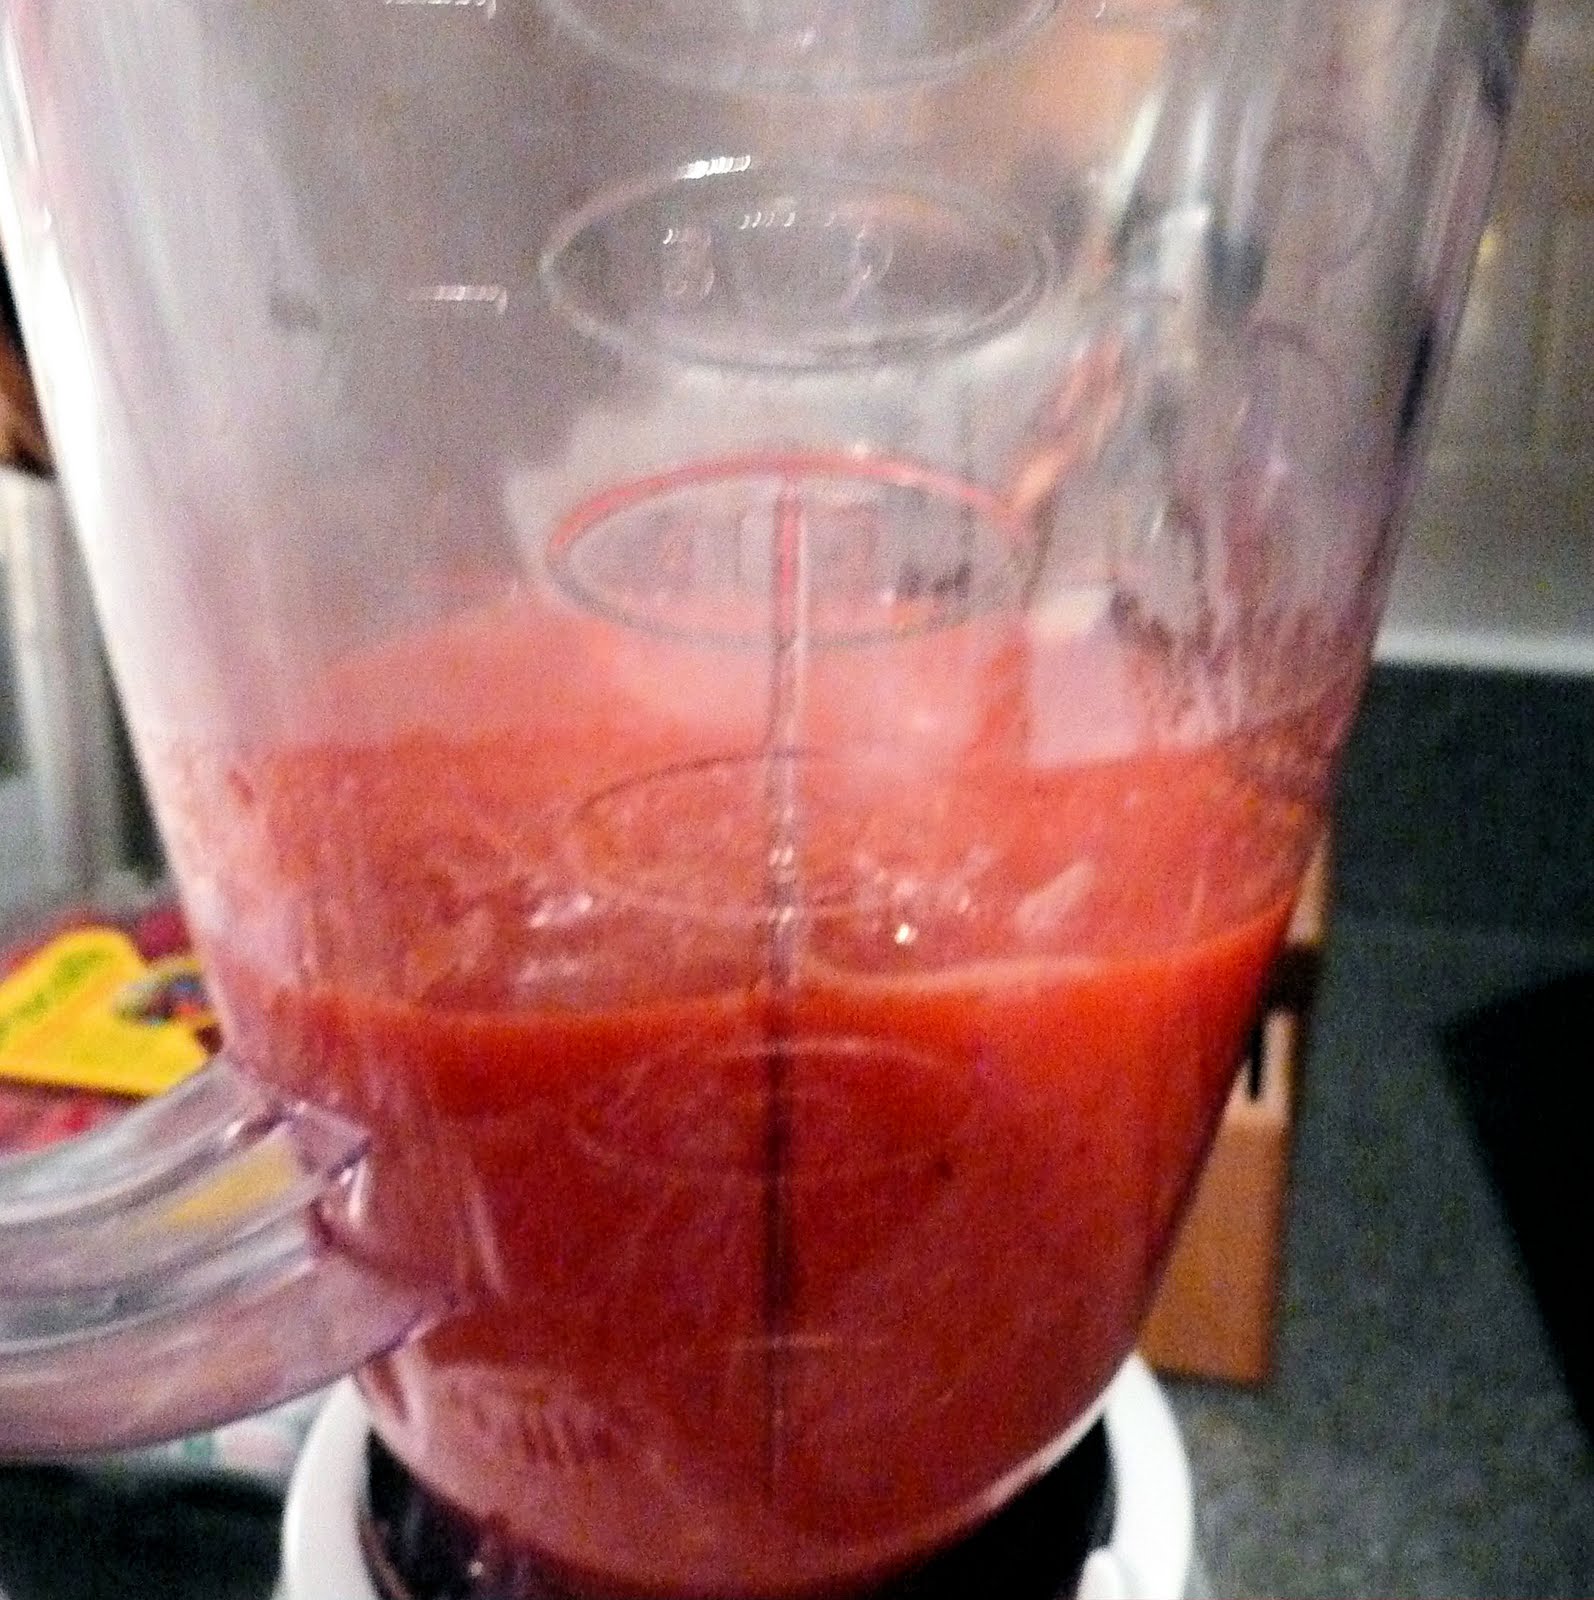
Combine the berries, lemon juice, and half of the sugar-water mixture in a food processor and process until smooth.
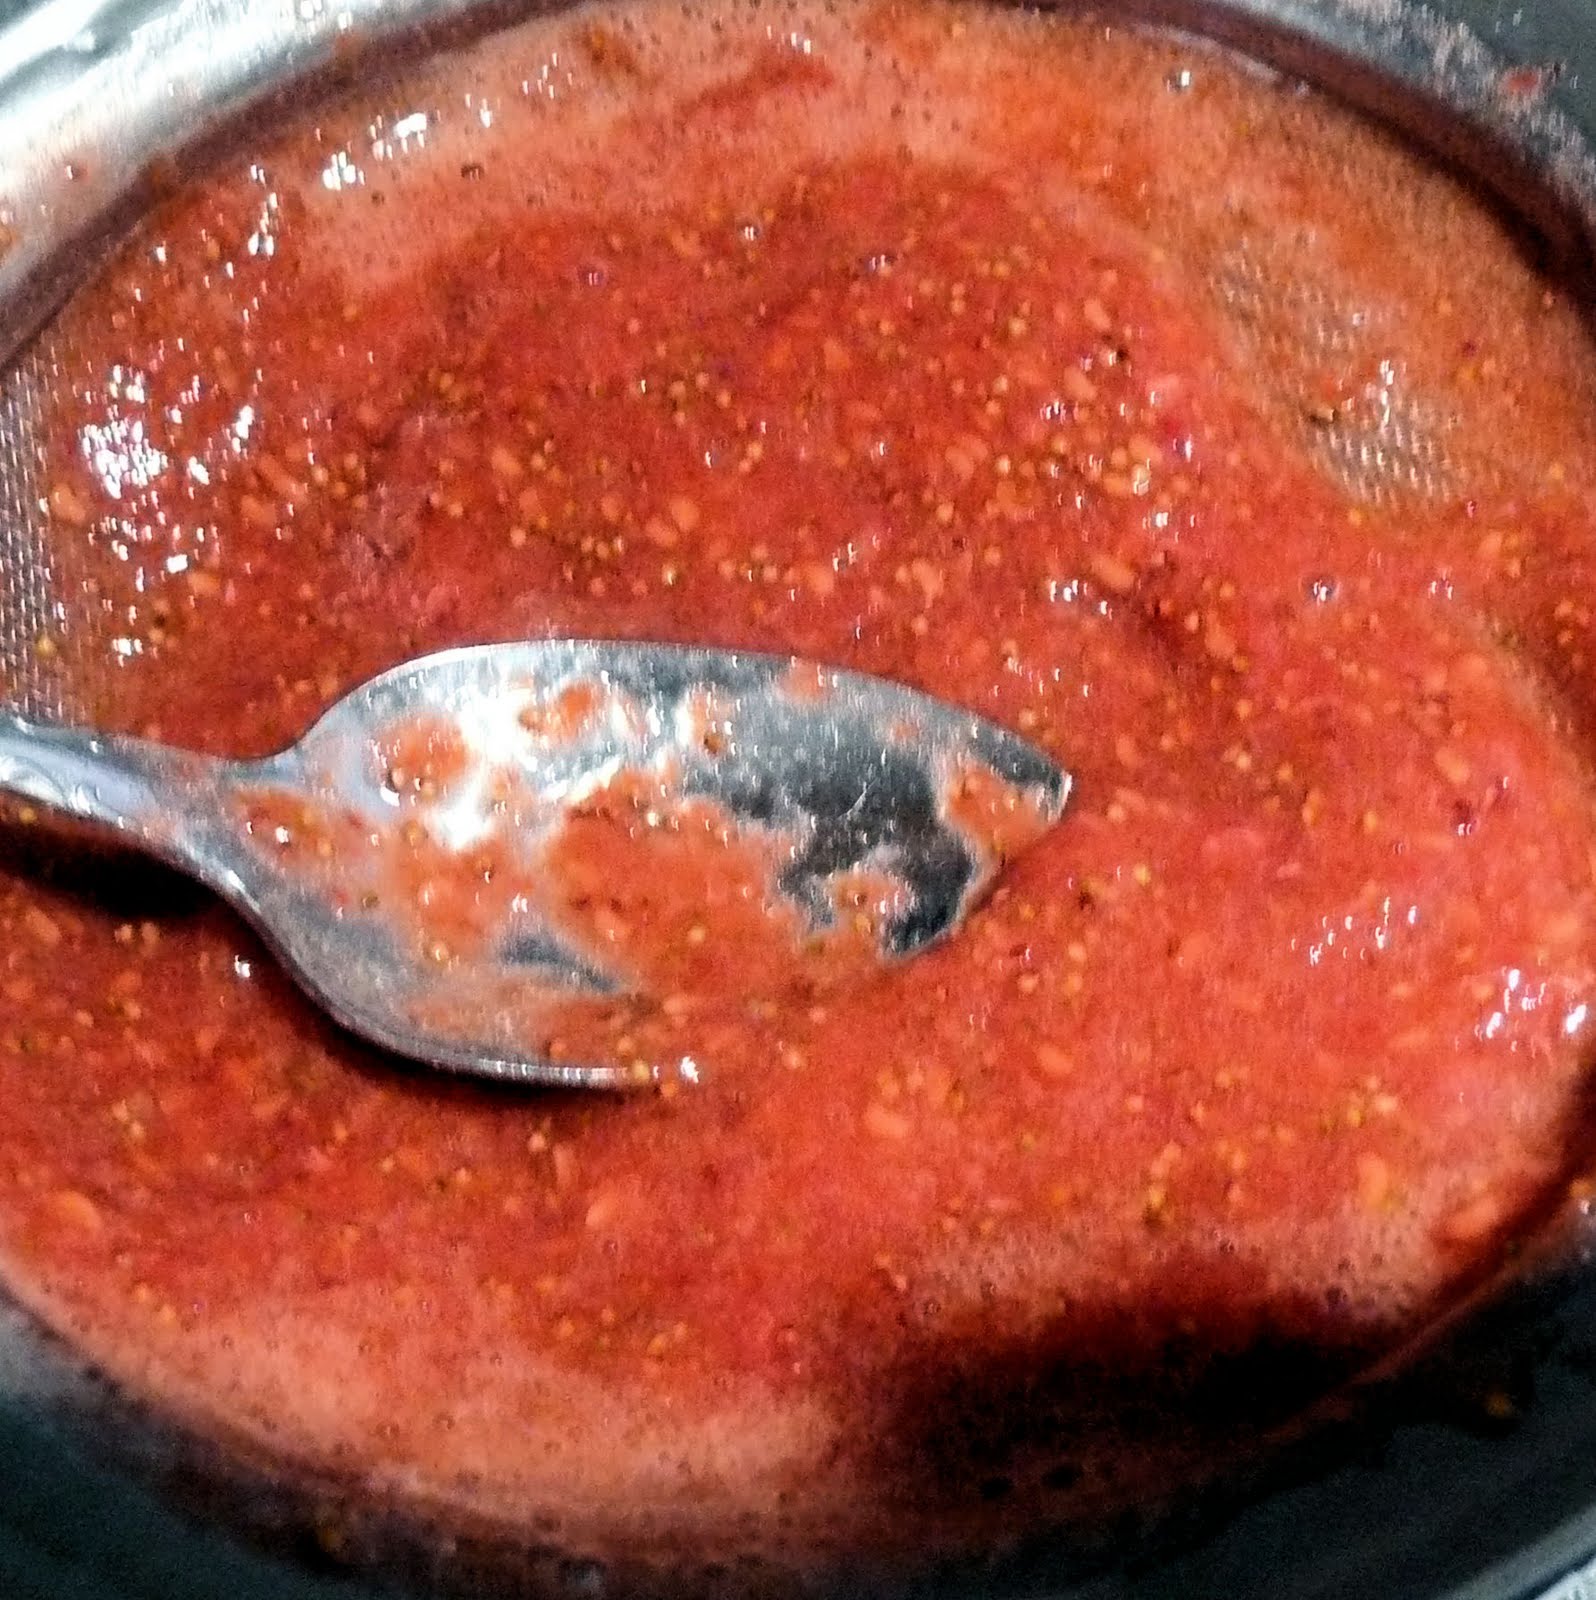
Using a fine mesh strainer, strain the mixture over a bowl.
Use a spoon to press down on the strainer to help push all the juices through.
This will remove all seeds and any parts of the strawberries that didn’t fully blend.
Discard the solids left behind.
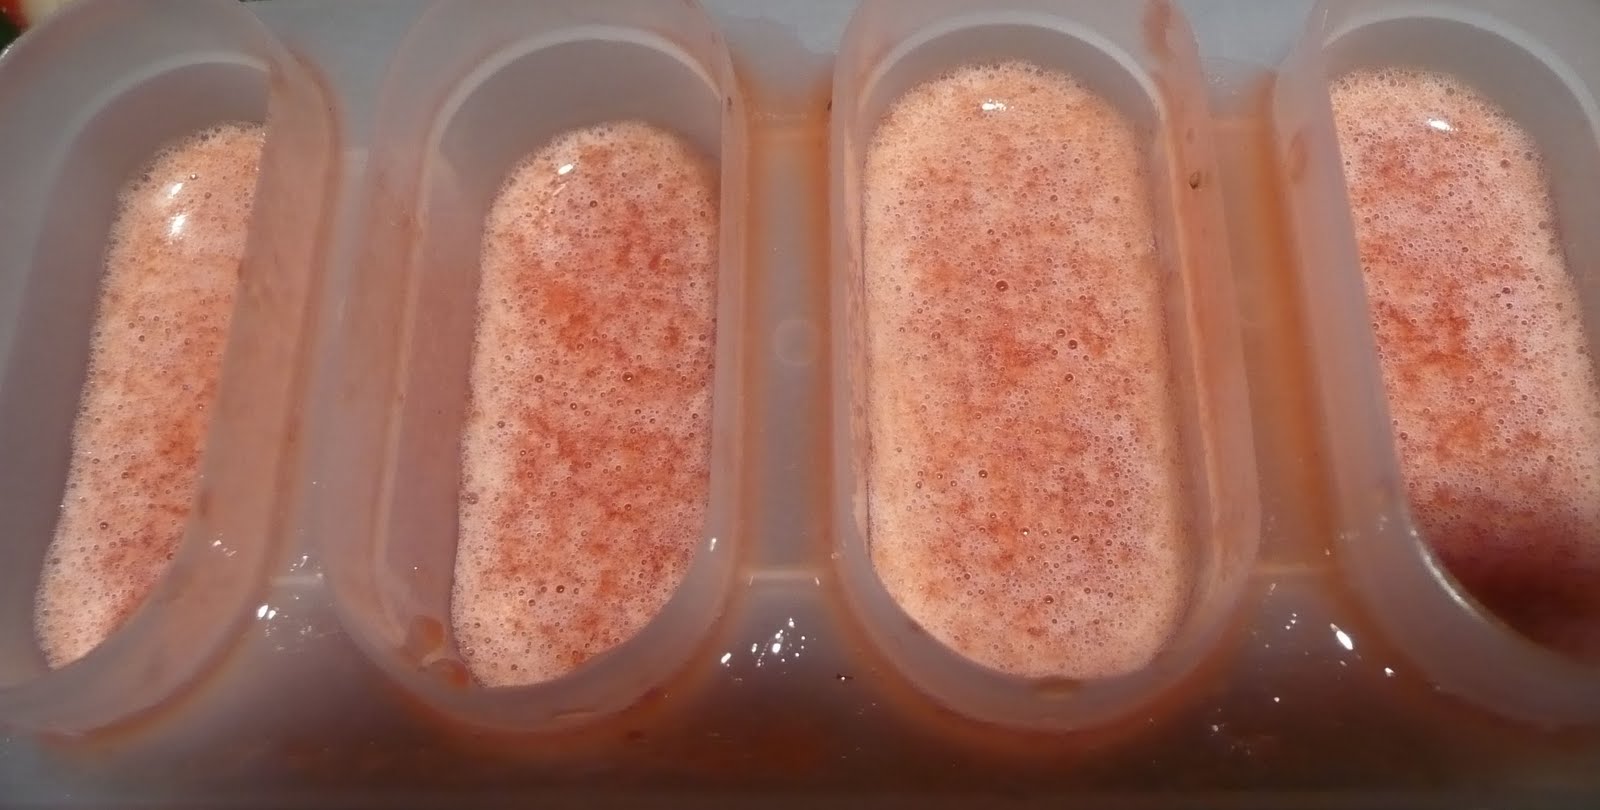
Add the rest of the sugar syrup and the sparkling wine to the strawberry mixture. Mix to combine.
Divide among 4 ice-pop molds.
Cover with tin foil. Using a knife, carefully make a small slit in the tin foil on top of each Popsicle.
Insert a Popsicle stick into each slit (this helps to keep the sticks centered).
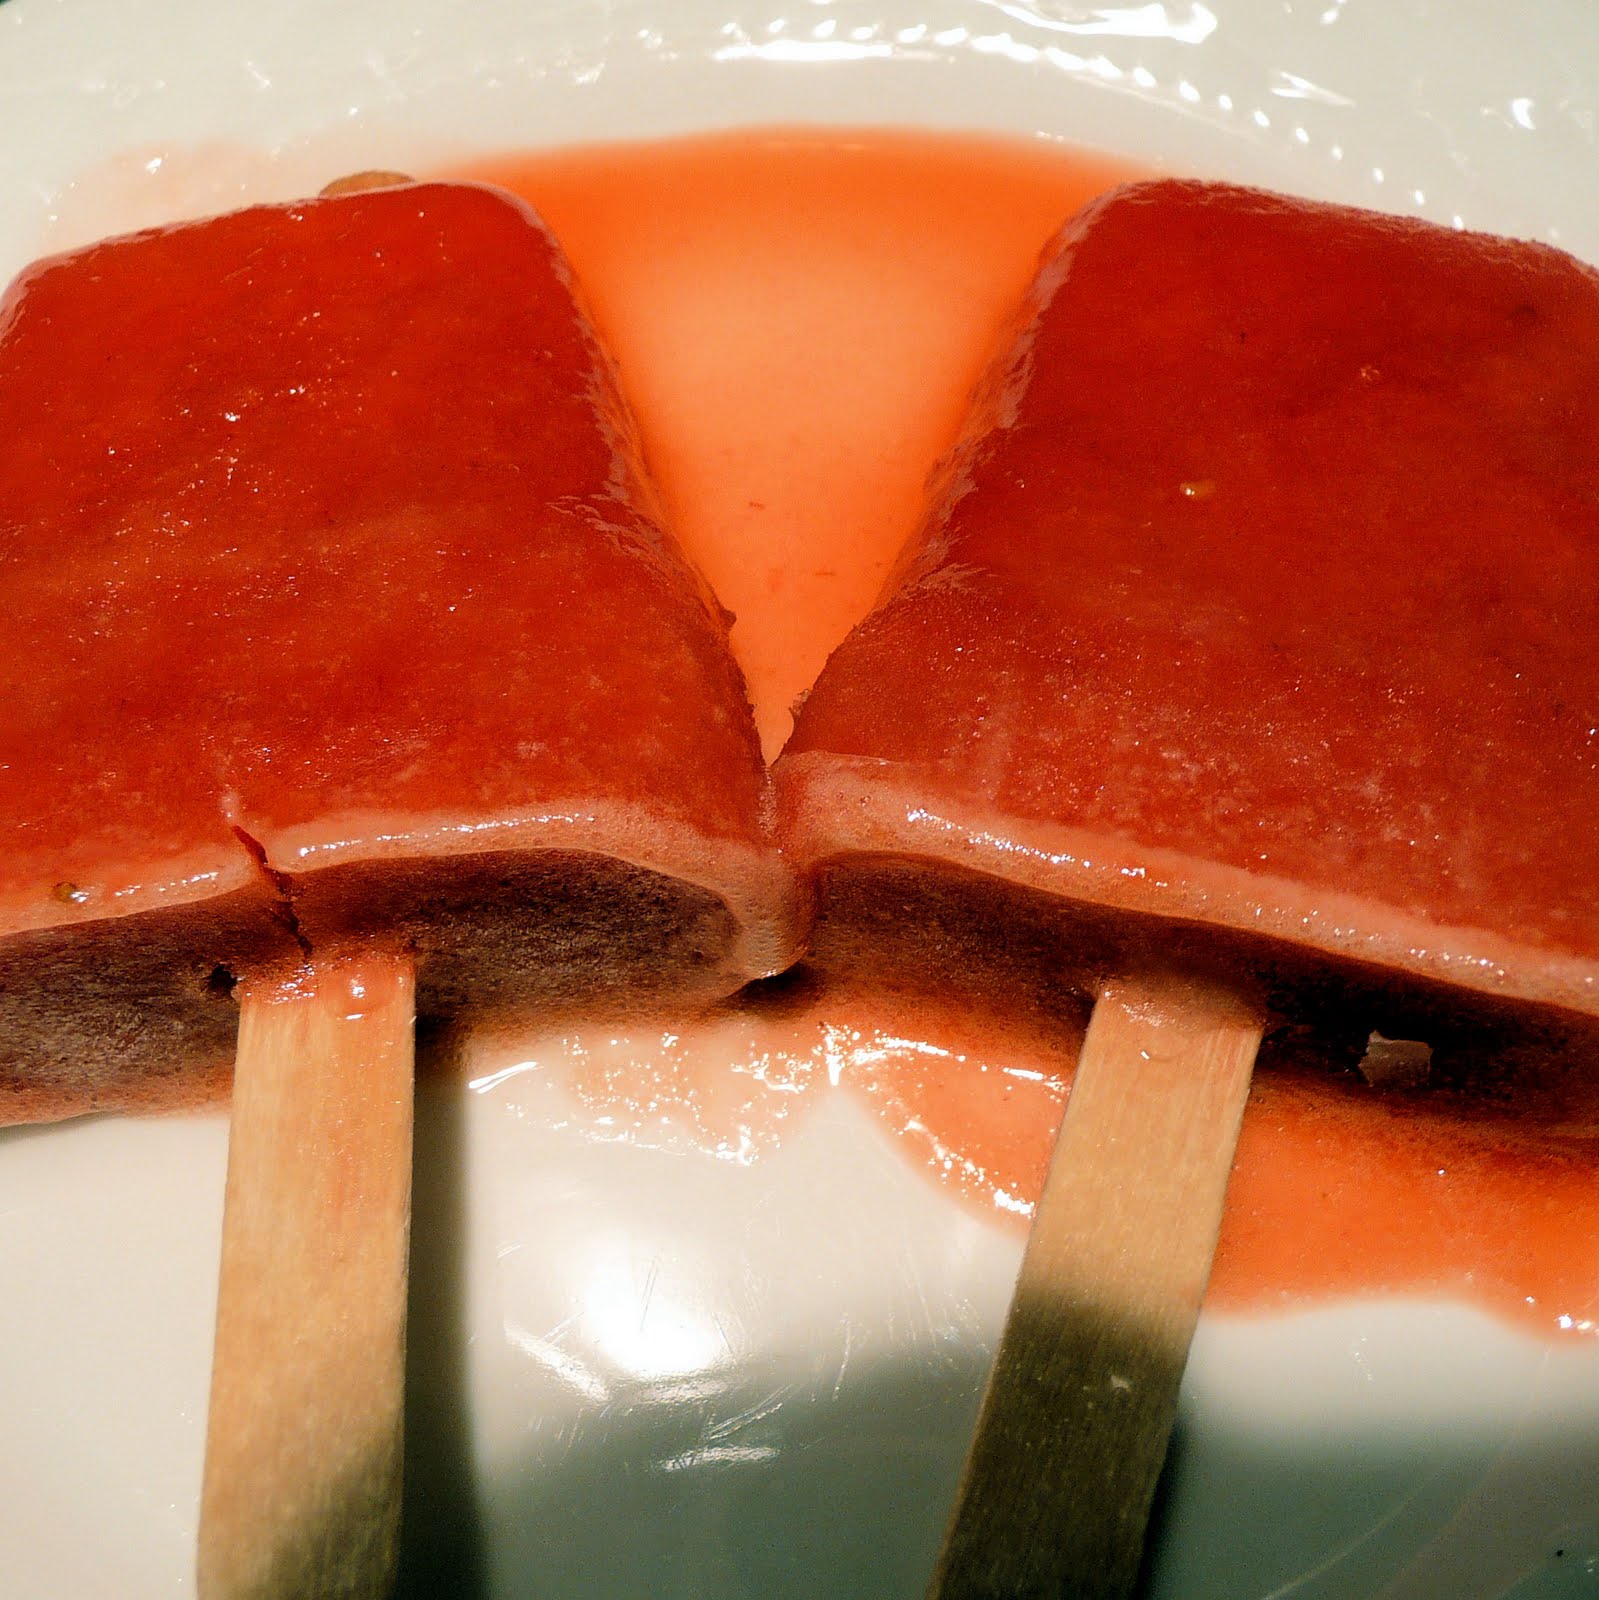
Freeze for 4 hours or until frozen.
To remove from the molds, run under hot water for a few seconds to loosen the pops.
These pops were really refreshing. I was never a fan of Popsicles growing up because of that fake fruit taste that they all seemed to have, so the fresh strawberries really added a nice natural taste that I appreciated. This recipe can be adapted to use any berries you prefer, or even a mixture of a few types of berries. I hope these help beat the heat!