Whenever I have a cocktail, I tend to lean towards refreshing drinks, usually with gin. But while visiting friends in New York, we went to a cocktail bar that used caraway vodka in a drink. (Caraway has an anise flavor to it and is frequently used in baking. It is commonly used in rye bread and most versions of Irish soda bread.) So it adds a really nice earthy flavor to any drink. I decided to make my own to use in refreshing cocktails. I also used it to make a version of my favorite cocktail: the east side, which is essentially a gimlet. (Every drink seems to just be a variation of yet another drink).
Ingredients to make caraway vodka:
2 cups vodka (I used a cucumber vodka for more flavor)
2 tablespoons caraway seeds
Ingredients to make cocktail:
2 oz caraway vodka
1 oz lemon juice
1/2 oz simple syrup
1 basil leaf, chopped
ice
club soda
Making your own flavored vodka is really easy. Just take a jar and fill it with 2 cups vodka and 2 tablespoons caraway seeds. Allow to sit for at least a week. Strain and store for future use. I used cucumber vodka as a base which made a pretty awesome flavor combination.
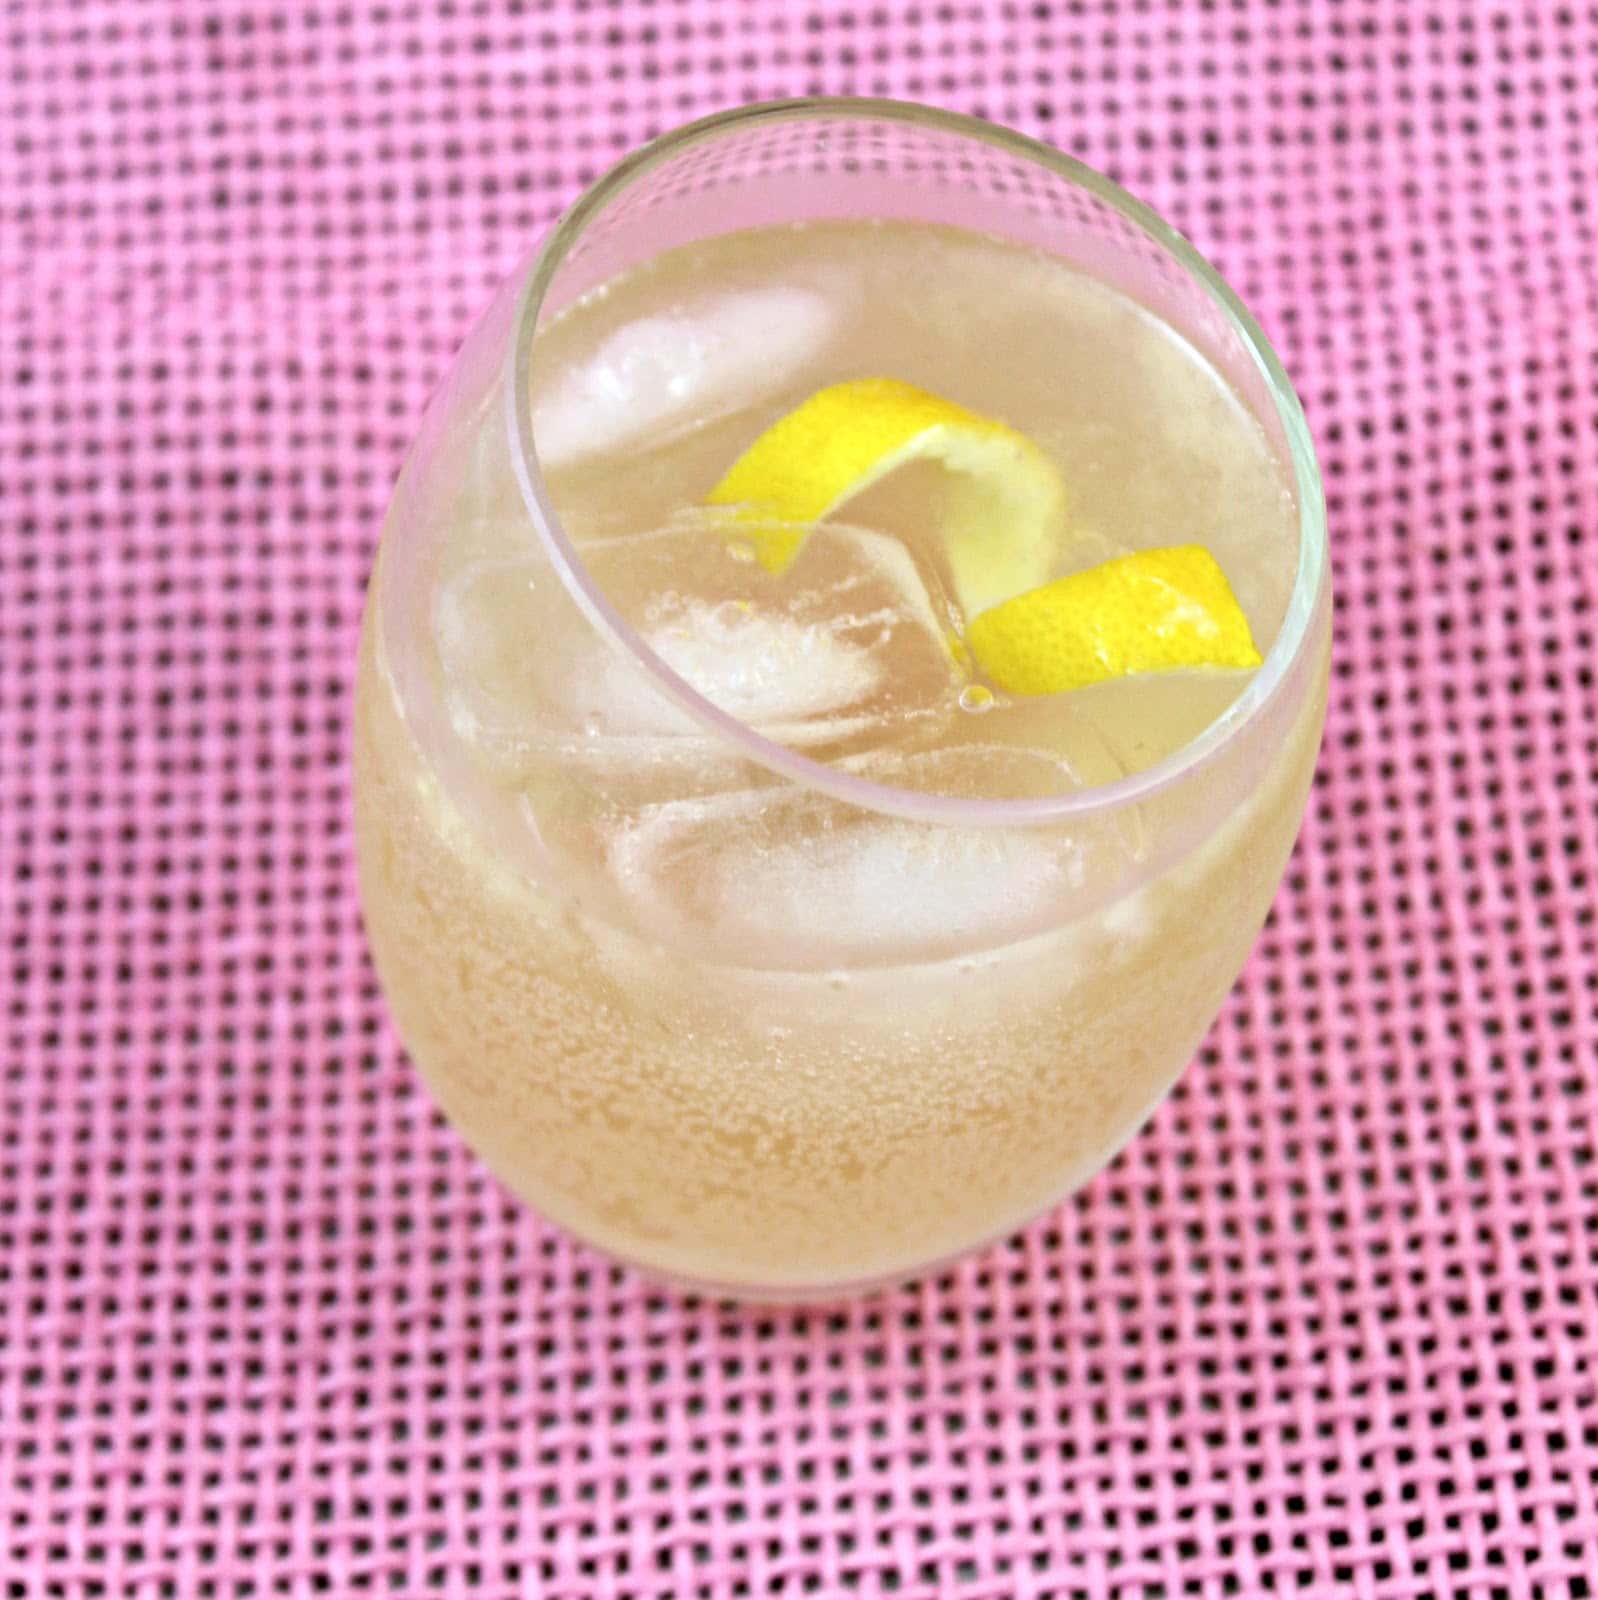
A traditional east side uses cucumber and mint muddled together then mixed with gin, simple syrup, and lime and topped off with club soda. My version is just as refreshing, but uses some of summer’s other favorite fresh ingredients, lemon juice and basil, paired with my homemade caraway-cucumber vodka.
To make, add ice to a cocktail shaker and add the caraway vodka, lemon juice, simple syrup, chopped basil, and ice. Shake and strain into a glass. Top with club soda. If desired, garnish with a cucumber or a lemon twist.
You can also serve the drink on the rocks, which I prefer (the ice keeps it nice and cool to keep it super refreshing).
If you are a fan of more citrus over sweetness, omit the simple syrup. You can further customize the drink by muddling the basil before adding it to the drink to release more flavor into the cocktail.
Everything about this drink screams summer. I wish I had made the vodka earlier in the summer so I could have had this all season. Sigh. Instead, it will just have to be my way to keep a little summer going on all year long!
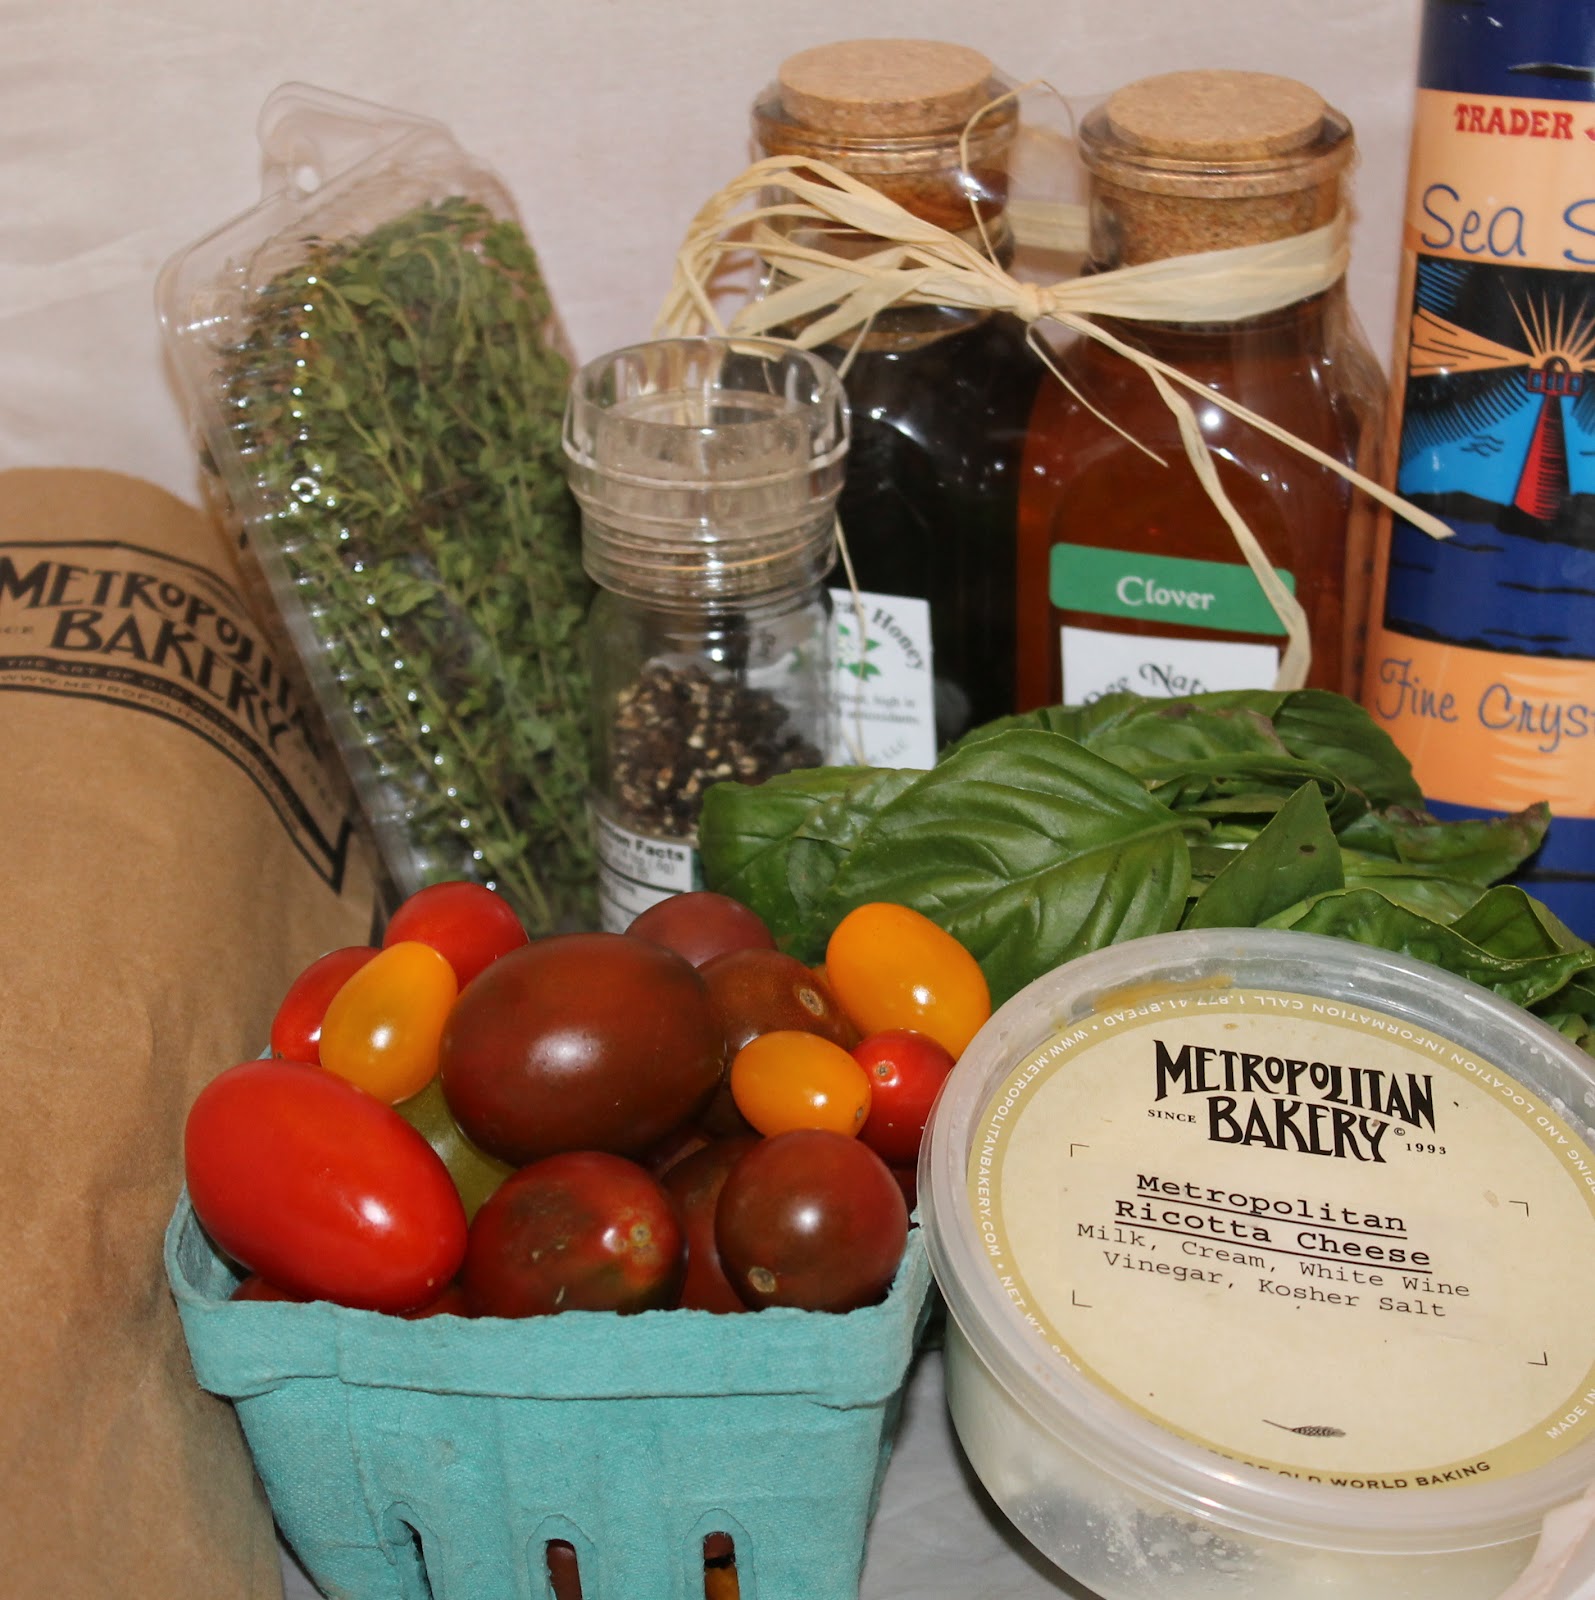
My CSA share this year has had plenty of tomatoes. Not that I’m complaining, I absolutely love them! But I’ve been running low on new inspiration for what recipes to use to highlight the tomatoes. I put out a request for yummy recipes that use cherry tomatoes on my Facebook page, and Katie H. suggested this Food and Wine recipe, which is a real winner. You slow roast the tomatoes to bring out the flavor and pair them with two types of honey and fresh ricotta cheese. mmm!
Ingredients:
2 pints cherry or grape tomatoes, halved lengthwise
1 1/2 tablespoons extra-virgin olive oil
2 tablespoons clover honey
2 teaspoons thyme leaves
1 teaspoon kosher salt
1/8 teaspoon freshly ground pepper
12 baguette slices, cut 1/2 inch thick on the bias
1 cup fresh ricotta (8 ounces)
1 tablespoon buckwheat honey
6 basil leaves, thinly sliced or torn
I wanted to go over the two different honeys used in this recipe. The tomatoes are tossed in the clover honey, which sweetens up the somewhat tanginess of the tomatoes. Clover honey is simply honey in which bees feed mainly on the nectar of clover plants. Clover honey is mild, relatively inexpensive, and has a slight floral taste to it. The buckwheat honey is drizzled over the finished burschetta to bring out the flavor of the ricotta. Buckwheat honey is a darker amber colored honey that is produced by bees who feed mainly on the nectar of flowers on buckwheat plants. The flavor is similar to molasses and has a wonderful earthy flavor. (If you’re in the Philadelphia area, Bee Natural, located in Reading Terminal, has both honeys for sale).
This recipe is definitely not weekday friendly. You can roast the tomatoes beforehand and refrigerate up to 2 days to break up some of the time. Just bring the tomatoes to room temperature before serving.
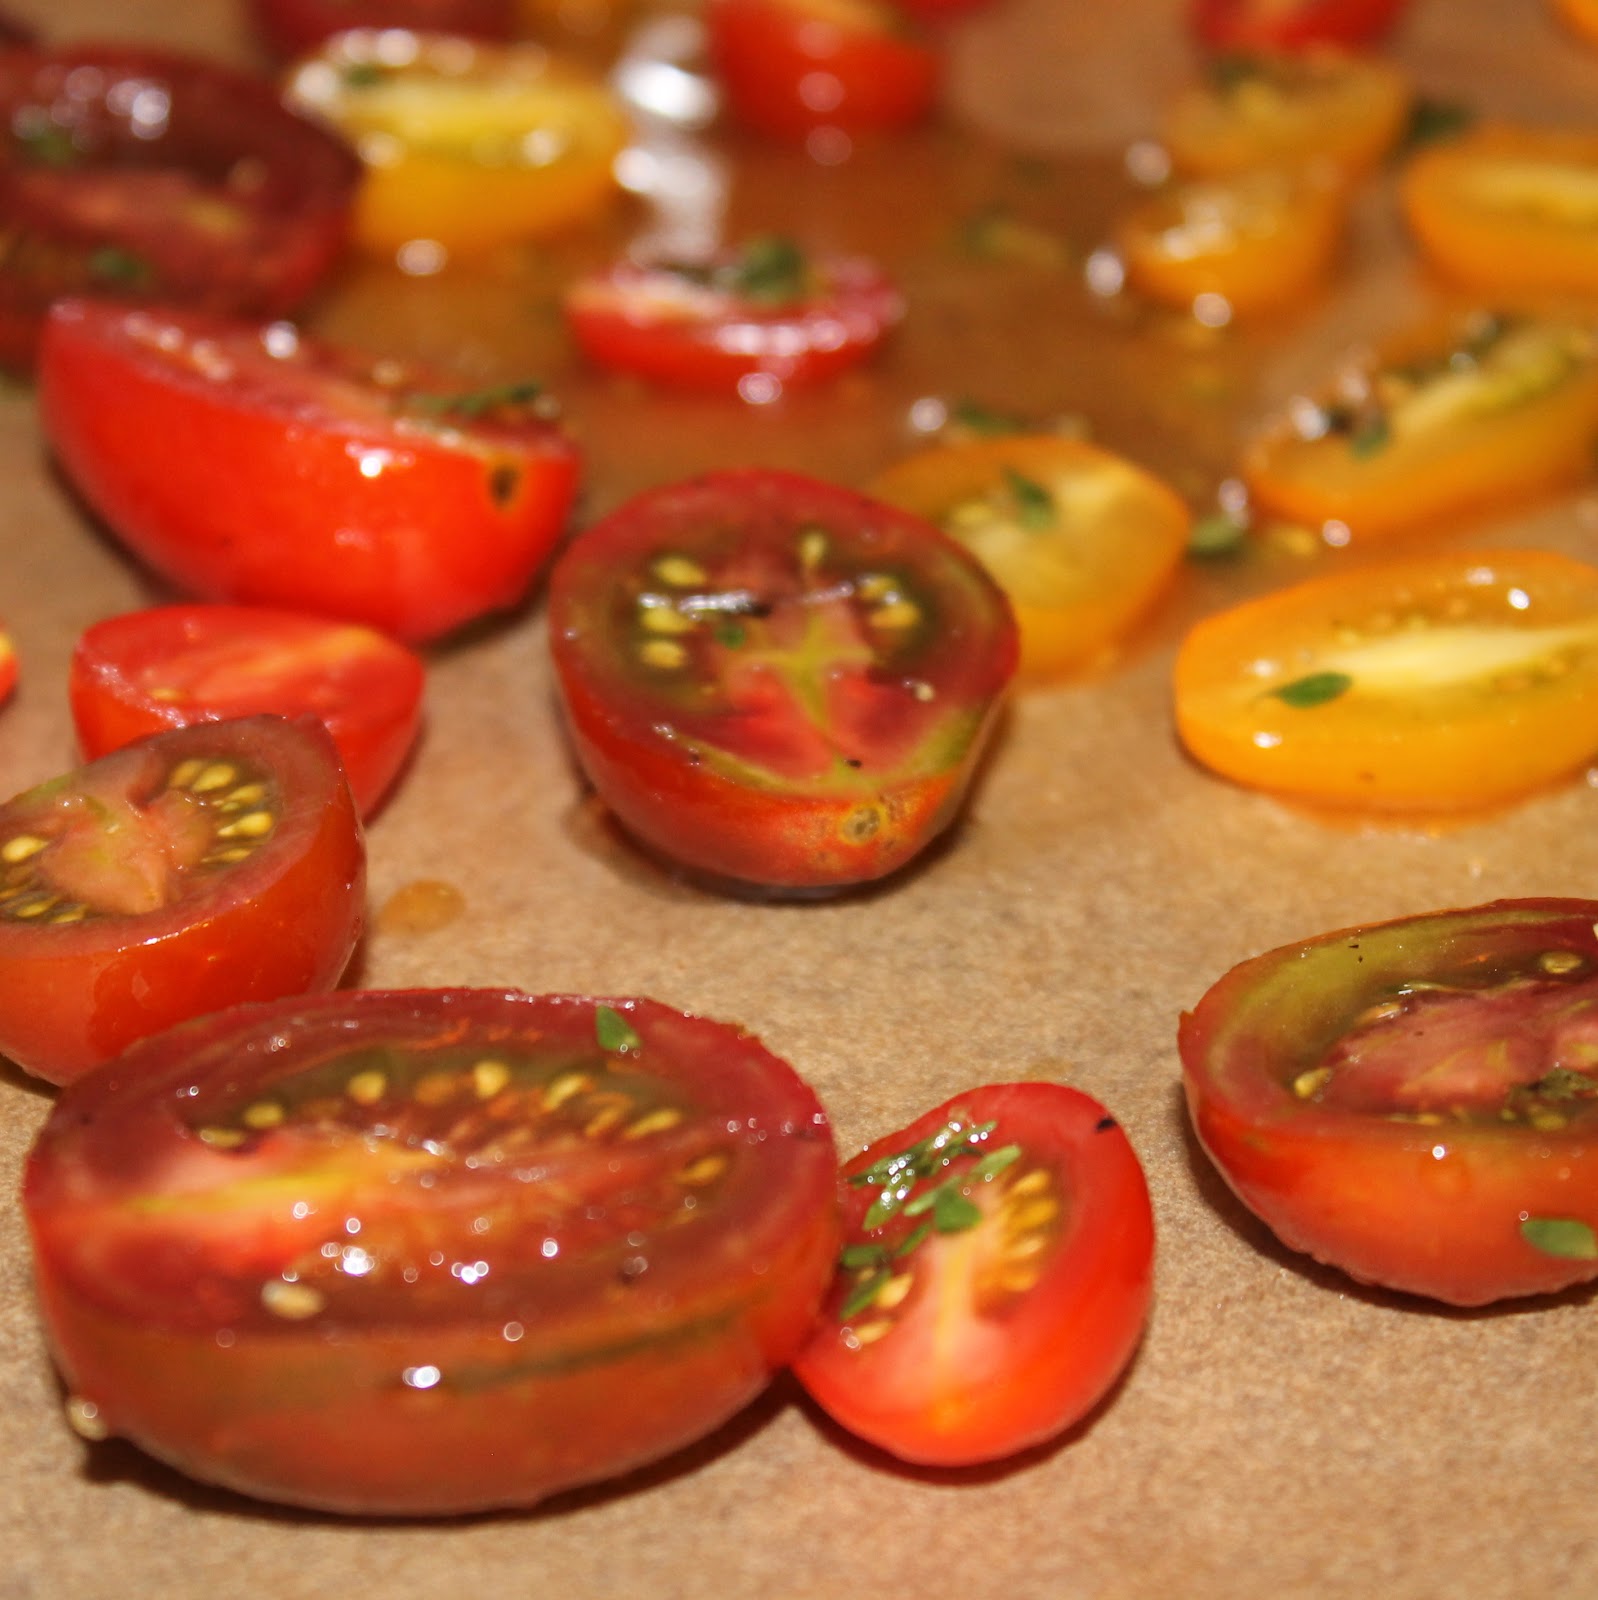
To make, preheat your oven to 300 degrees. Line a cookie sheet with parchment paper. In a large bowl, toss the tomatoes with olive oil, clover honey, thyme leaves, salt and pepper.
Add the tomatoes to the baking sheet, turning them cut side up.
Bake for 1 hour and 25 minutes or until they begin to shrivel. Allow to cool.
Preheat your broiler and add the baguette slices to a baking sheet. Broil for about 30 seconds on each side or until the edges of the bread are golden brown.
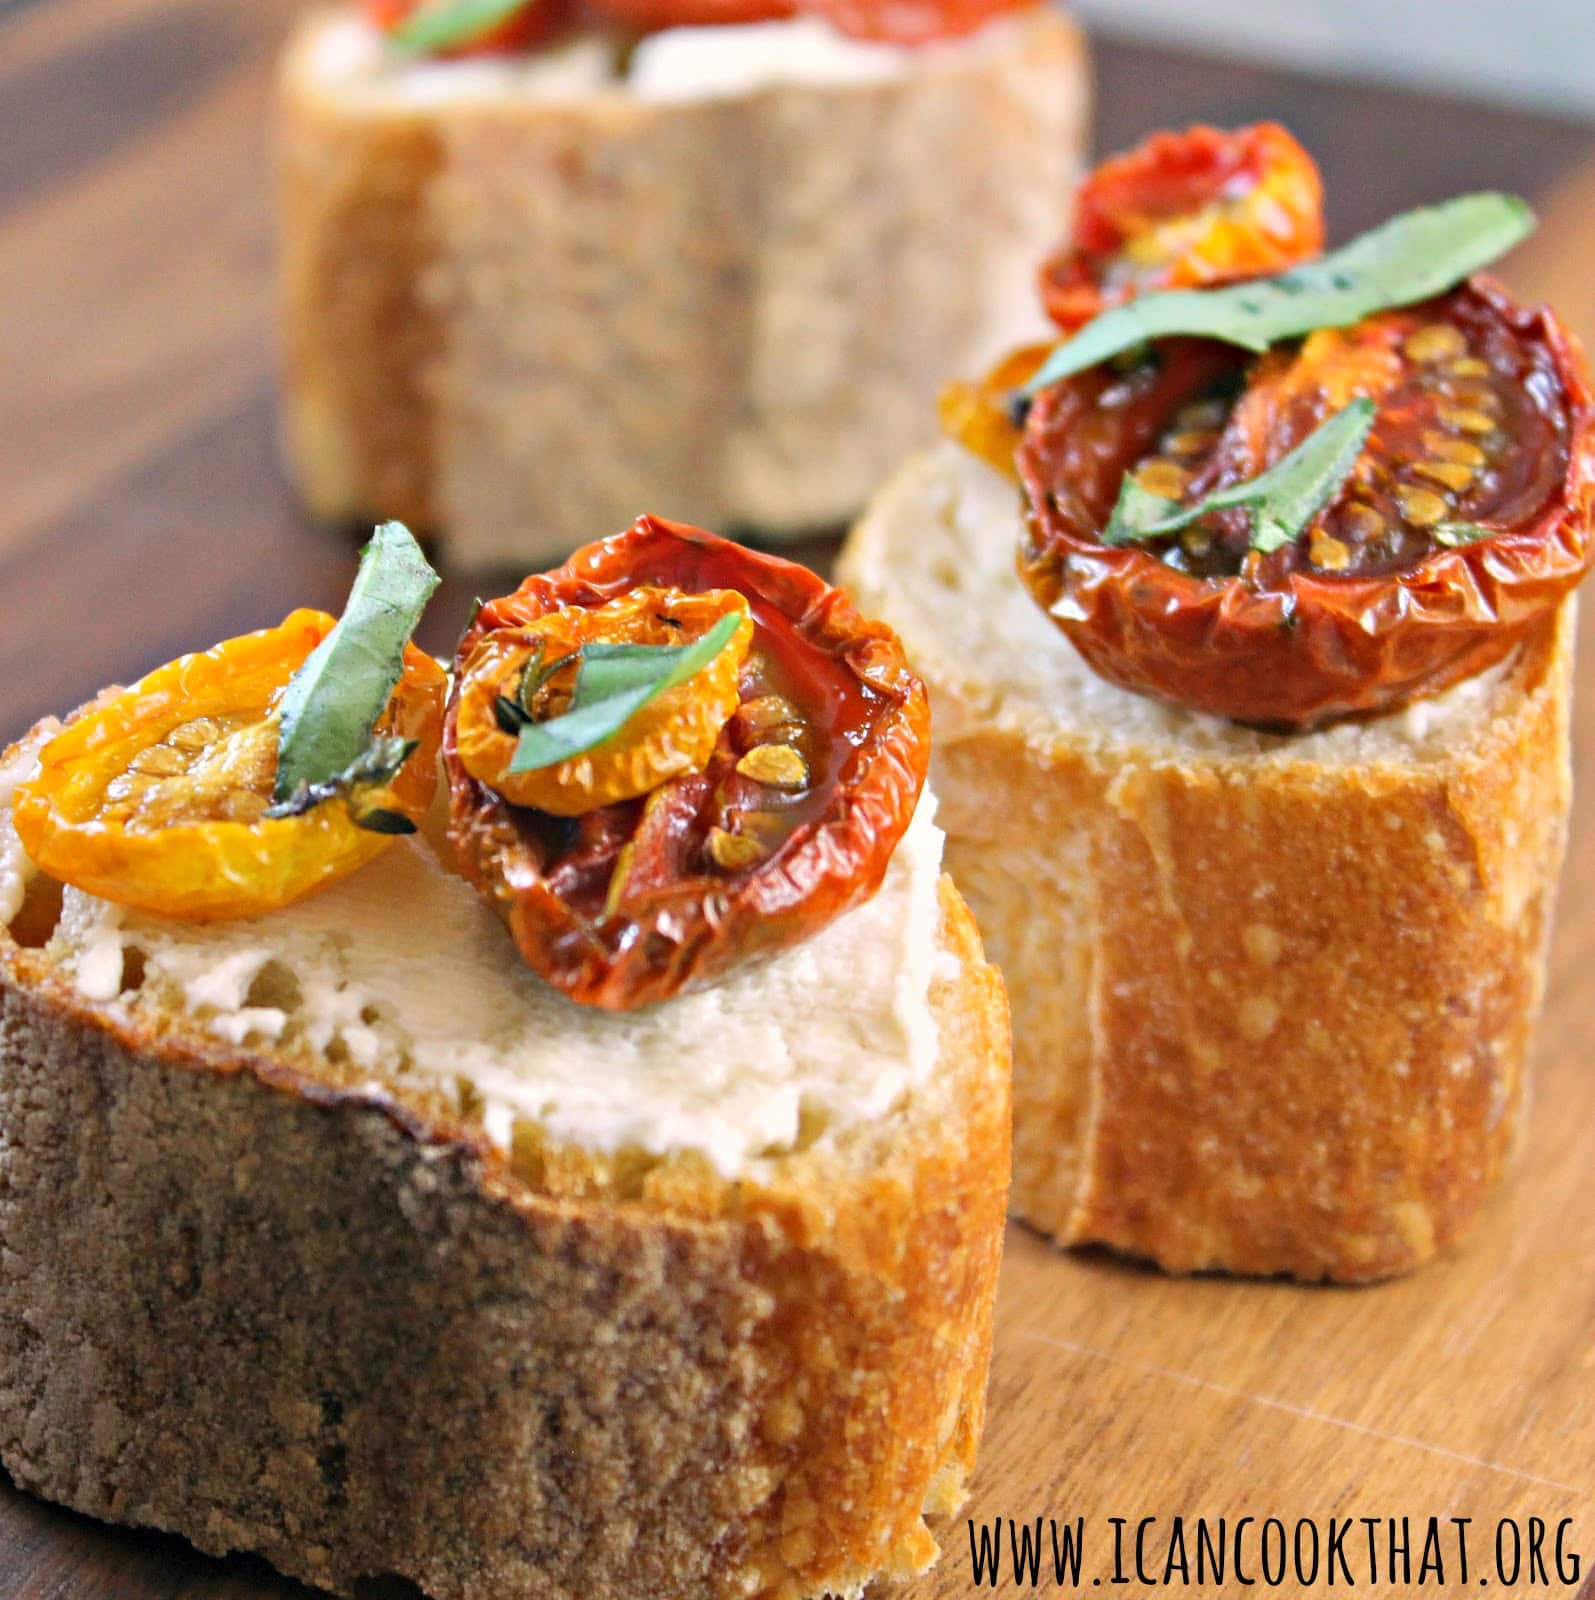
Add the ricotta to the baguette slices and top with the slow-roasted tomatoes.
Lightly drizzle with buckwheat honey and sprinkle with sliced basil.
I tend to be awfully impatient when it comes to making food, I want my meal prepared in under 40 minutes. So I’ve rarely attempt to slow roast, well, anything. But the flavor of a slow roasted tomato makes the wait time well worth it! (It also makes your kitchen smell fantastic)
The honey is a really nice addition and brightens up the flavors of the tomatoes. Creamy ricotta just finishes off the dish. The recipe is really simple (although time consuming) but would be a very welcome appetizer at any party.
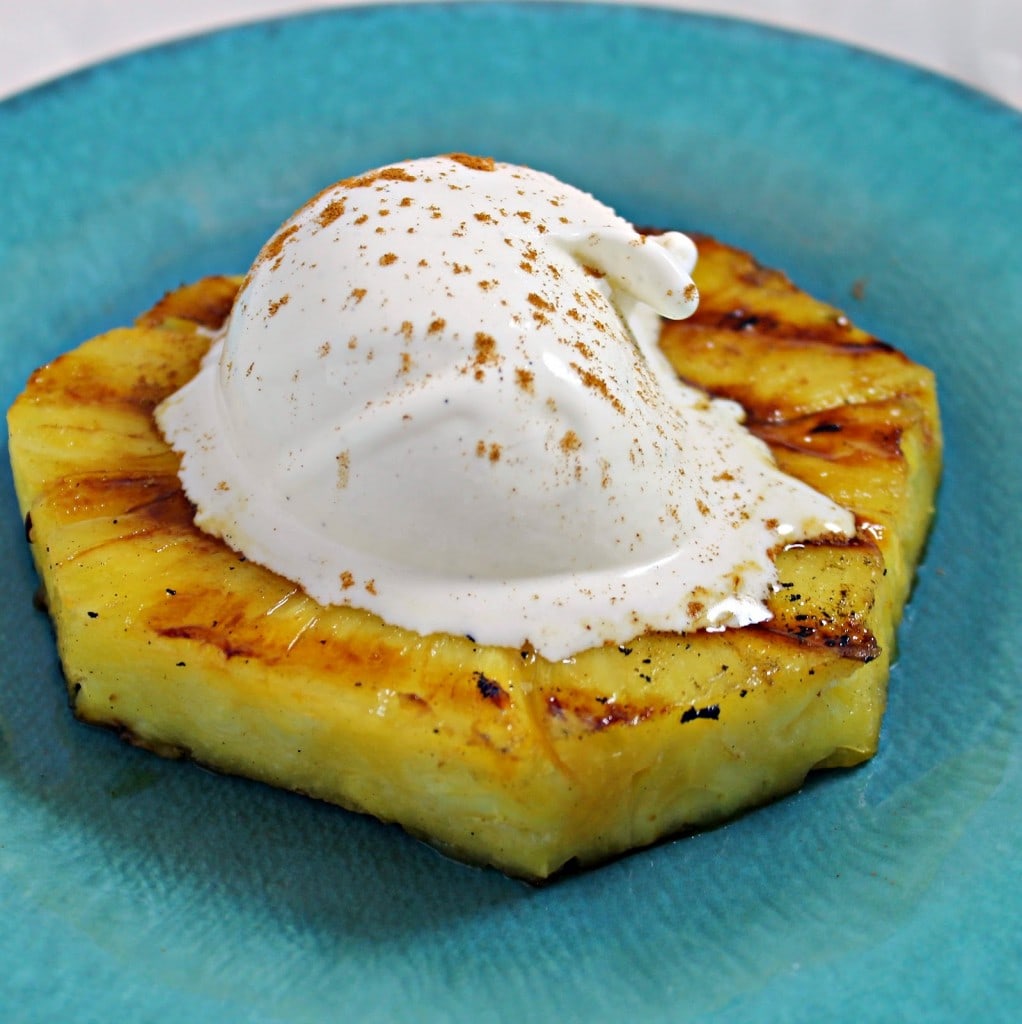
When I was creating my Labor Day Round Up post, I realized one of my favorite grilling recipes was conspicuously missing. My friends and I love to soak pineapple in a rum-sugar mixture, heat it on the grill until the sugars caramelize, and dig in. Although I have been butchering the recipe all summer, I used this Cooking Light recipe as inspiration for our favorite summer grilling treat. Now that I am making this in my kitchen on a grill pan, I’m actually able to pair it with the ice cream for the full effect.
Ingredients:
1/4 cup packed brown sugar
1/4 cup dark spiced rum (such as Captain Morgan’s)
1 pineapple, peeled, cored, and sliced
1 tablespoon butter
1 pint vanilla ice cream
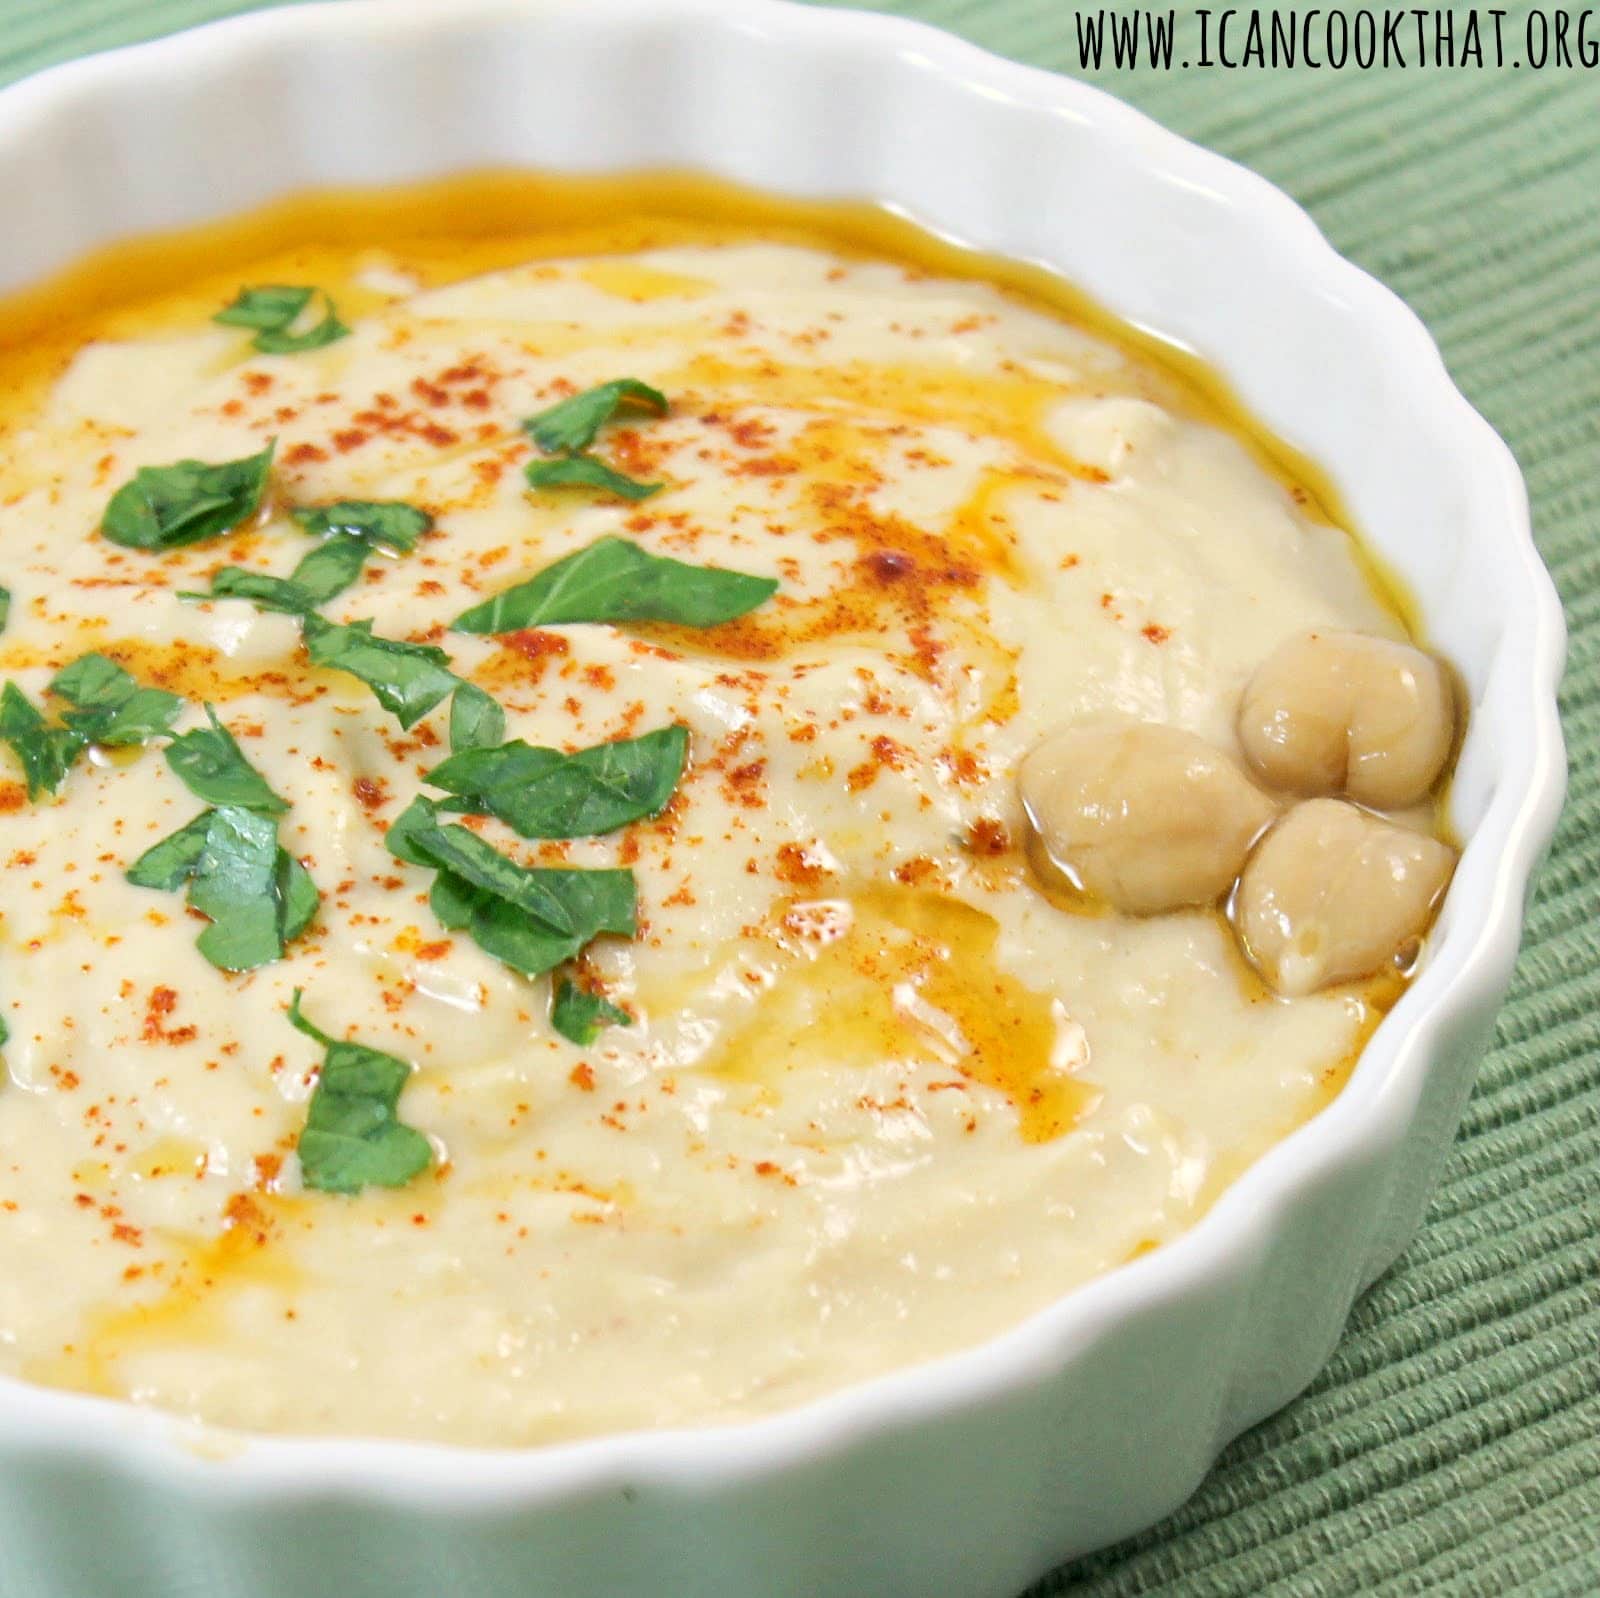
Hummus is probably my favorite snack. On days I don’t feel like cooking, I tend to grab some hummus with pita, tomatoes, cucumbers, or anything else that will work as a yummy vehicle for the hummus. It’s also really delicious as a spread on a sandwich instead of mayo. So I usually have at least one container of hummus in my fridge at any moment. But homemade hummus is exponentially better than the store bought stuff. Plus, you can customize it to your liking.
I recently watched a video of the hummus master himself, James Beard winner Michael Solomonov. Mike Solo has arguably the best hummus found in Philly, at his restaurant Zahav. I wanted to attempt to make my own creamy hummus at home. I tend to like mine slightly spicy, which can be achieved by adding a lot of garlic. But I have this awesome Nudo Chili Olive Oil, so I thought I’d include that to give it a bit of a kick, so I decided to make this Chili Oil Hummus!
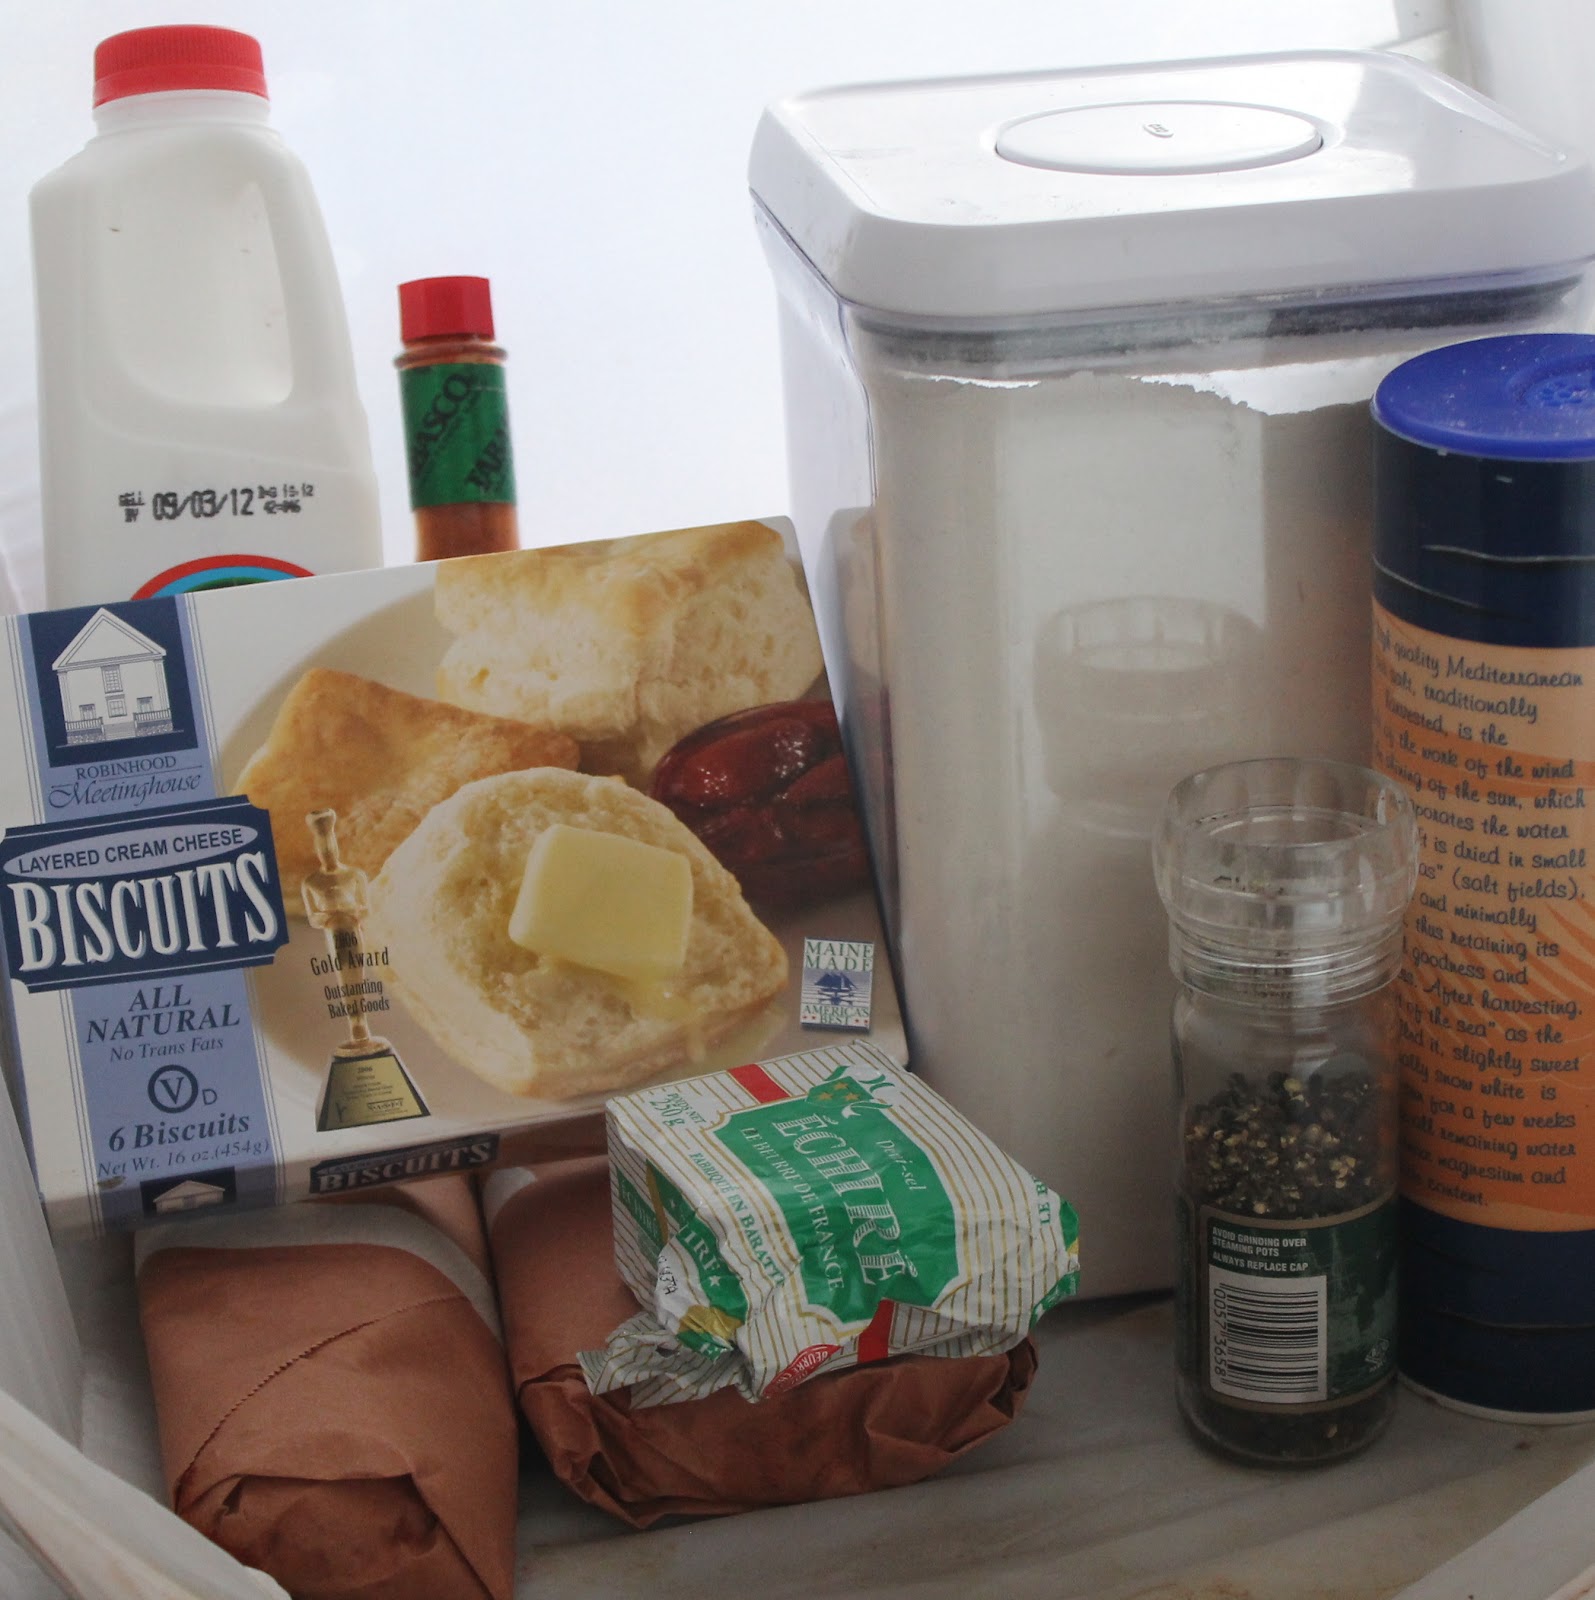
To my readers who come to my page looking for quick and health(ier) cooking options, I apologize for this post. I am making Biscuits and Gravy, and I can’t even pretend that there are any health benefits to this, except perhaps a feeling of pure joy as you consume it. Healthy readers, maybe we can pretend that this recipe for a Southern favorite never happened? For the rest of my readers, I hope you enjoy this recipe. Because I sure did, it was fantastic.
So why the sudden move into southern cooking? Biscuits, of course! I was sent a few boxes of Robinhood Meetinghouse‘s frozen biscuits, including their original Cream Cheese Biscuit. The Maine-based biscuiteers (yes, I just really wanted to write the word biscuiteer) also make pull apart cinnamon bread, sticky buns, and mini pies. The company’s products contain no artificial flavors, colors, corn syrup, or genetically modified ingredients (GMOs). And the best part? The frozen biscuits are ready in the oven in only 25 minutes time.
There are plenty of ways to use their original biscuits, but a friend mentioned one of her favorite recipes from the South, Biscuits and Gravy, and I had to try it. This recipe is really out of my comfort zone. It even uses sausage, eep (I’m really not the biggest fan of pork products… you’ll notice that there are very few of my blog, with the exception of bacon and proscuitto.) I used a Paula Deen recipe as the base for the gravy because, well, it’s Paula Deen.
Ingredients (Serves 3):
1 box of Robinhood Meetinghouse’s frozen original cream cheese biscuits
1/2 to 1 pound sausage (I went with garlic sausage from Martin’s in Reading Terminal)
Labor Day is only a week away, which means people around the country are in search of the best ways to celebrate the end of summer with their friends and family. I rounded up some of my past posts that would make any Labor Day celebration a delicious affair.
When most think of Labor Day, they think of grilling. So here are some of my favorites, along with sides and small bites that would be perfect for a barbecue:
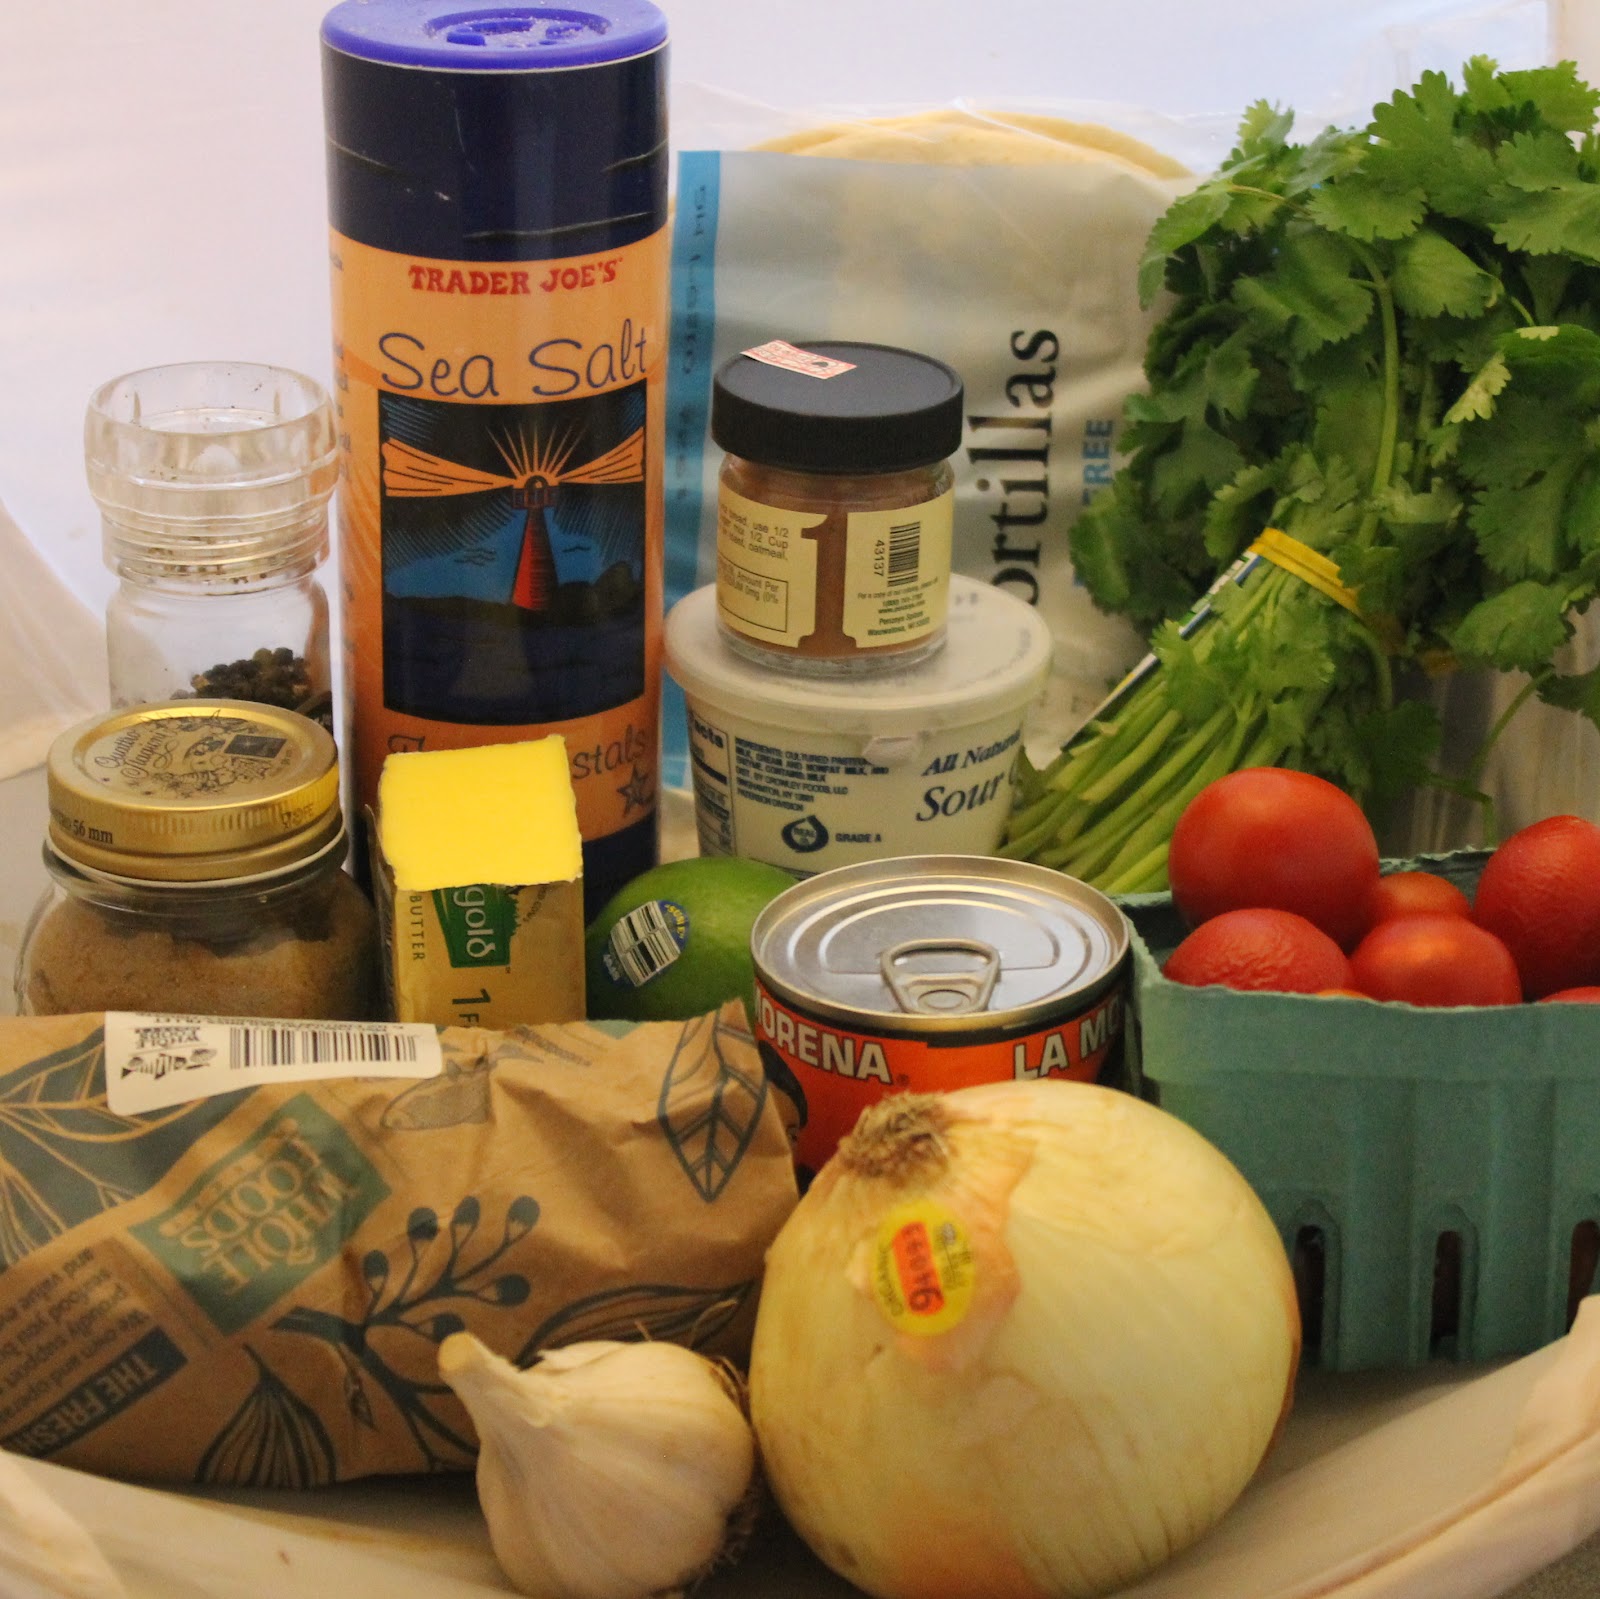
I have never made a taco recipe from Cooking Light that I didn’t love. Honestly, how do they manage to deliver fantastic recipe after fantastic recipe? This one for Chilean Sea Bass Tacos with Chipotle Cream is no different, although the original recipe was made with red snapper. I’ve been having really bad luck recently coming across the fish I want when I go to the market, so I had to sub in Chilean sea bass instead.
Ingredients:
1/2 cup fat-free sour cream
1/8 teaspoon salt
1 canned chipotle chile in adobo sauce, seeded and minced
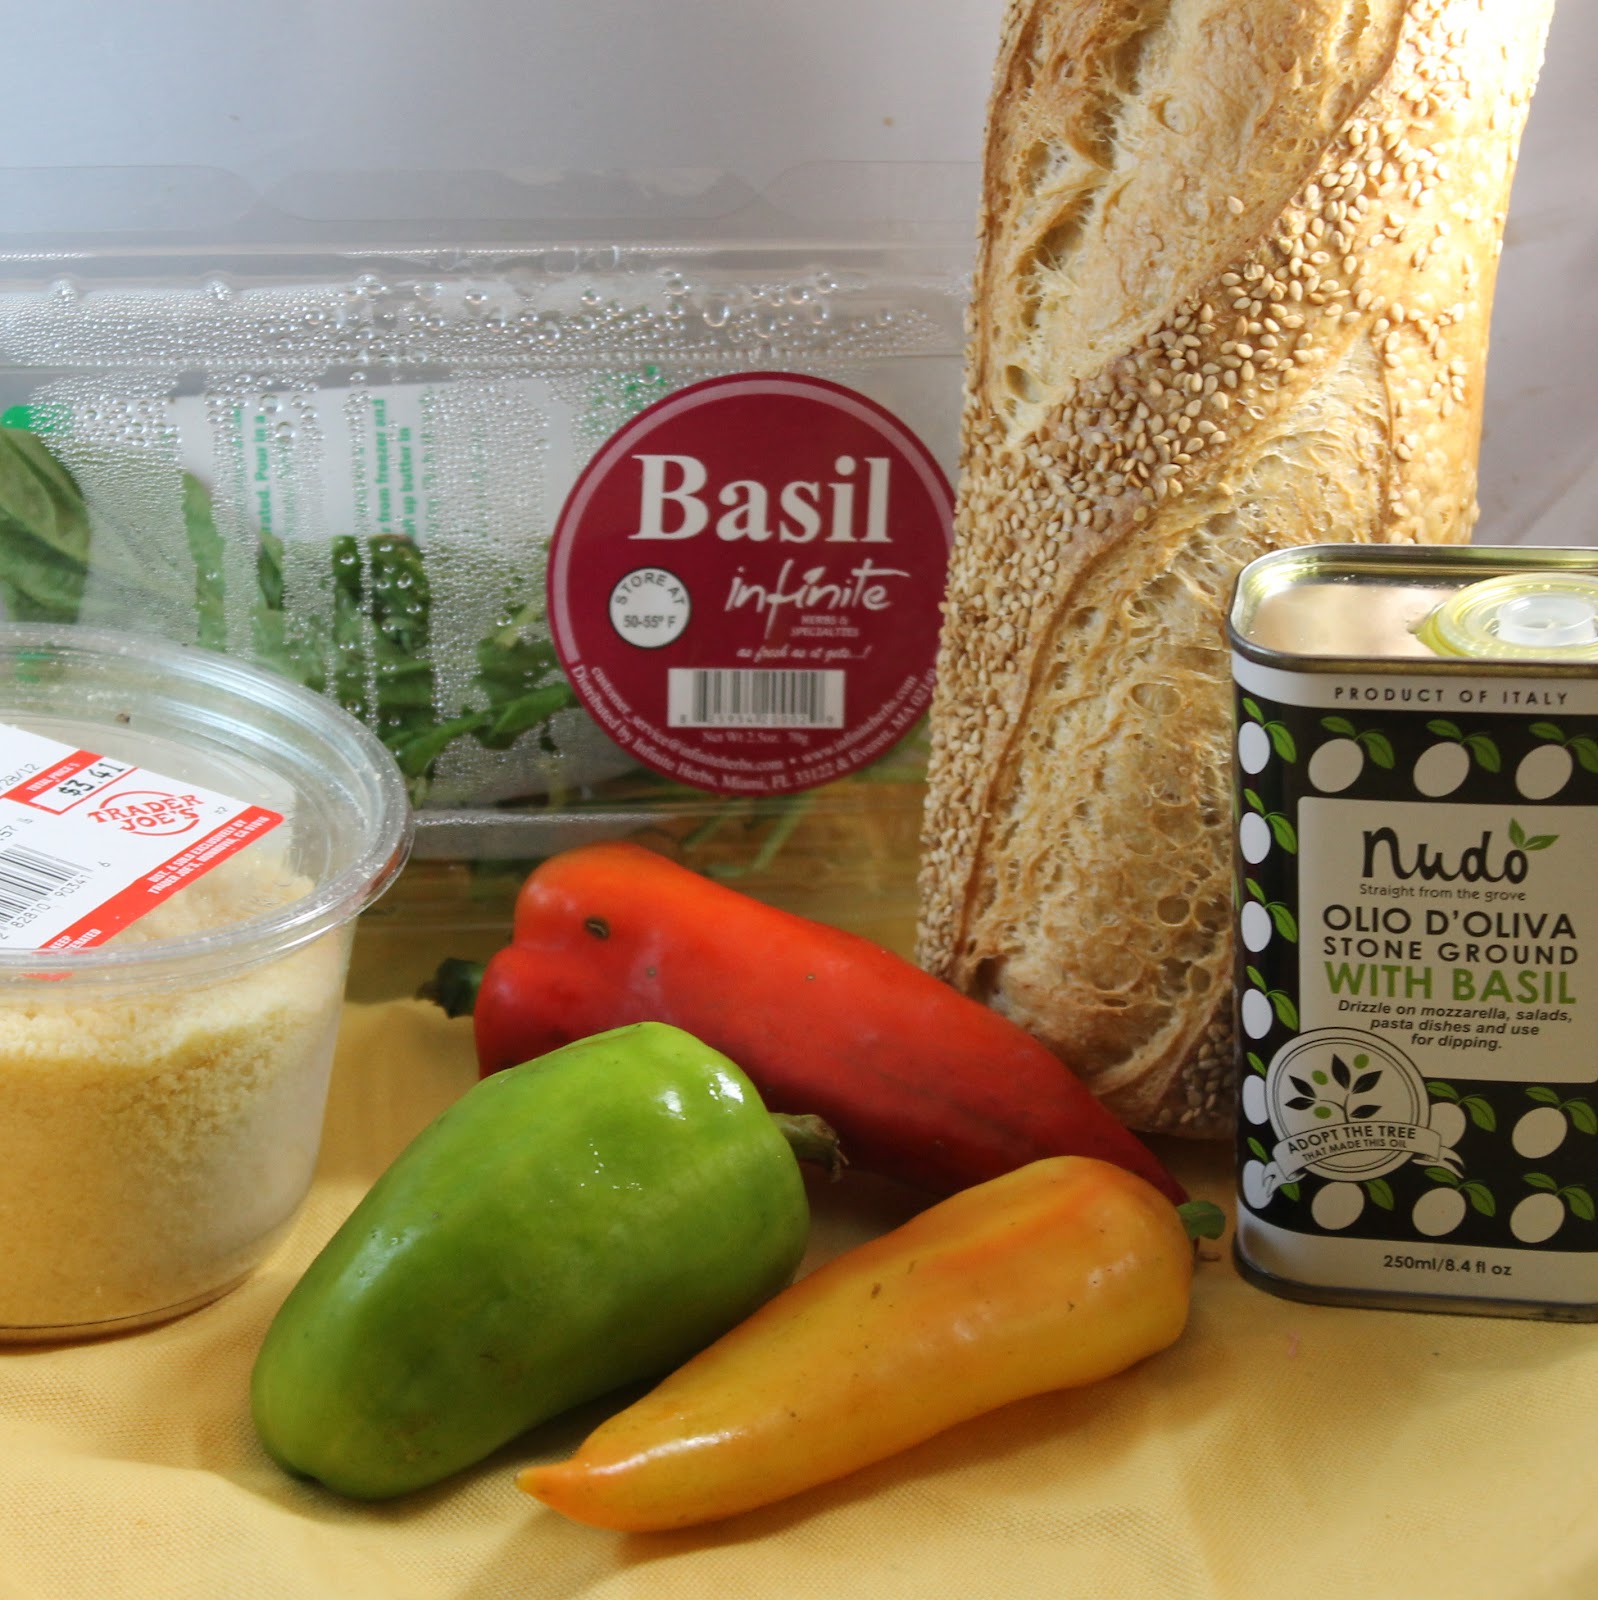
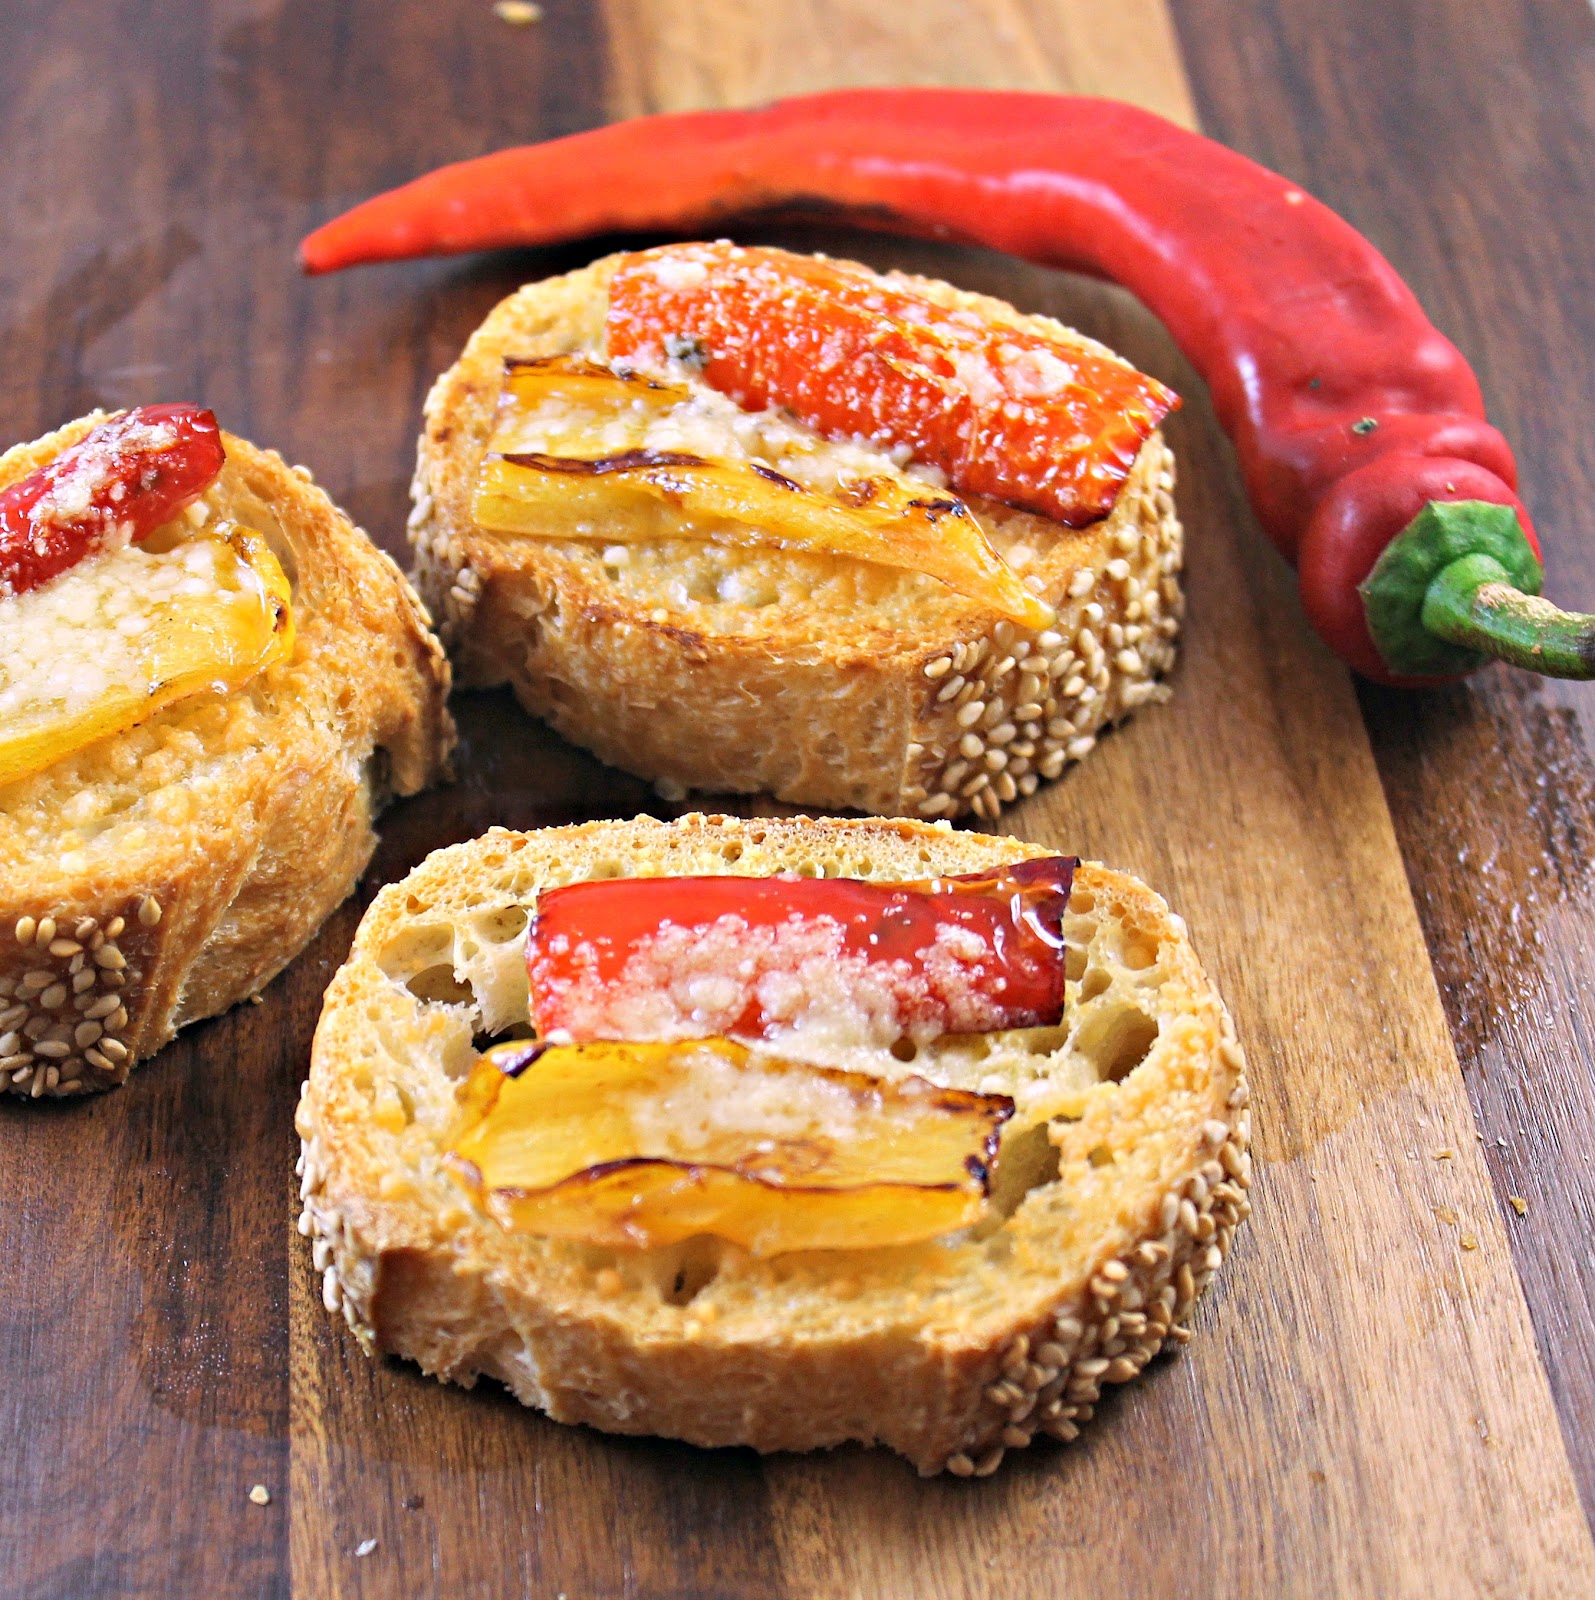
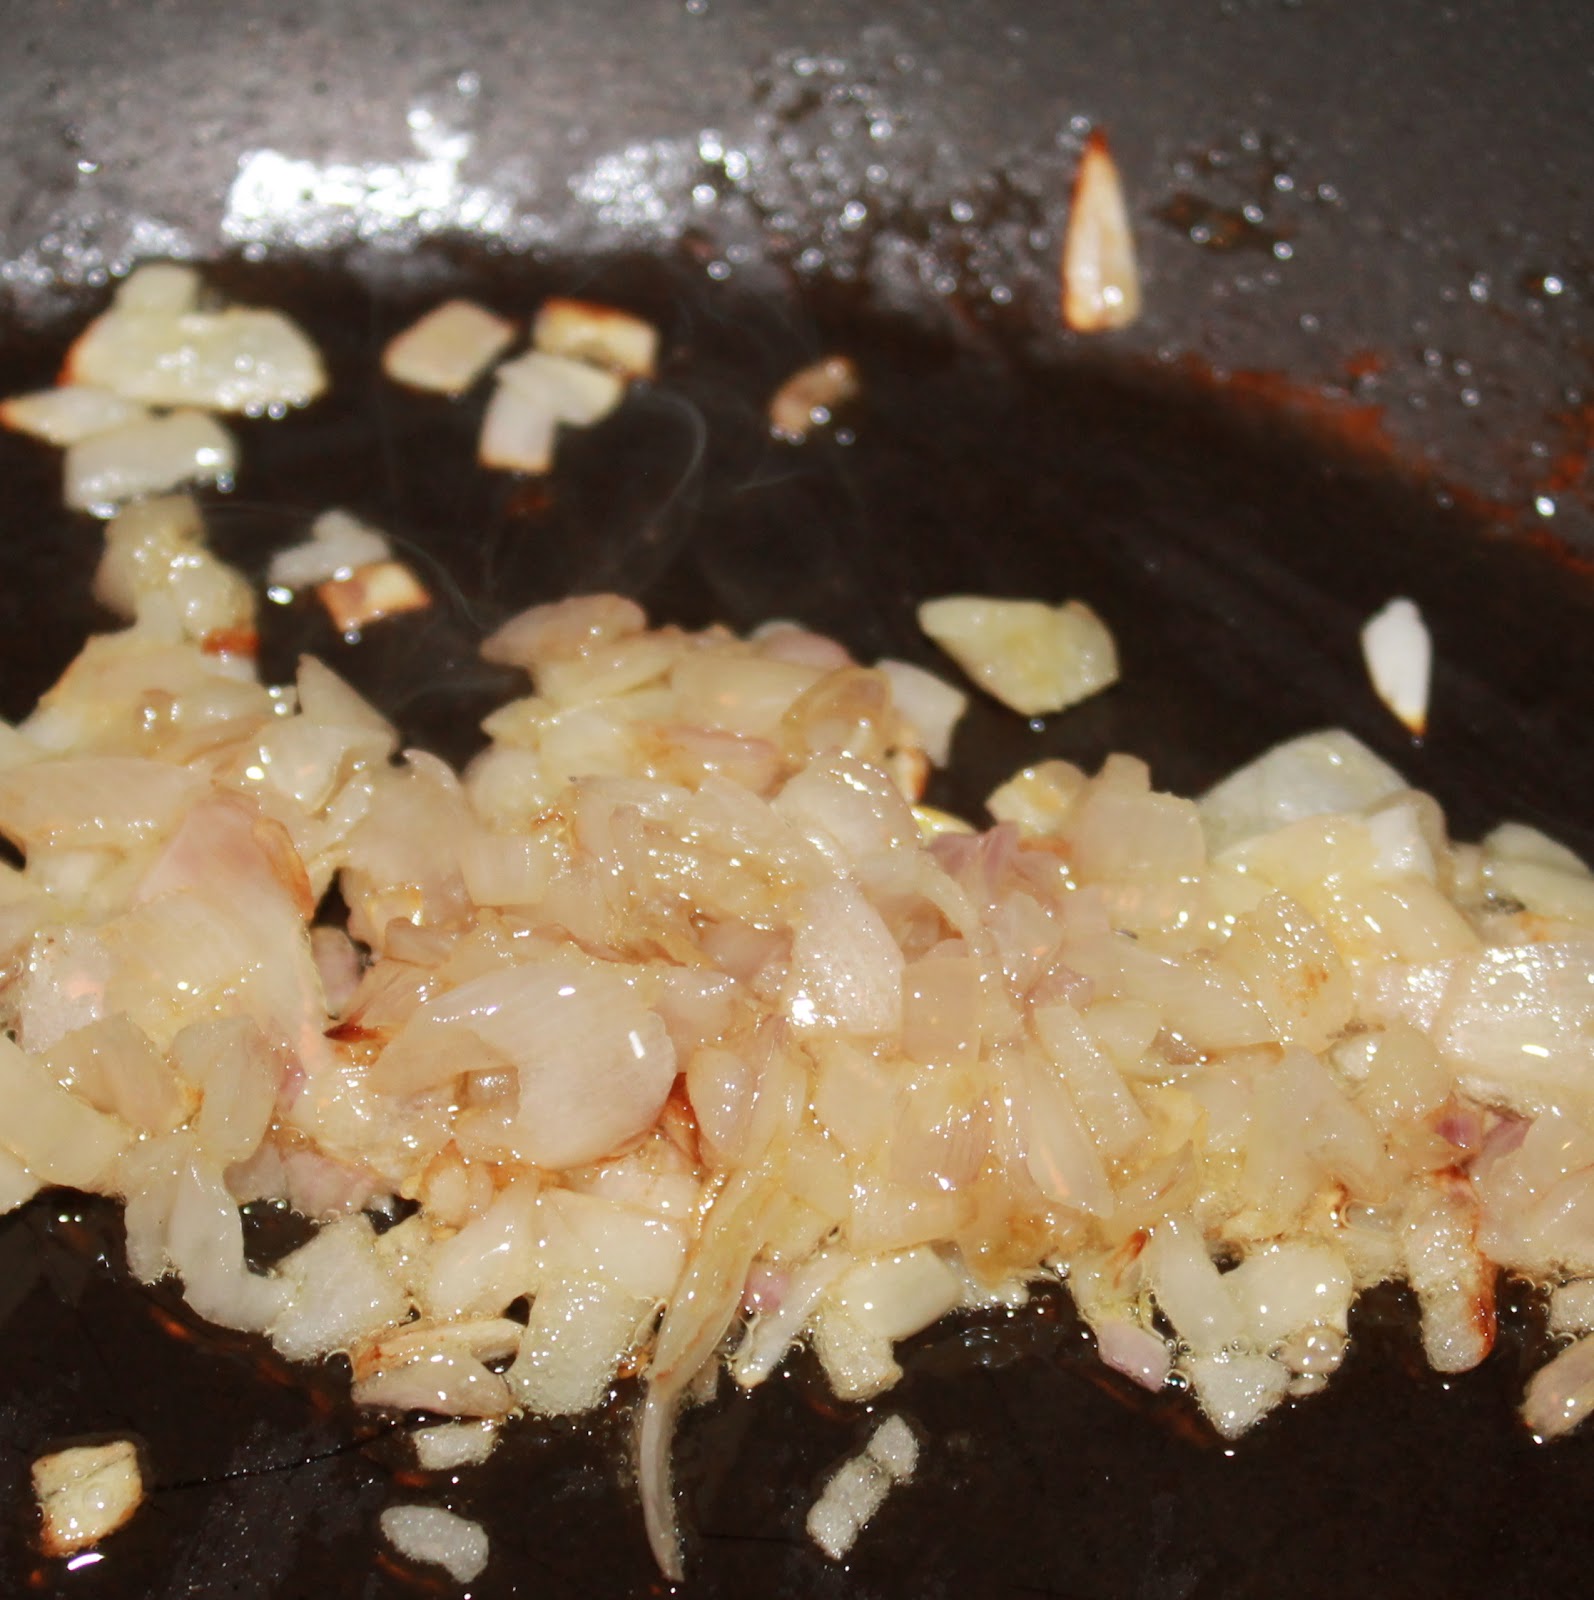
I received Italian Frying Peppers in my CSA share this week. I had no idea what an Italian frying pepper was so I was curious to find out more about these fun looking peppers. Although they look like they might be spicy, they are definitely closer to the flavor of a bell pepper, but there is a hint of spice. They come in a range of colors so I thought they’d make a beautiful bruschetta-type appetizer. I figured there was good reason they were called frying peppers, so I kept it simple and did just that: sauteed them up in some olive oil. (Sorry about the lack of amounts of each ingredient, I made this up as I was going)
Ingredients:
Italian frying peppers, cut small/thin enough to fit on bread slices
French or Italian bread, sliced
Olive oil (I used Nudo’s basil olive oil)
Parmesan cheese
Fresh basil, chopped
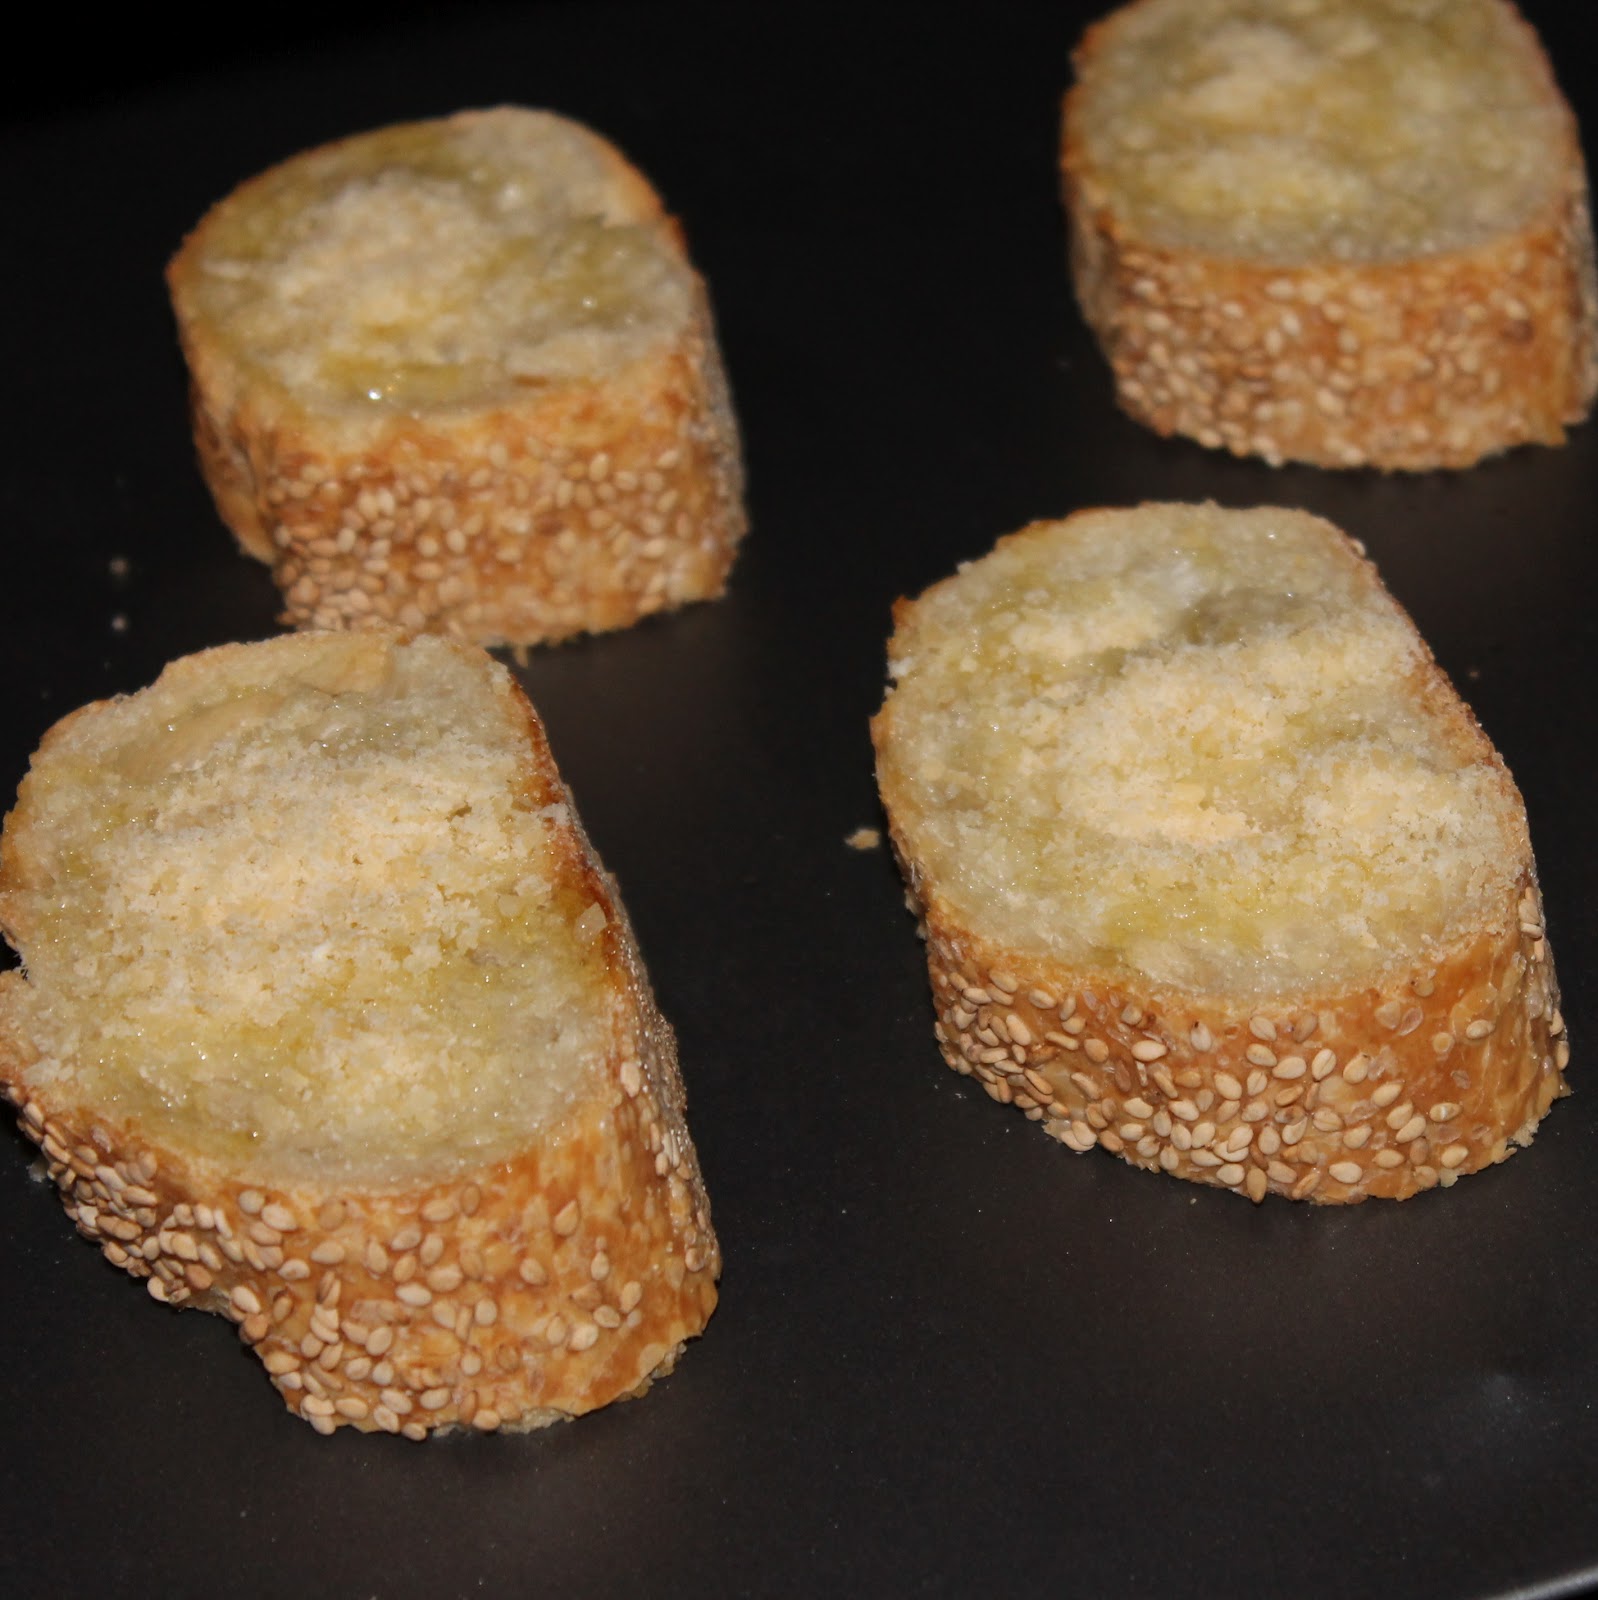
Preheat your broiler. Brush the pieces of bread with the olive oil. (I realized after I did this with basil how fantastic it would have been with Nudo’s olive oil with chili. Sigh. I’ll do that next time!)
Top with Parmesan cheese and add to a cookie sheet.
Broil for 1-2 minutes or until the bread begins to brown.
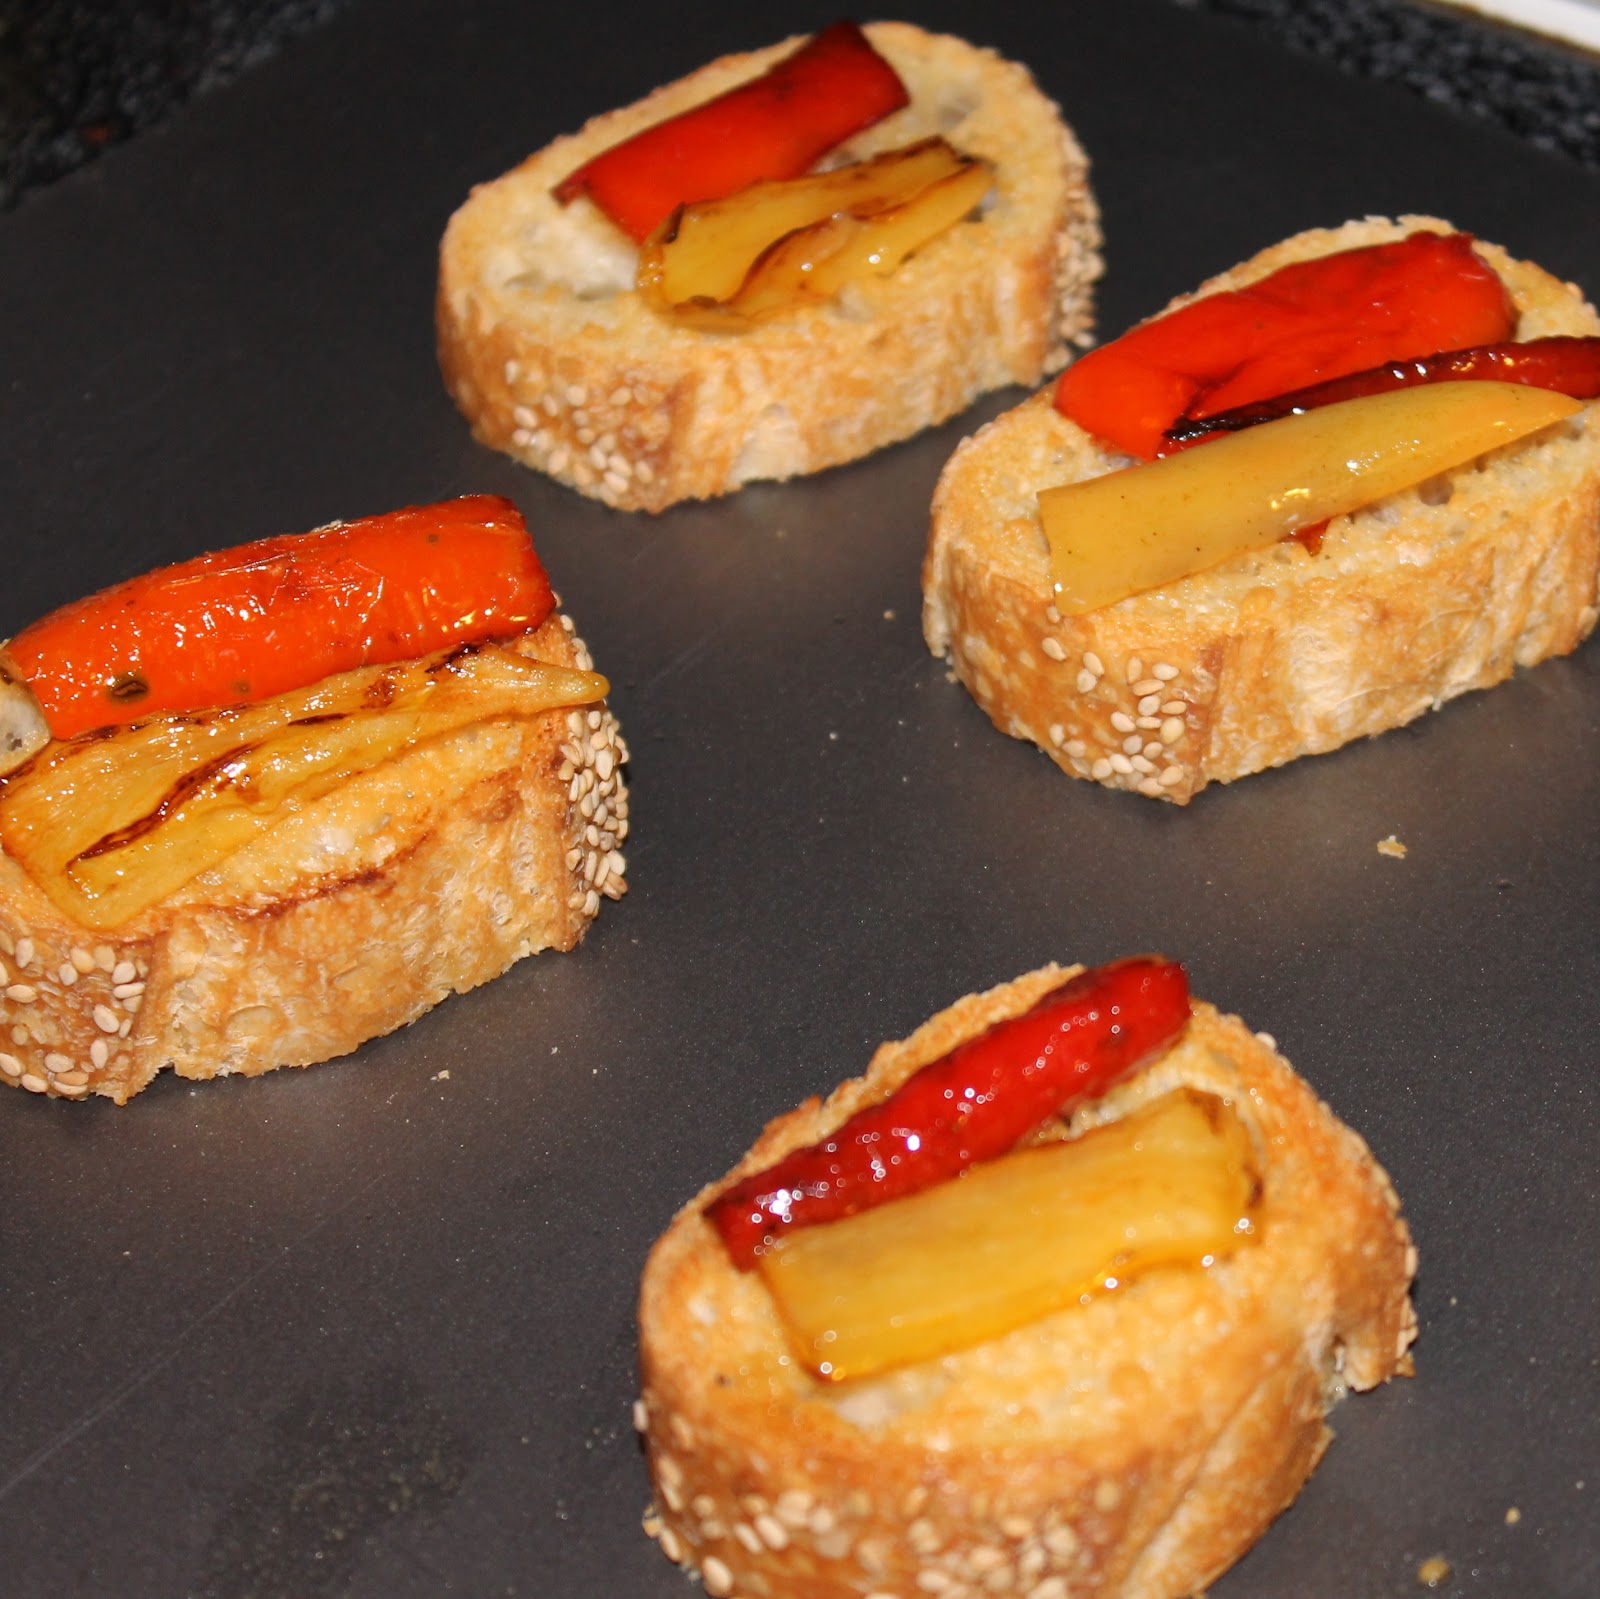
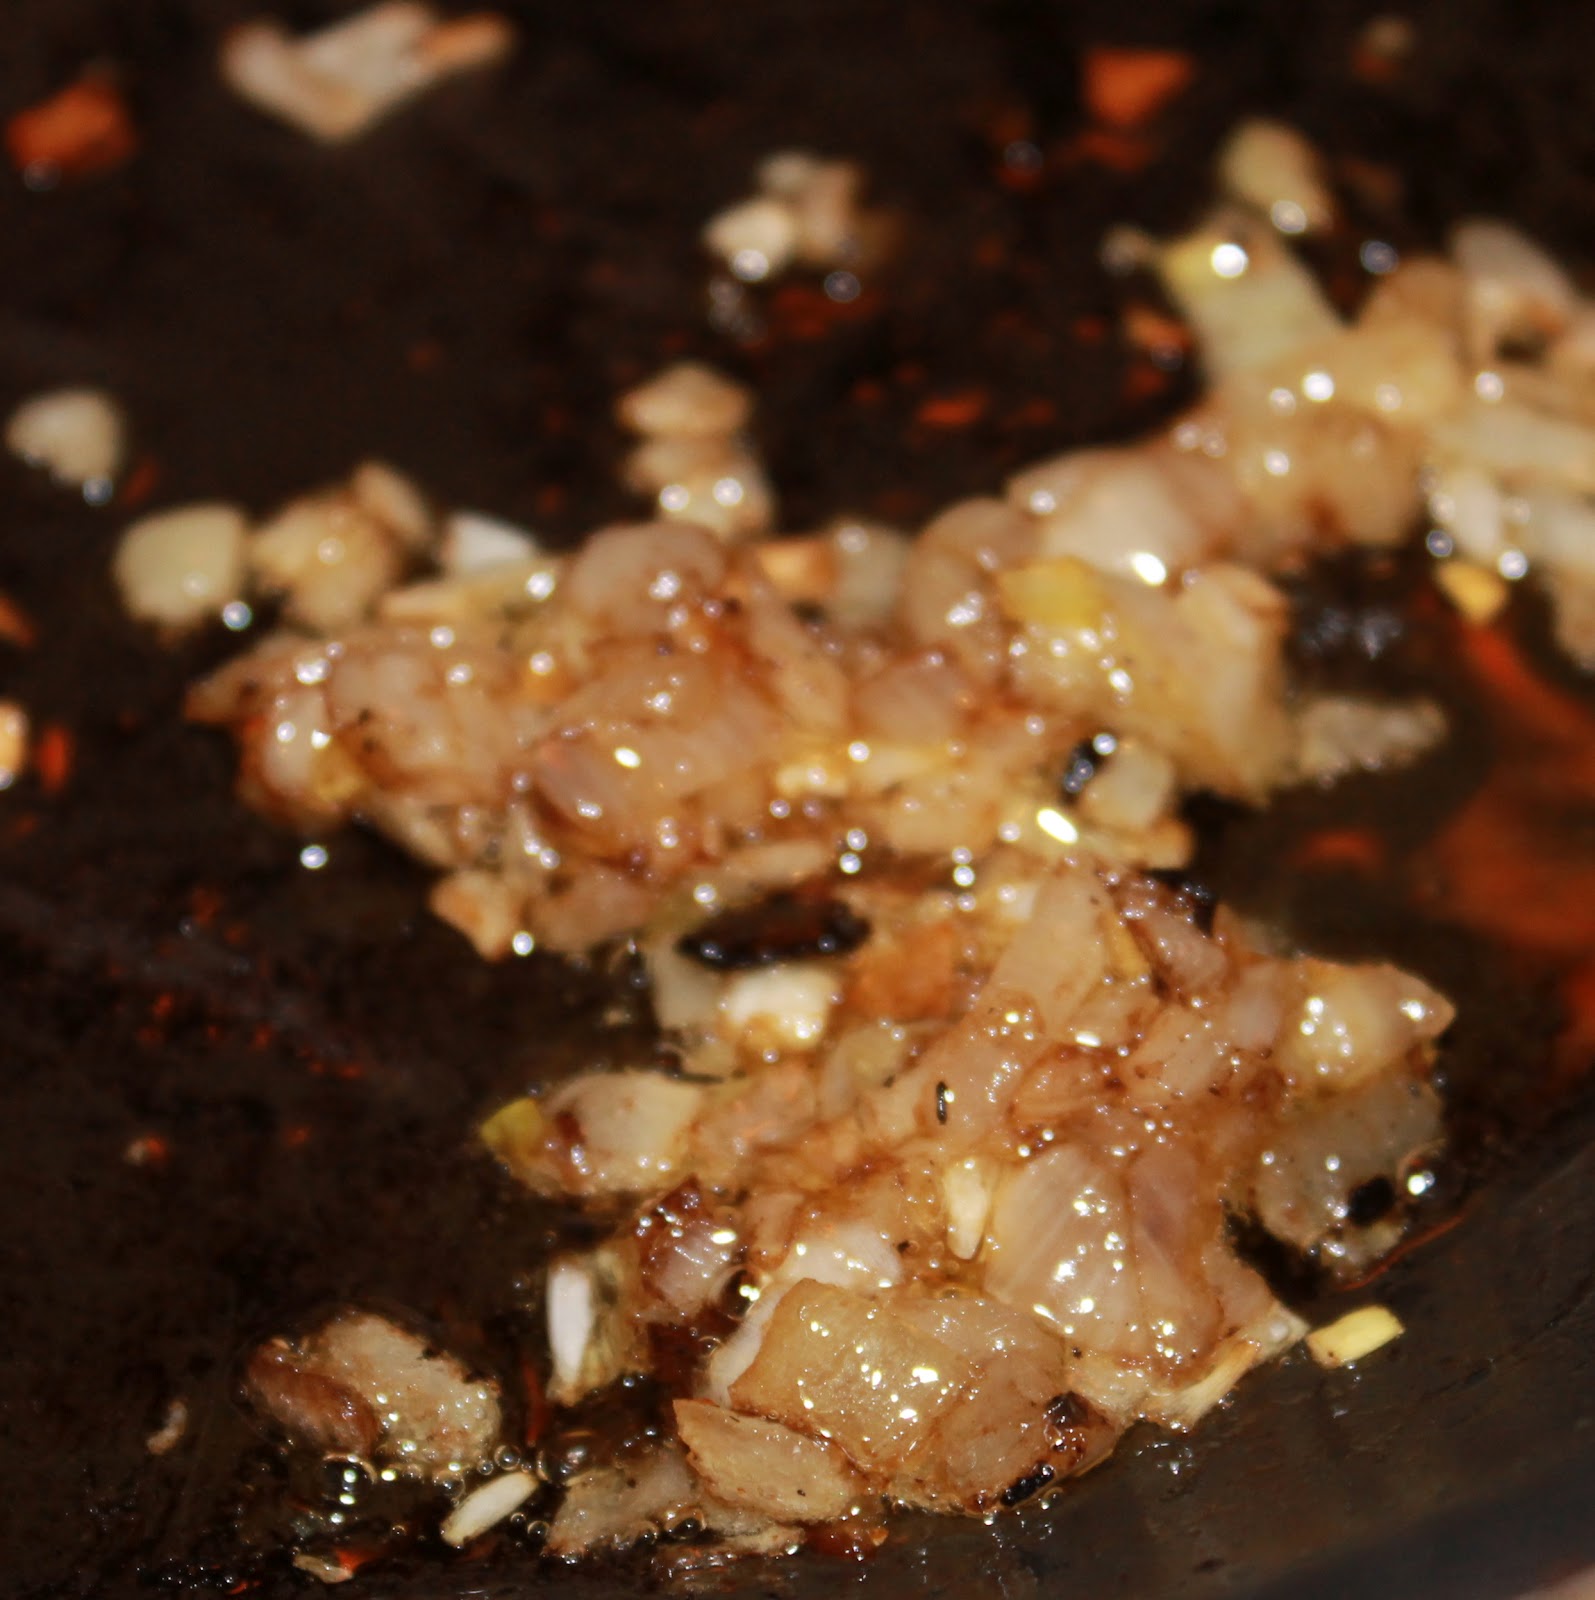
Add 1 teaspoon of olive oil per frying pepper (I cooked three so I used 1 tablespoon) to a saute pan over medium-high heat. Add the peppers.
Cook until they begin to brown, turning once, about 4-5 minutes.
Remove the peppers from the pan and top the bread with slices of peppers.
If desired, add a bit more Parmesan cheese and broil for another 30 seconds to a minute, or until the cheese melts.
They can be served as is. Simple, delicious, and quick.
You can also add some freshly chopped basil to the slices to add a bit more flavor.
These were really stellar. I loved how (for lack of a better term) creamy the peppers became once fried. This recipe was really delicious with the basil olive oil, but I bet the chili olive oil would have been spectacular. Normal extra virgin olive oil would also do the trick.
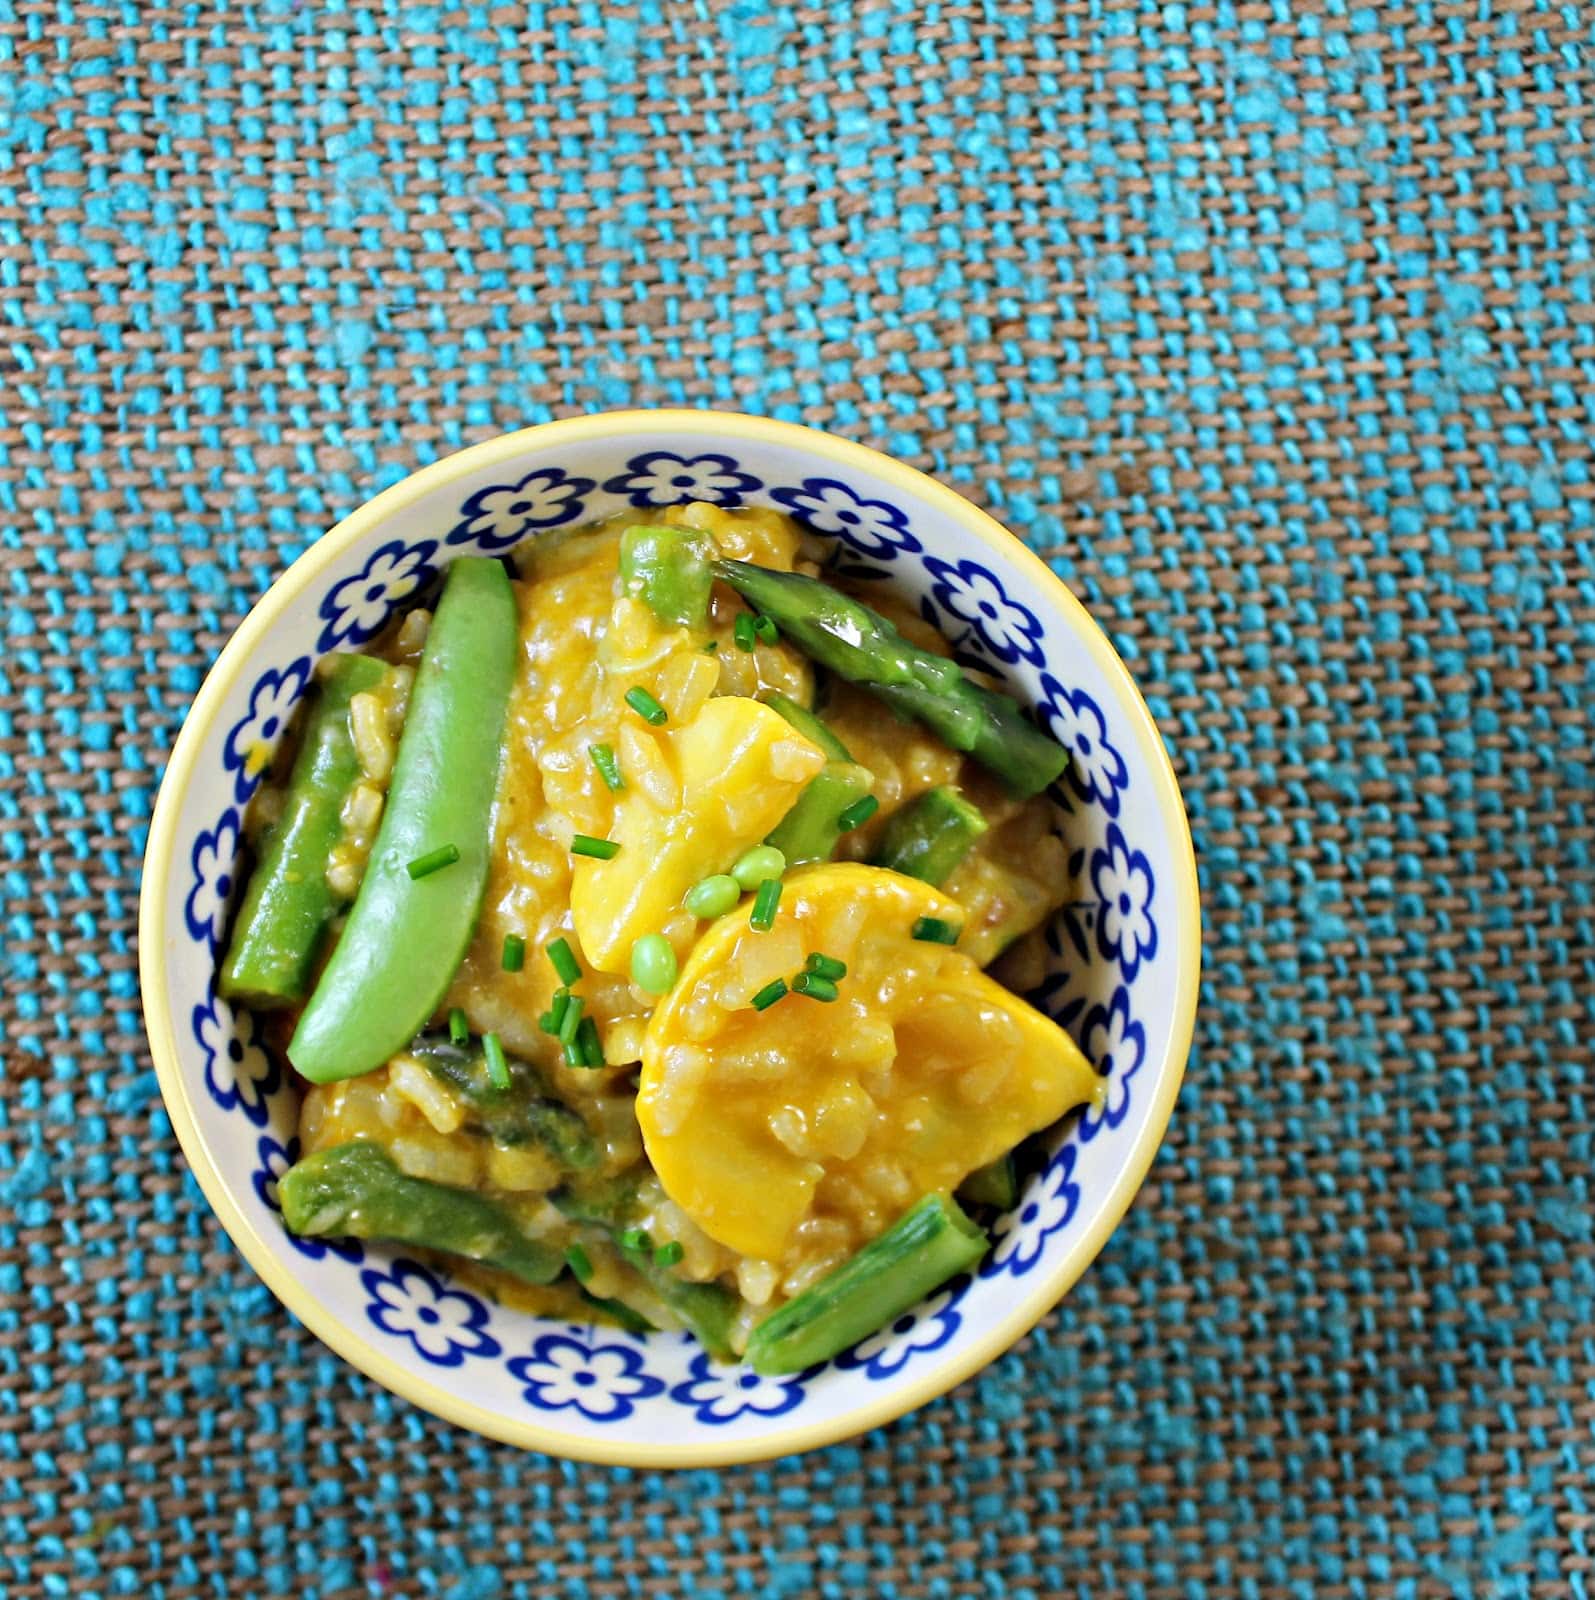
As I hear rumblings of all things pumpkin just around the corner (yay!), I realized that my days of beautiful, fresh vegetables are numbered (boo). Which means I needed a recipe that used some of summer’s best. This risotto recipe from Cooking Light fit the bill: Asparagus, Sugar Snap Peas, Zucchini, Yellow Squash.. mmm.
Ingredients:
8 ounces asparagus, trimmed and cut into 1-inch pieces
8 ounces sugar snap peas, trimmed and cut in half
5 teaspoons extra-virgin olive oil, divided
1 (8-ounce) zucchini, halved lengthwise and cut into 1/2-inch-thick slices
1 (8-ounce) yellow squash, halved lengthwise and cut into 1/2-inch-thick slices
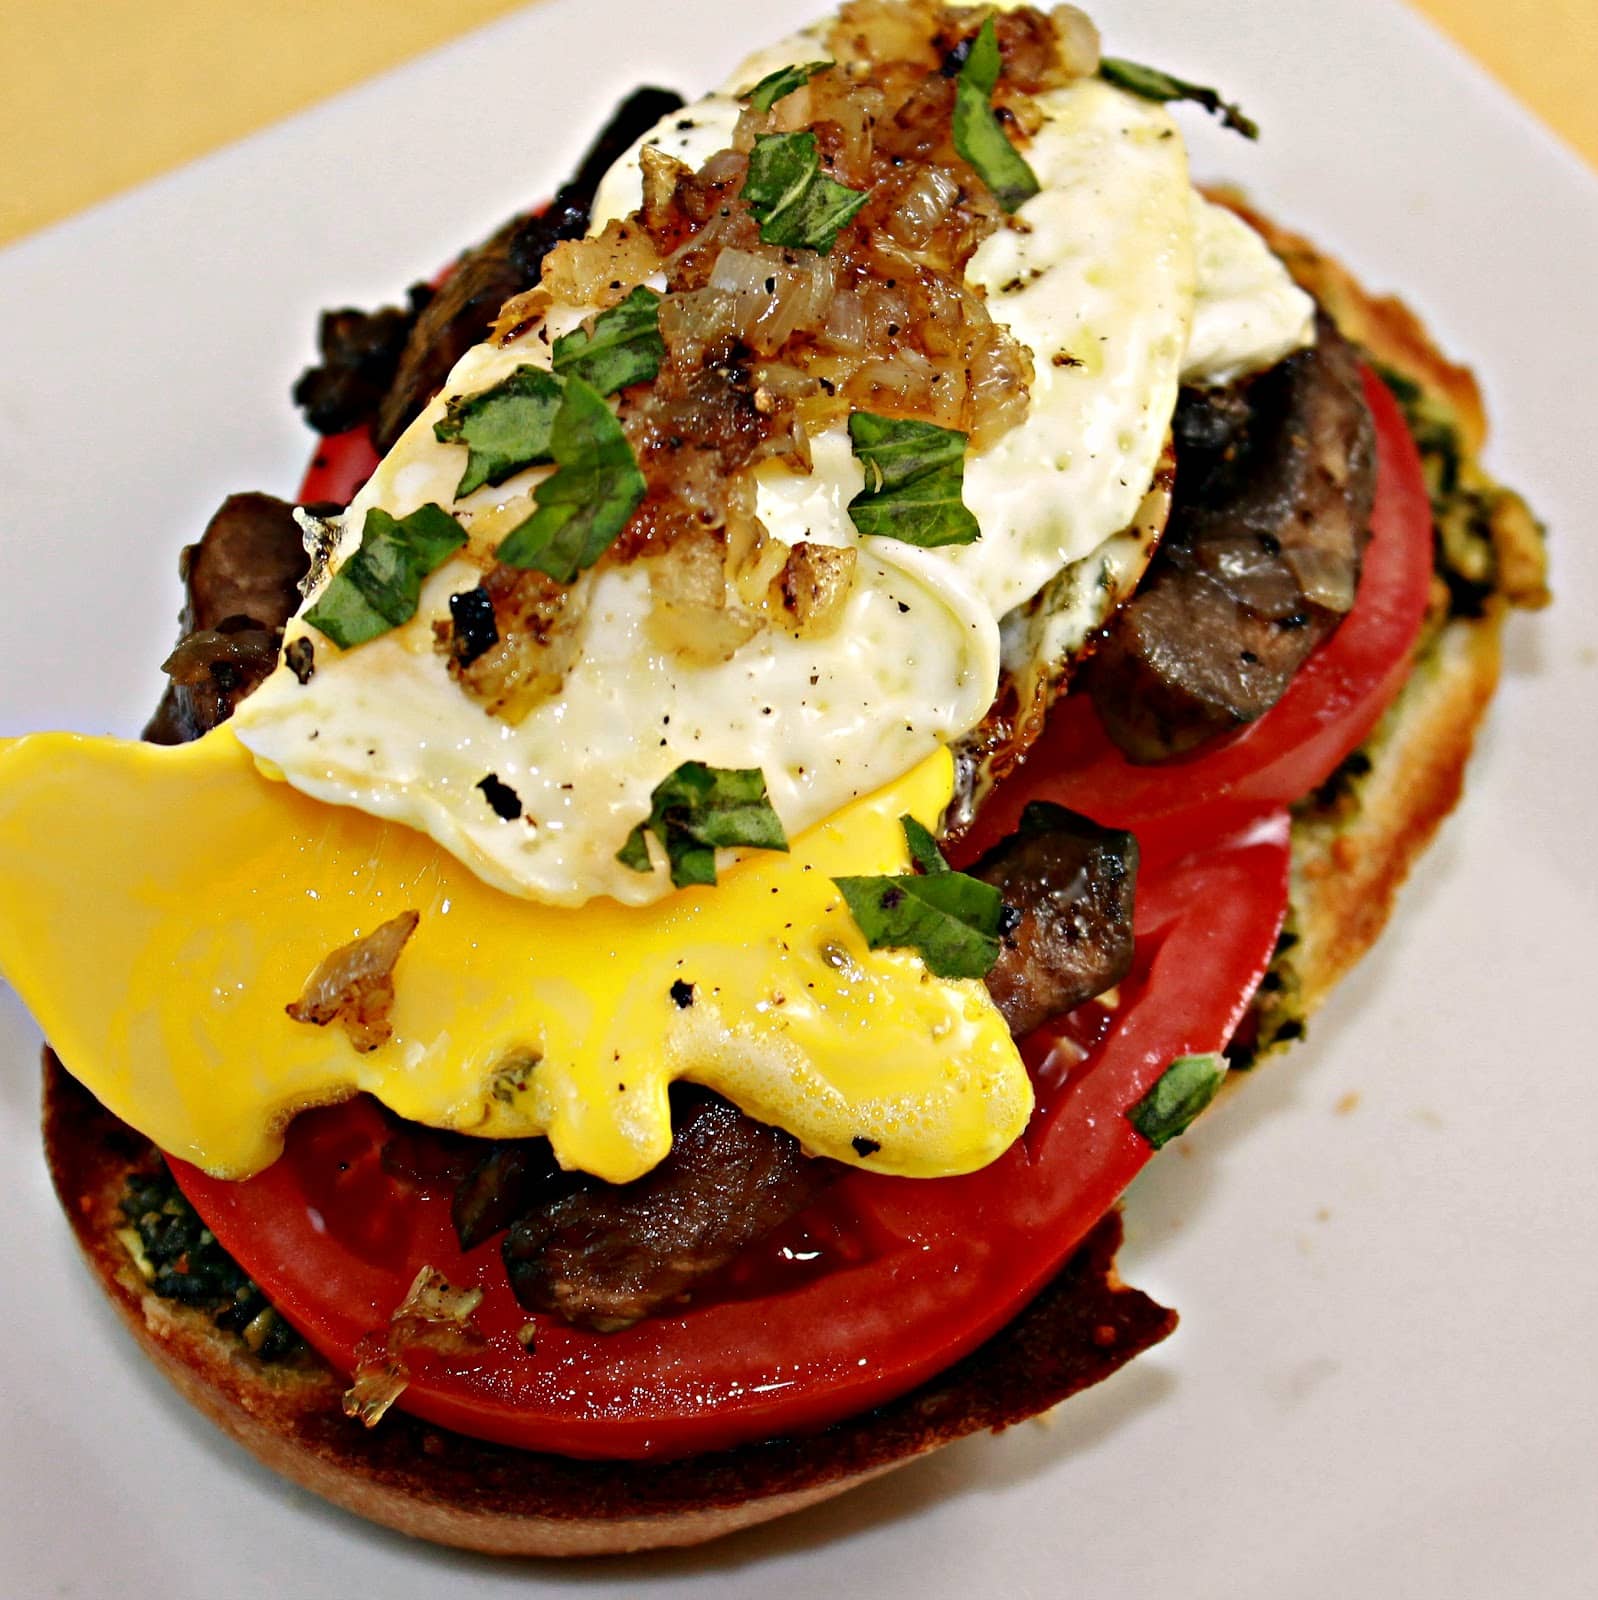
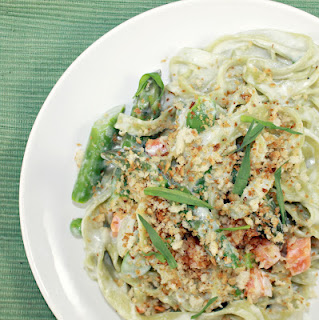
Brunch appeals to my indecisive side: I love not having to choose between breakfast or lunch. Philadelphia is a huge brunch town so almost every weekend I have the opportunity to have an awesome brunch at a local coffee shop or restaurant. This weekend, I decided to stay home for brunch and try out this delicious sounding recipe from Cooking Light. The recipe includes mushrooms, a fried egg, tomatoes, and pesto … did they make this recipe especially for me?!
Ingredients (this makes 4 servings):
4 teaspoons extra-virgin olive oil, divided (I used basil olive oil)
1 cup thinly sliced shallots, divided
3 portobello mushrooms, roughly chopped
2 tablespoons dry white wine
1/2 teaspoon freshly ground black pepper, divided
1/4 teaspoon kosher salt
8 teaspoons refrigerated pesto (or fresh, check out my recipe here)
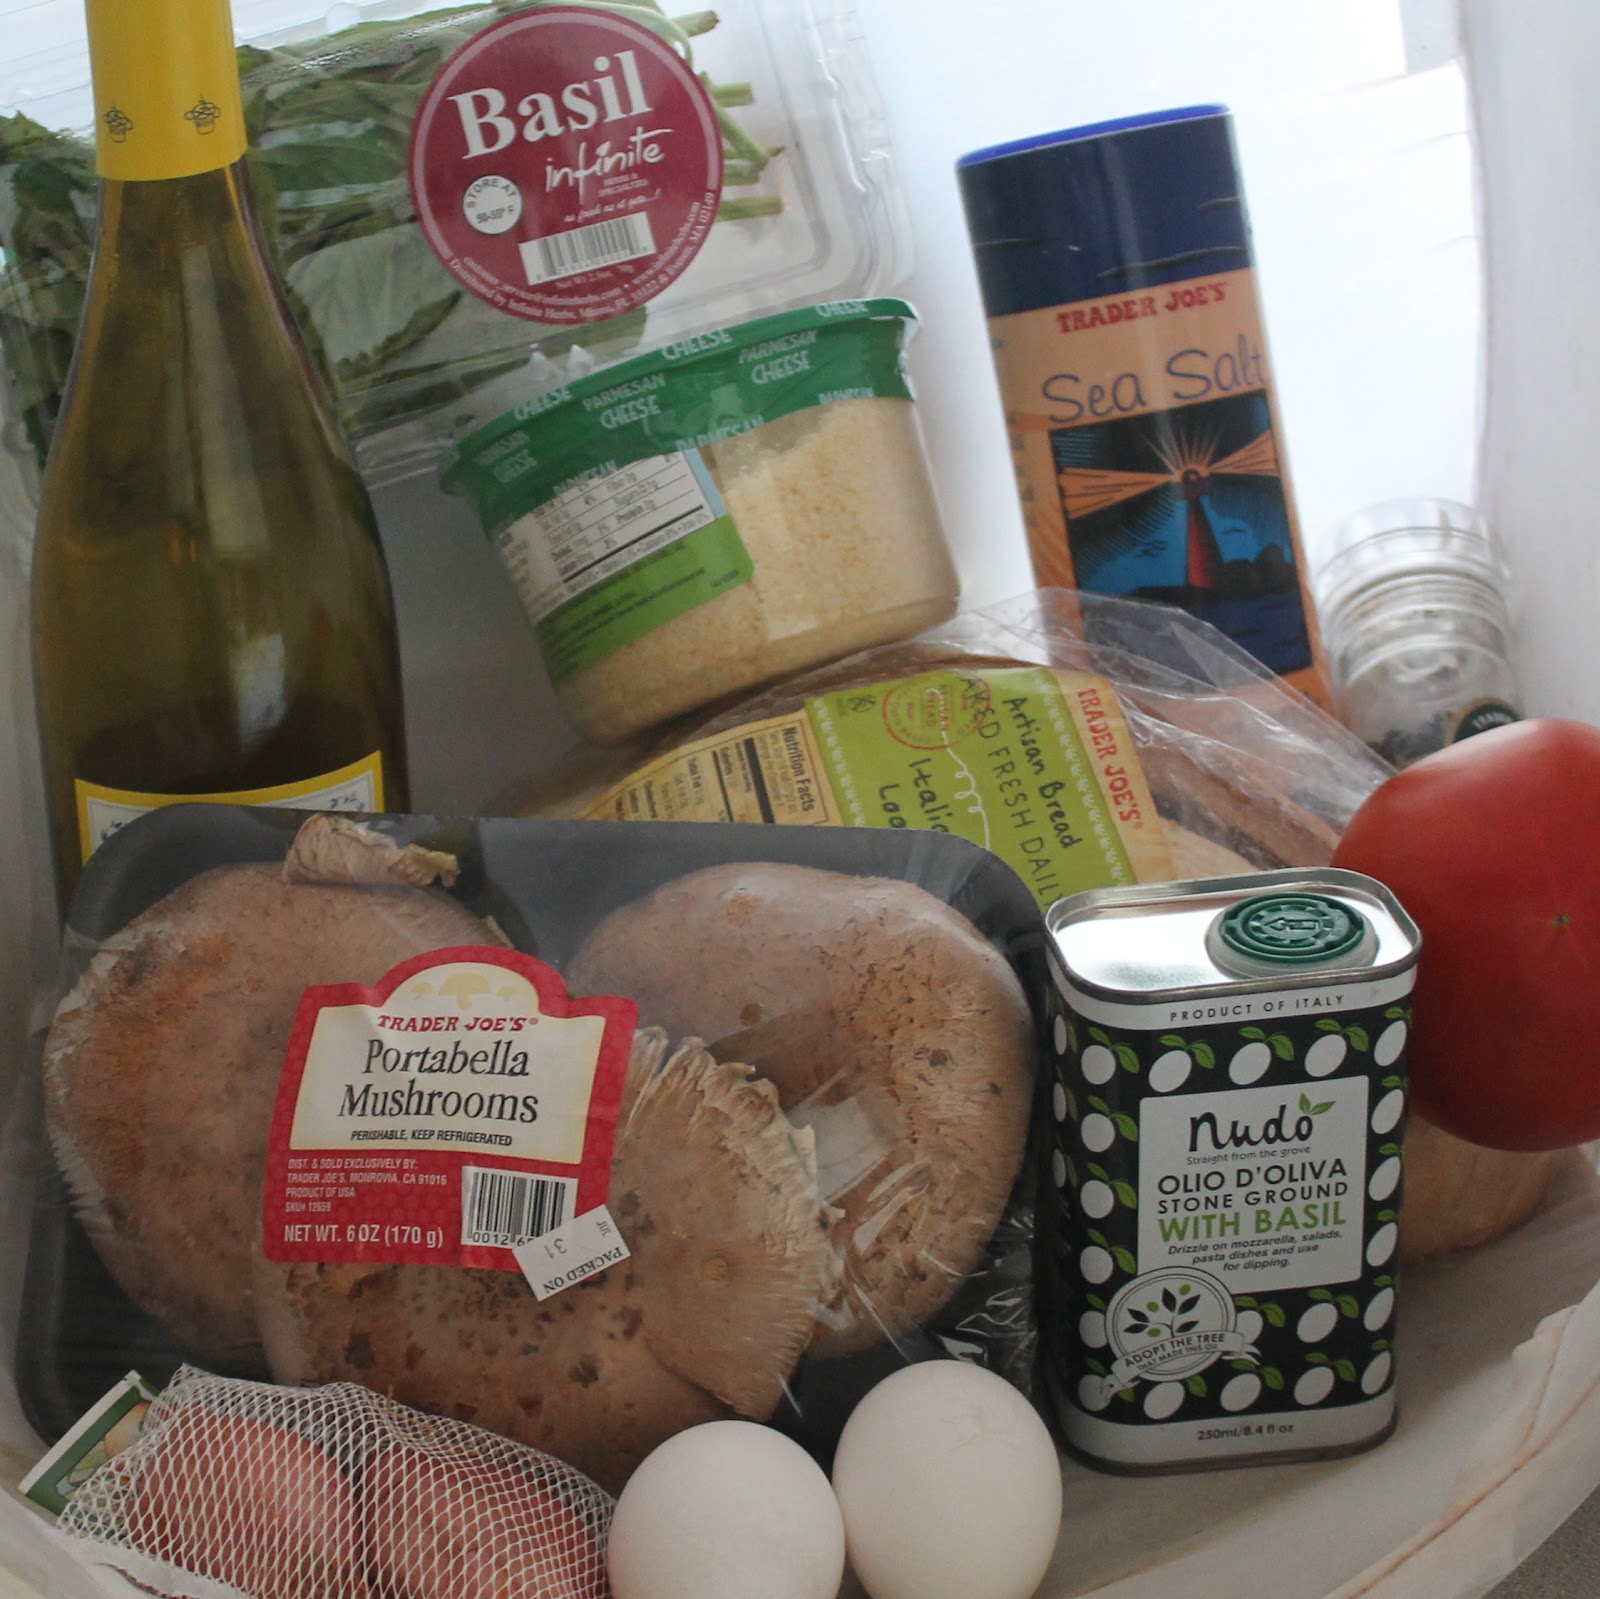
The wonderful people at Nudo sent me a new product on their site: the Squadra Italiana Set which includes cold press olive oil, olive oil with Sicilian chillies, and a free tin of extra virgin olive oil stone ground with fresh basil. These olive oils are absolutely wonderful on their own, to just dip breads in. But I wanted to add that extra punch of basil to this dish so I used the basil olive oil to add a little bit more flavor. Expect these tasty olive oils to show up in quite a few posts in the coming weeks. (You can get your own Squadra Italiana Set here)
If you’re making your own pesto, do that first. It takes maybe 5 minutes and tastes considerably better (at least I think so).
Heat a large saute pan over medium heat. Add 2 teaspoons olive oil to the pan and swirl to coat. Add 2/3 cup shallots and cook for 3 minutes.
Add the chopped mushrooms and cook for 4 minutes, stirring occasionally.
Add the wine, 1/4 teaspoon pepper and 1/4 teaspoon salt. Bring to a boil, scraping the pan to loosen up the brown bits. Cook for 2 minutes or until liquid almost evaporates, stirring occasionally. Remove the mushroom mixture from the pan and keep warm. Preheat your broiler.
Return the pan to medium heat. Add 1 teaspoon oil to the pan, swirling to coat. Add the remaining 1/3 cup shallots and saute for 5 minutes or until lightly browned. Remove from pan and keep warm.
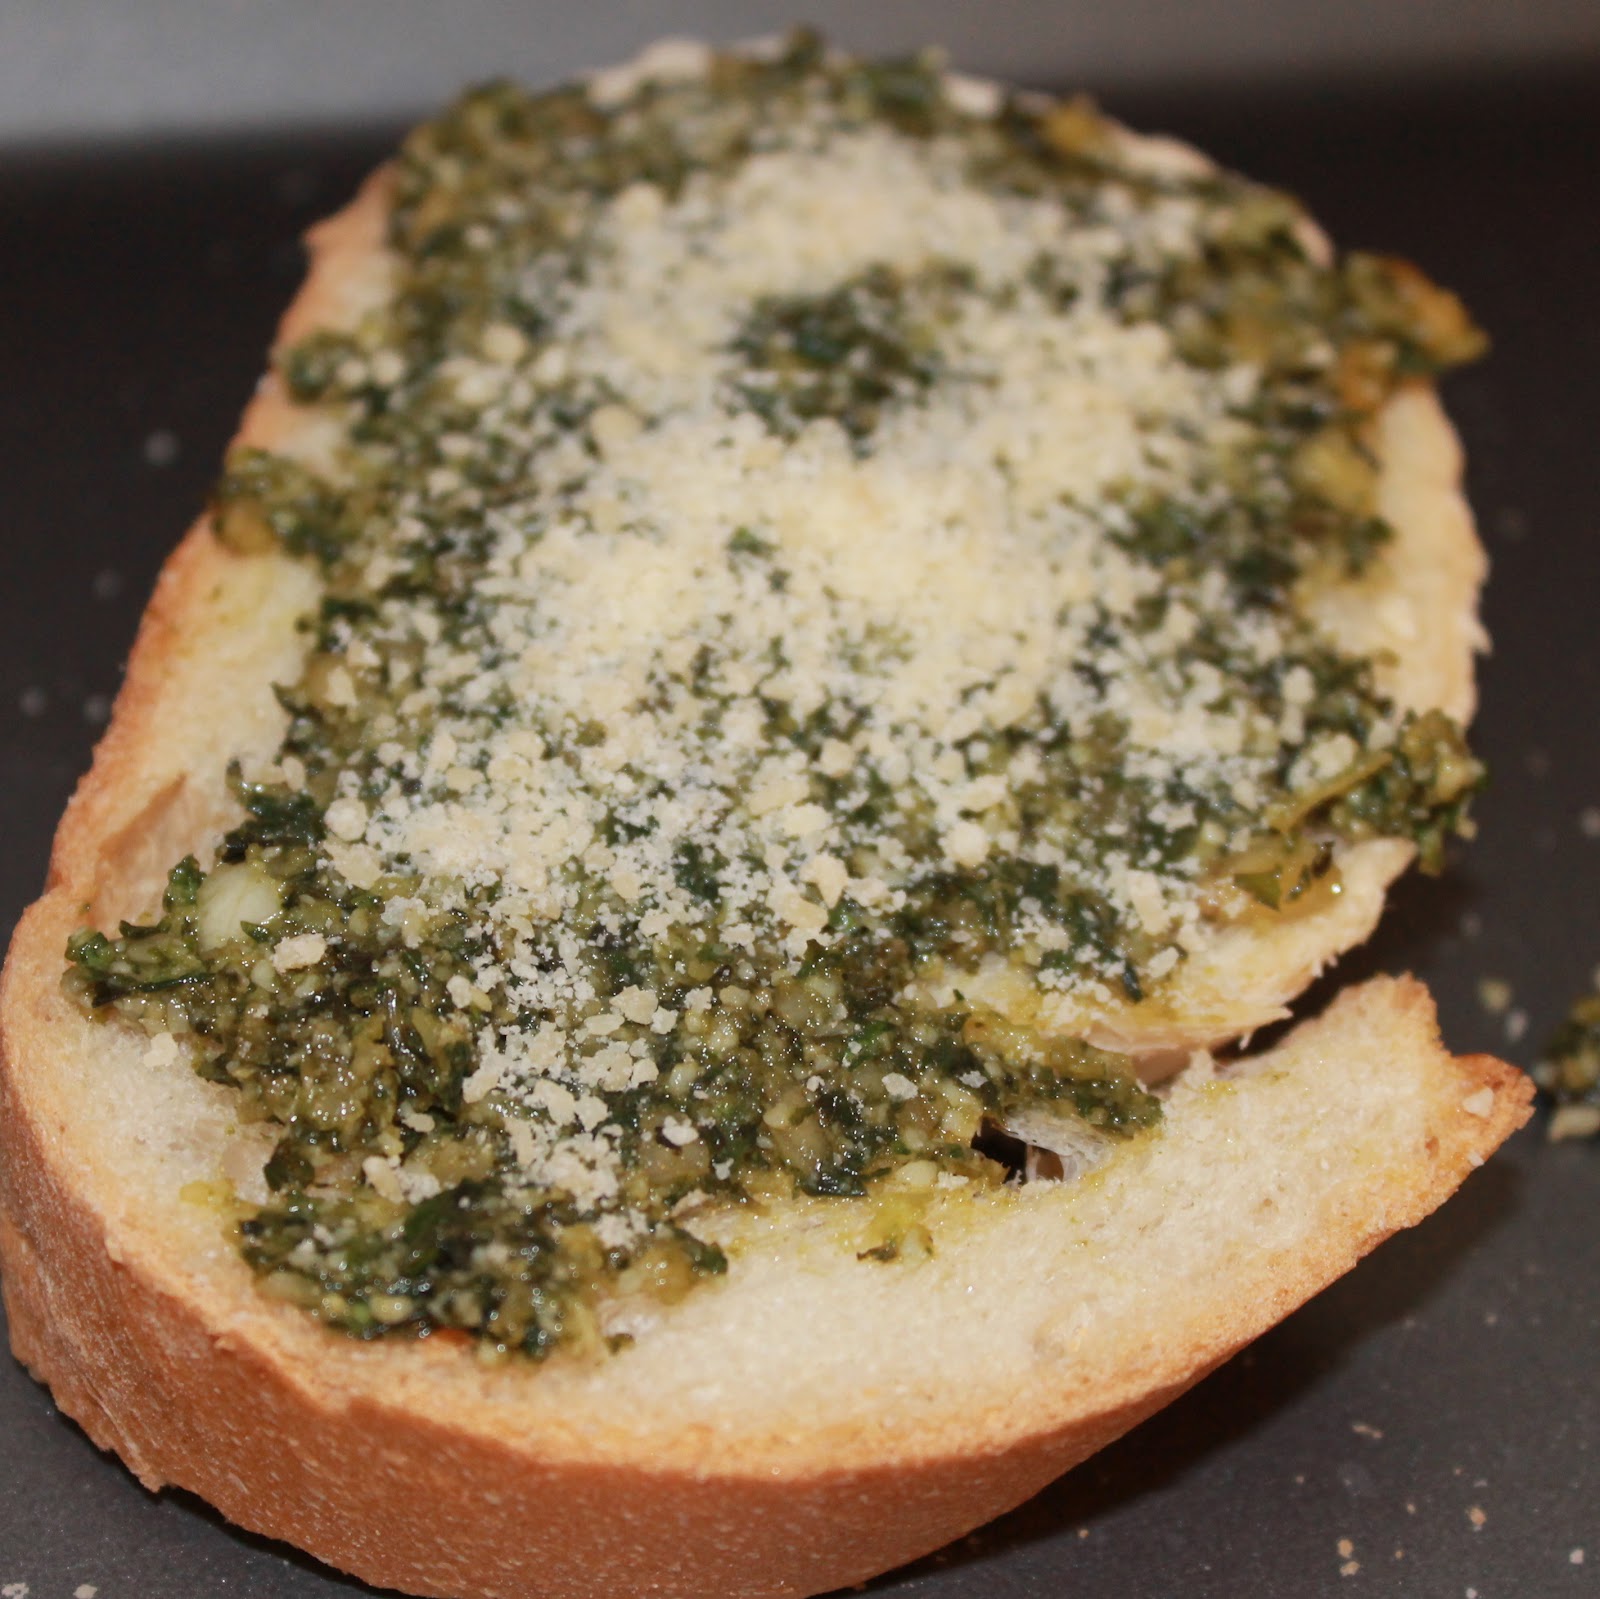
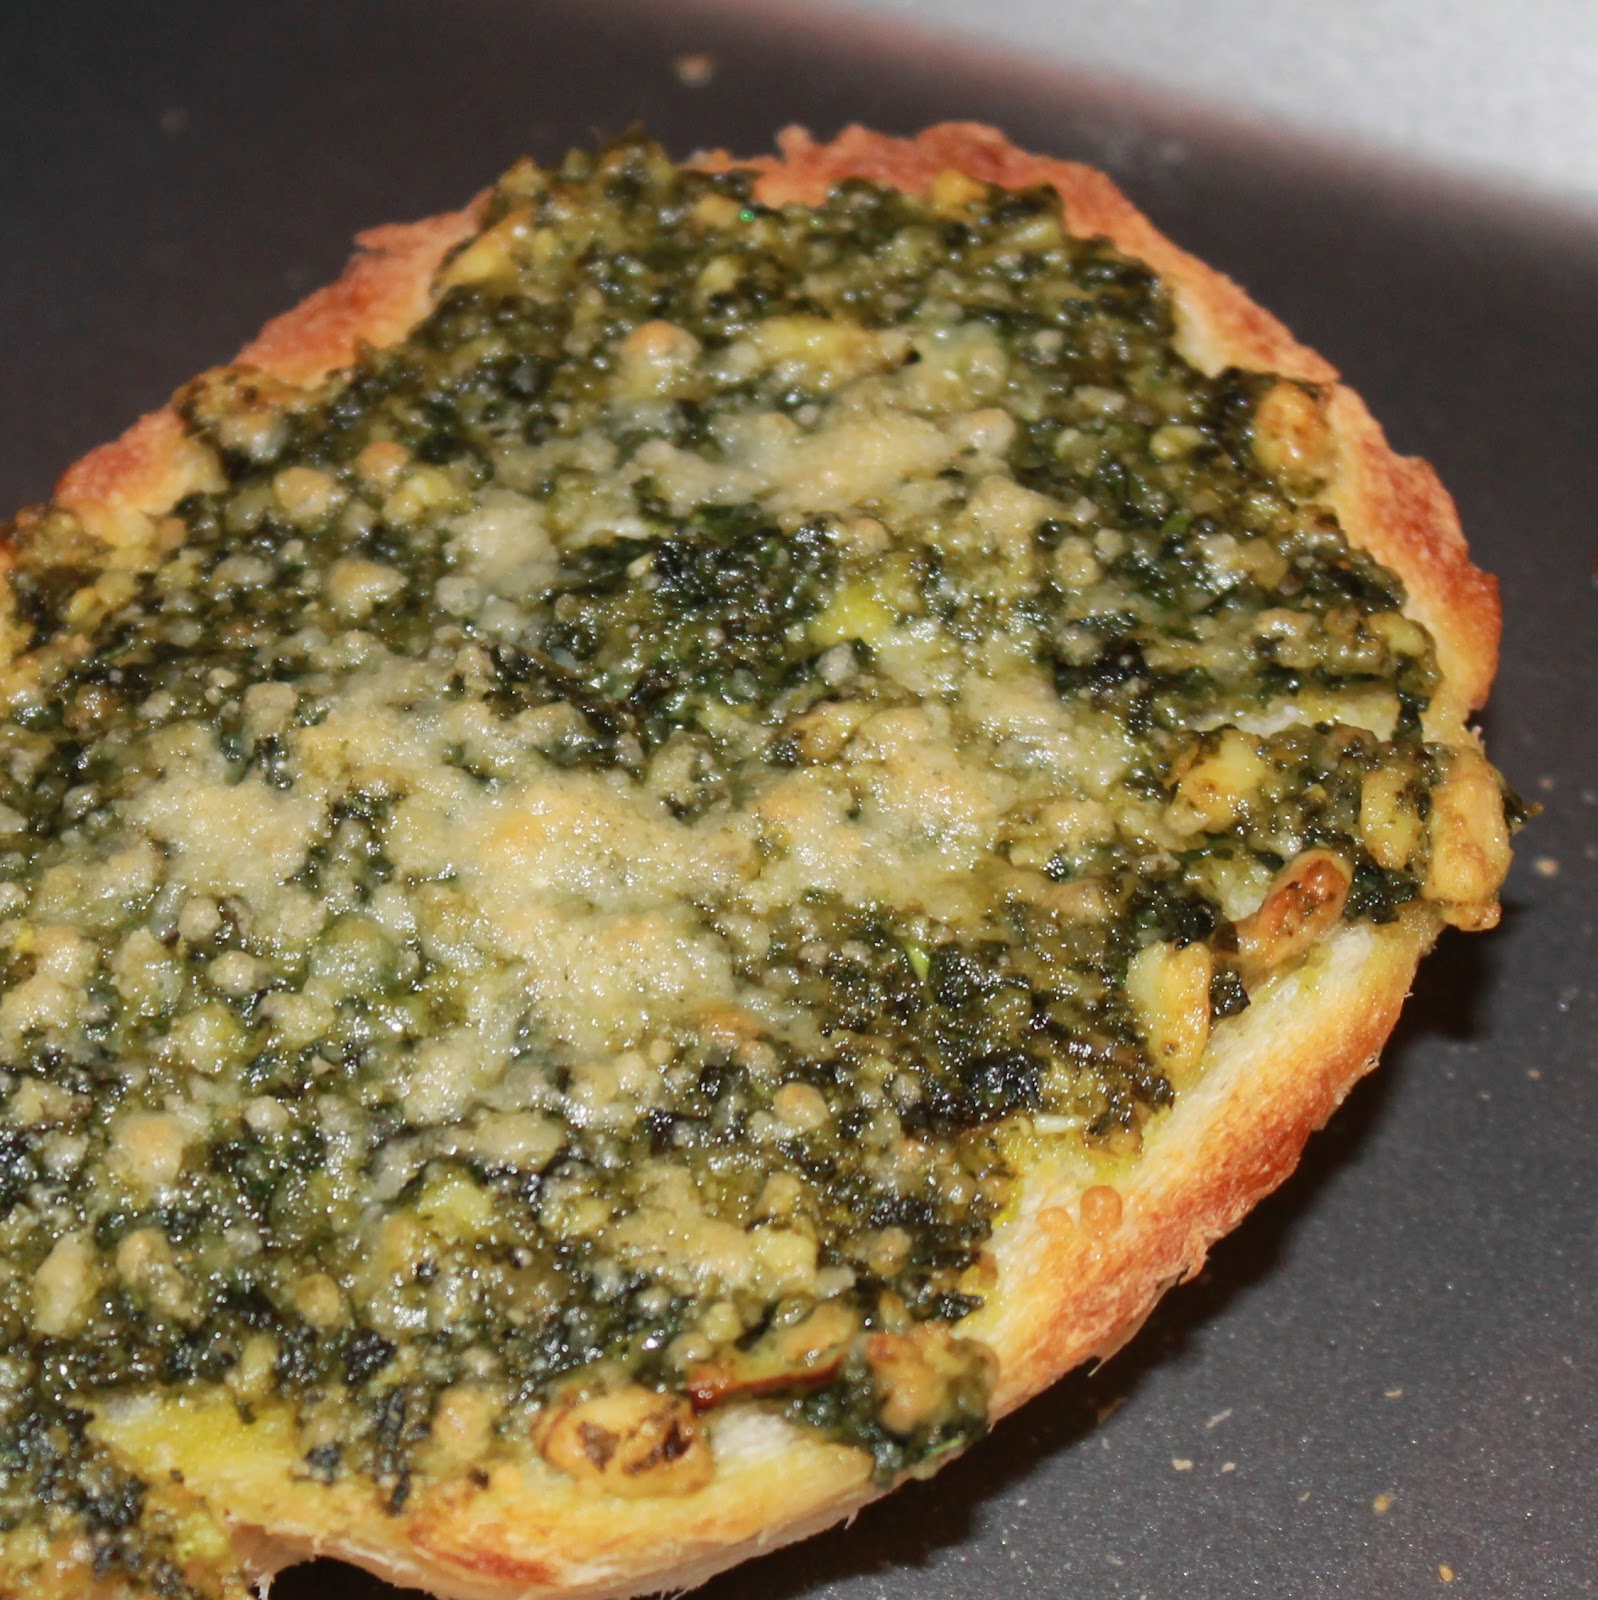
Spread 2 teaspoons pesto over one side of each bread slice. Top each slice with 2 tablespoons cheese.
Broil for 2 minutes and set aside.
Return the pan to medium heat. Add 1 teaspoon olive oil to the pan and swirl to coat. Crack the eggs into the pan and cook until whites set, about 4 minutes.
Boy did I botch this egg. Oh well, it will still taste good!
Top each bread slice with 2 tomato slices.
Divide the mushroom mixture evenly among the bread slices. Top each serving with 1 egg. Sprinkle with 1/4 teaspoon pepper, shallots and basil.
This is quite the meal!
I loved the meatiness of the mushrooms which went so well with the egg. Tomatoes are in season right now so they were absolutely perfect in this dish. And my pesto was pretty darn good if I do say so myself 🙂 This meal, although it’s called a “sandwich” definitely required a fork and knife, and even then got a bit messy. But that’s part of the fun!
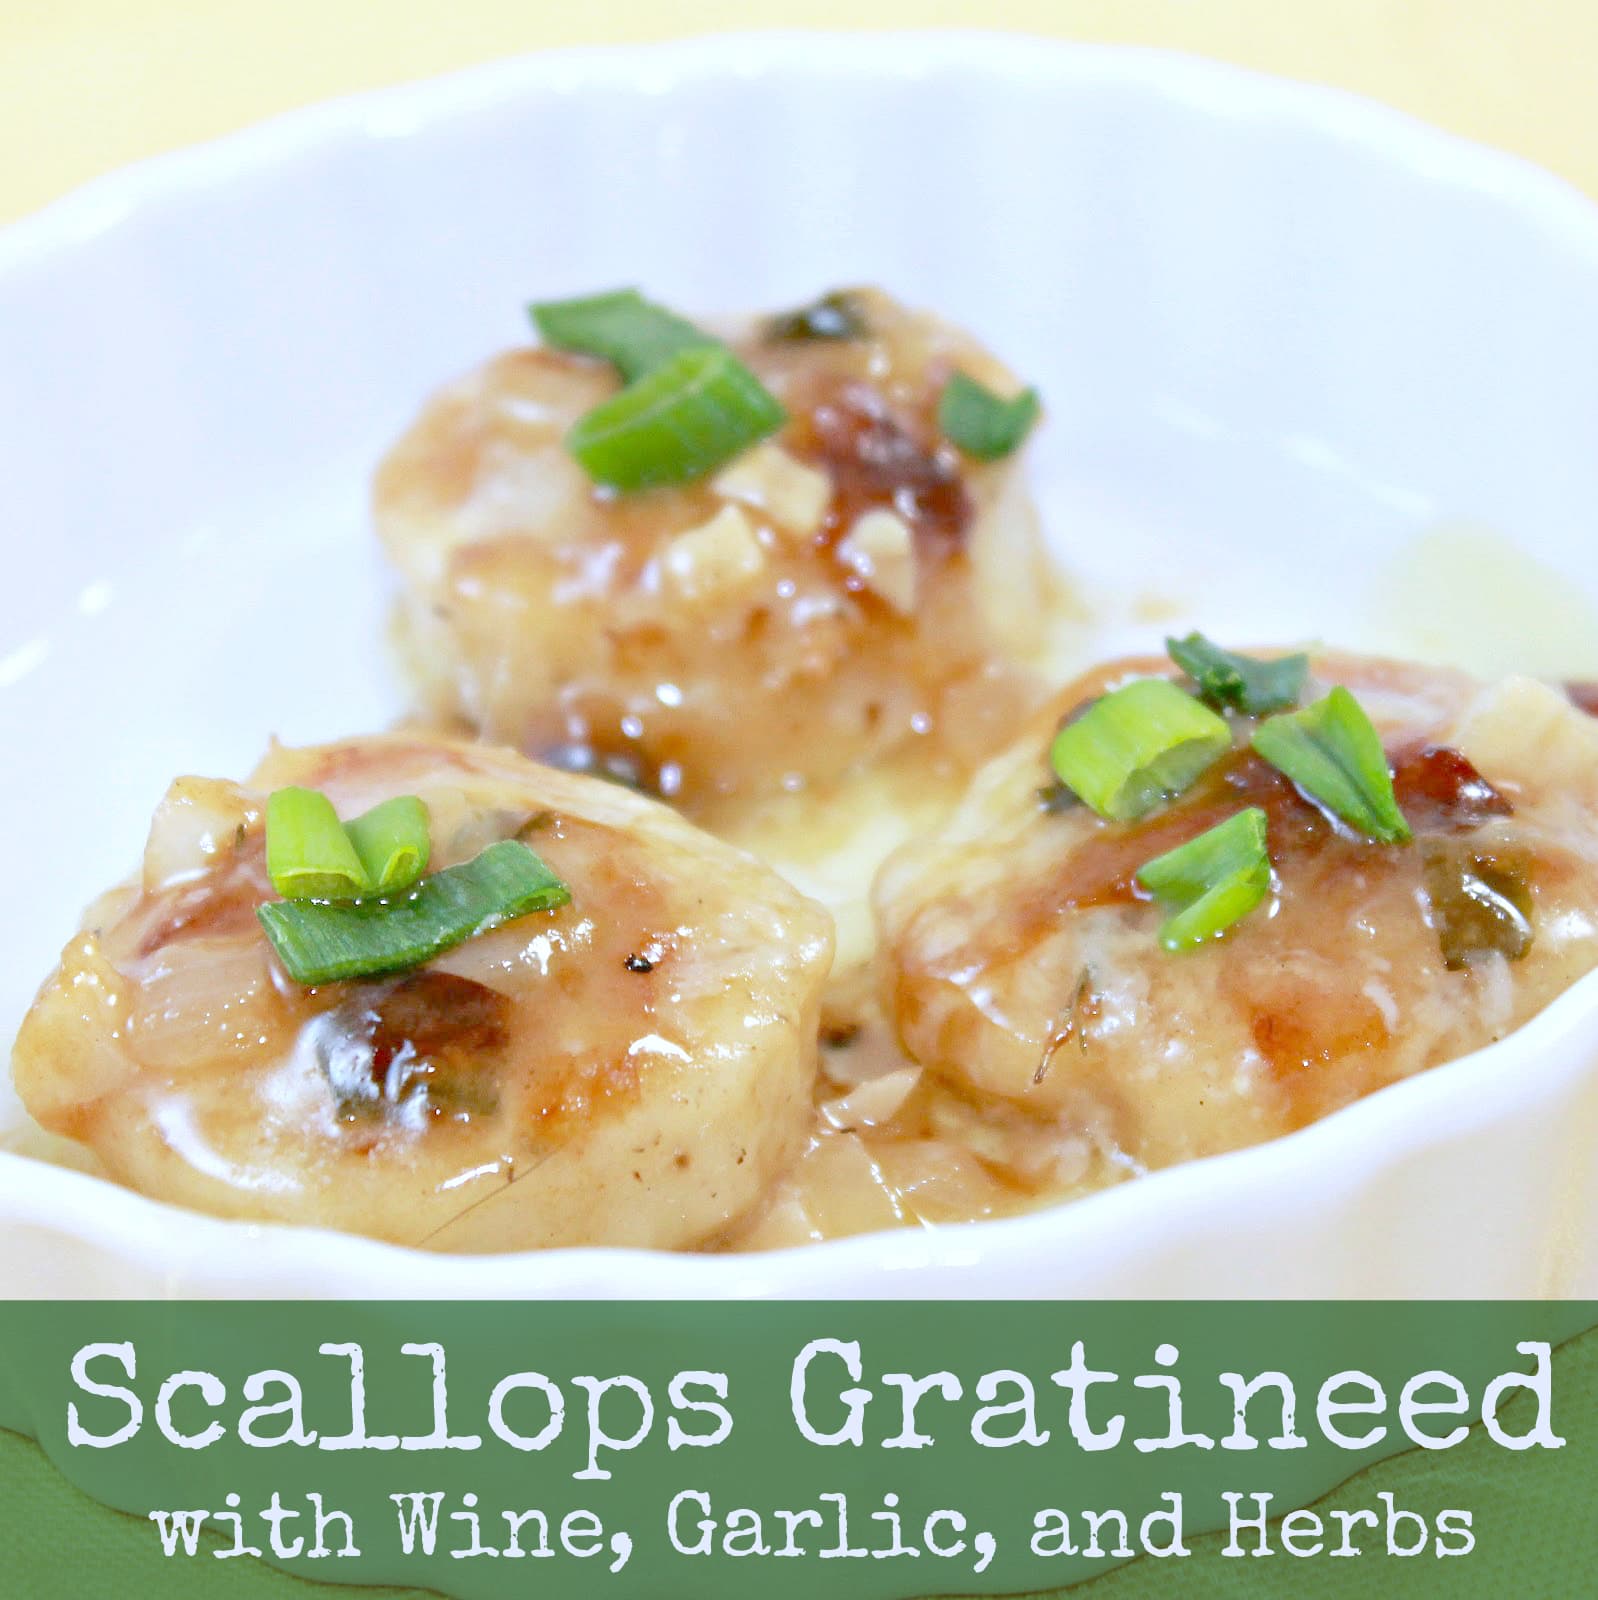
I am on a butter kick. Darn you, Julia Child, and your deliciously simple but butter-filled recipes. There are few things that change the taste of a meal as easily as really good butter. I’m talking full-fat, salted, hand-churned butter. Keep in mind, meals like this should not be a weekly staple. But my goodness are they fantastic as a treat. This recipe for Scallops Gratineed with Wine Garlic and Herbs is no different. I am obviously on a bit of a Julia Child kick at the moment as well which is well timed because her 100th birthday is coming up on August 15. Might I suggest making this lovely (but amazingly easy) recipe to celebrate? I made this as a meal for two, with a salad on the side. It would also make a wonderful appetizer, or just multiply as you see fit.
Ingredients:
1/3 cup minced yellow onions
1 tablespoon butter (I’m talking good butter, no substitutions here!)
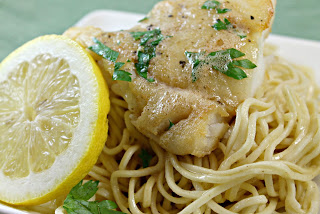
.With Julia Child’s 100th birthday fast approaching, the food blog world has been celebrating in the best way we know how: honoring Julia Child through her recipes. I am currently reading a book about her life called Dearie: The Remarkable Life of Julia Child by Bob Spitz. (I will have a review of this book when I’m finished reading). I just got to the chapter which describes Julia’s first encounter with French food. Her first meal in France was Sole Meuniere, a simple but absolutely delicious dish. I couldn’t get it out of my mind, so I made a slightly altered version of Julia’s version over spaghetti. I wanted to make it with sole, but my market was all out. Hake is a similar fish, so I substituted it for the sole, so I bring you Hake Meuniere over Spaghetti.
Ingredients:
1 pound fresh spaghetti
3 skinless and boneless hake or sole fillets, 4 to 6 ounces
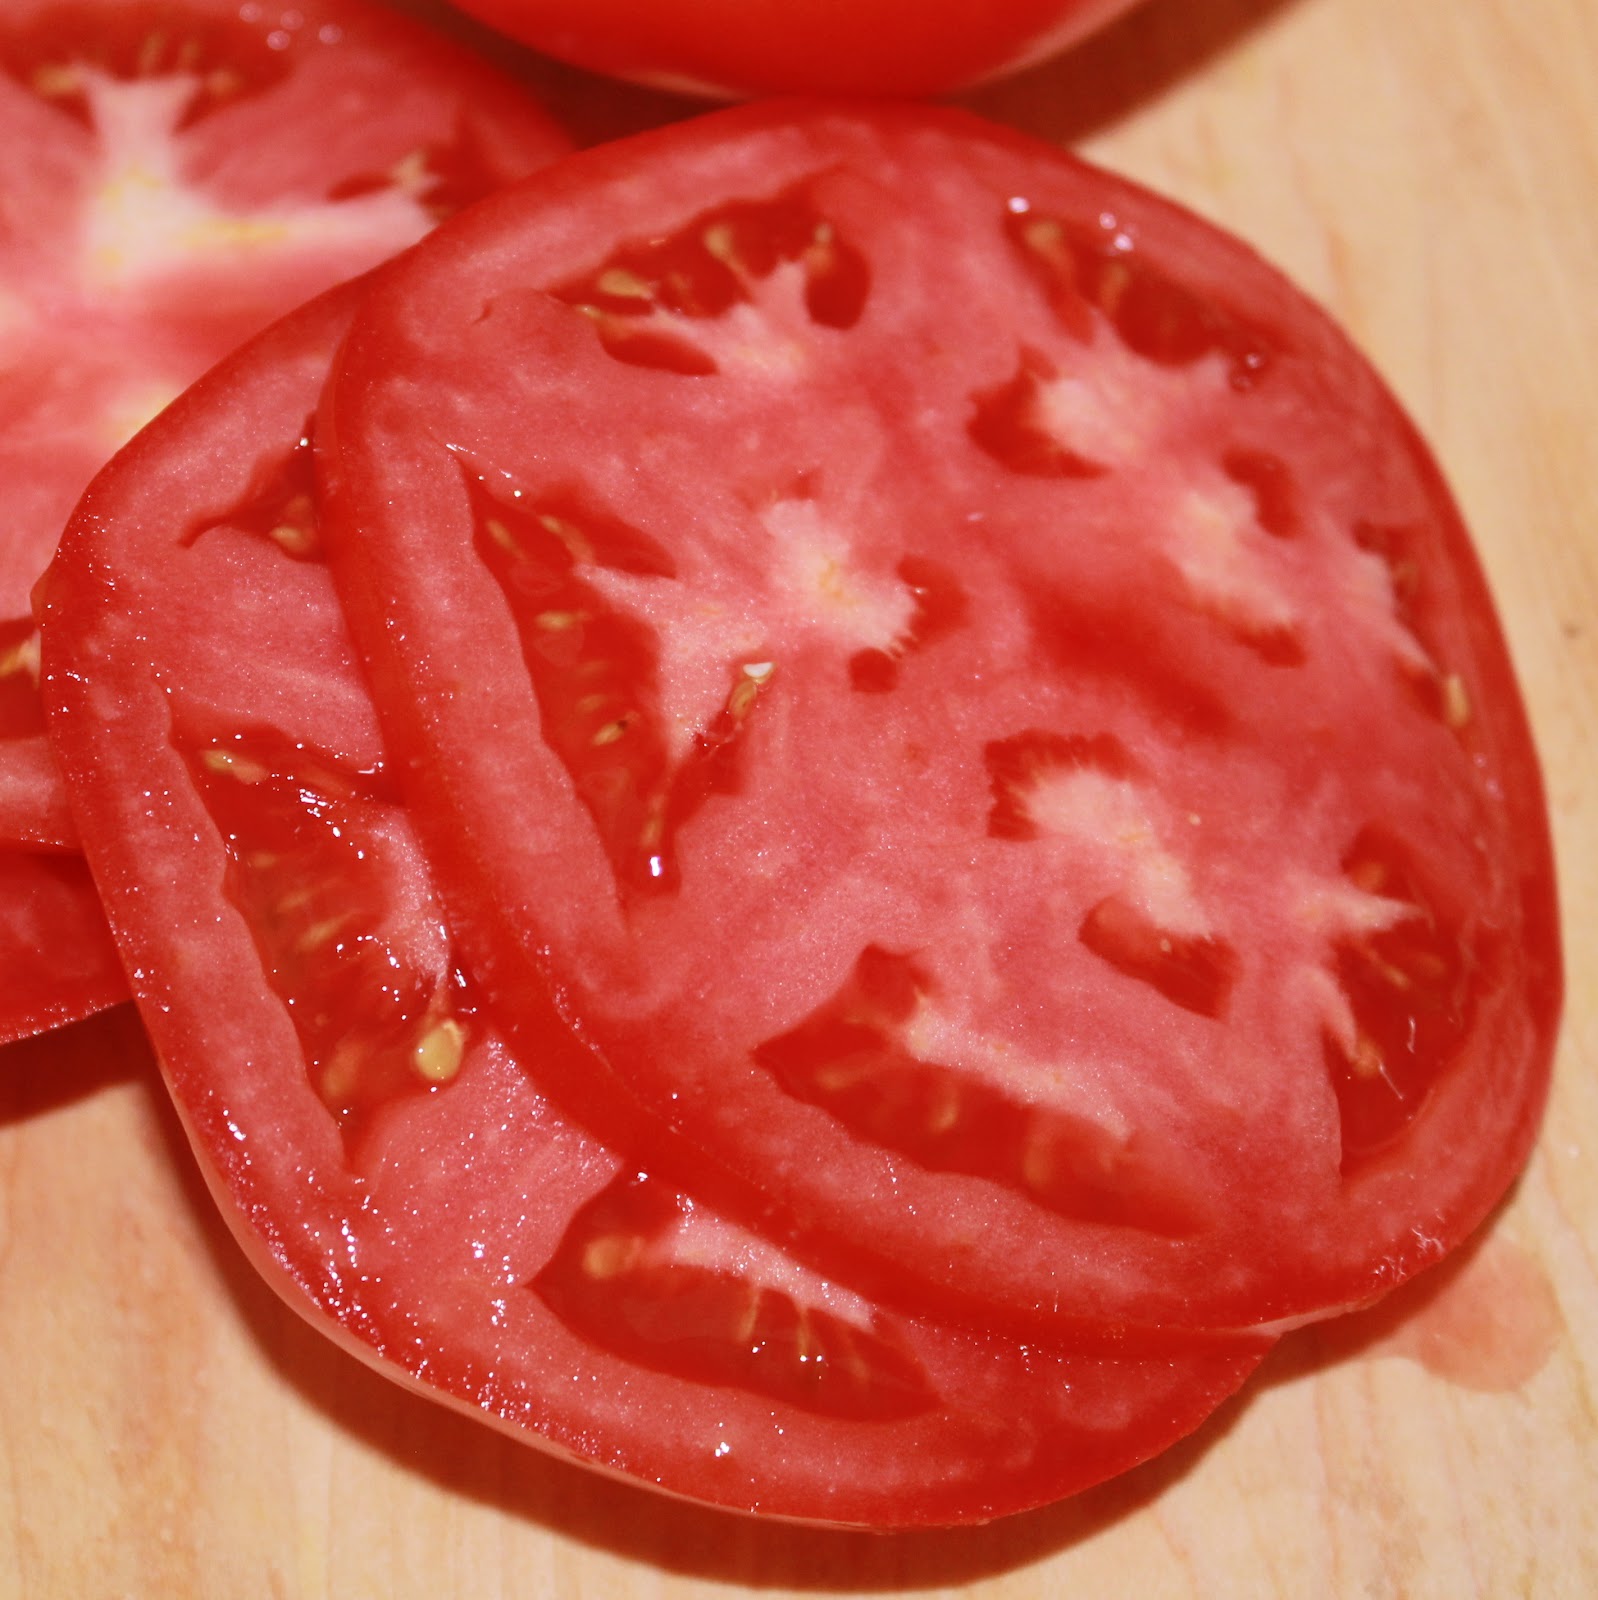
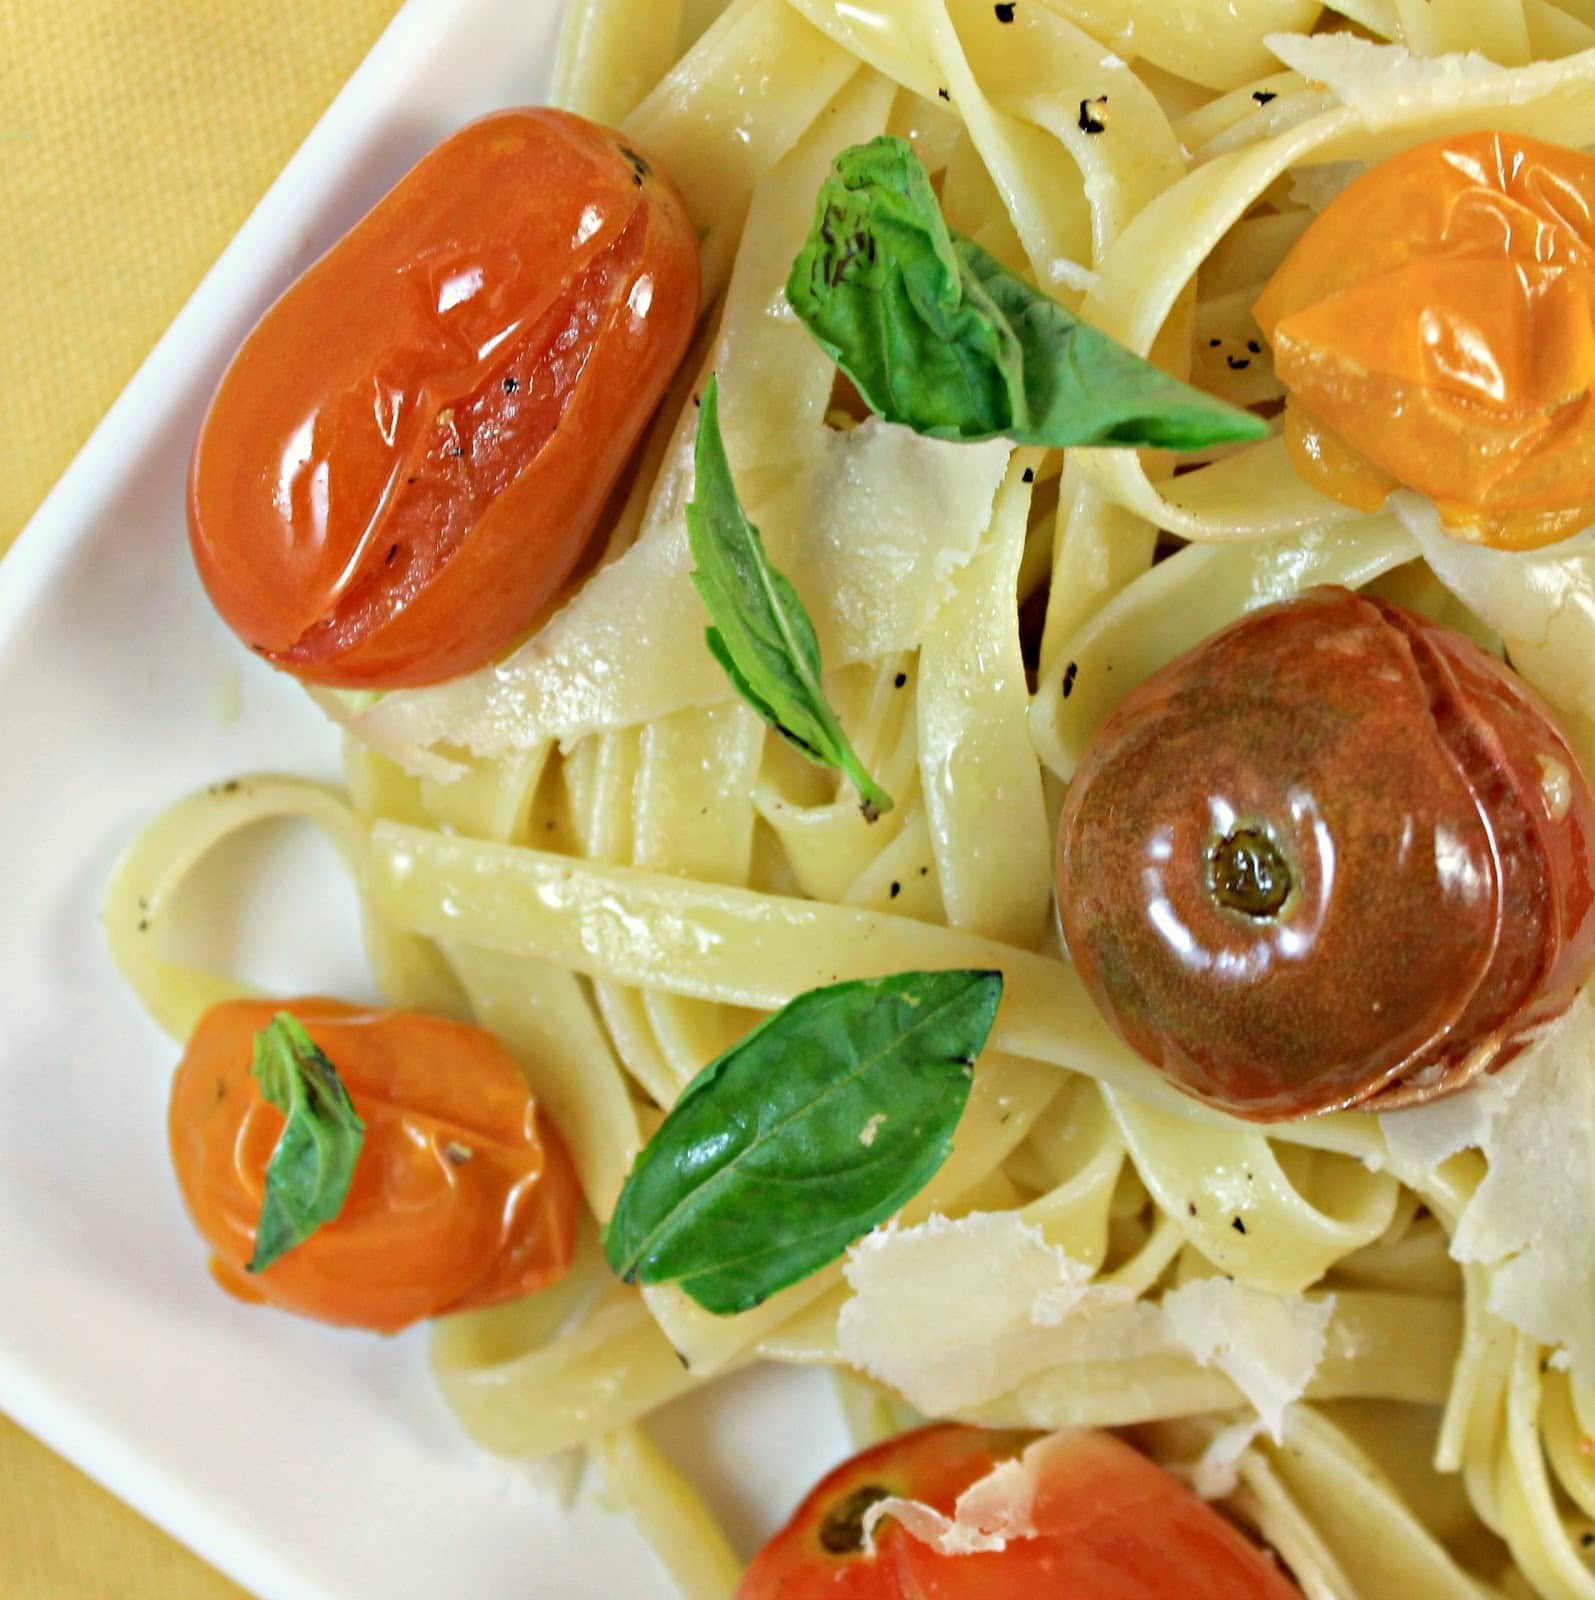
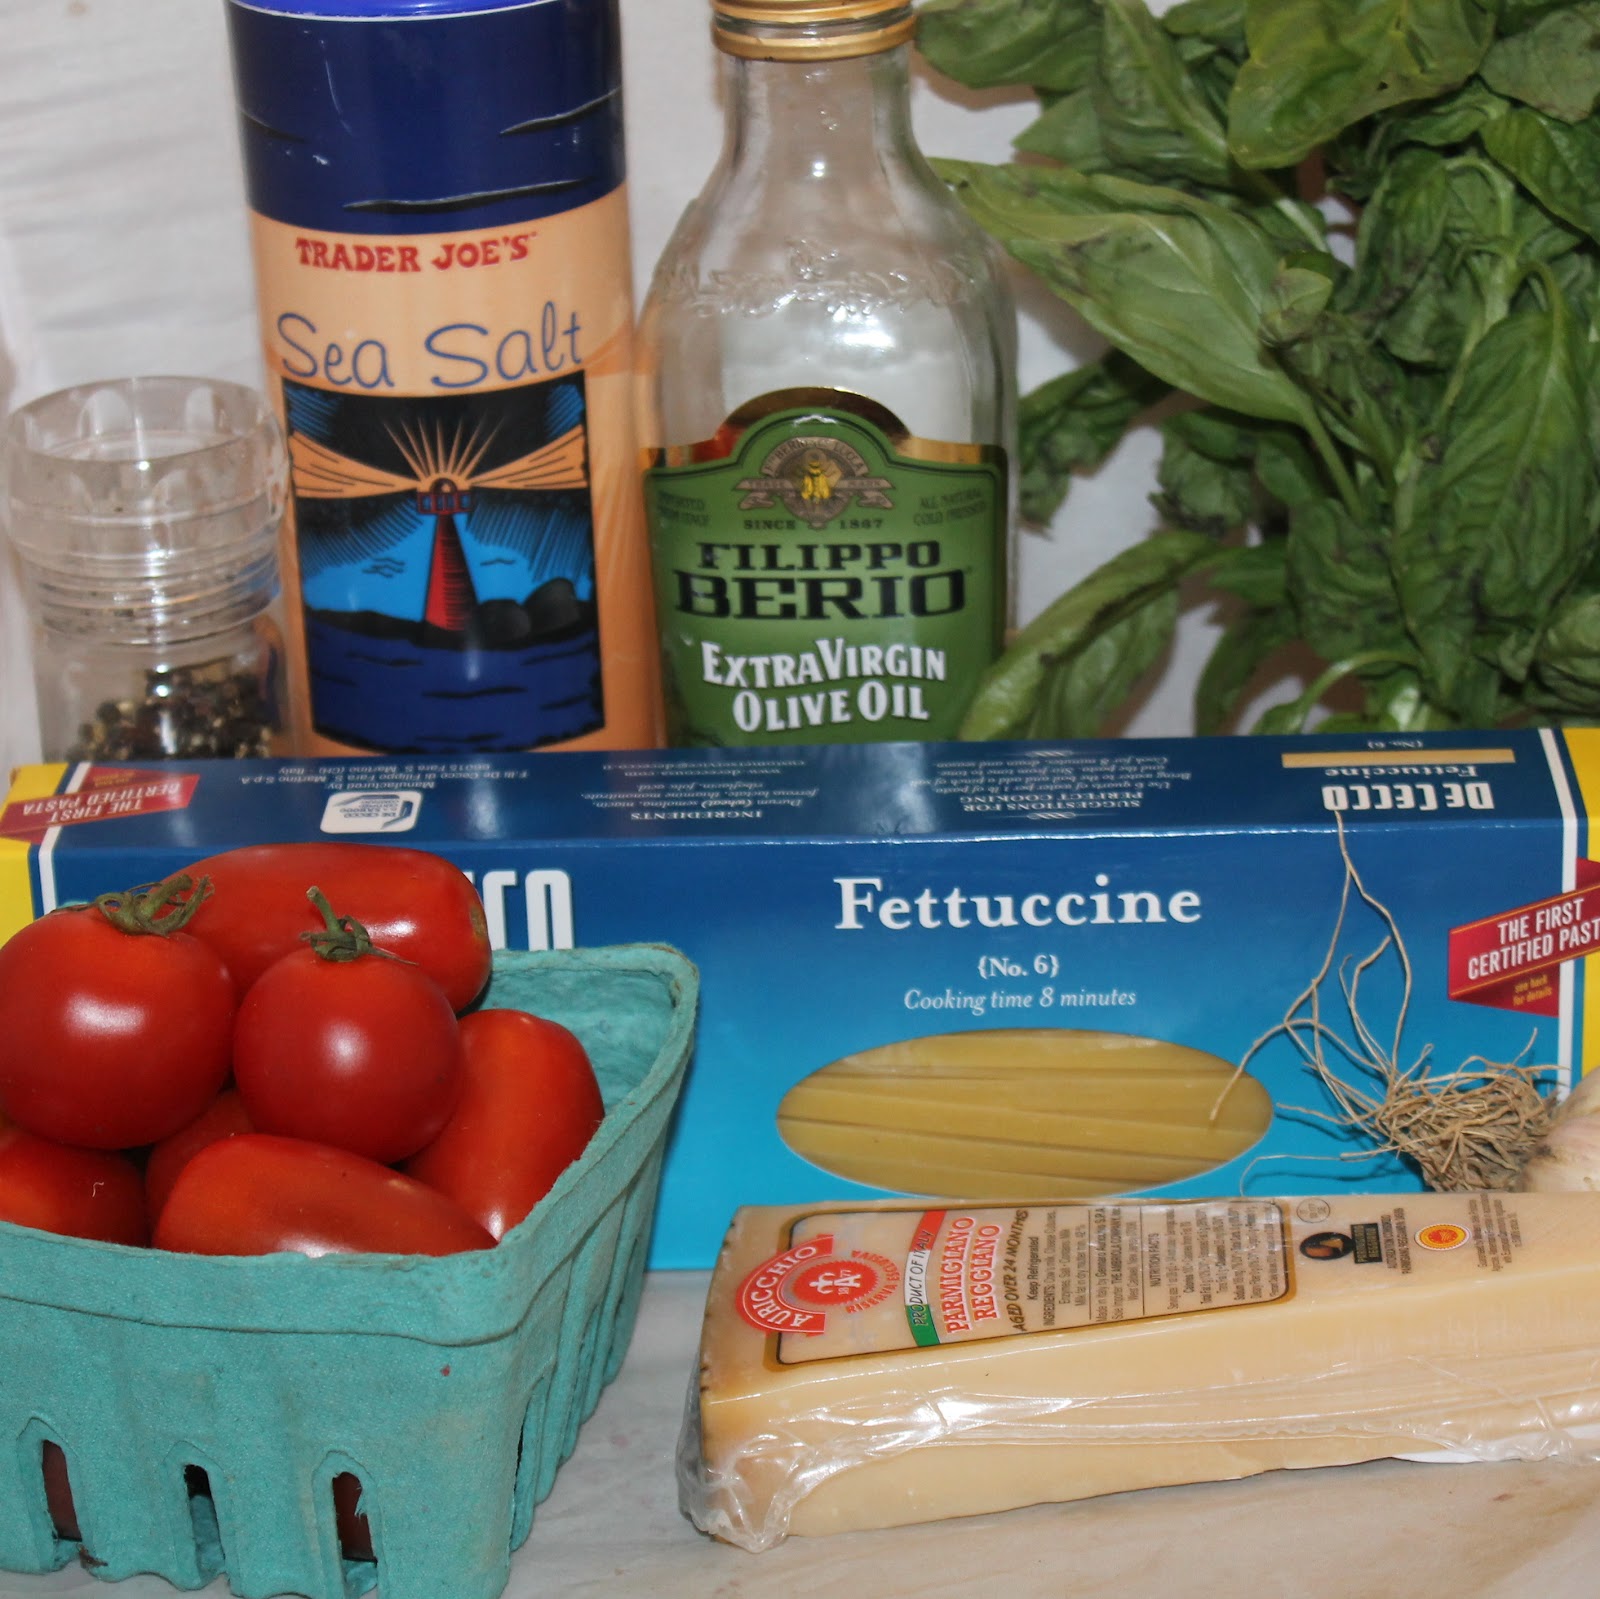
This week is my favorite week of the summer: I received my first batch of tomatoes from my CSA. I love tomatoes oh so much (if you haven’t figured that out with all my posts including tomatoes as an ingredient). As a kid, I used to eat them whole, dipping them in ranch dressing. Not much has changed, except now I choose to dip them in hummus instead. Although I do love a good fresh, juicy tomato, there is something wonderful about a cooked tomato. Cooking Light‘s latest issue was (as usual) on point with a lovely, simple pasta recipe that includes tomatoes, garlic, basil … and not much else.
Ingredients:
1 tablespoon kosher salt
8 ounces uncooked fettuccine
1/4 cup extra-virgin olive oil, divided
2 pints multicolored tomatoes (I used cherry/grape tomatoes)
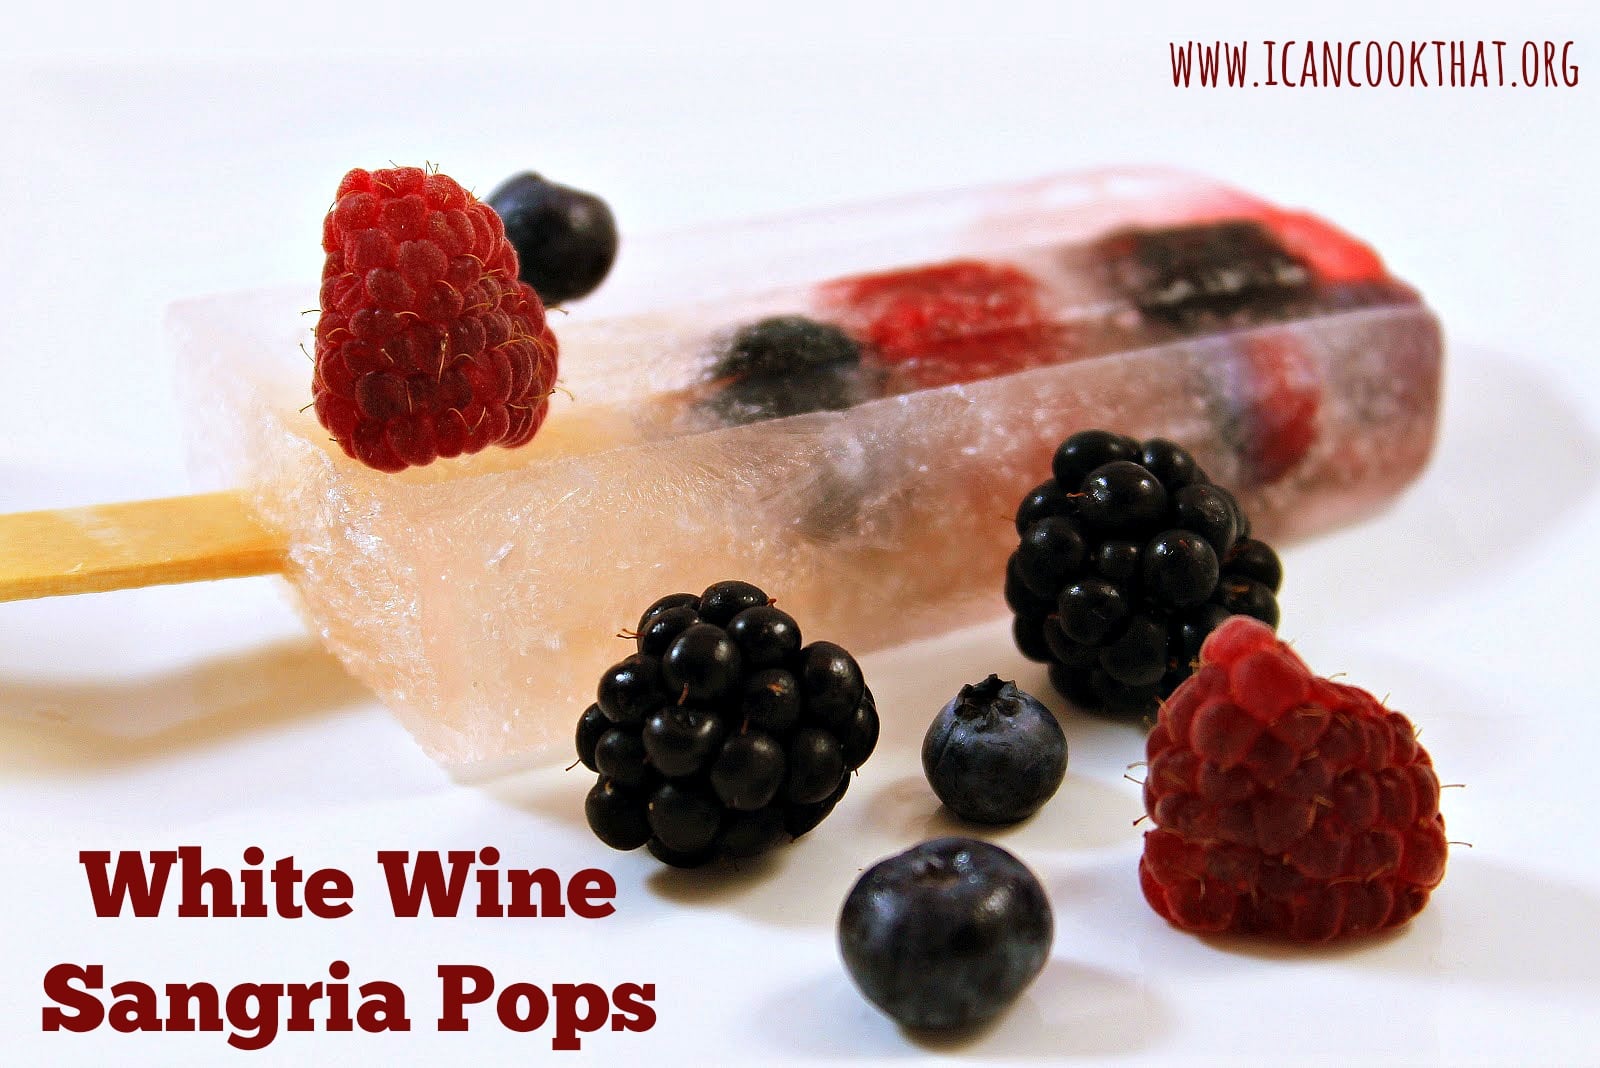
I was at a restaurant on Long Island that had a drink they called a “lushee” which was basically a frozen sangria. And I haven’t been able to stop thinking about it. Pure brilliance. I told a friend about this and we knew we had to make our own, what could possibly be more refreshing on a hot summer day? I was recently sent a cookbook that actually one-upped the concept of the lushee: a White Wine Sangria Popsicle.
The book, Poptails, by Erin Nichols of Erin Cooks, is filled with sixty pops inspired by your favorite alcoholic beverages. Recipes range from classics like a gin and tonic to fancy favorites like a cosmopolitan.There are even some awesome dessert pops like cherry cheesecake and banana split.
I was in love with this book before I even received it. What an amazing idea! Who wouldn’t want their favorite drink in iced pop form? The recipes had me imagining all of the lovely get-togethers I could have: a brunch with iced coffee and bloody Mary pops, a pool party with strawberry basil martini pops, or Christmas in July with spiked eggnog, mulled wine, and Christmas cheer pops. Sigh.
Anyways, I kept thinking back to those lushes and knew I had to try the white wine sangria pops.
I tweaked the recipe within the book a bit. For the original recipe, pick up a copy of this fun book!
Ingredients:
1 bottle white wine (I used Sauvignon Blanc)
1 liter flattened seltzer water
1/4-1/3 cup cranberry juice (I used cranberry hibiscus)
1 tablespoon simple syrup, or to taste
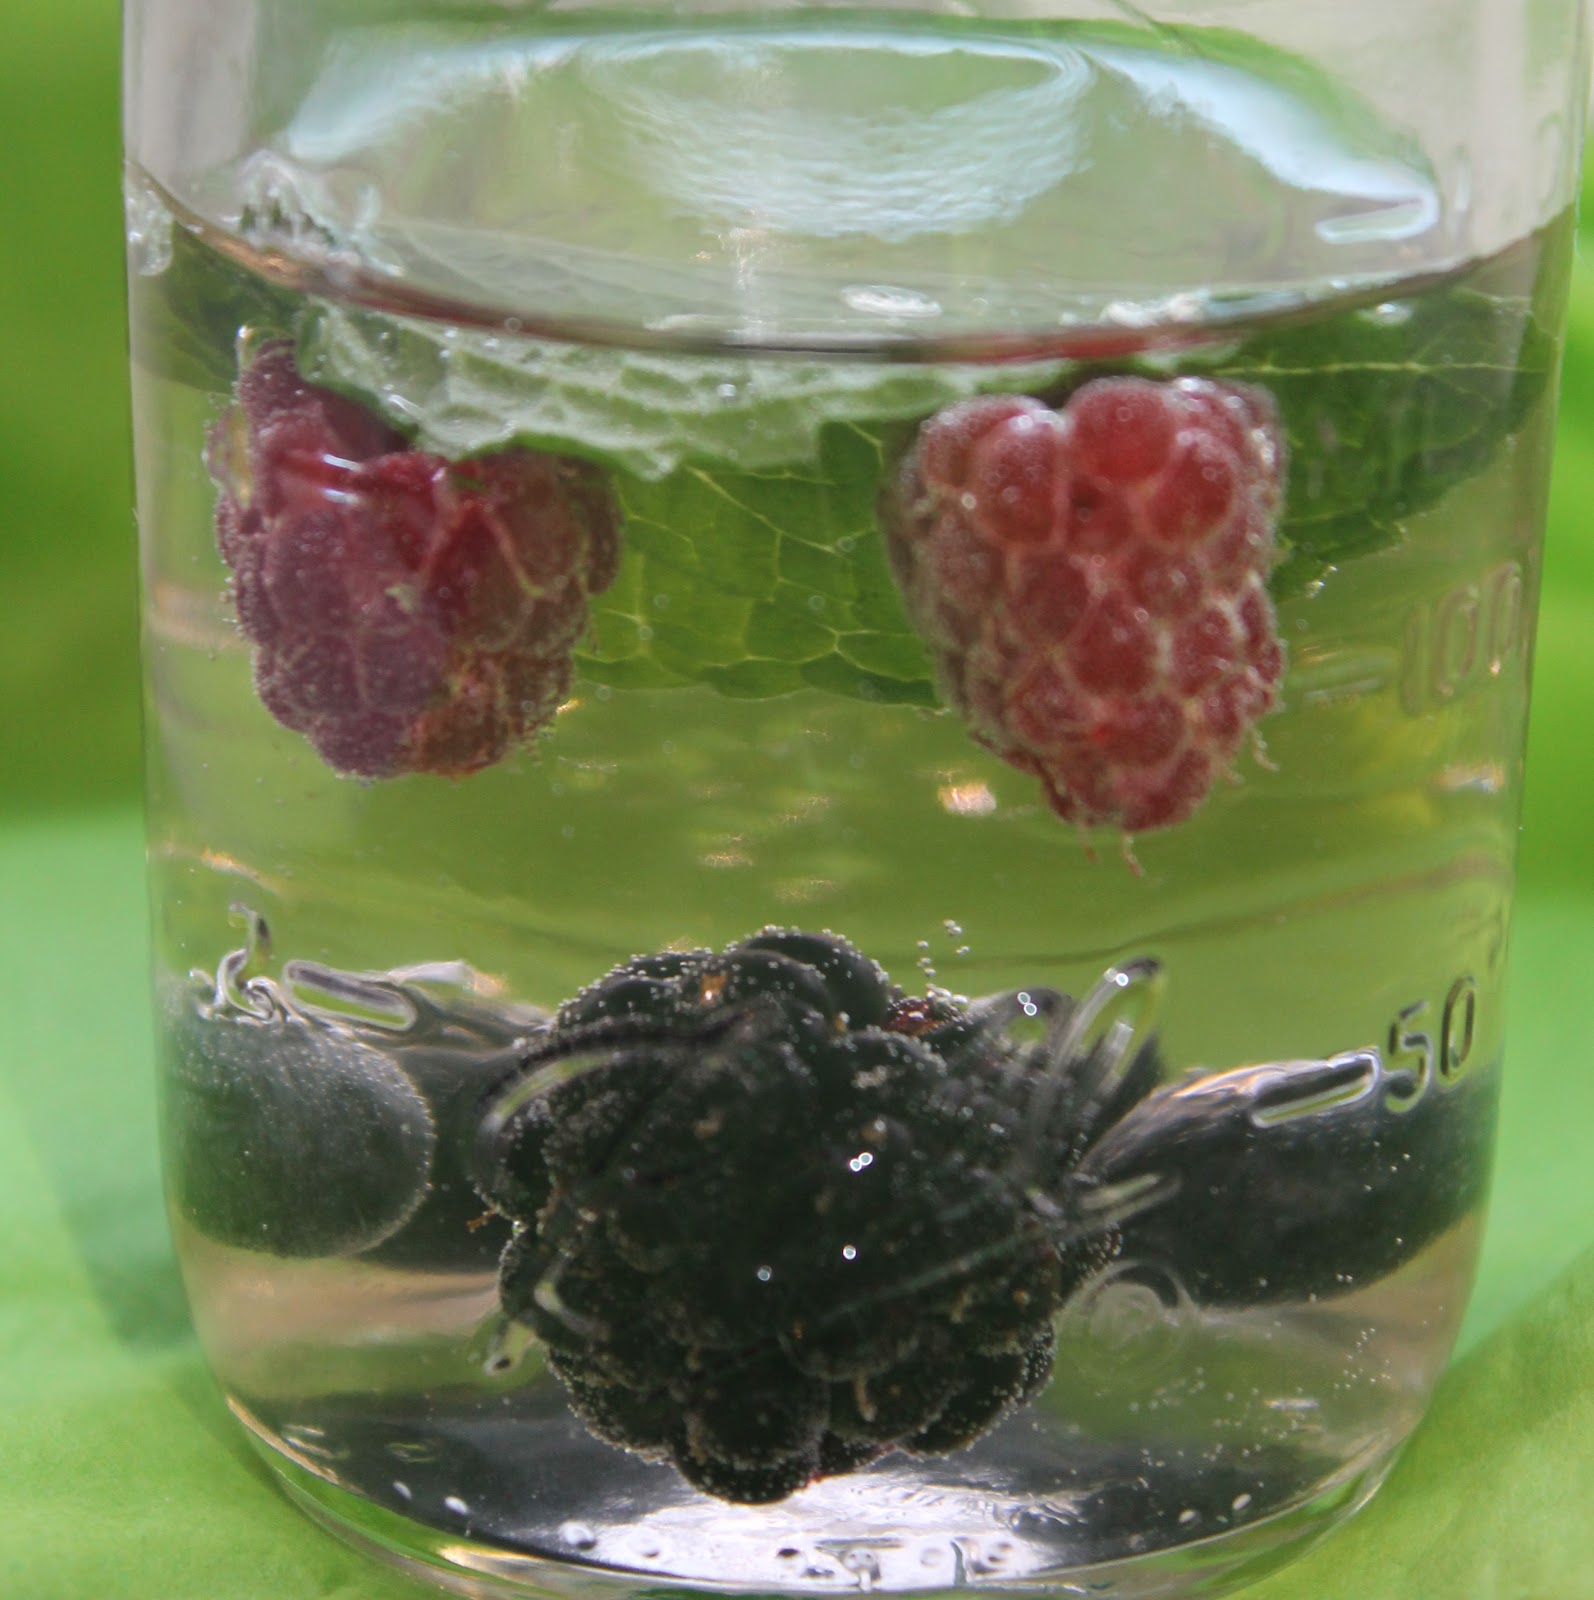
1 pint raspberries
1 pint blackberries
1 pint blueberries
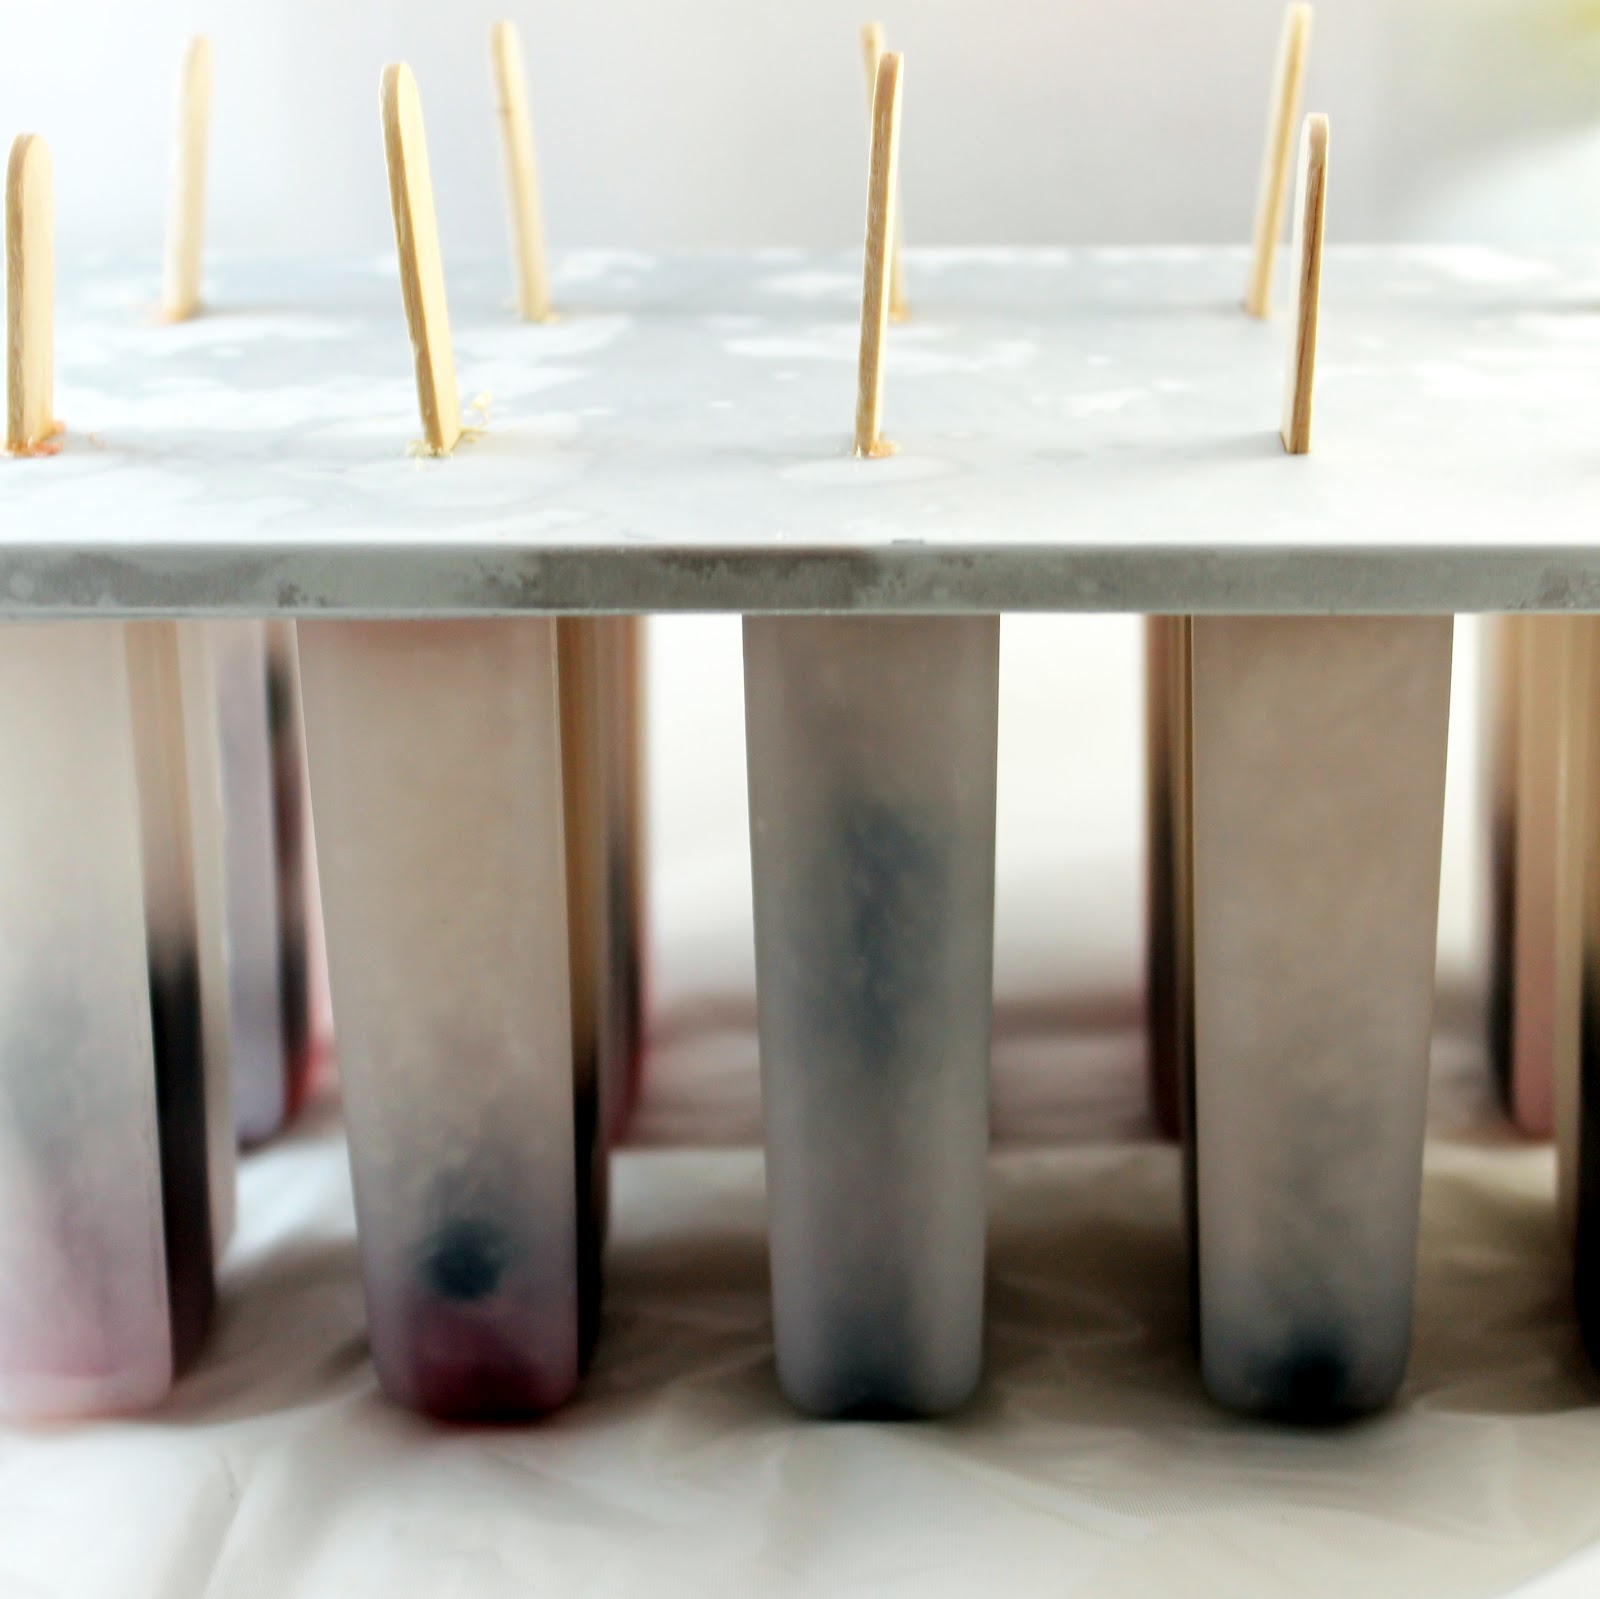
Note: You’ll need ice pop molds and Popsicle sticks to make these.
I wanted to start this post with the definition of seltzer, club soda, tonic water, and sparkling water. Because I always manage to mess these drinks up. And no wonder: club soda, seltzer and sparkling water are all water infused with carbonation. These can all be interchanged. Tonic water is something a bit different, it is still a carbonated water, but quinine is dissolved into the water as well. It’s quite a bit more bitter so be sure to use club soda/seltzer/sparkling water in this recipe. Or for a bit more sweetness, a lemon-lime soda would work.
Make sure to allow your seltzer water to flatten. Don’t forget this step! Unflattened carbonated beverages will explode when frozen. And that sounds like an awful waste of white wine sangria if you ask me. The book suggests opening your seltzer 8 hours prior and popping it into your fridge in a place it won’t spill.
Combine the wine, flattened seltzer water, cranberry juice, and simple syrup. I used lemon simple syrup to give a touch more flavor. Feel free to add some lemon zest to add a little extra.Add whatever mixture of berries you’d like to the pop molds. I went for one raspberry, one blackberry, and a few blueberries per pop.Fill each mold ¾ of the way full with the mixture; you need to leave a small amount at the top to allow the liquid to expand.
Note: you’ll have some extra sangria that won’t fit in the pop molds. This is so you can enjoy your creation before waiting 24 hours 🙂
Add popsicle sticks, cover, and freeze for approximately 24 hours.
To remove from the molds, fill a bowl larger than your pop molds with warm (not hot) water. Add the mold to the bowl for 15 seconds then gently pull on the top of the ice pop stock. If the pop does not release, add the mold back to the water for another 15 seconds, repeat this process until the pops come out of the molds.
These pops were refreshing and a little bit tangy. I wanted a bit more sweetness though, I might add more simple syrup next time I make them. I also would add a bit more cranberry juice so that the pops turn a very light pink color, which would probably look really nice.
What’s nice about this recipe is how adaptable it is. You can add or subtract whatever fruit makes you happy. You could use a sweeter wine, or even a (flattened) champagne. My friend made this recipe using white grape juice instead of cranberry.
There are plenty of other creative pop recipes within the pages of this book. I love the element of fun that the popsicles add and can’t wait to try more of these yummy recipes!
1/4-1/3 cup cranberry juice (I used cranberry hibiscus)
1 tablespoon simple syrup, or to taste
1 pint raspberries
1 pint blackberries
1 pint blueberries
Instructions
Make sure to allow your seltzer water to flatten. Don’t forget this step! Unflattened carbonated beverages will explode when frozen. And that sounds like an awful waste of white wine sangria if you ask me. The book suggests opening your seltzer 8 hours prior and popping it into your fridge in a place it won’t spill.
Combine the wine, flattened seltzer water, cranberry juice, and simple syrup. I used lemon simple syrup to give a touch more flavor. Feel free to add some lemon zest to add a little extra. Add whatever mixture of berries you’d like to the pop molds. I went for one raspberry, one blackberry, and a few blueberries per pop. Fill each mold ¾ of the way full with the mixture; you need to leave a small amount at the top to allow the liquid to expand.
Note: you’ll have some extra sangria that won’t fit in the pop molds.
Add popsicle sticks, cover, and freeze for approximately 24 hours.
To remove from the molds, fill a bowl larger than your pop molds with warm (not hot) water. Add the mold to the bowl for 15 seconds then gently pull on the top of the ice pop stock. If the pop does not release, add the mold back to the water for another 15 seconds, repeat this process until the pops come out of the molds.
Have you ever heard of Meatless Monday? It’s a campaign that began in 2003 encouraging people to cut out meat from their Monday meals. Monday was chosen as a way to start your week off more healthy. I am a big fan of Meatless Monday in general but I find it difficult to reserve one day a week specifically to go meatless. I prefer a much more flexible approach, where I try to cut meat out of three meals within my week.
The point of Meatless Monday is to eat a healthy meal as a substitute, adding a little more vegetables or whole grains to your diet instead of always making protein the star of the meal. I am by no means a vegetarian, and honestly never will be. But Americans in general tend to consume way too much protein. According to meatlessmonday.com, “going meatless once a week may reduce your risk of chronic preventable conditions like cancer, cardiovascular disease, diabetes and obesity.”
It’s honestly pretty darn easy to do once you make a mental note to try it out. I have plenty of meatless options on my blog to help get you started. Some of my favorites include (in no particular order):
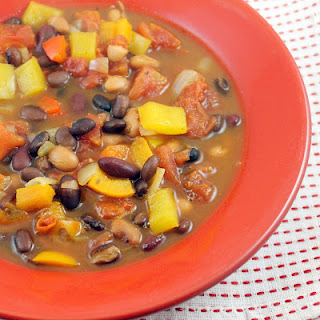
If you are in need of more inspiration, one of my favorite vegetarian cookbooks is Herbivoracious. (Michael Natkin, the author, also has a pretty snazzy blog. Check it out here.) Michael’s recipes are truly wonderful (the black bean soup above is one of his) so be sure to pop over to see them.
Do you already participate in Meatless Monday? What is your favorite meatless meal to prepare?