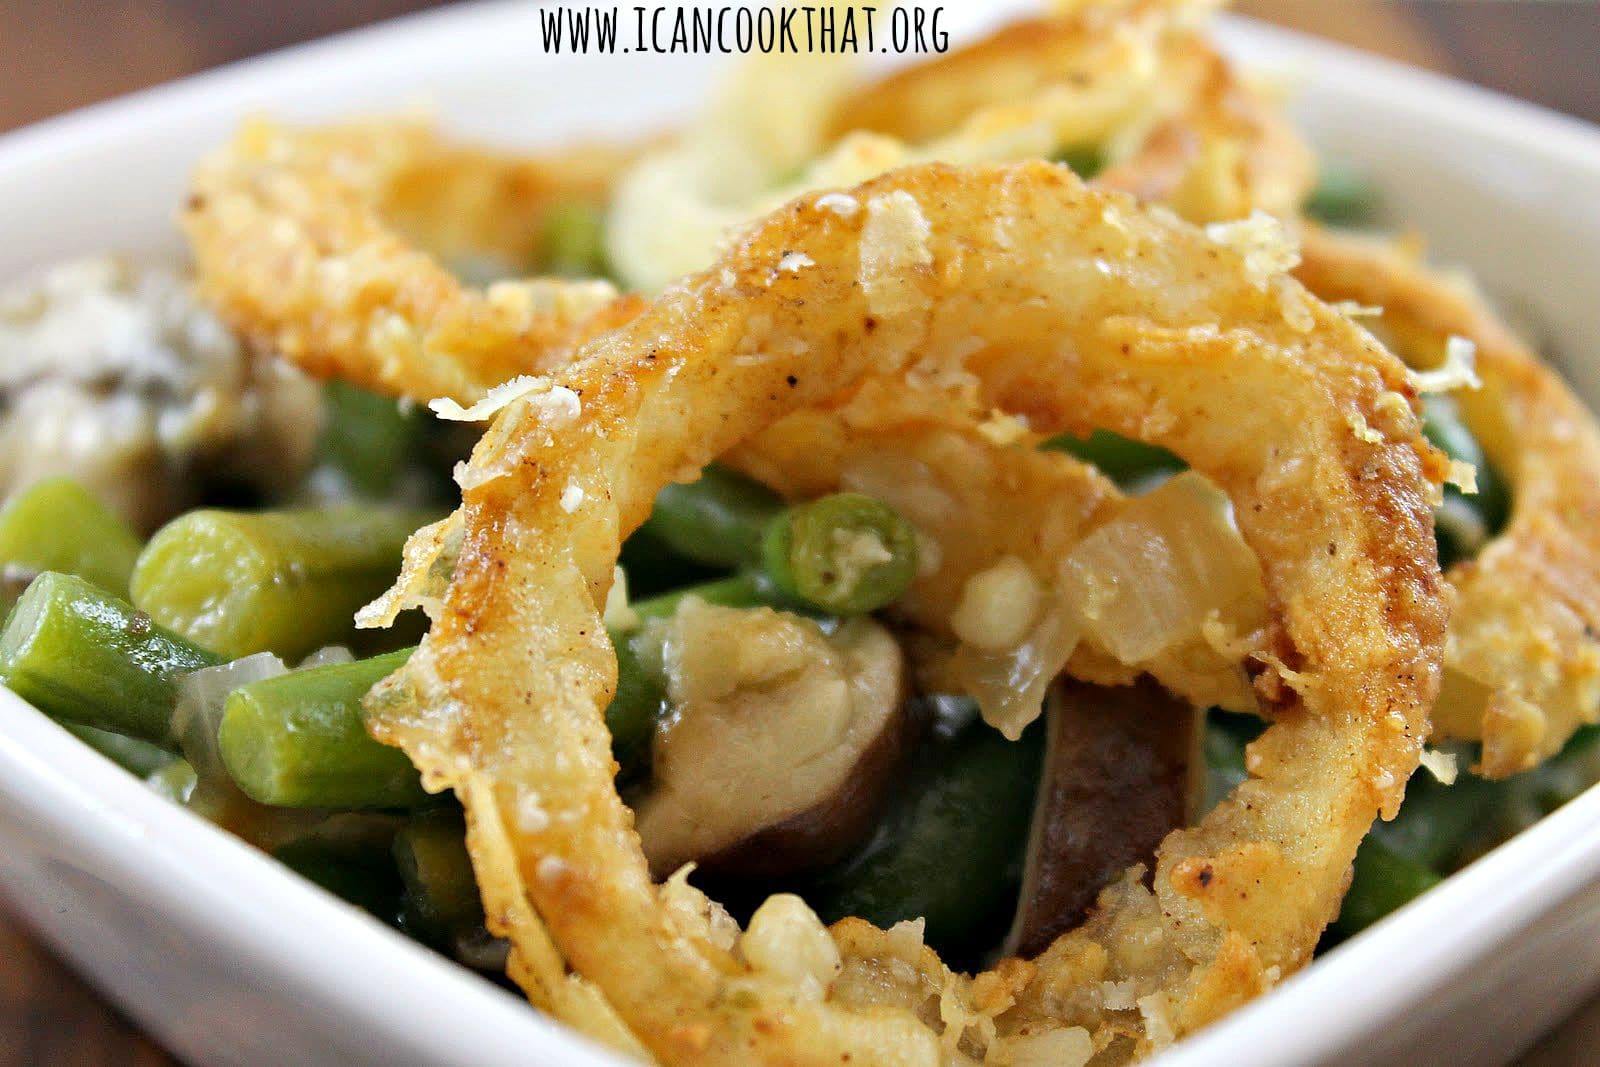
My goodness, can you really believe that Thanksgiving is in ten days? Thanksgiving is (not surprisingly) my favorite holiday of the year: it’s about coming together with the people you love for one absolutely fantastic meal. I do love turkey, but I always find the sides to be the best part of any Thanksgiving meal. In case you’re like me and you’ve begun testing recipes for the big day, I wanted to share this lightened up version of Green Bean Casserole with Mushrooms from Cooking Light. Although usually made with cream of mushroom soup, this version packs enough flavor that you won’t miss the lack of cream. And don’t worry, the fried onions are still there.
Ingredients
For the fried onions:
1 medium sized yellow onion, thinly sliced
1 cup flour
1 teaspoon paprika
Salt & Pepper to taste
1/2 cup milk
Canola Oil
For Green Beans:
1 1/2 pounds green beans, trimmed and halved crosswise
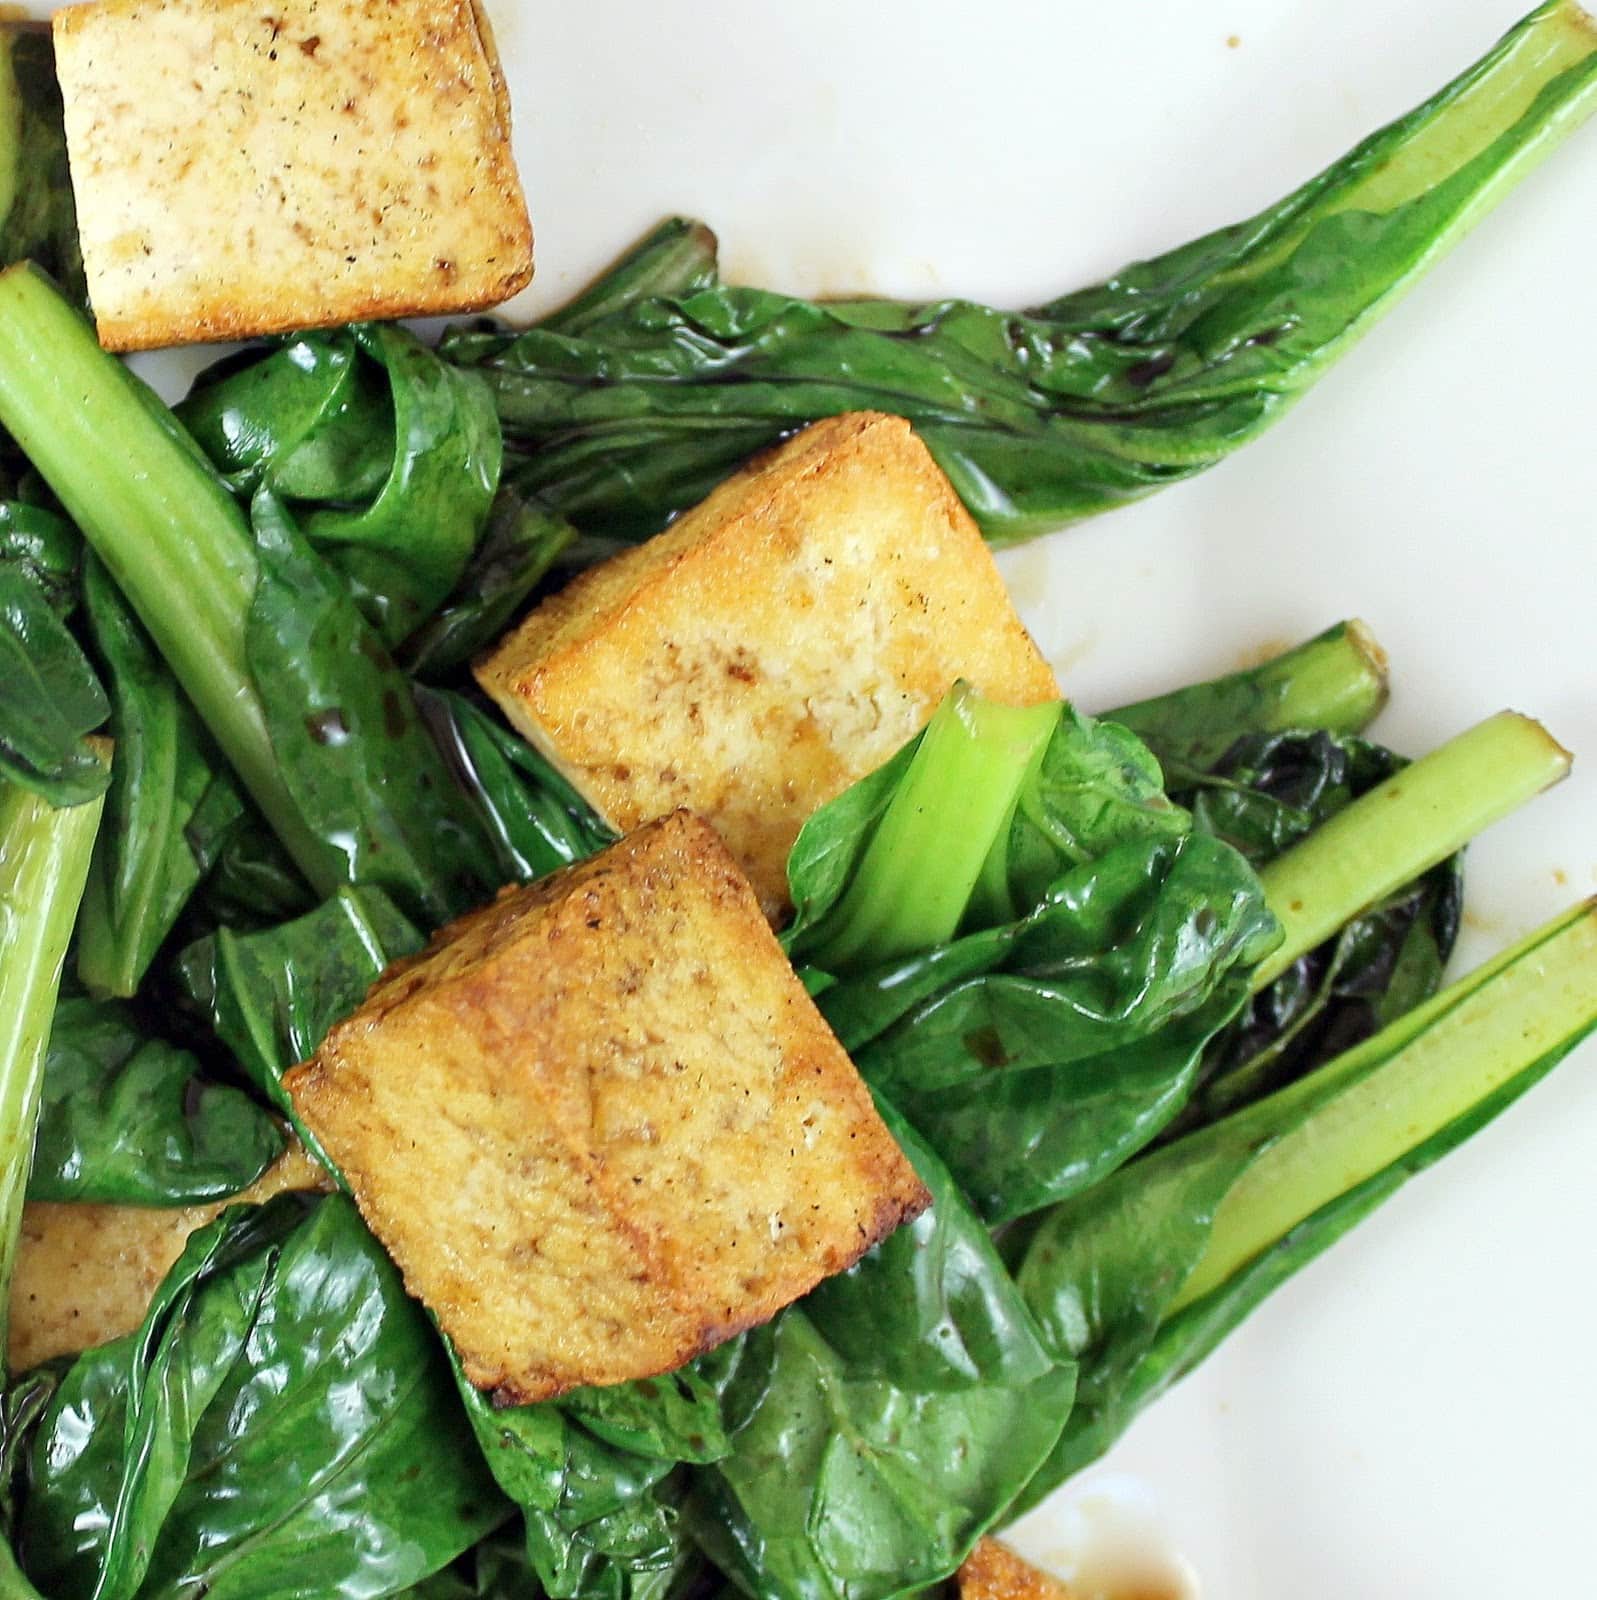
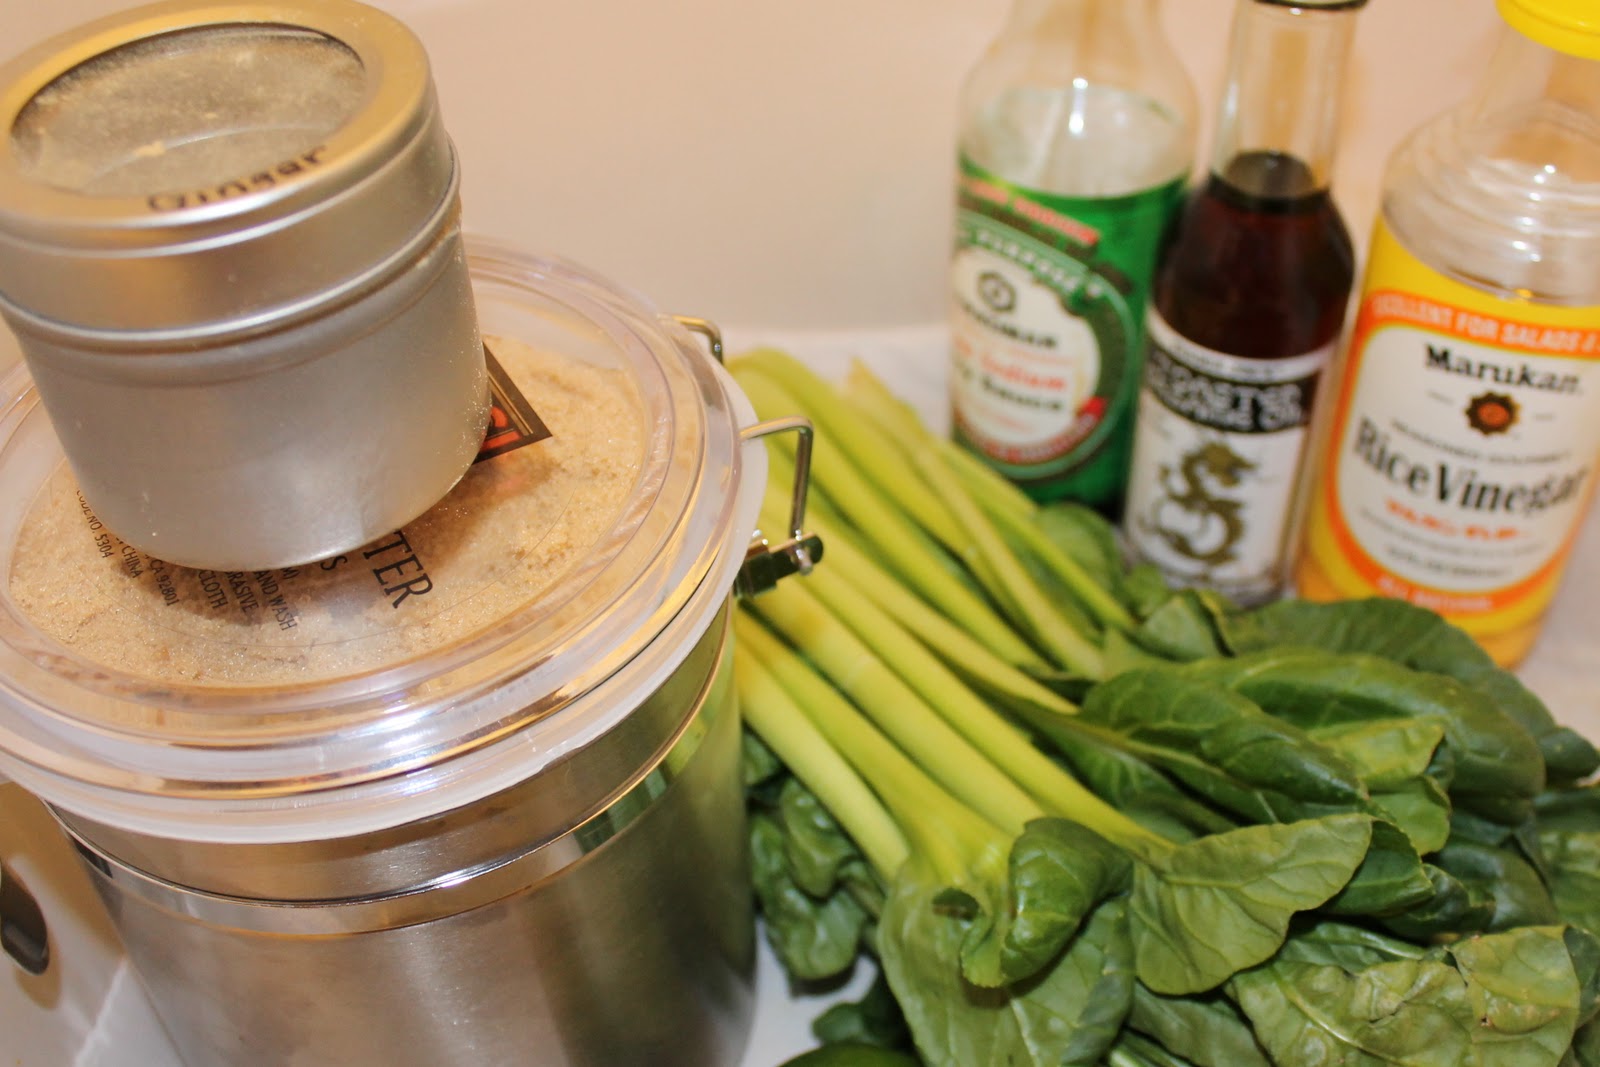
One of my friends asked me if I’d be willing to add some tofu recipes to my repertoire. I was pretty wary to try it. I don’t mind tofu, but I can’t say I’ve ever had a hankering for it. Well, for some reason, I picked up some tofu this week so I decided to finally make a recipe including it for my friend. I also received tatsoi in my CSA share, which is the perfect opportunity to use the tofu in this recipe for Wilted Tatsoi with Sauteed Tofu.
Ingredients:
2 bunches of tatsoi
2 teaspoons toasted sesame oil
1 tablespoon low sodium soy sauce (or coconut aminos to make gluten free)
A dash of rice vinegar
1/4 teaspoon ground ginger
1/2 teaspoon brown sugar
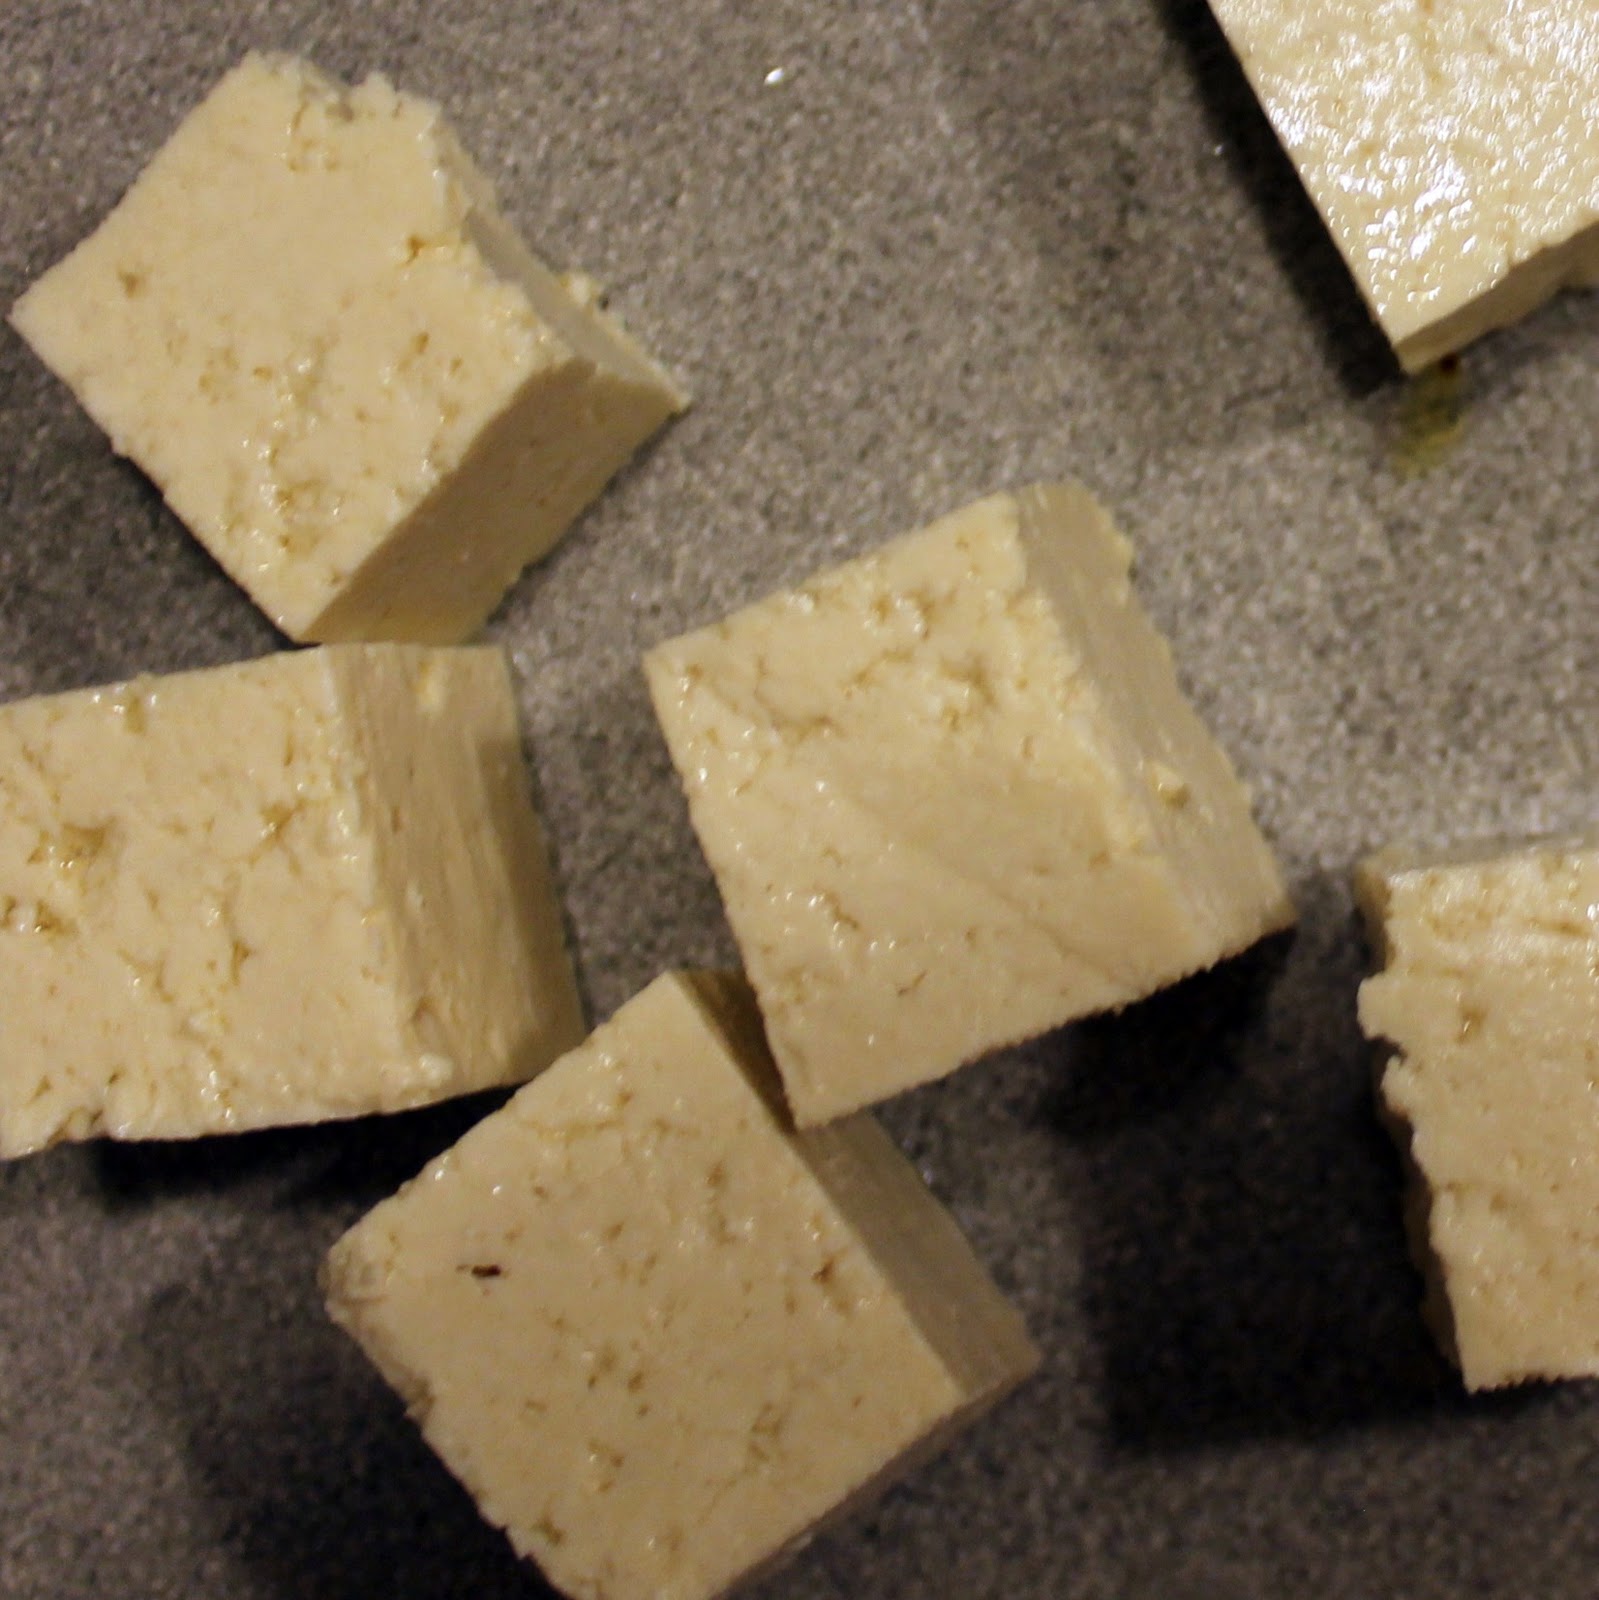
4-6 oz tofu, cut into cubes
Add the soy sauce, rice vinegar, ground ginger and brown sugar to a bowl and mix to combine and reserve.
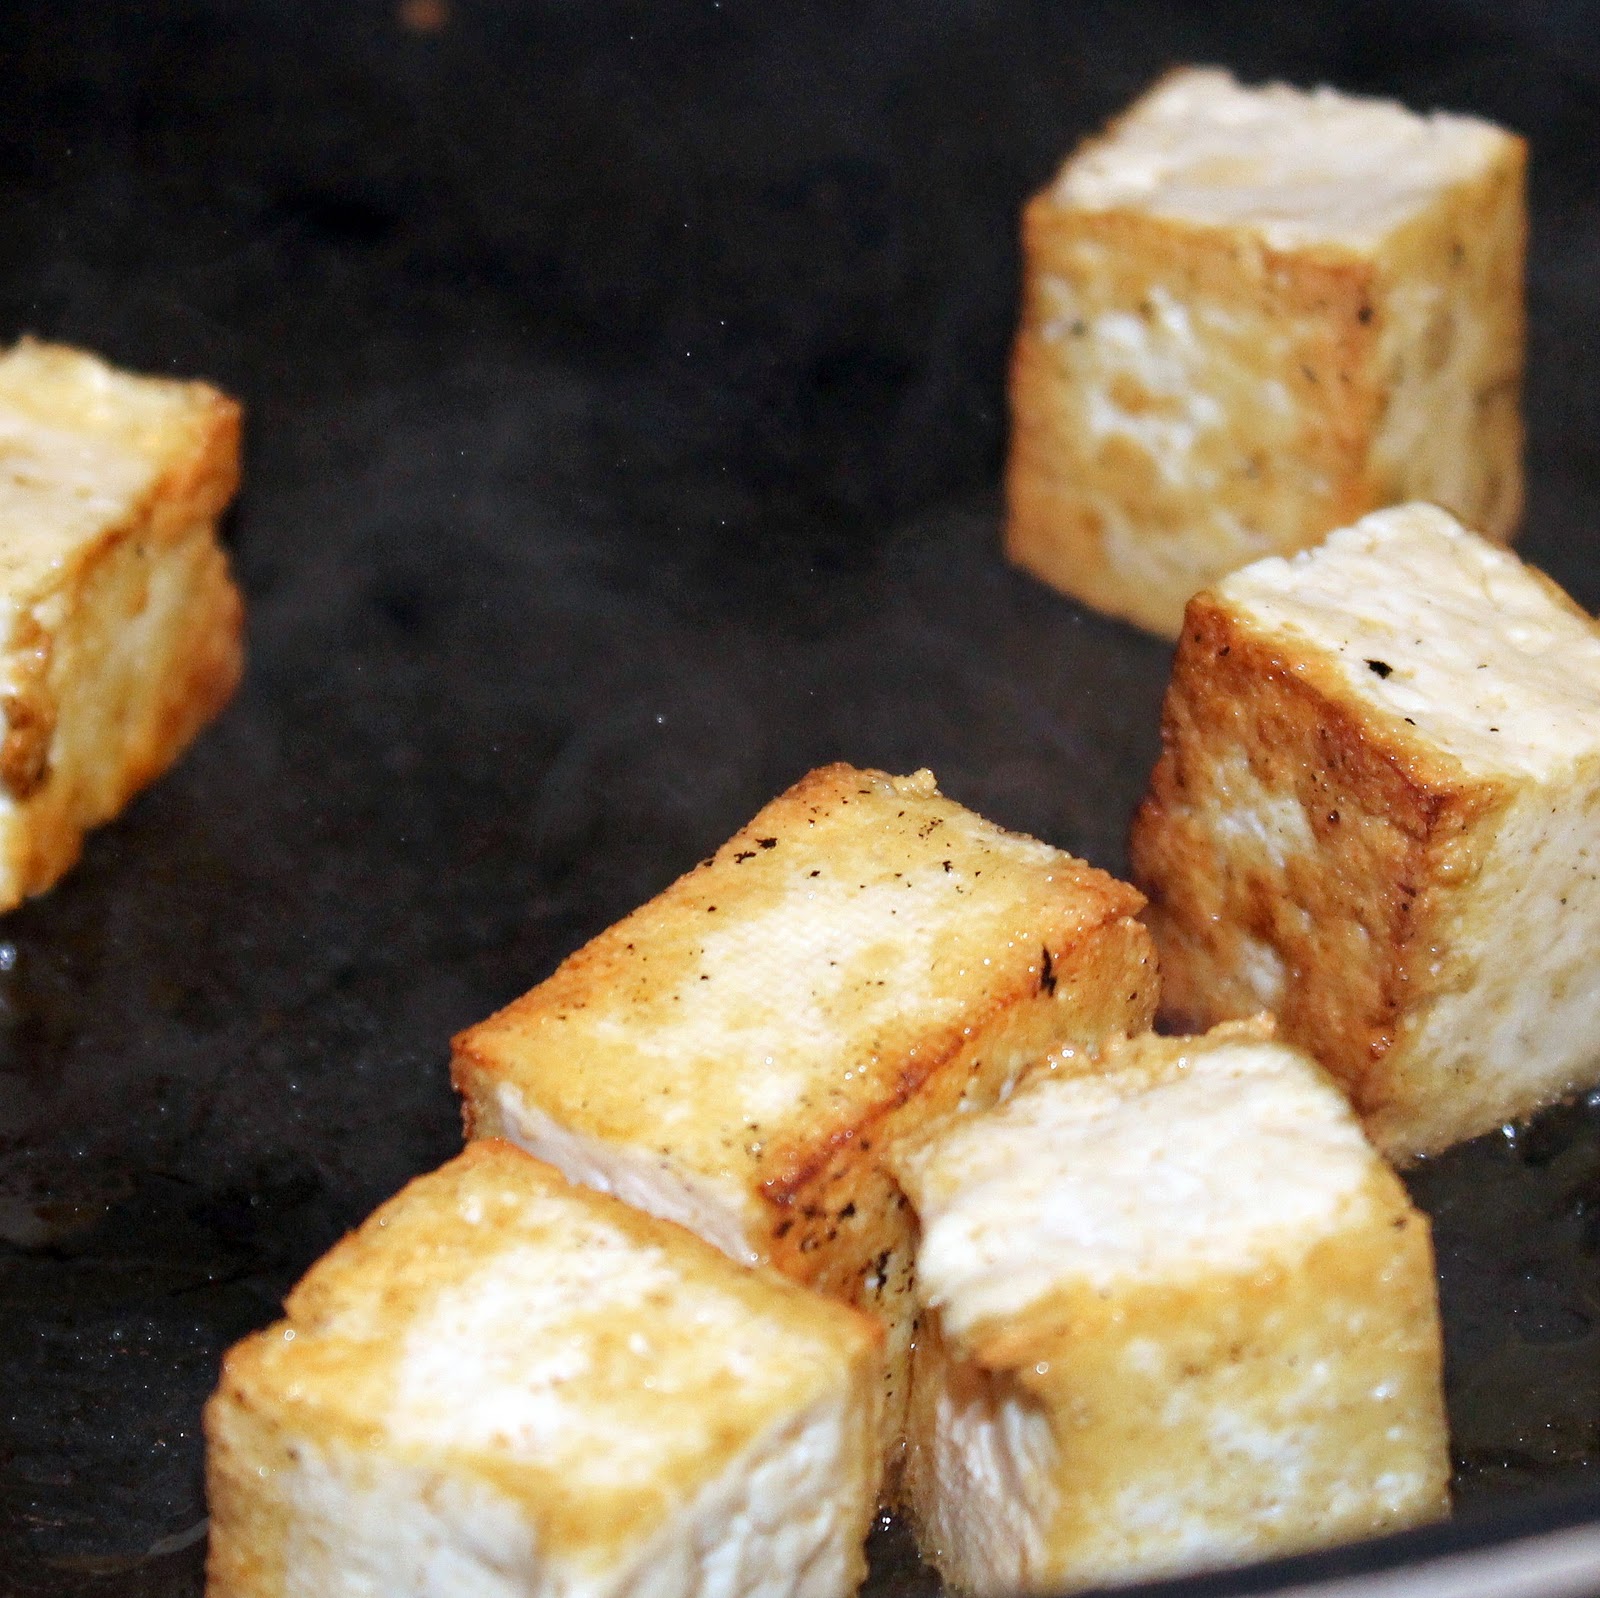
Add 1 teaspoon of the toasted sesame oil to a saute pan over medium heat. Cube the tofu.
Add the tofu to the pan.
Cook for 1-2 minutes on each side, or until browned.
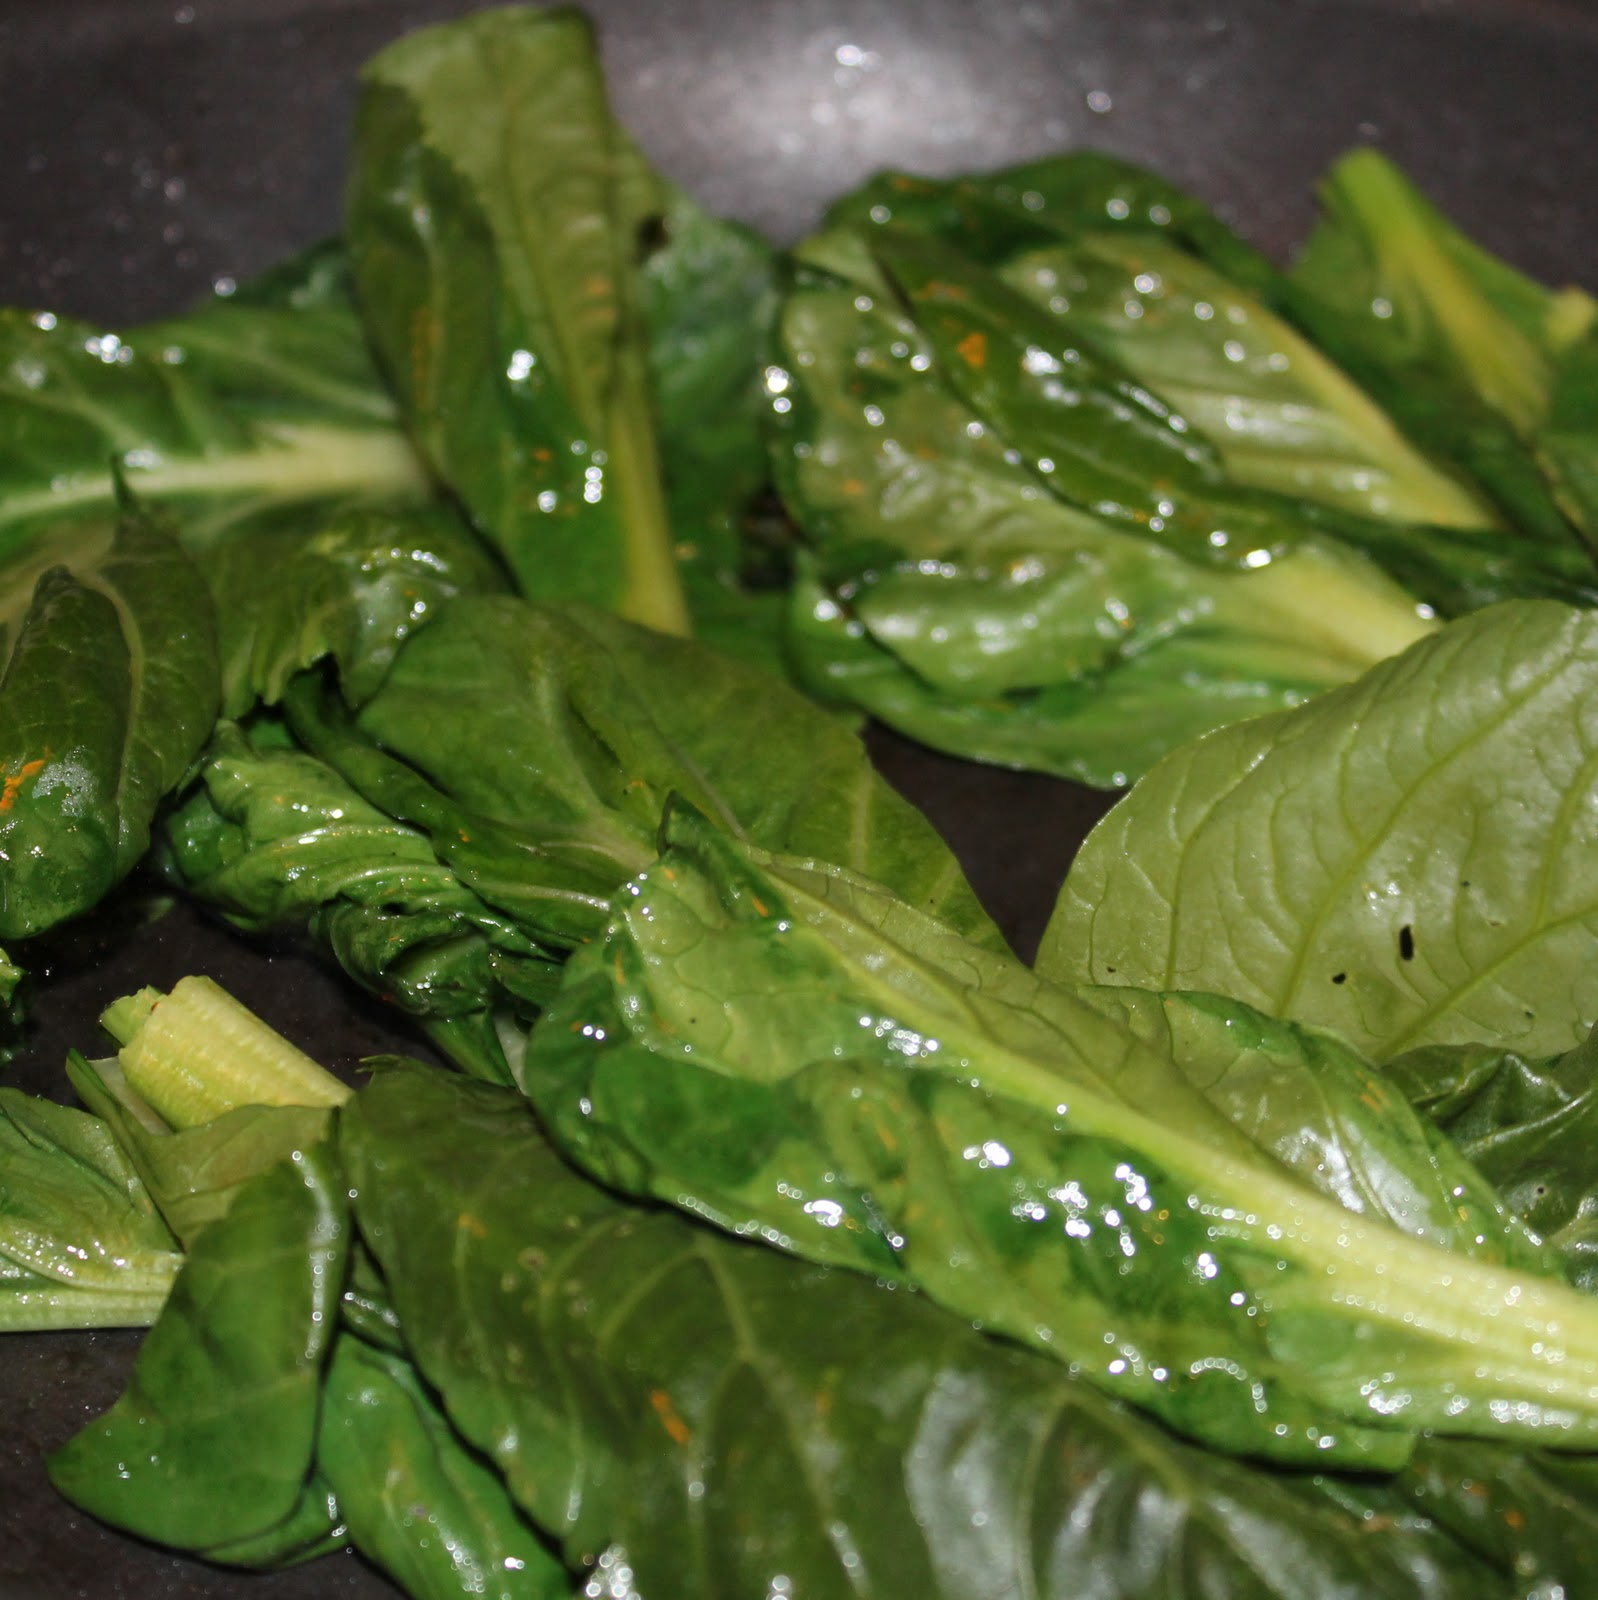
Remove the tofu from heat. Cut the stems off of the tatsoi.
Add 1 teaspoon toasted sesame oil to the saute pan and turn down the heat to medium low. Add the tatsoi.
Cook for 1 minute, stirring to coat. Add the reserved sauce to the pan.
Stir to combine. Mix in the tofu and serve.
This was so quick and easy! I actually ate this as a meal, but if you cut the tofu pieces smaller, this could also work as a yummy side.
I loved the subtle sweetness of the sauce. Tatsoi tastes very similar to bok choi, so the flavors worked really well.
I was really pleasantly surprised by the result. You might just catch me making another tofu recipe in the future!
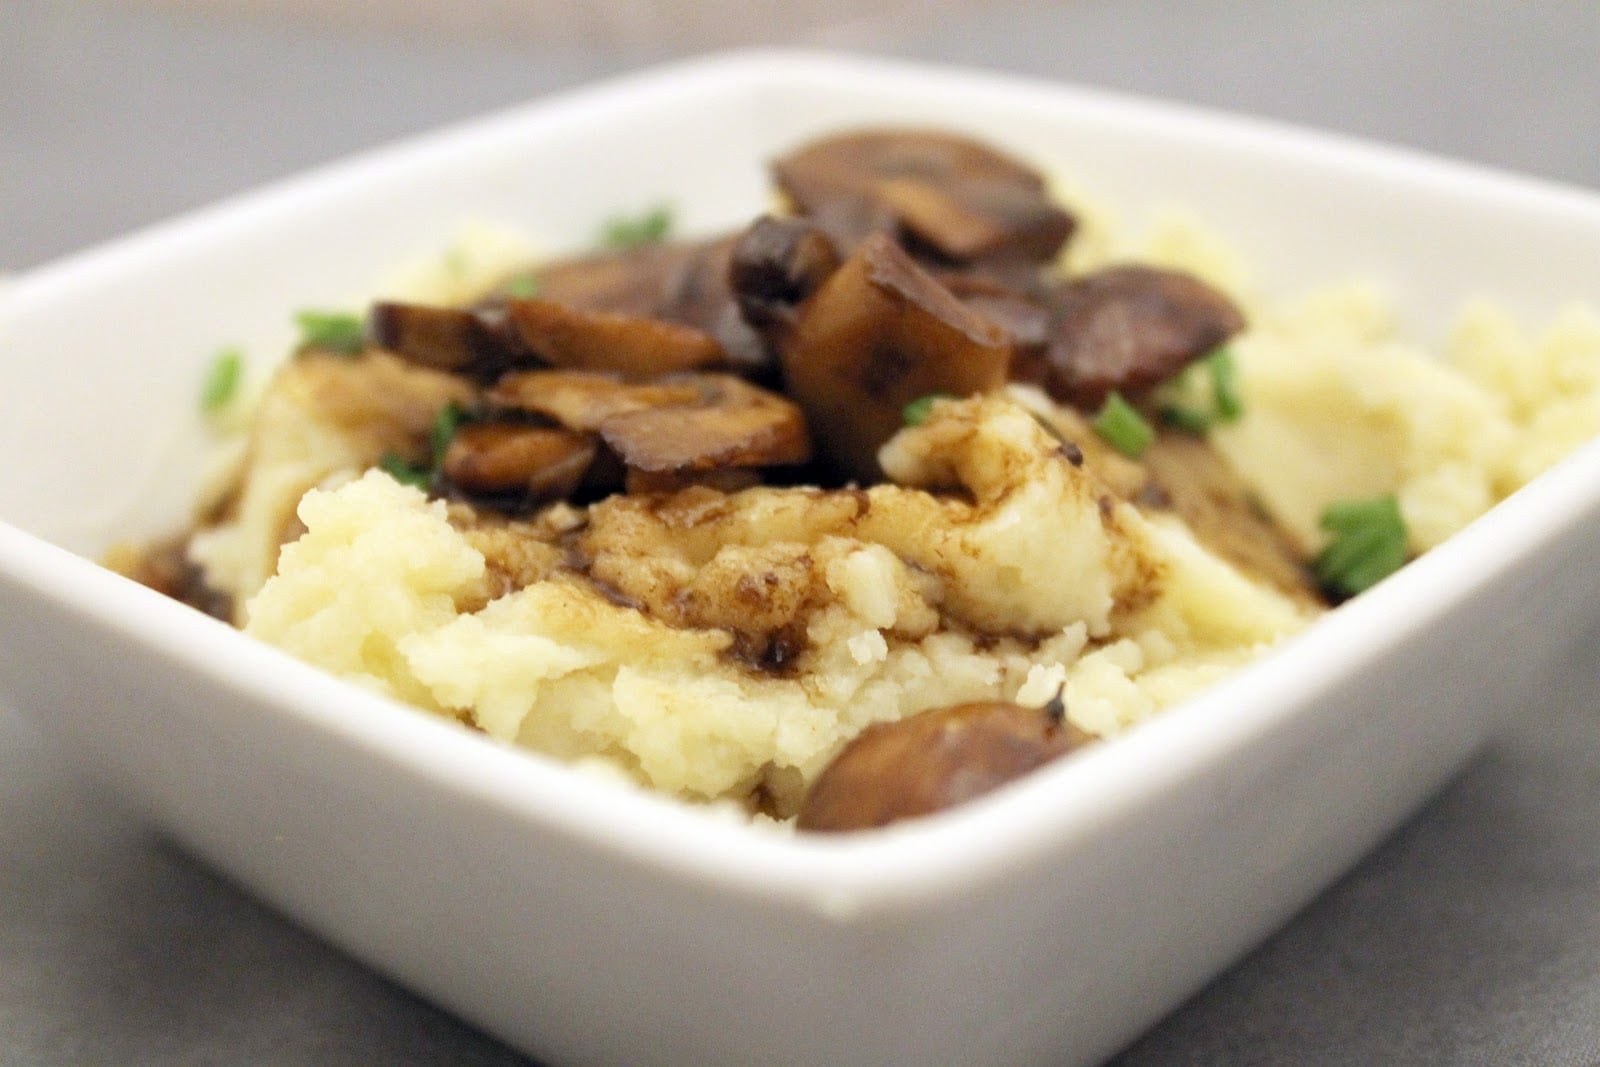
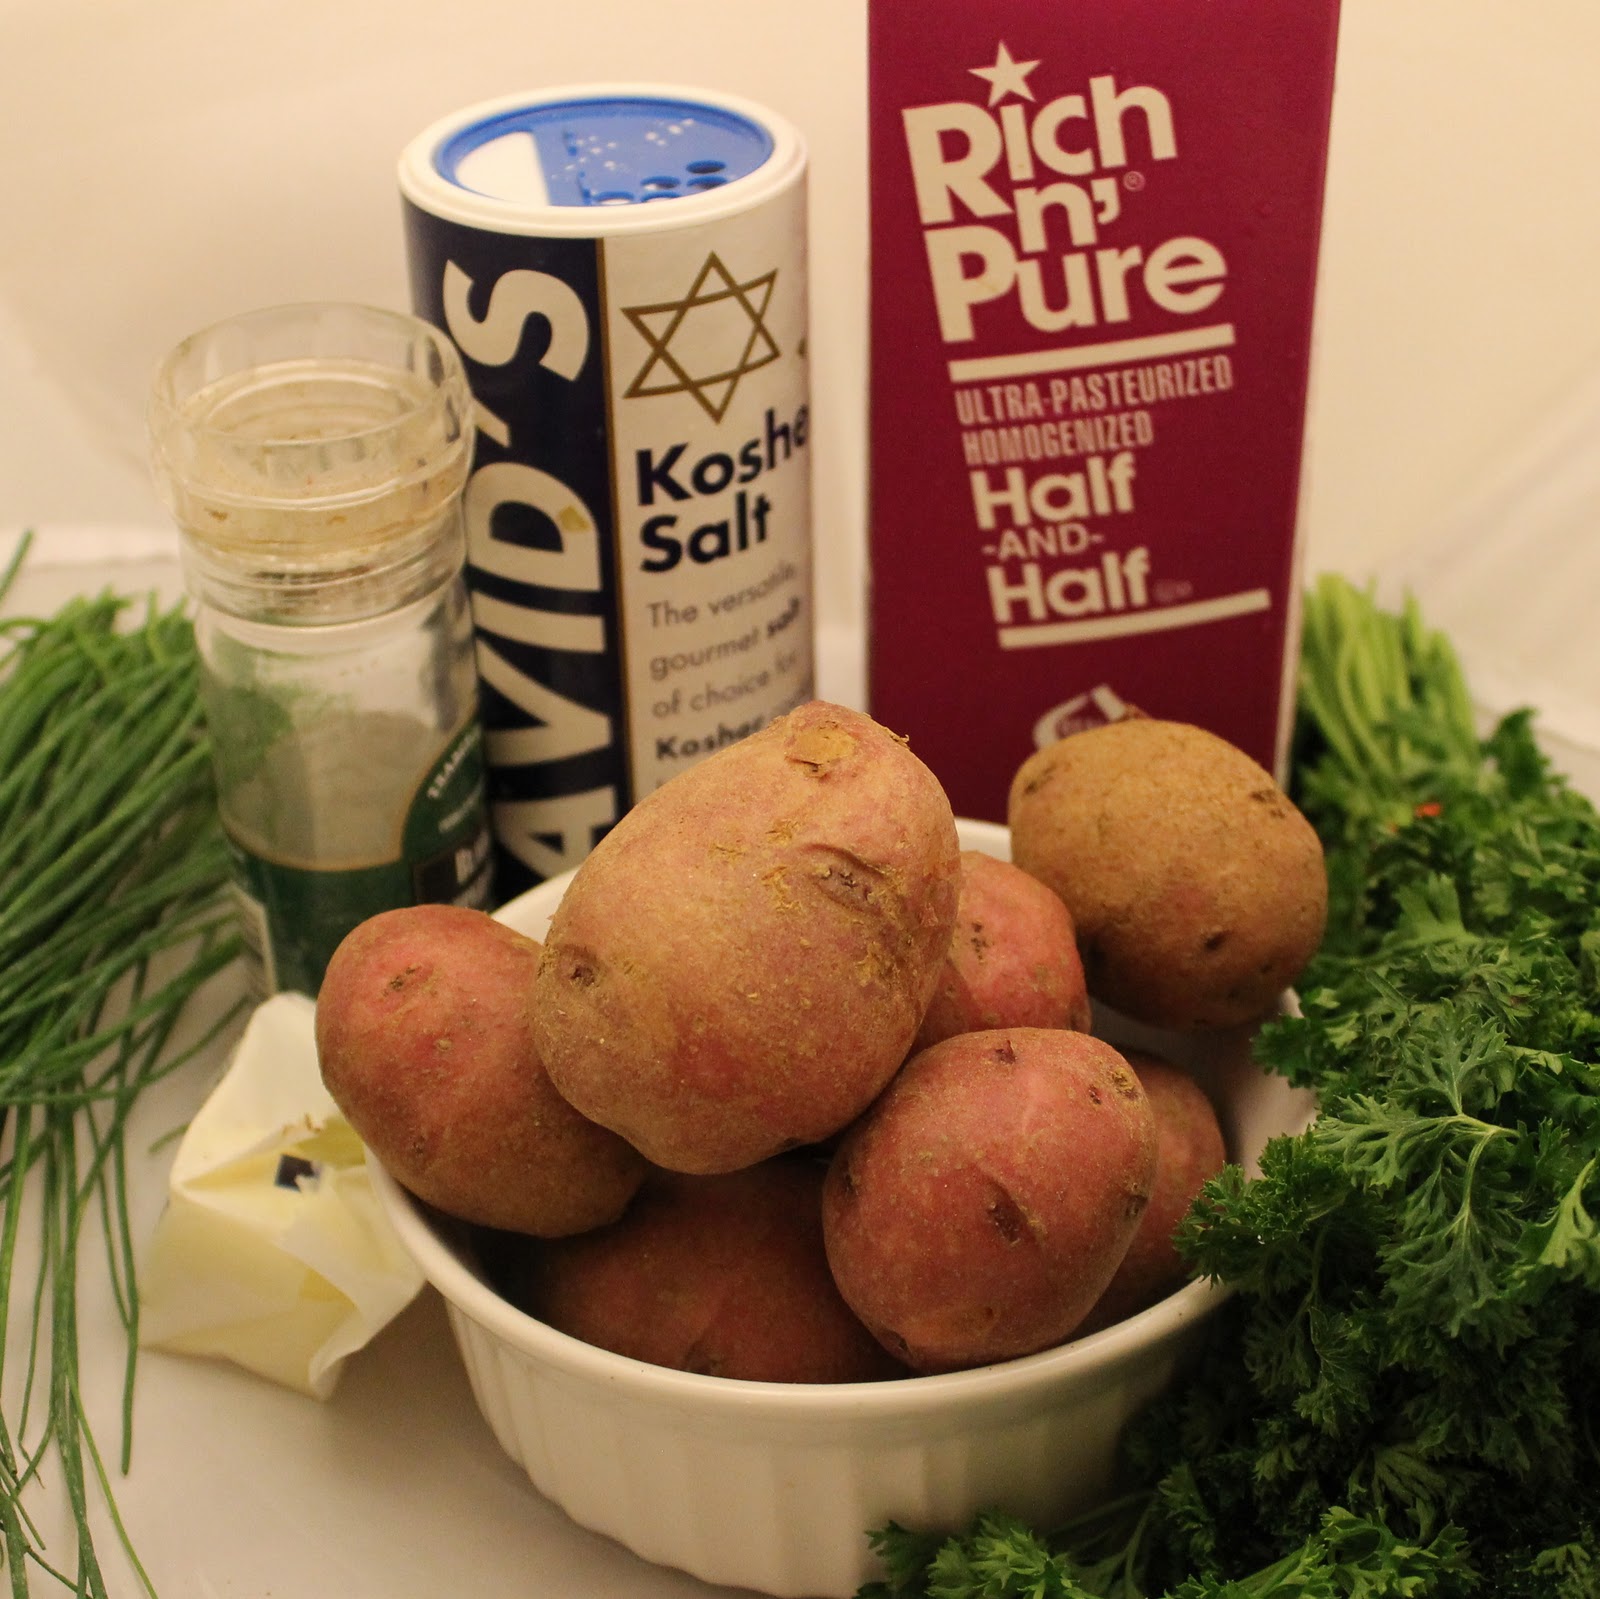
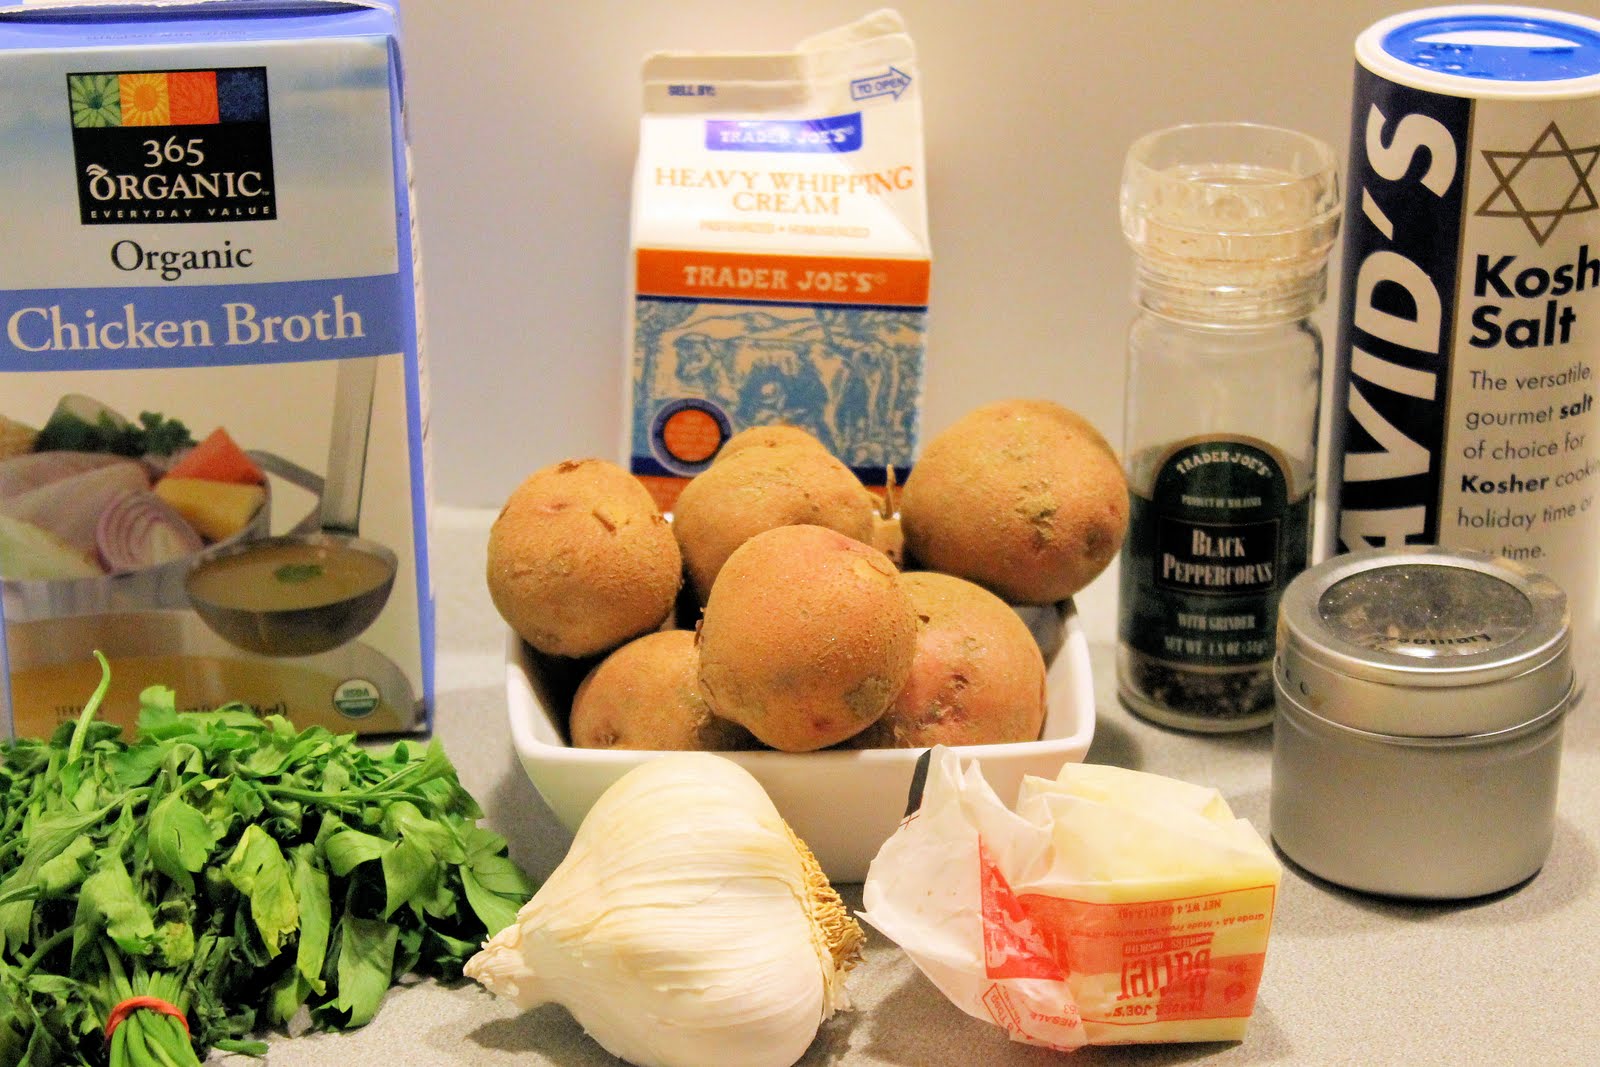
I love mashed potatoes. I love them so much that my Aunt and Uncle usually ask me to come over the day before Thanksgiving to help peel all of the potatoes so that there are enough for me (I could probably eat just a bowl of mashed potatoes on Thanksgiving and be happy.) I found a new method of making mashed potatoes on MyRecipes, but modified it a bit and added a mushroom sauce to make this vegetarian recipe for Mashed Potatoes with Mushroom Sauce.
Ingredients:
8 medium-size red potatoes, peeled and quartered
2 cups half-and-half
1/2 teaspoon salt
1/4 teaspoon pepper
1/4 cup butter or margarine, softened
2 teaspoons chopped fresh chives
2 teaspoons chopped fresh parsley
Mushroom Sauce:
2 teaspoons butter
2 garlic cloves, minced
1 container of sliced cremini (baby bella) mushrooms
1/2 teaspoon chopped fresh thyme
2 tablespoons balsamic vinegar
1 tablespoon water
1 teaspoon low-sodium soy sauce (or coconut aminos to make gluten free)
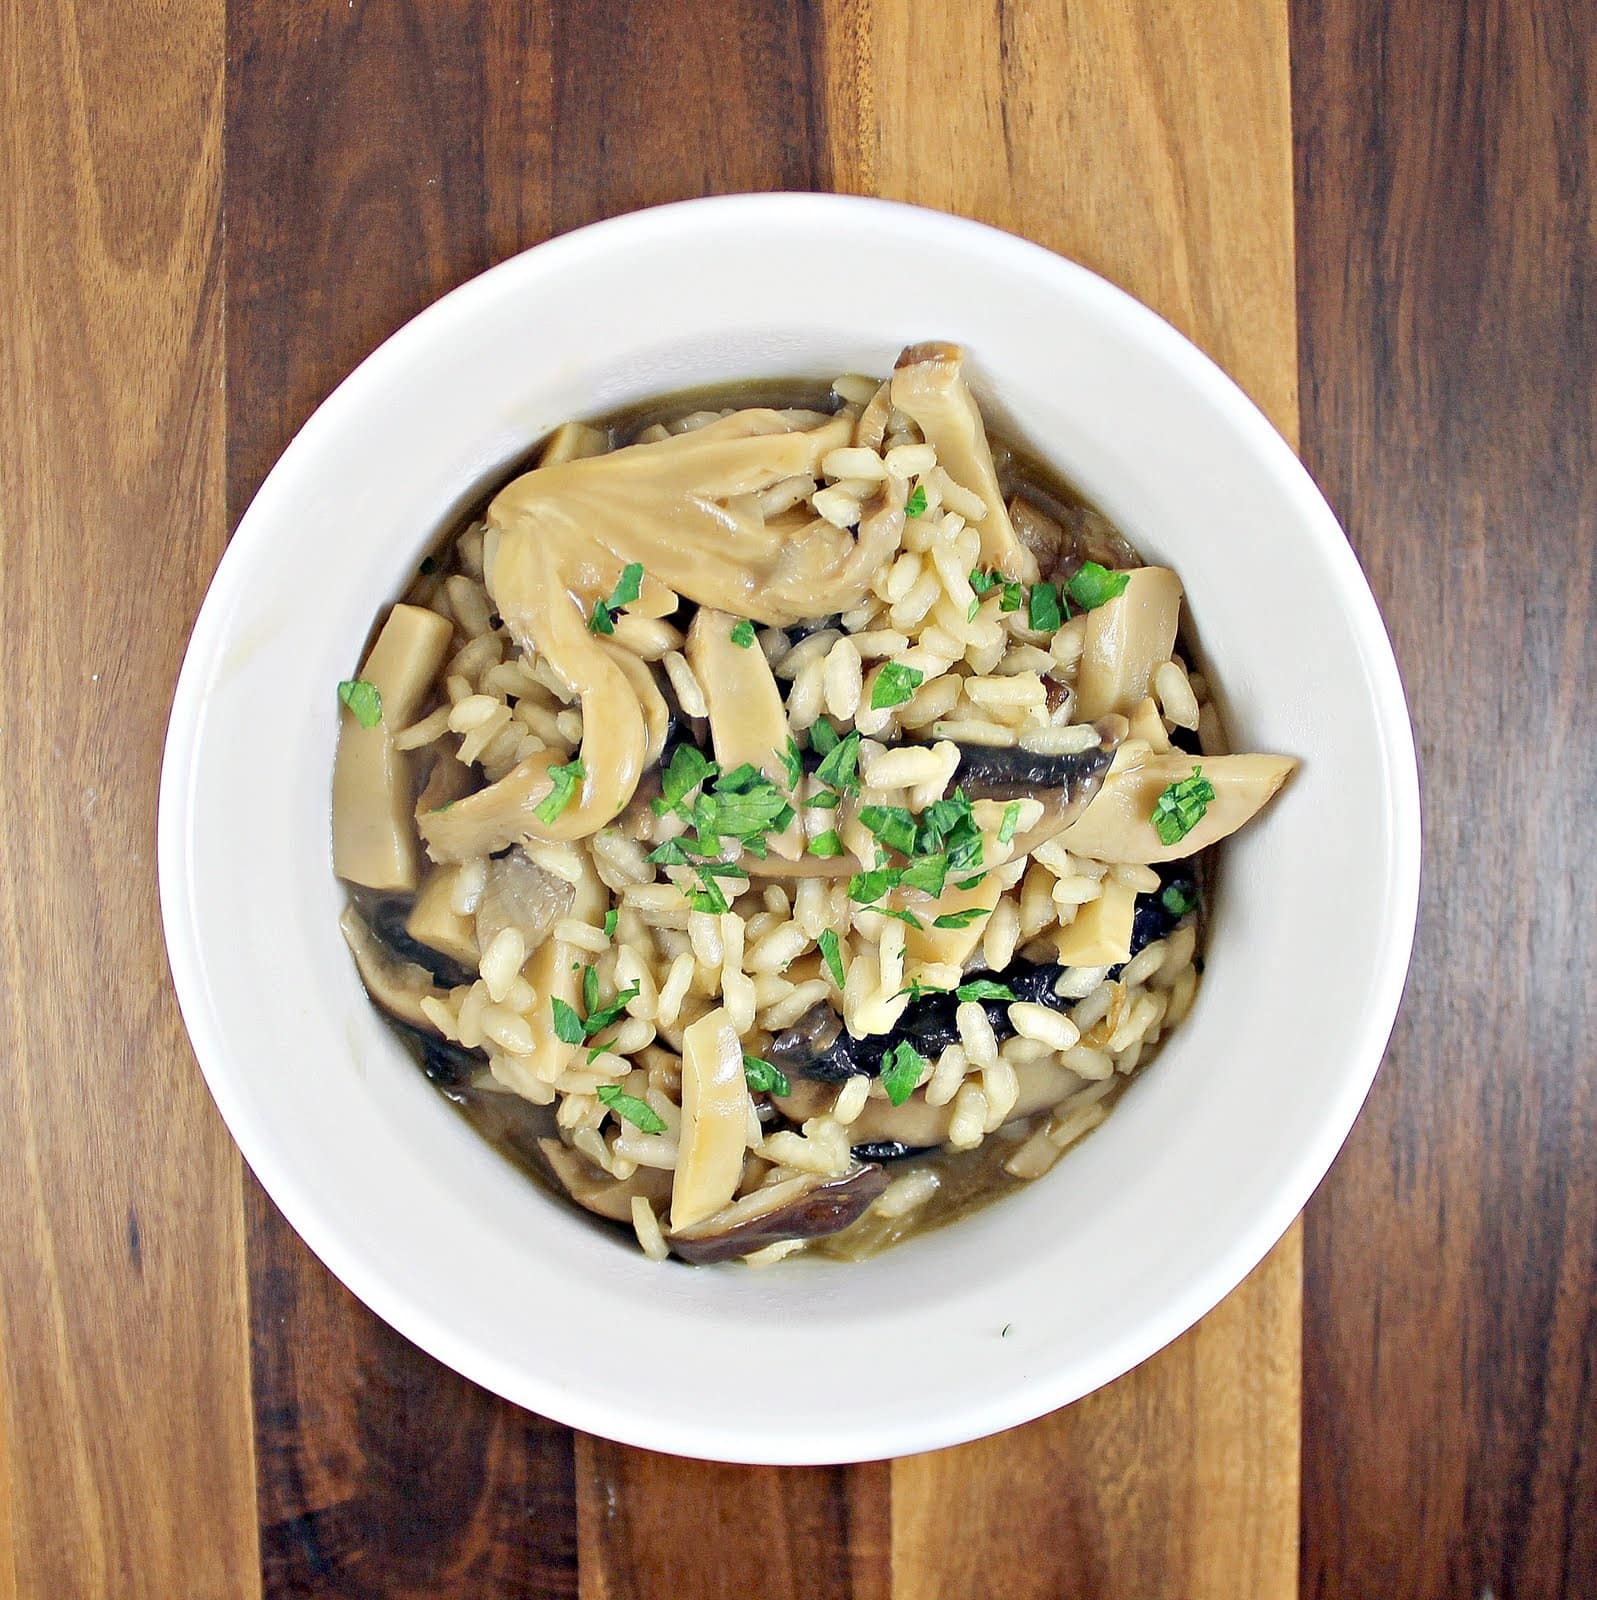
This past weekend, Kennett Square held it’s annual Mushroom Festival. I unfortunately didn’t get to go this year, but my parents dropped off a variety of mushrooms for me. When I have a lot of different types of mushrooms, my go to recipe is a mushroom risotto.
Ingredients:
1 tablespoon butter or olive oil
2 cups assorted mushrooms, sliced (I used oyster, shiitake, portobello & trumpet)
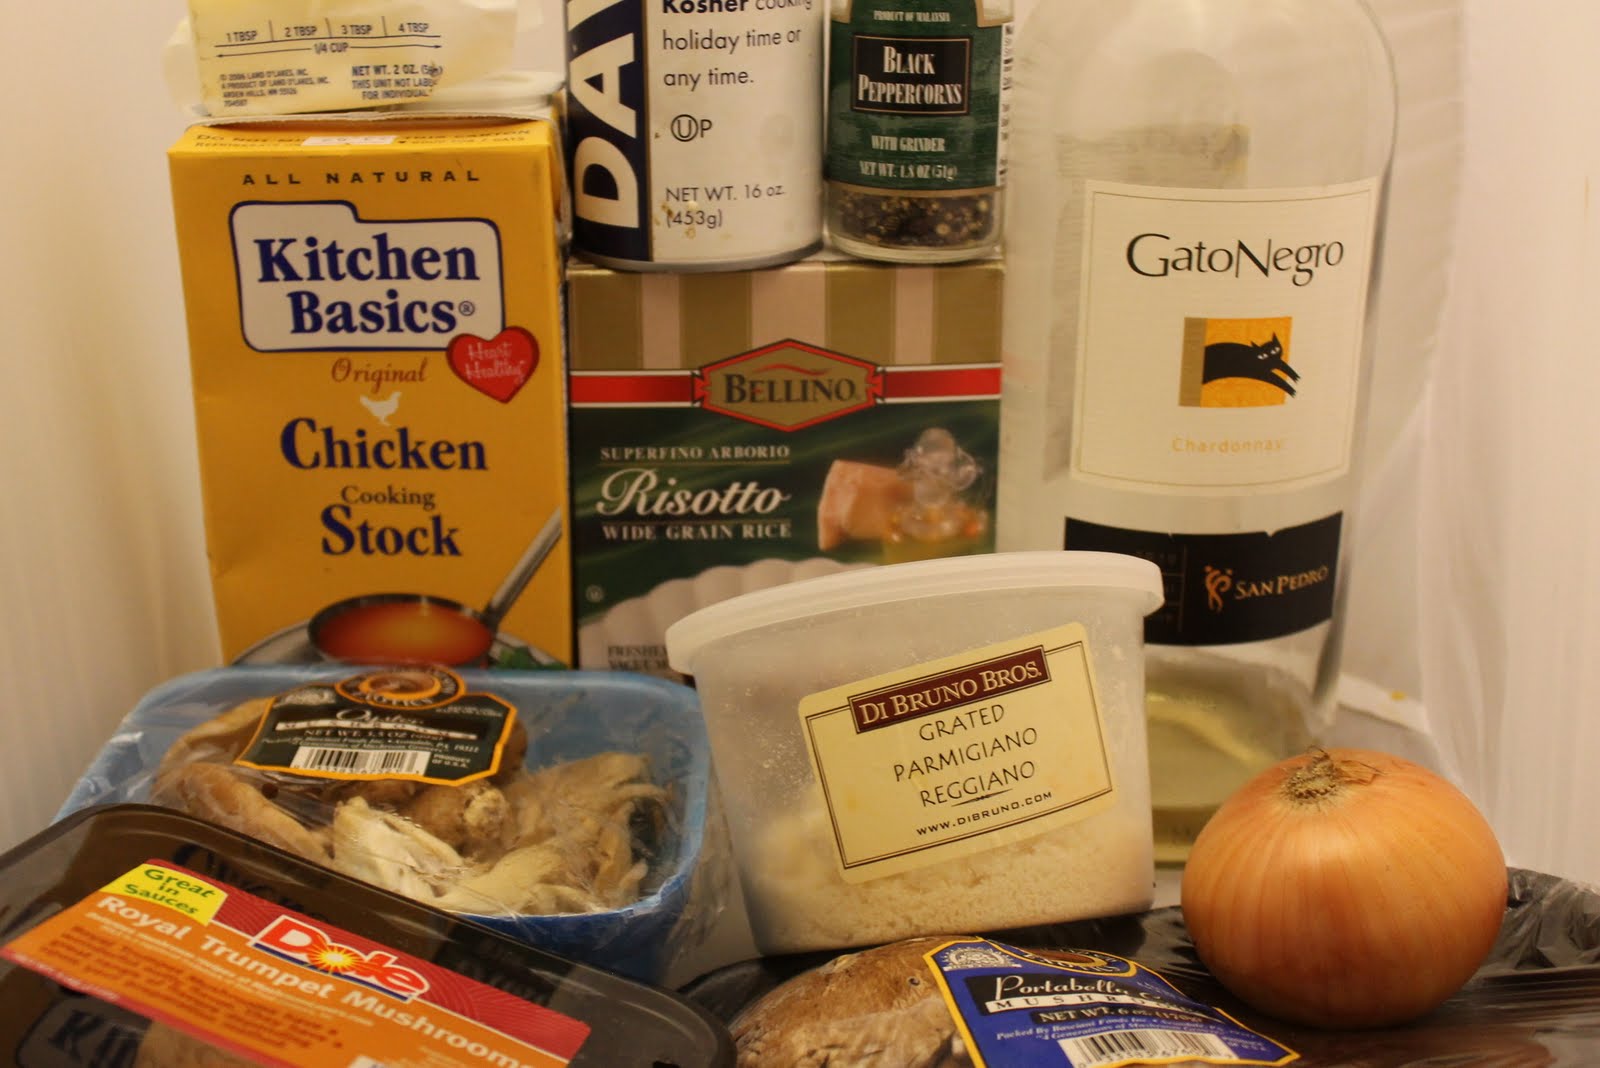
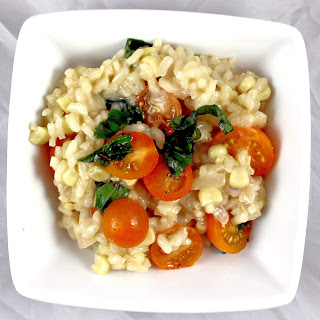
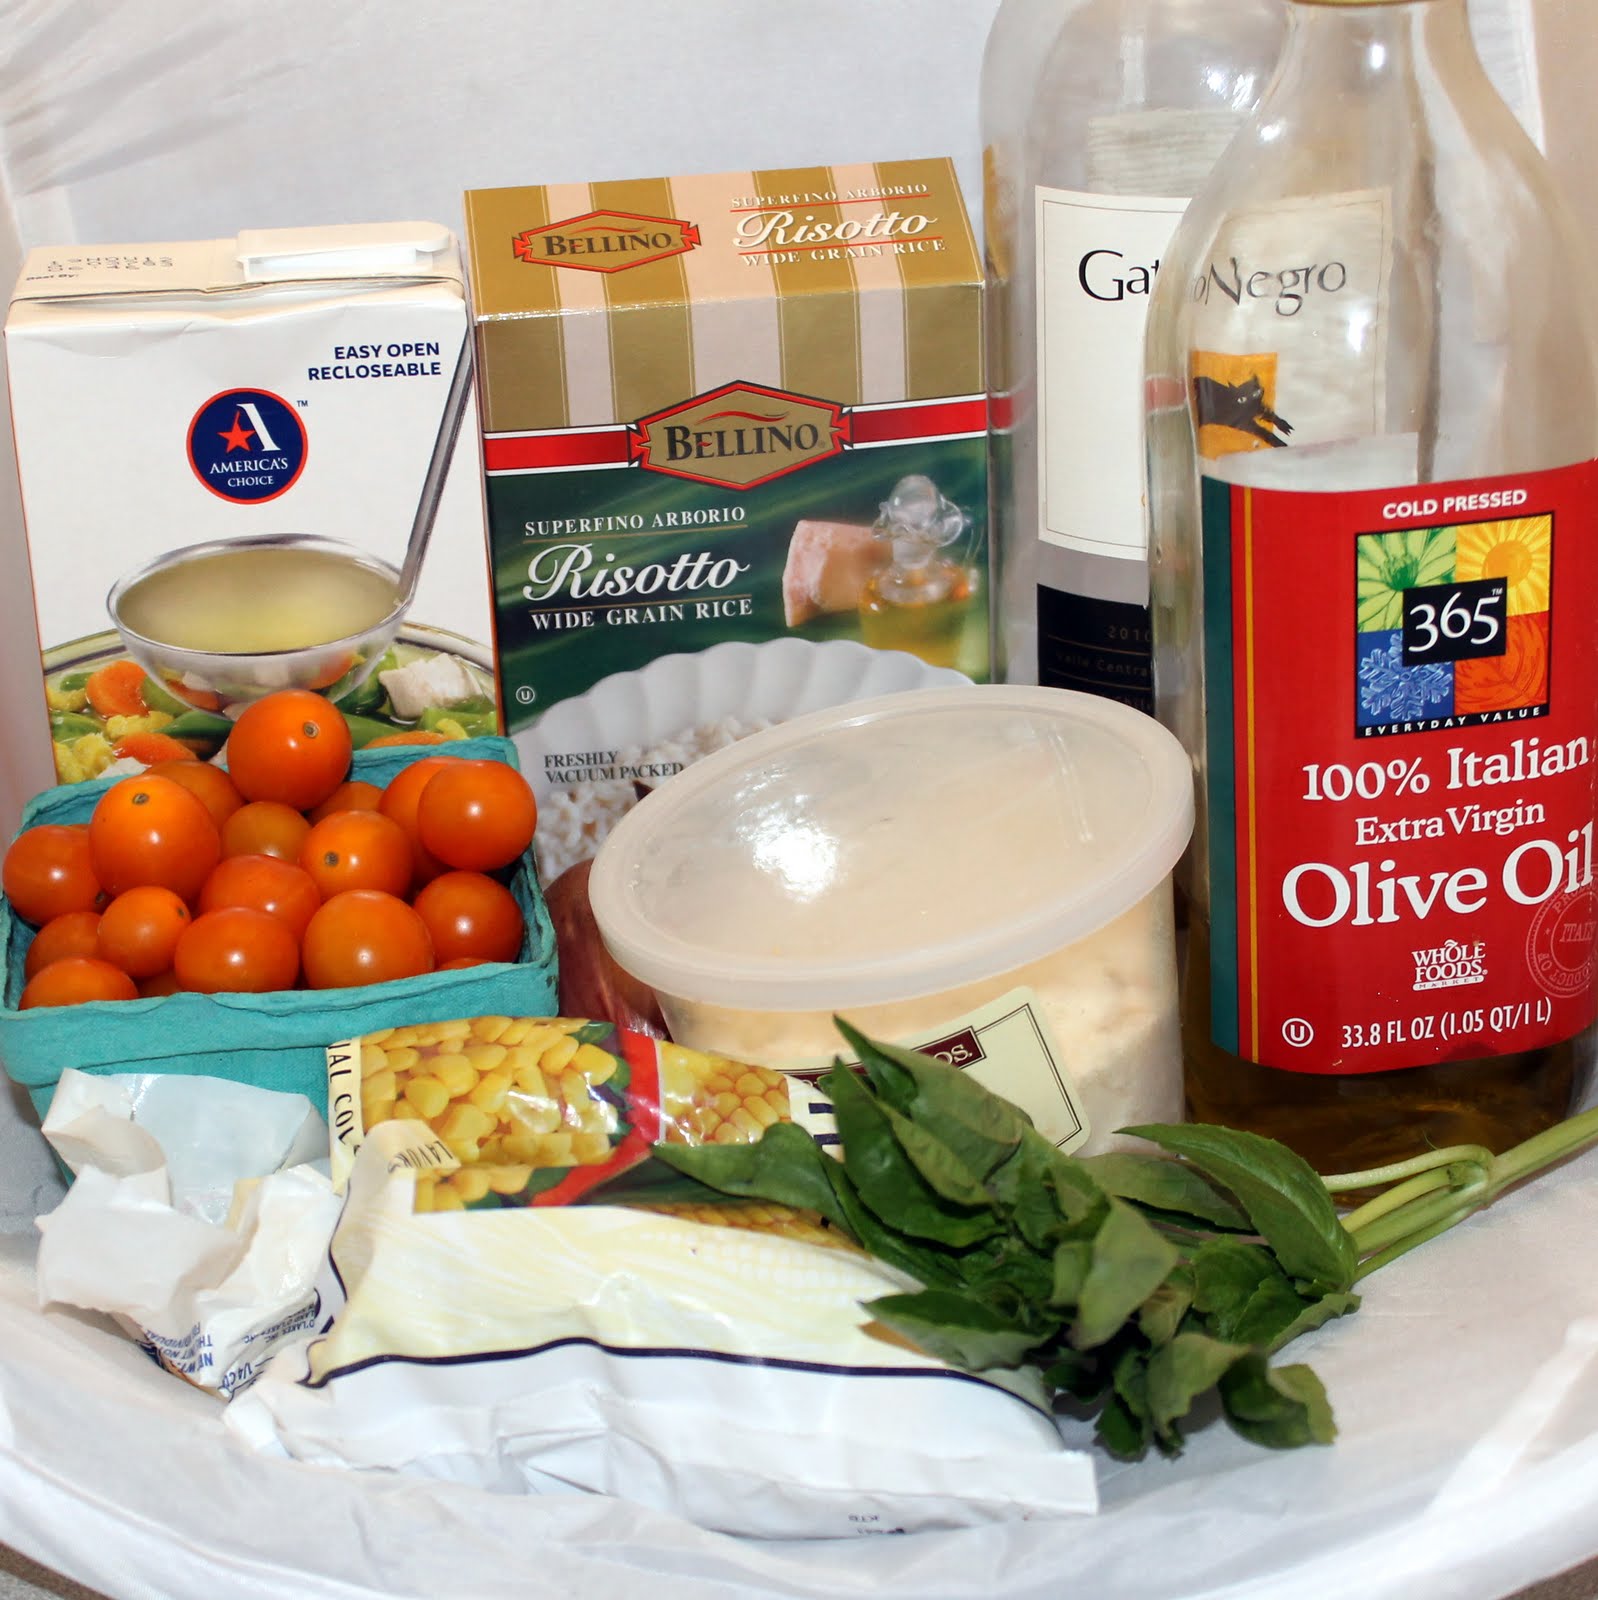
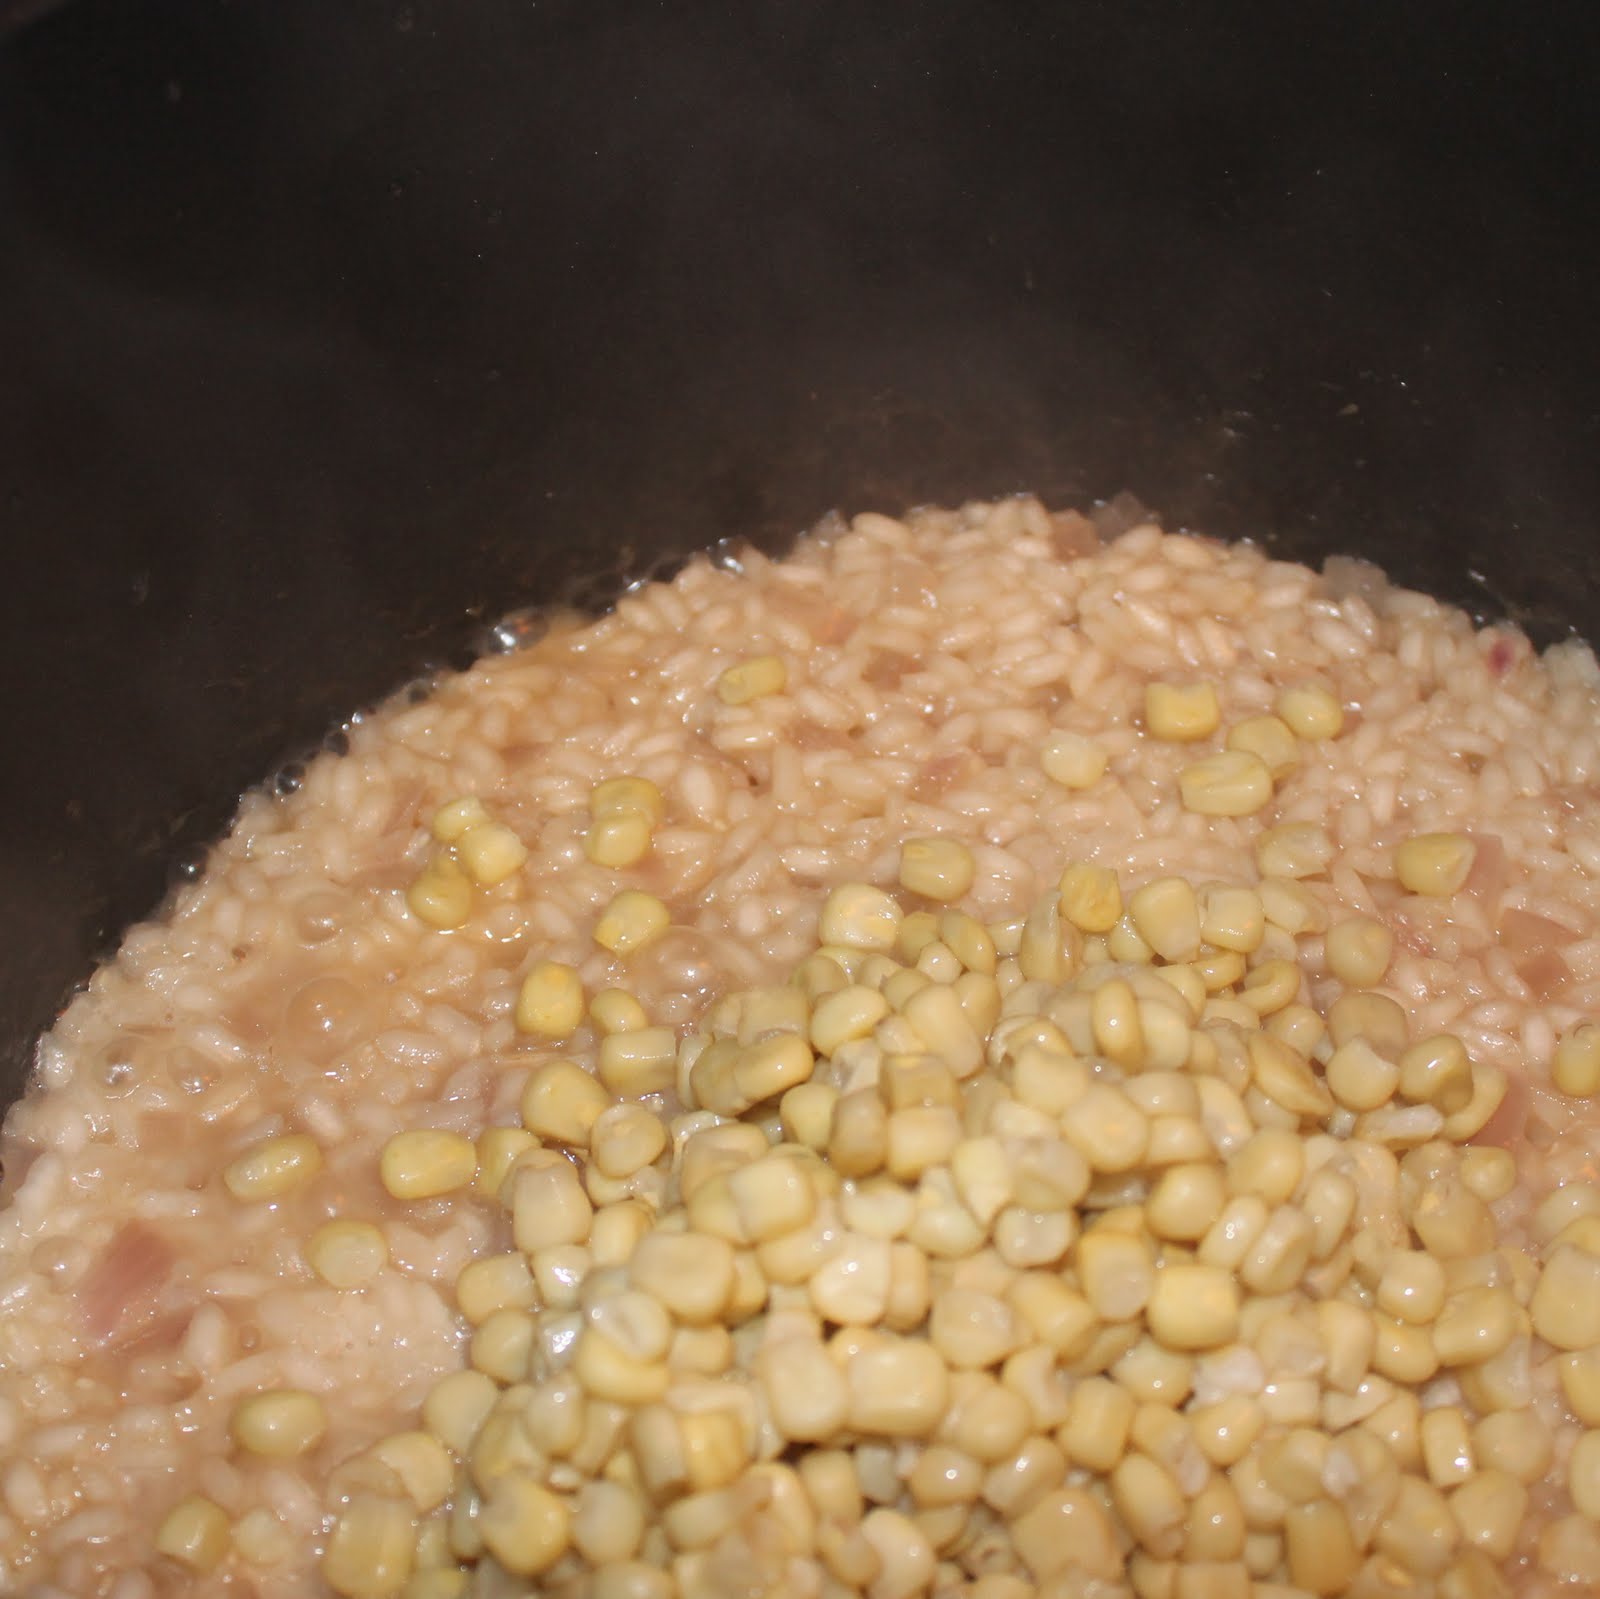
After a weekend of brownie and brie baking, I’m back on track making normal meals. Keeping with my tomato-corn themes, I was happy to find a recipe from Fine Cooking that included both of these ingredients. Even better, it is also a risotto!
Ingredients:
4 cups chicken broth
2 cups of frozen corn kernels
2 Tbs. unsalted butter
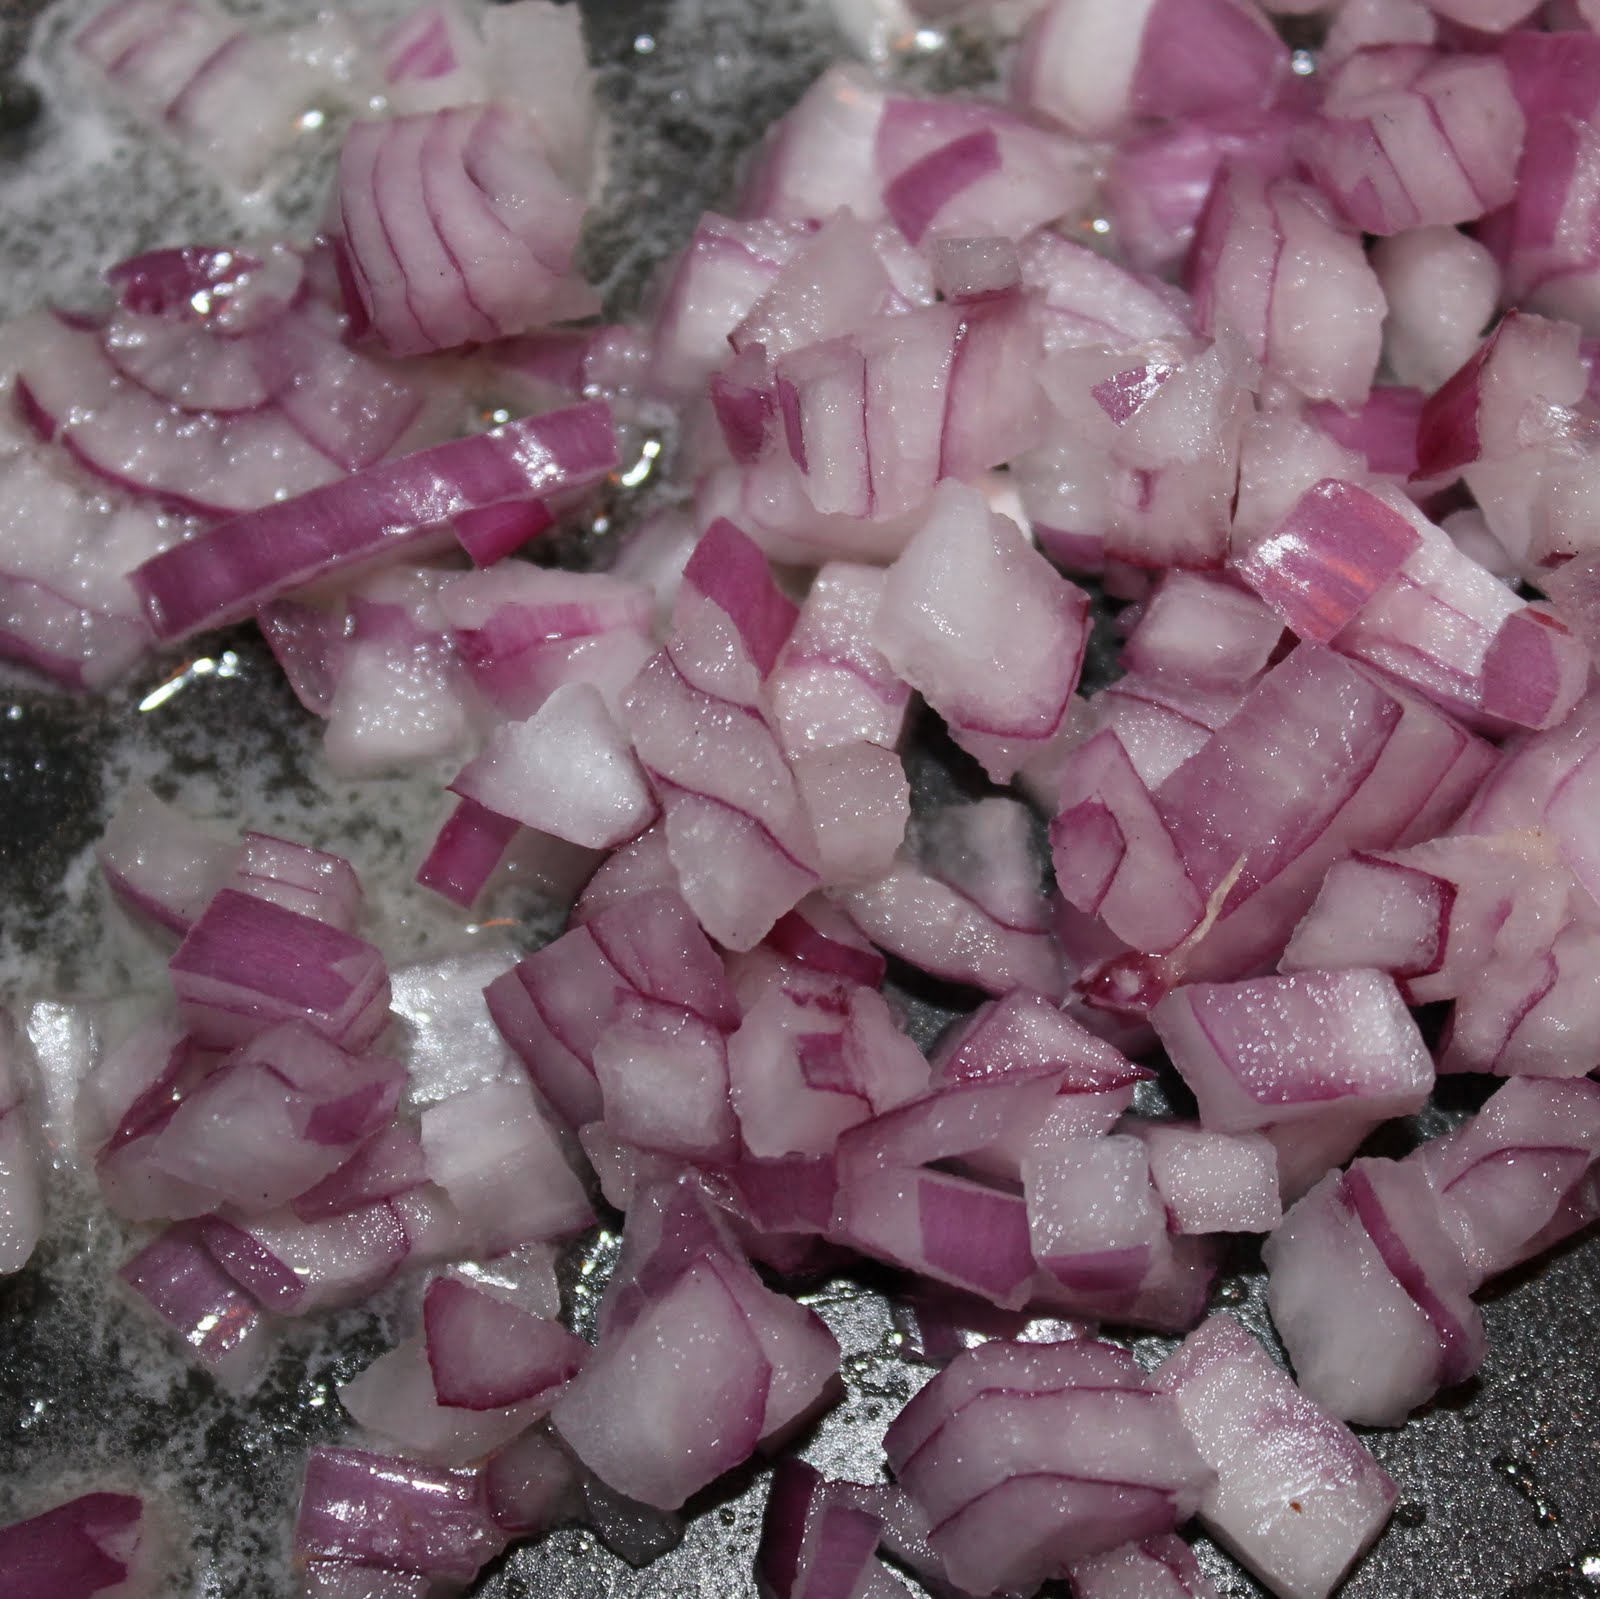
1 shallot, minced
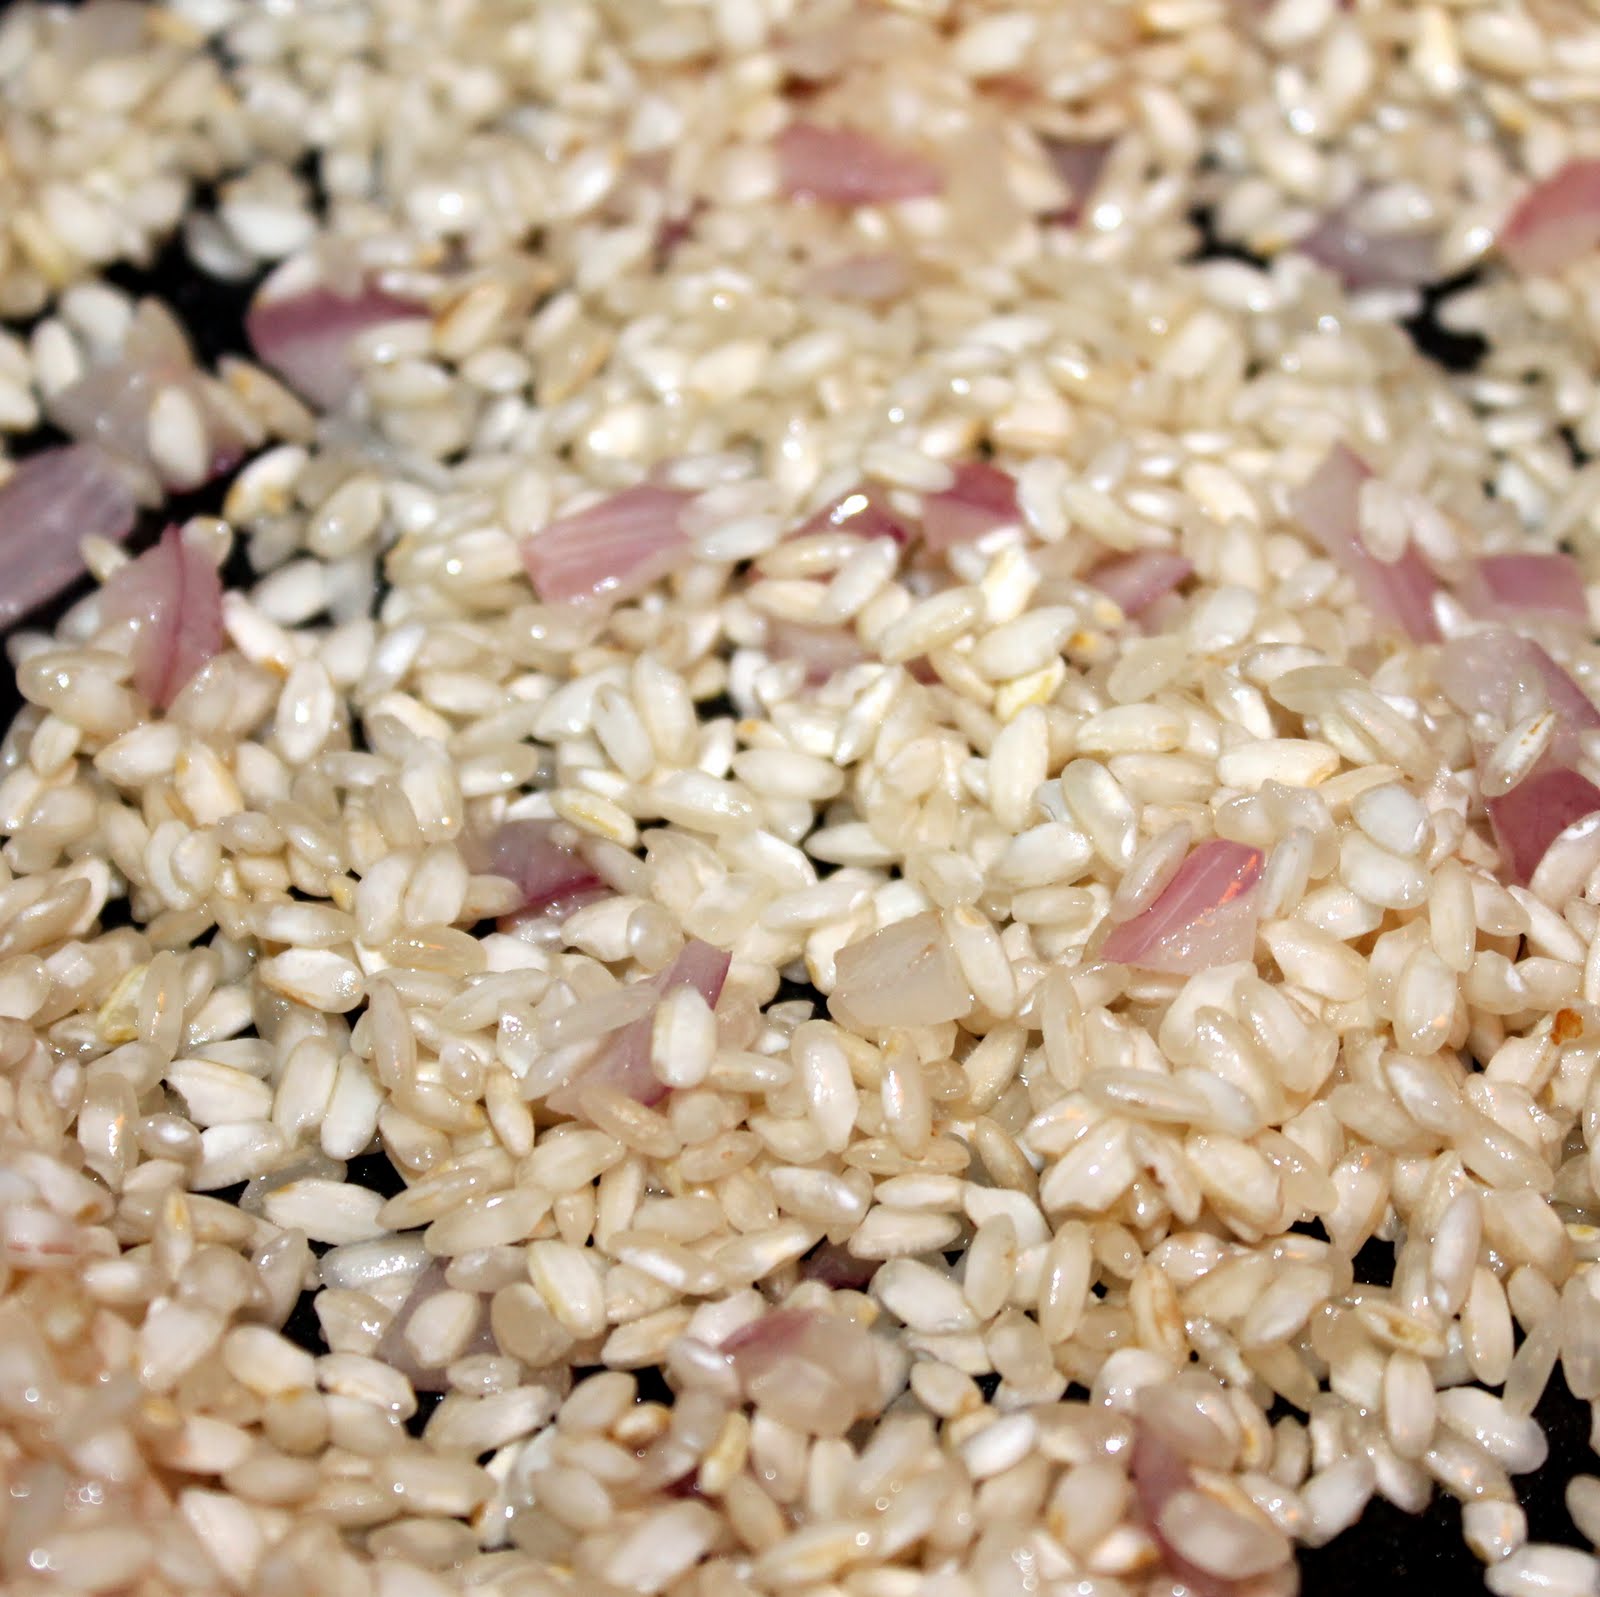
1 cup arborio rice
1/3 cup dry white wine
1 cup halved cherry tomatoes
2 tsp. extra-virgin olive oil
3 Tbs. torn fresh basil leaves
Kosher salt and freshly ground black pepper
1/3 cup freshly grated Parmigiano-Reggiano
So I chickened out this time on the corn. Out of my last batch of a half dozen corn cobs, 5 (FIVE!) of them had worms. Goo. I understand it is very difficult to grown corn organically, but I needed to just take a step back from the whole surprise-in-my-corn.If you are using fresh corn, click on the link above to see the original recipe, I used frozen kernels for mine so I had to adapt the recipe accordingly. You will need three corn cobs.
Add the chicken broth to a pot and heat over medium-low heat. In another saute pan melt the butter over medium heat. Add the shallot and cook for 2 minutes.
Add the rice and stir to coat.
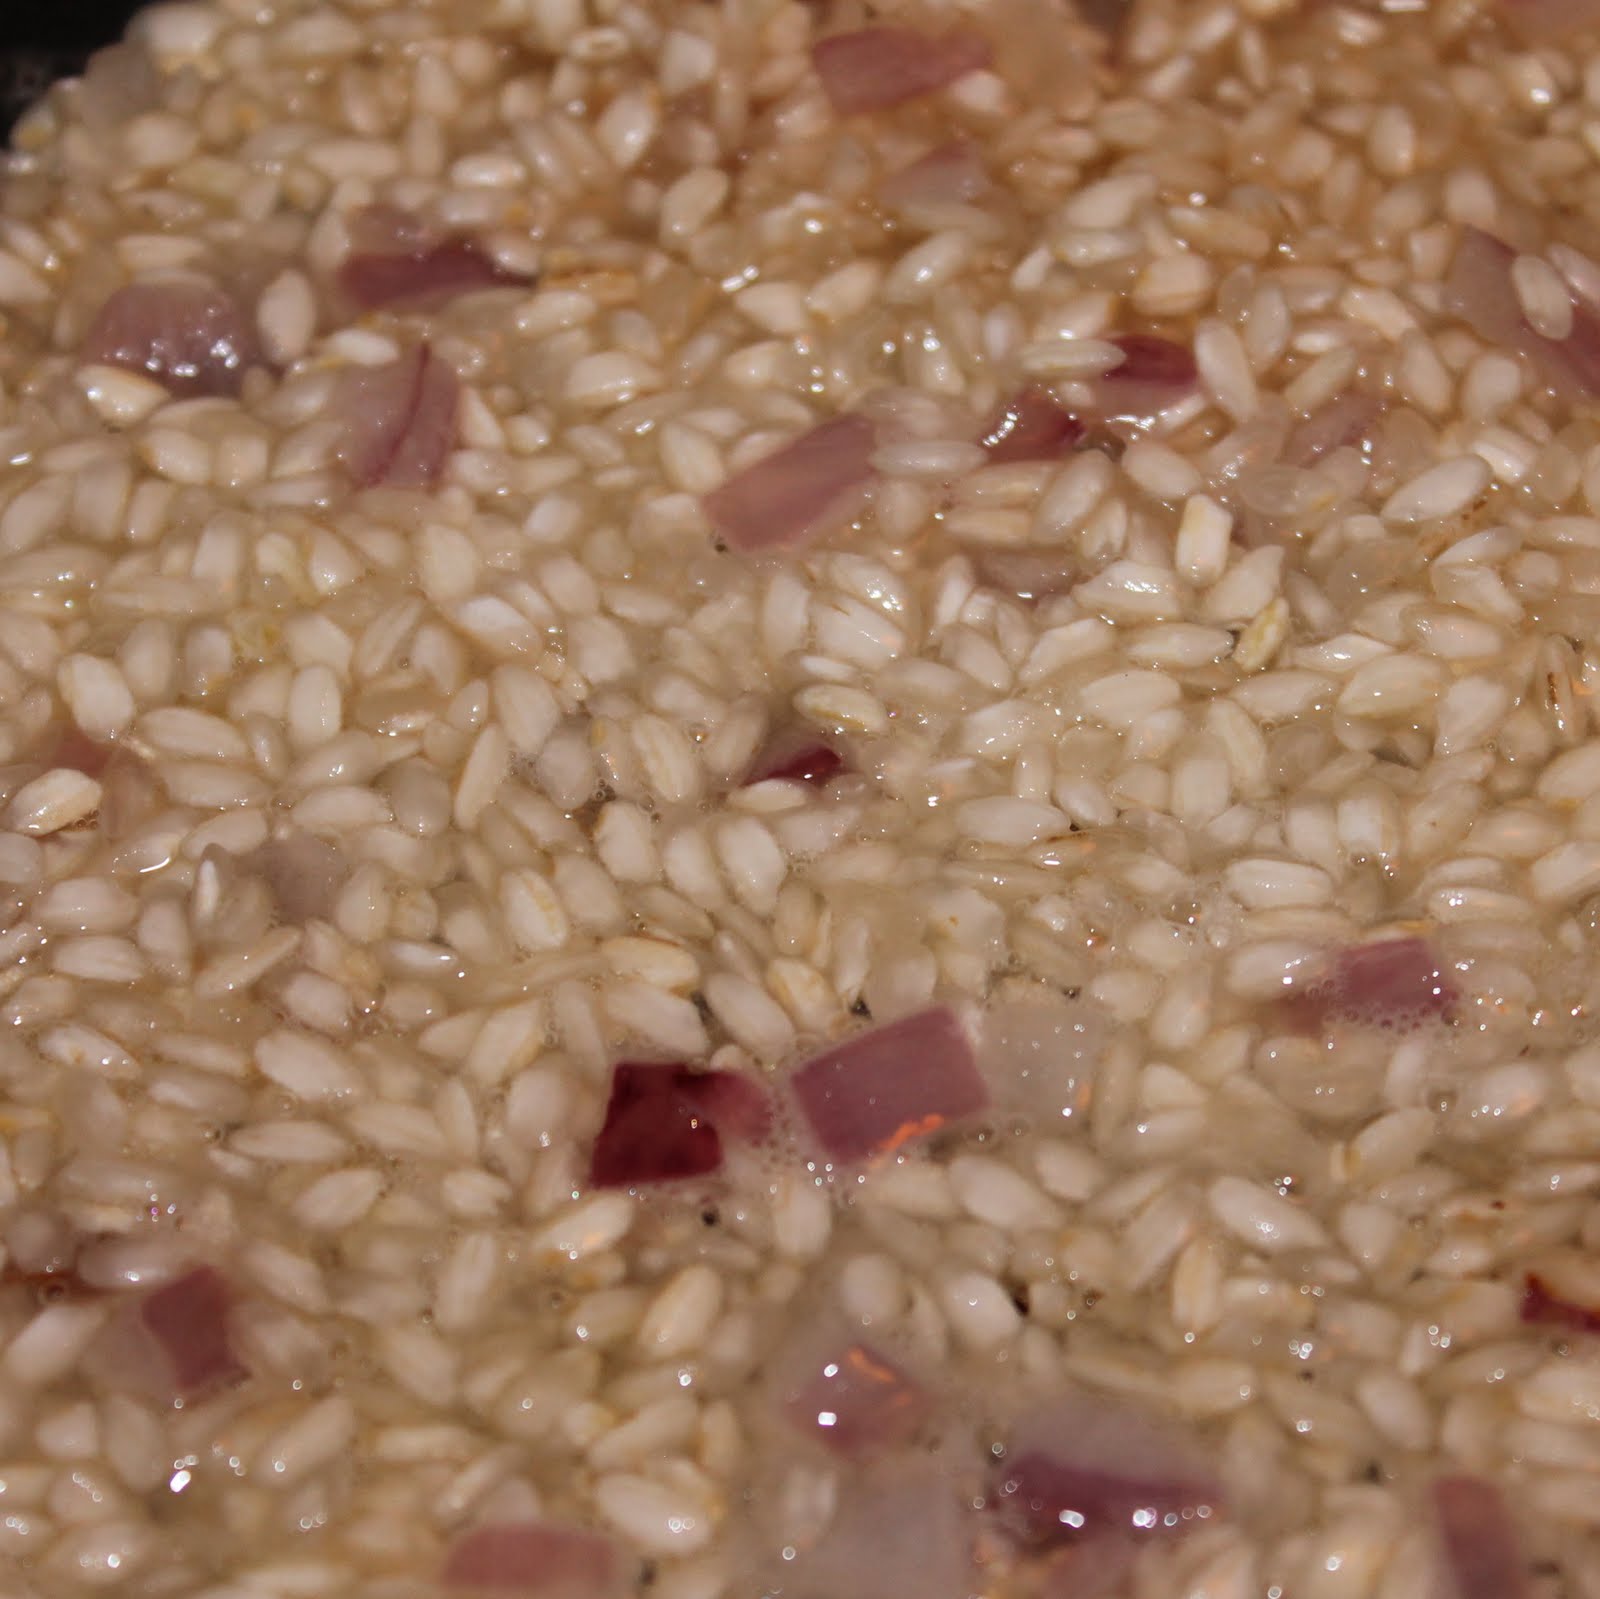
Add the wine and cook until absorbed, about 1 minute.
Ladle in 1 1/2 cups of the warm broth into the saute pan and cook, stirring occasionally, until the broth is absorbed (about 3 to 5 minutes). Add a 1/2 cup of broth at a time, waiting until the broth is absorbed before adding the next 1/2 cup.
Combine the tomatoes,olive oil, and 2 tablespoons of the basil in a bowl. Season with salt and pepper and set aside.
I’d be happy just eating this!
About 16 minutes into the cooking of the rice (you’ll still have broth left), stir in the corn. Continue to add the broth in 1/2 cup increments until the rice is creamy, about 20 to 25 minutes in total.
Remove from heat and add the Parmigiano cheese and tomato-basil mixture. Top with the remaining basil and serve.
Somehow, this risotto was light and refreshing. I loved the sweetness from both the tomatoes and corn, it tasted like summer! I ate the leftovers from this the next day for lunch and it held up really well, which is always a plus.
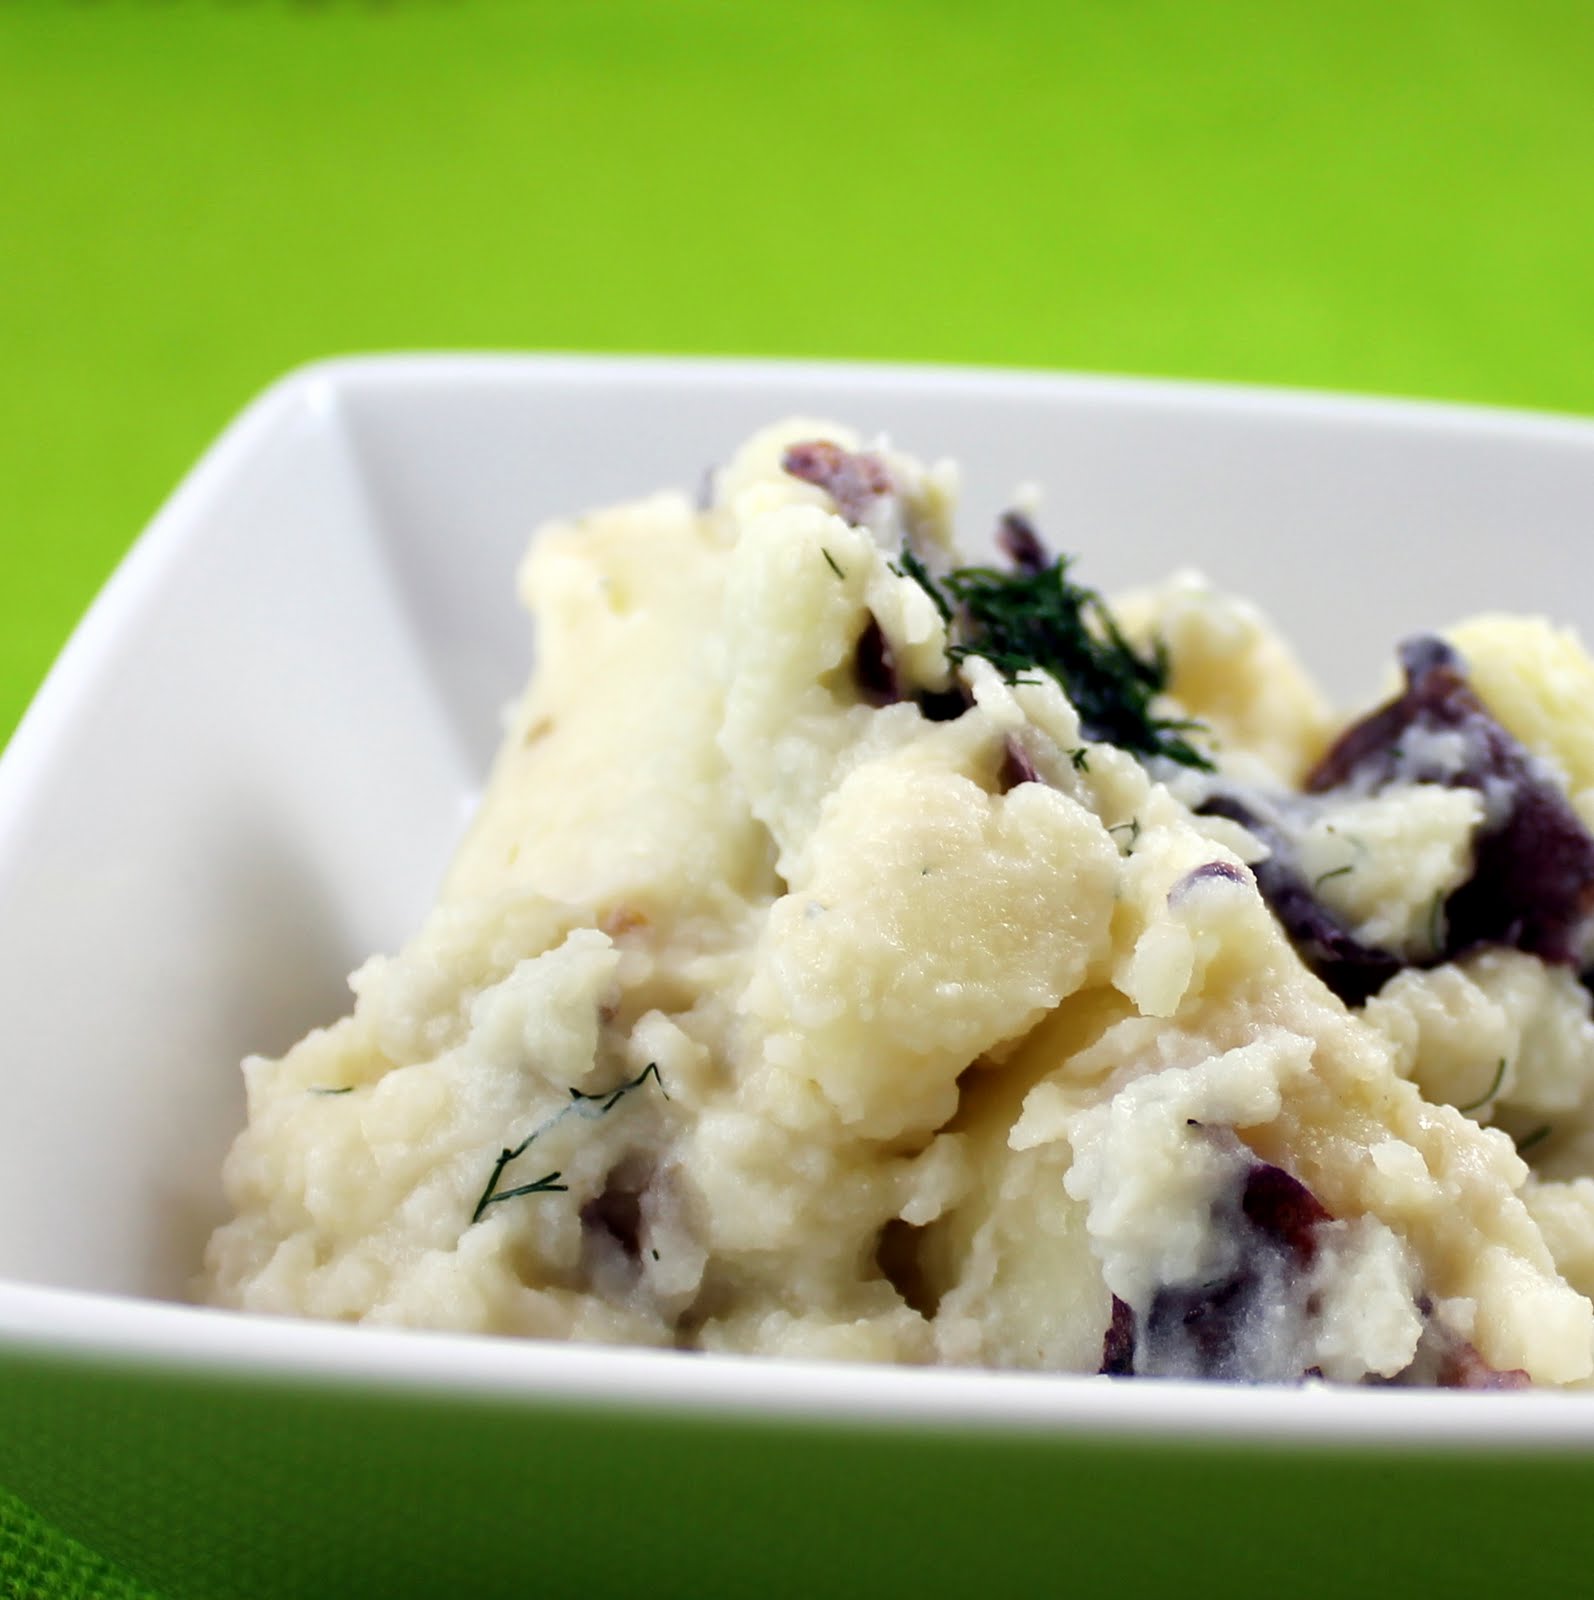
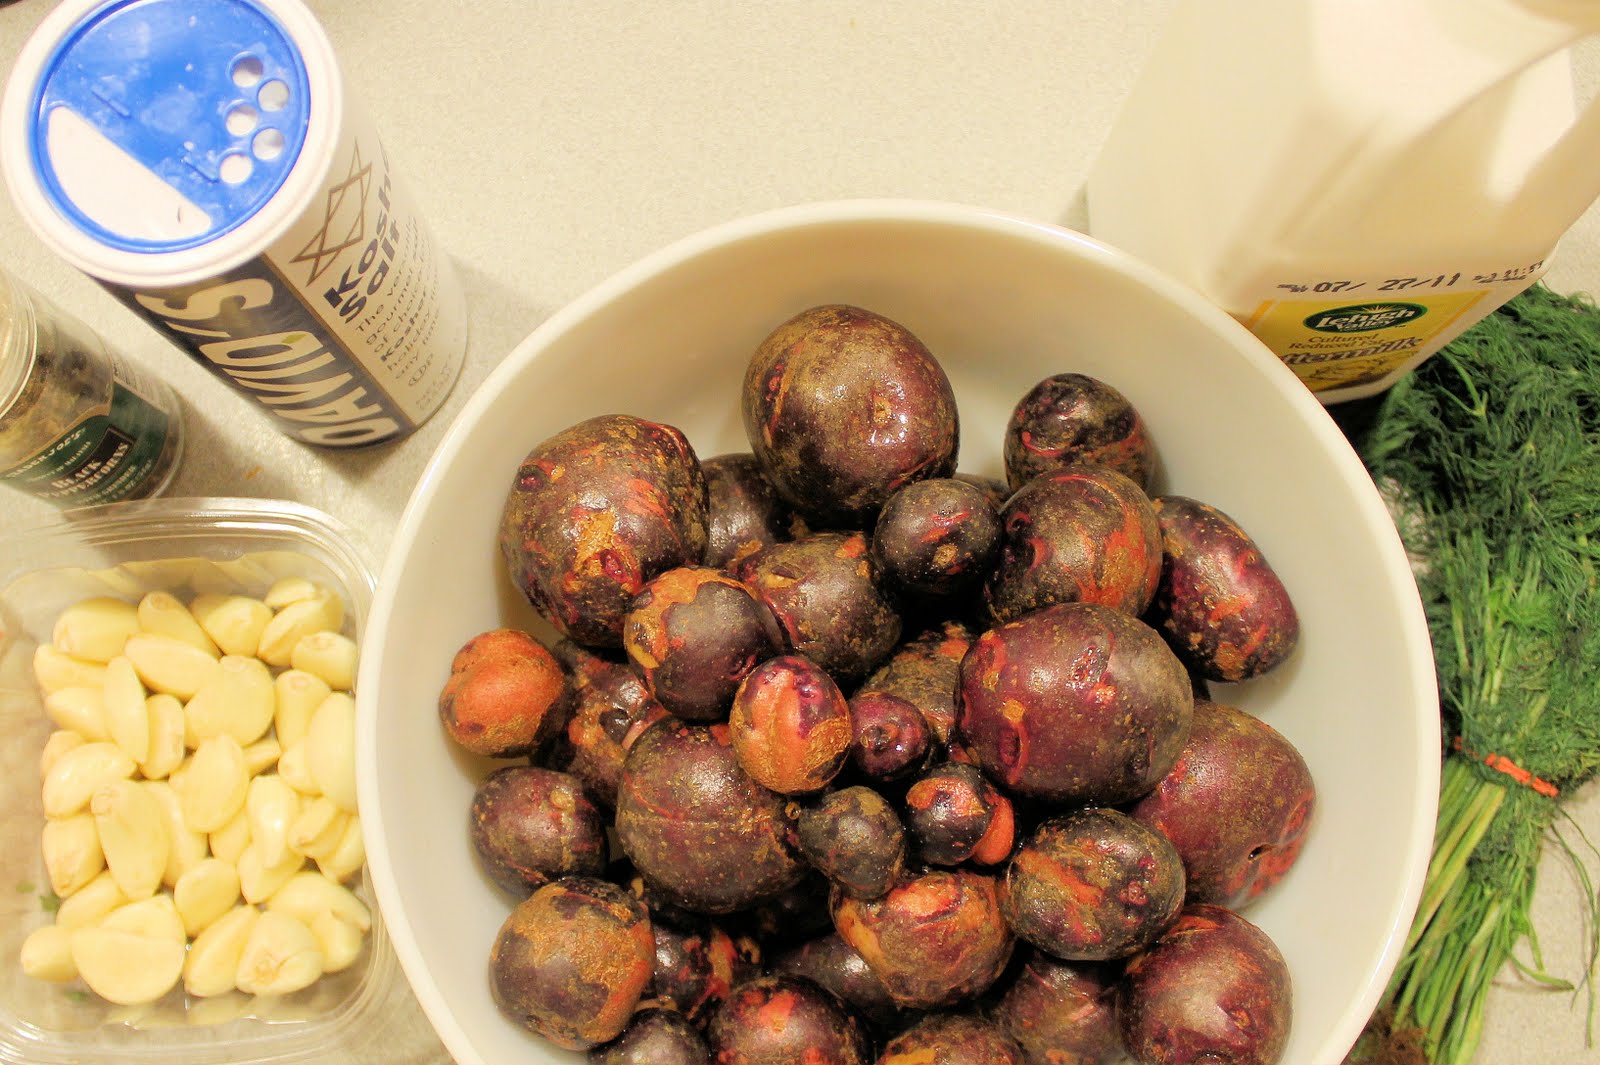
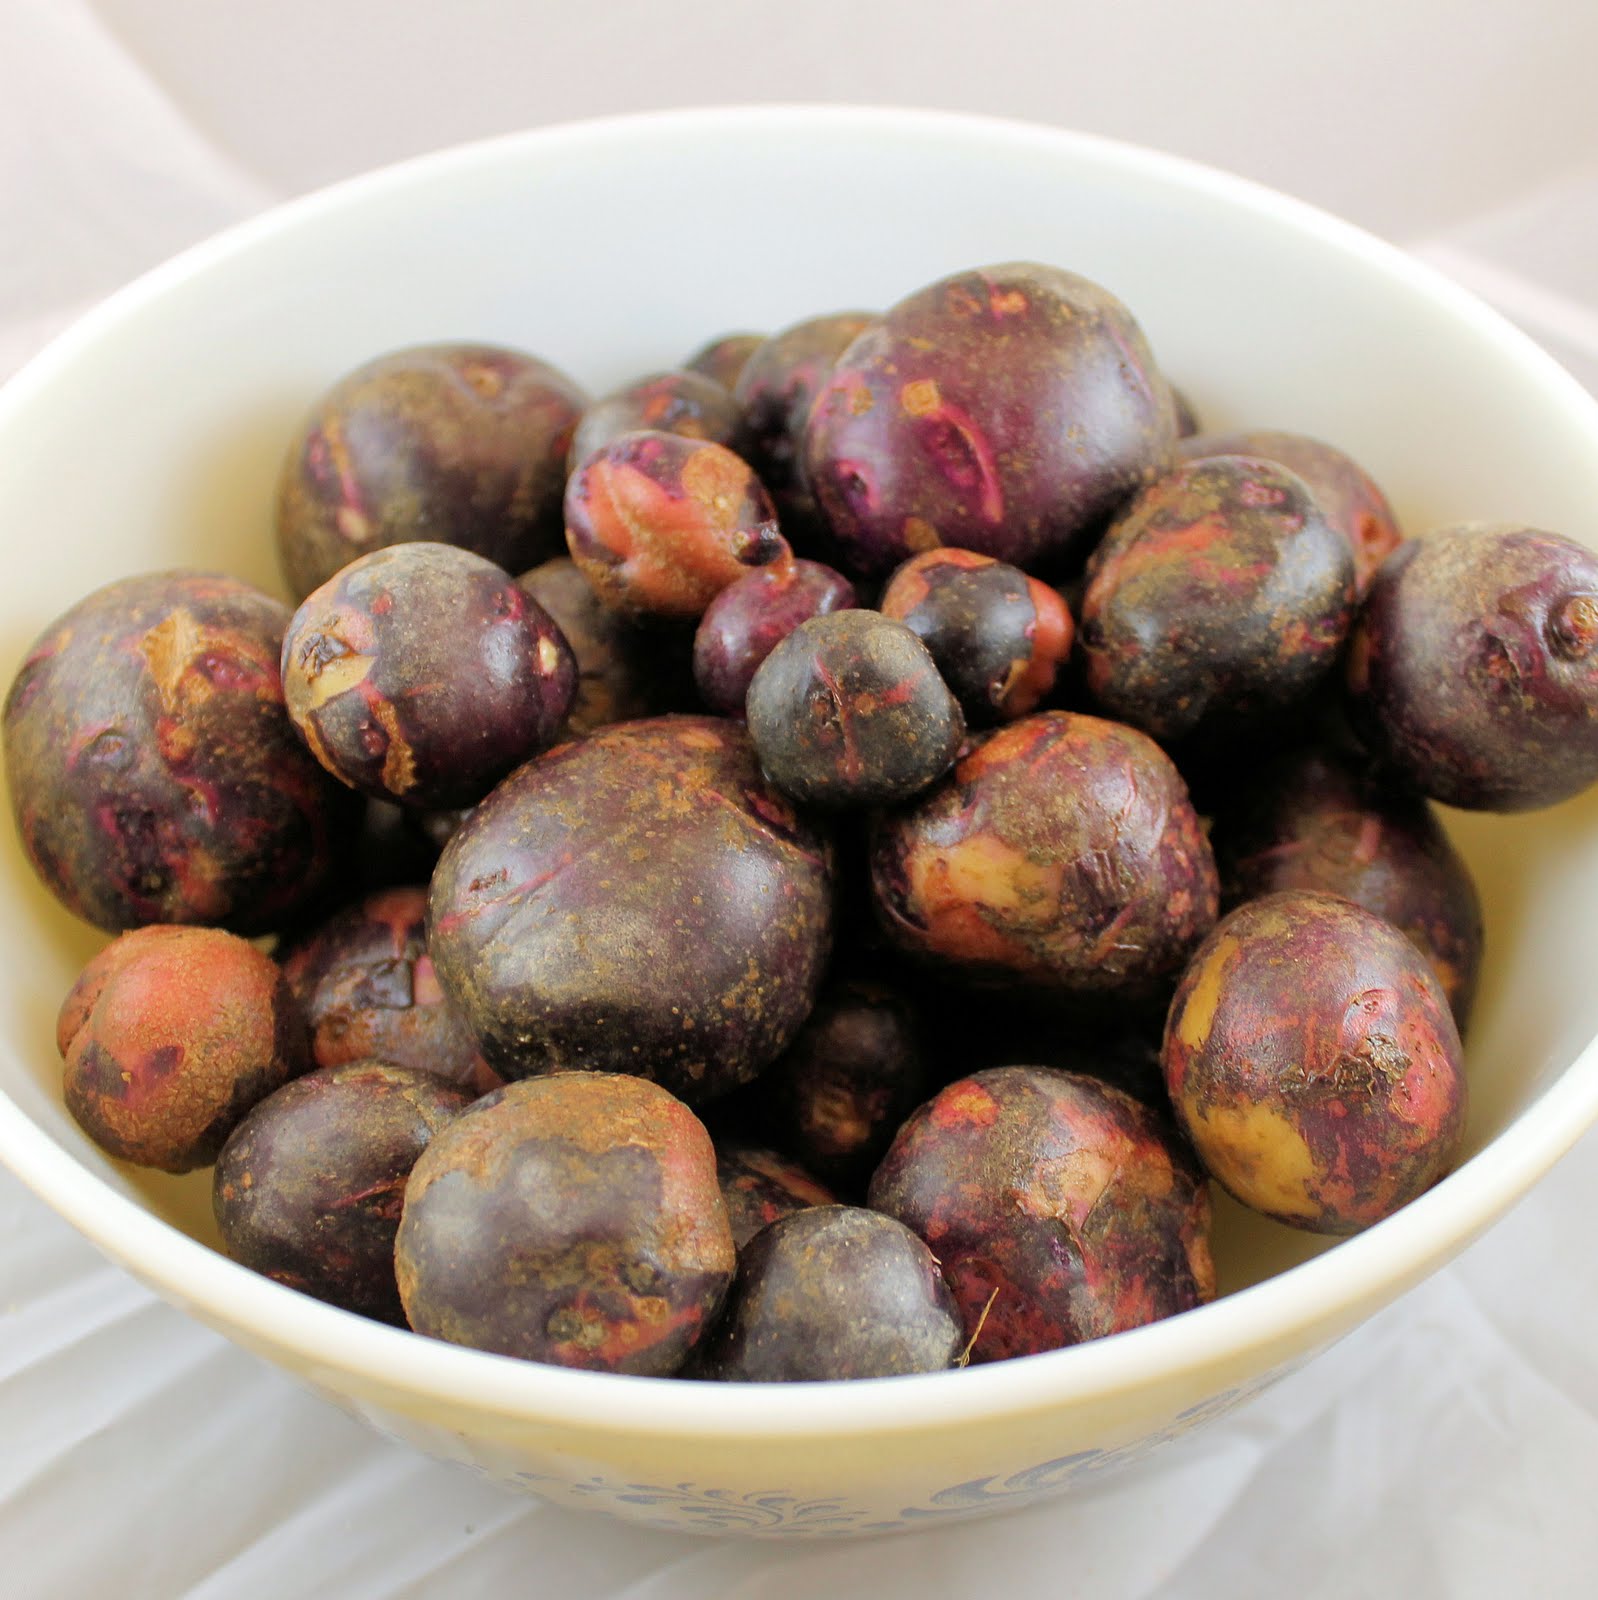
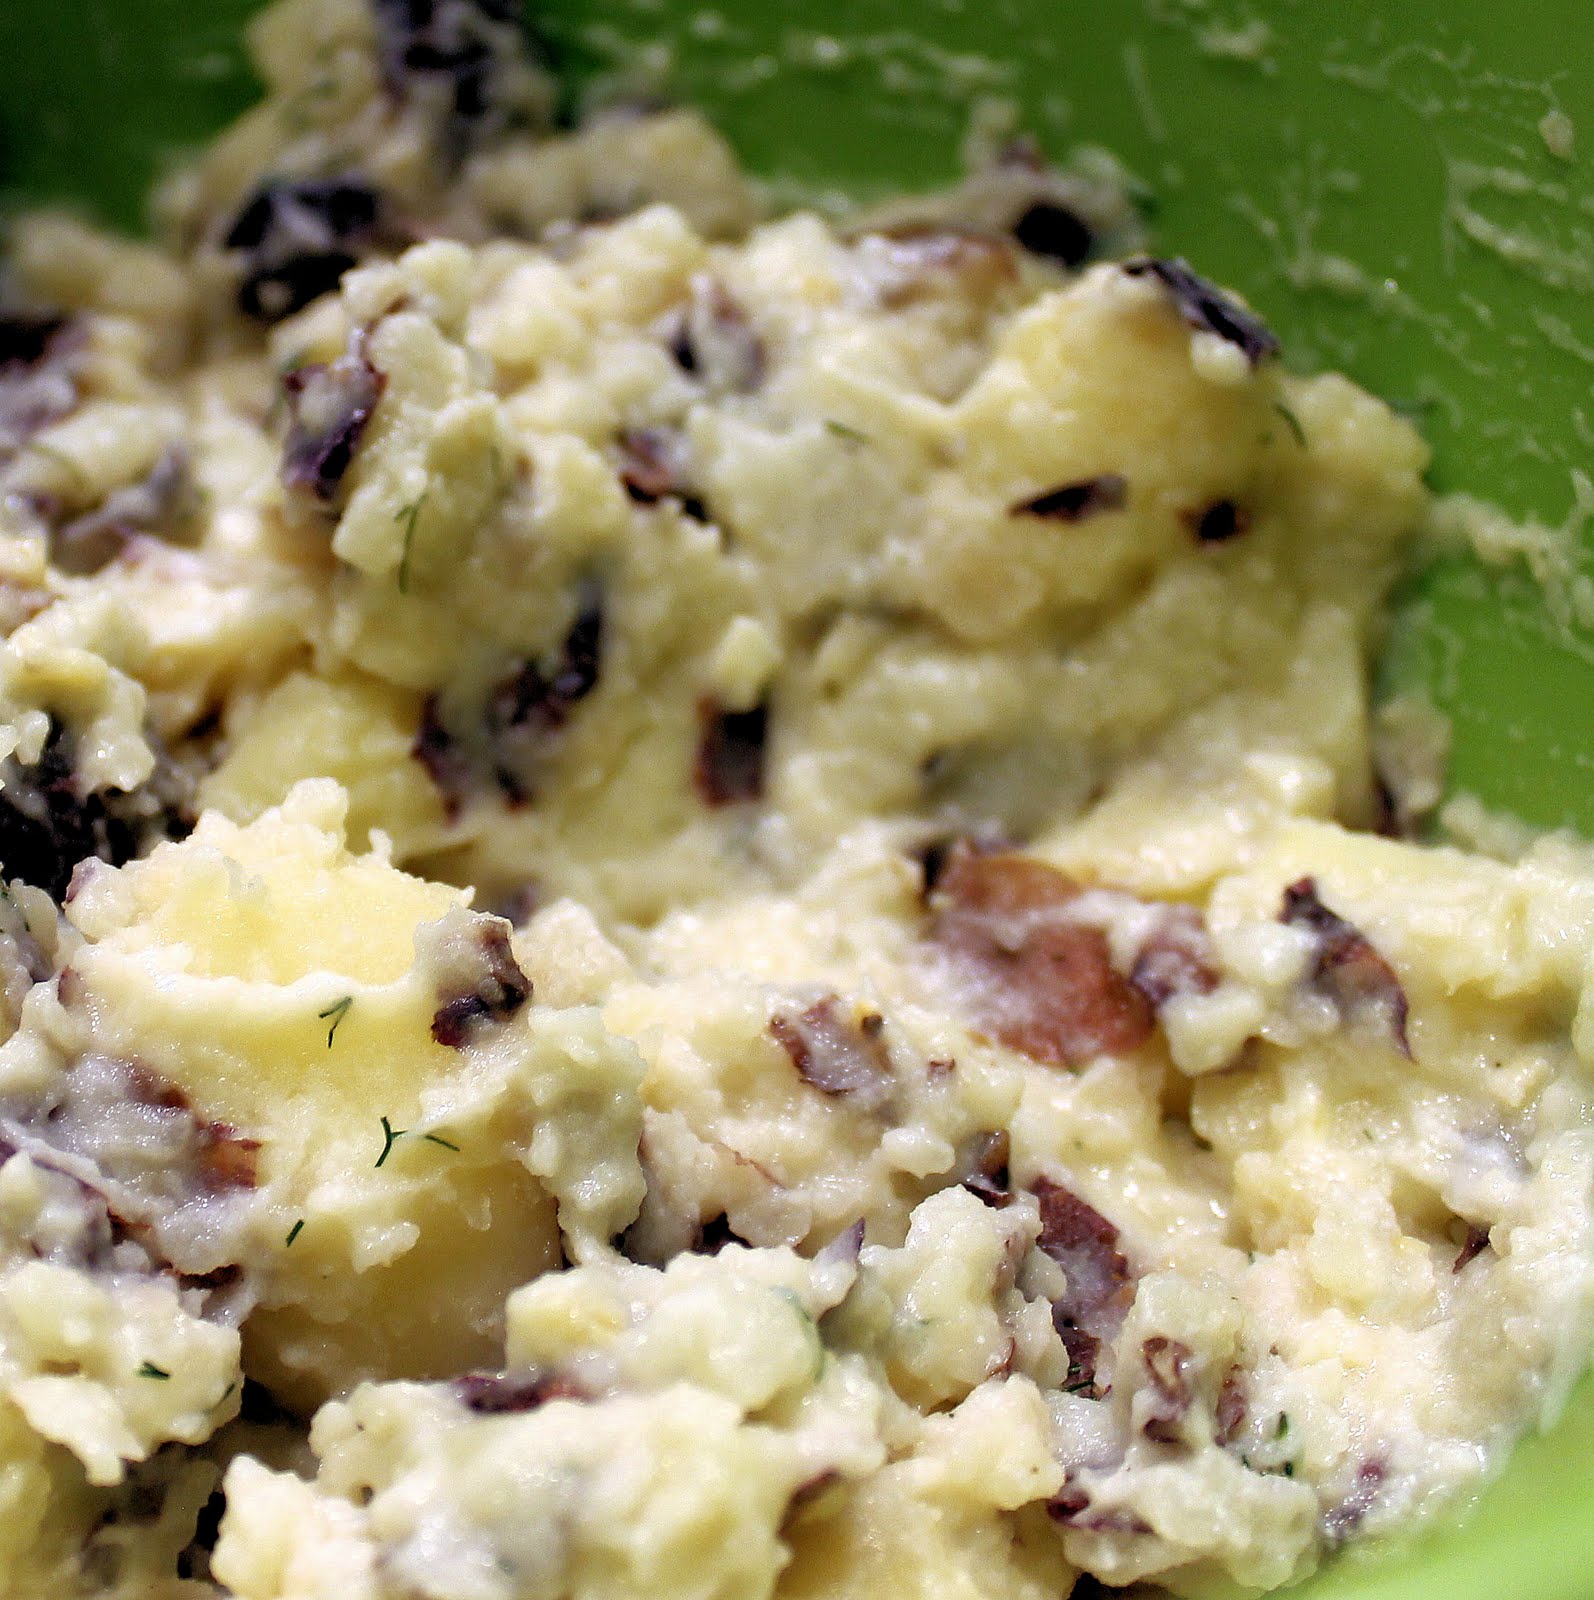
I love how purple viking potatoes look. They are so fun. There was no way I was willing to remove all of the skin to make mashed potatoes, so once again, here is a smashed potato recipe. The potatoes were another ingredient in my CSA share this week. The CSA share also came with dill so I incorporated that as well.
Ingredients:
1 bag of purple viking potatoes, washed
1 teaspoon kosher salt
2 tablespoons butter
4 garlic cloves, minced
1 cup buttermilk
1 tablespoon chopped dill (plus more for garnish)
Freshly ground black pepper
Bring salted water to a boil in a large pasta pot. Add the potatoes and cook until fork tender, about 15 minutes.
Drain and transfer to a medium sized bowl.
Using a potato masher or a whisk, firmly press down on each potato, smashing them.
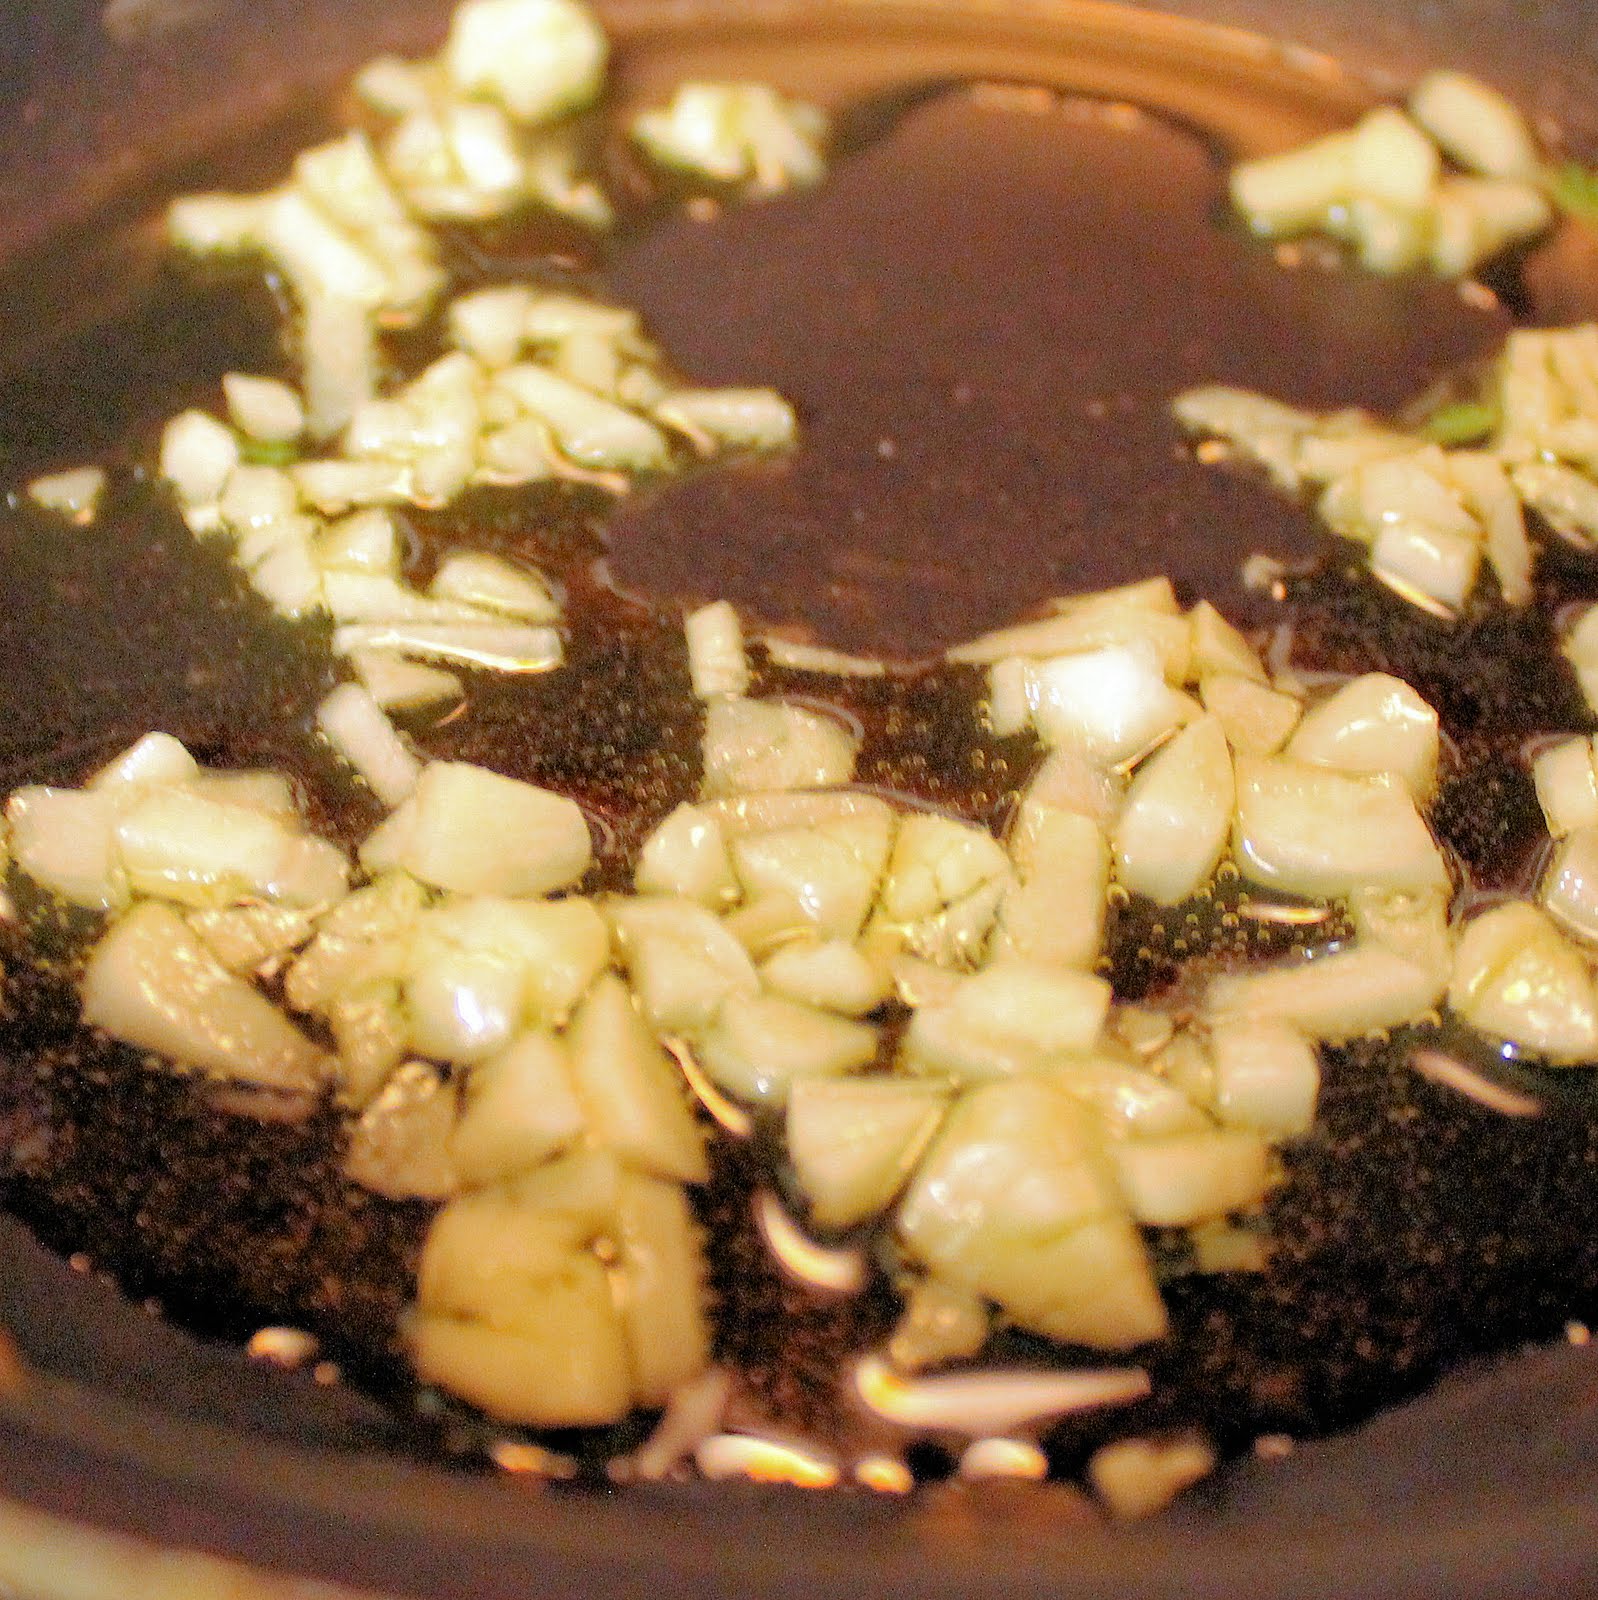
In a saute pan, add a small amount of the butter and the minced garlic over medium heat. Cook for 1 minute.
Remove from heat and add to the potatoes. Stir in the buttermilk, remaining butter and dill. Pour in the buttermilk a little bit at a time, so that you don’t over pour. You don’t want soupy potatoes! Season with salt and pepper to taste and serve.
I can never get enough potatoes; I love how versatile they are. The dill and buttermilk add a lot of great flavor to the potatoes and the purple-ish skin adds beautiful color to the dish!
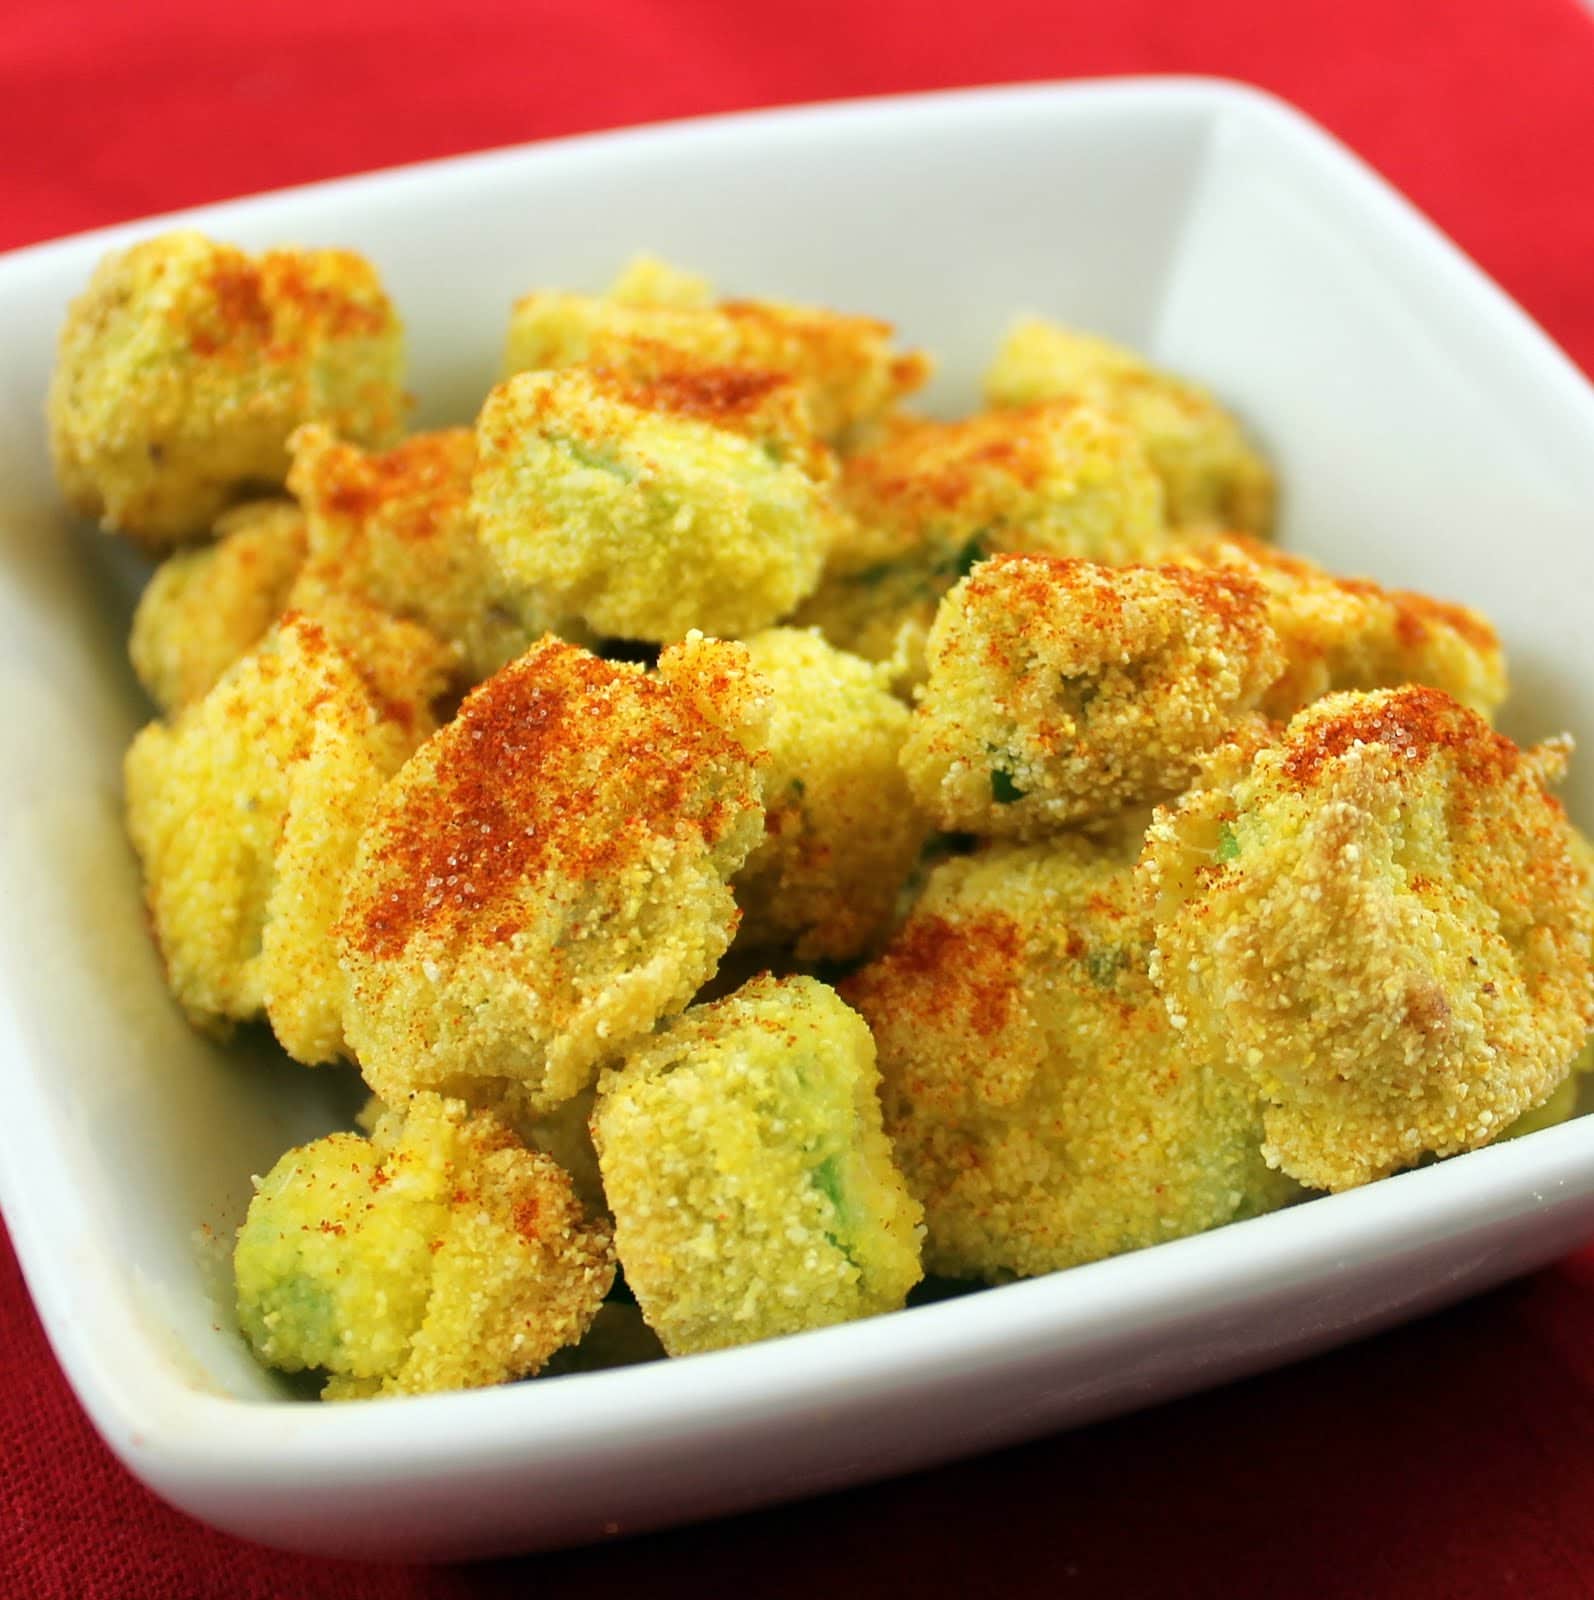
Okra. I have never made anything with okra, nor have a really had a hankering to do so. But it was one of my vegetables in my CSA share so I thought I’d give it a try. If I had time this weekend, I would have preferred to attempt to make a gumbo, but I’m short on time so I did the second best thing: fried them. Now I have zero idea how to fry anything, especially okra. Thankfully, All You had an easy looking recipe.
Ingredients:
1 pound okra
1 cup buttermilk
1 large egg
1 seeded and minced jalapeño chili
1/4 cup minced scallion
1 tablespoon salt
1 tablespoon smoked paprika
2 cups cornmeal
1 teaspoon salt
1/2 inch of vegetable oil
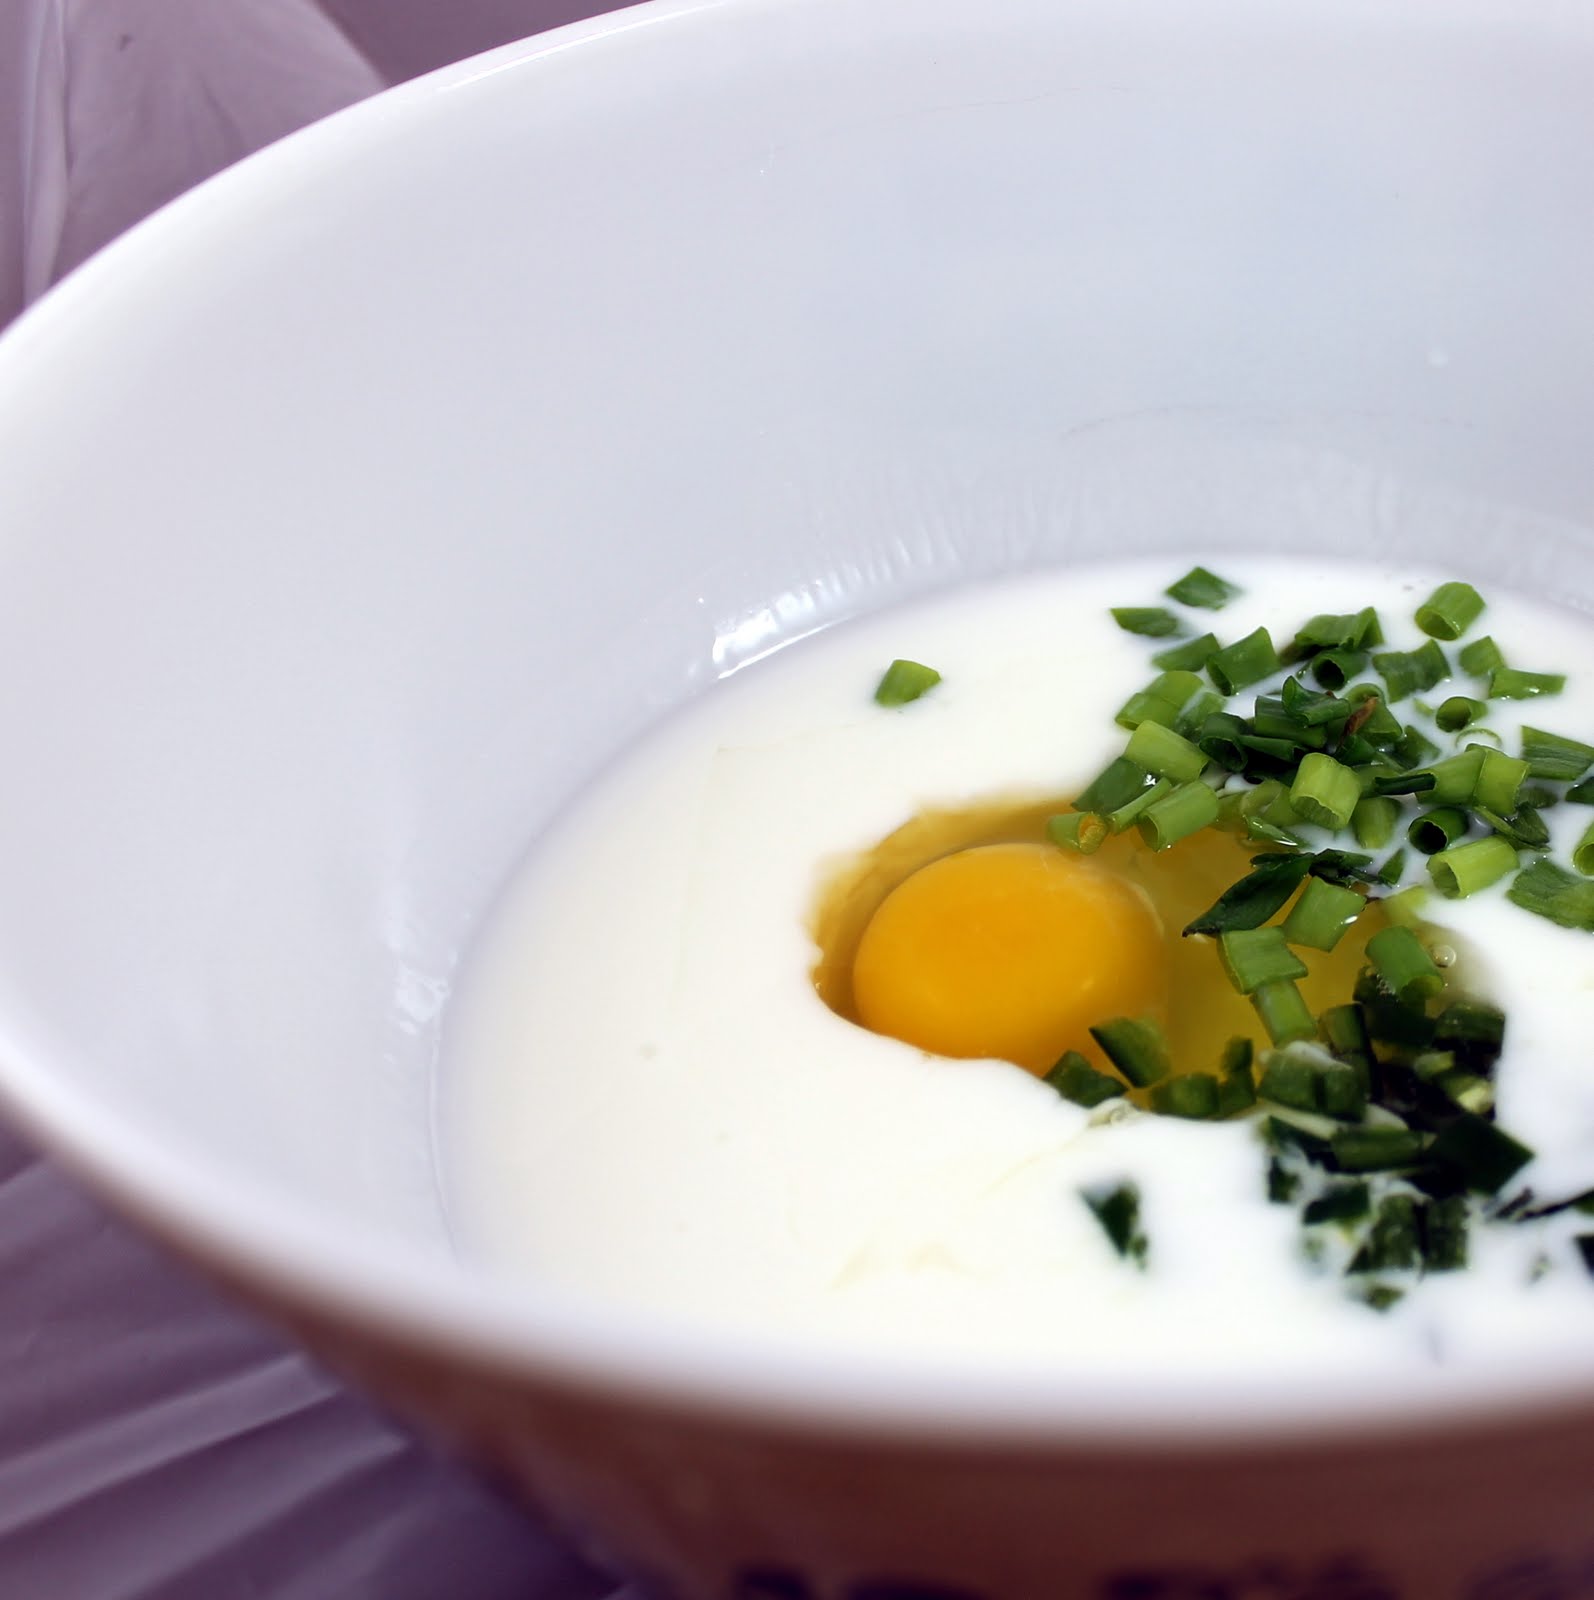
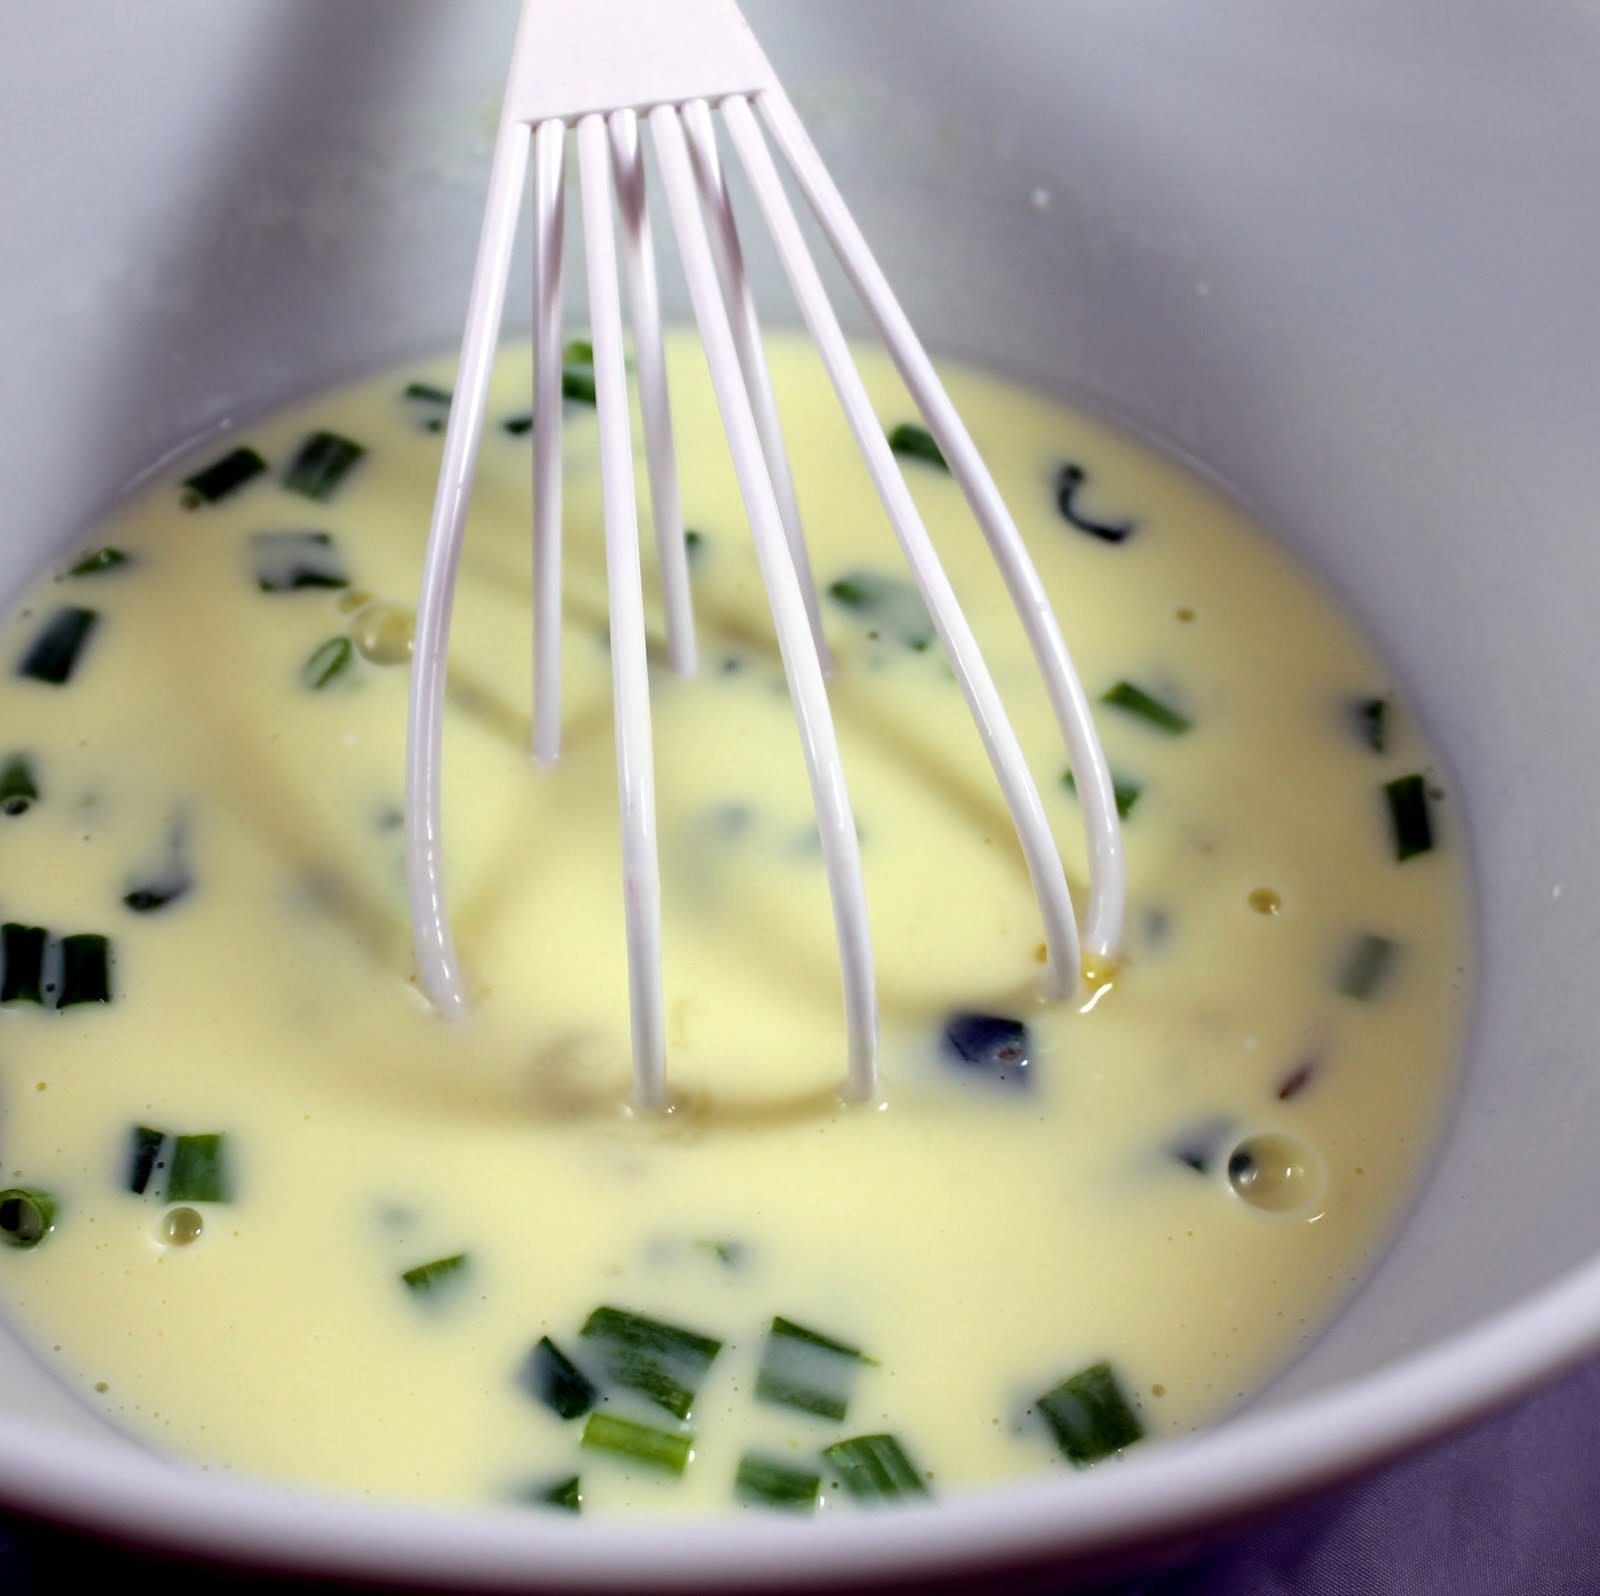
Add 1 cup buttermilk, 1 large egg, 1 seeded and minced jalapeño chili and 1/4 cup minced scallions to a medium bowl.
Whisk to combine.
Prepare the okra. Trim off both ends.
Cut the pods into 1/2 inch pieces and place into the buttermilk mixture.
Mix together so that the okra is coated. Marinate at room temperature for 15 minutes.
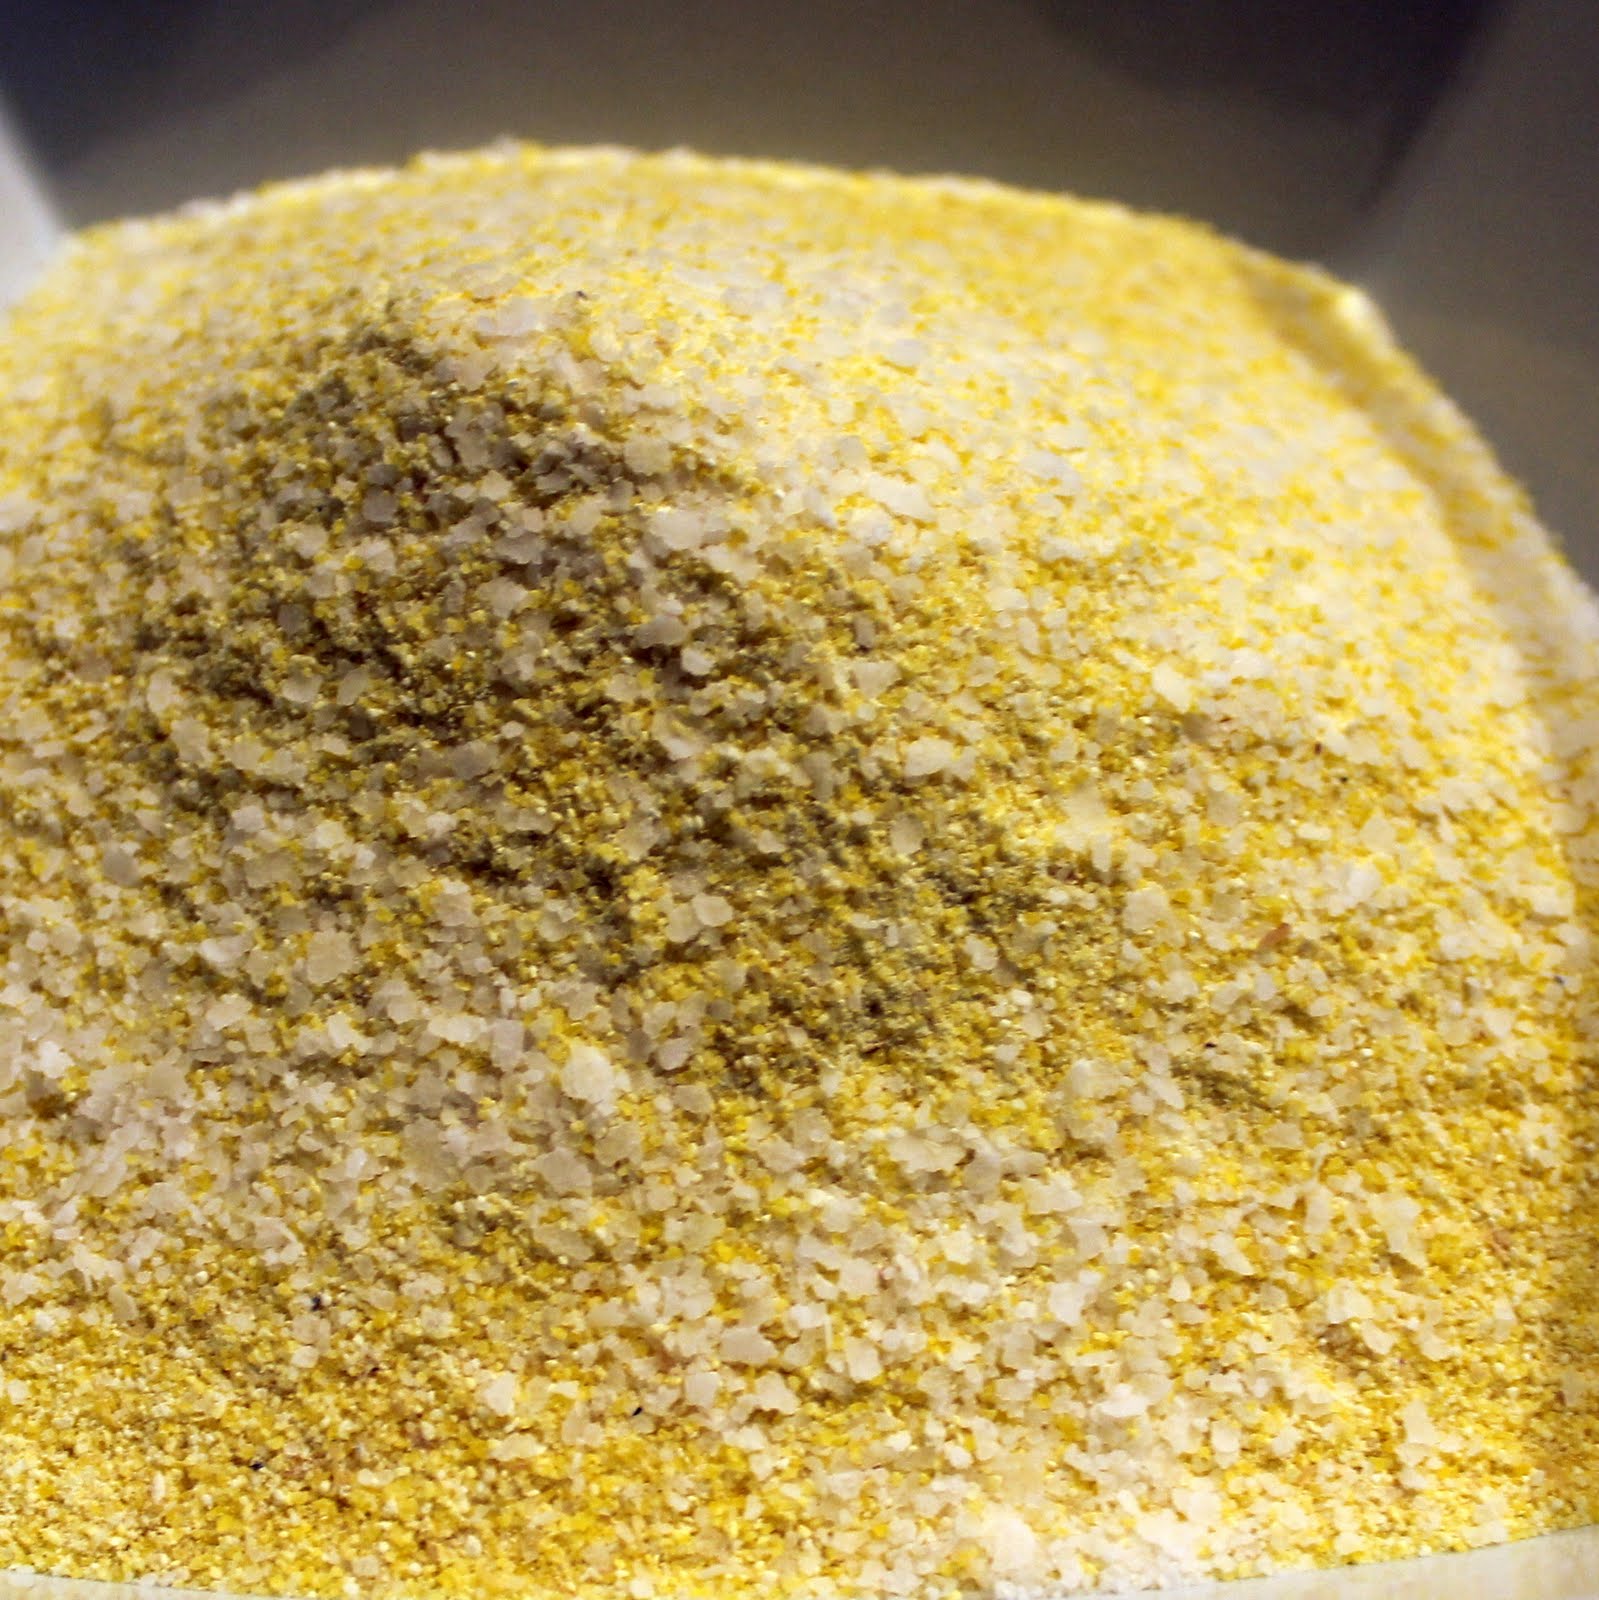
While the okra is marinating, mix 1 tablespoon of salt and 1 tablespoon smoked paprika in a small bowl.
In another bowl, mix 2 cups cornmeal and 1 teaspoon salt.
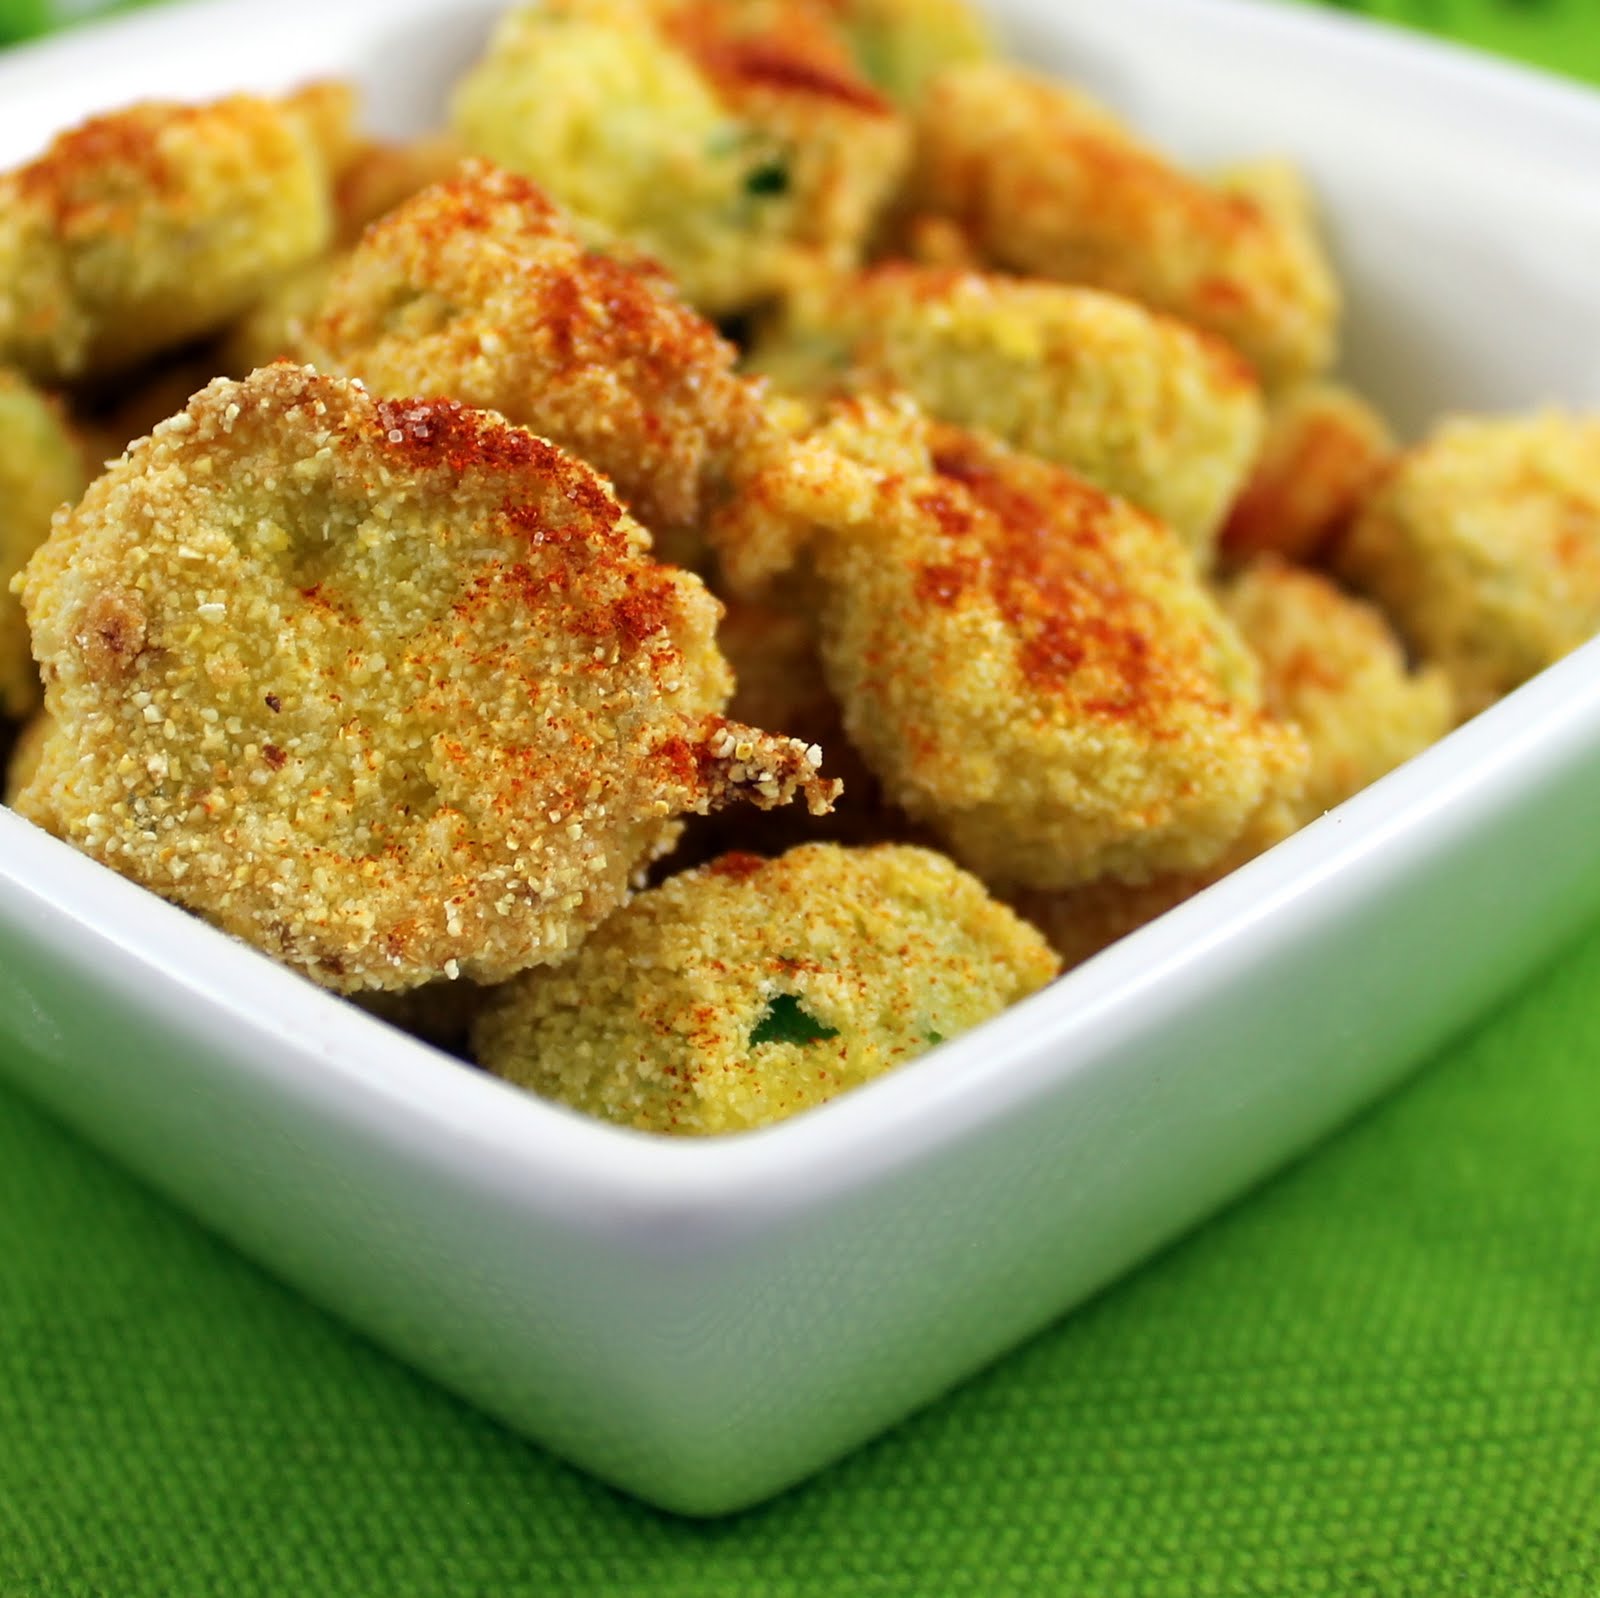
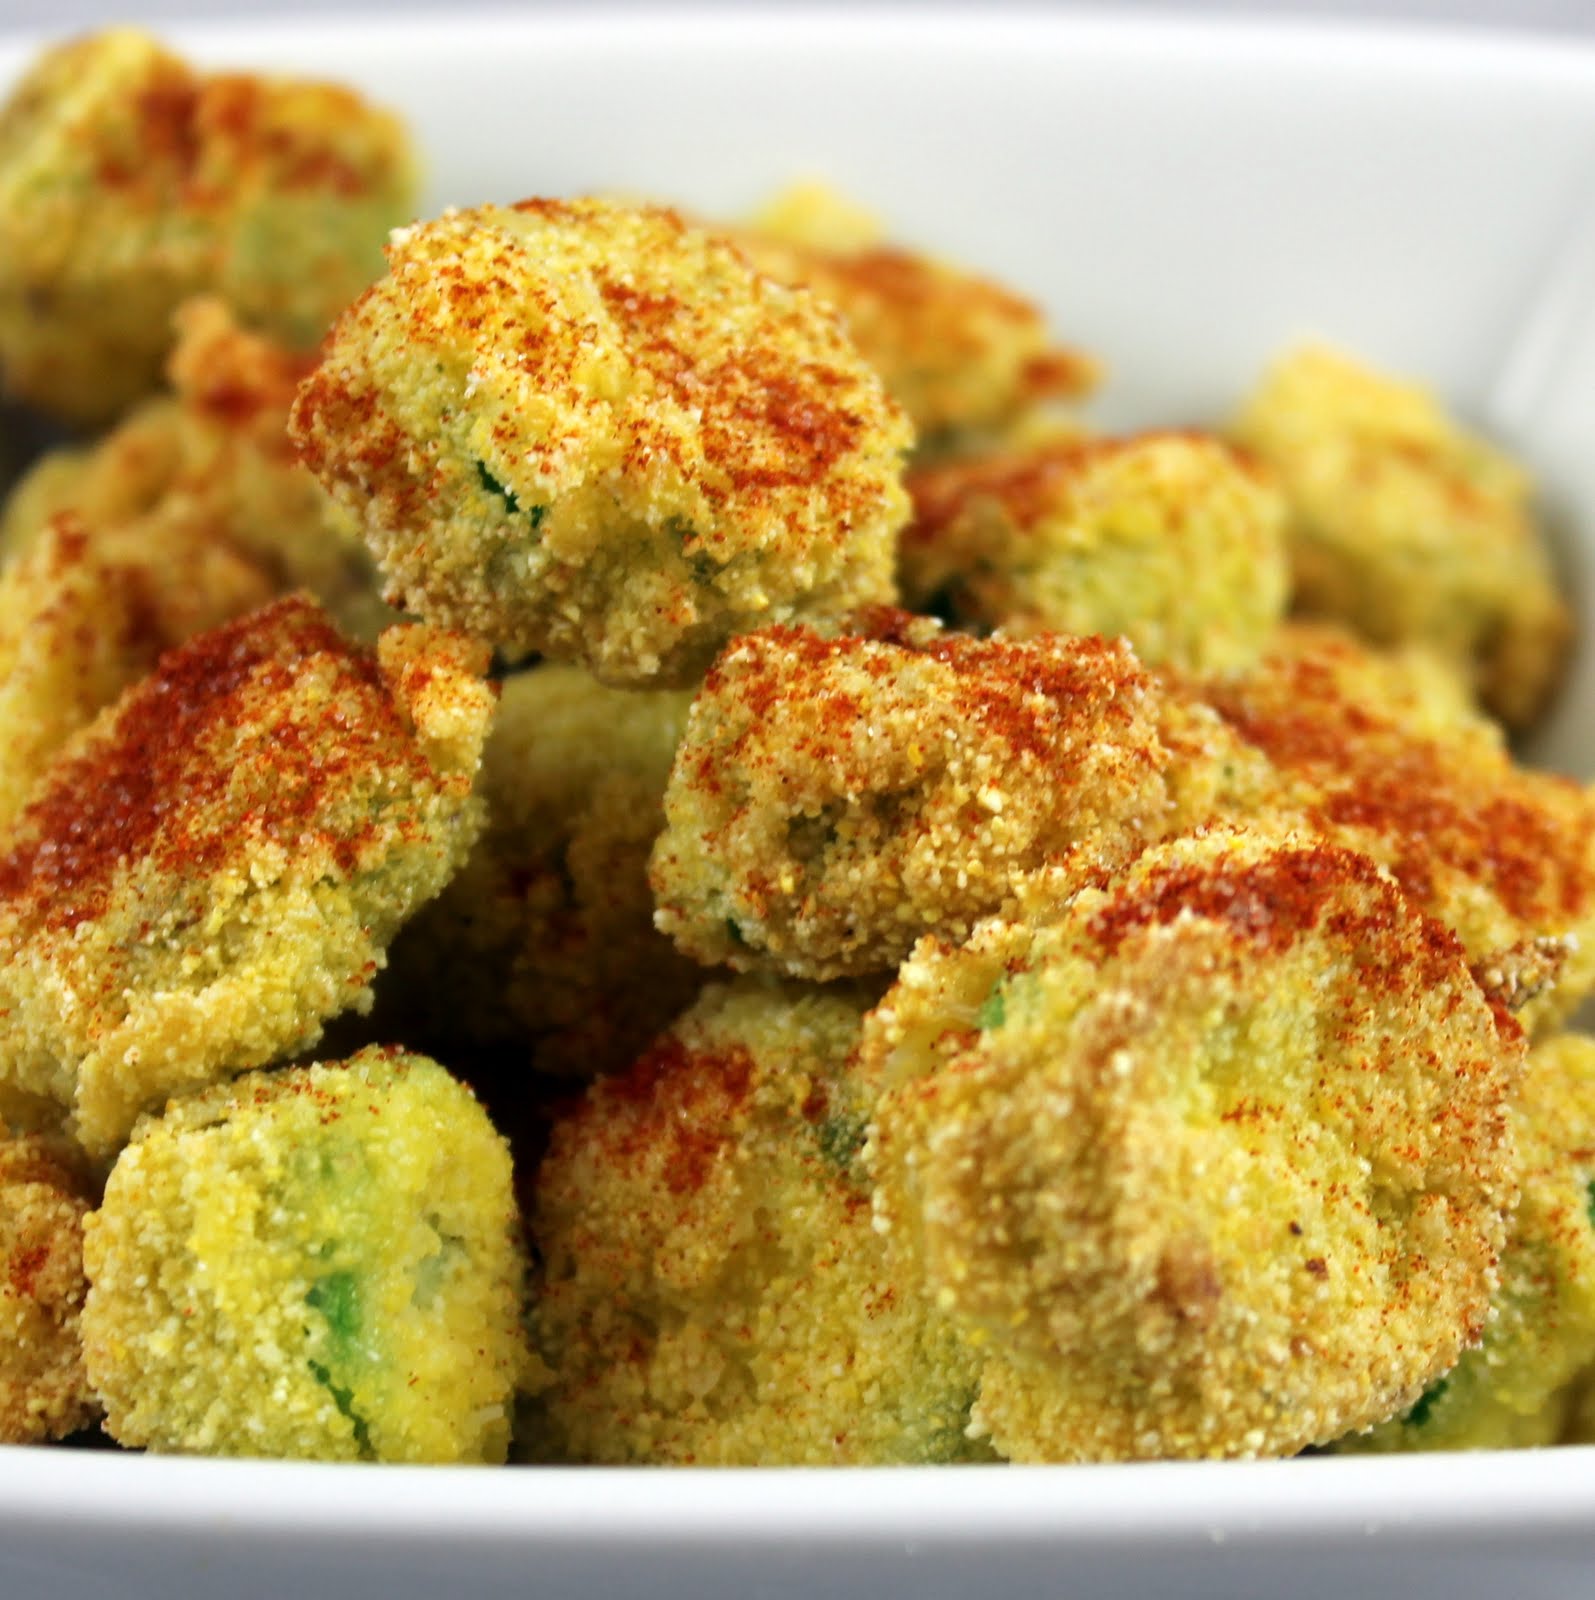
Heat 1/2 inch of vegetable oil in a medium frying pan to 375 degrees. Take a few pieces of okra out of the buttermilk mixture at a time, shaking to remove excess mixture, and toss in the cornmeal. In batches, drop the okra into the oil and fry for 3 to 4 minutes on each side, or until golden.
Drain on paper towels.
Sprinkle with the paprika-salt mixture and serve.
This was my first time eating fried okra so I honestly don’t have anything to compare this to. But fried food tends to taste, well, fried. And this does, but has a lightness to it that really surprised me. The jalapeño and smoked paprika add a little hint of heat at the end which is really nice!
P.S. My photos will (hopefully) be getting better now. I just bought a new toy suggested to me by my friend Mikey who always manages to take the most fantastic photos, be it of food (usually fried, hence my post choice to try this out), the Philadelphia skyline, or people. I picked up a Portable Photo Studio which should help with some lighting issues I’ve been having in my kitchen (no natural light). Any comments or suggestions about how to best use the photo studio are appreciated. Thanks again Mikey!!
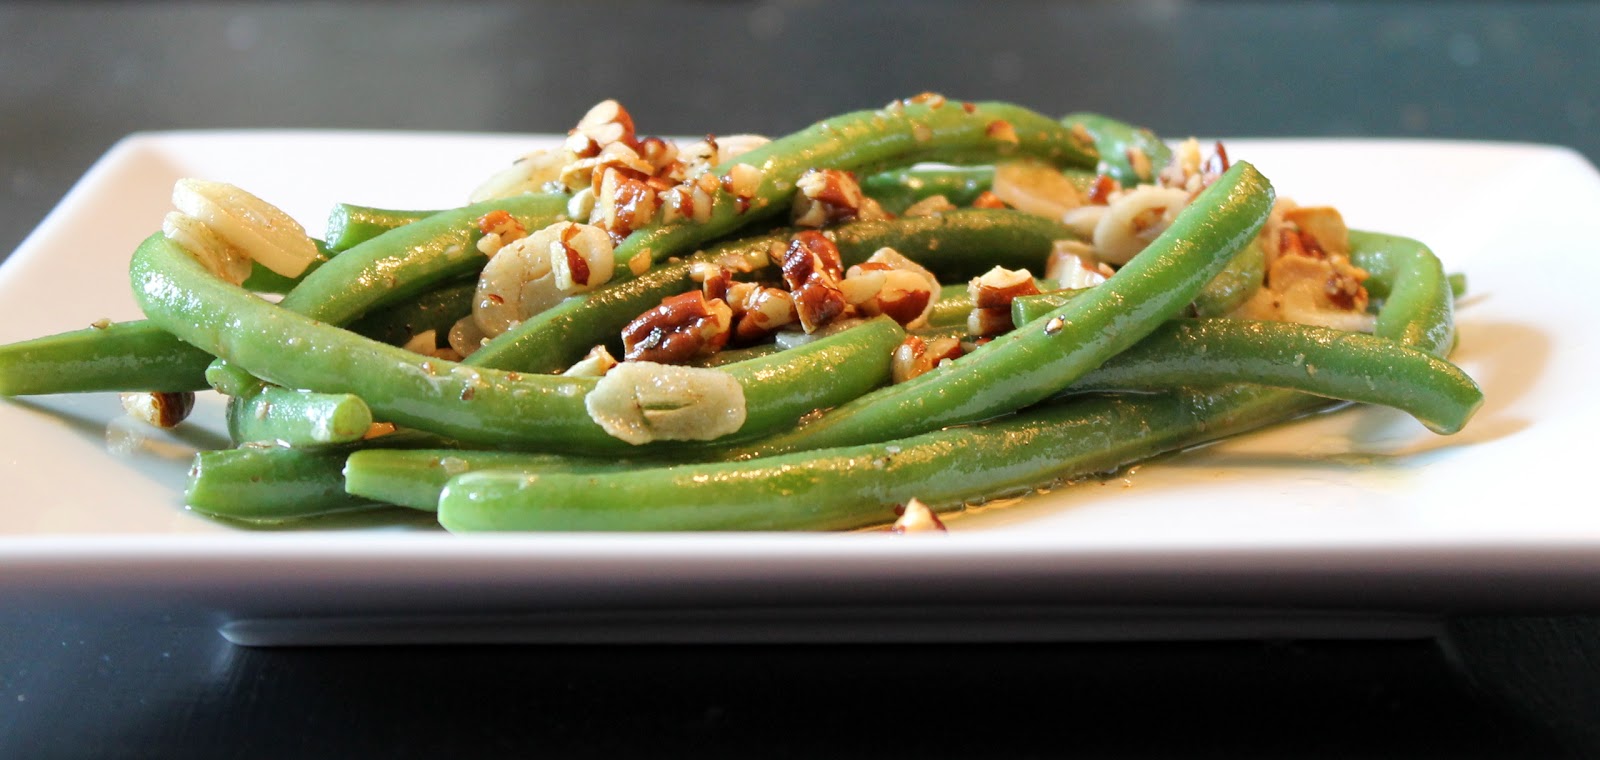
Green beans are one of my favorite vegetables. When I found out they were going to be a part of my CSA share I was really excited to have my first of the season. Green beans are delicious on their own so you really don’t have to do much to them. Here is a simple side of Green Beans with Garlic and Pecans that can be made in 15 minutes.
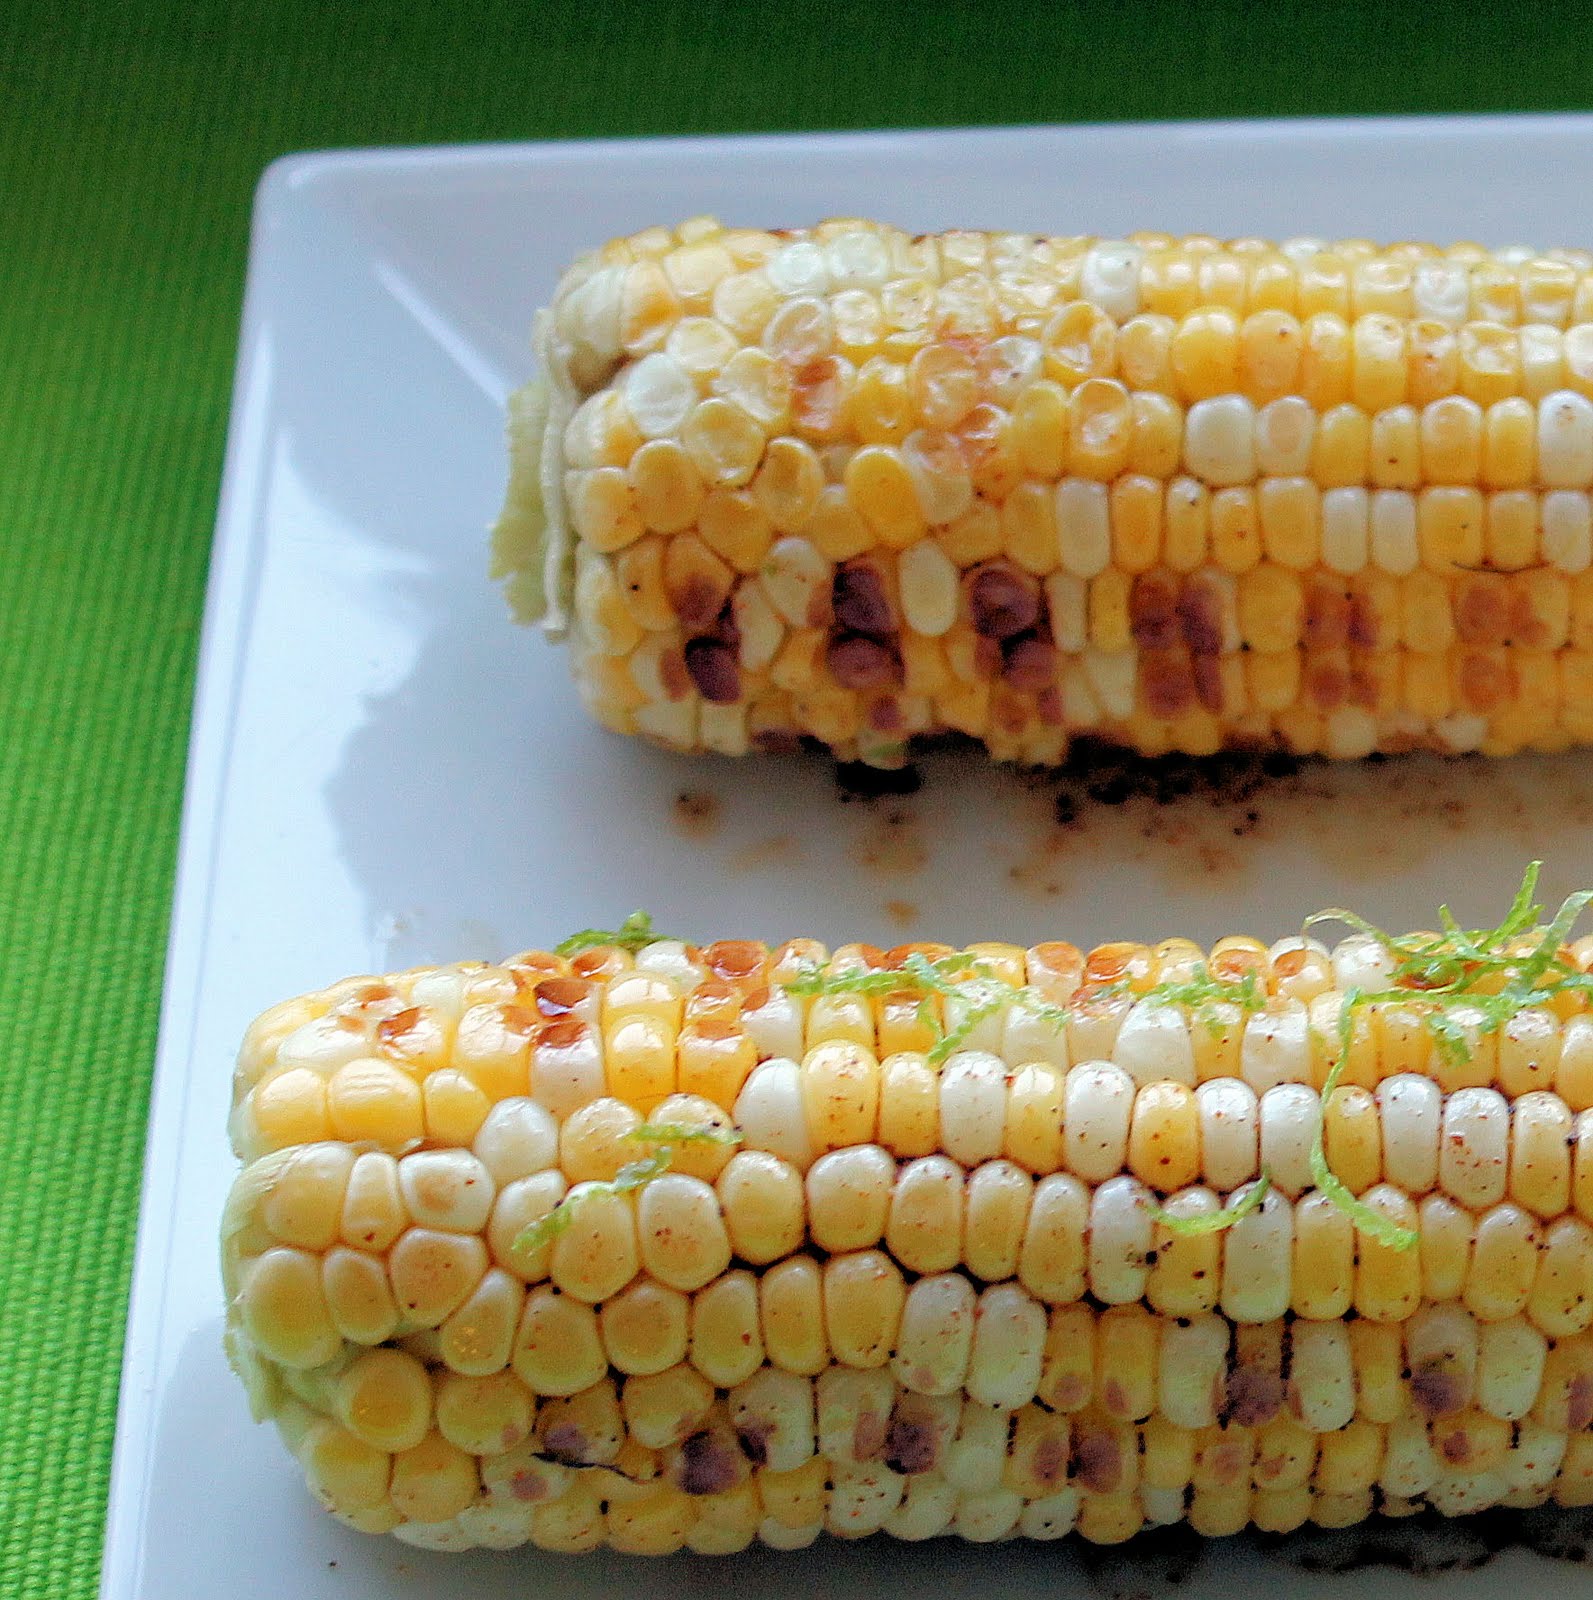
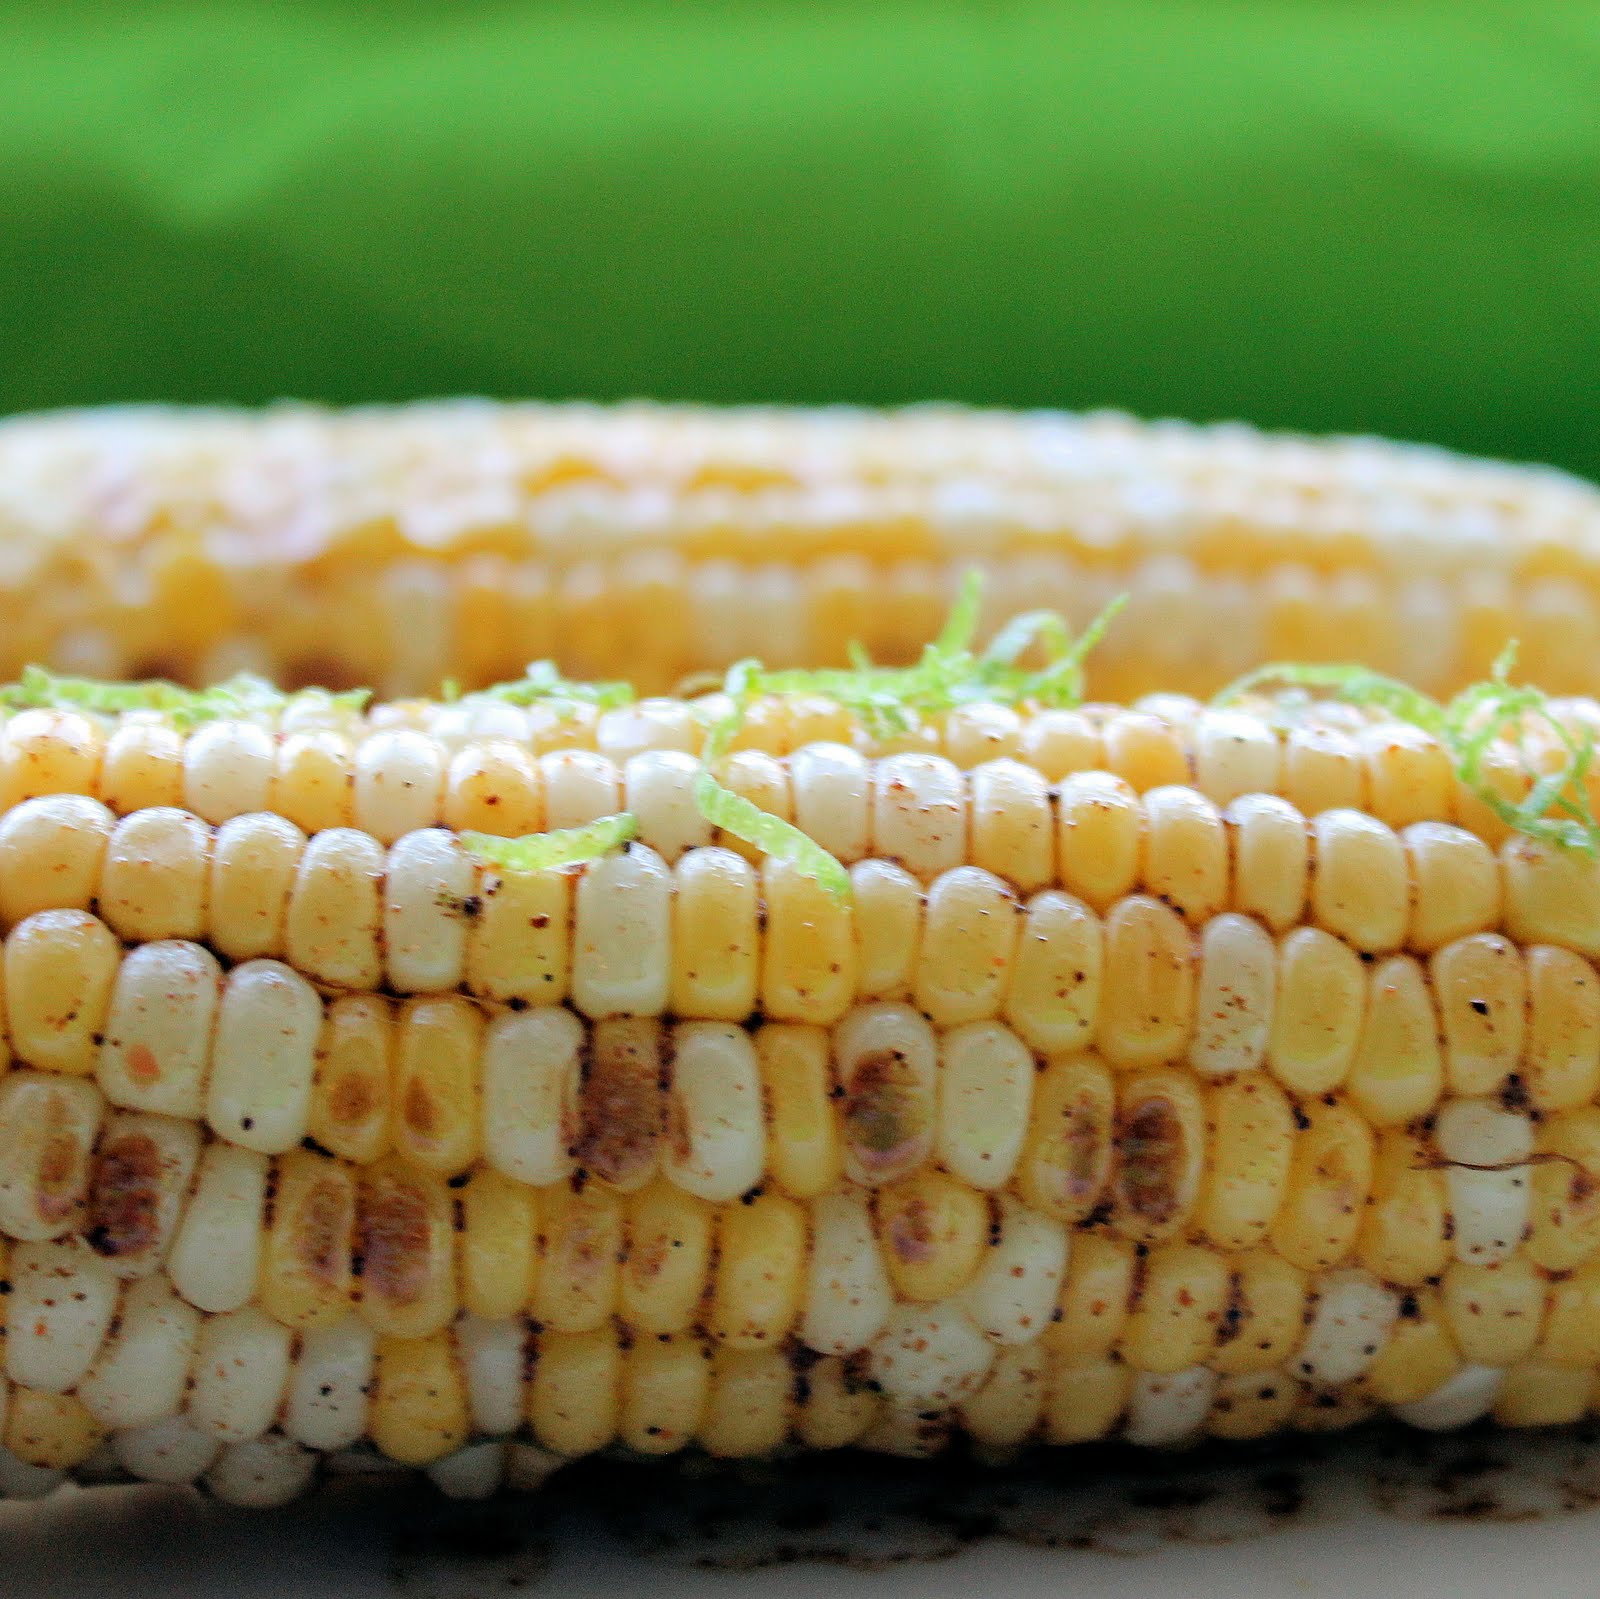
After reading just the title, how could you not be excited for this recipe? Grilled corn is one of my favorite treats in the summer, and I refuse to let my city dwelling keep me from it! I cooked this on a counter top grill and loved it, so I can only imagine how delicious this is on an actual outdoor grill.
This is another recipe from Cooking Light’s “Quick & Healthy Menu Maker App“. I cut the recipe in half, to make only two servings. We ate this along side the Mango Shrimp Kabobs.
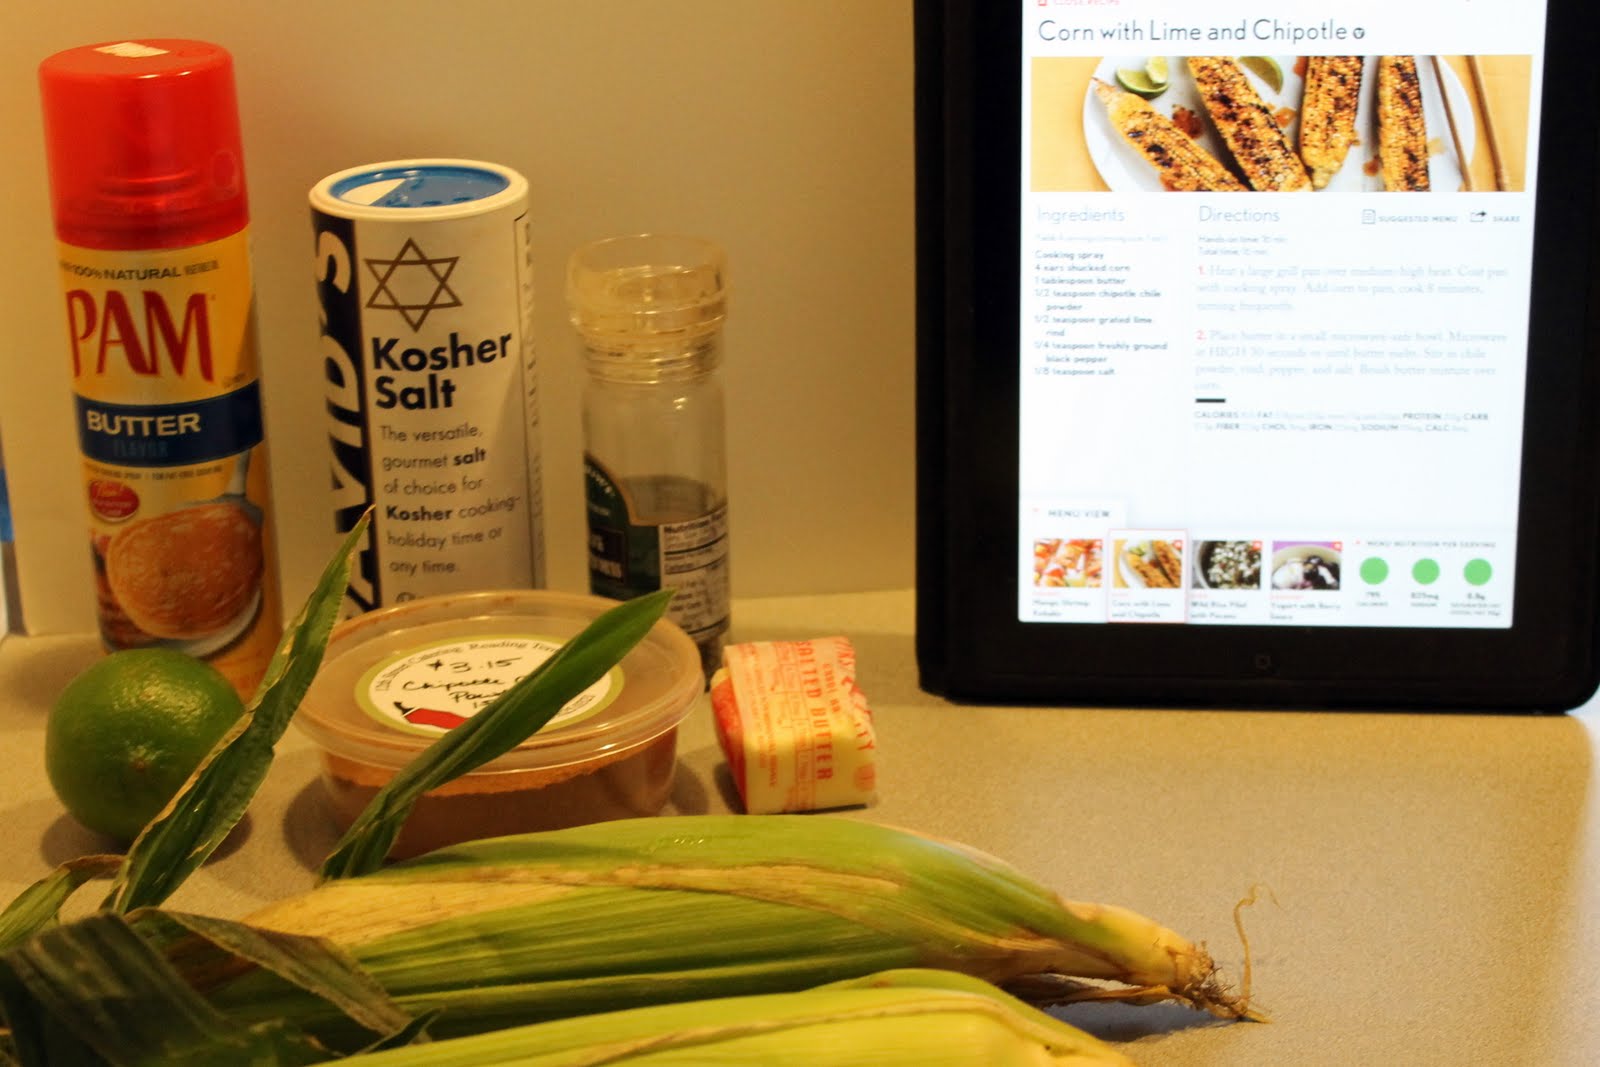
Ingredients:
Cooking spray
2 ears shucked corn
1/2 tablespoon butter
1/4 teaspoon chipotle chile powder
Zest from 1 lime
Salt and pepper, to taste
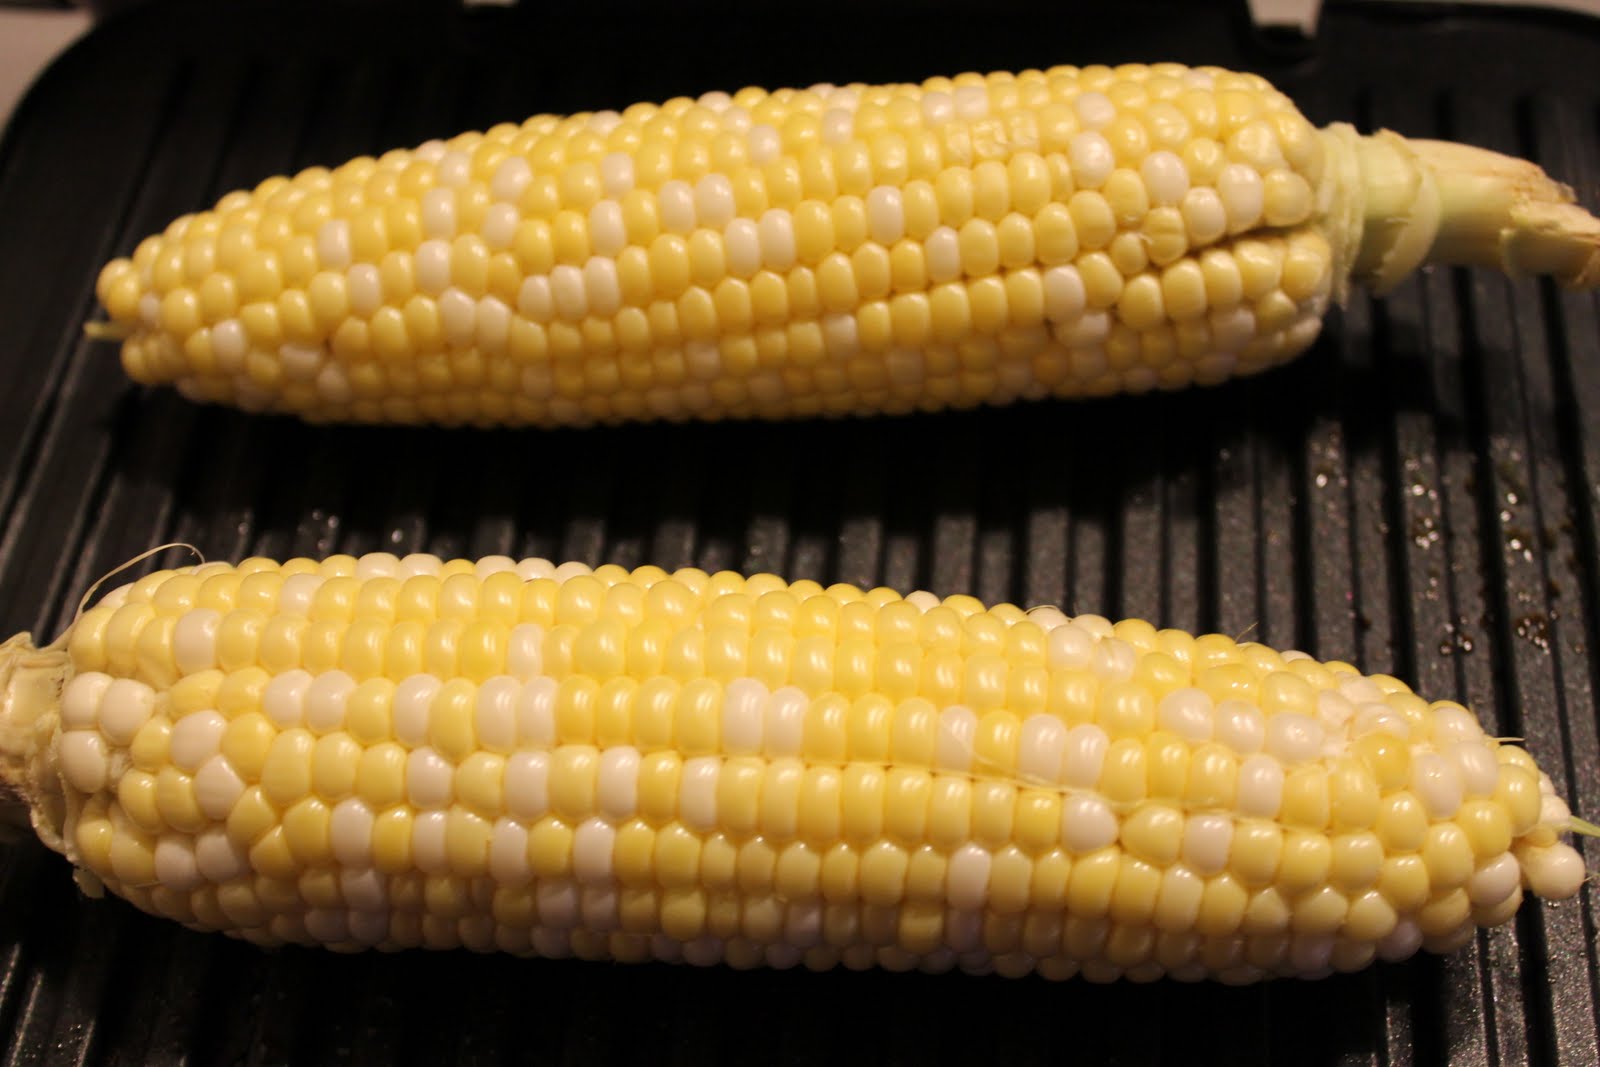
Begin by shucking your corn. Take care to remove as much of the silk as possible.
Side note: this was probably the most stressful part of the process for me. I was using corn from my CSA share and had read a post from another CSA share member, One Curly Fry in a Box of the Regular, about the horror she found under the husk. Oh the joys of organic produce. Thankfully, I had a bit more luck than she did. Look how wonderful that corn looks!
Preheat your grill. I set mine for medium-high. Coat the grill with cooking spray and add the corn.
Cook until grill marks begin to appear, about 10 minutes (closer to 8 minutes for a normal grill). Turn the corn frequently to allow it to evenly cook.
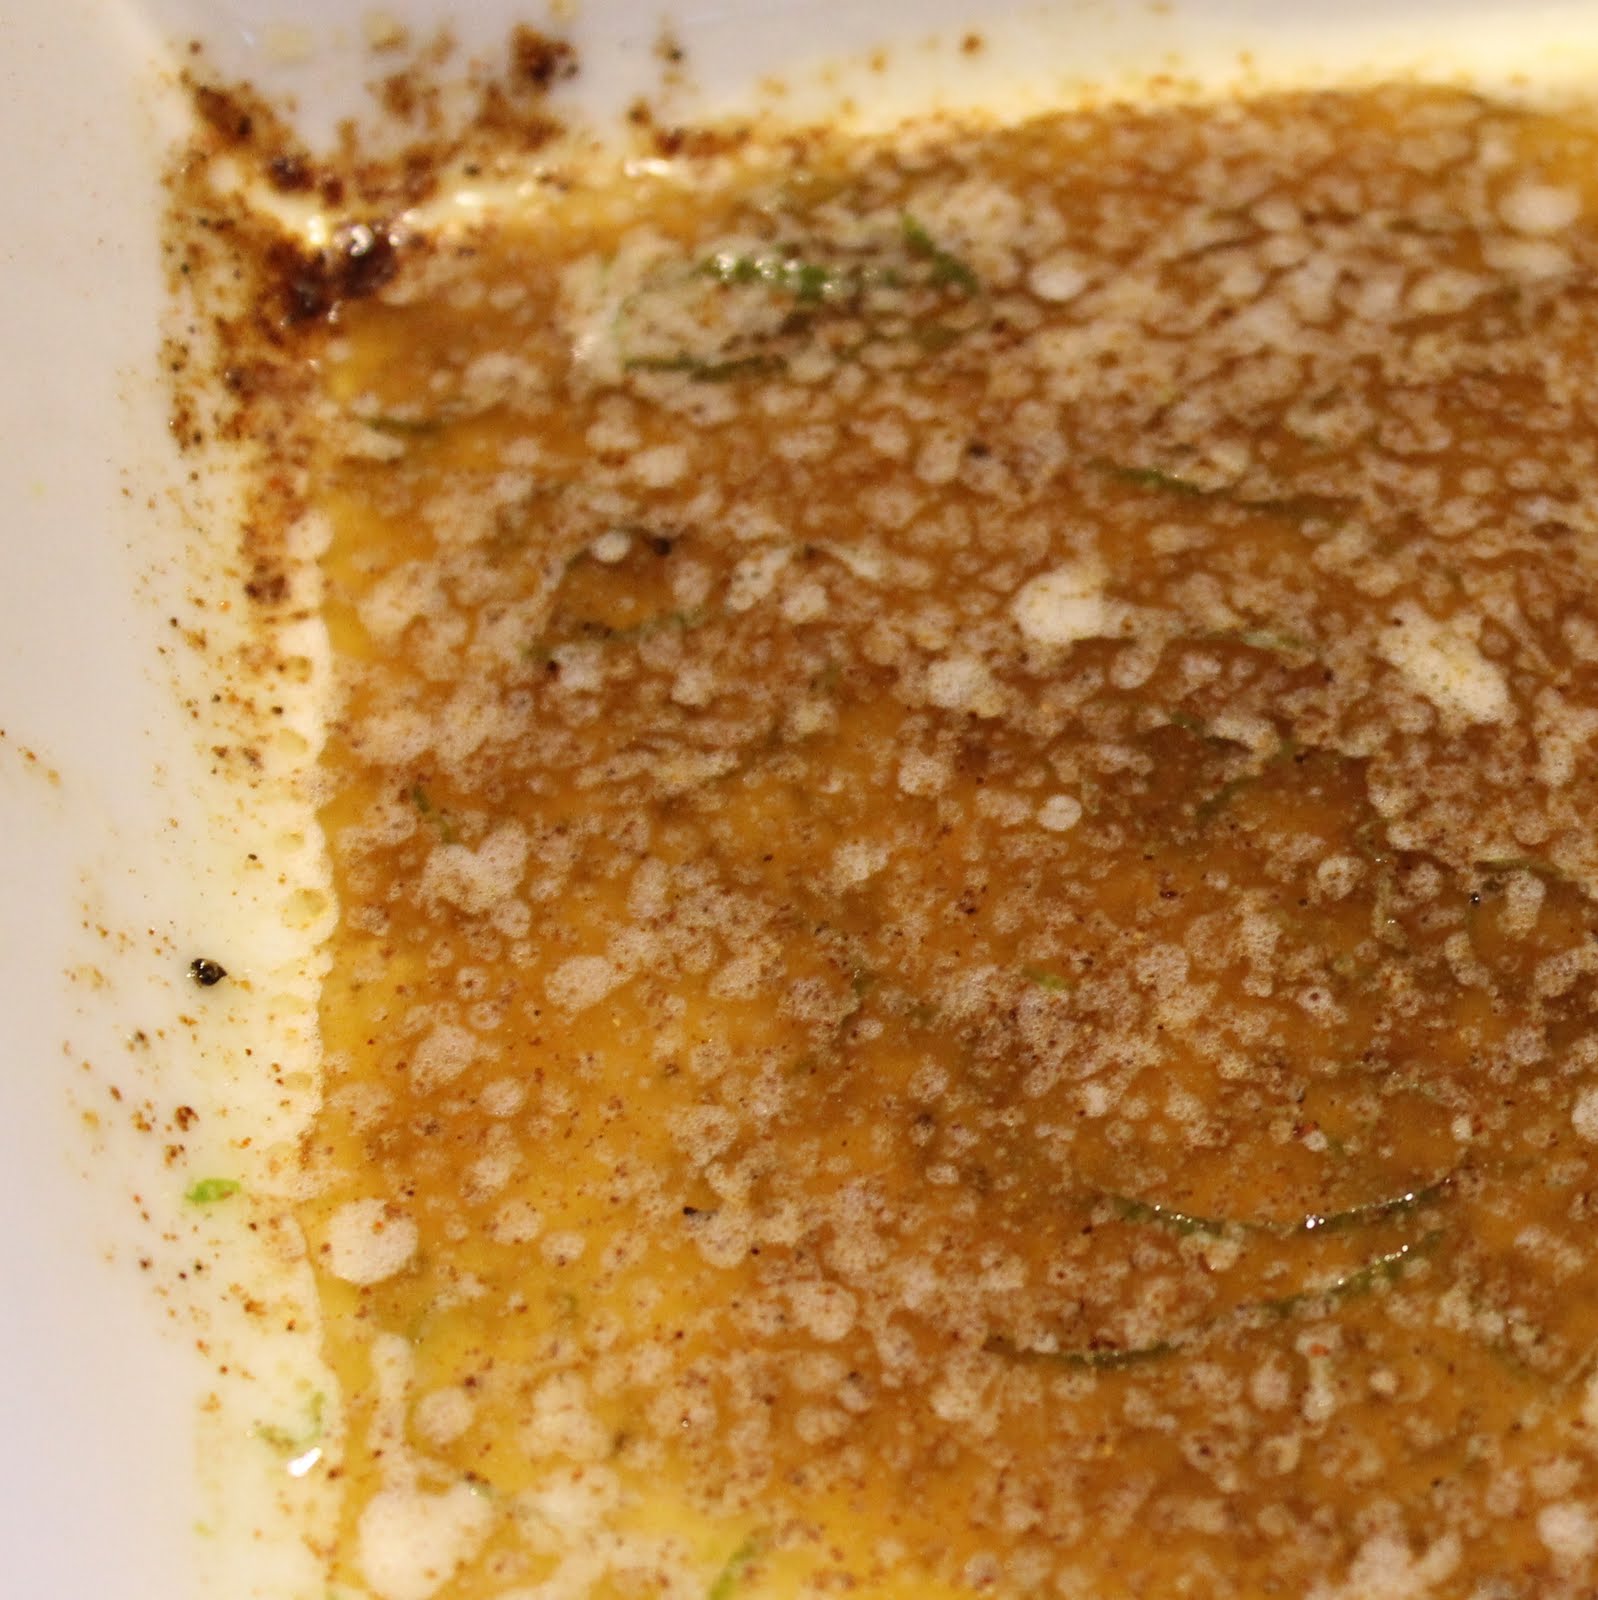
While the corn is cooking, place the butter in a microwave-safe bowl. Microwave for 30 seconds or until the butter has melted. Add the chile powder, zest, pepper and salt.
ok. It’s not much to look at, but it tastes good!
Remove the corn from the grill and brush the butter mixture over the corn.
I loved the subtle smokiness of the chipotle chile powder with the corn. We had some leftover limes from the kebobs and took full advantage of the lime juice on the corn, which really worked well with the butter mixture. I honestly had trouble taking photos of this, because as soon as it was done, we couldn’t control ourselves and scarfed it down! Definitely a keeper.
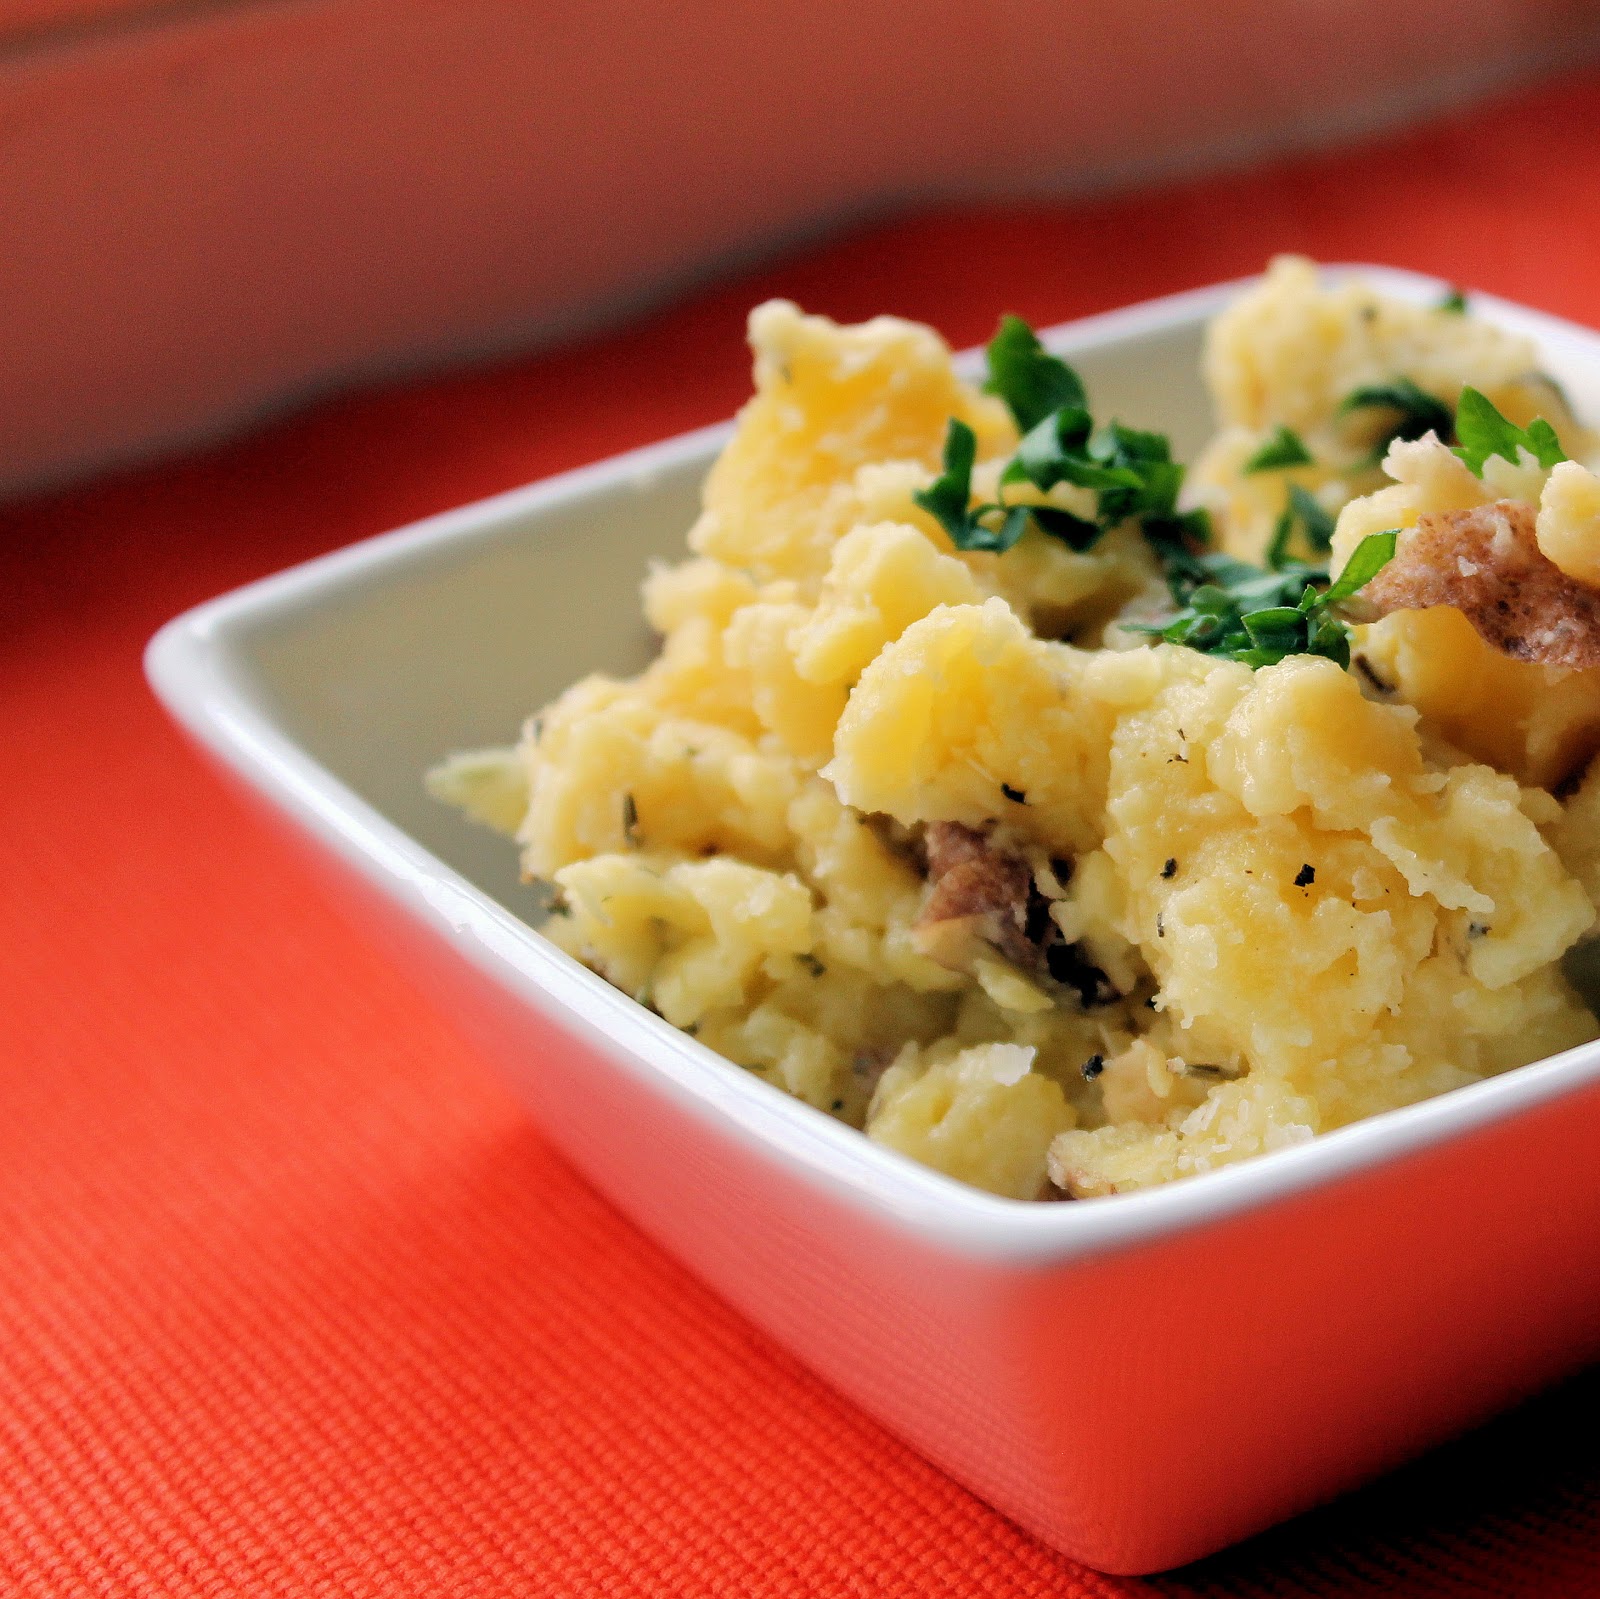
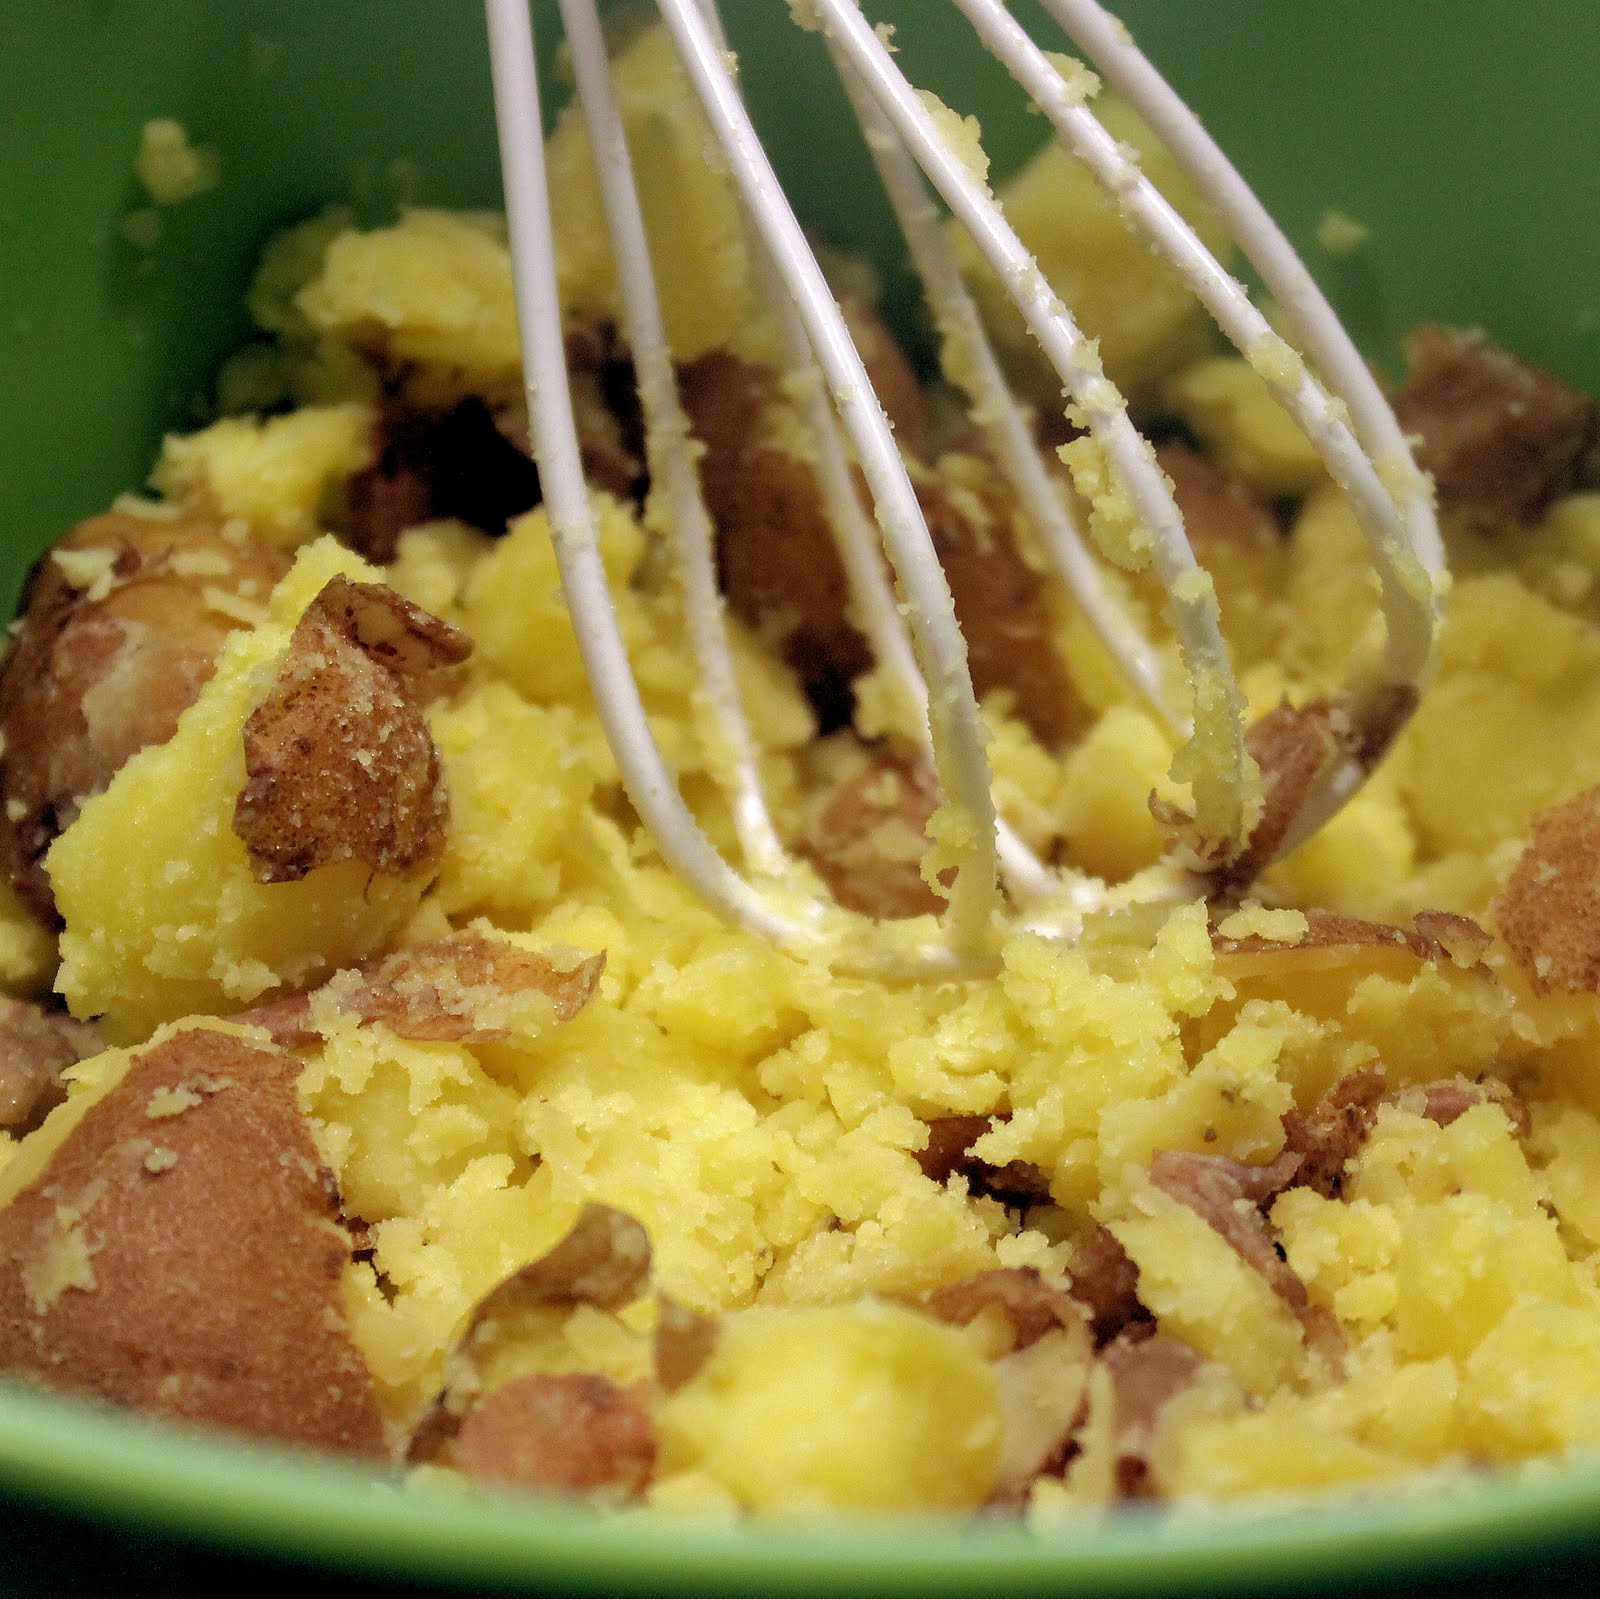
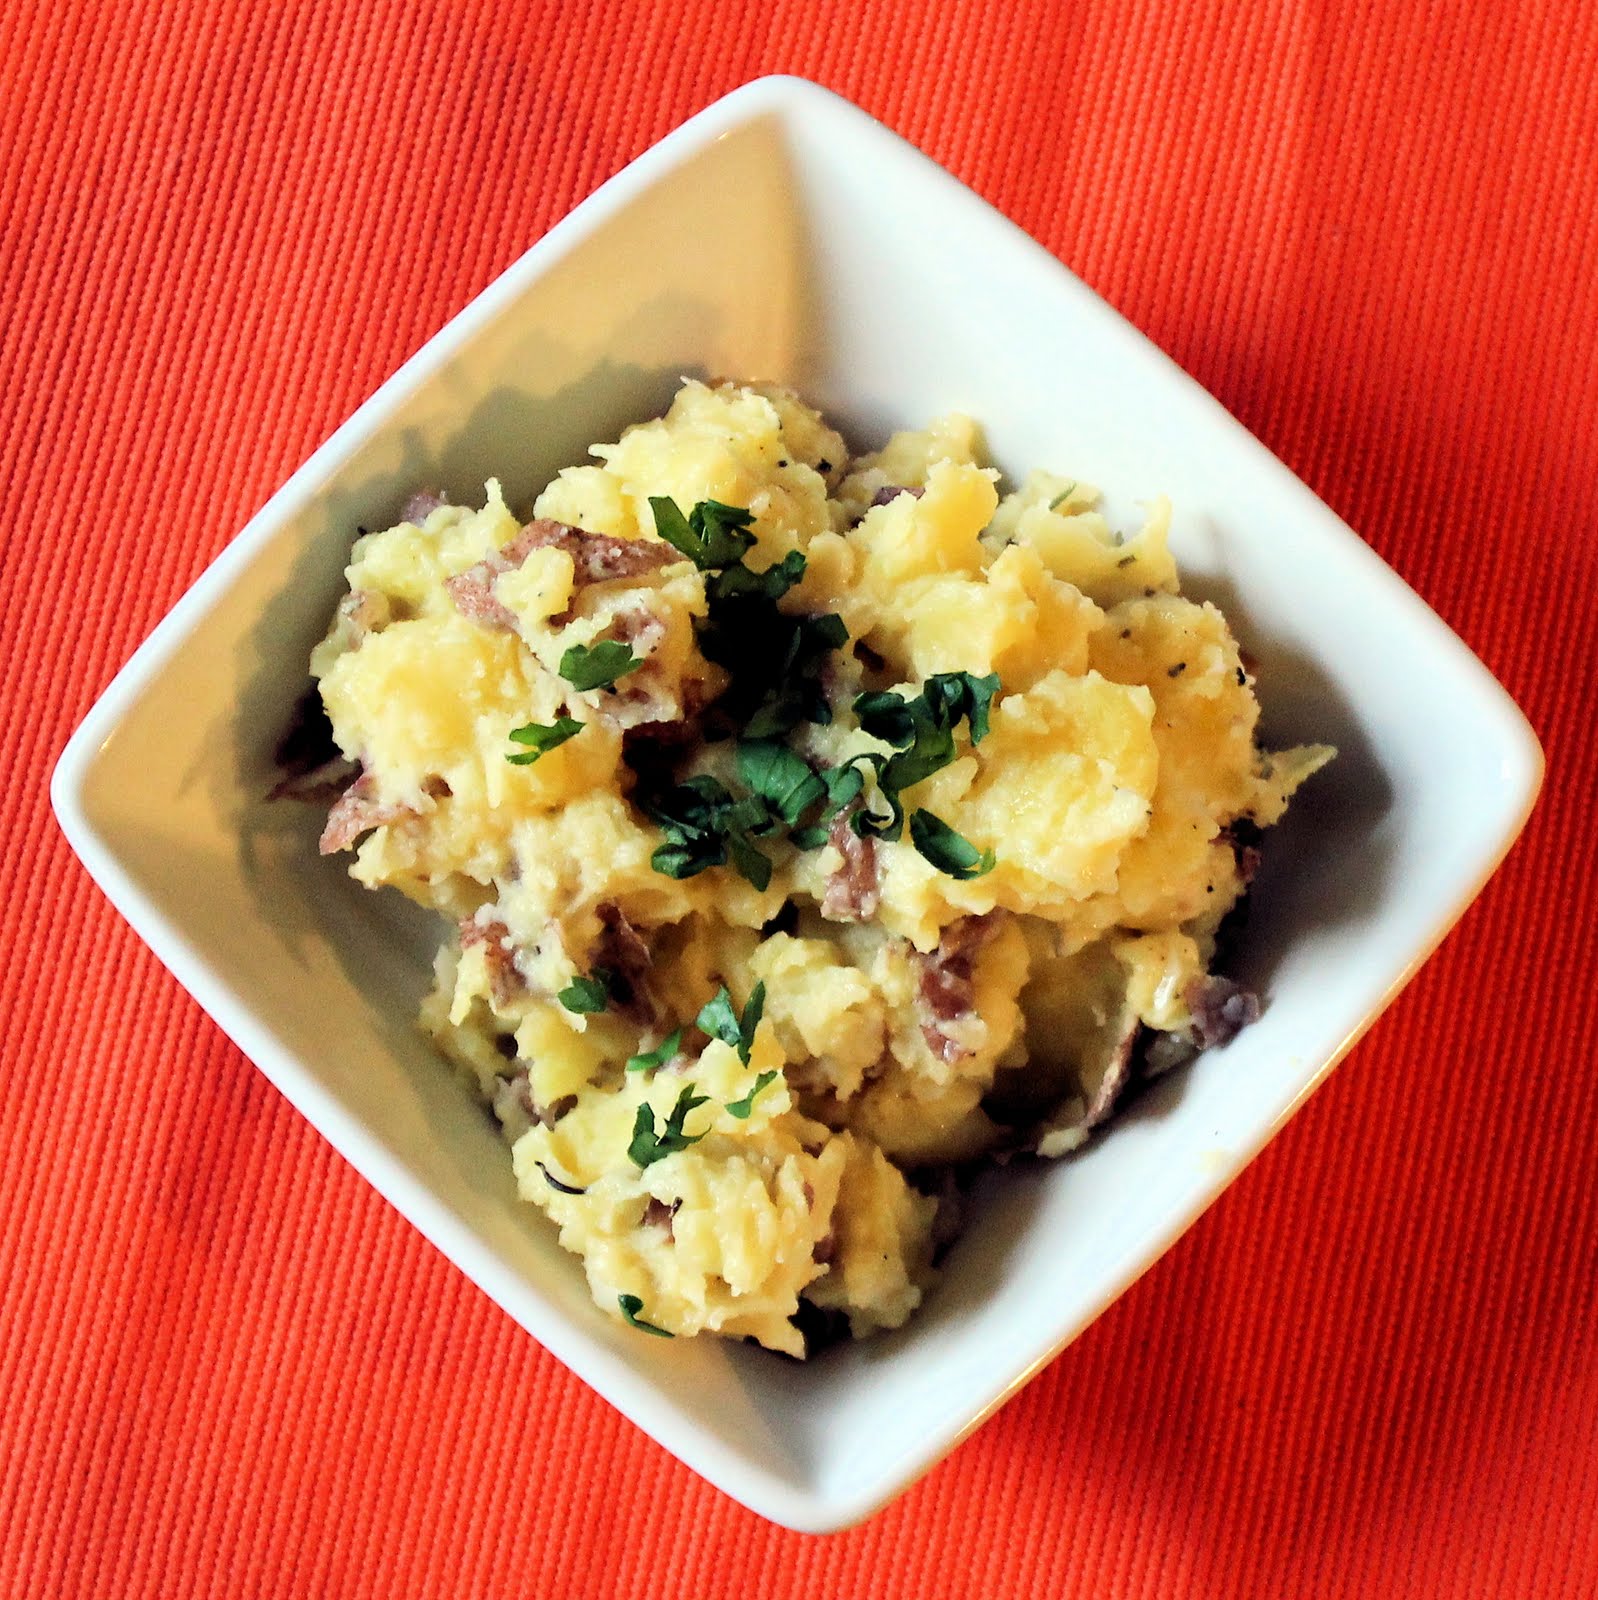
I made Sauteed Chicken with Fennel and Rosemary, and needed something starchy to soak up some of the sauce. The recipe suggested polenta or mashed potatoes, so I thought I’d make smashed potatoes and incorporated some of the same ingredients found in the main dish. I had a bag of red potatoes from my CSA share so I luckily had all ingredients on hand.
Ingredients:
1 bag of red potatoes (I had enough to fill up a medium sized bowl)
3 garlic cloves, minced
2 tablespoons butter
1 tablespoon heavy cream
1/4 cup chicken stock
Salt and pepper, to taste
1 teaspoon dried rosemary
1 teaspoon fresh chopped parsley
Wash your red potatoes thoroughly, making sure to remove all dirt.
Halve any red potatoes that are larger than the average size. Bring a pot of salted water to a boil. Drop in the red potatoes and cook until fork tender, about 15 minutes.
Drain the potatoes and add to a medium sized bowl. using a large spoon or a whisk, smash each of the potatoes. Don’t go overboard, you want them to be chunky.
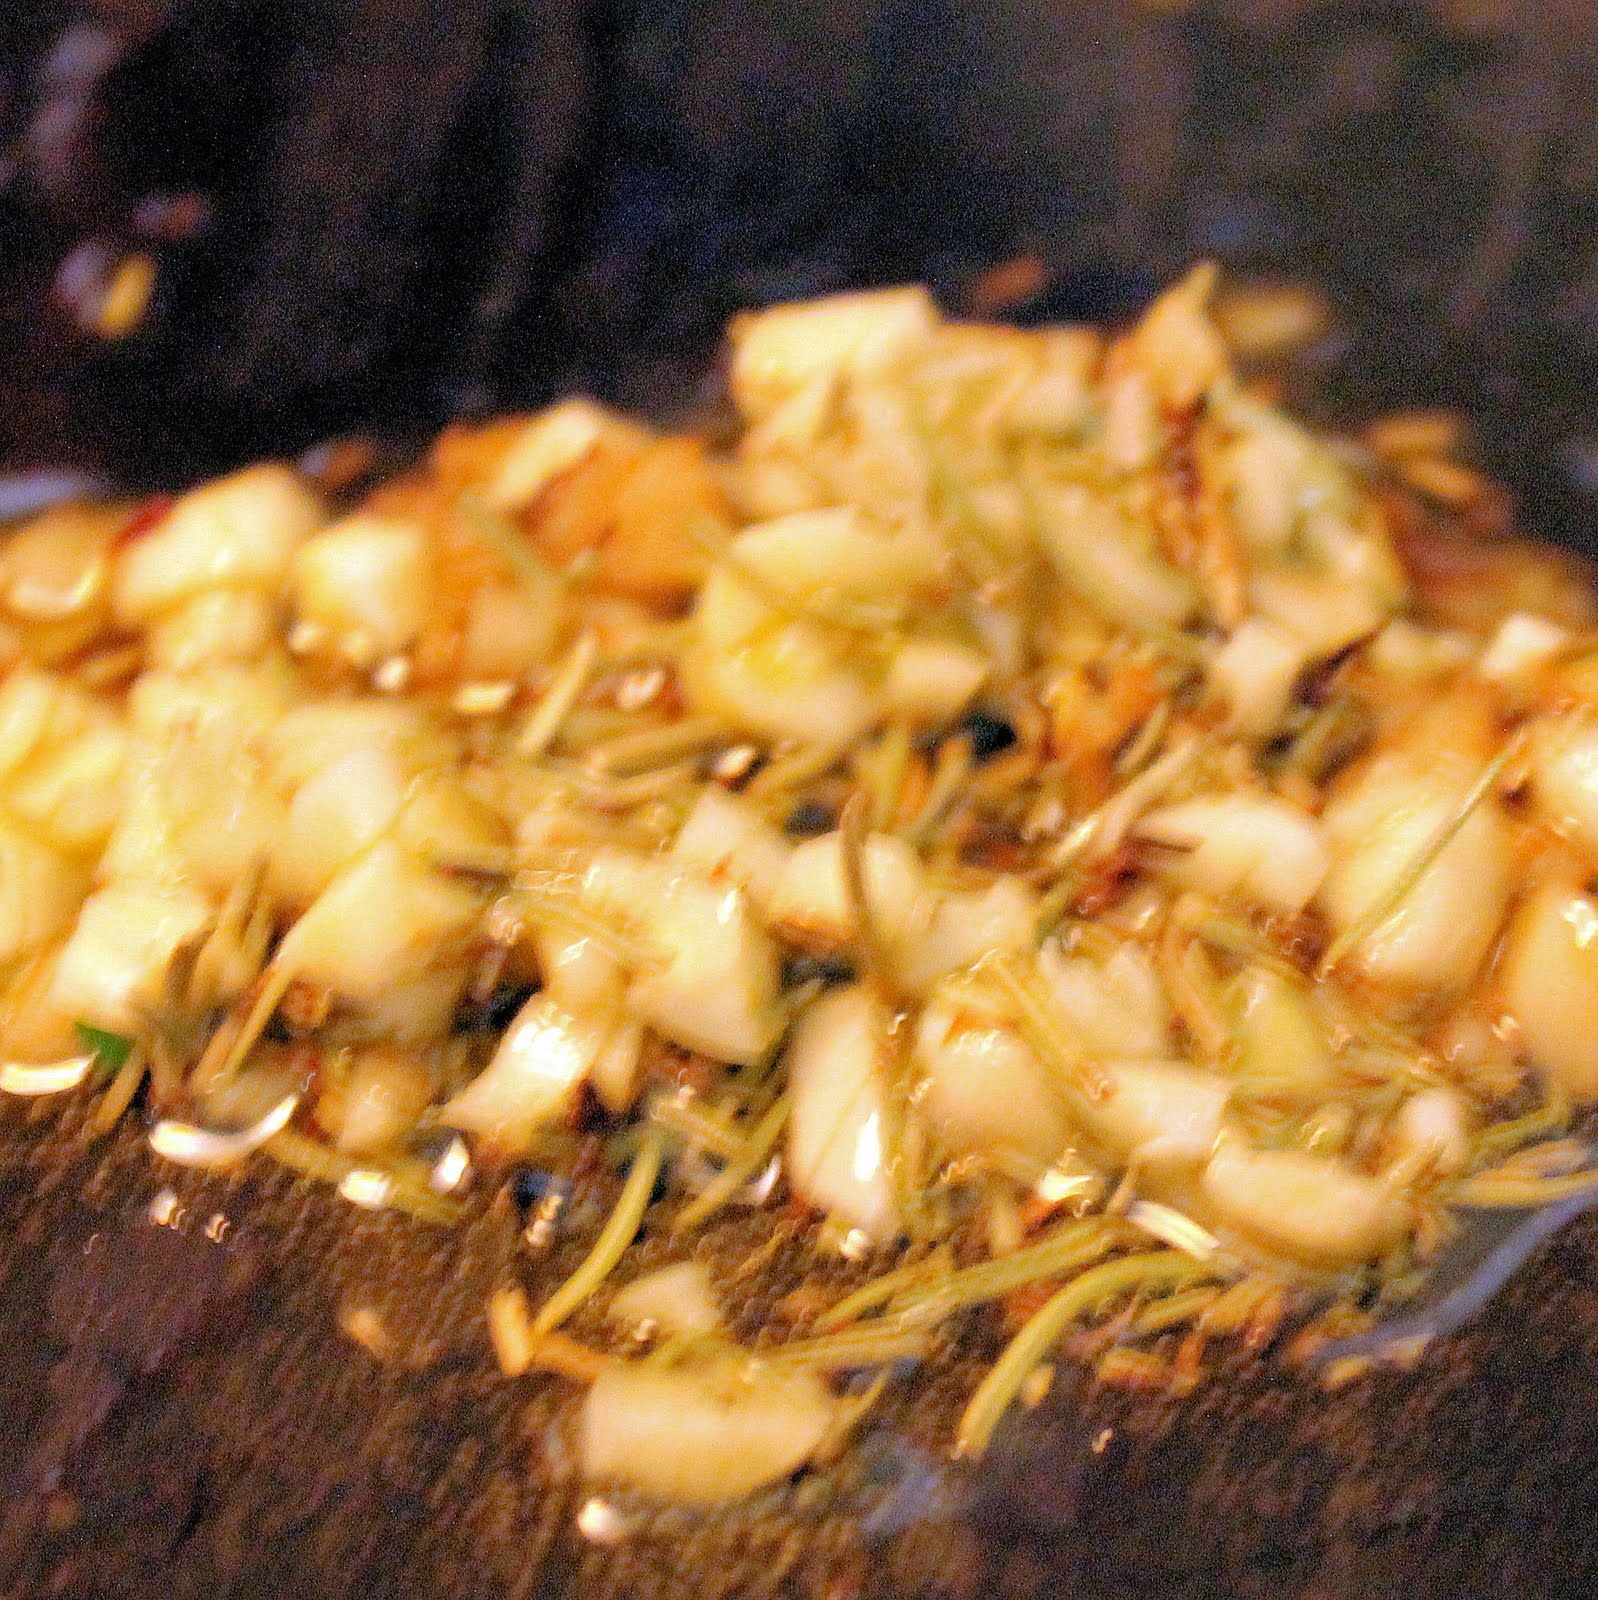
In a saute pan, add a small amount of the butter, rosemary and the minced garlic over medium heat. Cook for 1 minute.
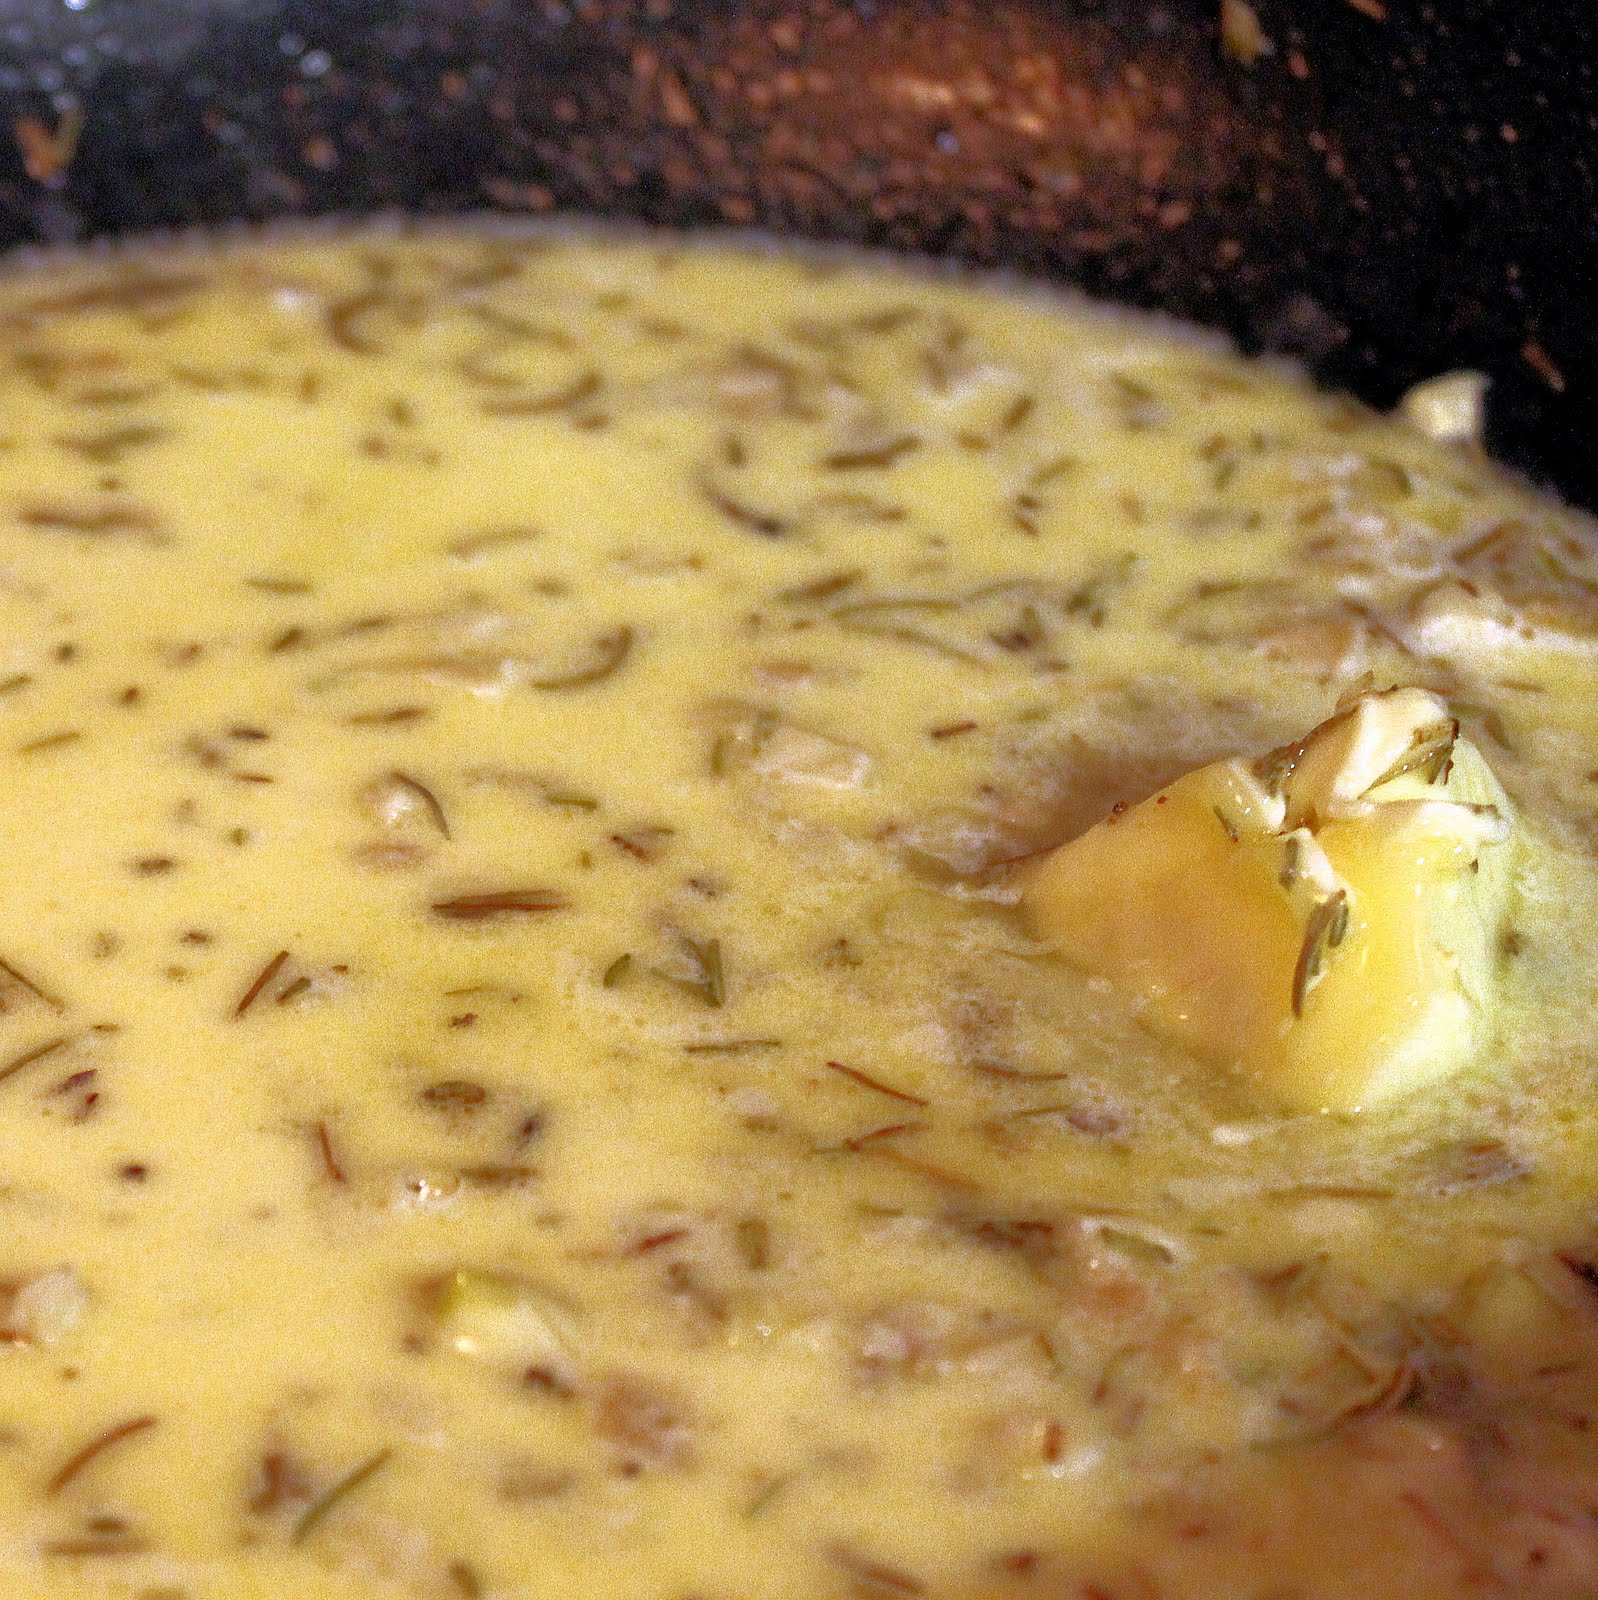
Lower the heat and add the chicken stock, stirring. Add the rest of the butter and the cream and stir to combine.
When the butter has melted, pour over the smashed potatoes and stir to combine.
Season with salt and pepper, to taste. Top with parsley.
These were absolutely delicious. Creamy and flavorful, the rosemary and parsley worked so well with the potatoes. I prefer smashed potatoes to mashed potatoes solely because you get to keep the skins on the potatoes. Not only does it make the dish prettier, it also adds texture.
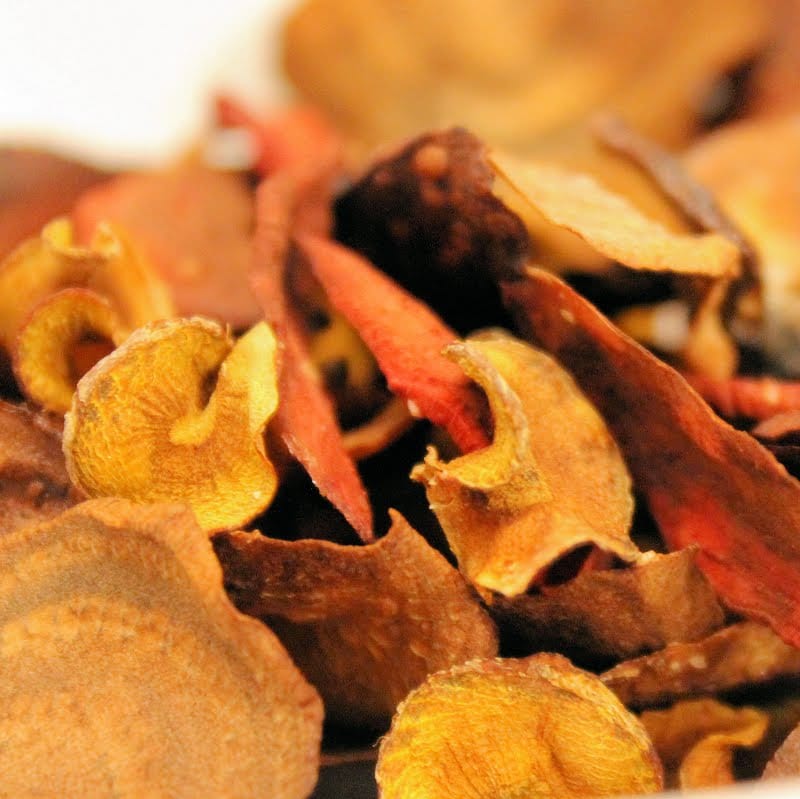
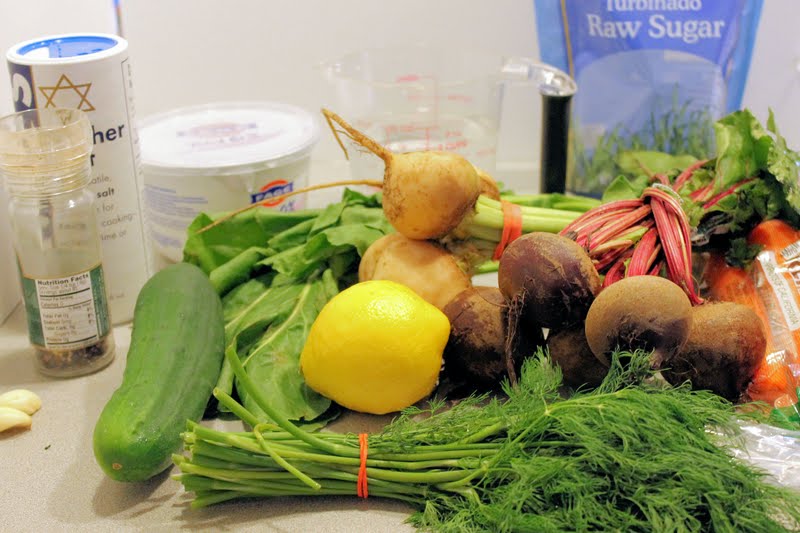
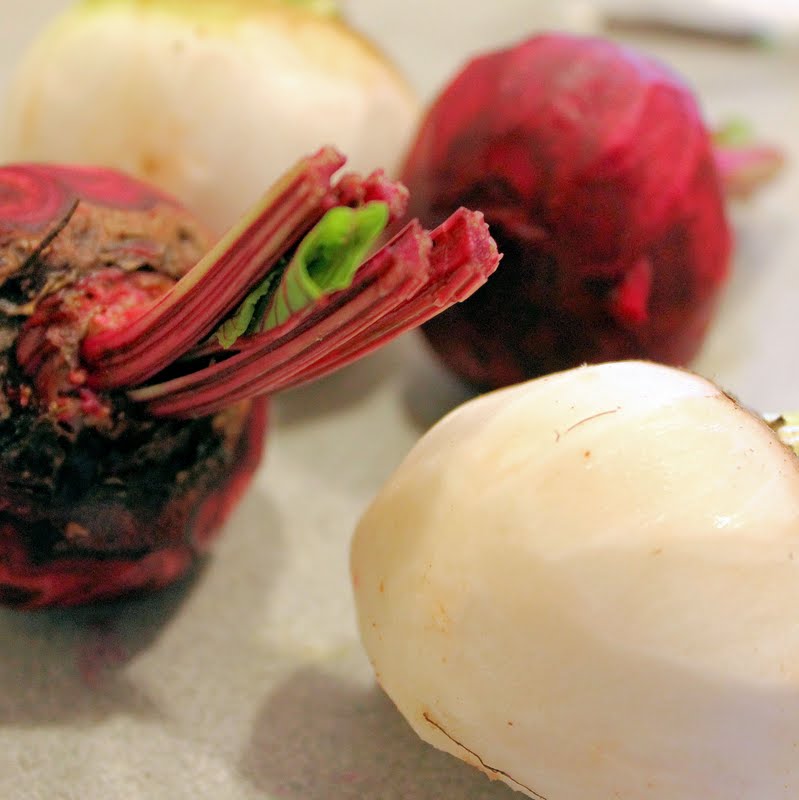
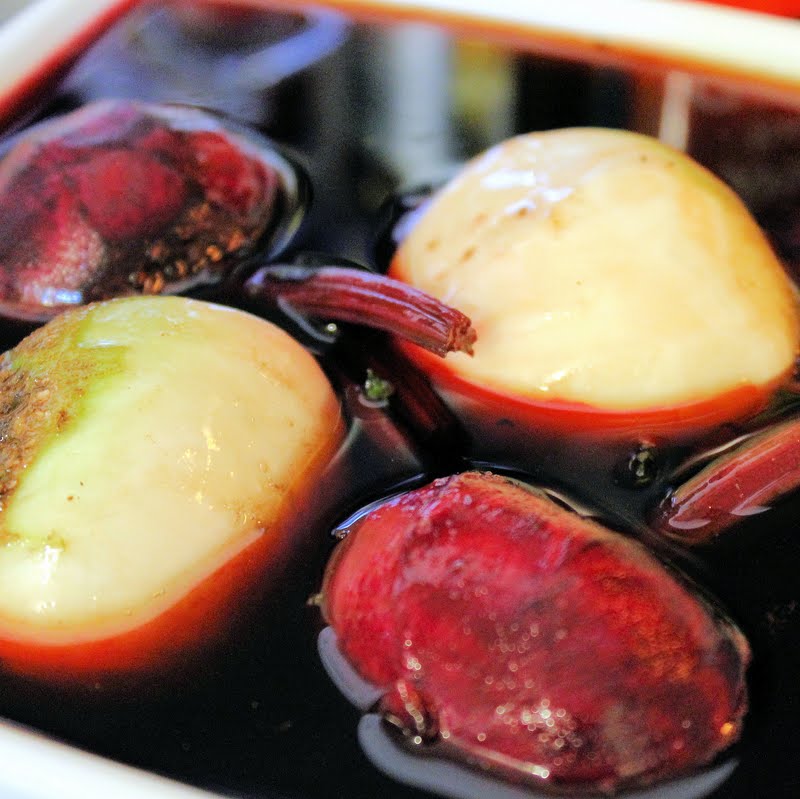
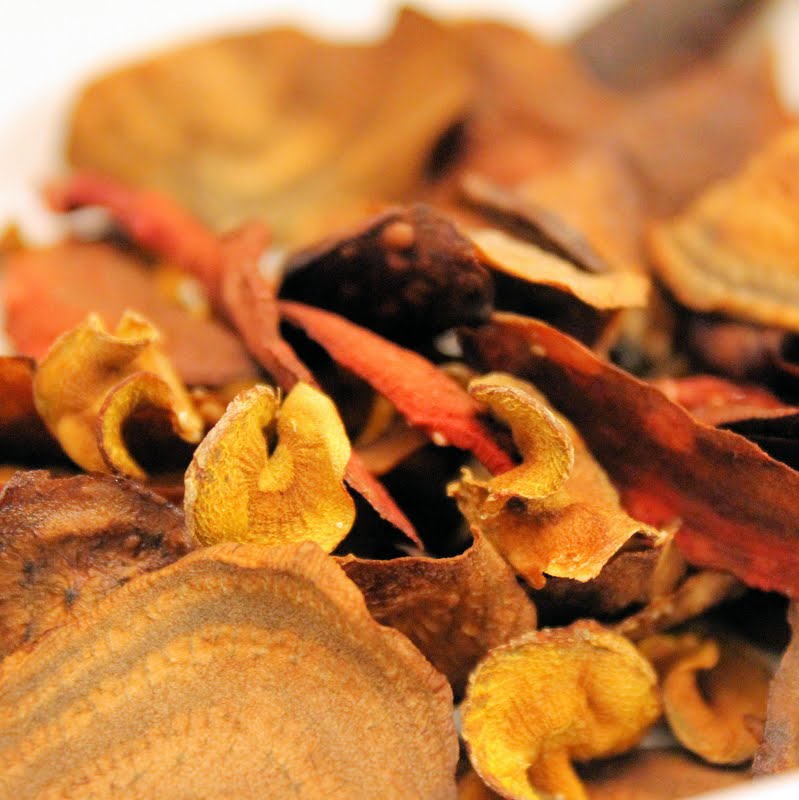
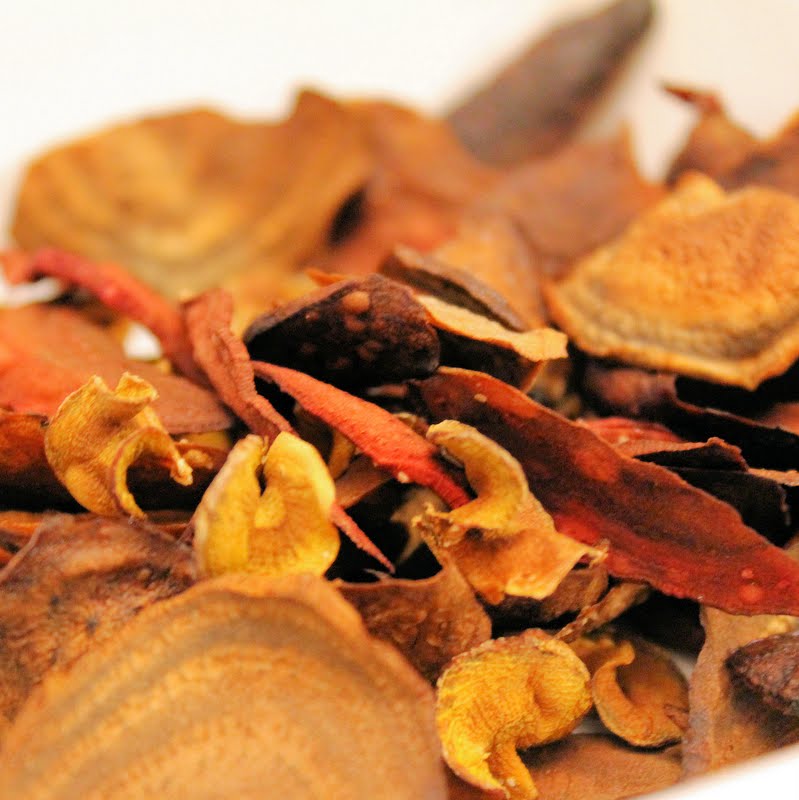
I came across a recipe for beet chips recently and was intrigued. It seemed relatively easy, didn’t involve frying the beets (I don’t have a deep fryer, and the idea of deep frying something kind of makes me sick), and appeared to be a great way for me to use some of the beets I received in my CSA share. I decided to bring it a step further and try to make carrot chips at the same time as well as a dip to go with them. I had both normal beets and white beats so I was really hoping this would turn out colorful!
The tiny ones are carrots, the others are red & white beets
Ingredients for chips:
2 white beets
2 red beets
2 large carrots
Salt and pepper to taste
2 cups water
2 cups sugar
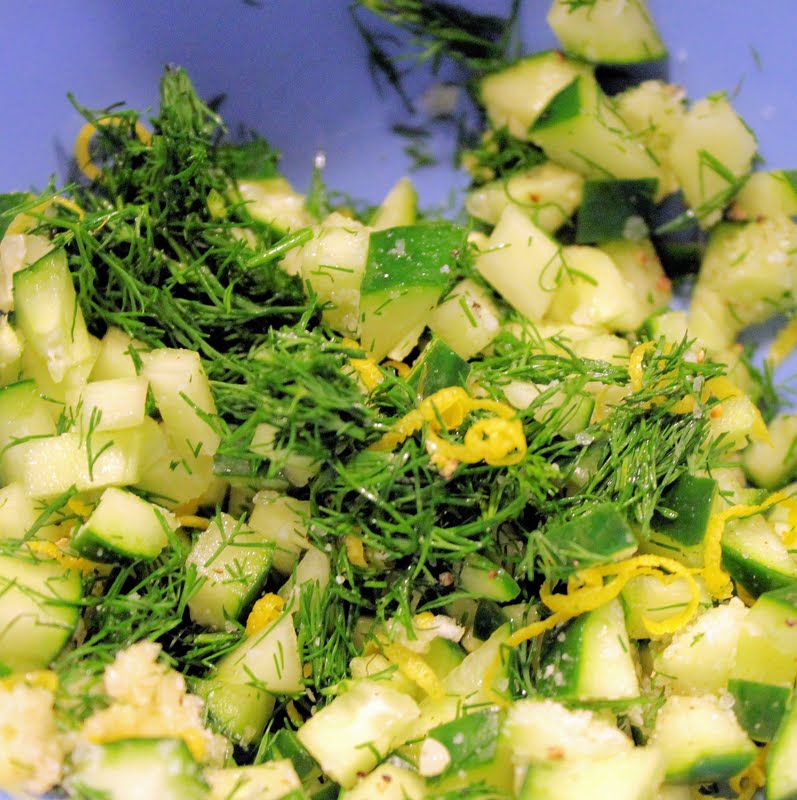
Ingredients for tzatziki:
1 container of Greek yogurt (I used 0%)
1/4 cup fresh chopped dill
Juice and zest of 1 lemon
2 garlic cloves, minced
1/2 a cucumber, finely chopped
Salt and pepper to taste
To begin, combine the water and sugar in a saute pan and bring to a boil. While the mixture is heating, peel the beets with a vegetable peeler. Chop off most of the leaves on top, but leave a bit to use as a handle when using the mandoline slicer.
When the liquid has boiled, remove from heat and add the beets to the liquid. Let sit for 15 minutes.
I used raw sugar, which is why it’s brown
Preheat the oven to 325 degrees. While the beets are soaking, use a mandoline slicer to thinly slice the carrots. After 15 minutes, remove the beets, dry them off with a paper towel, and thinly slice with the mandoline slicer. Arrange on a baking sheet sprayed with cooking spray and season with salt and pepper.
Cook for 40 minutes or until they begin to crisp slightly. While the chips are baking, prepare the tzatziki. Combine the chopped dill, lemon, zest, garlic, cucumber, salt and pepper in a medium sized bowl.
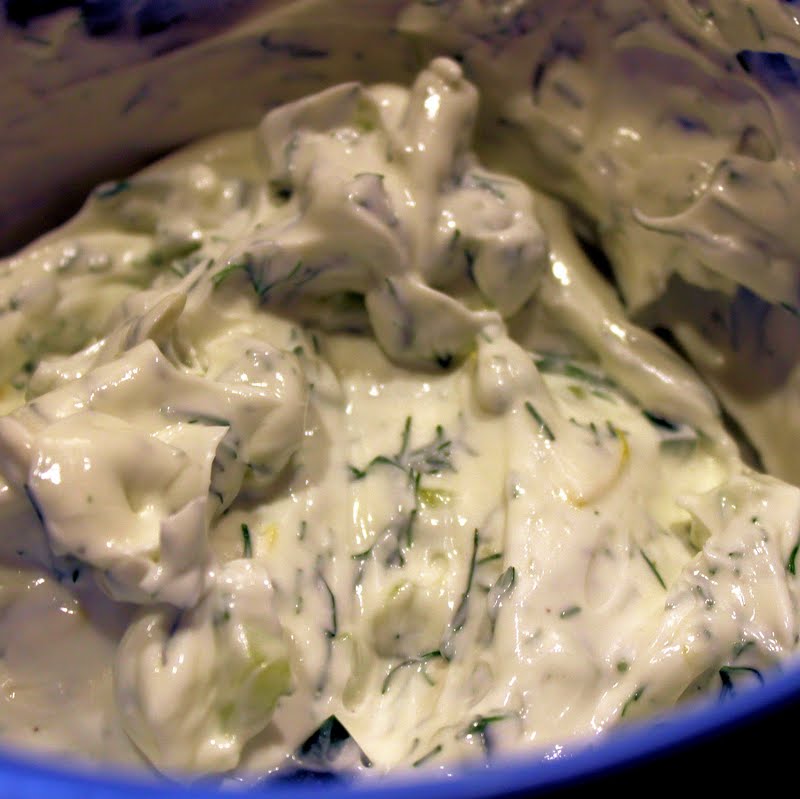
Mix in the Greek yogurt.
Cover and refrigerate until the chips are done.
Allow the chips to cool on the baking sheet for about 10 minutes after removing them from the oven. Carefully remove from the baking sheet.
The beets and especially the carrots really shrink up, so if you can, use quite large beets and carrots. I think mind turned out too tiny for my liking. I also think I sliced them a bit too thin, they really don’t seem like they’d stand up to the dip too well.
they are fun looking though!
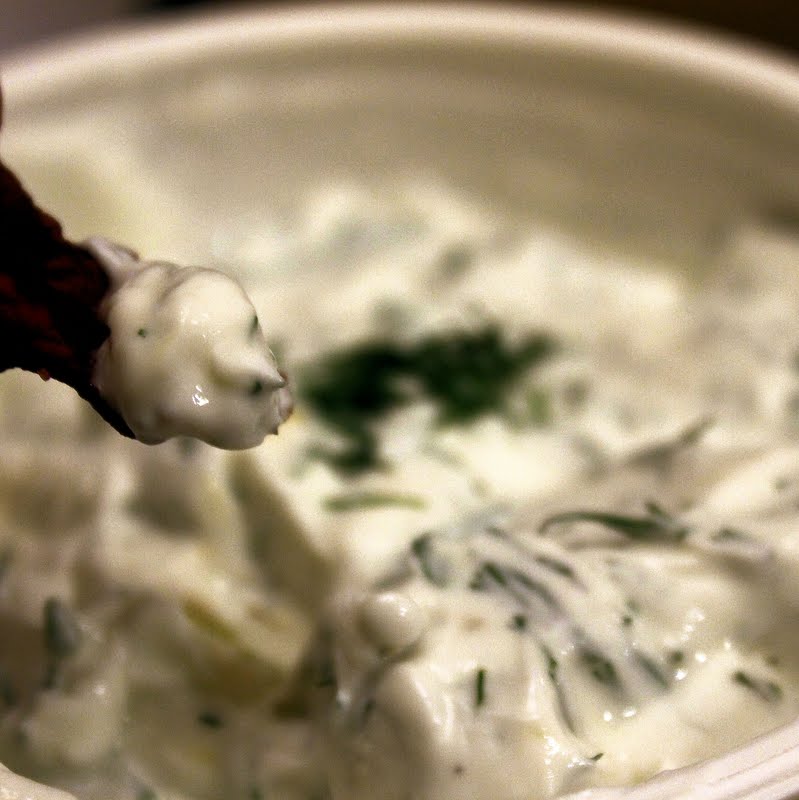
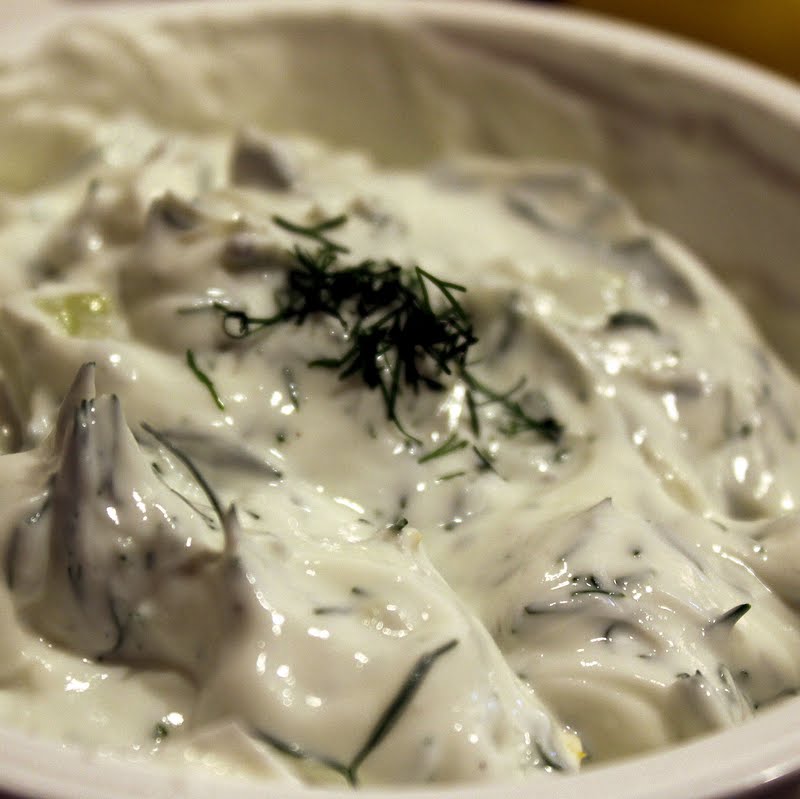
Place the chips in a bowl and serve with the tzatziki. Enjoy!
This recipe makes a whole lot of tzatziki, probably more than you’ll use on the chips. Tzatziki is great with pita chips, as a condiment on grilled meats, stuffed grape leaves, and crudites so you’ll have plenty of options to use the rest of the dip.
Beet and Carrot Chips with Tzatziki
Cuisine: Appetizer, Sides, Vegetarian
Author: I Can Cook That
Ingredients
Ingredients for chips:
2 white beets
2 red beets
2 large carrots
Salt and pepper to taste
2 cups water
2 cups sugar
Ingredients for tzatziki:
1 container of Greek yogurt (I used 0%)
1/4 cup fresh chopped dill
Juice and zest of 1 lemon
2 garlic cloves, minced
1/2 a cucumber, finely chopped
Salt and pepper to taste
Instructions
To begin, combine the water and sugar in a saute pan and bring to a boil. While the mixture is heating, peel the beets with a vegetable peeler. Chop off most of the leaves on top, but leave a bit to use as a handle when using the mandoline slicer.
When the liquid has boiled, remove from heat and add the beets to the liquid. Let sit for 15 minutes.
Preheat the oven to 325 degrees. While the beets are soaking, use a mandoline slicer to thinly slice the carrots. After 15 minutes, remove the beets, dry them off with a paper towel, and thinly slice with the mandoline slicer. Arrange on a baking sheet sprayed with cooking spray and season with salt and pepper.
Cook for 40 minutes or until they begin to crisp slightly. While the chips are baking, prepare the tzatziki. Combine the chopped dill, lemon, zest, garlic, cucumber, salt and pepper in a medium sized bowl.
Mix in the Greek yogurt.
Cover and refrigerate until the chips are done.
Allow the chips to cool on the baking sheet for about 10 minutes after removing them from the oven. Carefully remove from the baking sheet.
Place the chips in a bowl and serve with the tzatziki.
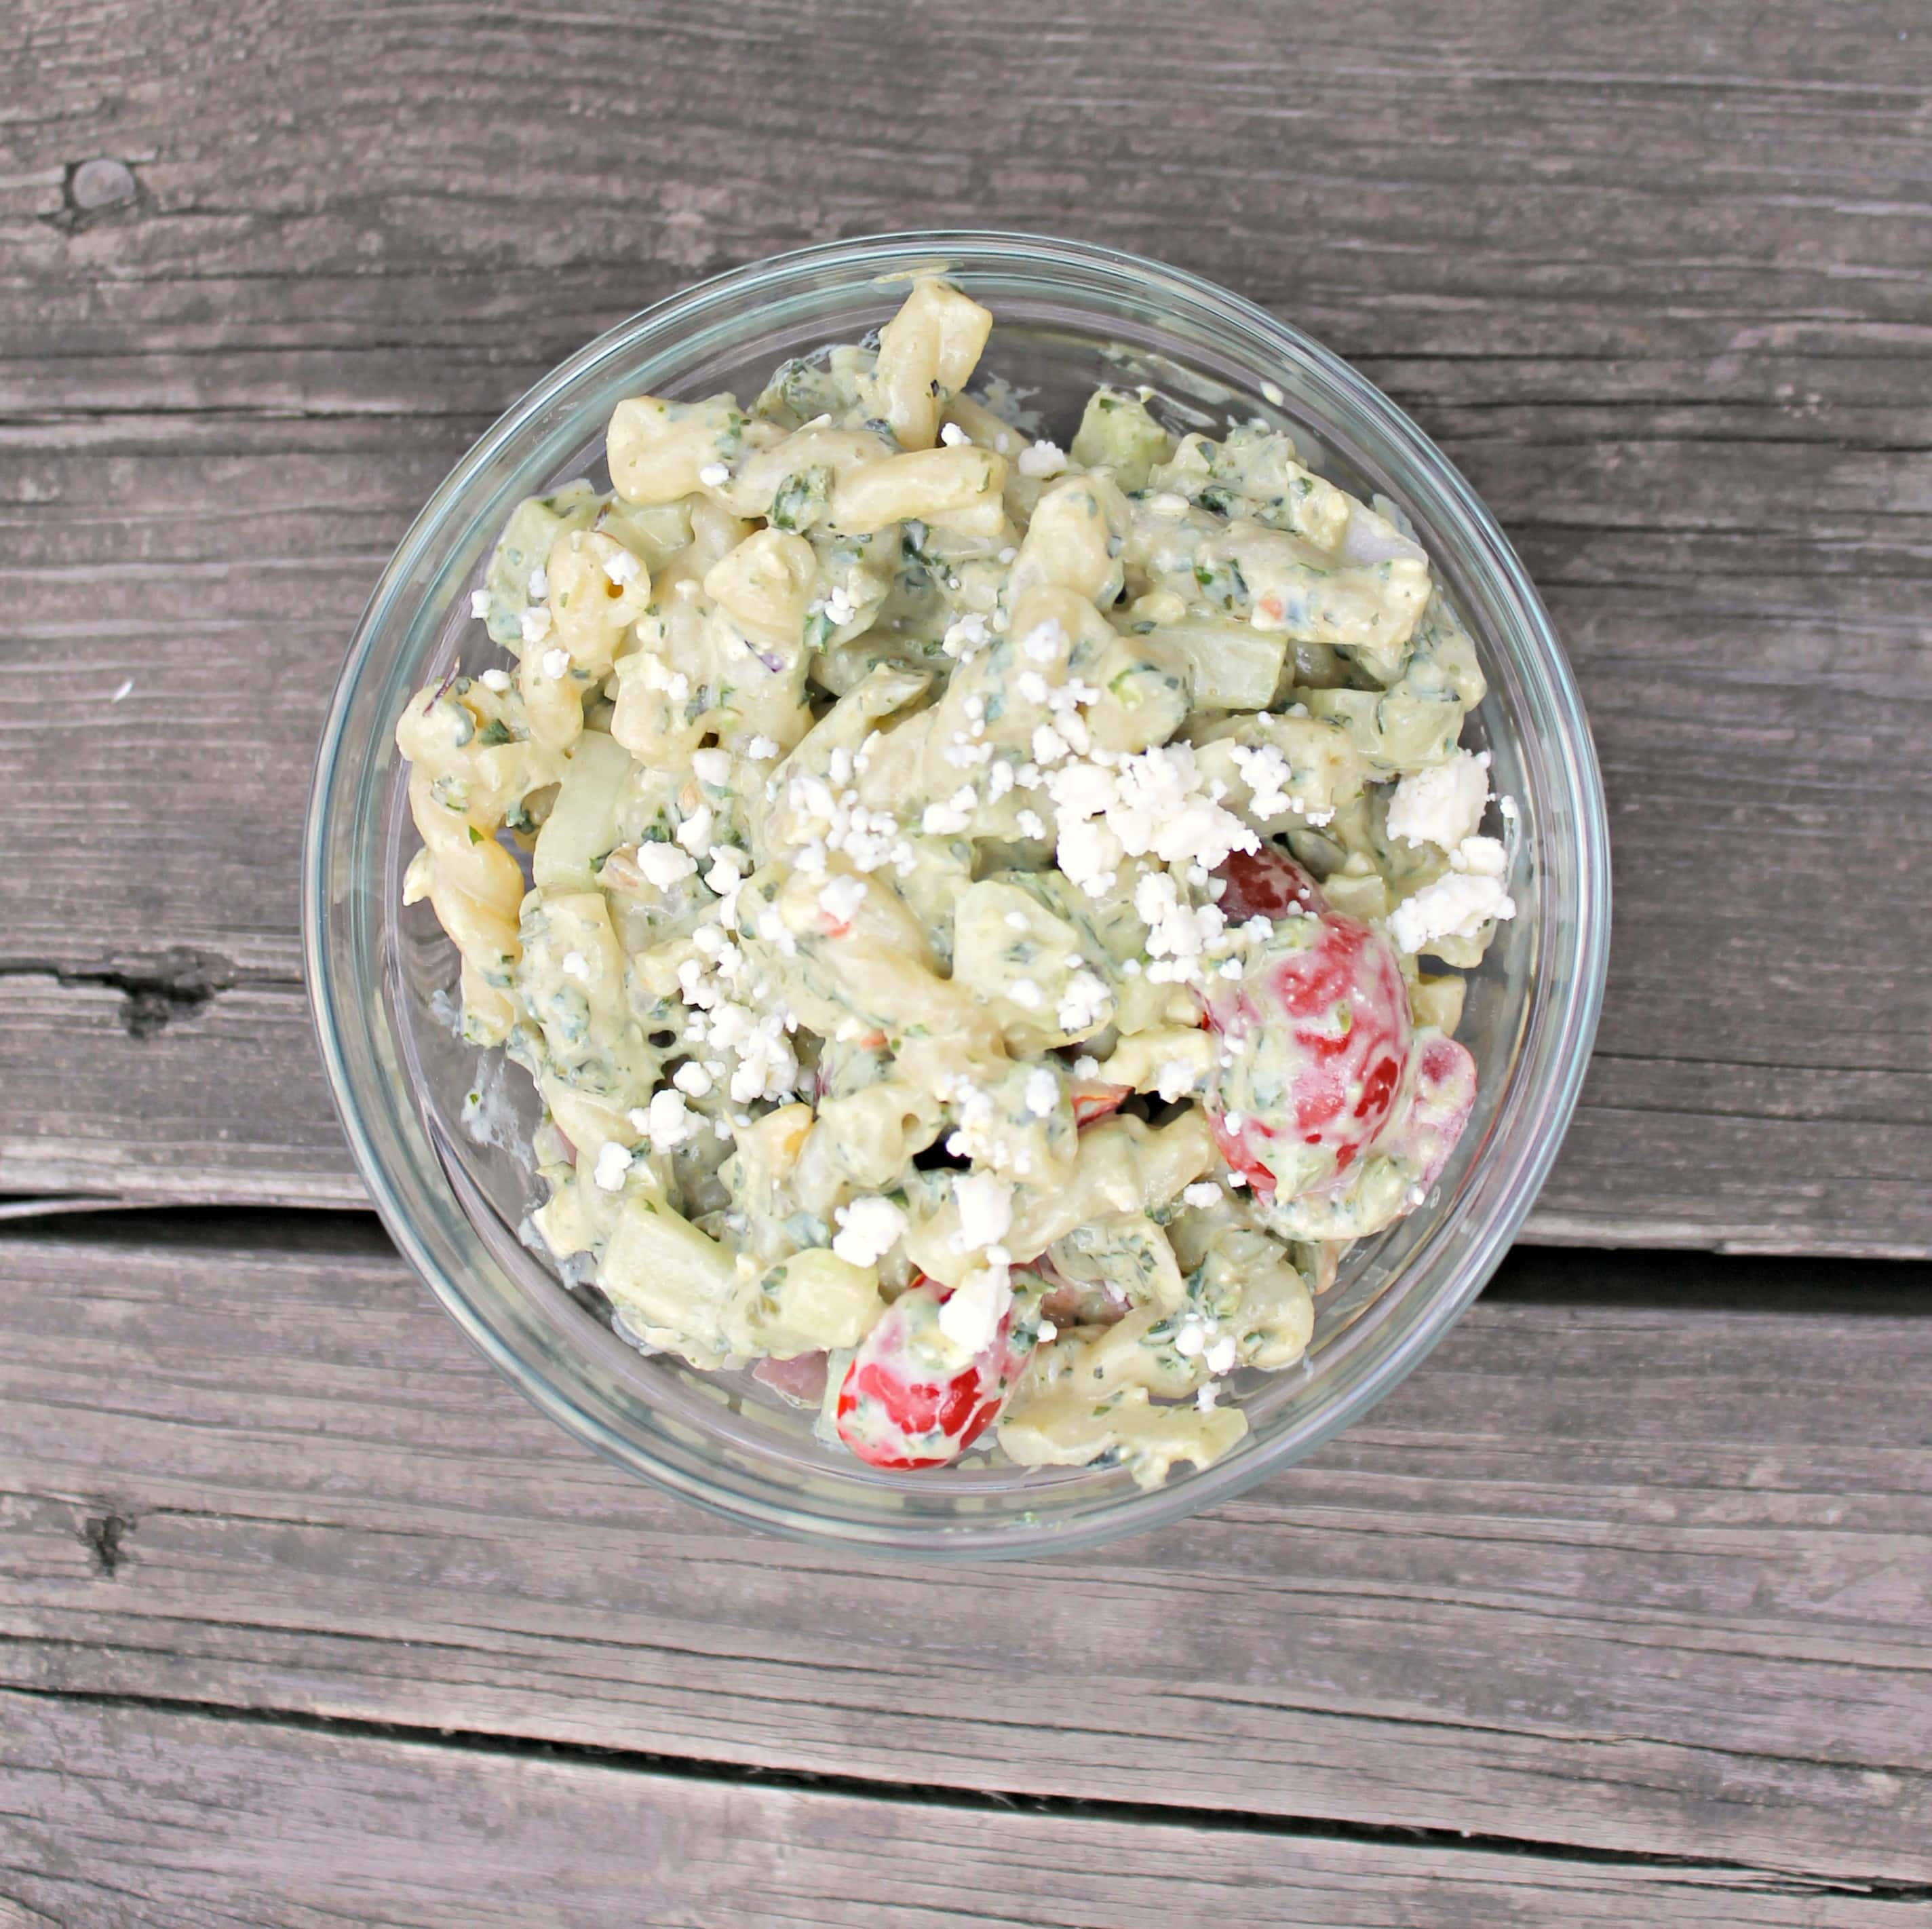
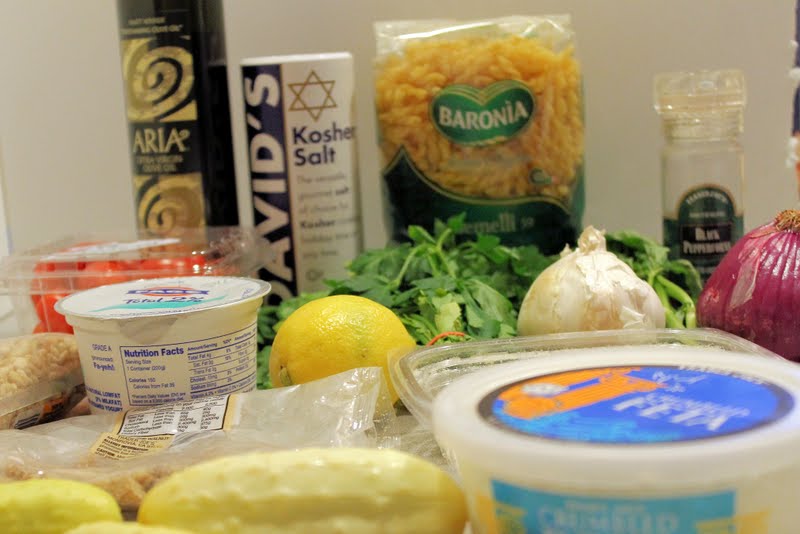
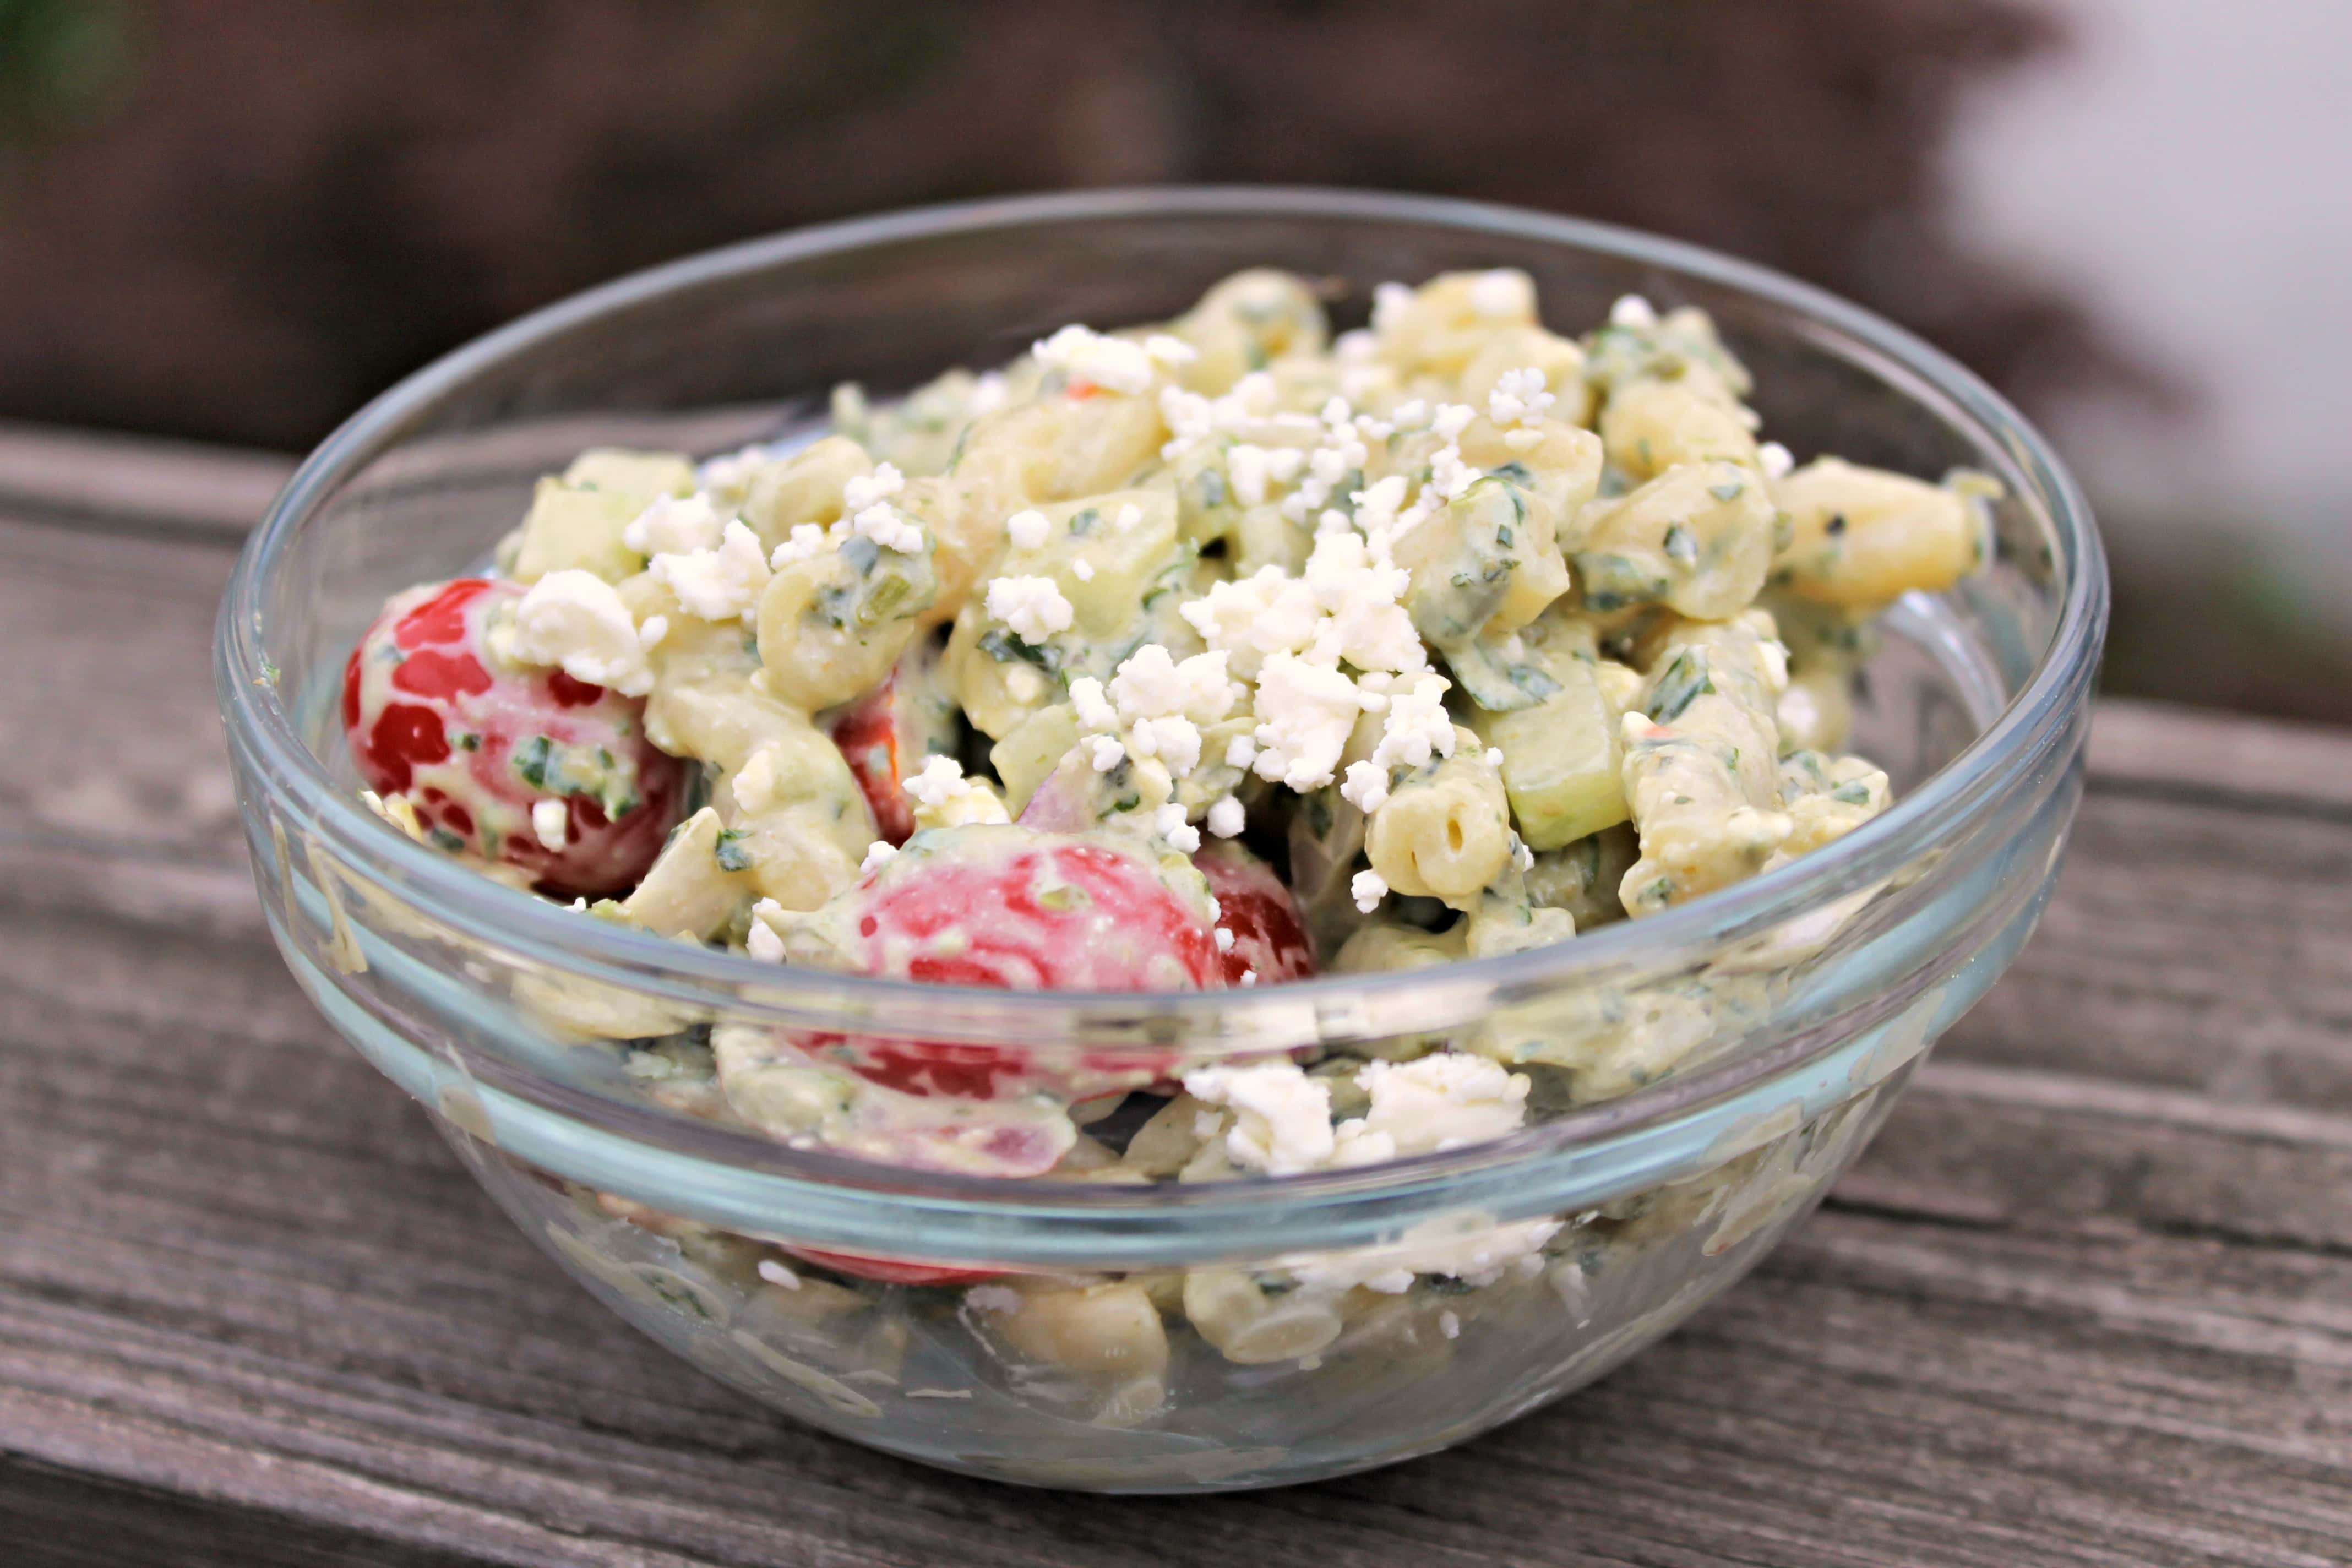
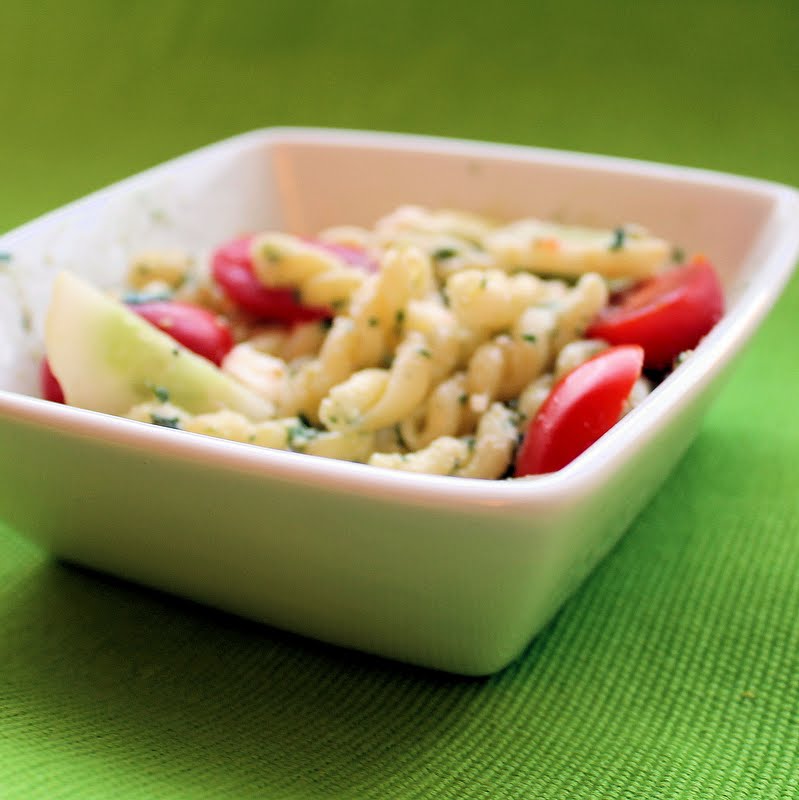
I am in a pasta salad making mood, so I decided to make one more batch for this weekend. I already made one pasta salad for this weekend, but I have a bunch of these ingredients on hand from other recipes and I don’t want them to go bad over the long weekend. I used a recipe from My Recipes as a base and substituted ingredients I already had, and ended up with this Pesto Pasta Salad!
Ingredients for the pesto:
1 or 2 bunches of packed fresh basil
1 bunch of packed fresh parsley
4 garlic cloves, minced
Juice and zest from 1 lemon
1/2 teaspoon salt
1/4 teaspoon pepper
1/3 cup walnuts (or toasted pine nuts)
1/2 cup olive oil
1/2 cup grated Parmesan cheese
Ingredients for the salad:
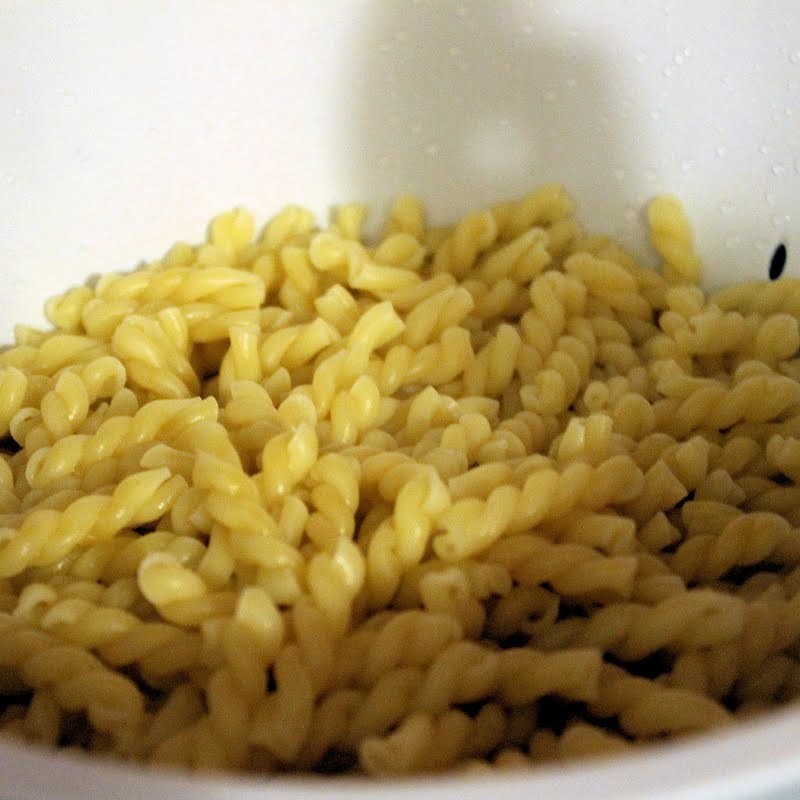
1 box gemelli or other short pasta
1 small container plain 2 percent Greek yogurt
1 pint cherry or grape tomatoes, halved
3 small cucumbers, sliced
1 red onion, chopped
1/2 cup feta cheese
Cook the pasta according to the “al dente” directions on the package. Drain and run under cold water. Set aside.
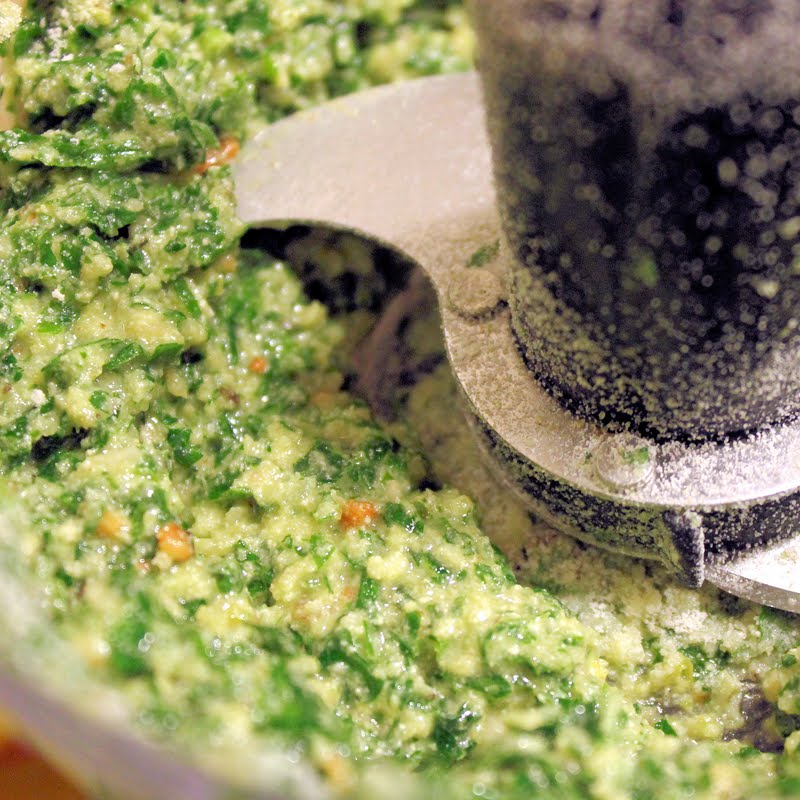
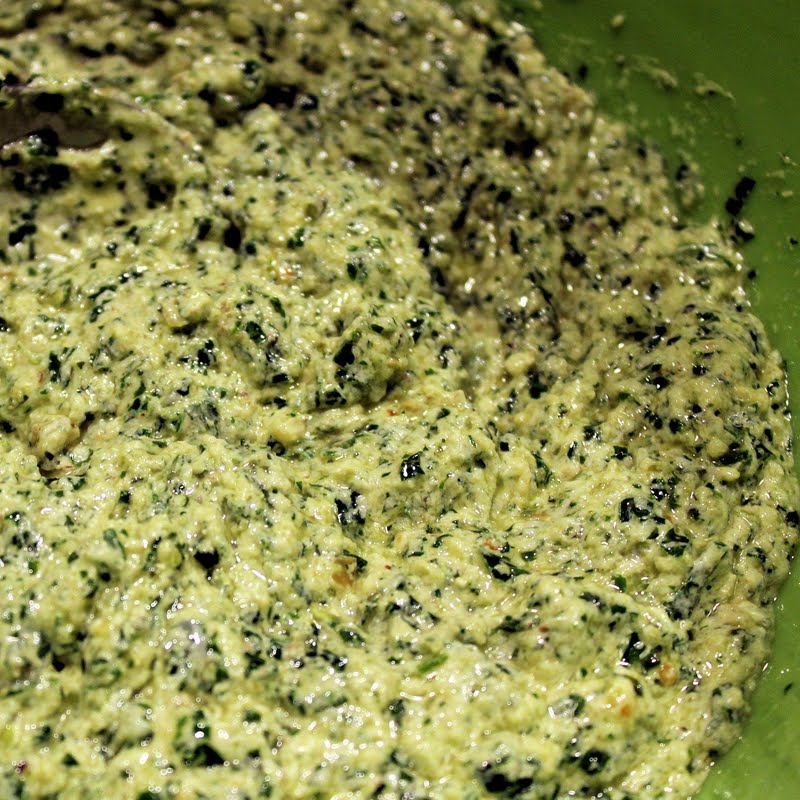
To make the pesto, combine the basil, parsley, garlic, lemon juice, lemon zest, salt, pepper and walnuts in a food processor. (I ended up being just short of 1/3 cup walnuts, so I also added in a few toasted pine nuts.) Blend until smooth. Pour in olive oil and blend until there is a thick paste. Add the Parmesan and combine until blended. Add more salt and pepper, to taste.
Prepare all of your vegetables. After chopping the red onion, run it under cold water to remove some of the bite. Slice your cucumbers and halve your tomatoes.
Combine the pesto and Greek yogurt in a large bowl.
Add the pasta and vegetables and toss to coat.
Because I am making this for the weekend, I only made a tiny batch fully mixed so I could taste it. The pesto mixture is so so creamy that you honestly might not even need the feta. The tomatoes and red onions add a wonderful contrast to the pesto and the cucumbers add a nice crunch to the salad. I will try to take some photos this weekend of the fully assembled salad, but if it is anything close to what I just sampled, I think my friends will be happy.
Cook the pasta according to the “al dente” directions on the package. Drain and run under cold water. Set aside.
To make the pesto, combine the basil, parsley, garlic, lemon juice, lemon zest, salt, pepper and walnuts in a food processor. (I ended up being just short of 1/3 cup walnuts, so I also added in a few toasted pine nuts.) Blend until smooth. Pour in olive oil and blend until there is a thick paste. Add the Parmesan and combine until blended. Add more salt and pepper, to taste.
Prepare all of your vegetables. After chopping the red onion, run it under cold water to remove some of the bite. Slice your cucumbers and halve your tomatoes.
Combine the pesto and Greek yogurt in a large bowl.
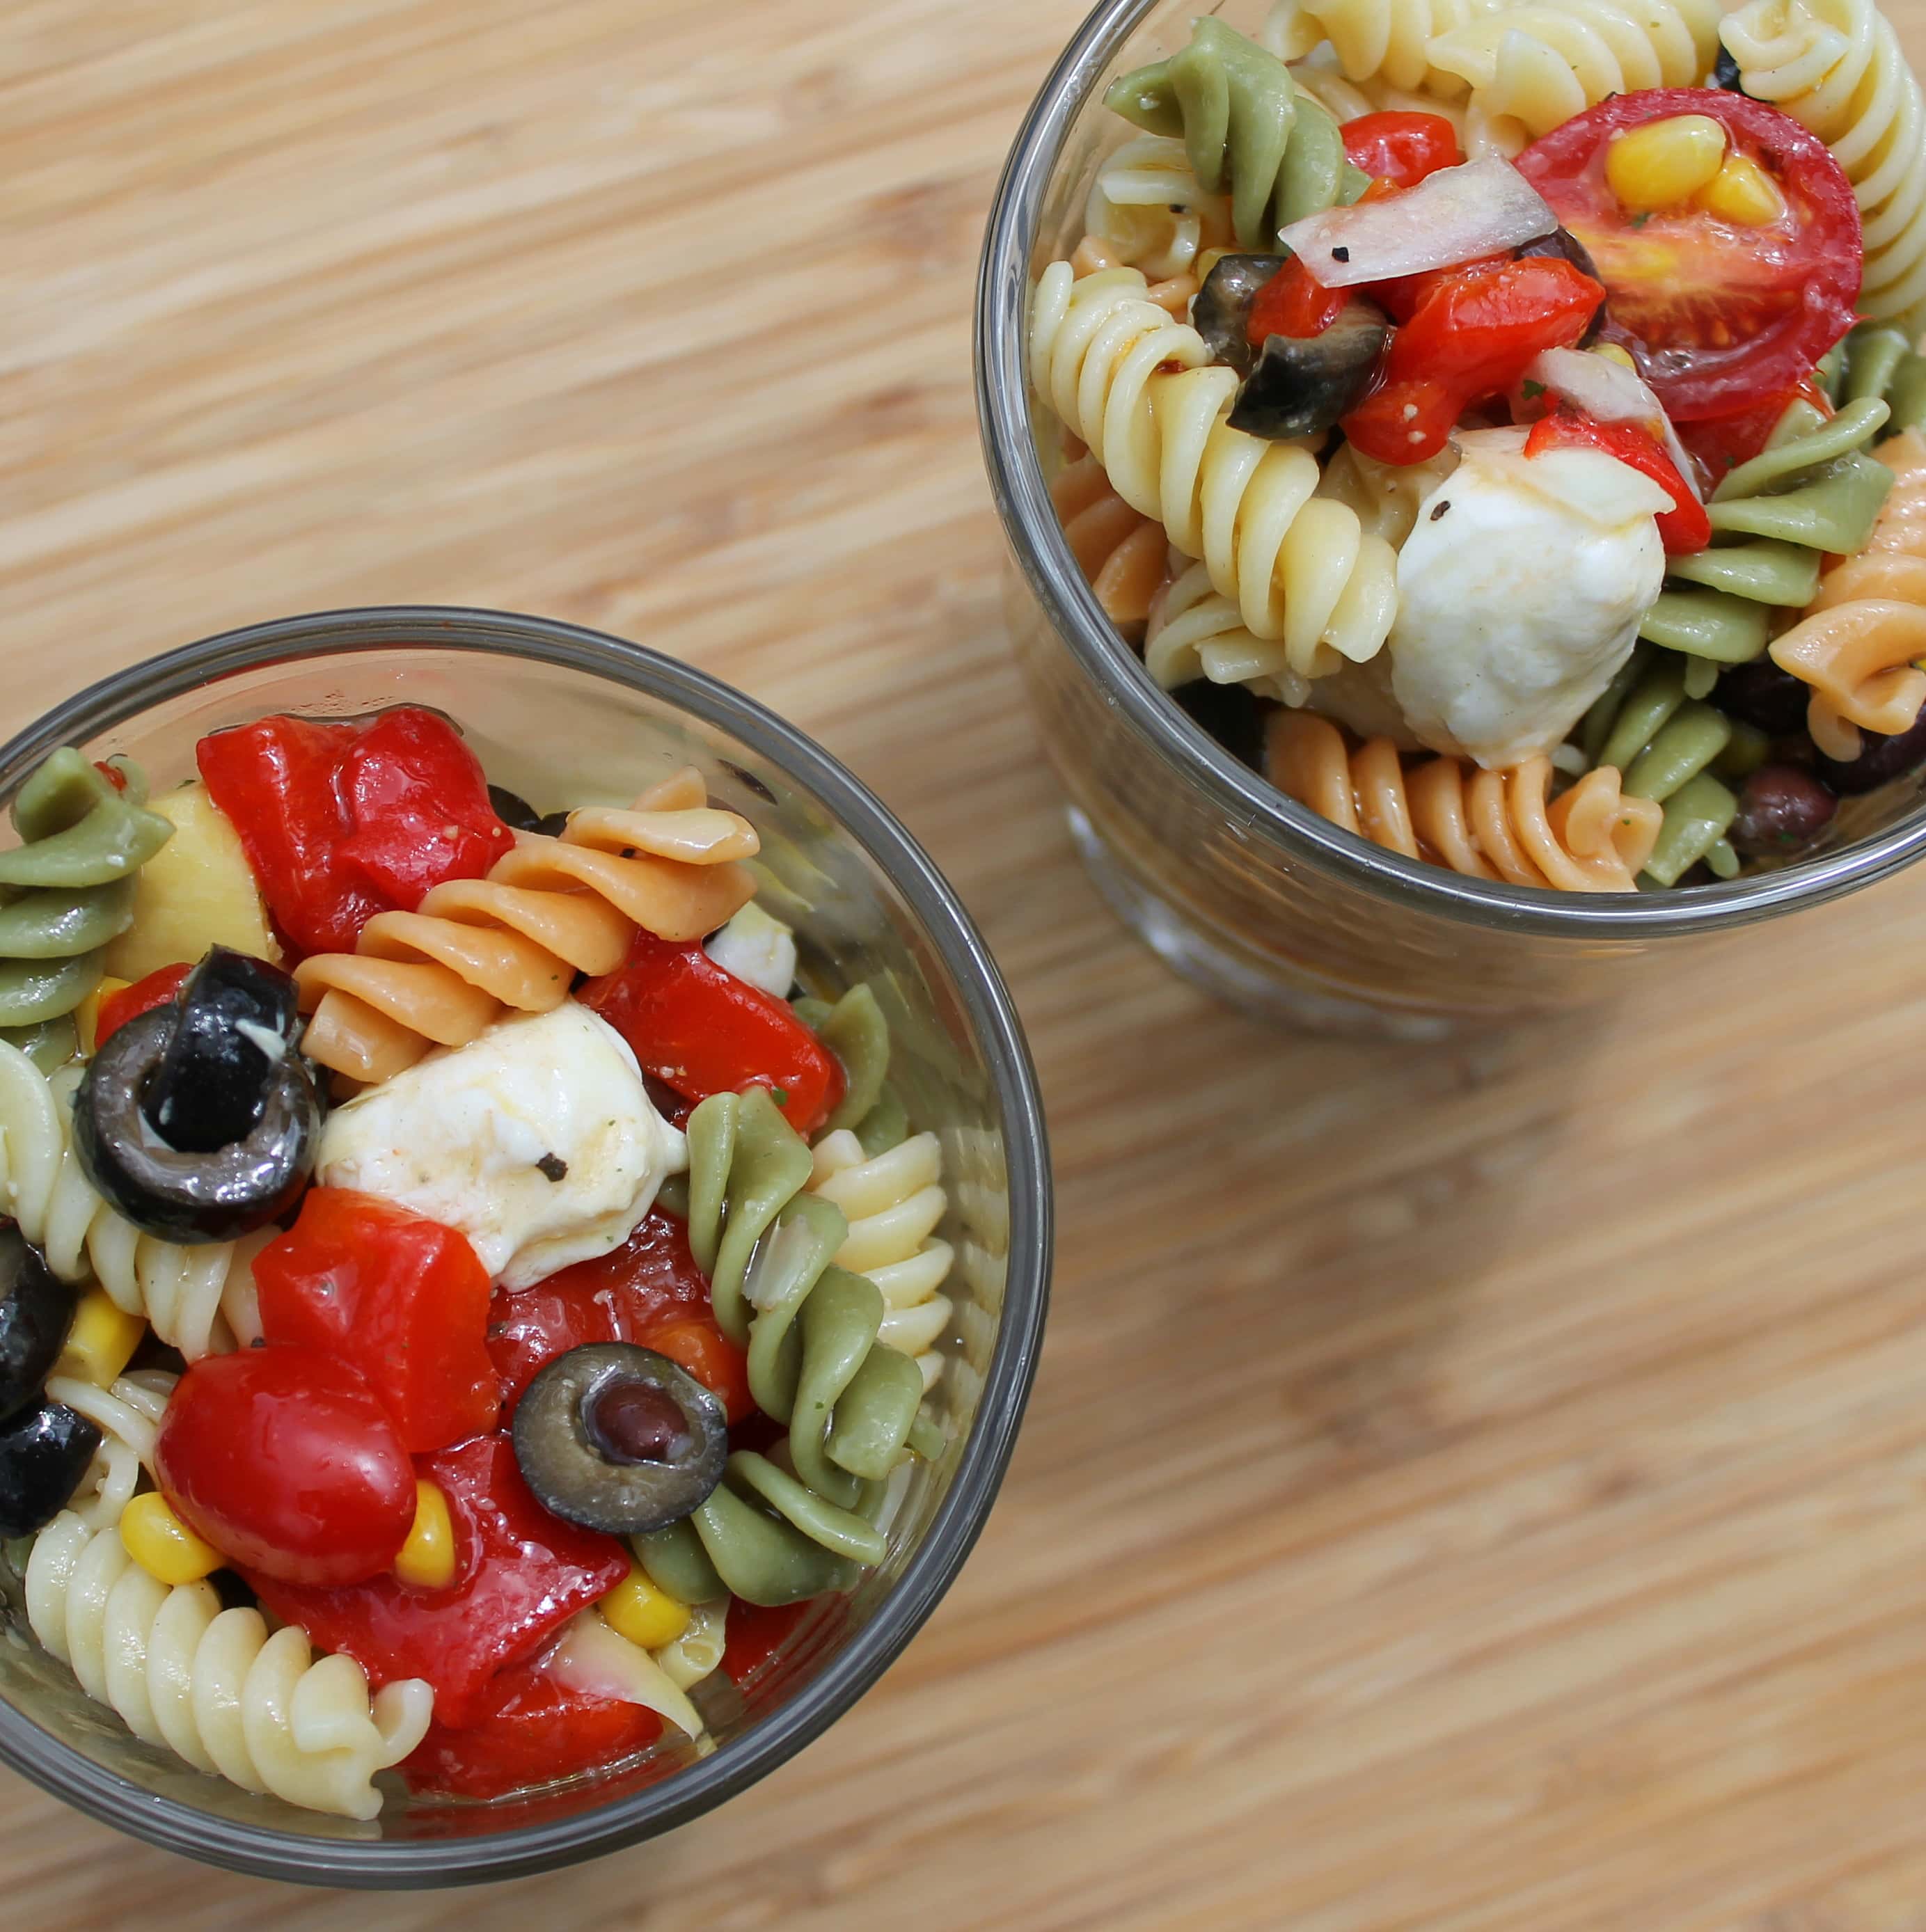
It’s almost July 4th weekend, so I am preparing a bunch of dishes for me to trek down to the beach.
I tend to make food that can marinate for a day or two so that I have time to make it without rushing around right before we leave. This time around, I decided to make a pasta salad based off my mom’s version.
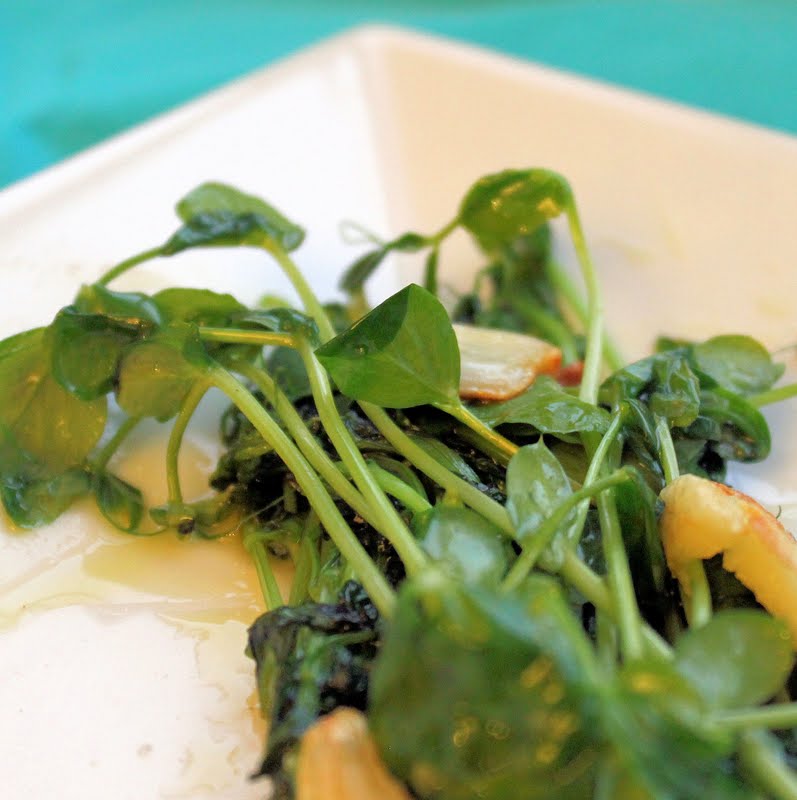
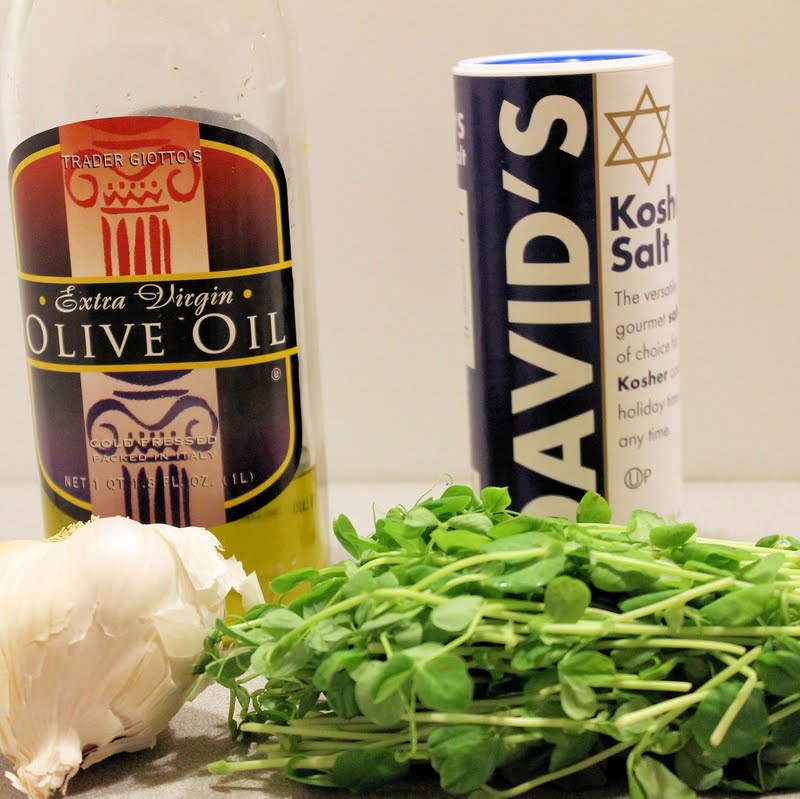
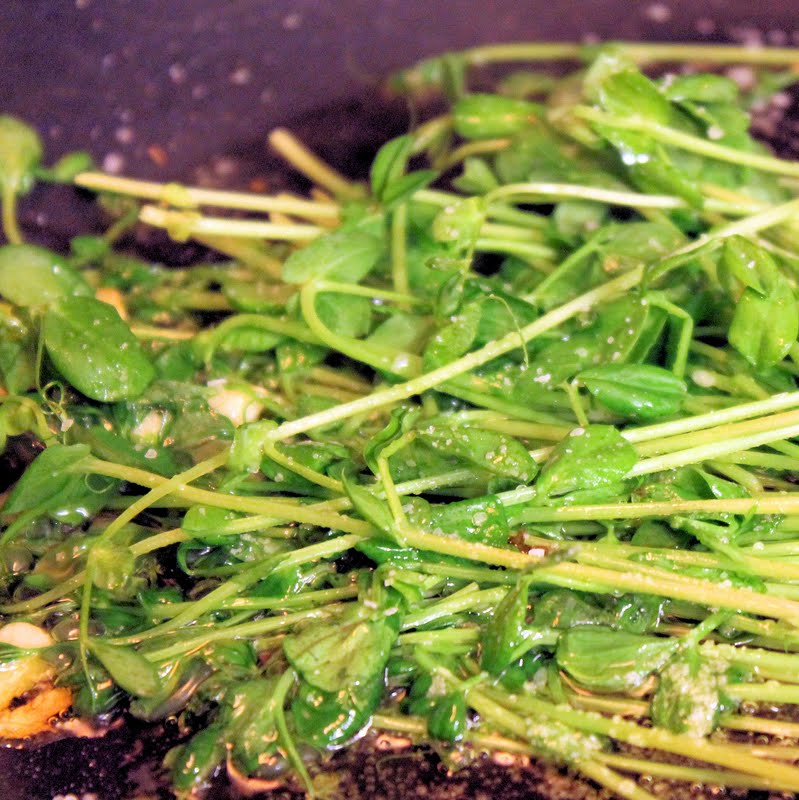
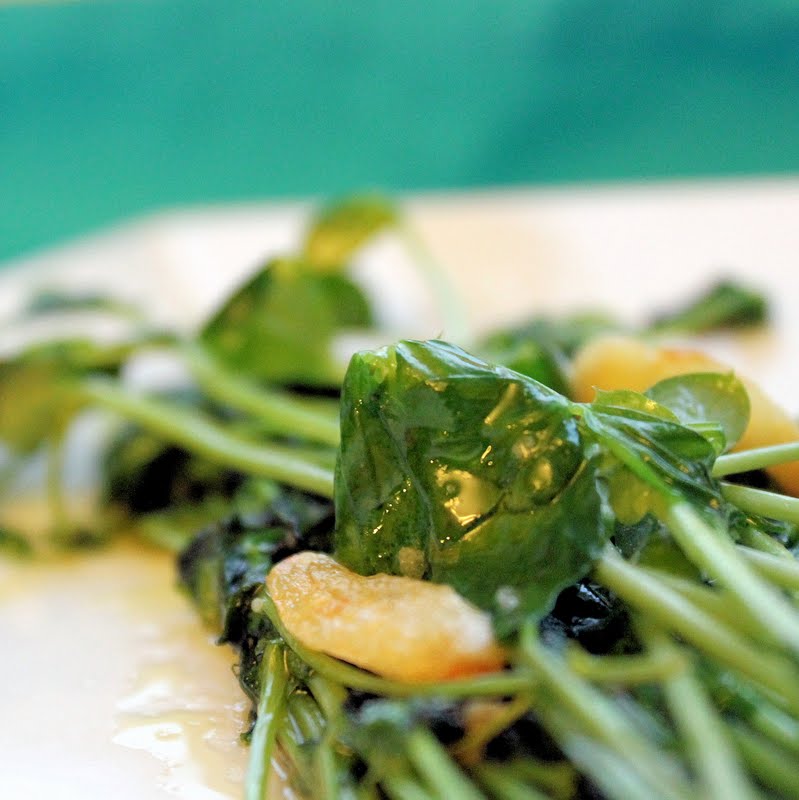
Pea tendrils (or pea shoots) are the leaves from a snow pea plant. They have a bit of a spinach-pea taste, delicate and very tasty. Before receiving them in my CSA share, I just thought they were used in a stir fry or as a topping. But these little guys are really delicious in a simple saute.
Ingredients:
Pea tendrils
1 teaspoon olive oil
3 garlic cloves, smashed and cut in half
Salt, to taste
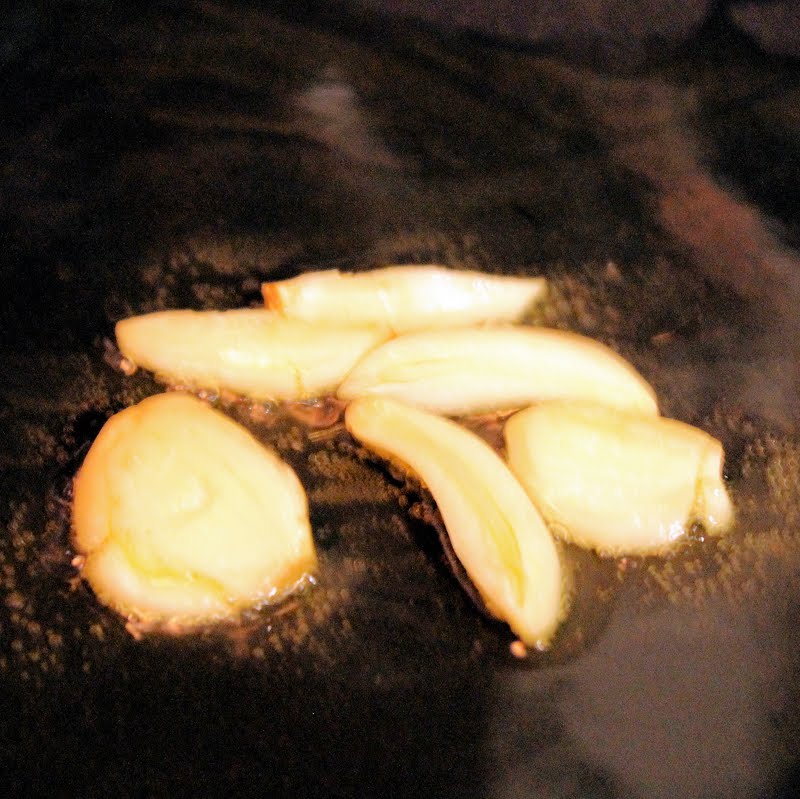
Heat the olive oil in a saute pan over medium-low heat. Add the garlic cloves and cook for 2 minutes, until sizzling but not browned.
You can either remove the garlic, or keep it in there to add more garlicky flavor. Add the pea tendrils and salt to taste.
Saute for 1-2 minutes until slightly wilted but still maintaining its shape. That’s it! So simple, so yummy.
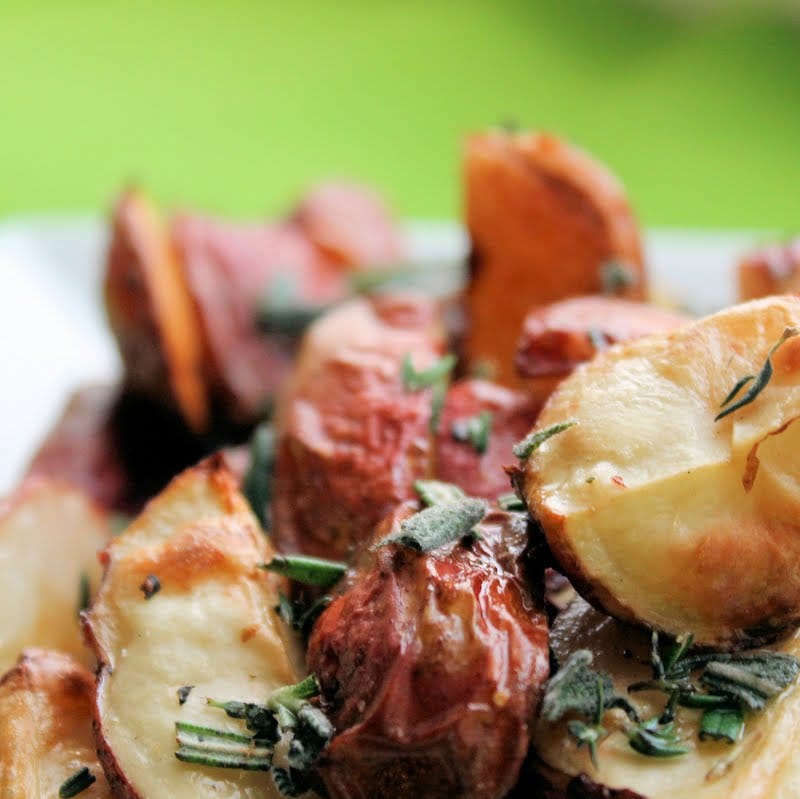
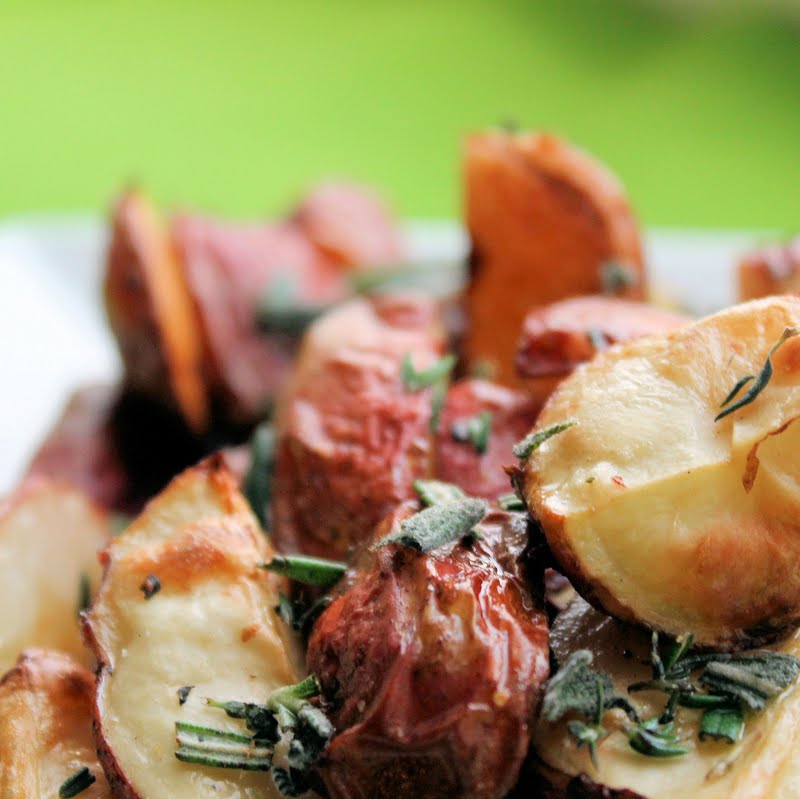
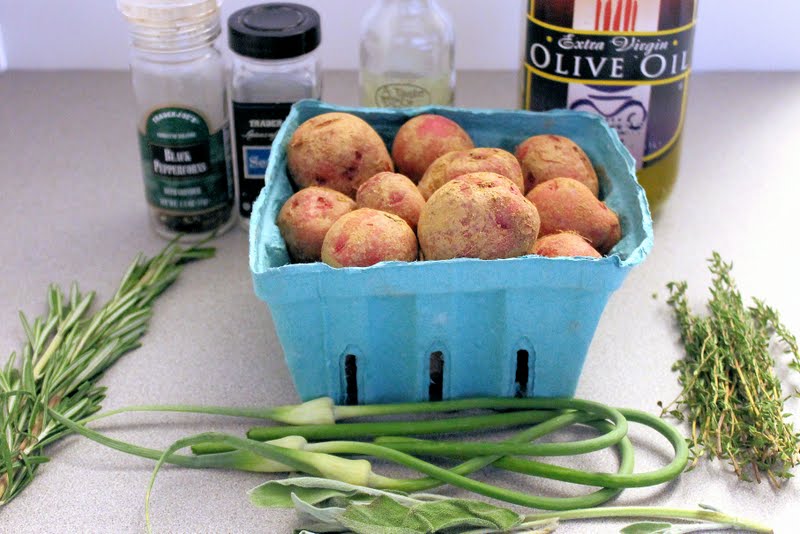
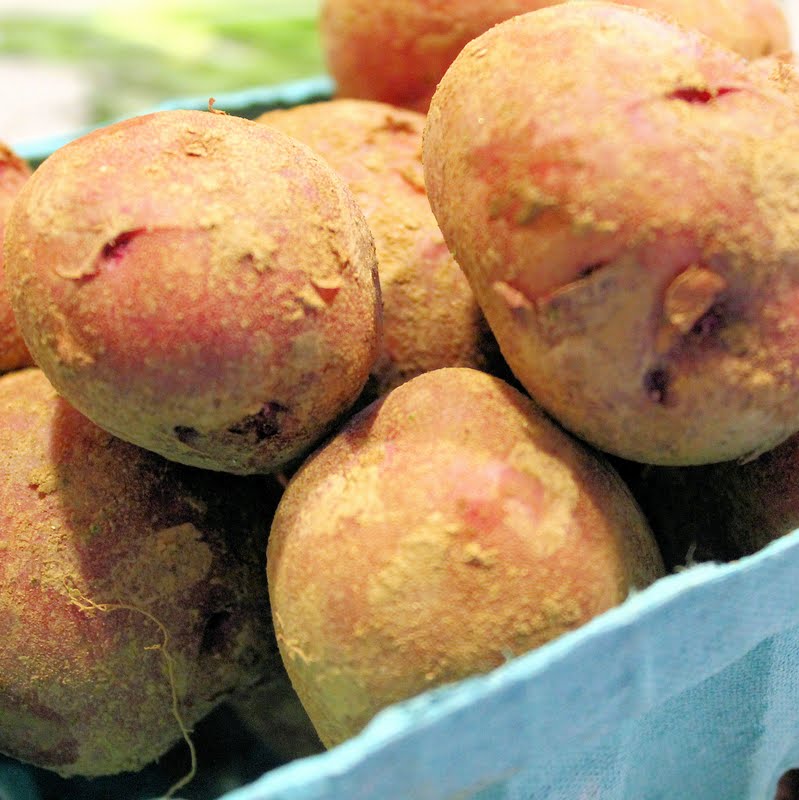
I was so excited to receive red potatoes in my CSA share this week. I love roasted red potatoes with fresh herbs, but I had a little bit of white truffle oil left that I wanted to use. I found this recipe for Truffled Roasted Potatoes from Cooking Light which sounded delicious.
Ingredients:
1 small container of red potatoes, washed and quartered
2 tablespoons olive oil
2 garlic scapes, chopped
Salt and pepper, to taste
1 tablespoon white truffle oil
1 teaspoon each of chopped fresh thyme leaves, sage leaves, and rosemary
Preheat your oven to 450 degrees. Wash your red potatoes thoroughly, but gently. (The skin of red potatoes is fragile). I used a little brush to lightly buff off the dirt under warm running water.
before
after
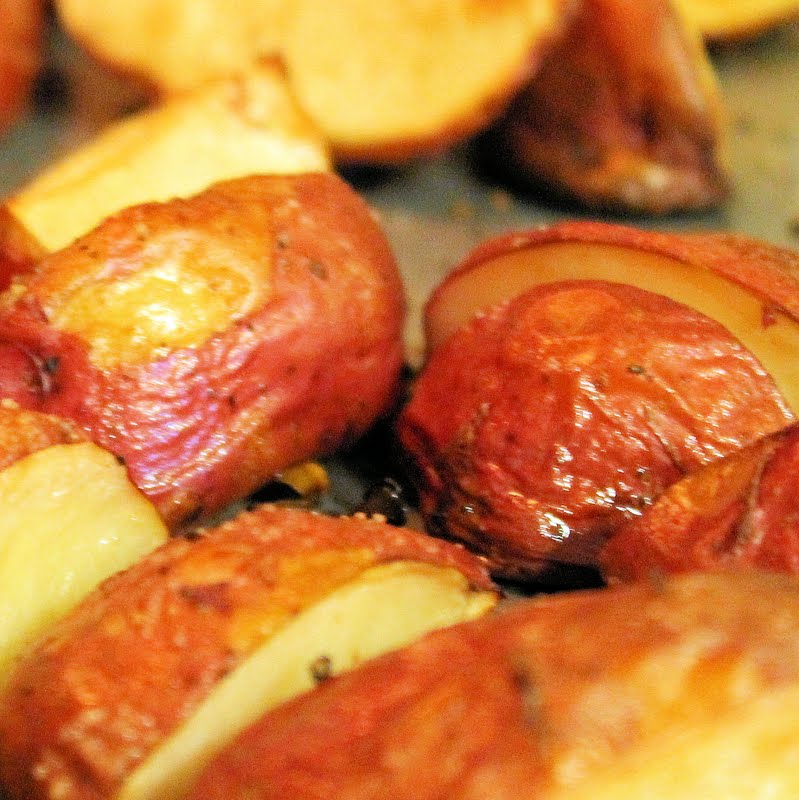
Cut the potatoes into wedges: quarters for the larger potatoes, and halves for the smaller potatoes, and arrange on a cookie sheet.
Drizzle olive oil over the potatoes and sprinkle with garlic scapes, salt and pepper.
Bake at 450 degrees for 30 minutes or until the potatoes are brown and slightly wrinkled.
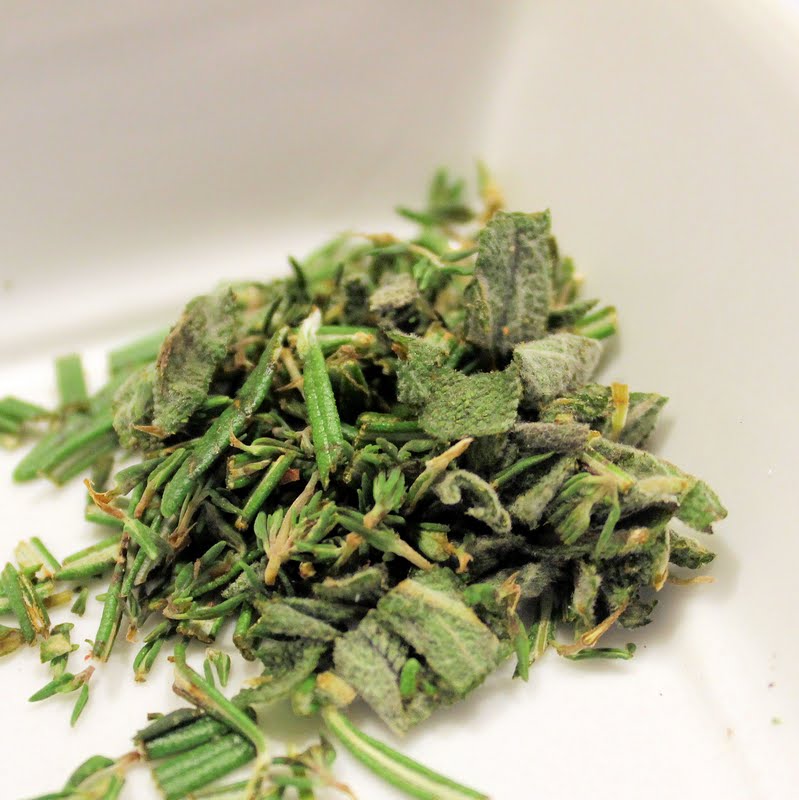
While the potatoes are cooking, chop your thyme, sage, and rosemary. Combine.
Remove the potatoes from the oven, drizzle with truffle oil, and sprinkle with the herb mixture.
This was fantastic. I honestly couldn’t stop eating the potatoes. Truffle oil is such a great ingredient, although it is a bit of a splurge. Truffle oil is usually added at the end of a dish, the oil is too delicate to be subjected to high heat. A little bit of truffle oil goes a long way though so do not overpour! When I make this recipe in the future, I plan on using normal minced garlic (2-3 cloves), the garlic scapes were quite burnt from the oven so I didn’t get any of the garlic taste from them. Boo.