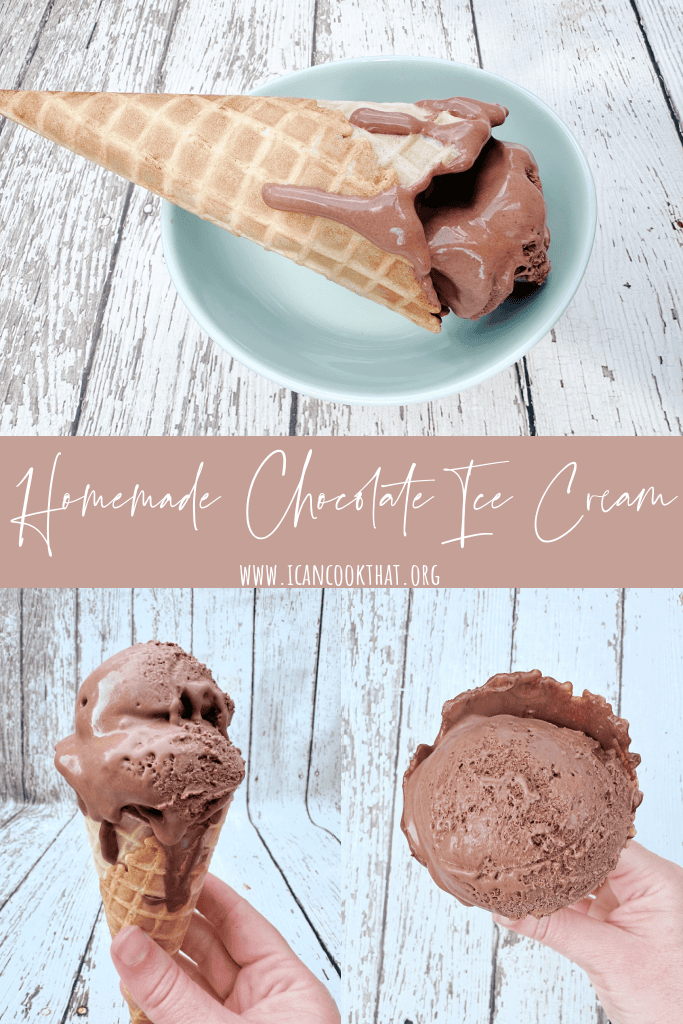
So, I’ll be honest. I was actually trying to make a different ice cream than what I ended up with. But this oh so chocolatey Homemade Chocolate Ice Cream is so delicious, it was quite a happy mistake!
My original goal/inspiration was to recreate the now defunct Capogiro’s scuro gelato – the most decadent and beautifully silky dark chocolate gelato. It was my mom’s favorite gelato ever and she’s basically been chasing the high of Capogiro’s scuro gelato ever since they sadly closed in December 2018.
I didn’t quite get to dark chocolate status this round (don’t you worry, that will be a future post!), but I am pretty sure this is the best chocolate ice cream ever. EVER. Don’t believe me? Try this recipe out for yourself!
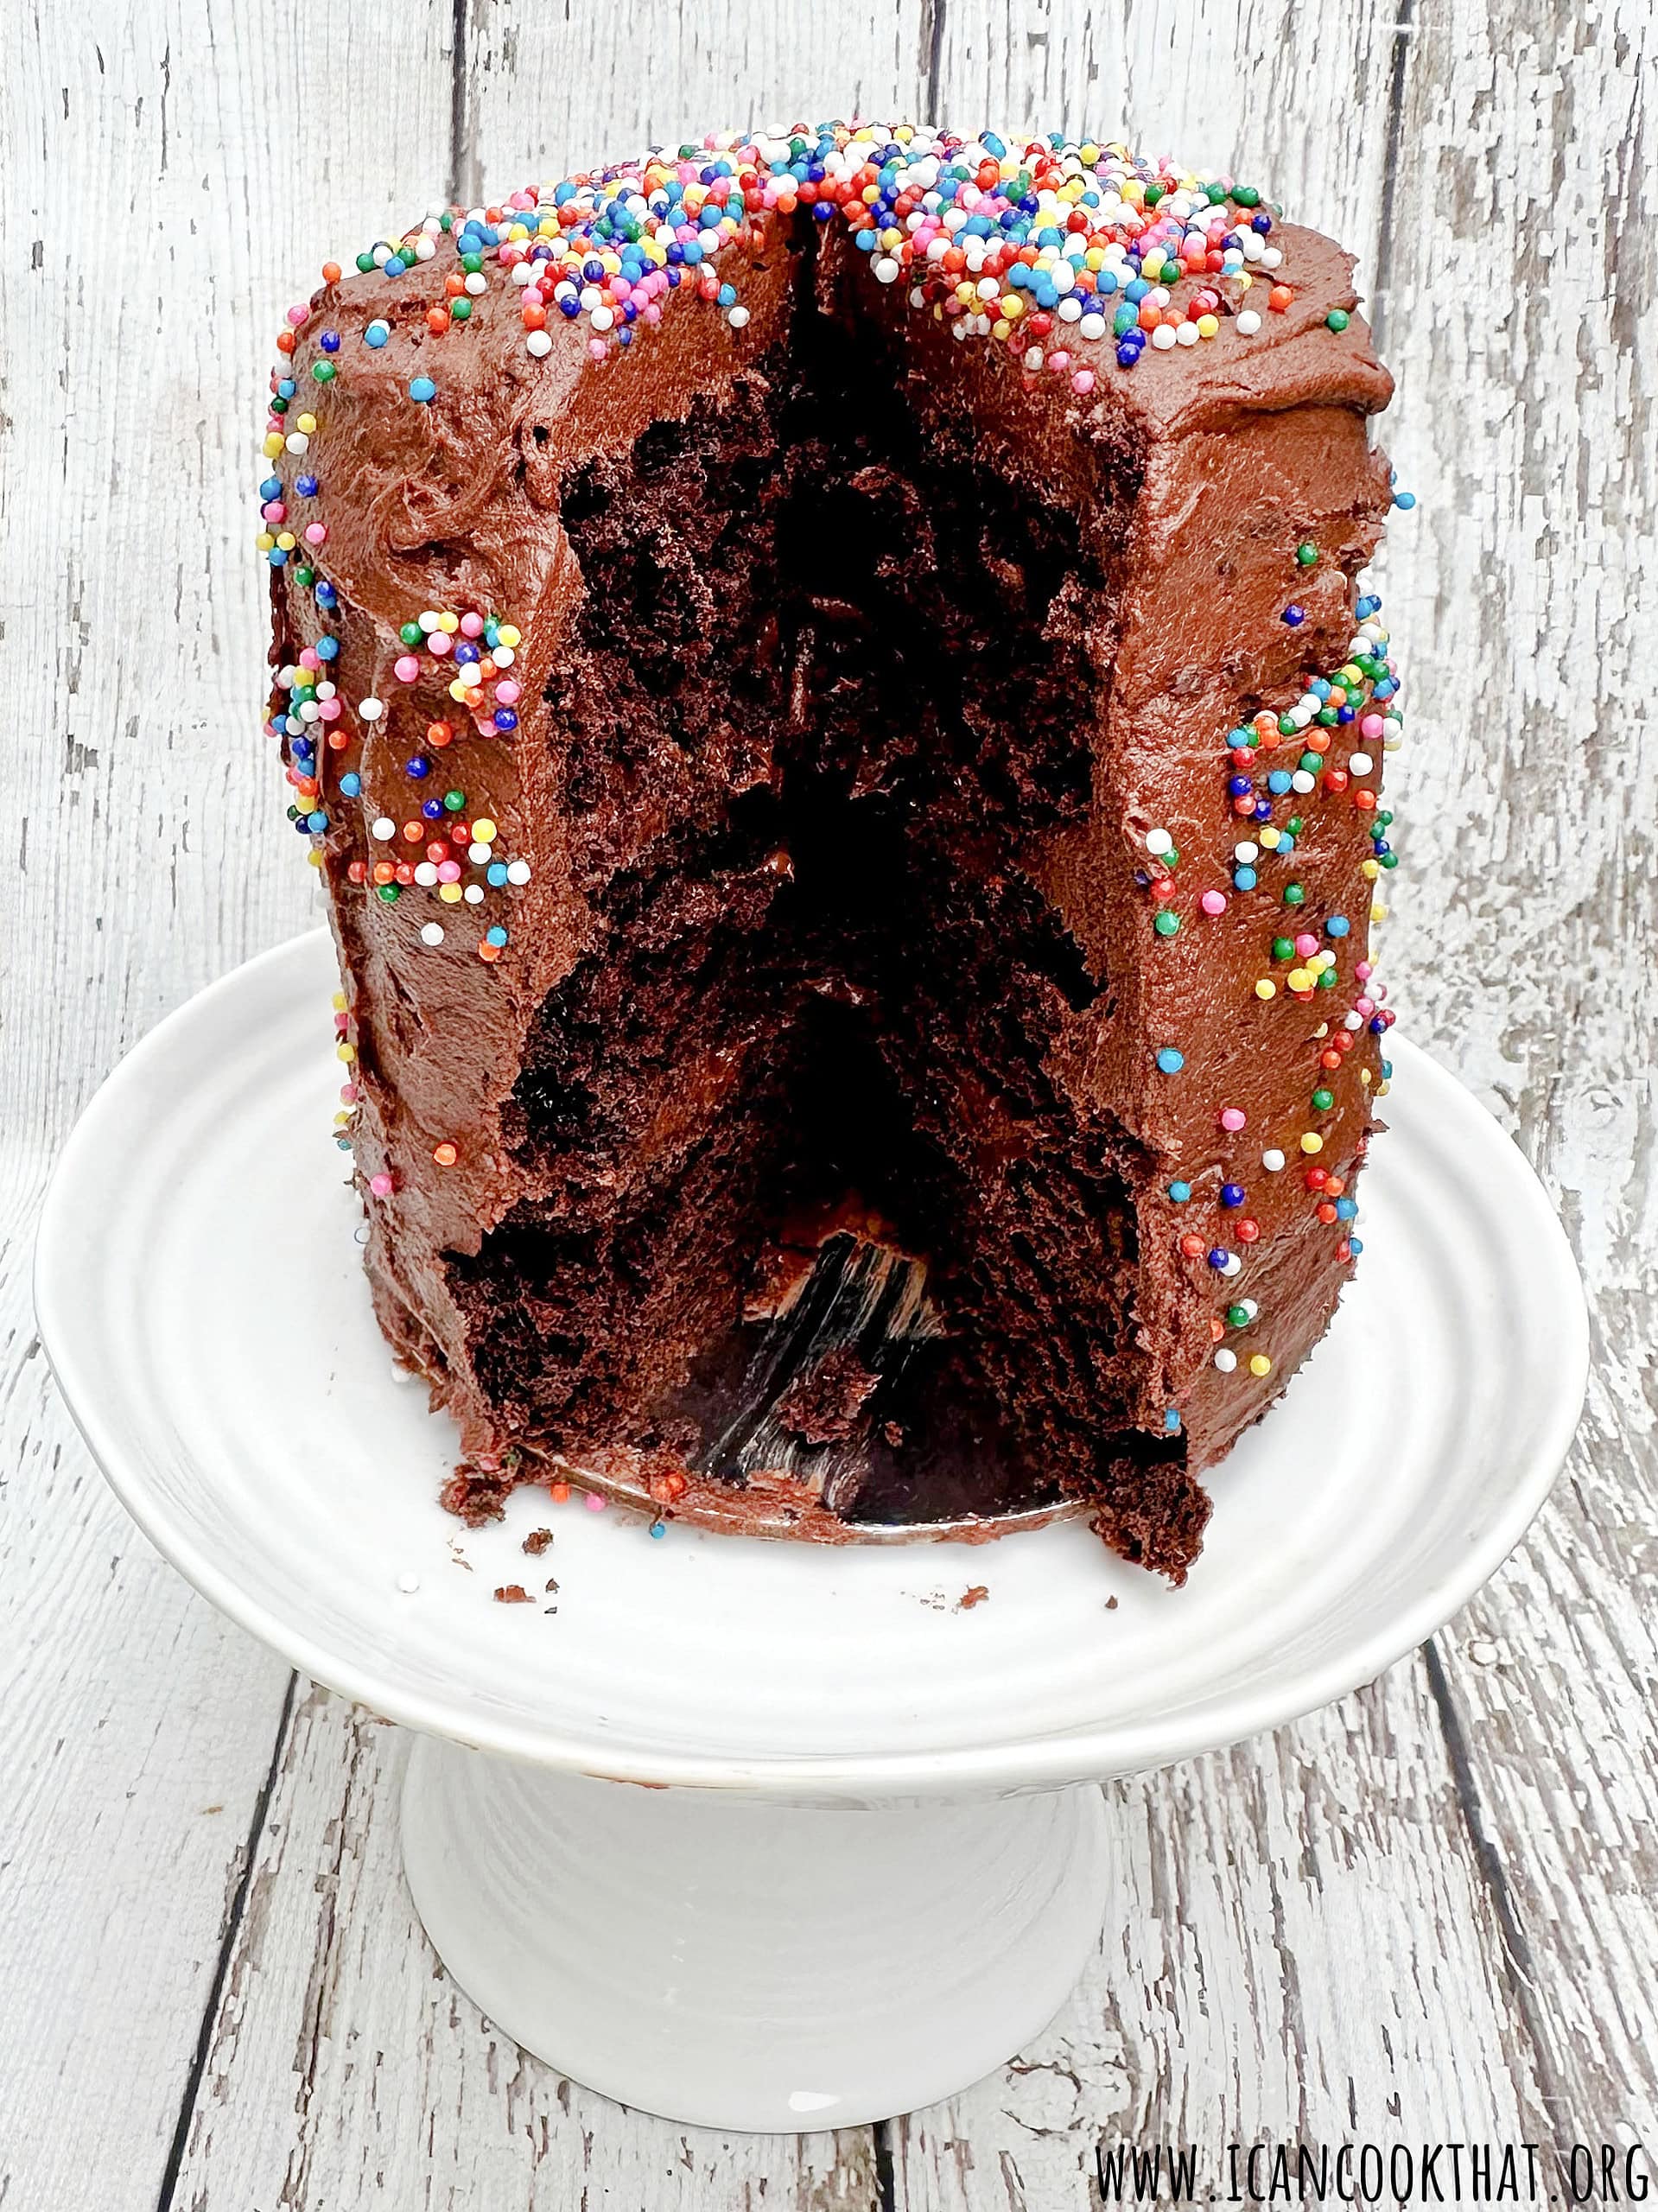
My niece’s first birthday is soon, and my sister asked if I would make her smash cake; what an honor!
My sister requested a chocolate cake with chocolate frosting, and as this will be my niece’s first taste of chocolate, I have to make sure it’s tasty with a few more baby-friendly adjustments.
This Chocolate Smash Cake is a fluffy, chocolatey mini cake perfect for (obviously) first birthdays, or for smaller get togethers.
Ingredients:
Chocolate Cake:
3/4 cup whole milk
1 teaspoon apple cider vinegar
1 cup flour
1/4 cup cocoa powder
1/2 teaspoon baking powder
1 teaspoon baking soda
1/4 teaspoon salt
1 tablespoon vanilla extract
2/3 cup coconut sugar
1/4 cup applesauce
Chocolate Frosting:
1 stick (1/2 cup) unsalted butter, at room temperature
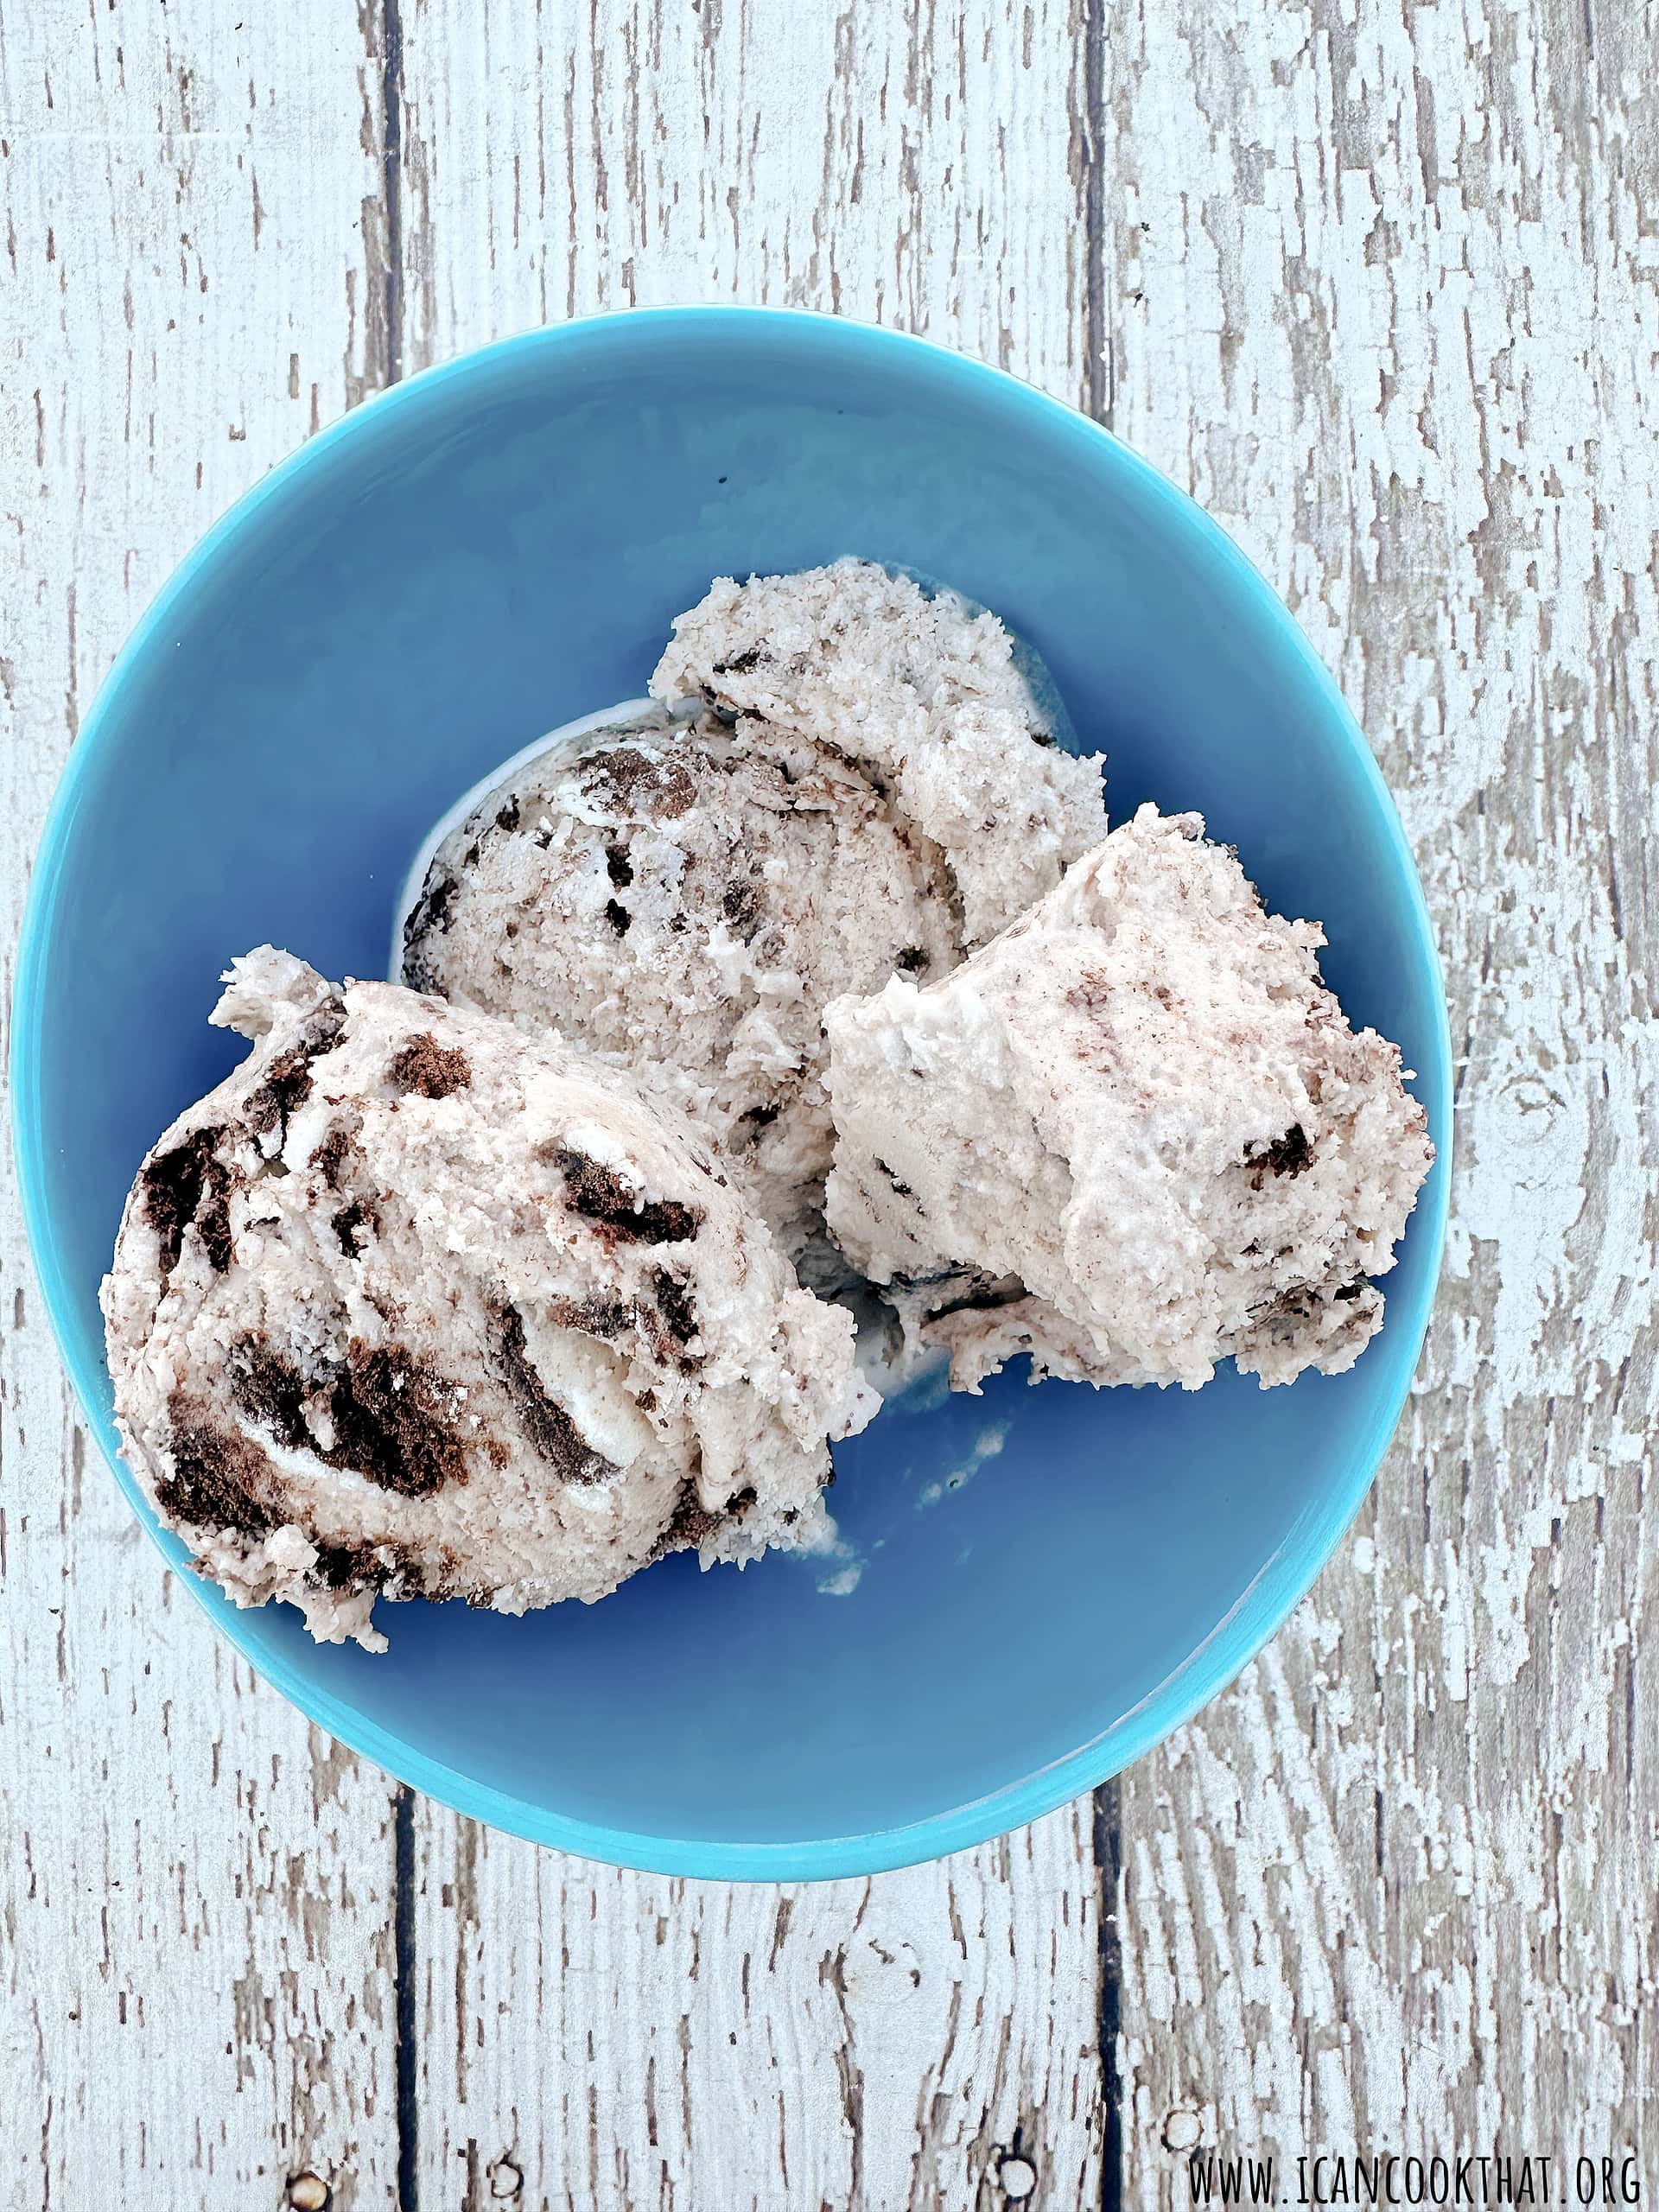
I love Oreos. They are easily my favorite cookie since childhood, and I used to eat them almost every day as my after-school snack. So, it probably goes without saying that Cookies and Cream Ice Cream is one of my favorite ice creams.
I have no idea why it took me so long to make my own homemade cookies and cream ice cream, but after making this recipe, I don’t think I’ll ever be able to go back to the store-bought stuff!
This recipe for Homemade Cookies and Cream Ice Cream uses just 6 ingredients. Because there are no eggs in this recipe, there is no heating of the milk mixture so it comes together pretty quickly. Note that this recipe does still require you to refrigerate the mixture overnight and churn the ice cream the next day.
Ingredients (makes 1 quart):
3/4 cup sugar
1 cup whole milk
2 cups heavy cream
1 tablespoon vanilla extract
1/4 teaspoon salt
1 sleeve Oreos (regular, not Double Stuf), chopped
Note: I was sent samples of Vanilla Bean Powder, Vanilla Beans, and Vanilla Extract from The Sweet Bean in order to write this post for Homemade French Vanilla Ice Cream. All opinions are my own.
I am still madly in love with my ice cream maker (paid link) and the delicious homemade ice creams I can now make! Today, I am excited to share a classic: Homemade French Vanilla Ice Cream, featuring The Sweetest Bean‘s Pure Vanilla Bean Powder.
The Sweetest Bean, a woman-owned company based in Colorado, sources its organic, whole-bean vanilla from Uganda where they employ a team who hand cures all of their gourmet vanilla. The company has a purpose of building an economy on the other side of the world, and is committed to one-single-supplier, their workers, their children, their futures, with the hope of true sustainable economic growth. Ugandan vanilla beans are known for their strong vanilla flavor, so the flavor stands out more in recipes.
source: thesweetestbean.com
The Sweetest Bean’s Pure Vanilla Bean Powder is made from 100% pure, ground, Ugandan bourbon vanilla beans. The vanilla beans spend months curing our beans in the sun, and then are ground fresh, to produce a fine powder rich in flavor and aroma. Pure vanilla bean powder was touted recently by the Wall Street Journal as the next spice you need to own. The powder can be used in both savory and sweet recipes, including barbecue rubs, soups, stews, fish, pork, smoothies, and coffee — vanilla adds a touch of sweetness without additional sugar.
The Sweetest Bean sent me their 3 Product Gift Set and have generously offered an additional set to one lucky I Can Cook That reader! Details for the giveaway after the recipe.
So let’s get churning! This Homemade French Vanilla Ice Cream has just 6 ingredients. The egg yolks, which makes this ice cream “French Vanilla,” adds wonderful richness without competing with the vanilla flavor.
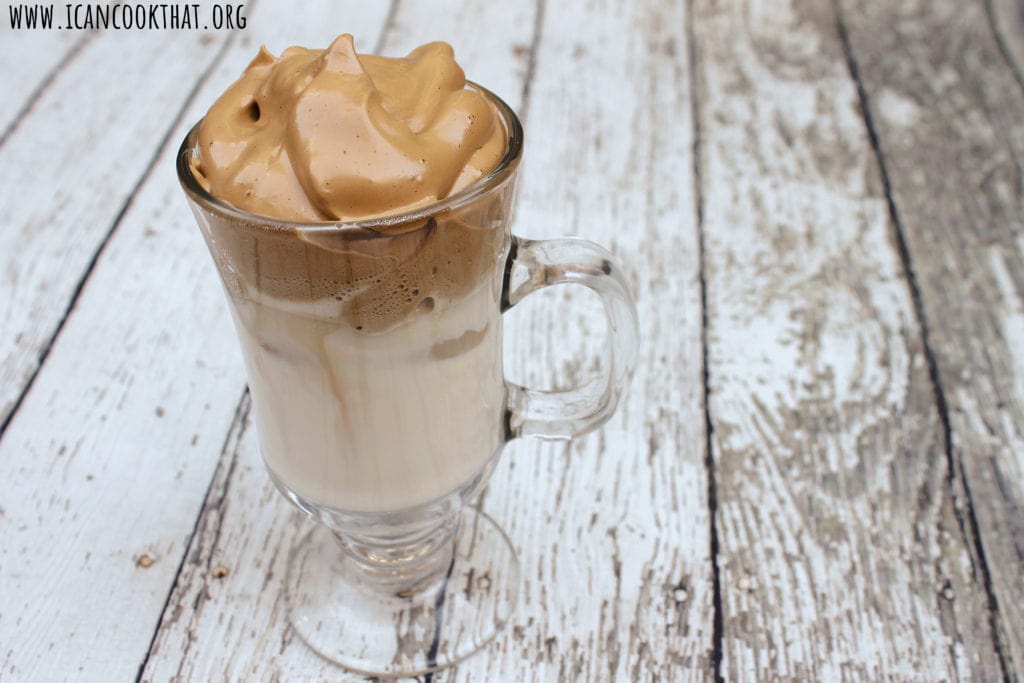
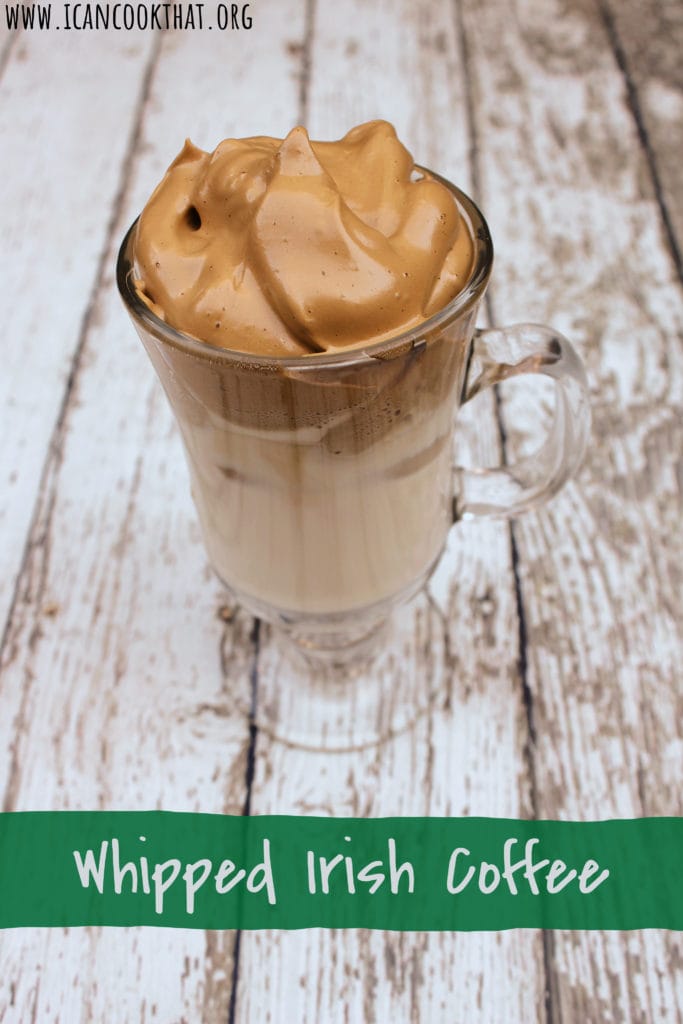
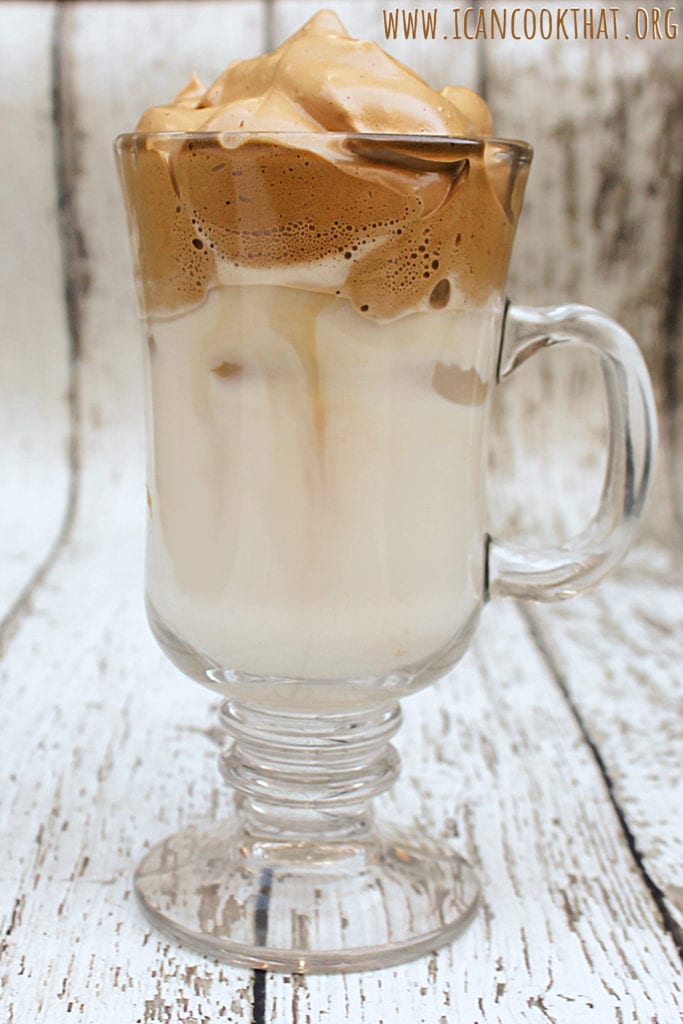
I know I’m a little late to the “whipped coffee” or Dalgona coffee trend, but I wanted to hold out for St. Patrick’s Day to make this awesome Whipped Irish Coffee!
Whipped coffee became quite the trend early in the pandemic. It’s made by whisking equal parts instant coffee granules, sugar, and hot water until it holds stiff peaks. You serve it on top of hot or warm milk, and then stir to combine, so adding whiskey to this lovely mix seemed like a no brainer to me.
Irish coffee is actually traditionally enjoyed the opposite way… kind of. Whiskey, sugar, and coffee are stirred together and then topped with heavy cream, while this whipped Irish coffee has the milk on the bottom rather than on top (although with whipped coffee, you do stir the milk and coffee together before enjoying). This recipe is to make the whipped Irish coffee iced, but you can easily adapt it to use warmed milk instead. If you’re looking for another spin on an Irish coffee, I also have a recipe for a Frozen Clover Cocktail you might want to try.
Ingredients (makes 2 servings):
1/4 cup instant coffee granules (normal ground coffee won’t work!)
1/4 cup sugar (or brown sugar to make it a touch more of a traditional Irish coffee)
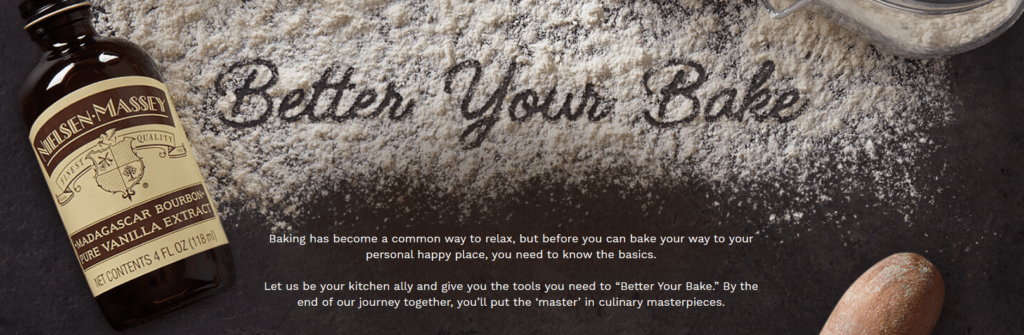
Note: I received a bottle of Nielsen-Massey’s Madagascar Bourbon Pure Vanilla Extract in order to write this post. All opinions are mine alone. #BetterYourBake
How is it already nearly October? Every fall, time seems to speed up and the months for the rest of the year just fly by! With so much happening in the fall, it makes sense that it feels like things are in fast forward. But it’s important to take the time to step back and do something you enjoy amid all the chaos.
Nielsen-Massey was nice enough to remind me of that, and sent me a bottle of their Madagascar Bourbon Pure Vanilla Extract to do what I love: bake! Recent studies have shown that creative activities, such as baking, help people feel more relaxed and happier in their everyday lives.
But in order to benefit from the mindful nature of baking, basic techniques must first be mastered. To help learn some new baking tricks, Nielsen-Massey has developed “Better Your Bake,” which delivers technique-based videos, tips and tools to help home bakers learn and master the basics of baking with the help of Nielsen-Massey products.
I was asked to show off my newest learned skill after watching some of Nielsen-Massey’s videos: how to temper chocolate. It takes some effort, but it’s easier than an initially thought!
Tempering chocolate is typically used for special occasions and results in a smooth, glossy chocolate coating that dries shiny and has a crisp snap
The process involves divvying and melting a portion of the chocolate, stirring in the reserved chocolate and heating the whole batch to the required temperature
Tempered chocolate is great for cake pops, fruit, candy molds and more
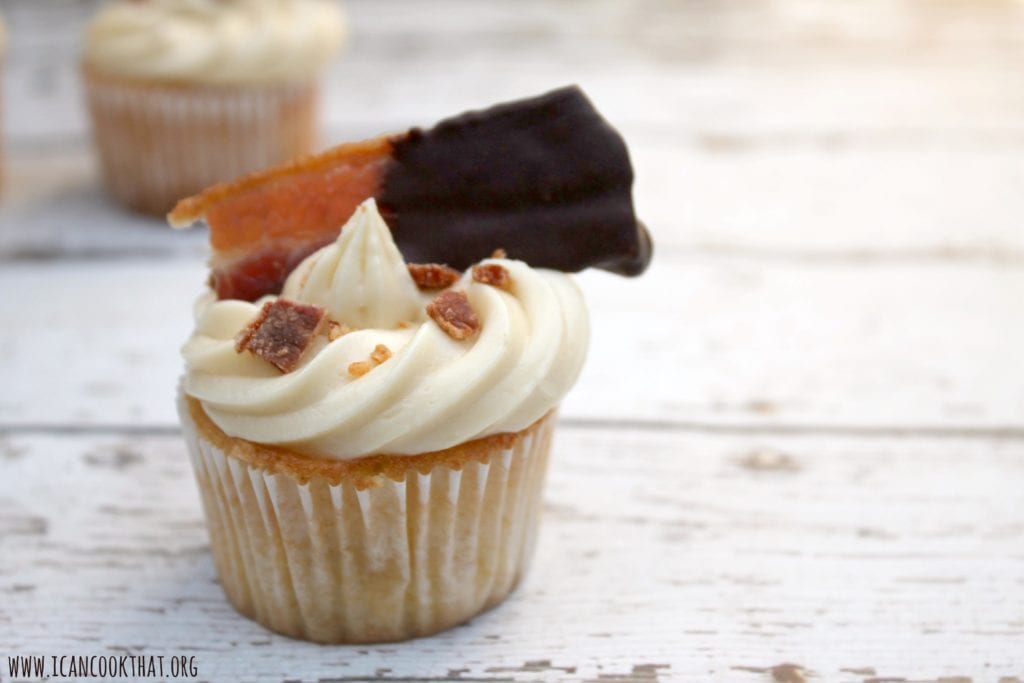
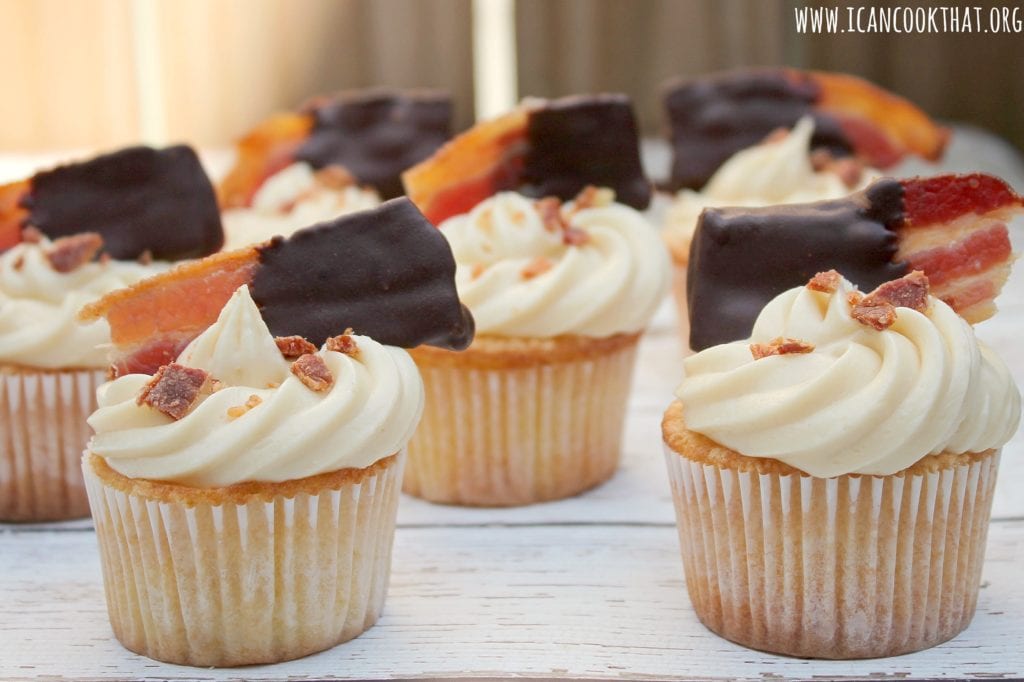
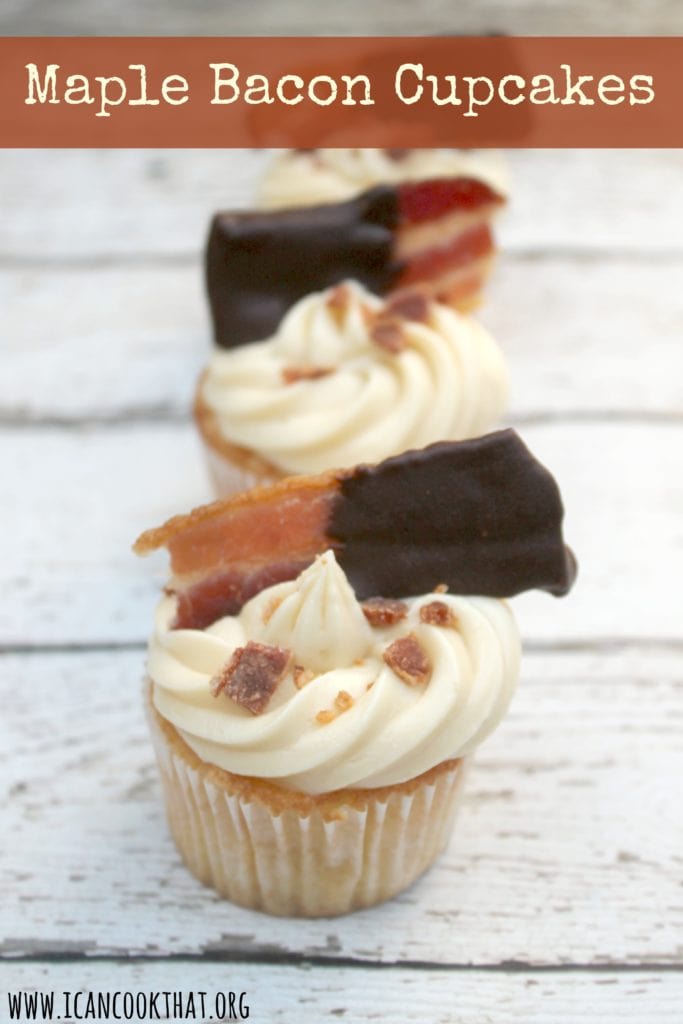
So, what could be better than chocolate covered bacon? This recipe, from Nielsen-Massey’s website, originally developed by Pastry Chef Jessica Ellington, is for Maple Bacon Cupcakes, topped with a maple buttercream frosting, crumbled bacon, and a half slice of chocolate dipped bacon. And yes, they are every bit as delicious as you are imagining!
Nielsen-Massey has a bunch of videos that are helpful for this recipe, so I’ve linked to them throughout the post.
Ingredients:
Maple Bacon Cupcakes
8 slices of bacon, cooked and crispy
8 tablespoons unsalted butter (1 stick), room temperature
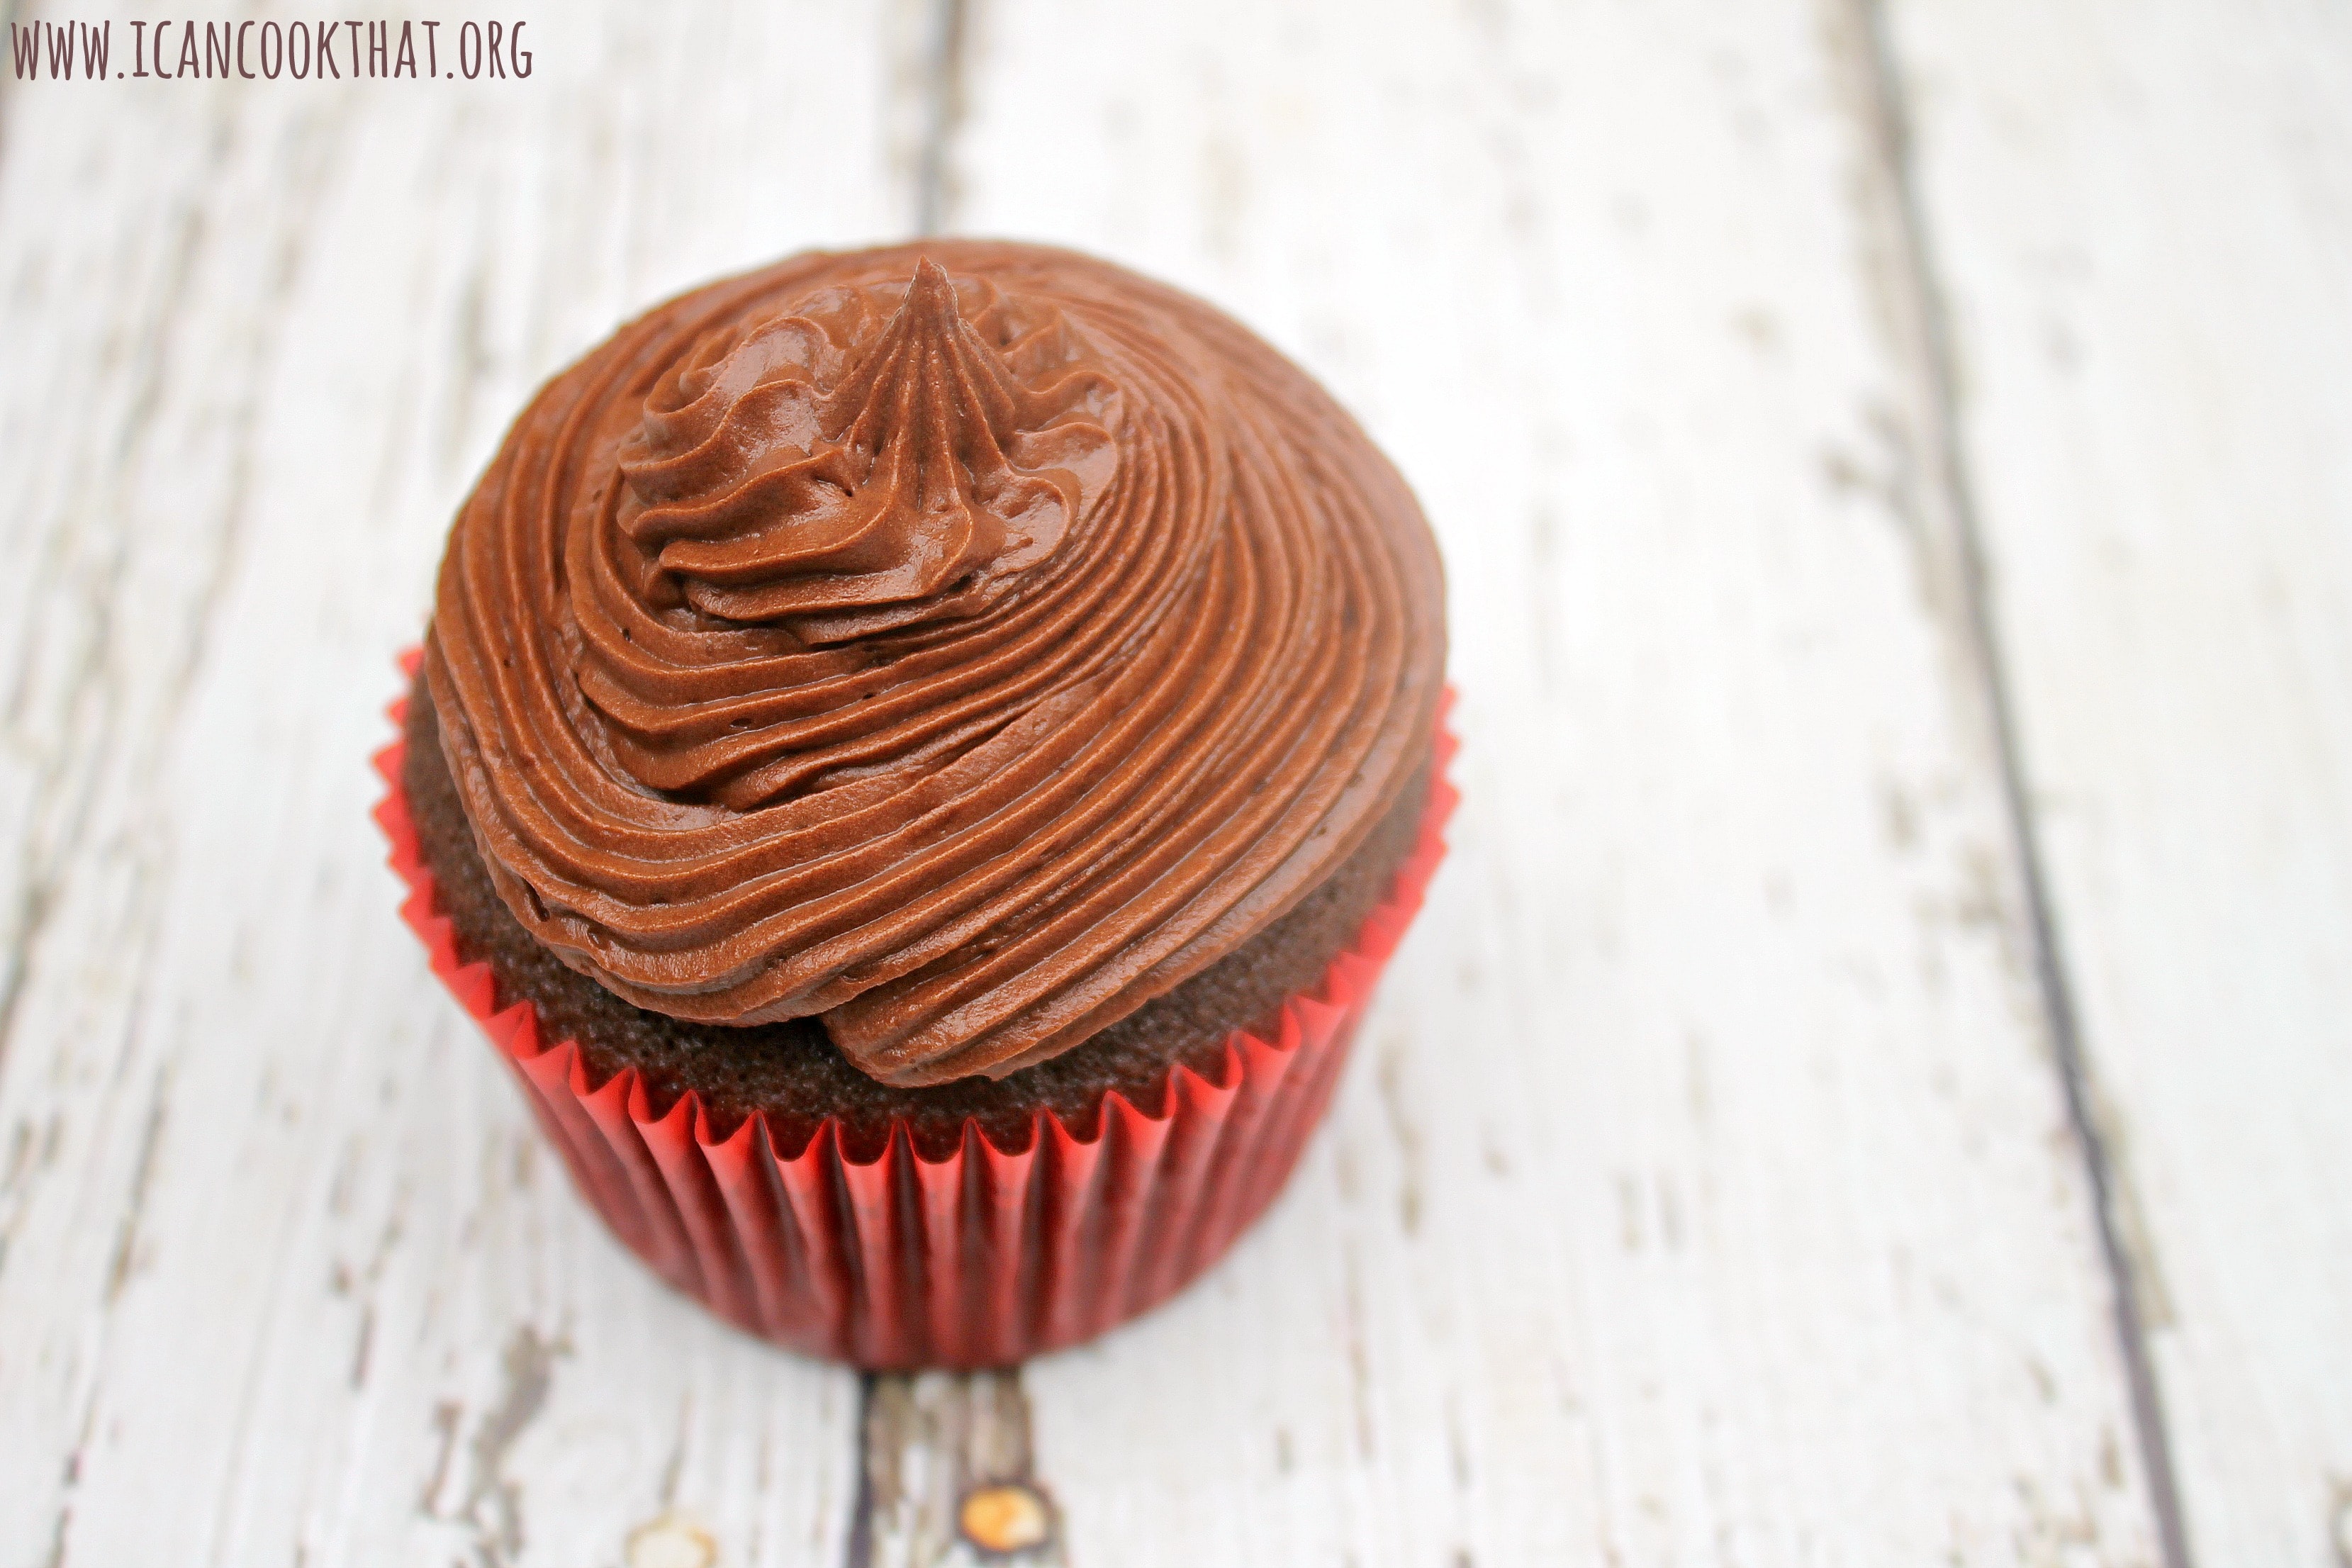
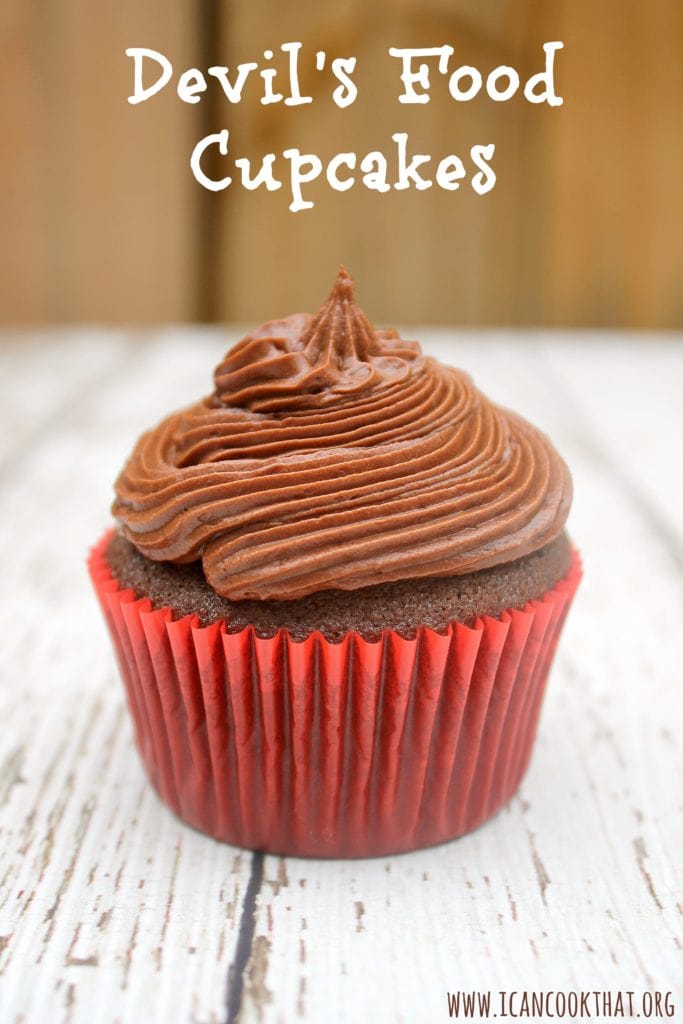
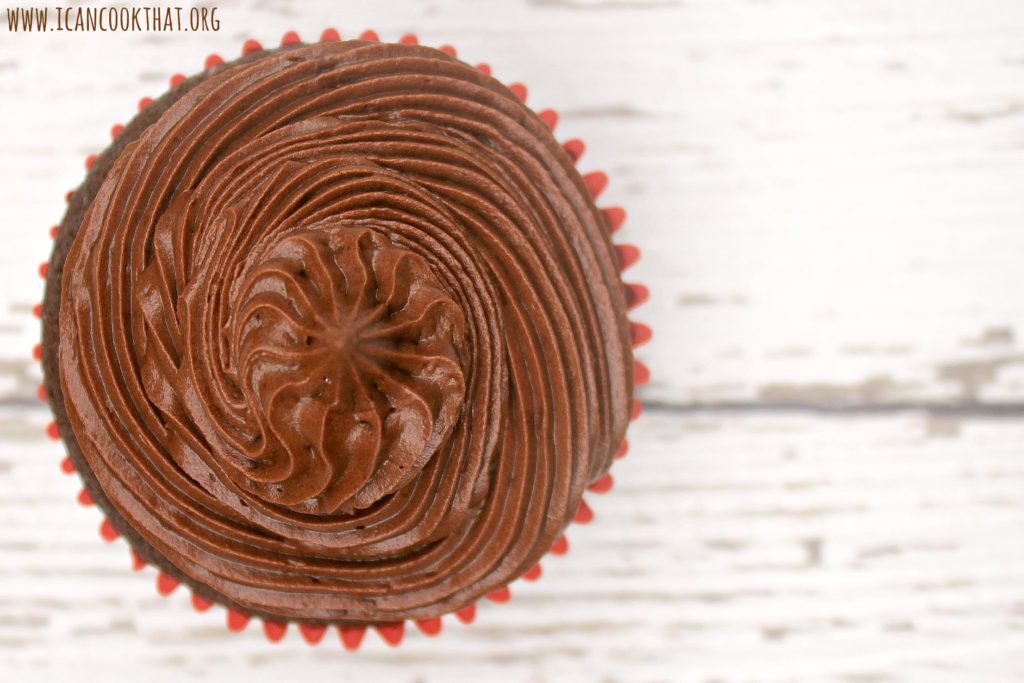
These super chocolatey Devils Food Cupcakes are most certainly going to be a favorite of the chocoholic in your life.
There isn’t anything that specifically determines a chocolate cake as devil’s food cake, but they do tend to be a bit more airy and have quite a bit of chocolate in them!
This moist and fluffy recipe for Devils Food Cupcakes also uses coffee extract to further enhance the chocolate flavor.
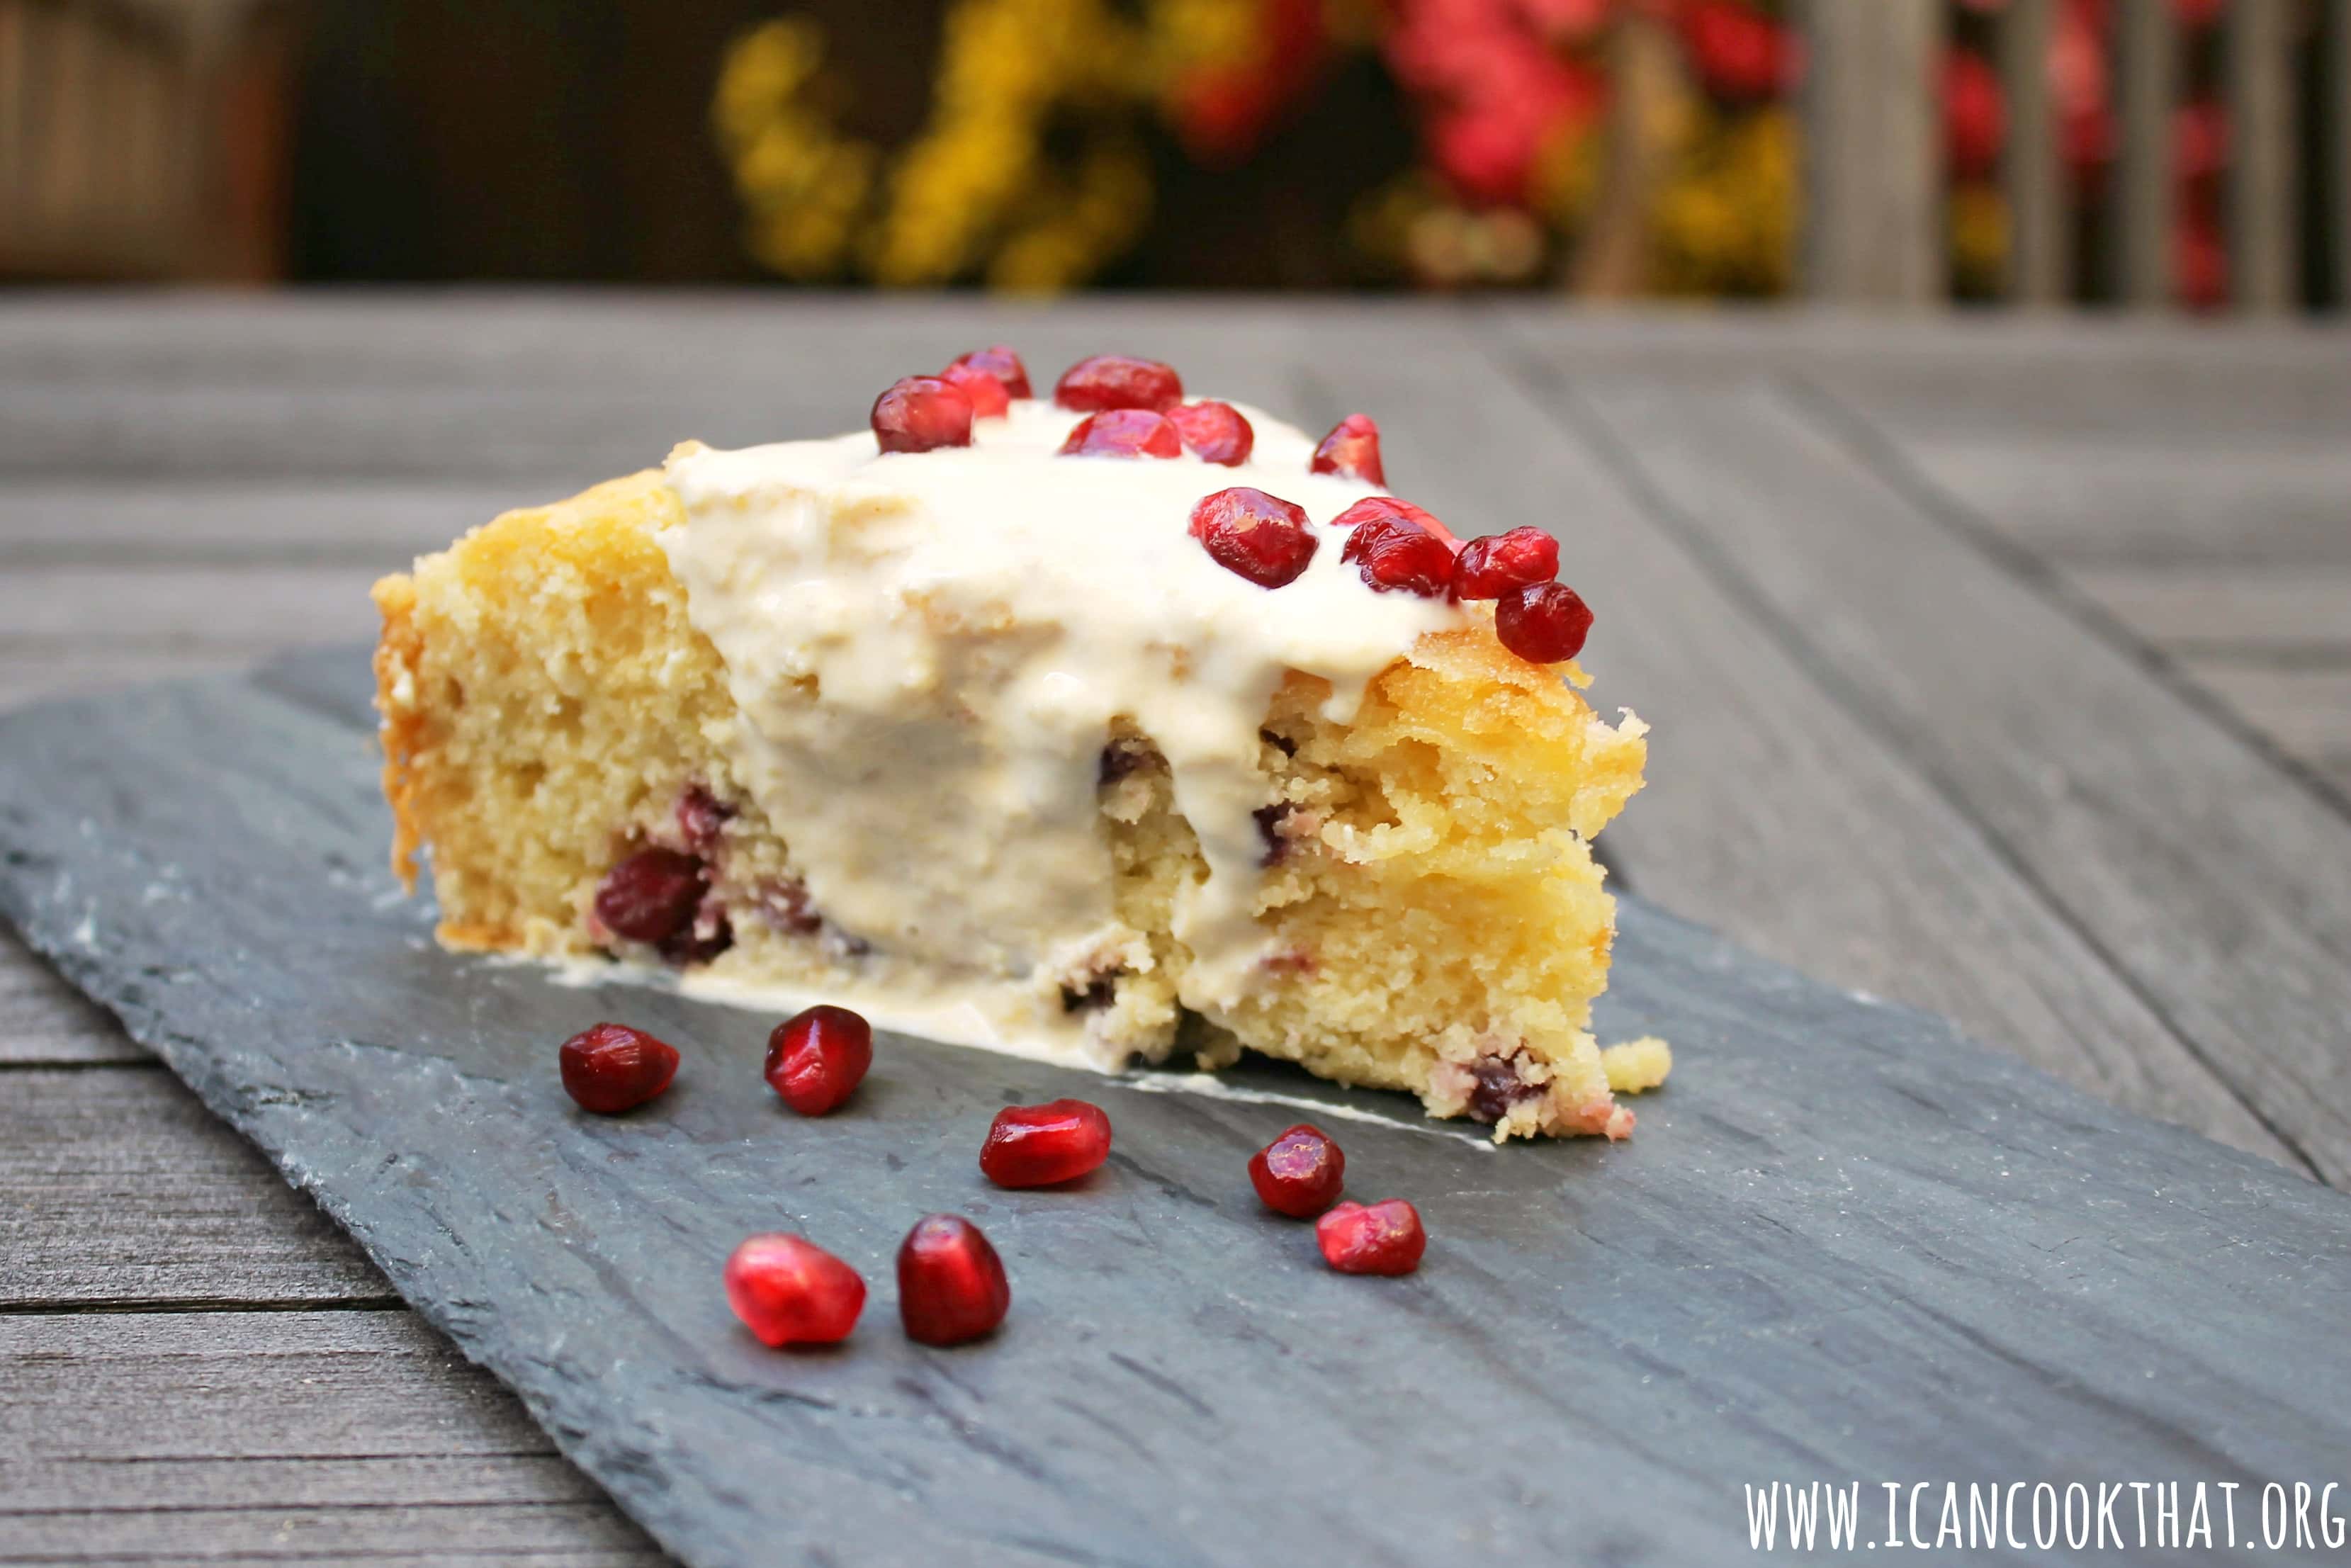
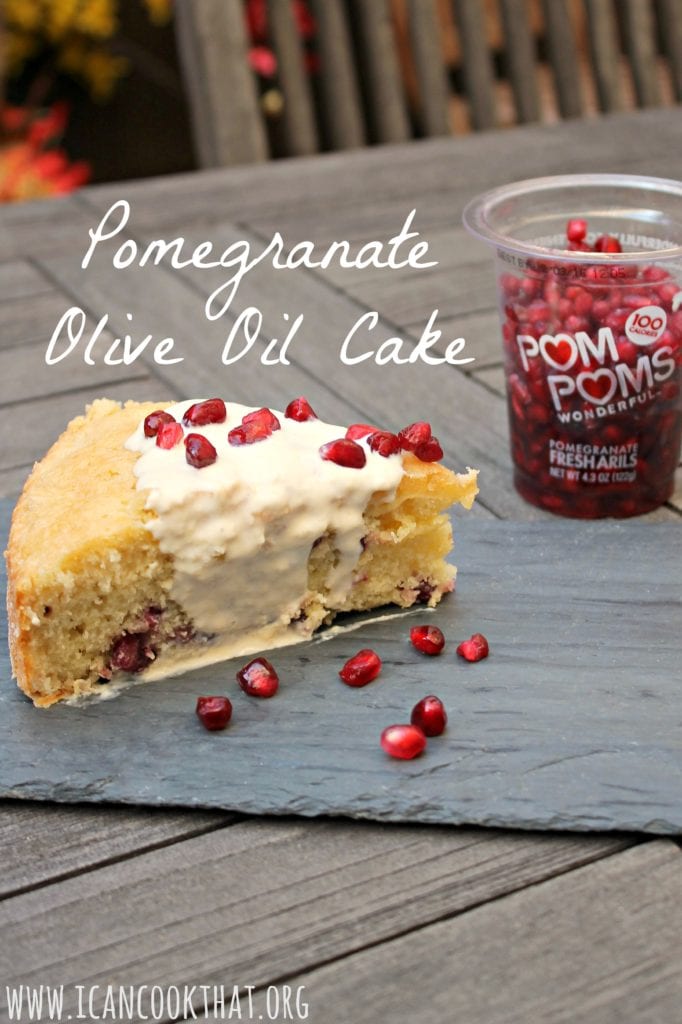
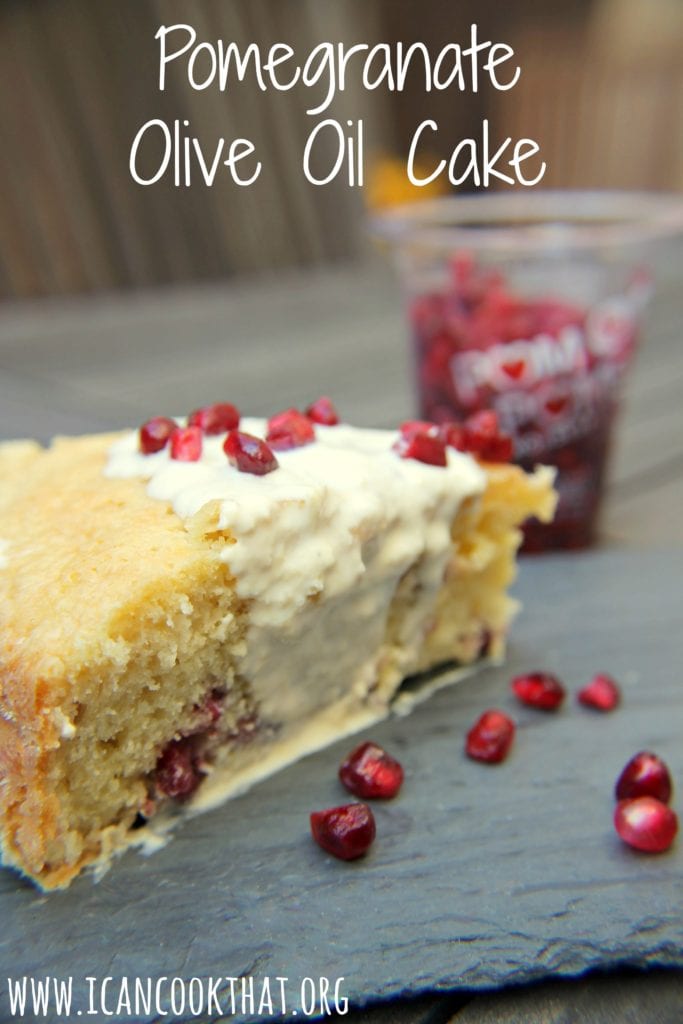
I love love love pomegranates. The burst of tanginess is awesome in both sweet and savory dishes.
It is once again pomegranate season (the season runs from ~October through ~January), so I am thrilled to be cooking again with one of my favorite ingredients.
POM Wonderful must have heard about my love of their products, because I was contacted to try out their POM POMS Fresh Arils and pomegranates. I will have a few recipes over the coming weeks, but let’s start with something a little sweet.
This recipe for Pomegranate Olive Oil Cake is from the POM Wonderful website. The Pomegranate Olive Oil Cake is topped with a Vanilla Crème Anglaise, a drizzle of olive oil, and some fresh pomegranate arils.
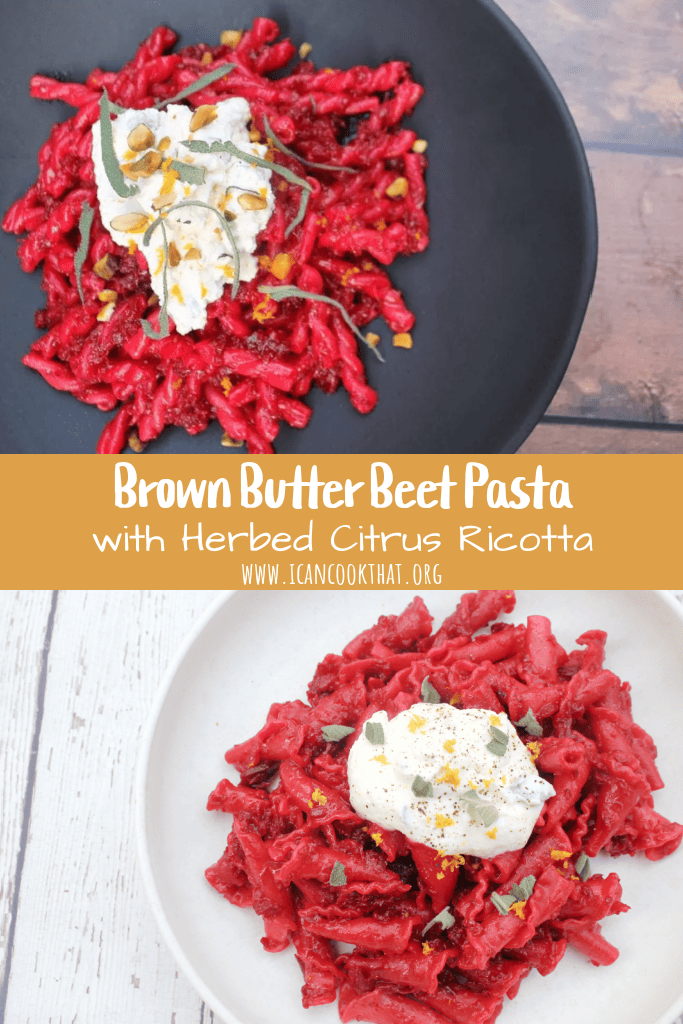
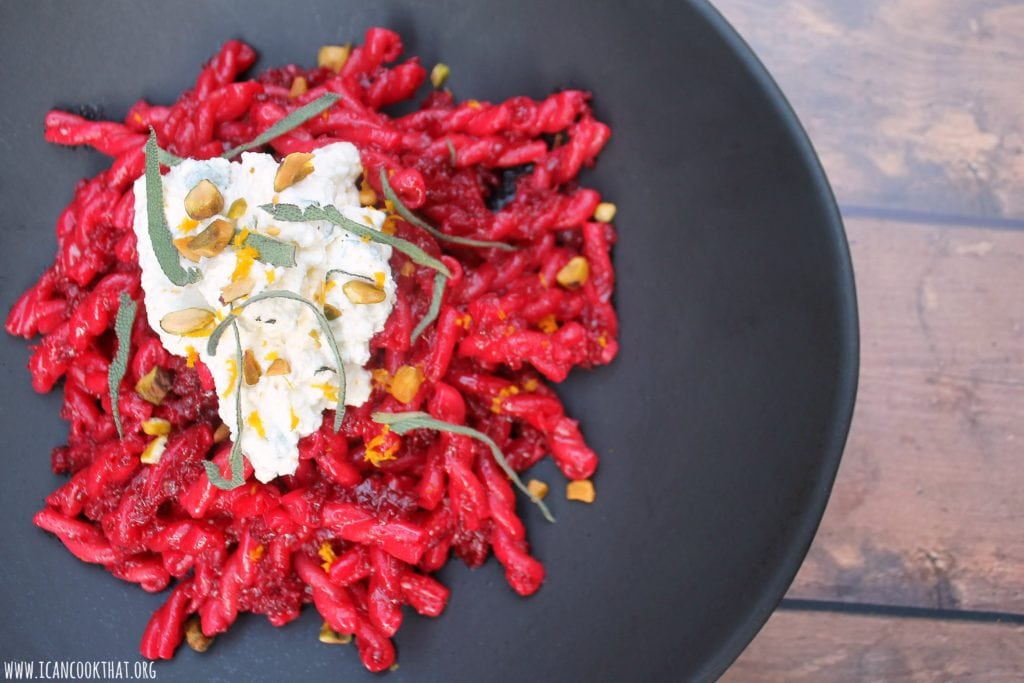
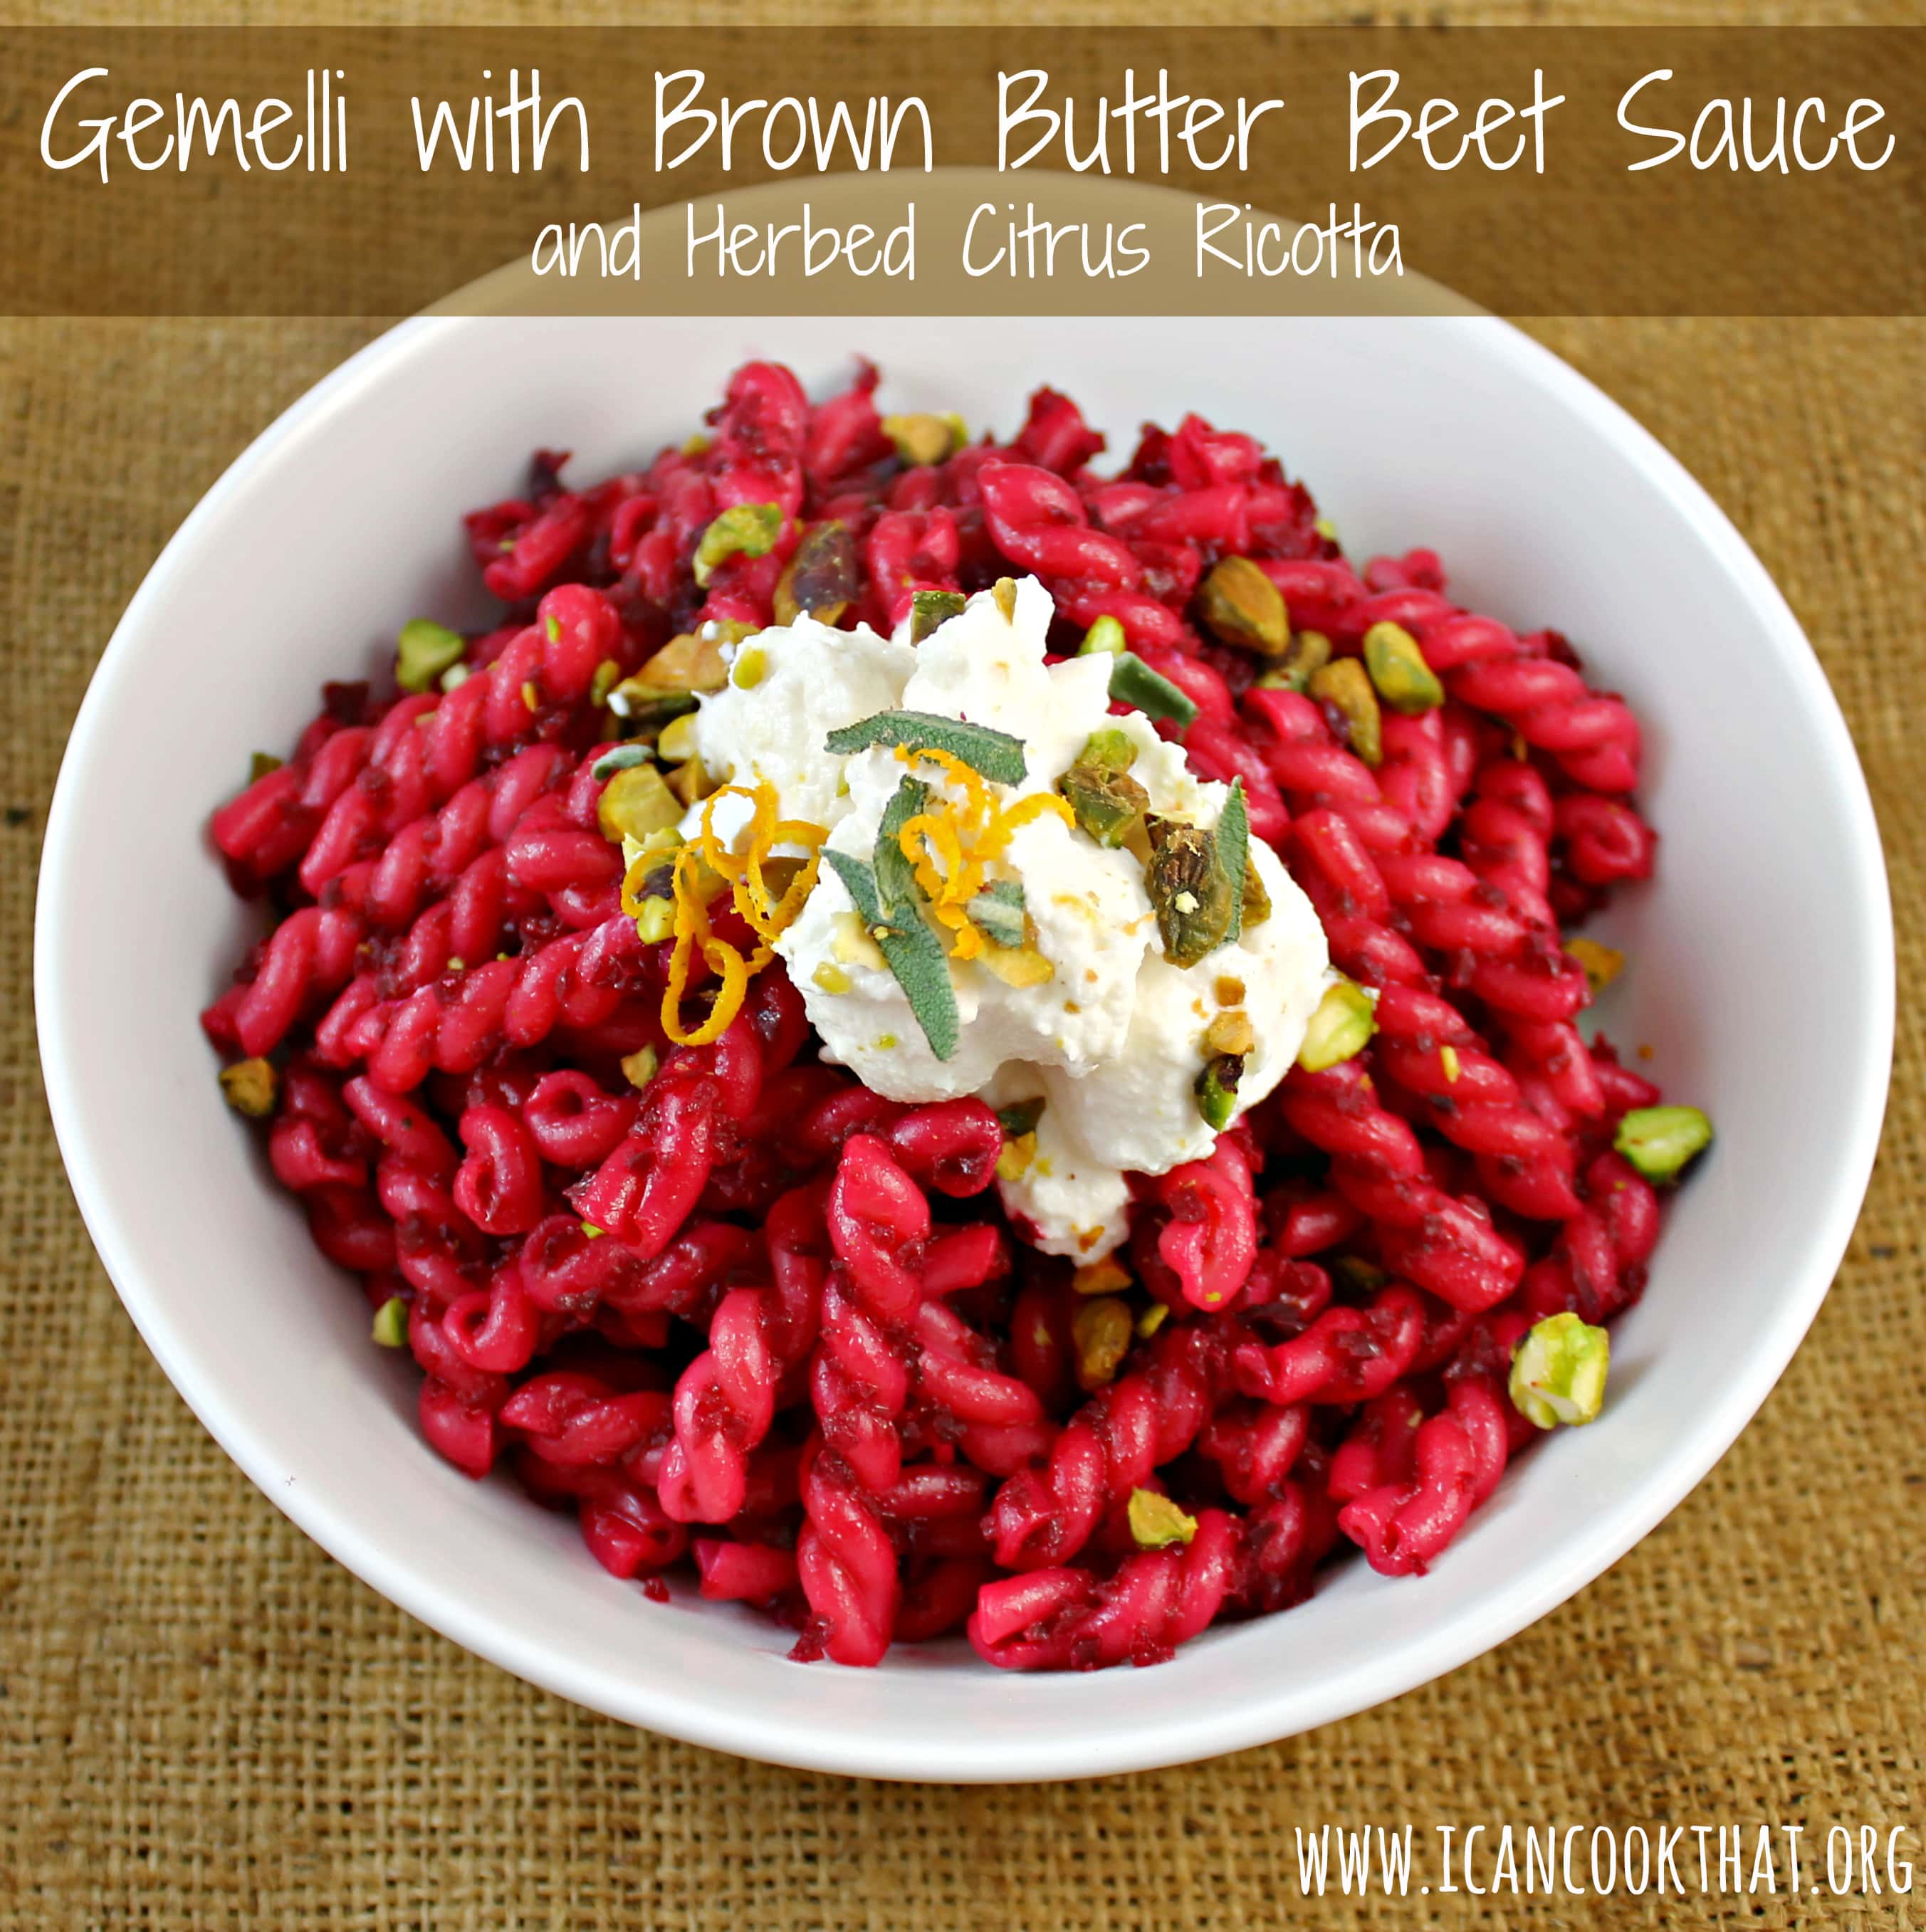
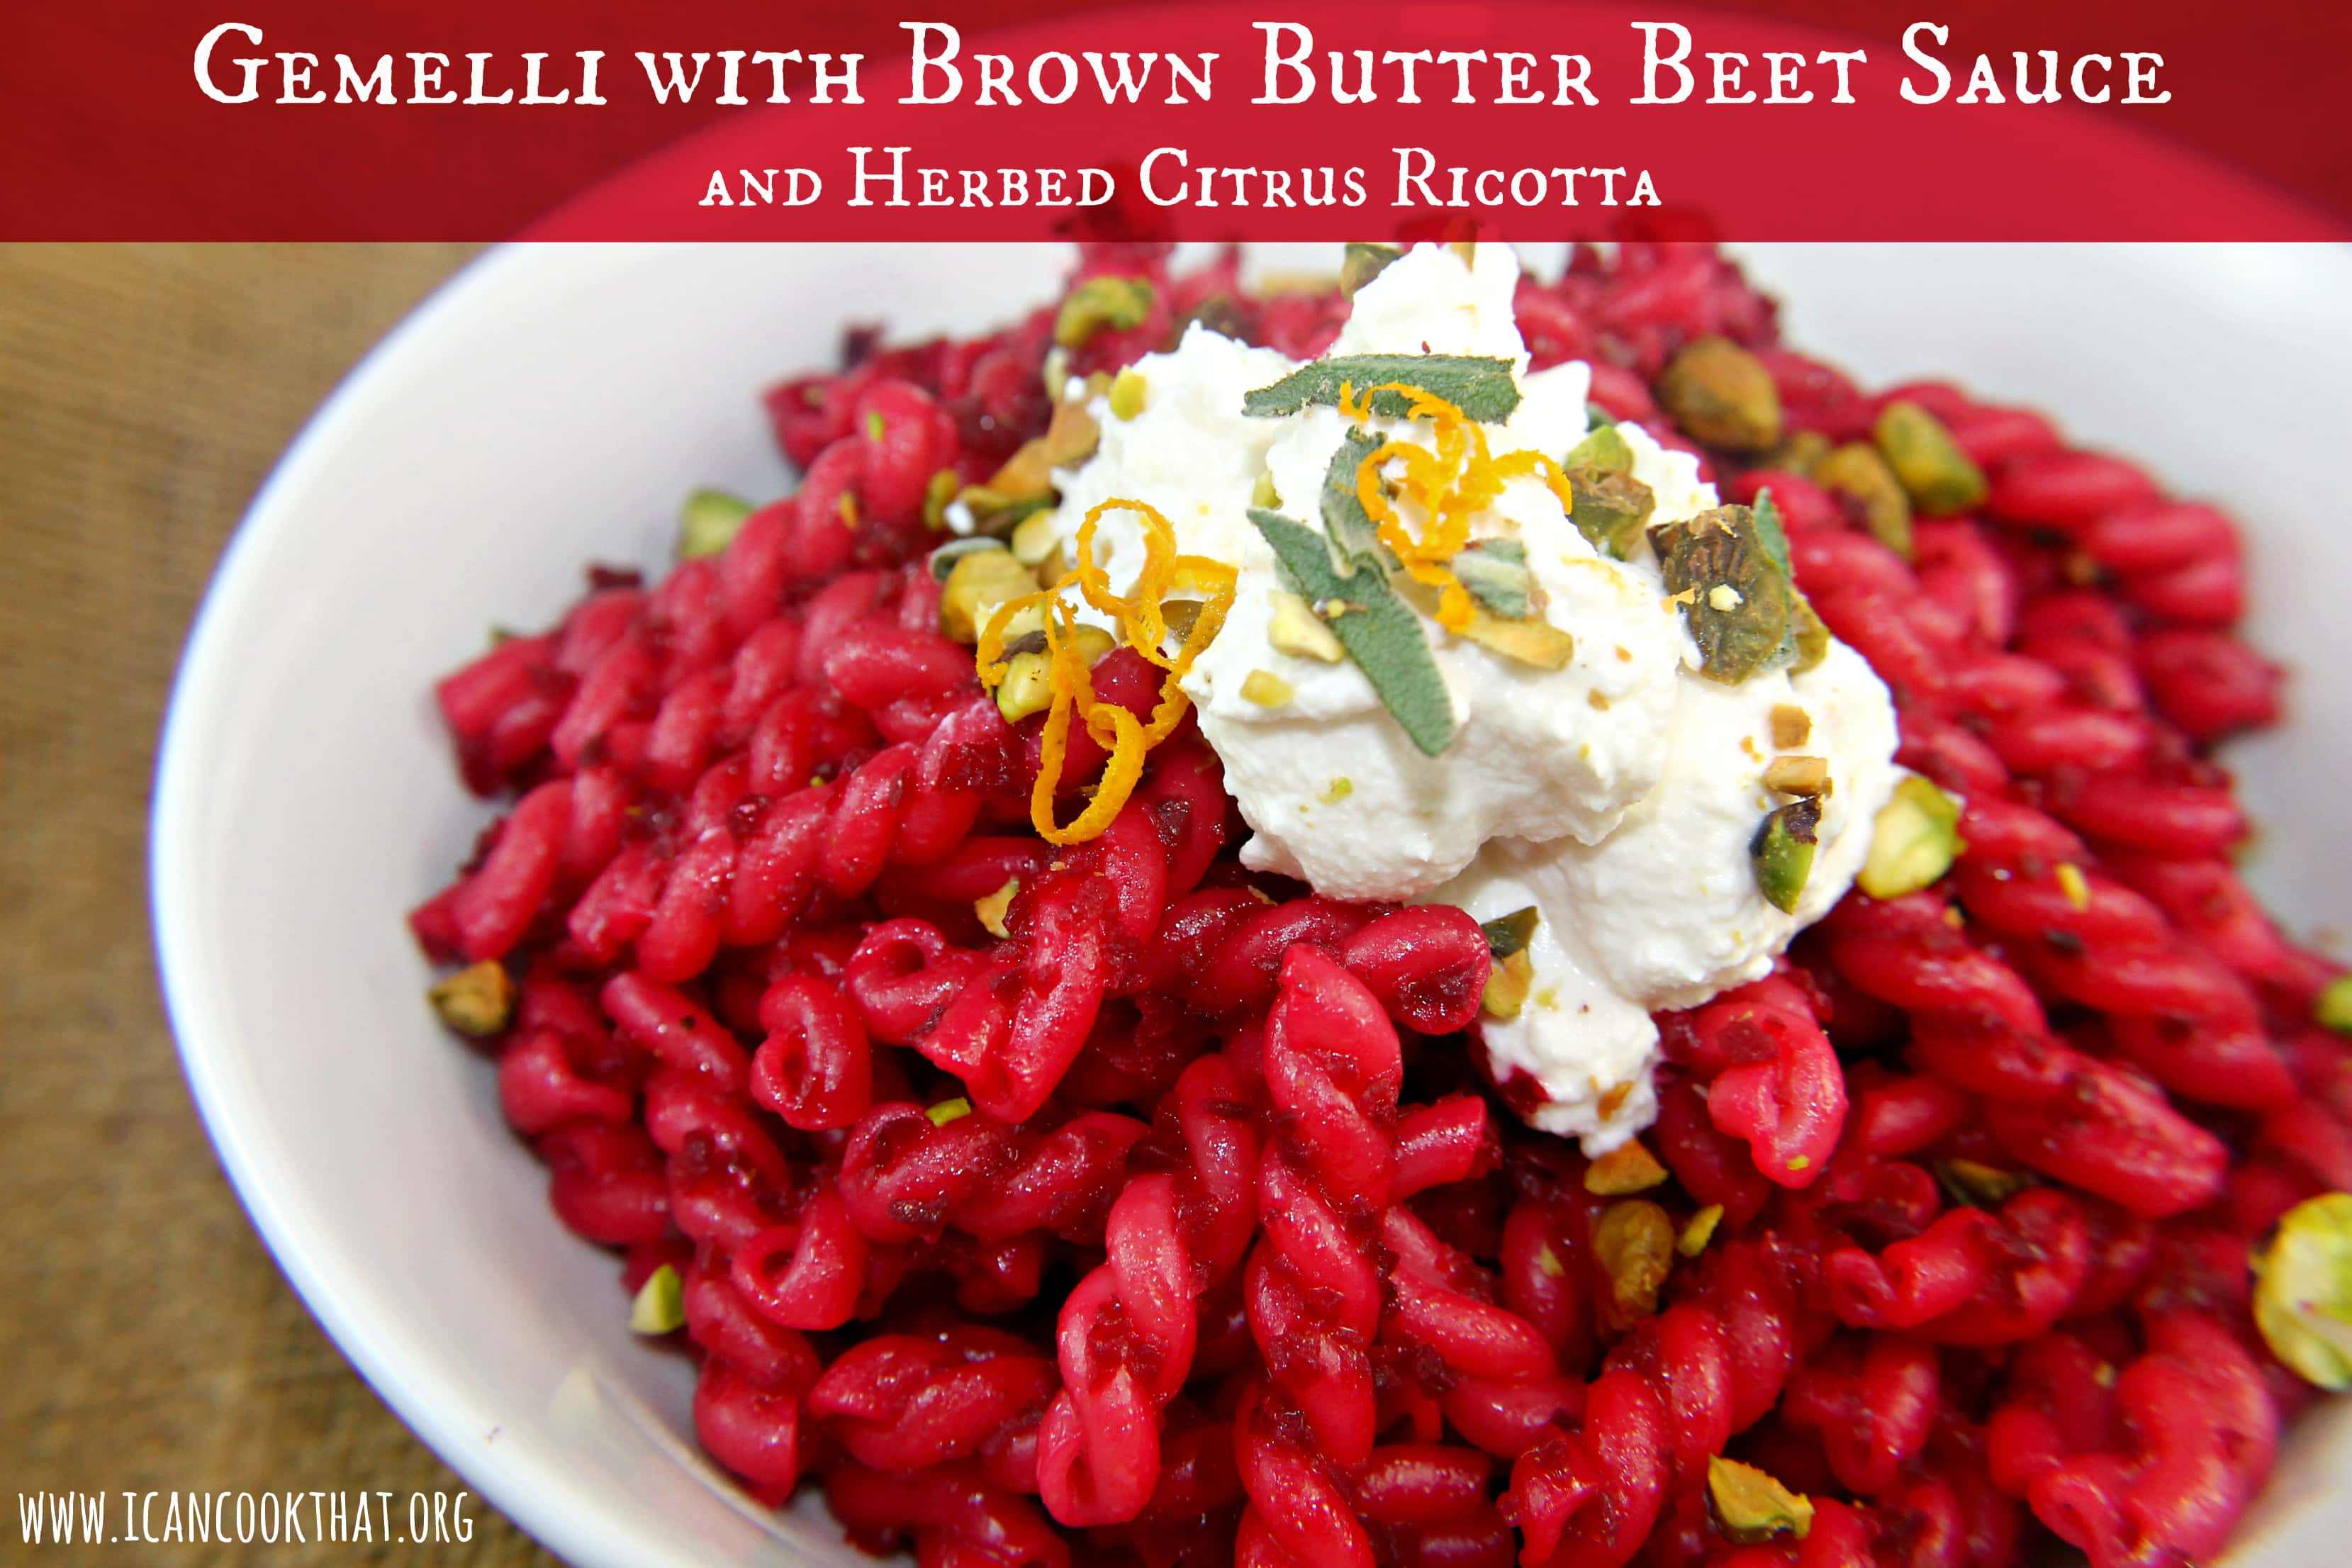
Why am I sharing this pink Gemelli with Brown Butter Beet Sauce recipe with you today? Well, I had a craving for beets … of all weird things to get a craving! Anyway, as I was searching for a yummy beet salad recipe, I came across a recipe for Cavatelli With Brown Butter Beets, Ricotta and Pistachios.
I was intrigued; I’ve never thought to use beets as a sauce for pasta!
What’s great about this recipe for Gemelli with Brown Butter Beet Sauce and Herbed Citrus Ricotta is that it doesn’t take that much time to make! Beets are typically roasted for 45ish minutes in the oven, but this recipe grates the beets before sauteing to cut down on their cooking time.
I changed the method a bit but the general idea is still there. The result of this Gemelli with Brown Butter Beet Sauce is a beautiful brightly colored pasta with great flavor. It reheats wonderfully as well!
Ingredients:
3 beets, peeled and finely grated in a food processor
1 1/2 cups whole milk ricotta
1/4 teaspoon finely grated orange zest, more to taste, plus more for garnish
1 1/2 teaspoons chopped fresh sage, plus more for garnish
1 teaspoon kosher salt, more as needed
1/2 teaspoon black pepper, more as needed
5 tablespoons unsalted butter
1 16 oz box gemelli (or other pasta of your choice)
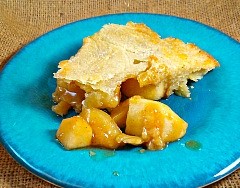
You can never have too many pie recipes during the holidays! This one for Caramel Apple Pie is a great spin on a traditional apple pie that adds caramel to really amp up the flavor. The recipe comes from Organic Valley and uses their Salted Butter, Whole Milk, and Eggs. Note: I was sent a coupon to receive one Organic Valley product for free.
Organic Valley is a co-op of organic farmers based in La Farge, Wisconsin. The cooperative was founded in 1988 and markets its products in all 50 states as well as Canada and Japan. Organic Valley promotes organic agricultural methods, with each participating farm certified as organic by the National Organic Program.
A problem I still run into when cooking/baking is I rarely read the directions all the way though before starting (a huge no no). So I made a completely different pie crust by accident because I got confused as to where the sugar and egg was supposed to go in the original recipe. Luckily it turned out fine (whew!) but for the original recipe, be sure to head over to the Organic Valley website.
2 pounds organic Granny Smith apples (10-11 medium-sized apples or 4 large), peeled, cored and cut into ½-inch thick slices (coat slices with juice of 1 lemon to prevent browning)
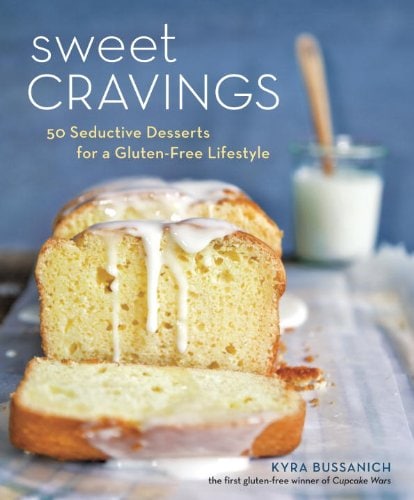
Gluten free baking. Does it terrify anyone else? Just me? Hm. Whelp. I finally decided it was time to conquer my fear and try my hand at it.
I was sent a copy of Kyra Bussanich’s new cookbook Sweet Cravings: 50 Seductive Desserts for a Gluten-Free Lifestylewhich makes gluten-free baking seem not-so-scary. Kyra was the first gluten free baker to win Food Network’s Cupcake Wars and has actually won twice overall so she knows her stuff! The cookbook is filled with really amazing sounding cupcakes but has a bunch of other mouthwatering baking recipes, including gluten free muffins, scones, cookies, brownies, and much more!
As I was paging through the cookbook, I came across her recipe for Boston Cream Pie Cupcakes. I just had to make them!
For every specially marked item sold, OXO is donating 25 cents in support of pediatric cancer research as a part of its $100,000 pledge to Cookies for Kids’ Cancer. Keep an eye out for the green sticker when buying your baking tools, every little bit helps!
Now, on to the recipe. I changed the frosting but kept the rest of the recipe intact.