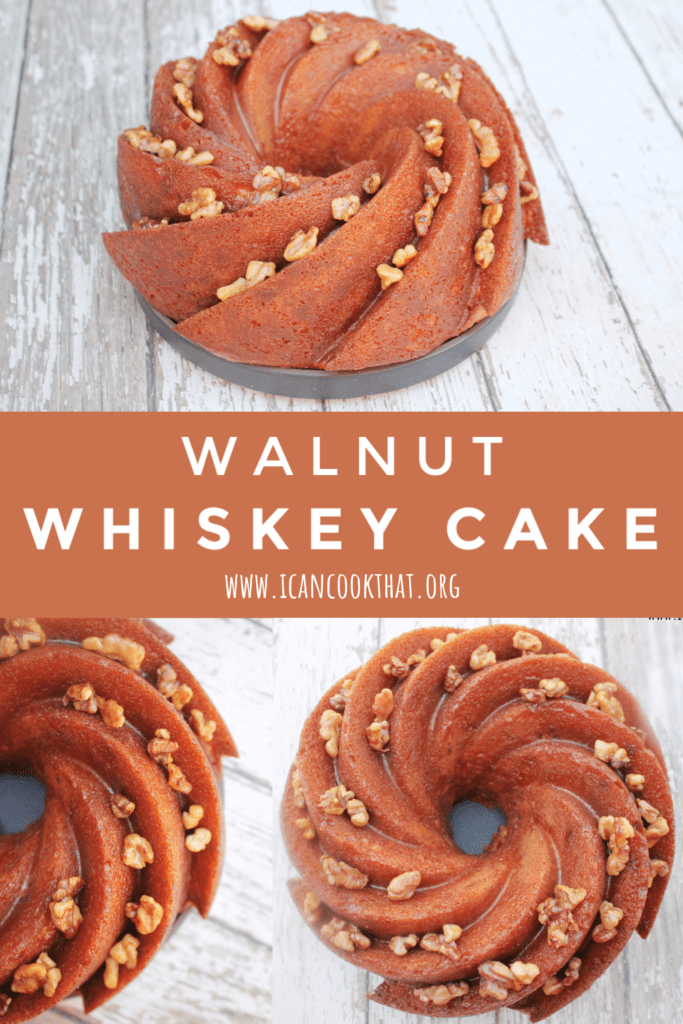
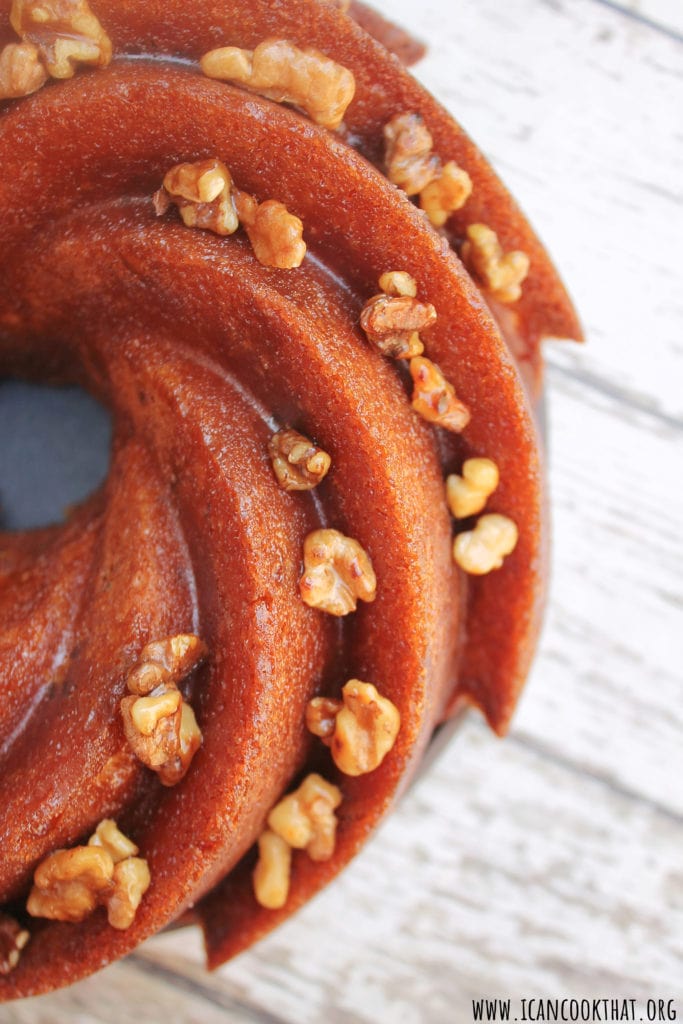
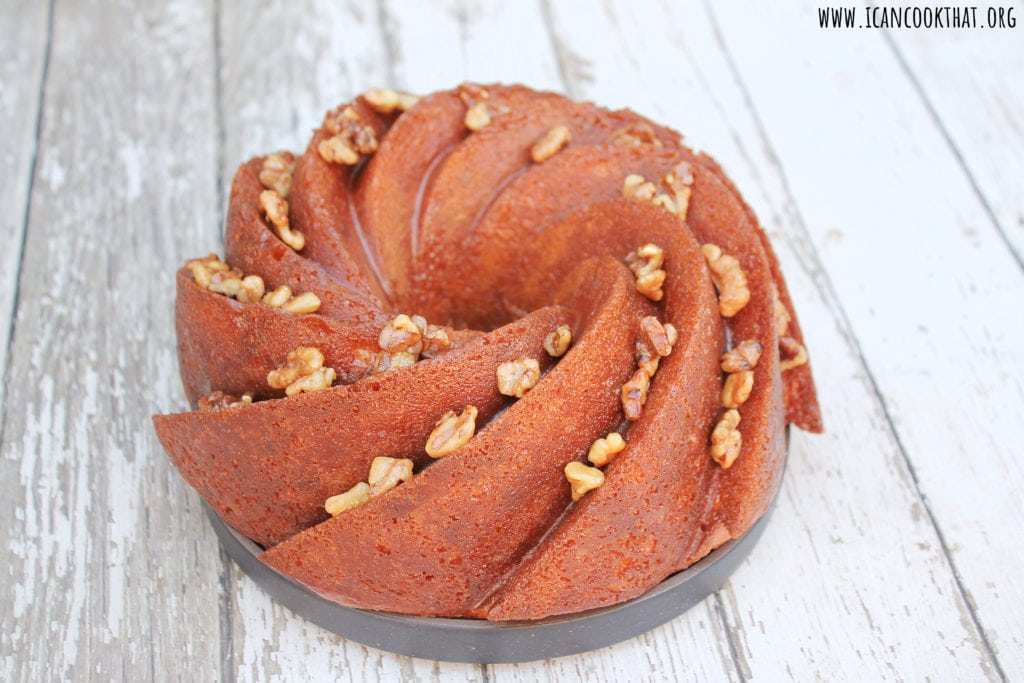
Whiskey Cake is something that has shown up to family gatherings since before I can even remember. My mom makes this cake for basically all extended family celebrations, and it has become a favorite of mine. Recently, we were celebrating a friend’s birthday and I thought a Walnut Whiskey Cake would be the perfect birthday cake for him!
My version is a bit different than the one my mom makes, but the general gist is still there. I added some candied walnuts on top because, why not, but feel free to omit them.
The best part of this recipe is it is made with cake mix and instant vanilla pudding mix, making this cake both super easy to make and incredibly moist! Using a Bundt pan makes this cake look like it took you all day to make, but the hardest part of this recipe is patiently waiting for the glaze to soak into the cake before removing it from the Bundt pan.
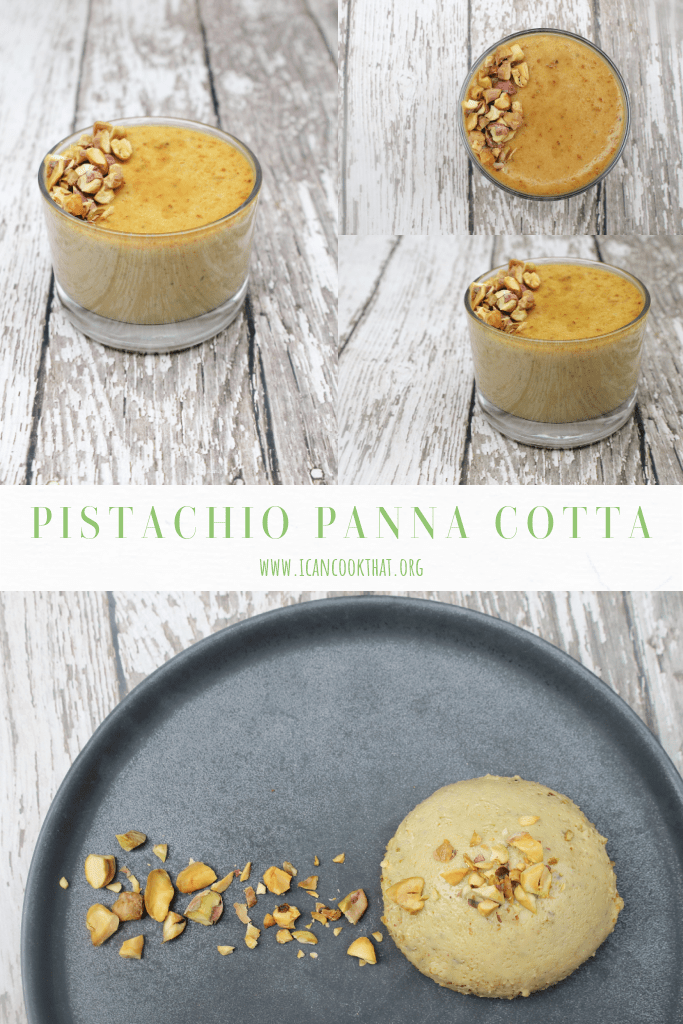
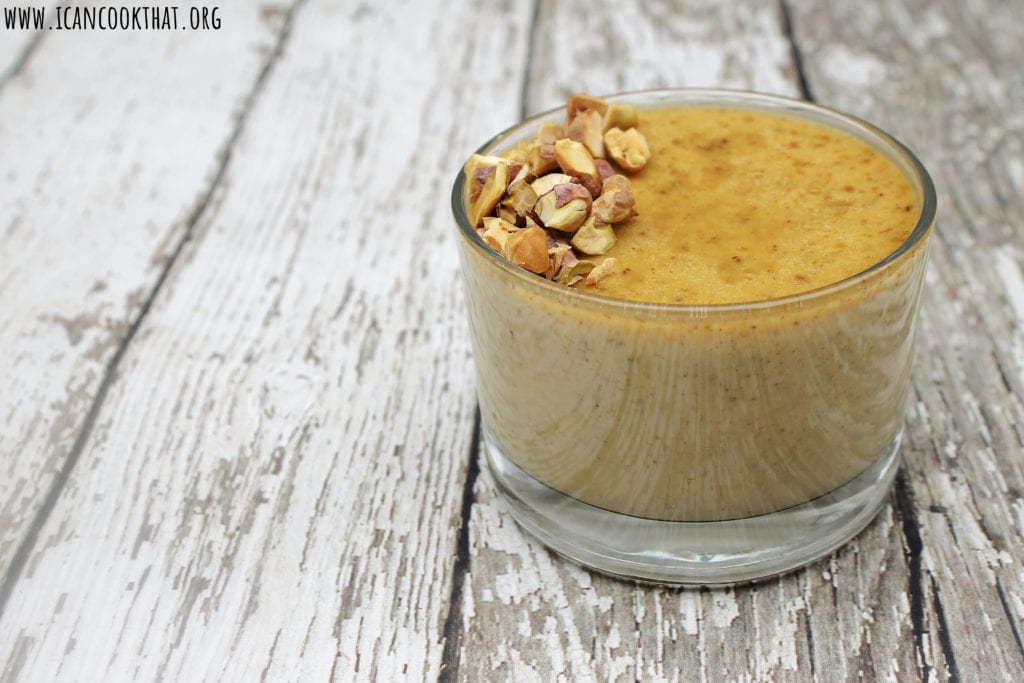
One of my favorite things about having a blog is the opportunity to try new recipes and learn new cooking methods. I have never made Panna Cotta before, but it seems to be a relatively simple dessert to make.
Panna Cotta, which means “cooked cream” in Italian, is an Italian dessert traditionally made with sweetened cream and gelatin. Because of the gelatin, it maintains the shape of whatever vessel it is in.
It would have probably made sense to try to make a class panna cotta first, but my husband and I love all things pistachio, so I decided to try to make a Pistachio Panna Cotta as a treat for us!
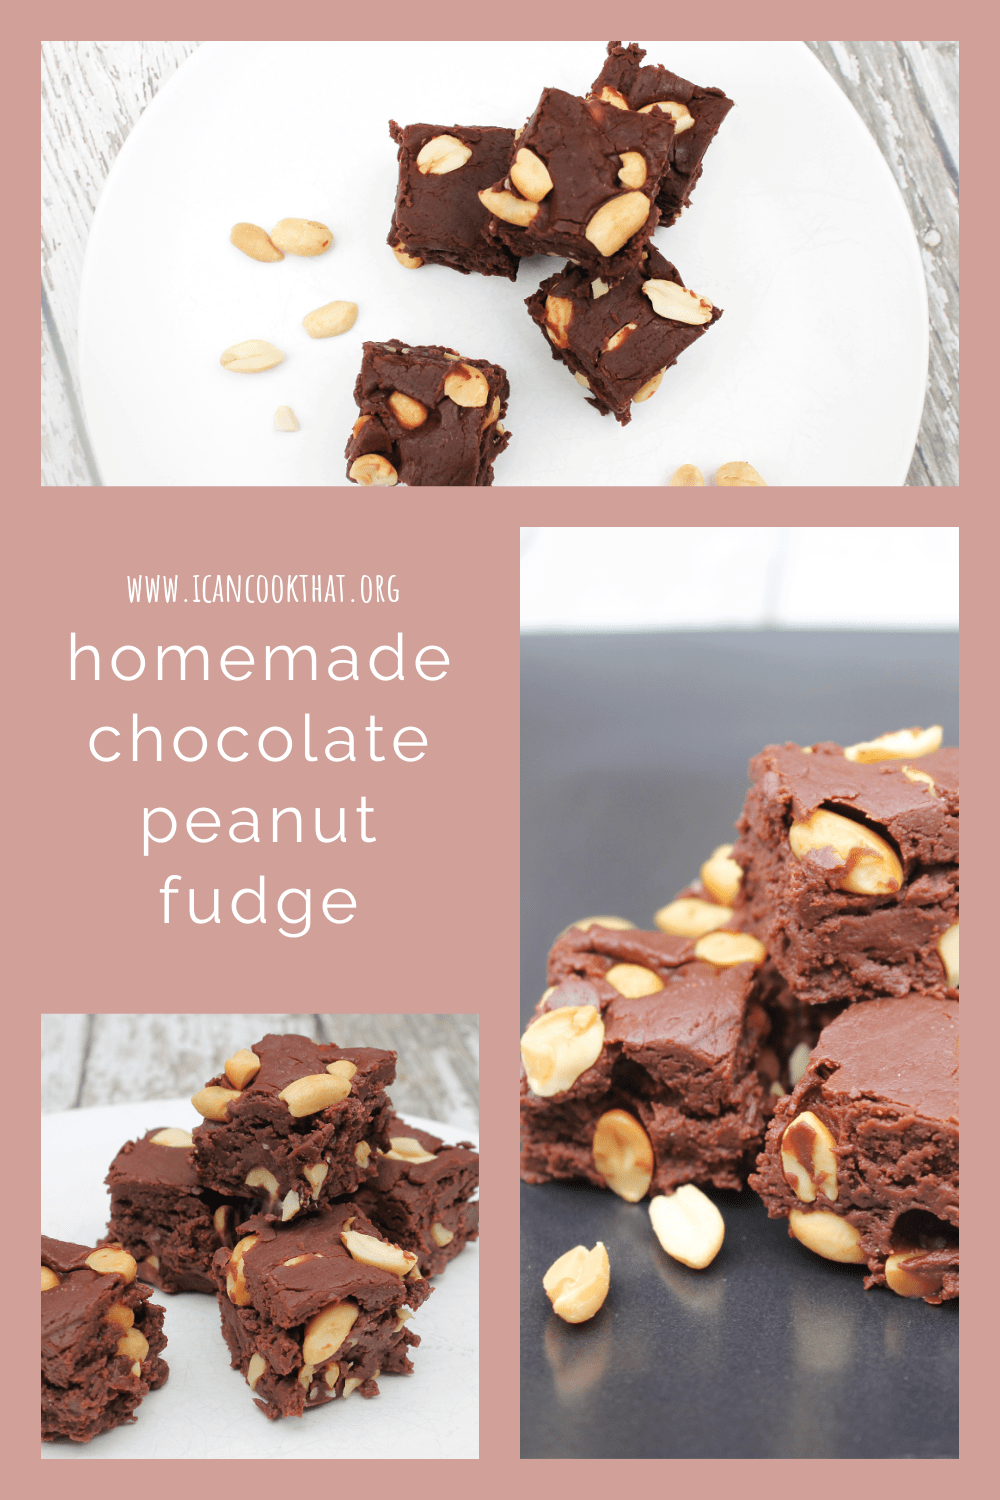
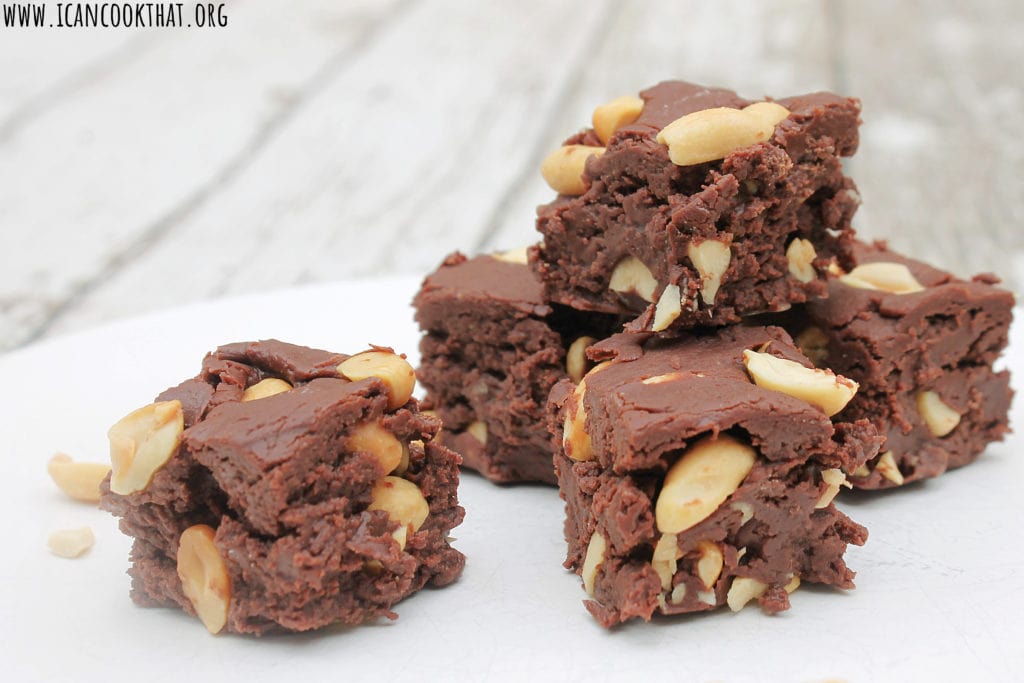
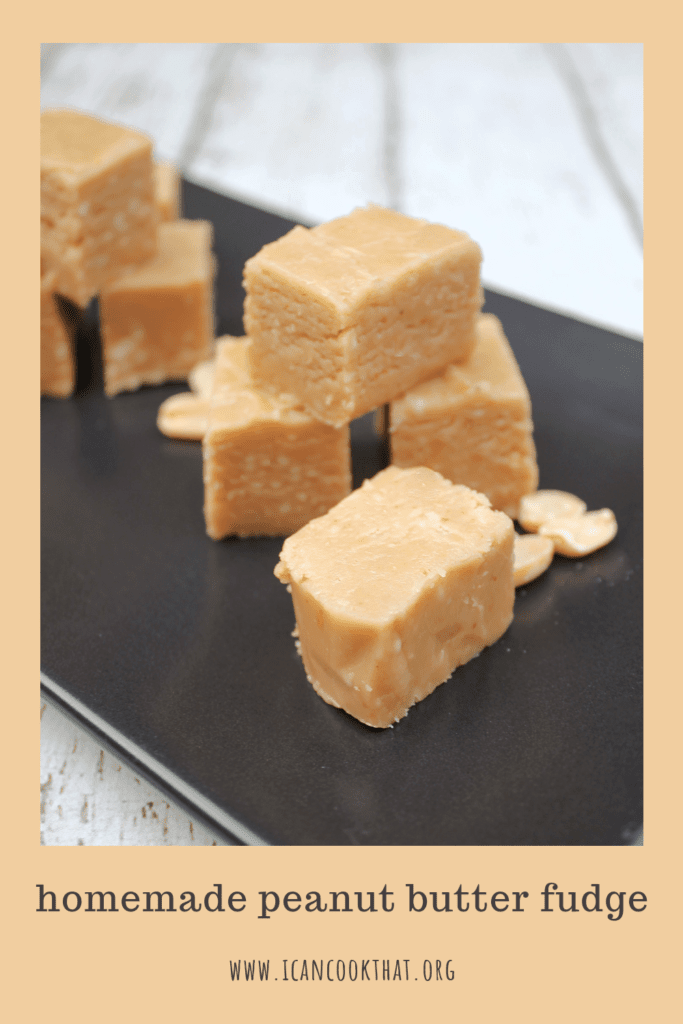
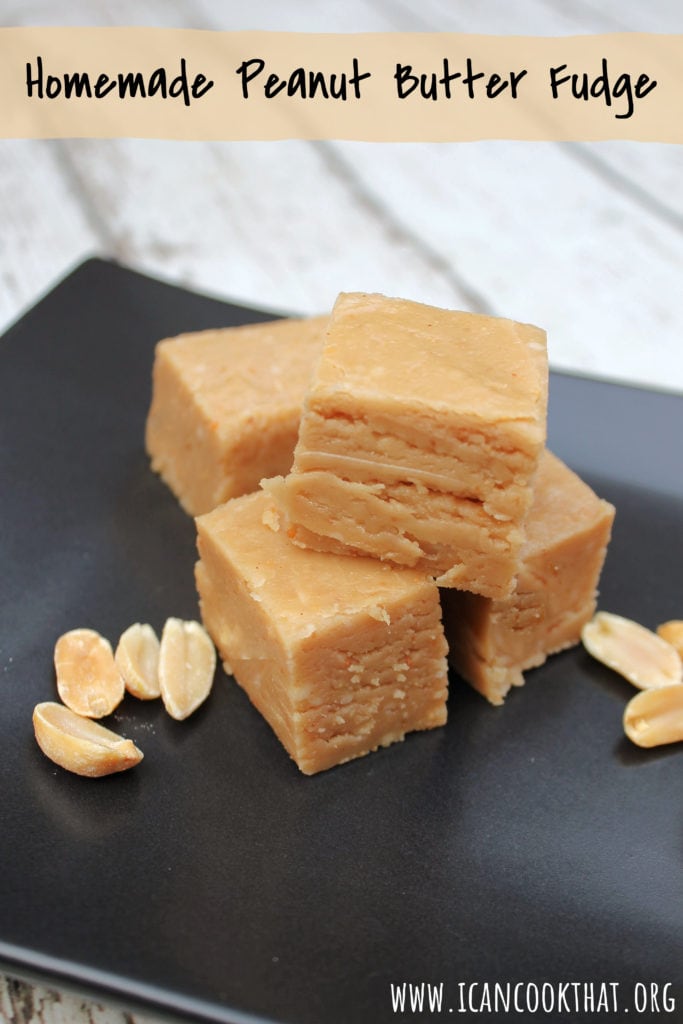
Now that I know how darn easy it is to make homemade fudge, I like experimenting and making my own at home when the mood strikes me. This recipe for Homemade Chocolate Peanut Fudge uses just 5 ingredients and can be made with ingredients you might already have in your home!
I used peanuts in the below recipe, but really any nut you enjoy can be substituted in (walnuts would be the more traditional choice).
Ingredients:
1 14 oz can sweetened condensed milk
1 teaspoon vanilla extract
3 tablespoons unsalted butter, cut into smaller pieces
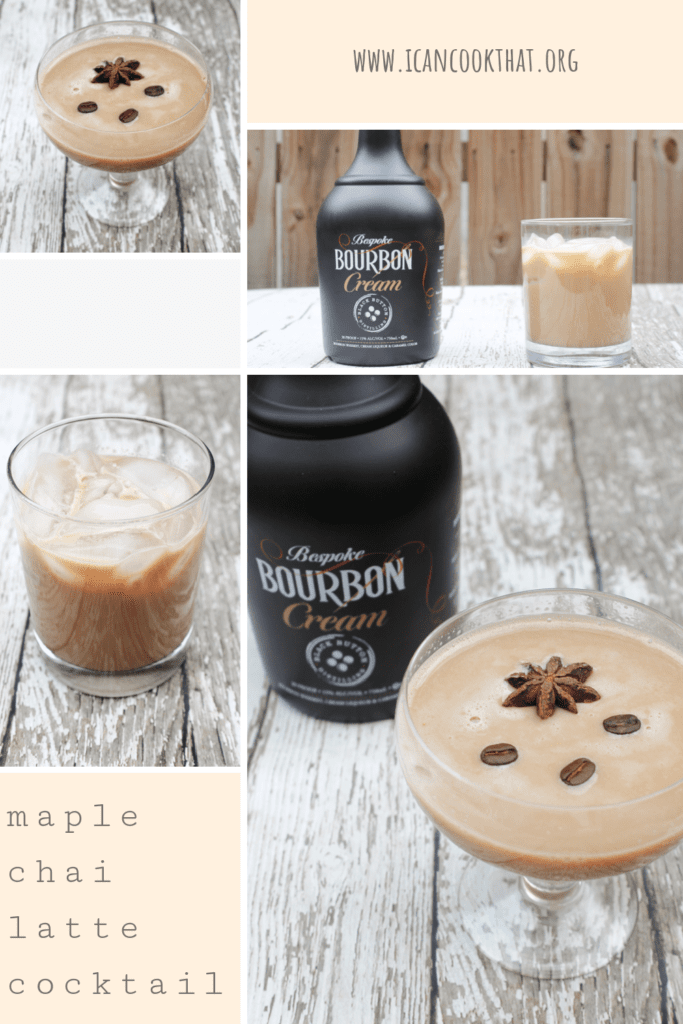
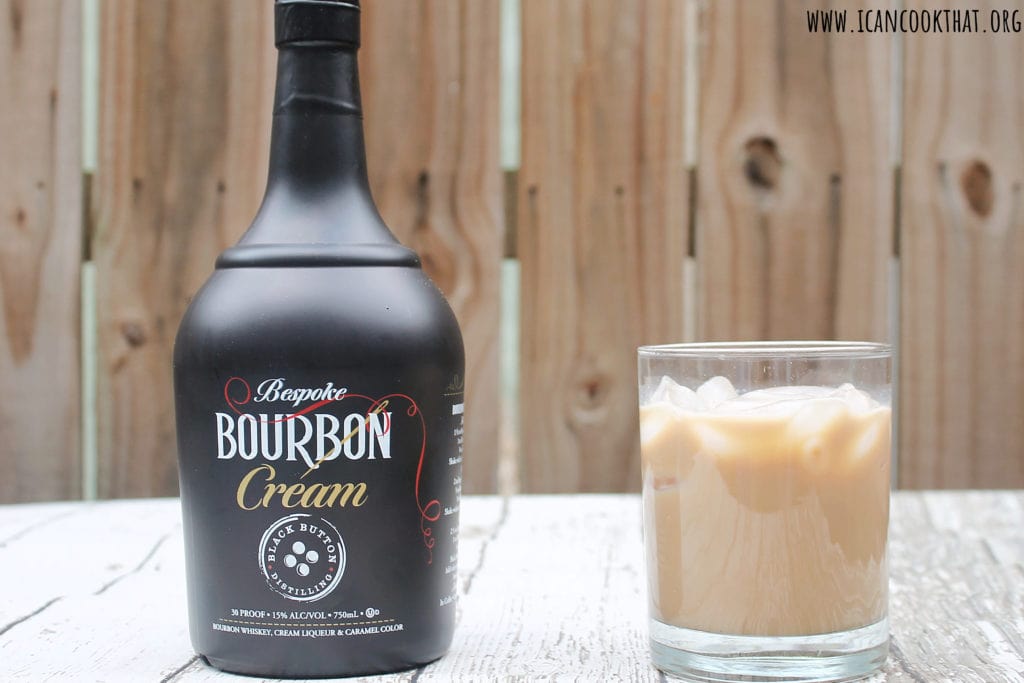
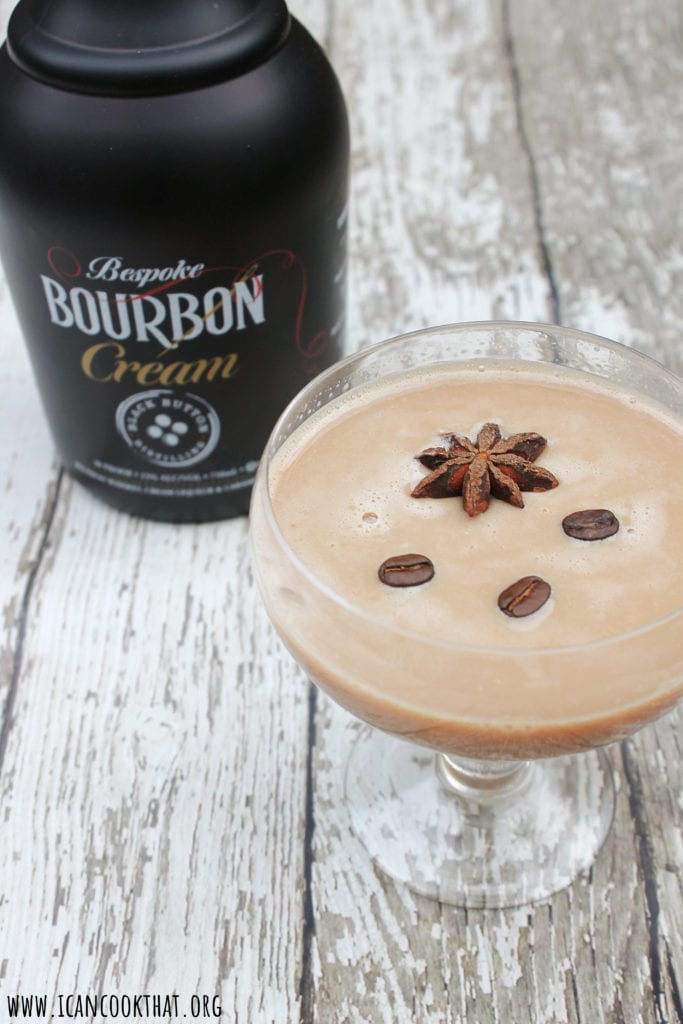
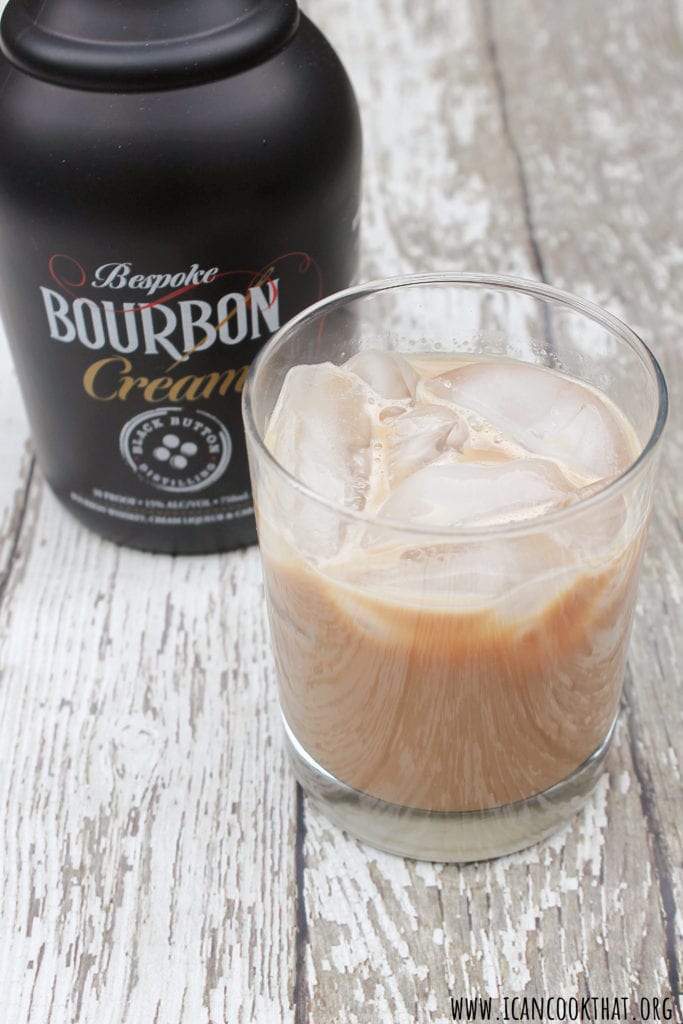
Note: I was sent a bottle of Black Button Distilling’s Bespoke Bourbon Cream in order to write this post. Opinions are mine alone.
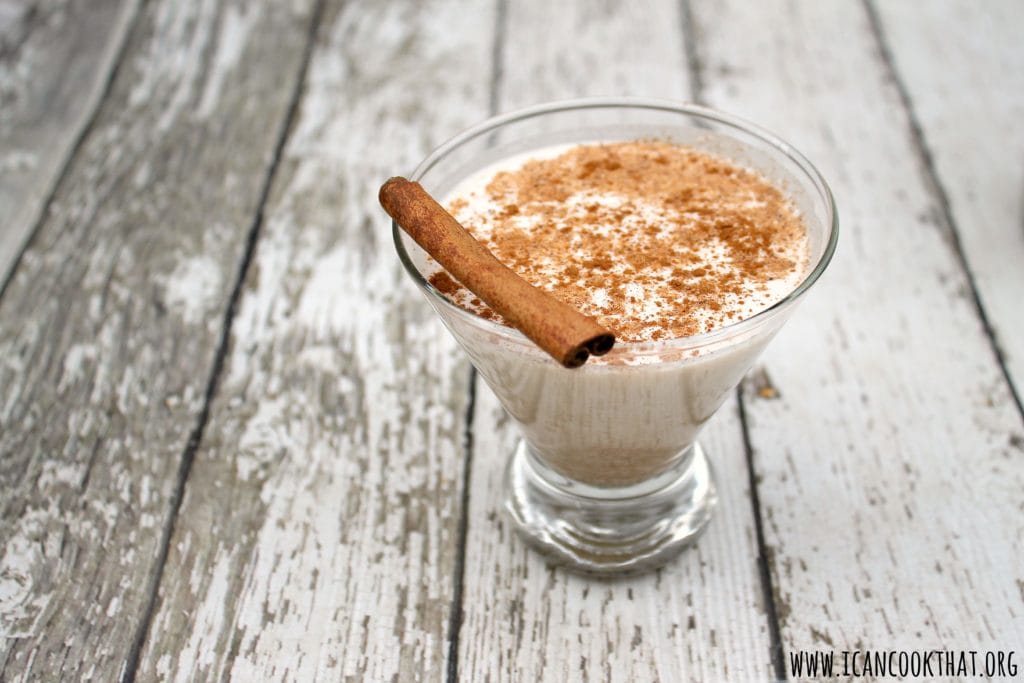
If you’re a fan of creamy cocktails, I have the perfect cocktail to share with you today! The team at Black Button Distilling sent me a recipe for a Maple Chai Latte Cocktail that sounded so tasty I knew I had to pass it along.
Black Button Distilling, based out of Rochester, NY, was actually Rochester’s first grain-to-glass distillery since prohibition when it was established in 2012. The cocktail is made with Black Button Distilling’s Bespoke Bourbon Cream, which combines their hand finished bourbon and local farm fresh New York State cream — it’s similar to Irish Cream but the bourbon brings a different (and delicious!) flavor profile.
This Maple Chai Latte plays up the vanilla and caramel notes in the Bourbon Cream with the addition of maple syrup, a chai simple syrup, and coffee liqueur.
You can buy chai simple syrup (paid link), but I’ve included a recipe below in case you want to make your own at home, like I did.
Ingredients (serves 2):
ice
3 oz Bespoke Bourbon Cream
4 oz coffee liqueur
1 oz Chai simple syrup (recipe below)
1 oz maple syrup (I used a bourbon barrel-aged maple syrup to really up the flavor!)
Note: I was sent ingredients from Plugra Premium Butter in order to make this post. Opinions are mine alone. Ingredients included: 1 bar unsalted Plugra Premium Butter,1 container of the Spice House’s Vietnamese Saigon Cinnamon, Valrhona Manjari 64% Dark Chocolate, and Nielsen-Massey Madagascar Bourbon Pure Vanilla Extract.
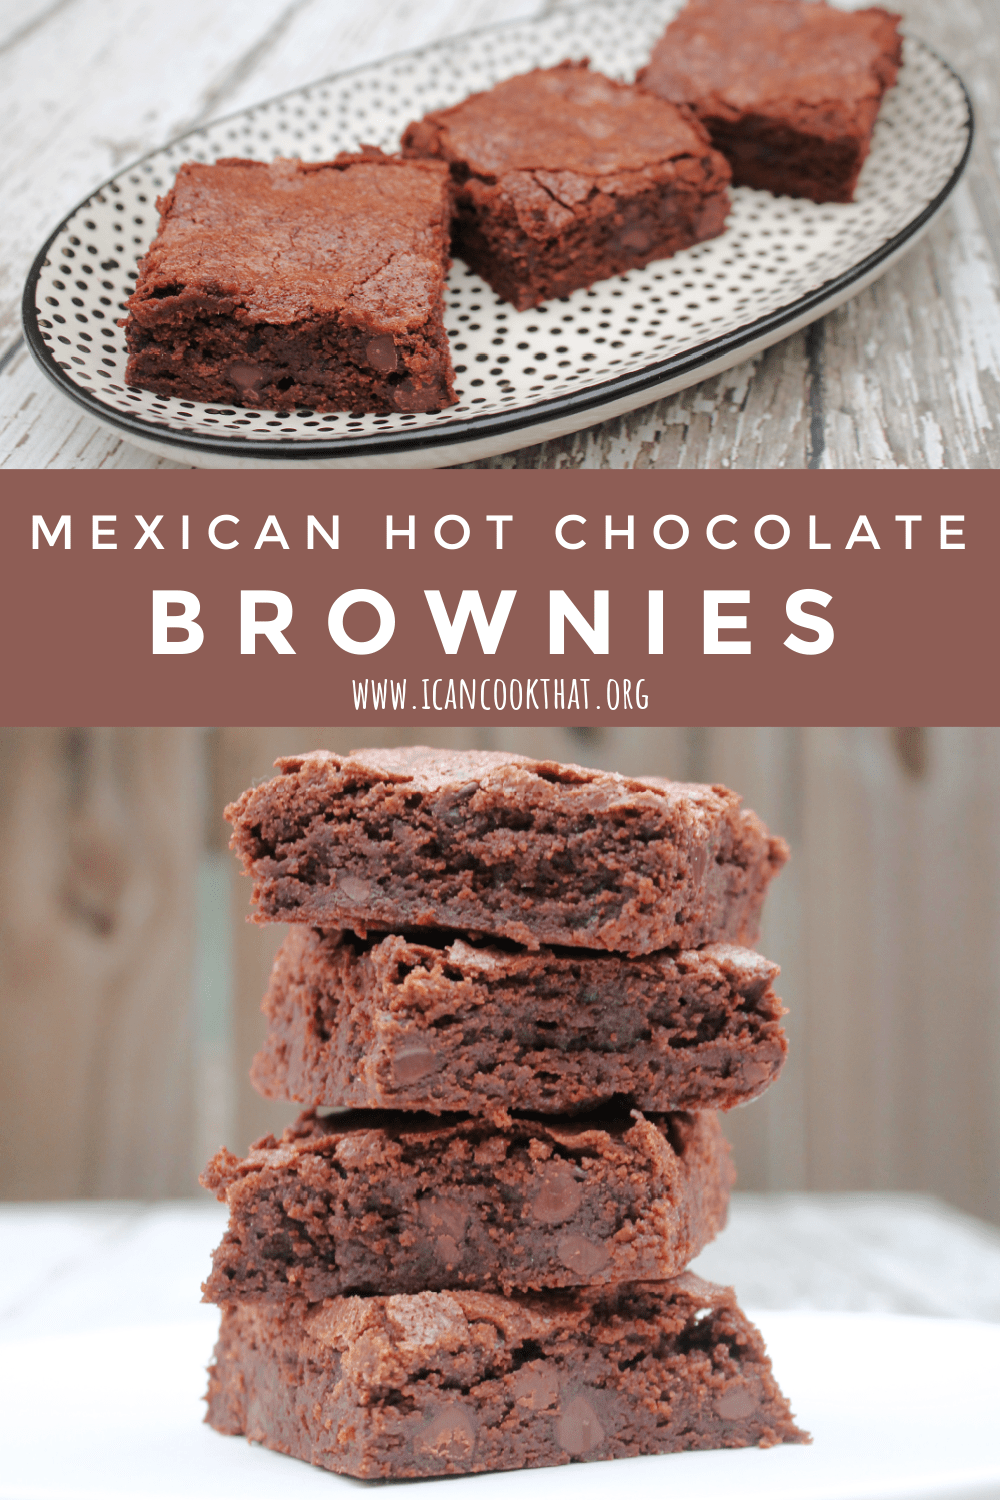
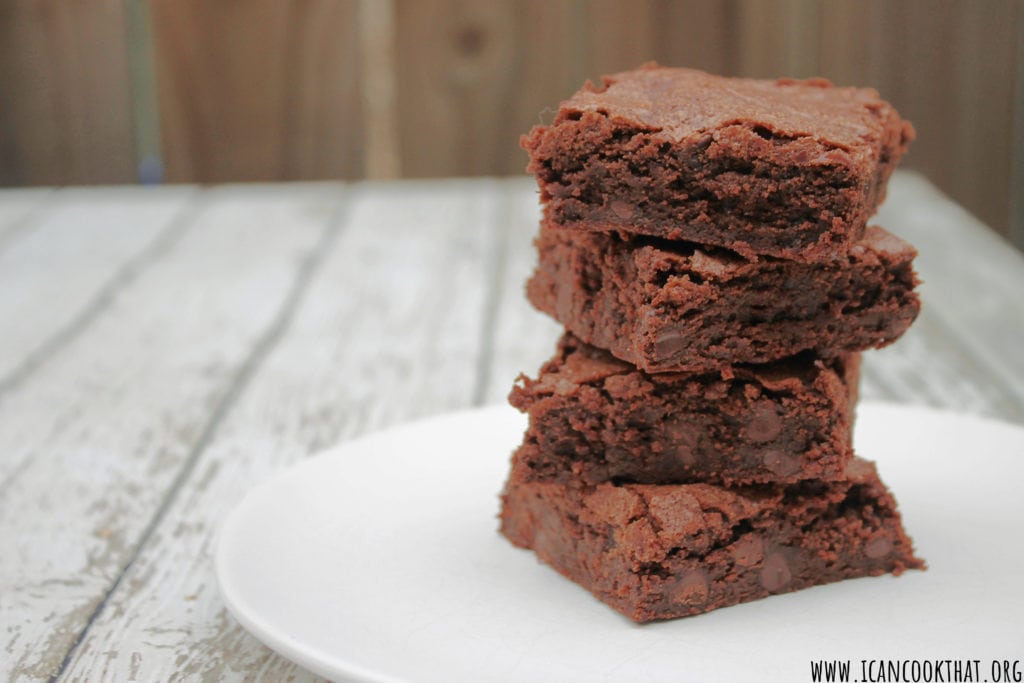
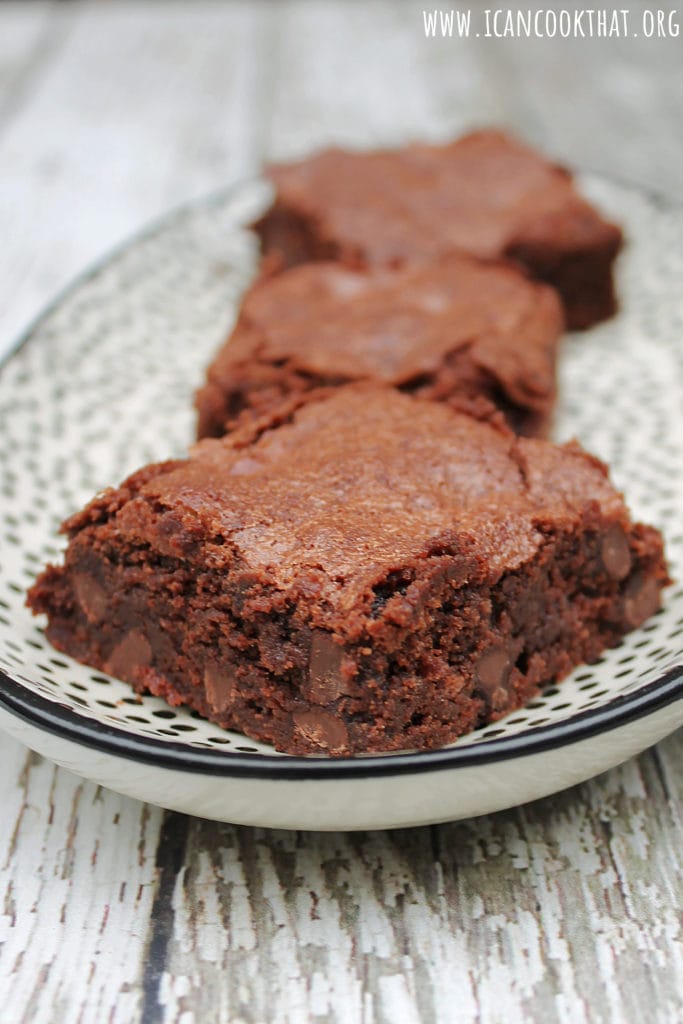
Do I have a tasty recipe for you today! I was contacted recently by Plugrá Kitchens with a delicious sounding brownie recipe (these Mexican Hot Chocolate Brownies) using some of my favorite ingredients, so I knew I had to share it. This brownie recipe is based off the flavors of Mexican Hot Chocolate, which is a hot chocolate that is spiced with cinnamon and sometimes a little bit of chili to bring additional warmth and heat.
Plugra Kitchens was nice enough to send me a package with the best goodies to make these brownies, including (of course) Plugrá Premium Unsalted Butter, Spice House Ground Saigon Cinnamon, Nielsen-Massey Madagascar Bourbon Pure Vanilla Extract, and Balrhona Manjari 64% Dark Chocolate.
Plugrá Butter is an awesome ingredient to use for baking. Made by Dairy Farmers of America, its slow-churn and extra creaminess has the perfect balance of moisture and fat for use in baking. The Spice House‘s Vietnamese “Saigon” Cassia cinnamon is the strongest and sweetest cinnamon in their collection. The Vietnamese cinnamon bark is ground in house to produce a dark, rich texture that is fiery and fragrant, making it perfect for these brownies. My love of Nielsen-Massey‘s Madagascar Bourbon is well known to those that frequent this blog. Their Madagascar Bourbon Pure Vanilla extract is made from premium, hand-selected vanilla beans cultivated in Madagascar, the world’s leading supplier of high-quality vanilla. It then utilizes a slow, cold extraction process to gently draw out and preserve all 300 natural vanilla flavor notes to create the richest tasting vanilla. Madagascar Bourbon Pure Vanilla has a flavor profile that is full, sweet, creamy, and mellow with velvety after-tones. Valrhona Chocolate has been a partner of artisans of taste since 1922 and is a pioneer and reference in the world of chocolate.
With ingredients like that, you know this recipe is going to taste good! I adapted the recipe a bit, but the overall gist is still there. These Mexican Hot Chocolate Brownies are soft and chewy, with a subtle warmth and heat that pairs really well with the richness of the chocolate.
Ingredients (makes 18 servings):
1 (8 oz) bar unsalted butter, like Plugrá® European Style Butter
2 cups sugar
4 large eggs, at room temperature
2 teaspoons vanilla extract, like Nielsen-Massey Madagascar Bourbon Pure Vanilla Extract
1 cup all-purpose flour
2/3 cup unsweetened cocoa powder
1 tablespoon ground cinnamon, like Saigon cinnamon from the Spice House
1/2 teaspoon kosher salt
1/2 teaspoon baking powder
¼ teaspoon ground cayenne pepper
1 cup dark chocolate, like Valrhona Manjari 64% Dark Chocolate, chopped
Note: I was sent some baking tools from OXO in order to write this post. Opinions are mine alone.
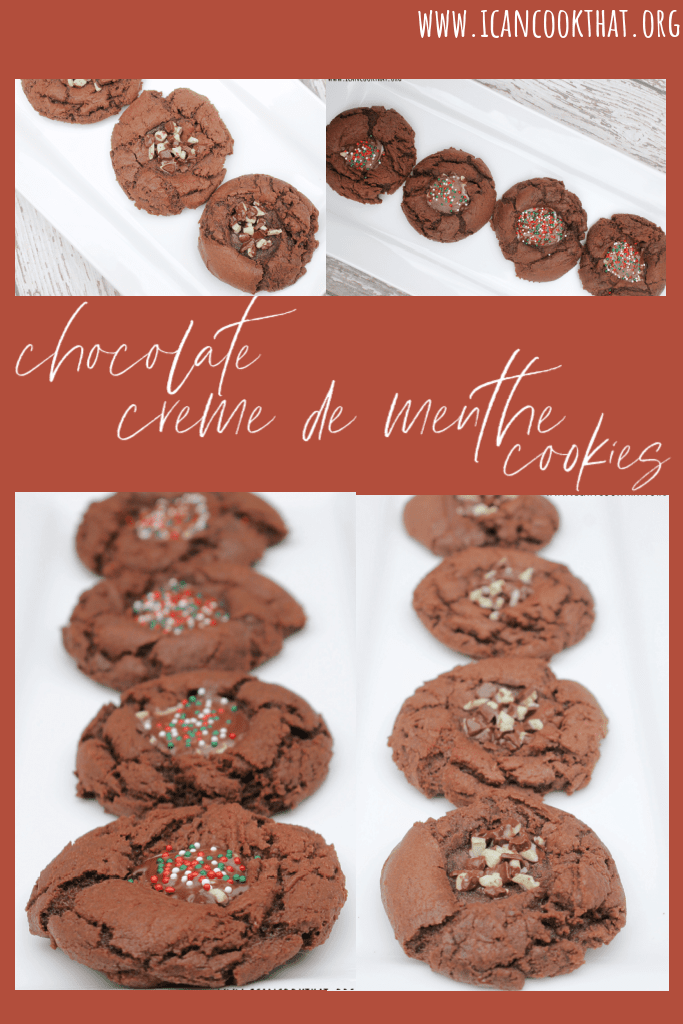
It’s that time of year again – OXO’s Bake a Difference Campaign is live! Every year, OXO supports Cookies for Kids’ Cancer and the fight against pediatric cancer. Before I share my cookie recipe, I wanted to tell you a bit about Cookies for Kids’ Cancer.
Cookies for Kids’ Cancer (CFKC) is a nonprofit founded by two OXO employees after their son, Liam, was diagnosed with pediatric cancer. Through grassroots bake sales across the country, CFKC raises funds to develop new, improved and less toxic treatments for childhood cancer. Liam Witt’s legacy lives on as the organization works toward a cure for pediatric cancer, helping children and families everywhere.
For every cookie baked, OXO donates $1 to Cookies for Kids’ Cancer up to $100,000, so here is my new cookie this year to support the cause and spread the word!
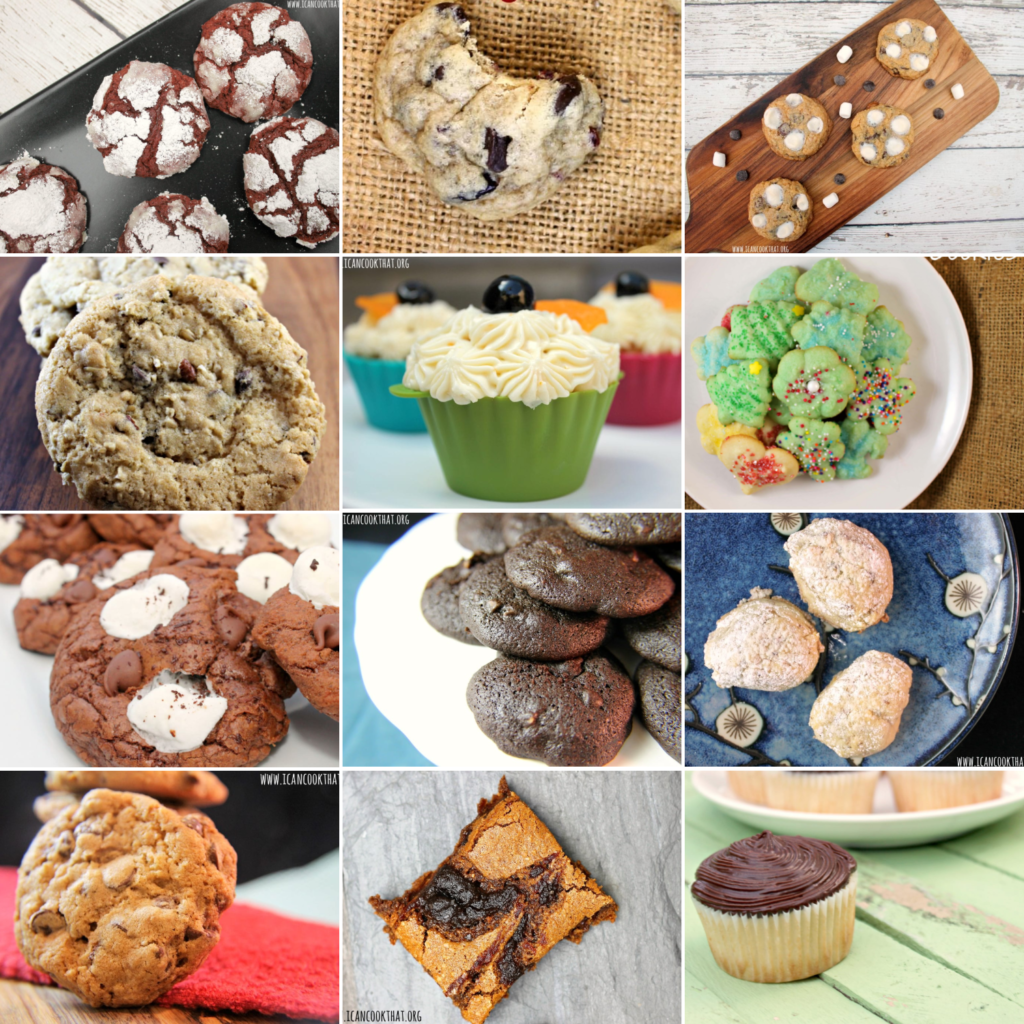
Here are some of my old cookie swap and Cookies for Kids’ Cancer posts, in case you’re in a baking mood:
To help support, you can also register for the Bake a Difference campaign and host a virtual bake sale or an in-person event!
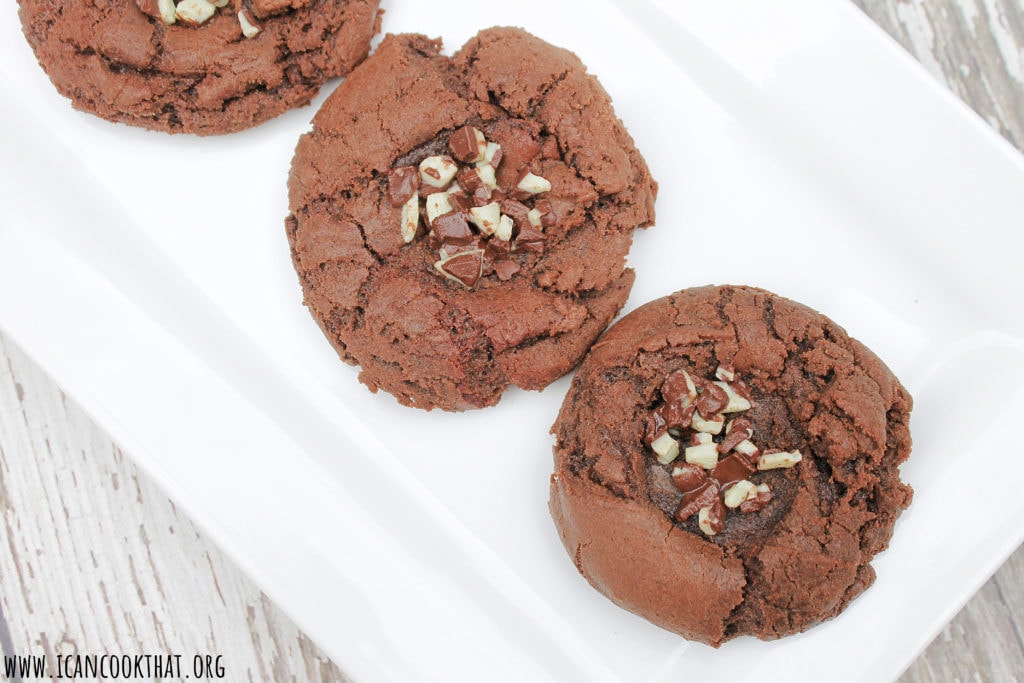
Moving to this year’s cookie: These Creme de Menthe Cookies are chocolate crinkle cookies with a chocolatey mint center. It is based off a cookie recipe I found in an Amish Community Cookbook (paid link) I’ve had for years.
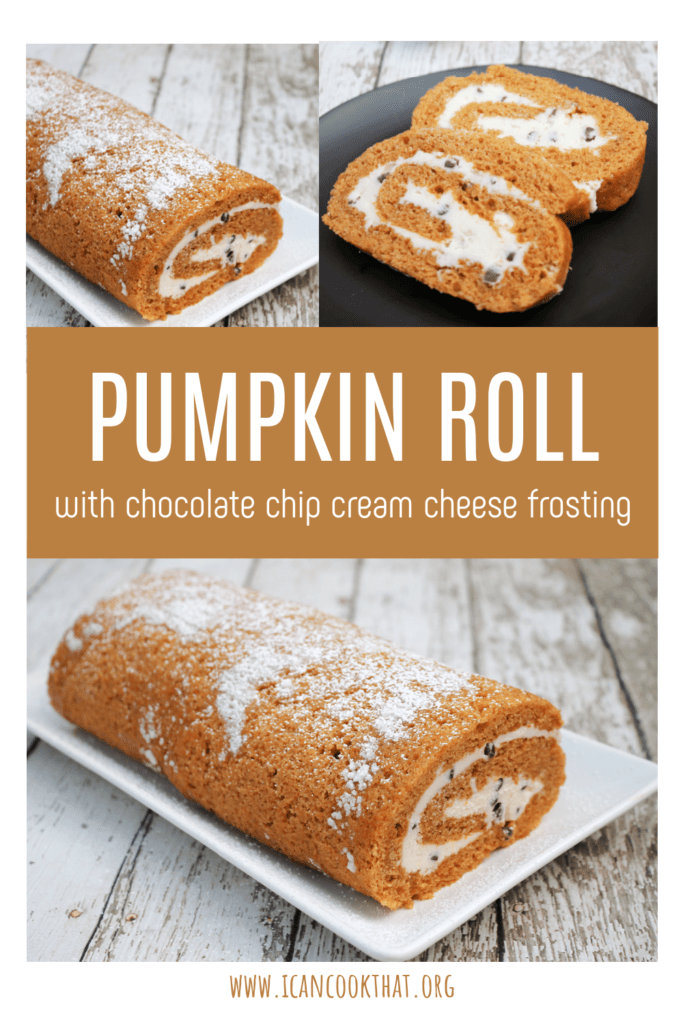
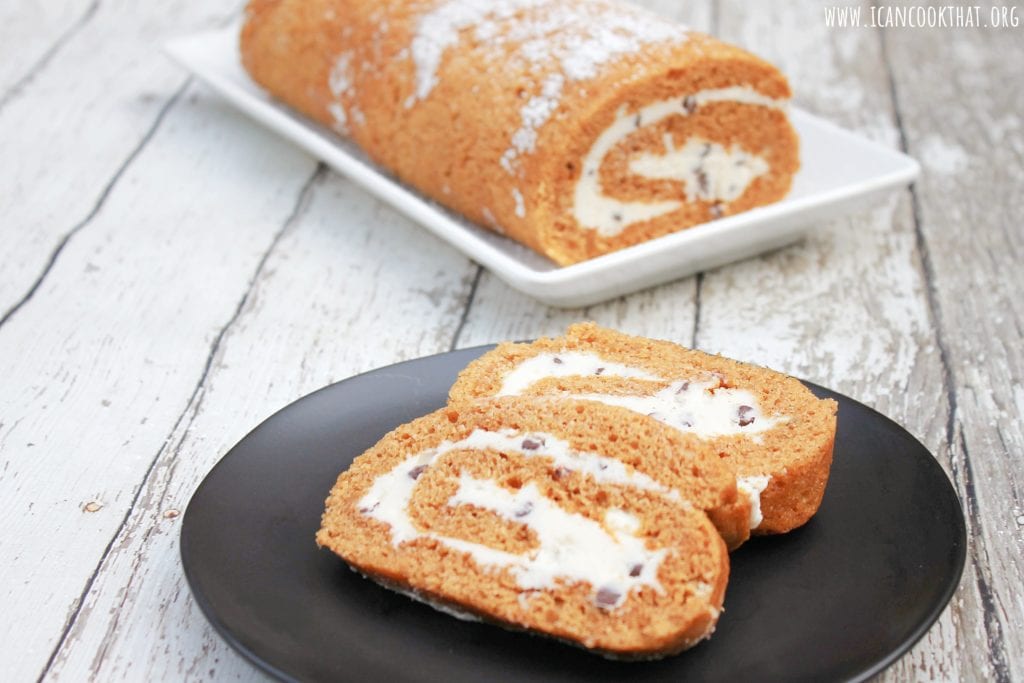
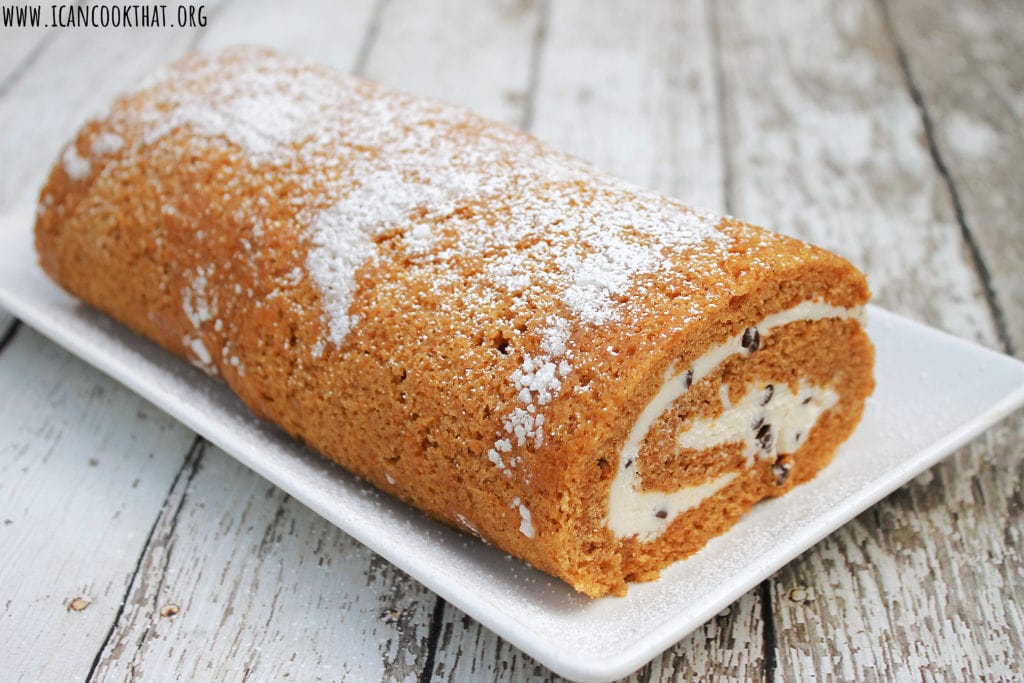
I can’t believe I’ve never shared a pumpkin roll recipe on this blog! For someone as pumpkin-obsessed as me, I’m happy to finally rectify that!
This recipe is a mostly classic recipe, with the addition of chocolate chips into the cream cheese filling. I made this for Thanksgiving, and my aunt who hosts it enjoys pumpkin-chocolate combinations, so I made this one for her.
This pumpkin roll recipe has been developed to be made in a half sheet pan (paid link).
Ingredients:
1 cup plus 2 tablespoons flour
3/4 teaspoon baking powder
3/4 teaspoon baking soda
1 1/2 teaspoons pumpkin pie spice
1/2 teaspoon salt
4 eggs plus 1 egg yolk, at room temperature
1 1/2 cups sugar
1 cup pumpkin puree
12 oz cream cheese, at room temperature
8 tablespoons butter, at room temperature
1 1/2 teaspoon vanilla extract
1 1/2 cups powdered sugar, plus more for sprinkling
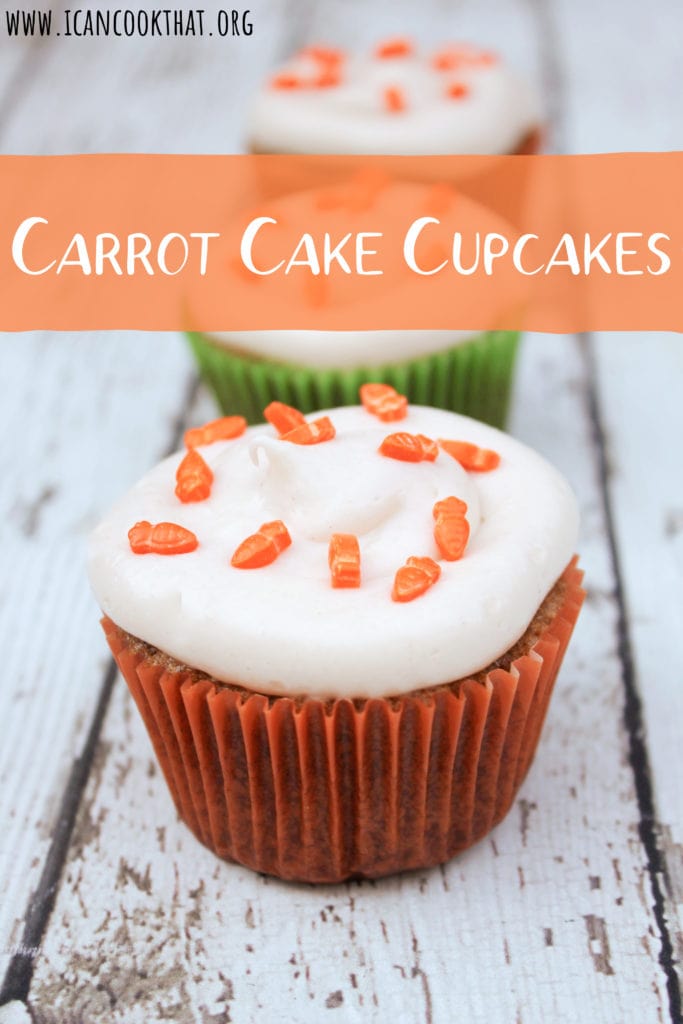
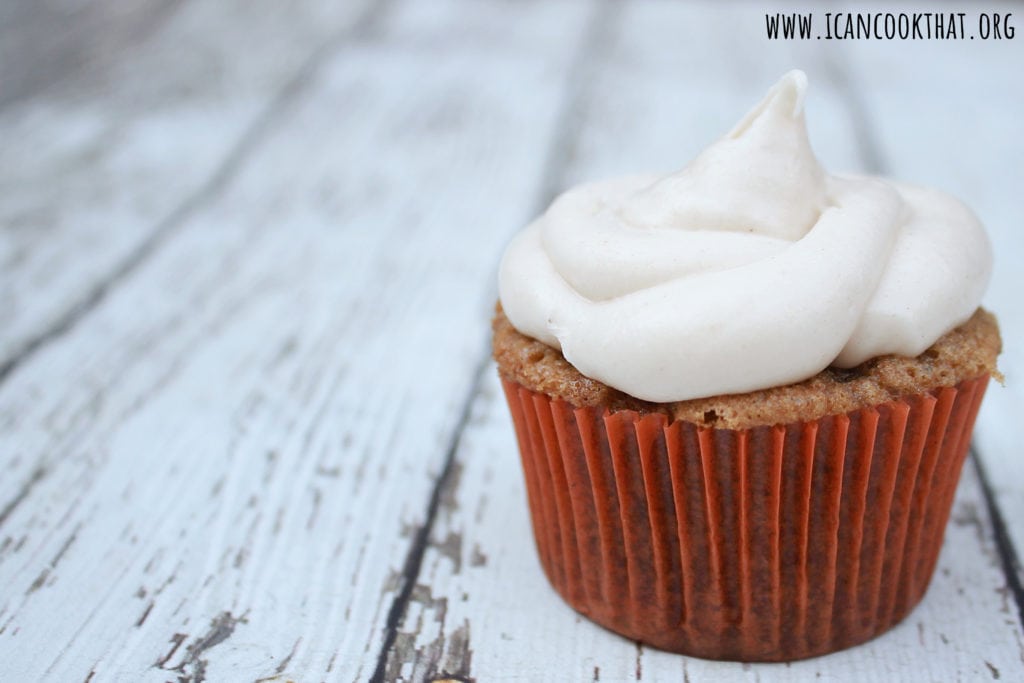
Nearly a decade ago, I shared a recipe for a Bunny Carrot Cake. Although it’s super cute, I figured it was about time I shared a decidedly less creative dessert that is still perfect for Easter and spring in general: Carrot Cake Cupcakes!
These Carrot Cake Cupcakes are based off the original recipe I shared 9 years ago, but I substituted in walnuts for the raisins. They are topped with cinnamon cream cheese frosting and then sprinkled with carrot-shaped sprinkles to make them extra adorable.
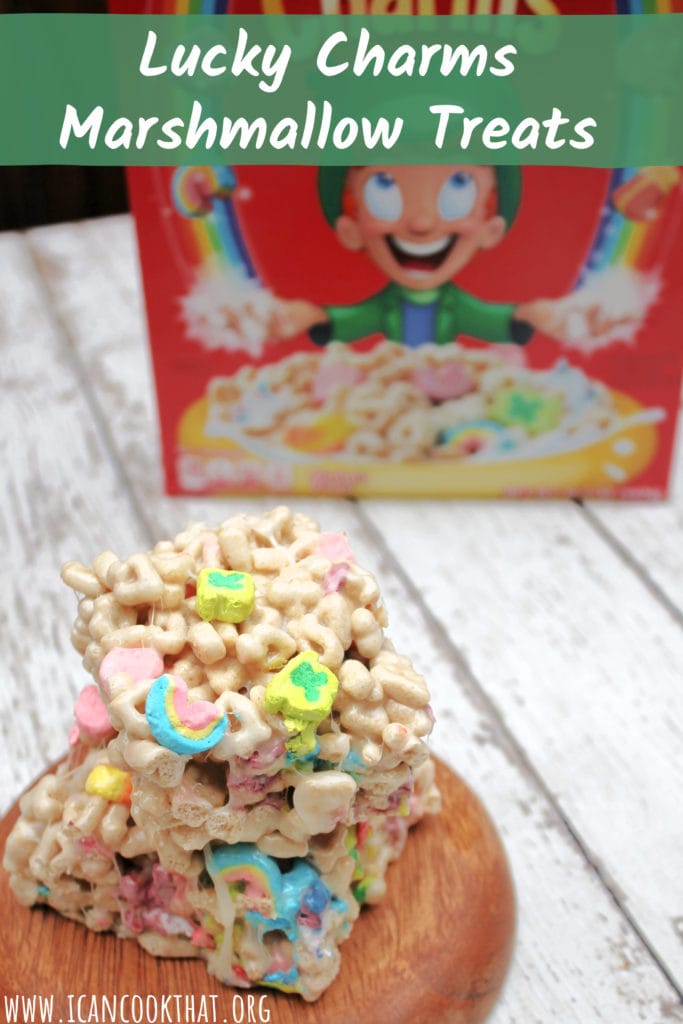
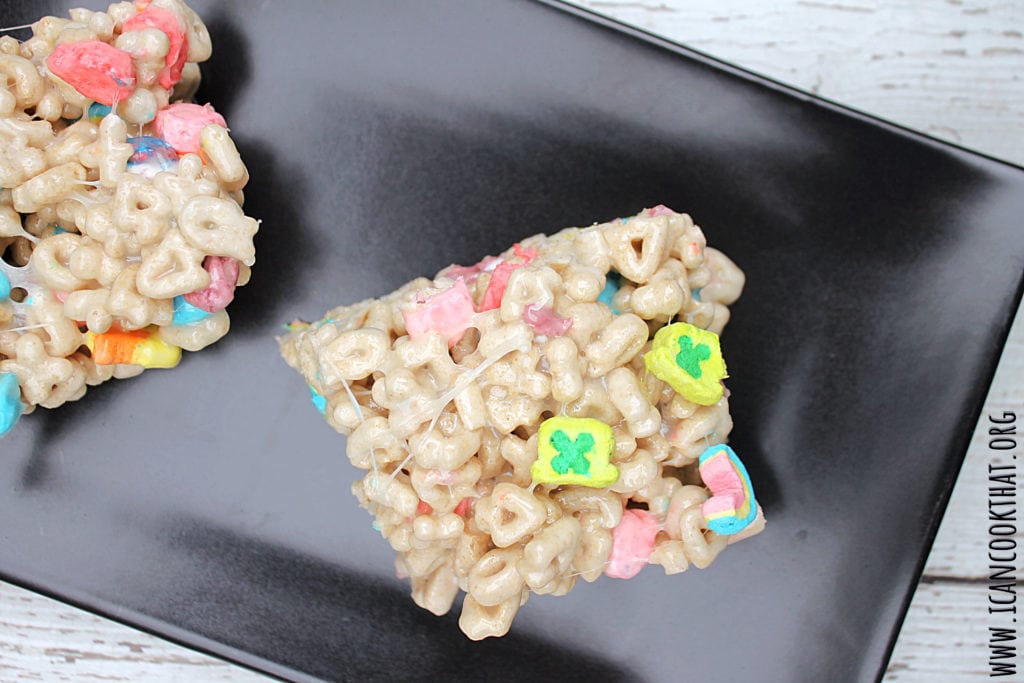
I have quite a few St. Patrick’s Day recipes on here, but I thought it was worth adding in one decidedly untraditional and whimsical recipe: Lucky Charms Marshmallow Treats!
The treats are made the same way as other chewy bars from your childhood but have the extra fun of colorful marshmallows! To keep the marshmallows mostly intact, this recipe adds the marshmallows back in at the end.
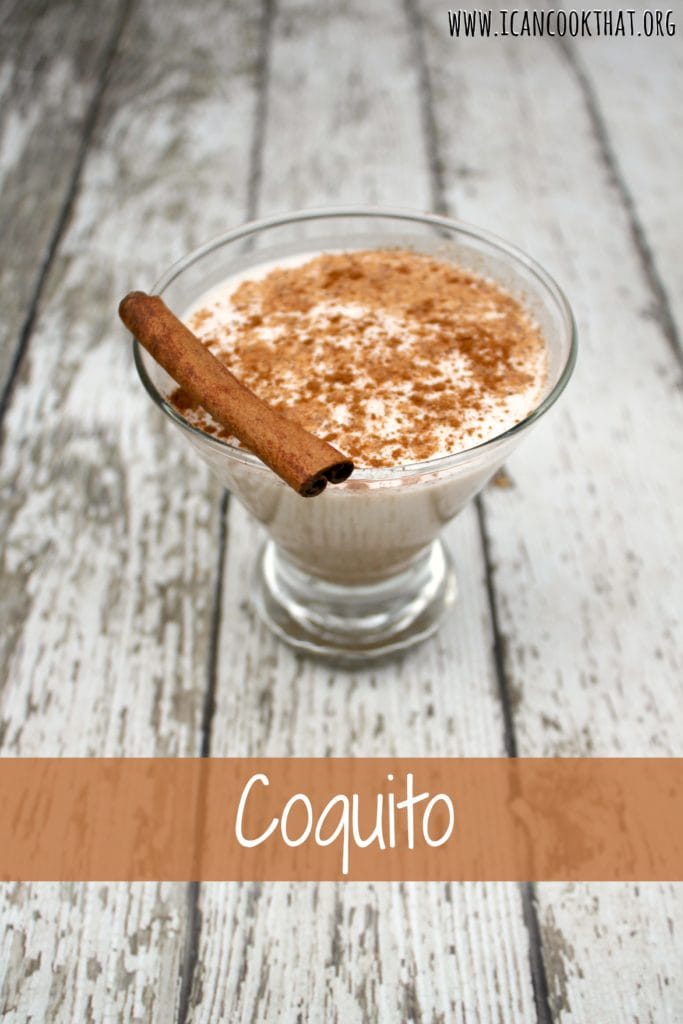
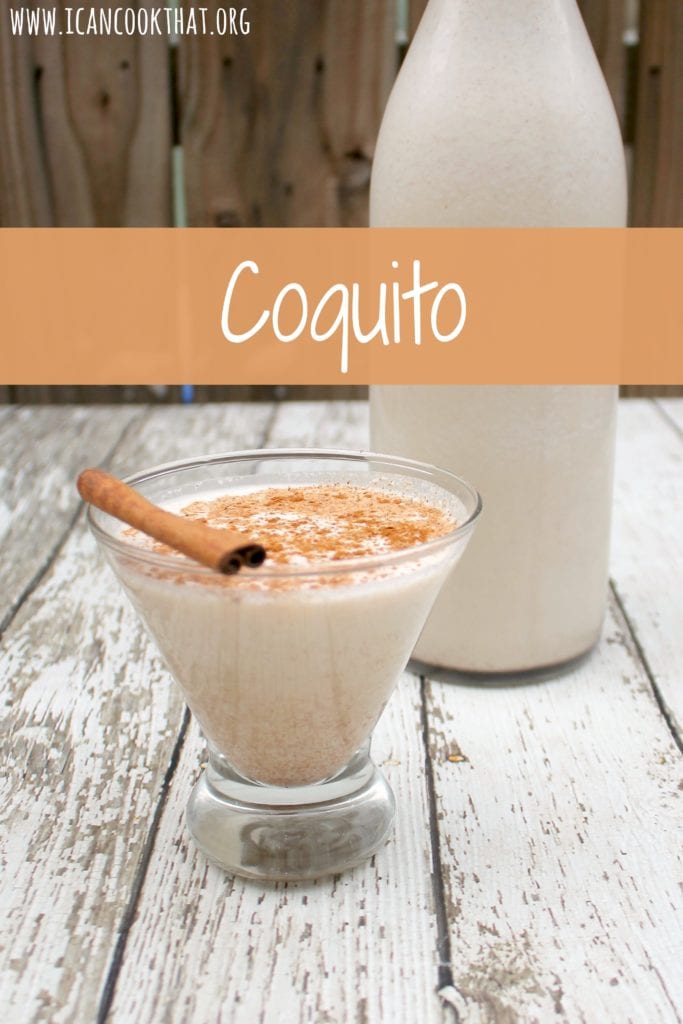
‘Tis the season for coquito! If you’ve never had coquito before, it’s a bit like eggnog.
Coquito means “little coconut,” and gets its flavor from coconut milk, cream of coconut, rum, and spices. For my version, I also used a coconut spiced rum to really up the flavor!
Coquito is a traditional Christmas drink that originated in Puerto Rico, but there are versions of it throughout the Caribbean. It’s absolutely delicious, plus it’s really easy to make!
Ingredients:
1 cup (8 oz) white rum (I used a coconut spiced rum)
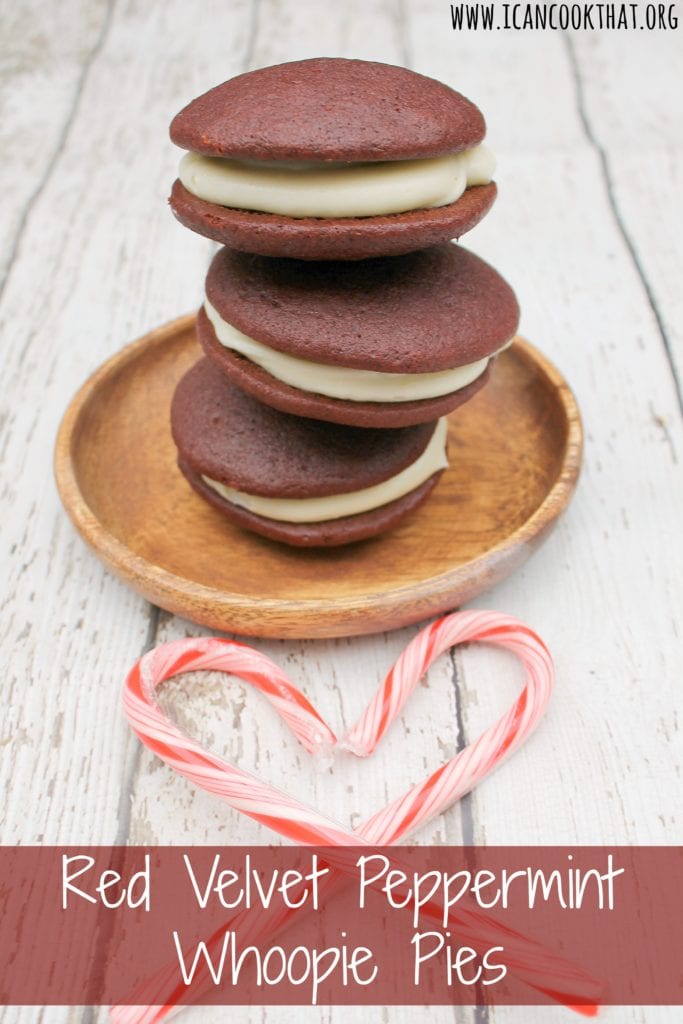
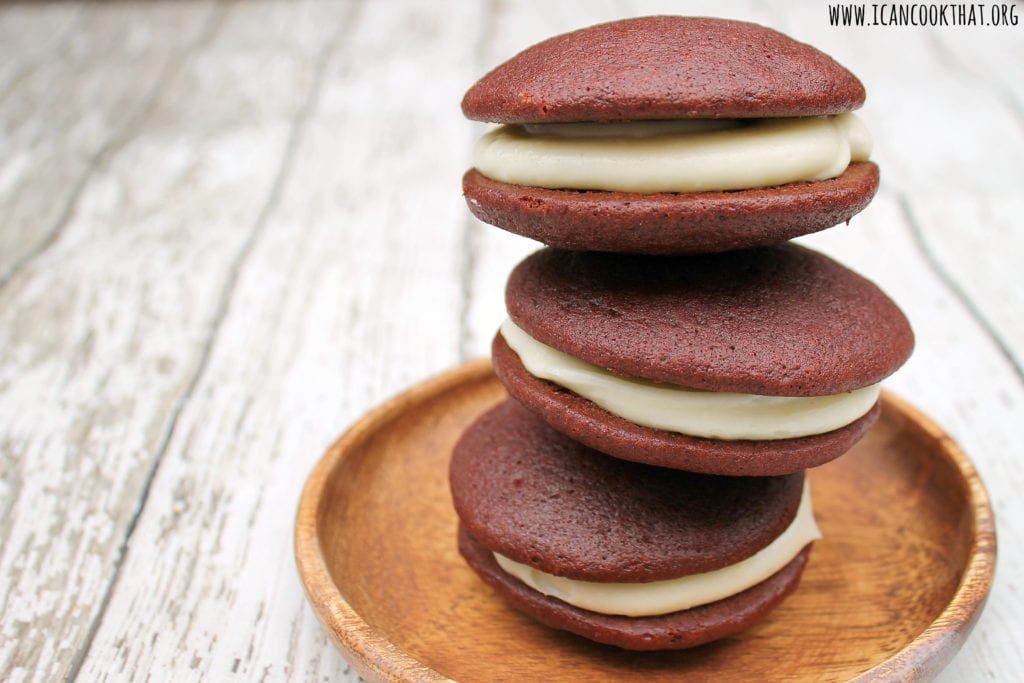
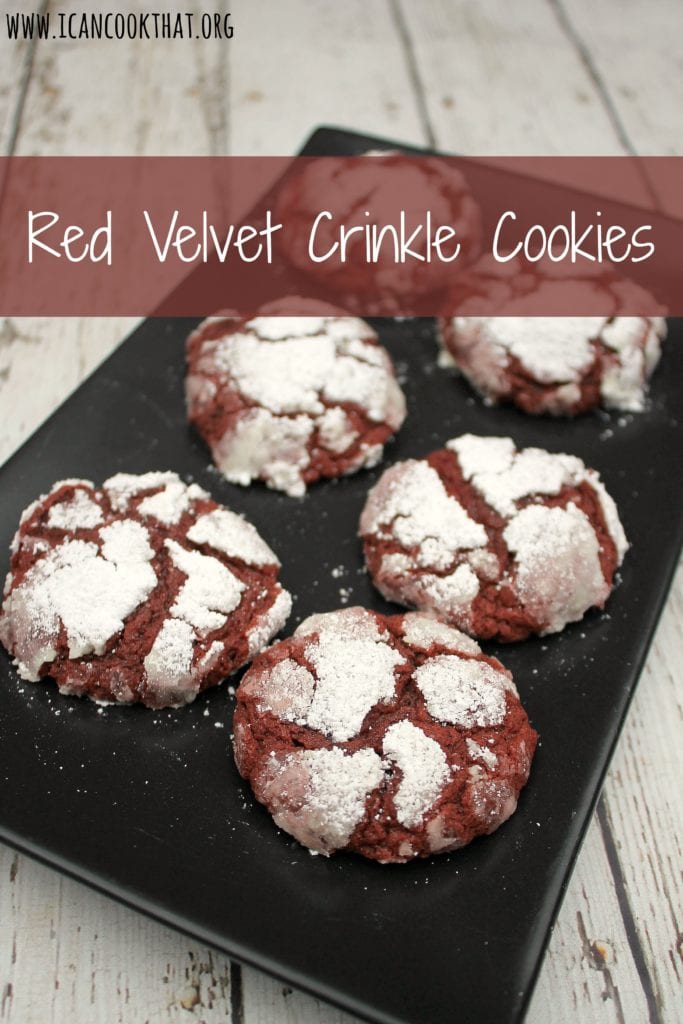
I’m having a little bit of a red velvet takeover on this blog. After making the Red Velvet Crinkle Cookies, I knew I wanted to make a Whoopie Pie version perfect for the holidays, specifically Red Velvet Peppermint Whoopie Pies! In case you don’t know what a whoopie pie is, they are cake-like cookies with creamy goodness sandwiched in between. They are quite popular in the Philadelphia area due to the influence of the Pennsylvania Dutch. In fact, I had whoopie pies at my wedding (along with cannolis and cupcakes)!
Whoopie pies are a lot easier to make than they look (I promise). These little guys are filled with a peppermint cream cheese filling, so they will get you right in the holiday spirit in no time!
Ingredients (makes 12 whoopie pies):
Red Velvet Cookies (makes 24 cookies):
1/2 cup (1 stick) unsalted butter, at room temperature
1 cup brown sugar, packed
1 large egg
2/3 cup whole milk
1 tablespoon white vinegar
1 tablespoon vanilla extract
1 (0.67 oz) tube gel red food coloring, about 1 tablespoon
2 cups flour
3 tablespoons unsweetened natural cocoa powder
1 teaspoon baking soda
1/2 teaspoon salt
Peppermint Cream Cheese Filling:
2 (8 oz) blocks cream cheese, at room temperature
1/2 cup (1 stick) unsalted butter, at room temperature
Note: I was sent some baking tools from OXO in order to write this post. Opinions are mine alone.
If you follow this blog, you know I am a huge fan of OXO-branded, well, anything. And every year, OXO helps to raise funds for childhood pediatric cancer research, supporting Cookies for Kids’ Cancer. In order to bring awareness to this organization each year, OXO has organized food blogger cookie swaps, which I’ve participated in since 2012.
Here are some of my old cookie swap and Cookies for Kids’ Cancer posts, in case you’re in a baking mood:
This year is a bit different. Instead, OXO is sponsoring The Cookie Chain, which empowers people to raise funds for pediatric cancer research and awareness of Cookies for Kids’ Cancer by baking, sending, and sharing packaged cookies to friends and loved ones. Participants can sign up via Cookies for Kids’ Cancer for a Cookie Chain kit including cookie bags, stickers and postcards about the promotion.
source: cookies for kids’ cancer
In the hopes of getting as many people involved as possible, I jumped at the chance to set up my own Fundraising page and got to baking! To help me get my bake on, OXO sent over some of their awesome baking tools. Here are some more details on those baking tools:
Silicone Baking Mat (paid link): The OXO Good Grips 2 Piece Half-Sheet Pan and Baking Mat Set is the perfect pair for any baking adventure. The reusable Silicone Baking Mat replaces parchment by transforming sheet pans into a non-stick surface. The food-safe silicone and fiberglass construction resists grease and residue and fits perfectly into the Half-Sheet Pan. Dishwasher safe. The Non-Stick Pro Half-Sheet pan is made from durable commercial-grade aluminized steel with a micro-textured pattern that promotes airflow under and around food for even, consistent cooking. The two-layer scratch- and stain-resistant coating is PFOA free and ceramic reinforced for exceptional performance for years to come.
3 Piece Mixing Bowl Set: Non-slip bottoms ensure the Mixing Bowls stay put on countertops and feature a soft, comfortable handle that’s easy to grip. The wide lip and spout make it easy to pour ingredients. Bowls nest for convenient storage.
Dough Whisk: When it comes to mixing dough by hand, a spoon just won’t cut it. You need a dedicated dough whisk to cut through thick dough. The solid stainless steel wires prevent sticking while the unique shape incorporates wet and dry ingredients with less effort. The innovative handle shape and soft, comfortable grip reduce pressure on your hands to prevent fatigue while you work. Once your cookies are in the oven, it’s easy to clean dough from between the coils. Dishwasher safe.
Medium Cookie Scoop: This size 40 portioner is designed for easy scooping and consistent shaping. The soft grip absorbs pressure while you squeeze to smoothly release your cookie dough. Dishwasher safe.
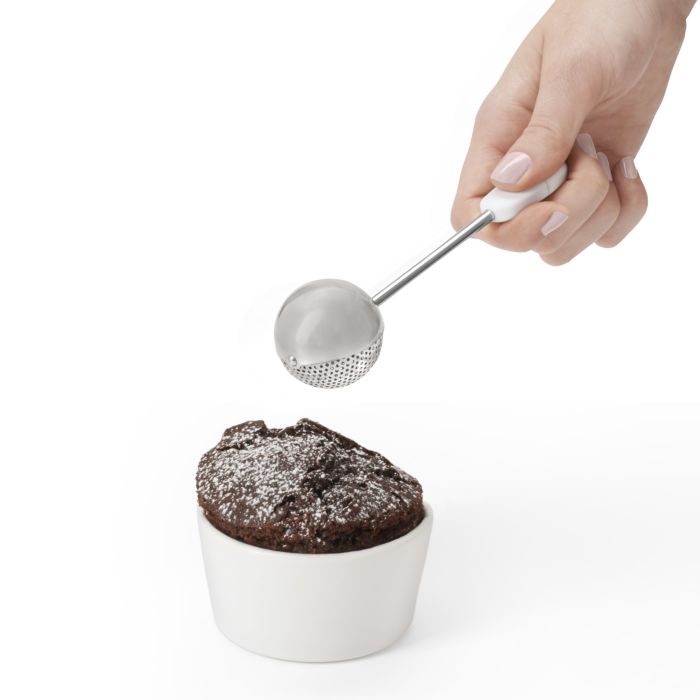
Baker’s Dusting Wand: With a quick twist to open and close, and a half-solid, half-perforated globe design, the Baker’s Dusting Wand is designed to prevent clumps, dumps and powdery messes. Perforation allows for evenly floured baking pans and lightly dusted baked goods. Sized to fit in most flour containers for storage.
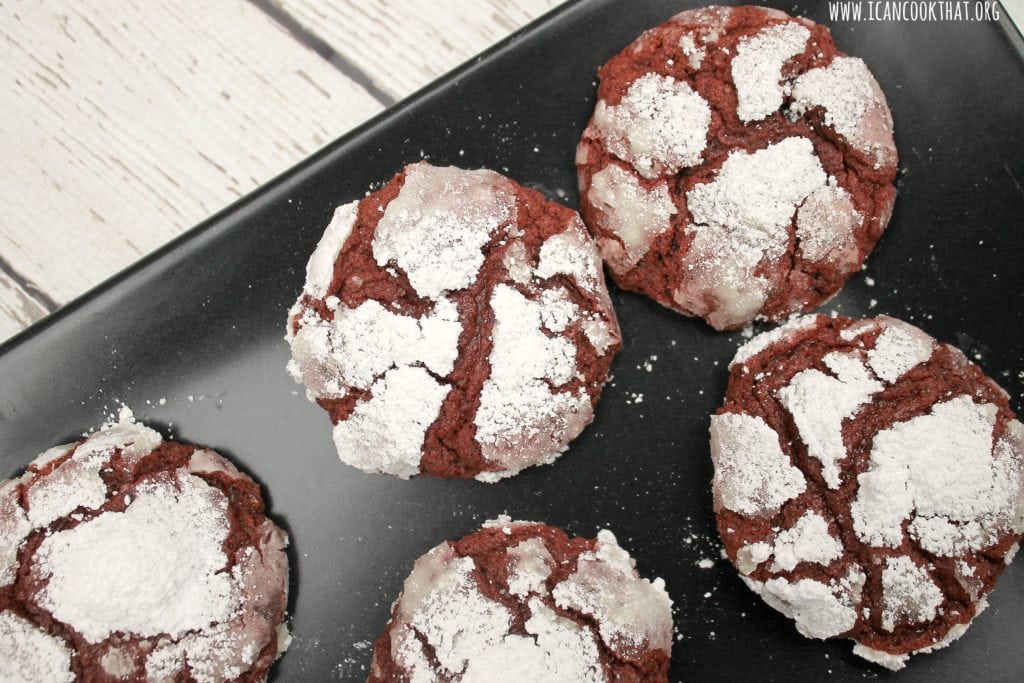
These baking tools were the perfect excuse to make a cookie recipe I had been eyeing up for a while now, Red Velvet Crinkle Cookies!
My recipe is based off a NYT Cooking recipe that can be found here. This recipe utilized both baking powder and baking soda so that the cookies rise and then fall quickly, created the crinkled effect on the cookies.
Ingredients:
1 cup (2 sticks) unsalted butter, at room temperature
1 1/3 cups granulated sugar
2 large eggs, at room temperature
1 (0.67 oz) tube of red food coloring gel (about 1 tablespoon)
1 tablespoon vanilla extract
2 3/4 cups all-purpose flour
3 tablespoons cocoa powder
2 teaspoons baking powder
3/4 teaspoon salt
1/2 teaspoon baking soda
1 1/3 cups confectioners’ sugar, plus more as needed
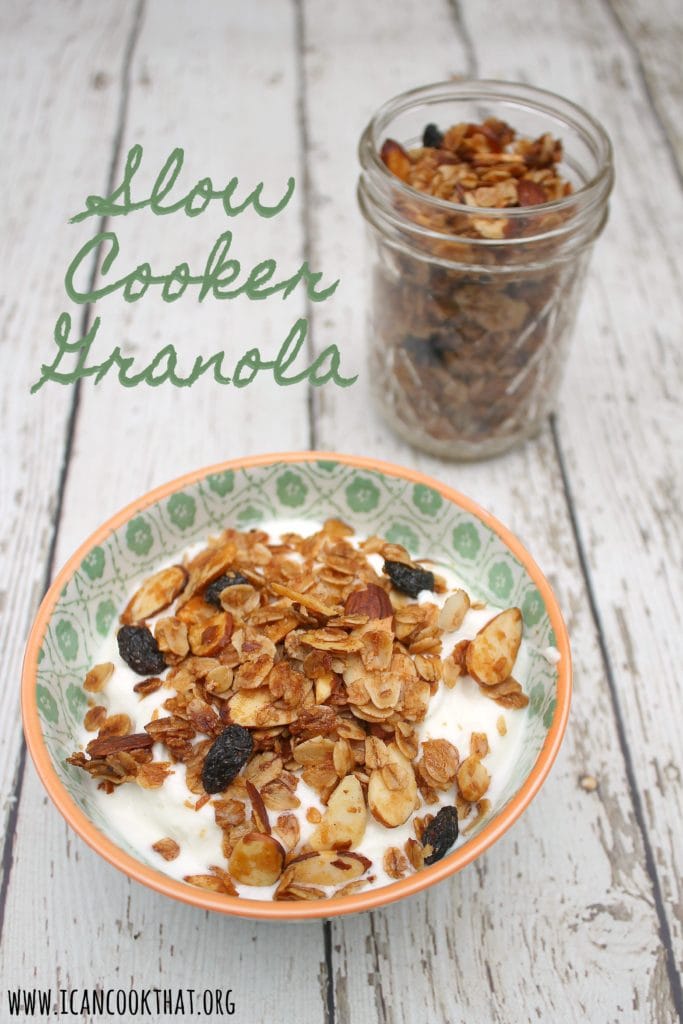
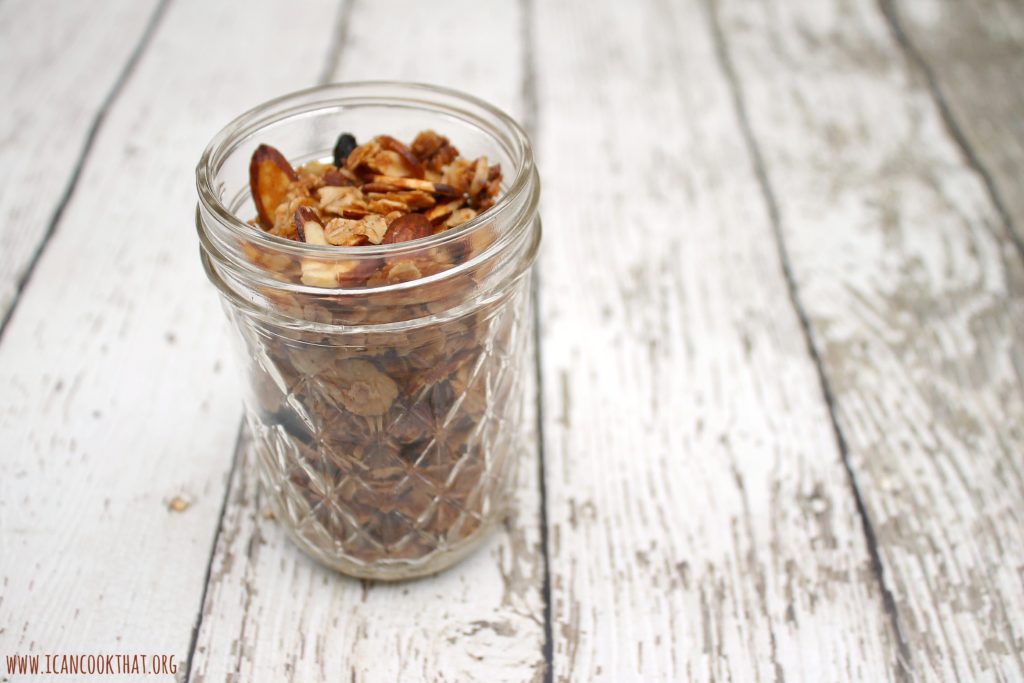
I am a big fan of my slow cooker (I have 50+ slow cooker recipes on my blog); especially recipes I can set them and walk away (or leave my house) for 4 to 8 hours. But like a lot of people, I’ve been home quite a bit more, given the pandemic, so I decided to try to make a recipe that requires you to stay a bit closer to your slow cooker – Slow Cooker Granola.
My mother-in-law mentioned making granola in her slow cooker, and how great the results were, so I wanted to try to make my own version!
This recipe is very adaptable, you can substitute in any nut, oil, liquid sweetener, and dried fruit you prefer. This recipe also makes a good amount of granola, but if your house is anything like mine, it will be gone before you know it!
Ingredients:
Cooking spray
5 cups old fashioned rolled oats (use gluten-free oats to ensure this is gluten-free)
1 1/2 cups sliced almonds (or any nut you prefer; omit to make nut-free)
1/3 cup unsweetened coconut flakes (optional)
1/3 cup light brown sugar, packed
1/2 teaspoon each of
ground cinnamon
ground nutmeg
salt
1/2 cup melted coconut oil
1/2 cup agave (or maple syrup or honey if you prefer)
1 tablespoon almond extract (or vanilla extract to make nut-free)
Note: I was sent a bottle of Nielsen-Massey Madagascar Bourbon Pure Vanilla Extract in order to write this post. Opinions are mine alone.
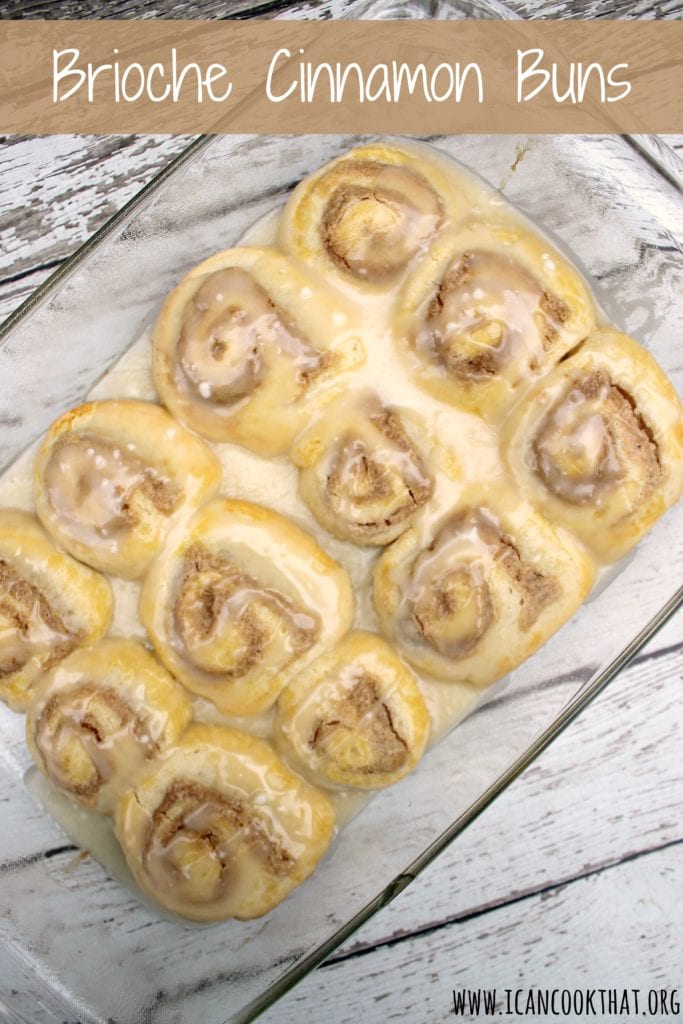
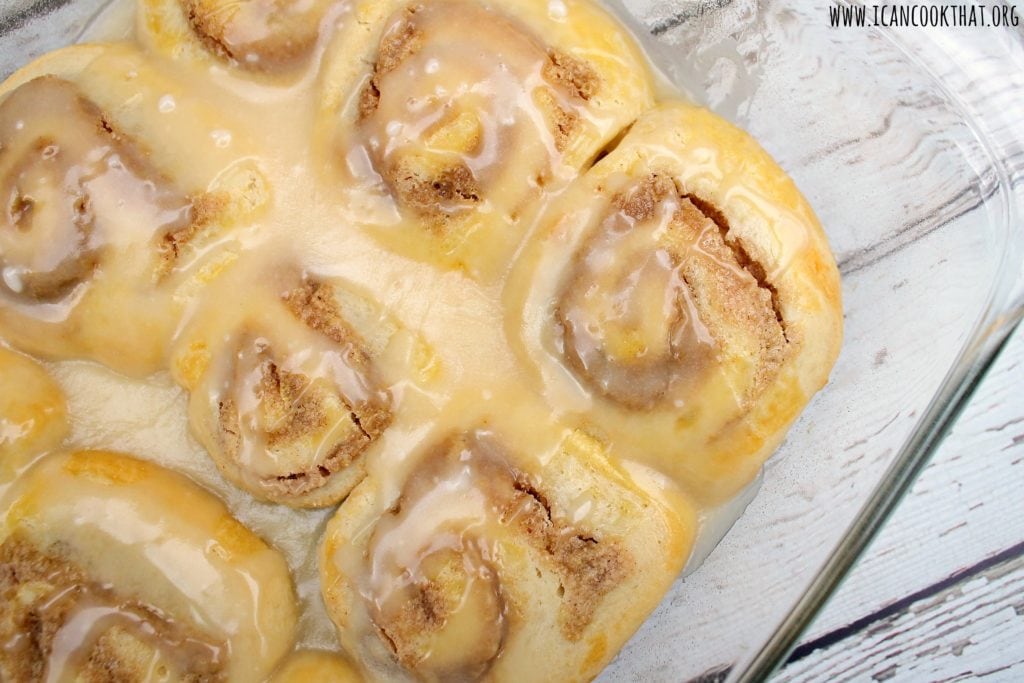
It seems like everyone has really taken to home baking while staying-at-home during this pandemic. I’ve been impressed with everyone’s sourdoughs, banana breads, and other baked goods! So why not add another awesome option to your repertoire: Cinnamon Rolls, or more specifically, Brioche Cinnamon Rolls!
Nielsen-Massey recently published a new video showing how to Knead Dough by Hand, which comes in handy while making this recipe.
This recipe for Brioche Cinnamon Rolls is based off a recipe from the Nielsen-Massey website as well.
Ingredients:
Dough:
2 tablespoons milk
2 1/4 teaspoons active dry yeast
1 2/3 cups flour, divided
1/4 cup sugar
1 1/4 teaspoon salt
3 large whole eggs, divided
7 tablespoons unsalted butter, cold, cubed
Cinnamon Roll Filling:
1 cup almond flour
1 egg white
1/4 cup brown sugar
2 tablespoons plus 1 teaspoon unsalted butter, melted
2 tablespoons water
1 teaspoon ground cinnamon
1/8 teaspoon salt
2 1/2 teaspoons Nielsen-Massey Pure Vanilla Extract
1/2 teaspoon Nielsen-Massey Pure Almond Extract
Vanilla Icing:
2 tablespoons unsalted butter
2/3 cup powdered sugar
Pinch of salt
2 tablespoons milk
1 teaspoon Nielsen-Massey Nielsen-Massey Pure Vanilla Extract