Happy Pi Day! As a Mathlete alum, Pi Day has always been a part of my nerdy math world. And what better way to celebrate than to make a pie?
I have some other pie recipes on here, but I have had a hankering for peanut butter lately, so I am celebrating this year with a Chocolate Peanut Butter Pie. This is a FoodNetwork.com recipe but I decided to make my own crust (you are more than welcome to just buy one – use a 9-inch pie crust).
Ingredients:
Pie Crust:
1 package oreos
4 tablespoons butter, melted
Hot Fudge Sauce:
1/3 cup heavy cream
1/4 cup light brown sugar
1/4 cup light corn syrup
2 tablespoons unsweetened cocoa powder
1/8 teaspoon table salt
2 teaspoons vanilla extract
3.5 ounces milk chocolate, finely chopped
Peanut Butter Pie:
8 ounces cream cheese, at room temperature
3/4 cup confectioners’ sugar, plus 2 tablespoons, divided
I’m so ready for spring. I’m sick of the cold and wind, although we didn’t have any snow this year. So I am going to force spring upon you in the hope of it pushing the warmer months up a little bit. When I think of spring, I always think of Strawberries. And what better way to show off strawberries than in Strawberry Shortcake, or more specifically, in Strawberry Shortcake Cupcakes? I decided to make them in cupcake form because, well, I like cupcakes. I used a Martha Stewart recipe for angel food cake to make the cupcake, filled the inside of the cupcake with a strawberry-sugar mixture, and topped it off with a strawberry whipped cream icing. These are pretty delicious if I do say so myself! Ingredients: Angel Food Cake Cupcakes:
1 cup cake flour (spooned and leveled)
1/4 teaspoon salt
12 large egg whites, room temperature
4 teaspoons lemon juice and zest from 1 lemon, divided
1 1/4 cups sugar
2 teaspoons pure vanilla extract
Strawberry filling:
3/4 container of strawberries, hulled and chopped
2 tablespoons sugar
Strawberry whipped cream:
1 8-oz container cream cheese
3/4 cup white sugar
1 1/2 teaspoon vanilla extract
lemon zest from lemon used in angel food cake
2 cups heavy cream
4-5 strawberries, stems removed and finely chopped
“The secret of good cooking is, first, having a love of it. … If you’re convinced that cooking is drudgery, you’re never going to be good at it, and you might as well warm up something frozen.”
– James Beard
James Beard is basically the father of American cooking as we know it today. He, along with the beloved Julia Child, is basically the “foodie” community’s version of The Beatles. As Julia Child put it, “in the beginning, there was James Beard.” So when I was offered to review a new compilation of some of his best recipes, I couldn’t wait to dig in. The cookbook, The Essential James Beard Cookbook: 450 Recipes That Shaped the Tradition of American Cooking is in stores beginning today.
The cookbook is filled with what we think of today as quintessential recipes: coleslaw, potato salad, pot roast, chicken pot pie. But James Beard’s travels through France as well as inspiration from the Chinese cooks who worked at the hotel his mother owned. Each page is filled with both new and different recipes as well as classic approaches to everyday food (ex. roasting a chicken). The editors did a great job of going through and adding notes to help enhance the recipes as well, including insight into what an ingredient is and what can be substituted.
I really had a tough time choosing a recipe to do this post. It’s really tough to pinpoint what James Beard is known for, because, well, he’s known for everything! I finally settled on his Cream of Tomato Soup recipe.
This recipe, passed down from his mother, is a classic comfort food choice. I loved the idea of making a family recipe and was intrigued by the process. (The onset of Hurricane Sandy may also have had some input into my decision.)
Ingredients:
2 28-oz cans of Italian plum tomatoes, undrained
1 cup Beef Stock
1 small yellow onion, roughly chopped
2 whole cloves, smashed
1 teaspoon dried basil
1 teaspoon kosher salt
1/2 teaspoon freshly ground black pepper
1 1/2 teaspoons sugar
1/2 teaspoon baking soda
1 tablespoon plus 1 1/2 teaspoon all purpose flour
1 tablespoon plus 1 1/2 teaspoons unsalted butter, melted
2 cups heavy cream
Chopped fresh basil or fresh flat-leaf parsley, for garnish
This recipe is adapted from James Beard’s The Essential James Beard Cookbook
I figured it was about time I posted another Julia Child recipe. I have to admit, the past two weeks recipes intimidated me quite a bit, so I didn’t even make them. Although I have to say, Coq au Vin is not even close to being a weeknight friendly meal. Vichyssoise, or cold leek and potato soup, is more my speed. I’m pretty “skilled” at throwing things into a pot and letting time do the work. This isn’t a meal you can make and eat within one night, unless you have the luxury of beginning your meal much earlier in the day. I cooked this one night, chilled it overnight, and served it for dinner the next night. The original recipe is quite simple. I added crumbled bacon on top because, well, what isn’t better with bacon?
Ingredients: (I didn’t want a ton of soup sitting around so I scaled the recipe down. This makes about 2 hearty bowls)
4 cups of chicken stock (or vegetable stock for vegetarian)
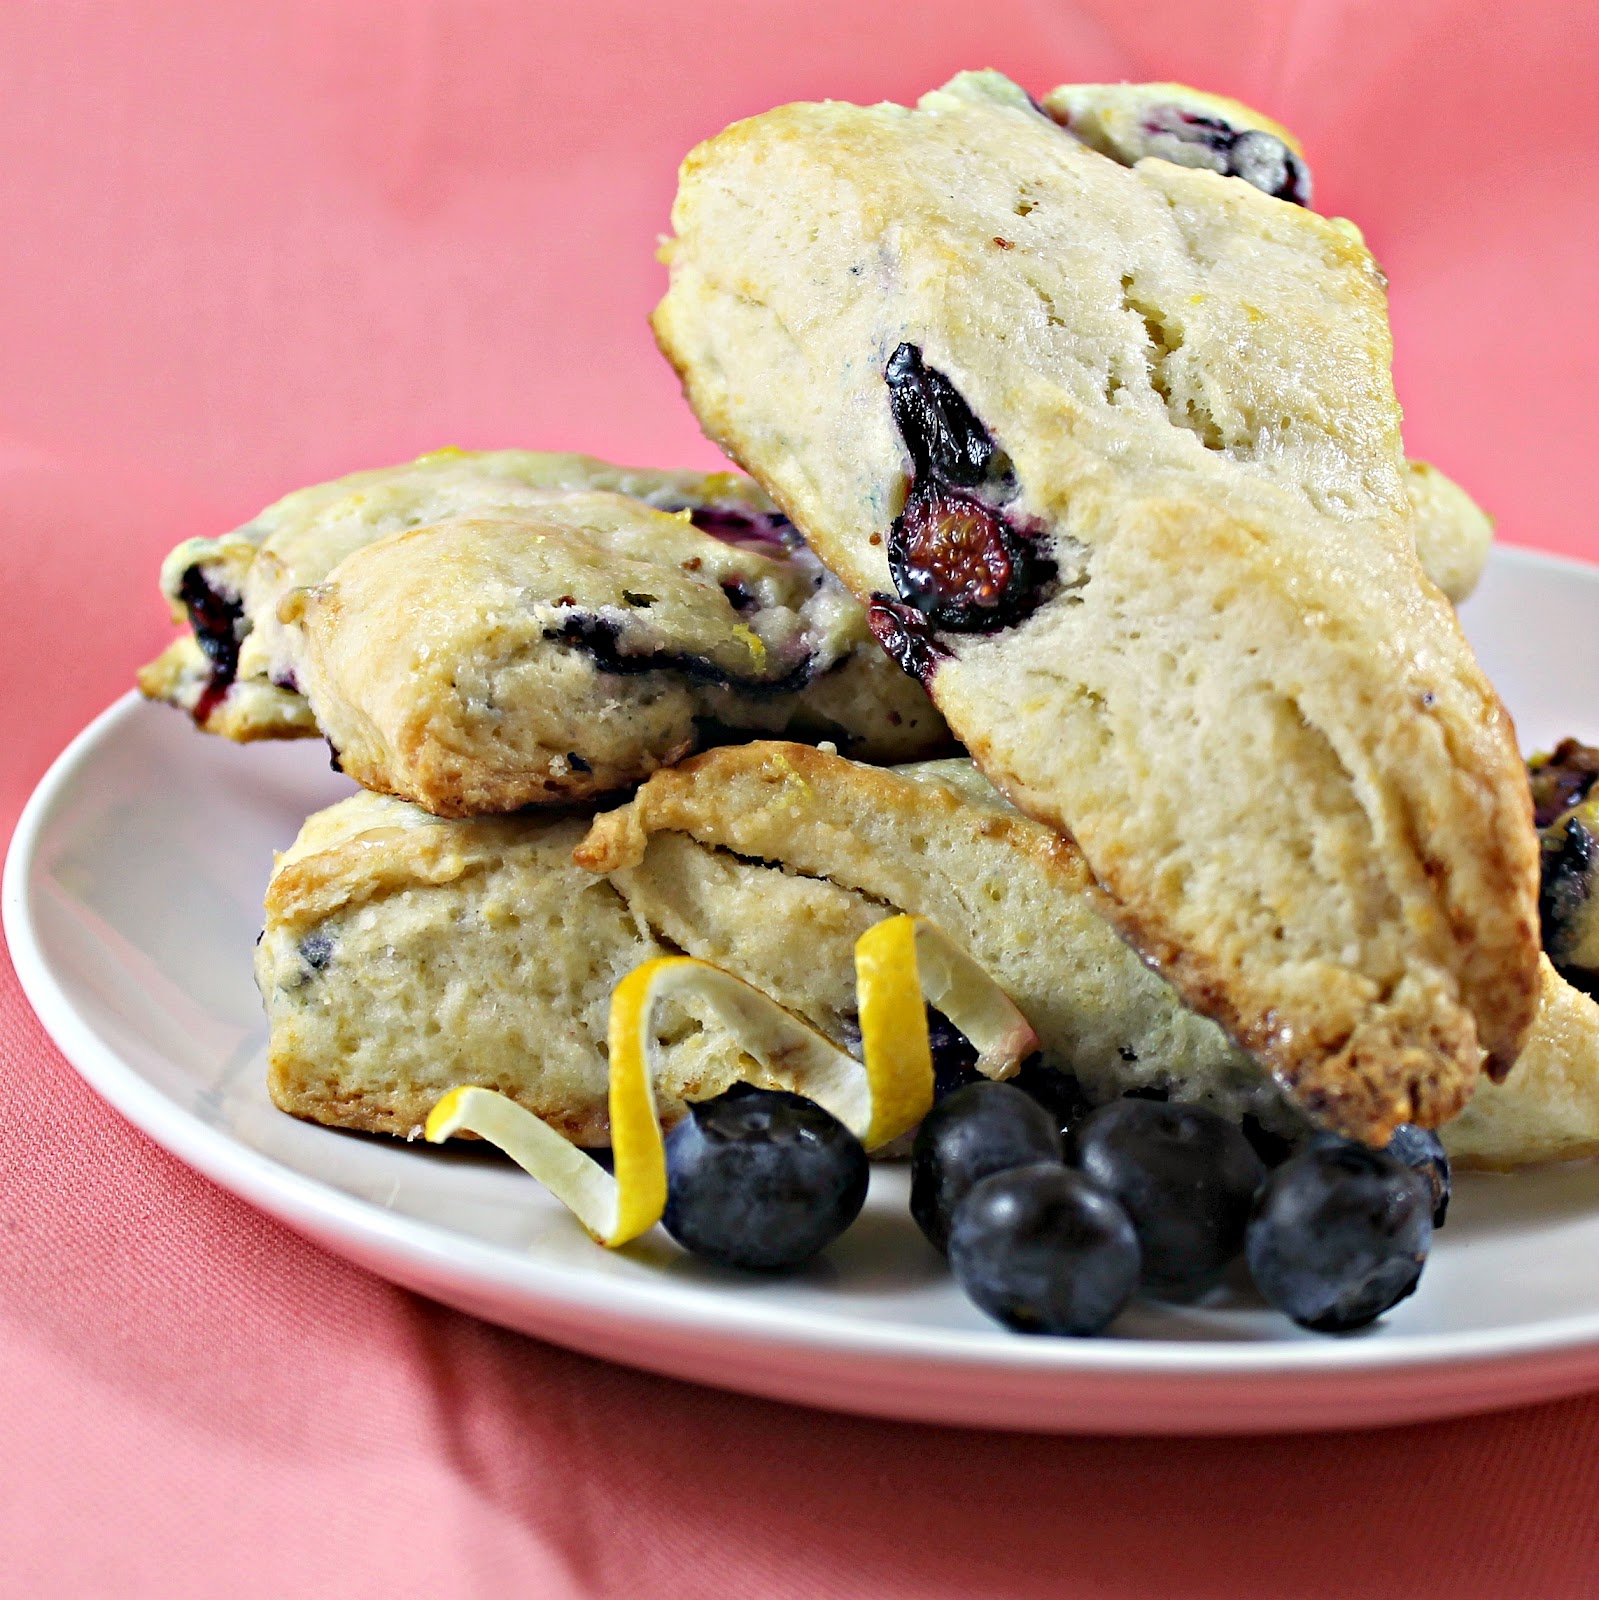
When a friend put in a special request for scones, I was up for the challenge. I’ve never made scones before, and I honestly wasn’t sure how they’d turn out. One of the issues is the definition of a scone changes depending on who you ask. In Great Britain, scones are usually round and look like American dinner biscuits. They are usually slightly sweet with raisins or currants. In America, we tend to make our scones into triangles. Despite being traditionally served as a dessert or with tea and coffee, most Americans eat scones as a breakfast. Scones within America tend to be include fruit and are more sweet than their British counterparts.
The difference between scones and biscuits is that scones used cold butter cut into the flour, making the scones flaky, while biscuits tend to use some type of shortening which results in a crumbly bread. So basically my goal was to end up with a baked good hopefully resembling a scone instead of a biscuit!
I used a recipe from Tyler Florence but changed the amount of Lemon drizzle used.
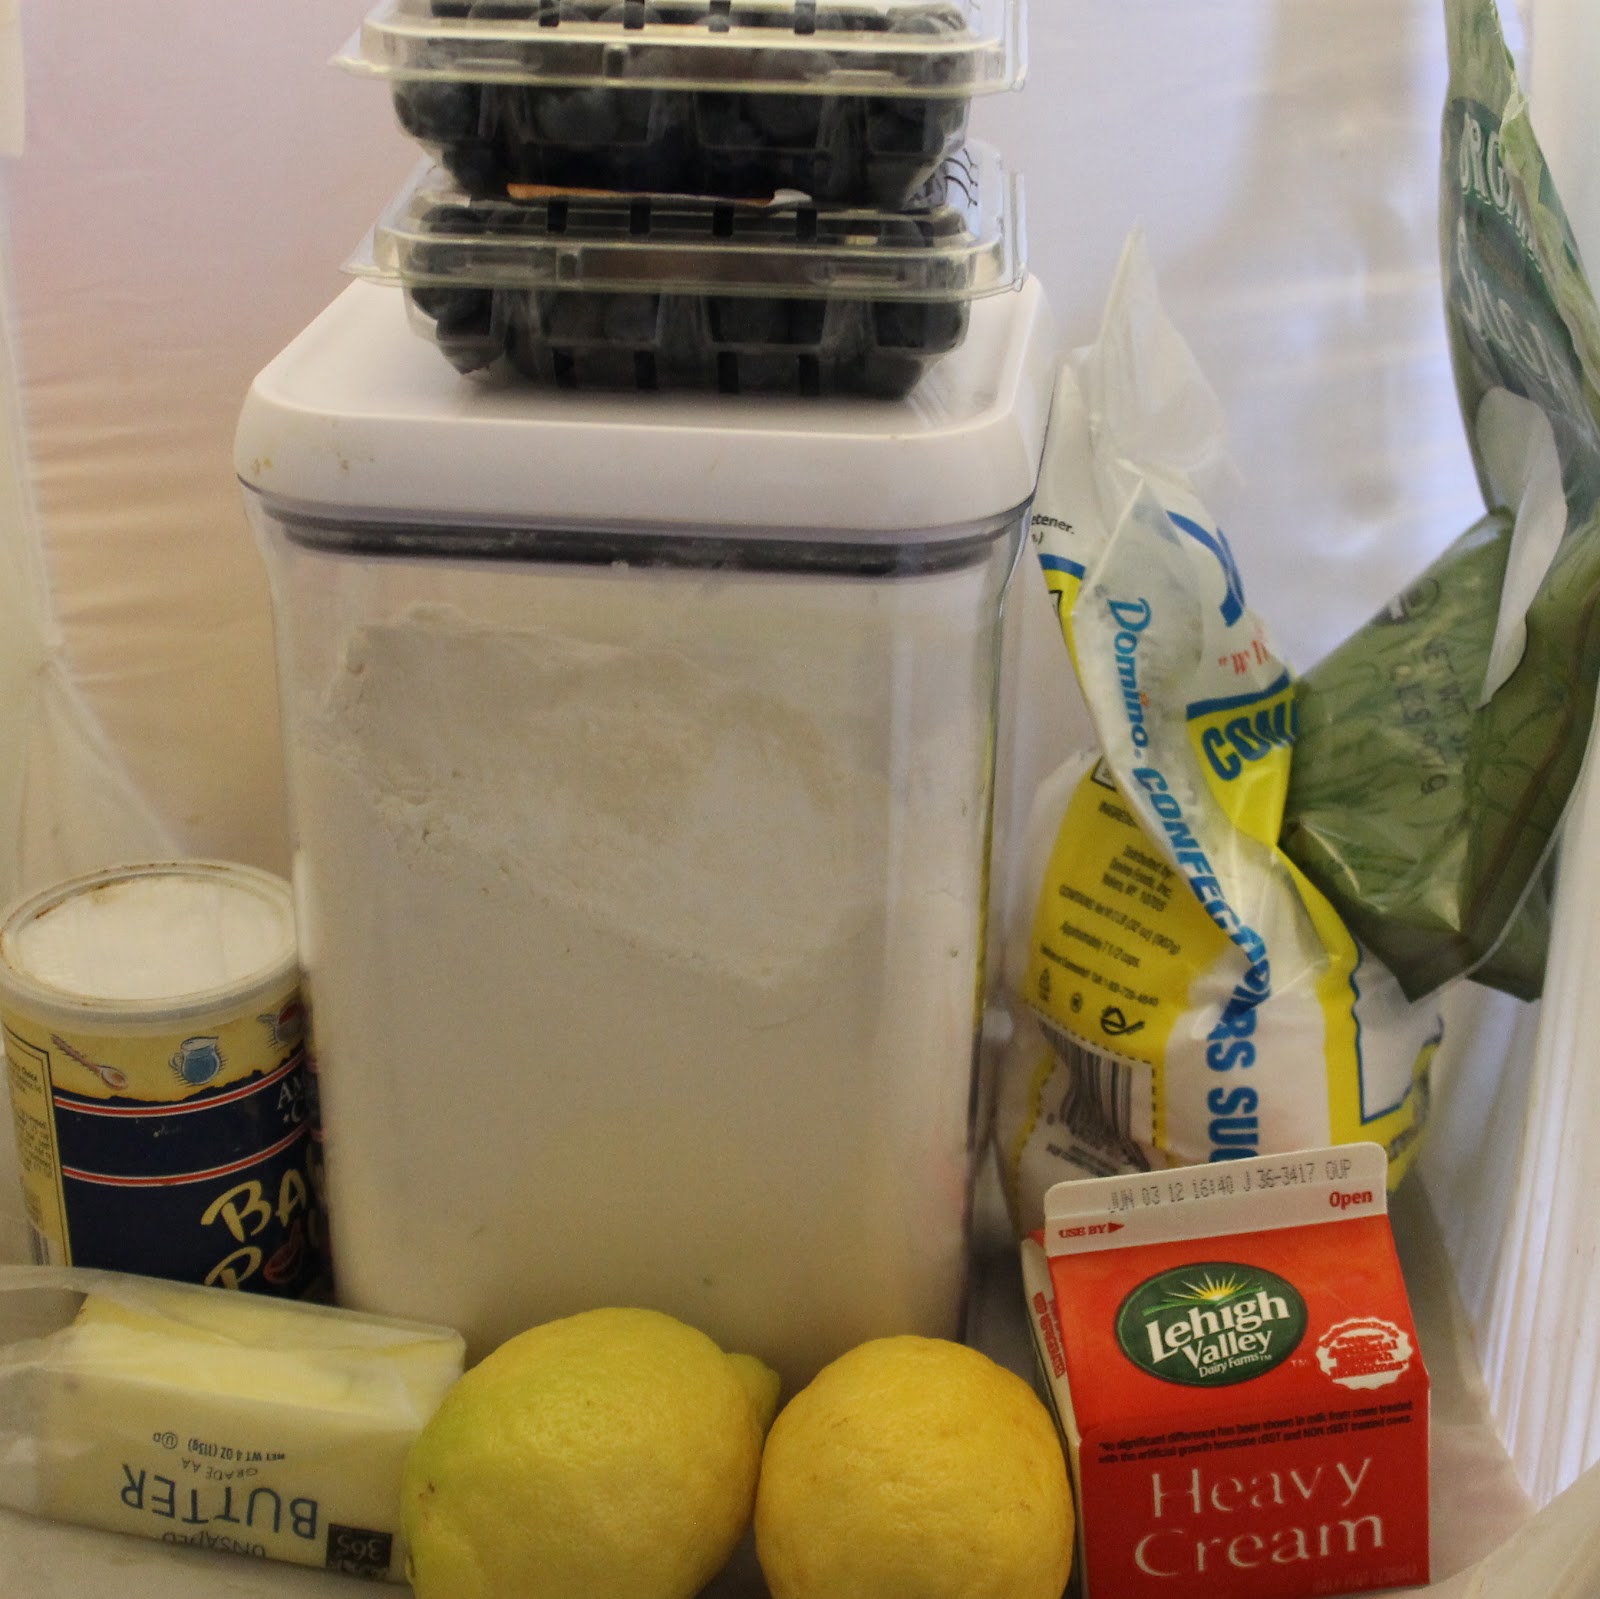
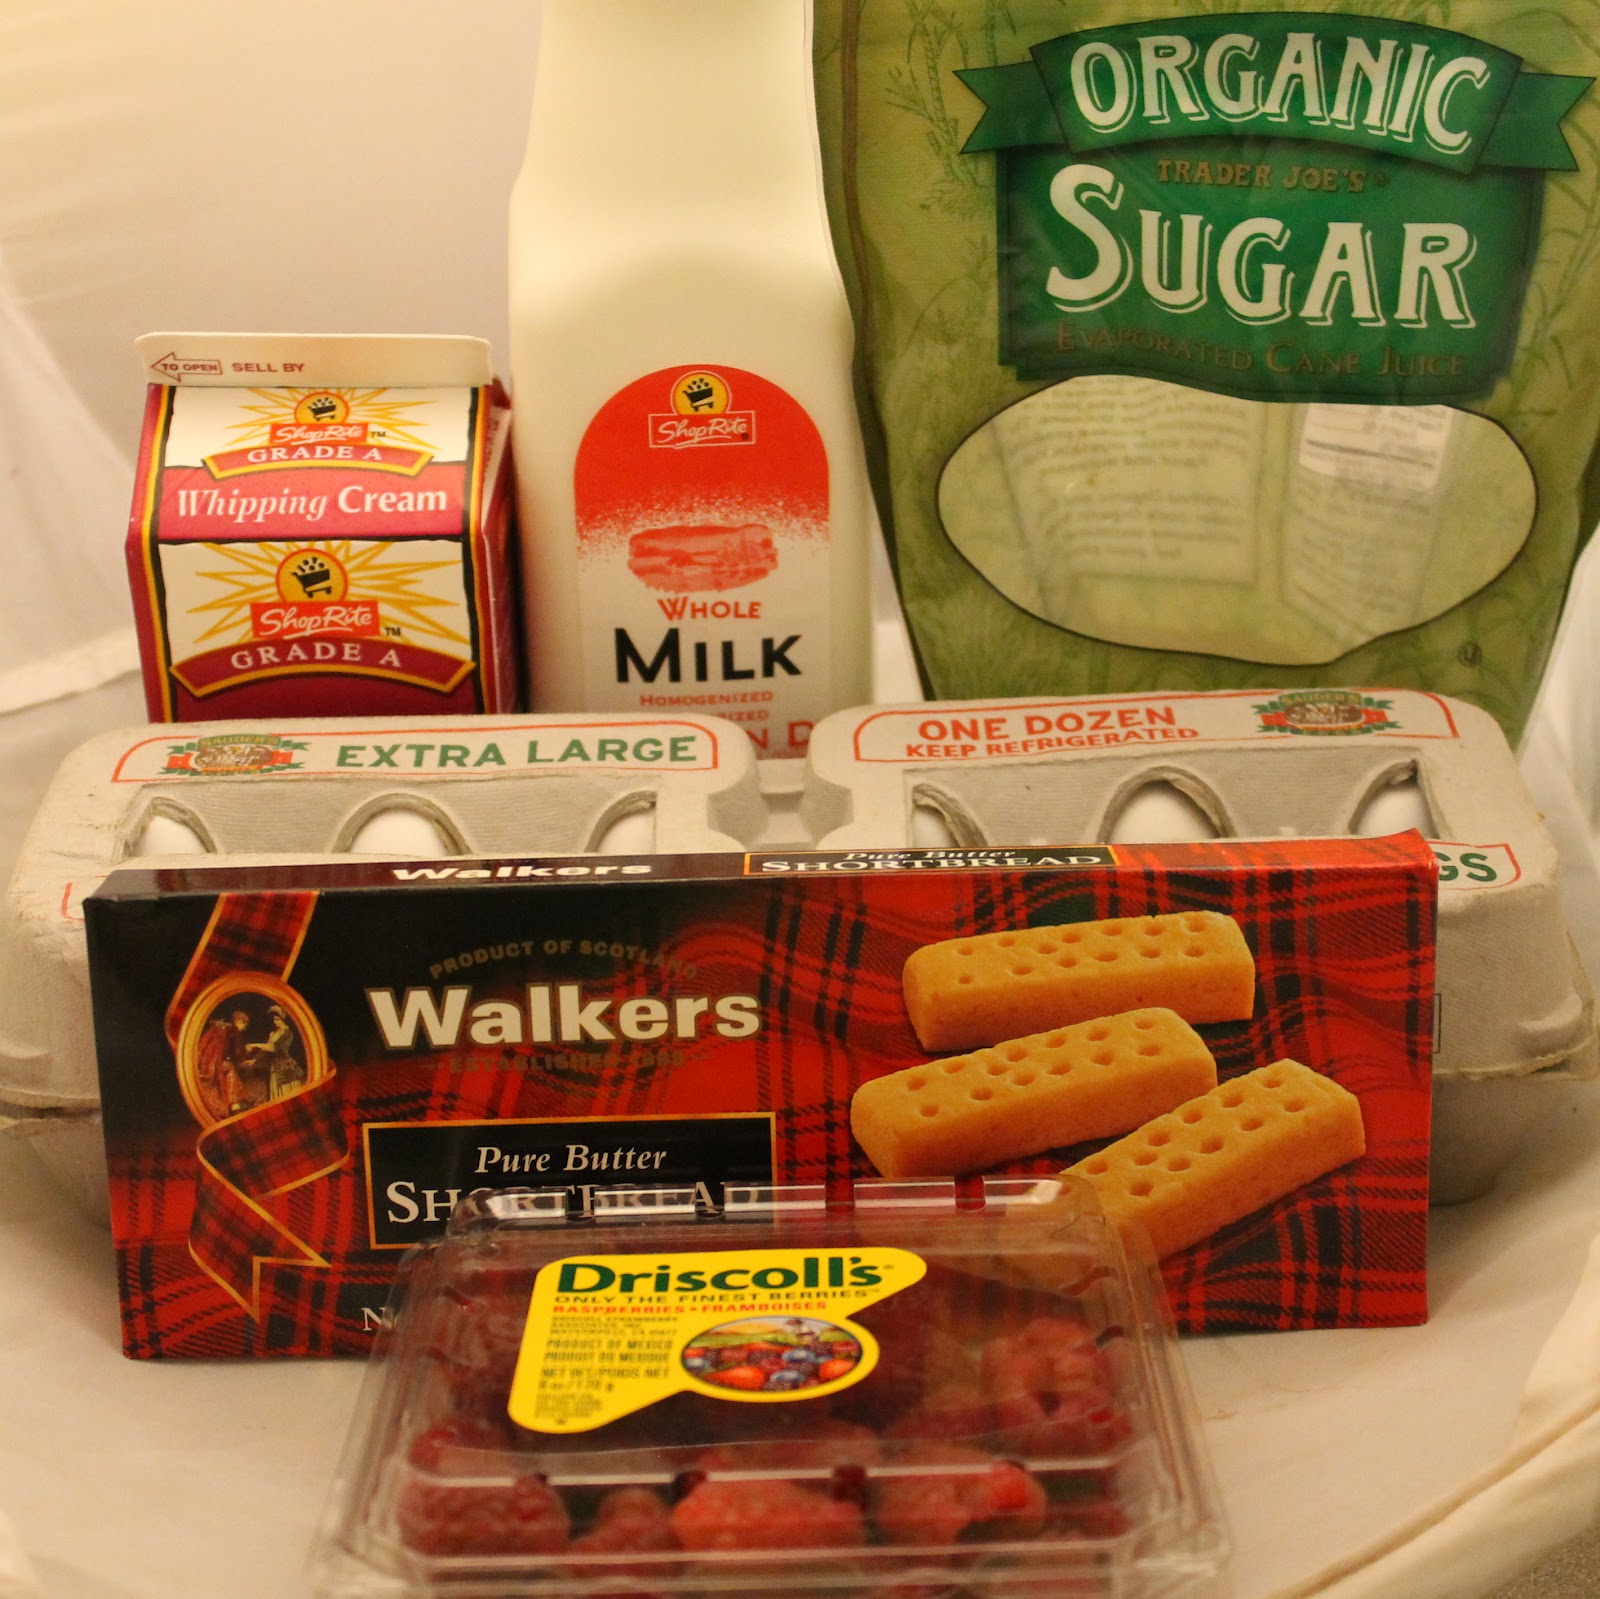
Ingredients:
for the scones:
2 cups all-purpose flour
1 tablespoon baking powder
1/2 teaspoon salt
2 tablespoons sugar
5 tablespoons unsalted butter, cold, cut in chunks
1 cup fresh blueberries
1 cup heavy cream, plus more for brushing the scones
for the glaze:
1/2 cup freshly squeezed lemon juice
2 cups confectioners’ sugar, sifted
1 tablespoon unsalted butter
1 lemon, zest finely grated
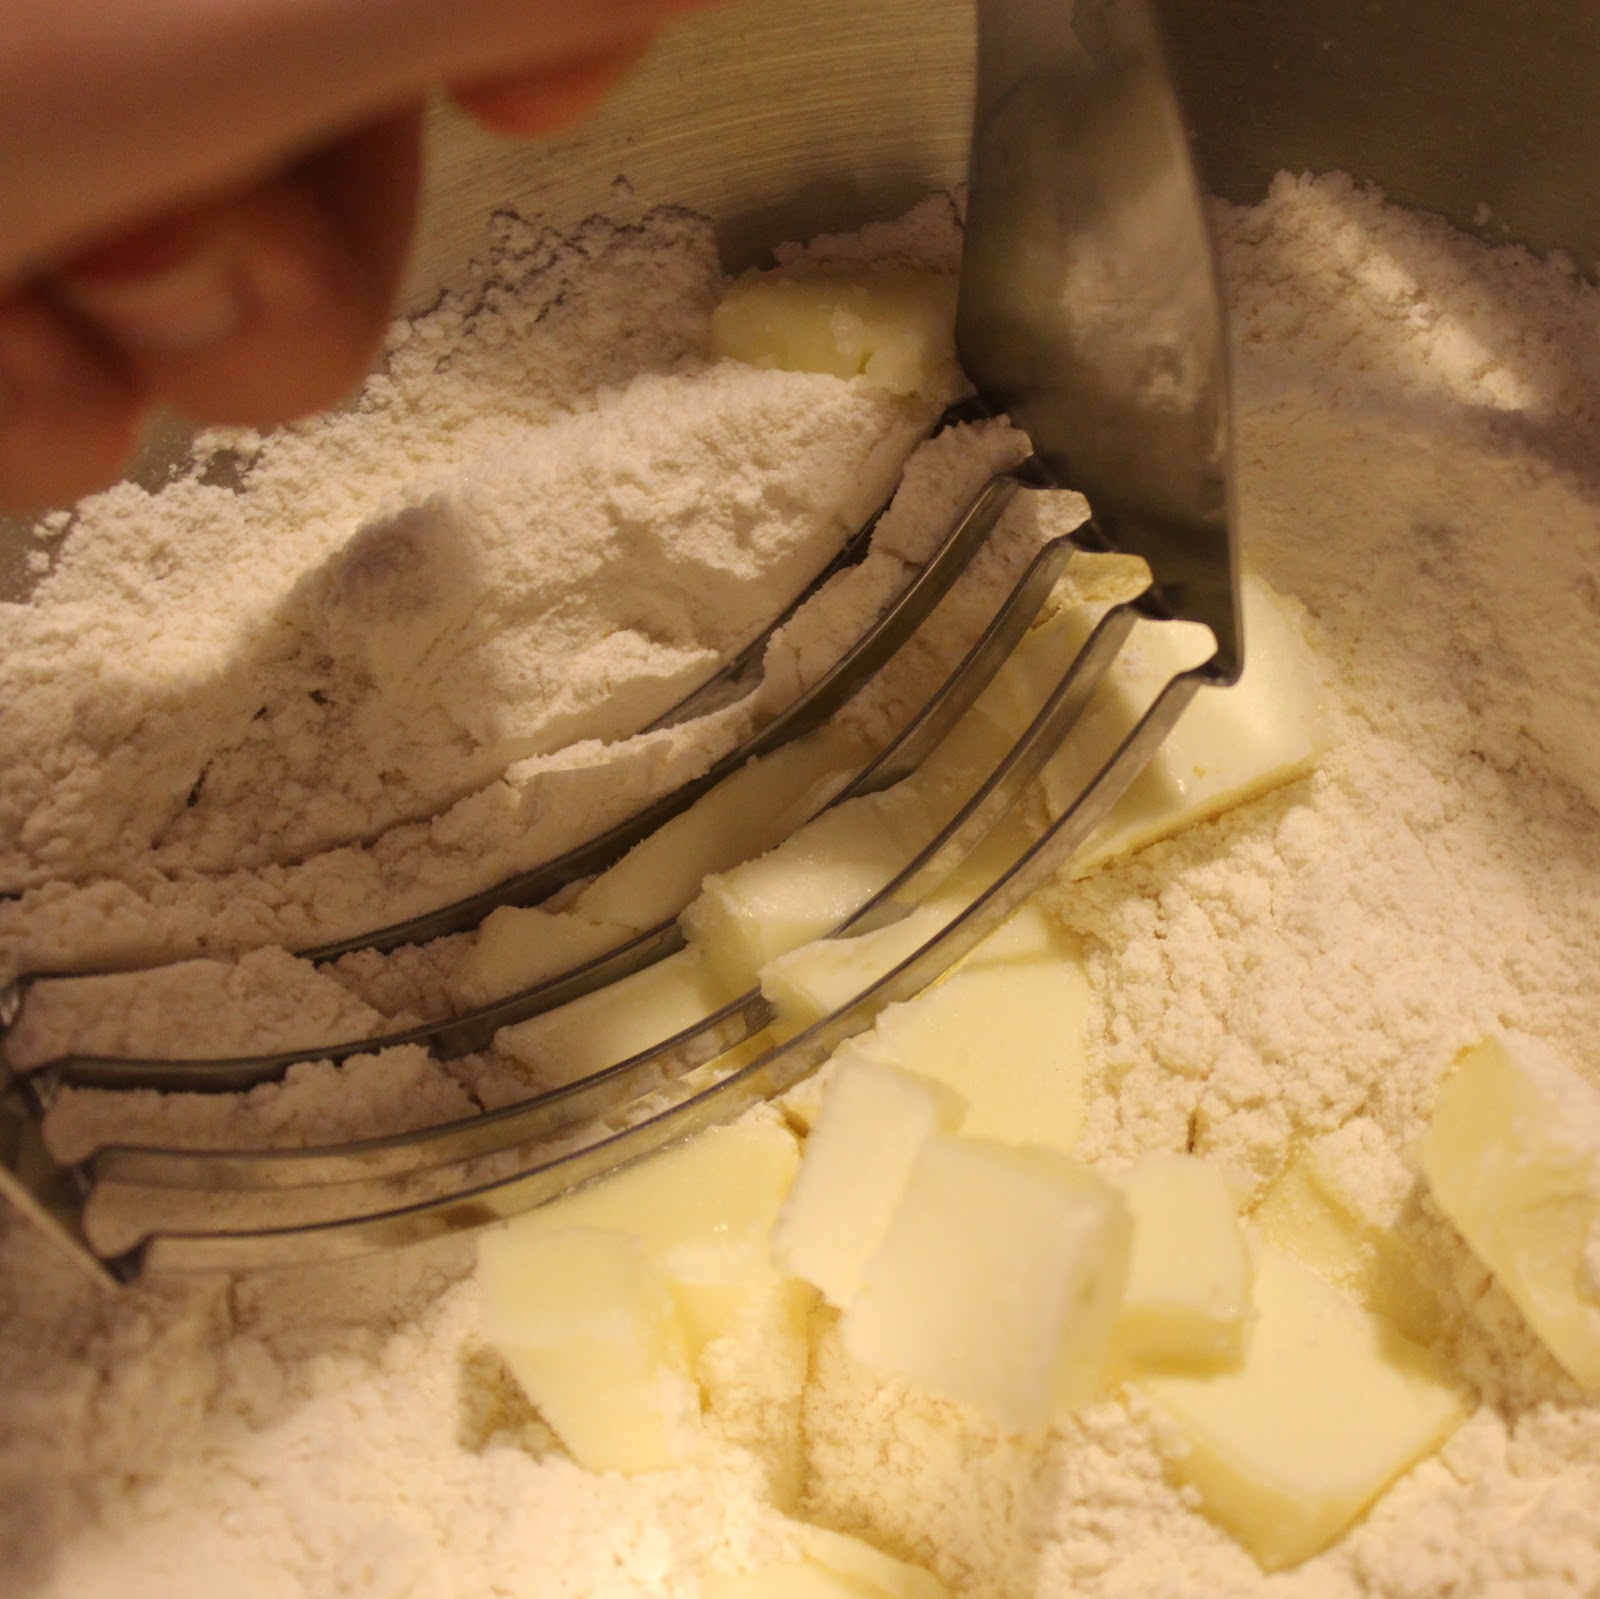
Preheat your oven to 400 degrees. Sift the flour, baking powder, salt and sugar together and mix to combine.
Remove the butter from the refrigerator. Cut the butter into smaller pieces (I aimed for 4 pieces per tablespoon) and add it to the flour mixture. You want to “cut” the butter into the flour using two forks or a pastry blender (the tool in my photo).
The goal is to get small pieces of butter covered in flour. It supposedly should look like coarse crumbs. Mine clearly doesn’t.
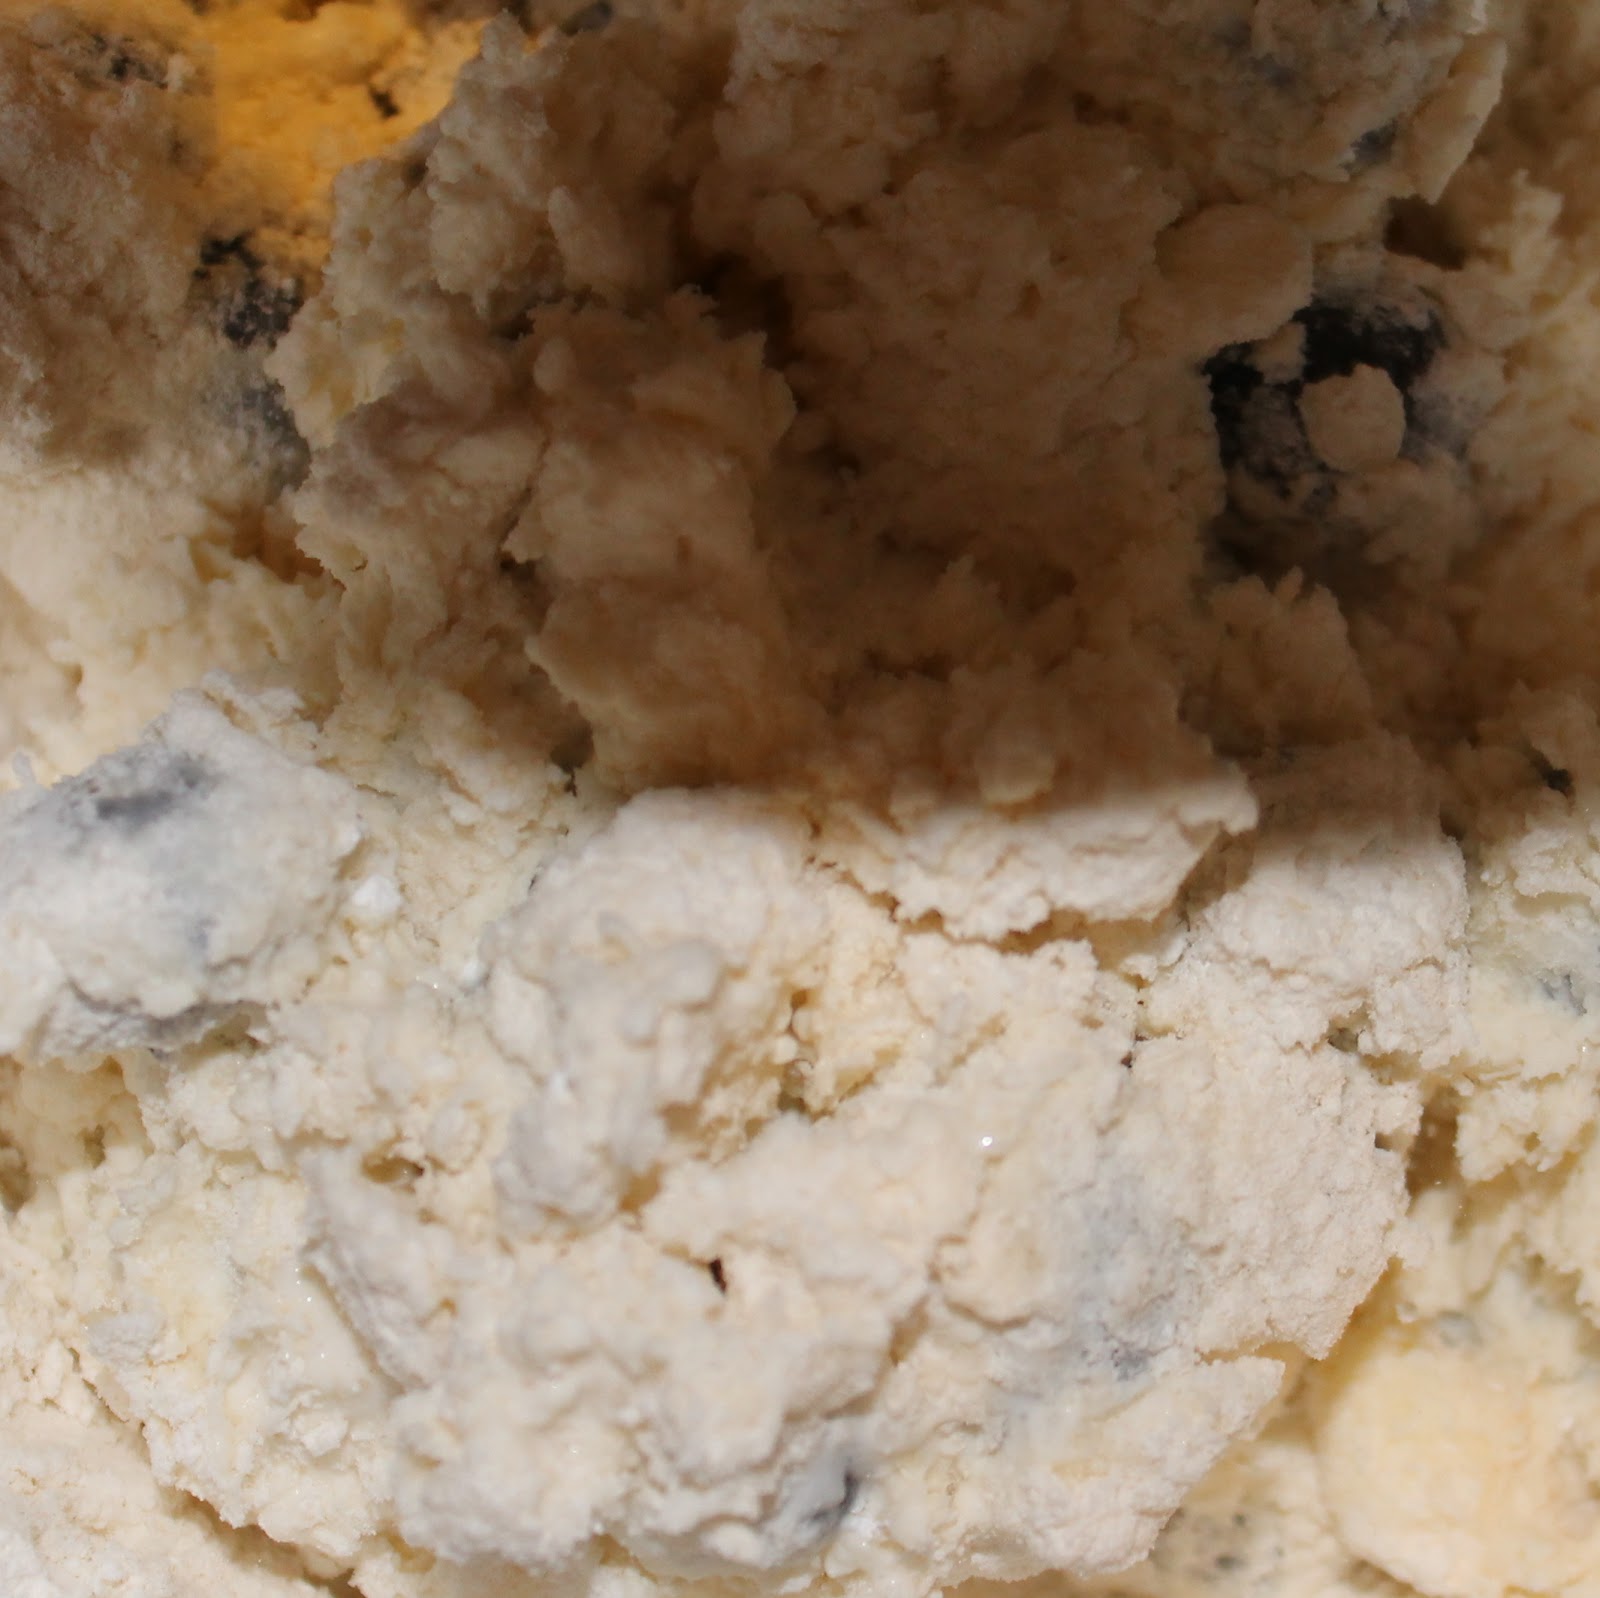
Add the blueberries to the mixture and combine ever so carefully, trying not to break the blueberries. (Using a silicone spatula or your hands will work well).
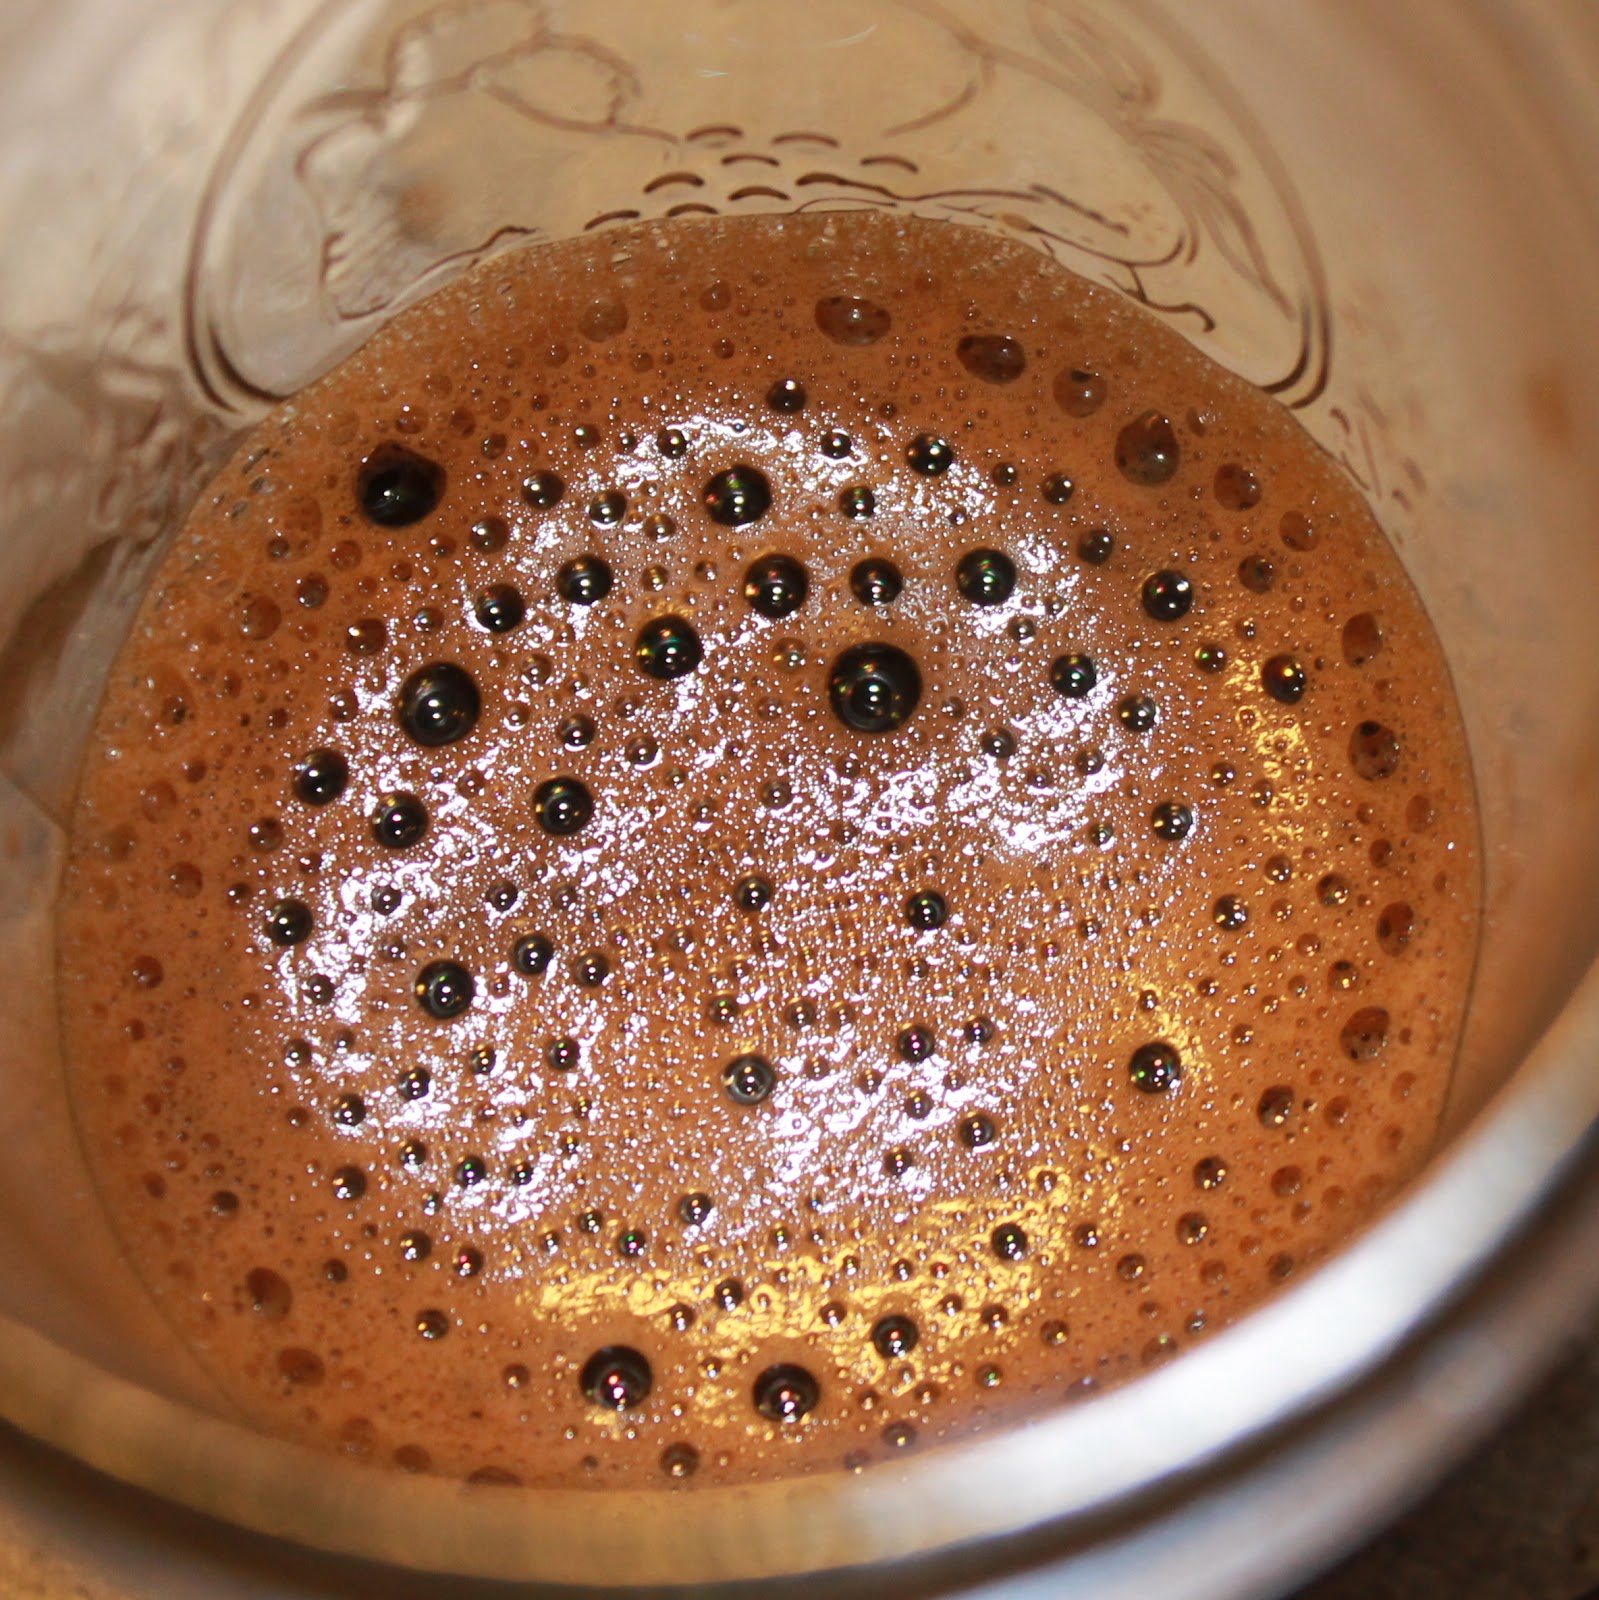
Make a well in the center and pour in the heavy cream. Fold the cream into the mixture until just incorporated, it can still be a little sticky.
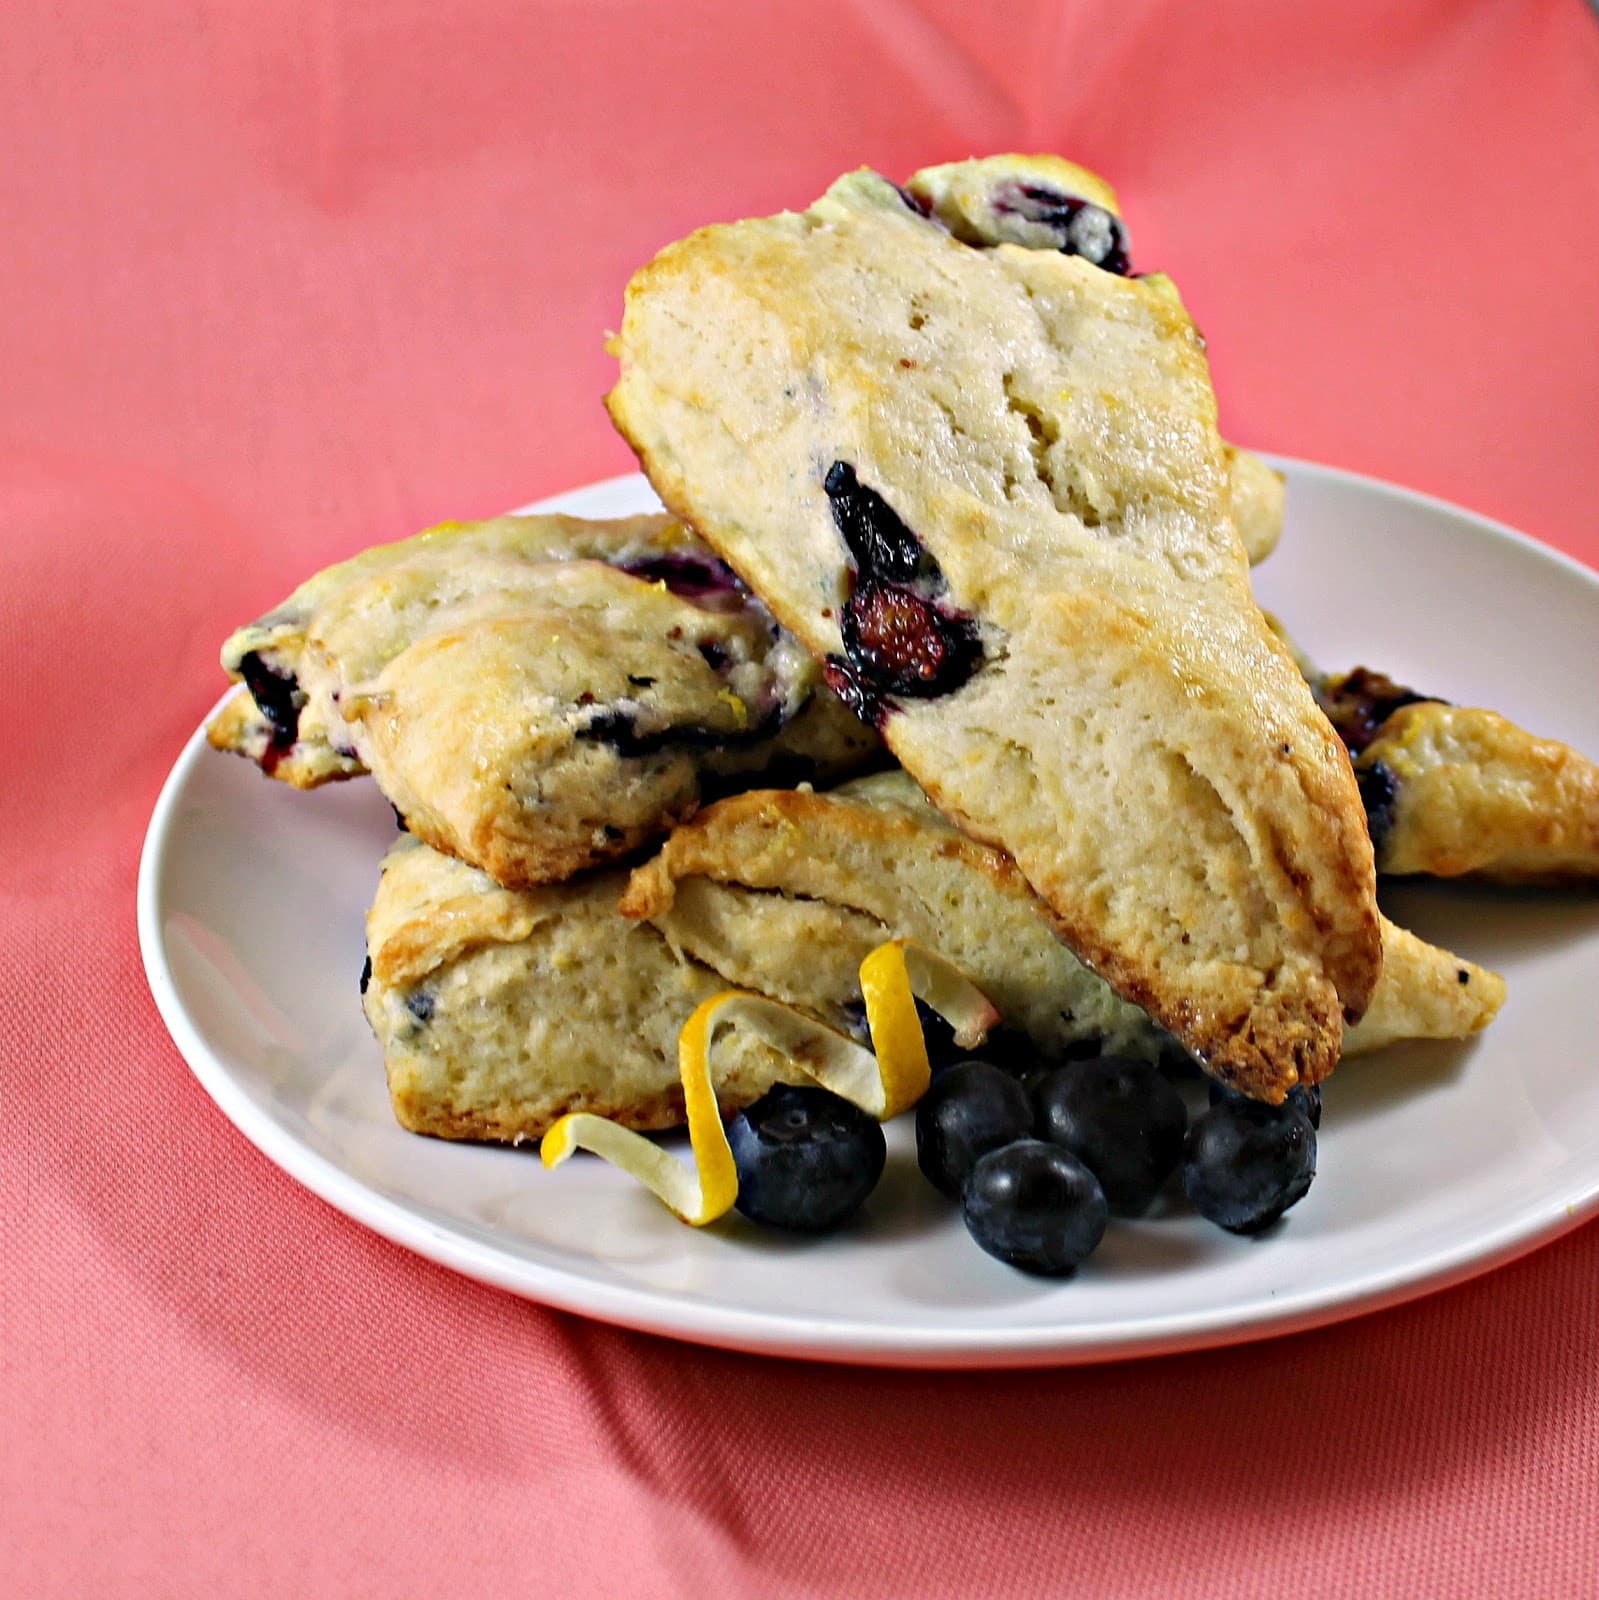
Remove the dough from the bowl and press the dough out into a 12x3x1.25 inch rectangle with your hands, again trying not to break the blueberries. I failed at this. 1. I have no idea if my measurements of the triangle were correct. I eyeballed it and just hoped for the best. I also had quite the heavy hand and broke more than a few blueberries.
Cut the rectangle into 4 equal pieces, making 4 smaller rectangles.
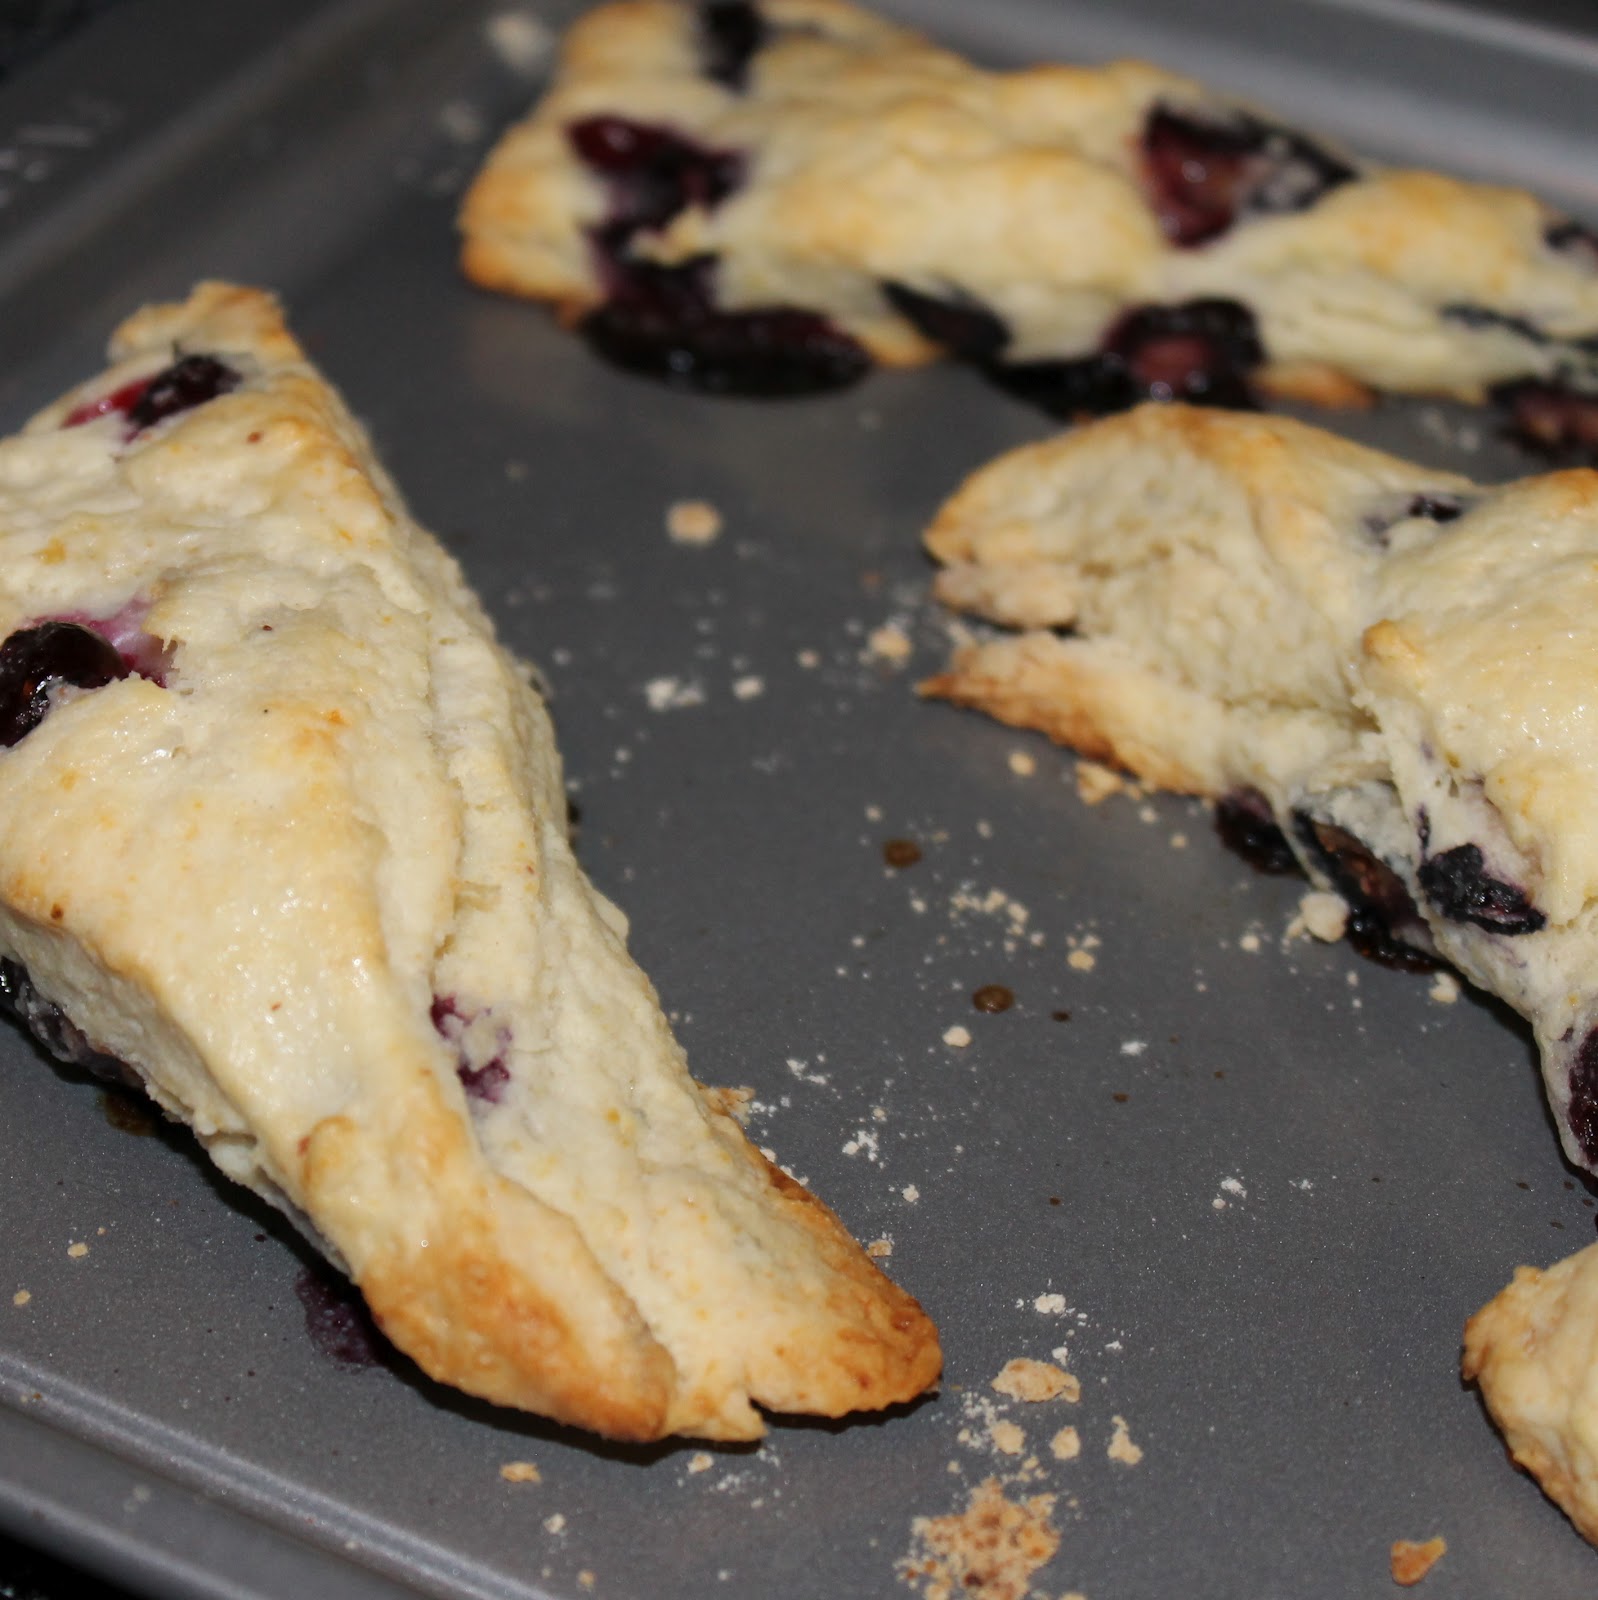
Cut these pieces in half on a diagonal, resulting in 8 triangle scone pieces. Add the scones to an ungreased cookie sheet and brush the tops with a little bit of heavy cream.
Bake for 15-20 minutes (mine too about 18) until they begin to brown on the top. Allow to cool.
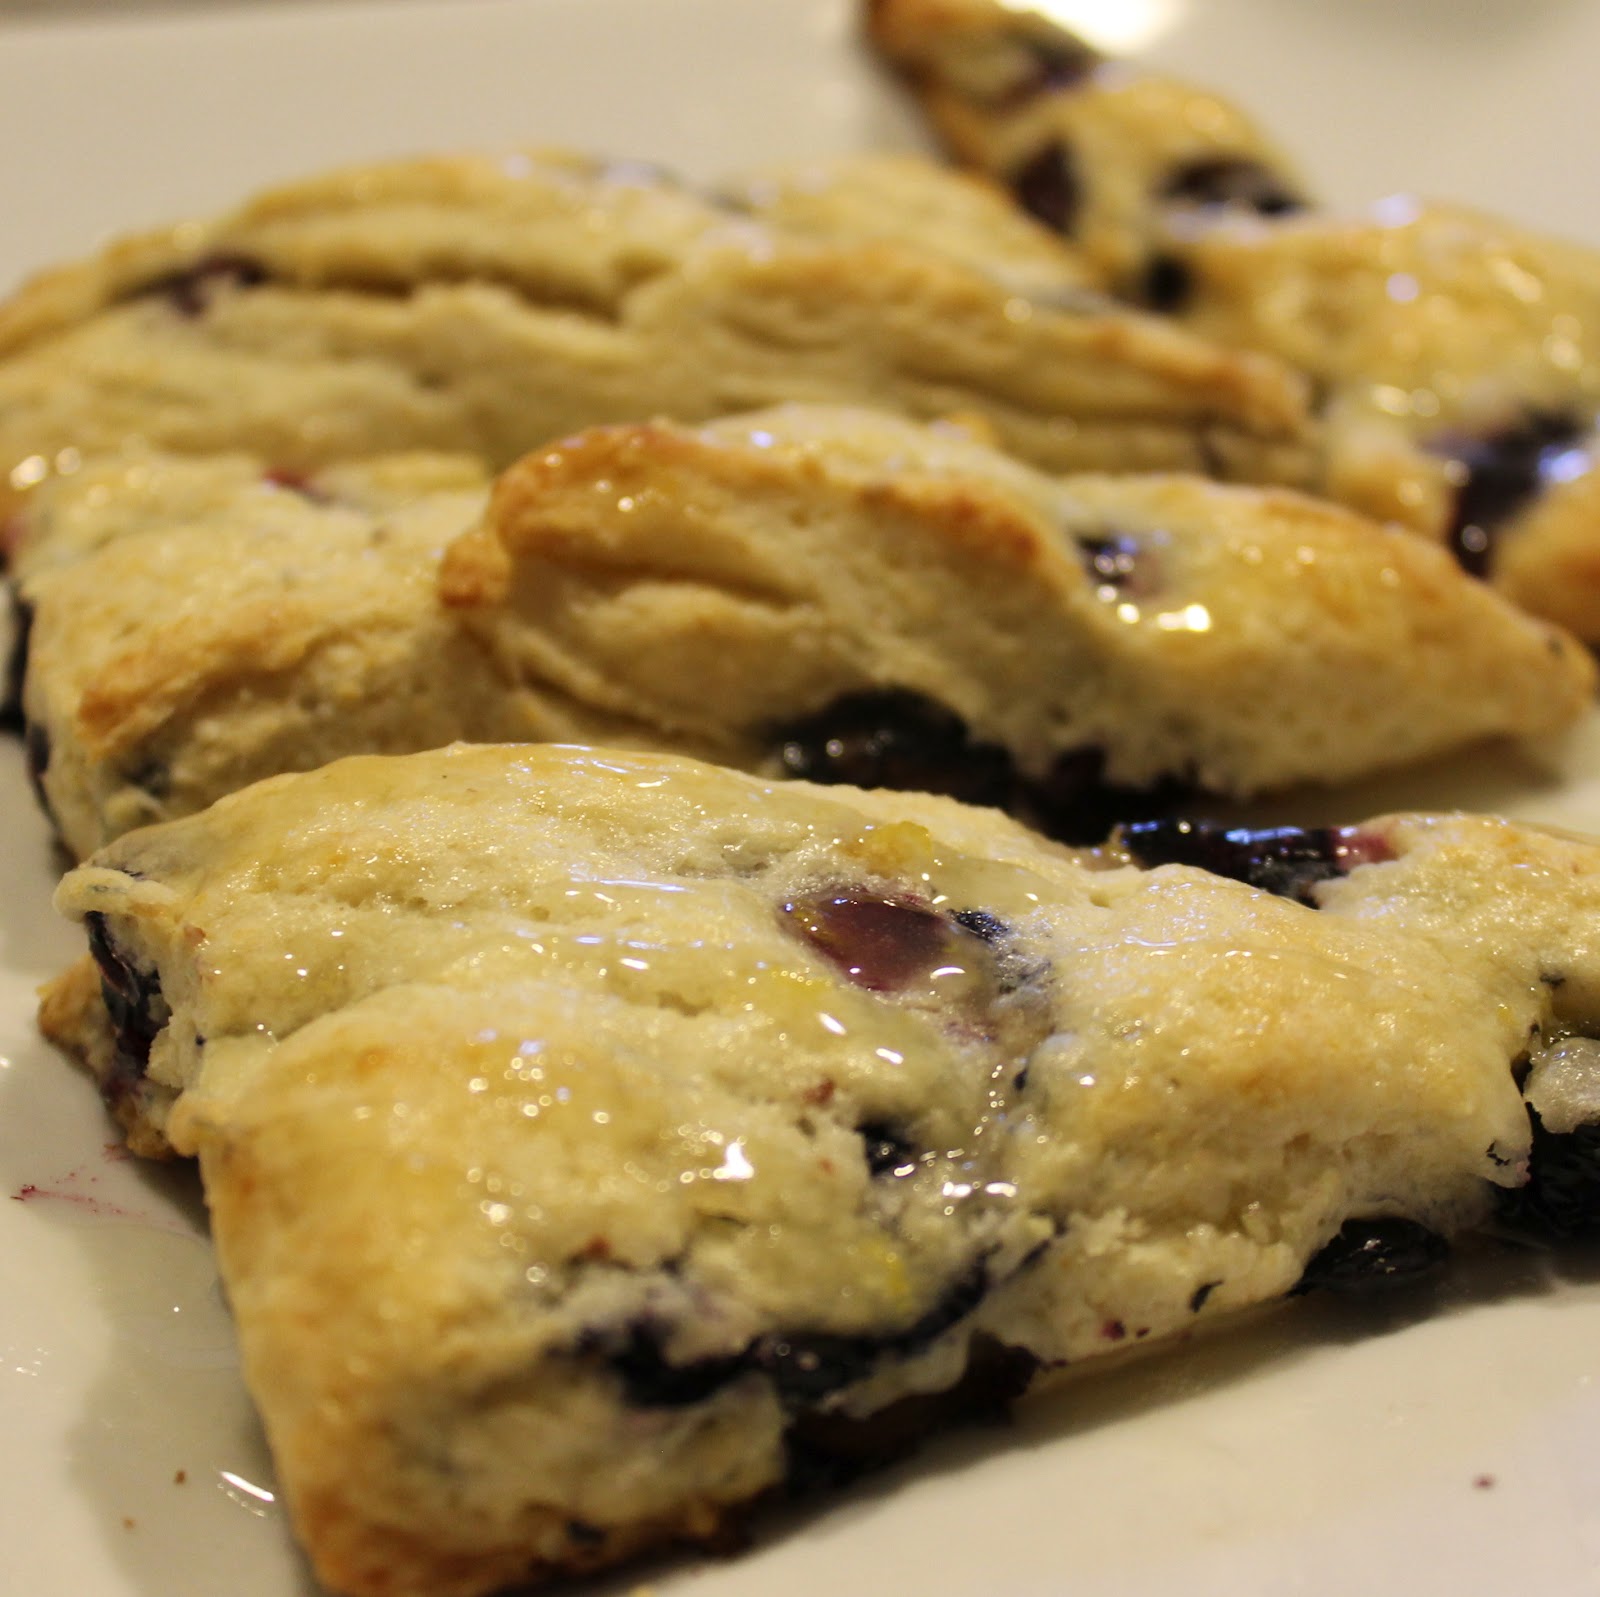
While waiting for the scones to cool, add the lemon juice and confectioners’ sugar to a microwave-safe bowl. Whisk to combine until the sugar is dissolved. Whisk in the butter and lemon zest (it’s ok if the butter is not yet fully incorporated). Add the glaze to the microwave for 30 seconds. Remove and whisk to remove any lumps.
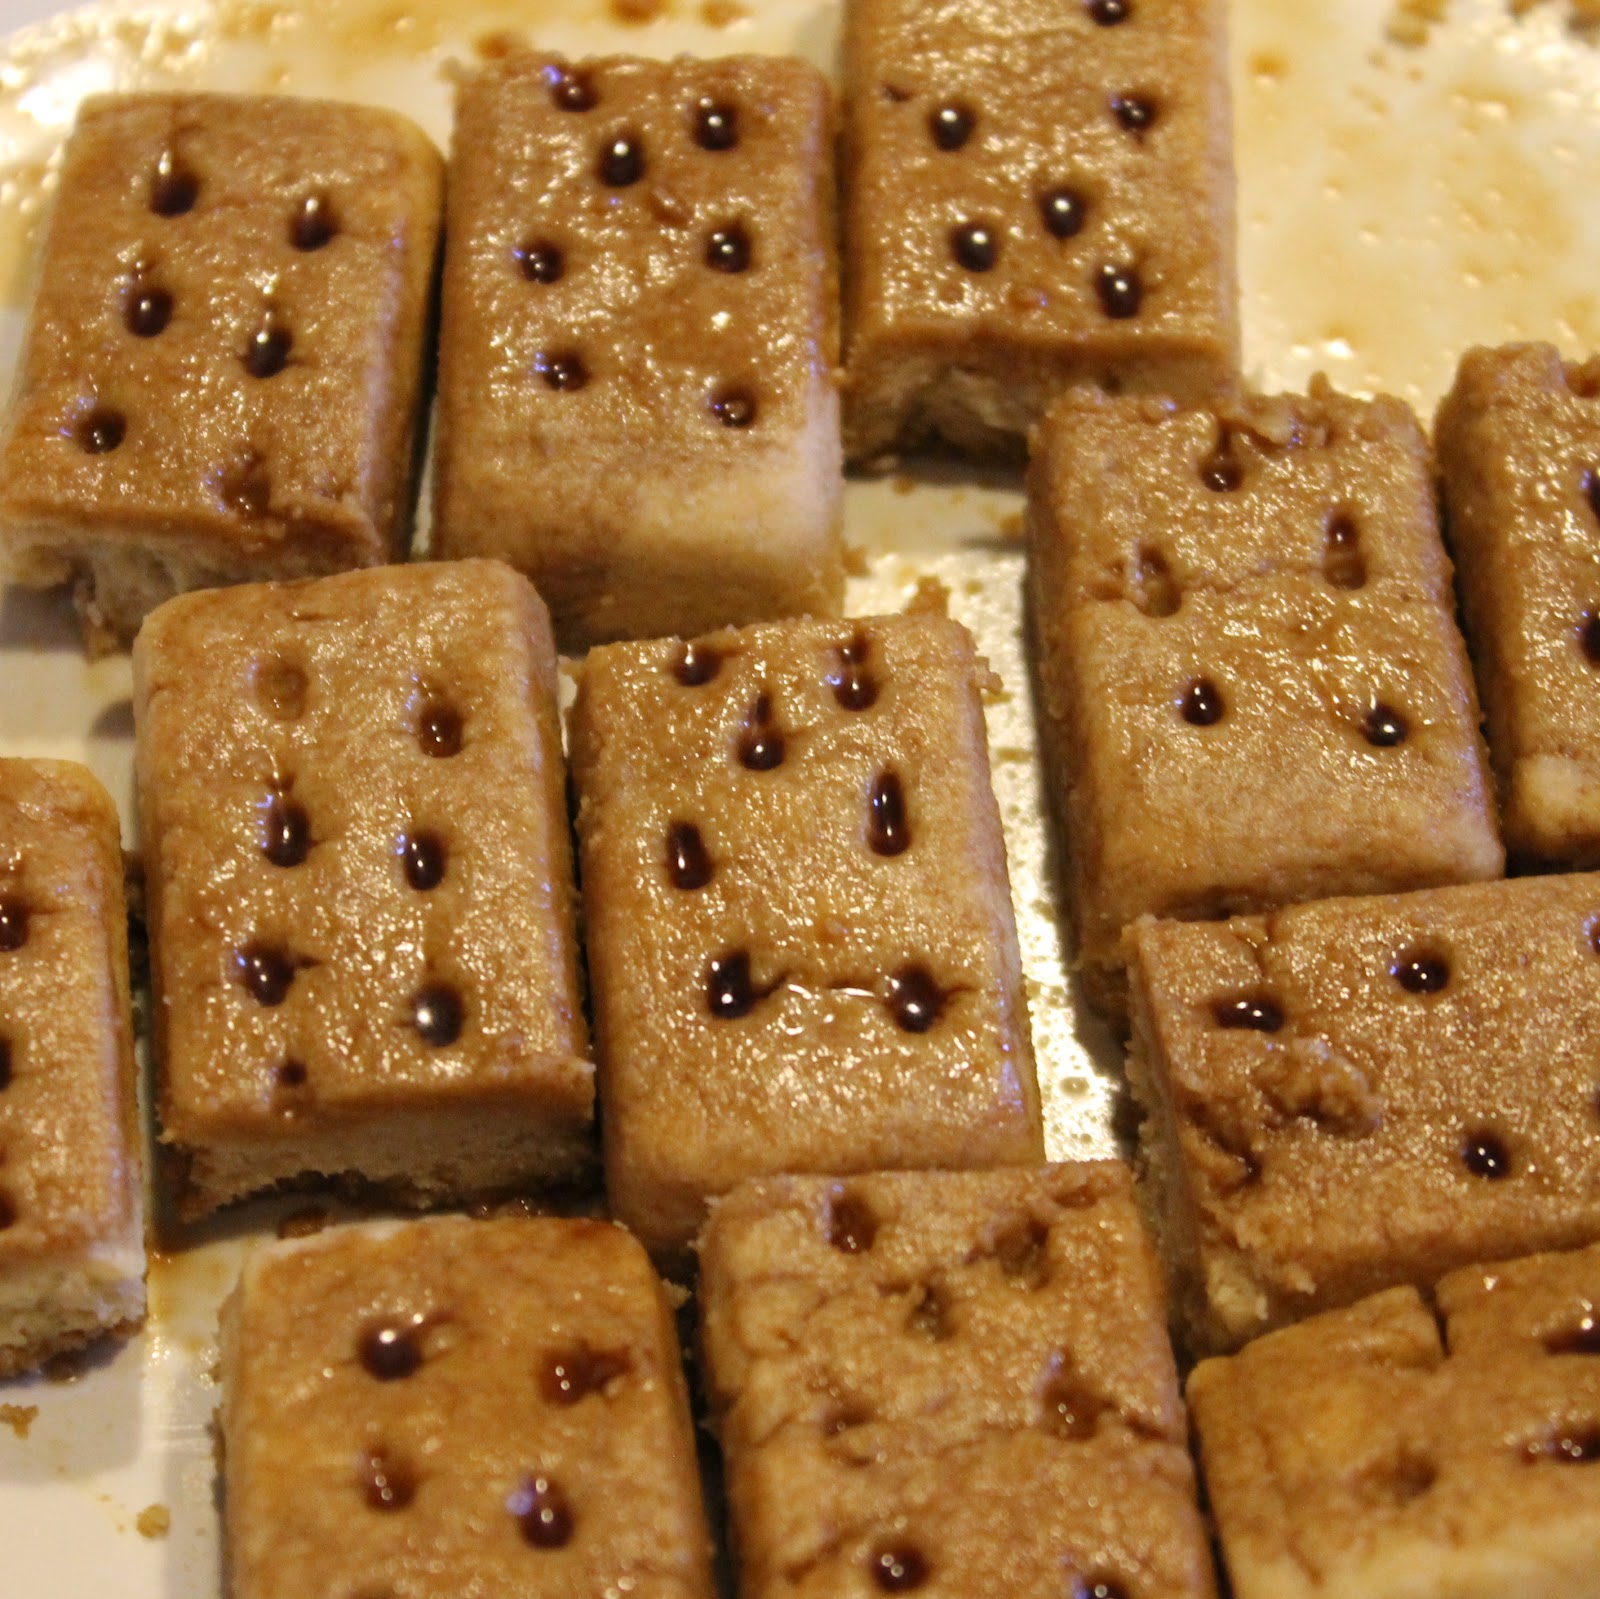
When the scones have cooled, drizzle the glaze over the scones. (I was left with a good 3/4 of the mixture. The scones would have been drenched if I used it all. I wanted more of a slight drizzle. Use to taste.)
Allow to sit for another 5 minutes before serving.
I’m really glad I didn’t try to use all of the glaze. My friend commented that at first bite, she actually thought they might be too sweet but that they ended up having the right amount of sweetness. Can you imagine if I doused them in the glaze?? It would have been a candy!
I wish I had added some of the lemon zest to the actual batter as well. I like my lemony flavor to be throughout my baked goods.
The scones were flaky when first removed from the oven, but by the next day they had become more dense which I didn’t mind at all.
The blueberries I crushed also (thankfully) didn’t bleed too much so I didn’t end up with purple scones!
Berries and Cream in Vanilla Dessert Cups is the perfect quick dessert for guests, or just to fulfill a sweet tooth in a pinch. I found the vanilla dessert cups in Whole Foods and immediately knew I was going to fill them with fresh berries and homemade whipped cream. This recipe for Berries and Cream in Vanilla Dessert Cups is easily adaptable to account for what is on sale or what looks freshest, any berry or fruit will do.
Naturally, the day after I made my Grilled Tomato Orzo Salad in a Tomato Bowl pretending it was summer, the weather decided to do a 180 and veer into rainy cold sadness. Sigh. So what better way to use some of my Lipman Tomatoes than to make Creamy Tomato Soup? I found this recipe on Food Network and I had most of the ingredients already, win! I changed the recipe slightly for my tastes.
Ingredients:
3 tablespoons olive oil
1 red onion, chopped
1 carrot, unpeeled and chopped
3 cloves minced garlic
12 plum tomatoes, roughly chopped
1 teaspoon sugar
1 tablespoon tomato paste
1/4 cup packed chopped fresh basil leaves, plus julienned basil leaves, for garnish
3 cups chicken stock
1 teaspoon kosher salt
1 teaspoons freshly ground black pepper
1/2 cup heavy cream
Croutons, for garnish
Heat a large pot or a Dutch oven over medium-low heat. Add the olive oil. Chop the onion and carrot.
Saute for 10 minutes.
While waiting for the onion and carrot to soften, mince the garlic and set it aside. Roughly chop the tomatoes. Chop the basil.
Add the garlic to the pot and cook for 1 minute.
Add the tomatoes, sugar, tomato paste, basil, chicken stock, salt and pepper to the pot.
Stir well and bring to a boil.
Lower the heat and simmer, uncovered, for 30 minutes.
If you have an immersion blender, at this stage, use to puree the soup. If you don’t, remove half the mixture and add it to a blender. Blend until smooth; be sure to keep the center of the top off of the blender and cover with a paper towel. Repeat with remaining mixture. Return to the pot over medium-low heat.
The soup is honestly good to go at this point. Feel free to just stop here.
To make a creamy soup, add the cream to the soup and mix.
Serve with basil and croutons.
Oh my goodness. Not only is this super easy, but it is absolutely delicious.
Because the soup is made with so many fresh tomatoes, it’s important to use tomatoes at their peak.
This is a wonderfully thick soup so it’s a meal in itself, but rainy, cold days always make me want a favorite childhood staple:
Note: The original recipe used a food mill but I don’t have one. And I was not willing to peel the tomatoes so I blended them, and it worked out great. The soup ended up completely creamy.
I love tiramisu. Honestly, what’s not to like? I’ve never tried to make a traditional tiramisu, but it might be a terrible idea. I’d probably eat the entire thing in one sitting. So to save me from that embarrassing end, I decided to try a recipe from the Walkers Shortbread website for Individual Tiramisu. The recipe makes two servings of tiramisu so that I can’t be a complete piggy. I came across it while trying to find a recipe to photograph (I made their raspberry creme brulee instead) and knew I’d have to make it. Luckily, I still had some Walkers Shortbread leftover!
1 tablespoon coffee flavored liqueur
1 tablespoon hazelnut flavored liqueur
2 ounces boiled water
1 heaping teaspoon espresso granules
8 shortbread cookies (I used Walkers Pure Butter Shortbread)
1/2 cup heavy cream
1/4 cup plus 2 tablespoons sugar
1 container (8 oz.) mascarpone cheese
1 tablespoon mini semi sweet chocolate chips
1/2 teaspoon unsweetened cocoa powder
So before I go into the recipe, I just wanted to talk about one of the small businesses near me, Wedge + Fig in Philadelphia. They are an amazing cheese shop, brunch location, and also serve some of the best and most creative paninis in the city. When I had a hankering for this tiramisu recipe, I was excited to find that I had all of the ingredients on hand. Except the mascarpone cheese. Blast.
I thought I’d take a gamble and went to two corner stores near me. No mascarpone. So I went over to Wedge + Fig, assuming they wouldn’t have it either, but thought they might know where to get some. I asked, expecting a no, and was ready to leave. They told me they did not sell it, but they had some on hand because they used it in some recipes and would be willing to sell me some. How awesome! So thank you SO much to Wedge + Fig for saving the day. My tummy thanks you!
On to the recipe: Begin by combining the espresso granules with the boiling water. Stir to combine.
Take 1 tablespoon of the espresso and combine it with the coffee and hazelnut liqueurs.
Take 6 of the shortbread cookies and brush them with the coffee mixture on both sides.
Cut each cookie in half. (Note: I decided later that I kind of preferred them crumbled so after allowing them to soak, I just chopped them up a bit. The halves didn’t fit in my glasses nicely.)
In a medium bowl, beat the heavy cream with 2 tablespoons sugar until stiff peaks form.
In another bowl, beat the mascarpone cheese and 1/4 cup sugar.
Fold in the whipped cream. (I could just eat this mixture allll day. Mmm.)
Take two wine goblets or Irish coffee glasses and place three cookie halves in the bottom. (I just put two teaspoons of the crumbs in the bottom of mine.) Spoon 2 tablespoons of the cheese mixture over the cookies and repeat the layers.
Refrigerate for at least 2 hours so that the cookies/crumbs can soften.
Add the chocolate mini chips to a microwave safe bowl and microwave on high, stirring until melted. Use a fork to drizzle the melted chocolate over the 2 remaining cookies. (Place the cookies on wax paper before drizzling).
Just before serving, lightly sprinkle the tiramisu with cocoa using a fine sieve. Add a chocolate-drizzled cookie to each glass.
How easy was that?
I love how fancy this dessert seems to be with minimal effort.
The whipped cream and mascarpone is so fluffy and flavorful.
The shortbread really soaked up all that coffee-hazelnut flavor, but maintained just enough crunch to keep it satisfying.
The presentation of this dessert is really nice too. The chocolate drizzled cookie is great to dip into the tiramisu to get some of the mascarpone mixture.
I’m aware I should share the second one of these. But um. I think I like it too much! We will see…
Yes, you read that title correctly. Penne with Bacon Vodka Sauce. I have wanted to make some recipes using Bakon Vodka ever since I heard of its existence. My mind immediately went to Bloody Mary’s (which I will have a post on soon), but a coworker suggested I use it for Penne Vodka. Brilliant, no?
Ingredients:
1 can (28 oz) tomato sauce
1 shallot, chopped
2 garlic cloves, minced
1 tablespoon olive oil
1 teaspoon dried oregano
1 teaspoon dried parsley
1/2 teaspoon basil
2/3 cup Bakon vodka
1/2 cup heavy cream
1/2 cup grated Parmesan cheese
1/2 box penne pasta
Chop the shallot and garlic cloves. Heat the olive oil over medium heat. Add the shallot and cloves and cook for 3 minutes.
Add the tomato sauce, oregano, parsley, and basil. Add the Bakon vodka and stir to combine. Simmer for 15 minutes, stirring occasionally; it will thicken and reduce a bit.
While waiting for the sauce to reduce, boil a pot of water and cook the penne according to directions, you want the pasta al dente. After the 15 minutes have passed, add the heavy cream and Parmesan cheese and stir to combine.
Add the pasta and mix to combine. Cook for another minute or so to allow the sauce to absorb into the pasta.
Mmmm. Smoky goodness.
This was really tasty! The bacon vodka added a subtle smokiness, kind of like using roasted tomatoes, or smoked paprika.
It wasn’t an overpowering, punch-in-the-face kind of bacon taste though. Honestly, it might be tough to pinpoint the flavor if you didn’t know that was in it.
So if you’re really in a bacon-y mood, I’d suggest adding some crumbled bacon or pancetta on top of the finished pasta.
Chop the shallot and garlic cloves. Heat the olive oil over medium heat. Add the shallot and cloves and cook for 3 minutes.
Add the tomato sauce, oregano, parsley, and basil. Add the Bakon vodka and stir to combine. Simmer for 15 minutes, stirring occasionally; it will thicken and reduce a bit.
While waiting for the sauce to reduce, boil a pot of water and cook the penne according to directions, you want the pasta al dente. After the 15 minutes have passed, add the heavy cream and Parmesan cheese and stir to combine.
Add the pasta and mix to combine. Cook for another minute or so to allow the sauce to absorb into the pasta.
Last week, I was contacted by Walkers Shortbread about a recipe photo challenge they are hosting. Walkers asked a bunch of bloggers to make one of the recipes off their site and photograph the end result. They even offered to send me the Walkers ingredient needed to make the recipe. I came across their Raspberry Creme Brulee recipe and I knew I had to make it. It’s a traditional creme brulee, with a Walkers Shortbread crust and raspberries. How fantastic does that sound?
Ingredients:
2 cups whole milk
4 egg yolks
1/3 cup sugar
1/3 cup heavy cream
1/2 pint Raspberries (fresh)
1 pkg. (5.3 oz) Walkers Shortbread Fingers
light brown sugar, to taste
Preheat the oven to 300 degrees. Add the milk to a medium saucepan and bring to a boil. While waiting for the milk to boil, add the egg yolks, sugar and heavy cream to a medium sized bowl. Whisk to combine.
Add 3/4 cup of the boiled milk to the egg mixture, whisking constantly. This tempers the eggs so that they don’t cook when you add the rest of the milk. Once incorporated, add the rest of the milk in a steady stream.
Take a box of Walkers Shortbread Fingers. Using a metal spoon, break the shortbread (while still in the plastic package) into fine crumbs.
Add the shortbread crumbs to the bottom of four ramekins. Add the raspberries to the ramekins.
Pour the custard (the egg and milk mixture) into the ramekins. Be sure to leave some room at the top.
Bake for 40 minutes at 300 degrees, or until a knife inserted into the center of the custard comes out clean.
Transfer to a rack and cool to room temperature. Chill the custard for at least two hours (I chilled mine overnight).
When ready to caramelize preheat your broiler to high. Sprinkle a thin coating of light brown sugar on each chilled custard. Place under the broiler for 2 minutes or until the sugar is melted and golden brown. (Check on the custard after 1 minute, the broiler works quickly!)
Remove and serve.
So. I hated it.
Hehe. Of course I’m kidding. This dessert was absolutely awesome. I can’t stop thinking about it. Plus look how pretty it is!
This has everything that attracts you to a traditional creme brulee: creamy, sweet, and a nice crunch from the crust and the broiled top.
But it also has little delicious bursts of raspberry. Yum!
I loved the incorporation of the Walkers shortbread crust. I think every creme brulee needs to have one of these delicious cookie crusts.
This could easily be changed to incorporate other berries as well. What a great recipe!
Note: I was provided no compensation other than samples of Walkers Shortbread fingers. All opinions are my own.
As I’ve mentioned before, I cannot help myself from making a million desserts in December. There is something about the last month of the year that makes me want to bake my little heart out. Oxo has decided to help my cause by asking me to check out their new and improved Egg Beater. I am a huge fan of Oxo products (bowls, containers, apple corers; you name it, I have it). So I knew that their egg beater would find a happy home in my kitchen. Oxo also sent me an extra egg beater to give away to one of lucky reader. Details will be below!
The egg beater has a non-slip grip handle for ease of use. The beaters are removable and then entire base can be detached and is dishwasher-safe (a must in my kitchen. I’m way too lazy to clean dishes after cooking). The beater itself has managed to improve upon its predecessors by adding a steel bridge at the bottom that can rest on the bottom of the bowl. This allows the beaters to be slightly in the air without causing arm strain.Note: This contest is now closed. Congratulations to Jill J;you have won! Check your e-mail 🙂
Photo courtesy of oxo.com
Their website had a great video that shows all the features so I wanted to include that hereas well.
So I really wanted to test this bad boy. I decided to not only test it’s ease of use, but it’s ease of cleaning by making a recipe that uses the egg beater in more than one step of the process. How about a chocolate souffle topped with a warm fudge sauce and some freshly made whipped cream? (Not going to lie, the whipped cream was an afterthought because my souffle collapsed. Sigh. Still learning…)
Ingredients:
Souffle:
Cooking spray
1/2 cup plus 2 tablespoons sugar, divided
3 tablespoons all-purpose flour
3 tablespoons unsweetened cocoa
1/8 teaspoon salt
1 1/4 cups fat-free milk
3 ounces bittersweet chocolate, chopped
1 teaspoon vanilla extract
1 large egg yolk
6 large egg whites
Sauce:
1 tablespoon butter
1/3 cup sugar
2 tablespoons unsweetened cocoa
1 tablespoon all-purpose flour
1/2 cup fat-free milk
1/2 ounce bittersweet chocolate, chopped
Whipped cream:
1 cup heavy cream
1 teaspoon vanilla extract
1 tablespoon powered sugar
This recipe requires a bit of oven preparation. Take out the top rack of your oven. Position the other rack as low as possible. Preheat your oven to 425 degrees.
Spray six 8-ounce souffle dishes (or ramekins) with cooking spray. Sprinkle evenly with 2 tablespoons (or 1 teaspoon per ramekin) of sugar and set aside.
In a large saute pan, combine 1/2 cup sugar, 3 tablespoons flour, 3 tablespoons cocoa, and the salt over medium-high heat, stirring with a whisk or the Oxo egg beater. Add 1 1/4 cups milk, stirring constantly. Bring to a boil and cook for 2 minutes or until it begins to thicken, stirring constantly.
Remove from heat and add 3 ounces chocolate, stirring until smooth. Add to a large bowl and allow to cool to room temperature.
In a medium bowl, add the egg whites (reserve one egg yolk!) and beat using your egg beater until stiff peaks form. This took a good 5 minutes for me.
Once the egg whites are beaten, the chocolate mixture should have cooled. Add the vanilla and egg yolk to the chocolate mixture and stir.Fold in 1/4 of the egg white mixture into the chocolate mixture.
Once combined, gently fold in the remaining egg whites.
Spoon the mixture into the ramekins. Sharply tap the dishes two or three times on counter to even out each mixture in the ramekin. You want them to be about 3/4 full so that they can puff over the top of the ramekin. If you are making these ahead of time, you can cover the ramekins at this stage and freeze until you’re ready to bake them.
When ready to bake, place them on a baking sheet and place in the preheated oven (which is at 425) on the bottom rack. Immediately reduce the temperature to 350 degrees (keep the souffles in the oven and don’t open the door, the temperature will slowly lower over time). Bake for 40-45 minutes or until a toothpick inserted into the side comes out clean.
The sauce can also be made ahead of time if you so wish. Melt the butter in a small pot over medium-high heat. Add 1/3 cup sugar, 2 tablespoons cocoa, and 1 tablespoon flour, stirring well with a whisk.
Gradually add 1/2 cup milk stirring constantly. Bring to a boil and cook for 1 minute, continuing to stir. Remove from heat, add 1/2 ounce chocolate and stir until smooth. Spoon over warm souffles.
To make the whipped cream, add the heavy cream to a bowl. Using the egg beater, beat the cream until peaks are just about to form. Add the vanilla and the powdered sugar and beat until peaks form. Add a dollop of the fresh whipped cream to the souffle and serve.
So my souffle came out puffy and happy and I was so excited!
But as I started adding the chocolate sauce, it began to deflate. Sigh.
So I topped it off with the fresh whipped cream and called it even.
Souffles are notoriously difficult to make, but I wanted to at least give it a shot. Who honestly cares if it deflated though? It still tasted wonderful! I think even a collapsed souffle still looks pretty darn nice as well, no?
So if you’re still with me, you can win your very own Oxo egg beater to beat and whip until your heart’s content.
Good luck, and feel free to leave me a comment below with any questions, comments, or complaints 🙂
Note: I received both a free egg beater for myself and for the giveaway through Oxo’s Blogger outreach program. All opinions and photos with the exception of the egg beater photo are mine.
Have you ever bought a bunch of ingredients just because they sounded good? I try to stick to a list, but this time I couldn’t help myself. I found fresh spinach spaghetti and it just sounded so wonderful, I had to buy it. I wanted to make a simple but flavorful dish so I was pretty happy to find salmon as well. I already had heavy cream and parsley in my fridge so this recipe for Spinach Spaghetti with Salmon Cream Sauce was the result!
One of my favorite shows on the Food Network is 5 Ingredient Fix. I love that all the recipes include 5 ingredients or fewer (plus salt and pepper, they are considered “freebies”) and I find the tips that host Claire Robinson shares to be so so useful.
I was watching an episode of 5 Ingredient Fix a few weekends ago, where she was making a Lobster Corn Creme Brulee. It looked so delicious (and easy!) that I promised myself I’d try it out the next time my CSA share came with corn. I didn’t have to wait long!
I made Sauteed Chicken with Fennel and Rosemary, and needed something starchy to soak up some of the sauce. The recipe suggested polenta or mashed potatoes, so I thought I’d make smashed potatoes and incorporated some of the same ingredients found in the main dish. I had a bag of red potatoes from my CSA share so I luckily had all ingredients on hand.
Ingredients:
1 bag of red potatoes (I had enough to fill up a medium sized bowl)
3 garlic cloves, minced
2 tablespoons butter
1 tablespoon heavy cream
1/4 cup chicken stock
Salt and pepper, to taste
1 teaspoon dried rosemary
1 teaspoon fresh chopped parsley
Wash your red potatoes thoroughly, making sure to remove all dirt.
Halve any red potatoes that are larger than the average size. Bring a pot of salted water to a boil. Drop in the red potatoes and cook until fork tender, about 15 minutes.
Drain the potatoes and add to a medium sized bowl. using a large spoon or a whisk, smash each of the potatoes. Don’t go overboard, you want them to be chunky.
In a saute pan, add a small amount of the butter, rosemary and the minced garlic over medium heat. Cook for 1 minute.
Lower the heat and add the chicken stock, stirring. Add the rest of the butter and the cream and stir to combine.
When the butter has melted, pour over the smashed potatoes and stir to combine.
Season with salt and pepper, to taste. Top with parsley.
These were absolutely delicious. Creamy and flavorful, the rosemary and parsley worked so well with the potatoes. I prefer smashed potatoes to mashed potatoes solely because you get to keep the skins on the potatoes. Not only does it make the dish prettier, it also adds texture.
I am a huge Top Chef fan. So much that my parents bought me the Top Chef cookbook a few years back. However, when I moved, I stored it away and completely forgot about it. I recently found the cookbook again and came across Ilan’s dish: Fideos with Clams and Saffron. My CSA share this week came with broccoli, cauliflower and onion so I thought this would be a perfect way to use these ingredients. Note: I switched up the way this recipe was cooked, used less cream, and added onions and Parmesan. Otherwise, the recipe is pretty close to the original printed version.